首頁 » 2025 » Page 10
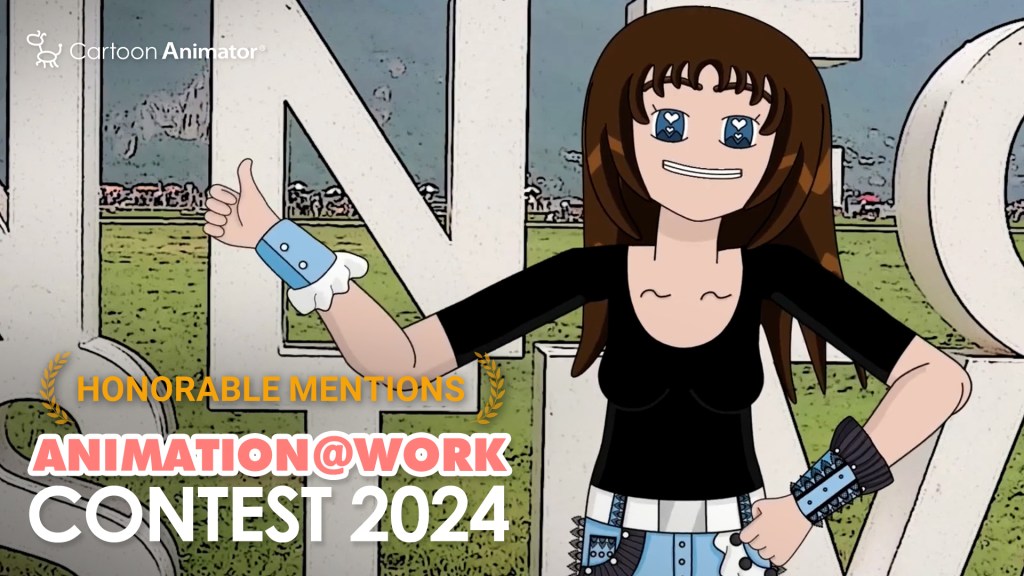
RebbyCraft used Cartoon Animator and Affinity, and landed her the winner for the 2024 Animation at Work Contest.

Winner Spotlight: Animated Vlog for the Annecy Festival, France | Cartoon Animator and Affinity Designer

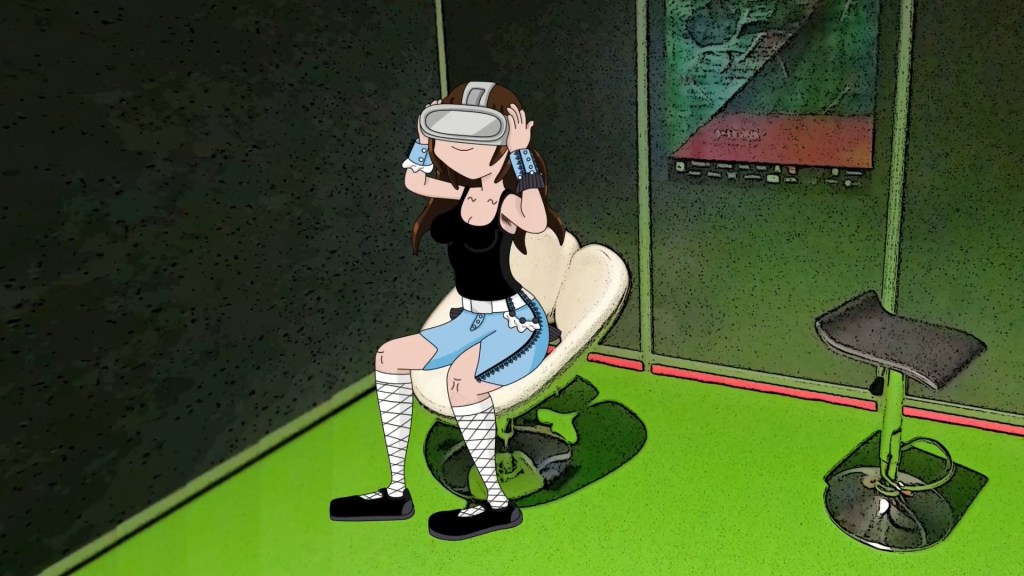
Artist RebbyCraft, received an Honorable Mention in the “Comic & Art” category of the Reallusion 2024 Animation At Work Contest. In this article, she shares the creative workflow behind her winning entry, Vlog Animé: LE FESTIVAL D’ANNECY C’EST NUL? and how she brought it to life.

RebbyCraft

Hi, I’m RebbyCraft, the creator behind the YouTube channel RebbyCraft. I’ve dreamed of becoming an animator since secondary school, with the goal of creating my own animated series. Back in the 2000s, animation resources were hard to come by, so I spent years exploring different paths—and even took a three-year gap from my studies. Maybe I was just ahead of my time.


Eventually, I enrolled in a vocational school to study graphic design. By then, I had already taught myself the basics of 2D and stop-motion animation, which made the transition to animation school feel natural. My ultimate goal is to become an independent animator—not only as a content creator, but also as a producer of my own original professional productions.

Follow RebbyCraft

How I Discovered Cartoon Animator

I first discovered Reallusion in 2016 through a simple Google search while looking for animation software that could help me create cartoons without requiring advanced drawing skills. At the time, my drawing abilities—especially for animation—were still developing, and I was frustrated by how that limited my ability to bring my ideas to life.

I tried Reallusion’s CrazyTalk Animator 2, the predecessor of Cartoon Animator, and immediately saw its potential. I felt a natural connection to the software, but struggled with certain aspects, especially animating characters with long hair like mine. Eventually, I set it aside to explore other options like TVPaint and OpenToonz. Everything changed when I purchased Cartoon Animator 4. I committed to learning it on my own by following Reallusion’s tutorials and gradually refining my animation skills.

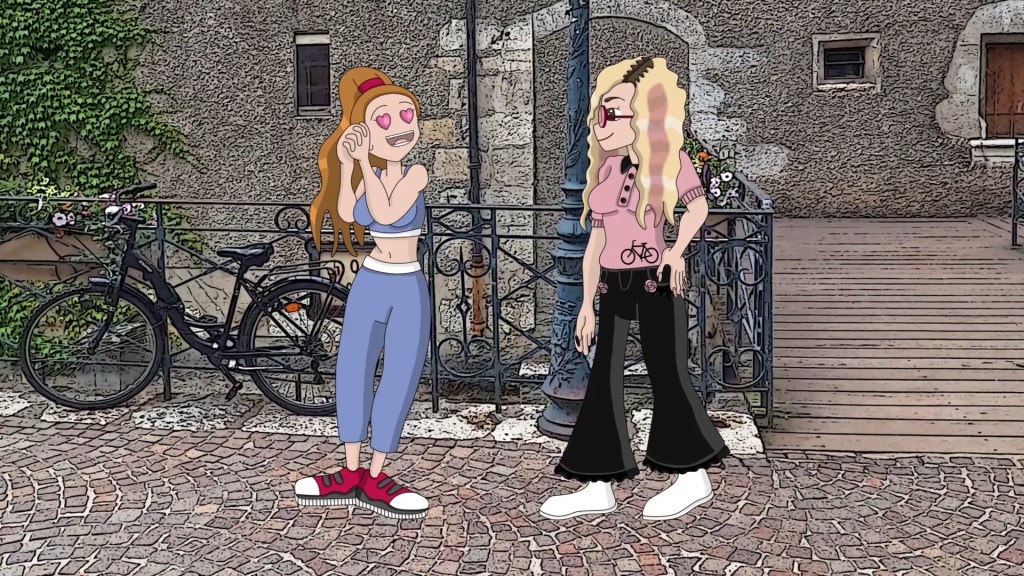
In the meantime, my drawing skills improved significantly after attending animation school. I used to see myself as just a hobbyist without much talent for drawing, but with consistent practice, I gradually got better, and the creative process became much more enjoyable. Discovering and applying Cartoon Animator as my go-to tool made all the difference.
It gave me the confidence to start posting animated videos regularly on my YouTube channel and other social media platforms. I love how easily I can reuse and modify the templates I’ve created, which speeds up my workflow. I have to admit, Cartoon Animator isn’t widely used in France, and that made it feel even more special, almost like the software was tailored for me!

Why did I join using the Annecy Festival VLOG?

I chose my Animated Vlog about the Annecy Festival 2024 as my entry theme because it’s currently the most ambitious long video I’ve made, and it is the most accurate representation of the spirit of my overall channel.
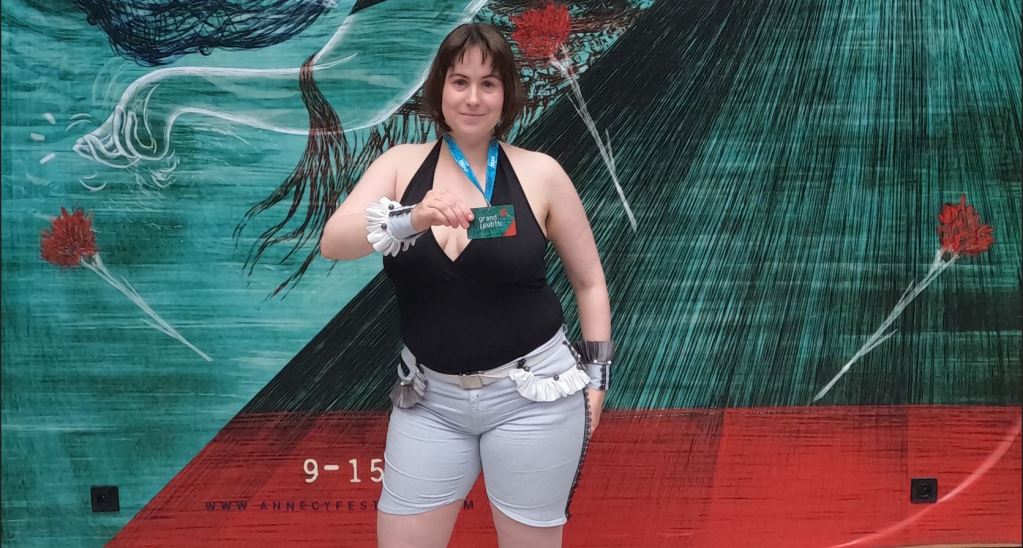
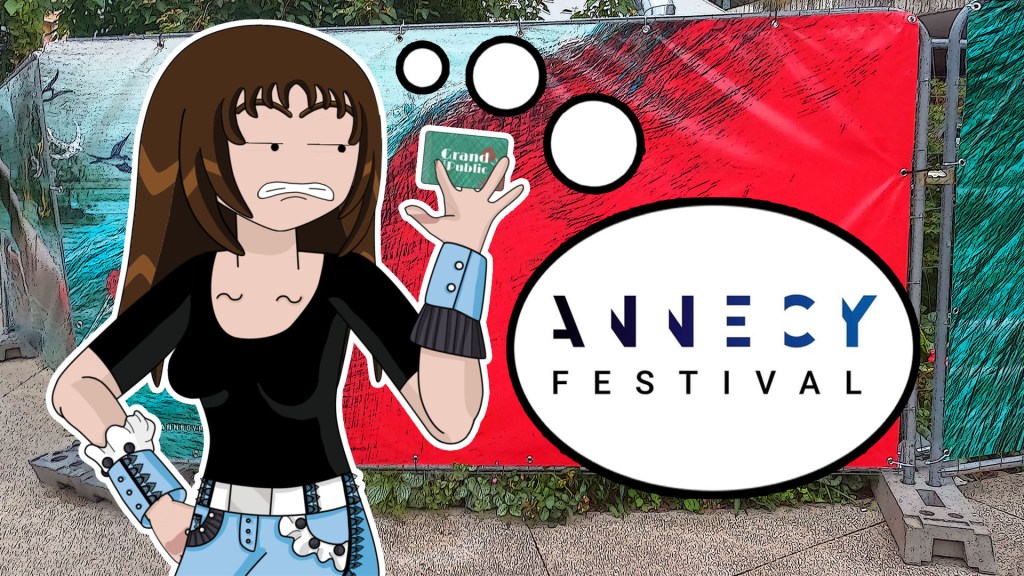
Even though the Annecy Festival is as international as the Cannes Festival, I noticed that not many people, especially cartoon enthusiasts and indie animators, were aware of what goes on inside. It’s a shame because this event has so much to offer, like exposing attendees to a variety of entertainment, work opportunities, art, cultural experiences, and more. With this video, I aimed to introduce the festival as a kind of pop-culture convention and explain why it stands out from the pack.

Storytelling: preparing what to animate

A lot can happen in one day, so I made sure to take as many pictures and videos as I could with my GoPro during the festival, capturing a wide range of scenes for my animated characters. To gather accurate background shots, I visited the event locations a day before the festival started to avoid the crowds. This allowed me to capture the full field of view of specific spots.

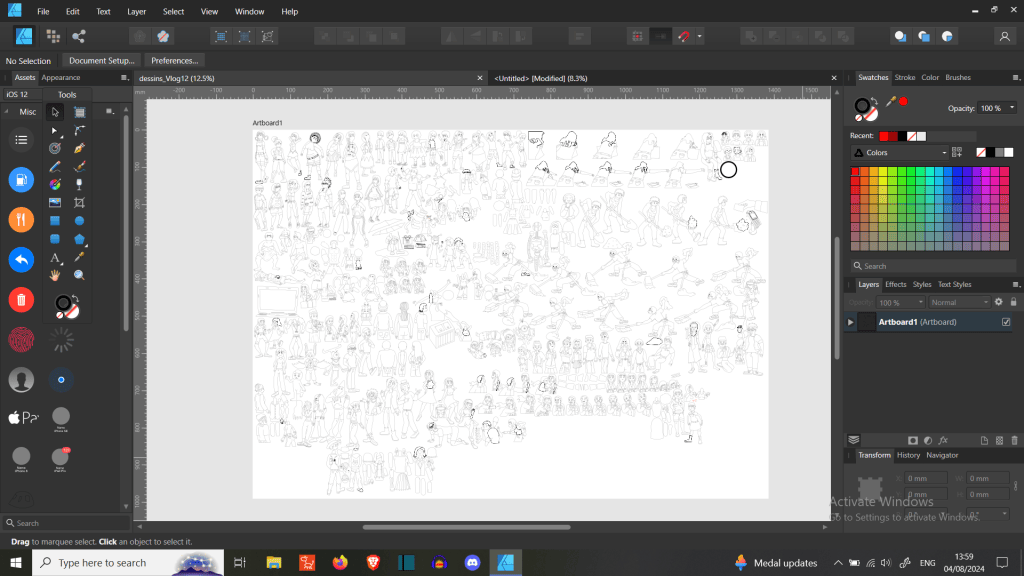
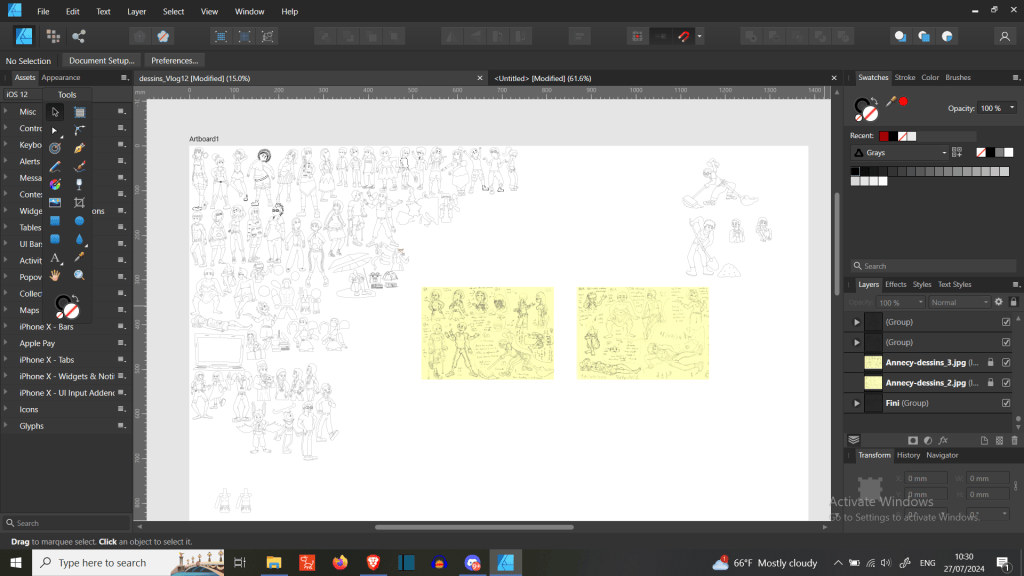
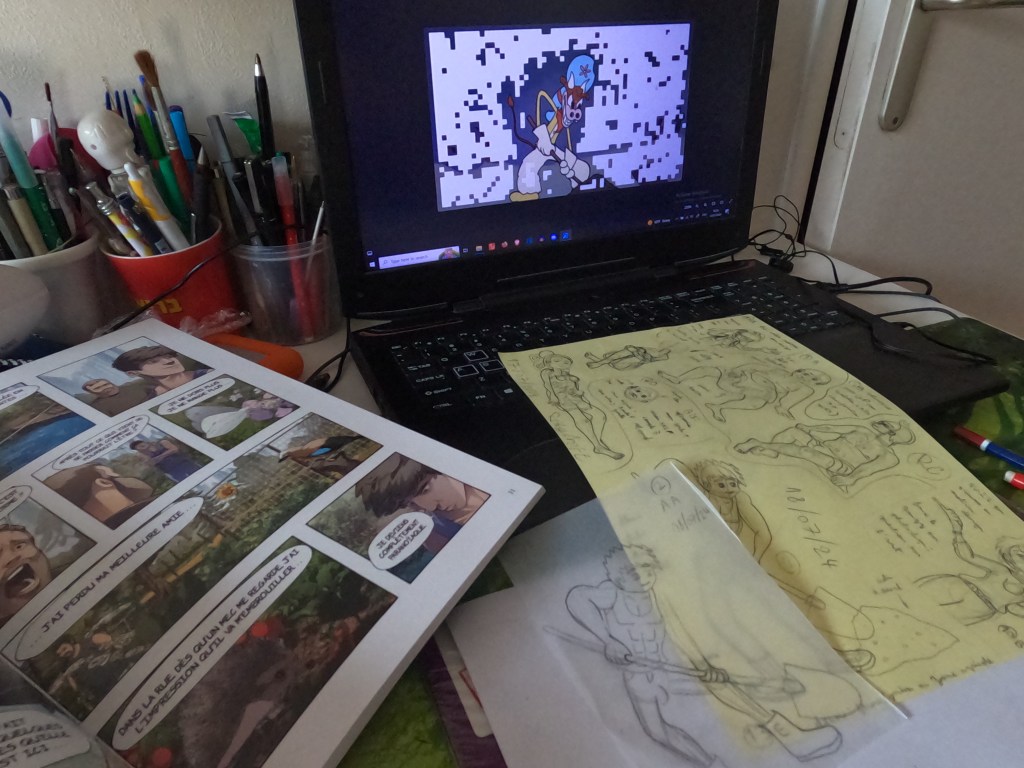
First, I finalized my script, then either sketched the scenes or created a list of what I needed to draw for the story. I scoured the internet for reference images, including poses, suits, props, and more. I also referred to materials I already had, like books, photos, and real-life objects. Finally, I drew my characters by hand on A4 sheets of paper, with the intent to fill each page to the brim before scanning them.

Leveraging Affinity Designer for drawing and character creation

After finishing my pencil drawings, I import them into Photoshop and Affinity Photo to apply subtle comic-style effects.
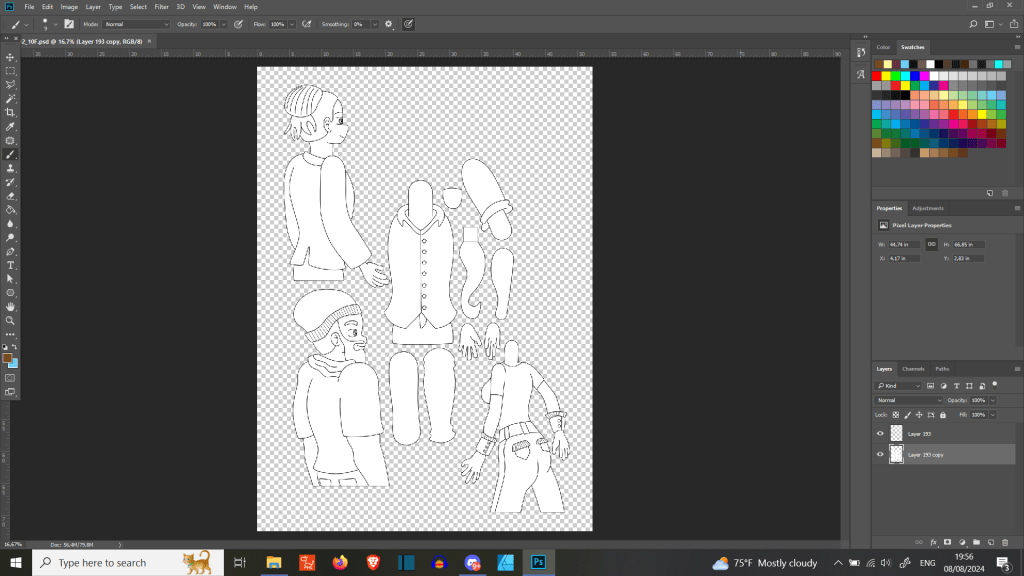
I typically handle the inking in Affinity Designer, then move back to Photoshop to finalize each element with color, shading, patterns, and additional details. This stage also includes character rigging. Once complete, I bring everything into Cartoon Animator 5 to check the rigs and add bones if necessary. Throughout the process, I deliberately skip background illustration due to the time-intensive nature of creating them.

I use a combination of manual and automated methods for animation. I typically automate the foundational movements, then manually refine specific parts—such as the body, head, or accessories—depending on what the scene requires. Making expressions in Cartoon Animator is also very intuitive and worth recommending.

Overall, it took me about four months to complete the video, largely due to numerous revisions of the script and voice recordings. Estimating the drawing time is difficult, as I often experience executive dysfunction. Some days I’m highly productive, while on others, progress is minimal. I’ve dealt with it for many years, and I’ve learned to work with it.

I can draw at least one A4-sized piece each day after spending some time gathering the best references. I prefer not to start digitally, as it lacks the tactile feel I get from traditional tools. It’s easier to infuse my drawings with my signature style, and I only use a basic graphics tablet when I need to maintain consistent size and linework for my characters.

Three things I like about Affinity

A solid Adobe alternative – It works similarly to Adobe, so switching over is easy. If you’re used to Adobe, Affinity feels familiar.

Modern and digital-friendly – Since it was made more recently, it suits today’s needs better, especially for web and screen design over print.

One-time payment – Each app costs under $60, sometimes less during sales. No subscriptions—buy once, own it forever.

About My Main Character

The main inspiration for my character design comes from 20th century cartoons like those from the golden age and the anime Magical Doremi. I love anime and cartoons, so my dream is to see a maximalist blend of both—where elastic animation and intricate details coexist. In fact, different prototypes of this mixed style have existed since 2007. This year marked the beginning of my journey on the internet to further explore and research this idea, especially by visiting MagicalDoremi.net daily to gather inspiration, all with the hope of one day creating my own animated series set in a Y2K-style internet world.


As a teenager, I used to worry that my designs weren’t original enough. But over time, I realized they actually are, mainly because I haven’t come across any copycats. I was even surprised that fans of Magical Doremi didn’t immediately recognize any resemblance between the eyes of Onpu Segawa and my character. Aside from the influences already mentioned, I also draw inspiration from real life—the people around me, specific moments, objects, and personal experiences. Other artistic influences include South Park and Caljbeut, a French animator known for his work on YouTube.

Character Creation

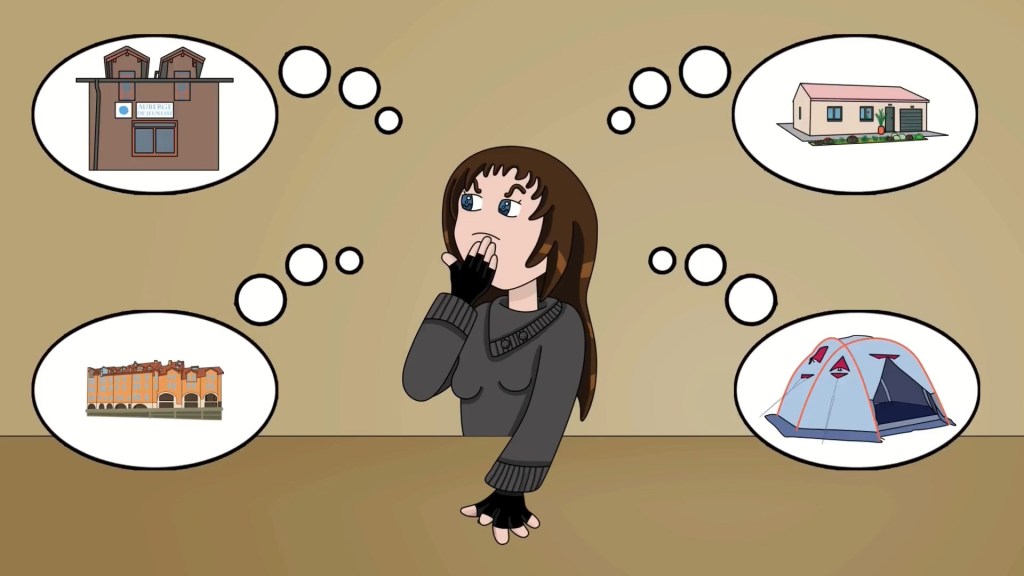
Rigged characters may seem easy to draw, but that’s not always the case—especially if proportions or anatomy aren’t your cup of tea. Despite the challenges, it’s essential to analyze the structure of other sprite characters to see how they’re drawn. Experiment with the templates available in Cartoon Animator, along with any additional templates you might have on hand. Imagining them with volume—like a sculptor would—can help you draw your characters from different angles. Here are some additional pointers:
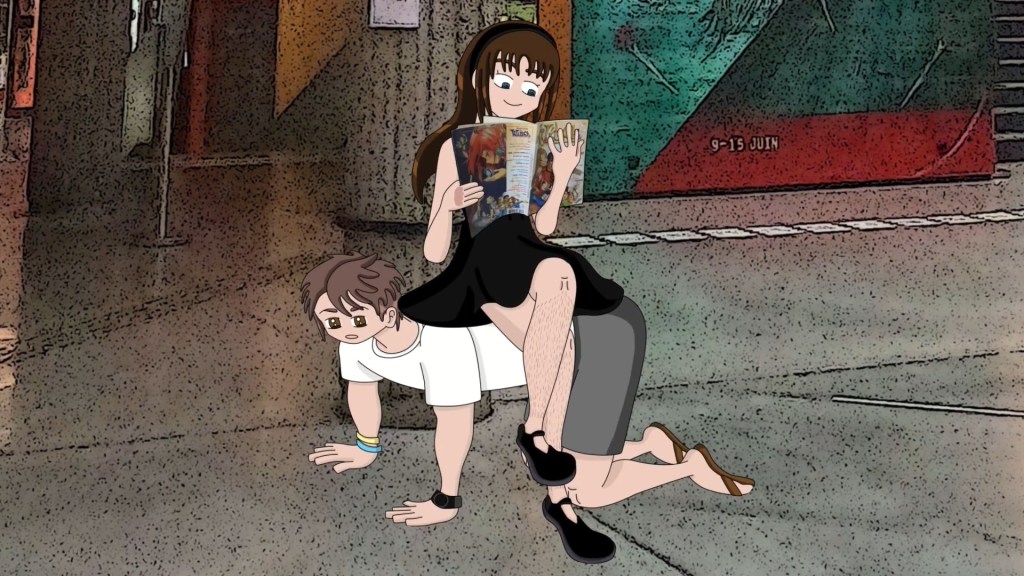
  • Don’t hesitate to create round shapes between joints as reference points.
  • Keep in mind that sketched characters are rarely 100% symmetrical, but you can correct that during the inking stage.
  • When it comes to sprites, the more parts you add, the better the accuracy and smoothness of the final result.

Character Animation

With regular animation, I typically begin by setting up a scene similar to my short content. I import new templates or reuse ones I’ve previously created in Cartoon Animator. First, I place the background, followed by the characters and props. Then I load the voice audio and animate the characters according to the overall theme and their individual emotions.

While working, I set the video format to MP4 and adjust the scene length to match the audio. For characters, I add automatic motions or keyframe body movements as needed. I also change hand, leg, and other sprites depending on the specific actions required. Accessory and prop animations are done manually for more precise motion.
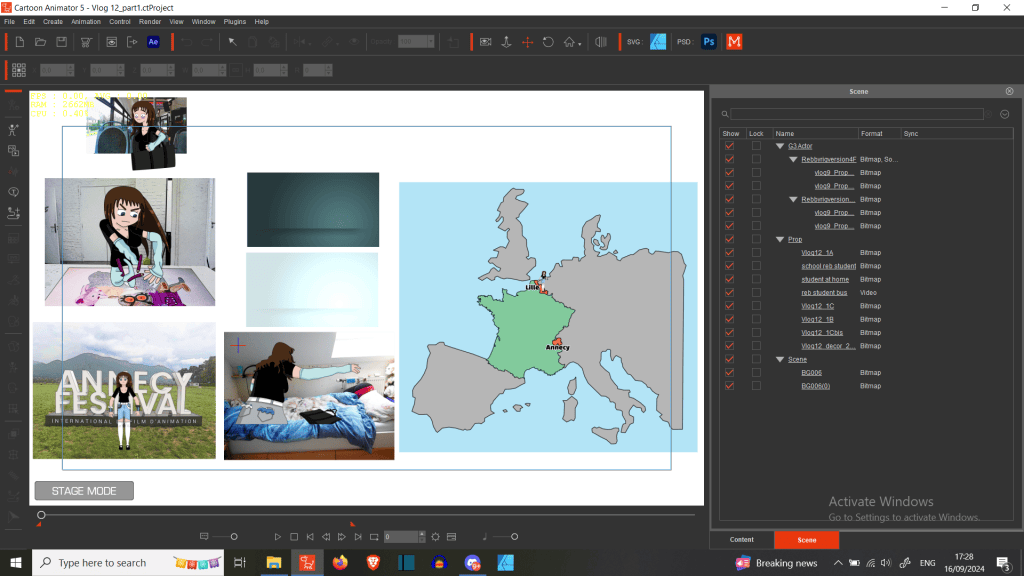
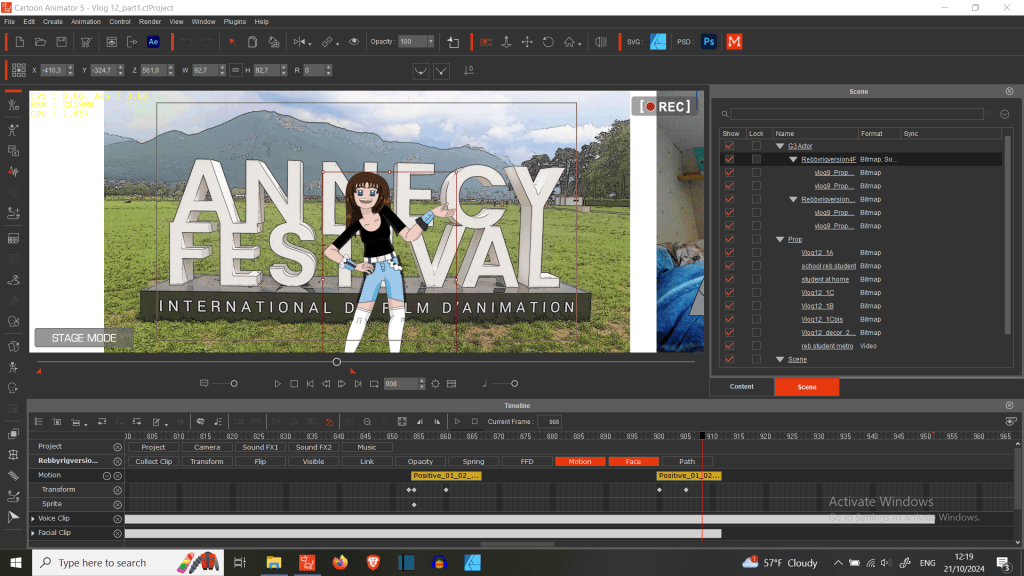
I often animate the head manually but sometimes use automated motions. Usually, I start with template expressions and modify them as needed, then apply transformations. I follow a similar process for details like hair, using deformations where appropriate, and swap eye sprites to match the expression.

For traditional motions, I change out sprites and fine-tune their timing based on the desired speed. Occasionally, I use FFD (free-form deformation) for added flexibility.

Finally, I position the camera to highlight key elements, check the scene thoroughly, render the project, review for errors, and then move on to the next shot.
Staying trendy with TikTok Shorts

At first, I was skeptical of the TikTok short format—its vertical orientation felt difficult to work with, and I worried about potential copyright issues when blending various materials. But I soon realized how much easier it was to gain visibility. As a self-proclaimed nerd, I now prefer producing loads of short videos over constantly promoting my longer projects on other platforms. It frees up more time for me to create and dive into new interests.
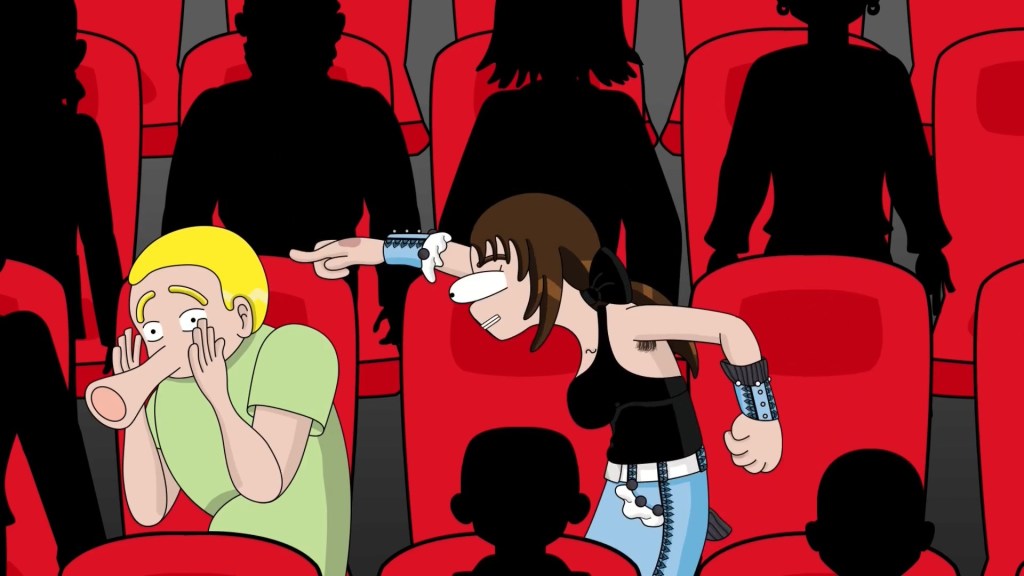
Short video formats offer a unique advantage to animators, especially when limited to 60 seconds or less. The time cap reduces the pressure to produce lengthy content and lowers the barrier to regular posting. In France, many have begun their animation journey through this new medium. Personally, it’s opened the door for me to explore concepts like détournement animé—a style of animation that repurposes existing media (like cartoons or films) to craft new meaning, often for satire, parody, or political commentary.

For this particular animation, I didn’t record any specific audio. I simply focused on building scenes around the main theme. I reused my go-to templates and rigged characters, which were more than enough for this longer format. While working with longer durations, not much is required to capture and hold the viewer’s attention. This workflow also allows me to appear on camera like a Vtuber, join trends, or react to current topics. It’s much easier to produce partial animations on a tight schedule. The more prep work you do in advance—like building reusable assets—the faster and more automated the process becomes. And within that framework, there’s still space for custom animations that enhance engagement and stand out. It’s like raising Tamagotchi pets: the more you nurture your animated characters, the more expressive, efficient, and capable they become.

Video Editing with ShotCut

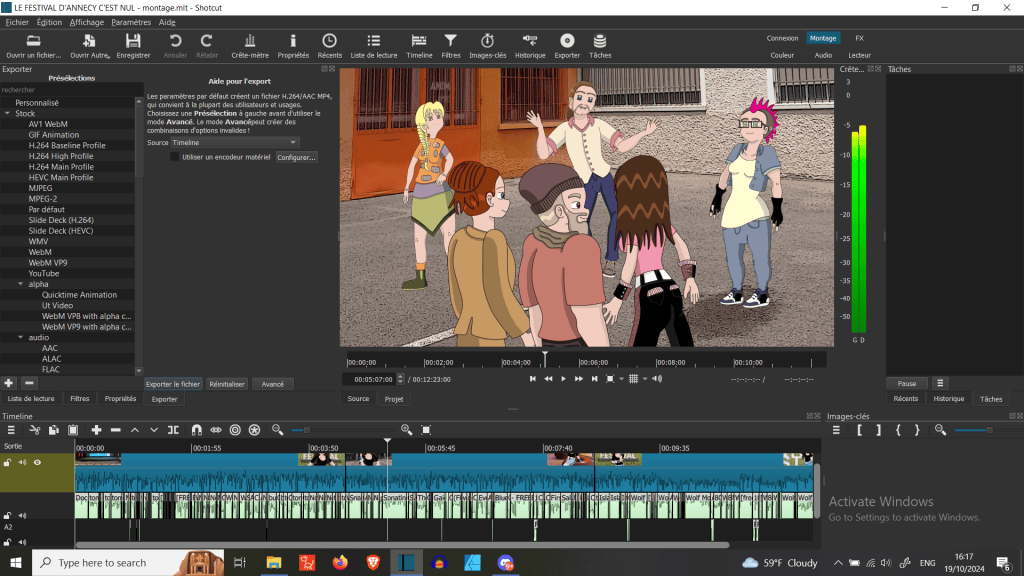
It took me some time to learn how to edit eye-catching videos. I started by following online tutorials on YouTube, especially from 60s Academy by Alex Bram and Merguez SuperStar on Loann LV’s channel. I also incorporated feedback from others to refine my approach.

The skills I developed for short-form video editing also proved useful when working on longer projects, such as my video about the Annecy Festival. Since animation is incredibly time-consuming—especially for a solo creator—I’ve streamlined my workflow for short videos. I study dynamic content and break down its structure, paying close attention to how elements like music, visuals, and scene transitions maintain a fast rhythm. Nothing should stay static for too long; every part should move in sync with the pacing.

While you can learn a lot through self-study, investing in training gives you access to more tailored advice that can really sharpen your skills. Finally, I wrap up my videos in CapCut, where I add subtitles, apply effects, and finalize the look with filters.

Closing Thoughts

I’m really happy to have taken part in the Reallusion 2024 Animation at Work Contest. Honestly, I wasn’t sure if my video met all the contest criteria, so receiving an Honorable Mention came as a complete surprise—especially since it was my first time entering any Reallusion animation competition. My advice to future contestants: be bold and take a chance. You have nothing to lose and everything to gain.
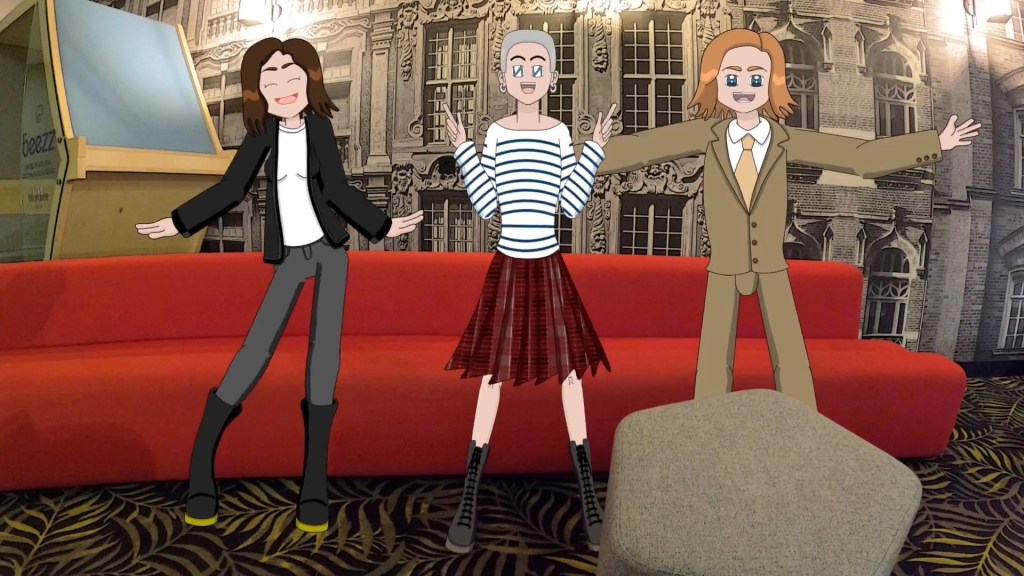
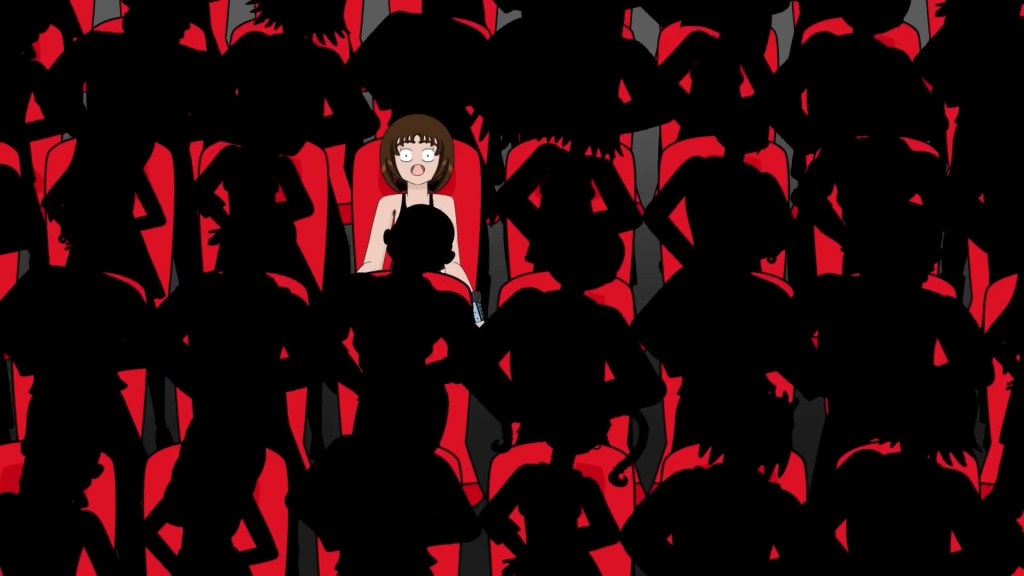
If you’re interested in my work, feel free to follow me on YouTube, Instagram, and TikTok—I’m very active on all three. You can also find me on other social media platforms!

Follow RebbyCraft

RebbyCraft’s Instagram

RebbyCraft’sTikTok

RebbyCraft’s Lemon8

RebbyCraft’s Facebook

RebbyCraft’s Qwice

RebbyCraft’s X

Click the banner to learn more about the winners’ portfolios and judge comments

Dom Fred’s “Ninja School”: Revolutionizing Action Animation

Dom Fred – Director / Producer / Editor / 3D Animator / Martial Artist

Dom Fred

Dom Fred is no stranger to pushing creative boundaries. As a seasoned director, producer, and 3D Maya animator with over two decades of experience in television advertising and digital storytelling, Fred has crafted visually compelling commercials, music videos, and documentaries.

Operating under his banner, DOM ANIMATION STUDIO, he specializes in blending 3D characters into live environments with an unmistakable flair for martial arts and acrobatic action.

His latest experimental short film, Ninja School, offers a powerful demonstration of what real-time tools and modern mocap technology can achieve in the hands of a skilled action director.

By adapting Reallusion’s tools—ActorCore, Character Creator, and iClone—with Unreal Engine, Dom Fred brings Ninja School to life as a high-impact, real-time action short, achieving fluid, cinematic martial arts sequences without the need for costly mocap suits or labor-intensive keyframe animation.

“This NINJA SCHOOL short will accompany me during masterclasses and my 2025 Cannes Film Festival presentation. It’s a proof of concept for how indie creators and professionals alike can leverage real-time workflows to tell powerful stories with cinematic precision.”

Dom Fred – Director / Producer / Editor / 3D Animator / Martial Artist

Behind Ninja School

Ninja School is more than just an animated film—it’s a technical showcase and creative exploration designed to highlight Fred’s real-time production workflow. The short film introduces viewers to Master Yen Chu and a group of ninja students in a training academy, where traditional martial arts and modern animation collide in cinematic fashion.

“This project was about exploring the creative and technical potential of real-time tools, and demonstrating how far we’ve come in animating complex action scenes quickly and efficiently,” said Dom Fred.

The characters, such as Master Yen Chu and his students, were brought to life using meticulous design and outfitted with costumes crafted by Libertas Armory—available on the Reallusion Content Store—adding authenticity and style to the film’s visual identity.

The Reallusion Tools Powering the Production

Fred’s Ninja School was made possible through a sophisticated pipeline built around Reallusion’s powerful suite of tools. From initial character design to post-production, the workflow was both efficient and cinematic.

  • Character Creator 4 (CC4) was used to model and customize all characters, giving them lifelike expressions, stylized proportions, and wardrobe flexibility.
  • iClone 8 served as the animation hub, used for animatics, pre-visualization, and scene layout.
  • ActorCore provided the motion capture data, specifically from packs such as SWAT Stunts, Wall Crawler, and Hand-to-Hand Combat.
  • The final renders were completed in Unreal Engine, with post-production edits in Adobe Premiere Pro 2025.

A Workflow Centered on Efficiency and Action

Pre-production began in iClone, where Fred and his team crafted animatics and technical shot breakdowns. This allowed them to plan camera angles, timing, and choreography without wasting time or resources.

“iClone is constantly evolving. Its flexibility lets us save precious time in pre-production while keeping the action sharp and cinematic.”

Dom Fred – Director / Producer / Editor / 3D Animator / Martial Artist

Once the shots were locked, ActorCore’s motion capture packs were brought in to bring high-octane martial arts to life. With direct integration into iClone, these pre-made motion clips allowed for fast iteration and powerful results.

Thanks to iClone’s LIVE LINK feature, all scenes were seamlessly transferred to Unreal Engine 5, enabling real-time lighting, high-fidelity rendering, and smooth animation playback. This seamless transfer allowed Fred to focus on cinematic quality while maintaining speed.

The Power of ActorCore Motion Packs

Fred relied on three specific motion packs from ActorCore, which delivered stunning realism and flexibility:

These ActorCore packs allowed the team to visualize and finalize movements rapidly, preserving energy for fine-tuning lighting and compositing in Unreal Engine and Premiere.

1. SWAT Stunts Motion Pack

This pack provided tactical movements, perfect for choreographing intense sequences where ninja students execute coordinated takedowns and disarm techniques. “The SWAT Stunts pack gave us grounded, powerful action movements that brought authenticity to our fight scenes,” said Fred.

2. Wall Crawler Motion Pack

Used to highlight acrobatic skills and vertical movement, this pack allowed characters to leap and scale walls, giving the short a dynamic verticality. “Wall Crawler animations helped us simulate gravity-defying ninja agility, all without needing mocap gear or manual keyframing,” Fred explained.

3. Hand-to-Hand Combat Pack

This pack delivered fluid, realistic martial arts choreography that made every scene feel like a blockbuster. “The hand-to-hand combat motions felt real and cinematic right out of the box. It saved us so much time,” – Dom Fred.

Real-Time Production for the Future

Ninja School isn’t just an internal experiment—it’s also a key piece for Dom Fred’s upcoming masterclasses and his technical showcase at the 2025 Cannes Film Festival. The short film exemplifies how real-time tools like Character Creator, iClone, and Unreal Engine, when combined with quality motion capture, can dramatically streamline animation pipelines.

A Collaborative Effort

Fred also extended thanks to Reallusion and the broader content creation community:

“We sincerely thank our partner Reallusion and the content creators who make it possible for us to efficiently complete our 3D animation and VFX projects.”

Dom Fred – Director / Producer / Editor / 3D Animator / Martial Artist

Ninja School stands as a tribute to what’s possible when innovation, technology, and storytelling come together—backed by the right tools and creative vision.

Follow Dom Fred

Website:
https://www.domfredfilm.com/accueil

LinkedIn:
https://www.linkedin.com/in/dom-fred-films-81904194/

YouTube:
https://www.youtube.com/channel/UCaEVZPzkWUsg9Wti9Cao4Vw

Facebook:
https://www.facebook.com/profile.php?id=100063571358642

Vimeo:
https://vimeo.com/spaceagentsmysteriousax/videos

Related Posts

Storyboarding with iClone

Storyboarding was one of the reasons I discovered iClone about twenty years ago as I was looking for an easier way to get the job done. Storyboarding, for those beginners not familiar with the concept, is a simple way to pre-visualize a script with static images for each scene that represent the flow of the story and give the director and principal photographer a chance to hash over their shot list and other items.

It is much easier and cost effective to storyboard a scene for animation or live action than to just start shooting it on location or start animating without a roadmap. When shooting a live scene there can be tremendous costs to redoing a shot because of a bad camera angle. Storyboarding allows the directors to visualize these shots before a crew is put on the clock.

More importantly, a storyboard adds structure and helps to maintain continuity between shots, and it works equally well in animation by providing a glimpse at what we are trying to animate or get on film versus what we “envision” in our minds. There are no downsides to using a storyboard and iClone is here to help.

Do not confuse a storyboard with an animated movie. Storyboards are usually concise and do not have to contain works of art. Some are nothing more than stick figures drawn on paper while others are almost complete productions of the movie in book form. While these do not have to be high quality, they do need to convey the direction the production takes and explain or show the aesthetics of certain scenes.

 A crude storyboard can at the very least help to get a coherent video that an audience can follow. It can also show problems before the production work beings. As mentioned earlier, this produces a cohesive video and can prevent straying from the main storyline. Even the smallest, seemingly unimportant video can benefit from storyboarding.

Posing Versus Animating

One of the best features of storyboarding is you do not have to be an animator to create storyboards. This only involves posing, not animating and iClone is packed with poses. And motions that can become poses. The new AccuPOSE makes iClone an even more formidable storyboarding app by providing a library of AI-assisted posing that can grow each month with the optional Infinity subscription that adds new pose libraries regularly

I mentioned motions because they are nothing more than a collection of poses and you can load a motion, scrub down the timeline until you find a pose you like then right click, select REMOVE ANIMATION and what is left is a pose.

iClone Workspace Setup for Cockpit Storyboard Below.

Static Storyboards

Think of a static storyboard as a simple comic book. It needs to convey the emotion, looks and feel of a comic book panel. It must tell viewers at a glance what the director or cinematographer wants the audience to see and feel. It’s not always possible to convey enough emotion in a static image especially when you are new to all this. Sometimes it’s not necessary depending on the direction and instructions you are following. In any case just give it your best shot and you’ll see your storyboards and videos improve.

I’ve yet to work on a storyboard that didn’t discover problems and require some adjustment no matter how ironclad we may think we have fleshed out our original story.

Animated Storyboards

Animated storyboards are fantastic but require a lot more time and resources. Even just 10 to 30 seconds of animation can take several hours at a previz level and that I something you need to keep in mind.

By previz level I mean flat or very rudimentary lighting, low poly props to keep things moving along while using simple characters and props.

The animated panels need to convey the proper message but not recreate the entire. Do not reinvent the wheel, just get the ideas across. A hybrid storyboard combing elements of static and animated panels may be a better fit for some projects.

Simplified Storyboard Setup Using Scaled Variations of the Free Box Primitive, Wall and Trees that comes with iClone.

Practice with your Favorite Movie or Show

Thats right! Storyboard a scene from one of your favorite movies or television shows that conveys the story and style of the scene as you see it. Then step back and storyboard it from another viewpoint or a re-imagining of the storyline to practice your creative thinking and getting what you see in your head down on the screen.

It’s that last part that trips up a lot of creatives. It can be the most difficult part of the pre-viz process.  The powers-that-be tell you what they want to see and then you have to get on the same page and storyboard their vision for everyone else to work with.

Storyboard 1 – Airliner Cockpit

Panel 1: Cockpit Interior | Tight Shot | Full Flight Crew
Routine flight with the crew concentrating on tasks during a routine and uneventful flight.

Panel 2: Cockpit Interior | Closeup of Cockpit Door
Shot slightly Rotated for dramatic Effect. No characters in view. A sudden pounding on the cockpit door rips through the cockpit with a warning.

Panel 3: Cockpit Interior | Crew Closeup.
The startled pilots look at each other while the Engineer looks through the peep hole. only to find it blocked.

Panel 4: Cockpit Interior | Door Closeup. The Engineer turns to get the Crash Axe while the pounding intensifies on the door. There is no answer to the captain’s demand to identify themselves.

Panel 5: Cockpit Interior | Wide side shot of Engineer holding Crash Axe in front of cabin door.
Flight Engineer stands in front of cabin door with the Crash Axe in hand ready to defend the cockpit. The 1st Officer continues the Mayday call while squawking the 7500-hijack code. The captain is still demanding Identification.

Panel 6: Cockpit Interior | Closeup of Copilot
1st Officer presses the transponder button for the 7500-hijack code.

Panel 7: Panoramic Shot | Jet Only
Side shot of Airbus jet over land.

Panel 8: Exterior Shot | Fighter Jets
Two F-16s take off from nearby airbase to intercept the airliner.

Storyboard 2: Simplified with Dummy Assets

We can create a storyboard with 3D primitives that come with iClone such as blocks, walls and floors to make the props in the in the scene. This works well in the early stages of a project when the exact location settings or interior types might not be set.

Like the first storyboard above it can also be used to create or adapt a shot list for the entire project. You can visualize camera angles at amazing speed and make adjustments before putting any crew on the clock.

Cafe Interaction – Taking an Order

Panel 1: Interior Wide shot | Café
Establishing shot to start the interaction between wait staff and customers

Panel2: Interior Wide Left to Right Angle with All Three Subjects
Waitress looks to customer 1 and waits for order.

Panel3: Interior | Right to Left Wide Angle
Customer 1 looks at waitress and gives order.

Panel4: Interior | Left to Right Wide Angle
Waitress switches to customer 2 and waits for order.

Panel 5: Interior | Left to Right Wide Angle with Customer 2
Customer 2 looks at and gives order to waitress.

Panel 6: Interior | Wide Left to Right Angle | All Three Subjects.
Waitress thanks the customers for their order and finishes up.

The above storyboard shows how even simple, everyday interactions like taking and giving an order in a café can not only be visualized but improved. It would be very easy for a director of photography to make changes to their shot list based on work from the storyboard phase and will usually have a large amount of input in the creation of the storyboard and its evolution.

Smart Search PlugIn

The AI-Assisted Smart Search plug-in utilizes AI-enhanced search techniques to quickly and easily locate assets for storyboards and other projects. Smart Search offers two methods of searching for and locating assets.

Keyword Search lets us locate assets by Name, Tag or Author similar to conventional search.

Deep Search is the real powerhouse with its AI-assisted algorithms to quickly locate what you need and not lose that creative spark while searching. It includes Natural Language Support where even brief descriptions will give accurate, immediate results in over 100 languages!

To top that off, Deep Search also provides Drag and Drop or Copy and Paste Image based searching for those just right assets you have in mind but can’t put a name to for conventional or keyword search.

We can even select a prop out of our scene, right click and use Deep Search Similar to find assets closely resembling the selected prop, usually in a matter of seconds. We can also filter by category and exclude unwanted results, cutting back on clutter than be so easily distracting and time consuming.

Remember what I said earlier about motions being a group of poses? With the newly released Motion Deep Search we can now find motions much faster, and each motion can carry thousands of poses to use in the storyboard by scrubbing down the time to a desired pose, right click and Remove Animation to keep the pose as mentioned earlier.

I could go on and on about Motion Deep Search, but you get the picture. When you combine existing motions with what is available in the Content Store and Marketplace you have the potential of thousands of poses extracted from those motions including free motions that come with iClone.

Usage Cases

Befores & Afters: The Art of Crafting War Scenes or Previs

This is a powerful usage case of Reallusion tools, planning and storyboarding to previsualize (Previs/Previz) a war feature motion picture on Amazon Prime India, The Forgotten Army. It’s also a classic case of using Reallusion tools to save on time and resources while moving the project forward possibly avoiding costly delays.

Bringing Brands to Life with Real-time Mascots in just 2 Months

This case features Carletto, a puppet developed and animated in 1996 by Jim Henson Studios. Italian production house UBIK recreated the character for a series of commercials using Reallusion tools.

Create CableLab’s Visionary Video: Real Actors Meet with Virtual Humans

This case highlights Geoff Hecht, VFX supervisor on the Near Future: Manana Cabana project using Reallusion tools and storyboards to speed up production while not sacrificing quality.

Cartoon Animator

We can storyboard with Cartoon Animator too. It shares a lot with iClone and can accomplish many of the same tasks. The latest update has improved it even more and it can be a more economical way to create storyboards. I’m not experienced with Cartoon Animator like I am with iClone, but I would be surprised it you ran into any problems using it for the same purpose.

Summary

In closing I would like to stress the importance of continuity when laying out a story and a simple storyboard will go a long way to making your story ironclad with no surprises during production and no plot holes or left turns to confuse the audience.

Even if you just sketch out an outline on napkins with stick figures it will often be superior to not having any storyboarding at all. In this business, continuity is extremely important.

Yes, it’s an extra step in the creative process but it’s those extra steps that make work stand out and be recognized.

Free online storyboard template:

Boords: https://boords.com/storyboard-template/animation

Sketchfab Models Used in this article:

“plane a340” (https://skfb.ly/oJWGw) by mamont nikita is licensed under Creative Commons Attribution (http://creativecommons.org/licenses/by/4.0/).

“F-16” (https://skfb.ly/oIXGU) by Cxyber is licensed under Creative Commons Attribution (http://creativecommons.org/licenses/by/4.0/).

“Twente Airport ATC Tower” (https://skfb.ly/ooIHR) by Robbert Kuijper is licensed under Creative Commons Attribution (http://creativecommons.org/licenses/by/4.0/).

MD McCallum - WarLord

MD McCallum – WarLord

Digital Artist MD “Mike” McCallum, aka WarLord, is a longtime iClone user. Having authored free tutorials for iClone in its early years and selected to write the iClone Beginners Guide from Packt Publishing in 2011, he was fortunate enough to meet and exchange tricks and tips with users from all over the world and loves to share this information with other users. He has authored hundreds of articles on iClone and digital art in general while reviewing some of the most popular software and hardware in the world. He has been published in many of the leading 3D online and print magazines while staying true to his biggest passion, 3D animation. For more information click here.

Reviving Ancient Rome with Character Creator & iClone

Luis Cerezo – Writer / Filmmaker / Director

Luis Cerezo

Luis Cerezo, a seasoned creator with extensive experience in advertising, television, music videos, documentaries, and independent films, has embarked on a captivating journey to bring history to life through the lens of digital storytelling.

At the age of 15, Luis began an early career as a jazz drummer. As a filmmaker, he founded Cinelibre, an alternative production platform inspired by guerrilla filmmaking. His works have been premiered in Madrid, Montreal, Bogota, Warsaw and Shanghai. In 2015, his first novel “Eo” was published by Suma Letras. (www.luiscerezo.net)

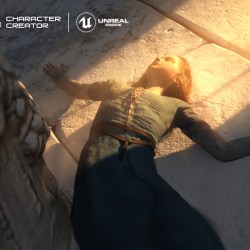
His latest project recreates the awe-inspiring atmosphere of Mérida, known in antiquity as Emerita Augusta—a city that flourished nearly 2,000 years ago as a major capital of the Roman Empire. This ambitious endeavor not only revives the architectural grandeur of the era but also highlights the poignant story of Eulalia, a 13-year-old girl whose bravery and defiance made her a timeless symbol of freedom and faith.

To authentically represent Eulalia’s character and her world, Cerezo collaborated with a global team of artists, historians, and archaeologists. Beginning with traditional sketches and children’s historical recreations of the saint, the team utilized Character Creator to design detailed 3D models of characters, while costumes were crafted with input from experts in ancient Roman fashion. The city itself was meticulously reconstructed using topographic studies and archaeological data, blending realism with artistic interpretation.

Animations were developed using iClone, with its native files seamlessly integrated into Unreal Engine for rendering. This workflow allowed the team to create dynamic and emotionally resonant scenes efficiently. Cerezo credits Reallusion’s software suite for transforming complex production into an enjoyable and time-effective process, pushing the boundaries of digital artistry while honoring an enduring cultural legacy.

How Luis Cerezo Revived Ancient Mérida and the Story of Eulalia with iClone, Character Creator, and Unreal Engine

Q: Hello Luis. Welcome to our Feature Stories. Kindly share with us what inspired you to focus on Eulalia’s story and the recreation of ancient Mérida for this project?

From the moment a friend shared Eulalia’s story with me, a seed was planted that grew little by little. Initially, I never thought I could write it due to its magnitude, but it emerged spontaneously as part of a novel draft. Another factor was walking through the ruins of the present-day city, imagining it as it once was, and asking myself, “Why not see it as it used to be?”

But the most important aspect is the underlying theme of the struggle of that young girl.

Eulalia is about free will and standing firm in one’s convictions—a concept that made her a spiritual cornerstone of the Hispanic world and the West, as free will is what defines us as human beings.

Q: How did you collaborate with historians and archaeologists to ensure historical accuracy in the character designs and environments?

I’ve noticed that major productions, such as The Fall of the Roman Empire (Anthony Mann, 1964) or Shōgun (Hulu & Disney+, 2024), often lack historical rigor.

While taking natural narrative liberties, I felt it was essential to depict things as they truly were. From Late Empire clothing, to streets and textures, everything has been cross-referenced with excellent researchers actively working on excavations.

Under the guidance of Miguel Alba, who accompanied me step by step through the reconstructed areas, every detail was verified alongside various specialists. The Consorcio Mérida Ciudad Monumental was pivotal to this process. It’s composed of enthusiastic archaeologists and historians with a strong reputation for their restoration work.

A great advantage is that Mérida has remarkably well-preserved sites—from the theater to the stunning Temple of Diana and the ancient circus. Much of their structure remains intact, serving as a basis for reconstructing what time has erased.

Q: Could you explain how you used Character Creator to design the characters, from sketches to final models?

First, I sought visual references for each character, much like I do for my novels: creating a conceptual foundation. For a character venerated by millions, this required special care and reflection. Early sketches using AI didn’t convince me, so I turned to Yan Rodríguez, an artist and excellent anatomist, who crafted traditional sketches on paper.

People often underestimate the importance of anatomy, but those who study it deeply understand how facial muscles and bones shape a character’s essence.

The challenge was to stylize the characters enough to avoid the “uncanny valley” effect but not excessively so. This process took considerable time.

Fortunately, once a strong initial concept was established, Character Creator provided all the necessary and highly flexible tools.

“Once a strong initial concept was established, Character Creator provided all the necessary and highly flexible tools. The workflow was smooth, as the software allows for intuitive manipulation of ideas—a quality I find fascinating.”

Luis Cerezo – Writer / Filmmaker / Director

I even think I could use Character Creator to design faces for my novels, visualizing characters as I write.

Q: How did you integrate iClone animations into Unreal Engine, and what benefits did this workflow provide for rendering the final scenes?

The story of Eulalia spans a dramatic moment with significant social weight. Therefore, the approach couldn’t be excessively realistic, in contrast with the scenery.

iClone is an incredibly intuitive system for animation, reminiscent of music composition in software like Logic or Cubase—you can layer, speed up, and amplify tracks. Being a first step, I conducted numerous tests and discovered that iClone allows blending MOCAP, manual animations, and library assets. The possibilities within iClone’s ecosystem are vast, and this experience has left me eager to explore further.

As for integration with Unreal Engine, iClone LIVE LINK worked seamlessly, enabling the use of Unreal’s lighting, scenery, and rendering capabilities, which dramatically enhanced the scenes.

“Reallusion has gained a devoted fan in me since day one, and I’ll rely on their tools for my next project, which takes place between interstellar space and a neighborhood market.”

Luis Cerezo – Writer / Filmmaker / Director

Follow Luiz Cerezo

Related Posts

MetaTailor Plug-in for Character Creator 4 

A fresh way to style Character Creator clothing and wardrobes with MetaTailor

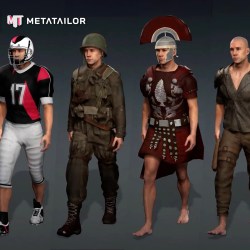
A fresh new way to dress up your Character Creator 4 (CC4) avatars is here! The MetaTailor Plug-in introduces a fast and seamless workflow: with just one click, send your character to MetaTailor, style them with outfits, and bring them back — no tedious exports, no manual adjustments.

What is MetaTailor?

METATAILOR is an interactive, real-time content creation tool designed for virtual fashion enthusiasts, game developers, and 3D artists. It empowers users to design outfits and dress 3D avatars with ease, offering a wide range of tools for creating unique outfits and accessories. It offers an extensive library of ready-made 3D garments and also supports importing your own designs.

Thanks to MetaTailor’s self-adaptive technology, each clothing item fits and conforms to your character’s body automatically in real time, letting you focus purely on creativity.

Whether you’re layering outfits, swapping styles, or fine-tuning the fit, MetaTailor removes the technical burden and speeds up the styling process for 3D artists of all levels.

Solution for Artists, Indies, & Studios

Whether you’re a hobbyist or part of a large team, the MetaTailor Plug-in amplifies your productivity. Here’s how it empowers creators at every level:

  • Game Artists: Rapidly prototype and iterate character outfits for different worlds and genres. Populate your game with diverse character wardrobes in a fraction of the time.
  • Indie Creators: Achieve AAA-quality character costumes without a large art team. MetaTailor gives a solo developer or small studio the power to dress characters with professional flair and minimal effort.
  • Studios: Streamline your production pipeline by eliminating tedious cloth-fitting tasks. Artists can swap and tweak outfits on the fly, making last-minute client changes or creative adjustments painless and fast.

Built for Character Creator 4 (CC4) Pipelines

The MetaTailor Plug-in is specifically designed to work seamlessly within the Character Creator ecosystem. It’s fully compatible with CC3+ base characters, and supports the iAvatar format.

You can send any Character Creator 3+ or 4 character to MetaTailor without re-rigging or conversion — the mesh, rig, and skin weights all transfer flawlessly.

After dressing your character in MetaTailor, simply send them back to CC4, ready for animation, posing, or export to platforms like iClone, Unreal Engine, and Unity. It’s a seamless extension of your existing CC4 workflow that feels natural and integrated.

What Are the Benefits of Using MetaTailor?

One-Click Integration: Send, Dress, Return

Say goodbye to tedious exports and file juggling.
MetaTailor Plug-in introduces a one-click send-and-return workflow between CC4 and MetaTailor.

  • Send your CC4 avatar directly to MetaTailor with a single click.
  • Dress up your character in MetaTailor’s intuitive environment.
  • One more click, and the fully dressed character — complete with all clothing and accessories — returns to CC4, ready for use.

This hassle-free round trip keeps you in the creative flow without technical interruptions, just like CC4’s other one-click integrations.

Instant Dressing with Smart Fitting

Drag, drop, and dress — in seconds.
MetaTailor offers a fast and intuitive way to outfit your characters.

  • Choose from a wide library of ready-made 3D garments or import your own designs.
  • Self-adaptive fitting ensures that each outfit automatically conforms to your character’s proportions in real time.
  • Layer multiple outfits, swap styles instantly, and fine-tune fittings with minimal effort.

Thanks to MetaTailor’s smart technology, you can say goodbye to painstaking manual adjustments and hello to effortless wardrobe creation.

Mesh Extractor: Build Your Ultimate Wardrobe

Unlock the full potential of your wardrobe with Mesh Extractor.

  • Pull existing outfits off any CC4 character and turn them into reusable clothing assets.
  • Reuse your favorite jackets, armor sets, or costumes by extracting them with a click and applying them to other characters.
  • Mix and match clothing pieces from different avatars to create entirely new looks.

Every character you dress can now help expand your outfit library — supercharging your workflow with limitless costume possibilities.

Getting Started

Ready to revolutionize your character creation workflow?
The MetaTailor Plug-in for CC4 is available as a free add-on for all Character Creator 4 users with an active MetaTailor Pro membership.

  • Download and install the plug-in easily through the Reallusion Hub.
  • Connect with MetaTailor to start dressing your characters effortlessly.

More Resource

Check out the MetaTialor Website

Check out Character Creator 4

Please feel free to leave any questions in the RL Forum’s MetaTailor subcategory

Riyad Rahman won the 2024 Animation at Work Contest. Learn how he creates a concise car insurance commercial with Cartoon Animator.

Winner Spotlight: Making a Concise Car Insurance Commercial with Cartoon Animator

For the Reallusion 2024 Animation at Work Contest, artist Riyad Rahman won second place in the “Business & Commercial” category. In this article, he walks us through the workflow behind his winning entry, 2D Explainer Video for Car Insurance.

Riyad Rahman

Hello, I’m Riyad Rahman, a Cartoon Animator and Motion Graphics Designer with five years of experience. I specialize in creating 2D explainer videos, business promos, and animated content that captivates audiences and simplifies complex ideas. My passion lies in bringing concepts to life through engaging visuals.

With expertise in character animation, motion design, and storytelling, I craft high-quality animations that help brands and businesses connect with their audience. Whether it’s an explainer video, a commercial, or social media content, I focus on delivering creativity, clarity, and impact.

Follow Riyad’s LinkedIn / Facebook

My Experience with Cartoon Animator

I’ve been using Cartoon Animator since 2021 and have worked on commercial projects with it. For this contest entry, it took me approximately 2 weeks to plan, design, and animate the video. The process involved storyboarding, character design, animation, and final edit to make it smooth and engaging. Using Cartoon Animator makes this process smooth and efficient!

  • Easy Character Rigging: This allows me to quickly turn any image into an animated character and apply smooth movements.
  • Motion Capture & Facial Animation: Let me bring characters to life with natural expressions and movements.
  • Smart IK Animation: I like using the 2D Motion Key Editor to flexibly pose the characters and make their motions more realistic.

“Cartoon Animator makes animation easy and fun! Its powerful tools, like motion capture and Smart IK, help bring ideas to life quickly and smoothly. Whether for business, education, or storytelling, it’s my go-to software for creating professional 2D animations.”

Riyad Rahman, Motion Graphics Designer

Story Background & Concept

I chose a car insurance commercial for my entry because it’s a practical and relatable topic that many people need to better understand. My goal was to create a clear, engaging, and visually appealing explainer video that simplifies the concept and makes it easy for viewers to grasp. Using Cartoon Animator, I was able to add fun visuals and smooth animations, transforming a complex subject into something simple and interesting. Here are some key tips I consider important when making a car insurance explainer video. Using Cartoon Animator makes this process smooth and efficient!

  • Keep It Simple – Use clear visuals and easy-to-understand language to explain key points.
  • Use Engaging Characters Animated characters can make the topic more relatable and fun.
  • Smooth Motion & Transitions – Utilize CTA 5 features like 2D Motion Key Editor, SVG Color Adjustment, Spring Editor, etc, to make the animation feel professional.
  • Add Visual Storytelling – Use scenes and props that show real-life situations, like accidents, claims, or benefits, to make the message stronger.
  • Keep It Short – A 1–2 minute video works best to keep viewers engaged.

Character Design

I chose the Content Store for characters because it easily combines with other G3 characters, allowing you to mix and match clothes to create your own unique styles. The benefits of choosing G3 characters are clear.

I can easily switch clothes for different styles using the included AI files. By showing and hiding layers, I can create different fashions, and adding props is simple—these can be created in Illustrator and exported back into Cartoon Animator.

I use the swapping technique to customize the character, making it look more unique and distinct. By simply exchanging the eyes, brows, mouth, and adjusting the hair and skin color, I can create a more personalized appearance.

Character Animation & Scene Animation

I spent around 14 Days on character animation, focusing on smooth movements, expressions, and natural interactions. By using Cartoon Animator’s tools like IK animation and face key editor, I was able to speed up the process.

Next, I plan with a storyboard and sketch out key scenes to maintain a clear and structured flow. After that, I focused on character design and background scenes. Then, I animate scene by scene using CTA features. I also applied the 12 principles of animation to ensure the scenes were clear and smooth.

VFX and Video Editing

To create a smoke effect, I use a particle playground, gaussian blur effects and wiggle expression.

By using the default parameters in After Effects, I created car movement, transitions, and so on. In Adobe Premiere, I added all the SFX, the scenes, voices, transitions, and more.

Closing Thoughts

This competition was an incredible experience that challenged me to enhance my storytelling and animation skills. Winning Second Place was an honor, and I gained valuable insights from seeing the work of other talented creators. For future contestants, my advice would be as follows.

Tell a clear story by mastering the basics, and focusing on smooth movements, expressions, and timing. Take full advantage of Cartoon Animator’s features to save time and improve quality. Lastly, experiment with new styles and effects to make your work stand out.

Related Posts

Click the banner to learn more about the winners’ portfolios and judge comments

iClone 8.53: Advanced Sync For Professional Mocap Workflows

Timecode Sync and Vicon Compatibility Now Available in iClone

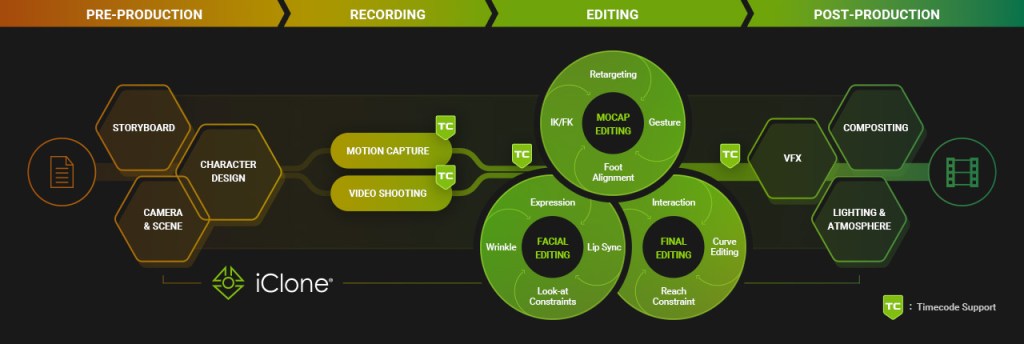
For full-body motion capture or multiple character performances, data drift and synchronization issues are major hurdles. They’re time-consuming and costly and can delay production workflows. That’s why in iClone 8.53, we’ve brought FBX timecode support front and center, introducing powerful new features that automatically sync data from multiple sources with precision. With practical tools designed to simplify your workflow, we’re making sure you spend less time fixing and more time creating — because creativity always comes first.

Key New Features:

Overview of iClone 8.53 New Features

FBX Timecode Synchronization

Animators, filmmakers, and mocap professionals have long battled the headache of managing multi-source animation data. Timecode sync has helped bring order to the madness — but constant file exchanges, software incompatibility, and team misalignment still slow everything down.

It now ends with the new Timecode Plugin — the solution for seamless synchronization across animation, mocap, and real-time production. No more drifting data. No more tedious syncing. No more back-and-forth between pipelines.

Synchronized Motion Capture

Timecode is fully integrated into Motion LIVE(the iClone built-in motion capture feature), embedding sync data directly into live mocap recordings. Capture multiple devices (face, body, hand) and actors at once, with the option to choose your preferred timecode source for accurate, real-time synchronization.

  • Multiple Device Capture: Connect and sync various mocap devices — body suits, facial trackers, hand sensors — into one seamless performance pipeline.
  • Multiple Actor Capture: Record multiple performers simultaneously, with all data precisely aligned for clean playback and streamlined editing.
  • Multiple Media Source: Integrate video, audio, and mocap — all synced to the same timecode for a unified production timeline.
  • Director Quad View: View live feeds from multiple perspectives — mocap data, virtual scene, camera angles, and talent — all in real time, all in sync.

Director Quad View lets you view multiple perspectives in real-time, including mocap data, virtual scenes, camera angles, and talent, all in sync for better monitoring and decision-making.

Check out the demo on the product page

Powerful Timecode Editing

The Timecode Plugin makes editing intuitive and effortless, starting with the ability to import FBX, video, and audio with embedded timecode, making timecode visible directly on the timeline. Snap clips to embedded timecode with a single click, ensuring everything stays perfectly in sync. Finally, custom options and Unreal Live Link support allow for exporting files with timecode embedded, providing a seamless workflow from start to finish.

  • Import Timecode: Easily bring in timecode data from FBX, video, and audio, ensuring precise synchronization across all media sources.
  • Switch to Timecode Mode: Customize time units and match frame rates for accurate, project-wide synchronization in iClone timeline.
  • Auto Align to Timecode: Instantly align animation files using embedded timecode or define a custom start frame for precise timing.
  • Native Timecode Support in iClone Motion Formats
    • iTalk (facial, audio, lip sync)
    • iMotion (body)
    • iMotionPlus (facial, body, expression, lip sync)
    • iProject (characters, motions, lighting, camera, audio)
  • Save & Export Timecode(Add timecode to Non-timecoded data): Maintain accurate sync while seamlessly integrating both custom and purchased motion assets across your production pipeline.

Check out the demo on the product page

Bidirectional Timecode Pipeline

Transmit and adapt timecode in both directions for a streamlined workflow. Seamlessly integrate with MotionBuilder, Maya, and Unreal Engine for smooth editing, rendering, and real-time production, enhancing efficiency and collaboration within existing workflows.

Check out the demo on the product page

Coordinate With Burn-In Data

Overlay timecode, take, date, camera, frame, and more — with multiple display and layout options to suit any workflow. Display in the viewport or final render using fully customizable burn-in settings for clear, production-ready visuals.

Check out the demo on the product page

Previz Compositing

Integrate mocap seamlessly into previz using iClone’s lighting and post-effects tools. The Timecode Plug-in enables smooth blending for a more immersive and production-ready preview.

Check out the latest offer for the Timecode Plugin

Perfect Combo for Professional Mocap: iClone and Vicon

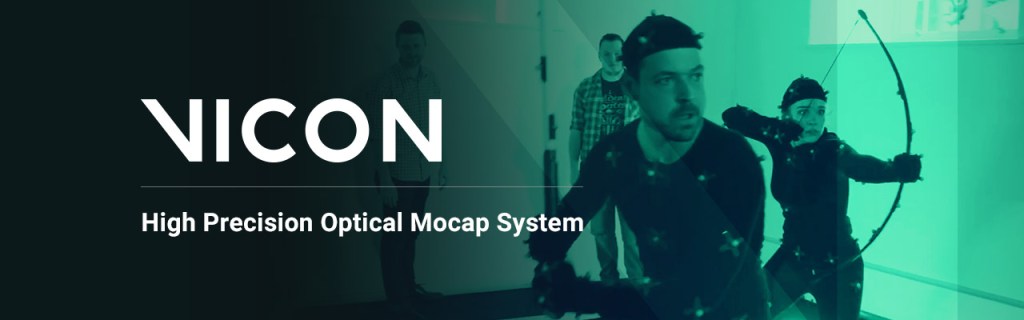
Partnering with Vicon, the new Vicon Profile in Motion LIVE allows seamless connection of Vicon mocap systems to iClone for real-time animation. It offers a unified, high-precision workflow for animating animation-ready characters from Character Creator. More importantly, Vicon can now capture both full-body and facial movements simultaneously through Motion LIVE.

The Vicon integration is fully compatible with iClone’s Timecode, enabling accurate multi-device sync, time-aligned recording, and smooth integration into virtual production pipelines.

With full compatibility, users can leverage both iClone and Shogun’s mocap editing capabilities, combining the strengths of both software for optimal results.

Check out the latest offer for Vicon Profile

Other New Updates

AI Search Premium Motions

Deep Search is an AI-powered tool that simplifies finding digital assets in the Reallusion ecosystem using natural language queries, category filtering, and image uploads. The new Motion Deep Search feature lets users search for ActorCore motion assets in the same intuitive way. Simply describe the motion, and the tool provides relevant results with an option to find similar motions, making it easier to locate the perfect animation for any project.

New Lip-Sync Animation Workflow

The latest update gives users the flexibility to refine lip-sync animations with AccuLIPS without being forced to do so during the initial audio import. This allows for a more streamlined workflow, letting users focus on other aspects before fine-tuning the lip-syncing later.

Related Sources

Learn more about Timecode Plugin features

Learn more about Vicon Profile

Timecode Tutorials

iClone 8.53 release note

Learn more about iClone 8

Online Manual

FAQ

Concept artist and 3D generalist Florian Salvesberger reveals how iClone’s Motion Director and MD Prop Interaction tools brought his medieval siege camp to life with fluid, game-like character control and dynamic crowd simulation.

Miniature Medieval Crowds in Action: 3D Prop Animation with iClone, ActorCore and Blender

Florian Salvesberger

Hi, my name is Florian Salvesberger. I’m a concept artist, 3D designer, and visual artist based in Vienna, Austria. My focus is developing concept artwork for characters, set designs, environments, props, and vehicles. I’m also a 3D generalist for hard surface modeling, 3d animation, and motion capture. Furthermore, I’m a tutor for CGI at the Werbeakademie Vienna.

Throughout my career, I’ve collaborated with diverse teams, including producers, game designers, and movie directors. By actively engaging in discussions and incorporating feedback, I am able to ensure that my work aligns with the overall artistic vision and project requirements. I’m driven by a passion for trying out different workflows and to simply create new things – I’d describe it as “Die Freude am Schaffen”, like “the joy of creating”. I constantly push my creative limits and embrace new technologies to stay at the forefront of CGI. Salve.vision is where I showcase my unique vision and how I deliver engaging experiences.

Follow Florian’s Instagram / ArtStation

iClone Motion Director and Prop Interaction

As a freelance concept artist and 3D animator, I’m always on the lookout for tools that streamline my workflow and enhance the quality of my projects. Over the years, I’ve had the chance to experiment with various software solutions, and one that has truly stood out is Reallusion Motion Director and Prop Interaction for iClone.

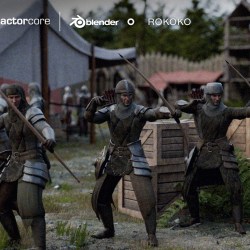
Whether it’s for film, gaming, or virtual production, iClone provides a real-time animation experience that is both intuitive and powerful. Recently, I set out to create a medieval siege camp. My work features a scene bustling with activity, from soldiers sitting around campfires to knights engaging in a training duel. The challenge? Making the characters move and interact naturally while keeping the animation process efficient. This is where Motion Director and MD Prop Interaction came in handy. It allowed me to create such a complex scene in a very streamlined workflow. I took the soldiers from ActorCore, and with a little customization, now it looks different but unique.

Getting Started with iClone and Motion Director

For those unfamiliar with iClone, it’s a comprehensive 3D animation software that simplifies complex animation tasks. The Motion Director tool, in particular, allows for a game-like approach to animating characters. By using a game controller or even a mouse, you can pilot your 3D characters, making the animation process much more interactive.

For those who prefer automation, the crowd scatter system handles autonomous behaviors, adding realism to character movement with minimal effort. Seriously, I was completely stunned the first time I used it! To set up my scene, I started with a character asset from Reallusion’s library—specifically, a Royal Guard model. Placing animations onto the character was as simple as dragging and dropping pre-made motion clips onto the model. From there, I could tweak animations using the Motion Layer Editor, adjusting joints and fine-tuning keyframes for precise movements.

Making Interactions Seamless with MD Prop Interaction

One of the standout features of iClone’s Motion Director is its seamless integration with props. For instance, in my scene, I needed a knight to walk over to a chair and sit down. With MD Prop Interaction, this was incredibly easy—I simply dragged the MD prop into the scene, positioned it correctly, and selected the interaction type. The knight smoothly walked to the chair and sat down, with natural transitions and fluid movement. Additional animations, like glancing around or adjusting posture, could be layered on to make the scene feel even more lifelike. Imagine you‘re playing The Sims, but it’s like a “3D Artist expansion pack“ edition that is easy to use, fast and optimized for your 3D software of choice. 

Beyond sitting, I used MD Prop Interaction for a variety of actions: soldiers inspecting a trebuchet, collecting firewood, and pushing carts filled with siege equipment. These small details added a sense of realism to the medieval environment

Bringing Crowds to Life with Motion Director’s Crowd Simulation

A siege camp wouldn’t feel complete without a bustling crowd, and manually animating every background character would be an overwhelming task — which can be fun of course — but, why make things more complicated than they already are, right? Fortunately, Motion Director’s crowd simulation tool made this process effortless.

Using the Crowd Scatter Tool, I was able to populate the camp with characters who navigated the scene realistically—avoiding obstacles, reacting to props, and moving dynamically. By setting up a NavMesh, I ensured that the crowd moved only within specific areas, avoiding walking over tents or other restricted spaces. For variation, the tool allowed me to randomize character appearances and behaviors, making the scene feel organic rather than repetitive.

Seamless Integration with Motion Capture and Blender

One of my favorite aspects of iClone is its ability to integrate with motion capture systems. If I wanted to refine character movements, I could easily apply mocap data and further tweak it using the Motion Layer Editor, saving time and ensuring realistic animation without the need for excessive post-processing.

I‘ve used my trustworthy Smartsuit Pro II from Rokoko, captured a few specific movements, retargeted them onto my knight characters — and done! It just works.

Once the character animations and interactions were complete, I exported the scene as an FBX file for further refinement in Blender. iClone’s export settings allowed me to customize the resolution and frame range, ensuring the right level of detail for both close-up shots and wide-angle scenes.

Final Thoughts

Reallusion’s Motion Director and Prop Interaction have revolutionized how I approach 3D animation. The ability to direct characters in real-time, automate complex movements, and seamlessly integrate with other tools has significantly improved my workflow.

Whether you’re an aspiring animator or a seasoned professional, these advancements offer an intuitive and powerful way to bring your projects to life. If you’re interested in exploring these features further, I highly recommend diving into Reallusion’s community and tutorials. It’s time to experiment, create, and push the boundaries of what’s possible in your 3D animations. Stay creative!

Related Posts

Francis Bon Vun Hong won the 2024 Animation at Work Contest. Learn how he creates captivating 2d storytelling with Cartoon Animator and XPPen.

Winner Spotlight: Vestiges of Humanity within Spirited Automatons made with Cartoon Animator and XPPen

In the Reallusion 2024 Animation at Work Contest, artist Francis Bon Vun Hong secures first place in the “Comic & Arts” category. In this article, he guides us through the creative process that brought life to his winning entry, “The Horizon”.

Francis Bong Vun Hong

Hello, I’m Francis, a recent graduate with a Bachelor of Arts with Honors in Creative Digital Media, completed over three and a half years. My journey into the 3D industry began during my studies, where I discovered a passion for animation, character design, and digital storytelling.

In September 2023, I joined Betapuru Digital Studio as an intern, immersing myself in a professional environment to hone my skills and gain hands-on experience. Now, I am continuing to build my career in 3D and animation, aiming to create visually captivating content.

Francis’ YouTube Channel

Transitioning from 3D to 2D

I think my 3D animation background helped a lot! The principles of animation—like timing, posing, and movement—are more or less the same, so it was more about getting used to a different workflow. The best trick up my sleeve was focusing on rigging and motion editing right away. Since I was already familiar with Reallusion’s tools from my 3D work, picking up Cartoon Animator felt pretty natural. I also watched how the pros used it and just kept experimenting until things clicked. In addition, I made use of parallax, camera tricks, and depth—just like I would in a 3D workflow—in order to make my 2D animations feel more dynamic. That crossover knowledge made for a way faster learning process!

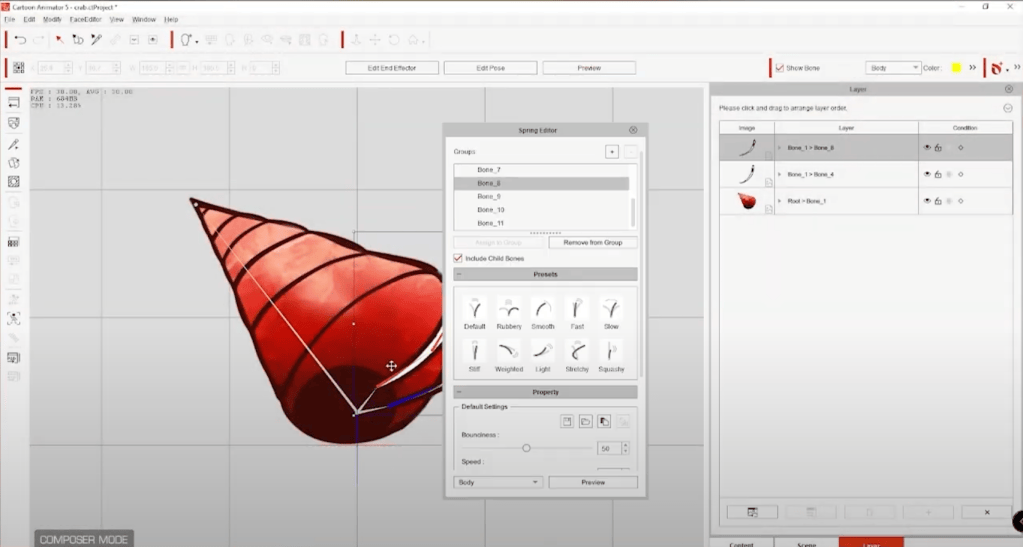
I really enjoy using the Spring Editor, which adds natural wiggle effects to body parts. It creates smooth, fluid animation without the extra effort of manually keyframing the character.

Most importantly, the built-in assets and animations significantly sped up my workflow. Instead of animating characters from scratch, I could simply drag and drop assets from the content browser to bring them to life! Another major advantage was the rigging system. Unlike traditional frame-by-frame animation, it works similarly to 3D: once a character is rigged, I can create a series of animations with ease. It’s an absolute game-changer!

Story Background & Concept

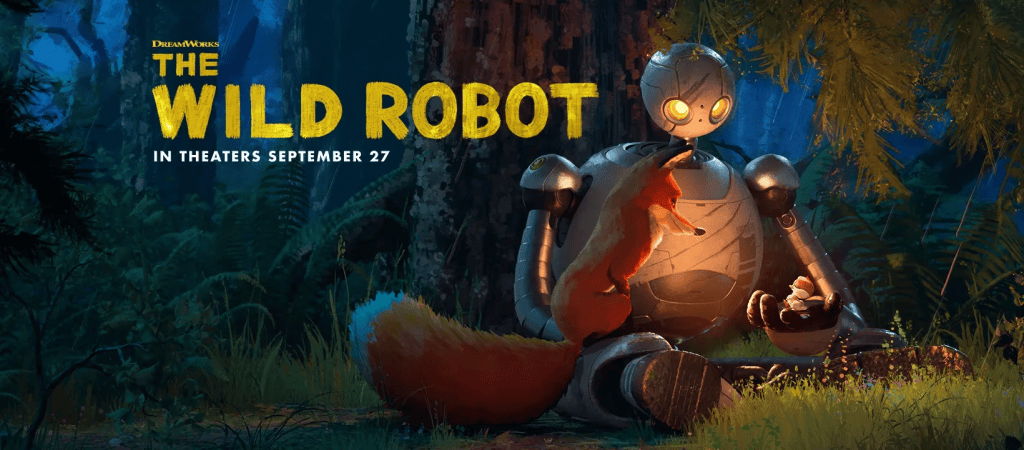
My character was inspired by The Wild Robot. I loved the film’s plot and contrast. Spoiler: The robot was programmed to follow orders but eventually broke the rules and acted on her own. In my story, however, the robot is tasked with rebuilding his civilization elsewhere after his home is invaded and destroyed. The entire production took over a month, though Cartoon Animator significantly sped up the process.

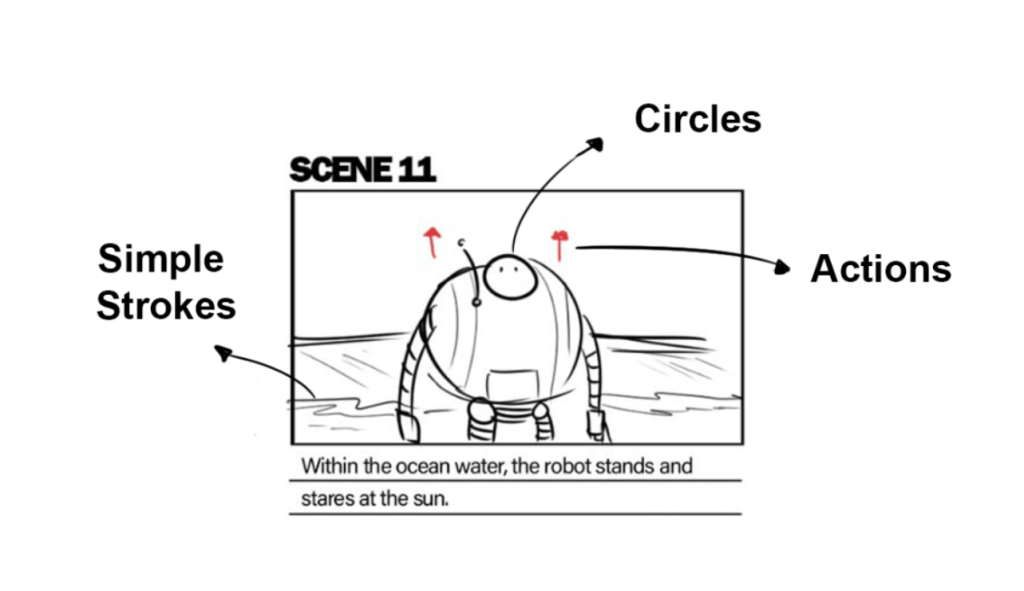
Before moving into the production stage, I needed to establish a solid plot to guide the process. Therefore, storyboards played a crucial role in ensuring a smooth workflow. Creating the storyboard typically took a few days, and it wasn’t as difficult as it might have seemed. They were simple, serving as a visual guide for how each scene was set. Using basic shapes and strokes was an effective way to create a strong storyboard. I didn’t hesitate to be bold with my strokes—there was no need to perfect every line. Adding arrows also helped show the direction of actions or camera angles. In short, I kept storyboards simple and focused; they were just guidelines for the production.

Character Design with XPPen Tablet

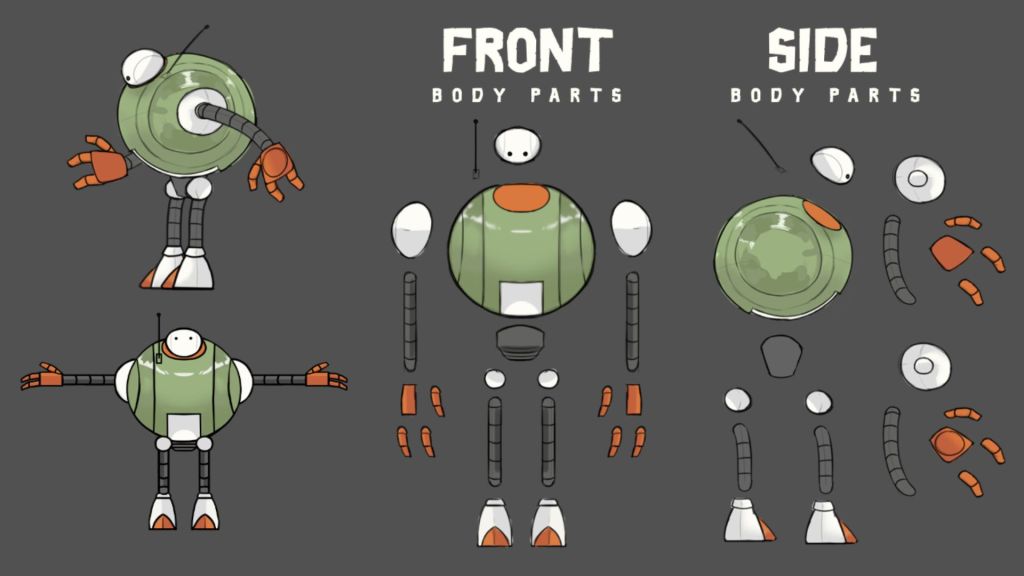
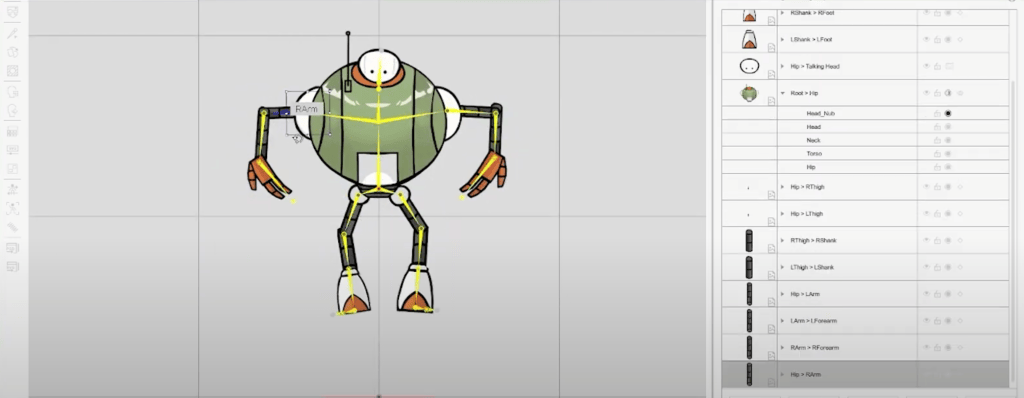
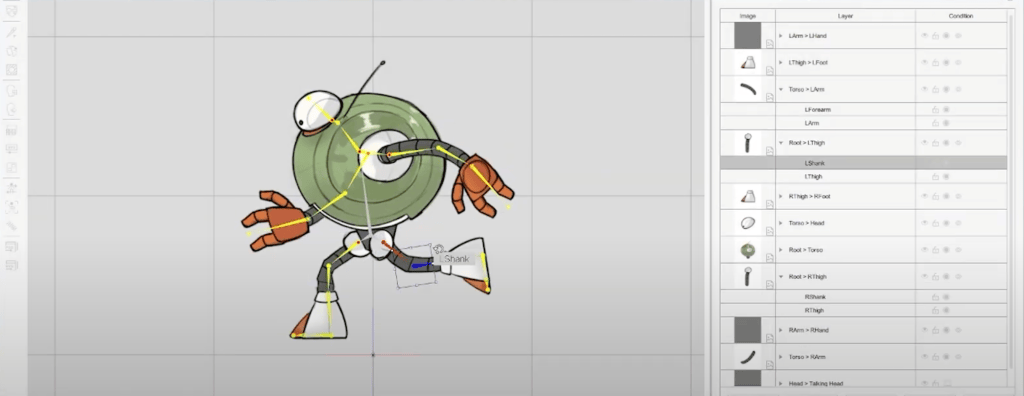
The character was drawn in Photoshop using an XPPen tablet. To animate the character in Cartoon Animator, it had to be separated into parts, as shown in the image below. These separated parts enabled efficient rigging in Cartoon Animator, with each bone attached to specific body parts. The rigging process for the character is broken down in the images below.

I then imported the base, which was the body with the combined parts. Next, I created the skeleton based on the character’s base. After that, I assigned the different parts of the body to the skeleton. Finally, I deleted the base of the character, and that was it—simple as that.

Character and Scene Animation

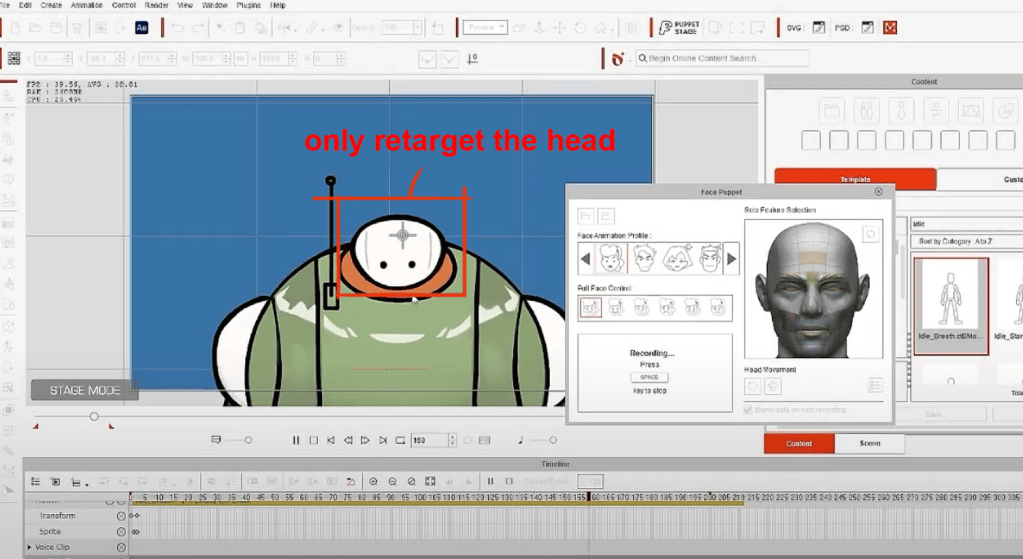
I utilized the 360 Heads in Cartoon Animator to allow slight turns of the character’s head. It was not perfect since the head is not exactly humanoid. The robot’s eyes are actually not of the human eye proportion and there are no mouths involved, so the only way to do it is to retarget only the head without separating the eyes.

As mentioned before, the motions of the characters were mostly from the available assets in Cartoon Animator. Only a few required hands-on animating, which greatly reduced the work time. Another great thing about Cartoon Animator was that those motions can be blended with each other, creating a series of smooth movements.

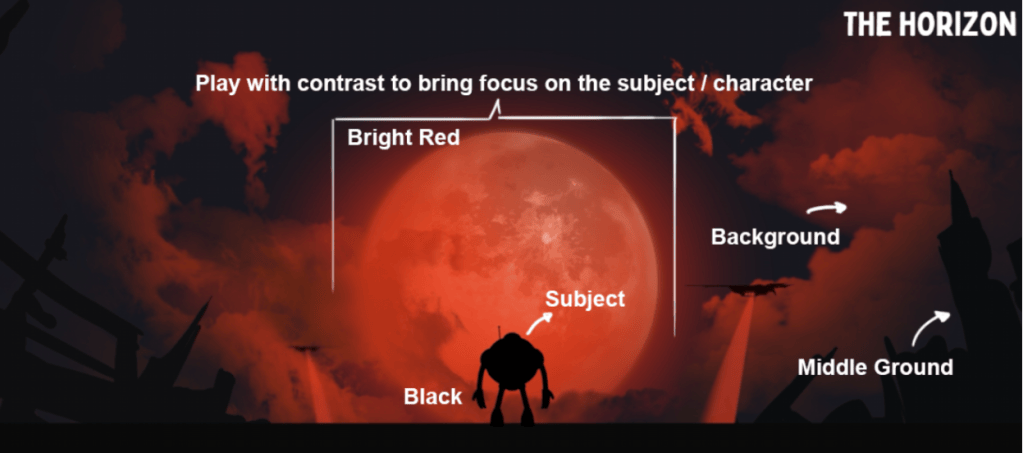
I always focus on making 2D scenes feel more alive and dynamic. Adding depth, camera movement, and parallax can take things to the next level. Use contrast to grab the audience’s attention. In my opinion, don’t just animate characters; instead, animate the whole scene. Use foreground and background elements, play with lighting, and add small details that make the world feel real.

VFX and Extras

Camera shakes can enhance the actions of the character. For example, aggressive shakes are used during the running scene to give a sense of panicking and the feeling of the character running with full effort. It can be simply achieved in After Effects by doing this:

ALT + Left click on the “Orientation” key of the camera and type in “wiggle(A,B)”. Wiggle means shaking while A means how many times the wiggle happens while B means the level of wiggles. Higher value in A makes more wiggle per seconds, while higher value in B makes bigger movements.

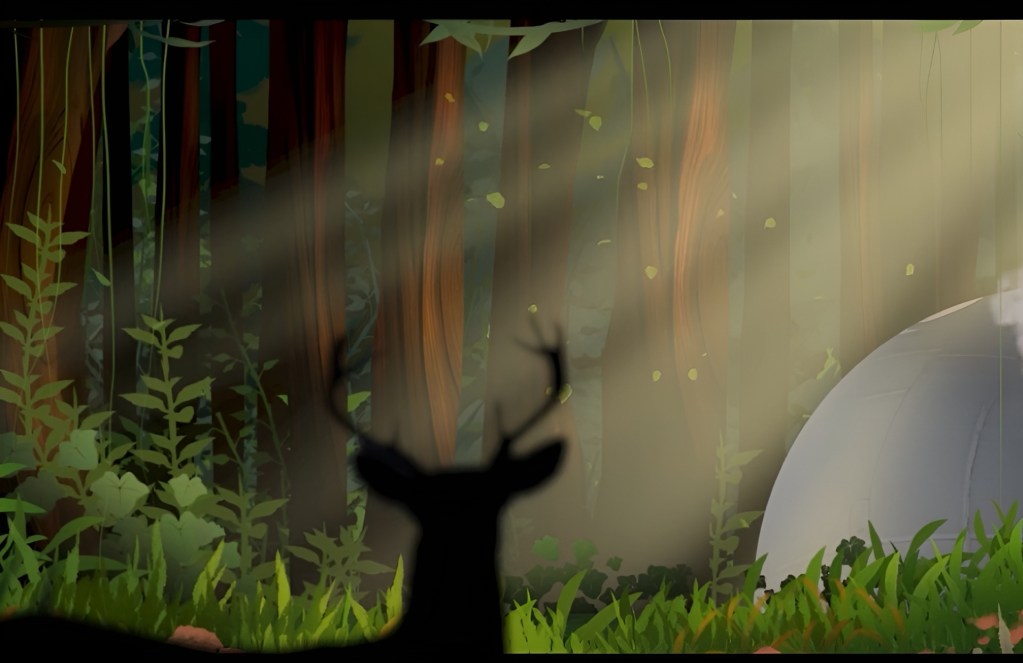
The light rays, or the so-called volumetric lights, are pretty straightforward. It is just a simple light ray PNG image that is added in during the post-production stage. During the final editing in Premiere Pro or After Effects, drop in this PNG while changing the opacity mode to “screen” and it’s all done.

Closing Thoughts

This competition was an awesome experience! Seeing so many creative entries really pushed me to bring my best. It also showed how powerful a Cartoon Animator can be when you push its limits. I’m grateful for the opportunity and the recognition!

Advice for Future Contestants

Go beyond just animating characters; think about the entire scene. Try to experiment with camera movements, lighting, and effects to add more depth. Use colors and contrast to effectively bring out the moods and emotions. Most importantly, every project is a chance to grow, keep learning, and have fun!

Click the banner to learn more about the winners’ portfolios and judge comments