In the high-stakes world of digital media, the ability to create your own character with speed and artistic precision is a vital skill. Whether you are an independent artist or a professional character designer, bridging the gap between a standard human-creator tool and a fully customized, stylized asset is key to a modern 3D pipeline.
This workflow breakdown explores how we leverage the combined power of Character Creator 5 (CC5) and Blender to build a stylized Easter Bunny. By utilizing a solid character base and advanced 3D animation software techniques, you can achieve cinematic results without sacrificing production efficiency.
1. Establishing the Silhouette: Base Proportions & Pipeline
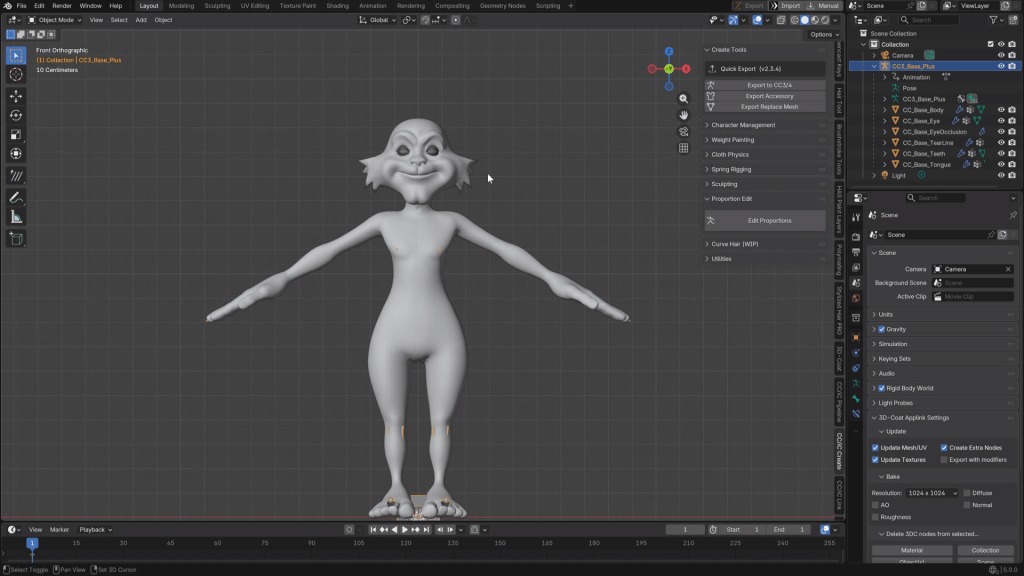
Every iconic character designer knows that a successful design begins with a readable silhouette. The process begins inside Character Creator 5 using the Proportion Editor on a standard neutral character base.
By dialing in the general body shape—adjusting limb length, torso width, and head scale—we establish the foundational cartoon proportions before ever touching a sculpting brush.

The Character Creator Blender Pipeline Export
Once the rough shape is set, the model is sent over to Blender using the Blender Auto Setup free add-on. A key choice here is exporting the character as a fully rigged armature rather than just a morph. This is a critical step for any character designer because it allows for much more complex geometry modifications and advanced texture painting later in the pipeline without breaking the underlying rigging.

2. Pushing the Geometry: Stylized Facial Sculpting
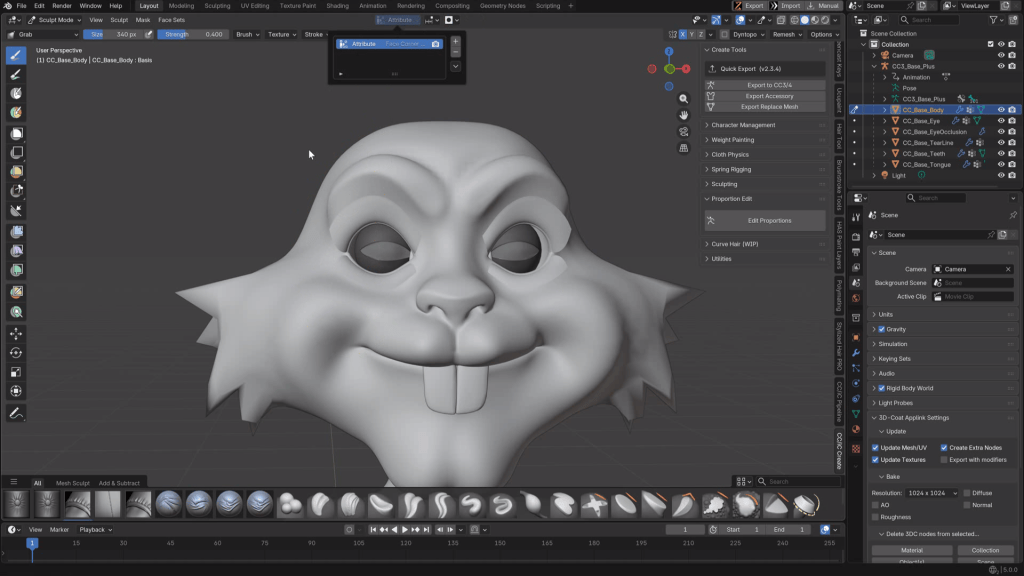
When the model arrives in Blender, the real work begins. For this stylized bunny, working at SubD1 provides the perfect “sweet spot” of resolution.
Sculpting Fur and Features
Working at this level offers enough geometry to grab and pull distinct tufts of fur directly out of the facial mesh, yet it remains low enough to easily manage broad structural changes. While this aggressive mesh-pulling isn’t suited for realistic humans, it is highly effective for exaggerated designs in 3D character animation.
Custom Jaw and Teeth Modifications
One of the most drastic modifications involves the character’s mouth. The jaw is heavily manipulated, and standard teeth are hidden to make way for custom-modeled cartoon buck teeth.
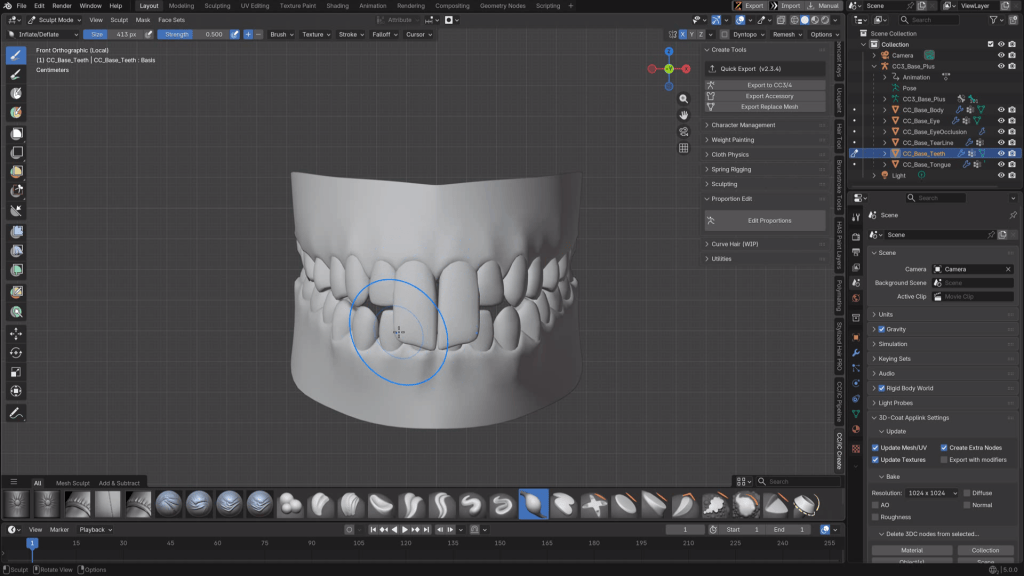
Important Note: Extreme facial modifications require extensive care to ensure they don’t break when accommodating CC5’s wide range of standard facial expressions and lip-sync animation. There is a significant difference between prepping a character for a specific project versus the Reallusion Content Store.
3. Dynamic Accessories: Ear Construction & Rigging
To give the rabbit its signature look, the large ears are modeled from scratch in Blender. Starting from a simple flat plane, the ear shape is mapped out, inset to create the inner ear cavity, and extruded for thickness.
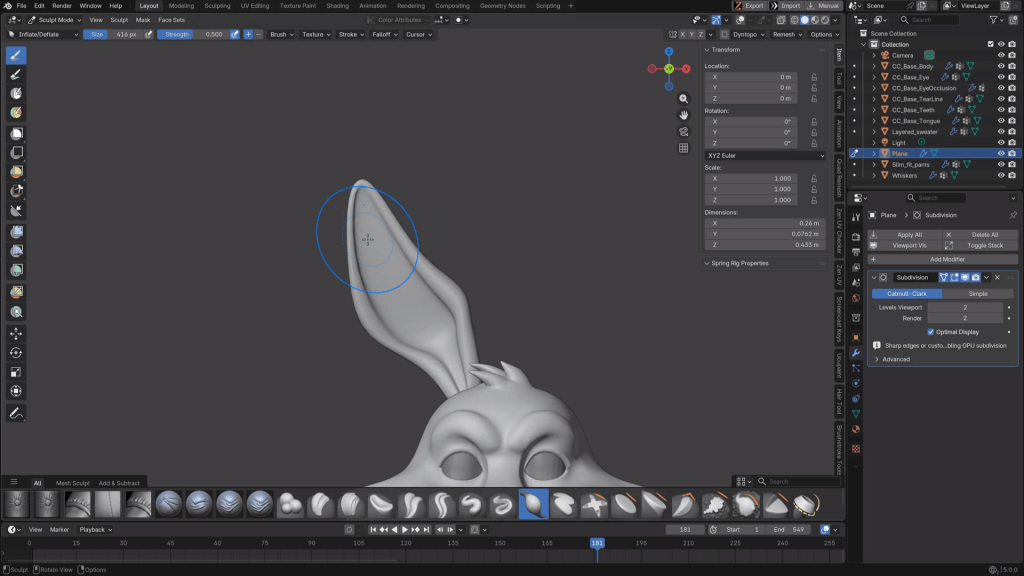

The 0,0,0 Origin Rule
Before these ears are rigged for 3D character animation, a crucial pipeline step must be taken: the geometry is dropped down to the absolute center of the scene (the 0,0,0 origin).
If you build an armature with an offset origin, the bones will often float off-axis when you attempt to set up spring bone physics back in CC5. By centering the asset first, smoothing the vertex weights, and applying a gradient tool for a clean transition, we ensure flawless dynamic secondary animation once the ears are parented to the character’s head.

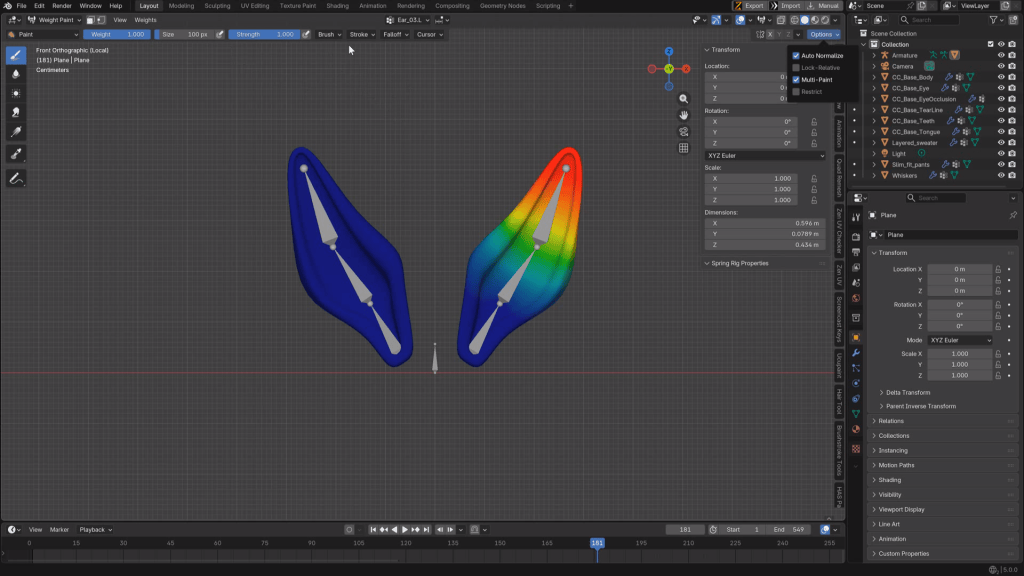
4. Procedural Texturing: Achieving the Stylized Look
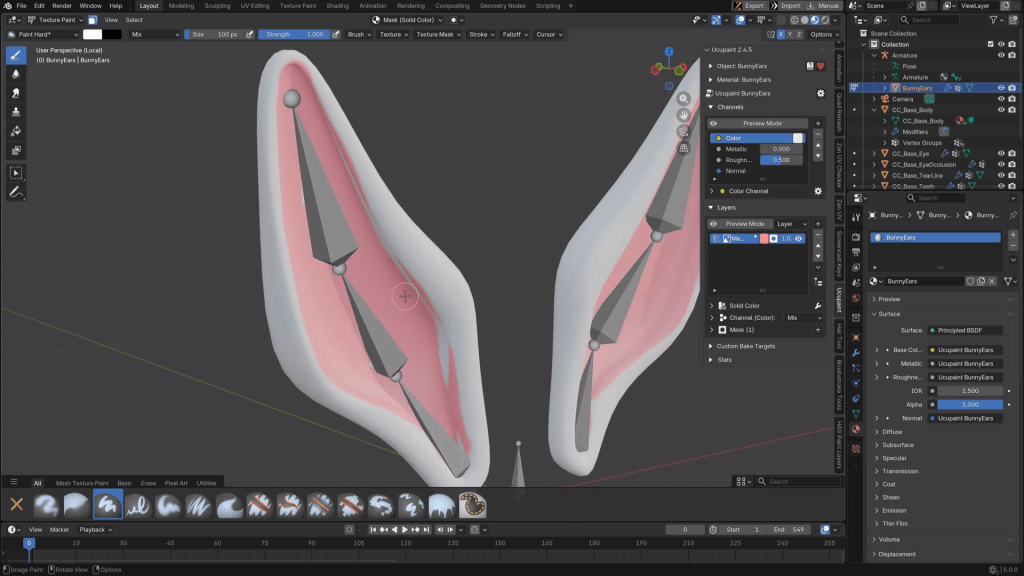
For texturing the stylized fur and skin, the workflow utilizes UCU Paint directly inside Blender. While external programs are industry standards, UCU Paint offers a remarkably robust layered system right in the native viewport.
By stacking procedural effects, generating noise, and baking the lighting directly into the base color, we can achieve a highly appealing, hand-painted aesthetic. Once the textures are baked and saved, the procedural nodes are removed to keep the asset clean for export.
5. Building the Scene: Custom Easter Props
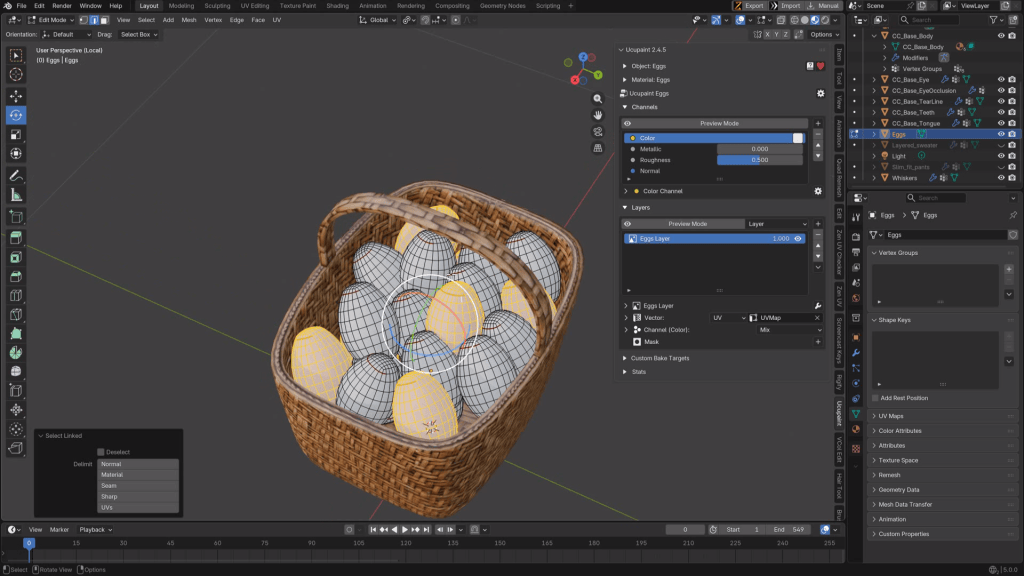
No Easter Bunny is complete without his deliveries. We jump back into Blender’s modeling tools to create a custom wicker basket from a subdivided cube.
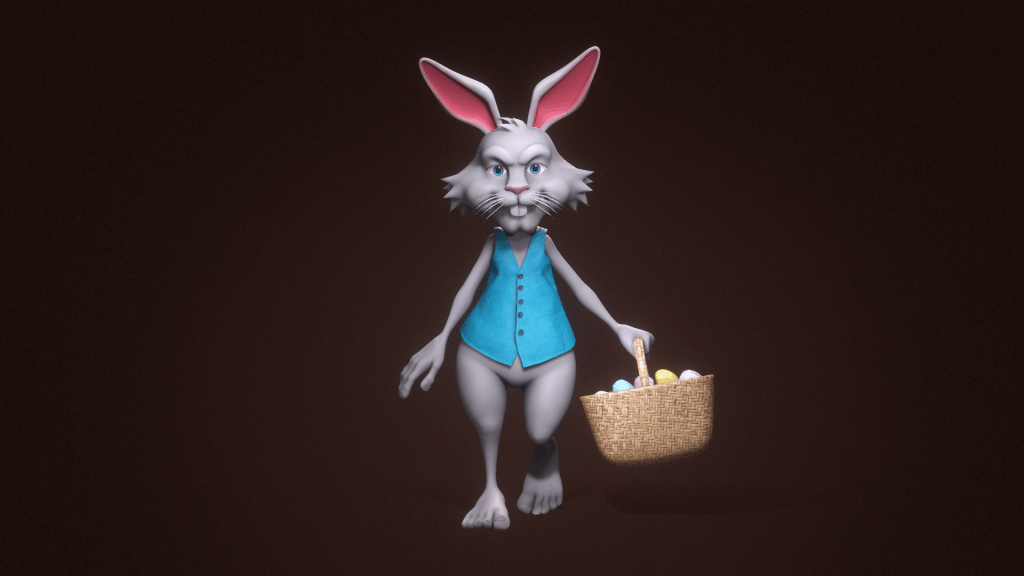
Using edge loops and basic shaping tools, a handle is formed, and a woven procedural texture is applied. The basket is then filled with a cluster of smooth, colorful eggs, giving the character immediate context and charm for future 3D character animation sequences.

6. Final Assembly
The final step brings all the custom Blender assets back home to Character Creator 5. The custom ears are parented to the head with spring physics applied, the baked textures are slotted into the materials, and the basket is placed in the character’s hand.

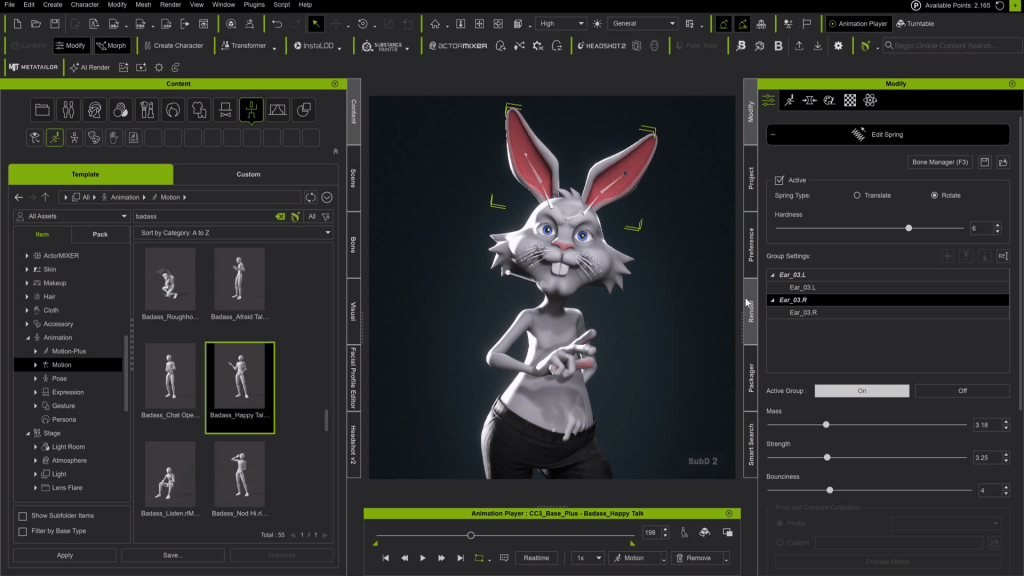
The result is a fully rigged, highly stylized, and animation-ready character created in a fraction of the time a traditional scratch-build would take.
Conclusion: Elevating Your Character Pipeline
By following this structured pipeline—from the initial character base in CC5 to the stylized sculpting in Blender—you can create your own character that bridges the gap between technical reliability and artistic flair. Whether it’s mastering 3D character animation or perfecting custom geometry, this hybrid workflow is the most efficient way to build high-quality characters in 2026.
Mythcons
Greetings, my name is Peter Alexander. In this demonstration, I’m going to walk you through how you can leverage Character Creator 5‘s new ActorMIXER as a powerful stepping stone to create unique, stylized characters. We’ll use the CC Base Mesh as our foundation, and ActorMixer will provide the next layer from which to build, making professional character creation that much easier. For this demo, I’ll be creating a stylized version of Arnold, using the Blender Autosetup pipeline, which is both cost-effective and efficient for creating characters and assets.

FAQs
Why use Character Creator base as a starting point for Blender? Why not model directly in Blender?
Starting with a CC5 character base saves a massive amount of time on technical fundamentals. While you can model directly in Blender, using the base ensures you have professional topology, UV maps, and a fully functional skeleton right away. This allows you to skip the tedious rigging and skinning process and jump straight into the creative sculpting and design.
What is the function of the Blender Auto Setup Plugin? Is it free?
Yes, it is a free plugin provided by Reallusion. Its main function is to automate the import/export process between Character Creator and Blender. Beyond setting up complex shaders and mapping the rig, it features a powerful Data Link function. This allows you to sync and transfer your character, scene, lighting, and camera with one click, ensuring total consistency between both environments.
How to get Character Creator & iClone for my Blender project?
You can download Character Creator (CC) and iClone (IC) from the Reallusion website. Starting from 2026, Reallusion offers flexible options: you can choose from various subscription plans (monthly or annual) for low upfront costs or purchase a perpetual license for permanent ownership. Trial versions are also available to test the workflow, and the Blender Auto Setup tool is available on their official plugin page.
Related Posts
- Creating and Animating a John Wick 3D Caricature with CC5 & iClone Video Mocap
- Creating a Stylized Arnold Schwarzenegger 3D Caricature with CC5, ActorMIXER & Blender
- A Stylized Wolverine Workflow with Character Creator 5, ActorMixer & Blender HD Workflow