Real-Time Motion Capture Powered by iClone Timecode Sync in Studio 101
The Actor Capture team leads two advanced motion capture shoots in Studio 101 at the Creative Media Industries Institute (CMII) at Georgia State University. Reallusion iClone Timecode plugin played a pivotal role in synchronizing the motion capture sequences, highlighting its importance in real-time virtual production.
Based in Atlanta, Georgia, Actor Capture is a motion capture and VFX powerhouse known for its work on blockbuster productions like The Electric State (Netflix), Lyle Lyle Crocodile (Sony Pictures), The Suicide Squad (Warner Bros.), and Replicas (Entertainment Pictures). The company also caters to the music and episodic world, with notable appearances such as Cardi B and Offset’s feature in “Cardi Tries..,” garnering over 6.8 million views.
Whether capturing high-impact stunts or intimate performances, Actor Capture’s team often juggles multiple motion capture technologies by combining optical, inertial, facial, and hand tracking depending on the shoot’s requirements.
Motion capture pipelines are complex, especially when syncing data from various sources like OptiTrack, Xsens, Rokoko, and FACEGOOD. The introduction of Reallusion’s Timecode plugin within iClone’s Motion LIVE ecosystem solves one of the industry’s longstanding pain points: data synchronization.
Enabling timecode metadata into multiple datastreams (even without native LTC – linear timecode – support) ensures the alignment of all captured motion, video reference footages, and animation outputs throughout production and post-production.
The Quad System and Synchronized Visualization
Actor Capture’s unique setup includes a Quad video village display with four critical views:
Two RED cameras for video reference.
The mocap software interface (OptiTrack, Vicon Shogun, or Xsens MVN Animate).
A real-time visualization engine (iClone or Unreal Engine) rendering the retargeted character animation.
This layout offers all stakeholders, including directors, editor, and VFX supervisors an overview of the aligned performances, data, and visualizations. The glue that kept this all together was timecode synchronization.
Timecode-enabled capture ensures “circle takes” and other critical moments are clearly documented and easily retrievable during editorial and VFX processes. With a synced shotlist and detailed notes, each take remains linked to its corresponding data—all essential for large-scale, high-stakes productions.
For the first session, four stunt performers comprising two males and two females, were recorded using a 40-camera OptiTrack system with Motive suites. An equal number of avatars were assigned to the actors and streamed live into iClone through Motion LIVE.
Thanks to iClone Timecode and Tentacle Sync devices, even complex scenes with multiple actors and overlapping performances were kept in sync; allowing the editorial and post teams to easily identify, evaluate, and extract the best takes for final production.
Session 2: Multi-Device Capture with Xsens and FACEGOOD Face Mocap
The second session featured a high-energy DJ performance by Ruban “Swift” Vidal. To capture his full-body performance, the Actor Capture team integrated:
Xsens Link Suit with MVN Animate for body tracking.
Rokoko Smart Gloves for finger capture.
FACEGOOD HMC with Avatary for facial capture via dual IR camera feed.
All data streams were unified through iClone Motion LIVE, synced with Tentacle Sync Timecode devices. While tools like MVN and FACEGOOD supported direct timecode jamming, Rokoko did not; making the iClone Timecode plugin’s ability to assign timecode retroactively a critical component in maintaining a unified timeline.
Real-Time and Post-Production Benefits
Recordings can undergo HD Processing post-shoot to refine body motion. Once enhanced, this data can be reimported into iClone, where iClone Timecode ensures face and finger captures align perfectly with the refined body motion.
Facial data captured with FACEGOOD can be solved in Avatary Studio, where the landmark tracker enables high-precision face tracking. With iClone integration, key poses are instantly visible on characters in real time, allowing precise retargeting for high-fidelity facial expressions.
By embedding and burning timecode across all data streams, Actor Capture ensures a high level of accuracy when delivering takes to animators, VFX vendors, or editors; At the same time, avoiding mismatches and saving hours in post.
Conclusion: A Game-Changer for Real-Time Studios
Reallusion’s iClone Timecode plugin brings professional-grade precision to real-time animation; And the Actor Capture team was able to embrace this technology to unlock the full power of synchronized workflows—even when juggling complex, multi-source mocap data.
In productions packed with long scripts, dense shotlists, or multiple performers, the iClone Timecode keeps everything tight and on track. Circle Takes are called in perfect sync and delivered without a hitch. With it, directors, producers, and animators have the control they need to drive performance-focused storytelling forward.
How to Animate a Fast MetaHuman Fight Scene with Reallusion 3D Motion Packs
If you’re a 3D animator or filmmaker looking to create fast, fluid fight scenes, this real-world breakdown from Charlie Driscoll will show you how. Using Reallusion’s ActorCore hand-to-hand combat pack, paired with Unreal Engine 5, MetaHuman Animator, and Move.ai, he demonstrates how to blend pre-built assets and performance capture into cinematic action sequences — all without needing a massive team.
“I was just like I have to make something with this pack of amazing hand-to-hand combat animations. I just remember thinking they were so cool, and all I would have to do is come up with a story to tie these fight scene animations together.”
Charlie Driscoll – Director, Cinematographer, Producer
Charlie Driscoll is a Director, Cinematographer, and Producer at Northwoods Revolution and the creator of the YouTube channel The Darkest Age – Unreal Engine Filmmaking. On his channel, he explores real-time animation techniques and pushes the boundaries of short film production using Unreal Engine 5, MetaHuman, and AI-powered tools.
In his recent behind-the-scenes breakdown, Charlie shares how he choreographed and animated a kung fu-style action short, integrating Reallusion’s ActorCore 3D motion content, AI dubbing, VFX assets, and his own motion capture performance.
The Creative Spark: ActorCore’s Combat Animation Pack
The project began when Charlie discovered Reallusion’s Hand-to-Hand Combat Motion Pack. With over 60 polished, professionally choreographed fight animations — punches, kicks, blocks, knockdowns — this pack served as the foundation of his scene.
“You just drop them (ActorCore 3D animations) into Unreal Engine and you have the basis of a fight scene.”
Charlie Driscoll – Director, Cinematographer, Producer
Building the Scene in Unreal Engine 5
Charlie selected a burning tree temple from FAB (formerly Quixel) and added dramatic lighting, rain, smoke, and fire FX. He then:
Retargeted the Reallusion animations to MetaHumans
Layered in custom mocap using Move.ai
Used dynamic camera movement to blend mocap and pre-built animations
Motion Capture with Move.ai + Reallusion
Charlie used Move.ai’s markerless mocap with multiple iPhones to capture his own body movement. He then blended it with Reallusion’s combat animations — giving the scene both cinematic action and personal expression.
This hybrid workflow allowed:
Speed from premade animations
Emotional nuance from custom mocap
Flexibility to iterate quickly
AI Lip Sync with ElevenLabs + MetaHuman Animator
To add realistic lip sync:
Charlie recorded lines in English
Translated and cloned the voice in Mandarin using ElevenLabs
Captured facial mocap using MetaHuman Animator
Synced the new Mandarin voice with accurate Chinese lip movement
Tools Used in the Workflow
Tool
Role
ActorCore
Hand-to-hand combat animation pack
Unreal Engine 5
Real-time rendering and scene setup
MetaHuman Animator
Facial mocap and lip sync
Move.ai
Suitless motion capture
ElevenLabs
AI dubbing and voice cloning
FAB
Environment assets
Artlist
Music and SFX
Why Reallusion is a Game Changer
Reallusion’s ActorCore motion packs allow 3D creators to:
Animate instantly with high-quality human motion
Avoid tedious keyframing or custom mocap setups
Focus on storytelling and visual polish
For indie creators, it’s a powerful way to animate action scenes quickly without sacrificing quality.
Final Thoughts
Charlie Driscoll’s workflow proves that real-time cinematic animation is now more accessible than ever. With tools like Reallusion, Move.ai, and MetaHuman Animator, animators can create polished fight scenes faster — and with fewer technical hurdles.
FAQ
What is ActorCore?
ActorCore is Reallusion’s marketplace for professional motion-capture animations ready for Unreal, Unity, and other 3D platforms.
Can I use ActorCore animations on MetaHumans?
Yes — they can be retargeted in Unreal using standard workflows.
Do I need motion capture gear?
No — Reallusion animations are pre-made. You only need mocap gear if you want to add custom performances.
Reallusion joins forces with elite stunt pros to unleash cutting-edge motion capture animations for next-gen digital production.This high-impact collaboration taps into the explosive talent of veteran kung fu artists, celebrated for their precision in wire-aerial combat and harness choreography.
By fusing top-tier stuntcraft with state-of-the-art mocap, Reallusion delivers a game-changing pipeline for blockbuster-quality action with the same level of planning and execution as big-budget productions. The result is a dynamic library of cinematic stunt animations that are refined, action-ready, and available now on ActorCore as plug-and-play assets for instant integration.
What’s more, you can witness the action unfold:
How Wire Stunts Electrify Mocap Animation
Wire stunt performers offer significant advantages for motion capture, especially in action-heavy or physically demanding scenes. This technique is increasingly in demand in the film industry, particularly within superhero, sci-fi, and fantasy genres.
Authentic Daredevil Action
When paired with skill and precise body control, wire stunts can execute complex aerial maneuvers, flips, and quick reflexive actions (think explosions) — all feats that are challenging to achieve with hand-key animation. With the right equipment, technique, and technology, wire stunts can deliver natural, believable, and physics-driven action.
“Motion capture relies on the body’s lines to reconstruct the shape and movement of a person, so the resulting curves can often look a bit different. However, when viewed with the naked eye, the motion usually appears acceptable.
That’s why, during many of our motion playback sessions, we need to review the captured animation to examine the body’s curves and verify whether the performed actions meet our requirements.“
Jun-xi Wu, Stunt Choreographer, the Hung Ga Ban Team*
Precise Capture of Gravity-Defying Stunts
Wire harnesses let stunt actors defy gravity to soar, leap, float, and spin right into the heart of explosive action scenes. With the same level of precision and planning as major blockbuster productions, these high-flying performances bring an extra spark to 3D animation and visual effects, turning motion capture into something truly spectacular.
“You might have seen some motion capture setups where they tie a sling around the actor’s body, and when they pull it, the actor starts spinning around. Actually, when doing that move, it’s really hard for the person being pulled to get a feel for it. You have to completely trust the wire team, otherwise, if you’re not careful, it’s really easy to get hurt.”
Yu-Kai Lin, Stunt Performer
Stunning 3D Stunts are Now Available
Reallusion’s collaboration with wire stunt performers has led to the creation of three high-impact motion capture animation packs, each filled with impressive action.
Explosion Stunts Pack
Bring the heat to your scenes with the Explosion Stunts pack—tailor-made for modern warfare and high-stakes rescue missions. Packed with powerful reactions to bomb blasts and energy weapon impacts, these animations inject explosive realism and heart-pounding intensity.
SWAT Stunts Pack
Unleash gravity-defying action with the SWAT Stunts pack—crafted for elite operatives and thrill-seekers alike. From rappelling down walls and smashing through windows to scaling skyscrapers and soaring in wingsuits, these heart-stopping stunts channel the intensity of blockbuster hits like Mission: Impossible. Perfect for SWAT units, special forces, secret agents, or extreme sports stories that demand grounded heroes and high-octane realism.
Fight Stunts Pack
Step into the arena with the Fight Stunts pack—an adrenaline-charged collection of martial arts choreography built for cinematic impact. Featuring high-flying kicks, crushing blows, body throws, and bone-crunching takedowns, these moves channel the explosive energy of Street Fighter, The Matrix, and John Wick. Whether you’re crafting a gritty brawl or a slick showdown, this pack delivers the raw power and precision your fight scenes demand.
Reallusion continues to revolutionize animation, offering users unparalleled tools and content for high dynamic, cinematic productions. With numerous exciting content releases on the horizon, now is the ideal time to explore the limitless possibilities on the ActorCore 3D Motion store. These motions will soon be incorporated into iClone AccuPOSE for AI motion editing. Stay tuned for more!
*The Hung Ga Ban Team (洪家班) was founded by action superstar Samuel “Sammo” Hung Kam-bo (洪金寶) in the 1970s as a martial arts action film troupe. With his exceptional physical skills and quick thinking, Sammo Hung not only became a successful action star but also rose to fame as a renowned martial arts choreographer. Sammo places great importance on teamwork—he built Hung Ga Ban like a big family, where anyone with talent and ability would receive his unconditional help and support. Today, this team is one of the most successful and professional martial arts and stunt choreography groups in the film and entertainment industry.
FCN Producciones Transforms Biblical Storytelling Through Advanced Character Designer Tools and 3D Animation Software
FCN Producciones
Based in Heredia, Costa Rica, FCN Producciones represents the production arm of Fore Christ, INC., a non-profit organization headquartered in the United States. This foundation is dedicated to creating value-based media content and implementing community impact programs that resonate across cultural boundaries. What began as a modest operation has evolved into a technically sophisticated studio capable of developing virtual productions for international television networks and digital platforms.
The studio specializes in creating immersive visual storytelling that brings biblical narratives to modern audiences through advanced 3D character animation and virtual production techniques. Their flagship series, “Walking by the Word,” exemplifies their creative vision by seamlessly blending biblical storytelling with contemporary virtual environments.
Through innovative use of technology, FCN Producciones has pioneered a real-time production workflow that combines tools like Unreal Engine, Aximmetry, and Reallusion’s Character Creator and iClone, its AI-enhanced AccuPOSE tools, and the iClone Unreal LIVE LINK plugin. This workflow allows them to create, animate, and integrate 3D characters and scenes with a level of efficiency and detail that matches the visual demands of today’s media landscape.
Meet the Team
Jonathan Williamson – President of Fore Christ, INC. / Chief Operations Officer at DeCarol Williamson Enterprises / Walking by the Word / Time to Talk
Jonathan Williamson – President and Creative Visionary
As President of Fore Christ, INC., Jonathan Williamson leads with a clear mission: creating and promoting values-based content that resonates across cultures. He serves as both host and creator of “Walking by the Word,” FCN’s flagship series that shares biblical teachings through visually engaging, accessible, and culturally relevant formats.
Jonathan’s vision extends beyond pure entertainment. He also hosts the complementary program “Time to Talk,” where he interviews diverse voices to explore conversations around faith, values, and positive impact in everyday life. Both formats reflect the foundation’s commitment to meaningful storytelling.
With an eye toward international outreach, Jonathan expertly combines spiritual messages with cutting-edge technology, connecting with audiences of various ages and backgrounds. His leadership also extends to the FCN Samaritan Initiative in Africa, which provides discipleship, social support, and community development programs to vulnerable communities.
Beyond his work with FCN, Jonathan serves as Chief Operations Officer at DeCarol Williamson Enterprises, a North Carolina-based company developing various business initiatives, where he oversees strategic operations and contributes to growth project execution.
Giovanni Rojas Alfaro – 3D Generalist for Virtual Production
With over 17 years of experience in graphic design, advertising, illustration, and 3D visualization, Giovanni Rojas brings exceptional technical and creative skills to FCN Producciones. Throughout his impressive career, he has collaborated with international brands and projects across multiple industries, delivering sophisticated visual solutions for both digital media and corporate environments.
Giovanni Rojas Alfaro – 3D Generalist for Virtual Production
Since joining FCN in 2017, Giovanni has focused on character design, scene development, and asset creation for virtual environments. His expertise spans multiple tools, including Cinema 4D, ZBrush, Unreal Engine, and the Adobe Substance 3D suite. Recently, he has incorporated Reallusion’s powerful toolset—namely, iClone and Character Creator—into his workflow, significantly expanding his capabilities in real-time production and personalized character design.
Giovanni’s work stands out for its meticulous attention to detail and solid foundation in visual design principles, which he now applies to optimized workflows in virtual production settings, achieving impressive results with limited resources.
Minor Cortés Chinchilla – Virtual Production Technical Director
As a veteran team member with over two decades at FCN Producciones, Minor Cortés has been instrumental in the studio’s technical and operational development. In his current role as Virtual Production Technical Director, he coordinates the integration of real-time production technologies, expertly adapting tools such as Unreal Engine, Aximmetry, iClone, and Character Creator to meet the demands of a fast-paced, multidisciplinary work environment.
Minor’s approach combines hands-on technical expertise with structured workflow management, allowing the team to handle complex projects efficiently despite their relatively small size. Through his technical leadership, FCN maintains high production standards in audiovisual content for both digital and broadcast media platforms.
The Creative Process: Bringing Biblical Stories to Life
FCN Producciones recently had the opportunity to bring their content to an international network broadcasting via satellite throughout the United States and Latin America. This new partnership required them to adapt to precise formatting and duration requirements, prompting the team to re-record three pivotal episodes: “Bethlehem,” “The Ministry of Jesus,” and “The Crucifixion.”
FCN animates the Ministry of Jesus with Reallusion tools
Character Creation Revolution with Reallusion Tools
When FCN first began producing “Walking by the Word,” one of their greatest challenges involved animated character quality. As Jonathan Williamson explains, “If you look at some of our earlier episodes, you’ll notice that the quality was honestly a little bit low. The animations were very blocky, very jumpy, and we didn’t have any way of actually customizing the clothing they were wearing.”
FCN uses Character Creator to create biblically accurate figures.
Everything changed when they discovered Reallusion’s software suite. “Once we began working with Reallusion, it gave us a new ability to make more real characters,” Williamson notes.
“We were able to start creating and customizing clothes, customizing the animations where it made it seem as if they were interacting. It made them seem more real and that lent to a much greater quality in production for all of our episodes and programs.”
Jonathan Williamson – Host and President of Fore Christ, INC
For these updated episodes, FCN leveraged the full power of Reallusion’s character design tools:
Character Creator became their primary platform for generating biblical characters from scratch. The team designed everything from body types and skin tones to period-appropriate clothing and accessories. For the “Bethlehem” episode, they created detailed characters, including baby Jesus, while “The Ministry of Jesus” and “The Crucifixion” required diverse figures with historically accurate attire and props such as vessels and Roman weaponry.
For the “Bethlehem” episode, FCN used Character Creator for baby Jesus
Each character was meticulously crafted using Character Creator‘s sophisticated toolkit, including Transfer Skin, Wave, Comfort Adjust, and Edit Mesh functions to achieve realistic and contextually appropriate appearances.
The character base technology within Character Creator proved invaluable for ensuring historical accuracy while maintaining visual coherence across different scenes and episodes.
Animation Workflow and Integration
Once characters were designed, FCN utilized Reallusion’s animation tools to bring them to life:
iCloneserved as their primary animation platform, allowing them to apply base animations from extensive motion libraries while making precise adjustments for each scene.
FCN used iClone as primary character animation platform
iClone AccuPOSE became an essential tool for refining character movements and expressions. Giovanni explains, “For scenes that required more complex movements or specific postures, we turned to iClone AccuPOSE, which allowed us to intuitively manipulate the character’s entire body. We could move one part of the body and see how others adjust automatically in a natural way.”
For crowd scenes, the team usediClone Crowd Simulation to create believable background activity and navigation paths that enhanced the environmental storytelling without overwhelming their system resources.
The iClone Unreal LIVE LINK feature proved particularly valuable, enabling seamless transfer of characters and animations directly into Unreal Engine scenes, maintaining visual fidelity and animation quality throughout the pipeline.
Technical Integration: The Aximmetry Challenge
One key technical challenge FCN faced was their use of Aximmetry as their final production engine. Unlike standard setups, Aximmetry operates on a modified version of Unreal Engine, which often creates compatibility issues with third-party plugins.
“One of the key points of our workflow is that we use Aximmetry as the final production engine. Unlike other systems, Aximmetry operates on a modified version of Unreal Engine, which often causes incompatibilities with many plugins. However, Reallusion tools like iClone and LIVE LINK are fully compatible with this customized version of Unreal.”
Minor Cortés Chinchilla – Virtual Production Technical Director
This compatibility proved decisive in their tool selection process, as it allowed for a seamless workflow from character creation through final production. Minor’s team developed a systematic approach:
They accurately replicated terrain and environmental elements within iClone to test animations
Using iClone’s Unreal LIVE LINK plugin, they selected meshes or element sets from Unreal Engine and transferred them directly to iClone as reference meshes
These reference meshes allowed for precise character positioning and interactions, such as natural walking on terrain or proper alignment with environmental obstacles
iClone Unreal LIVE LINK plugin to directly transfer animations and meshes with Unreal Engine
Problem-Solving with Reallusion Tools
The FCN team encountered and solved numerous technical challenges using Reallusion’s toolset:
Costume Physics and Collision Management: “On several occasions, it was necessary to adjust the costumes to prevent garments from passing through the character’s body during movements like walking, bending, or interacting with objects,” Giovanni notes. The team used collision management tools and applied physics simulations for natural cloth movement without compromising performance.
Complex Animation Requirements: For specialized scenes, like a Roman character mounted on horseback, the team combined multiple approaches. They first exported the character to iClone, utilized preset animations like horseback riding from the software’s gallery, then customized these animations to fit their specific scene requirements. AccuPOSE helped perfect the rider’s posture for natural arm, torso, and head movements.
Resource Management: To enhance scene richness without overwhelming their limited resources, FCN leveraged Reallusion’s Content Store, Marketplace, and ActorCore. These resources provided access to period-appropriate accessories, costumes, hairstyles, and other elements without requiring costly custom modeling.
Blueprint Control in Production: From iClone, the team exported fully animated characters and organized them in Unreal within independent sequences managed through a master sequencer. “Each group—Romans, merchants, animals—has its own sequence,” explains Minor. “These sequences generated from iClone can be integrated within a blueprint in Unreal, and once the project is exported to Aximmetry, it’s possible to control it using triggers during live production.”
The Reallusion Advantage: Why These Tools Matter
For a small studio like FCN Producciones, Reallusion’s character designer and animation tools have been transformative. Giovanni Rojas summarizes it well: “The flexibility of Reallusion’s tools gave us creative control that wouldn’t be possible with a small team otherwise.”
Key advantages of the Reallusion ecosystem include:
1. Accessibility and Efficiency
Reallusion’s tools democratize high-quality character creation and animation, making professional-grade results achievable even for smaller studios. The intuitive interfaces and comprehensive libraries allowed FCN to focus on storytelling rather than technical hurdles.
2. Seamless Integration
The compatibility between Reallusion products and FCN’s existing technology stack (particularly the modified Unreal Engine used by Aximmetry) eliminated workflow bottlenecks. As Minor Cortés emphasizes, “Reallusion’s compatibility with the version of Unreal used by Aximmetry was key. Everything worked without technical barriers.”
3. Complete Character Control
From initial design through animation and integration into final scenes, Reallusion provided FCN with unprecedented control over their characters’ appearance, movement, and expressiveness. This level of control significantly elevated the visual quality of their productions.
4. Resource Optimization
For a small team with limited resources, Reallusion’s extensive content libraries and efficient workflows allowed FCN to achieve results that would otherwise require much larger teams and budgets. The ability to customize existing assets rather than creating everything from scratch proved invaluable.
Character Creator content libraries make all motions, clothing, hairs and props, interchangeable
Conclusion: The Future of Biblical Storytelling Through 3D Animation
FCN Producciones demonstrates how even modest-sized teams can achieve impressive results in virtual production by selecting the right tools and establishing efficient workflows. Their success with Reallusion’s character creation and animation software illustrates how modern technology can revitalize traditional storytelling.
“What matters to us is telling meaningful stories. These tools helped us do it with clarity and quality,” says Jonathan Williamson, highlighting the ultimate purpose behind their technical achievements.
For other 3D animators, content creators, and production houses seeking to enhance their character creation capabilities, FCN’s experience offers valuable insights. The combination of Character Creator‘s detailed human creator tools, iClone‘s animation capabilities, and AccuPOSE‘s refinement functions provides a comprehensive solution for character-driven storytelling across various genres and formats.
By embracing these powerful 3D character animation and lip sync animation tools, FCN has not only improved their technical capabilities but also enhanced their ability to fulfill their core mission: telling meaningful stories with technical precision and creative vision.
Artist Pascal Teunissen earns third place in the “Business & Commercial” category of the Reallusion 2024 Animation at Work contest. In this article, he walks us through the complete workflow behind his winning entry, “Fictive Commercial: Pilgrim Travel Mug”.
Pascal Teunissen
Hello, I’m Pascal Teunissen. My professional background is quite diverse. I began my career as an architectural drafter in infrastructure, focusing on electricity and water pipelines. Currently, I work as a civil servant at Rijkswaterstaat, where I’m responsible for data delivery and processing to support the planning of major maintenance on provincial roads in the Netherlands.
Alongside my professional work, I’ve always had a passion for creativity. I started by developing simple games in Unity, but I soon felt the urge to do more, including creating my own characters and worlds. My first attempt was with OpenToonz, but I quickly ran into its limitations and technical issues. While working with Unity, I discovered Character Creator, which seemed like the perfect tool for building 3D characters.
At one point, I explored cryptocurrency trading, but eventually chose to invest in something far more fulfilling: my creative hobby. That decision was perfectly timed with a bundle offer for iClone, Character Creator, and Cartoon Animator, which was an opportunity I couldn’t pass up.
Cartoon Animator turned out to be the tool I had been looking for. Especially after mastering Affinity Designer, I was able to design and animate my own characters. I invested in all the Reallusion add-ons and taught myself the software through practice and experimentation. Cartoon Animator has become my favorite animation program, enabling me to work faster and more efficiently, even with my busy family life.
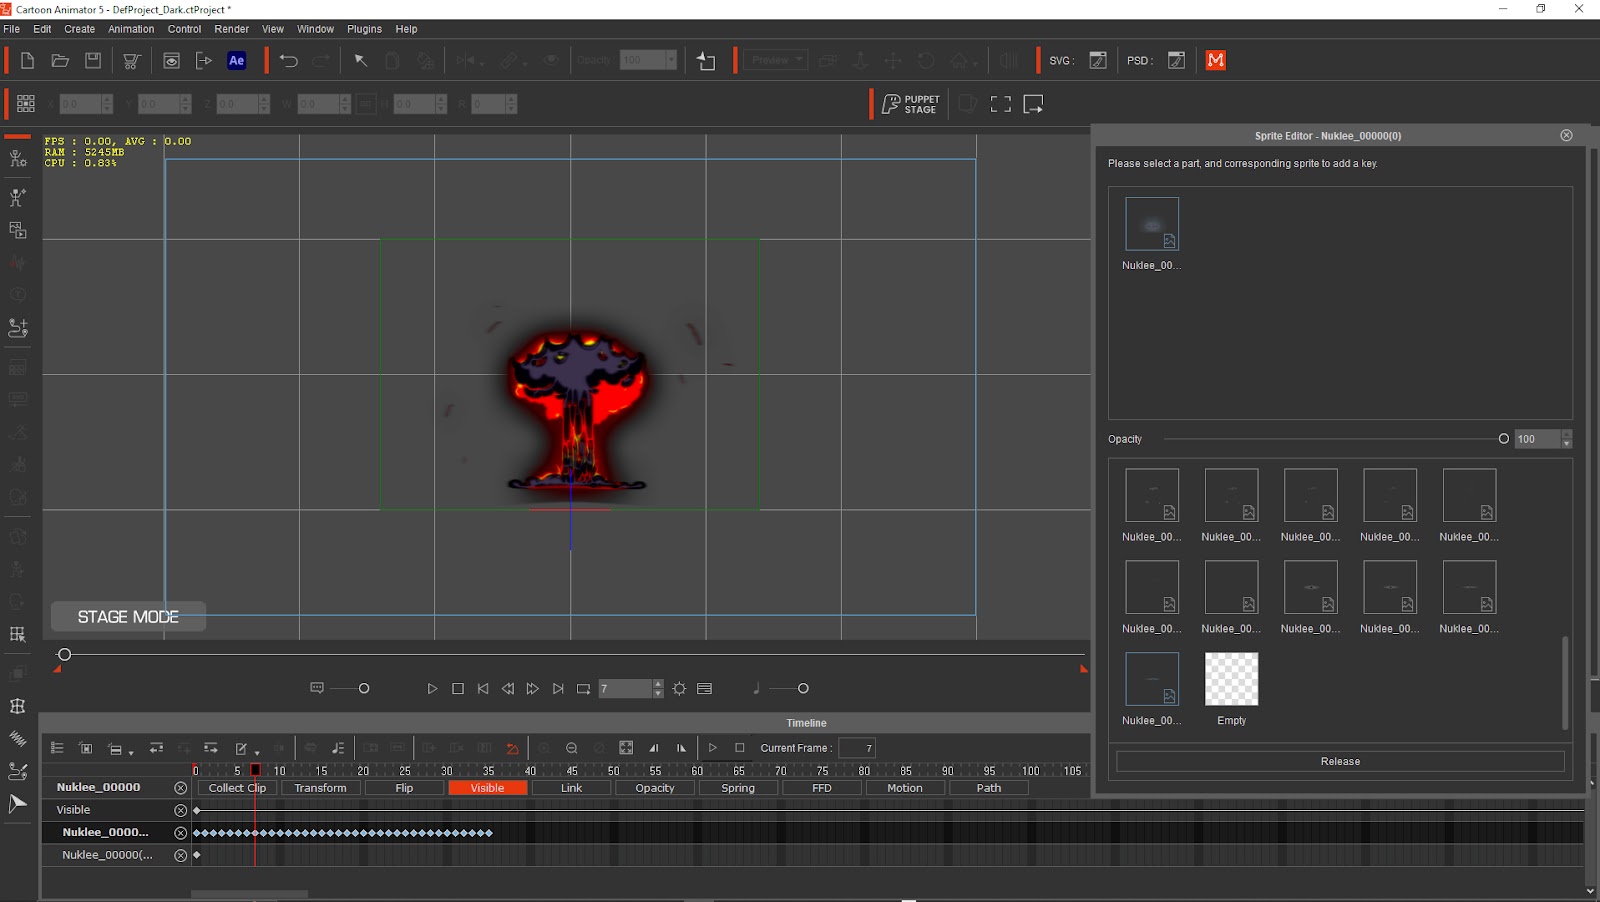
Among my favorite new features in Cartoon Animator are the spring bones function and the image/sprite sequence options. These tools allow me to animate props quickly and add frame-by-frame action to my scenes. When I need to create animations rapidly, these features significantly enhance my workflow, helping me achieve a more professional animation style.
Background Story & Concept
The idea for the portable cup commercial came from a personal moment. I had just started my new job at Rijkswaterstaat, and on my first day, I received a travel mug. I liked it so much that I thought “it would make a great idea for an animation”. I’ve created several commercial-style animations Supsman.
Preparing this particular entry took me about two to three weeks. The first week is usually spent on design and storyboarding. Weeks two and three are focused on animating, reviewing, and refining any errors. Storyboarding is a major part of my process. I invest a good amount of time into it, as it helps shape the flow and visual structure early on.
Tip to fellow artists: keep things simple but clear. A strong storyboard doesn’t have to be perfect—it just needs to communicate your ideas effectively.
Character Design with Affinity Designer
My creative process often begins with inspiration from Pinterest or AI-generated characters. I then design my own versions in Affinity Designer, working directly in a vector style. I’ve also gained experience in rigging, partly through feedback received while selling my creations on the Reallusion Marketplace. In addition, I share free content on the marketplace as a way to give back to the community.
I’ve experimented with rigging in Moho and After Effects, but Cartoon Animator remains my preferred tool due to its intuitive workflow. I discontinued my previous YouTube channel due to copyright issues and a lack of focus, but I’ve since launched a new one called Kleine.wijsneuzen.kanaal, focusing on educational content for children.
Building the Animated Scene
One of the most challenging scenes to create was one where the color palette didn’t align with the rest of the film. Balancing the look and feel to match the overall tone proved to be especially tricky.
When it comes to crafting strong backgrounds, I rely on a wide range of references. These include photos I’ve taken of buildings while on vacation, images from Pinterest, and even AI-generated concepts. I often use AI to create cartoon-style visuals from specific camera angles. By blending these various sources of inspiration, I’m able to distill the strongest elements and shape them into a style that reflects my own vision.
I used a lot of 2D and 3D motions from the Reallusion Marketplace as starting points and adjusted them to fit my needs for the animated scene.
I kept my VFX as subtle adjustments, such as lighting adjustments, adding shadows, and occasionally a slight wiggle in the lines, which can be seen in my kitchen scene.
Advice to Future Contestants
For future contestants, I would say: don’t be afraid to experiment or make mistakes. The learning journey is just as valuable as the final result. Take time to understand the judging criteria and focus on the elements that carry the most weight. Have a clear plan before you begin, but stay flexible and adjust your approach when needed. Seek feedback from others and use it to strengthen your work.
Use references and lots of them. Study professional animations and let yourself be inspired by other artists, but always bring your own unique style and vision to the project. Most importantly, be honest and authentic in your work. Stay positive, even if you don’t win. Be grateful for the experience, and see it as a step forward in your creative growth. I won the Honorable Mention from last year’s contest, but as I practiced more with the techniques, the better I eventually improved.
Closing Thoughts
My final thoughts on this competition are overwhelmingly positive. It was an intense, yet highly educational experience. I learned a great deal, especially in the areas of storytelling and storyboarding, which I now realize are skills I want to continue improving. I’m proud of what I’ve achieved through this process.
To future contestants, my advice is simple: enjoy the journey. Don’t put too much pressure on yourself. Be open to experimenting, embrace mistakes as part of the process, and learn from every step along the way. Most of all, stay true to your creative vision.
If you’d like to connect, feel free to send me a message through one of my items on the Reallusion Marketplace – Joekie. You can also reach out to me through my other YouTube channels for Kids: kleine.wijsneuzen.kanaal. Thank you for having me in this contest!
Much of filmmaking thrives on the smooth coordination of independent teams. In his latest video, Michael Tiedtke emphasizes the critical role of consistent timecode in maintaining that cohesion across disciplines. He demonstrates how the iClone Timecode plugin was used to produce a short Star Wars fan film in Unreal Engine, ensuring frame-accurate synchronization for elements like dialogue, motion capture, and visual effects. This article is a brief overview of how his timecoding approach enabled smooth integration of mixed media during production, saving both time and resources in the process.
Michael Tiedtke
Michael Tiedtke is a Pipeline Technical Director at Stiller Studios, where he develops advanced workflows and tools for real-time animated feature production. His work draws on deep expertise in character rigging, simulation, and the Unreal Engine. He is currently contributing to the film Handbok för Superhjältar – Röda Masken. Outside the studio, Michael runs a widely viewed YouTube channel with over a million views. There he shares practical, production-tested tutorials on 3D, VFX, and real-time animation for artists at all levels.
By connecting Rokoko Studio to iClone Motion LIVE, Michael was able to stream motion capture data directly for real-time preview on his 3D characters. At the same time, he set up a timecode-enabled reference camera to align the motion accurately. To ensure synchronization, he matched the frame rate and system clock across all recording devices. The motion capture was then recorded using system timecode, enabling timecoded burn-in data for each frame in iClone, direct timecode input and timeline display.
Embedded Timecodes for Effortless Alignment
iClone enabled Michael to precisely align motion capture data with reference video using their embedded timecodes. The process was both fast and precise through intuitive context menu commands and automatic alignment across all media types, including audio. The same method was applied to facial and audio capture, allowing him to synchronize both elements and fine-tune facial expressions with ease.
Post-Production Alignment in DaVinci and Unreal
For previsualization, Michael handled the initial editing in iClone and exported the previz video with a timecode burn-in. He then used DaVinci Resolve to align the timecoded video on the timeline with the audio track for perfect synchronization. In Unreal Editor, characters were placed into the scene, and Metahuman facial capture was integrated. Thanks to the consistent timecode across all assets, audio and body motion remained perfectly aligned in the Sequencer; regardless of when each element was created.
Undeniable Advantage of Timecoding
For Michael, iClone’s timecode functionality proved essential for syncing a wide range of multimedia assets. Presented through an intuitive, easily accessible interface, timecoding is just one of the many features that showcase Reallusion’s commitment to modern, efficient workflows in digital filmmaking — Another step toward democratizing the CG industry by saving time, effort, and resources.
Drag and Drop motions are a quick and easy way to animate characters for beginners and pros alike. There are many ways to break and blend existing motions, but the introduction of Animation Layers gave us a new level of control to change existing character motions limb by limb if needed.
These layers are a means to non-destructively edit a base motion by using custom layers that are “on top” overriding that part of the base motion. If you create a layer named “arms” and use that layer to animate only the arms, then it will override any arm animation contained in the base motion.
To be clear, we can animate any or all limbs with each layer as that depends on our needs and workflow. This is another example of iClone being as simple or as complicated as we need it to be. While it is just as easy to animate any combination of limbs on any given layer, I would recommend that beginners keep it simple as shown in the example tutorial below by confining each layer to a limb or two until you get some experience.
These layers are in the timeline and can be accessed by limb for fine tuning, adding preset curves or adjusting timing. The layer can also be turned on and off with a checkbox which leaves the layer intact but not in use. Since the base motion is still intact and the layers can be toggled on and off, there is no destructive editing at this point, leaving us the ability to change any aspect of our editing, regardless of timeline location or even go back to the original motion.
More Control
Animation layers give us a lot more control since we choose what to animate and when to animate it on each layer. If we choose to animate the arms and head and do so in separate layers, then we can name each layer accordingly and only animate those parts.
Keep in mind that all character limbs can be animated so be sure not to make any inadvertent changes to other limbs. Even if you make intended changes to other limbs but label the layer as arms and legs you might have trouble finding it in a complicated project so label accordingly.
Color Code
Each layer has a color code that helps you to find it on the timeline by using that color to highlight which layer you are looking at. The layer is color coded and when you select a motion on that layer, it will be highlighted with the matching color.
These unique colors give us a way to quickly and easily identify which motion belongs to which layer on the timeline.
How Animation Layers Work
Let’s jump right into an example of how simple this process is. For this example, I am using an action character carefully moving forward, crouched and at a slow to moderate pace. We’ll do this using the basic walking motion in the Motion Puppet then add animation layers to edit the characters arms and head.
The basic walking motion will be far from what we need so I will demonstrate how to adjust the motion before recording it. We will change the character’s posture and pace while locking down the hips to a more controlled and less swaying motion to match the mood of what the character is doing then we’ll start working with the layers.
I will use the layers to add a different arm motion, and I’ll also animate the head to move around and scan the area ahead and to the side. This will be manual editing but do not let that scare you as it couldn’t be easier. If all you have done is drag and drop motions at this point in using iClone then this will be a good introduction to how you can tweak those motions or customize them completely.
At the end of the tutorial, we will have a cautious walking motion with custom animation layers for the arms and head. After this you will be on your way to more customized animations.
Merge Animation layers
We can also merge animation layers into one to combine animation effects. We have a choice of Optimized which according to the manual will merge layers and their keys with a smooth optimization algorithm. The manual also warns SOME DETAIL may be lost with this method.
There is also the Per Frame method that merges the layers and their keys into continuous keyframes across the timeline.
When you merge, the layer will be renamed to MERGED [ORIGINAL Layer Name], i.e. merged right hand to easily identify merged layers.
Weight
Weight is another tool that can blend layers smoothly or transition between active layers. Below is a quick look at using the Weight slider and its effects on blending multiple layers. Weight allows us to assign weight to each motion layer to control how they interact with the other layers. It is a slider from 1 to 100 percent to control the influence of the layer within the percentage range.
Motion Versus Animation
Animation layers are for manually adjusting the limbs and not for loading motions as this has been confused in the past. If you try to load a motion into an animation layer it will overwrite the base layer and remove any animation layers you may have already added.
Motions and animations are technically different animals in the iClone world even though the terms are used interchangeably. Motions are canned animations that we drag and drop onto characters. Animation in this sense refers to manual manipulation of a character or prop by the user. These manipulations create keyframes that drive the animation. It depends on the context of the conversation or usage to distinguish between the two.
Summary
The addition of Animation Layers brings us a tool that is extremely easy to use while providing more control over our characters limbs when adding more animations to the base layer. These layers can be turned on or off so you can make several of them to test different techniques or styles and only use the ones that suit your needs. Animation Layers are another great tool for the animation toolbox and can help beginners to create custom animations on top of base layer motions for a new hybrid motion.
Digital Artist MD “Mike” McCallum, aka WarLord, is a longtime iClone user. Having authored free tutorials for iClone in its early years and selected to write the iClone Beginners Guide from Packt Publishing in 2011, he was fortunate enough to meet and exchange tricks and tips with users from all over the world and loves to share this information with other users. He has authored hundreds of articles on iClone and digital art in general while reviewing some of the most popular software and hardware in the world. He has been published in many of the leading 3D online and print magazines while staying true to his biggest passion, 3D animation. For more information click here.
Greetings, this is Peter Alexander. I’m thrilled to introduce an innovative collaboration between Reallusion’s Character Creator 4 andMetaTailor — a workflow designed to significantly enhance your 3D clothing creation process.
This integration offers a seamless, direct pipeline between two powerful tools, elevating both character design and garment fitting to an entirely new level.
Character Creator 4 is well-known for streamlining the character development process. It provides artists with a deep set of tools for rapid, high-quality avatar creation; including detailed morph sliders, facial rigging systems, and SkinGen for advanced skin texturing. It also connects directly with iClone for animation, making it a robust platform for end-to-end production.
However, one of the remaining challenges in the pipeline has been clothing; specifically, getting garments to fit, deform, and move properly across different character morphs. It’s a technically demanding process that can take hours of manual adjustments and weight painting. That’s exactly where MetaTailor comes in.
MetaTailor is purpose-built for garment rigging and fitting. It gives artists an intuitive, visual way to edit clothing meshes directly, with smart tools for vertex manipulation, automated weight transfers, and real-time collision detection. With its live deformation previews, you can immediately see how a garment will behave during character movement—drastically cutting down trial-and-error.
Let me walk you through a typical MetaTailor workflow:
Export Your Character from CC4
Start by exporting your character mesh from CC4 using the MetaTailor Bridge, which ensures your avatar is ready for fitting in the correct format.
Assign Clothing Organization by Color / Type
MetaTailor allows you to organize clothing by Type (e.g., Head, Pants, Shoes). You can group items by assigning them the same color, clicking and cycling through the color options, or assigning them an individual color to keep them separate.
Body Arrangement Points
You will next go to a screen with various points on the character’s face and body. Line them up as best as you can according to the arrangement label. You can also redo this later if you’re not sure.
Apply Automated Weight Transfers
At this point you’re able to go through the library of clothing and assign outfits and accessories with a single click. Skinning weights will be smartly applied to the clothing, and in many cases very little adjustment will be needed.
Vertex and Mesh Manipulation Tools
For more exaggerated characters, there is a variety of tools capable of pushing, pulling, smooth, and relaxing vertices. You can sculpt on the base shape or an additional sculpting layer. For even more complex characters that defy all human proportion, there is a lattice tool that allows for greater manipulation of the mesh.
Check Real-Time Deformations
Preview how the garment moves with the character using MetaTailor’s real-time deformation playback.
Export the Fitted Garment Back to CC4
Once everything looks right, simply export the updated mesh back to Character Creator 4. At which point the character’s clothing will be exported back to the existing character.
Additional Clean Up
You can use CC4’s existing tools to hide the underlying character mesh and maximize CC4’s animations without any mesh penetration.
By combining CC4’s robust character-building tools with MetaTailor’s precision garment-fitting system, artists can dramatically streamline their workflow. The result? Less time battling technical constraints, and more time focused on creativity and storytelling. This collaboration between Reallusion and MetaTailor makes high-quality, professional-level garment rigging accessible to both novice and experienced creators. Whether you’re building assets for games, film, virtual fashion, or digital humans, it’s a win in every way.
Reallusion combines Vicon technology with industry-standard timecode support in iClone
Reallusion announces its official partnership with Vicon, enabling direct motion capture support for iClone. For the first time, Vicon systems can seamlessly connect with Motion LIVE, offering full integration of real-time, high-fidelity body capture, along with facial and hand mocap, all within one unified platform. Jeff Sheetz, founder of Monkey Chow Animation Studio, shares his experience with this powerful iClone-Vicon suite, which he believes delivers studio-quality results faster than ever before.
Jeff Scheetz, Motion Capture Orlando
Since leaving his role as co-founder of The Digital Animation & Visual Effect (DAVE) School, Jeff Scheetz, alongside his wife Anne, has been running Monkey Chow Animation Studio in Orlando, Florida. In 2021, they expanded into motion capture with the launch of Motion Capture Orlando, serving the theme park industry. Their work can be seen at Universal Studios and Walt Disney World, and they’ve also produced various motion capture packs for iClone and ActorCore, such as Run for Your Life, Bank Heist, and Avenging Warriors. Jeff’s team also collaborated with Actor Capture on the Netflix movie The Electric State. Key team members include senior mocap technicians Kaszmere Messbarger and Nelson Escobar.
iClone and Vicon—The New Dynamic Duo
One of the most exciting aspects of Jeff’s relationship with Reallusion is getting to test out cutting-edge technology before it’s officially released. When he was informed that iClone would soon support Vicon integration and timecode synchronization, it was a game-changer. Motion Capture Orlando has been using Vicon’s cameras and software since they started investing in mocap gear, but they were unable to integrate Vicon data directly into Motion LIVE until now.
This breakthrough is especially significant for Jeff, as the previous workflow involved streaming Vicon data into Motion Builder for retargeting, and then moving that data into Unreal Engine. The integration of facial data, hand motion (via data gloves), and the inherent latency in this multi-step process presented challenges. Now, with iClone’s Motion LIVE, Vicon streams directly into iClone, allowing for seamless integration of face, body, and hand all within the platform. This streamlined approach reduces complexity, making it easier to execute live shows and set up production workflows.
Record, Edit, and Render Previz in iClone
When it comes to previz, speed and cost-effectiveness are essential. Traditional mocap workflows can be time-consuming due to the necessary exports and imports between different software tools. However, by recording directly into iClone, you can immediately start blocking shots, working out camera moves, and rendering previews. Jeff’s team recorded a few assassin chase scenes on their stage, using Motion LIVE to capture data, and the resulting iProject files served as the foundation for their productions.
The quality of the capture was impressive due to starting with Vicon data. This allowed them to present high-quality previz to a director quickly. The renders included vital data on the edges, such as version info, lens used, and notes for feedback, helping the team stay organized throughout the process.
From Previz to Polished Video: Cleaning and Syncing with Timecode
After capturing mocap for the previz, the team performed proper data cleaning using Shogun Post (Vicon’s mocap cleaning software), and motion edits were carried out in iClone. They identified the best takes—approximately 20% of what was shot—and cleaned only those pieces. One major challenge was syncing the cleaned data, but the introduction of timecode has made this process much easier.
Using the new Timecode Plugin, Jeff could instantly sync the cleaned motion data with the original timeline. By dropping the new motion (as an FBX) onto their character and selecting “Align Clip to Embedded Timecode”, iClone automatically aligned it with the original recording. This feature works not only for motion data but also for facial capture, hand data, audio, and video.
Seamless Mocap Sync with Live Action
This seamless integration was especially useful when creating a sitcom scene for Life with Bob! in which a live actress performed against a CGI character. Mocap actors, placed just out of frame, could improvise and interact with the CGI character.
The use of a Tentacle Sync device transmitted timecode across all systems: Vicon, the Live Face app, the video camera, and sound recording devices. This made it incredibly easy to sync everything once the master shot was completed.
Reshooting and Updating with Motion LIVE
One of Jeff’s favorite features of this new workflow is the ability to quickly make adjustments, such as reshooting facial animation without the need for a full reshoot. Using his iPhone, he could capture just the parts that needed improvement, like the lips, while leaving other aspects of the face intact. The flexibility to isolate and reshoot specific elements is a major time-saver and enhances the overall efficiency of the production process.
The New Workflow: Speed, Efficiency, and Creativity
For creators using Reallusion products, the integration of Vicon with iClone opens up new possibilities for creating high-quality animated content in a fraction of the time previously required. The new workflow allows for fast, professional results with minimal overhead. With the addition of the Timecode plugin, keeping everything aligned and organized is simple. Motion LIVE, combined with Vicon’s mocap system, empowers creators to focus on what matters most: creativity and storytelling. And after all, that’s why many of us got into animation in the first place.