首頁 » Page 15

AccuRIG 2 Debuts Direct In-App Access to 4,500+ ActorCore Motions

Reallusion announces a major upgrade to AccuRIG, the industry’s most popular free automatic rigging software, used by over 200,000 creators. The latest version 2 boosts productivity by integrating advanced AI search technology directly into the workflow. With the powerful in-app AI Deep Search, artists instantly browse and explore more than 4,500 ActorCore motions, dramatically accelerating the creative process. This deep integration saves valuable production time and enriches the animation pipeline with smart, intuitive tools that help creators find the best motions without ever leaving AccuRIG 2.

AccuRIG 2 Continues the Legacy of Innovation

AccuRIG 2 introduces a suite of innovative features aimed at enhancing both user experience and productivity. Over 4,500 premium 3D motions from ActorCore are now directly accessible within AccuRIG. Fully integrated motion preview and retargeting tools also enable the testing and adaptation of animations in AccuRIG’s intuitive interface, eliminating the need to switch between applications to check content fit.

Blitzing Through AI Motion Search and Preview

One of the highlights of AccuRIG 2 is its powerful AI-driven search capability, which makes discovering the perfect motion quicker than ever. With Reallusion AI Deep Search, content can be searched by category, filters, or even natural language using detailed descriptions in over 100 supported languages. This flexibility ensures that creators worldwide can easily find exactly what they need for any project. The enhanced preview window supports free navigation around the character, enabling thorough examination of rigging and motions before committing to export for 3rd-party integration.

The Pinnacle of Character Rigging: Trusted by Users Worldwide

AccuRIG remains at the forefront of 3D character rigging, revolutionizing how artists and studios approach character creation. Trusted by over 200,000 users worldwide, this free application simplifies the rigging process by transforming static 3D models into fully animatable characters—down to the finger joints—in just a few easy steps. Whether for games, films, virtual production, or interactive media, AccuRIG’s intuitive design and advanced automation dramatically lower technical barriers. Its compatibility with industry-standard platforms such as Unreal Engine, Unity, Blender, iClone, Omniverse, Maya, 3ds Max, MotionBuilder, and Cinema 4D makes it a flexible and powerful addition to any pipeline.

Multi-Purpose ActorCore Motion Integration

ActorCore offers thousands of high-quality motions tailored to meet the needs of diverse industries—from video games and filmmaking to training simulations, digital twins, and architectural visualization. Each motion is professionally produced, featuring precise foot contact, detailed finger and toe articulation, smooth transitions, adaptable stance shifts, and natural movement. By combining AccuRIG’s auto-rigging with ActorCore’s curated motion system, it’s possible to rig, animate, preview, and refine characters with unmatched speed and precision—all in one streamlined platform.
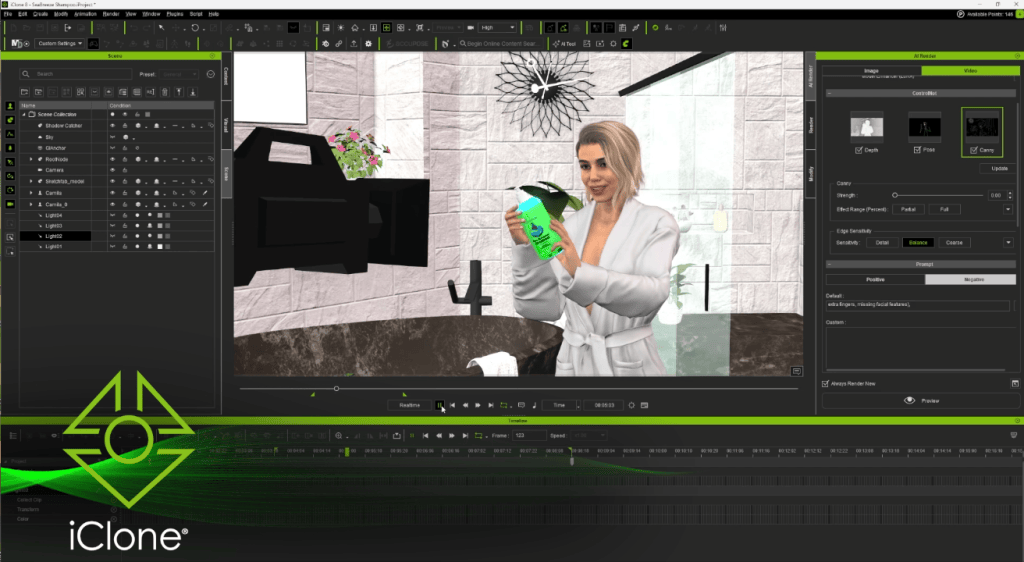
AI Search Ushers in Next-Level Augmented Productivity

By consolidating advanced AI technology with ActorCore’s extensive motion library into a single free tool, AccuRIG 2 redefines the character animation process. With instant access to thousands of retargetable motions, intelligent search features, and an intuitive rigging system, there’s no need to juggle multiple applications or get bogged down by complex workflows. Instead, users gain a seamless, end-to-end pipeline that takes them from rigging and preview to export with minimal effort. For studios and creators looking to boost productivity and achieve professional-grade results, AccuRIG 2 sets a new standard for accessible, high-quality animation.

Related Posts

From 2D to 3D: My First Steps with iClone and Character Creator

Animation Journey: From Drawing Cartoons to 3D Worlds

This article is the second installment of my Garry’s ongoing journal series, From 2D to 3D. If you haven’t read the first post yet, we recommend starting there: From 2D to 3D: Why After 10 Years I Moved to 3D Animation.

In that opening chapter, I share the pivotal moment that led me to transition from a decade of 2D work into the world of 3D animation. Now, in this second entry, I dive deeper into the tools, challenges, and creative breakthroughs shaping my journey.

Entry 2 – My First Steps In A 3D World

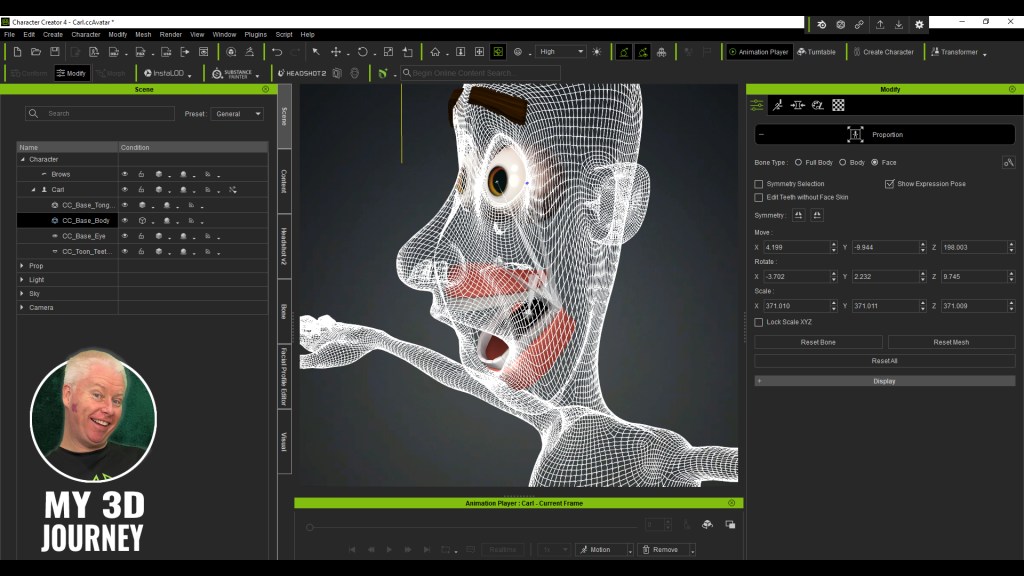
If you’d asked me four months ago whether I could create a fully custom 3D character, I’d have laughed nervously, changed the subject, and pretended to know where my glasses were. But here I am, knee deep in polygons, sliders, and UV maps, slowly but surely learning how to bring my cartoon world into the third dimension.

This is the second blog in my series documenting my jump from 2D to 3D animation, and let me tell you, the learning curve has been more of a learning vertical wall. But we’ll get to that. First, let’s rewind to the beginning.

When I first dipped my toe into 3D, I knew I wanted to build my own characters from scratch, not just use existing assets. That meant learning how iClone and Character Creator 4 (CC4) worked, and more importantly, figuring out which tools would actually help me create characters that still felt like “mine.”

My early impressions of iClone and CC4 were honestly impressive. These tools felt powerful and professional, but at the same time, there was something familiar about them. Because I’d spent years with Cartoon Animator, I instantly recognised the DNA. The UI structure, the logic behind the sliders, even the naming conventions. That familiarity gave me a bit of a head start.

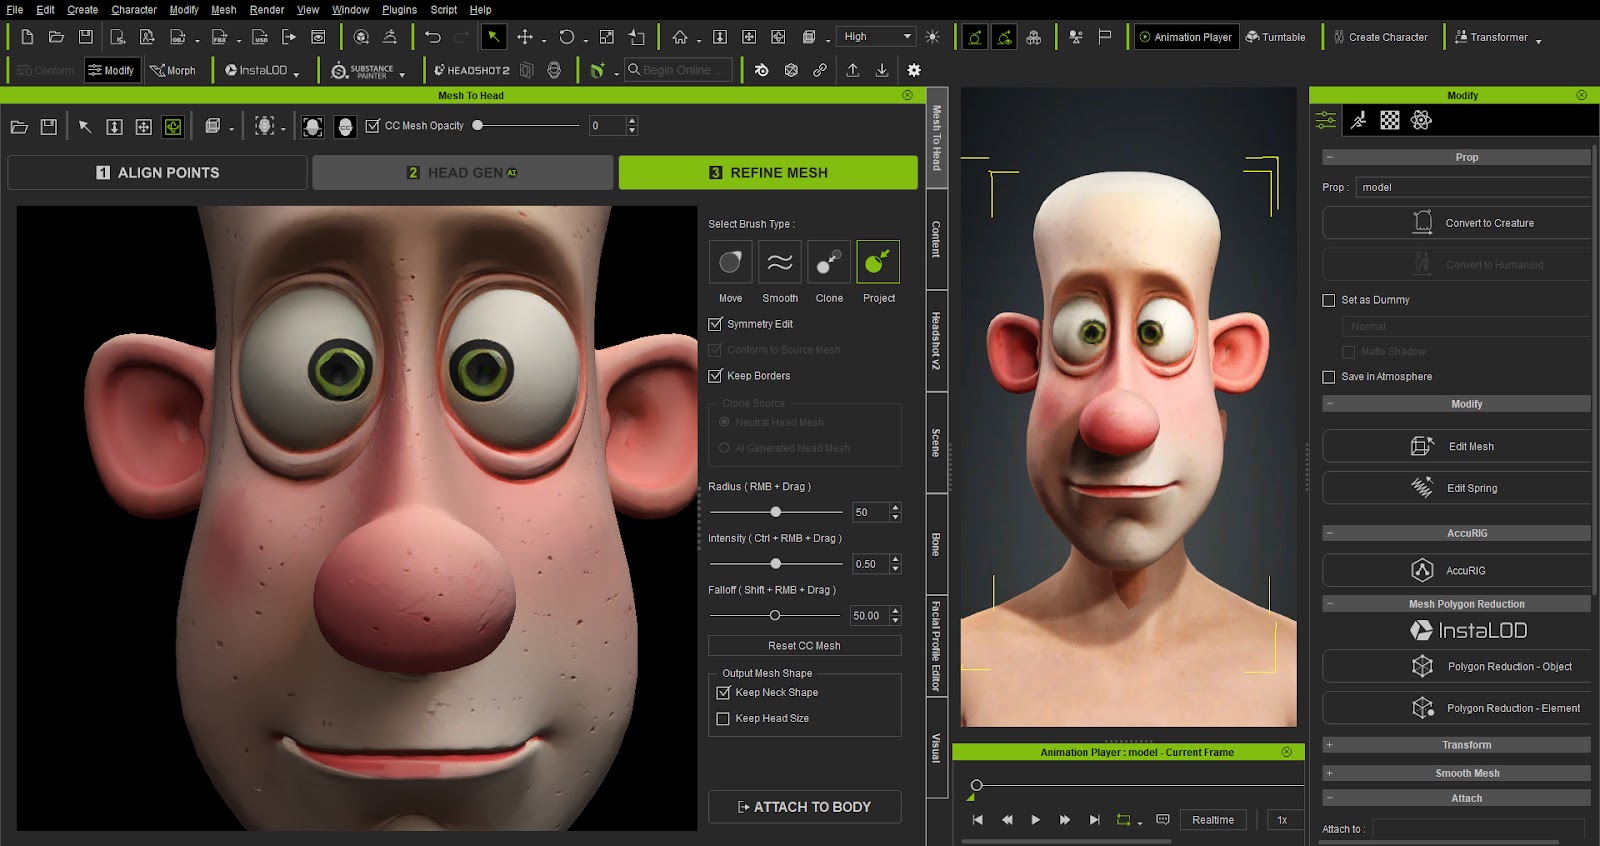
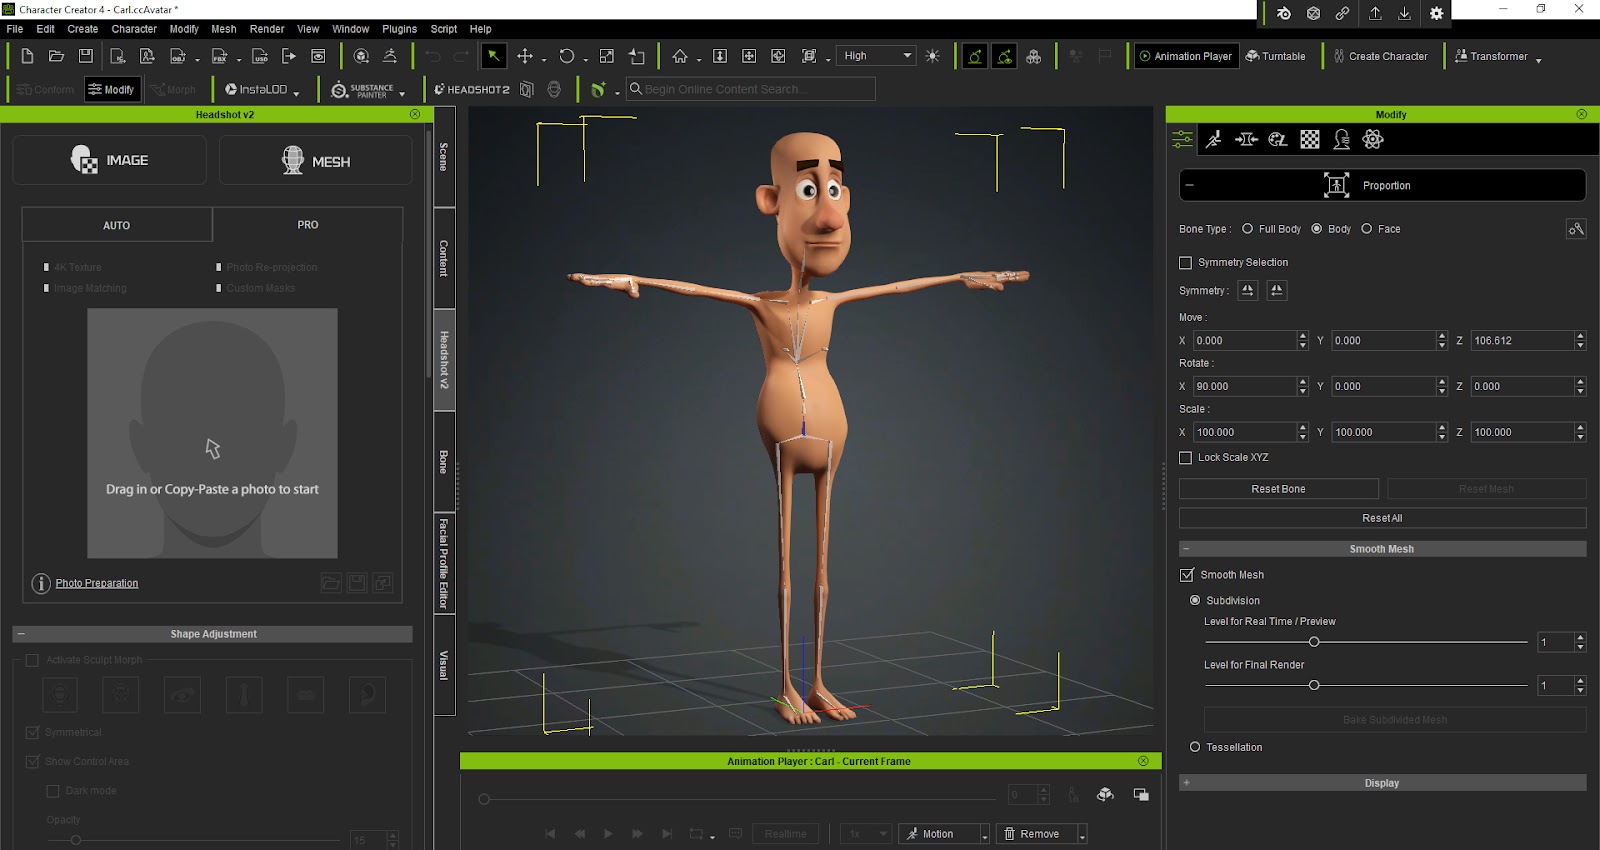
I also started exploring Headshot, which is Reallusion’s face generator plugin. At first glance, I assumed it was just for making realistic humans. I was wrong. Gloriously wrong. With some creative thinking (and a lot of morph slider nudging), I realised I could push HeadShot well into the cartoon space.

I initially thought I’d use the box modelling technique in Blender to sculpt my characters. It seemed like the “real” way to do it, the purist approach. So I experimented with that. But quickly I realised I was in way over my head. The idea of building a character from a cube with extrusion tools and loop cuts was exciting….. until it wasn’t.

Instead, I made the decision to use the tools that make sense for where I am now, not where I think I should be. That meant going all in on Character Creator and Headshot, and only jumping into Blender when I needed to tweak something I couldn’t do in CC4, like specific mesh edits or object manipulations.

Because CC4 and iClone come from the same company that makes Cartoon Animator, a tool I know backwards, the transition felt smoother. The UI language made sense. I didn’t have to relearn how to navigate the workspace or figure out where the “make head bigger” button had run off to.

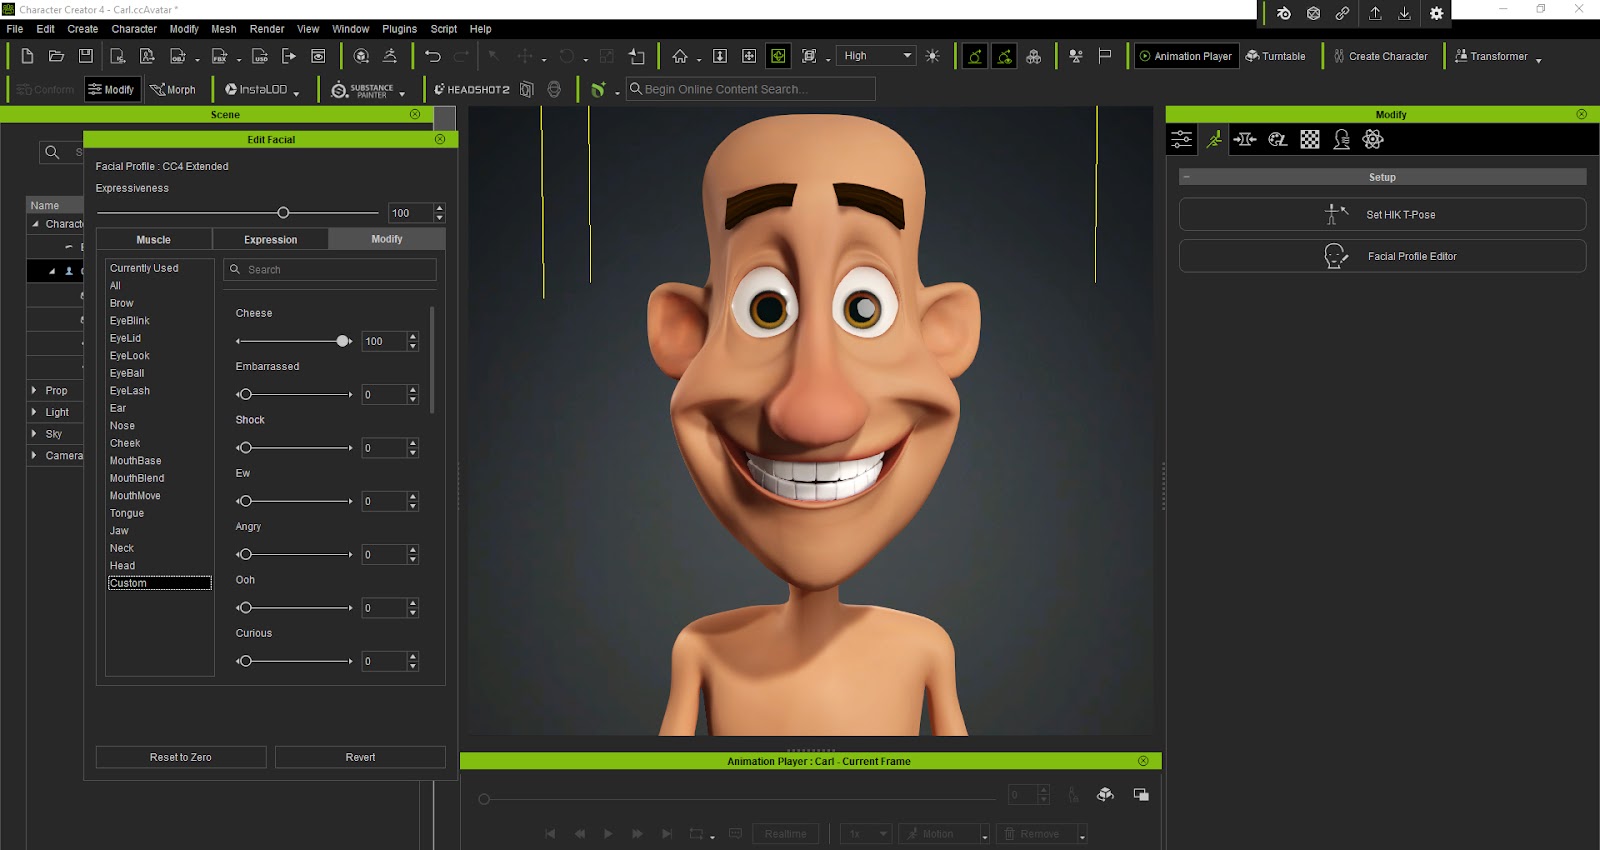
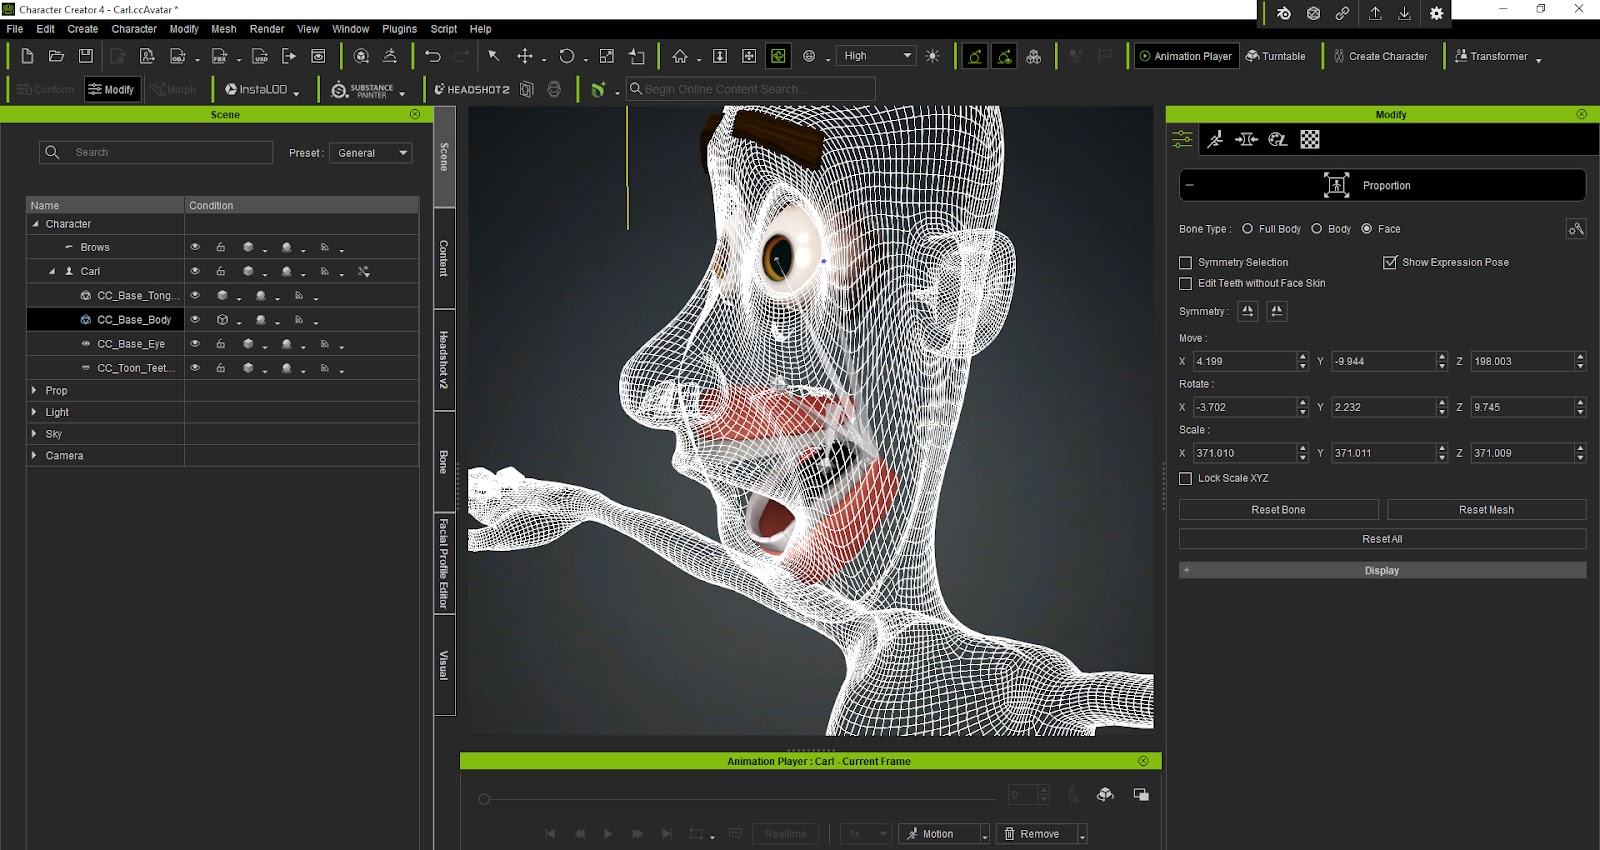
So far, I’ve been using HeadShot 2.0 to create custom cartoon faces and Character Creator for the bulk of the shaping work, especially facial detail. CC4 has some wonderful tools like Edit Mesh for when I need to push shapes further than the sliders allow and for me, the all important Morph Slider Editor to build custom expressions that would let my characters unique personalities shine through.

Each day I learn something new. Just this week, I figured out how to create morph sliders for rescaling teeth during an expression. I’m not saying I’m a wizard, but if the pointy hat fits.

Coming from 2D character design, where I could sketch something and have it ready to animate in a day, 3D felt like moving through molasses. The technical side is heavier, and yes, I struggled. Hard.

There were nights where I closed the software and walked away frustrated, convinced I’d never finish even one fully custom character. But I kept going, out of sheer stubbornness. I made a promise to myself, just finish one, no matter how long it takes.

I need to point out that I am not doing this alone. Rampa Tinling and Peter Alexander, two pros in the Reallusion community, have been incredibly generous with their time. Their encouragement gave me the push I needed when I hit a wall.

I also started a Facebook group to share my progress, ask for help, and support others doing the same thing. That group has turned into an unexpectedly warm little community. We cheer each other on, laugh at our mistakes, and swap solutions freely.

The official Reallusion YouTube channel has been invaluable. And it’s come full circle for me because years ago, I learned Cartoon Animator by watching Kai DeNeve’s tutorials. And now, here he is again, guiding me into 3D. Same teacher, new dimension.

Each day, things feel a little more intuitive. I don’t have to look up how to move a vertex anymore. The fog is lifting.

When I wrote my first blog post, I wasn’t confident I could do this. I genuinely worried that I wasn’t smart enough to make sense of the 3D world. That I’d hit a wall and walk away defeated, which I had done twice already in the past.

But now, writing this second post, something’s shifted. I still have a lot to learn, and sure, it’s not going to happen overnight. But now I believe I can get to the end of this journey. I believe I can finish what I started.

And most importantly, I’m having fun.

This image has an empty alt attribute; its file name is Garry-Pyes-profile-image-edited.jpg
Garry Pye – 2D/3D Animator, Cartoonist, Content Developer

Garry Pye – 2D/3D Animator | Content Developer

Garry Pye is an Australian illustrator, animator, and Cartoon Animator instructor with over a decade of experience in the animation industry. Known for his unique blend of creativity and humor, Garry’s work spans from teaching animation techniques to creating innovative content that helps both novice and experienced animators improve their skills.

Garry’s enthusiasm for storytelling and animation shines through in all his projects, whether it’s creating animated shorts, preparing educational tutorials, or sharing his expertise by teaching. With a passion for making animation accessible and fun, Garry has built a community of learners who not only appreciate his knowledge but also his infectious sense of humor and dedication to his craft.

Follow Garry Pye’s iClone Page2D Animation Page2D Marketplace

Related Posts

CTA5 vs. Adobe CA: The Ultimate Showdown of Top 2D Animation Software

Scott Evans, Digital Puppets

As a professional animator with years of experience using Adobe Character Animator (CA) on projects for clients like Disney, Cartoon Network, and the BBC, I was excited to dive deep into Reallusion’s Cartoon Animator 5 (CTA5).

After being asked countless times which 2D animation software is better, I’ve created this comparison to share my honest perspective, highlighting where each tool shines and how they fit different animation needs.

Check out Digital Puppets’ YouTube Channel

Pipeline: Similar Files, Different Approaches

Both CTA5 and CA support PSD and Illustrator imports, offering flexibility for asset creation, but their workflows differ significantly.

Adobe Character Animator allows for highly customized builds, which is great for experienced riggers who need precise control over every joint and puppet behavior. However, this level of detail can be overwhelming for beginners just starting their 2D animation journey.

Cartoon Animator 5 simplifies this process with templates and a SMART Rigging system, making it much more approachable for new users. While it offers less flexibility for highly custom, unconventional builds, the streamlined approach is a huge time-saver for most animators.

Speed: Setup Time Matters

When it comes to getting animations off the ground quickly, setup time is crucial.

CA offers deep control, but setup can be time consuming, especially when tagging layers manually for head turns, IK, and lip sync. This meticulous approach can add significant hours to a project.

CTA5 is faster out of the box, with prebuilt motions and streamlined rigging. While CTA5’s auto rigging sometimes needs refinement, the learning curve is much lower, allowing animators to jump into creating compelling 2D animation faster.

Visual Advantages: FFD and Spring Dynamics

Expressive character movement is key in quality 2D animation, and the tools available for deformation and physics play a significant role.

CTA5 includes advanced Free Form Deformation (FFD) and easy-to-apply spring dynamics, allowing for expressive, cartoon-style motion with natural bounce and fluidity. CA, on the other hand, offers only basic physics and deformation capabilities. For animators wanting dynamic movement in their 2D animation projects, CTA5 clearly has the edge.

Trigger Animation: Expression & Tempo Control

Efficiently triggering animations and expressions can dramatically speed up production and enhance character performance.

CTA5’s trigger system is intuitive and powerful. The new puppet panel library lets users apply complex facial expressions and animations with remarkable ease, enabling quick iteration and nuanced performances. CA’s trigger setup is more manual and time intensive, though highly customizable. However, it lacks advanced puppeteering options like motion flocking found in CTA5.

Animation Control: 3D Motion for 2D Characters

CTA5 uniquely enables 3D-style motion in 2D characters and supports detailed motion capture, even finger tracking. Reallusion has a huge library of motion assets which provide multiple angles of 2D motion capability—invaluable for diverse scenes.

While CA focuses on webcam-based performance capture and includes a reliable walk behavior, it lacks external mocap integration and downloadable motion assets. CTA5 offers deeper, more scalable control for complex animations, particularly for studios looking to incorporate motion capture data.

Character Reusability: Streamlining Production

Efficiency in a 2D animation pipeline often hinges on how easily characters can be adapted and reused across projects.

CTA5 allows for standardized, reusable rigs, helping speed up character production, especially for series or projects requiring multiple characters. This allows for applying the same motion to several characters, drastically cutting down on repetitive tasks.

CA, meanwhile, is excellent for updating character graphics—just change the linked PSD or AI file, and the model updates instantly. CTA5’s PSD linking is effective but sometimes less intuitive compared to CA’s seamless approach.

Scene Production: Full Control vs. Focused Simplicity

The scope of your animation projects will often dictate which software is more suitable.

CTA5 is built for full scene animation with multiple characters, props, and cinematic camera movements. It offers robust tools for orchestrating complex interactions within a scene. CA is more limited here, though it does have a simple and effective camera system for zooms and pans. For anything beyond character-centric animation, CTA5 provides much more flexibility for expansive 2D animation scenes.

Timeline Animation: Flexibility vs. Clarity

The timeline is the heart of any animation software, and both tools offer distinct approaches.

CTA5’s timeline is powerful and allows for advanced edits like reordering body part layers mid-scene. This flexibility can be incredibly useful for complex layering and visual effects. However, its lack of named keyframes can make it harder to navigate, especially in intricate sequences.

CA’s timeline is clear and beginner-friendly, with an excellent swap-set system for managing triggers and timing. This makes it intuitive for quick performance-based animation.

Head Turns: CTA5 Dominates

This is where one software truly stands out for expressive character animation.

CTA5 is unmatched when it comes to creating fluid, 3D-style head turns from 2D assets. Users from LIVE2D will find CTA5’s parallax system more advanced and flexible, allowing for incredibly convincing head rotations. CA does allow head turns, but only through multiple rigged heads, which increases file size and complexity—making the process less efficient for subtle shifts.

Updates: CTA5’s Steady Evolution

The continuous development and support directly impact long-term viability.

Reallusion continues to roll out regular updates and feature improvements to CTA5, often driven by user feedback. This commitment ensures the software remains cutting-edge and responsive to animators’ needs. In contrast, CA has seen few major updates in recent years, which can be a concern for animators seeking new capabilities.

Conclusion: Choosing Your Ideal 2D Animation Software

Both tools are excellent 2D animation software solutions, but for different purposes.

Adobe Character Animator is ideal for real-time performance animation, thanks to its intuitive timeline and trigger system. It’s perfect for live streaming, creating quick reaction videos, or producing content rapidly with a single performer. However, its rigging complexity and lack of recent updates may be limiting for more advanced users seeking long-term production scalability.

Cartoon Animator 5 is designed for animators who want more control, richer visuals, and scalable production tools. With its powerful rigging, deformation, scene control, and continuous development, CTA5 is a robust solution for creating polished, professional animations, especially when working with multiple characters and cinematic sequences.

Consider your primary goals: Are you focused on live performance and rapid content generation, or are you aiming for highly controlled, cinematic 2D animation with deep feature sets? Your answer will guide you to the ideal animation software for your next project.

FAQ

Which 2D animation software is better for beginners?

Cartoon Animator 5 offers a more approachable learning curve with its SMART rigging system and pre-built templates. Adobe Character Animator is user-friendly for real-time puppeteering but requires more complex setup when creating characters from scratch.

Can I use motion capture with both animation software tools?

Yes, but differently. Adobe Character Animator excels in webcam-based facial capture for real-time puppeteering. Cartoon Animator 5 supports facial capture plus external motion capture devices for detailed full-body and finger tracking.

Which software is better for creating full 2D animated scenes with multiple characters?

Cartoon Animator 5 is designed for comprehensive scene production with multiple characters, props, and cinematic camera movements. Adobe Character Animator focuses on individual character performance and works best for single-character projects.

Do these 2D animation tools integrate with other creative software?

Both support PSD and Illustrator imports. Adobe Character Animator integrates seamlessly within Adobe Creative Cloud, while Cartoon Animator 5 offers robust PSD support and access to Reallusion’s growing content marketplace.

Which animation software offers more creative control over character deformation?

Cartoon Animator 5 provides advanced Free Form Deformation (FFD) and spring dynamics for expressive, cartoon-style motion. Adobe Character Animator offers more basic deformation tools, making CTA5 better for dynamic character movement.

Related Posts

My Journey From Shorts to Props with Cartoon Animator: Shane McKnight

Shane McKnight’s creative path into 2D effects, props, and the growing Marketplace community

Shane McKnight – Content Developer, Minister

Shane McKnight – Content Developer, Minister

Having learned many skills such as animation, special FX creation, videography, Shane McKnight is also a full time minister and father of 8. His interest in film making began at an early age when he produced his first documentary in 2004. Shane began his business called Props for Props together with Mike Martwell, his colleague from the UK , an avid photographer skilled at marketing wares and a good knowledge of animation software. 

Shane now has his own themed store at the Reallusion Marketplace where he sells 2D props to Cartoon Animator (CTA) animators worldwide.

Cartoon Animator really has opened needed doors with the tools it has. My favorite is the After Effects and Photoshop extensions. With the Photoshop pipeline, I can quickly export my work for refinement from Cartoon Animator, then to Photoshop, then back to Cartoon Animator where it is automatically updated. It’s amazing!”

Shane McKnight – Content Developer, Minister

I came across some of the work by other 2D content developers on social media, which sparked my interest with Cartoon Animator (CTA), so I made some cartoon shorts for my ministry. I watched a number of online tutorials and video breakdowns of its abilities and the price hooked me because as an individual artist it was exactly what I envisioned I needed to create cartoon animations. I had a lot of ideas for projects and it seemed Cartoon Animator was quite the program to help me make these toons. I was right and instantly fell in love with it. 

Q: How has Cartoon Animator influenced your animation workflow?

Cartoon Animator really has opened needed doors with the tools it has. My favorite is the After Effects and Photoshop extensions. With the Photoshop pipeline, I can quickly export my work for refinement from Cartoon Animator, then to Photoshop, then back to Cartoon Animator where it is automatically updated. It’s amazing! And I have created quite a few projects where I was able to animate my main scene in Cartoon Animator and then export it to After Effects to do the “spice” work in post production.

The various manipulation tools for character animation, like Facial Puppetry add expression and realism to my characters performance. And I am amazed at the volume of content readily available from the Reallusion site and 2D Marketplace that is both free and paid as well.

Cartoon Animator makes 2D animation faster, fun, and accessible to everyone.”

Shane McKnight – Content Developer, Minister

Q: Can you tell us about any exciting projects you’re working on with Cartoon Animator?

In the beginning working with Cartoon Animator, I made some animated cartoon shorts. As I learned the software more, I started making animated props and effects which can be easily dragged and dropped to Stage Mode for instant, smooth results, saving animators hour of tedious keyframing, and I was even fortunate enough to be invited as a beta tester for some of the Cartoon Animator updates. Today, Props for Props is still making animated effects and props and animated layered scenes. And we hope to branch into new regions soon.

Q: What’s the most challenging aspect of 2D animation, and how did Cartoon Animator help you overcome it?

Even with challenging aspects of 2D animation, like characters lip synching and motion, Cartoon Animator offered me a variety of ways to approach these. I kept pushing through till I got the results I wanted, and was even able to implement the Webcam plugin for CTA, and the usable IClone motions that could be applied to 2D actors. 

Q: What inspired you to start creating and selling your own content for the 2D Marketplace?

I felt there was a need for different animated effects and props. I love thinking outside of the box and taking creative risks to see if it would benefit the community. The 2D community itself has really been a big inspiration as well, which encouraged me many to join the Marketplace.

I would advise anyone with creative artistic talents to take the plunge and join the Reallusion 2D Marketplace. At first I was very skeptical, not knowing how my style of assets would sell. But I went ahead and made the big decision. The community is awesome and inspiring, and it is always rewarding when reviews pour in with positive support. 

Now I see my CTA store – Props for Props as filling a niche within the Marketplace and our content fits in very well. 

Q: What would you say to other artists considering starting out in the 2D Marketplace?

Overall my experience with Reallusion and the Marketplace has been very rewarding and I encourage those who are ready to bring their art and sell in the 2D Marketplace. It has an awesome community that supports it and makes selling a wonderful experience.

It would be an advantage to bring your style and artwork to this community as I am sure they will welcome it. Being in the 2D Marketplace for me in the time I have been there has really helped me hone the assets Props for props offers. There is always a need for “fresh” content that other creators can use, and I am thankful how it propels me to produce more content even if certain ones do not sell well, it is a teaching tool helping me to get a feel for what the community needs.

Q: Do you find the process of creating content for Cartoon Animator easy and enjoyable?

Very much so! When I am needing help, the Cartoon Animator 2D User Group is always there to answer any questions and walk me through certain processes. I can also access a plethora of tutorials on YouTube as well. Overall the learning process has been very exciting, both with the failures and successes. I was able to make my first short very quickly once I used the software. 

https://www.facebook.com/groups/CartoonAnimatorUsers/

Cartoon Animator makes it very easy to compile my creations, making packs and selling them. The more I worked with prop creation, the more passionate I got with the software as it matured. When the After Effects extension was added, it really blew my mind and opened more doors to creativity and pushed me to really explore the new possibilities.

“ With Cartoon Animator, an individual can create an entire show from start to finish, all on their own.””

Shane McKnight – Content Developer, Minister

Follow Shane McKnight

Facebook:
https://www.facebook.com/shanemcknight8

2D Marketplace:
https://marketplace.reallusion.com/cartoon-animator/author/Props%20for%20Props

Related Posts

Using AI Tools to Speed Up Cartoon Animator Workflow

Animation is something we all love—but let’s face it, the time it takes can be daunting. What if you could achieve professional-level results in just a few days? In this article, I’ll break down how I created a polished, high-quality animated short by combining Cartoon Animator 5 (CTA5) with AI tools, using an eight-step workflow that blends the best of automation and human artistry. This is a repeatable pipeline you can apply to client projects, contests, or personal creations.

Mark Diaz / 2DAnimation101

Enthusiastic in both animation and teaching, Mark Diaz is the CEO and Founder of 2DAnimation101. He is a passionate online instructor. He helps beginners all over the world to improve in animation and drawing. He has helped more than 52,000 students worldwide.

Mark is a speaker of TED Talks, “Can anyone become a genius.” His versatile talents also made him a Short Film Director and Editor for Autumn Leave Films.

Follow Mark’s Latest Courses

Step 1: The Story Idea

Every great animation begins with a story. Without a clear idea, there’s nothing meaningful to animate. When I started, I had no concept in mind. To spark inspiration, I turned to AI. I used a prompt generator to brainstorm ideas, and from the list of results, one immediately made me laugh: Two women in a hair salon—one claims she found a miracle weight-loss cure. The twist? She disguises herself so that “if the cake can’t recognize her, the calories don’t count.”

The concept was simple, funny, and, most importantly, feasible to produce within a tight timeline. With that spark of inspiration, I began visualizing the setting and how the characters would interact.

Step 2: The Script

Once I had the core idea, I moved to scripting. I already envisioned the setting—a hair salon—so I grabbed a reference image and fed it into ChatGPT, along with a prompt describing the scenario. In seconds, ChatGPT produced a fully fleshed-out short script, including dialogue and scene progression.

To make production smoother later on, I also asked ChatGPT to add visual descriptions for each line of dialogue—this saved me time during storyboarding. The AI even helped me brainstorm names. I went with Wilma and Rita, names that were easy to remember and fit the light-hearted, retro vibe I wanted.

Step 3: The Storyboard

Storyboarding is where the animation starts to take shape. Using ChatGPT, I designed a detailed storyboard plan structured like a spreadsheet: character actions, dialogue, shot types, camera angles, and framing. ChatGPT helped fill out this framework based on my script, which I then organized in Google Sheets for easy reference. This process is speedy, and it helps us to create the storyboard way faster than before.

When it came to visualizing panels, I decided on a drawing style inspired by Kim Possible—simple but expressive. With AI’s help, I generated consistent character designs across all panels. Big tip for you: to ensure high quality, I upscaled each image using GigaPixel, so I could zoom and crop without losing detail. This gave me the flexibility to plan shots creatively while keeping visuals sharp.

Step 4: The Animatic

The animatic is the rough cut of the animation, where you can see me putting all the puzzles together. With the storyboard in place, I moved on to creating an animatic—a rough sequence that combines images, dialogue, and music to test the pacing and mood. I generated the voiceovers with ElevenLabs, trying out different voices until I found tones that matched the personalities of Wilma and Rita.

For music, I turned to Suno AI. I recorded myself humming a tune, and Suno transformed it into a full instrumental track—fast and surprisingly good! I also generated a second track purely from text prompts. Laying everything out in Premiere Pro, I aligned the dialogue, music, and storyboard panels into a fully-timed draft that gave me confidence to proceed.

Step 5: Production

To start, I prepared the assets, drawing custom mouths and eyes in Photoshop for better expression and lip sync. I extracted clean characters, backgrounds, and key props, focusing effort where it mattered most—like the hair salon scenes.

Next came asset preparation. While I experimented with AI-generated eyes and mouths, I quickly realized they lacked the consistency and expressiveness needed for proper lip sync. So, I manually created these in Photoshop, drawing multiple mouth shapes for dialogue and expressive eye poses for key moments.

I extracted clean character layers, isolated props (like the fridge door), and kept backgrounds on separate layers. I focused most detail on the hair salon scenes, where character expressions were critical, while simplifying backgrounds and props in other scenes to save time.

Step 6: The Rigging

With the assets ready, I moved into Cartoon Animator 5 for rigging. Thanks to clean PSD layers and using Reallusion’s Photoshop template, rigging was smooth. I rigged both Wilma and Rita for full facial and body control, and created functional props, like the fridge door that could open and close easily.

For simpler scenes, I skipped complex rigs—sometimes a character or object was treated as a prop with swappable parts. This kept the setup lean and focused on what was actually needed for the camera.

Step 7: The Animation

Here’s where the magic happens! I created one Cartoon Animator 5 project file for each storyboard panel—18 in total—so that I could work efficiently and avoid bloated project files. I exported individual audio clips for each panel from Premiere, brought them into CA5, and started animating.

The earlier rigging and prep work paid off—I could reuse assets, duplicate similar panels, and just tweak them as needed. For example, panels featuring Wilma in similar poses were duplicated and adjusted rather than animated from scratch. This approach saved hours while maintaining high quality.

Step 8: Putting it all together

Once all panels were animated and rendered, I returned to Premiere Pro, swapping out the storyboard panels for the finished animation. It was a simple matter of clicking and dragging. The result: a polished 30-second short with clear storytelling, smooth animation, and engaging audio.

The result? A fast, pro-quality animation created in days—not weeks. This pipeline lets you combine AI and Cartoon Animator for client projects, contests, or just for fun, delivering top-tier results at record speed. Make sure you try it yourself, and have fun with it!

Related Posts

Free AccuRIG Versus CC Advanced AccuRIG

Rigging a character mesh was, in the past, a difficult and time-consuming task that was rarely enjoyable. It could take days to properly rig characters and setting envelopes or mapping vertices was anything but exciting. Auto-rigging became a thing but those pesky fingers were generally left out and none of them rigged a jawbone so that meant the fingers and jawbone were rigged in separate applications taking even more time.

Since 2015, when Reallusion introduced Character Creator, we have been able to leave behind the manual rigging allowing the application to take care of the technical work. We had characterization where we could match enough bones to map out a working skeleton from an existing non-Reallusion character, but AccuRIG gave us a powerful auto-rigging tool to animate our character meshes in little time.

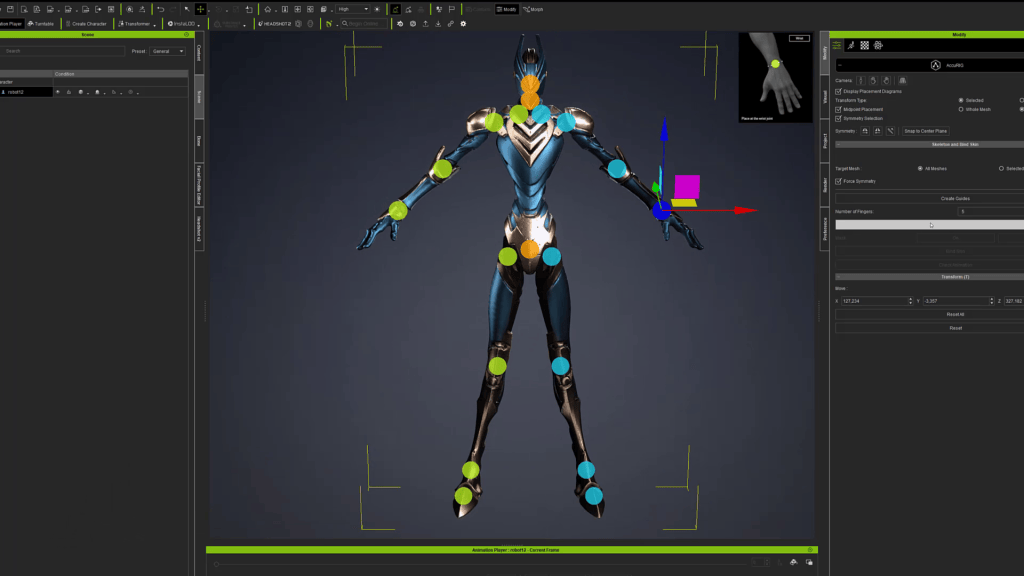
There are two versions of AccuRIG. A free stand-alone version that can be downloaded from the Actorcore website and CC Advanced AccuRIG that is integrated into Character Creator. Both are powerful auto rigging tools that share the same basic functionality with the Advanced CC version having more powerful tools such as Optimize or Decimate and Show/Hide mesh among other features.

What We Can Do in Both Free AccuRIG and CC Advanced AccuRIG

  • Automate rigging in five steps with free Actorcore AccuRIG
    Load Character, Check Model, Body Rig, Hand Rig and Check Animation guide us through the process of setting up and rigging the mesh. CC Advanced AccuRIG has a similar user-friendly process to achieve the same result.
  • Rig all types of Humanoid (Bipedal) character meshes
    This includes just about any mesh that can be considered bipedal. This opens up the possibility of imaginative characters like tree people, rock golems, living statues and whatever else our creative minds can come up with. It does not even require four limbs as we can mask missing limbs out.
  • Auto-Rigging and Manual Refinement
    Not only does the free AccuRIG provide automatic rigging, but it also allows us to modify that rigging. We can check animation and if we find something wrong, we can go back and make corrections to marker (joint) placement and reskin.
  • Joint Masking
    The concept is simple. It turns off bones of our choice which prevent them from accepting any motion. This allows us to freeze one bone or an entire section of bones from moving. If left active, these bones outside of the mesh can cause unwanted distortion as they will still influence some of the mesh. The bones run in chains (hierarchy) and these chains of bones can be selectively masked either in groups or single bones. This makes for a versatile tool that can rig any number of anthropomorphic characters that may not have all the limbs or fully functional limbs. Kai has a great tutorial on How to Mask Unused Body Parts… that goes into more detail over at Reallusion Courses.
Left Advanced CC with body masked for rigidity. Right Free CC with neck masked (Black equals masked).

Free Actorcore AccuRIG

This free auto-rigger includes:

  • Ability to use Low, Mid or High Poly Mesh
    Polycount is no longer an obstacle as both versions work with many different types of meshes from low poly to high poly count. It may take a bit longer to map those high poly meshes but it maps high to low with equal precision.
  • Preserves Volume
    AccuRIG preserves volume to control mesh collapse in areas where extreme movement is common.
  • Twist Bones
    Twist bones allow joints like wrists to twist without collapsing. Without twist bones lower poly meshes would collapse at some point. Twist Bones cover most joints that bend more than other parts and whose normal range is extreme.
  • Finger Rigging
    From 0 to five fingers either version of AccuPOSE can rig most hands and fingers (including knuckles) and provides easy to use markers to correct any occasional finger rigging errors.

Download the free Actorcore AccuRIG

Actorcore Free AccuRIG Quick Tutorial

CC Advanced AccuRIG

The more advanced AccuRIG in Character Creator has all the features of ActorCore Free AccuRIG, the easy rigging steps, marker placement, volume protection, and twist bones. Being part of Character Creator, CC Advanced AccuRIG has access to the the advanced features of Character Creator like InstaLOD Polygon Reduction, Mesh Editing, Bone Adjustment, Automatic Skin Weighting for clothing, Proportion, Spring Bones and many more advance, pro level features such as those below.

Select Hard or Soft Rigged Mesh

In CC Advanced AccuRIG we can select which parts of a character are soft or hard rigged. Soft is any mesh that has to move with the body during animation like clothing. After Advanced AccuRIG is finished, all other meshes become accessories attached to the character instead of skinned as cloth to the character.

In the case of a ring on a finger, the ring can be either skinned as cloth or unskinned and attached as an accessory. However the ring can distort when skinned with the character when the fingers are moved. An accessory would move as one object on the finger instead of part of it. Kai has us covered on this topic with a short tutorial on rigging multi-mesh characters.

Adjust Bones and Proportion using X, Y, Z Values

These more valuable tools not available in the free version. We can adjust the bones and bone proportions after skinning. This can be done to correct posture or limb penetration into the body. We can also lengthen bones after skinning to make limbs longer but keep in mind the mesh that is skinned to that bone or bone chain will move with it. This is very useful in the right situations.

Show/Hide Mesh for Accurate Editing with Mid-Point

As referenced in the above Rigging Multiple Mesh Characters section and tutorial, we can use the Scene Manager to select meshes that are to be accessories and hide them. This allows us to skin only the soft meshes like the body and clothing ignoring the hidden meshes which will become accessories. This eliminates the need to remove accessories before skinning the character body and clothing. We can then select Midpoint Placement in the AccuRIG menu if not already selected. This allows for a more accurate placement of markers/bones in the mesh.

Ready for Physics, Skin weight, Proportion Editing in Character Creator

Characters auto-rigged with the Advanced CC version are prepped for physics, automatic skin weighting and manual skin weight editing. As mentioned earlier, we can also edit the proportion of bones and skinned mesh after we’ve finished rigging if without having to jump back into AccuRIG again.

Left: Skin Weighting by AccuRIG and editable. Right: Physics weighting for cloth.

Optimize or Decimate with RLBone

There are a lot of options out there for character meshes but unfortunately, not all of them work well in the iClone ecosystem. This eliminates a lot of useful iClone pipeline tools. Equally unfortunate is the fact that a lot of these third party meshes carry a high polycount that might not work as efficiently as possible within iClone or its pipeline. The good news is the features of Advanced CC AccuRIG and Character Creator can make these third party characters iClone ready converting them to more accurate RL Bone skeletons with skinning and compatible with all aspects of the iClone ecosystem while preserving the facial bones of the original character.

With the character being RLBone compatible we can use the Optimize and Decimate feature to easily make clones of the characters at 7K and 800KB each. There is also a custom option to chose which optimization style and level serves you best.

If you are like most animators I know, you can never have enough characters. Leverage your existing library of third party characters and bring new life into old assets with CC Advanced AccuRIG and Character Creator.

CC Advanced AccuRIG Quick Tutorial

Try the Character Creator Free Trial today!

Which AccuRIG?

That all depends mainly on your needs and your budget. Both versions of AccuRIG can perform basic auto-rigging to get your character animation ready. The Advanced CC AccuRIG in Character Creator comes with many professional features that can greatly enhance your characters. We’ve covered some of them here but there are many more.

A big factor to consider is Facial Rigging. Free AccuRIG DOES NOT support or create facial bones. If this is required, then CC Advanced AccuRIG inside Character Creator is needed and can create facial bones including mouth and eyes.

While Actorcore AccuRIG is free there is a free trial available for Character Creator so you can try out both versions to see which best fits your needs. If you are budget constrained like so many of us are then the free version can certainly get you into the iClone ecosystem where you can start learning how to work with the tools.

Summary

I find old fashioned manual rigging to be a real creative buzzkill and a tedious process in many cases. It was nothing to take several days to a week to skin a character only to have it come back downline for either technical or creative revisions. Those pesky fingers could get to be a real pain depending on the character or creature. Bone envelopes could be the worst to deal with at times.

When Reallusion released Character Creator I immediately started creating characters again both with the default CC meshes and my own meshes from ZBrush and other tools. It was so nice to not have to even consider rigging other than the few minutes it usually takes to rig a decent mesh in Character Creator. I was far from alone as many other creators from newbies to veterans jumped on the Character Creator bandwagon over the years.

With the introduction of AccuRIG, both the free Actorcore and Advanced CC version, the idea of custom characters is not out of reach anymore. Almost anyone can rig a bipedal, anthropomorphic character with AccuRIG.

Why wait? Download the free Actorcore AccuRIG and give the Character Creator free trial a go to see what you’ve been missing if you are still manual rigging or have never rigged a character mesh before.

Besides… it’s fun seeing your characters come to life!

Tips

  • CC Advanced – Use Orthogonal View for Marker Placement
    This allows for a more refined placement by keeping the viewport in the proper perspective for placing the joint markers.
  • Use both front and side views when placing joint markers
    This allows for proper placement by viewing the joints from the front and side making the appropriate adjustments. Remember to Skin Bones again anytime you move or edit the placement of a bone.
  • CC Advanced – Frame Left or Right Hand when placing joint markers
    This not crucial but rather an example of saving time to easy jump to each hand when placing the markers. It is so essential to have the marker placement right to avoid twisted joints which, while not often, can happen on models not in a good A or T pose.
  • CC Advanced – Remember to press the Bind Skin button after making joint edits
    THIS IS A MUST, or your edits will be lost. If you move a bone or bones in CC Advanced, you must press the Bind Skin button before proceeding for the changes to be re-skinned. It doesn’t matter how many bones you move or edits you make as long as you remember to bind the skin again. This will soon become another rote function with enough experience.
  • In Free Actorcore AccuRIG we choose joint markers to activate the Mask feature. In Advanced CC AccuRIG we choose the bone to active the Mask feature.
MD McCallum - WarLord

MD McCallum – WarLord

Digital Artist MD “Mike” McCallum, aka WarLord, is a longtime iClone user. Having authored free tutorials for iClone in its early years and selected to write the iClone Beginners Guide from Packt Publishing in 2011, he was fortunate enough to meet and exchange tricks and tips with users from all over the world and loves to share this information with other users. He has authored hundreds of articles on iClone and digital art in general while reviewing some of the most popular software and hardware in the world. He has been published in many of the leading 3D online and print magazines while staying true to his biggest passion, 3D animation. For more information click here.

Related Posts

Reallusion Unlocks Creative Potential with Trial Access to 130,000 Premium Assets

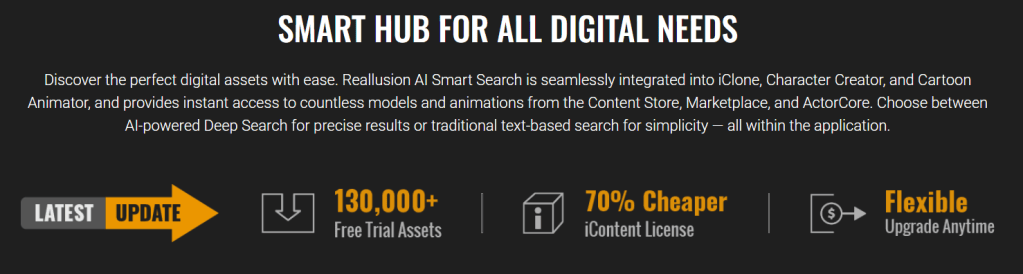
Reallusion announces a major enhancement to its AI Smart Search, transforming how 3D creators discover, access, and apply content within iClone and Character Creator (CC). This powerful update delivers unmatched ease and accessibility, empowering users to elevate their projects without compromising flexibility or cost-efficiency in today’s fast-paced digital content landscape.

Access Best-in-Class Content with Ease

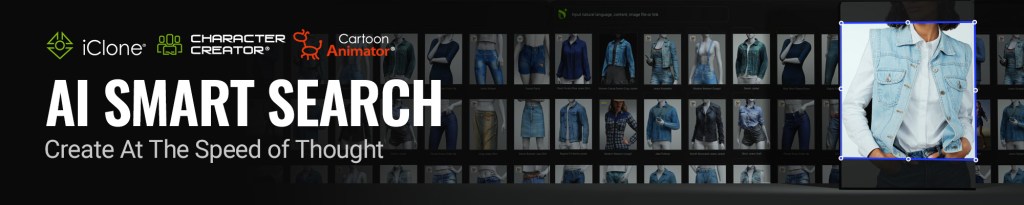
Fully embedded within the Reallusion ecosystem, the in-app AI Smart Search curates best-in-class content with exceptional accuracy, ensuring top standards of quality and relevance in every result. Whether searching for assets in animation, gaming, or virtual reality, its streamlined interface offers seamless navigation—making it a pleasure to explore Reallusion’s vast libraries of digital human assets. Users can easily browse over 30,000 clothing items, 5,500 pairs of shoes, 3,000 hairstyles, 23,000 professional 3D motions, and much more.  

Unprecedented Accessibility with Try-Before-You-Buy

To eliminate waste and purchase regret, AI Smart Search introduces a groundbreaking feature: try-before-you-buy access to 130,000 premium assets from Reallusion’s Content Store, Marketplace, and ActorCore. Users can now evaluate content integration directly within their workflow, ensuring every asset aligns with project needs before spending a single cent.

Exclusive Rate for iContent Offers Unbeatable Value

Priced at just 30% of the standard goods, iContent is designed exclusively for image and video rendering within iClone and Character Creator. It offers an affordable way to access and build a mountain of assets optimized for AI-driven projects, pre-visualization, video production, and high-quality rendering. 

iContent only requires upgrading to the Standard License when 3D export or pipeline integration is needed. Plus, upgrades can be made anytime by paying just the price difference — no hidden fees or extra charges guaranteed.

Direct Instant Purchasing Within the App

Instant purchasing arrives in AI Smart Search with seamless in-app payments using Direct Access (DA) Points. With just a few clicks, users can buy the assets they need instantly—without leaving the application—streamlining workflows and saving valuable time.

Reallusion DA Points offer a simple micro-payment alternative. Unlike credit cards or PayPal, DA Points can be preloaded into accounts for easy, verification-free purchases with no handling fees.

Embrace an Affordable Future of Creative Possibilities

AI Smart Search disrupts the traditional model of digital asset stores by enabling precise content discovery powered by machine learning. Whether searching with natural language, images, text inputs, or finding similar assets, it makes exploring vast libraries effortless. Users can try thousands of assets without financial commitment and use iContent for rendering, and upgrade to Standard licenses only when export or pipeline integration is needed. 

This approach delivers fast access to high-quality designs, fueling creative freedom and efficiency. Ultimately, AI Smart Search marks another milestone in Reallusion’s mission of pushing the boundaries of modern creativity through seamless, intuitive, and empowering technologies.

Related Posts

Studio-Grade Sync for Solo Creators: iClone Timecode in Action

Manageable cross-tool workflow for frame-precise media timing

Nick Shaheen, a solo creator passionate about bridging the gap between vision and execution, focuses on streamlining character animation workflows across multiple tools. With Reallusion’s latest Timecode Plugin for iClone, Shaheen highlights how individual creators and small teams can now stay perfectly in sync—without the complexity or large overhead of a studio production.

Nick Shaheen

I’m Nick Shaheen, a radiologist by profession and a CG artist by passion. My journey into animation started in an unexpected place—medical illustration. Early in my career, I spent a fair bit of time creating motion graphics and anatomical visuals to help explain complex medical concepts. That experience taught me the power of visual storytelling and deepened my appreciation for animation as a way to communicate ideas dynamically.

Nick’s Instagram / YouTube Channel

The Everyday Challenge of Sync

If you work across softwares like iClone, Cinema 4D, and Premiere, you know the pain of keeping motion capture, voiceover, and live-action elements in lockstep. For smaller teams, there’s rarely a dedicated tech artist to wrangle assets — it falls on you. And when you’re combining body and facial mocap with pre-recorded audio, even a few frames of drift can kill the performance. Until now, my workaround involved manual clip nudging, makeshift slates, and guesswork. But that’s changed with iClone 8.53’s new timecode functionality.

Perfect Timing: Timecode Support in iClone

With the Timecode plugin, whether you’re capturing mocap with iClone Motion LIVE or importing timecoded data from other softwares, iClone can seamlessly embed, preserve, and even edit timecode directly in the timeline—ensuring precise alignment and easy correction. This enables frame-accurate sync of mocap, audio, and live-action plates across tools — eliminating manual tweaks and timeline drift.

Timecoded Workflow: iClone to Cinema 4D

I recently built a short animated musical scene — think Broadway energy meets stylized CG. Using Rokoko for full-body mocap and a pre-recorded voice track (AI-assisted), I needed tight, frame-accurate sync. iClone’s timecode export meant I could bring it straight into Cinema 4D with zero offsets. It freed me to focus on refining the emotion, not chasing timing errors.

The workflow is simple: switch your timeline view to Timecode in preferences, then right-click any clip with embedded timecode and choose “Align with Timecode” to instantly lock it in place. When exporting, make sure the timecode is baked into the FBX file. Whether you’re crafting a short film or blending CG with live footage, this gives even solo creators and small teams a professional-grade sync pipeline with zero hassle.

Finishing Touches for Perfection

The final polish came effortlessly thanks to iClone’s built-in features. AccuLips delivered precise, audio-driven lip sync, while AccuFACE brought expressive facial tracking into the mix. To refine emotional beats, I used Face Key to adjust brows, eyes, and mouth shapes with intuitive morph controls.

To finish it off, the Casual 20 Clothing Pack gave my character a clean, customizable look with multiple material options and morph-compatible designs — perfect for quick, professional styling without having to dive into Marvelous Designer.

Final Thoughts

For solo creators and small teams, iClone’s Timecode support isn’t just a convenience — it’s a workflow breakthrough. What once required manual syncing, endless adjustments, or external tools can now be handled natively, with frame-perfect accuracy. It brings big-studio precision to compact productions, letting creators focus on storytelling and performance rather than chasing down timeline drift. If you’re working across tools and juggling multiple layers of audio, mocap, and animation—this is the kind of update that transforms your entire pipeline.

Related Posts

Animating Props for Beginners

When a new animator gets started it can be an overwhelming process just to learn the terminology.  Experienced animators can sometimes forget how confusing and difficult it can be for beginners to wrap their heads around all the animation tools in just one package like iClone, and this doesn’t include POST work.

With this in mind I was recently reminded that not everyone sees how easy it can be to grasp the animation basics of simple tasks like moving an object across the screen. A lot of new animators haven’t even heard of keyframes or a timeline so it can be a very frustrating experience at first. In this article I will cover a few basic concepts with some short tutorials to demonstrate the various processes.

Prop animation can be just as important as character animation in terms of what it can add to a scene. A multi-object or skinned prop can be animated on the timeline with keyframes. In case you are completely new to animation, keyframes capture the state of the prop or character based on its transform-attributes like location, rotation and several other factors. While iClone does most of the work behind the scenes we still need to be familiar with a few basics.

Type of Mesh – Static or Animated

This is simple. If you right-click and there are no Perform Menu actions, then it is static. This doesn’t mean it can’t be animated. It just means it has no built-in motions. We can still animate it as a whole or in parts if those parts are separated or skinned to some sort of skeleton we can manipulate with the Animate Prop tools. Almost anything can be animated on at least the X, Y, and Z axis in most cases.

Why is Everything Moving?

It’s happened to a lot of us, including yours truly, and still does from time to time. What I’m talking about is when you add a prop or number of props to the scene and then you play it back… some or all of the props will seem to disappear or move back to the point of import or origin, then slide over into place when as the scene plays.

What happened was simple and can become an annoying and irritating habit. In this scenario, when we added the new prop or props, we did not return the playhead to the start of the timeline. This creates a motion that starts at frame one even on static props. The prop then slides across the scene to the point where you placed it as the animation plays out.

The simplest way to stop this is to RETURN THE PLAYHEAD TO THE START OF THE TIMELINE BEFORE ADDING ANY PROPS.

There is also an easy way to remove this unwanted and inadvertent motion by moving the playhead down the timeline to a point where everything is in its proper place then selecting the affected props and right clicking to choose Remove Object Animation.

Keyframes

This topic cannot be covered enough until you completely understand the concept. We can consider keyframes to be markers that show us where we made changes to a prop’s location, orientation or other attributes. It not only marks the location on the timeline it also provides a visual aid for us to know where to make edits or insert new edits.

I also want to familiarize you with the basics of Curve Presets before we get into moving long distances with a prop. Curves can be considered a more middle to advanced tool but the curve presets are already set up and can be utilized very easily by beginners even if you still don’t grasp what a curve is. Below is a quick primer on using Curve Presets to add more than just steady movement. It will demonstrate how we can get various effects from just applying the presets to the existing keyframes. If you are more adventurous then you can try out the Curve Editor but it is not a beginners level tool. Here is a link to the Curve Editor: Getting Started tutorial in iClone 7 when it was introduced. It wouldn’t hurt to take a look at that tutorial as not every beginner struggles with the curve editor.

In the case of moving a prop from Point A to Point B, we need to make sure there is a keyframe at the BEGINNING and ENDING of the movement. This will make the prop move along until it reaches the ending keyframe.

To accomplish this, we use the basics of movement:

  • set a keyframe (if there already isn’t one) where the box is located at the START of the movement.
  • Move down the timeline whatever number of frames are required, then move the box to the desired location. This will set up a motion between the keyframes generated by iClone that move between the starting and ending keyframes. In the early days of animation these were called tweens as they filled in all the frames “in-between”.
  • We can speed up the motion by SHORTENING the distance between keyframes, transversely we can slow down the movement by LENGTHENING the distance between keyframes.

One practical example of this is something like a Sci-Fi speeder racing across the desert. It’s a very simple animation with no moving parts on the speeder.

Pivot is Very Important

The importance of the pivot location cannot be stressed enough. If, for example, you want a door to swing open and closed but the pivot is in middle then the door will revolve around that pivot instead of the proper side of the door. We can edit the pivot with the Pivot section of the Modify menu.

There is a preset diagram of pivot points we can click on for front, middle or back in nine directions. This will place the pivot point in the chosen location within those parameters. We can also edit the pivot manually with the Edit Pivot button in the same Pivot panel of the Modify menu. This will activate a 3D-Gizmo to move the pivot to your desired location.

Saving Custom Perform Motion

We can also add our own custom motions with the ability to edit the menu when needed. There is a line on the Timeline for collecting and saving our motions. As mentioned earlier there is (with the prop selected) a right-click Perform menu that controls any built-in motions and allows us to use our own custom motions. If there are any motions listed in the right-click Perform menu then the prop already has some motion embedded and we need only to click on one of those motions to add them to the prop. To add our own custom motion take a look at the short video below demonstrating how we use the Collect Clip feature on the timeline to collect and save the motion either to the Perform Menu or other locations.

Props on a Path

Paths are another essential tool for beginners to get an object to move from Point A to Point B. They work with all sorts of props like cars, hot air balloons, even characters but a path is particularly good with aircraft and objects like our Speeder hovercraft.

We can easily create a path by point and clicking in the workspace to place path points. We can manipulate these path points in terms of space between them, rotation and other orientations.

In its simplest form we start on frame 1 with the object attached to the first path point then we move down the timeline however many frames are desired or to the end and use the same Path eyedropper tool to select the path point. From here the path will fill in with a visual reference for easy scrutiny or editing.

Scaling a Prop in Real Time

Another simple effect that beginners can use right away for fast animation is scaling to change the scale of the prop in one or the other axes. We can make a prop larger, smaller, flatter, wider and taller. When you set a keyframe at both ends of the animation we can capture the scaling in real time as the video plays out.

Animating Prop Diffuse Color

This is an often-overlooked feature when learning iClone. The Diffuse Color can be keyframed and anytime an attribute can be keyframed it can be animated. In the case of the Diffuse Color, it means the colors blend over time to change from one color to another.

Visibility

This is yet another easy-to-use setting that can toggle visibility of the entire object on or off. It works the same as the previous tutorials except we will use visibility under Display – Visible in the Display menu of the modify tab.

Summary

While we have covered many attributes of animating a prop, in reality we have only scratched the surface of what can be done. These are the very basics of keyframe and timeline-based animation. I have used very basic scenarios to keep things simple and straightforward, but these techniques apply to almost all props.

We have covered how to keyframe the movement of an object, embed the custom animation and save it for future use. We haven’t covered all attributes, but we can do that at another time as this should be plenty to consider when you are just starting out.

I realize there is a lot to take in when setting out on this animation journey and like any other occupation or hobby it takes time, patience and practice. Don’t start with complicated scenes. Animate simple projects like the ones in this article and you will start to come to grips with what we can do with a powerful animation tool like iClone.

We haven’t covered Prop Puppeteering as that will take an entire article by itself, and these basics can be put it immediate use by beginners. Also keep in mind that the hyperjump example was far from the most sophisticated jump-in but it serves the purpose of learning while providing something that can actually be used. Give it a try, then improve it. You might be surprised at what you’ve learned.

Manual

Creating A Perform List

MD McCallum - WarLord

MD McCallum – WarLord

Digital Artist MD “Mike” McCallum, aka WarLord, is a longtime iClone user. Having authored free tutorials for iClone in its early years and selected to write the iClone Beginners Guide from Packt Publishing in 2011, he was fortunate enough to meet and exchange tricks and tips with users from all over the world and loves to share this information with other users. He has authored hundreds of articles on iClone and digital art in general while reviewing some of the most popular software and hardware in the world. He has been published in many of the leading 3D online and print magazines while staying true to his biggest passion, 3D animation. For more information click here.