Animation Journey: From Drawing Cartoons to 3D Worlds
This article is the third installment of my Garry’s ongoing journal series, From 2D to 3D. If you haven’t read previous posts, then we recommend starting there:
- From 2D to 3D: Why After 10 Years I Moved to 3D Animation
- From 2D to 3D: My First Steps with iClone and Character Creator
In the first post, I shared the pivotal moment that led me to transition from a decade of 2D work into the world of 3D animation. In the second, I explored the tools, challenges, and creative breakthroughs that shaped my early steps. Now, in this third entry, I take on my biggest test yet—building my first fully custom 3D character from scratch.
Entry 3 – Make or break
By now, I’d played with my new toys, iClone and Character Creator (CC4). I’d clicked all the buttons just to see what they do. I’d binge watched every Youtube tutorial Reallusion had ever posted, and I’d even reached out to some of the pros for advice.But the honeymoon phase was over. It was time to knuckle down and see if I could actually make something. A full 3D actor. From scratch. By myself.
I opened up Character Creator 4 and took a deep breath. I knew I wanted to create a stylised character that kept the look and personality of the 2D actors I have made. A cartoon character with exaggerated features, custom proportions, and a head that looked like it belonged in a Pixar short.
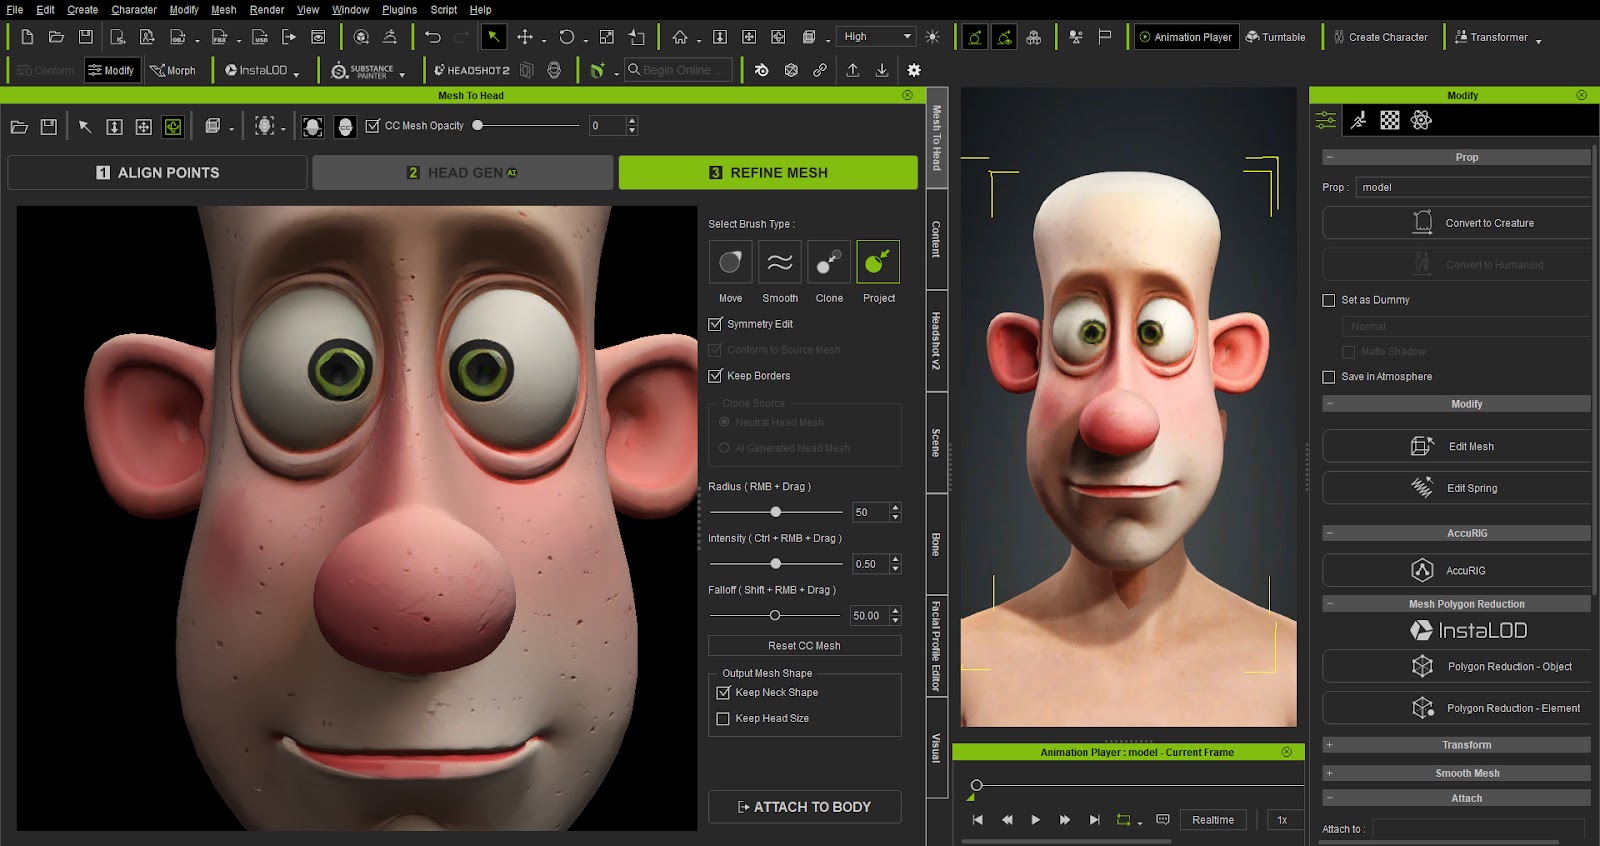
I generated a 3D head model in the AI software Meshy, saved it as an FBX file and applied that skin mask to the HeadShot 2.0 base model. And even hearing myself say that sentence out loud puts a smile on my face and demonstrates just how far I have come in such a short space of time, because a couple of months ago, none of that would’ve made the slightest bit of sense to me.
The decision to do as much of the heavy lifting as possible directly inside Character Creator was the right decision for me, because the more I used CC4 the more comfortable I was using it. Processes became more instinctive, although there were still plenty of times I needed to refer back to the tutorials and I now use ChatGPT so much that we are best friends.
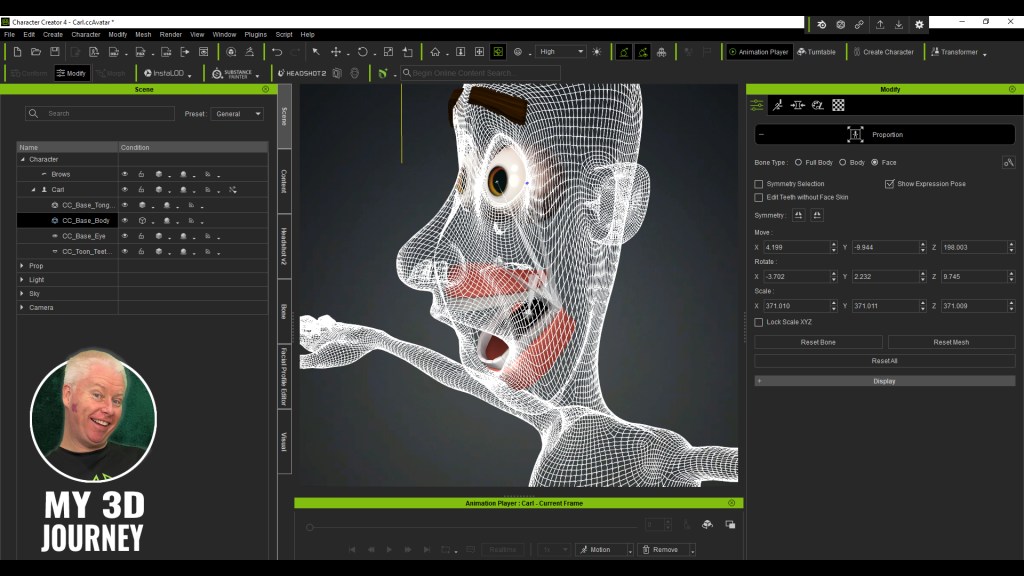
With the help of CC4s morph sliders I was able to make instant changes to my characters look, both for his face and body. And when I had maxed out the sliders and needed to push the extremes, I had tools on hand like the Proportion tool and Edit Mesh which allowed for precise control of even the smallest details.

Working in 2D character design requires hours of drawing and redrawing mouth shapes and eye sprites. Now I found myself modelling my actors face to accommodate these shapes, making sure that his teeth were in the correct position when he smiled and that his eyes stayed in his sockets when they rotate. The biggest advantage of working in 3D was the opportunity for more subtle face movement as well as the most extreme. I already had the feeling that if I could see this character through to the end that he was going to be more expressive and have more personality than almost any character I have been able to make in 2D.
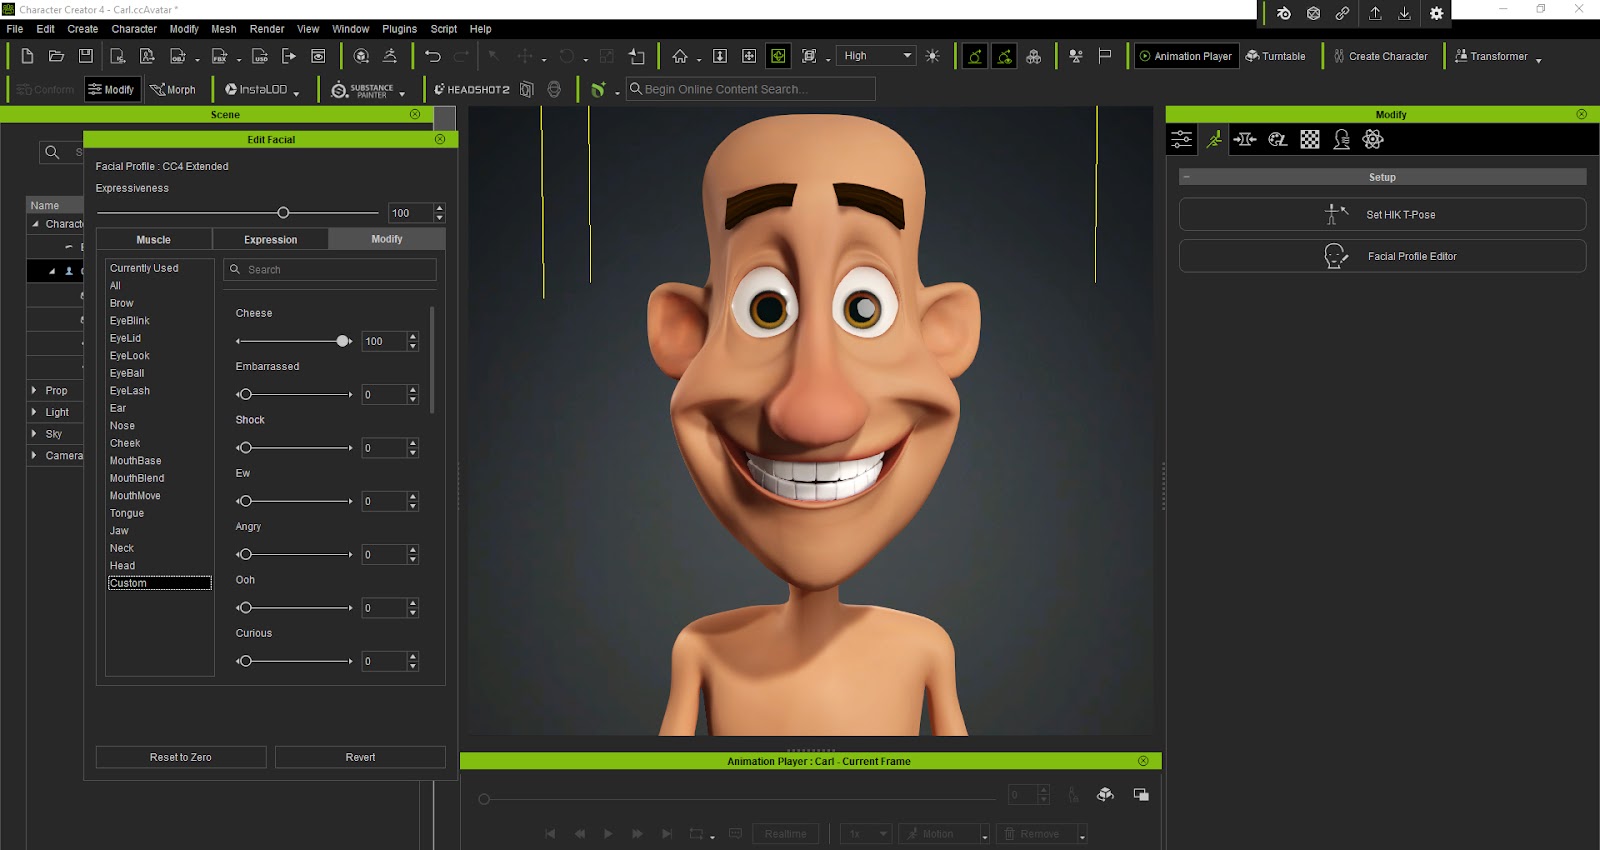
I had named my first 3D actor Carl. Carl now had a face, but he was going to need a body. Naturally, I started with the default male base in Character Creator. He was tall, chiseled, and clearly went to the gym more than I ever have. But this wasn’t going to be that kind of character. I wanted to create something stylised. So instead of chasing perfect anatomy, I decided to do something much more cartoony and goofy.
This is where the morph sliders and the Proportion tool in CC4 came into play, both of which are incredibly powerful. You start with a few innocent tweaks, like bringing the waist in or rounding out the shoulders. But then you start exceeding the parameters of the sliders like a mad scientist just to see what your character would look like with a giraffes neck or six foot long legs. Whatever you do, there is nothing more fun than seeing your changes happen in real time.
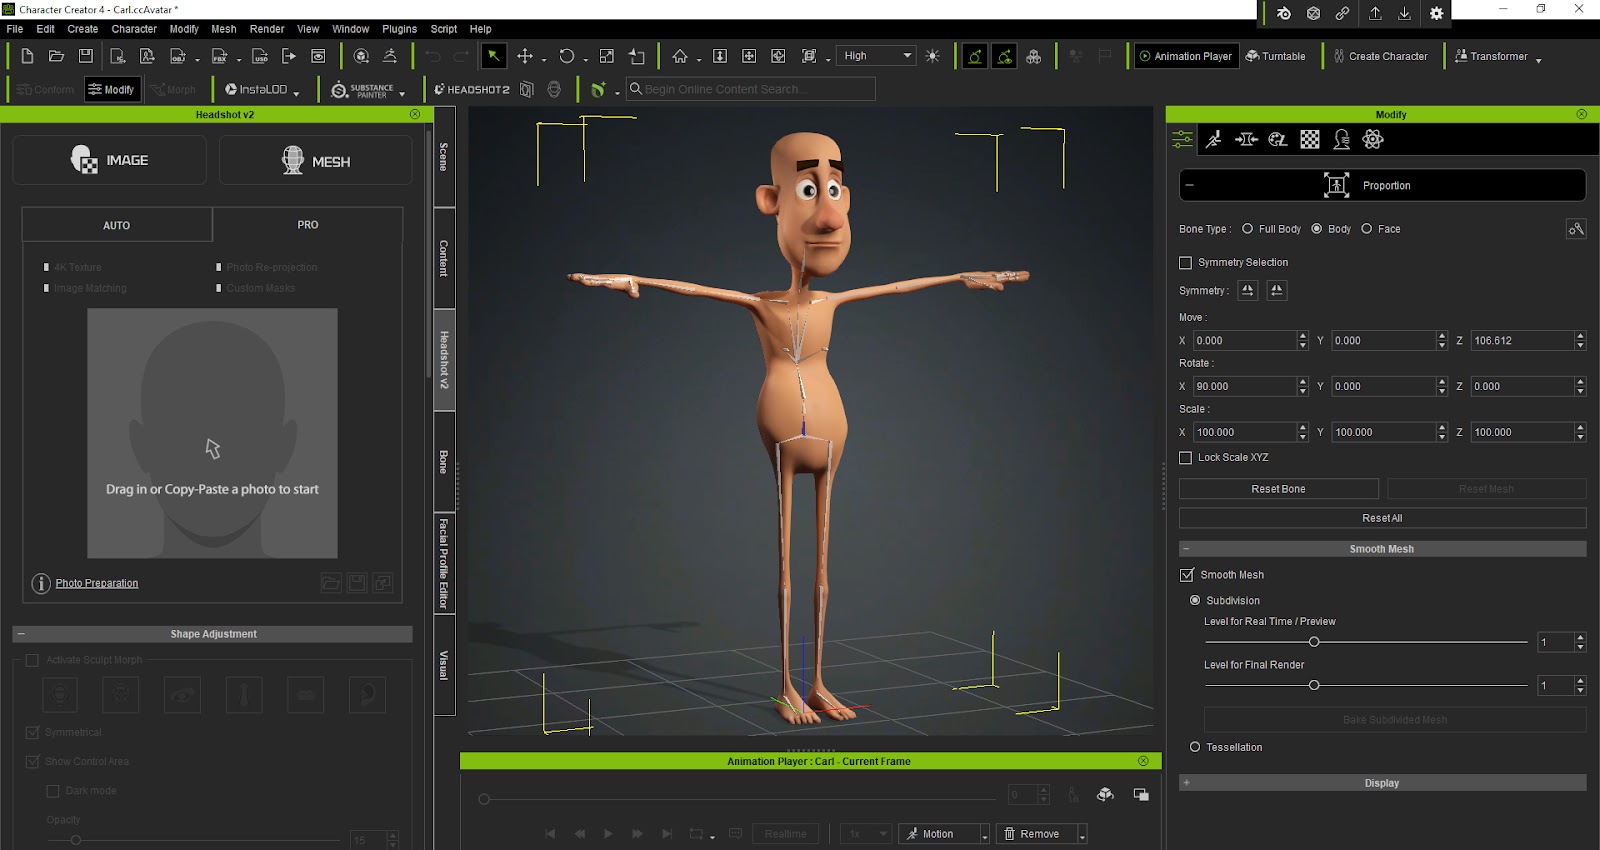
I wanted a 3D cartoon style version of my own 2D characters. Something that could live in the same exaggerated world as my 2D characters but still feel grounded in reality.
The morph sliders let me dial in specific details like a softer jawline, broader nose, flatter chest, slightly hunched shoulders. The Proportion tool helped me fine tune the overall body shape including a shorter torso, longer arms, slightly bowed posture.
I was building a custom character in 3D that felt like mine. Not just in style, but in shape. He wasn’t a template anymore. He was starting to feel like a cartoon reflection of my style. I wasn’t just learning the tools, I was connecting to them.
What followed was hours of experimentation, frustration, small wins, and spectacular failures. Sliders were pushed. Meshes were mangled. Eyeballs were accidentally deleted. But slowly, something began to take shape. I wasn’t just clicking anymore, I was making choices. The chin needed to be wider? I could do that. The ears a little lower? Too easy. Make the eyes match my style and vision, not just a generic preset? Done. Suddenly, I was no longer following the tutorial, I was breaking away from it.
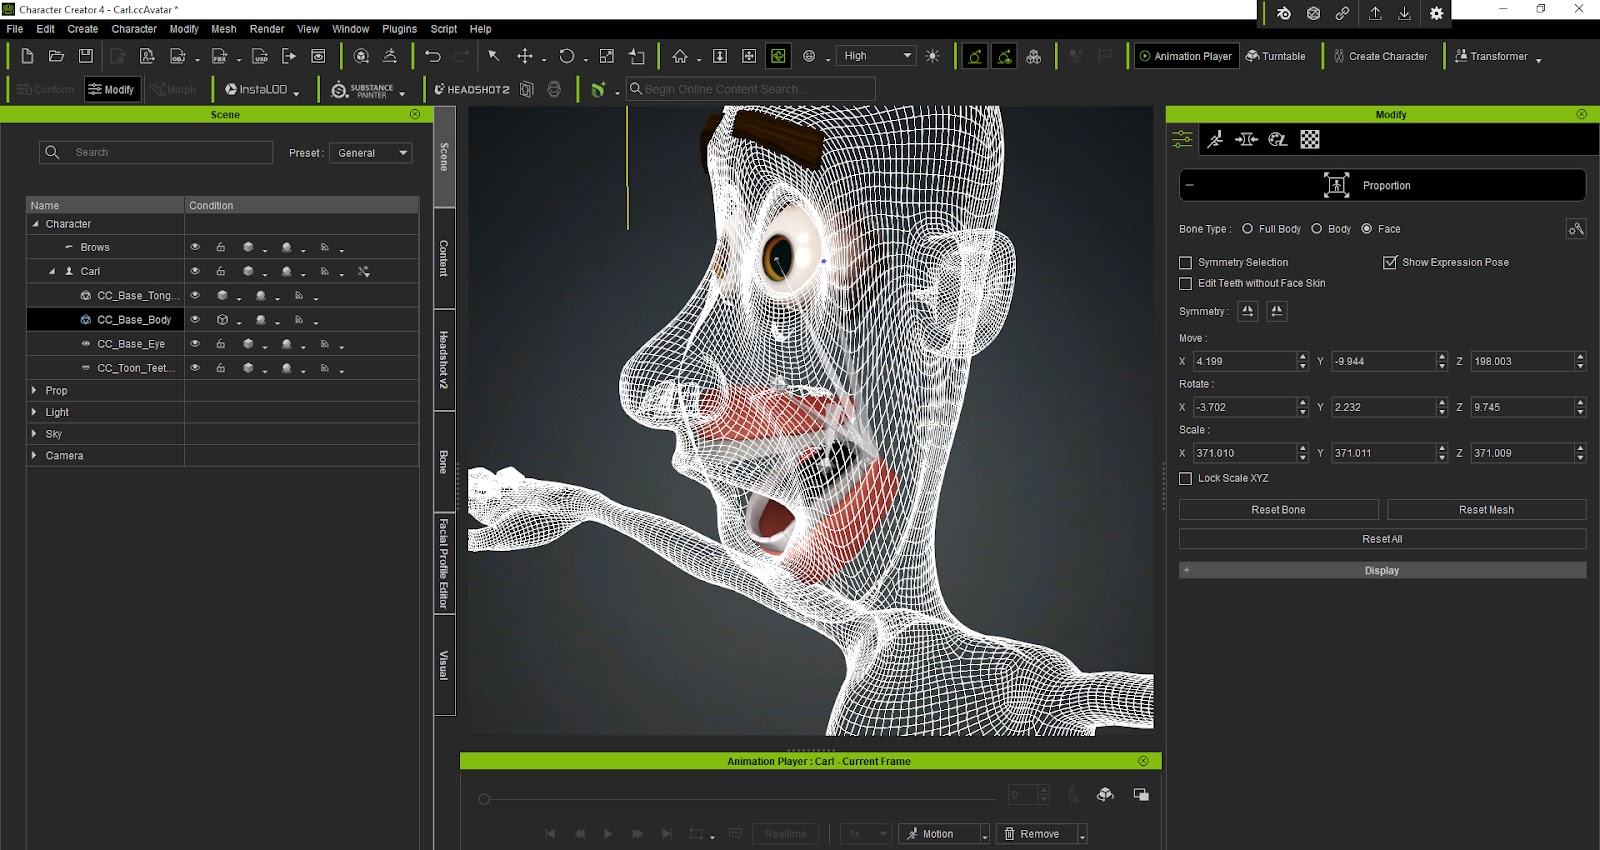
I decided to export my actor into Blender to start tweaking the mesh. Ten minutes later, I was questioning every life choice I had ever made and quickly went back to CC4. Blender was going to have to happen, but not today.
The lesson I learnt at this point in my journey is that it’s not about perfection, it’s about commitment. I told myself “You’re going to finish this actor, no matter what. No backing out. No abandoning the file in a WIP folder that you never open again.”
I have a long way to go. And so does Carl. But he was starting to take shape and my first steps into the 3D world were more than exciting enough to make me keep going.

Garry Pye – 2D/3D Animator | Content Developer
Garry Pye is an Australian illustrator, animator, and Cartoon Animator instructor with over a decade of experience in the animation industry. Known for his unique blend of creativity and humor, Garry’s work spans from teaching animation techniques to creating innovative content that helps both novice and experienced animators improve their skills.
Garry’s enthusiasm for storytelling and animation shines through in all his projects, whether it’s creating animated shorts, preparing educational tutorials, or sharing his expertise by teaching. With a passion for making animation accessible and fun, Garry has built a community of learners who not only appreciate his knowledge but also his infectious sense of humor and dedication to his craft.
Follow Garry Pye’s iClone Page|2D Animation Page|2D Marketplace
Related Posts
- The Evolution of Cartoon Animator: A Conversation with Garry Pye
- Control Diverse Characters for Live Performances with CTA5.3
- How to Level Up Your 2D Animations Like a Professional