首頁 » Page 30

Reviving Historical Figures with Character Creator and iClone

Jose Andrés García – 3D ARTIST AND CREATIVE

Jose Andrés García is a 3D artist and creative professional from Málaga, Spain. He first developed an interest in 3D animation through his work in decoration. He also worked in architectural visualization.

He started with Daz Studio. He gradually mastered Character Creator and iClone. Eventually, he integrated these tools with Unreal Engine to tackle more advanced projects. His expertise has been instrumental in crafting stories about Spain’s history.

For several years, Jose has collaborated with The Legacy: El Legado Español. The organization is dedicated to promoting Spain’s legacy in North America. This collaboration has involved organizing traveling exhibitions in Spain and the USA. These exhibitions celebrate the 250th anniversary of American independence and Spain’s support for the thirteen colonies.

Jose’s use of Character Creator and iClone in these exhibitions has gained significant media attention. It was notably featured on NBC during an exhibition in Washington D.C. that ran until April 12th, 2024. Among his notable works is the historical series “We The Spanish People.” This series received considerable recognition in both Spain and the United States.

“Creating and animating this kind of stories presented itself as a real challenge. After trying several programs, I discovered iClone and Character Creator. That’s when everything changed. The workflow and the ease of creating animations and characters surprised me a lot. I was also impressed by the possibility of transferring everything to Unreal Engine.”

Jose Andrés García – 3D Artist & Creative

Transitioning from Architecture to 3D Artist

Hello, my name is Jose Garcia. I have been working as a freelancer for several years. I want to share with you how I started in the field of 3D animation. I also want to discuss the creation of historical videos. I have always been passionate about drawing and painting.

I worked for many years as a decorator. However, my dream had always been to tell animated stories beyond infographics and architectural video presentations. I wanted to create stories where characters interact with each other and their environment. This was finally achievable when I discovered Reallusion tools.

Creating and animating this kind of stories presented itself as a real challenge. After trying several programs, I discovered iClone and Character Creator. That’s when everything changed. The workflow and the ease of creating animations and characters surprised me a lot. I was also impressed by the possibility of transferring everything to Unreal Engine. I spent some time learning and practicing both programs. Finally, I set out to create a project. Through this project, I can tell stories of my country using 3D animation. This method would reach a young and not-so-young audience in an entertaining way. Now, they could watch episodes of Spain’s history and its heroes, many of them forgotten.

“My dream had always been to tell animated stories beyond infographics and architectural video presentations. I wanted to create stories where characters interact with each other and their environment. This was finally achievable when I discovered Reallusion tools. “

Jose Andrés García – 3D Artist & Creative

Creative process of “We The Spanish People”

Thanks to this storytelling approach, my videos have been widely disseminated. They are exhibited in traveling exhibitions both inside and outside of Spain. One of the most notable works is the video “We the Spanish.” It was created for the presentation of the book “The Spanish Legacy; We the Spanish People.” The book was presented at the National Library of Spain in September 2023. The book was created by The Legacy association in collaboration with the Ministry of Defense. It is a journey through postcards that span three centuries of history. It showcases the cultural footprint that Spain left on what is now the United States.

Several of my videos are included in the book, viewable via QR codes. The creative process in this project has been very smooth. This is thanks to the integration of iClone, Character Creator, and Unreal Engine. The possibilities for creation and editing are almost endless. With Character Creator, I can even use AI enhanced plugins like Headshot. These plugins allow me to quickly generate a face and body animatable 3D character from a photo or portrait image.

For characters where we have paintings or images, like Admiral Luis de Córdova, I use those sources for their creation.

For those without documentation, like General Montiano from northern Spain, I create the characters based on facial features. These features are appropriate to their place of origin. I also consider the era. It’s incredible to see how a forgotten hero like General Montiano is now easily recognizable with his story. You can simply search for him on Google.

Character Animation with iClone and Unreal

In the case of the project “Nosotros los Españoles” (We the Spanish People), the main animations focus on three heroes: General Montiano, Admiral Luis de Córdoba, and the Corsair Olavarría. They are protagonists of previous videos. These heroes appear in the explanatory postcards included in the book and seen in the museum paintings.

iClone is a fantastic program. In combination with Unreal Engine, it allows us to transfer our characters and animations with motion capture.”

Jose Andrés García – 3D Artist & Creative

Using the Museum Environment Kit from Unreal Engine, we created a realistic setting. In this Unreal Engine setting, we recorded everything as if it were a real movie.

We added secondary characters from ActorCore. It helped make digital people appear as if they were visitors to the Spanish Legacy Museum.

Experiencing the Spanish Legacy Exhibition

Thanks to associations like The Legacy: El Legado Español en los Estados Unidos de América, the history of our country has been widely disseminated. Our country’s crucial contribution to the development of what is now the USA has also been widely shared.

The Legacy has organized traveling exhibitions throughout Spain over the past few years. These exhibitions showcase Spain’s impact and the contributions of the Spanish Viceroyalty. This occurred during the 300 years our ancestors were in those lands. These exhibitions have been held in over 30 Spanish cities, where people have enjoyed the videos I’ve created. These videos tell mostly unknown chapters of this part of Spanish history.

Additionally, an exhibition was organized in Washington D.C. at the Spanish Cultural Center. Another was organized at the Army War College. The Army War College is the most advanced center of the US Army, which trains its future leaders.

Learn More

https://www.spainculture.us/city/washington-dc/we-the-spanish-people

https://www.thespanishlegacy.com/en/we-250th-aniversary

https://www.youtube.com/@thespanishlegacy6236

https://www.defensa.com/espana/we-the-spanish-people-expone-washington-aportacion-espanola

Related Posts

Cutting-edge technologies at Choffin Career and Technical Center

STEM Students at Choffin Career & Technical Center employ cutting cutting-edge technologies with iClone and Character Creator

Choffin Career & Technical Center offers Youngstown City School District scholars career and technical education opportunities combined with hands-on learning experience to prepare them for their futures.

ABOUT CHOFFIN

Originally opened in 1912 from a generous gift from the C.C Choffin estate, Choffin Career and Technical Center has provided specialized training for various skilled trades and occupations beyond traditional high school and college curricula for decades. From automotive repair to game design, Choffin has been preparing students for careers in various industries.

In September of 1973, a new building was built to house Choffin Career and Technical Center to accommodate 1,100 juniors and seniors from Youngstown’s high schools.The opening of the new center introduced several new courses, including account clerk, auto body, advanced secretarial, and many more, supplementing existing courses such as appliance repair, drafting, and cosmetology.

Today, fifty years later, the Choffin Career and Technical Center continues to serve both Youngstown students and adults, offering updated versions of existing courses and introducing new ones aligned with technological advancements. The programs are organized into five academies: Skilled Trades, The Arts, YouMed, Business, and Public Safety. Additionally, the center provides adult training in practical nursing, dental assisting, and surgical technology.

While career tech training was once considered an alternative to college, it now serves as a pathway to higher education, particularly for those pursuing STEM fields. The Choffin Center remains committed to accomplishing three primary goals for Youngstown students: graduating on time, earning industry credentials, and being prepared for both career and college pursuits.

TEACHING TOMORROW TODAY

In 2019 Interactive App and Game Design was added to the program available at Choffin. In this program, high school juniors learned how to do computer programming as well as design games using Unreal Engine. 

In their senior year, they learned 3D modeling and animation using software such as Blender, Character Creator, and iClone. In 2023 the program evolved and became the Real-time 3D Technology program. The Real-time 3D Technology program is designed for the world of entertainment, arts, and technology. In this program, our students learn how to develop video games, create 3D worlds, animate 3D characters, and develop AR and VR experiences.

This knowledge prepares students who wish to enter the Mobile App and Video Game industry with vast knowledge in Design, Programming, 3D Art, and Animation. The skills learned throughout this program will open the doors to endless possibilities in industries such as Game Design, App Design, Film, Architectural Visualization, Artificial Intelligence, Augmented Reality, and Virtual Reality.

WORKING WITH REALLUSION SOFTWARE

In the real-time 3D technology program at Choffin, our students are no longer confined to traditional textbooks and lectures. With the advent of cutting-edge technologies like iClone and Character Creator, the classroom has become a vibrant hub of creativity and innovation. From crafting digital worlds and games to producing virtual production sets, movies, and VR experiences, our students are embracing the limitless possibilities of these powerful tools to redefine the way they learn and express themselves.

This year we purchased iClone 8 and Character Creator 4. These programs allow our students to create lifelike characters, animate them with fluid movements, and design immersive environments with ease. Whether they’re crafting a fantasy adventure, building a futuristic city, or reimagining historical events, iClone provides students with the tools they need to turn their ideas into reality.

Complementing iClone is Character Creator, a versatile tool that enables students to customize and personalize their characters with unprecedented precision. From facial features and body proportions to clothing and accessories, Character Creator gives our students the freedom to express their creativity and bring their characters to life in ways never before possible. With a vast library of assets and a seamless integration with iClone, Character Creator empowers our students to create unique and compelling characters that drive their narratives forward.

But the impact of iClone and Character Creator extends far beyond the realm of storytelling. In our classroom, students are using these tools to explore a wide range of disciplines and subjects, from art and design to computer science and engineering. With iClone and Character Creator, students can collaborate on projects, experiment with different ideas, and develop critical thinking and problem-solving skills in a dynamic and engaging environment.

One area where our students are using iClone and Character Creator is in the creation of digital worlds, games, and virtual production sets. Students are leveraging these tools to design interactive experiences that transport players to new and exciting worlds, challenge them with puzzles and obstacles, and immerse them in rich and immersive narratives. Whether they’re exploring ancient civilizations, traversing distant galaxies, or embarking on epic quests, our students are pushing the boundaries of what’s possible with iClone and Character Creator.

One of the things that set iClone apart for us is its seamless integration with our Perception Neuron suit. By pairing iClone with our motion capture suit, our students learn how to capture human movement for editing inside of iClone. This allows them to create characters that move and behave in a way that feels natural and lifelike, enhancing the overall quality and realism of their animations.

In our classroom, iClone and Character Creator are invaluable tools for students interested in filmmaking and virtual production. With their intuitive animation tools and powerful rendering capabilities, students learn how to produce high-quality movies, animations, and virtual reality experiences. From previsualization and storyboarding to final production and editing, iClone and Character Creator provide students with everything they need to bring their cinematic visions to life on the screen.

iClone and Character Creator have revolutionized the way our students learn, create, and collaborate in the classroom. By empowering them to explore their creativity, express themselves, and push the boundaries of what’s possible, these tools are transforming education at Choffin and shaping the next generation of innovators, storytellers, and digital artists. 

Choffin Career and Technical Center Hosts Market Day

At the bustling Choffin Career and Technical Center, Friday April 26th marked a day of innovation and creativity as the annual Market Day unfolded. Among the many exhibits, one particularly caught the eye of the press – the Real-time 3D Technology class, where students showcased their mastery in digital artistry. Utilizing cutting-edge tools like Character Creator and its Headshot 2.0 plugin, they demonstrated to attendees their skills by crafting lifelike digital humans from photographs.

Throughout the day, the students explained their process, explaining how the digital humans created can be used in projects such as games, movies, VR experiences, and training simulation apps. From the initial creation in Character Creator 4 to the seamless animation in iClone, powered by Perception Neuron motion capture suits and animations from Mixamo, the students at Choffin Career and Technical Center showcase their dedication and expertise.

WFMJ.com News weather sports for Youngstown-Warren Ohio

Follow Choffin Career and Technical Center:

Facebook:
https://m.facebook.com/ChoffinCTC/

Instagram:
https://www.instagram.com/choffinctc/

Epic Showdown with a Demigod | Character Creator and iClone

Mohammad Khalikh

Mohammad Khalikh, trained and educated in India, is a skilled previs artist renowned for his contributions to both live-action and animation projects. His clientele includes prestigious names such as Lenovo India and Xolair, with one of his previz works notably featured in a war movie available on Amazon Prime Video India.

To explore more of Mohammad’s artwork, follow his portfolio on ArtStation under the username @grizzlyartist.

Khalikh’s Contest Entry

The artwork was a submission to the Pwnisher Boss Fight 3D Montage Challenge in 2023. Utilizing seamless integration with Unreal Engine, iClone, and Character Creator, Mohammad showcased an epic fight between the hero and the ultimate boss with imaginative storytelling and precise technical execution.

Concept Phase

The moment I saw the template for the Boss Fight, I realized I wanted to create a sequence from the epic Ramayana where Lord Ram fights Kumbhakarna. Additionally, I chose Unreal Engine for this project, as I had very little time to execute this challenge.

Using Proxy Models

An important aspect of using the Unreal Live Link with iClone is understanding the correct layout and measurements. Using the Unreal template I received from the 3D challenge, I exported the proxy models from Unreal to iClone with just a click. This helped me understand the layout of the characters in the scene, enabling me to place them in the correct positions accurately.

Generating Crowds

Another critical aspect of this challenge is that it involves a war sequence, which requires crowds. To address this, I quickly created a humanoid monkey soldier using the Headshot 2 plugin. I then used Blender to add a tail with springbones to the monkey character. Additionally, I utilized the available Gargoyle and elephant characters from the Reallusion store. My focus was on creating various animations. And these characters are engaging in combat with each other.

Crafting Characters

The characters were put together with ease in Character Creator. The clothing for the characters was readily available, as it had been prepared for some of my previous projects involving Indian characters. One of the greatest advantages of using CC characters is that the clothing can be easily saved and reused for multiple human characters. It’s as simple as drag and drop!

Making Prop Animation

Animating the bow and arrow is a must. So, I exported the bow from Character Creator and rigged it in Blender. Then, I easily animated it in iClone using the Edit Animation Layer feature. The bones created in Blender were accessible here to create motion for props.

Using Unreal Transfer

After having all the main characters, crowds, and props animations ready, I utilized the Unreal plugin and CC auto setup to export all the characters along with the animations into Unreal Engine. This process also facilitated the reassignment of textures and shaders in Unreal Engine.

Composition in Unreal Engine

After setting all the animations, I utilized the free available models from Sketchfab and other sources like Quixel Megascans to create the 3D environment. Additionally, I incorporated the Ultra Dynamic Sky. This add the sky and lighting for the scene, resulting in the final render.

Thoughts

Creating this boss fight scene was a thrilling and challenging experience. It pushes the boundaries of my skills in Character Creator and iClone. The integration with Unreal Engine allowed me to bring my vision of an epic showdown from the Ramayana to life with vivid detail and dynamic animations. 

From generating crowds to crafting intricate character animations, each step of the process showcased the flexibility of these tools. I hope this scene inspires others to explore their creative limits and leverage the incredible capabilities of modern 3D software. Thank you for joining me on this journey! I look forward to sharing more of my work in the future.

Related Posts

Animating Commercial Quality Film with CC UE Control Rig

Maya director animates sci-fi clone story with Character Creator, iClone, and Unreal Engine Control Rig

Dom Fred – Director / Producer / Editor / 3D Animator

Dom Fred

Dom Fred has established a remarkable career in the television advertising industry. He has made significant strides in digital and 3D production tools.

Over the past two decades, he has expanded his expertise to include music videos. He also creates documentaries, catering to a global clientele. In 2007, Dom founded his own company, DOM ANIMATION STUDIO. He specializes in product and post-production. He seamlessly integrates 3D characters into real environments and special effects (SFX). He also creates martial arts and acrobatics action sequences for commercials.

“The Uni-T” is a 3D animated short film, by Maya animator and director Dom Fred. It showcases how filmmakers can leverage the CC UE Control Rig. This rig can animate Character Creator characters inside Unreal Engine with precision. It enlivens full-body movement and facial expressions using the familiar MetaHuman Control Rig.

In this short film, Dom Fred utilized Character Creator, iClone, and ActorCore‘s vast motion capture library. He combined these with Unreal Engine Control Rig tools. This highlights the full animation compatibility Character Creator users now have with these powerful tools.

The Birth of “The Uni-T”

Written by Alick Macaire, “The Uni-T” is a 3D animated short film by Maya animator and director Dom Fred. This project showcases the innovative use of the CC UE Control Rig to animate Character Creator characters within Unreal Engine. It allows for precise full-body movement and facial expressions through the MetaHuman Control Rig.

The universal CC standards offer Unreal developers unprecedented flexibility in character customization, while providing access to a vast content ecosystem. This enables the deployment of animated digital doubles, stylized avatars, biped creatures, and crowd simulations.

This science fiction short film “The Uni-T” narrates the story of Sergeant Dominic Helion. He wakes up on the human space colony Libra 2 with no memory of his identity. As he uncovers combat clones in his image, he embarks on a journey to understand his singularity and achieve unity, despite the obstacles in his path.

Technical Mastery of Tools

Dom Fred utilized ActorCore‘s extensive motion capture library to enhance the authenticity of live combat sequences in “The Uni-T.” The project employed advanced tools like iClone , ActorCore, and the Unreal Engine Control Rig. Together these tools forma state-of-the-art production pipeline, that light speeds any animation workflow. Animations that would take weeks can now be done in days.

Character Creator, with its digital human character Kevin, exemplifies the level of detail and realism achievable with the Reallusion ecosystem.

Character Creator, with its digital human character Kevin, exemplifies the level of detail and realism achievable with the Reallusion ecosystem. 3

The iClone Unreal Live Link plug-in simplified the animation process. It allowed for efficient control and rendering of 3D animations from iClone to Unreal Engine. With this plugin you can control characters, lights, cameras, and animation directly from iClone into Unreal Engine.

Collaboration with Reallusion

Years of collaboration with Reallusion have enabled Dom Fred and his team to push the boundaries of 3D technology. They have advanced real-time digital production to new heights. The integration of the CC CONTROL RIG plug-in into their production pipeline added an accent to the creation of “The Uni-T,” allowing for direct interaction with characters and ultra-realistic motion capture from ActorCore.

The CC CONTROL RIG facilitated full-body movements and facial expressions using the MetaHuman Control Rig. This synergy offers unprecedented flexibility in character customization.

Production Process

During the production of “The Uni-T,” the ability to adjust animations directly within the Unreal Engine timeline proved invaluable. It was also crucial to add and modify animations. This flexibility allowed for precise control over complex scenes and character expressions, enhancing the overall storytelling. The use of face and body control poses across different Character Creator characters streamlined the animation process. It ensured consistency and efficiency.

Final Thoughts

The CC-UE Control Rig has revolutionized 3D animation. It enables seamless interaction between CC characters and the Unreal Engine environment. It provides unprecedented control over all tools. Dom Fred’s latest creation, “The Uni-T,” exemplifies the power of Reallusion’s and Unreal Engine’s 3D technology.

For this team, the production of “The Uni-T” is a milestone in 3D animation. It showcases the capabilities of the CC-UE Control Rig plug-in. This project not only highlights their technical expertise. It also reflects their dedication to pushing the boundaries of digital production, to deliver an immersive and visually stunning experience to audiences.

Follow Dom Fred:

Website:
https://www.domfredfilm.com/accueil

LinkedIn:
https://www.linkedin.com/in/dom-fred-films-81904194/

YouTube:
https://www.youtube.com/channel/UCaEVZPzkWUsg9Wti9Cao4Vw

Facebook:
https://www.facebook.com/profile.php?id=100063571358642

Vimeo:
https://vimeo.com/spaceagentsmysteriousax/videos

Related Posts

Photo or Image to 3D Face

When I first discovered iClone in version one it had a powerful image to 3D face tool that was unmatched in the industry as far as I could find. What impressed me was using a photo of the long-running James Bond actor Roger Moore. The character mesh looked nothing like Moore. Having already been disappointed by the early photo-to-face tool in Poser, which did everything but look like the reference photo, I wasn’t expecting much.

The default mesh had a thin face and head along with an equally thin body that did anything but match Roger Moore’s appearance at the time. After a short wait, I couldn’t believe what I was looking at. It WAS Roger Moore in the face and head despite the body being thin.

Both use Auto Mode. The Left has no shaping while the right has stylized shaping.

After this, I rounded up several more pictures of former Bond actors like Sean Connery, Timothy Dalton, and Pierce Brosnan. All were very good copies of the original actor as the tool seemed to shape the head according to the image. Maybe it was just my imagination but that thin mesh head suddenly filled out with different images and became the basis of a test clip called “The Faces of Bond” which helped to sell me on iClone as a viable tool.

Even being new to iClone I was able to put the clip together in one day. Something unheard of at the time, particularly when animation could cost thousands of dollars per minute to produce. My project cost was the cost of iClone and my time.

Both images use Auto Mode with no shaping. Anyone can reproduce reasonable copies of famous actors, people or characters.

Today Reallusion’s photograph to 3D face tool is known as Headshot and resides in iClone’s close cousin, Character Creator and it is easy to use with a minimal learning curve like other Reallusion products. Whether it be a photograph or an AI-generated image, Headshot can use that image to make a very close copy with minimal work.

As of yet, I haven’t found an easier-to-use photograph to 3D face product that turns out such stunning characters with so little time and effort.

AI-Enhanced Headshot 2 Plugin

Headshot, like Character Creator, was a major boost in creativity and productivity when it was released. This is particularly true for those of us who might be lacking in a skill or two when it comes to creating characters with unique faces or reproducing well-known faces of celebrities or newsmakers. Character Creator is loaded with tools including integration with ZBrush for quick and easy round trips between the apps. However, not all of us are master sculptors of facial features but this photograph to 3D face tool makes us look like pros.

Headshot gives digital artists or character devs a quality photo-to-face tool that can bring more detail to your characters. Headshot gives us the ability to take an image (photo or ai-generated) and create a high-quality character with great facial features and expressions. It can be done with little to no intervention in the Auto mode or more detailed shaping and guidance with the Pro mode. Both modes are included in the plugin. 

If you are new to creating 3D characters, you’ll soon learn there is no easy way to do so without applications like Character Creator. Not only does creating a character involve making the basic character mesh, but there is also UV mapping, rigging, and skinning down to knuckles and toes. You have to learn about binding and poly collapse along with poly count and many other 3D nuances.

Or… you can use Character Creator and the Headshot plugin.

Why Use Character Creator and Headshot?

To save time and frustration while getting great results. Being able to tweak those results right up to rendering time is another bonus. Character Creator and Headshot handles all of the character creation tasks for us while we concentrate on making the best character we can.

It wasn’t that long ago that a 3D artist had to have several applications like Maya, 3DS Max, or Cinema 4D for the majority of the work. A painting program like 3D Coat for UV texturing. Sculpting programs like ZBrush or Mudbox for more organic shapes and the list was long. None of those tools are cheap and back in the early days they were prohibitively expensive for the average freelancer while shutting out the home animator completely.

Character Creator and Headshot’s pricing make the tool more readily available to a wider group of animators and character devs for fast turnaround which saves time and money. Smaller studios can benefit from getting more of out their existing talent pool without increasing anyone’s workload. It may decrease the workload while improving character output.

With Character Creator and the Headshot plugin, we can dump the expensive apps and the long, difficult learning curves to concentrate on creativity instead of the tedious technical work required to create a great character with full function and a massive expression library.  

Character Creator characters also work in pipelines for Unreal Engine and Nvidia Omniverse with plugins and USD file support. You can control the action from iClone while using the game and render engines for a more cinematic look and feel.

Auto Mode

Auto mode excels at making groups of unique characters in a ridiculously easy way. In this tutorial, I wasn’t looking to exactly duplicate the head in the image, which is possible, but I was more interested in quickly turning out unique characters. This was a quantity-over-quality endeavor (1024×1024 texture resolution) looking to turn out as many characters as possible, so I did not do any reshaping to tweak the head to match the image.

Pro Mode

Don’t let the title fool you. While it is Pro mode, you don’t have to be a pro to use it. In fact, it gives us more tools like the image matching tool and sculpting tools to get results of 4 times higher resolution (4096×4096) compared to Auto Mode. When used in combination with each other, Headshot can create even more professional and delicate close-up views of virtual humans without tweaking any sliders or other morphs.

However, if we use the morph sliders to help shape the head we can more closely match our source image with overall head shaping and individual feature shaping.

The second part of the tutorial below shows how easy it is to use the pro mode with the sculpting features to more closely match the source image. I’ve purposely kept the tutorials short as we can always go to Kai’s tutorials for more details.

TIP: If necessary, you can run your character through both modes using the Auto mode for hair generation and the Pro mode with the Image Matching tool for more detailed sculpting. Go through the Auto mode first then save the hair it generates before going on to the Pro mode for more shaping after which you can load the generated hair onto the character as the hair will conform to the head shapes.

Common Features for Both Modes

Facial Ethnicity Detection

The Headshot AI Engine detects the human face and creates 3D heads with naturally matching face types. Typical profiles for Caucasian, Asian and African are provided, and each with subtle variations based on the nature of your source images.

As you can see, behind the scenes, Character Creator does a lot of work that we don’t have to even think about. As I stated earlier it was the powerful “image to head” technology that brought users like me to iClone back in version one long before AI and since then, with AI, Reallusion has improved on that tech.

Match Skin and Body Types for Generated Heads

Character Creator gives us several body types to choose from whether it be for “Image to Face” or Mesh. These body types range from a currently loaded character to male, female, baby, and neutral. It also gives us some initial tools on skin type like Clean Soft, Clean Rough, Scalp, Beard and Scalp. These help to tell Character Creator how to handle the final output and deserve some time spent here with experimentation. It is recommended that you try all of these types at least once to get an idea of what they can do.

Hair Generation

One of the unique features of Auto mode is Hair generation. Character Creator takes care of this process with no intervention on our part as it relies on the original image for input. According to the website it also adds an additional mesh layer with an alpha mask to soften the edges. The generated 3D hair is also conformable to other character head shapes.

Build a 3D Hair Library

Auto Mode Hair generation can help you build a library of Character Creator hair. Start a habit of saving generated hair and before long you will have a library of hairstyles for your characters. Since the process is handled by the software we just have to wait for the magic to happen, save the hair, and watch our library grow.

One thing we find out, as animators and digital artists, is the fact that you can never have too many hair assets in your inventory. Not only does Auto Mode do all the work but you get the hair as a bonus.

The AI-enhanced plugin does a great job of initial shaping so for a large number of characters, auto mode is a click-and-forget procedure for each character.

Headshot Morphs 1000+ Detailed Shape Refinement

Another feature that makes Headshot so powerful is the Headshot Morph 1000+. From full head and face sculpting to individual features – head contour, face, eyes, nose, mouth, and ears, the six levels of morph detail enable users to hover over different control areas, and use directional mouse drags to refine the corresponding mesh shape intuitively. You can quickly achieve the professional and detailed look of 3D scan models.

Even more, the search function in Headshot Morph 1000+ helps to locate the targeted morph out of 1,125 facial morphs categorized by unique visual icons and naming within a second, users are given control over all possible facial shapes for the most accurate source images to recreate all possible human facial varieties regardless of race.

Source Photograph or Image Prep

There are some things to keep in mind when searching for or creating source images. Foremost is a good image with soft, diffused lighting. We don’t want any harsh shadows on any area of the face as it may come out as a dark spot on the character’s face. A main offender is a side shadow which makes one side of the face too dark and one side of the face light resulting in a less than desired result that looks more like a dirty face.

From the Source Photo Guide in the Headshot Manual:

  • A good image/photo is the key to great result of Headshot 3D head generating process. There are five crucial factors to kind in mind when it comes to choosing a good image or taking a good photo.
  • The image used for realistic 3D head generation should be a clear, well lit picture of a full head facing front, with nothing obscuring the facial features. The film format of the image can be .bmp, .jpg, .jpeg, .png, .tif or .tiff.
  • Depending on the mode you use for generating the head, the concept of an ideal image are basically the same yet differ in terms of resolution and cropping.

Mesh Head Option (New in Headshot 2.0 Update)

There is also a mesh option with Headshot 2 that allows us to replace the head of a character with a different head mesh such as creating an anthropomorphic cat or dog with human, bipedal characteristics with a working animal mesh head. While this article focuses on the Photo to Face options I also wanted to point out the mesh feature for those that may not be aware of it. This powerful, but simple method involves mapping points on the mesh head to match up with Character Creator’s mesh and controls. You can have as few as 24 points or more if needed to define areas like the back of the head or odd shaped ears. There is also an auto-map feature that, in my experience, matches anywhere from 80 to 100 percent of the points needed leaving only minor adjustments and maybe a few additional points.

Overview of using Mesh feature for bipedal Cat character. “Imagine cat” (https://skfb.ly/6R6Qv) by nonlly is licensed under Creative Commons Attribution (http://creativecommons.org/licenses/by/4.0/).

As usual, Character Creator does the hard work for us. You can get more information from my review on the Mesh option when it was released providing an overview of the process.

Summary

It doesn’t matter what size operation you have, from a one-person studio to a major motion picture studio, Headshot can save a lot of time which saves a lot of money that can be budgeted elsewhere or possibly even go into that ever-elusive concept called “Profit” to make your life better.

Using AI-generated images, stock photography, or our images, Character Creator and Headshot provides us with a consistent and feasible method of creating highly detailed characters for close-ups, crowds or actor groups. We don’t need a supercharged set of skills to produce a great character. Just a good source image, Character Creator, and the Headshot 2 plugin.

Click here for an overview of the 7 steps to create an AI-generated character.

MD McCallum - WarLord

MD McCallum – WarLord

Digital Artist MD “Mike” McCallum, aka WarLord, is a longtime iClone user. Having authored free tutorials for iClone in its early years and selected to write the iClone Beginners Guide from Packt Publishing in 2011, he was fortunate enough to meet and exchange tricks and tips with users from all over the world and loves to share this information with other users. He has authored hundreds of articles on iClone and digital art in general while reviewing some of the most popular software and hardware in the world. He has been published in many of the leading 3D online and print magazines while staying true to his biggest passion, 3D animation. For more information click here.

How to Create Kid-Friendly Educational Animation Step by Step

Prosenjit Biswas

Hi, my name is Prosenjit Biswas, and I am a freelancer from India. Since childhood, I have been captivated by animation, superheroes, and anime characters. This passion inspired me to pursue a career as a freelance 2D animator. Additionally, I teach digital graphic design at my local school, where I enjoy sharing my knowledge with aspiring animators and educators who want to create educational animations for children or personal YouTube channels. I am here to guide you through every step of the animation process, making it easy and enjoyable. Let’s get started!

1. Finding Your Idea

  1. Identify Your Target Age Group: Determine the specific age group you’re targeting.
  2. Incorporate Educational Elements: Consider teaching numbers, letters, moral values, or social skills.
  3. Draw Inspiration: Use classic fairy tales, children’s books, and fables for timeless story ideas.
  4. Ask “What If” Questions: Generate unique scenarios, such as “What if animals could talk and had their own adventures?”
  5. Develop a Simple Plot: Create an engaging story with elements of adventure, mystery, or problem-solving.

2. Writing Your Script

Turn your idea into a story. The script needs to be easy and understandable for kids. Include funny and engaging lines to attract them. If you don’t know how to write a script, use AI software like ChatGPT to generate one quickly.

3. Voice Recording

I usually use Adobe Audition for recording, but you can use any software you like. Audacity is a great free option. If you don’t want to record your voice, you can hire someone or use AI voices, which are now very human-like. Some AI voice tools include ElevenLabs, Play.ht, Speechify, and Murf, with various free and paid plans.

4. Collecting References

Collect references for your ideal character and scene. This helps in defining the character style and personality. Develop a unique art style that distinguishes your educational animations, whether it’s whimsical, cartoonish, or realistic. Use sites like Behance, Google Images, Pinterest, and ArtStation to gather references for your project.

5. Storyboarding

Storyboarding is crucial for complex projects. It helps plan camera angles and character interactions with props and other actions. For simpler animations, a storyboard may not be necessary. I use Clip Studio Paint for storyboarding and composite in Filmora. You can use any drawing software or even simple pen and paper.

6. Character design

This is a kid’s video, so I focus on creating happy and energetic characters that evoke joy and have cute reactions. Chubby characters are also adorable. Kids typically enjoy videos featuring colorful, engaging characters with vibrant personalities. Popular types of characters include:

  • Cartoon Animals
  • Fairytale Figures
  • Friendly Robots

I draw all my characters in Clip Studio Paint. I start with simple, easy lines and then add some details. I focus on the hand and leg joints because these parts need to be movable. I always create easy-to-animate characters. 

For coloring, I use the Adobe Color website to choose my palette, then apply the colors to the characters one by one. Character color is very important as it represents various moods and situations. After coloring, I place the character on a premade template, putting all layers into the premade character folder. Then, I adjust the bones, especially the hip joint, which is essential for cartoon animation because it changes the character’s body weight. Finally, I recheck the bone names and export the character as a PSD file

7. Head Turn

Cartoon Animator has a very useful feature called the 360 Head Turn. This allows you to take a character and make the head turn easily, as demonstrated in my tutorial video. The 360 Head Turn transforms 2D art into 3D-styled characters with up to 360 degrees of motion for deeply rich performances. Additionally, it offers Photoshop round-trip integration for editing multi-angle characters in and out of the 360 Head Creator.

8. Animation

For some scenes, I use premade walk motions, but mostly I create custom motions. Using the IK (Inverse Kinematics) and FK (Forward Kinematics) features, along with the End Effector, I place keyframes to pose the character, then apply easy ease to the character and adjust the timing.

Motion Pilot

Motion Pilot is a great tool that adds a new dimension to your animation. With the help of your mouse, you can animate anything in a minute. Simply select the object, open Motion Pilot, adjust the slider, click preview, then press the spacebar. Now you’re ready to animate.

Motion Path

Motion Path is a line that helps you animate anything along your preferred trajectory. Just create a line, select the object, then select the path and adjust the path progression bar. It’s that simple.

9. Export

You can export images in BMP, JPG, TGA, PNG, and GIF formats. For videos, you can export in WMV, AVI, MP4, popVideo, MOV, and WAV formats. I use After Effects, so I export as a JSON file with all PNG sequences.

10. After Effects Script

The After Effects script is a game-changing step for Reallusion. Many users rely on After Effects, and now they can edit in After Effects with ease. Simply import the JSON file into the Cartoon Animator AE script. Once the file is fully imported, you can begin editing the scene. I added some blur effects, motion blur, glow, and layer styles before rendering the file in MP4 format.

11. Compositing

When all scenes are ready, I bring them into After Effects. Here, I add various effects, transitions, masking, and time remapping. After applying these enhancements, I export the final render.

12. Sound Design

The final video is then imported into Filmora, where I add all the necessary sound effects and voiceovers. I also include an intro and end credits before exporting the final ready file. There are many websites where you can collect sounds, such as YouTube Studio and FreeSound.com.

Conclusion

If you’re an individual animator or a teacher with limited animation experience, Cartoon Animator is the perfect tool for you. I hope you now understand how I created that video, so you can start making your own as well. For more information, visit the Reallusion website and check out their social media channels.

Facebook – Cartoon Animator Users Group

This group comprises many professional animators who are always willing to assist beginners. You can ask any questions you may have and also view our animations on the page. Feel free to join our community and become a part of our growing family.

Learn More

Official product page:

2D Animation Software for Cartoon Maker | Cartoon Animator

FREE for 30 days & get 1,700+ ready-made assets:

2D Animation Software Download | Cartoon Animator

Related Posts

————————————————————————————————————————————————————————————

The original article was written by Prosenjit Biswas and also featured on Cartoon Brew.

“3 Body Problem” Concept Artist: 5 Reasons Character Creator Reigns in Previz

This article is featured on befores and afters

Jakub Kaźmierczak

Hi, I’m Jakub Kaźmierczak, a concept artist specializing in environments and keyframes. I’d like to show you how we at OUT Studio designed sets for “Three Body Problem” previz and how I used Character Creator to save time during production.

Check on Jakub’s ArtStation

About OUT Studio

OUT-Studio is a concept art studio that brings talented artists and agile management together to efficiently visualize our clients’ storytelling. We are based in the UK and Poland, although we collaborate with artists from around the world. We build highly effective teams tailored to the client’s individual requirements to achieve innovative and cost-effective solutions.

Interview with Jakub

Today, we are fortunate to interview the experienced 3D concept artist Jakub, who recently collaborated with Out Studio on the popular Netflix series “3 Body Problem.” Jakub was responsible for some of the previz scenes and used Reallusion products such as Character Creator, Headshot, and ActorCore in the process. We invited him to share why he chose Reallusion products for previz and the benefits they brought to the production.

Q: Please share why filmmakers need concept art and the challenges you have encountered.

Why do filmmakers need concept art in the first place? Short answer is to save money. If you sweat more in preproduction you will bleed less when shooting. The sets are being physically built so the team has to know what they are building, how the material samples will look on the elements and if the camera crew can squeeze in there with all the equipment. Even if the design won’t be used at the end or it will be on the screen for 3 seconds it will definitely help with making the right choice.

Q: Could you please describe what it looks like in practice?

For instance, on one set I worked on, I was provided with a simple 3D model of the room with all the real-life measurements. They wanted to see three specific shots: the main shot of the room, the view from the room into the bathroom, and the dead body in the bathtub. I had to use specific materials provided by the client for the curtains, walls, and floor. For the smaller elements, I used scans of the books and papers I had in my room.

Q: Is there a reason why characters are included in concepts for set environments?

Besides the design of the environment, I have to show the story moments that are happening in the script. Like the dead body in the bathroom. Unfortunately I don’t have a lot of time to do everything from scratch and model every face and outfit. That’s where the Character Creator comes into play and saves my time allowing me to focus on the task and iterate on the idea with ease.

Q: Please talk about your technique of mixing scans with characters.

Back in the day I used to use posed scans with kitbashed heads from the character creator. It’s a fast workflow but it gets tricky when I have to change the pose of the character. In the past years the workflow got a bit of an overhaul that I’m going to show you.

When I can, I scan the elements that could be helpful with the project, books, papers, clothes or full characters. So I get dressed in an outfit that resembles the character in the scene. I record myself or take pictures for reconstruction. 

I use reality capture or reality scan for processing. Both tools are free.

The best practice involves capturing RAW photos and adjusting shadows and highlights in Lightroom to achieve low contrast. Recording is also an option, but it may impact the quality of the 3D model. In Reality Capture, I follow the standard procedure: aligning images, reconstructing the model, decimating, smoothing, and applying textures. With the model prepared, I’m set to create the character.

Q: Please reveal your five reasons for choosing Character Creator for previsualization!

There are five aspects where I believe Reallusion products are particularly suitable for previz:

  1. Headshot
  2. Comprehensive content
  3. Fast posing
  4. Fast material editing
  5. AccuRIG for the crowd posing

Let’s talk about those in detail…

Headshot

Sometimes I know the actor who will play the role, and I use their face for the 3D double. When I don’t have that information, I create a face that closely resembles the script’s description. Headshot is a valuable tool for this, producing results that reach the benchmark of professional concept work.

Comprehensive content

To enhance my work further, I utilize my scan for clothing and refine the remaining elements using the program’s extensive content, including hair elements and skin decals.

Fast posing

At the beginning of my work, I always place a T-posed character in my scene as a reference for scale. As mentioned earlier, I need to show the scene from multiple angles, and my characters must perform various actions according to the script and director’s requirements.

Reallusion offers a vast library of motion captures Actorcore that assist me in this task. Typically, I duplicate the folder containing my characters to create copies for each required shot. This allows me to easily apply motion capture data to the characters, find suitable poses, and create realistic interactions between them.

Fast material editing

If I receive feedback from production requiring changes to the character, such as adding bruising from a fight, I can incorporate these adjustments using Character Creator and seamlessly re-import them into Blender. Fortunately, I don’t need to reposition or pose the character again. With just two clicks, I can update the materials using SkinGen on the main model and continue working on the scene.

AccuRIG for crowd posing 

To fill the scene with background characters that don’t require anything specific, I usually rely on scans, either purchased or captured by myself. Thanks to the intuitive interface of AccuRIG, I can get them rigged with just a few clicks. It also works seamlessly with mocap packs, allowing me to easily pose the characters without having to do everything manually.

Conclusion

After completing the initial setup, I overpaint and color grade the image before delivery. Sometimes the concept is approved instantly, while other times it requires iterations. Using Blender and Character Creator, I can efficiently apply even the most challenging and time-consuming changes without any issues. This streamlined workflow helps the team produce their best work for the show.

Related Posts

————————————————————————————————————————————————————————————

The original article was written by Jakub Kaźmierczak and is also featured on befores and afters.

Completing University Thesis with Character Creator and Blender

This article is featured on Creative Boom
Alberto Méndez Rojas – Film Director / Cinematic Artist

Alberto Méndez Rojas

My name is Alberto Méndez Rojas. I am 25 years old. I am a professional cinematic artist based in Costa Rica. I graduated as a 3D Artist from Véritas University with a short film called Rebus. This opened opportunities for me due to my precious skills. I participated in the production of Sausage Party: Foodtopia for Amazon Prime.

Since a young age, I developed a love for cinematics. I am especially fond of fantasy ones where there is a whole world to explore. These worlds have their own mechanics and story. They are often shrouded by a social or political problem that escalates. These stories teach us about the human condition. They show how subjective and abstract the values and morals of civilizations are. They also show how history shapes the environment.
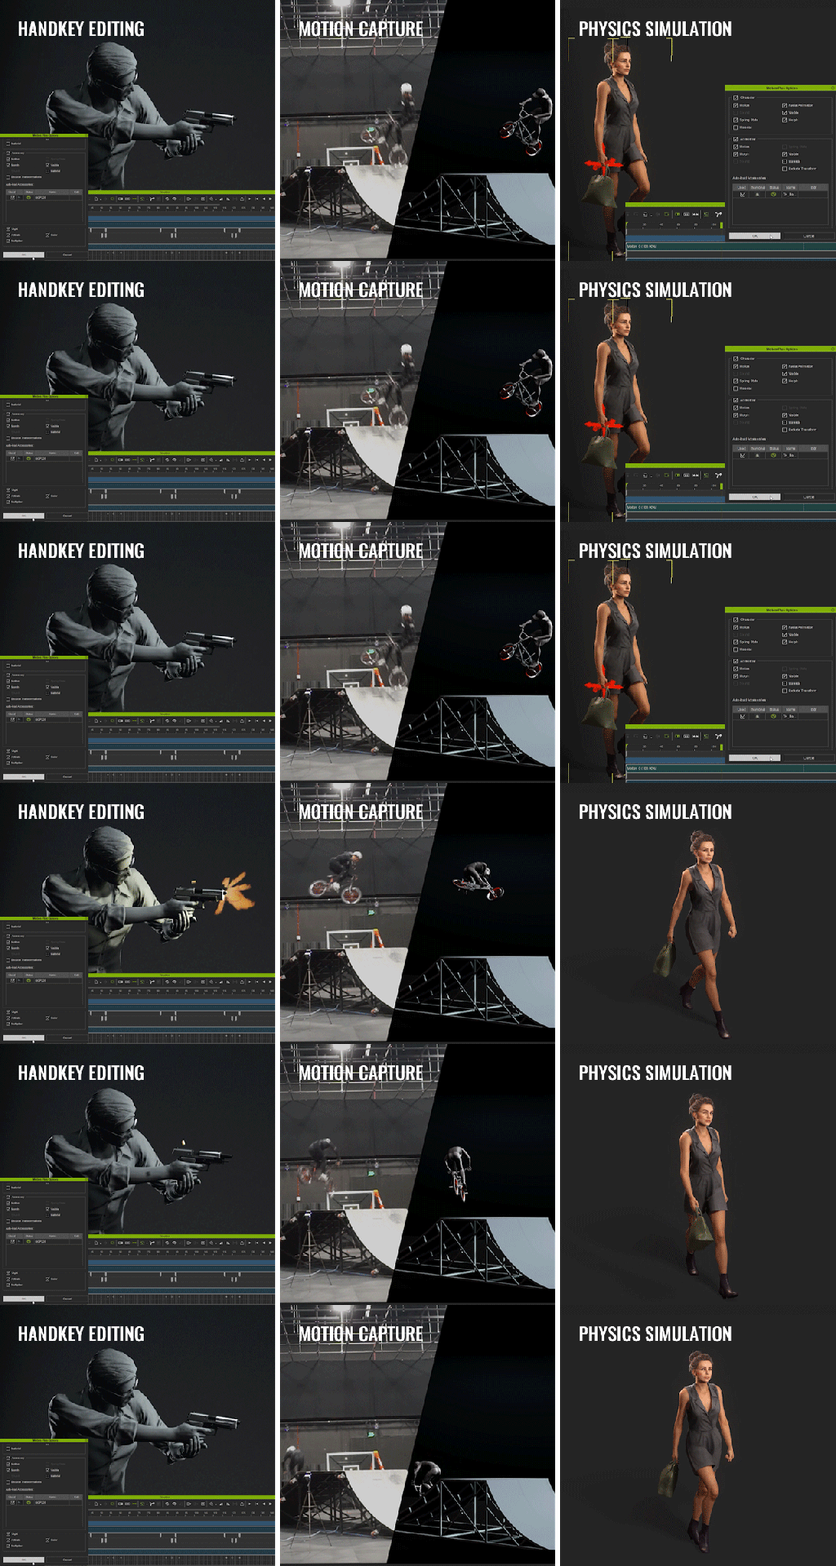
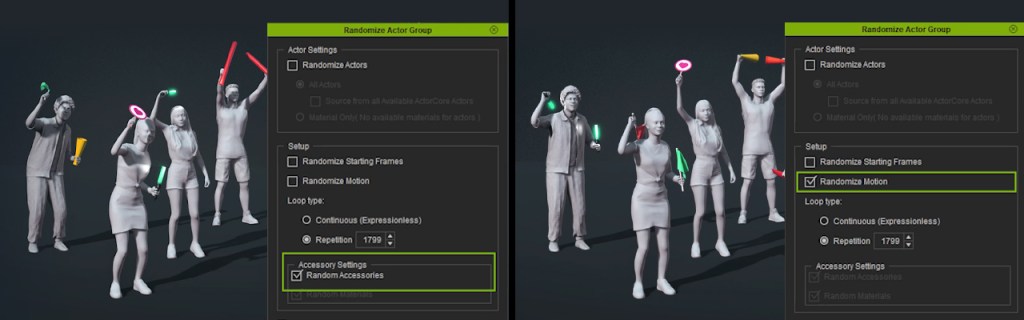
Rebus is a short film centered around world building as the main focus of the project. It tells a story about a dystopian civilization. This civilization is trying to endure the harsh world they live in, surrounded by magical creatures and unexplainable natural disasters.

For this project we had the opportunity to use Character Creator to make many characters. They represent the civilians, like merchants, slaves, commoners, and much more. We also implemented ActorCore motion library to animate our characters. We made good use of the library of motion capture provided for us.

Additionally, the store of Reallusion was of great help. There were many assets for the characters like hair, skin, clothing, and full fledged characters.

“If you want to create a movie or short film, you shouldn’t waste resources by creating each character individually. Using tools like those provided by Reallusion is crucial. They represent, for me, the future of digital cinema for small and large teams.”

Alberto Méndez Rojas – Film Director / Cinematic Artist

University project REBUS: 8 month challenge

The animation career of Véritas University has a length of 4 years plus the final project. One option is another short film. We had the chance to develop the skills and tools learnt through this film. From the very beginning, I wanted my final project to be the culmination of my vision. I had a vision for my story. This vision began to be written 7 years prior to this point in my life.

With this vision in mind, I had a foundation. My friend, Adrián Sánchez Albán, and I decided to create this project from that foundation. We envisioned a new world from the ground up. Thus, Rebus came into existence. In these 8 months, the main challenges were at a conceptual level. We already had the necessary skills to create anything we saw in our minds. But it is useless to create things that look cool but lack meaning and deep value.

Once this section was completed, we now had to deal with another challenge but on a more technical level. We had to learn new tools. We tried to manage a team of 6 people as best we could. This was challenging because we were students.

The most important part of Rebus was trying to make the viewer feel that this world was real. We wanted to show that people lived there and had their own stories. Due to the lack of a large team, we couldn’t afford to create people and animations from scratch. This is why we decided to use Reallusion tools. They helped us complete this crucial segment in our project in a quick and effective way.

“Due to the lack of a large team, we couldn’t afford to create people and animations from scratch. This is why we decided to use Reallusion tools. They helped us complete this crucial segment in our project in a quick and effective way”

Alberto Méndez Rojas – Film Director / Cinematic Artist

Vision, Pre-production, Production

The preproduction phase was very hard and tiring, because we created a world with its own rules and mechanics. From religion and economy, to fantasy aspects such as magic and rituals, education system and more. A lot of research had to be done about civilizations and some philosophical points of war. Along with the human condition, in order to give more realism to our world.

We thought that the best way to complete this project was to create all the environments of high value/demand. And then fill them with the help of Reallusion assets. On some occasions, we did not have time to create our environments. That is why we also incorporated Kitbash3D assets. These assets are highly optimized just like the ones from Character Creator. This is because the focus of both Kitbash3D and Reallusion is to develop tools. They can be used in a large production setting. And these tools come at a low cost for the user. An example of this is shown in a market with a high number of civilians.

Creating a World of Characters

We used something around 20+ characters created just with the tools of Reallusion. Then we arranged that scene with only Kitbash3D assets. This created a full shot fairly easily. It helped us further push this idea of a rich world with people and a social structure. These assets were taken from the Kitbash3D Dark Fantasy library. These assets fit perfectly with the aesthetics we were looking for. We also used the character pack from the Medieval Reallusion library.

Full Compatibility with Blender

We succeeded wonderfully thanks to how flexible Blender is. All of these different factors and sources could be compiled into one file. They could be played with each other without much problem. One very important thing to note is that the assets from Character Creator and Kitbash3D can be used. They come with high quality textures. However, if it is too much for your hardware, there is a setting inside of Blender. It can take all of the textures used and reduce them to a certain texture size, like 1k or 2k. This helps a lot to save ram memory and keep building a larger scene.

Obviously certain problems had to be resolved on the fly, but it wasn’t a big deal

Advantages of Character Creator

The advantages of using Character Creator are the ability to create a character very quickly, something around 10-20 minutes. This is due to the different types of packages available in the store, such as hair, skin or even clothing. The optimization processes such as texturing and adding assets to the characters is very good and stable. This makes everything else easier.

“The advantages of using Character Creator are the ability to create a character very quickly, something around 10-20 minutes. This is due to the different types of packages available in the store, such as hair, skin or even clothing.”

Alberto Méndez Rojas – Film Director / Cinematic Artist

For Character Creator’s Ai plugin Headshot, we used a photograph of a person. We added the photograph into the program. Then we made the Character Creator tool use the reference image. This created facial proportions in the 3D model similar to that of the photograph. In addition to this, the same photograph could be used as a texture in the model. This makes the similarity even greater.

Key factors: iClone, ActorCore, Blender

The core difference between live action movies and animated movies is movement. In digital film, we have to make sure to make it as it seems to be alive. Examples of this are like subtle details like the wind moving a flag or some flowers. A flag or flowers are easy to animate. However, characters are a completely different challenge.

To animate characters, we first need a good topology. We also need a functional rig, and good, clean motion capture animations. These are available with the iClone and ActorCore tools.

After working on our character in Character Creator, we can send it directly to iClone and ActorCore. There, we work on the character’s movements in a procedural way. This involves moving a certain number of keys.

If we do not want to use the animations provided by the Reallusion library, we can export the characters. Once exported, we can work on their animations in Blender. This process also works the other way around. We can export the animation from the library. With a tool called Auto Rig Pro, we can select the Rig chain brought from Reallusion. We can then retarget the animation to the bones of a native Blender character. This allows us to use that same animation on different characters if necessary.

Advice to other directors

There is no need to reinvent the wheel. Nowadays we can’t afford to have our egos affected by using tools that make production processes simpler. These tools make production processes faster, which for AAA companies are a daily occurrence. The important thing should be to express these ideas and concepts. We want to expose them to the world. We can bring this to reality.

“Nowadays we can’t afford to have our egos affected by using tools that make production processes simpler. These tools make production processes faster, which for AAA companies are a daily occurrence. The important thing should be to express these ideas and concepts.”

Alberto Méndez Rojas – Film Director / Cinematic Artist

If you want to create a movie or short film, you shouldn’t waste resources by creating each character individually. We can’t use our resources of money and time to create/animate the characters one by one. Using tools like those provided by Reallusion is crucial. They represent, for me, the future of digital cinema for small and large teams.

“In the end, these tools and the company gave us crucial help. Without them, we would not have been able to finish the graduation project. We left the university with a strong portfolio piece to start a professional career on the right foot.”

Alberto Méndez Rojas – Film Director / Cinematic Artist

Follow Alberto

http://www.instagram.com/betomzr

Related Posts

————————————————————————————————————————————————————————————

The original article was written by Alberto Rojas and is also featured on Creative Boom.

Reallusion enhances Character Creator to ZBrush pipeline with free GoZ Plus plugin upgrade

Reallusion is consistently working to improve the integration between Character Creator (CC) and ZBrush, aiming to streamline the workflow for 3D artists and simplify character animation. Over the past year, Reallusion introduced Pose Tools for managing character poses and Face Tools for customizing expressions between CC and ZBrush. Now, Reallusion announces the launch of the enhanced and free GoZ Plus plugin, which significantly enhances the CC and ZBrush pipeline. It will be automatically available when you update CC to the latest version.

One-click transfer of CC character poses, expressions, and wrinkles to ZBrush

Previously, artists relied on ZBrush GoZ to transfer assets between Character Creator and ZBrush. This method had limitations, such as only being able to transfer character meshes while textures had to be imported separately. With the new GoZ Plus plugin, 3D objects and texture maps can be directly transferred. GoZ Plus also includes subdivision and smoothing options to supplement more essentials of the ZBrush workflow.

Streamlined Texture-to-Mesh Baking and UDIMs Conversion

Previously, artists faced the tedious process of manually hiding and showing meshes to export material maps one by one, followed by sequential importing into Character Creator (CC). With the introduction of CC GoZ Plus, this process has been revolutionized, artists can import characters from CC into ZBrush for sculpting and polypainting. It will automatically convert CC diffuse textures to ZBrush polypaint and normal maps to ZBrush displacement. Once you complete the detailed sculpting and painting, textures can now be baked and applied to CC3+ UDIMs with just a single click, streamlining and accelerating the workflow.

Seamless high-poly mesh sculpting and smoothness options

Unlike prior versions of GoZ which could only transfer characters, GoZ Plus allows for the direct transfer of props. Additionally, the smooth mesh option allows users to choose between maintaining the sharp edges of a hard surface model or smoothing out soft surface models.

Recognizing the importance of detail sculpting for ZBrush artists, Reallusion has also added a subdivision option to the GoZ Plus. This enables the transfer of props from CC to ZBrush at high subdivision levels, providing high-resolution meshes for sculpting and polypainting to achieve intricate details. 

Transform CC assets into 3D printing-ready models

As a major benefit for character artists, the new GoZ Plus plugin makes it easy to transform low-poly CC models to high-poly sculpts. Custom poses and expressions can be applied to million-polygon meshes, enabling ZBrush artists to sculpt micro-details, make intricate tweaks, and create multiple characters with different poses. Artists can create new layers in ZBrush to manage poses using Pose Tools and switch between different poses with ease. Due to its versatility, Pose Tools is quickly becoming an essential tool for 3D print artists.

Image courtesy of from Michael Pavlovich

GoZ Plus is completely free and will be automatically accessible with ZBrush 2022 or later when you update to the latest version of Character Creator 4.42. Besides, ZBrush Artist Michael Pavlovich has created a series of tutorial for CC GoZ Plus. For more information and to experience the enhanced capabilities of GoZ Plus, update your versions of Character Creator and ZBrush right now!

Resource Links

Character Creator 

CC GoZ Plus official page

Character Creator ZBrush Pipeline

Tutorials for CC GoZ Plus

Michael Pavlovich Tutorial part 1

Michael Pavlovich Tutorial part 2

Michael Pavlovich Tutorial part 3

External Link

Best Laptops For Graphic Design For Artists