Making Way for a More Powerful and Polished Edition
To ensure the highest level of quality and performance, Reallusion has decided to move the official launch of Character Creator 5 to August 27, 2025. This buffer time will allow us to deliver a more refined user experience, introduce even more powerful features, and update key plugins to enhance third-party integration and workflow compatibility.
Exciting new additions include the all-new ActorMIXER system, which enables both custom and random character generation directly within the application. CC5 will also offer seamless MetaHuman compatibility, unlocking a unified workflow for Unreal Engine developers and artists.
To reward your extended patience, all CC5 Prelaunch Offer qualifiers will now receive the ActorMIXER PRO plugin (a $199 value) completely free—on top of the previously promised complementary Character Creator 5 license ($299 value). This deal upgrade is our way of saying thank you for sticking with us through thick and thin.
>> Check the Reallusion Software Store for more details
A free powerful new plugin and an enhanced CC5—now that’s real value for your patience!
Introducing ActorMIXER, the Future of Character Generation
The brand-new ActorMIXER will bring major innovation to CC5, dramatically expanding the creative possibilities of character design with greater ease and flexibility.
- Non-Destruction mixing between characters to generate entirely new looks
- Mix by full heads, individual facial parts, or full bodies
- Seamlessly blend between stylized or realistic characters

Unlock Advanced Capabilities with ActorMIXER PRO
Upgrade to ActorMIXER PRO to access powerful features and the complete ActorMIXER CORE Library, designed for serious creators who want full control and flexibility in character creation.
ActorMIXER PRO Plugin

- Make Any Character Mixable: Make any character mix-ready by converting it into mixer sliders and mixer skins.
- One-Click Randomization: Instantly generate unique and diverse characters with a single click.
- ActorMIXER Packages: Use the ActorMIXER Packager to create and package your own mixer-ready assets for sharing or for profit.

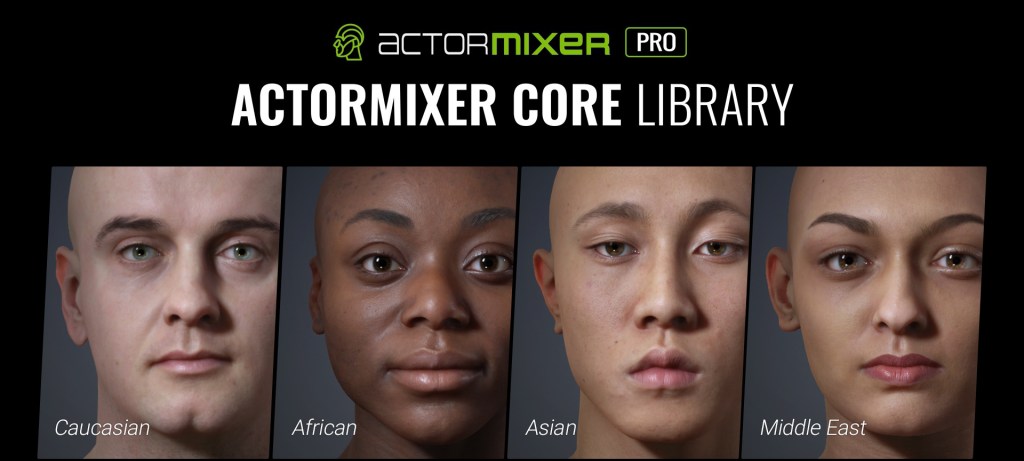
ActorMIXER CORE Library

- 40+ Hyper-Realistic Scanned Heads: Ready-made for full head or facial-feature mixing.
- Diverse Ethnic and Facial Variants: A wide range of facial structures, and ethnicities for endless combinations.
- Optimized Texture Workflow: Includes both low-resolution textures for fast previewing and high-resolution assets for final rendering and HD export.
Secure FREE CC5 & ActorMIXER PRO by August 27!
All CC5 Prelaunch Offer qualifiers will receive a FREE copy of Character Creator 5 (a $299 value) and ActorMIXER PRO (a $199 value)!
This exclusive plugin giveaway is available only until August 27, 2025, so don’t miss your chance to claim it. It’s the ultimate reminder that we’re excited to have you with us as we unlock the full potential of Character Creator 5 together!

Additional Enhancements in CC5 and iClone 8
Beyond the introduction of ActorMIXER, Character Creator 5 and iClone 8 bring a host of powerful new upgrades designed to elevate animation quality, improve Unreal Engine integration, and streamline character workflows.

Enhanced iPhone and AccuFACE Support
- Improve non-linear facial performance, add precision to lip movements for natural speech animation
- Add corrective morphs to existing CC characters for enhanced mocap quality, especially for intense emotional expressions.
Extended Eyelash & HD Eye System
- Upgraded 3D eyelashes feature adjustable lash density, refined mesh structures, and greater shaping possibilities.
- Smart hair-compatible color controls enable natural lash color transitions from root to tip, with realistic reflectivity adjustment.
- Automatically repositions eyelashes after intense eye shape editing.
- Enhanced HD Eye library delivers outstanding detail in the pupil, blood vessels, moisture, and realistic concave rendering when viewed from the side

Easy Motion Retargeting for UE5

- Now supports skeleton export geared for UE4 and UE5, with bind pose presets optimized for MetaHuman and UEFN.
- Enables accurate motion retargeting and real-time game control.
- Character and animation can be exported together, significantly simplifying the Unreal Engine pipeline.

Expanded MetaHuman Compatibility
- The upgraded CC/IC AutoSetup ensures full compatibility between CC5 characters and MetaHumans in Unreal Engine, providing identical facial controls and skeleton structures.
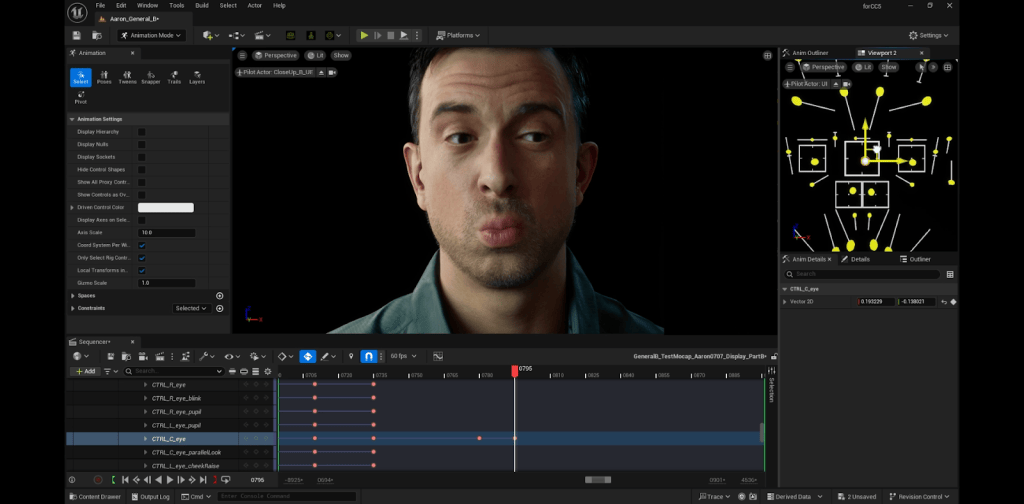
- MetaHumans can be easily swapped with CC5 characters in Unreal Sequencer while preserving all facial and body animation data.
- LiveLink integration supports real-time streaming of motion capture to CC5 characters, including MHA facial mocap, Audio-to-Face syncing, and full-body tracking.
- The MetaHuman-compatible CC Control Rig plugin enables 1:1 animation matching and layered animation refinement inside Unreal workflows.


MHA Animation Import & HD Face Board Editing
- A new MetaHuman-style face control panel in iClone enables fine-tuned editing of HD facial expressions for CC5 characters.
- CC5 and iClone 8 now support MHA animation imports from Unreal, bringing high-quality facial capture into the ecosystem.
- Existing CC3+ characters can be upgraded with the CC5 HD facial profile for full compatibility with MHA animation data.
FAQ
When exactly will CC5 be released?
CC5 will officially launch on August 27. We’ve extended the release to ensure a more polished experience and to include powerful new features such as ActorMIXER and enhanced Unreal Engine compatibility.
What is ActorMIXER, and can it mix my custom characters too?
ActorMIXER is a new system in CC5 that allows you to blend up to six characters — either full heads, facial parts, or entire bodies. To mix your custom characters, you’ll need the ActorMIXER PRO Plugin, which enables you to convert any character into mixable sliders and skins.
Do all prelaunch buyers get the ActorMIXER PRO Plugin and scanned heads for free?
Yes. As a token of appreciation for your support, all prelaunch participants — whether you’ve already purchased or will purchase before August 27 — will receive the ActorMIXER PRO Plugin and the ActorMIXER Core Library (over 40 high-quality scan heads) at no extra cost.
Can I use ActorMIXER PRO with my custom characters?
Absolutely. That’s the core value of PRO — it allows you to convert any of your custom characters into mixable sliders and skins, giving you complete creative control.
Can CC4 users use ActorMIXER PRO?
No. ActorMIXER and ActorMIXER PRO are designed specifically for CC5. You’ll need to upgrade to CC5 in order to use these new features. But you can mix your legacy CC3+ character with CC5!
Any plans for existing CC4 users to join the prelaunch offer and get ActorMIXER PRO for free?
We understand your concern, and our team is actively discussing options for existing CC4 users. Please stay tuned and keep an eye on your inbox — we’ll be sharing updates very soon.
Will there be any further delays to CC5?
We understand your concern and appreciate your patience. As of now, August 27 is our confirmed release date, and our development is in its final stage. We’re committed to delivering a stable and feature-complete version on time.
What improvements have been made for Unreal Engine users?
CC5 brings several major upgrades for Unreal workflows:
- Use of MetaHuman-compatible Control Rig for precise animation in Unreal
- Direct support for UE4 and UE5 skeleton export, including bind pose for UEFN
- One-click export of character and animation together
- Full MetaHuman compatibility, with identical facial rig and animation support
- Support for LiveLink, Audio-to-Face, and MHA facial mocap streaming