Reallusion invites creators from around the world to enter the Lip-Sync Animation Contest 2021. Apply the game-changing, Reallusion facial animation pipeline into 30-second videos of movie scenes, TV series, music videos, or anything creative. Compete for a chance to win $40,000 in prizes and awards. The contest starts from now and runs until September 30th.
iClone Lip-sync Animation Contest trailer video:
Lineup of Prize Sponsors: Nvidia, Epic Games, ZBrush, and more
Reallusion has teamed up with industry professionals for a valuable prize package that awards creativity and achievement for judging requirements. The sponsors include Nvidia, Epic Games, Marvelous Designer, ZBrush, Razer, Replica Studios, BorisFX, FXhome, Noitom, and Rokoko.
“The most powerful storytelling combines the human voice with immersive visuals, and so we’re pleased to offer Replica Studios voice AI tools integrated with Reallusion’s animation software for contest participants and the broader developer community to create unique and compelling narratives.”
– Shreyas Nivas, Co-Founder, and CEO of Replica Studios
Game-changing facial animation workflow
Reallusion is commemorating a game-changing facial animation workflow for accurate voice lip-sync, puppet emotive expressions, muscle-based face key editing, and professional iPhone facial capture all in one iClone package.
During the contest period, participants can get free software licenses, character content, face tools, and AI voices. This contest calls on artists and storytellers to create their best short lip-sync video for a chance to win prizes and get featured as an official Reallusion showcase.
“As a storyteller, iClone has made it possible for me to create convincing facial animation and short films using the awesome MetaHuman characters from Epic Games. I can’t wait to see more and more storytellers and filmmakers harness iClone to bring their animated stories to life.”
– Solomon Jagwe, Co-founder at Sowel Studios
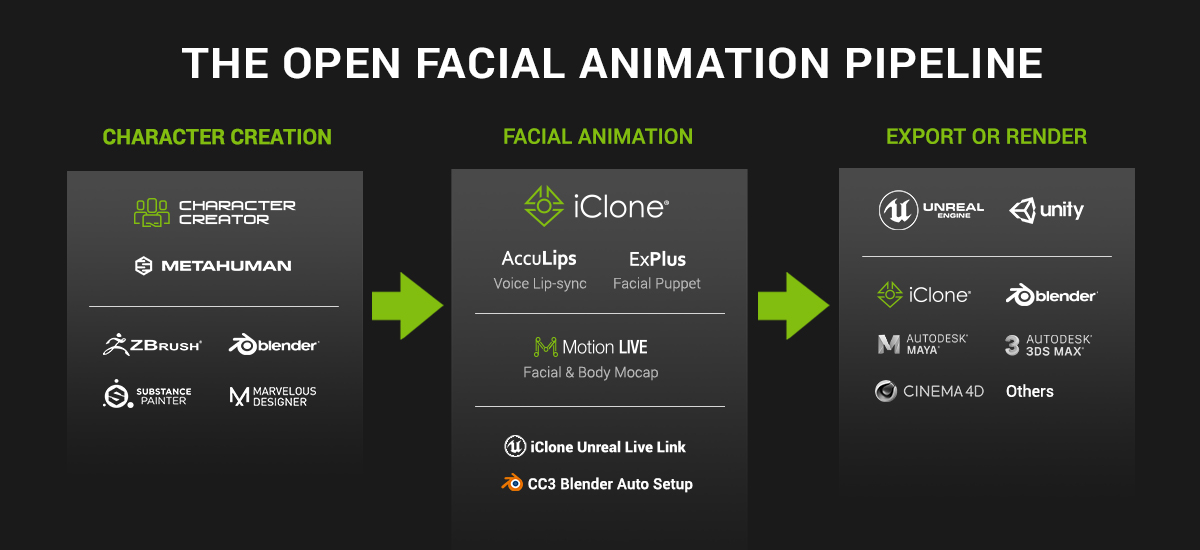
The open facial animation pipeline also for MetaHuman and Blender users
New animation advancements in iClone face and lip-sync solutions work with Character Creator or Unreal MetaHuman allowing for entrants to utilize digital humans from either platform for the contest. The Blender Character Pipeline is also introduced for the large Blender artist community.
The contest welcomes designers with different skill sets and backgrounds to join. Import a character to iClone, use iClone facial pipeline to animate their actors, and export and render in iClone or other favorite tools for contest entries.
Multiple categories with over $40,000 in prizes
The Contest offers cash and prizes valued at over $40,000 from various a-list sponsors that have partnered with Reallusion. The award categories and prize list include opportunities for entrants to unlock special awards with a single submission.
Top Cash Prizes and Awards:
Best Character Animation: 1st place $3,000, 2nd place $2,000, 3rd place $1,000. Best Character Design: 1st place $2,500, 2nd place $1,500, 3rd place $1,000
Special Awards:
Special Achievement Awards will be given to recognize the best works in these categories: Movie Remake, Music Video, Best use of Blender, MetaHuman, and Replica Studios, Best Costume, Best Digital Double, and Student Artwork. These awards are juried by the judges and add more to the winnings from sponsor prize packages and DA points to get products from Reallusion.
Immersive Experience from the Perspective of a Negro League baseball player
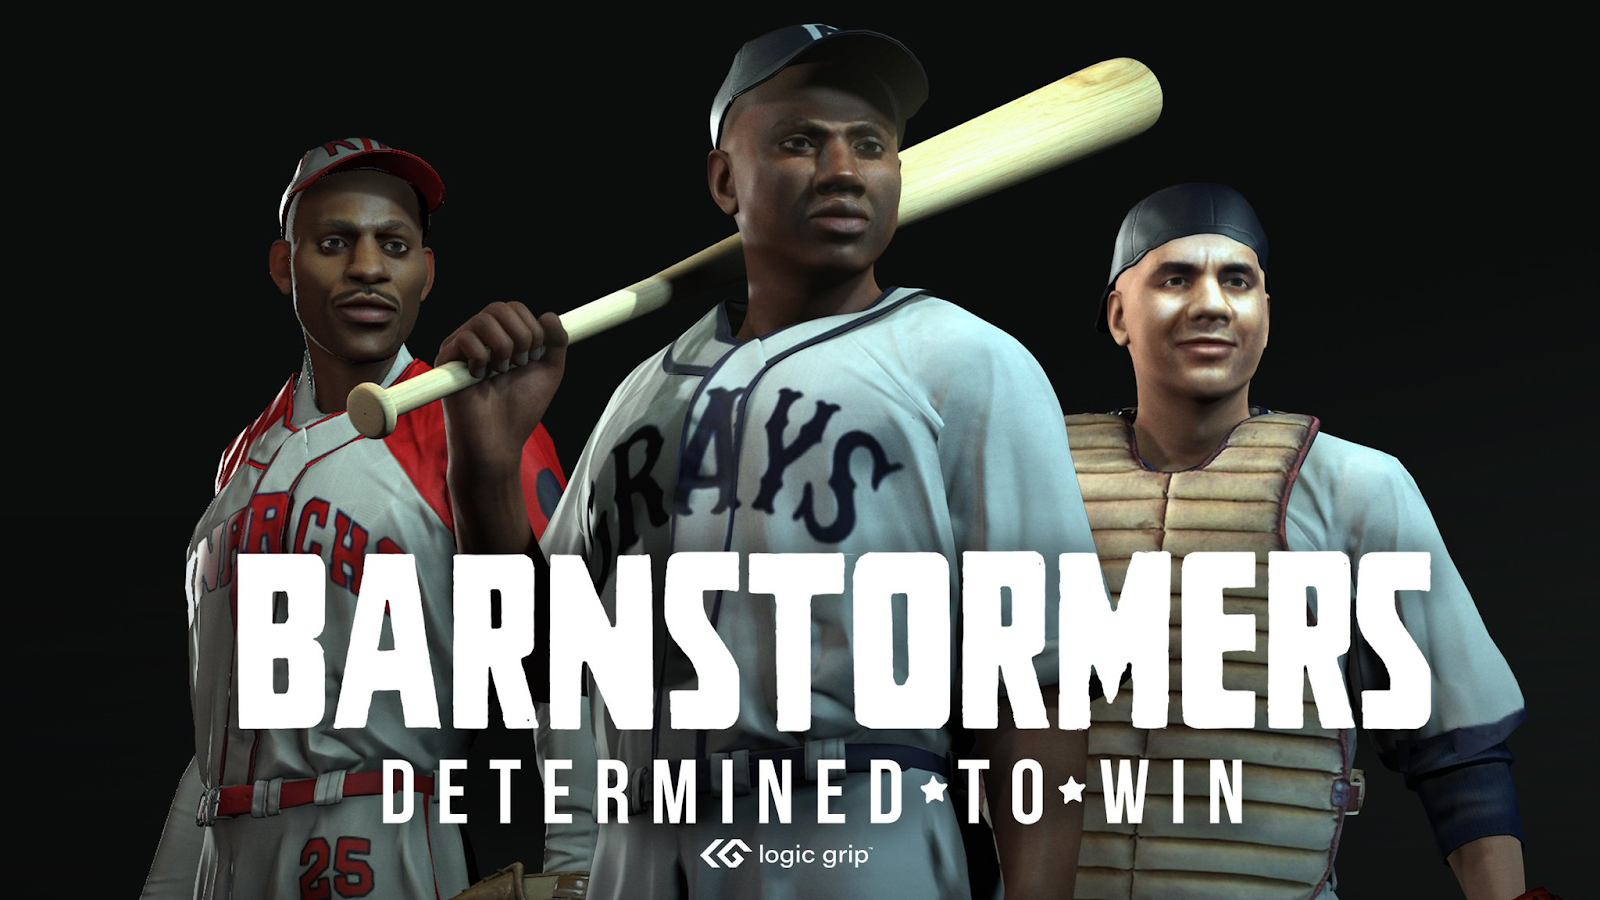
BARNSTORMERS: DETERMINED TO WIN, I AM A MAN, DEREK HAM
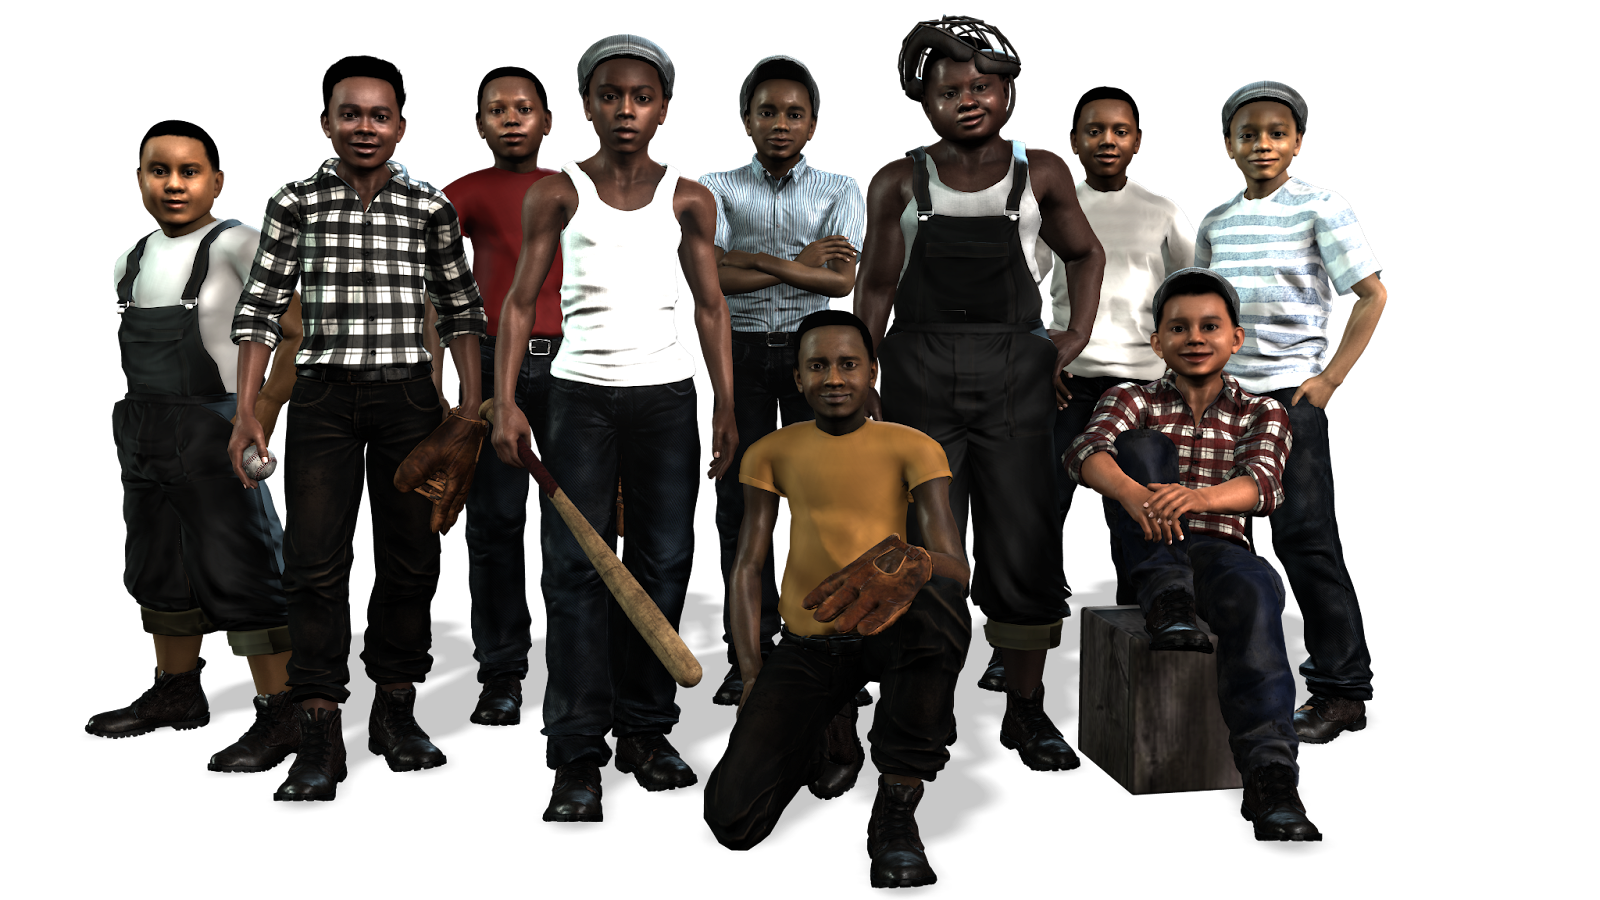
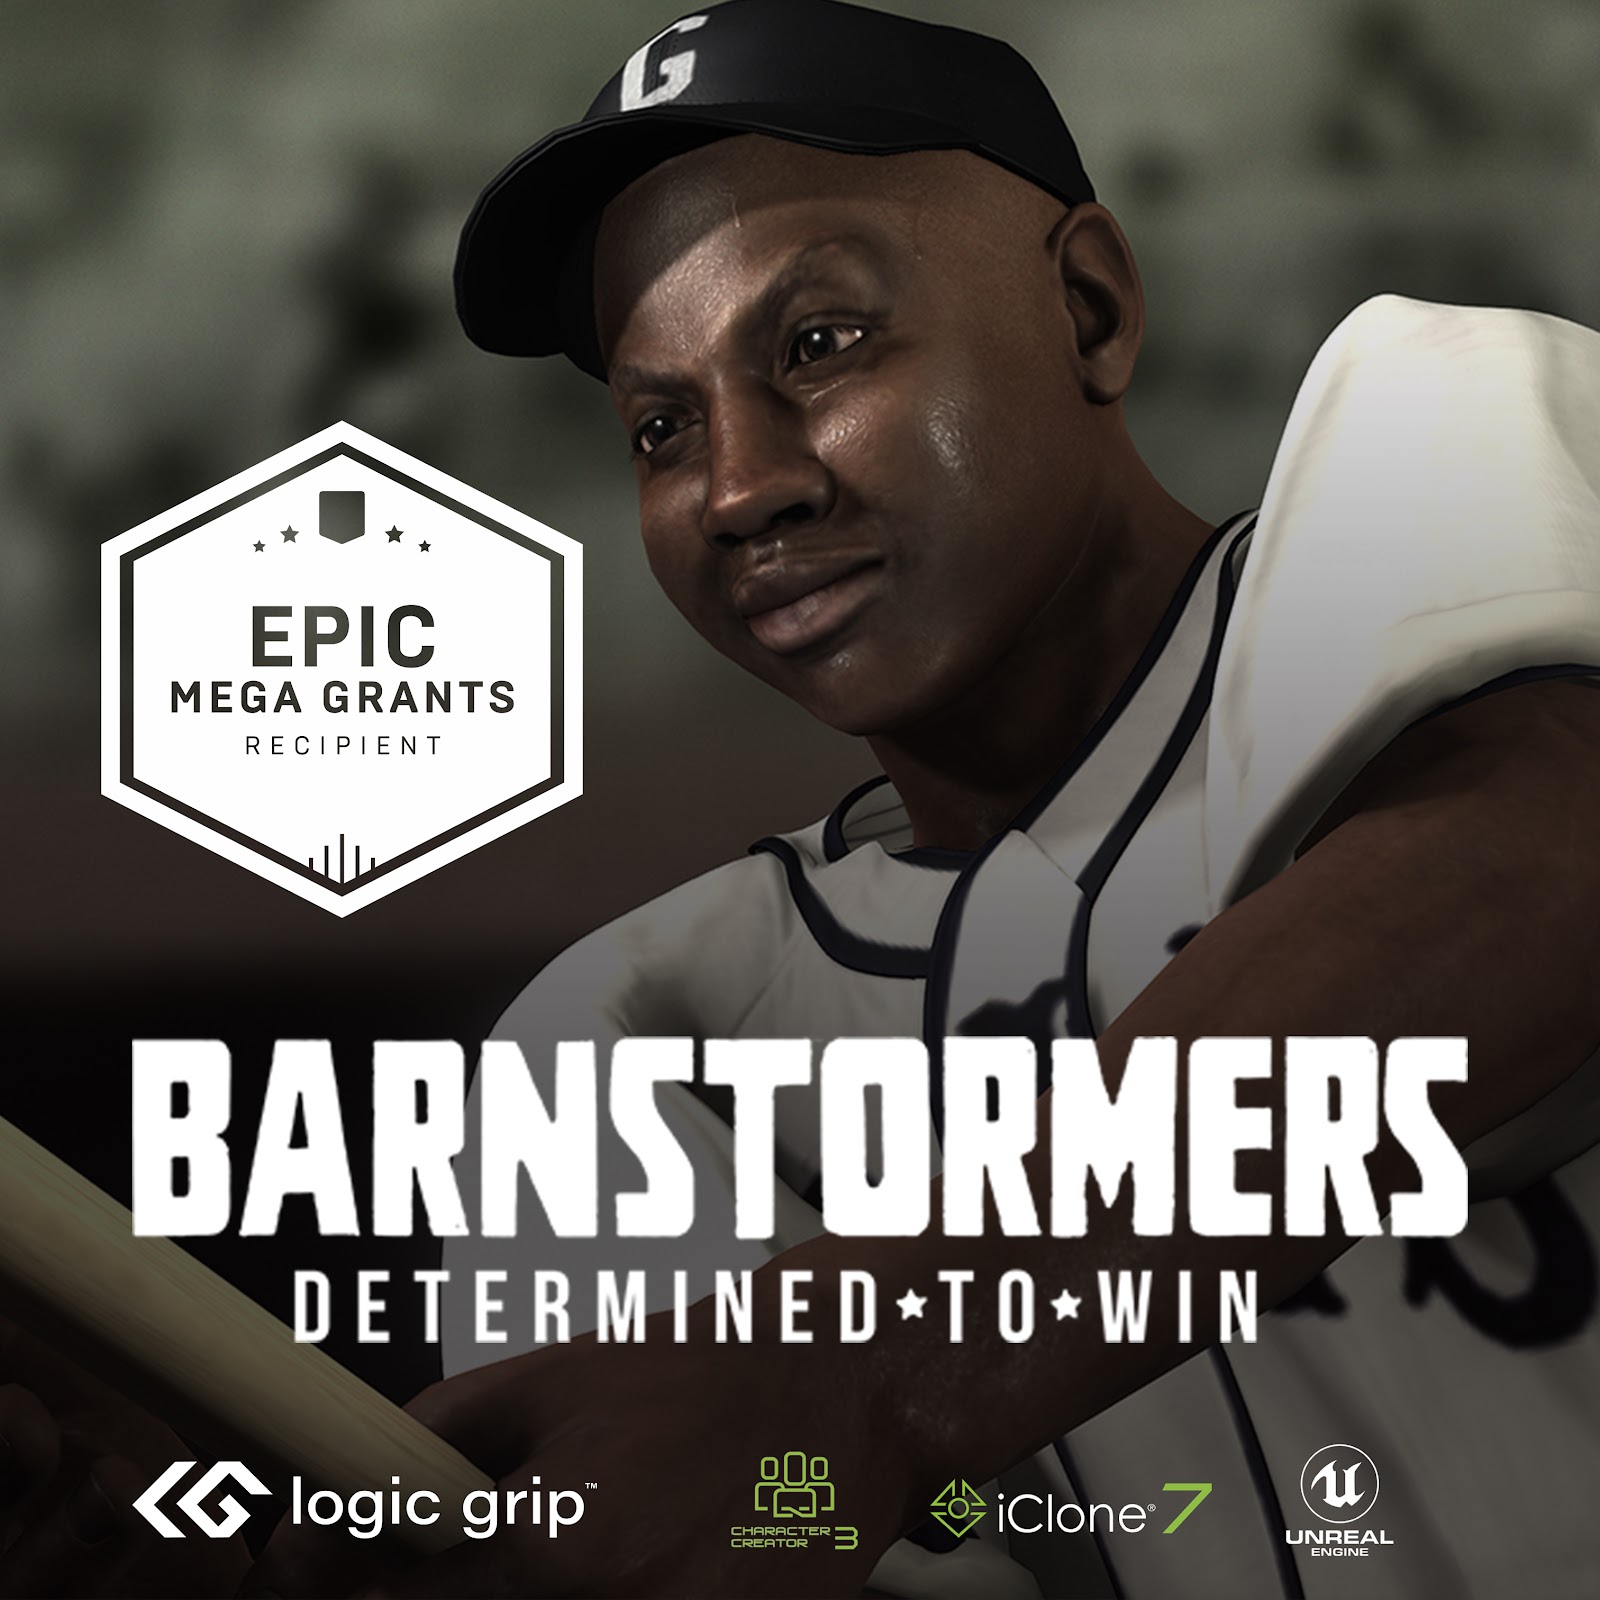
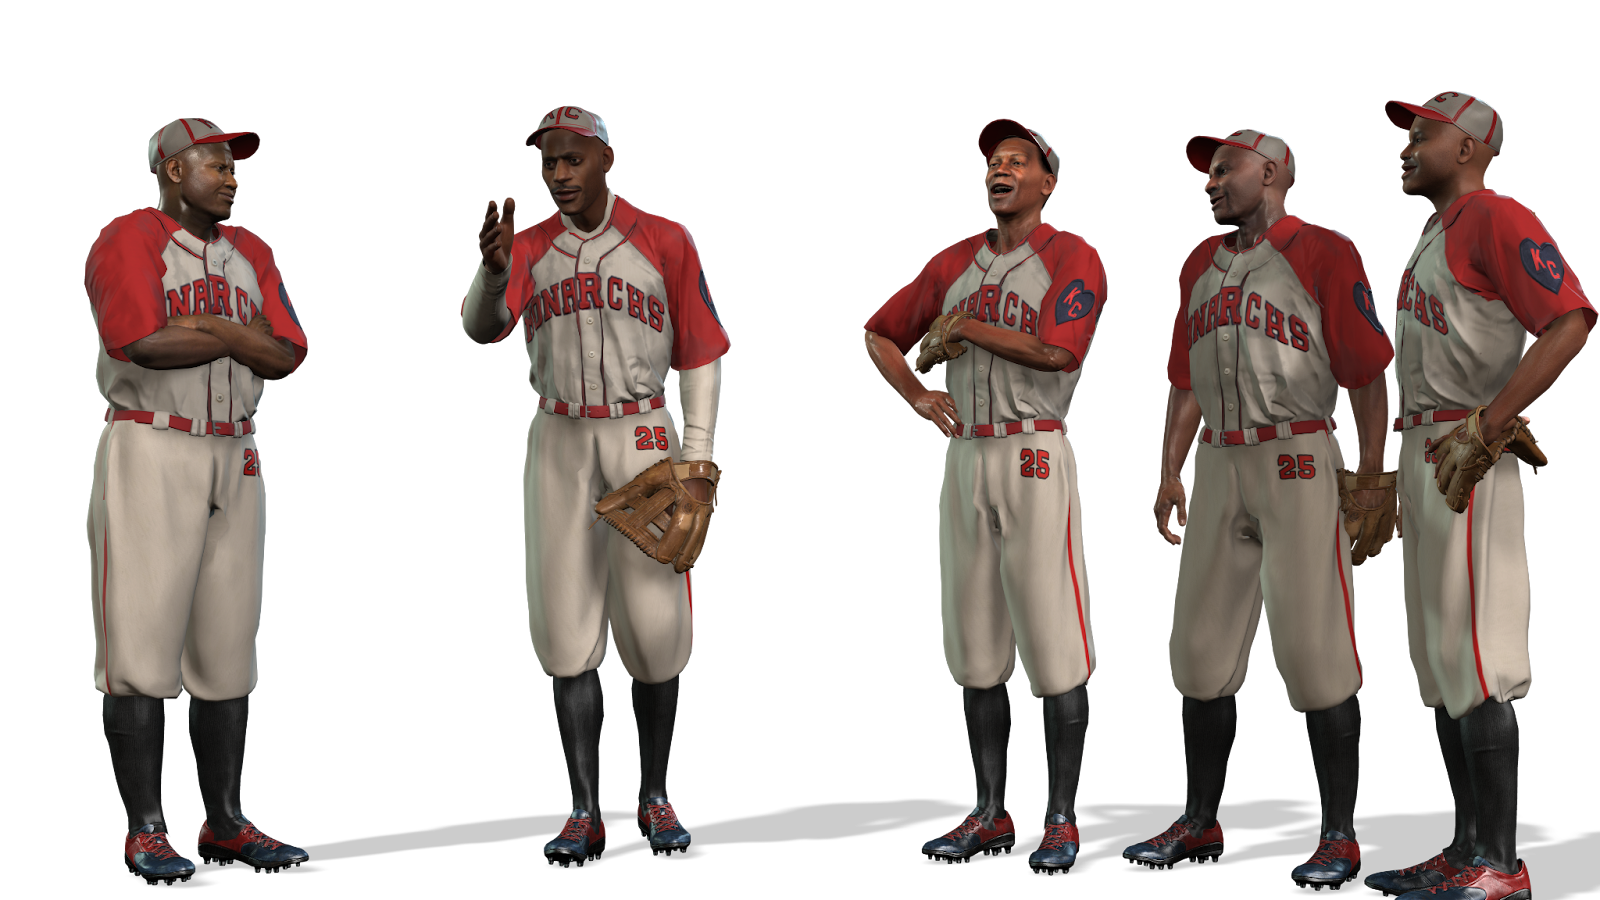
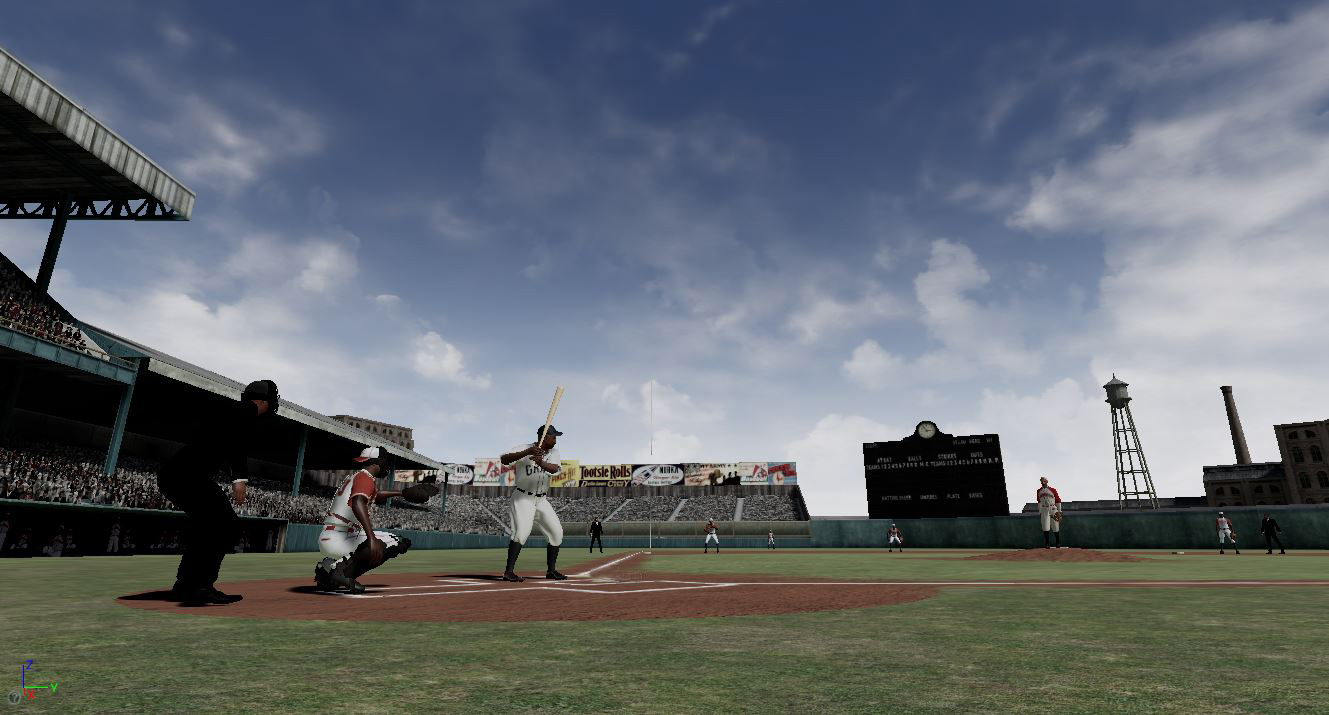
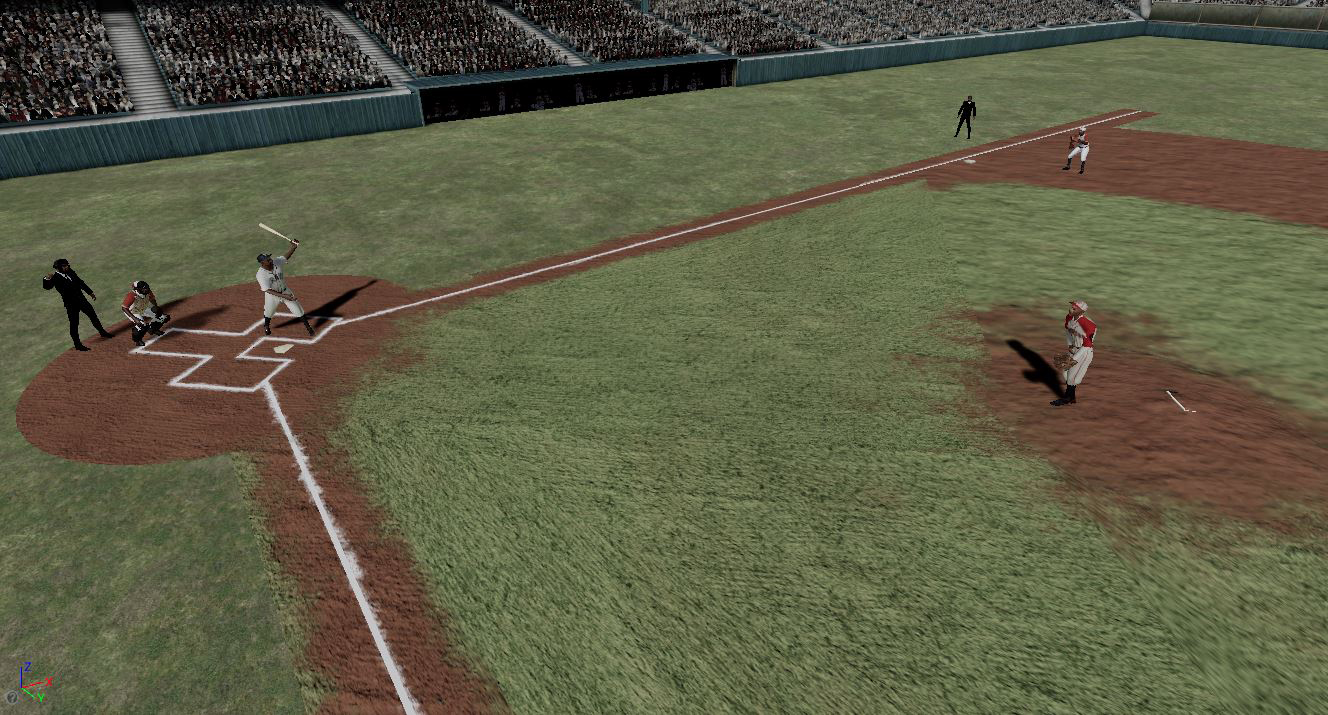
From Derek Ham, the award-winning creator of the VR experience, “I Am A Man” comes the next big history-themed VR project, “Barnstormers: Determined to Win, is an interactive VR experience set to the backdrop of the Negro Baseball League. The immersive experience is a historical fiction piece allowing the players to experience people and places from the perspective of a Negro League baseball player.
Through a partnership with the Negro League Baseball Museum, funding from the Epic Games Mega Grant, and partnership with Reallusion (the creators of iClone and Character Creator), we bring Negro League Baseball to life as they celebrate their 100th anniversary. This project will be produced under the umbrella of the “Our Civil Rights” VR series.
In this VR experience, users will face certain struggles in playing the game of baseball during the time of racial segregation. This project is sure to be a hit for people of all ages as you face off with baseball legends such as Satchel Paige, Josh Gibson, and Buck O’Neil.
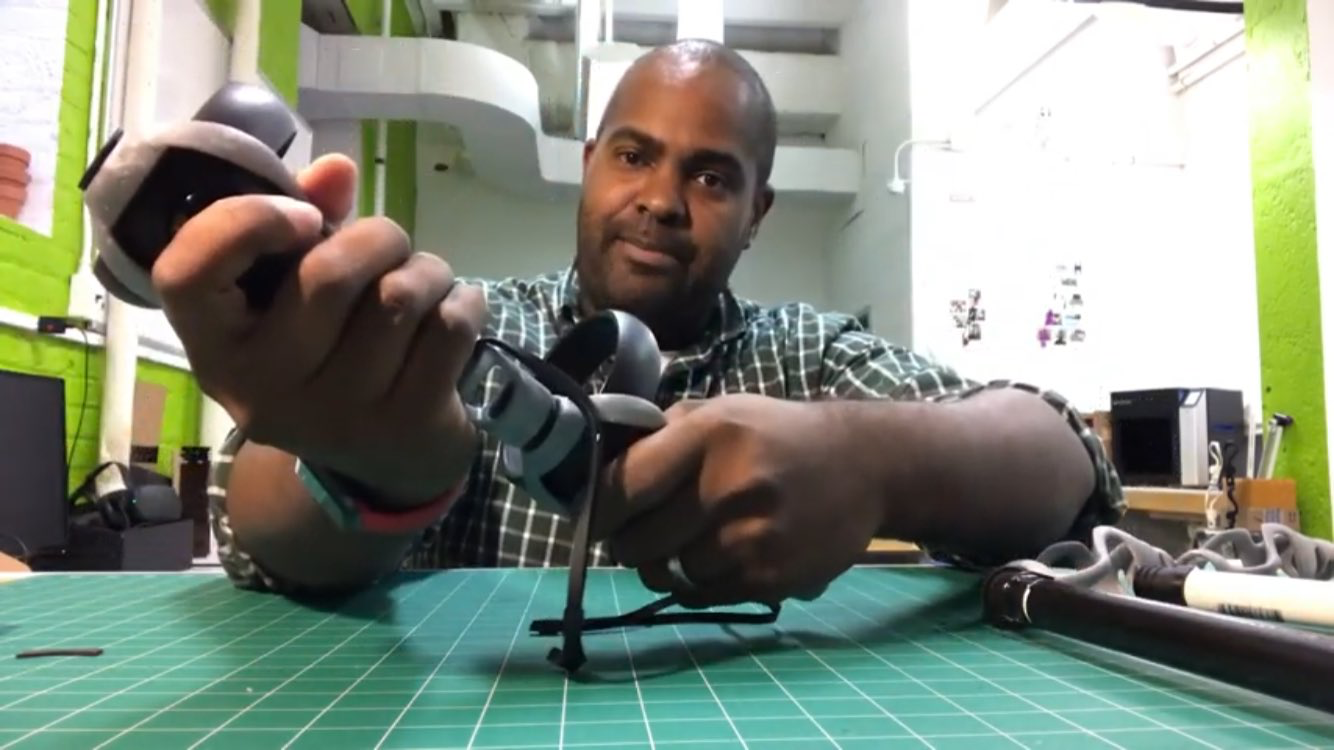
Creator, Derek Ham, with the Logic Grip AxeOne for the Oculus controllers, connects them for an alternative VR controller for a solid two-handed stick like a baseball bat.
The Axe One is more than an aesthetic peripheral. This patent-pending design allows your controllers to lock in place giving you an on-axis grip during gameplay. This revolutionizes the way we interact in virtual environments.
Logic Grip is an NC State University official startup that was spun out of the College of Design’s Mixed Reality Lab (MxRLab). This lab serves as the research and development arm for startups. The MxR Lab is constantly developing new concepts, prototyping, and conducting user experience studies to help bring new products to market.
Work smart, with Photoshop imagery and 3D motions to create lovable and memorable cartoon animations.
Creating engaging animated shows can be time-consuming, prohibitively expensive, and technically challenging, which is why it’s so refreshing to see successes, especially with kids’ shows. Children can be the harshest critics and with so many options to hand flicking away from the ones that don’t interest them is an easy fix.
Youtube is a prime candidate for content paralysis, where audiences are confronted with such a vast quantity to choose from, that the quality really needs to stand out (barring unboxing and cat videos of course). PowerUp Kids is one of the shows on Youtube which has turned a simple musical children’s show into something polished and well-produced, serving up a fantastic 2D animation short-form show that’s supported by some cutting-edge software tools.
The winning combination of animation and music has been put together using Reallusion’s Cartoon Animator 4, which empowers artists and creators with a suite of tools that support fast turnaround without making any compromises to quality. Motion resources for all.
Animations can be created using pre-existing motion resources, for a more efficient workflow (Image credit: Powerup Kids)
Motion resources for all
Modern audiences are a savvy bunch, with high expectations even when it comes to things like animated cartoons and other non-realistic animated 2D characters. Imbuing a 2D animated cartoon character has traditionally been a time-consuming, labor-intensive task but the tools available in Cartoon Animator 4 make this not only a far more efficient task but also an enjoyable and intuitive one. Using 3D motion resources allows animators to realize the sequences they need.
This enables a level of interaction with the art that shines through in the finished animation, which only leads to a better reception by the children watching. But what if you don’t have access to any motion capture devices? Well, you are covered there too, as you can use one of the many 3d motion resources available to use with the Motion Converter tool. These allow users to take 3D motion data and apply the animations to 2D characters. You can even activate a Z mode, to add depth to the animation.
The motion may be an obvious part of the workflow that benefits from the tools Cartoon Animator 4’s arsenal but there are many other, less obvious but equally important, areas that allow artists to deliver great content, efficiently.
Animations powered by motion resources and based on Photoshop artwork (Image credit: Powerup Kids)
Work with the tools you know and love
The act of getting an animated 2D character concept from the drawing app into the animation is now about as easy as you can imagine. In fact, Cartoon Animator 4 is so closely aligned to industry-standard tools, such as Adobe Photoshop or Affinity, that the process is virtually seamless. You can even interact with the animation using your graphics tablet, bring in the level of artists and art interaction as close as ever, and all the familiar gestures and muscle memory serve the rigging and animation, as much as painting the concept.
With that in mind, it is worth mentioning that the concept art, or any other 2D animation asset, can now easily be rigged with the tools of Cartoon Animator 4, meaning you can even take pre-existing art, rig it, apply motion capture data to it and add it to your project. Head over to test out the Photoshop tools integration and pipeline, or to read more detail.
This ease of use, tight integration with other tools and the familiarity of the hardware used by animators on a daily basis has meant youtube creators can generate shows like PowerUp Kids, rapidly and efficiently, and with all the hallmarks of a top-quality show. To try this out for your own projects you can get a trial license, with which you can test the suite of tools including motion gestures, and PSD compatibility.
Learn to take advantage of Character Creator 3 to empower your render pipeline.
José Tijerín is a digital illustrator and 3d sculptor, he is currently a videogame developer at Tijerín Art Studio.
Character Creator 3 is a powerful 3D character creation program used for video game and video production. It is capable of producing highly believable – yet stylized – images when used in conjunction with Maya and V-Ray.
In this article, Jose will explain his workflow with Character Creator and Maya V-Ray for creating Pixar style characters. You can download a free trial of Character Creator to create yourself.
Why Character Creator
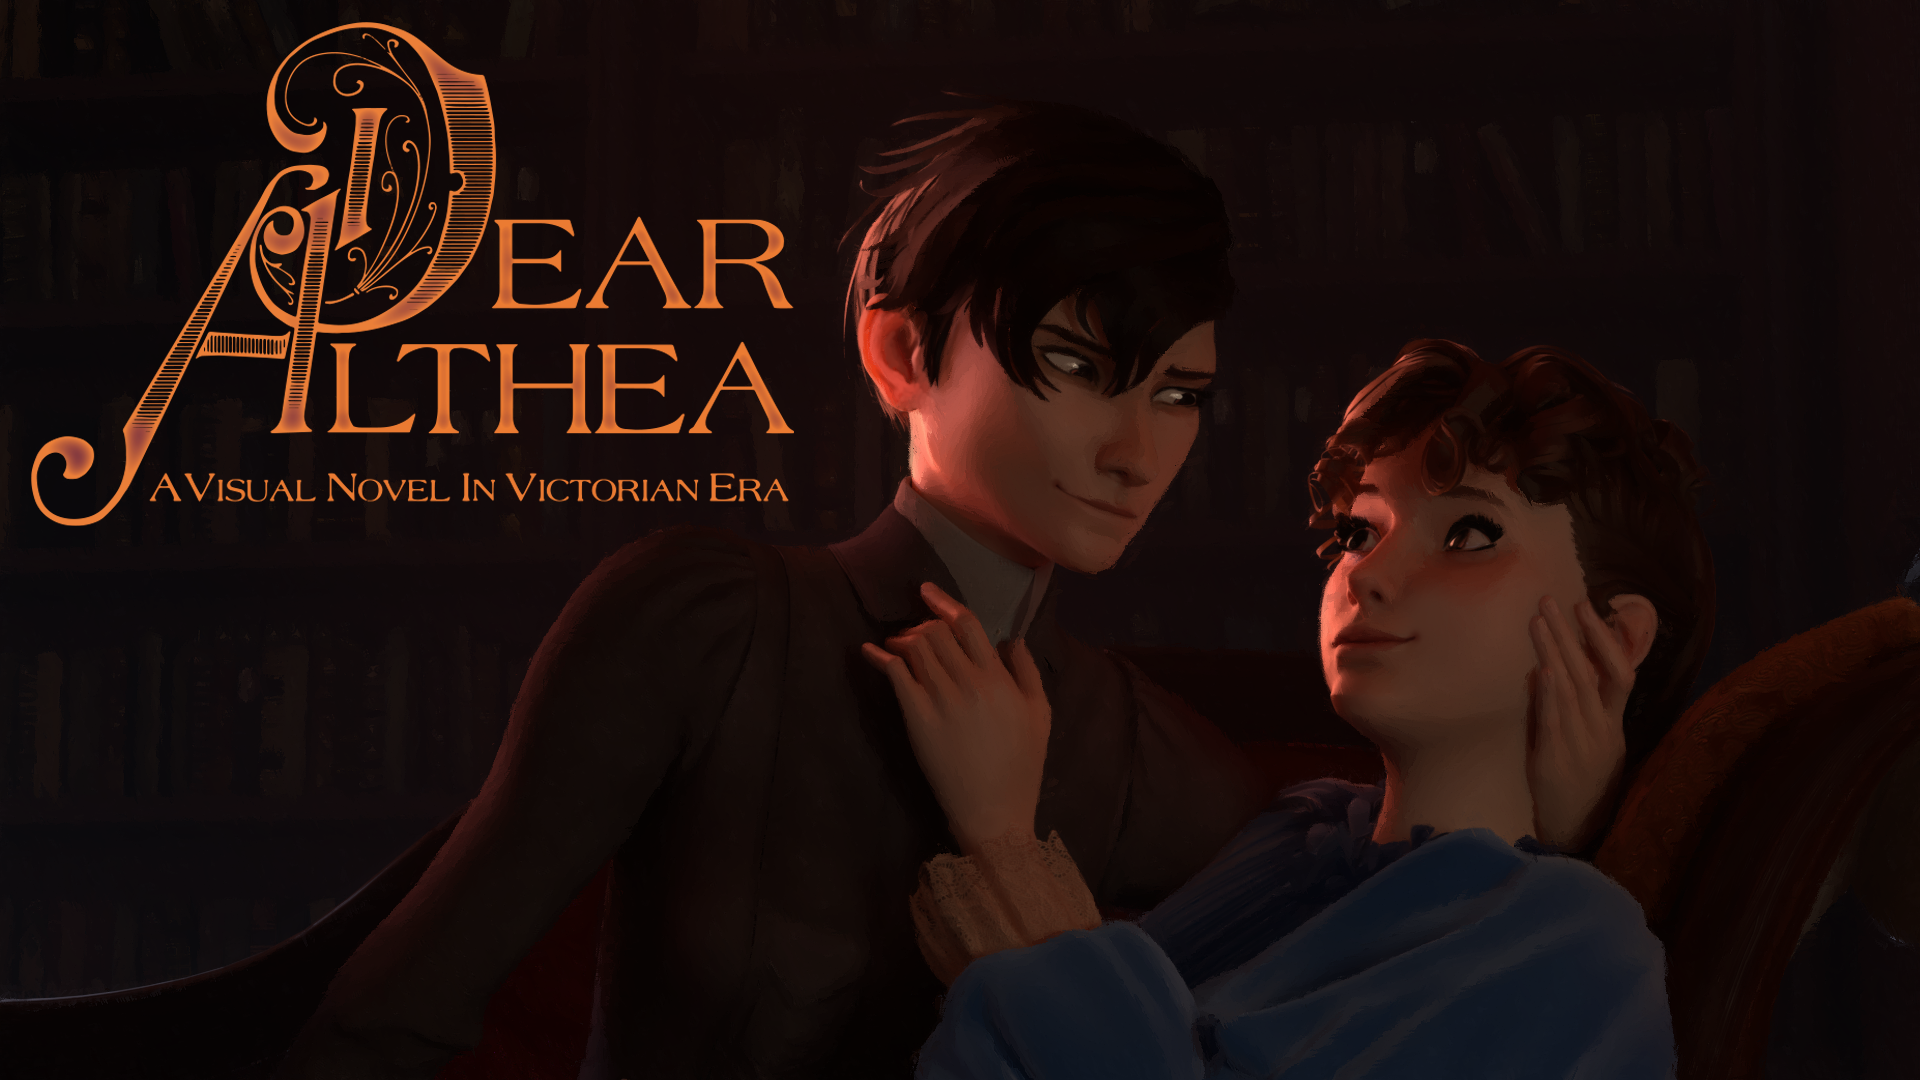
For this tutorial, I will use one of the cartoon characters from my videogame “Dear Althea” which will be released this summer on Steam and Itch.io, and whose characters were created entirely with Character Creator. In my game I use rendered images with an oil painting filter to create beautiful illustrations that resemble old paintings, so you can see just how many options Character Creator has to offer when it comes to making projects.
Using high quality textures offered by Character Creator
When creating a character with Character Creator we will automatically have the face morph, the full rig and textures at high quality. All this can be exported perfectly to 3D Maya saving us several days of work and increasing the speed in the workflow if we have many characters. The aspect we will focus on will be the use of these textures in V-Ray to create fantastic materials and render images of our characters at high resolution.
In this case, I start first with looking for references and making some concept art of the character. Then for me it is important to start modifying the textures before I start modelling because, especially in the cartoon style, this can completely change the features of the face.
Thanks to Character Creator we can easily save the textures to our project folder; but it is also possible to first create the character in 3D and then send it to Substance Painter to create the textures later.
Keep in mind that each skin is unique and it is not enough to change the general tone of the texture, even if your character has a cartoon style, so it is advisable to consult the appropriate references.
To achieve a stylized finish in the textures I recommend redrawing the opacity texture of the eyelashes, redrawing the eyebrows in the facial texture and replacing the texture of the eyes with cartoon eyes. We can also slightly blur the skin and nail textures to get rid of the pores and create a more uniform texture, but we won’t do that in this tutorial.
Modelling a cartoon style character
After updating the textures of the model in Character Creator we can start modifying its physical appearance. If we activate the Morph option we can modify the facial and body features by clicking and dragging the areas we want to modify. I recommend to start doing this to get a rough resemblance of our previous character drawings and then go to the Morphs section in the Modify menu to have more control over the changes, and further adjust the resemblance.
Finishing modelling in ZBrush for a great finish
Once this process is finished I always send the character temporarily to GoZ directly.
To do this remember that you have to have ZBrush installed, with the plugin already installed and the program open with a project already open. I also recommend working without perspective and having symmetry activated.
To model the character you will see that the size of the brushes is very small compared to the character. To modify the size of any brush we have to go to the menu Preferences / Draw / Max Brush Size and increase the size of the brush to work more comfortably.
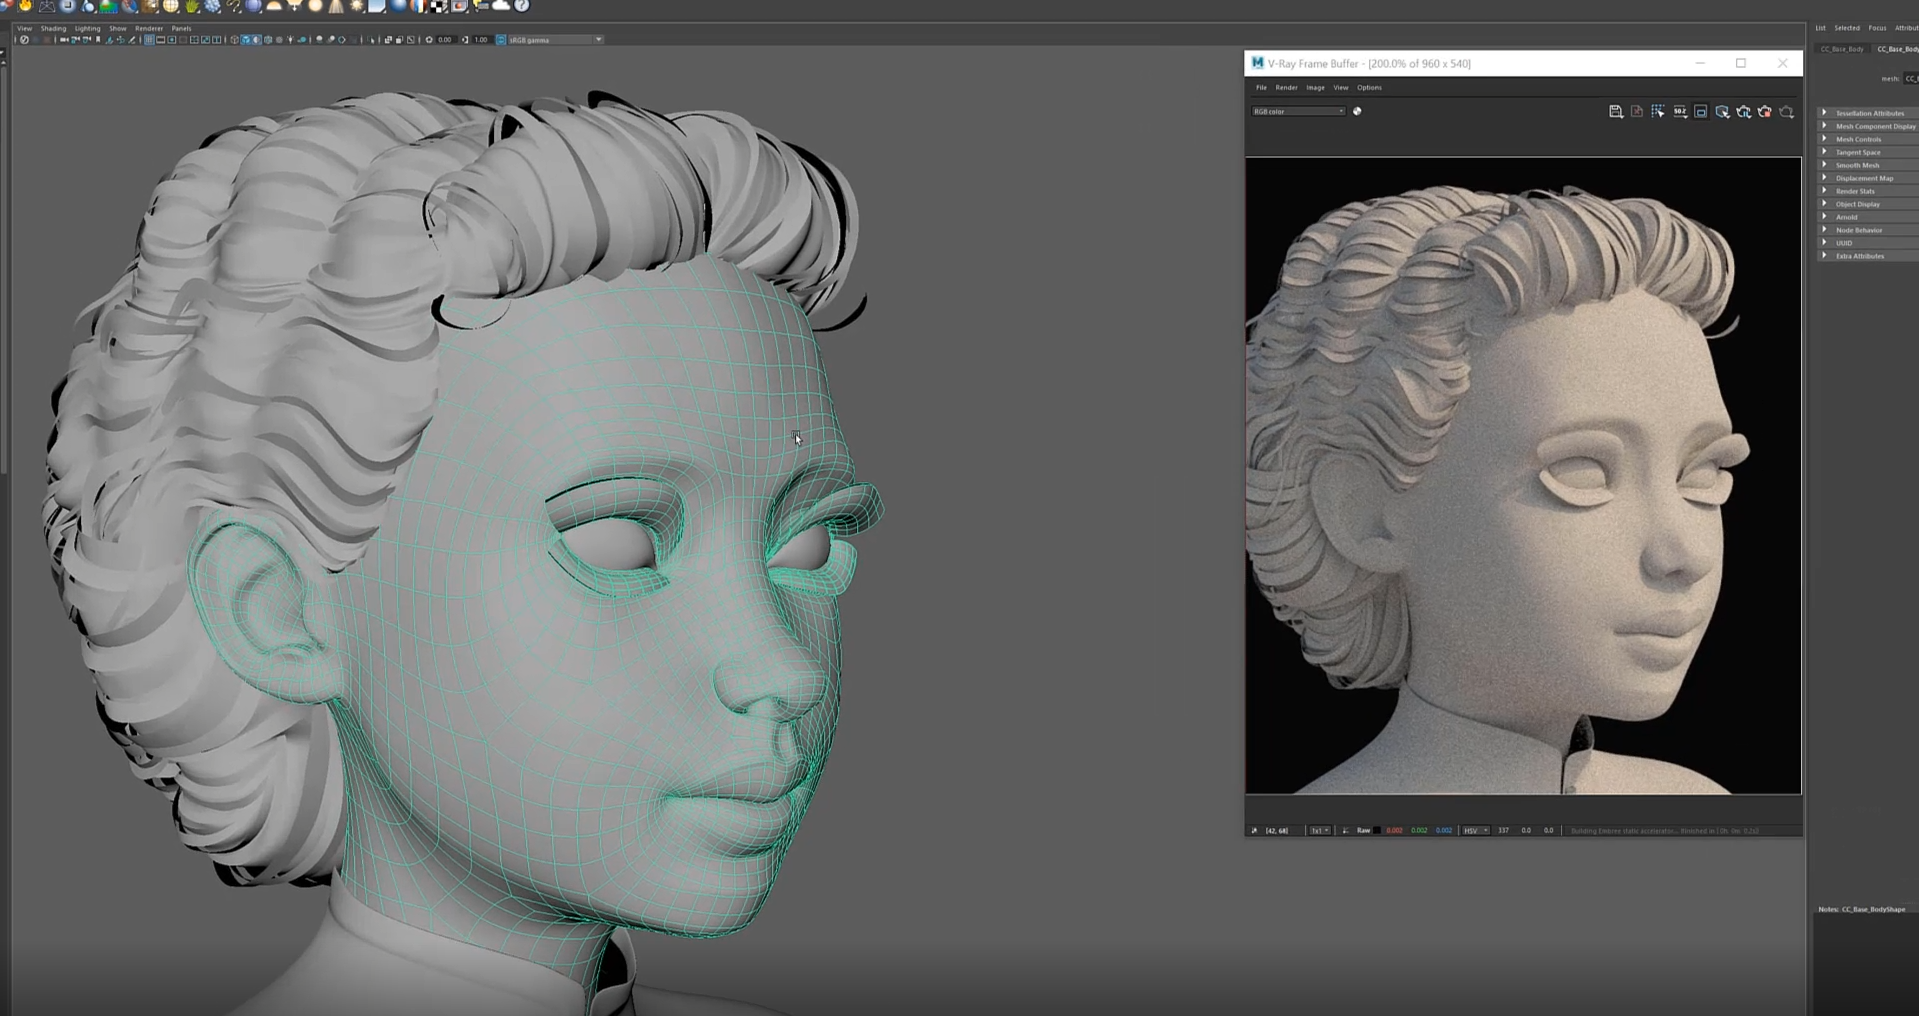
Working with a cartoon model in ZBrush until it resembles the references I have drawn is very simple and does not require us to increase the number of subdivisions. We just need to smooth the model to visualize it in the same way as we will do in 3D Maya when we lay out the character and work with the polygons.
To work with the polygons we have to activate the PolyF option, although at first it may seem unintuitive and it may seem that we need more polygons; remember that animation companies often use even fewer polygons in their animated characters.
Back to Character Creator
I don’t want to finish this section without giving a warning: that if we deform some parts of the model too much, several errors can happen, such as texture distortion (for example if we stretch some part of the model and our texture will be very distorted), morph deformation (if for example we make the eyes too big it is likely that the eyes can’t close properly) or rig deformation (if for example we deform the shoulders the rig of the hands will stop working properly). Fortunately for all these problems Character Creator offers solutions.
When we have finished we will only have to use the GoZ again to return the character to Character Creator, but remember to remove the Diffuse and Normal Map textures if you have not modified them before because the Normal Map textures that Character Creator offers by default will modify the appearance of your character and can confuse you if they are not the textures that you will use in the final version.
The perfect hairstyle
Character Creator has just updated its hair system and now offers several hairstyles, beards and even eyebrows (suitable for video production) that you can use on your characters, but for my project I decided to create a very personal style of hair.
In my case I start creating the base of the hair using the Topology tool. The hairstyle gives a very important definition to the character, so you have to pay special attention to its shape and volume. When I finish creating the clothes I make a retopology of the hair and start shaping the polygons to create tufts of hair. Once I do this process on the whole base of the hairstyle, I make a copy and take it to Maya. There I select a few rows of polygons to create hair tufts.
I don’t apply any texture to this hair because I leave all the work to the hair material offered by V-Ray, but later in the tutorial we will see how to work with realistic hair.
The clothes that define the character
To create the clothes I usually use ZBrush and its new fabric simulation options; although sculpting the clothes is still one of the options I like the most when we have very complicated garments. I always create these clothes on top of the character and when I have finished them I make a good retopology and send them to Substance Painter with the orderly UV maps.
Although I used to attach the clothes to the Maya character rig, I have now realised that Character Creator offers a lot of advantages when it comes to dressing characters. It offers several clothing items in addition to the ones we can import and use on future characters.
Exporting from Character Creator to Maya
Now we can export our character by opening the File menu and clicking on Export to have our character in Fbx format. In the window that appears, remember that the most important thing is to select the Maya option, everything else can be left as default.
To put this FBX file in Maya we only have to open the program and drag it in.
Configuring Maya to use V-Ray
Once we have imported the 3D character from Maya we have to go to the Render Settings menu and in the pop-up window we have to go to the Render Using section to select the V-Ray option. In that same window, in the Overrides section, activate the Viewport subdivision option to render the smoothed geometry (as long as we have selected this geometry and we have previously smoothed it using the numeric button 3). Further down in the same section we can find the Environment section. Finally, go down the tab and activate the Override Environment option.
Get good lighting quickly
If we now activate the render by clicking on the “Render the current frame” button we can see that the scene has basic general lighting. To improve the lighting quickly we can add sun and sky to the scene through the same window in the Environment section.
In order for the rendered scene to not appear over-exposed because the default camera in use is not well configured, we must select it in the Outliner menu and within the camera menu, activate the physical camera option. If we go into the properties of the sun we can also reduce its intensity and add some turbidity.
Applying the normal skin texture well
Now it’s time to use textures, you can look for them in the folder that the Character Creator has generated or you can save them directly from Character Creator. The most important images for the skin are all the diffuse textures and the normal micro map texture that can be obtained in the Shader Settings section.
To apply the skin texture just hold down the right mouse button and release it on the Assign New Material option. The properties window of the image we are going to add to the material will appear. Normally this normal texture is too strong. To lower the intensity just go to the Bump multi parameter and lower its intensity.
Applying two normals textures to the skin with a single material
Rendering the material with this texture we can see that it works perfectly, however if we zoom in we can see that we need much more detail. To add the micro-normal map we have to open the Hypershade menu and load the texture we just created. In the node representation we can see how the only texture associated with the material is the normal map that we have just placed and that now we have to unlink.
If we go to the Create section we can look for the Layered Texture node and click on it. This node will allow us to combine several textures in the same material. If we click on the node we can see its menu, inside we can create two spaces for two textures by clicking on the Add New Item button. If we already have the textures inside Maya we can simply drag them to the section we want. Before we continue we have to link the Out Colour parameter of the Layered node with the Bump Map parameter of our texture.
To add the second texture which would be the Micro Normal we can simply drag it from the folder to the node window. Now we just have to click on the Layered node and drag it as we did with the previous one to its section.
Now we have the two textures in the same material, but one of them covers the one underneath. So for the moment I’m going to deactivate it to leave only the Micro Normal texture. As you can see the Micro Normal texture is not working properly, this is because the texture size has to be reduced. To do this, click on the Place node of this texture and in the menu look for Repeat UV and enter a value of about 40.
Now we can see that the quality of the skin has improved a lot, but we still need to blend both textures. If we go to the Blend Mode section of the Micro Normal texture inside the Layered node we can select the Add option. And then we lower the opacity of the layer. We can see how both textures have been combined. Now we can increase or decrease the intensity of these combined textures to get the perfect result.
Creating a V-Ray Skin Mtl material
You already know how to set a basic skin volume. But now let’s go one step further. Again we will select the face of the model and add a new texture. But this time we will choose the V-Ray AI Surface material, but first, I’ll remove the basic material.
This material already incorporates a texture blending system for normals, so we’ll remove the layer node. Now we will attach the facial normal texture through the Out Colour section to the Bum Map of the new material. And the Micro Normal texture is introduced in the same way in the Reflection 1 Bump Map section of the new material. The first thing to do is to lighten the skin. To do this, we go to the Diffuse section and set it to black.
In my case I’m going to modify the Character Creator glow texture and place it in the Reflection 1 Strength section. And I’m going to lower the volume values in Reflection 1 Bump Amount and Bump Amount to make the skin less rough and have a better glow. Now that I’ve set the glow I’m going to introduce the Diffuse texture in the Diffuse section of the material.
Creating realistic skin
When rendering the material, we can see that although it has the diffuse texture and the shiny texture, it doesn’t look like real skin but like a painted sculpture. To bring it to life we need to go to the SSS Density Scale section of the material. I will give it a value of 0.05 so that the effect is clearly noticeable.
This allows the material to be more translucent; it allows light to pass through, but diffuses it by diffusion in the same way as real skin. Next, let’s modify the value of the Sss Mix section to 0.5. This will mix the Fuzzy component and the SSS component. To intensify this concept I will darken the colour of the sss1, but you could also try different SSS settings to get different effects like in the dragon statue example.
In these comparative renders we can clearly see how the skin now transmits lighting and feels warm and natural; in the backlit ears we can see that they are much more realistic.
Creating realistic material for Character Creator hair
Now that we have finished with the skin, it’s time to continue with the eyelashes. We will select the polygons of the eyelashes and apply a basic material as we did at the beginning of the tutorial. In my case I just want to make some cartoon eyelashes; so I’m just going to change the diffuse colour to black. And I’m going to apply the opacity texture I drew at the beginning in the Opacity Map section.
If you want to make realistic eyelashes you have to do the same steps as for realistic hair. I’m going to make an example hairstyle: let’s take a hairstyle from the Character Creator and extract the opacity textures from the hair.
Once in Maya we have to apply a material called V-Ray Hair Next Mtl. And of course, then we must apply Transparency to give the desired colour to the hair. For a natural looking model, all the polygons of the model must be smoothed. This makes the results much more realistic, especially the hair.
However, I chose not to apply textures to the hair of my character because I want to give it a cartoon look. This way I leave all the work to the material; which gives a very good final result.
Creating perfect V-Ray material for teeth
Now we come to the part that everyone forgets, the mouth and especially the teeth. If we select the character and hide it, we can have better access to the teeth. We are going to use Character Creator textures using the same material as the skin but increasing the brightness. However, we can see that the teeth need a different material to look correct.
If you are also making a cartoon character I recommend you to make the teeth whiter. I set the glow colour to white and lower the Reflection Brightness a little. Then I go to the Reflection Colour section and set a grey colour. At the bottom, in the Refraction Glossiness section I give it a value of 0.5. If we now look at the render we can see a translucent glass material. To give it colour, we go to the Fog Color section and place the same texture we used in the Diffuse section. For it to look less like glass, we have to increase the colour density in the fog multiplier. And finally, what I do is to activate the Subsurface Scattering option. If, as it has happened to me, the teeth look too shiny, we just need to darken the texture we have set in the Fog Color section.
Creating cartoon eyes with V-Ray materials
Let’s move on to the eye texture, I could show you how to create a realistic eye with the Character Creator textures but that would take a whole tutorial; so let’s create some eyes in the Cartoon style. Let’s start by hiding the Eye Occlusion and Tearline geometry. Then I’m going to select the geometry of the two eyes and extract it. Don’t worry, the eye rig will still work perfectly afterwards. I select the polygons of the geometry that I haven’t extracted in the shape of the iris and flatten them.
When I go back to the geometry I had extruded, I deform it so that it can fit into the hole I just created in the iris-shaped eye. To this geometry I like to apply very colourful materials, so starting from the V-Ray base material, I try out various combinations. This is one of the most creative parts of V-Ray, because I like each eye to shine differently. This allows me to make materials similar to gems or precious crystals.
In this case, as her cartoon eyes are brown, I have created a material with the same parameters as the material of the teeth, but with a metallic touch that will give a lot of life to the cartoon eyes. When I like the material, I select the pupil-shaped polygons and put them inside. To these polygons I assign the basic V-Ray material but I leave the diffuse texture totally black so that it doesn’t reflect any light. For the eyes to have good brightness we have to unhide the Occlusion geometry of the eye and deal with its material.
Again the V-Ray base material will be perfect to create a crystalline material. For this we have to put a white colour in the Refraction Color section. And to make it shiny we just have to put a white colour in the Refraction Colour section. We can control the intensity of this brightness using the Amount parameter. To finish with the eyes we have to unhide the Tearline geometry and of course apply the basic V-Ray material. The material I use is exactly the same as the one we just applied.
Applying textures to V-Ray materials
I finish the textures section by applying the rest of the body textures with the same skin material and the same parameters. And of course I apply the clothing materials that I had previously created in Substance Painter. Remember that if you want more definition in the clothes you can apply a second texture of Normal map of a fabric in detail as we did to the textures of the skin to give it much more realism.
To visualize the whole rendered cartoon character I usually apply the render inside the scene, to do this I go to the Render menu and select the V-ray IPR option.
Character Creator and V-Ray to achieve different environments
Now that the cartoon character is complete we must make sure for the last time that we have respected the original design or idea. We won’t be able to make major changes at this stage, but we should be able to adjust some tones and brightness.
If in addition, as in this case, the character is part of a larger project such as a video game, the overall result must be compared with the rest of the work. These are concepts that must be taken into account throughout the project and that, fortunately, Character Creator helps to do. Character Creator allows us to save Morphs to be able to apply them to all the characters we create equally.
For example, if you want to make characters with bigger heads, you can apply the same parameter to all your characters. A good way to check that the materials look correct is to subject them to various types of environments. Character Creator offers several high quality HDRIs to light up your renders.
You can find the HDRIs in the Atmosphere menu. Within the IBL submenu we can view them and search for their location on the computer by entering them and selecting Find File. We don’t need to copy them anywhere as they are large files, instead, we can use them from the same folder in V-Ray. To apply these backgrounds to our Maya scene, we have to go back to the Display render Settings menu. And just like at the beginning we have to go to the Overrides menu, but this time when we enter the Environment menu, we will remove the sun and the sky. In the same way that we apply the textures on a material we should apply the HDR Background texture on all the sections of the menu.
To save time, remember that you can copy and paste the address where the texture is located so you don’t have to look for it again and again. Even after we have applied all the textures, they still can’t be seen because changes were made to the camera. For these textures to show up, we’ll need to deactivate the physical camera inside the Extra Attributes section of V-Ray.
When moving from one environment to another we have to pay attention to the brightness of the skin, as it is very common for shiny spots to appear in unwanted places. These backgrounds are not only useful in these kinds of tests, they can also be used as Reflection Textures for improving the quality of your render.
Final optimisations for complex scenes
Before we get to the end of the tutorial with the final render settings, we have to talk about optimisation. Character Creator characters are perfectly optimised to work in video games, but if in Maya we smooth the polygons of the character we will be multiplying those polygons three-fold. And very complex scenes can slow down the workstation.
A good trick to solve this is to apply V-Ray Displacement to the models, this will make the models look smooth when they appear in the render. When applying this parameter it will appear in the Outlinery, inside it we will be able to drag all the geometries that we want to smooth. To activate it we will have to enter in the Attributes menu and open the V-Ray menu. Inside we will activate the Subdivision option. As you can see, although the model has few polygons in the final scene, it appears smoothed when rendered.
Final rendering
To start with the final render, let’s open the Display render Settings menu. To find out where our render files go we have to go to the Edit menu. If we go to Change Project Image Directory we can see and change the location where all the renders are stored. If we look inside the Common menu we can find the Animation section that can be activated if we want to render several frames. In the V-Ray menu we can find the Image Sampling section.
Here we can control the sum of divisions and the way the render is sampled. When a render is started, a series of rays are drawn to get the geometry information that will be visible in the final image. The more subdivisions we put in, the more rays there will be and the better the final image will be. However, the more rays, the longer the computer takes to render. It is not necessary to touch them, the default figures given by V-Ray are the optimal ones to work with both types of samplers. In a nutshell these two types of sampler are:
Progressive which is mainly used to preview a render, as it prioritises speed over quality.
On the other hand, Bucket prioritizes quality and is the one mainly used for final renders, giving very good results.
If we go to the Render Elements menu we can select the render passes we want to output from our render. Among all of them I recommend adding the Denoiser to the render. Besides giving render passes as the diffuse (which serves to see only the textures of the render), it allows us to obtain a special render pass in which, as you can see, has removed much of the noise that would have otherwise cost additional hours of rendering. Although there is a limit in reducing render times in which Denoiser begins to adversely affect quality.
Render passes
Finally it is important to see the resulting render passes in the drop-down menu of the render window. Vray allows you to make the following render passes: SSS (for skin materials), Diffuse, Atmosphere, GI, Reflect, Light, Reflection, RGB, and zDepth (useful for applying lens blur filters in After Effects and Photoshop).
I hope this article has helped you with your creations and please remember to check out my video game on Steam. If you want to keep expanding your knowledge, visit Magazine Reallusion and read their interesting articles, or go to their YouTube page and subscribe to it so you don’t miss any of their upcoming video productions.
Brian Clarke is a solo independent game developer focusing primarily in the horror genre with a 13 year history working at game studios like Trion Worlds, EA, and Disney Interactive. Brian aims to bring his experience in the field to solo development.
Starting out as a terrain artist at Mythic Entertainment, Brian spent his AAA game career working as an artist and manager through many different projects.
After achieving many of his goals in the AAA space, he decided it was time to build something of his own. Brian taught himself to program in C# and set out to make his own projects with a long term goal of creating a small independent studio.
His next project is The Mortuary Assistant where the player assumes the role of a mortician in training. While performing the normal tasks around the mortuary, strange things start to happen. As time goes on, we learn the player is in the process of being possessed and must identify which demonic entity is lurking within the mortuary.
In this game project Brian utilizes pre-rigged characters made with Character Creator to generate a number of animatable characters. He also utilizes iClone‘s animation tools for both protagonists and none-playable characters.
“Being able to change everything about your character in real-time saves on a lot of guesswork. You can really make some amazing stuff that is fully functional, quickly with these Character Creator tools.”
Reallusion Cartoon Animator 4.5 update exports transparent footage for video compositing
Reallusion, the software developer of Cartoon Animator 4 (CTA4) – a 2D animation software that turns images into animated characters with intuitive animation tools and content libraries; expands its horizons to the video editing community by supporting transparent footage to all video making tools.
Combine 2D Animation with Live-Action Video Footage
Cartoon Animator combines animation with real-life footage, helping creatives revisit once difficult projects like Disney’s acclaimed “Who Framed Roger Rabbit?”, or Looney Tunes and Michael Jordan’s Space Jam. This latest CTA 4.5 update allows video editors to employ a repertoire of powerful animation tools including facial expressions, smooth body motions and 360 head, along with animated characters, backgrounds and motions that can be exported as transparent MOV videos for fast video compositing.
Through Cartoon Animator, video editors can also access an extensive library of fully-rigged characters and motions that can be easily customized, making animation editing a fun experience.
Two typical user cases frequently seen on professional video projects:
Composite 2D characters with live action footage with post lighting and shadow effects
Immerse real-life actors inside virtual 2D scenes
Supports Transparent MOV and PNG Sequences
Cartoon Animator supports both transparent video (MOV) and image sequence (PNG) export. CTA 4.5 Users can freely group animated elements into transparent footage to easily add visual effects to animated items, and composite 2D animations with video through all major video editors while employing useful features such as exporting selected items for fast video compositing, Fit-to-Object-Size output for optimized video editing, and much more.
Users can use Isolate Selection to exclude unwanted elements, and export only selected ones. Selected items will be automatically merged into one transparent element for fast video compositing.
Smart Export
Exported items will automatically be placed into their corresponding folders in accordance to their types.
Fit-to-Object-Size Export
Creators can export animated items with their effective animation range instead of the entire project. They can also easily rearrange object positions in editing tools, and optimize performance for smaller data sizes.
Update for After Effects
In CTA version 4.5, Reallusion also enhances the functionality of Export to After Effects, including exporting audio clip by object (.wav), camera settings, project sounds, background image, and transparent Video (.mov). Users can download the free AE script from the webpage.
Free Update for CTA Pipeline / Pro Purchase Users
This CTA 4.5 free update allows Cartoon Animator users to use any preferable video editing tools to add powerful post production effects to their videos, elevating their end products faster and at low costs, in ways that would normally take big budget studios several weeks of work with a large team.
“I’m so excited with this update. If you are an animator, I assure you that this is going to change your work life. You will no longer be restricted in any way. All new exciting possibilities will open up for you. If you can dream it, you can create it.” said GarryPye, Reallusion’s 2D Community Manager and Certified Content Developer.
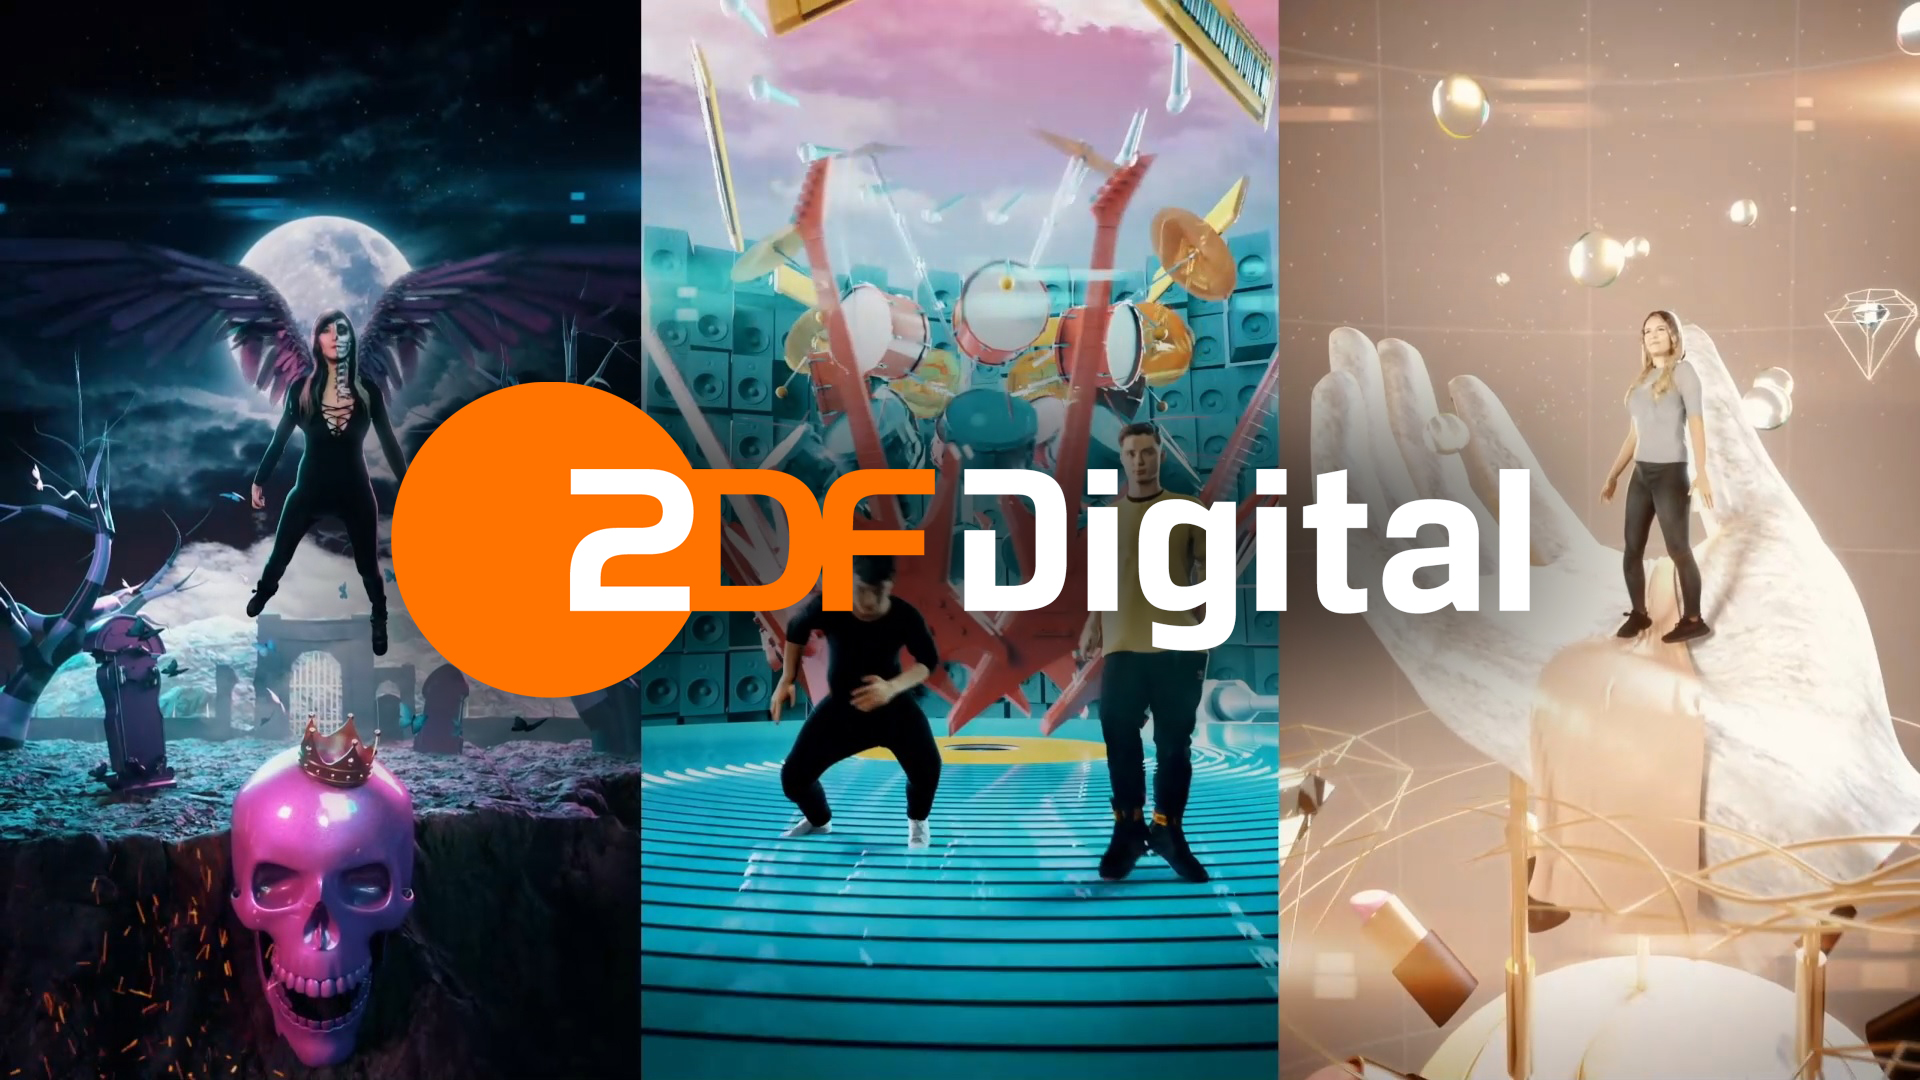
ZDF Digital develops advanced television and design products for national and international clients. They create immersive and interactive experiences and products for TV, web and social media for national and international customers.
At their offices in Mainz and Berlin, they bring documentary reports, TV magazines, TV shows, corporate and advertorial films, transmedia productions, apps, e-books, interactive and broadcast designs, animation and visual effects to life.
With have over 70 experts – developers, editors, concept designers, 3D, VR, motion, corporate and sound designers, performance managers, editors / cutters and subtitlers working together on projects, they have recently delved into adopting real-time creation and animation tools, like Character Creator and iClone, in their network pipelines to speed up production while maintaining quality.
“Now we use the Reallusion software on a daily basis, for all kinds of high-end projects to create much more, and better output at the same time.”
Mario Hill – Motion Designer | ZDF Digital – Germany
Explore innovative ways to create animations with iClone for Cartoon Animator.
The world of animation traditionally has sets of tools devoted to 2D or 3D. In recent years, with the advancement of technology, the barriers between 3D and 2D have been broken down. More and more 3D animators have found ways to create 2D animations on the basis of 3D skills. Here, I’ll explore how to create animations with both 3D and 2D tools.
Where 3D meets 2D
I’m Tom Jantol, a filmmaker and animator who graduated from Film Academy as a film and TV director a long time ago – I’ve been a professional animator for more than 15 years. I first started with game engines as part of the Machinima movement, then further delved into software such as iClone, Cartoon Animator for 3D and 2D animation, Unreal and Unity game engines, and After Effects for post-production.
As 3D animators, we have always been in a race with photorealism; however, there are times when we need different creative approaches for storytelling. I will never forget the time a viewer watched a realistic animated character I had made and said: “sorry, but hand-drawn cartoons are far more convincing”. Our brains automatically compare 3D with the real world and the tiniest discrepancy shatters that illusion. On the other hand, 2D animation has the flexibility to create its own world of exaggerations and illusions.
(Image credit: Tom Jantol)
3D and 2D both have something to offer, then – they can both create distinctive and incredible worlds. Traditionally, the learning curve of mastering 2D or 3D animation was too high to acquire both skillsets. However, new software has made it easier than before. For example, you can now directly apply your 3D animations to a 2D character, despite the dimension difference in iClone and Cartoon Animator. This is where both worlds cannot just coexist but supplement each other. My dream is to merge these two worlds in a way that celebrates both, showcasing the best of each. After all, the viewer doesn’t care about dimensions, they care about the emotion that the art brings.
An easy workflow from 3D to 2D
Cartoon Animator, iClone, and After Effects are the backbones for any idea willing to emerge from my crowded animator’s brain. They cover everything from creating 3D animations, making a 2D character move, to post-production, which makes the final result enticing. The best thing is that I don’t have to think in dimensions; whatever comes to mind can be realised using these three programmes.
Take one of my recent animations – Lamp Fight – as an example (see video above), there are a few key steps to completing it:
01. Animate 3D characters in iClone
(Image credit: Tom Jantol)
For the initial animation of the character, I prefer using iClone to make the character animation I want. As there are advanced features in iClone to help me easily animate the details.
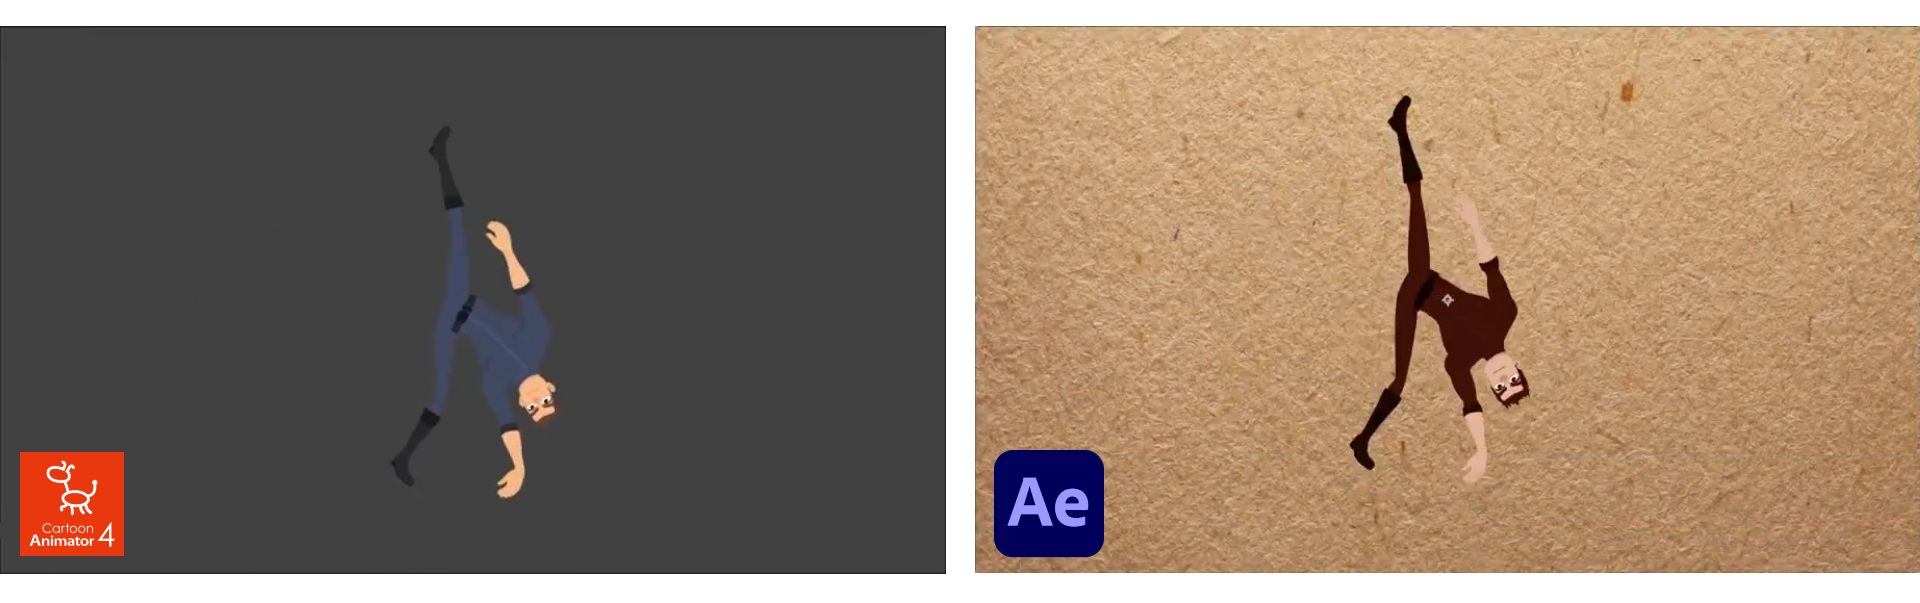
02. Apply 3D animation to 2D characters in Cartoon Animator
(Image credit: Tom Jantol)
I know many animators who would like to try 2D character animation, but they are afraid of the complex work they think is involved. With iClone’s Motion Link plugin for Cartoon Animator and iClone, this fear is obsolete. Animators can literally animate 3D characters and in real-time watch that animation applied to 2D characters. It may sound almost impossible, but it is not just possible – it’s easy to do. Let’s put it this way: what was once a nightmare, is now a pleasant multi-dimensional dream.
03. Polish the animation with VFX in After Effects
(Image credit: Tom Jantol)
Then, I send the entire animation clip as sequence images to After Effects with just a few clicks by using the AE scripts for Cartoon Animator. I further arrange the compositing and add lighting, texture effects to give the animation a finished look.
04. Create scenes in iClone
(Image credit: Tom Jantol)
iClone is perfect for making a quick 3D scene of the table with a lamp and a bunch of papers. I used After Effects to give the video the ‘paper look’, and then I send the video back to iClone to close a circle with animations of a 3D lamp, synchronised with the moves of a 2D character.
05. Animate lamp according to character animation
(Image credit: Tom Jantol)
With all the materials gathered, the last key step for me to work on is to arrange the camera movement and animate the object (the lamp) to interact with my character.
Combine 2D and 3D in incredible ways
Thanks to the recent capabilities of the Motion Link connection of iClone and Cartoon Animator, and the AE script that links Cartoon Animator to After Effects, Reallusion plugins make the realisation of any idea possible. Jumping from one software to a second, or third has never been easier. Sometimes I feel like I am working in one big, merged software.
The iClone Motion Link plugin is a game-changer for animators. It solves the biggest problem of 2D animators and brings 3D functionality right into a 2D world. Those two dimensions are now closer than ever. It is modern puppetry with modern wizardry. We can now animate our characters in an easy-to-use 3D environment and then ‘glue’ that animation onto a 2D character in Cartoon Animator in real-time.
Founded in 2020 in France, Sandfall Interactive is an independent video game studio focusing on PC and next gen console development of high quality premium games. With a focus on single player experiences, they are looking to deliver incredible stories with fascinating characters in gorgeous worlds for all players to immerse into.
Their first game currently in development – Project W is an RPG experience aimed at next gen consoles and PCs. Set to release on Unreal Engine 5, the game will immerse the player in a beautiful post apocalyptic fantasy world through an epic single-player narrative-driven adventure.
Guillaume worked in game production at Ubisoft for 4 years before founding Sandfall Interactive. They won support from Reallusion’s Pitch & Produce program, where they received the help of real-time creative tools like Character Creator,SkinGen plugin for Character Creator (CC), iClone, the Rokoko Smartsuit profile for iClone, and AAA mocap motions from the ActorCore online platform, to be used in the Unreal Engine.
“The promise to get realistic characters, fully customizable, automatically rigged to the UE4 skeleton, and with blendshapes seemed too good to be true — but Character Creator actually delivers in all these areas.”
Guillaume Broche – CEO / Creative Director
Q: Bonjour Guillame, and welcome to the Reallusion Feature Stories. Kindly introduce yourself, Sandfall Interactive and Project W.
Bonjour everyone! My name is Guillaume Broche and I am the CEO and Creative Director of Sandfall Interactive – a new video game studio based in Montpellier, a sunny city in the south of France. I have worked at Ubisoft for over 4 years and recently decided to start my own studio together with another Ubisoft dev, and we are now a team of 8 planning to grow up to 15 people.
Our first game currently in development is Project W, which is a fascinating and ambitious RPG experience aimed at next gen consoles and PCs. Set to release on Unreal Engine 5, the game will immerse the player in a beautiful post-apocalyptic fantasy world through an epic, single-player, narrative-driven adventure.
Q: You applied to the Pitch & Produce program where you used Character Creator and the SkinGen plugin to create your characters. What are the typical challenges that game developers face when making characters? And what originally caught your attention when using Character Creator and SkinGen?
When creating 3D characters, especially in a realistic style, there are a lot of things to worry about: do they look good? are they well optimized? How am I going to do the facial animation? How am I going to rig them? How can I make my textures realistic enough? All these questions and many more make creating high-quality characters expensive and time-consuming, especially when you want to create many.
As a small team we have to find ways to optimize that, which is why Character Creator and the SkinGen plugin for Character Creator, caught our attention. Character Creator has great tools to setup cloths and paint weights.
Not only that, but we are using it to rig all the creatures in our game.
Q: For your game animations you utilized a combination of mocap from the Rokoko Smartsuit, key-framed animations and Reallusion’s ActorCore mocap library. As a game developer, what kind of motions do you need to mocap yourself, versus using pre-made animations from a collection?
Pre-made animations are a fantastic way to gain time. We always modify them a bit to make them more unique, but having access to a polished library of mocap animation, like the Reallusion ActorCore platform, is awesome.
— Sandfall Interactive – CO:E33 out now! (@SandfallGames) February 12, 2021
Though of course it doesn’t fit all our needs, especially when we have complex cutscenes and such. In which case we turn to the Rokoko Smartsuit Pro to get exactly the animations we need.
Finally for the character’s skills, we use a combination of mocap and keyframes to make them more dynamic.
Q: Yourself and some of your team members have previously worked in big AAA studios like Ubisoft. What would you say are the biggest hurdles in coming from a large studio, to an indie studio?
Time and people of course! When switching to an indie studio you lose the comfort of having ultra-specialized people in every field, so you have to learn a ton of stuff that wasn’t originally your specialty, including character art. So far, I was the one making the character, but we are hiring a character artist to push they quality ever further with custom hair, beards and skin textures. We also need quite a few monsters to kill!
The indie adventure is fascinating, you learn a ton every day, you meet so many incredible people along the way, you face so many technical and creative challenges… but overcoming them feels so incredible. We are also able to go much faster than big teams on many points, as we are much more agile and communication goes a lot faster when the team is human-sized.
Q: Project W is currently in development; when is the game to be completed and what can the community look forward to from Sandfall Interactive?
Project W should release in about 3 years. It is quite an ambitious project so we want to take our time to deliver something incredible and unique. Note: that this is an estimate that is totally subject to change don’t take it as a hard date.
The community can expect us to always deliver games that we are proud of. We love single player narrative games with well written characters, an engaging story, a unique Art Direction and deep yet fun gameplay.
— Sandfall Interactive – CO:E33 out now! (@SandfallGames) February 22, 2021
We really hope that our first project will be loved and played by as many gamers as possible, because we are really pouring all our hear into it. Stay tuned for more news!