首頁 » Page 73

Concept Art MasterClass #1: Getting Started and Sketches

Gnomon Instructor and Senior Concept Artist Kyle Brown shares a groundbreaking workflow

As the world of 3D art and animations continues to expand into a new renaissance, animators and artists alike are rushing to find the best, most efficient tools to bring their visions to life. To CG artists, the ability to seamlessly move through the workflow of concept to finished product is invaluable. From rigging and posing character models, to the generation of textures and skins, and finally the pipeline to outside 3D tools, these artists require the best possible tools at their fingertips. And for Senior Concept Artist Kyle Brown and his students, having such tools is essential.

Kyle Brown, a veteran of the CG world, Kyle has worked within the field since 2015 and has had his hand in a number of projects throughout the film and television industry. He also currently is an instructor at the Gnomon School of Visual Effects where he is able to share his expertise with others.

Kyle is not a character modeler. Any 3D he has learned has been out of necessity to make the conceptual designs he creates more efficient. For the longest time, the only 3D package he utilized was ZBrush with programs like Keyshot to render.

This is Kyle’s first time using Character Creator and SkinGen Premium Plug-in. After this project, he shared the work he has done using Character Creator, and he is constantly telling friends and peers who work in the industry and use the same tools about Character Creator 3 and how valuable it has been to his work as a whole.

In this demo, Kyle will walk you through the steps of using Character Creator 3 from the earliest steps to render out a simple image to sketch on top of to using that same avatar to send to ZBrush to sculpt and dress, then to finish back in Character Creator 3 where we resolve textures, lighting, and rendering of our cyberpunk character.

This Master Class comes in 7 parts, each carries its own tutorial video to guide you through the entire process of how Kyle incorporates Character Creator, Photoshop, ZBrush, and other tools to create a character and concept art. You can find links to the other 6 tutorials below.

Part #1: Getting Started and Sketches


There are plenty of options in the 3D marketplace, but from the first time I opened Character Creator 3 was clear that it was a step beyond. A real time render window gives me an up to the second preview of my character creations. This was extremely valuable to start the whole process as I was able to find and place the female character of my choice into the scene and use some basic, yet impactful stock lighting to bring it all together. Since This was going to be the same character, I would use for the rest of the design process, I knew that whatever I sketched on top to have approved, would be fully achievable on the proportions of my avatar.


The base body render straight out Character Creator 3 that will serve as the base of our cyberpunk character / android sketches.

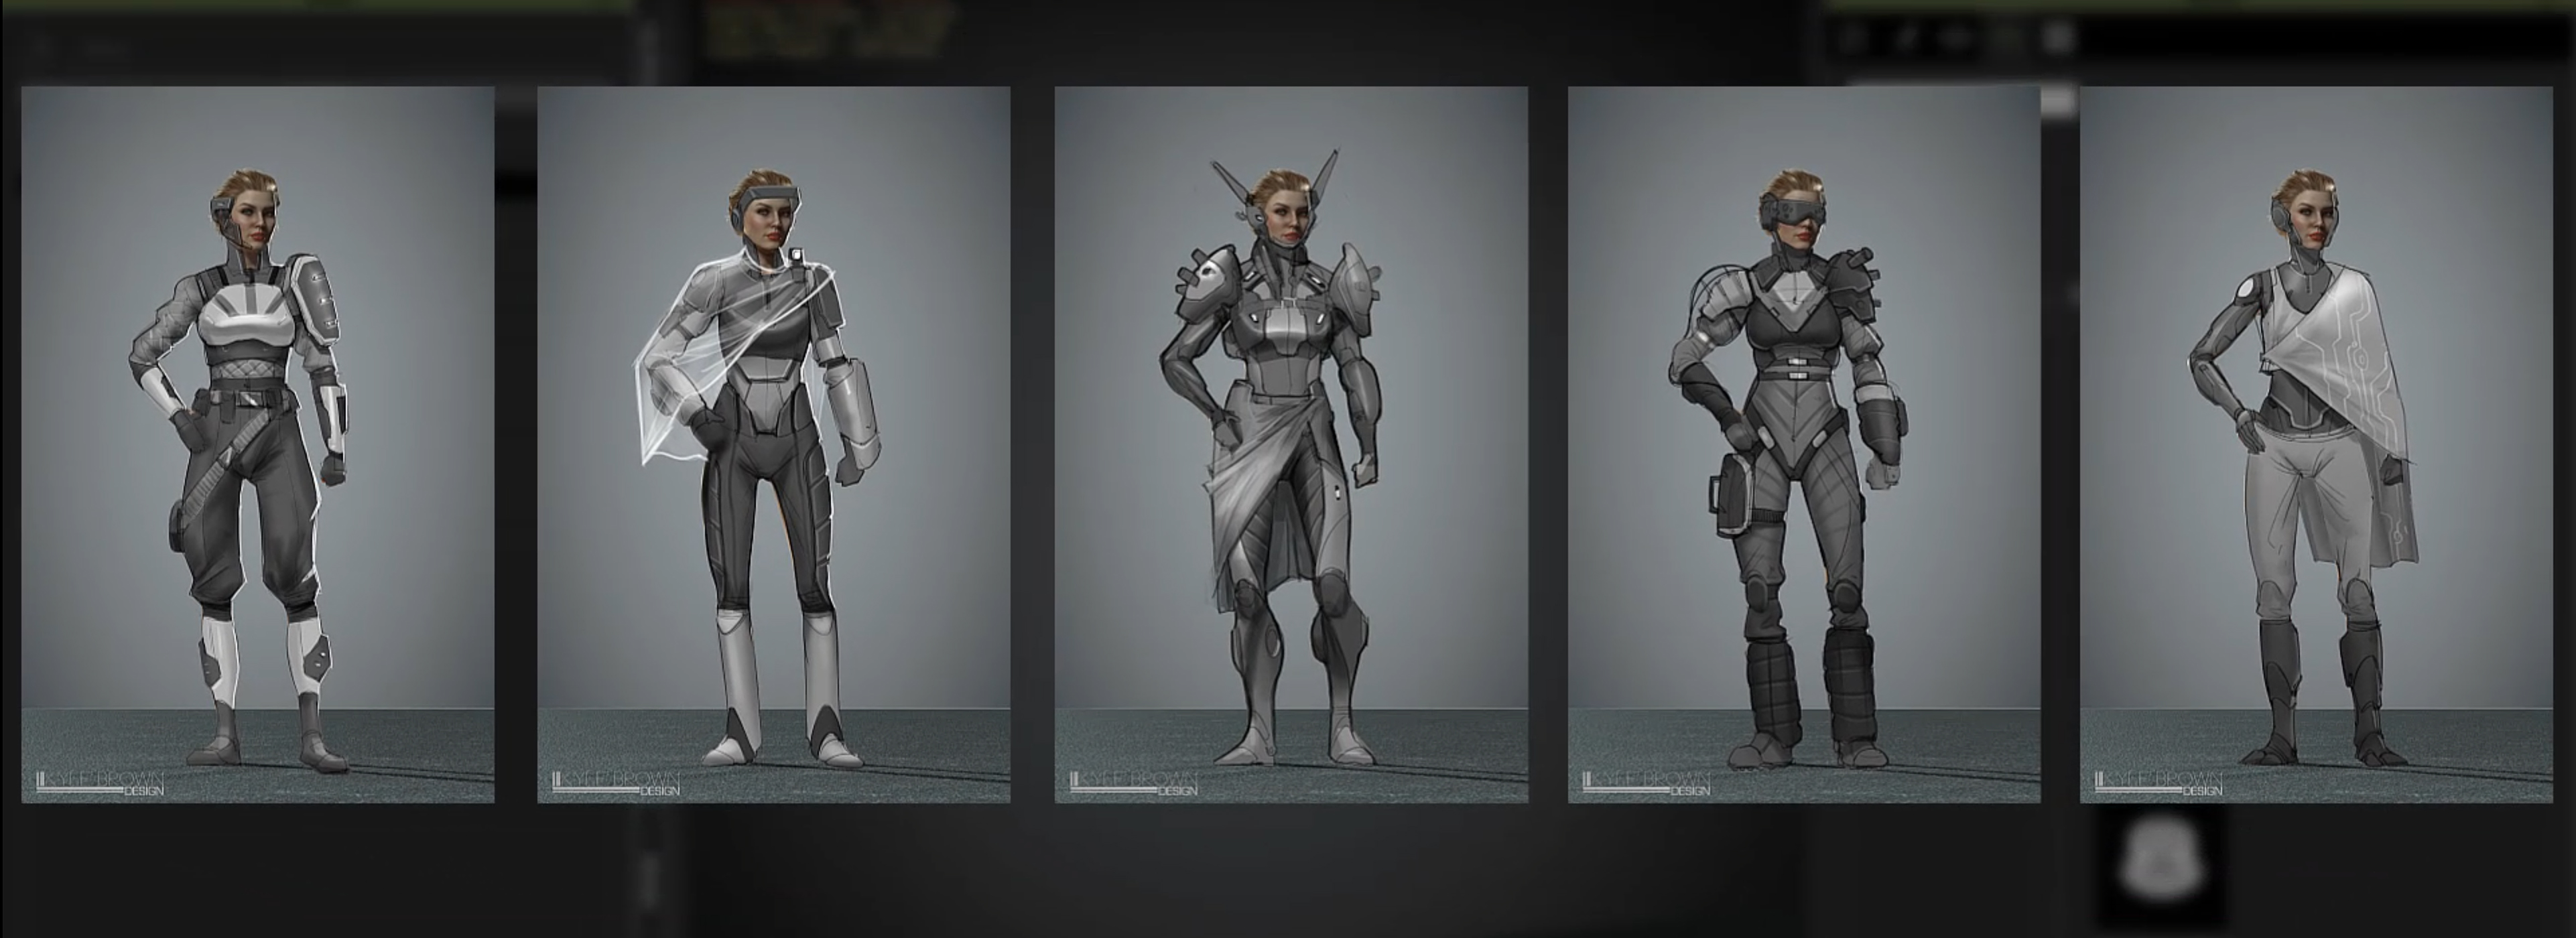
I utilized the perspective and lighting built into the initial render to quickly sketch out ideas for her costume. This offers an efficient way to create a character and be creative without having to juggle a bunch of balls like blocking out the underlying anatomy for every concept.

The Sketches might not be the prettiest, but variety is the name of the game with early exploration. I want it to be clean enough that it reads and will convey exactly what I plan on doing with the final to the client, meaning I want hard surface pieces to look like hard surfaces pieces, cloth like cloth and skin to look like skin as a few examples.

After the first wave of initial sketches, completed in grey scale so the client can look at the shapes alone, I utilize the client’s feedback and some inspiration to explore some color options. I really enjoy the color palettes of any cyberpunk universe, whether they are dark and gritty, muted with pops of neon, or an over the top ‘extreme’ aesthetic based in future street fashions and extreme sports.
I explore some refined facial details for the new features in SkinGen inside of CC3. Looking through the features, I saw there is an ability to apply decals or cuts to the skin that I figured would be perfect for the traditional cybernetic cutlines on cyborgs and androids.

I opted for a blend of the two, something with a tactical purpose but something that would stand out. Saying it now, it might sound like a contradiction, but visually I want it to look purposeful but still look sleek and unique.

I quickly blocked out some color, not being too precious with fine details, but opting for more of a graphic read, something the client can quickly look at and give immediate reactions and input to. Once we get the greenlight on the options, or make quick modifications of the presented versions, we are ready to jump back into CC3 and ZBrush!

Follow the other 6 tutorials in this series:

Part #2: Costume & Asset Creation in ZBrush

Part #3: Refining and Adding Details in ZBrush

Part #4: Generating Textures and Importing into Character Creator 3

Part #5: Lighting and Posing a Character in Character Creator 3

Part #6: Costume Variation and Texture Modification


Part #7: Comping Renders, Paint, and Finish

“Cardi Tries” Facebook Watch series takes Cardi into the game with Reallusion & Actor Capture

“Cardi Tries” Facebook Watch series takes Cardi into the game with Reallusion & Actor Capture

The 2020 Billboard Woman of the Year and Grammy-winning artist – Cardi B teamed up with Facebook for a series that featured Cardi in a number of experiences which were all caught on camera.  Cardi B was joined by her husband – Offset, to experience motion capture, create a game character and get themselves into the game as they go through the motions at a rapid pace to see what it takes to build a game featuring custom animated characters from Character Creator, animations from Reallusion’s ActorCore, mocap with Xsens motion tracking, iClone motion editing, all into the Unreal Engine.  This is “Cardi Tries… Gaming”.

The reality TV series features custom animated characters, motion capture and animation from the Reallusion pipeline wielded by Atlanta, GA based crew from Actor Capture featuring James Martin (master of ceremonies and TD), Joel Mack (Unreal Engine, Xsens MVN, iClone), Max Thomas (Unreal Engine, LED wall), and John Martin (Reallusion Character Creator).

Cardi Tries Gaming – Facebook Watch – 2021 – Episode 7

Cardi Tries Gaming

Episode 7 was filmed December 2020 in Pacoima, CA near Burbank on the XRStage. The team from Actor Capture worked with Jesse Collins Productions, Director Brenden Carter and Facebook’s production team to plan the shoot, find the location at XR Stage and develop the experience of the characters, mocap, and  game levels from start to finish. Actor Capture utilized Xsens, iPhone, Character Creator, iClone with Unreal Engine to bring everything together for the two games. 

James Martin, Joel Mack and director - Brenden Carter during pre production with Xsens MVN.
James Martin, Joel Mack and director – Brenden Carter during pre-production with Xsens MVN
The motion capture was made possible through the Reallusion pipeline, Xsens and the iPhone powered by iClone Motion Live to animate the Character Creator characters of Cardi and Offset.

The motion capture was made possible through the Reallusion pipeline, Xsens and the iPhone powered by iClone Motion Live to animate the Character Creator characters of Cardi and Offset.

James Martin welcomed Cardi and Offset to the stage after they were briefed on the events of the day and suited up in their Xsens Link motion capture suits. The motion capture led Cardi and Offset through sword fighting, melee combat and special finishing moves. James directed the combat scenarios while Joel Mack and Max Thomas were engineering the stage and capture workstations. A camera and production crew of over 40 people were surrounding everyone to shoot the show during the capture.

A camera and production crew of over 40 people were surrounding everyone to shoot the show during the capture.

The character building process for the game characters included feedback from Cardi and Offset during the shooting as they directed their design in realtime. We started with four characters prepared in different game genres using Character Creator

The character building process for the game characters included feedback from Cardi and Offset during the shooting as they directed their design in realtime.

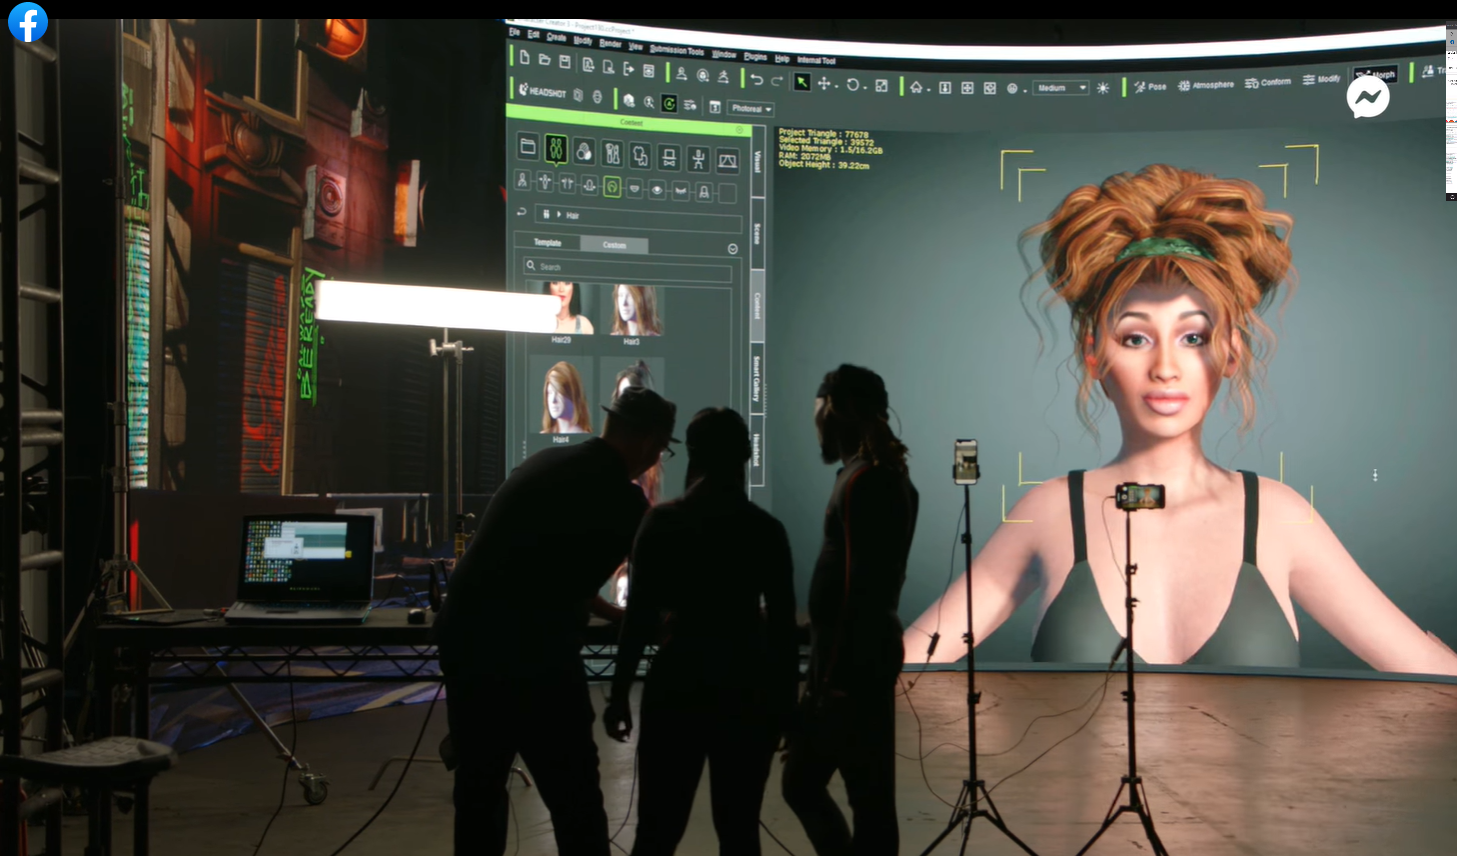
Cardi even got in on the creation and took the controls to customize her digital human double’s body, face and hair.  Character Creator enabled fast creation, on set collaboration in real-time and quick export to the Unreal Engine projects.

Cardi and Offset selected items from the Character Creator library to customize their characters during the production filming.  The entire episode was filmed in one take with the duo truly sharing their reactions of each step of the process.

Cardi and Offset selected items from the Character Creator library to customize their characters during the production filming. 

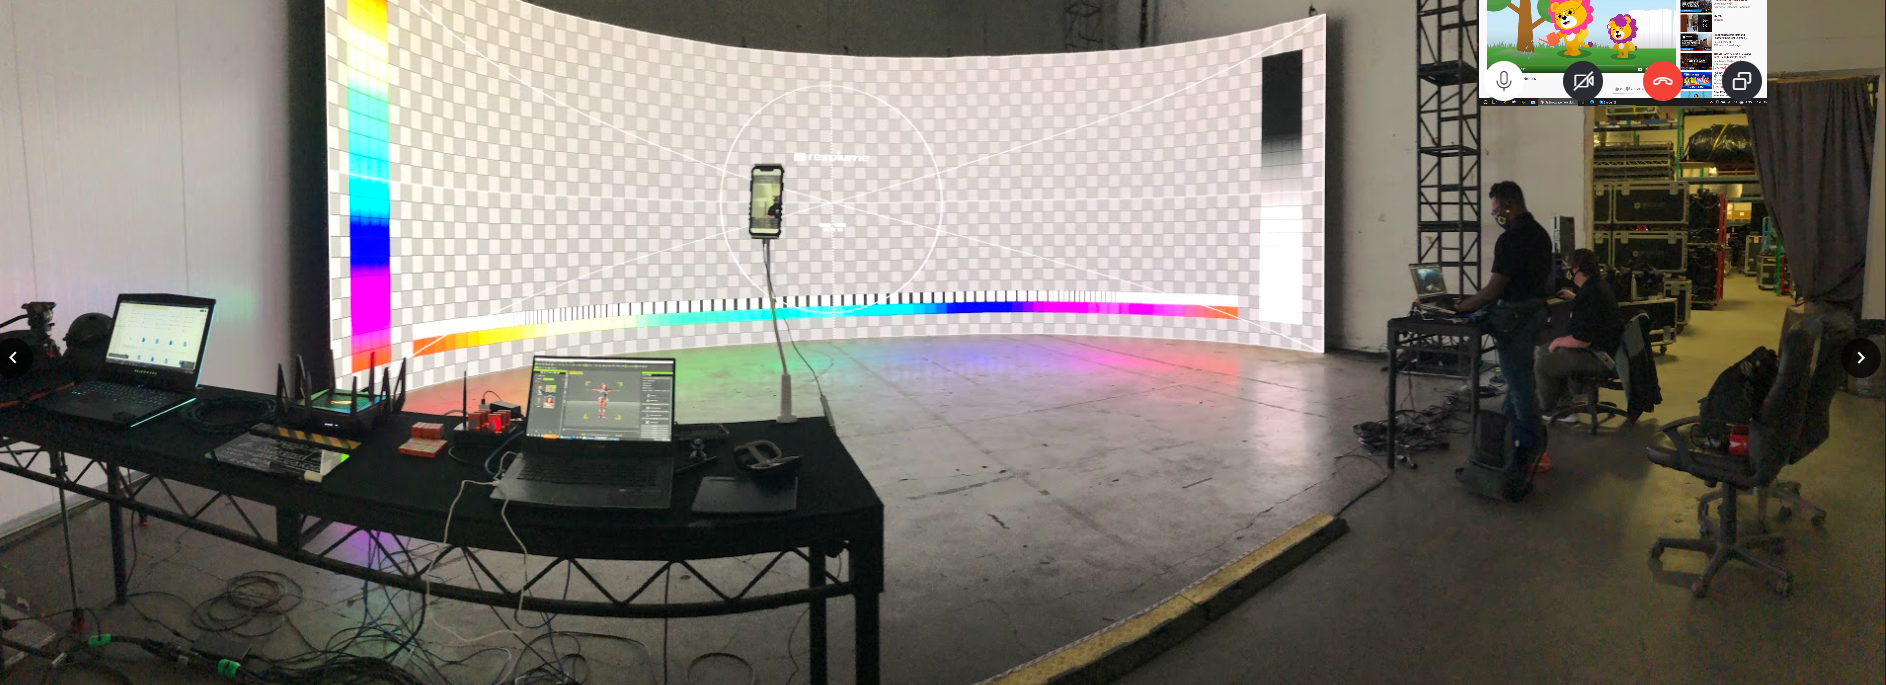
The character creation process was displayed on the XRstage LED wall while John worked with Cardi B and Offset to design their game characters.  The couple enjoyed making some tweaks to their characters and experienced the speed of building digital humans in real-time with Character Creator

The character creation process was displayed on the XRstage LED wall while John worked with Cardi B and Offset to design their game characters. 

Behind-The-Scenes iClone Animation Cardi B and Offset for Cardi Tries Gaming

After Cardi and Offset finished their motion capture session with James, and they each worked with John to design a character with Character Creator, we captured some impromptu dialog with iClone.

Facial animation captured during the shoot was simple with iClone Motion Live, iPhone and LiveFace.  The end result was provided by Actor Capture and used by Facebook Watch as a cut-scene throughout the episode.  The full animation was given to production as 4K video renders from iClone and the producers at Facebook selected clips to add in the episode.  The final edit added animated shots from Cardi and Offset using the iClone capture. This was a great example of Reallusion Character Creator and iClone going from concept to production and approval, for inclusion of multiple shots in the final edit.  

Cardi's Game Day.

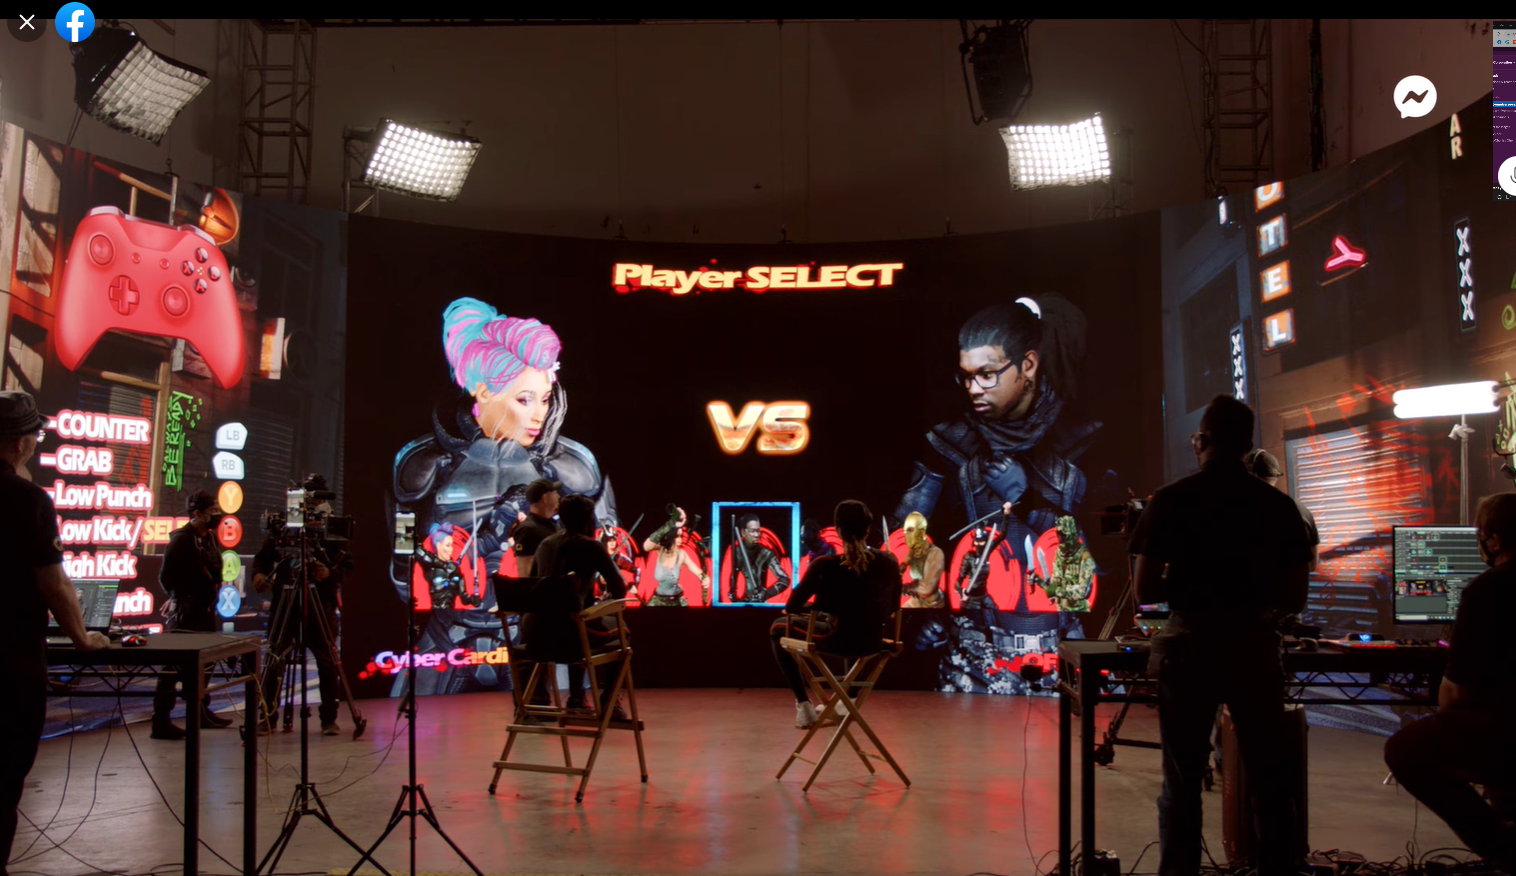
Unreal Engine game characters and scenes were created with Character Creator and the assets from the Unreal Engine Marketplace. Cardi Quest and Cardi Combat featured 3rd person fighting in two different styles that allowed Cardi B and Offset to face off in head to head combat or try and clear all the levels while fighting enemies to win. These vertical slices were made to provide an end to our story and finally get Cardi and Offset into the game. With the massive help of Reallusion tools, Actor Capture was able to make it all happen. The games created for the show are featured in a reel below with some clips for each game level.

The full production took place over the course of one day of shooting and since airing on Facebook Watch the “Cardi Tries Gaming,” episode has reached 3.9 million views. 

The full production took place over the course of one day of shooting and since airing on Facebook Watch the “Cardi Tries Gaming,” episode has reached 3.9 million views. 

For more information about Actor Capture visit:

http://www.ActorCapture.com

Reallusion multiplies industry career skills in the classroom

Curriculum and tools for students to join the creative workforce

The Reallusion pipeline opens the threshold for students to learn and train for essential industry career-building skills in 3D character creation and animation. Digital Humans are increasingly in demand throughout the visualization, simulation and research fields. Media and Entertainment are already pioneering in digital humans and real-time virtual production. More industries beyond media and entertainment are now seeking creative professionals with expertise in real-time 3D characters, animation and motion capture like; Architecture, Engineering, Construction, Manufacturing and Education.

Reallusion tools, pipeline and its network of training from higher education institutions to expert certified trainers offer a path for students and enthusiasts to achieve the training and expertise to prepare for careers in the creative workforce. For further information, visit Reallusion Global Training Network at  https://www.reallusion.com/global-training/

Learning Innovation for Higher Education and Entrepreneurship

Learning and experiencing the Reallusion ecosystem is paramount to understanding the shift in real-time creation and what it means for studios as they venture into real-time tools and as indies, students and storytellers brazenly leap into new technology. A new era for real-time education and experience is rising with the establishment of the Reallusion Learn program, training resources and facilities. This network of knowledge provides learning resources with dedicated training, classes and even college accredited courses to gain a deep real-world understanding of Reallusion tools and how they relate in courses for Unreal Engine, 3D game developers, virtual production and animation for both 2D and 3D content creation.  

Creative Media Industries Institute at Georgia State University

The first authorized training center and model school for Reallusion curriculum. GSU and the CMII currently offer courses in Virtual Production, Game Design and Animation for undergraduates; and features a learning environment that connects a $27M facility with the latest motion capture, game development and virtual production technologies. Beyond the classroom, GSU and Reallusion offer workshops throughout the year to connect continued learning to the entertainment industry and invite expert speakers to relate their real-world workflows, experiences and advice.  

“Part of our vision at CMII is to create the next generation of digital storytellers using emerging technology, said Brennen Dicker, CMII Executive Director. “Over the past couple of years, CMII and our students have benefited from our evolving relationship with Reallusion.  We are excited to embark on this latest chapter that will give our students a competitive advantage in this growing industry.”

The Reallusion and CMII together open the facility to producers and projects, including companies wishing to fully experience Reallusion’s complete pipeline along with cutting-edge motion capture and inside a highly equipped studio with expert engineers.

North Carolina State University – College of Design Mixed Reality Lab

The MXRlab vision is to push the boundaries of VR/AR technology into new opportunities for commercialization and wide adoptive use.  Current projects at NCSU College of Design and Mixed Reality Lab feature work with Character Creator by lab director, Derek Ham for the BARNSTORMERS VR baseball game that celebrates the history of the first Negro Baseball League players in an experience where you take the field.


Derek Ham, creator of Barnstormers with the Logic Grip Axe One for the Oculus controllers that connects them together for an alternative VR controller that has a solid two-handed stick like a baseball bat.   The Axe One is more than an aesthetic peripheral.  This patent pending design allows your controllers to lock in place giving you an on-axis grip  during game play.  North Carolina State’s MXR Lab utilizes Reallusion tools to produce VR content and projects for their program. 

Specialized Training Centers and Certified One-on-One Trainers

Choose from training centers and solutions that fit best for learning realtime character creation and animation.  Students and those seeking college credit or professionals looking for workshops, all can keep refreshing their skills in our training resources.  Ask for help from our certified trainers and arrange for one-on-one learning sessions. Learning is a lifetime journey and Reallusion enables creators to stay ahead of the curve with elite training and education.

Reallusion Learn Program Provides Schools with Tools and Resources

Reallusion helps educators take the first step in learning Reallusion real-time tools with a 60% OFF coupon on our products. The coupon is available to students and school teachers that are currently enrolled/employed in educational institutions.  Apply for the discount here: https://www.reallusion.com/global-training/educational-licensing.html. Reallusion also supports those educational institutes which utilize Reallusion software to impart innovative animation knowledge. Get the academic licensing and we will provide you with the resources as stated, for us to deliver an exceptional learning experience together.

  • Extended Trial
    • Offers 3-month free trial semester (Reallusion will offer standard packages for teachers to choose)
  • Multi-seat Licenses
    • Discounted multiple seat licenses on the latest Reallusion solutions for school teachers to impart classes with.
  • Home-access
    • Offers home-access accounts where students can download onto their own computers and practice at home.
  • Content Library Support
    • Reallusion has 100,000+ assets for creators to unleash their creativity. The content support may be included on different terms and conditions. Benefits will be provided at its discretion.

Watch Surrealist Artist Cleverly Bring Life to Images with Cartoon Animator

Tom Jantol is a professional and seasoned filmmaker/animator specializing in animated images with a particular emphasis on surrealist style, usually consisting of circuses, antique toys, deserted factories, and strange attics. 


Tom believes that discovering invisible stories is a duty for everyone involved in art-making. So like a journalist in pursuit of important news, he looks around for something subtle that can later be the inspiration for a future creation. In this article, we reveal Tom’s latest creation  – “Poem is dreaming” as an example, and an opportunity, to have a closer look behind Tom’s method of animation as he turns the bizarre into a surreal world with the help of Cartoon Animator (CTA).

The Design 

In this amazing creation, Tom generated the illusion of a “dream within a dream”, making characters out of different objects to recite a poem. He cleverly composed irrelevant objects and formed talking faces in an unconventional way. The structure of each scene is based on an inner logic that seemingly doesn’t make sense, yet in the end, it’s balanced in the overall design.

The Workflow

Composite all the elements in Photoshop

To make the composition visually satisfying, Tom gathers all the graphic materials and arranges them in Photoshop, with every animatable object in a different layer.

Make Animated Images in Cartoon Animator

Then Tom sends a PSD file to Cartoon Animator where he applies bones to each part of the graphics he plans to animate. With an optimized pipeline to connect Photoshop to CTA, users can send and update graphics layers back and forth, while preserving layers.

Create a Talking Head in Cartoon Animator

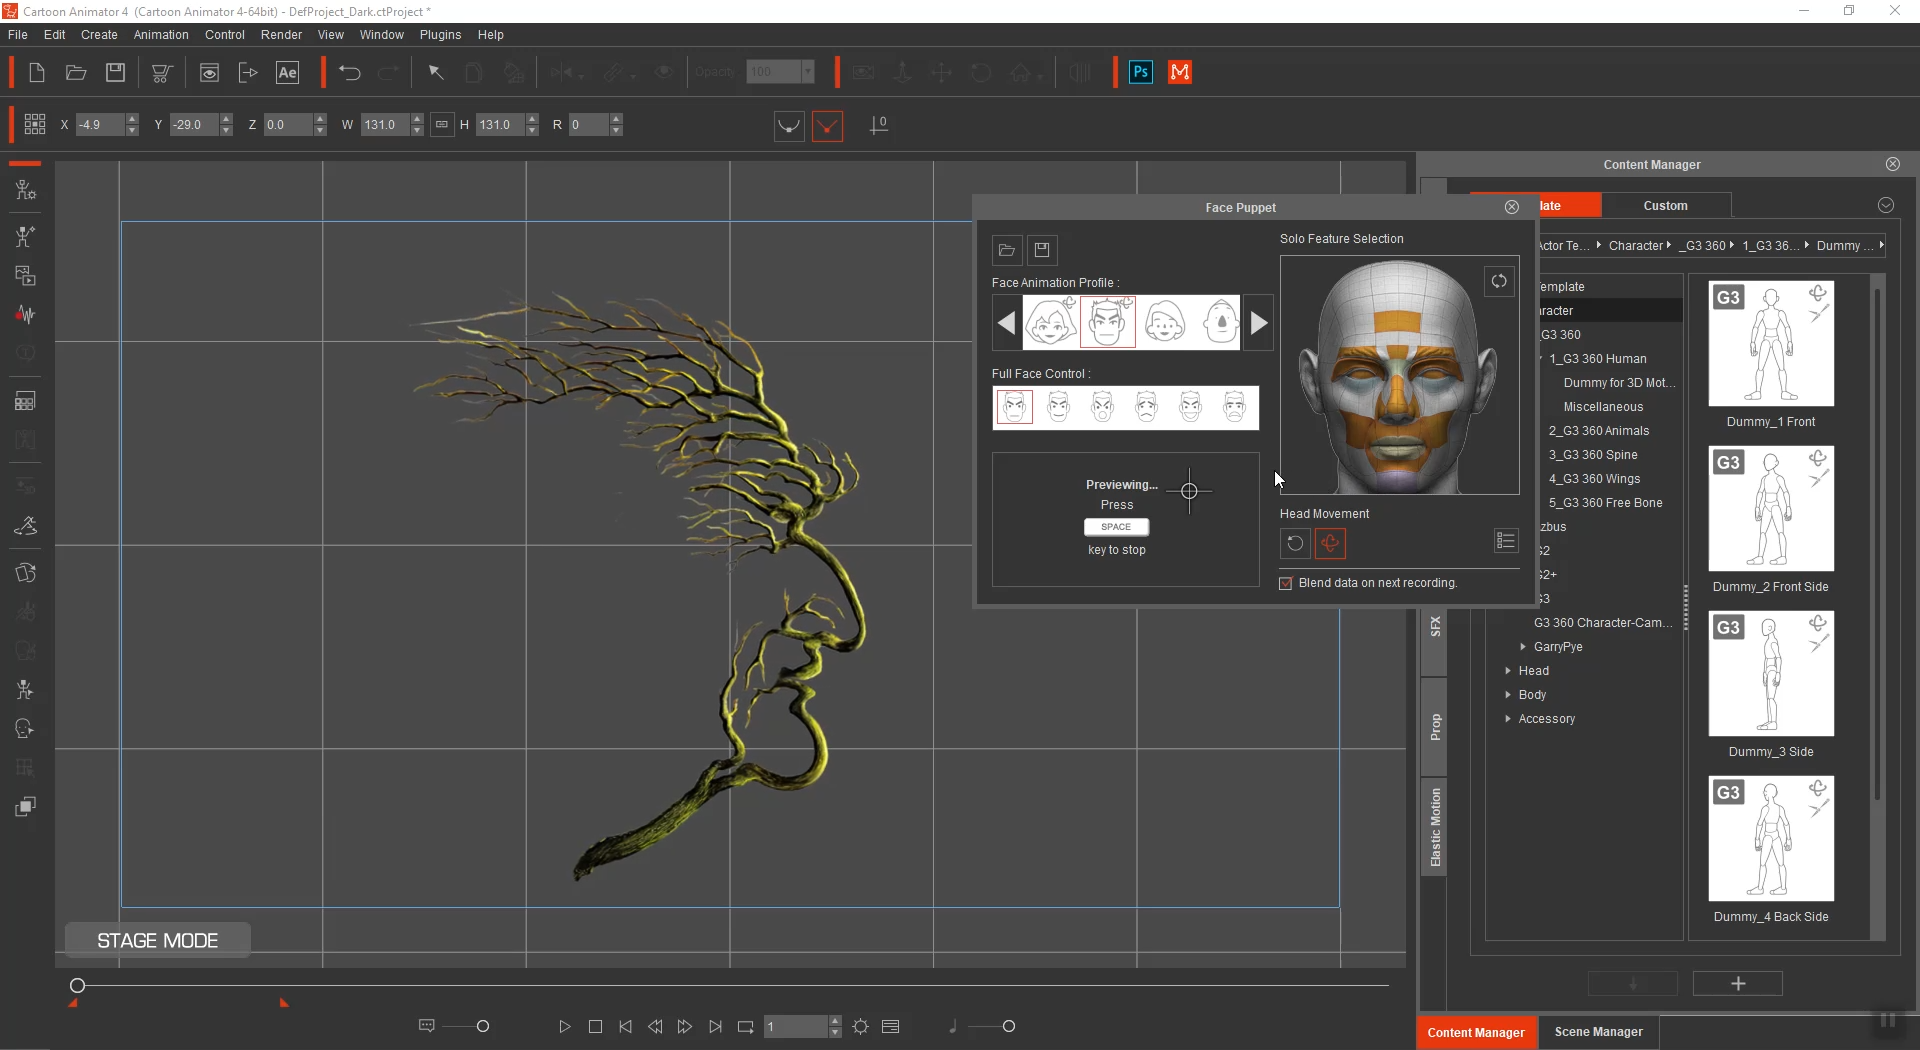
To make objects talk like humans, Tom employs a collection of features in Cartoon Animator like: Face Fitting Editor to locate eyes, nose, and mouth on abstract objects. Along with the Face Puppet Tool to animate with a mouse. Next, he applies an automatic lipsync to some parts via TTS, through voice recording or audio file, to animate a talking face.

Post-production in After Effects

When finishing the most crucial part – image animation – in Cartoon Animator, Tom exports the 2D animation as image sequences to AfterEffects via the “Cartoon Animator to After Effects” plug-in. This skips any hassle of cropping out or rearranging layers. In After Effects, he adds filters, effects, particles, and more to give a finished look to the 2D animation. And that’s everything. Job done.

The Software

To handle the structure of a scene and make it come to life; Cartoon Animator immediately becomes the best possible answer. As in Cartoon Animator, creators can make talkable characters out of literally anything, by easily and effortlessly lip-syncing to create an illusionary actor out of the chair, tree, flower, or Edgar Allan Poe in no time. 

For beginners, CTA is more approachable as its animation usability and practicality are at the core of the application. No other software can do bone-rigging and lip-sync so fast and so intuitively. 


“It’s a smooth workflow from Photoshop to Cartoon Animator to After Effects for image animation, as they work well together. “Of all the software I ever used, only Cartoon Animator is intuitive-to-use enough to keep up with the chaotic speed of my newly born ideas, which gives me the freedom and luxury of not thinking about it. So that all my attention goes where it belongs – to the final render. ”

Tom Jantol – 2D / 3D Animator

From ZBrush Modeler to Animation Artist

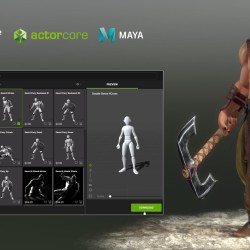
Giancarlo Sevilla, a 3D model artist, shared his experience of using Character Creator, the full character creation solution, and ActorCore 3D motion library to quickly turn his T-pose character into vividly animated avatar for games and films.

Giancarlo Sevilla is a 3D modeler who graduated from a Canadian school where he specialized in character art. He started this journey back in 2012, working in the 3D printing industry making figures for collectors and in his spare time getting some freelance contracts. After getting some experience making characters, he then jumped into the video game industry.

In this tutorial, Giancarlo will show how to turn a T-pose model into a 3D animated character and send it into Maya in no time, using Character Creator to create the rigged, textured character with quality mocap animations from ActorCore.

Fast Way to Create Animatable Game Characters for UE with Character Creator

Senior character modeler, Crystal Bretz, shares her experience in creating an animated character for Unreal Engine by using Character Creator and iClone.

Crystal Bretz is a Senior Character/Creature Modeler working in Canada. She has worked for many companies over the years such as Method Studios, DNEG, Artifex Studios, Redpill VR, TLM Partners Inc and BRON.

Crystal is currently working as a Senior Modeler at Digital Domain. She has a background as a generalist and has worked on many different types of media such as; TV episodic, Short films, Feature films, VR, and animated features.

In this tutorial, Crystal will be showing how easy it can be to create an animated character from a concept with Character Creator and send it into the Unreal Engine using the LiveLink from iClone.

Part 1: Creating Character Model in Character Creator and Sculpting in ZBrush

The first step of this project is to match the body proportions to the wonderful concept by Jue Li and it is made very simple with the use of Character Creator 3 (CC3).

The 3d character base (CC3+) mesh utilizes UDIM workflows as well as has optimized geometry and UVs to allow for a better final 3d character as well as opens more doors and opportunities in terms of texturing methods.

I utilized the morph sliders to fine tune all the muscles and proportions, and then used GoZ to send the 3d character into ZBrush for a final sculpt pass on the body. While I’m in ZBrush, I try to be careful to not move the positions of any geometry affected by a bone, such as elbows or eye locations. It’s best to alter these things inside Character Creator and sculpt details inside ZBrush. I then sent the body mesh back to Character Creator and transferred all of the newly sculpted details back to the base mesh simply by updating the mesh.

Part 2: Modeling Clothes and Accessories in ZBrush, Maya and Marvelous Designer

The next thing is to model the costume. I began by blocking out base forms in ZBrush by masking sections of the model, extracting the mask, zremeshing to refine the edges, and then panel looping to add thickness, if needed. I do this as a first step to proxy out the proportions of the costume and establish the forms and silhouette. My next steps were to use Maya for any hard surface modeling, as well as finalizing the proxy meshes I made in ZBrush. I also used Marvelous Designer quickly to create the flowy skirt.

After completing the final models in Maya, I brought the entire outfit into ZBrush for a final sculpting pass, created low poly meshes from the final sculpt and used GoZ to send the geometry back into Character Creator. Upon the geometry returning to Character Creator, I was making sure to establish if the geometry is clothing or an accessory as this establishes how it is skinned to the body. Accessories will follow the bones and clothing objects will skin to the body and current skin weights.

Part 3: Texturing the Body and Outfits with Substance UDIM Workflow

After I have modeled the body and the outfit, I begin texturing. I started this by baking my high poly sculpted geo to my low poly model that has the ideal UV layout. I will bake a normal, AO, curvature, ID, world space normal, and position maps. Once this is done I can save these for importing and using inside Substance Painter later.

The new CC3+ base mesh has a UDIM tile UV layout which allows for a seamless workflow within Substance Painter utilizing its new UV tile workflow options. I chose to work with the clothes using texture separate texture sets to demonstrate the versatility of the new base and the different ways you can work with your 3d characters going forward. On this specific game character, I have textured the clothing in a separate Substance scene than the body, because I had a lot of texture sets and was worried that the amount of large maps could create too large of a file size to work with if the body was included.

The first step for texturing the body is to make sure the game character is in A pose in Character Creator and then click the “Export Character to Substance Painter” button on the top bar to export the model. This will export the model and the maps in neat folders for me to set up inside Substance Painter and begin the texturing process.

Once the texturing is completed, I exported the maps using the Character Creator to export the appropriate maps to apply to my model inside CC3.

Applying the new textures to the model in CC3 is very simple, you only need to click the “Update Textures from Substance Painter” button on the top bar and navigate to the exported maps and it will all load into their respective spots.

Part 4: Utilizing the Content Library inside Character Creator to Create Original Designs

The next thing I want to talk about was the importance of utilizing the content library for the creation or this character. Character Creator has an amazing content library full of many useful tools; anything from poses to lighting rigs.

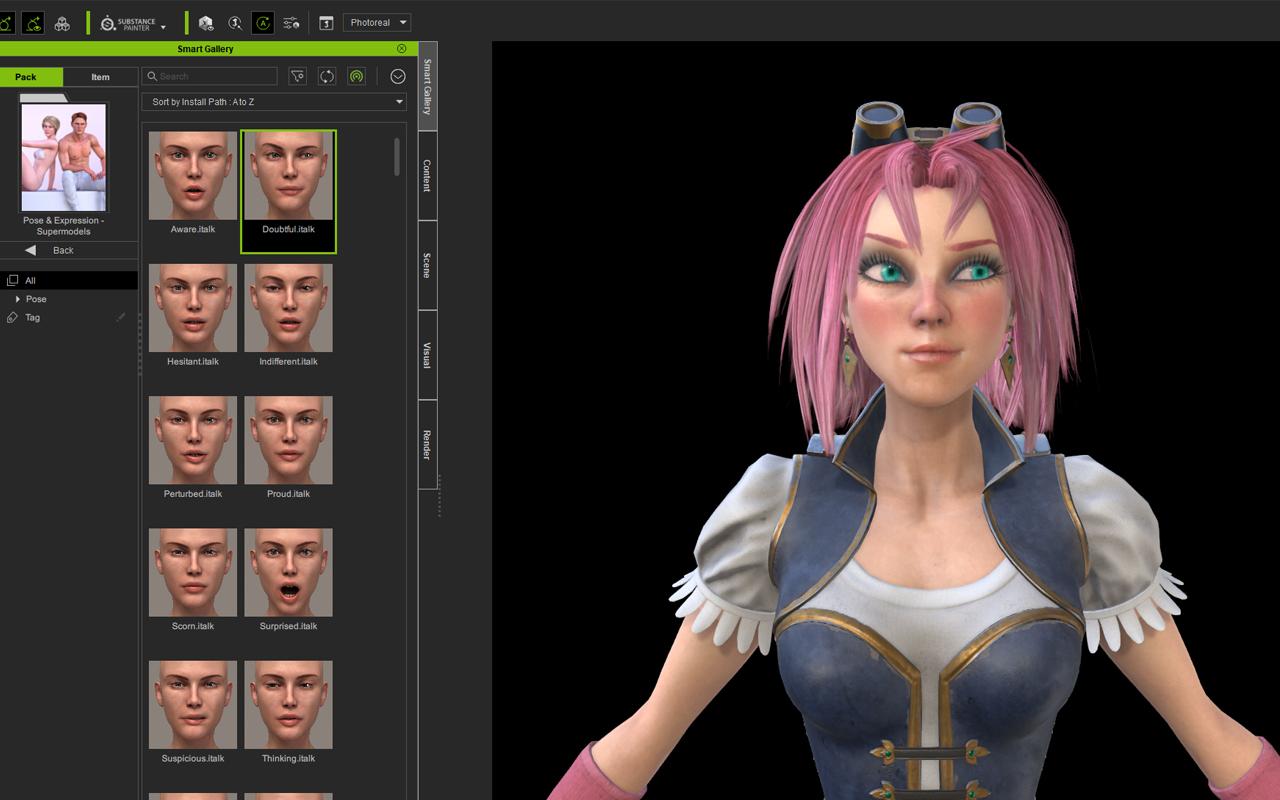
During the course of this project I used many of these tools to help along the way. I used built-in eyebrows with color customizations, SkinGen for tattoo and makeup, Facial and Pose Editor for posing, and many lighting setups to finalize my character.

Part 5: Animating with iClone and Live Link to Unreal Engine

The final phase of this project was to animate in iClone and use the Live Link to send the model directly into the Unreal Engine. iClone has so many useful tools for animation, but utilizing the Live Link helped me to adjust camera angles and animation choices in real time instead of making the iterations and reimporting the new character animation every time. I utilized the mocap animations already inside iClone and the purchased content assets, and blended them together with others to create a seamless animation that still felt very real.

Once the character was inside Unreal Engine, I ran the Auto Setup tool to set up the materials properly. There were some physics tweaks with the skirt and material tweaks on the hair that were needed as they don’t transfer at the exact same values, but polishing this inside Unreal Engine is very simple. Overall utilizing the iClone Unreal Live Link was really quick and well worth it to present my final character.

Thanks for reading! You can download a free trial of Character Creator, and iClone to test out by yourself.

Digital Puppets | Interactive Animation Studio offers Turnkey Services with Character Creator iClone

Digital Puppets | Interactive Animation Studio offers Turnkey Services with Character Creator iClone.
Scott Evans and Antony Evans, owners of Digital Puppets UK.

Digital Puppets UK

Digital Puppets is a UK based animation studio that specializes in Cartoon motion capture, both 2D and 3D. The studio is run by brothers Scott Evans and Antony Evans.

As well as creating real-time performing avatar puppetry, they also work in developing and designing custom characters for their clients, in a wide range of styles, though they can replicate any existing licensed character or company/product Mascot. The studio not only creates motion capture characters for online Entertainers, Educators and marketing/advertising agencies, but they can also take the characters that they produce and provide their customers with fully animated shows.

The duo has recently completed a 50 episode run for the UK nationwide radio station ‘RADIO X’, in which they animated the hosts and turned their weekly podcast for their online audience to enjoy. The studio also does work for multiple worldwide known broadcasters such as the BBC, Cartoon Network and more which cannot be disclosed due to NDA’s.

“iClone & Character Creator have dramatically increased how fast we can produce character designs and animations, which allow us to create client content at a more affordable price.”

Antony Evans | Digital Puppets UK

Quick Ways to Animate 2D Cartoons with 3D Motions using ActorCore, iClone and Cartoon Animator

My name is Warwick Hays and I’ve been creating content for Cartoon Animator for many years now. I am a featured content developer on the Reallusion’s Content Store and I love combining 2D with 3D assets to make things a little different.


I created the above video with the help of Reallusion’s ActorCore, iClone and Cartoon Animator. So let’s run through how I did it.

Vector Graphic Specialist brings High Quality Content to Cartoon Animator

Serg Pilypencos

For many years, artist Serg Pilypencos has specialized in vector graphics as a content contributor to online sites with his unique visual style. Providing custom orders for illustrations, banner designs, and others.

While currently working to create more characters, assets and content for the Cartoon Animator community and 2D Marketplace, Serg took time out to talk to Reallusion about his passion and projects.

“Cartoon Animator is easy even without a lot of experience in animation.”

Serg Pilypencos / 2D Content Developer