首頁 » Page 20

Reallusion Revolutionizes Digital Human Simulations & Machine Learning Across Industries

Reallusion, a leader in digital human character creation and animation, continues to transform real-time character applications across multiple industries, including Media & Entertainment, the Metaverse, Digital Twin, Architectural Visualization, Manufacturing, and Simulation. By emphasizing scalability and realism, Reallusion’s innovative technology enhances simulations, machine learning, and automation in groundbreaking ways.

Advancing Industrial Simulation and Machine Learning

Reallusion has long been at the forefront of digital content and application development for industrial simulations and machine learning, focusing on the creation of highly realistic digital humans and autonomous behaviors. These advancements are widely adopted by top-tier partners such as NVIDIA, Mercedes Benz, BMW, Volvo, Microsoft, Google, LG, Samsung, Axis Communications, Bentley Systems, Ford, Hyundai, Toyota, General Motors, Stellantis, and more.

Reallusion’s 3D character animation and automation have been widely adopted in industrial simulation projects.

Simulation Applications for Industry Demands

Reallusion’s powerful solutions cater to 5 key aspects:

  • DIGITAL TWIN: AI-driven digital humans enhance simulations, enabling real-time testing and optimized workflows that reduce risk, cost, and time.
  • AUTONOMOUS VEHICLE: Lifelike driver and passenger simulations provide critical training for autonomous systems to navigate real-world challenges.
  • SECURITY & SURVEILLANCE: Virtual characters improve facial recognition, intrusion detection, and crowd analysis for heightened security operations.
  • CONSUMER ELECTRONICS: Smart devices benefit from precise recognition, interpretation, and response to human commands and behaviors.
  • PEDESTRIAN TRAFFIC: Dynamic pedestrian simulations consider mobility restrictions, group dynamics, and real-world environmental factors.
Reallusion’s facial tracking, expression system, and motion data are used to simulate driver status, occupant activity, and overall cabin conditions.

Comprehensive Solutions for AI-Driven Simulation

Reallusion offers a suite of robust applications tailored for simulation and machine learning, including:

  • Crowd Simulation: Generate real-time 3D crowd animations and customize characters with ease.
  • Interactive Environment: Enable virtual actors to perceive and interact naturally with their surroundings.
  • Interactive Props: Utilize interaction templates for realistic character-object engagement.
  • BuildingGEN: Instantly create modular structures such as factories, warehouses, and assembly lines for industrial training and simulations.
From crowd simulation, interactive environment and props, and building gen, Reallusion has complete solutions for simulation and machine learning.

Advanced 3D Character and Motion Content

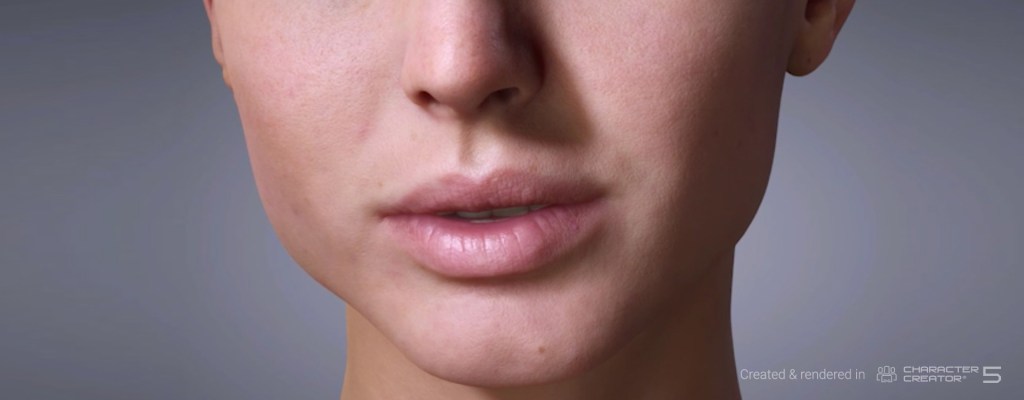
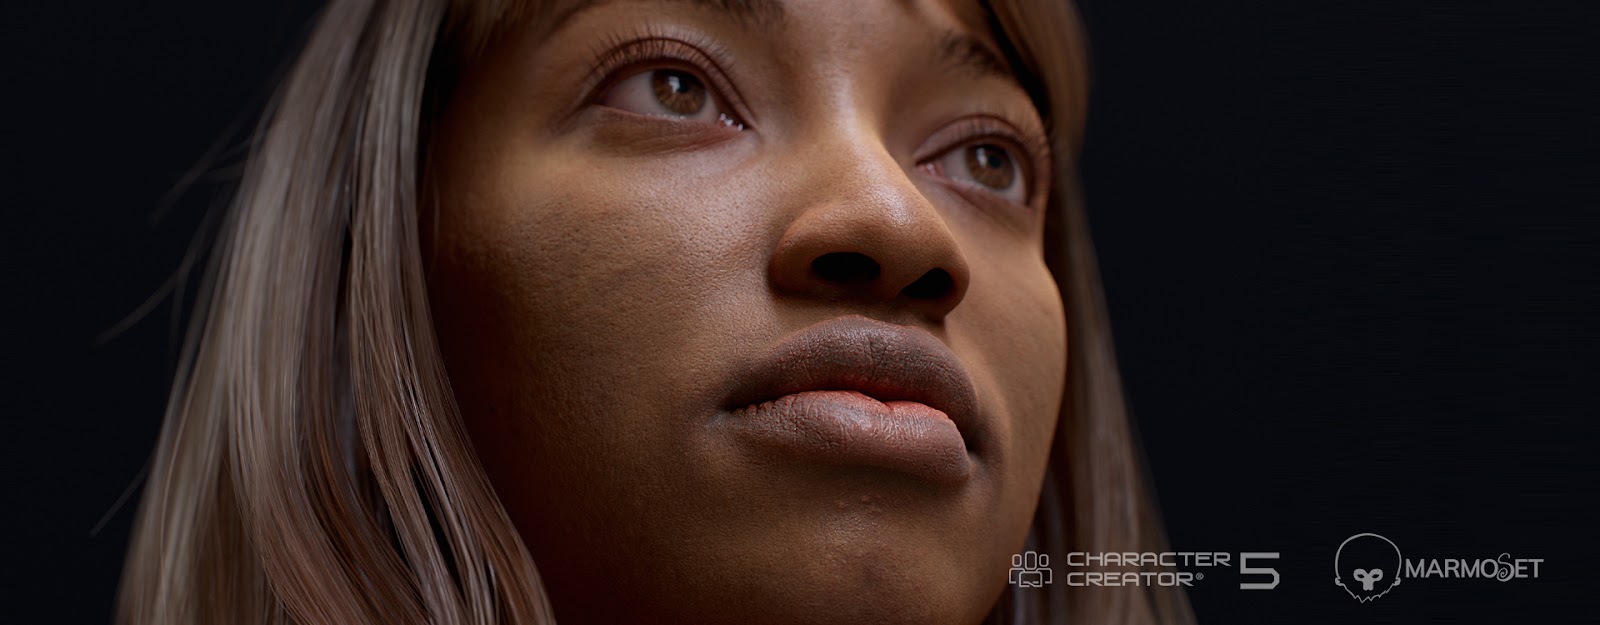
Reallusion provides a comprehensive range of 3D character content designed for simulation and machine learning applications. Users can create highly detailed 3D photorealistic doubles from scratch, or transform photos and scans into fully animatable characters. This offers extensive customization, allowing users to modify morphs, skin, hair, outfits, and more within a robust digital human ecosystem. Additionally, the company’s 3D crowd library features a diverse collection of 3D-scanned humans representing various ethnicities and age groups. These assets are optimized for different animation styles and high-performance crowd simulations, making them ideal for large-scale, realistic scenarios.

From digital doubles to a large crowd,  users can create a variety of 3D characters with Reallusion.

In addition to character content, Reallusion offers premium 3D motion content tailored for simulation and machine learning. High-quality motion-capture animations accurately replicate interactions in factory manufacturing and construction site environments, ensuring realistic and dynamic training applications. And a large library with business and services animation enables the simulation of transactional activities in locations such as airports, transit stations, shopping centers, events, and restaurants. These motion assets enhance the authenticity of digital environments, making them valuable for interactive AI training and simulation.

Reallusion provides over 4,000 motion ready for use in any scenario.

Comprehensive 3D Workflow

Reallusion offers a robust 3D pipeline that seamlessly integrates with major 3D tools. It features automatic character shader and material setup, supports FBX and USD export, and provides LiveLink controls for leading simulation environments such as NVIDIA Omniverse, Unreal Engine, and Blender.

Linked workflow brings simulation projects to major 3D production platforms.

Driving the Future of Machine Learning & Simulation

Whether you require data, tools, auto-gen, pipelines, or APIs, Reallusion’s solutions efficiently produce highly customizable characters and integrate them seamlessly into realistic animations. With a streamlined workflow, Reallusion can help users save time and cut costs, driving significant advancements in AI training and simulation.

Contact Us

Enterprise License Inquiry

Spiderman in Action: From 3D Scans to AI-Automated Animation

AccuPOSE Realizes Game-Changing Techniques with AI-Driven Motion Models

Make It Move Media

Hey everyone! I’m the creator behind Make It Move Media, where I specialize in 3D scanning and animating action figures. On my channel, I bring iconic action figures to life through 3D animation by creating epic action sequences and cinematic moments.

Around 2023, Reallusion found me over Instagram and asked me about my most wanted animation. Without a second thought, I answered Spider-Man because I had already made a whole series of short films with Spider-Man as the lead hero. Spider-Man’s motion is incredibly challenging, even for the most experienced animators, which is why it had always been a goal of mine to perfect it. To my surprise, my wish came true!

Reallusion’s Wall Crawler motion pack was released, and it exceeded all my expectations. It contains nearly every Spider-Man action I could imagine, such as crawling, swinging, hanging, and even his special web fighting style.

And as if that wasn’t enough, Reallusion also released AccuPOSE, an AI-trained posing model that makes posing much easier and more natural. Fortunately, I got access to the “Wall Crawler” model, which comes with the AccuPOSE Infinity Extension and works perfectly with the “Wall Crawler” motion pack.

Whether you’re new to 3D scanning or an experienced animator, this guide covers techniques for scanning, animating in iClone 8, and using Blender Auto Setup for a seamless workflow from iClone to Blender 3D.
What You’ll Learn:

  • Using AccuRIG: How to scan and quickly create animated rigs for your action figures.
  • Importing Figures into iClone 8 & Using AccuPOSE: Bringing your models into iClone and applying animations.
  • Post-Processing & iClone 8 Blender Auto Set Up: Refining your figures and animations for use in Blender.

Step 1: 3D Scanning Your Action Figures

To start, 3D scan your action figures using tools like Polycam, which turns photos into high-quality scans.

Using Polycam:

Polycam captures your figure using photogrammetry, turning multiple photos into a 3D model.

  • Tips: Capture all angles, including undersides. More photos lead to a better scan.
  • Trick: Use a turntable for better precision and a stable setup.

Cleanup in Blender:

After scanning, import the model into Blender to clean up any imperfections.

  • Tips: Use Blender’s sculpting tools to smooth rough areas. Apply the Subdivision Surface modifier for detail without adding polygons.
  • Trick: Use the Decimate modifier to lower polygon count without losing quality.

Importing into AccuRIG:

Once cleaned, import your FBX file into AccuRIG for rigging. AccuRIG auto-aligns joints, making your model ready for animation.

  • Tips: Ensure the model is symmetrical for best results.
  • Trick: Set key joints (elbows, knees, shoulders) correctly to make the rigging smoother.

Step 2: Rigging the Character with AccuRIG

After importing into AccuRIG, you can start the rigging process, which sets up bones for animation.

Set Points and Adjust:

Manually place points for elbows, knees, and neck. AccuRIG adds the bones based on these points.

  • Tips: Focus on areas with dynamic movement like the shoulders, knees, and hips.
  • Trick: If your figure has clothing or armor, adjust bones to avoid clipping during animation.

Finalizing the Rig:

Once you place the points, AccuRIG adds the skeleton and previews the movement.

  • Tips: Always preview poses in AccuRIG to check for natural movement.
  • Trick: Pay extra attention to spine and neck joints for fluid, acrobatic poses.

Step 3: Animating with iClone

With the rig set, we move to iClone 8 to animate. iClone offers a range of motions, from pre-set animations to custom movements.

Uploading to iClone:

Upload the rigged figure to ActorCore and select animations, like Spider-Man’s wall-crawling action.

  • Tips: Adjust the animation’s scale to fit your figure.
  • Trick: For actions like web-slinging, tweak the pose in AccuPOSE for natural motion.

Using iClone’s Motion Capture Integration:

iClone 8 lets you apply motion capture animations Wall Crawler from ActorCore content store, and use AccuPOSE Infinity – Wall Crawler for AI-assisted Posing.

  • Tips: Adjust timing to ensure smooth transitions.
  • Trick: Use ease-in and ease-out for seamless motion transitions.

Step 4: Refining Animation and Adding Realism

Next, we fine-tune the movements to add fluidity and realism.

Fine-tuning Movement:

Adjust keyframes in iClone to ensure smooth motion, especially during high-speed actions like swinging or shooting webs.

  • Tips: Use ease-in and ease-out for smoother frame transitions.
  • Trick: Add secondary motion to the head and torso to make the character’s actions feel more lifelike.

Rotation and Realism:

Use AccuPOSE and manual adjustments to ensure weight distribution is accurate. For Spider-Man, his rotation and arm movement while swinging or shooting webs should look natural.

  • Tips: Adjust keyframes for limbs to avoid stiff movements.
  • Trick: Apply secondary motion to smaller parts like fingers, wrists, and ankles to add realism.

Step 5: Final Rendering and Exporting

After animation, we finalize everything by rendering the animation. Instead of manually exporting to Blender, iClone’s Blender Auto Set Up feature makes it seamless.

Exporting with iClone 8 Blender Auto Set Up:

Instead of exporting manually, the Blender Auto Set Up feature sends the character and animation directly from iClone 8 to Blender.

Final Adjustments in Blender:

In Blender, make final adjustments like lighting or camera positioning.

  • Tips: Ensure lighting is set up for realistic shadows and details.
  • Trick: Use motion blur in Blender for fast-paced actions like swinging or punching.

Finally, render the animation, producing a polished 3D action figure animation, ready to share.

Conclusion

This tutorial showed how you can easily 3D scan your action figures and animate them using AccuRIG, iClone, and Blender. These tools simplify the process of bringing action figures to life and making them part of an epic animated story!

A special shout-out to Reallusion for fulfilling my wish! When they released the Spider-Man “Wall Crawler” motion pack, it was exactly what I had been hoping for. The inclusion of the AccuPOSE feature, particularly the “Wall Crawler” AccuPOSE model, completely changed the way I approach Spider-Man animation. The ability to pose Spider-Man in a natural, fluid way has been a game-changer—something that I had been struggling to achieve for years.

I’m excited to keep pushing these tools to their limits, and I hope this tutorial helps you do the same with your own figures and animations. Whether you’re just getting started or looking to refine your techniques, the combination of AccuRIG, iClone, and AccuPOSE provides a powerful workflow for animators of all levels.

Learn More

Visit ActorCore 3D Motion Store

Download free AccuPOSE CORE

Subscribe to AccuPOSE INFINITY Expansion

Related Posts

Creating Multi-Headed Character(s)

Multi-headed characters are often used to portray aliens or more dramatically, inner turmoil and self-loathing. Most of these stories, however, revolve around two-headed characters or three-headed characters to explore the duality of inner conflict or how having multiple opinions can stifle progress and cause extreme frustration.

There have been many times over the years that people have used iClone to put together multiple characters for this purpose. It could get a bit complicated and downright messy in the earlier versions but a prior update to Character Creator gave us a quick way to hide any body part(s).

With the introduction of Character Creator’s Hide Mesh tool this went from being a tedious process of opacity maps to being able to use a single piece of cloth like shorts, to hide all of the character except the neck and head.  This meant getting the extra “talking heads” ready was a snap that I will demonstrate in a short tutorial further down this article.

In fact, it is incredibly easy to assembly a character like this now making the hardest parts dialog and motion.

Linking versus Attaching

This one is easy as we have no choice with characters. While things can be attached to them, as characters they cannot attach to anything themselves which leaves us with linking. We don’t lose a lot as the characters still move as one, but we can’t save our combined character as characters. We have to save them as a project file. This is not a problem as we can merge parts of project files anyway.

Main Character

The main character is the control point so the other “heads” will be linked to this character specifically to the Spine Bone 2 so the heads will move properly with the shoulders of the main character.

Shoulder Width and Size

If you are going to keep all the heads at 100 percent in size you will need a main character with large, wide shoulders. You can use the Bodybuilder slider and shoulder sliders in Character Creator 4 to edit the shoulder size.  

The demo characters I created while practicing had a regular herculean build that provided big broad shoulders. Putting two normal sized heads, one on each side of the main character’s head was easy enough.

LEFT: Base Character 80% Head Size. MIDDLE: Enlarged shoulders 80% Head Size RIGHT: Herculean Character 100% Head Size

In the image above the left sided character consists of three Base male characters with the “head” characters on each side scaled to 80 percent for an easier fit but notice what happens with the shoulders. The middle character has shoulders broadened with the Proportion tool in CC4. The character on the right has a large build all around and gives plenty of room for heads at 100 percent.

I wouldn’t worry a lot about the broaden shoulders not looking quite right as three heads don’t look quite “right” either. Don’t box yourself in by applying conventional anatomy to this type of character. Just keep proportions recognizable or within reason.

Make sure you do any body size scaling BEFORE you animate them as this will remove the animation and return the character to a default pose. There may be scenarios where we would need different sized heads on the same body so take that into consideration when necessary.

The heads don’t have to be just on the shoulders either. We can scale whatever size we need and smaller heads can be placed in many places. We could literally have a character talking out of his… err… backside for memes or comedy.

We might even be able to mimic a giraffe type neck with a little ingenuity and creativity. I won’t’ go so far as to say the possibilities are endless but they are numerous depending on your imagination.

Preparing the Characters

We need three characters. In my video I use Meshy AI community generated heads for Batman and Joker. I then went to Character Creator 4’s Headshot 2 Mesh plugin tool to shape the heads and transfer the textures.  This takes a huge burden off of us by doing all the work after we “point-and-click” outline enough features to get a good duplicate.

Next, we use CC4 to select the shorts then hide all of the body except the head and neck. After that we make the shorts invisible with opacity and I will show you how to do that too.

Superman was created using the Headshot 2 image to face technology on a Character Creator body and the suit came from creator Fate Han in the Marketplace.

Scale, Place and Link

Now we need to scale down the Heads (in reality the entire body which in turn affects the head). Then we can move the characters over, tilt them if needed and place them in the proper location.

Since these are characters, we cannot attach them as “attach” is not available for the character itself, so we use Link. Keep in mind that linking does NOT store linked items when the character is saved. To accomplish this, we must save our tri-characters as project files. We can then use Merge to merge those characters into another project. This is a very simple process.

Easy Three Character Dialog

A multi-character dialog may sound tough but it’s not. If you can use an enlarged timeline it will be much easier. For me it’s important to have the timeline visible, enlarged and use multi-select to put all three characters in the timeline at once. This keeps me from loading one character’s dialog over another character.

It also helps in editing the timing within the timeline by showing you exactly where all three character’s dialogs reside for easy adjustment. I realize not everyone has screen space for a large timeline but the larger the better.

For Superman I used the soundtrack because he is just thinking not speaking his dialog. Musing to himself. For this I dragged and dropped the audio file onto his character. For Batman and Joker, I used AccuLIPS to import the audio and create the visemes in the appropriate location down the timeline. All dialog is from Eleven Labs.

Animating the Trio

Since this is a beginner level tutorial, I’m going to stick to basic Motion Puppet motions and one motion clip from an old pack named Wings.  It is a very short up down idle motion to simulate hovering. It should not be a hard motion to emulate with AccuPOSE or manually moving down the timeline while moving the character slightly up and down or side to side.

With the Head characters I used the Motion Puppet masking tool to make sure the heads did not move out of place by allowing only the head to be animated. If you are using a regular motion, there is the Remove Motion option on the clips right click context menu. You can even use Break on that same menu to cut out the section needing motion removal from the rest of the clip by breaking it before and after the edited section. You can then use the Remove Motion selection without effecting the entire clip. I’ll go into this a bit more towards the end. As I wrote earlier, I dragged and dropped an old motion clip that simulated hovering in the air with wings to animate Superman. From there I looped the clip and slowed it down.

Final Render

Below is the final render after adding an image background and some ice column props to add some depth. This only covers the basics and could certainly be more cinematic with more effort, as it didn’t take long to produce. It’s a great learning exercise too.

Two-Headed Via Proportional Neck Bone Placement

There is a simple way to create two headed characters with the main head pushed over to one side so the two heads are balanced in case you don’t want one head in the center and one head on the side. For this we go into Character Creator 4 to use the Proportion tool to move the bottom of the neck over to whichever side you prefer.

Apply the same procedure as above to prep and attach another character for the second head then position and link.

These characters are one hundred percent in size and could easily illustrate a story about good and evil, determination and laziness or comedy.

NOTE: When you push the bone over like this it distorts the neck mesh which is why I pushed it downward to hide that part.

NOTE 2: For those of you that want to know… yes it can be done with limbs too, but it can start to get a bit complicated. Possibly naming each character after the limb(s) it represents will help sort things out like an extra pair of arms.

Getting Them into Unreal Engine

Getting these combined characters into Unreal Engine is easy but you must unlink them in iClone first, or you get unexpected positioning in Unreal Engine. Once you have transferred all three characters to Unreal Engine you can link them back together in iClone and the combined characters will work as expected with Live Link into Unreal Engine.

Using Motions

Using Drag and drop motions for BOTH characters (including the same motion) will require you to UNLINK the characters before adding the motions or the Head character will jump out of place. Then go into the timeline and REMOVE MOTION from the Torso to keep the body from moving out of place. While it is some extra steps it keeps the characters synced.

This multi-character method is more efficient when using a drag and drop motion for the main character and using the Motion Puppet for the second “head” with the masking features where only the head is animated. Now that I think of it, animation layers might work too but I haven’t tried it.

Left character without removing Torso motion. Right Character with Torso motion removed.

Summary

While this method is not new, advances in iClone and CC4 have made it much easier to accomplish especially when using the motion and motion puppet combo. Load your motion onto your main character and use the Motion Puppet to animate the second “head”.

The pipeline of Character Creator 4, Headshot 2 Mesh, Image to mesh and iClone can put together some compelling characters with a lot of potential for great dialog between the heads and like a lot of iClone projects it can be done at a beginner’s level as long as you understand the timeline.

MD McCallum - WarLord

MD McCallum – WarLord

Digital Artist MD “Mike” McCallum, aka WarLord, is a longtime iClone user. Having authored free tutorials for iClone in its early years and selected to write the iClone Beginners Guide from Packt Publishing in 2011, he was fortunate enough to meet and exchange tricks and tips with users from all over the world and loves to share this information with other users. He has authored hundreds of articles on iClone and digital art in general while reviewing some of the most popular software and hardware in the world. He has been published in many of the leading 3D online and print magazines while staying true to his biggest passion, 3D animation. For more information click here.

Winner Select: Creating Game Art for a Cyberpunk Heroine Using AccuRIG

Overview

Iván Gallardo Landskron, a Chilean 3D artist, won the Best AccuRIG Character award in the 2024 Reallusion 3D Character Contest with “Nyka”, a cyberpunk-inspired warrior with a post-apocalyptic flare. Developed during a mentorship at Libel Academy, Nyka was crafted using ZBrush, Character Creator 4, and AccuRIG, allowing for fast rigging, dynamic posing, and intricate sculpting.

Iván Gallardo Landskron

Hi, I’m Iván Gallardo Landskron from Chile. I’ve been working as a 3D designer since 2011, contributing to projects in VFX, animation, advertising, film, and TV. Over the past four years, I’ve specialized as a 3D artist for video games, a field that truly drives my passion. I look forward to continuing in this industry for many years to come.

Check Iván’s Artstation

In the video game industry, I’ve contributed to projects such as Nerf Legends, G.I. Joe: Operation Blackout, and Little League World Series 2022 Baseball, all developed at Iguanabee, a Chilean game studio. Currently, I’m working on Tormented Souls 2, a survival horror game, at Dual Effect, another Chilean studio.

I worked as a 3D artist on the following video game projects:

G.I. Joe Operation Blackout / Nerf legends / Little league world series 2022 baseball / Tormented souls 2 (work in progress)

The concept behind “Nyka”

I created “Nyka” thanks to a scholarship from Libel Academy, which allowed me to participate in 3D Camp, an intensive ZBrush Transition course led by Oscar Fernández. The program lasted several months in 2023 and provided valuable mentorship in character creation.

As students, we received a concept brief with the premise: a cyberpunk girl with katanas. While I stayed true to the core idea, I introduced my own variations. From the start, I envisioned a post-apocalyptic warrior from the desert, drawing inspiration from sepia tones and earthy browns instead of the usual neon purples of cyberpunk aesthetics. My focus was on her gaze and facial expression, ensuring they conveyed her personality with depth and intensity.

My Workflow

After establishing the concept art, I began by sculpting a blockout version to establish the character’s shapes, anatomy, and proportions accurately. Once the blockout was complete, I moved on to the high-poly version, refining details and sculpting clothing and accessories—all in an A-pose to simplify the rigging process later.

Next, I retopologized each element separately, ensuring proper UV mapping before painting the textures. With the mesh and textures ready, I exported the low-poly version to Character Creator 4 and used AccuRIG to generate a complete rig. After some adjustments to the skin weights, everything worked smoothly.

For posing, I tested multiple variations before selecting the best ones. I then exported them to ZBrush for refinement, like adding folds, extra details, and accessories. To complete the process, I rendered the character from dynamic camera angles, applying smoke, particles, and color correction for a polished final presentation.

Advantages of AccuRIG

The main advantage was how quickly I could generate a functional rig for my character. With just a few clicks, I could send the model to ZBrush for further sculpting, adding details, and refining poses. I also appreciated that each exported pose was automatically saved in a library using ZBrush Pose Tools, allowing me to instantly switch between multiple poses.

Making the Perfect Pose

Based on my experience in character design, several key factors are essential when posing a character. First, minimizing geometry improves performance, especially when painting skin weights in CC4.

Second, considering action lines and curves helps convey direction and movement, making the pose feel natural and dynamic rather than static and lifeless.

Third, eye direction and gaze are crucial, as they create the illusion of a world beyond the character, adding depth and storytelling to the composition.

Finally, it’s important to determine how the character will be presented—whether as a 360-degree model or a frontal view—since the pose should remain visually compelling from every angle.

Final thoughts and what’s next

Learning a new workflow for character creation in video games was a rewarding experience. I now have a much stronger grasp of the process, whether for stylized or semi-realistic characters.

My next goal is to refine my skills in creating realistic characters and continue studying—taking as many courses as possible.

Related Posts

Click through to learn more about the winners’ portfolios and judge comments
Christo the Civilized Barbarian is an award-winning animated series with iClone and Rokoko tools. The motion capture and 3d workflow introduced helps filmmakers deliver quality works within budget.

Feature Animation at 1% Cost: One Pixel Brush Founder Leverages CC & iC for Real-Time Filmmaking

‘Christo the Civilized Barbarian’ is an animated series about a sharp-tongued barbarian that has earned multiple global film festival awards. Created by Shaddy Safadi and Loic Bramoulle, the team navigated the complexities of motion capture and animation using iClone and Rokoko tools. They showcased their 3D workflow at the Barcelona Film Festival in February 2025.

Shaddy Safadi – Director of One Pixel Brush

Shaddy Safadi / One Pixel Brush

Shaddy Safadi is a Director, concept artist, and creative director with over 15 years of experience shaping the visual worlds of film and video games. As the founder of One Pixel Brush, he has led a team of elite artists in crafting concept art for some of the industry’s most iconic franchises, including The Last of Us, Uncharted, Call of Duty and 100’s of others. His ability to translate narrative themes into striking visual designs has made him a sought-after creative force in entertainment.

In addition to his work in concept art, Safadi is the director of Christo the Civilized Barbarian, a 3D-animated comedy series that reimagines the ancient world with sharp satire and high-concept storytelling. Bringing his extensive background in world-building and visual storytelling to animation, he continues to push creative boundaries, blending humor and artistry in fresh and unexpected ways.

One Pixel Brush’s ArtStation

Loïc Bramoullé

Loïc Bramoullé is an art & film director from France. Since 2010, after completing his graduation film at Melies Animation School, he’s been working in game and animation studios in Paris, like Ubisoft, Fortiche, UNIT & Supamonks. Since 2015 he’s been working mostly remotely as a freelancer, and in the last 3 years, he has specialized in indie motion capture cinematics using Blender.

Since he first tested the iPhone facial mocap with CC3 characters, he realized how easy it is for an animator to enhance raw mocap with Reallusion toolsets, and thus produce animation at unprecedented pace. His latest cinematic was for the upcoming Mars Attracts indie game, which was one of the most viewed trailers at Gamescom 2024 on IGN’s channel.

Loïc Bramoullé’s ArtStation

Loïc Bramoullé – art & film director

How Shaddy and Loic Integrated iClone and Rokoko for Cristo’s Animation

The Initial Dilemma: Choosing the Right Tools

During the early stages of Christo, we faced the difficult decision of selecting the right software pipeline. While many industry professionals advised using Maya due to its robust mocap capabilities and MotionBuilder integration, we chose Blender as the core animation tool for its versatility and growing popularity. And, frankly it’s the one 3D application we are familiar with due to extensive industry experience. However, relying solely on Blender posed challenges, particularly getting quick versions of the performance that can be instantly assessed and changed. Real filmmaking is about iteration and that’s where iClone became invaluable.

Overcoming Traditional Animation Hurdles

Traditional mocap workflows often involve multiple steps, including data cleanup, retargeting, and fine-tuning. By integrating iClone and Rokoko, we bypassed many of these hurdles. The Motion Live add-on for iClone made it very easy to quickly capture voice and face right onto the character and vet it instantly. We could record lines over and over again just sitting at a desk with no fancy gear besides an iPhone.

Then, because Shaddy did all the voices, he would do one character, then the second, then the third, and edit all the spaces between the talking in iClone so the conversation flowed. Then it was relatively easy to set up cameras in iClone to actually see the scene play out. Of course there was no body animation or backgrounds at this point but the voice, and facial data was there and it was good enough to send to colleagues for feedback. Only after that would we utilize the Rokoko’s suit doing our body performance to match the voice performance of each character. In this case, we recorded natively into the Rokoko application and just easily dragged it onto the character in Iclone and assigned the correct retargeting profile upon import. 

Another key advantage was cost-effectiveness. Unlike traditional mocap systems, which require expensive equipment and large studio spaces, the iClone-Rokoko setup offered a budget-friendly alternative without sacrificing too much quality. With animation you can get 85% of the way there for 1/10th the budget, so that was our goal. Make it good enough to sell the intention of the scene but not to noodle it into Pixar quality animation — as we didn’t have 100 million dollars.

Enter iClone and Rokoko: A Game-Changing Combination

Recognizing the need for a more agile solution, we turned to Reallusion’s iClone and Rokoko’s mocap suit. This combination proved transformative for Christo, as it enabled rapid recording and editing of character movements but more importantly rapid vetting of performances and scenes. Additionally, iClone’s compatibility with Blender meant that Loic could relatively easily transfer mocap data for further refinement and rendering.

For the body suit part, it’s not that difficult.

Setting up the facial and body mocap

After a series of trial and error, we managed to set up the facial mocap with my iPhone and Live FACE. Here’s a catch: one must connect the iPhone with the Ethernet cable shown below. You can easily purchase it on Amazon, and it maintains superb stability for facial data capture without the latency — I highly recommend it!

Seamless workflow: AccuLips for Lip Sync Animation

Beyond technical efficiency, iClone enhanced the team’s creative freedom. Once the facial animation performance is recorded, we can bring that motion data in iClone, and combine it with the use of AccuLips to quickly set the visemes for the talking characters. Witty conversation is the cornerstone of Christo and so accurate facial capture is top priority.

Experimenting with different character movements and expressions in real-time allowed us to explore various storytelling possibilities — thanks to iClone’s built-in facial puppet and the Edit Facial panel. This flexibility was crucial for Christo, a project that demanded a high level of emotional engagement from its characters.

Leveraging iClone’s Asset Library

Moreover, iClone’s library of pre-built assets and animations provided a valuable starting point for many scenes. By leveraging these resources, we could focus more on fine-tuning and less on building animations from scratch. Even Christo and Gary’s base designs began with a purchased stylized character pack from the Reallusion store. This approach not only saved time but also ensured compatibility with the robust iClone, and eventually Blender Rigify, rigging systems.

A Revolution for Indie Animation

The integration of iClone and Rokoko was more than just a technical solution; it was a creative revolution! The streamlined workflow, cost savings, and enhanced creative freedom enabled the Christo Project to produce high-quality animation within tight deadlines and budget constraints. Loic’s experience in iClone highlights the potential of modern animation tools in democratizing film production, making professional-grade animation accessible to indie creators.

The Reallusion Blender addon even allows us to leverage each application’s power seamlessly. For example, having the ability to customize characters in both CC4 & Blender, and continue to work on the animation after it’s been exported from iC8. Another example is doing final animation polish on the Rigify version of the characters, while they are rendered in Blender.

Conclusion: Empower Your Indie Animation Project

Our creative path with Christo demonstrates how indie filmmakers can leverage modern tools like iClone and Rokoko to produce professional-grade animation efficiently. By following these steps, you too can revolutionize your animation workflow and bring your creative vision to life, even on a tight budget. With the first episode of Christo done and the next one near completion, we will continue to advocate this workflow in various events and film festivals worldwide. Innovative solutions like iClone, Live Face, and Rokoko, empower small teams like us to push the boundaries of what’s possible in independent animation.

Other News: Official Selection at BARCIFF

Christo the Civilized Barbarian had its first-ever festival screening at BARCIFF – Barcelona Indie Filmmakers Festival, a showcase for innovative and independent films from around the world. The festival, known for its diverse selection of bold storytelling, provided the perfect stage for Christo to make its debut in front of an international audience.

Following the screening, I had the chance to participate in a Q&A session where we discussed the revolutionary animation pipeline we developed using iClone and a Rokoko motion capture suit. This approach allowed us to streamline production while maintaining a high-quality, cinematic feel — an essential breakthrough for independent 3D animation.

As a director, one of the most nerve-wracking moments was waiting for the audience’s reaction to the first joke. But when the laughter came, it was a huge relief. Seeing people connect with the humor and the world of Christo made all the challenges of production worth it. The festival was not only an exciting launchpad for the series but also a validation of our unconventional, tech-driven approach to animation.

Related Posts

Animate for Concept Art: The New Workflow Combining AI

Redefine Concept Art with Animation and AI Guidance

Jakub Kaźmierczak

Hello, I’m Jakub Kaźmierczak, a concept artist specializing in environments concept art and key frames. I have been in the industry for the past 7 years. In my professional career I work mostly for the movies and game cinematics. Some projects being: “Three Body Problem”, “Shōgun”, “Concord” and “Call of Duty BO6 Libertyfalls”.

Jakub’s ArtStation

Integrating iClone into Your Concept Art Workflow

As a concept artist specializing in environments and keyframes, I’m always on the lookout for tools that can streamline my workflow and help me deliver high-quality work to my clients. One such tool that has become indispensable in my process is iClone, a powerful animation software that complements Character Creator (CC). In this article, I’ll walk you through how I use iClone to create dynamic scenes, particularly for sequence keyframes, and how it integrates seamlessly with Blender to enhance my workflow.

Bridging the Gap Between Concept and Animation

iClone is primarily known as an animation tool, but as a concept artist, I don’t consider myself an animator. So, why do I use it? The answer lies in the growing demand for sequence keyframes in my professional work. Sequence keyframes involve creating multiple shots within a single location, and traditionally, this required setting up multiple cameras and manually copying characters across the scene to match each shot. It was a tedious and inefficient process.

With iClone, I can now set up simple animations, export them to Blender, and animate my camera to capture all the necessary shots. This allows me to deliver multiple shots to clients with ease, iterate quickly, and focus on the overall design without worrying about the characters’ movements. The best part? You don’t need to be an expert animator to use iClone. Reallusion has made the process so intuitive that anyone can integrate it into their workflow.

AccuPOSE: AI-Powered Posing Made Easy

One of the standout features of iClone is AccuPOSE, a posing assistant that uses AI to help you pose characters quickly and efficiently. In the past, I had to pose characters in Blender by moving each bone individually or importing animations and adjusting them manually. With AccuPOSE, whenever I move a bone, the rest of the body reacts to the adjustments, and eventually generates a naturally balanced pose. 

A subscription to AccuPOSE INFINITY offers tons of AI-trained pose presets across different themes that I can directly apply to my characters. This is especially useful for creating combat scenarios or other dynamic poses for keyframes. The result? A significant reduction in posing time, allowing me to focus on the bigger picture.

Creating Animations with iClone

To create animations in iClone, all I need to do is drag motion capture data from the content library onto my characters. I should also mention that Reallusion’s ActorCore offers a wide variety of motions to choose from, and they can all be further edited. 

If I need to include different animations for storytelling purposes, I can easily drag the next animation onto the timeline and blend the two together for smooth transitions. I can also break the animation and rotate it to change the direction, giving me full control over the scene’s dynamics.

For sequence keyframes, precision isn’t always necessary. I’m not creating a full movie — I’m presenting an idea. This flexibility allows me to experiment with different animations and camera angles without getting bogged down in the details.

Crowd Simulation: Bringing Scenes to Life

One of the most impressive features of iClone is its crowd simulation capability. In the past, animating multiple characters was a daunting task that forced me to repeat the process for each character, leading to repetitive poses and a lack of variety in the scene. 

With iClone’s crowd simulation, I can generate a navmesh from a ground plane, select the characters I want to include, and assign animation sets to them automatically. This creates a dynamic, lifelike crowd without the need for manual adjustments. The result is a scene that feels alive and avoids the monotony of repeated poses.

Seamless Integration with Blender

Blender Auto Setup has undergone a significant overhaul, making it easier than ever to link Character Creator with Blender. Gone are the days of exporting and reimporting files; Now, everything works as one cohesive system. With just a click, I can pose, edit, and dress my characters in CC and instantly see the changes reflected in Blender’s 3D viewport. This seamless integration has been a huge time-saver, allowing me to focus more on the creative aspects of my work.

Like Character Creator, iClone uses the same plugin to link with Blender. This allows me to export all my animations and see how they fit within the broader scene. The workflow is seamless, significantly speeding up my process and enabling me to make creative changes on the fly. Once the character animations are in place, I can set up simple camera movements, record the scene, and send it to my client for feedback. This iterative process ensures that the final product aligns with the client’s vision.

Refining and Delivering the Final Product

After setting up the scene and capturing the necessary shots, the next step is to refine the keyframes, render out the final images or short videos, and deliver them to the client. This streamlined process allows me to focus on the creative aspects of my work while ensuring that the technical details are handled efficiently.

Conclusion: Expanding Your Skillset with iClone

Integrating iClone into my workflow has been a game-changer. It has allowed me to experiment with new tools, expand my skillset, and deliver high-quality work to my clients more efficiently. As a freelancer, I don’t always have the luxury of sitting next to a director and discussing shots on the spot. Creating simple animations in iClone allows me to communicate my ideas more effectively, especially when working with clients in different time zones.

I encourage you to explore iClone and see how it can enhance your own workflow. Whether you’re a concept artist, animator, or somewhere in between, the ability to experiment with different creative tools can open up new opportunities and take your work to the next level.

I hope this article has given you some insight into how I use iClone in my workflow. If you have any questions or want to share your own experiences, feel free to reach out. Happy creating!

Learn More

Related Posts

Reallusion Magazine Earns #7 Spot in FeedSpot’s Top 100 Animation Blogs

We are excited to share that Reallusion Magazine has been recognized by FeedSpot as one of the Top 100 Animation Blogs, securing the #7 spot! This honor reflects our dedication to bringing valuable resources to the animation community.

From major updates in iClone, Character Creator, and Cartoon Animator to inspiring contests and artist features, we strive to keep the animation community informed and inspired. Our goal has always been to highlight technical advancements and the creative possibilities they unlock.

Our coverage includes the Reallusion Content Store, a comprehensive vault of 2D/3D assets, and ActorCore, the one-stop platform for 3D motions and characters. We also highlight the Marketplace with its 200,000+ assets and community rating system. In our Learning articles, we share insights from certified artists and developers.

Here is the list of the top 10 animation blogs in 2025 ranked by FeedSpot:

We extend our heartfelt gratitude to our readers and contributors. Stay tuned for more innovations as we continue to explore the evolving world of animation!

Check out the full list here: https://bloggers.feedspot.com/animation_websites/

Elevating Action with Legendary Heroes and Wire Stunt Cinematic Motions

Thrilling 3D motions coming to ActorCore and iClone for unparalleled animation productions

Mainstream action movies like Mission Impossible and the Marvel series often feature thrilling scenes with explosions, sling loads, and other high-risk stunts. Producing these complex sequences requires extensive resources, including hiring large teams, time-consuming setups, and managing the inherent dangers of stunt work. As a result, the demand for intricate action animations has significantly increased in the 3D motion market.

Reallusion, known for creating dynamic and stylish action movements, has stepped up to meet this growing demand.  Designed with the same level of planning and execution as big-budget productions, the company has combined advanced motion capture technology with keyframing techniques, as many superhuman actions are nearly impossible for real performers to execute safely. This innovative approach allows the company to bring extraordinary motion to life while maintaining authenticity and excitement.

Industry Experts, Multi-National Collaboration

Producing these projects required top-tier professionals from around the globe. In the U.S., Reallusion has worked closely with Motion Capture Orlando, whose expertise in dynamic motion capture is invaluable. In Asia, the company collaborated with Hong Kong kung fu stunt performers renowned for their mastery of wired stunt actions. This collaboration enabled Reallusion to capture a diverse range of complex motions, seamlessly blending Western superhero action with Eastern martial arts precision. 

Exciting New Motion Packs Unveiled

In 2025, an exciting lineup of new animation packs will be available from ActorCore and iClone, including:

Legendary Heroes Hand-key Animation

Already released is the Legendary Heroes: Wall Crawler pack, featuring hand-keyed animation clips inspired by characters like Spider-Man and Tarzan. This pack enables fluid transitions from climbing to swinging to combat in one continuous shot. 

Another exciting addition is Legendary Heroes: Aerial Fighter, the first flying hero animation collection. Inspired by Superman, this pack allows animators to create thrilling mid-air fights and daring rescues with cinematic quality.

Wire Stunt Mocap Animation

Partnering with martial arts professionals to deliver top-tier kung fu stunt choreography and wirework, this collaboration has produced several dynamic motion capture packs. The first, Explosion Stunts, showcases intense reactions to bomb blasts and energy weapons, adding realism and excitement to any action-packed production.

The Swat Stunts* pack delivers breathtaking aerial stunts for non-superpowered heroes, featuring rappelling, crashing through windows, scaling buildings, and wingsuit flying. These animations are perfect for SWAT teams, special forces, secret agents, and extreme sports narratives.

Additionally, the Fight Stunts* pack offers high-energy martial arts choreography, including high-flying kicks, devastating punches, body throws, and brutal takedowns. This pack enables users to create thrilling fight scenes reminiscent of The Matrix and John Wick.

Hollywood’s Legendary Heroes Mocap Animation

Partnered with Motion Capture Orlando, the Legendary Heroes: Avenging Warriors* pack is inspired by Marvel movies. This collection features animations reminiscent of characters like Iron Man, Captain America, and Doctor Strange and more. Created by top stunt performers from Marvel Universe Live, these animations allow users to recreate iconic battle sequences.

Expanding on this expertise, the Legendary Heroes: Laser Swords* pack brings meticulously designed combat animations inspired by the Star Wars universe, enabling animators to stage epic duels across galaxies.

These new animation packs serve as versatile building blocks for creators to craft their own heart-pounding sequences.  Reallusion continues to revolutionize animation, providing users with unparalleled animation tools. With so many exciting releases ahead, now is the perfect time to explore the limitless possibilities.  Visit ActorCore 3D Motion today and experience yourself.

* coming soon

Related Posts

Reach Targets for Beginners

Reach Targets can be either overlooked or a bit confusing for beginners as they are used for far more than just reaching for an object or item. One of the first problems encountered is the positioning of two hands on a shovel, weapon or other item. Since a prop can only attach to one hand, we use Reach Target dummies (Reach Targets) as the go between.

The Reach Target tool has been around for a long time through many versions of iClone and has seen some significant upgrades since its introduction. In the early days of iClone we had to make our own dummies but today’s Reach Target system in iClone creates dummies for us even if they are invisible when created. Visibility can be toggled, and a popup will remind you of that. The tutorials below will cover all this and more.

The Reach Target system steps in to not only link the second hand but also provides a method for us to place that second hand where we need it. As I said earlier there is much more to the Reach Target system than meets the eye.

As I alluded to earlier, two-handed animation is not necessarily the Reach Targets original task. It was just as the name implies a target for the character to reach something like a doorbell or light switch and lock on if needed. This also works for other two-handed applications like a steering wheel in an automobile. One hand is either attached to the prop or to a Reach Target and the other is attached to the other Reach Target which is attached to the prop.

As you will see the Reach Target Dummy is created with just a few mouse clicks within the Reach Target interface located in the upper area of the Animation tab. You need to select a character first then click EDIT REACH TARGET within the Animation tab. Below we will take a look at a couple of usage scenarios in the embedded tutorials and show some other examples of using the dummies.

Object Driven Animation

In this example we’ll be animating an alien pilot inside a cockpit to show movement of the joystick and throttle as you might expect from a pilot. In the tutorial I set up two target dummies. One for the joystick and the other for the throttle. This process is Beginners level with no difficult animation required.

I will be using a two headed iClone character which is actually two characters linked together using opacity to hide body parts of the second “head”.  Don’t let this confuse you if you notice two characters in the Scene Manager. Refer to my article on Multi-Headed Characters for more information.

NOTE: I’ll be changing the texture of the dummies so we can see them easily. This is NOT a step you need to duplicate unless you want to see the target more clearly. Once you set them as a dummy (as shown in the tutorials) their visibility is toggled off and they will not render.

Reach Driven Animation

Similar to the object driven animation in the earlier tutorial we will use the dummy to drive the animation instead of an object in the scene. Object driven animation uses a prop to drive the character animation, whereas Reach Driven Animation uses the dummy itself to drive the reach animation.

In this case it will be a character reaching and pressing a button on a wall console. A move that can be smooth and adjusted with little effort with the Reach Target dummy. If you have never used this method before, you may be surprised at how easy it is to get a fluid movement with just the reach targets that you are grabbing or releasing while moving down the timeline.

Note: These types of actions can be accomplished with the new AccuPose feature for more advanced animations. I wouldn’t recommend using both at the same time as you have Reach Target dummies working against the constraints of the AccuPOSE system.

Examples

Now that you’ve seen how a couple of basic Reach Target scenarios work, we will take a look at a few examples of simple uses for Reach Targets. This tool can reduce animation time and give you more time for other tasks while getting a confidence boost as iClone does most of the work.

Baseball Batter

The baseball batter uses one Reach Target for the upper hand while the other hand is attached to the lower section of the bat.  The dummy will keep the arm attached to the bat until released. This can also cause elbows to collapse if the character is too low poly. You might also have to make some adjustment to the position of the opposing shoulder in cases of extreme motion or bending.

You can see the dummy in place for the upper hand on the grip area of the bat. This dummy can be moved in any direction and the hand will follow and stay attached until released. The release can be animated in the timeline.

Two-Handed Staff Weapon

In this scenario we can use either one or two Reach Target dummies as it depends on if you are going to use the weapon to animate the arms or use a motion for animation. It is very important to make this distinction.

If you are going to use the weapon to drive the animation, then you can use two Reach Target dummies, but the weapon will remain in place and not react to any motions. To use motions, we need to only use one Reach Target dummy for the upper hand while attaching the weapon to the lower hand in the desired position.

TIP: If your Reach Target dummy is frozen in place it is because you did not attach it to the object you were reaching for or holding.

This video contains tutorial for the Two-Handed Weapon above and Driving Reach Targets below

Remember, if you use a motion use one Reach Target. If you are using the object to animate, then use two Reach Targets.

Two Handed – Select Target and Keep Current Pose Method

This method was introduced in a previous update and is much simpler to set up for a two-handed object as it does not use dummies and can lock limbs into position no matter how much the body is distorted. The trade-off is you lose the ability to animate the Reach Target dummies if you need to make simple edits or move hand positions. Both serve important functions when needed.

Guitar Player

This one isn’t so simple but can be done depending on how accurate you want the animation to be. As far as anchoring the hand on the fretboard one Reach Target works great. Like all Reach Targets you can use two and animate the dummies, but I would prefer to have guitar motions driving the strumming hand and a Reach Target for the fretboard.  

If you are looking for finger accurate animation, then good luck to you. I’ve never tried that as I’ve always had motions of some sort when needed but I would probably just move the upper dummy arbitrarily, if at all, to get some movement.

Two-Handed Sword

This weapon is a little different from others just like the guitar. It is a close to the body object that can cause limb distortion when too close. There is a sweet spot that you can find by adjusting the item distance from the body.

In this case I used only one Reach Target and all the two-handed “rules” we’ve explored so far apply here too. I’m sure you are tired of this but just to make sure… for motion use one Reach Target and use a motion for the other hand. For object-driven motions, use two Reach Targets and move down the timeline, then move the object both hands are attached to to animate the arms and upper body as demonstrated in the joystick and throttle tutorial above.

Steering Wheel

This example is basically the same as the joystick and throttle example too. The steering wheel is a separate object and both hands are attached via Reach Target dummies to their respective places on the steering wheel.

We then use the steering wheel to drive the motion of the arms and upper body. Since most of the body is stationary you can concentrate on animating the upper body with this method. Add a few head turns and bobs to add more motion.

See the last half of the video tutorial shown earlier under the Two-Handed Staff Weapon section for details about this driving set up

Summary

The added benefit of Reach Target Dummies versus the Select Target and Keep Current Pose method is the ability to animate the dummies on the timeline as I mentioned in the tutorials above. This means if you have dummies attached to each hand you can move the dummies on the timeline and animate hand or limb position changes. This is generally not something most beginners need to know to get started but I wanted to make you aware of it. If this makes no sense to you now, that is probably because you haven’t needed it yet.

As for myself, I use it much more as an anchor than to animate a reach. There are far more scenarios for Reach Targets than I could ever list, and it is one tool that is hard to overuse. The only problem I can think of would be if, as I stated earlier with AccuPOSE, the targets and locks interfered with each other.

Do not forget to attach the Reach Target dummy to the object. It is easy to maneuver the dummy into place then forget to attach it. Also keep in mind that you can twist and turn the dummy to move the limb in more directions than forward, back, up or down.

Reach Targets have their uses and if you are still new to animation and iClone in general then these Reach Targets will become another tool in your animation toolbox.

Below you will find a tutorial from Kai if you want to look into more advanced usage of the Reach Target feature.

MD McCallum - WarLord

MD McCallum – WarLord

Digital Artist MD “Mike” McCallum, aka WarLord, is a longtime iClone user. Having authored free tutorials for iClone in its early years and selected to write the iClone Beginners Guide from Packt Publishing in 2011, he was fortunate enough to meet and exchange tricks and tips with users from all over the world and loves to share this information with other users. He has authored hundreds of articles on iClone and digital art in general while reviewing some of the most popular software and hardware in the world. He has been published in many of the leading 3D online and print magazines while staying true to his biggest passion, 3D animation. For more information click here.