首頁 » Page 22

Boundless Automated Movement – AccuPOSE INFINITY

Recently I wrote an article on the AccuPOSE Core library and how it can be a boon to beginners and a time-saver for experienced users and pros by keeping the body in proper position while moving a limb or limbs for custom animation. The built-in AI-assisted posing maintains a proper posture while we push, pull, or rotate limbs into position.

The Core Library has a wealth of everyday motions that can be very difficult to keyframe by hand and we all know canned motions can, and usually do, require editing as they can’t fit all situations. This is where the AI-assisted accuPOSE library fits in. Motions are great and Pose to Pose is great but AI-assisted Pose to Pose allows us to manually create poses that do not contort or move body parts out of place while moving down the timeline to create our own custom motions.

The Core Library is free, and the optional INFINITY subscription allows that library to grow as more AI-assisted pose packs are added. Infinity already has many different types of AI-assisted poses with plans for many more.  In fact, there is a roadmap for the continual expansion of the Infinity pose library.

INFINITY Subscription

The INFINITY subscription expands the Core Library with new AI-assisted motion packs already available or coming soon according to the INFINITY roadmap.

Pricing directly from the website:

As of this writing, the New to iClone discounts are available.

Available Now in INFINITY

Let’s take a quick look at what is available now. The categories are Daily Life, Communication, Occupation, Combat, Action and Adventure and Dance.

Dailey Life
Communication
Occupation
Combat
Action & Adventure
Dance

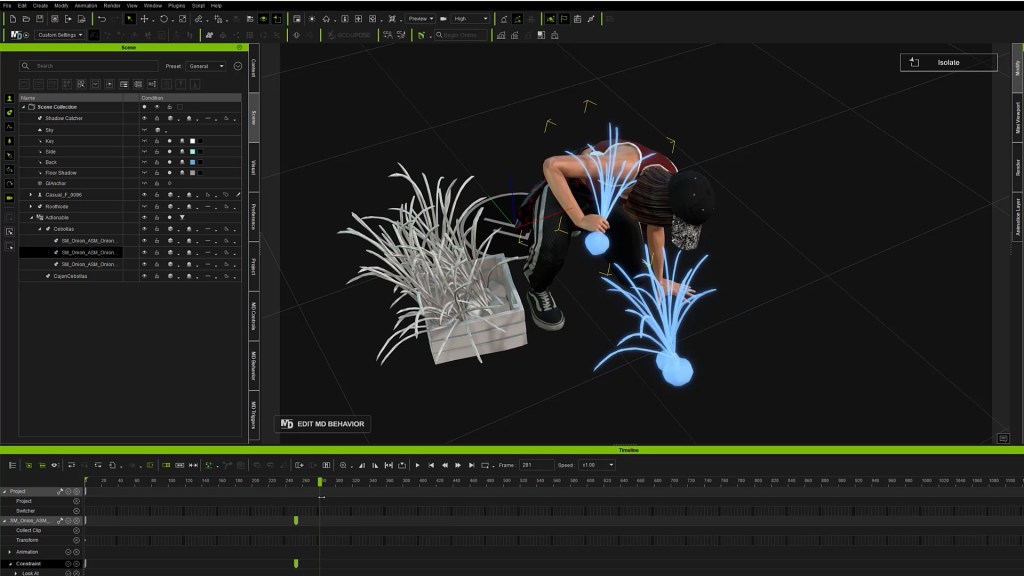
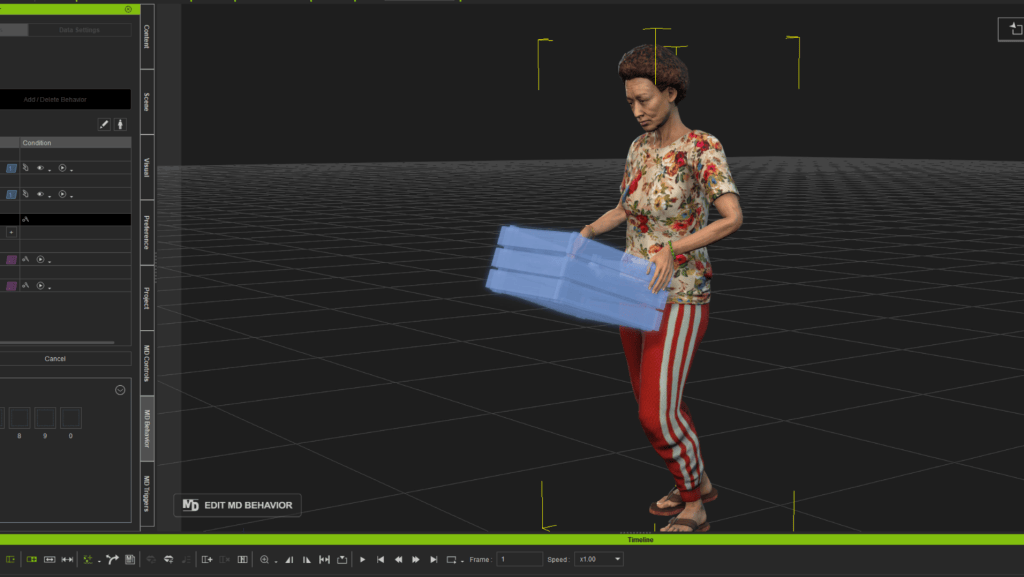
Mobility Male, Mobility Female, Mobile Phone F, Mobile Phone M
Conversation, Emote
Construction, Rock Singer
Agent F, Agent M, Assassin, Wall Crawler, Street Fighting, Pistol, Rifle, Sword & Shield, Boxing, Orc
Parkour, Flee Male, Flee Female, Injury & Rescue M, Injury & Rescue F, Car
Dance 60s – 90s, Ballet

You can also see where some packs complement each other like Wall Crawler & Parkour or Rock Singer and Dance. This initial library has many time-saving packs like mobility and mobile phone that will provide realistic poses for our pose-to-pose work for everyday or even camera-centric scenarios.

You will notice INFINITY has already released its first expansion available to subscribers via an update in Reallusion Hub. This expansion includes: Wall Crawler, Rifle, Boxing, Orc, Ballet, Flee Male, Flee Female, Injury and Rescue Male, Injury and Rescue Female and Car.

How Can This Benefit Beginners?

As I wrote in my article about the free Core library AccuPOSE extends our current motions by giving us the ability to manually move parts of a character (keyframing) while keeping the character in the proper position and not distorting the body. The proper use of translation and rotation locks help with this by keeping certain body parts locked in to place or open for movement.

Manual keyframing can be one of the most difficult skills to master as a slight movement out of place can produce strange or off-putting results for the viewer. AccuPOSE takes care of this problem by using AI-assisted poses to keep everything in line.

It is more difficult to explain this article than it is to actually do. It also brings us one step closer to that animation easy button we are all wanting.

What is Pose-To-Pose?

If you are not sure what Pose to Pose is, you are not alone. It baffles many beginners, but it relies on picking a frame like 40 and loading a pose at that frame then moving a number of frames down the timeline, in this case 100 frames, to frame 140 and altering the pose with the built-in tools and locks or loading another pose. iClone will take care of the animation between those keyframes.

Yes, it’s that simple.

I didn’t say easy as some packs like Web Crawler will still involve some work on the posing until you get some experience but that is a more extreme type of animation. Everyday life events like picking up an object or opening a door benefit tremendously with the AI-assist and those “everyday” motions can be some of the most difficult to learn and execute manually.

Just because we can get from point A to point B in an animation sequence doesn’t mean we ‘ve done it well. If our technique is lacking, then our animations will be lacking too. Keep in mind the fact that our viewers are trained to near perfection by Pixar, DreamWorks and other triple A studios. It becomes imperative we make our animations as good as possible.

Audiences may forget bad stories or writing, but they might not forget bad animation.

CPR Tutorial

Let’s start with a real-world example of a scenario involving a police officer giving CPR to a person on the street. While this might not be a difficult animation for a pro it can be very difficult if you are just getting started. accuPOSE INFINITY provides a pack that includes this scenario making quick work out of what once would have taken hours and maybe even a day to animated properly.

We load the CPR AccuPOSE and watch the character immediately jump into an appropriate pose for the motion pack. As I show in the short tutorial below, I also use Lie from the Core library for the prone pose of the victim.

Industrial Painting Tutorial

The Construction pack under Occupation in the INFINITY pose library provides us with another easy to learn example of pose to pose with iClone taking care of the movement between poses. This example shows how quickly you can add background motions as scene filler. This also adds more life to the scene.

Think Outside the Box

Just because a motion pack says it is for a certain type of motion doesn’t mean that pack can’t be used for other motions. All we need to do is see what fits our needs like sitting, standing and so forth then drill down through those packs to see what can be used for our current need as a starting point or pose.

Almost any sitting pack will work for simple animations like a pilot in a cockpit as long as we use the locks and tools properly. A sitting conversation pack might well work for a pilot moving a joystick around while staying within the confines of the seating area or a character using a control panel.

Expanding Library of Packs

The INFINITY Library will grow regularly over time as more AI-assisted motion packs are added with new packs already available in early January.

As you can see from the above image Reallusion already has several new packs scheduled for release to expand the INFINITY library.

Existing Projects

AccuPOSE can slip right into an existing project to enhance the work with AI-assisted posing and posture.  To quote from the Reallusion website:

Works with Normal Poses
Transform existing poses into AccuPOSES with selected AI model and experience the precision of natural posing through customizable IK constraints.

Clip Layer Editing
By incorporating AI-assisted layer keys, users can effectively enhance motion velocity in selected motion clips.

Keyframing from Library
Easily add poses from the AccuPOSE library to arrange keyframes on the timeline, with the option to fill in custom in-betweens and curves for smooth transitions.

Accelerate Animation Workflow

Handkey Animation
Driven by deep-learned human motions, the pose suggestions enhance the efficiency of quality keyframe posing and support the creation of compelling animation styles.

Connecting Clips
The intelligent posing feature simplifies the process of filling in missing poses between motion clips, creating more natural transitions.

Mocap Correction
The natural AI posing capability can effectively solve the mocap challenges such as shoulder stiffness, motion distortion, and even enhances animations with realistic hand gestures.

Curve & Trajectory
iClone’s Motion Curve and Motion Trail functions empower animators to fine-tune keyframe timing and spatial trajectories, ensuring high-quality animation results.

Summary

The free core library is a great library of poses in itself, but the INFINITY Library subscription is already expanding the AccuPOSE library with more poses and will continue to do so according to its release schedule. The poses are not only AI-assisted but also professionally created to maintain superior quality that can enhance your animation project.

I have always been a pose-to-pose advocate even when it required cleanup but with AI assistance the cleanup will be little too non-existent which is a plus to beginners.

As you have seen in the examples using pose-to-pose with AccuPOSE is only a matter of timing (the number of frames between poses) and positioning of the limbs which is guided by AccuPose. As I wrote earlier the INFINITY subscription is another step closer to that coveted “easy button” for animation.

MD McCallum - WarLord

MD McCallum – WarLord

Digital Artist MD “Mike” McCallum, aka WarLord, is a longtime iClone user. Having authored free tutorials for iClone in its early years and selected to write the iClone Beginners Guide from Packt Publishing in 2011, he was fortunate enough to meet and exchange tricks and tips with users from all over the world and loves to share this information with other users. He has authored hundreds of articles on iClone and digital art in general while reviewing some of the most popular software and hardware in the world. He has been published in many of the leading 3D online and print magazines while staying true to his biggest passion, 3D animation. For more information click here.

Masterful Motion Editing Brings an Artist’s Dream Project to Life

Dream Big, When You Have All the Support to Get Over the Hump

Elvis Deane

Hi, I’m Elvis Deane, a seasoned digital event and video producer. I take pride in my ability to communicate clearly with clients and my proficiency with a wide range of production tools. My educational background in visual effects coordination, virtual production, and creative arts has provided me with a strong foundation in both traditional and cutting-edge industry techniques. After graduating in 1999 from one of Toronto’s first 3D college programs, I chose not to pursue a full-time career in animation. Instead, it became a hobby of mine alongside my work in video production, making me a long-time 3D enthusiast.

Elvis Deane’s ArtStation

Breaking Through Barriers

Around 2002, I started writing a show called Crash Landed with the hopes of producing a one-minute silent cartoon every week. The lead character was named Griff, a pilot in a little spaceship, who crash lands on a planet and is on the run from a giant army.

I had been watching a lot of Samurai Jack, and I was hoping to bring those sensibilities to 3D animation. But after months of modeling, rigging, and animating, I stopped working on it. It was too ambitious for what I could do alone. I made a comic book with the assets to tell a small part of the story.

I started writing a story for a feature length movie, The Sky’s The Limit, about Griff. I never really expected to make the film, it was just a fun idea I wanted to explore and maybe do as a graphic novel eventually.

In 2020, I was looking for a way to still be creative during the Covid shutdowns, and I tried Reallusion’s software for the first time. I quickly realized that the technical barriers I had faced when I first started learning 3D animation could be easily overcome. Instead of spending my time rigging and modeling characters, I could use Character Creator to quickly make a whole cast of characters for my projects.  

With iClone, I could use motion capture to act out many of the scenes instead of animating everything by hand. I could concentrate on the story and performances rather than spending all my time troubleshooting technical issues. I dusted off some ideas I had for my character Griff, and started animating test scenes.

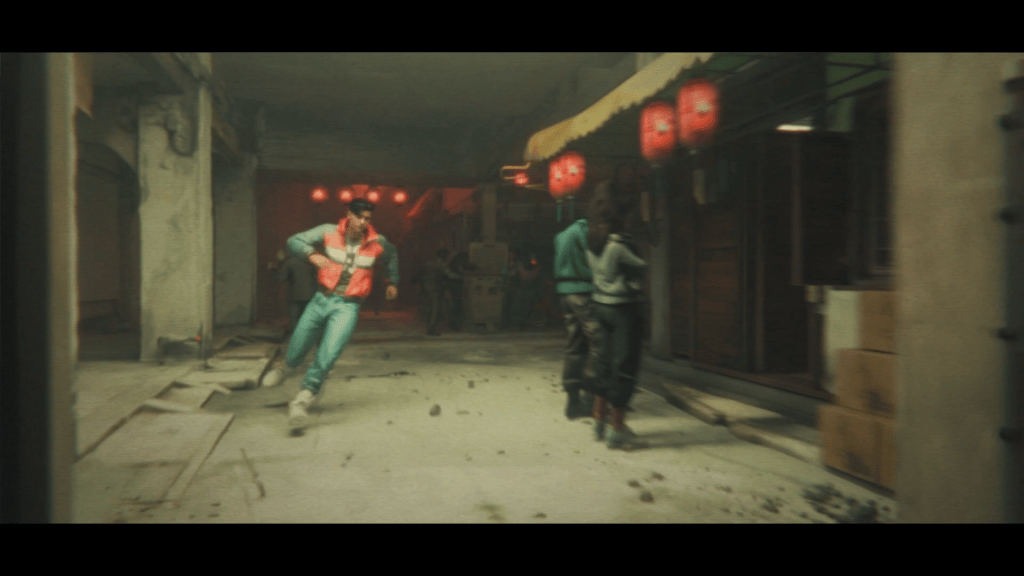
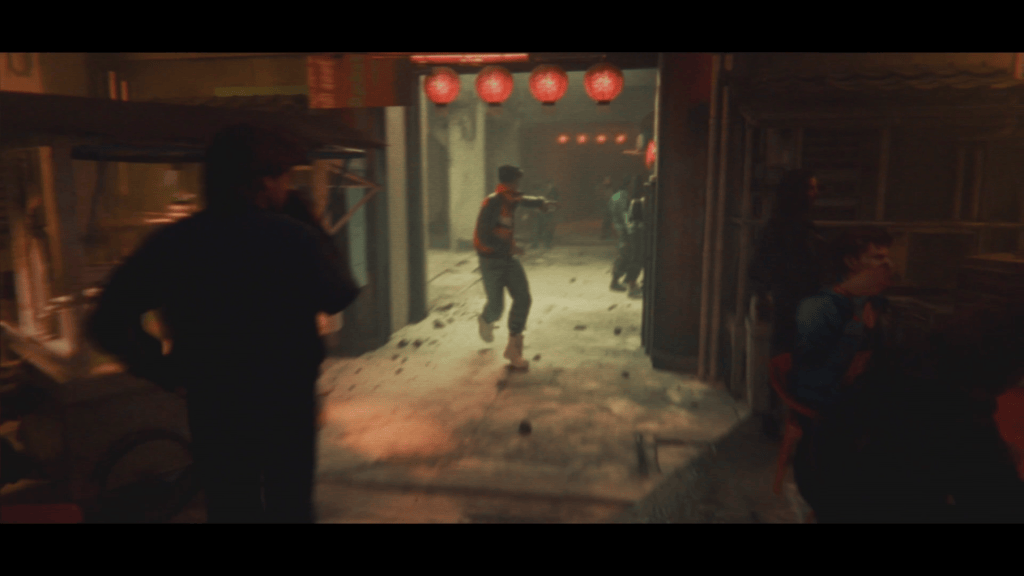
The Sky’s The Limit starts off with a robot police force arriving in the slum that Griff lives in. I wanted a big chase scene to introduce Griff.

A Game-Changer in Motion Editing: AccuPOSE

One of my major struggles when doing character animation has been animating action scenes. I often couldn’t get my characters to hit the poses I wanted. AccuPOSE has changed that in a big way. By offering tons of AI-trained poses. The real magic is it reacts to my adjustments automatically, and generates the most natural poses.  I could use motion capture to do some action, like running, but AccuPOSE really helped in getting the specific poses I wanted with great freedom of customization.

AI Guidance Based on Themed Models

I used AccuPOSE to make Griff climb up a pipe and fight a robot, two things I would have hesitated to try before. Thanks to AccuPOSE INFINITY, which expands the plugin with poses based on different themes and categories, I was able to find the poses that I could play with for the two specific scenes.

I used the Wall Crawler model for climbing the pipe, and it only took me a few minutes to create the climbing key poses. I could move the hand, foot, and hips to the place I wanted, and the rest of the body would follow.

For the fight scene, I used AccuPOSE to create my key poses of swinging a pipe and jumping in the air, and then went back and did my in-betweening to smooth out the motion. I used some poses from the AccuPOSE Sword & Shield model to get the general movement planned out, and made adjustments to make the poses fit my story.

Visualizing and Adjusting with Motion Trail

To make sure the arc of the arm looked good when he swung the pipe, I used Motion Trail to see exactly how the pipe was moving in 3D space, and adjusted my keyframes and added in-betweens to smooth out the motion.

Advanced Motion Capture Editing

The final shot of the scene introduces the mob boss character, and it’s the only spoken dialogue in the film. I acted out the scene in my living room, recording my body animation on my phone, and used a GoPro to record my face. I used AccuFACE to capture the facial animation, and then made some small adjustments to the eye positions in iClone. I used Marionette XR to capture the body motion.

To get rid of any jitter, I used the Butterworth filter to smooth out the motion capture curves without losing fidelity on any of the big poses, and then made some quick fixes to where the mob boss’ feet were placed.

Interacting with Unreal Scene

Back in Griff’s early days, rendering a shot would take me hours and hours. I’m now using Unreal Engine to render everything in real time. I use different marketplace and Kitbash assets to build the set. iClone integrates really well with Unreal Engine, the Unreal Live Link plugin allows the assets from both sides to be transferred, so I can quickly move back and forth between the two to make adjustments to the performance or set. To make the final adjustments to my climbing shot, I brought the building’s geometry into iClone to make sure Griff’s arms and legs were in the right places.

More Options, Less Challenges with iClone

I’m really having fun mixing motion capture, keyframe animation, and AccuPOSE to animate the story.  It gives me so many options on how to approach a scene. I can start a shot using downloaded mocap clips and then add custom animation with AccuPOSE, or I can act out a scene with motion capture and exaggerate the facial expressions by keyframing the eyes and eyebrows. There’s so much flexibility in how I can tackle a scene, and less technical challenges compared to when I started writing Griff’s stories.

To Conclude

Bringing Griff back to life after all these years has been an incredible experience. The roadblocks that once made animation feel impossible are gone, replaced with tools that let me focus on what really matters—the story. With iClone, AccuPOSE, and Unreal, I can mix motion capture and keyframe animation in ways that weren’t an option when I first started. Instead of getting stuck on technical issues, I’m experimenting, refining, and actually finishing scenes. Griff’s world is finally coming together, and this time, I’m seeing it through.

Learn More

Related Posts

Using CC4 to Make a High-Quality 3D Game Character for UE

Cho Hyeongmo

Hello, my name is Cho Hyeongmo, and I am a student studying game character modeling. While majoring in visual design, I discovered my passion for game art through a character design course, which steered me toward a career in character modeling. Using my background in drawing, I began exploring concept art and the game development process. 

Over time, I realized I thrive when focusing deeply on a single project to enhance its quality, which led me to dedicate myself to character modeling. Over the past year, I’ve been refining my skills and streamlining my workflow. I enjoy the meticulous nature of modeling and find great fulfillment in discovering efficient methods and tools.

Cho Hyeongmo, game character modeler

My goal is to contribute to a game project and create characters that leave a lasting impact.

Check Cho Hyeongmo’s ArtStation

Find concept art

The characters Blue Rose Knight and Octo Head Warrior, which I previously worked on, had concepts belonging to the broad category of medieval fantasy. In order to strengthen my portfolio, I realized that I needed to show character modeling based on a new type of concept. Additionally, I wanted to find artwork that lets me focus my practice on programs like Marvelous Designer and Ornatrix, as well as hard surface modeling.

Prototype Modeling 

Through the modeling process of the two characters I had worked on previously, I realized that a considerable amount of time was spent on rigging and skinning, as well as adjusting the base pose for rendering. To save time, I decided to start with character meshes or programs that offered auto-rigging features or animation samples. 

I first used MetaHuman Creator to set the skin tone, define large facial features, and create a similar hairstyle. I then brought it into Unreal Engine for testing, checked the low-poly state in 3ds Max, and finally imported it into ZBrush. However, the mesh was imported as a triangular mesh with separated vertices and edges, making it impossible to increase subdivisions for high-poly sculpting. 

As a result, the MetaHuman mesh was only used as an avatar in Marvelous Designer to ensure the clothes fit properly. The MetaHuman hair, being similar in style to the concept art, was exported as hair cards and used until I transitioned to Ornatrix.

Using Character Creator  

To reduce the time spent on rigging and skinning, I searched for other programs and tried the free trial of  Character Creator 4 (CC4). Since CC4 offered more morph options than MetaHuman, I was able to adjust the face to better match the concept art. I was already making clothes for MetaHuman, so I adjusted the character base accordingly.

Additionally, the CC GoZ Plus and Max Auto Setup plugins provided by CC4 were very well  built, so I attempted several transfers. Considering the desire for future rendering work with iClone and  Unreal Engine, I ultimately purchased CC4. To summarize, the workflow I followed before moving on to low poly and texturing work is as follows: 

  • Clothes: Marvelous Designer 
  • Body: Character Creator 4 (CC4) 
  • Hair: MetaHuman 
  • Accessories and Hard Surface Work: 3ds Max 
  • Final Details: ZBrush
  • Posing and Rendering: UE5 
Workflow

Texturing and Unreal Auto Setup 

When texturing, I prefer to put the mesh into Unreal Engine and repeatedly update the texture file to check the results. While this can be done to some extent in Substance Painter or CC4, subtle differences can arise due to lighting environments or material values in the engine.

Using the Unreal Auto Setup Plugin, I  quickly imported the CC4 mesh into Unreal Engine 5.4 and continued the texturing work based on this.  The material graph created by the plugin had many useful elements, which I combined with the material graph I had been using to prepare for the final rendering.

Unreal Engine before and after

To proceed, I imported all the low poly meshes into CC4 and used CC GoZ Plus to fine-tune the clothes  (as I had originally started working with the MetaHuman body). After that, I performed auto-rigging using the Transfer Skin Weight feature and manually adjusted some skin weights. After applying some animations provided by CC4, I quickly checked for any issues and then moved on to Substance Painter for texturing. 

Animation Applied in CC4 During Skinning
Converting Character to Humanoid and Adding Bones in Blender, Spring Bone Test

While utilizing a CC4 character, I tried the UDIM workflow for the first time. I referred to tutorials provided on  Reallusion’s YouTube channel to import the character into Substance Painter and worked on the skin textures. 

Substance painter workspace

CC UE Control Rig

Once the texture work is finalized, I use the CC UE Control Rig Plugin to generate the final rendering. Previously,  the process involved a complicated workflow of adjusting poses in 3ds Max and re-importing the data.  However, with this plugin, I can create poses that effectively showcase the character’s appeal by manipulating the bones in real time within the engine. By retaining the CC4 skeleton instead of switching to a biped system, I was also able to import basic animation samples and incorporate them into my portfolio. 

Final Thoughts

By introducing applications to improve rigging and skinning, I discovered even more possibilities and began to fully incorporate CC4 into my workflow. By using CC4’s shaders, I was able to significantly reduce the time spent on facial sculpting work that would have been difficult to perfect in ZBrush. Additionally, using the biped system in 3ds Max, I was able to efficiently complete the time-consuming rigging work as a character modeler. 

The basic animation samples provided by CC4 were particularly helpful, allowing me to quickly identify and correct any issues that arose during skinning. As a student still learning, CC4 has been the program that has solved the most problems during game character modeling work and provided clear guidance. Thanks to it, I was able to significantly improve the quality of the final output and intend to continue actively using CC4 in future projects.

Next Portfolio Project  

Having completed my recent modeling projects on three different characters, I felt there were some shortcomings in their facial expressions. For my next project, I plan to focus on refining facial work to naturally implement a variety of expressions. Additionally, I aim to learn new techniques by practicing wrap tools and XYZ textures. 

Related Posts

Revolutionizing Animation with ActorCore & iClone in Maya

Out Left Productions: Pioneering Animation and Live-Action Storytelling with Character Creator, iClone and ActorCore

Richard Keane – Filmmaker, Writer, Director, Producer

Out Left Productions Ltd.

Out Left Productions Ltd., a distinguished boutique production company based in Dublin, Ireland, has been making waves in the animation and live-action industries since its establishment in 2015.

Founded by award-winning filmmaker Richard Keane, the company is driven by its core philosophy: “Creativity is Key.” Known for its commitment to crafting original, high-quality content, Out Left Productions earned acclaim for its innovative short films and is now poised to venture into feature films and television series, catering to both domestic and international audiences.

Living up to its name, Out Left Productions thrives on “out of left field” thinking, embracing disruptive innovation to forge unique creative paths. The studio’s vision is rooted in producing high-concept genre content designed for global appeal, achieved through collaborations with dynamic talent from Ireland and beyond.

Currently, the company is working on its latest ambitious project, Scrap Metal, an animated short film set for release in 2025. Helmed by seasoned CG Generalist and Art Director Darko Mitev, who brings over 13 years of industry expertise, the film showcases a meticulously crafted world that serves as the foundation for a broader universe of stories.

Harnessing cutting-edge tools from Reallusion, including Character Creator, iClone, and ActorCore, Out Left Productions continues to push the boundaries of visual storytelling. By blending advanced technology with a bold creative vision, the team is set to deliver an exceptional cinematic experience with Scrap Metal and beyond.

Darko Mitev – CG Generalist, Art Director

“Beyond the main action, iClone and ActorCore were key in bringing our crowd characters to life and making the bustling city feel alive. Using a combination of motion-capture assets from ActorCore and iClone’s real-time animation capabilities, we could efficiently populate scenes with background characters performing natural movements—like walking, chatting, or interacting subtly with their environment. This process added depth and energy to the world without requiring extensive manual animation.”

Richard Keane – Filmmaker, Writer, Director, Producer

Q: Hello Richard and Darko, and welcome to our Reallusion Feature stories. Please introduce yourselves and share a bit about your backgrounds.

Hi, I’m Richard Keane, an award-winning filmmaker from Dublin, Ireland. I have worked as a writer, director, and producer across both animation and live-action. Since 2003, I’ve had the privilege of working at several high-profile studios in Ireland and the UK . Many of these on ANNIE, BAFTA, and Emmy award-winning productions. Clients have included Amazon Studios, BBC, Disney Junior, Nickelodeon, RTÉ, and Screen Ireland.

In animation, I’ve directed on projects such as Disney Junior’s Peabody Award-winning series Doc McStuffins (2012), Nickelodeon’s Butterbean’s Café (2018), and Screen Ireland’s award-winning short Bird Food (2012), which I also wrote.

On the live-action side, I’ve written, directed, and produced several short films that have been screened at major film festivals around the world. These include Perpetual Darkness (2007), The Grand Canal (2016), Hot Knives (2016), and Time Slips Away (2019). My most recent short, Chicken Out (2021), has won multiple awards globally and is currently streaming on Disney+.

In 2015, I founded Out Left Productions, a boutique production company based in my hometown of Dublin. The company has produced several high-end animated and award-winning live-action projects. I’m currently developing exciting new projects and am mid-production on our latest animated short film, Scrap Metal.

Hi, I’m Darko Mitev, I am a CG generalist and art director originally from Macedonia, currently based in Dublin, Ireland. Over the past 13 years, I’ve worked on a range of award-winning productions, spanning VFX, feature and TV show animation, game cinematics, and commercials.

My clients have included Disney Junior, Nickelodeon, Netflix, Apple TV, Axis Animation, Windmill Lane, Brown Bag Films, Sunrise Animation, Alt VFX, Sehsucht, and many others.

Notable projects I’ve contributed to include the games Halo 5 (2015), Destiny 2 (2017), the TV series Vampirina (2017), Butterbean’s Café (2018), Dee & Friends in Oz (2024), and the feature films Rock Dog (2016) and David (2025).

In 2022, I founded my company, Split Poligon, in Macedonia, where I am developing an original IP set in Oris City, where Scrap Metal is based.

Q: The concept of AI robots was integral to the story and the production of your short film, Scrap Metal. How did this narrative inspire your approach to motion capture and animation?

As we developed the story for Scrap Metal, we kept two key factors in mind: our tight budget and the need for a high-fidelity final output. These constraints influenced every aspect of production. Starting with the story, how we built, rigged and animated the assets, all the way down to the pipeline of the production itself.

We soon realised that we could only afford to fully model, rig, and groom one main human character, Sybyl. Because of this, we decided the best approach was to make the story’s antagonists robots—these would be the entities chasing her.

The pursuit begins with a drone robot tracking Sybyl, but after she defeats it, a larger and more sophisticated biped robot takes over, pursuing her through the city. While the biped robot is highly detailed, featuring an incredibly advanced rig created by Dhanesh Valappil, we knew that designing and animating robots would be far more feasible than creating another fully human character.

As the story progressed, we began to explore the tracking element further and asked: what if the robots tracking her could actually scan her movements, learning and predicting her actions using their own version of AI?

This idea not only served the narrative but also worked to our advantage in production. By having the biped robot mimic Sybyl’s movements, we were able to reuse her animation—both keyframe animation and the motion-capture data we obtained from ActorCore—by simply applying it to the robot character.

This also allowed for a nice evolution in the robot’s movements. Initially, its motions are more rigid and robotic, but as it learns from Sybyl, its movement becomes more natural and fluid. This shift not only enhanced the story but also created a dynamic change in the visual style of the animation, which was both efficient and effective for the production.

Q: Your decision to forego traditional storyboarding and instead use previs is intriguing. Could you discuss how this approach impacted the creative process and overall workflow?

Richard’s background is in previs and cameras, and he led that department in several companies over the years. This experience made him very comfortable with blocking and staging action sequences directly from scripts. Because the core of Scrap Metal is a chase sequence, with Sybyl using parkour-style movements to traverse the city and evade her pursuers, we relied heavily on pre-captured movements from ActorCore. We identified motions that suited the character and loaded them onto our rig. Richard would then cut together multiple motion-capture actions, blending them seamlessly with camera cuts and shot transitions to ensure the sequence flowed naturally.

Rather than starting with storyboards, Richard used previs as the foundation to shape both the sets and the shots. Once the movements were in place, he roughed out the surrounding environment in previs and began experimenting with camera angles, finding the most dynamic and cinematic perspectives—similar to how a cinematographer works on a live-action set. This approach gave us the flexibility to let the sets evolve organically without being constrained by predefined storyboards.

Sometimes, we started with an idea for a cool action set piece. Richard would rough it out in previs and animation, refining both the action and camera work iteratively until we were satisfied. Once the sequence was locked down, Darko stepped in to build the sets to their final, high-quality standard.

Richard’s experience in live-action filmmaking had a significant influence on the visual style of Scrap Metal. He wanted the film to have a live-action, cinematic quality rather than a traditional animated look. To achieve this, the cameras were deliberately allowed to behave more naturally—sometimes lagging slightly behind the action or not framing the character flawlessly throughout the shot. These subtle imperfections added realism, giving the sequences a grounded, handheld quality that mimicked live-action cinematography.

In post-production, we further enhanced the sequences by adding camera shake to the shots, intensifying the effect as the action escalated. It was crucial that these movements and shakes were never jarring or distracting but served to immerse the viewer in the experience. This approach ensured the audience felt like they were right there alongside Sybyl, pulled into the energy and tension of the chase.

Q: Character Creator (CC) streamlined the process of designing characters. Kindly elaborate on the flexibility CC and ZBrush provided when creating character variations?

As mentioned earlier, our budget meant we could only afford to custom-build one character—Sybyl—who was modelled, rigged, and groomed entirely from scratch. However, because our story takes place in a bustling city, we needed to populate the environment with other human characters to make it feel alive and believable. This is where Character Creator (CC) really came into its own.

Using CC and its extensive range of high-quality, customisable assets, we were able to quickly and efficiently generate a variety of characters to populate the world of Scrap Metal. The flexibility CC provided was invaluable, especially when working under tight time and budget constraints. Without it, we simply wouldn’t have been able to achieve the sense of scale and vibrancy that the city needed.

Once we had the base characters in place, Darko brought them into ZBrush for further sculpting and refinement. ZBrush allowed us to add unique details and variations that gave each character individuality—an essential step to ensure they matched the distinct style of our lead character, Sybyl, while blending seamlessly into the stylised yet realistic world we had created. For example, we could enhance facial features, tweak body proportions, and add intricate details like clothing folds, surface textures, and subtle wear and tear to make the characters feel more lived-in and unique.

The combination of CC and ZBrush gave us the perfect balance: CC delivered speed and efficiency for creating diverse characters, while ZBrush provided the creative freedom to add high-quality, bespoke details. This streamlined pipeline enabled us to produce polished, professional characters that worked beautifully in motion and held up in close-up shots, helping to bring the world of Scrap Metal to life.

Q: iClone and ActorCore were pivotal in bringing life to Scrap Metal’s dynamic chase sequences. Describe how the Parkour motions and iClone accelerated the overall production workflow.

For Scrap Metal, the dynamic chase sequences were central to the story, and achieving Sybyl’s parkour-style movements in a believable way was essential. ActorCore provided a fantastic library of pre-captured parkour motions—covering actions like sprinting, vaulting, and climbing—which aligned perfectly with our needs. Instead of animating everything from scratch, Richard could quickly select and test motions directly on Sybyl’s rig, saving us valuable time while keeping the action fluid and natural.

“For Scrap Metal, the dynamic chase sequences were central to the story, and achieving Sybyl’s parkour-style movements in a believable way was essential. ActorCore provided a fantastic library of pre-captured parkour motions—covering actions like sprinting, vaulting, and climbing—which aligned perfectly with our needs. Instead of animating everything from scratch.”

Richard Keane – Filmmaker, Writer, Director, Producer

iClone played a crucial role in refining these animations. Its real-time tools allowed us to blend, adjust, and seamlessly stitch together different motion clips, ensuring the parkour movements felt continuous and energetic. With iClone, we also had the freedom to experiment with camera work alongside the animation, treating each scene like we were filming on a live-action set. Richard could quickly test dynamic camera angles, tracking shots, and framing to enhance the visual impact of the chase.

Beyond the main action, iClone and ActorCore were also key in bringing our crowd characters to life and making the bustling city feel alive. Using a combination of motion-capture assets from ActorCore and iClone’s real-time animation capabilities, we could efficiently populate scenes with background characters performing natural movements—like walking, chatting, or interacting subtly with their environment. This process added depth and energy to the world without requiring extensive manual animation.

“By leveraging ActorCore for high-quality motion assets and iClone for real-time animation and camera integration, we streamlined what could have been a time-consuming process. These tools not only accelerated the production of our chase sequences but also allowed us to populate the city with believable background characters, creating a vibrant and immersive world that brought Scrap Metal to life.”

Richard Keane – Filmmaker, Writer, Director, Producer

Going forward, we are super-excited to try the new features in iClone 8.52, like the AccuPose, the motion capture clean-up filters, and the optimise key function. We believe these will be a game-changer in our workflow since our animation is primarily based around motion capture.

Q: You integrated Maya with Character Creator and iClone. Please explain how this integration streamlined the process and contributed to the visual quality. How compatible are Reallusion tools/assets with Autodesk Maya?

While our main character, Sybyl, was custom-built entirely in ZBrush and Maya, Reallusion tools such as Character Creator (CC), iClone, and ActorCore were essential for streamlining other aspects of production, particularly for creating crowd characters and supporting animation workflows.

Darko used Character Creator to quickly generate a variety of high-quality background characters, complete with rigs, clothing, and textures. The excellent compatibility with Maya made it easy to export these characters via the FBX format, preserving the joints and blend shapes, UVs, and basic materials with assigned textures.

Once imported into Maya, we converted the standard materials to Redshift materials, because that is our renderer of choice. We could then use Maya’s Human IK rigging tool to add a quick layer of rig over the joints coming from iClone, which allowed us to refine their placement in scenes and add any tweaks on animation layers if necessary. This approach saved us considerable time compared to building every character from scratch, allowing us to populate the city efficiently while maintaining visual quality.

We are looking forward to the upcoming iClone-to-Maya bridge, which will save us even more time in the future for converting materials and make the integration truly seamless.

On the animation side, we leveraged iClone and ActorCore to source and preview motion-capture animations for the background and crowd characters. The pre-captured motions—such as walking, chatting, and parkour-like actions—were applied in iClone and exported seamlessly into Maya. Because the motion data transferred cleanly, we could blend, refine, and finalise these animations in Maya without any loss in quality. This allowed us to maintain consistency across the production pipeline.

“The compatibility between Reallusion’s tools and Autodesk Maya was smooth and efficient. Reallusion gave us the speed and flexibility to generate high-quality assets and previsualise animations, while Maya provided the precision and control needed for final production. This integration allowed us to focus more on storytelling and refinement without getting bogged down by technical challenges, ultimately ensuring Scrap Metal achieved the visual high-fidelity and cinematic quality we were aiming for.”

Richard Keane – Filmmaker, Writer, Director, Producer

Follow Out Left Productions

IMDB:
https://www.imdb.com/name/nm2886050/

Vimeo:
https://vimeo.com/outleftproductions

Instagram:
https://www.instagram.com/outleftproductions/

Facebook:
https://www.facebook.com/OutLeftProductions/

ArtStation:
https://www.artstation.com/darkomitev

Website:
https://darkomitev.com/

Related Posts

Winner Select: 3D Recreation of Dua Lipa “Houdini” using CC & Keentools Facebuilder

Héctor Mercado, a seasoned 3D generalist and VFX artist from the Dominican Republic, steps into new territory with his entry for the 2024 Reallusion 3D Character Contest and wins the special award for Best Render. Inspired by Dua Lipa’s Houdini music video, Héctor utilizes Character Creator, iClone, KeenTools, Blender, and ZBrush to craft his fan work, exploring character creation and animation in ways that push his creative boundaries.

Héctor Mercado

With over 15 years of experience in motion graphics, post-production, and fluid simulation, Héctor has contributed to numerous TV commercials. From 2021 to 2023, he worked on VFX and fluid simulations for Capitán Avispa, a local animated movie released in April 2024. Héctor started sculpting likeness in ZBrush a couple of years ago, gradually building his skills and diving deeper into character creation.

Check Hector’s Artstation

Concept

The idea for Héctor’s project came together serendipitously. While considering entering the contest, he stumbled upon Dua Lipa’s Houdini music video, which he hadn’t seen before despite being a fan of the song. Inspired by the visuals and motivated by a long-standing desire to sculpt a likeness of Dua Lipa, Héctor decided to give it a try, blending his passion for music and 3D art.

Dua Lipa’s Houdini MV

Blender Pipeline & KeenTools

Héctor faced one of his biggest challenges early on: achieving a convincing likeness. However, the KeenTools FaceBuilder add-on for Blender proved to be a game-changer. It allowed him to refine his character’s likeness before seamlessly integrating it into Character Creator’s Headshot 2, giving him a strong foundation to build upon.

Use Keen Tools Face Builder

Blender’s Auto Setup feature further simplified Héctor’s workflow. “Character Creator’s Auto Setup in Blender was a huge help in bringing the character over to Blender complete with shaders ready to render and setting a Rigify rig with a single click”, Héctor shares. The countless hours saved allowed him to focus on refining poses and animations with ease.

Using Blender’s Cycles render engine, Héctor created stunning visual results, capturing the essence of his character with lifelike lighting and textures. The seamless integration between Character Creator and Blender allowed him to achieve professional-quality renders that brought his vision to life.

Why Character Creator & iClone

Héctor credits Character Creator for significantly streamlining his workflow. Its integration with Blender allowed him to pose and animate his character efficiently. Although he initially faced technical difficulties animating in iClone, the experience highlighted the potential of iClone’s animation tools for future projects.

ZBrush Pipeline & Face Tools

Héctor’s workflow also relied heavily on ZBrush, where he used GoZ and Face Tools to refine expressions and mesh details. Introduced to these tools through Michael Pavlovich’s tutorials, Héctor was impressed by their ability to simplify complex workflows, especially for newcomers to character creation. The seamless integration between ZBrush and Character Creator bridged technical gaps and made the process far more intuitive.

ZBrush Face Tools

Looking Ahead

Héctor is determined to deepen his skills as a character artist, leveraging the powerful integration of Character Creator, iClone, ZBrush, Blender, and Unreal Engine. Revisiting and refining the likeness sculpt for this project is high on his to-do list, as he continues to explore and push the boundaries of his craft.

By adopting new tools and workflows, he created a standout entry for the 2024 Reallusion 3D Character Contest and set the stage for ongoing artistic development. His journey is another demonstration that the right tools and mindset can drive innovation and overcome any creative challenge.

Related Posts

Click through to learn more about the winners’ portfolios and judge comments

Rig Anything with Your Imagination!

As a kid I was always fascinated with dancing candlesticks, waltzing silverware and other objects brought to life with animation. This was back in the old cell shading days when studios like Disney would animate just about anything to add motion to their cartoons. It was always a little magical to see those objects move with anthropomorphic ease like they were actually alive.

It is a memory that has stuck with me over the years.  There have been many times in the past that I wished there was an easy way to rig non-human or character-based objects using the library of human based, bipedal iClone motions for those newly rigged items.

Character Creator 4 steps up with its ability to easily rig just about anything using bone masking to keep the motions from creating too much distortion.  In the case of animating a candle and holder we can utilize our bipedal motion library with masking to produce great results with little skill on our part.

What Can We Rig?

A recent article I wrote brought this question to the forefront about how I animated certain objects like wooden toy soldiers and Christmas trees to dance. You can also throw in Christmas cookies like gingerbread people and watch them dance to seasonal Christmas tunes.

I also wrote an earlier article back in July about rigging any model with AccuRIG but it did not go into detail about skinning non-bipedal objects. That article mainly delt with bipedal objects and then there is the article I wrote on skinning versus rigging for things like statues that may not have fully defined arms and legs.

The truth is we can do so much more than those articles covered. In fact, we are limited only by our imagination as rigged non-bipedal objects have a lot to add to a scene in the right circumstances.

In the Christmas article, I briefly explained how objects were rigged along with a picture showing masked bones which brought more questions about the process so let’s dig into it a bit deeper with the candle example. Keep in mind that just because it doesn’t have arms and legs doesn’t mean you can rig it with a human skeleton for human (iClone) motions.

Our imagination helped us get here so let’s not shut off the creative tap. A big part of animation is realizing what CAN be animated with your current skillset and tools.

Rigging a Simple Candle

Below I give an example of simple rigging with the option to use or not use the arms and legs via masking. This simple, fast process can turn a static object into an animatable object that works particularly well in cartoons and children’s stories. And don’t forget genres like science fiction where we can easily add a little motion to some props.

Classic Example of Arms and Legs on a Prop

We can use the Disney Lumiere model (Beauty and the Beast) and rig it just as we as did the candle above except with arms this time around. As shown in the image below you can see Disney’s Broom character is an obvious choice for AccuRIG too.

Disney Lumiere and Broom Characters “Lumiere” (https://skfb.ly/pstSM) by ThisIsntAPerson is licensed under Creative Commons Attribution (http://creativecommons.org/licenses/by/4.0/).

Gingerbread Cookies Dance

I realize it’s not Christmas anymore, but these props serve as practical examples. They are another obvious choice for AccuRIG as some have a bipedal body or in the case of the Christmas Sweater cookie enough of the torso to rig it for the motion library. The first batch is no different than rigging any character. Make note of the Black Masked Bones that lock down that part of the mesh to keep it from moving or distorting. This is optional but can make for smoother movements.

Below are bipedal cookies:

Next up are the not-so-obvious characters like the Sweater, Lollipop and Tree. As you can see these characters rely more heavily on masking to either freeze a limb or a section of bones to limit deformation and make for a smoother animation.

In the above examples, I have masked out some bones on each mesh. The sweater has no functioning pelvis or head while the lollipop only uses the torso section of the skeleton. The tree cookie has a mixture of masked out arms, masked out pelvis but active legs and torso.

The bones that require masking will depend on the model in question and sometimes it can be confusing to new users. The skeleton bones are directionally chained from the Waist down and the Waist up.

Masking can seem to be tricky on your first attempt, but it doesn’t take long to see how it works. Repetition will help bring familiarization with the masking process. It won’t take long for you to grasp how to mask out unwanted bone movement.

Another Classic Example

The Sugar Bowl and Creamer characters from Beauty and the Beast are great examples. I made the objects in 3DS Max then went into Character Creator 4 to skin them as characters. From there over to iClone for composite with the original frame from Beauty and the Beast. I used the AI eraser in Photoshop to remove the original sugar bowl and creamer. I then used an NPR special effect and the Toon Shader.

Pink Alien

This Meshy AI community asset is a great example of an unconventional rig. You may have already guessed that AccuRIG bent over backwards… literally… to rig this four-legged alien using the arms as the back legs which meant I had to correct the hands by pivoting them the opposite direction. It’s not a perfect solution by any means but I hope it will jog those creative juices to show you what can be done with a little imagination.

Example of using the skeleton bent over backwards with the arms working as the back legs. This was achieved by placing the initial markers in the proper locations. The back legs can function as arms if needed.

The walking motion. Not a perfect solution but works for a quick shot that doesn’t linger. It also demonstrates the power of AccuRIG to adapt to unconventional situations.

Correct Pivot Solves a Lot of Problems

One obstacle to rigging non-bipedal objects is a badly off-center pivot or root. This can cause the mesh to jump out of place during the final parts of the rigging process.  Center your character in the screen as best as you can before rigging and set the pivot to the bottom of the mesh. Edit the pivot if necessary to get it properly placed into the center, bottom of the model.

Extend your Existing Motion Library

The big plus is how this rigging opens up our existing motion library to all these newly rigged “characters”. It’s amazing how just a small amount of animation can go a long way. If the torso is all you are animating, then you can use almost any motion that moves the torso. Within minutes you can have a prop rigged and animated with iClone motions.

Mesh Density

This is also a consideration when using a mesh for something other than its intended purpose. There may not be enough mesh density to move without the mesh collapsing. This is more evident in things like elbows and knees on any character. If you find that instead of bending, your mesh is collapsing then you probably won’t be able to use that mesh unless you have another program like ZBrush, Blender or 3DS Max to add more density with subdivision than iClone is capable of.

TIP: If you put together a group of separate parts to form a character such as rocks or pencils, pens and erasers, you don’t have to group them or attach them together. Just export as one object from your software of choice or build it in the CC4 workspace then rig it. No need for attaching or linking beforehand as the rigging process will take care of that.

Summary

As I wrote earlier, we are only constrained by our imagination as to what we can rig and throw into a scene as a main character or filler characters. Cartoons can be fertile ground for his type of wham-bam animation that takes little time and effort but affords a lot of eye candy and movement. This will probably spur more questions but this series of articles on using AccuRIG to extend our motion library to props will hopefully spur your imagination to see what kind of unique characters you can rig and add to your scenes for more engagement.

This is also a great exercise for newbies to pros to experiment with AccuRIG in Character Creator 4 to gain a better understanding of what can be done and just maybe add a little “wow” factor to your next animation.

FYI from From ChatGPT:

Some inanimate objects that Disney animators commonly animate include:

  1. Furniture – Chairs, tables, wardrobes (e.g., Beauty and the Beast).
  2. Kitchenware – Teapots, cups, cutlery (e.g., Beauty and the Beast).
  3. Clocks and Candles – Cogsworth (clock) and Lumière (candelabra) from Beauty and the Beast.
  4. Toys – Woody, Buzz Lightyear, and others from Toy Story.
  5. Vehicles – Lightning McQueen and Mater from Cars.
  6. Tools – Brooms and mops (e.g., Fantasia).
  7. Household Items – Umbrellas (The Little Mermaid), carpets (Aladdin), and lamps (Aladdin).
  8. Musical Instruments – Pianos, violins, and other instruments (e.g., Make Mine Music).
  9. Food Items – Dancing mushrooms (Fantasia) and tacos (Foodfight!).
  10. Books and Papers – Animated spellbooks or maps (e.g., The Sword in the Stone).

Related Posts

MD McCallum - WarLord

MD McCallum – WarLord

Digital Artist MD “Mike” McCallum, aka WarLord, is a longtime iClone user. Having authored free tutorials for iClone in its early years and selected to write the iClone Beginners Guide from Packt Publishing in 2011, he was fortunate enough to meet and exchange tricks and tips with users from all over the world and loves to share this information with other users. He has authored hundreds of articles on iClone and digital art in general while reviewing some of the most popular software and hardware in the world. He has been published in many of the leading 3D online and print magazines while staying true to his biggest passion, 3D animation. For more information click here.

Winner Select: Creating Standout 3D Character with Methodical Artistry

Kurt Boutilier takes second place in the “Best Design Styled” category of the Reallusion 2024 3D Character Contest. He shares insights and techniques on how he brought his award-winning piece, “Avice,” to life by synergizing the strengths of Character Creator, ZBrush, and Substance Painter.

Kurt Boutilier

With over 20 years of experience as a freelance 3D artist, Kurt has worked on a wide range of projects, from video games and toys to 3D-printed miniatures. For the past eight years, his focus has shifted primarily to 3D printing, a medium he considers his “first love”. In addition to his professional work, Kurt regularly participates in art contests, viewing them as valuable opportunities for growth and collaboration within the creative community.

Check Kurt’s artstation

Concept

Avice was inspired by Kurt’s admiration for the strong female characters in The Dragon Prince. Eager to push his boundaries, he embraced the stylized aesthetic, stepping outside his usual approach. “The contest gave me an opportunity to work in a style I don’t often do”, he explains. Her design came together swiftly after the initial thumbnail sketches, with Avice’s bold yet feminine appearance reflecting Kurt’s dedication to infuse a blend of strength and grace into her character.

Creation Process

Kurt began by using Character Creator 4  (CC4) to block out Avice’s base mesh, drastically reducing the time needed compared to sculpting entirely from scratch in ZBrush. He then exported the base mesh to ZBrush, where he focused on refining Avice’s appearance and sculpting her intricate outfit.

With the modeling complete, Kurt used Autodesk Maya to lay out UVs for Avice’s outfit and other elements. He textured the character in Adobe Substance Painter, blending stylized and semi-realistic textures to enrich her design. Finally, Avice was posed and rendered in Maya using Arnold.

Why Character Creator 4

For Kurt, CC4 was invaluable in the early stages of creating Avice. “CC4 allows me to block out the base mesh of a character quickly without having to spend hours building up forms and a silhouette from scratch in ZBrush”, he explains. Beyond initial creation, CC4 also enabled him to pose Avice efficiently, maintaining her strong yet feminine essence.

The integration between CC4 and ZBrush was another highlight for Kurt. “The way I can go from CC4 to ZBrush effortlessly from a base mesh to a finished sculpt is a huge time saver”, he says. Additionally, AccuRIG proved instrumental in refining poses, providing a quick and intuitive solution compared to the time-intensive adjustments in ZBrush.

Overcoming Challenges

The most challenging aspect of the contest for Kurt was posing Avice in a way that balanced her strength and femininity. However, he found that the contest pushed him to grow as an artist, both in terms of trying new styles and improving his skills. “Contests like this help artists of all levels improve and challenge themselves”, he reflects.

Looking Forward

Kurt’s passion for 3D printing continues to fuel his creative ambitions. His next objective is to create a collection of printable miniatures, a long-held idea he’s eager to bring to life. He also plans to explore concept work further, focusing on character design and illustration.

For Kurt, contests like the 2024 Reallusion 3D Character Contest are more than competitions—they’re platforms to connect with fellow artists, experiment with new styles, and push creative boundaries.

Related Posts

Click through to learn more about the winners’ portfolios and judge comments

Winner Select: Virtual Live Capture & Animation for Anthropomorphic “Monkey Band” | Character Creator, iClone, Unreal

Anthony Evans / Digital Puppets UK

Hi, my name is Antony Evans, and I am the co-founder of Digital Puppets, an animation studio based in the United Kingdom. I have worked as a character designer for many years, specializing in real-time animation, and collaborating with studios such as Disney, Warner Bros, and the BBC. In addition to creating real-time performing avatar puppetry, I focus on developing and designing custom characters for clients in a wide range of styles.

My team and I can replicate any existing licensed character or company/product mascot. Our studio not only creates motion capture characters for online entertainers, educators, and marketing/advertising agencies, but we also produce fully animated shows for our clients using the characters we design.

Recently, we completed a 50-episode series for the UK nationwide radio station ‘RADIO X’, where we animated the hosts and transformed their weekly podcast into engaging content for their online audience. We also work with globally recognized broadcasters such as the BBC and Cartoon Network, among others, though many projects remain undisclosed due to NDAs.

Antony Evans’s ArtStation

Concept & Character Creation

Last year, we submitted a clip of “Monkey Band” to the Reallusion 2024 Character Contest and won “Best Mocap Use” in the “Special Awards” category. This contest allowed us to explore new workflows and integrate our existing practices with innovative technologies and techniques. It’s also the inspiration behind this article, where I’ll be sharing the full creation process.

The decision to create the Monkey Band stemmed from our desire to explore fur creation within Character Creator. Additionally, monkey characters provided a unique opportunity to utilize the humanoid base mesh, granting access to the clothing and hair systems. This allowed us to design distinctive outfits and looks for each band member, thereby, enhancing their individuality.

The concept was inspired by our long-standing interest in virtual bands that can perform in real time. To achieve this, we ensured the characters were equipped with detailed facial morphs to maximize performance during live facial capture. The band was specifically designed to enable real-time virtual avatar control for the lead character, allowing us to stream pre-recorded performances seamlessly. You can see an example of this in action here

The characters were developed using a combination of Character Creator 4 (CC4) tools and ZBrush via the GoZ workflow. ZBrush was instrumental in adding intricate details to the base model and in sculpting facial morphs. Its capabilities in creating organic shapes allowed for rapid exploration of different looks, which greatly contributed to giving each band member a unique personality.

While designing the monkey characters, we utilized preset hair cards to create their fur. Specifically, the “Fur Collar” and “Fur Cuffs” presets from the “Stylings” pack in CC4 proved invaluable. By leveraging the Edit Mesh tool, we customized and duplicated these hair cards to achieve a full-body fur effect. For a more in-depth look at the process, you can refer to our video on customizing hair.

iClone Motion LIVE for Facial Animation

When utilizing Live Face for facial capture, it’s important to exaggerate expressions. Overacting ensures that subtle details are captured, as it’s easier to tone down exaggerated expressions during post-processing than to add missing nuances. Additionally, the quality of blend shapes is critical. Take time to review them in the Facial Profile Editor, ensuring they work well, particularly for stylized characters like the monkeys. Modifications to the base mesh for a stylized appearance can sometimes distort blend shapes, so proper setup is essential to achieve high-quality facial capture.

Facial mocap is highly efficient and allows for a quick turnaround. For this animation, I mimed the song while recording the performance using an iPhone and LIVE FACE. Afterward, I reviewed the recording and made adjustments to refine expressions and mouth shapes. Simultaneously, I recorded the audio track and used AccuLips to generate a viseme track.

By blending the viseme track with the expression track, I achieved more natural results. The viseme track ensures accurate mouth shapes for speech, while the expression track adds emotional nuance. This workflow significantly reduced the time required compared to manual facial animation.

iClone for Body Animation

For this project, we utilized the Xsens Link motion capture suit, which delivered highly accurate results with minimal cleanup. Each character’s movements were recorded in single takes, one after the other. The motion data was processed in Xsens MVN software and exported as FBX files. Importing the mocap data into iClone was seamless—simply drag and drop the FBX file onto the character and select the Xsens profile.

The primary cleanup involved aligning the characters’ hands with their musical instruments. For example, refining the hand placement for the keyboard took the most time. Using an actual keyboard during the mocap session would have been beneficial, as physical props provide clear points of contact and improve accuracy in hand positioning.

Here are some Dos and Don’ts when animating body motion in iClone:

DO:

-Exaggerate your movements to ensure the capture conveys dynamic motion.

-Use real-world props to add weight and realism, especially for interactions like playing instruments.

-Allow sufficient space for natural movement during capture.

DON’T:

-Avoid miming contact with imaginary objects; it’s challenging to replicate consistent positioning without real props.

-Don’t neglect refining hand and finger alignment during cleanup, especially for detailed tasks like playing instruments.

Final Render in Unreal

The workflow between iClone and Unreal is highly efficient, especially with the Auto Setup plugin. This tool makes it simple to transfer animations to Unreal while retaining the original look of the characters without the need to recreate materials. For this project, all animations were created in iClone and transferred to a pre-built stage scene in Unreal using Live Link. Once transferred, the remaining steps involved setting up cameras and adjusting the lighting directly in Unreal.

The Unreal Sequencer is intuitive and functions similarly to other timeline tools. One standout feature of iClone’s Live Link is its ability to automatically configure the Sequencer when transferring animations. In this case, transferring animations for four characters was straightforward, as Live Link set up the Sequencer automatically, saving a significant amount of time and effort.

Unreal was selected for its ability to handle large environments seamlessly. While iClone’s renders were great, Unreal’s render offered access to an extensive stage asset complete with pre-configured particle effects and dynamic lighting. This allowed us to effortlessly integrate our animations into the scene, achieving professional-quality results with minimal setup.

Additionally, Unreal’s real-time capabilities made it ideal for a live show setup. By connecting the Xsens suit, we could perform live interactions, such as the lead singer engaging with the audience in real time. This setup also allowed us to trigger pre-animated sequences, like songs, with a single button press, before seamlessly transitioning back to the live performance. Unreal’s real-time triggers enabled one person to orchestrate an entire virtual band performance.

Closing Thoughts

Working on the “Monkey Band” project alongside my brother Scott has been an incredibly rewarding experience. At Digital Puppets UK, we’ve always strived to push the limits of real-time animation and virtual avatars. Using tools like iClone, Character Creator, and Unreal Engine, we’ve been able to create detailed characters and fluid animations with a remarkable level of efficiency. By blending motion capture with real-time performances, we can deliver highly engaging content, transforming simple ideas into polished, professional-quality animations that truly resonate with audiences.

Looking back at projects like animating RADIO X’s podcast and working with major broadcasters like the BBC and Cartoon Network, it’s clear how far we’ve come. Each step of our workflow—from character design to live performance capture—has been meticulously refined to ensure we’re always delivering the best. The “Monkey Band” project, in particular, showcases how we can seamlessly integrate these powerful tools to bring a virtual band to life. It’s exciting to see how these innovations are shaping the future of virtual production, and we’re proud to be part of that journey.

As we reach the conclusion of this article, I can’t think of a better way to wrap things up than by offering you some more Monkey Band for your entertainment:

Related Posts

Click through to learn more about the winners’ portfolios and judge comments
Elvis gives a textbook-level acting performance in facial animation with iClone LIVE Face Mocap.

Winner Select: Hybrid 3D Animation feat. Markerless Mocap and Facial Capture | Rokoko, Move.ai, iClone

Elvis Deane

Hi, I’m Elvis Deane, a seasoned digital event and video producer. I take pride in my ability to communicate clearly with clients and my proficiency with a wide range of production tools. My educational background in visual effects coordination, virtual production, and creative arts has provided me with a strong foundation in both traditional and cutting-edge industry techniques. After graduating in 1999 from one of Toronto’s first 3D college programs, I chose not to pursue a full-time career in animation. Instead, it became a hobby of mine alongside my work in video production, making me a long-time 3D enthusiast.

The character I selected for the 2024 Reallusion 3D Character Contest is one I’ve been developing since 2001. Drawing inspiration from my love for Samurai Jack and Star Wars, I created Griff as the protagonist of a series of silent short animated action films. His backstory revolves around a pilot on the run from a powerful, evil military. However, I soon realized that completing the entire project alone was too ambitious. Instead, I pivoted and created a comic that tells part of his story.

Elvis’ ArtStation

Character Design in Character Creator

Every few years, I revisit the character and model new versions based on the software I’m using at the time. In 2020, I tried a demo of Character Creator and created a version of Griff to test the program. Since then, the character has undergone three revisions, and I’ve finally settled on a more cartoony, stylized version for the 2024 Reallusion 3D Character Contest.

I didn’t use any reference material when stylizing Griff; instead, I drew from intuition. Given that he’s a tall and thin character, I wanted to exaggerate those traits in his face. I opted for realistic textures while keeping his features cartoonish to create a strong contrast, allowing me to apply realistic props and set pieces.

Versatility of AI-based mocap

As part of my setup for mocap, I make sure to have a few hours of uninterrupted time when nobody will disturb me. I also mark boundaries at the edges of the camera’s frame to prevent moving off-screen and losing tracking data. This is vital because I use AI-based mocap with Move.ai, and processing happens only after recording. If there’s an issue, I won’t know until about half an hour later, when the data is finally processed and I can preview the motion.

By using an AI-based mocap solution, I’m not required to wear a marker suit. Instead, I typically wear something comfortable and flexible, while clipping on a lavalier microphone to capture high-quality audio. I prefer recording facial motion capture simultaneously with the body performance, as it enhances the realism of the final result.

In the past, I recorded body and facial capture separately, but this caused a loss of subtle details, particularly in eye and head movements. This project marked the first time I used the Rokoko Headrig, designed to hold a phone. Previously, I built my own facial capture rig using an airsoft helmet and GoPro mounts. While it worked, the helmet was heavy and shook during fast movements. In contrast, the Headrig is lightweight and pairs well with an iPhone for Live Face. I also like to mount a light on the helmet when possible, ensuring my face stays lit even if I turn away from the light source.

Facial Animation in iClone

Live Face is really a dream app. It gets a very accurate version of my performance, and the more recent addition of denoising is amazing for taking out any small jitters. Once I have the data inside iClone, I also like to use AccuLips with the audio recording of my performance to get a more accurate lipsync. One of my favorite parts of AccLips is the Talking Style Editor, which lets you break down an audio clip into different sections and apply different styles of talking. For this animation, Griff is pretty loud, so I used the Bellowing setting for most of the monologue.

For the body mocap, I used MoveOne, which is an iPhone app that records a video and then sends it to the cloud to process the movement into an FBX file. Even though it only sees the movement from one angle, it does a very good job at capturing my overall movement.

Having the mocap as a basis to start my animation is very helpful. I like to take that performance and exaggerate certain things as necessary.  Sometimes the eyebrows and eyes need bigger movements at times to emphasize a point in the dialogue. 

Character Animation in iClone

The thing I love about iClone is how many tools there are to adjust and tweak a motion capture performance.  I did two full takes of the monologue but preferred the start of the second take and the end of the first take. It was very easy to line them up in iClone and blend them so that it became one seamless performance.  I also really appreciate the curve editor. As good as MoveOne is, it often has a lot of small jitters in the motion capture data which can make the character look shaky. I also like to use different motion layers when I’m working so that I can add new animation to the character without affecting what I tried before.

Final Render and Composition

For the final renders, I chose to use Unreal Engine, starting with LiveLink to transfer my characters from iClone. Sticking to my preferred method, I built a rough set using boxes and cylinders to get a general sense of camera movement. Once I was satisfied with the layout, I recorded a take of the LiveLink from iClone and began refining the set before focusing on lighting.

It usually takes me a day or two to finalize the look and composition, but for my contest entry, I managed it in about a day since I started the animation late and was running out of time. I’ve learned to delete all my lighting and start fresh if something doesn’t feel right—sometimes a blank slate is more effective than trying to fix what’s not working.

Benefits of iClone

Though I almost talked myself out of participating, I’m incredibly thankful I entered the Reallusion contest. It provided a challenge and a deadline that pushed me to complete the animation, forcing me to think deeply about new directions for the character that I hadn’t explored before. Griff had always worn a jacket, but for fun, I decided to dress him in a hockey jersey instead. His character had always been a bit serious, and this contest gave me the opportunity to experiment with a different look. I’m hoping this fresh energy will translate into the film I’m currently working on.

Art contests are a great way to push yourself out of your comfort zone and spark fresh ideas. For years, I avoided creating 3D work because the technical demands of building and rigging multiple characters were so time-consuming, sapping my energy for animation. Since I started using iClone, I’ve taken on many more creative projects. I can use motion capture for a base performance, but iClone also offers excellent tools if I prefer to animate by hand.

iClone is especially beneficial for indie or solo creators. It simplifies the technical aspects of 3D that I’ve always struggled with, allowing me to focus entirely on animation. I no longer have to fight with rigging or clothing, and there are plenty of tools for scaling up a project, adding crowds, or creating complex interactions in scenes. Another advantage is its integration with other software. The new CC Control Rig in Unreal Engine lets you make adjustments after exporting, adding elements like squash and stretch to enhance your animation.

Closing thoughts

Participating in this contest not only reignited my passion for my character, Griff, but also opened my eyes to the possibilities of blending creativity with cutting-edge tools. It’s been an invaluable experience, pushing me to step outside my usual workflow and explore new ways of bringing my characters to life. The process of combining motion capture, hand animation, and powerful software like iClone has made a significant difference in how I approach animation. For anyone working solo or on smaller teams, iClone’s user-friendly features are a game-changer, enabling more focus on the creative aspects without getting bogged down by technical challenges. The journey continues, and I’m excited to see where this hybrid approach takes me in future projects.

Related Posts

Click through to learn more about the winners’ portfolios and judge comments