首頁 » Page 23

Beginner Guide to AccuPOSE

When I first got into animation, I remembered early on that some of the hardest animations to keyframe and sell the audience on were everyday motions. Something as simple as picking up or putting down a drink on a counter took hundreds or thousands of keyframes from limbs down to finger joints. It took days, not hours unless you had a lot of experience and back then, no one had a lot of experience as practical and effective 3D animation was something new.

Shaking hands, forget about it. Things like that just weren’t done back then. They were intentionally left out of the storyboard due to being financially and deadline impractical. It took a long time to animate any movement. In some applications, every bone or joint had to be moved until some form of linking or IK was introduced and even then, it was basic and simplistic with a lot of adjustments.

Some of you know that I hate tedious tasks and to be honest, I’ve never met anyone that really embraced it either. It did not take long to realize that this cool thing known as 3D Animation was going to, possibly, become the most tedious work a person could do.

Imagine populating a battlefield with low poly proxies before multi-duplicate or scatter existed. Sure, we could cut, paste, and drag each item to a location but what if there were 500 to 1000 items? Even this was preferable to keyframing a motion like smoking a cigarette in a camera closeup. This could take thousands of keyframes until it was done and at the end… the creative spark was dead, cold, and buried.

AI-Aided Animation

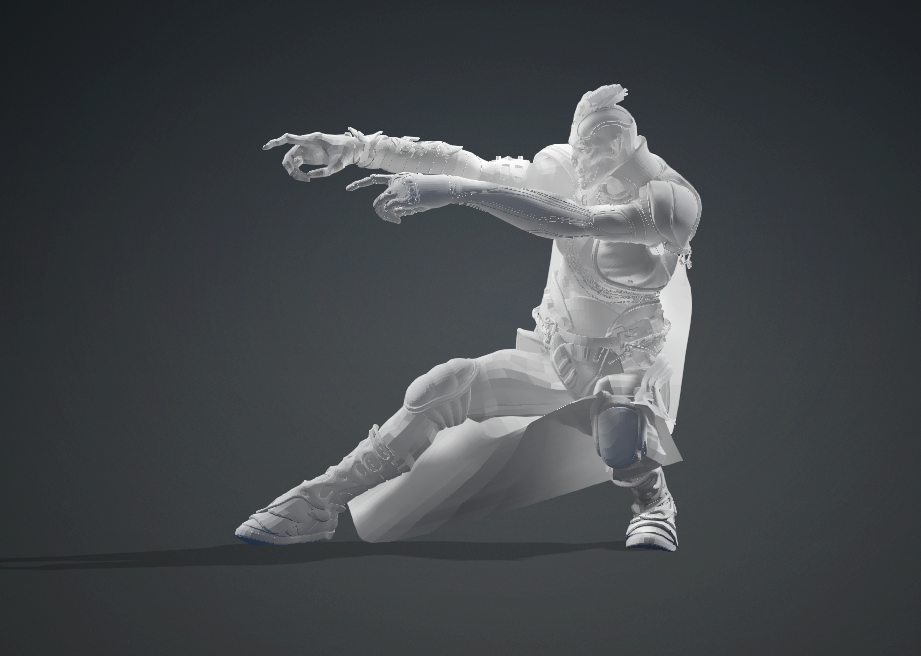
We move on down the timeline of life a few decades and Reallusion brings us AccuPOSE. AI-aided sweetness that does so much of the hard work of everyday motions that I have LOOKED for scenarios to experiment with. Generally, I would have avoided such work, when possible, but AccuPOSE has flipped the script for me by opening up more opportunities to enrich a scene with detailed movements and motions I might never keyframe and curve on my own.

What’s the big deal? Well, I’m an animator not an AI expert but it basically marries AI-assisted posing with automatic keyframing for lack of a better term. All we have to do is lock down certain parts of the character we don’t want to move, then go down the timeline and make our changes by simply moving the character into place. AI makes sure everything else follows in a natural way.

Core Library

A library of AI-Assisted motion is provided with the plugin. From the Reallusion website:

The Core Library is available for free to all iClone members, providing a hands-on experience of how AccuPOSE responds to fundamental human body movements. Explore natural actions like standing, sitting, squatting, kneeling, lying down, crawling, rolling, and even performing a handstand.

All of the examples used in this article use the free Core library.

Installing the Plugin

The plugin is very easy to install via Reallusion Hub. If you don’t see it there then refresh the Hub and you should see it under iClone plugins. Just press the install button to continue and the plug in along with the Core library are installed.

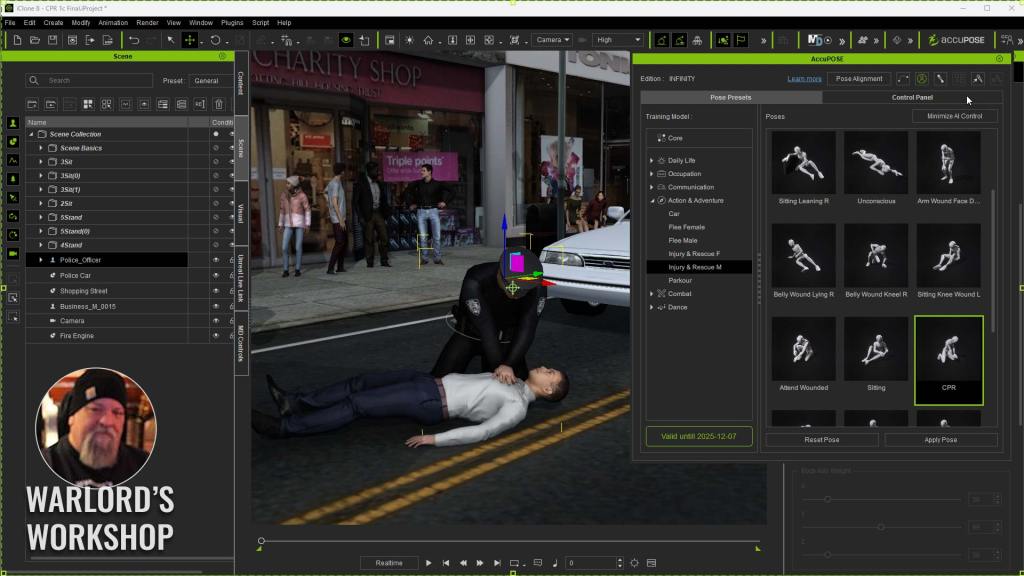
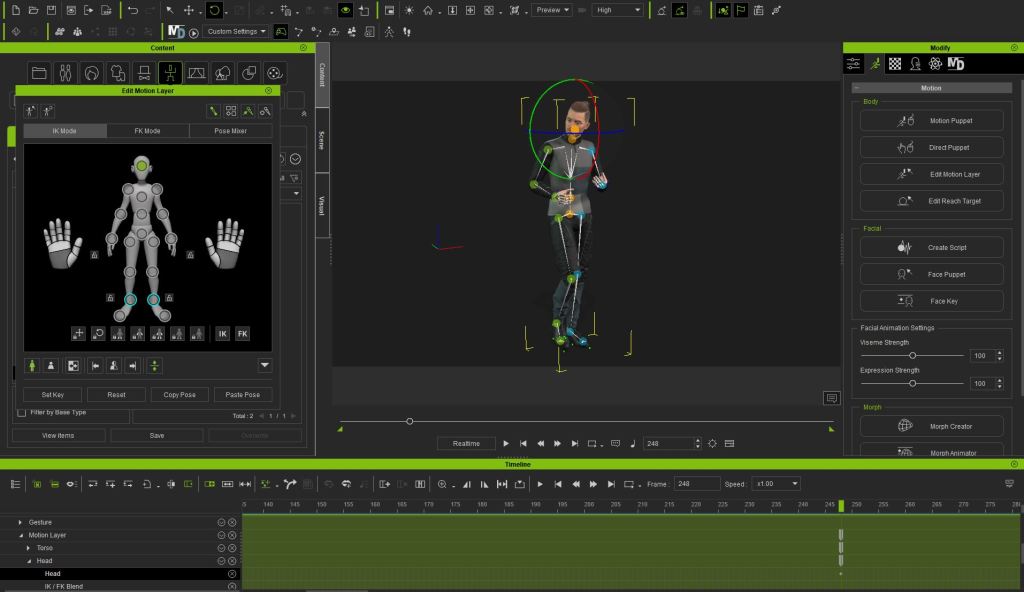
We can invoke AccuPOSE by selecting a character and pressing the “9” key or press the AccuPOSE button on the upper toolbar, or we can also go to the plugins menu and select it from there but the fastest for me is the “9” key. The AccuPOSE menu does not appear to be dockable but is instead a floating window.

Pose to Pose

This technique has been around for a long time, or at least of long as we’ve been able to “tween” the frames between the manual keyframes. This is a feature of most modern animation software and a norm in the industry. Computer aided tweening was instrumental in making computer animation feasible in the first place.

I’ve taught pose to pose techniques in tutorials years ago as it is a great way for beginners to get some animation time under their belts. Back then there was still a lot of cleanup and manual keyframing, but IK reduced some of the load. Now the AI-assisted AccuPOSE plugin makes sure that limbs follow in a natural progression without twisting or contorting unless that is what you want it to do.

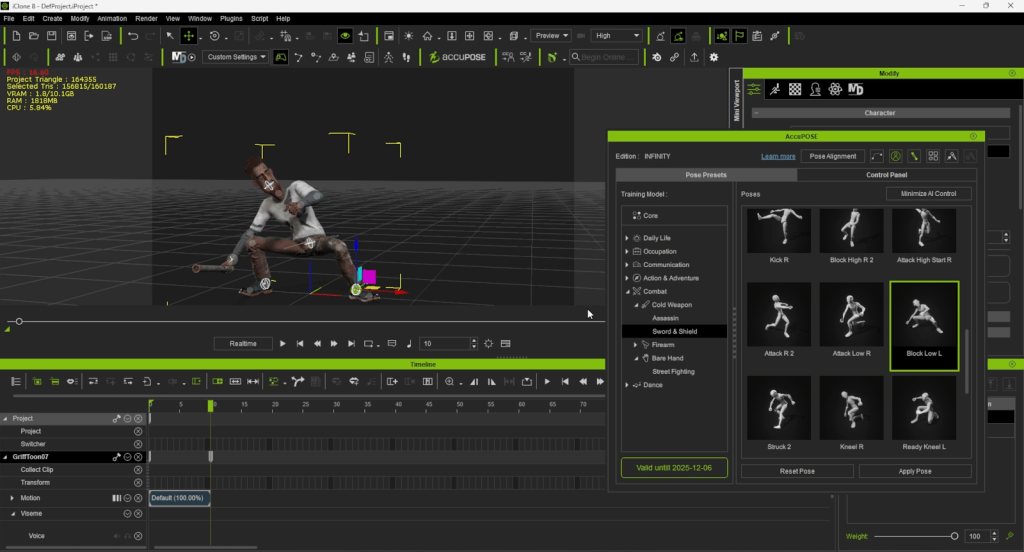
With the old method we had to move everything down to fingers and toes in some cases, with curves, but now we just grab a character, start AccuPOSE, load a pose, set the alignment, move down the timeline to the next pose and load it.

For example, using the Core Library, I’ll load Kevin into the workspace, select him and press F9 to load AccuPOSE. I want Kevin to stand with his arms crossed then sit down and naturally put his hands on his lap.

  1. For this I started off by loading the Cross Arms pose in frame one.
  2. From here I clicked the Pose Alignment button and set it up to align to the Right foot of the Previous Keyframe. This keeps the character from sliding around between the roots of the different pose motions. In this case Kevin sat down instead of sliding back or forth to sit down.

    How far apart you place the keyframes determines the speed of the sitting down motion. You can change the speed by editing the motion shortening or lengthening the distance between keyframes.
  3. Move down the timeline and select another sitting or standing pose. From here is just a repetition of the same steps going between poses and keyframes.

Be sure to pay attention to the Align Pose settings as the default Root setting will make the character slide back and forth between root locations. In the example below Align to Right Foot kept the character in place as needed.

With this method all we have to do is choose our poses and how many frames apart they need to be as the AI makes sure the character moves according to our choices.

Demonstrating basic AccuPOSE usage and the importance of Alignment

Control Points

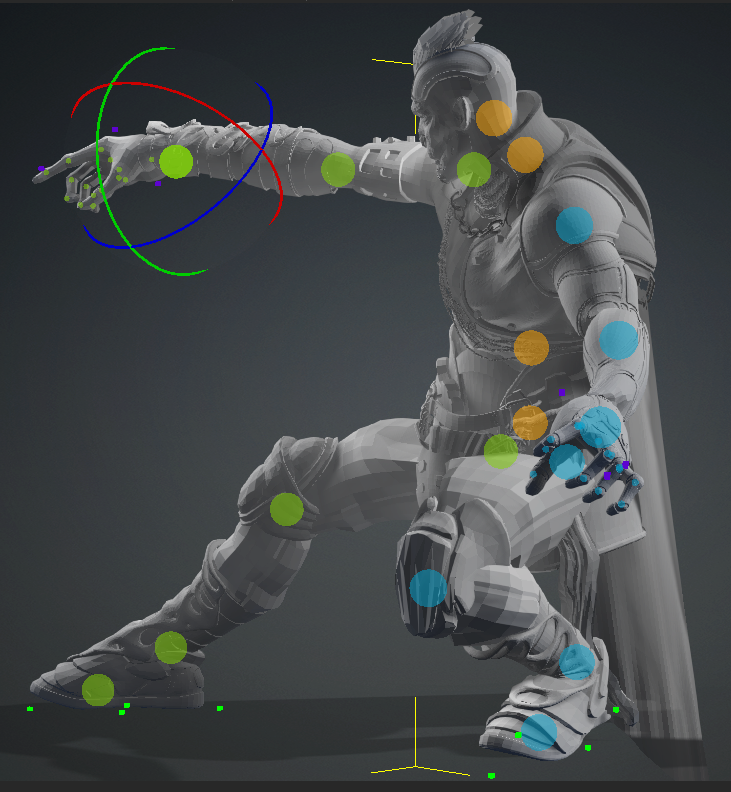
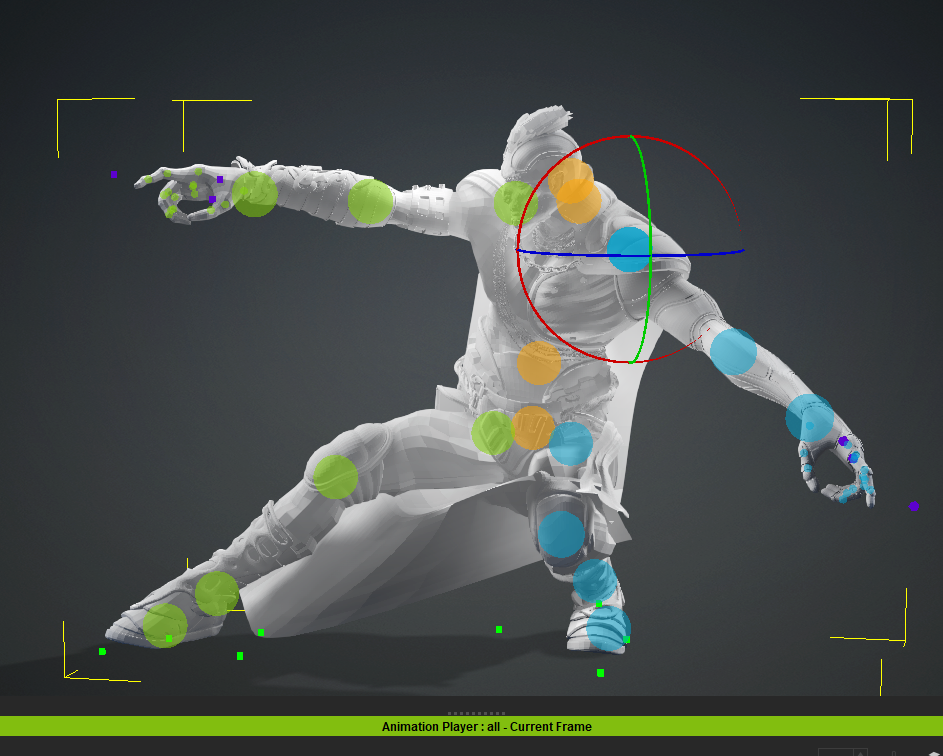
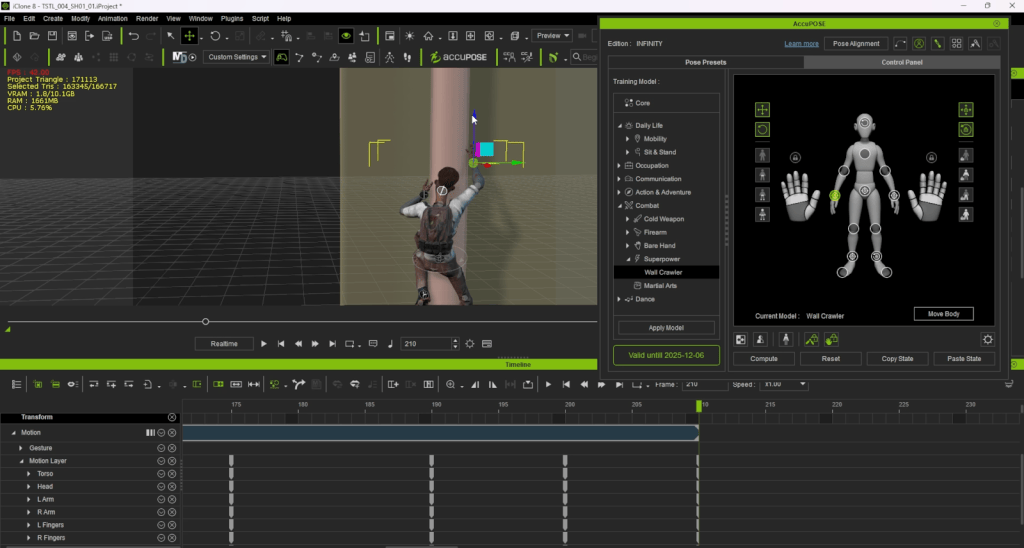
Control Points are a bit more complicated than simple Pose to Pose but you can dive right in anyway.  With Control Points we need to remember every Control Point activated is one less limb the AI is positioning and one more that we will have to position. We will also have to lock certain control points when needed to keep a foot or hand in place as one example.

Controls points allow us to decide what happens, where that limb will go without interference from the AI. When we set up control points, we tell AI to guide everything that is NOT a control point as we will take care of that movement ourselves.

The second tab of the AccuPOSE interface is the Control Panel that gives us access to several shortcuts like selecting only the Hip and Feet or just the Hip. We can transform, rotate or lock as needed.

This is where we can set a pose then lock, unlock, move or rotate limbs into our desired positions on the next keyframe down the timeline. This can be tricky at first but the more you do it the easier it gets. There can be a lot of locking and unlocking for some poses but not every pose. Once you get a little Control Point time under your belt, you’ll quickly learn how to handle most situations.

Kai’s tutorial below goes into detail about how to use control points and locks.

If you are a beginner, you might consider skipping control points in the early stages of learning the plugin. At least until you understand exactly what is going on with the plugin as the wrong combination can start to create unexpected results. Unlike the Pose to Pose method described earlier, the use of Control Points and Locks requires a fundamental understanding of the plugin. On the other hand, you won’t learn what you don’t try so don’t avoid it by any means. Just get a handle on AI assisted Pose to Pose first.

No Curve Editor Needed

I’m not saying the curve editor couldn’t improve things, but beginners rarely use a curve editor so the smooth tweening means little if any need for editing any curves. This leaves us plenty of time to work on all that other stuff we are learning about as new animators.

Summary

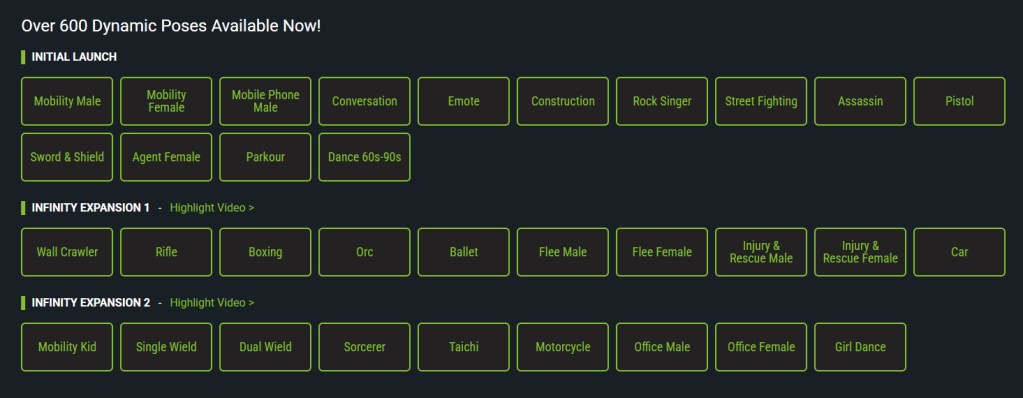
The Core library is extensive with over 40 AI assisted poses that kick your animations up a notch. No more writing around the “hard to animate” motions when the Core library provides so many poses that can translate to many different scenarios.

It’s not just for beginners either as seasoned pros can speed up their workflow while making it more enjoyable by eliminating a lot of the tedious animation work leaving room to be much more creative.

Never before has it been easier to animate everyday motions for just about any animator from beginner to pro. This is just another tool in the amazingly large toolbox of animation tools within iClone.

Manual

Reallusion Courses

AccuPose – Three Tutorials

MD McCallum - WarLord

MD McCallum – WarLord

Digital Artist MD “Mike” McCallum, aka WarLord, is a longtime iClone user. Having authored free tutorials for iClone in its early years and selected to write the iClone Beginners Guide from Packt Publishing in 2011, he was fortunate enough to meet and exchange tricks and tips with users from all over the world and loves to share this information with other users. He has authored hundreds of articles on iClone and digital art in general while reviewing some of the most popular software and hardware in the world. He has been published in many of the leading 3D online and print magazines while staying true to his biggest passion, 3D animation. For more information click here.

Melis Caner: Turning myself into game character with Headshot 2

Becoming a Game Character using Headshot and Polycam | Unreal Engine

Author: Melis Caner

Melis Caner

Hi, I’m Melis Caner, a 3D Generalist and filmmaker with a Film degree from Dokuz Eylul University. After graduating with a focus on cinematography, editing, and sound design, I discovered 3D animation during the pandemic that followed. Amazed by its limitless creative possibilities, what began as a hobby quickly became my career and a new form of self-expression. My lifelong love for drawing, dancing, and acting now comes together in 3D animation, blending all my passions into one art form.

Melis Caner | LinkedIn / Melniverse | Instagram

Making Game-Ready Characters from 3D Scans

In this article, I’ll guide you through the workflow of transforming a 3D scan into a fully game-ready character using Polycam and Reallusion Headshot 2. From scanning to exporting, it covers the entire process, along with tips for effective character creation.

3D Scanning with Polycam

Polycam is a powerful app for capturing real-world objects in 3D. Using just a smartphone, it can effortlessly create high-quality, detailed scans. For this project, I started with a head scan.

For a clean scan, even lighting is essential. Cloudy weather offers naturally diffused light, making it ideal. Take plenty of photos from the neck to the top of the head, ensuring all angles are covered. Scanning the back of the head is less critical, as details are scant and errors can be easily remedied.

3D Scanning with Polycam

After exporting GLTF or OBJ from Polycam, bring it into a 3D software to clean up the mesh. Smooth the rough surface and delete the unnecessary parts and merge the mesh by distance.

Processing the Scan with Headshot 2

Reallusion’s Headshot 2 Plugin is a great tool for converting 3D scans into digital characters. The following are the steps I used:

  1. Import the cleaned OBJ file of the 3D scan into Character Creator (CC).
  2. Click on “Start Head Generation” and then “Auto Detection”.
  3. Align the points according to the model. You can also increase the number of the points for more detail.
  4. Proceed to the second step for “Head Gen” and pick the suitable effective area for your model. I personally recommend choosing the face, as it usually works the best for me.
  5. Refine the mesh by sculpting on the model and make sure it is the right shape according to the original head scan.
  6. Use the “Mask” feature in Headshot 2 to refine areas like the eyes and mouth and fix broken areas. Choose the mask that works best for your character.

Accessorizing & Adding Personality before Unreal Engine Export

Once the base head model is ready, select the appropriate skin type and enhance it with clothing and accessories from your CC content library. I typically choose hair and other items that align with the character’s story and style. If the right assets aren’t immediately available, don’t worry—you can easily import custom clothing and accessories into your CC library.

Using the Character in a Unreal Engine

  1. Export the clothed character in FBX format, selecting the “Unreal” preset as the target application.
  2. Choose “Mesh” or “Mesh and Motion” if animations are included. Adjust the texture size if necessary.
  3. Delete hidden faces to reduce the overall polycount.
  4. Use the Auto Setup plugin for Unreal Engine to import the character efficiently into the engine.

The final step involves exporting the character to a game engine for real-time use. Reallusion provides the Auto Setup plugin for Unreal Engine to streamline this process. Integrating the character into the engine was a straightforward process:

Special thanks: The project was made possible with the help from other! Game Demo by Byron Qiao.

Conclusion

Converting a 3D scan into a game-ready character blends artistry with technology in a rewarding way. Tools such as Polycam and Reallusion Headshot 2 make the process accessible to artists of all skill levels. This workflow empowers indie developers, digital storytellers, and creatives to infuse real-world authenticity into their projects.

Check out my video for a quick breakdown of this process

Related Posts

Bringing The Soldier to Life with iClone

A Trailblazing Career in Animation and Production

Dom Fred – Director / Producer / Editor / 3D Animator

Dom Fred – 3D Maya Animator

Dom Fred, a veteran in the television advertising industry, has continually pushed the boundaries of animation and production using cutting-edge tools. His mastery of Autodesk Maya, combined with two decades of experience, has earned him acclaim in commercials, music videos, and documentaries worldwide.

At the helm of DOM ANIMATION STUDIO, Fred specializes in integrating 3D characters with real environments, leveraging special effects (SFX) to create dynamic martial arts and acrobatic action sequences.

In his latest project, The Soldier, Fred demonstrates how iClone enhances his animation process.

A New Era of Production with iClone

In The Soldier, Fred’s primary objective was to establish a robust workflow that blends technical precision with creative storytelling. By adopting tools such as iClone, Unreal Engine, and Character Creator, he navigates seamlessly between software, enabling innovative production techniques.

“In The Soldier, the goal was to set up a solid workflow with technical mastery, both for the preview of each scene and its execution. With new production methods, tools like iClone and Character Creator allow us to design detailed characters and refine scenes with greater efficiency.”

Dom Fred – Director / Producer / Editor / 3D Animator

Highlighting Realistic Action

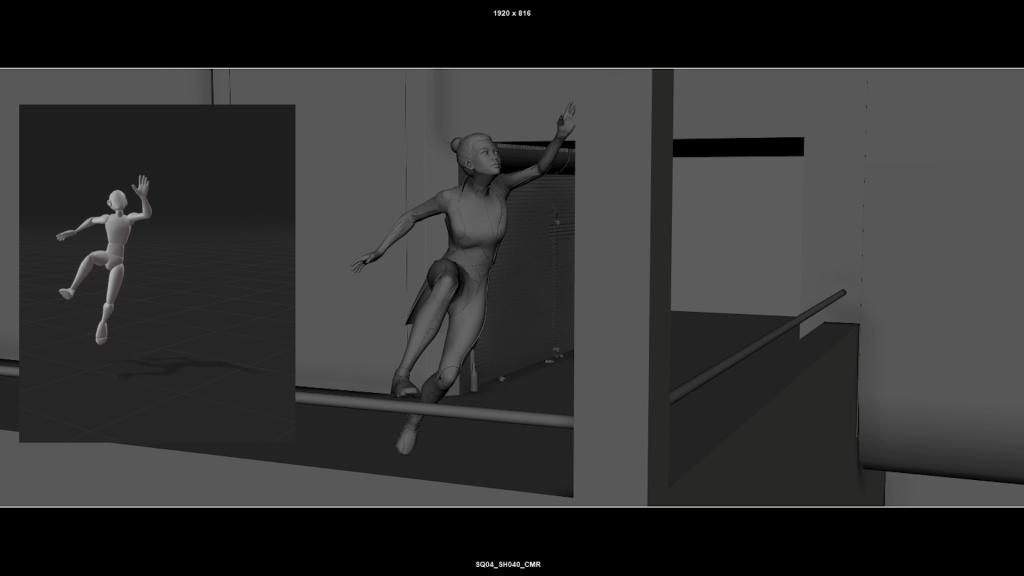
The action sequences in The Soldier are a testament to Fred’s expertise in choreographing martial arts and acrobatics. He treats these scenes as if they were live-action productions, carefully orchestrating every movement and angle.

“Here, we have several action scenes where I wanted to highlight all the techniques and production methods involved in shooting a real live-action scene,” Fred notes. This approach bridges the gap between animation and reality, delivering visually compelling results that resonate with audiences.

Fine-Tuning Shots with iClone

Once the fight sequences are complete, Fred transitions to iClone to finalize the visual narrative. This stage is critical for defining camera shots and angles, ensuring the scenes align with his creative vision.

“After completing the fight scenes, I send the animations to iClone to define the camera shots. This step allows me to achieve the real feeling I want to convey on screen,” Fred elaborates.

iClone’s user-friendly interface and real-time preview capabilities enable precise adjustments, saving time and enhancing the production’s overall quality.

Redefining Animation with Innovative Tools

Fred’s adoption of iClone and its companion tools exemplifies the potential of modern animation technologies. By incorporating these tools into his workflow, he achieves a level of realism and efficiency that traditional methods often cannot match.

His work on The Soldier not only showcases the technical and creative possibilities of tools like iClone but also inspires other animators to explore new horizons in storytelling.

Dom Fred’s dedication to advancing animation techniques reflects his passion for blending art with technology. As he continues to innovate, projects like The Soldier serve as benchmarks for what’s possible in the ever-evolving world of 3D animation.

Follow Dom Fred

Website:
https://www.domfredfilm.com/accueil

LinkedIn:
https://www.linkedin.com/in/dom-fred-films-81904194/

YouTube:
https://www.youtube.com/channel/UCaEVZPzkWUsg9Wti9Cao4Vw

Facebook:
https://www.facebook.com/profile.php?id=100063571358642

Vimeo:
https://vimeo.com/spaceagentsmysteriousax/videos

Related Posts

Getting to Know AI Smart Search

Have you ever been looking for a specific content item for an animation project, but you just can’t find it? The right character or background, or maybe a unique prop? And you’ve spent hours scouring the 2D Marketplace but you just can’t find what you’re looking for.

With the new Keyword Search and Deep Search tools, you can now find the right item for your project instantly right here in Cartoon Animator. And who knows, maybe you’ll even be inspired by a few items you didn’t even think of!

Let’s go to the AI SMART Search page to learn more about these two amazing tools. 

Difference between Deep Search and Smart Search

The new KEYWORD SEARCH tools allow you to simply type in a product name, keywords, descriptions, authors, or search through related items of what you’re looking for.

The new DEEP SEARCH tools bring intuitive search functions with category-based filtering. You can type using natural description in any language and even drag in thumbnail images for visual recognition to get matching results straight away, without ever having to leave Cartoon Animator.

Making a project using AI Smart Search

The best way to demonstrate how practical and how much fun the new AI SMART SEARCH tools are, is to create an actual scene, and see how it can help us find all the elements we want to use. Lets say I want to set up a scene of a backyard barbecue, complete with background, actors, props and some animated effects. Lets see how we can use any of the SMART SEARCH tools to find everything we need. 

Set up a scene

The first thing we’re going to need is the actual background scene of a backyard, where we can host our barbecue. Starting with DEEP SEARCH we can type in the word Backyard and see what results that gives us.

This search will give results of all different backyards created by a variety of developers. One thing to take into consideration is that you will get much better results if you use natural language prompts and include more descriptive adjectives to specify the content you are looking for. For example: instead of just typing Backyard, use more descriptive language like “ Summer House Backyard” or “Fenced Area backyard”.

The DEEP SEARCH has bought up a selection of Packs related to backyards. Under the Pack tab there are many different results for backyards, meaning you don’t have to dig through hundreds of different unrelated packs to find what you need for your project.

DEEP SEARCH provides only the results that are relevant to your search, saving you valuable time. You also have the option to search by Item, which will bring up individual items for your search.  The great thing here is that you are going to get results from all the Cartoon Animator developers, meaning you might stumble across a hidden gem or two. 

In the Item Search window, you can see the backyard scene which is available in the Marketplace. To take a closer look you can toggle your view to be Extra Large Thumbnails. Right-click the thumbnail and select View Product Page to be taken to the Marketplace page where you can purchase the pack. You can also filter where you get my content from, including the Content Store, Marketplace and ActorCore.

The product page provides all relevant information about this pack, the price and who the developer is so you can follow their work. Once the pack is purchased, it will install automatically to your Content Manager, ready to use. 

This DEEP SEARCH has suggested some other packs as well, created by multiple content developers, which may give inspiration and suggest other items which can be used.

Since this scene is going to be a backyard barbecue, we will need a barbecue. Under the Search Item tab, you could just type in a keyword BBQ for a selection of content items based on that text prompt. 

However, should you require a specific style of barbecue, a quick Google search returns a variety of options, and for this example we will choose the red kettle barbecue.

Simply drag and drop a photo directly from your browser and then DEEP SEARCH will track down content that best matches the image. If searching items in the Marketplace or Content Store, you can drag an drop images directly into the Smart Search UI. You can also exclude image searches you don’t need. Now that we have the barbecue, double-click the thumbnail to view the product page.

As well as being able to search by keywords and images, If you particularly like an author, you now can start to try  KEYWORD SEARCH to search by Author. So if you have a favourite content developer you follow, you can type in their name and find their content fast.

The backyard scene and barbecue used in this example were created by the developer Garry Pye, and if we want the look of the rest of our scene elements to match, we can include his name into the search to find other content packs and items created by the same developer and give our scene a consistent look. 

Sometimes you can successfully mix and match content from different developers, to keep the same style and look consistent, it can be beneficial to stick to one developer.

But for this example, let’s first look for some content created by other developers. A search for the developer Parramon brings up a variety of content, including a tree that we want to add to our scene. By double clicking on the item it will automatically download to your Content Manager. Some content will offer a trial version, so you can test it out in your project by just dragging it into your project. Use of trial content will result in a watermark being overlaid on your project until you either purchase the content or remove the trial content. 

Using the DEEP SEARCH tool we now have our backyard scene set up. And SMART SEARCH makes it so easy to find everything we need to build great projects. For now, let’s remove the trial content in order to retain a consistent look in our art style. 

Add a character

It’s time to add a character to our scene. Using the name of the developer in the search field so we keep a consistent look, we can type in ‘Cartoon Man’. In the left hand column you can select the actor tab to only get search results of actors. Should the character be from a particular series you remember, you can type that series name in, to focus your search further.

Once you settle on the right character for your scene, double-click him to be taken to the page in the Marketplace or Content Store to make a purchase and download him to Cartoon Animator. But now he’s going to need something to cook on that barbecue. A search for food packs will provide results and you can use Deep Search Similar to find other related items to fit the scene. 

A new Prop Search for ‘BBQ Food Meals’ and see what that gives us. Again, being a little more descriptive with the text never hurts! 

As the steak cooks on the barbecue, you’ll want to add some animated smoke drifting up from the hotplate. Use KEYWORD SEARCH and the keywords smoke and backyard and you’ll find many different developers packs suggested.

Once you find the right prop, double-click the pack to go to the Marketplace page to see the contents of this pack. You may find a Youtube video to click on and see the animated props in action. Purchase the pack and download it to your Content Manager. Now simply drag and drop the animated smoke prop into Stage Mode and to get your steak cooking away nicely.

There’s one more thing AI SMART SEARCH can help with for this example project. We need to get this guy cooking! And the fastest way to do that is by using a pre-made cooking motion. Don’t forget, if you want to search motions, they are only supported in KEYWORD SEARCH for now. In the KEYWORD SEARCH menu, select the Animation tab and search for ‘Cooking.’ Instantly we get all the results of premade motions for cooking and right there at the start is the perfect animation we can apply to our barbecue chef to finish our animation.

Now you know how to use KEYWORD SEARCH and DEEP SEARCH to find everything you need for your next project. With this new feature, you are going to be able to build any scene you can imagine! 

Tips for content developers

If you are a content developer for Cartoon Animator, the new SMART SEARCH function right here in Cartoon Animator offers a great opportunity for users to find your creations. DEEP SEARCH relies on visual recognition, so your thumbnail design is crucial. KEYWORD SEARCH is the only way to find motions, or search by author, and it finds your assets based on names, descriptions and tags, making it essential to have a good product name with clear descriptions containing keywords. Now, potential customers don’t need to know who you are to discover your content! They can text or image search for specific characters, scenes, or props directly in Cartoon Animator, and your content will appear. 

To let your assets be easily searched for by SMART SEARCH, please go to the Developer Center, scroll down and  check the Smart Search Guidelines for more details on how to optimize their assets for maximum exposure.

Keyword Search and Deep Search are just two great new tools that are going to speed up your productivity and make your animation experience more fun than ever before. 

Related Posts

Love is a Championship (LIAC) is a film project directed by seasoned 3D and VFX artist Geoff Hecht. This project is powered by Reallusion's Character Creator and iClone, bringing together over 30 artists from six countries and features a cast of 10 actors known from Netflix and Paramount Plus.

Pitch & Produce: AccuFace as the Solution for Rapid Film Production

Geoff Hecht / Love Is A Championship

Geoff Hecht is a seasoned 3D and VFX artist based in San Francisco, California. A graduate of the Academy of Art University with a degree in Animation and Visual Effects, Geoff directed a team of 78 on the animated short Metro6, which was featured in nearly 70 international film festivals and nearly ranked among FilmAffinity’s Top 100 Best Animated Shorts of 2020. Building on this success, he is now directing his second animated film, Love is a Championship (LIAC).

LIAC is a short-form animated romantic comedy that creatively parallels sports with dating. The project brings together over 30 artists from six countries and features a cast of 10 actors known from Netflix, Paramount Plus, Amazon Prime, and major films. Under Geoff’s direction, the film humorously likens penalty calls in sports to the awkward missteps of relationships. By mid-2023, LIAC had made significant progress in storyboarding and production development.

Surpassing Traditional Facial Animation

Facial animation has traditionally been a time-intensive hurdle in filmmaking, especially with the challenges of precise lip-syncing. For LIAC, Geoff Hecht turned to Reallusion AccuFACE to streamline the process. This decision proved transformative, as AccuFACE enabled pre-recorded video to drive virtual character performances with a flexible workflow. By separating body and facial animations, the LIAC team achieved significant time and cost savings in production.

AccuFACE: Transforming Facial Animation Workflow

In December 2023, Geoff’s team completed a motion capture shoot for body animation, postponing facial animation to February 2024 due to onsite limitations. AccuFace’s support for remote recordings proved invaluable, enabling actors to participate via Zoom when in-person sessions were not an option. By removing the need for restrictive equipment, AccuFace allowed actors to deliver natural performances, enhancing the quality of the final animation.

Efficient Facial Animation Production with Unyielding Quality

Reallusion’s iClone and AccuFace enabled Geoff to mash up the best takes and minimize the need for reshoots for LIAC. Its compatibility with industry-standard tools like Maxon C4D, Maya, Unreal Engine, and Blender ensured seamless integration across the diverse production pipeline that Geoff was already used to. With Redshift rendering and a paint-over workflow, the film took full advantage of AccuFace’s adaptability and efficiency to overcome various technical hurdles.

Aria Song recording her performances for AccuFACE

Revolutionizing Facial Animation for Modern Filmmaking

For Geoff, AccuFace wasn’t just a technical upgrade; it represented a creative breakthrough. By cutting production costs, speeding up workflows, and preserving high-quality standards, AccuFace became a vital tool. As Love is a Championship nears completion, its use of AccuFace underscores how innovative technology can empower creators and transform the way stories are told in animation.

Editing viseme in iClone AccuLips

Additional Information

“Love is a Championship” is a passion project directed by Geoff Hecht. With a team of 30 people, Geoff understands that a systemic approach is essential to manage both the team and production time with efficiency and precision. Since its announcement in November 2023, Geoff and the team have completed the script, the full animatic storyboard, body motion capture, and several animation scenes.

Lead Animator Michael Grassi and the team are proud users of Reallusion Character Creator and iClone. Having released several tutorials online, they invite you to join them on their animated filmmaking journey

Outreach

By subscribing to their creative channel and Patreon, you can gain exclusive access to behind-the-scenes footage that walks you through the tools and methodologies used to bring Love is a Championship to life. For instance, we have worked closely with Noitom and proudly use their Perception Neuron Body Mocap for entire body movements. We have put these professional voice actors into mocap suits, having them perform real actions from the script and it all paid off. Unlike traditional releases, where the audience must wait until the film’s completion to see the final behind-the-scenes video, Geoff’s team is sharing these insights progressively, leading up to the film’s ultimate release. Geoff refers to this approach as “Before the Scenes”.

Love is a Championship (LIAC) is a film project directed by seasoned 3D and VFX artist Geoff Hecht. This project is powered by Reallusion's Character Creator and iClone, bringing together over 30 artists from six countries and features a cast of 10 actors known from Netflix and Paramount Plus.

Related Posts

Blender Bob uses iClone AccuFACE & LIVE FACE Facial Capture

Blender Bob: A 3D Animation Expert

Blender Bob is a well-known figure in the 3D animation community. With years of experience creating high-quality animation content, Bob has earned a reputation for his clear and educational tutorials that help fellow artists understand complex techniques. His YouTube channel offers valuable insights into 3D workflows, making him a go-to resource for aspiring animators.

Bob’s work involves utilizing powerful tools like iClone to push the boundaries of digital animation, particularly in the realm of facial motion capture. His creative approach combined with state-of-the-art technology, like iClone’s AccuFACE and LIVE FACE for iPhone, allows him to streamline his process, resulting in highly realistic character animations that captivate audiences.

Exploring iClone’s AccuFACE: Revolutionizing Facial Animation

What is iClone AccuFACE?

Bob’s work involves utilizing powerful tools like iClone to push the boundaries of digital animation, particularly in the realm of facial motion capture. His creative approach combined with state-of-the-art technology, like iClone’s AccuFACE is a real-time facial motion capture tool that utilizes advanced facial recognition technology to capture the full spectrum of facial expressions. This powerful plugin integrates seamlessly with iClone, one of the industry’s leading 3D animation platforms. AccuFACE captures expressions using a standard smartphone or tablet camera, eliminating the need for expensive mocap setups.

Key Features of AccuFACE

  1. Real-Time Motion Capture: AccuFACE allows animators to see their facial expressions mirrored on 3D characters immediately. This real-time feedback is crucial for adjusting and perfecting facial animations during production.
  2. Precision and Detail: Using AI-powered technology from NVIDIA RTX, AccuFACE tracks over 50 facial muscles, capturing every subtle change in expression, from a smile to a furrowed brow, resulting in highly lifelike animations.
  3. Easy Integration: AccuFACE easily integrates with other animation tools and software, enabling animators to work across multiple platforms without interruptions, ensuring a smooth workflow.

Why Facial Animation Matters

Facial expressions are a fundamental part of character development. They convey emotions, reactions, and personality traits, making characters more relatable and dynamic. iClone’s AccuFACE plugin enhances this crucial aspect by allowing animators to create realistic expressions quickly and efficiently, saving time and effort while ensuring high-quality results.

Blender Bob’s Workflow with AccuFACE

Blender Bob’s animation process is both systematic and creative. He starts with the conceptualization phase, developing characters and scenes through sketches. Once the design is ready, he proceeds to modeling using Blender, followed by texturing and rigging to prepare the character for animation.

However, it’s the animation phase where AccuFACE comes into play. Bob uses a iClone to capture his own facial expressions and apply them to his 3D models in real time.

“Using iClone’s AccuFACE has transformed the way I approach character animation; it allows me to infuse my characters with genuine emotion, making them feel alive.”

Blender Bob – Veteran Hard Surface Modeler | CG supervisor

With AccuFACE, Bob can streamline the facial animation process, reducing the time spent manually adjusting keyframes. This makes it easier to focus on creativity, refining other aspects of the character’s performance and overall scene dynamics.

LIVE FACE for iPhone: Another Level of Facial Motion Capture

What is iClone’s LIVE FACE?

The iClone LIVE FACE plugin for iPhone takes facial motion capture to the next level. Paired with iClone, LIVE FACE allows animators to capture detailed facial expressions with exceptional accuracy using the front-facing camera of an iPhone. The plugin supports over 50 different facial movements, including subtle eye and mouth changes that bring characters to life.

Key Features of LIVE FACE

  1. Precise Real-Time Tracking: The plugin tracks facial movements in real time, providing immediate feedback on the character’s expressions. This capability is particularly valuable for animators working on highly emotive scenes that require accurate facial cues.
  2. Cost-Effective Solution: Unlike traditional motion capture methods that require specialized equipment, LIVE FACE uses the iPhone’s built-in camera and ARKit to capture facial movements. This makes it an affordable option for both indie animators and small studios.
  3. Syncing with Voice and Body Mocap: LIVE FACE integrates seamlessly with other motion capture systems, allowing facial animations to be synchronized with voice recordings and body movements. This creates a cohesive performance that feels natural and engaging.

How Blender Bob Uses LIVE FACE in His Workflow

Blender Bob highlights the advantages of using the iClone LIVE FACE for his character animations, noting how it adds depth and realism to his projects.

“iClone is a game-changer, especially with the LIVE FACE plugin. It lets me bring out the depth in character expressions that other software struggles to capture.”

Blender Bob – Veteran Hard Surface Modeler | CG supervisor

Blender Bob sets up the LIVE FACE plugin with iClone, calibrates his iPhone camera, and captures his facial movements while recording. This simple yet effective process enables him to create realistic animations with minimal effort. After recording, he exports the facial animation data to Blender for final tweaks, refining eye movements, lip sync, and more to match the scene’s emotional tone.

Comparing iClone AccuFACE vs. LIVE FACE for iPhone

While both iClone’s AccuFACE and LIVE FACE capture facial expressions, they cater to different needs and workflows.

  • AccuFACE offers greater precision, particularly for fine-tuning subtle facial movements like eyebrow raises or lip curls. It is ideal for animators who require high-quality results with minimal setup.
  • LIVE FACE for iPhone provides a more accessible and affordable option. It’s a fantastic choice for independent animators or small studios looking for an easy-to-use solution for realistic facial capture. While it may not offer the same level of detail as AccuFACE, it is highly efficient and convenient, especially for animators on the go.

Both tools offer exceptional performance, but the choice between them depends on the animator’s specific needs, budget, and level of technical expertise.

Blender Bob’s Final Thoughts on iClone AccuFACE and LIVE FACE

In conclusion, Blender Bob’s workflow highlights the power of iClone’s AccuFACE and LIVE FACE plugins in creating lifelike facial animations. These tools allow animators to work more efficiently, ensuring that the focus remains on creativity rather than technical challenges. As Blender Bob sums up, “iClone with facial capture is a powerhouse for anyone looking to bring their characters to life. The level of detail and efficiency is unmatched.”

As digital animation continues to evolve, tools like iClone’s AccuFACE and LIVE FACE are pushing the boundaries of what’s possible. For animators like Blender Bob, these technologies represent a significant leap forward, making the animation process faster, more accurate, and more creative. Whether you’re an independent creator or part of a larger studio, integrating these tools into your workflow will help you create compelling, realistic animations that captivate your audience.

Follow Blender Bob

YouTube:
https://www.youtube.com/c/BlenderBob

Instagram:
https://www.instagram.com/realbyfake/

LinkedIn:
https://www.linkedin.com/in/robertrioux/

Related Posts

Duai Sebastian Florez shares his know-how in ZBrush, Character Creator, iClone and Unreal Engine. His familiarity with tools helped him to create a stylized game character for the 2024 3D Character Contest.

Winner Select: The Better Way to Create Game-Ready Characters

Duai Sebastian

Hello, my name is Duai Sebastian, and I am a Character Artist and teacher at Libel Academy. Thanks to the partnership between Libel and Reallusion, I have learned to use very powerful tools that have become an important part of my workflow, both for my profession and my commitment as a teacher.

Duai is also Libel Academy’s newest Master Course. He is a distinguished Colombian character artist renowned for his expertise in Blender, ZBrush, Character Creator, and iClone. Duai’s masterful creation, the ZBrush + CC4 course, centered around his CyberMaya character, represents a pinnacle of digital artistry.

Duai’s ArtStation

Concept Behind “Seeker”

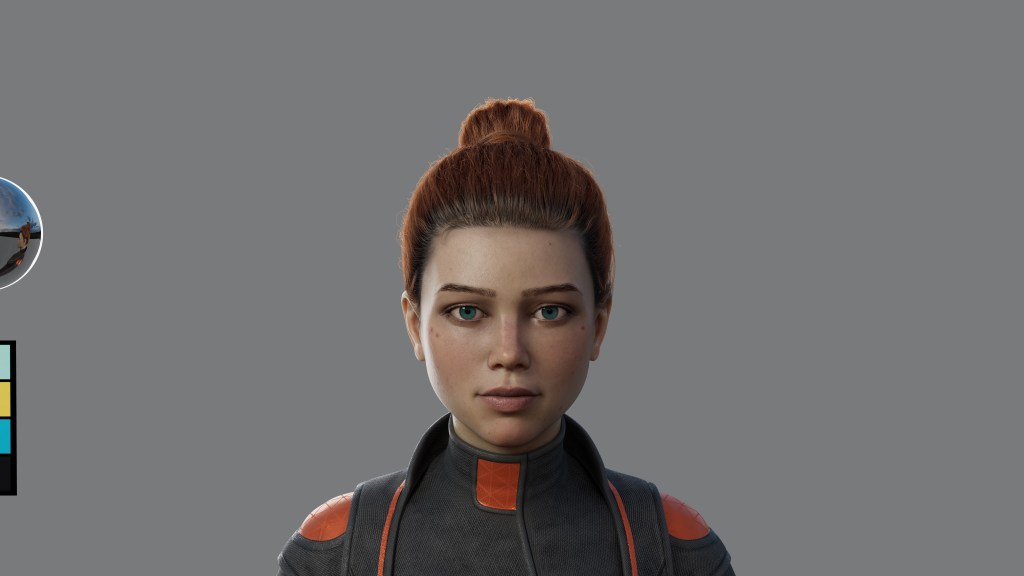
Meet Seeker – a charming little ninja whose design draws inspiration from ancient times, brought to life with a playful cartoon flair. I used AI to brainstorm different concepts for this character, who became the perfect showcase for Character Creator 4 and iClone 8’s capabilities. Seeker demonstrates how modern tools can help create polished, game-ready characters without getting bogged down in technical details. By streamlining tasks like rigging and animation, artists can spend more time on what matters most – bringing their creative vision to life.

My Personal 3D Workflow

The CC4 base meshes have been a game-changer for me, whether I’m using morphs or the new GoZPlus feature. What I love most is how they’ve made character animation accessible. Before, I’d often shy away from bringing my characters to life because the process was so time-consuming and complex. But now, I can focus on what I do best – character art – while still producing fully rigged, animation-ready characters. This workflow has really allowed me to specialize in my passion without getting bogged down in technical hurdles.

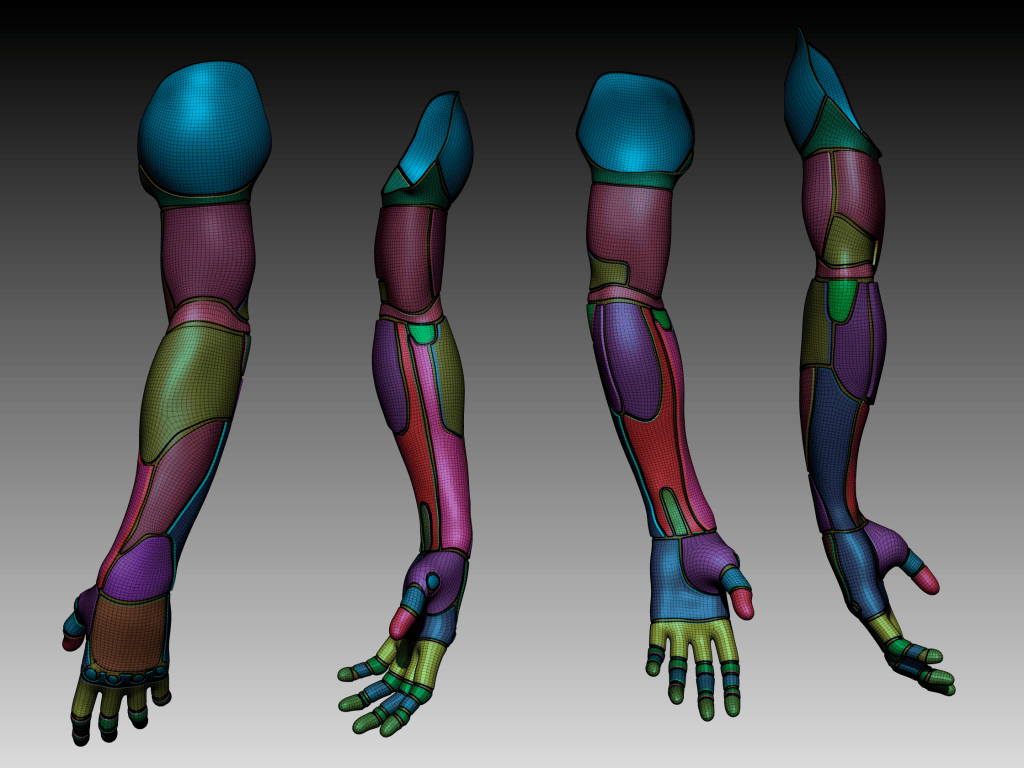
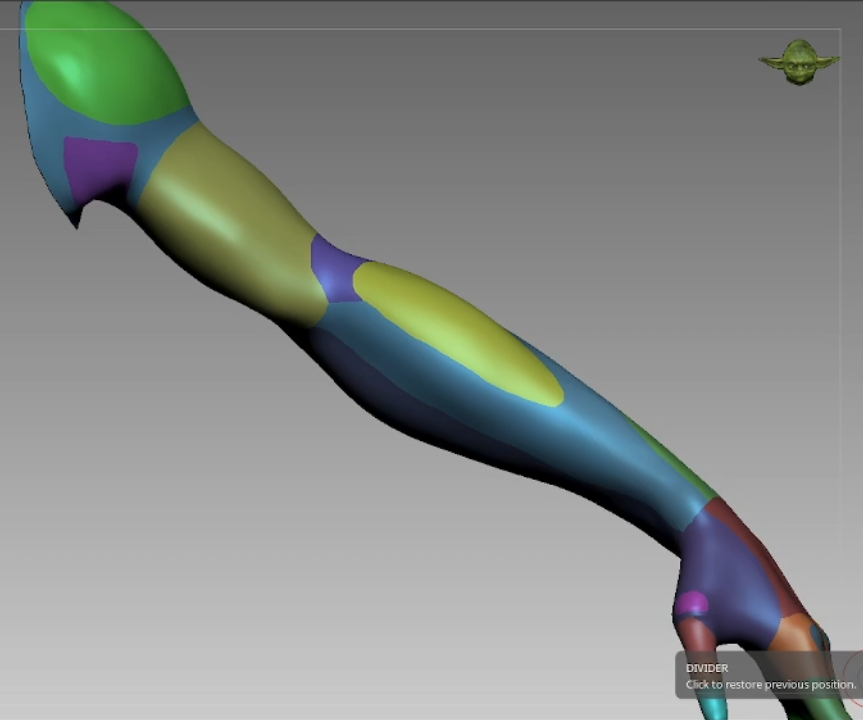
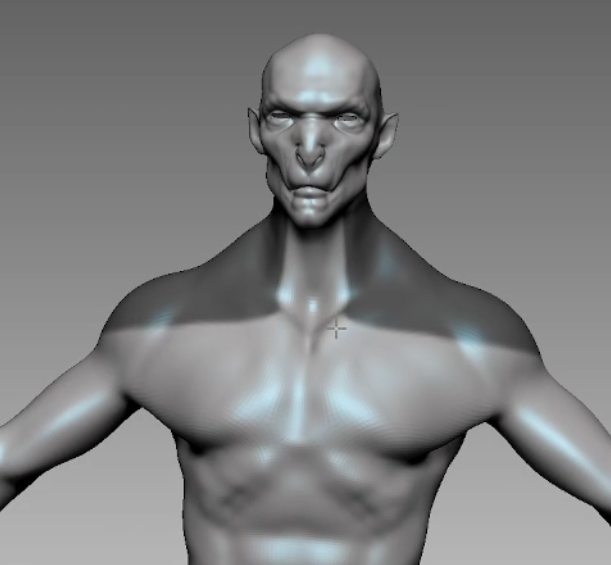
The use of morphs allowed me to find a shape close to what I needed for my character, both in terms of muscle structure and proportions. I loved the latest update of GoZ Plus because of the distribution of the polygroups; this allowed me to modify many more details in the sculpting process much more quickly and efficiently.

Tips: When using morphs, I feel that the biggest piece of advice is to know how far you can enhance your character and where not to. The important aspect of using these sliders, in my opinion, is to get the general shapes close and then let the artistic work take place in ZBrush.

Progressive Detailing: ZBrush Face Tools & Marvelous Designer

The use of Face Tools was mainly to modify the facial expressions of my character. In this particular case, I made the eyes a bit larger and the mouth a bit smaller. By using Face Tools, I was able to better control each facial animation of my character.

The connection between Character Creator and ZBrush is wonderful! So much so that these two pieces of software feel like one. For Seeker, I wanted to implement Marvelous Designer due to the dynamism and practicality of creating patterns, making seams, and allowing the clothing to interact with our character in a more natural way.

Leveraging CC Rigging Tools

I really liked the precision of the Transfer Skin Weight tool. Even though I had to correct a few weight issues, which were very minor, the “Layer Cloth” feature also helped me a lot by allowing me to specify which clothing goes underneath and which goes on top in CC4. In this part, I focused on maintaining good deformation, so I used weight paint as well as a weight map in the physics section of CC4, taking collisions into account to avoid intersections between the objects. I also used the “Layer Cloth” feature to keep everything more organized.

For the poses, I looked for various references in anime, searching for action poses and also aiming for the pose’s curve to be appealing, as well as the facial expression.

To improve the shapes that were slightly distorted due to the pose deformation, I used Pose Tools. To enhance facial expressions like blinking and other expressions, I used Face Tools. Since I wanted the course to be more comprehensive and demonstrate that Character Creator is compatible with most 3D production software, I utilized Auto Setup, and to create the cinematic, I used Unreal Live Link.

“Character Creator 4 is an incredible software; it helped me save 50% of the time in my character creation pipeline. Additionally, it allows me to pose characters quickly without needing complex rigging methods. Its integration with ZBrush is so seamless that they almost seem like a single program.”

Duai Sebastian Florez , 3D Artist and Instructor at Libel Academy

Thoughts on Character Creator

As someone who teaches, I’ve made it a priority to keep up with Reallusion’s latest tools, and Character Creator has been invaluable to my workflow. Creating game-ready characters used to be overwhelming – you had to master rigging, animation, and so many technical aspects. But Character Creator streamlined all of that for me. Now I can pour my energy into what I really love – character design – while still ending up with fully animated characters that feel alive and dynamic. It’s amazing how much time I save, and my students benefit from learning these efficient workflows too!

As I mentioned before, I come from a traditional workflow: starting with blocking, then high poly modeling, followed by clothing and accessories, and finishing with retopology and rigging. Not knowing how to rig a character made it difficult for me to create facial expressions. Character Creator changed that, providing everything I had been missing in my characters instantly. It allowed me to focus on creativity, making the process more fluid by trusting that the toughest part was already handled.

Advice to Others

I would advise newcomers to embrace this workflow now, as it is gradually gaining traction in the industry. Adopting it sooner will give us a competitive edge. Many major companies are already using this optimal approach. In an industry where time is money, leveraging Character Creator to streamline production will enable us to create spectacular games within a more efficient timeframe.
Stop overthinking it—just do it! This won’t hinder our artistic expression; in fact, it enhances it by integrating with ZBrush, preserving our creative vision. With facial and body rigging, Character Creator supports not only realistic characters but also stylized ones, like cartoons. It’s not limited to video games—it’s also perfect for film!
Related Posts

Click through to learn more about the winners’ portfolios and judge comments

Dialog for Beginners

Sooner or later beginners have to tackle one of the most important parts of animation… dialog. And not just an offscreen narrator as that is something generally done in the video editor instead of iClone. While dialog often remains restricted to just a few or couple of characters, there are also scenes where dialog comes from several different directions, both cinematically and literally. Today we are going to keep it simple by focusing on two-person dialog so you can quickly grasp the basics.

At the end of this article, you will find a tutorial using a free account from ElevenLabs for dialog then into iClone to get the dialog associated with a character and lip synced. As a bonus I will show you how to use a single motion for a short dialog even when the motion is too short.

There is also an extensive list of items important to dialog broken down into a bullet list of Do’s and Don’ts. This reference will serve as a great jumping-off point for those new to dialog and animation. I’ll show you the technical aspects of how to use dialog in iClone, and the bullet list will help you improve what you’ve learned.

There are a lot of things that need to be learned over time about effective dialog, but we are going to focus today on the technical aspect of getting dialog into iClone synced to characters with lip sync, letting iClone do all the hard work.

NOTE: You can use a chatbot to write dialog if needed. We are animators but not all of us are script writers.

ElevenLabs

If you have never used ElevenLabs or any AI voice generator don’t be alarmed as they are very simple to use. It is basically a matter of typing or pasting the text dialog to the website app. It also appears that they have apps available for iOS and Android, but we’ll be using the web app which couldn’t be simpler.

The layout is easy on the eyes and navigate as it is a no-nonsense user interface with menu choices on the left, text input areas in the middle-, and a two-tab menu on the right for voice Settings or History. I won’t be covering the various voice settings in this article, but I do advise experimenting with the sliders and models. I never had to alter much dialog coming from ElevenLabs so I’m not all that versed on that aspect.

This dialog uses the default settings so you can get an idea of what type of dialog can be produced.  Most of the dialog is just fine but there is one that is rather flat of emotion and I’m sure you spot that one.

I also show a basic command of <break time=”1.5s”/> for a pause of one and half seconds.

One thing to keep in mind with dialog is that you can always make it shorter or remove pauses during the edit phase. A longer pause than needed may be preferable in some instances where you aren’t sure of the length yet as this gives you the easier route of just editing the pause instead of inserting a pause.

A free account at ElevenLabs provides 10,000 characters per month and projects like this tutorial use less than 900 words.

There are seven tiers in all

  • Free Account – Generate speech in 32 languages using thousands of unique voices
  • Translate content with automatic dubbing, create custom synthetic voices, Generate sound effects
  • $5 per month for 30K characters – Clone your voice with as little as 1 minute of audio
  • Projects to create long form content with multiple speakers, Access to the Dubbing Studio for more control over translation & timing
  • $11 per month for 100K character – Access to the Dubbing Studio for more control over translation & timing
  • $99 per month for 500K characters – Professional voice cloning to create the most realistic digital replica of your voice. Audio Native to add narration to your website and blogs, Higher quality audio – 192 kbps
  • $330 per month for 2M characters
  • $1,320 per month for 11M characters
  • Custom Pricing for Enterprise

We’re just focusing on the Text to Speech tool but there are many other great tools like the Voice Changer, Sound Effects and others.

The tutorial at the end of this article demonstrates how to use the fundamental tools opening with ElevenLabs Text to Speech basics tutorial then on to using the dialog in iClone

Audio Import

Audio import is straightforward, but you do have to follow a process otherwise it might just become a background sound instead of character dialog.

If you drag and drop accidentally to a prop, then it becomes a sound.  If you drag and drop your audio onto the character you will be bypassing the AccuLips plugin which is one of the best lip sync tools out there and the legacy lip sync engine will kick in with no intervention on your part.

If you don’t have the AccuLips plugin then I highly recommend getting it. AccuLips has far more advanced AI-driven features than the legacy engine. If you don’t have AccuLips then just drag and drop on the character and the legacy engine will process the lip sync for you.

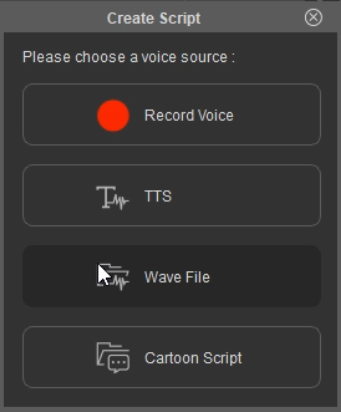
To get to AccuLips, as demonstrated in the tutorial, is to go to the Motion tab, select Create Script the choose AccuLips from the resulting popup menu. This will trigger the AccuLips plugin instead of processing through the legacy lip-sync engine.

Select Character go to Motion tab -> Create Script -> AccuLips if you have the plugin.

Lip Syncing

At one time lip syncing was a tedious task with lots of viseme edits and while we can still edit visemes AccuLips will assist in getting the right visemes in the right place. We can then edit the duration of the viseme or type but that is beyond the scope of this beginner’s article.

That being said, Viseme is a term you need to know so you understand when it is referenced even thought software like iClone does most of the viseme work for us. Below I asked CoPilot to explain Viseme as a dictionary entry and as an explanation.

Viseme (noun)

A specific facial and mouth movement or configuration associated with a particular sound in spoken language, especially in the context of lip-reading.
The visual equivalent of a phoneme in the study of visual speech, important for recognizing and distinguishing speech sounds by sight.
For example, the sounds represented by “p,” “b,” and “m” might share a similar viseme because they all involve the closing of the lips
Let’s break it down in practical terms. Imagine you’re watching someone speak. A viseme is essentially what your eyes see when you look at the movements of their mouth and face. It’s the visual part of speech sounds.
For instance, when someone says the sounds /p/, /b/, or /m/, their lips come together and then part. This mouth movement looks the same for these sounds, even though they produce different noises.

Reference – Copilot

Using AccuLips is a simple process, and you probably should have the dialog in text form readily available for those rare cases where the plugin may struggle with some words or audio. There may be times you’ll need to reference the text for corrections or even paste in the text if a lot of errors pop up. This is rare but poor quality of audio will lead to problems so try to keep it as clean as possible with text handy as reference or to copy and paste corrections.

Correcting mistakes is a simple process as any words not recognized are highlighted in red for your correction and then you can press the Align button to realign the visemes.

You can see that two words have been strung together. Separate them then press Align to realign the Visemes

Just like the previous steps, this is all explained in the iClone portion of the video tutorial below after the ElevenLabs segment.

Pace and Timing

Pace and timing are critical whether it be drama or comedy, timing can make or break an animation. Just like poor animation, bad timing throws off the audience expectations or train of thought leading to viewers questioning the bad timing and losing focus on the story. Bad animation can sink a production while good animation can salvage a bad story in some cases and the same holds true for bad pacing and timing.

The sad part is that pace and timing are not things that can be taught so much as it is based on a “feeling” that you have. Most of us can spot bad timing right away, but what does it take to have good timing?

 Experience… and I don’t mean production experience so much as I mean viewing experience.

We watch a lot of movies and weekly shows and therefore have been trained to what is good and bad in a movie. Pace and timing are foremost. It is true we are all critics, but it is true because of our viewing experience over our lifetimes to this point. We know what we like and don’t like so if you have a bad feeling about the timing and pace of a particular interaction it probably is BAD.

Listen to your hard-earned intuition and keep moving that dialog and those animations until the timing does “feel” right. If you don’t like it, you won’t be the only one so build off that feeling and keep going until you are comfortable with it.

We cannot brute force timing and pace nor can we ignore its effects. I can’t offer you any real solutions, but I can, at least, make you aware of its implications.

We need to be our own worst critic and NEVER assume it is a masterpiece just because we animated it.  Always look at timing and pace with a critical eye.

Summary

The act of getting recorded dialog into iClone is not difficult by any means and may be one of the simplest animation tasks in a lot of projects. Using an AI service like ElevenLabs is almost the same as having a voice-over studio in your workspace. You have control over scripting, voice selection and fine tuning.

In the future we will take a look at other aspects of dialog including facial expressions which are almost as important as the dialog itself. Until then I will leave you with a list of Do’s and Don’ts after the tutorial that hopefully help shape your future projects or provide ideas for further research.

Camera Do’s and Don’ts

For this list I queried the various chatbots (ChatGPT, Gemini, Perplexity and Claude) for a bullet list of do’s and don’ts concerning use of the camera.

I then fed all of those bullet points into CoPilot and had it compile a reference list of what basically best camera practices.

Do’s:

  • Fluid and Smooth Movements: Use ease-in and ease-out curves for transitions to avoid jarring effects.
  • Experiment with Angles: Utilize various angles (low, high, Dutch tilt) to enhance visual storytelling.
  • Optimize Framing and Composition: Follow the rule of thirds, golden ratio, and ensure depth with foreground, midground, and background elements.
  • Plan with Storyboards: Outline key camera movements, positions, and shot compositions beforehand.
  • Consistent Lighting: Ensure balanced lighting without overexposed areas.
  • Consider Perspective and Emotion: Position the camera to reflect characters’ emotional states and provide impactful perspectives.
  • Strategic Use of Shots: Use a variety of wide and close shots to emphasize action or emotion.
  • Maintain Clarity: Keep the subject clear, avoiding clutter and distractions.
  • Incorporate Realistic Imperfections: Slight camera shakes, subtle focus adjustments for a more organic feel.

Don’ts:

  • Neglect Backgrounds: Ensure the background complements the scene and doesn’t detract from the focus.
  • Overcomplicated Movements: Avoid excessive pans, zooms, and rotations which can confuse viewers.
  • Abrupt or Jerky Movements: Prevent disorienting transitions and ensure smooth camera actions.
  • Static Shots for Long Periods: Keep the animation dynamic with occasional camera movements.
  • Excessive Cuts: Avoid overusing camera cuts to maintain narrative flow.
  • Neglect Scale and FOV: Ensure proper scaling of the camera and realistic field of view settings.
  • Predictable Movements: Introduce subtle variations to keep the viewer engaged.
Dialog Do’s and Don’ts

Once again, I queried the various chatbots (ChatGPT, Claude, Gemini and Perplexity) for bullet lists of do’s and don’ts. I then fed all of those bullet lists into CoPilot and asked for a summarized list for reference.

Some of you will consider these rules and yes, we all know rules are made to be broken so that is completely your call, but I provide it as future reference material, so you don’t have to waste time looking it up or cross examining and double checking multiple chatbots. These bullet points work for animation and live action.

Do’s

  • Use the 180-Degree Rule: Maintains spatial orientation and prevents audience confusion.
  • Capture Reactions: Enhances emotional depth by showing characters’ reactions.
  • Monitor Audio Levels: Clear audio is crucial for a professional scene.
  • Use a Variety of Shots: Incorporating different shot types (close-ups, medium shots, over-the-shoulder) adds visual interest.
  • Plan Your Shots: Storyboarding and planning help streamline the filming process.
  • Consider Lighting: Proper lighting sets the mood and enhances the visual quality of the scene.
  • Maintain Continuity: Ensures consistency in props, costumes, and actions across shots.
  • Utilize Over-the-Shoulder Shots: Establishes perspective and connection between characters.
  • Frame Your Shots Thoughtfully: Use composition techniques like the rule of thirds for visually appealing scenes.
  • Natural Movement and Blocking: Characters should move naturally to maintain realism.

Don’ts

  • Avoid Over-Directing: Allow actors some freedom for natural performances.
  • Avoid Crossing the 180-Degree Line: Keeps spatial orientation clear.
  • Avoid Distracting Backgrounds: Ensures the focus remains on the characters.
  • Don’t Ignore Audio Quality: Poor audio can distract from the scene.
  • Avoid Flat Lighting: Good lighting adds depth and dimension.
  • Don’t Overcomplicate Shots: Keep it simple to avoid unnecessary distractions.
  • Don’t Overuse Special Effects or Cutaways: These should be used sparingly to keep the focus on the dialogue.
  • Avoid Jump Cuts: Unless intentional, jump cuts can disrupt the flow.
  • Avoid Inconsistent Audio Levels: Maintain steady dialogue volume.
  • Don’t Neglect Pacing: The scene should flow naturally without rushing or dragging.
MD McCallum - WarLord

MD McCallum – WarLord

Digital Artist MD “Mike” McCallum, aka WarLord, is a longtime iClone user. Having authored free tutorials for iClone in its early years and selected to write the iClone Beginners Guide from Packt Publishing in 2011, he was fortunate enough to meet and exchange tricks and tips with users from all over the world and loves to share this information with other users. He has authored hundreds of articles on iClone and digital art in general while reviewing some of the most popular software and hardware in the world. He has been published in many of the leading 3D online and print magazines while staying true to his biggest passion, 3D animation. For more information click here.

Varuna Darensbourg swiftly combines his knowledge with ZBrush, Character Creator and iClone, sharing his winning workkflow for the 2024 3D Character Contest.
Winner Select: How Unorthodox Design Steals the Show | Character Creator GoZ & ZBrush Face Tools
Varuna Darensbourg

My name is Varuna Darensbourg. I got into 3D about 5-6 years back. I started exploring a few programs like Daz, and then I discovered iClone. I made some fun things by combining the two tools, but I always really wanted to create much more custom characters. I then started learning UE4 and started to scratch the surface of making custom characters for a game, using Character Creator.

It wasn’t until I saw the entries for the first Reallusion Contest in 2020 that I started to really push myself to learn sculpting and modeling tools. I try to always find time at night to learn something new and experiment. It’s a lot to learn UE, ZBrush, and Blender, but I’m very grateful for the time I have put into it thus far.

Varuna’s ArtStation

Character Design with CC, ZBrush, and Photoshop

I started sketching in Photoshop with a few loose goals and design points in mind

  • Challenge myself technically & creatively
  • Implement unusual proportions
  • A Merchant lady with a military background & Mechanical aspects;
  • A little sci-fi, a little medieval, a little creepy, a little beautiful

I think reference is very important, but for me, I have to start out with sketching a basic idea and then gathering some references later, once I have a core concept roughed out. For Karra, I knew she was a merchant with some mechanical /prosthetic elements and some sort of military history. I turned on the mirror option in Photoshop to speed things up and just started focusing on interesting shapes, odd proportions, and a visual flow. Once I had something that I was motivated to tackle, I moved to Character Creator to block in the general character proportions.  To help, I brought in the sketch by placing it on a plane and lowering the opacity a little.

Once the proportions felt close enough, I used GoZ to sculpt the character’s face, clothing and gear.  This is actually when I gathered a very small batch of references. Stuff to help inspire clothing details.

The GoZ+ Workflow is CC4’s super power. The whole character or just individual items can be sent to ZBrush, detailed and sent back and updated on the character.  I was able to create all my character’s clothing by exporting the whole character and then using it as a template.

The beauty of GoZ+, is that you can subdivide your mesh, sculpt all your details and then use the GoZ+ menu to send the object’s base geo back to CC4 with all the details automatically baked into the Normal Map. One click and it does all the busy work.  The same goes for poly-paint.

My tip would be to send stuff back to CC4 early, before you get into any detailing.  The speed of the tool allows you to quickly test clothing and props out in the early stage, to see if it’s working. This is super important with clothing.  You want to make sure it conforms and functions before you make it look cool.  Send it back to CC4 and use a template animation to assess how things hold up. This tool helps you do that instantly.

ZBrush Sculpting & Face Tools

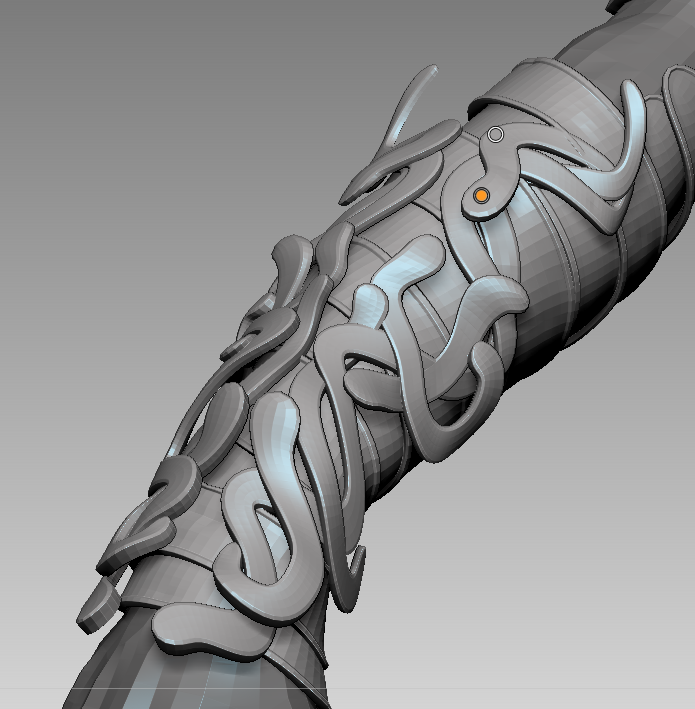
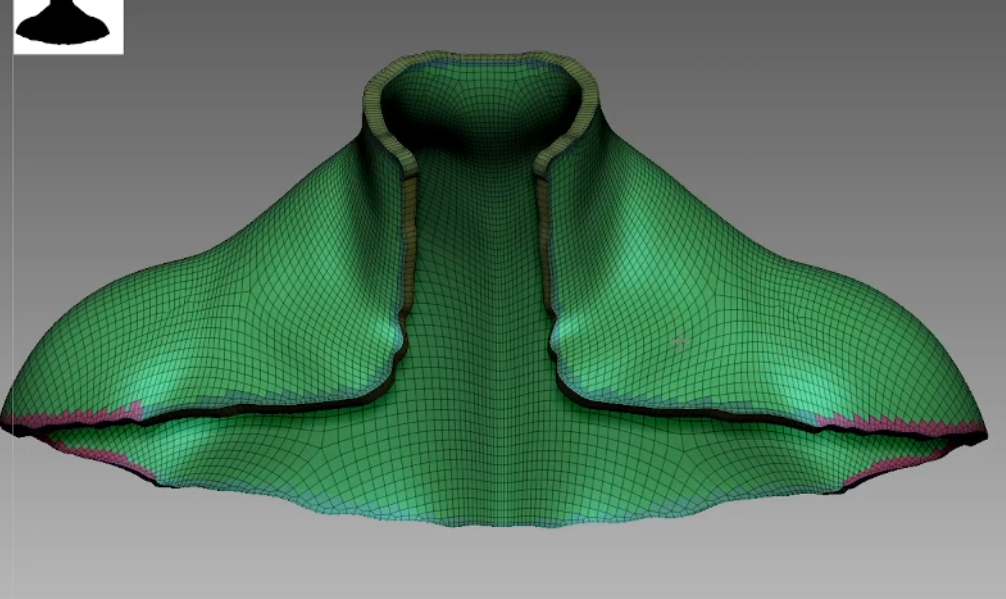
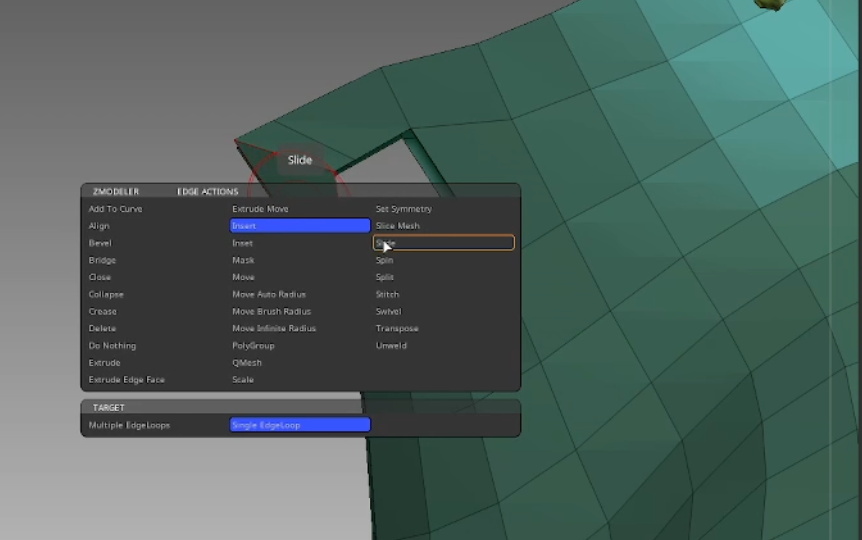
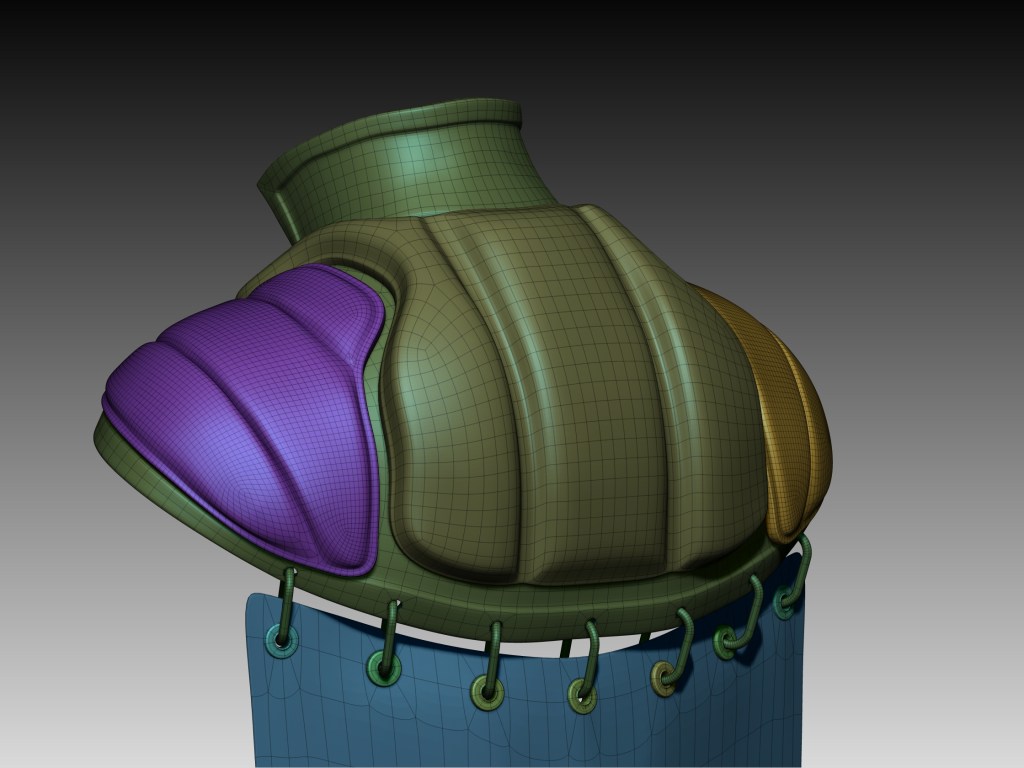
Largely, I use the common technique of extruding mask selections and then building off of the extruded geometry to make what I needed. A very important technique I learned from a tutorial by Nikolay Naydenov, is to extrude mesh without thickness, then at a super low poly stage, push and pull it like crazy into the shape you want and then use the Dynamic Subdivision tools to add thickness and subdivision as needed.  If you add thickness or resolution too early, then it is very hard to push things around without distorting your clean edges. This really helped me make the jacket and many other things for Karra.

When I started the project, I dreamed a little too big and started making 3 characters.  One of them was Larrk, a character that I envisioned having very extreme expressions.  When I was working on him, I did several tests using ZBrush Face Tools to create custom expressions.  I was super happy and excited about the possibilities, but I had to cut him from the project in the end.  What I learned from those tests however, has me very excited to implement Face Tools in future projects.

Motion Capture: Body & Face

In addition to Accuface, I used the Perception Neuron Suit & Gloves for the character body motion. Nothing beats traditional key frame animation, but I think motion capture is very ideal if you are working solo and or have limited time. While mocap lends itself to realistic motion, you can go back in and enhance the motions in iClone or UE5 by adding in motion overlay layers and keyframing something to give it more impact or a desired exaggeration that can be lost in mocap.

Accuface is superb. I had my wife do the voice acting for the character, so I had her record a video of her face while she did it.  I used the video in AccuFACE to capture her expressions, lip sync and audio all at once.  While I intended to go back and enhance some of the expressions manually, I didn’t, and it held up surprisingly well.

3D Props & Accessories

All the props were made by sending primitive shapes into ZBrush, detailing them slightly and sending them back. The pillar and the Dragon Egg were made very quickly this way.

I’m often guilty of trying to make everything myself, but I have learned to choose my battles. Don’t be shy to use pre-made props to save time. The pillar and the Dragon egg are basic examples. The pillar was a primitive shape I found in the base iClone & CC4 library.  I sent it to ZBrush with GoZ+, detailed it, sent it back, and then duplicated it to make it taller. Boom, done.  Same deal with the Egg; It was a free primitive shape with no detail. I downloaded it and ran it through the same process.

The same goes for character clothing and props. While I pushed myself on this project to learn how to make as much as possible from scratch, I think It’s smart to use base meshes to build off of. If you have a unique vision, you can still use any of the Reallusion library items to get your idea started.  Glasses not quite as crazy as you want? Send them to ZBrush or Blender and make them into something new.  Delete the textures on a jacket or dress and paint on the base mesh to turn it into something that matches your project.

Final Render and Composition

NPR rendering had a very important role in this project, even though my final presentation didn’t use it. I started the project with the intention of developing an NPR workflow. A long way in, I ran into some issues that I needed extra time to solve, so I leaned into a traditional render in the end.

What I got out of starting with the NPR line art style however was an interesting workflow for quickly iterating ideas. If I got any ideas that were not in the original concept sketch, I could render out an NPR still frame and paint on top of it quickly.

For the final, I focused on a streamlined workflow and set everything up to render out of iClone in one pass.  I actually took too much time initially setting up a whole scene that looked like the aftermath of a battle. In the end I decided to stick with a single camera view and relied on the lighting and camera defocus to produce the look I wanted for the final render.

Thoughts on the Contest

My advice to anybody joining or considering joining future Reallusion 3d contests, would be to go into it with a mindset of pushing yourself to learn and grow.  Having a solid workflow is very important, but there is nothing wrong with using the challenge to help develop a workflow. Put time into something outside of your comfort zone. Many of the elements in my design were born from me stumbling about and trying to solve something that I had not tackled before. Whether all those elements were Successful or not, I came out of it with a much more refined workflow that allows me to bring my ideas to life with far less struggle.

Character Creator is a powerhouse. You can adapt it into your workflow as you see fit. Alone it’s capable of producing incredible characters, but if you combine it with any modeling or sculpting program, it’s a total dream.
For me, CC4 serves many uses. One of those is the library system.  Anything I create can be saved to the library and used on future characters; clothes, props, skin textures and body morphs, etc.  Everything can be quickly accessed and applied to other characters.
Varuna Darensbourg, Stereo Compositing Supervisor at SDFX Studios

Additionally, you can instantly test animations on your characters right inside CC4 to see if things are working before exporting them to other apps or sending them to iClone. Simply fantastic!

Related Posts

Click through to learn more about the winners’ portfolios and judge comments