首頁 » Page 24

How “BMX” Pushes the Boundaries of Motion Capture

Elevate visual realism through synchronized human movements and animated props.

For much of 3D animation history, artists faced the painstaking challenge of syncing character movements with the props they interacted with. This meticulous process demanded countless hours—sometimes days—of trial and error to achieve seamless results. Enter Reallusion Motion+, a game-changer that redefines this legacy workflow. By automatically pairing character motions with prop deployment, Motion+ introduces the fundamental technology behind character-prop animation synchronization that actually works.

Building on this innovation, the acclaimed Motion Capture Orlando (MCO) debuted the “Skateboard – Flatground Skate Tricks” motion pack, earning widespread praise. Now, MCO raises the bar once more with “BMX,” a 3D mocap animation package that flawlessly combines rider and bike movements. The result? Smooth, cohesive animations that bring dynamic action to life like never before.

Catch the behind-the-scenes video on MCO’s incredible process:

Capturing the Adrenaline of BMX

“BMX” began as an ambitious vision to digitize the dynamic trick motions of bicycle motocross. To bring this idea to life, MCO collaborated with Rob Nolli’s BMX Trickstars, a premier traveling stunt show founded by the X-Games medalist himself. This partnership evolved into multiple proof-of-concept phases, capturing real-life BMX riders performing tricks across a range of difficulty levels.

To tackle the challenge of recording the bike’s complex movements—such as those of the frame, wheels, handlebars, cranks, and pedals—MCO’s technical lead, Kaszmere, had to get creative. This led to her placing mocap markers on strategic parts of the bike, and reverse-engineering a custom motion capture rig to synchronize fluid motion of the bike with its rider. 

Digitizing BMX Maneuvers

To bring a wide range of BMX tricks to life—including high-flying jumps and technical flatland maneuvers—MCO staged the motion capture on a large platform equipped with a competition-grade ramp. The entire TrickStars team joined the shoot, ensuring authentic performances for every trick. The result is a meticulously crafted collection of stunt animations, seamlessly pairing virtual riders and bikes, along with perfectly synchronization of the riders and their bikes.

iClone’s X Factor

Capturing over 50 paired mocap shots of both the bike and the performer posed a significant data-cleaning and processing challenge for MCO. To overcome this, they turned to iClone, leveraging its powerful tools such as reach constraints and dummy objects for target endpoints. By placing virtual dummy objects on key contact points like the handlebars and pedals, the rider’s hands and feet could automatically align with those positions. This allowed MCO animators to fine-tune the motions with precision, ensuring the character’s movements seamlessly matched the placement and orientation of the bike. This setup was also instrumental in preventing over-extended or disjointed limb positioning.

When we first started working with Reallusion, I thought it would be a good idea to learn to edit all our mocap data in iClone, and I’m really glad I did because it is simple to learn and the tools are surprisingly powerful, so powerful that I have yet to use MotionBuilder or Maya in any of our mocap packs.

Jeff Scheetz, Motion Capture Orlando

Creating Steerable Bike Animations

Another standout feature of iClone is its ability to quickly generate large crowds. Using Motion Director, users can steer characters through an environment with a game controller, or create AI-driven animations along predefined pathways.

To make the bike steerable, MCO captured all the bike animations for different turning angles, acceleration, deceleration, and stops. A well-planned dance card was laid out for the performer to use as a moving reference.

With more motion sequences recorded to train the system, Motion+ has enhanced Motion Director, enabling users to dynamically guide bikes, skateboards, and even wheelchairs within scenes. This exciting feature will be available soon for all iClone users.

One-of-a-Kind Motion Pack

Featuring 44 expertly crafted movements that range from basic riding to flatland and vert tricks, “BMX” is a must-have addition to any mocap collection. Its seamless motion transitions make fluid animation sequences possible, from mounting the bike and riding forward to performing stunts and dismounting. This pack also includes matching BMX bikes with adjustable height, six material variations, and a 1:1 ramp model for breathtaking high-flying jumps.

Visit ActorCore 3D motion store today to experience the power of “BMX”.  

Related posts

What Can Be Done in One Evening

An Overview of Creating a Christmas Short

In my almost twenty years of using iClone and other Reallusion products, I have seen the software move from a market niche to a complete animation package supporting most industry tools and developing a cost-effective method of producing animation. The same holds true for Cartoon Animator, its 2D cousin, which is a major player in its own right.

To demonstrate this ability to deploy animations in an afternoon or evening I tackled a short Christmas themed, toy shop animation with lots of animated characters including some “wooden” toys without arms and legs but they still danced to the Suno generated Christmas song, A Season in our Hearts as the driving force of the animation.

Below is the short holiday video:

Gathering the Assets

One of my first tasks was jumping over into Daz Studio which I use as an in and out tool for my older Daz assets. I converted the Christmas Carol toy store to an FBX file and dumped it into the iClone workspace. I dropped the whole store complete with toys, trees and other Christmas objects and let iClone separate all the meshes into individual pieces after it asked if I wanted to do so.

The Assets Used in the Project

This feature alone saves a lot of time as it provides a store full of toys and other assets as separate items that I can then manipulate to my needs, including skinning some of the toys for animation using drag and drop motions.

Generating and Rigging the Main Characters

Before I went to Meshy.ai I stopped by Midjourney and used the prompt:

A full-body, forward facing 3D Toon Santa in a T-Pose with arms stretched out to the sides set against a solid white background.

I used the same prompt for the elves after substituting the words Male Elf or Female Elf for Santa. This provides some continuity of poses for AccuRIG to work with.

Midjourney Images used for Mesh Generation at Meshy AI

For some reason I cannot seem to get any consistency at Midjourney to get the hands palms-down for better rigging. It only happens ever so often and as you can see from the final mesh the female elf was fine except for some weirdness in the cap; Santa had an extra finger on top of the hand while the male elf didn’t need any alterations.

GoZ to the Rescue

I used ZBrush to remove the extra fingers and smooth out some of the strange lines on the female elf cap taking just a few minutes. The built-in GoZ feature made the transfers from Character Creator 4 to ZBrush and back effortless. No need for exporting and importing as integration with ZBrush runs deep.

The “Generated from Image” Main Characters

The images provided a great starting point for Meshy to create the above meshes in as close to a T-Pose as I could get. You can also use A-Poses in the prompts. AccuRIG quickly turned the meshes into animatable characters.

If I have problems with deformed hands, I usually just rig a 2 fingered hand if regular motion is not required. This hand rig will still open and close the entire hand but is not for use in closeups. If I’m on a tight time constraint I rarely take time to rig all the fingers unless necessary.

This gets the main characters and most of the toy shop out of the way. Now I only have some odds and ends to gather up as I work. For an example I added a cat curled up on a cushion near the “other” Santa at the very end of the production along with a wood burning stove. These were last-minute additions that were not planned but added for atmosphere.

Suburbs In Winter

I needed a street scene outside the toy shop windows for filler. Proving that Reallusion assets stand the test of time, this pack is an oldie but a goodie loaded with winter-based assets. What I was after was the Shopping Street prop that is one side of a snow-covered store filled street with glow-based lighting on certain decorations. Being a single prop, this immediately gave the scene the filler it needed.

Shopping Street Prop from Suburbs in Winter Pack

Now that it’s no longer a black void outside the toy shop windows we need activity. Not a lot as the camera won’t show the street in great detail, but enough to give us a little movement.  

Crowd Generator – Winter Crowd Set

This is where the Crowd Generator really saves production time as it makes quick work of filling the other side of the street with animated people.  The Winter Crowd set was a perfect fit for the task and after locating some idle motions I had a 20-person crowd created and animated in less than a few minutes.

Crowd Pack used for Quick Winter Crowd Generation

You won’t see much of the crowd in the final shot, but it is there in case I change my mind and want to use the crowd for more detail. Making a 5-person crowd versus a 20 crowd takes about the same time and I had the computational overhead to handle an even larger crowd, why not?

The basics of the scene are coming together quickly and I’m ready to add the music and start animating.

The Other Santa

For this character I used my own Santa from the marketplace without the cap and big coat sitting on a very nice rocking chair generated by Meshy. This character will be seen indirectly, lounging by the fire, as the camera moves around the toy shop interior. The inference will be that it is Santa.

The Soundtrack – A Season in our Hearts

I was very lucky with Suno AI as it generated a great original Christmas song on its first try and was in fact the first song generated out of the initial pair. Sometimes I’ll drag and drop the song onto a prop, but I have to remember which prop, and this is going to be a somewhat busy scene.

I dragged in a box and set it as a dummy in the modify panel as the song container. A simple drag and drop associated the song with the dummy. All I had to do was look for the dummy in the scene manager to see if I wanted to change something about it.

Now I could have some fun… animate the characters!

Dancing Santa and Elves

That’s right… this is a music video, a genre that defined iClone in its early years and is an easy way to make a holiday video for family, friends and the internet. A music video is a fun, quick and easy vehicle for new animators to get some experience.

Another reason music videos are great for beginners is the fact that the script can be loose or no script at all and still end up with a great end product. We don’t have to adhere to a certain kind of dance or movement. We just need dancing. It couldn’t get much simpler.

I choose sequential routines from the Street Dancing Popping pack for Santa and two different routines from the Girl Dance pack for the male and female elves so they could groove alongside Santa without stealing the show. I looped these motions to the end of the timeline.

Work or Preview Cameras

In the end we will only be using a single animated camera run but that doesn’t mean that it is the only camera in the scene. I relied heavily on the Preview camera, and we can add any number of cameras we need to be able to view the scene properly for animating from different angles. This is entirely up to you as to how many work cameras you use.

Animate Everything

Need to animate something with no arms or legs? Use AccuRIG for the skinning with its bone masking feature to mask out the bones for missing arms and legs so they won’t look strange when dumping a motion on them.

When I say “animate everything” that is close to what happened.  I dropped the motions on the main characters and timed it to the music. It was easy and went smoothly. Then I noticed the toy shop had some rows of wooden soldiers on the shelves in the camera shot. Wouldn’t it be nice if they danced too? In unison, of course, to make it even easier. Unison means animate one character then copy and paste however many characters you need.

To make them dance I had to rig them, and it was so easy in Character Creator 4 AccuRIG that it should be illegal. The Prop Puppet would have worked too but I just wanted to drag and drop motions to save time.

Wooden Toy Soldiers, Teddy Bears and Trees

I sent the toy soldier over to Character Creator 4 and AccuRIG took care of the hard work while I masked out the missing arm and leg bones so the motion wouldn’t have too much deformation on playback. Again… quick and easy in and out. A matter of minutes.

The Simple Rigging using AccuRIG. Notice the black bones, they are masked out and will not move to limit deformation.

This was starting to come together when I noticed the lifeless Teddy Bears! Now those have to be animated so into CC4 they went. I again masked out the arms and legs and then sent it back into the scene with no importing or exporting… just clicking a mouse.

Teddy Bear Rigged with AccuRIG with Arms and Legs Masked Out So Only the Torso and Head Move

Before you know it, I was linking animated Teddy Bears to rockers, then twirling drums and spinning Christmas trees. None of them were difficult. Now we have action in the scene. Once the main characters start doing their thing all of the other toys join the party, and they rock on to the music.

The Other Santa… Again

I’m ready to sit the Other Santa in the rocking chair, link it to the chair then start the chair rocking back and forth between a couple of keyframes. I can copy and past those keyframes all the way to the end of the timeline. Since Santa is linked to the chair and is only seen on passing, we don’t have to animate him. That much is usually implied in the viewers mind regardless of whether it actually animated or not.

The “other Santa” that is placed near the end of the room for the camera to show last.

Animating a Single Camera

While making the camera run, I have to admit that I didn’t have much planned on what the camera track would be, so I did what I usually do when there is no tight script… I winged it. I knew what I wanted to highlight so that was the major decision maker on where the camera moved to.

Also, with a single cam you can use transition curves such as “ease in – ease out” to smooth the movement or change speeds going in and out.  The camera switch with multiple cameras would certainly work here too but it doesn’t have the curve transitions.

Time Frame to Completion

About 6 hours in one late afternoon to evening. No, that is not a mistake or a misprint. Not 600 hours, not even 60 hours but around 6 hours including gathering up all the assets and motions needed. Including AI-generated assets, standard assets and the Suno generated song which conveniently avoids copyright issues.

One Scene – One Project

Another thing about this video is that it is all in one project file. One scene. Generally, this would’ve been chopped up into several projects and pieced together in a video editor but iClone handled all of it, including the sound. Now this doesn’t mean you won’t want to drop the final render into your favorite editor for post work and tweaking, but it does show what iClone can do without an external editor.

Snags

None! I didn’t have to backtrack or alter course because something didn’t work. I’m having a hard time believing it was this easy. While this was a simple video in concept there were no hiccups that made me waste time or get frustrated. Nothing made me alter my plans for the final product. In fact, it all went so well I was able to add a few things and make a few tweaks.

Summary

So, what is my point here? Demonstrating how easy, fast and cost-effective Reallusion products like iClone, Character Creator 4 and Cartoon Animator are. From big productions to mom-and-pop operations or even one person with a passion that few understand, Reallusion products are cost-effective, powerful, easy to use.

Another reason this was a quick project is due to the use of beginner’s level animation that anyone can do. No edited or cut up motions just dragged and dropped or motion puppet.

It wasn’t that long ago that the reality of going from an “idea” to “video” in one afternoon or evening would have gotten you laughed out the door. Now we just get iClone, CC4 or Cartoon Animator and start animating.

The turnaround time for a previz or simple animation has been significantly reduced and with more polish that previz can turn into production footage. The bottom has fallen out of the cost per second of animation when using tools like iClone, Character Creator 4 and Cartoon Animator.

Get your free trial today!

MD McCallum - WarLord

MD McCallum – WarLord

Digital Artist MD “Mike” McCallum, aka WarLord, is a longtime iClone user. Having authored free tutorials for iClone in its early years and selected to write the iClone Beginners Guide from Packt Publishing in 2011, he was fortunate enough to meet and exchange tricks and tips with users from all over the world and loves to share this information with other users. He has authored hundreds of articles on iClone and digital art in general while reviewing some of the most popular software and hardware in the world. He has been published in many of the leading 3D online and print magazines while staying true to his biggest passion, 3D animation. For more information click here.

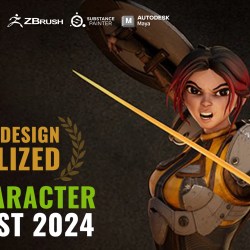
Winner Select: Making Photo-realistic Fashion Models with Character Creator and Blender

Robert Lundqvist, a self-taught 3D hobbyist, has secured first place in the “Best Animation – Realistic” category of the 2024 Reallusion 3D Character Contest. His success can be attributed to his expert use of Character Creator to design photo-realistic characters, paired with captivating animations in iClone and lifelike renders produced in Blender. As Robert explains, “If you don’t want to wait for some magic AI tool to do all the work for you or spend time pushing 2,048 buttons in Unreal Engine, I believe using the Reallusion suite and Blender is the easiest and fastest way to create characters today.”

Robert Lundqvist

While working full-time as a sales assistant, Robert spends much of his free time mastering 3D software like Blender, 3ds Max, and Maya. Despite having 15 years of digital art experience, his introduction to Reallusion tools came just a few years ago. Their user-friendly design quickly streamlined his workflow and opened a world of creative possibilities.

Check out Robert’s Artstation

Concepting photo-realistic Lisa & Fia

Robert’s creative process for Lisa & Fia was inspired by music. He began by searching for an audio track that would set the right tone for his project. After hours of listening, he discovered a French song that perfectly captured the mood he was after. “When I heard that song, I immediately knew it was the one,” he recalls. With the music in place, he crafted the visual narrative and atmosphere to complement it.

Starting Out with Headshot

Robert used Headshot 2.0 in Character Creator to transform a raw scan model into a functional base mesh. He applied Texturing XYZ V-Face textures to wrap both the albedo and normal maps onto the model.

Use Headshot 2.0

To maintain uniformity, he skipped the refinement step during wrapping, opting to sculpt finer details later in Blender. This seamless integration of tools enabled him to create a clean and realistic foundation for his characters.

Refine details in Blender

Benefits of iClone & Character Creator

Robert crafted facial expressions in Character Creator and polished the animations in iClone. Leveraging the ActorCore mocap library, he streamlined the animation process, avoiding the need to start from scratch. iClone’s tools further enabled him to refine movements, resolving issues like hand clipping and ensuring smooth cloth simulations.

Robert crafted facial expressions in Character Creator

“The animation library and real-time editing features were transformative”, Robert explains. The blend of mocap and CC’s facial puppet tools allowed him to achieve expressive, natural performances with ease.

Cloth Creation with Marvelous Designer

For the clothing, Robert used Marvelous Designer to fit garments onto an exported OBJ mesh of his character. By setting the particle distance between 3 and 5, he was able to achieve realistic wrinkles and fabric folds. Having run several simulations with triangulated meshes and ensured proper UV layouts, Robert then exported the final garments as Alembic files for smooth integration into Blender.

Cycles Render in Blender

The final steps of Lisa & Fia took shape in Blender, where Robert utilized the Cycles render engine. He chose a 35mm lens positioned 50cm from the characters’ faces, creating a cinematic depth that accentuated their intricate details.

Despite facing hardware limitations and occasional Blender crashes, Robert persevered, ultimately delivering a breathtaking photo-realistic final render that showcased both his resilience and technical mastery.

Final Thoughts

Robert’s meticulous approach to Lisa & Fia demonstrates how the seamless integration of tools like Character Creator, iClone, Marvelous Designer, and Blender can elevate 3D character creation and animation. His skill in combining multiple platforms and adapting to challenges underscores the importance of planning and persistence in achieving artistic mastery.

For aspiring artists, Robert’s workflow provides invaluable insights into crafting hyper-realistic animations without sacrificing efficiency. His success comes from the synergy of a well-planned creative vision and practical application of advanced tools.

Related Posts

Click through to learn more about the winners’ portfolios and judge comments
Film director Loïc Bramoullé, shares his tips on winning the 2024 Reallusion 3D Character Contest.

Winner Select: Placing First in Stylized Animation with Face Tools and Blender Pipeline

Loic Bramoulle

Hi, I’m Loïc Bramoullé, an art & film director from France. I’ve been working in game and animation studios in Paris since completing our graduation film at Melies School in 2010. Since 2015 I’ve been working mostly remotely as a freelancer, and in the last 3 years, I’ve been specializing in indie motion capture game cinematics with Blender.

Loic Bramoulle’s ArtStation

Since I first tested iPhone facial mocap with CC3-based characters. My latest freelance cinematic gig was for the upcoming Mars Attracts game , which was nearly the most viewed trailer at Gamescom on IGN’s channel.

I used AccuRIG for the two first custom characters, CC4 and iClone to mocap the astronaut’s scream with my iPad.

Project HellGal

With HellGal I wanted to see how I could push my mocap cinematic pipeline to be as seamless as possible. Essentially merging mocap recording and film editing, to avoid all the time lost rendering individual shots and only seeing the final film at the last moment. The main thing I used for that is the under-exploited Scene Strips in Blender, allowing you to do non-destructive video editing on 3d scene(s), meaning you can select and time your animations to create shots, without actually cutting your animations.

All my mocap clips were imported on a big 5000 frames timeline, and just like in a video editor I edited my final cut from that, in 3d, without rendering these 5000 frames in any way. The big advantage is that when rendering, only my ~1000 final cut frames were considered, versus having to render a huge amount of frames and discarding them in post-edit.

Character Design – Inspiration and Concepting

Creatively, my goal was to design a female mashup of the DOOM Guy and Hellboy, set against the backdrop of a BLAME!-inspired ancient structure. This concept had been on my mind for years, and this contest provided the perfect excuse to dedicate as much time as I could. For HellGal’s design, I gathered references on Pinterest and began sketching, focusing on close-ups of her face to refine her character. For the environment, I opted for a rapid workflow, imagining it on the spot and kitbashing directly in Blender while iterating on the shots and animation as I went along.

Starting with Character Creator (CC)

I usually start with Kevin or Camilla to already have everything setup, realistic features, and wrinkles, but I just have to symmetrize the mesh in CC4. As they are scanned, it’s not ideal to sculpt an entirely new design with these slight symmetry differences. CC4 mesh editing makes it easy to symmetrize the face, then all design sculpt layers in ZBrush or Blender can be perfectly clean, and asymmetry can still be controlled independently with another sculpt layer.

ZBrush Face Tools for Character Creator is really the go to solution to design not only a character’s face, but its expressions and even wrinkles along with it. And that’s key for convincing facial animation, it’s not just about the motion data and design, but the actual custom expressions that really enhance the performance’s believability, instead of being generic and making the character feel more flat.

I worked on the design in a very iterative way, meaning I started with CC4 morphs to start customizing Camilla, then did most of it via FaceTools. Which allowed me to seamlessly preview her design and facial expressivity back in CC4. But I’ve also kept doing slight design variations in Blender while I rendered the various iterations of the full animation. So I could still polish her design while seeing her in the final shots, with the final lighting and cameras.

Wrinkle editing in Character Creator (CC)

The default Wrinkles packed in CC4 are already perfect in many cases, but I did want to stylize and paint them myself, to match the handcrafted style I was after. So after customizing a bit the sculpt of the wrinkles via FaceTools, and once HellGal was imported in Blender via the pipeline addon, I created a PSD file where I had the 4 albedo texture: the base face color, and the 3 wrinkles color textures.

Each time I painted over the face, I could update and refine the wrinkles simultaneously. By using Photoshop’s “File > Generate > Assets” feature, I enabled real-time saving for any layer ending with an extension (e.g., Layer_01.jpg). This meant I didn’t need to manually save textures—just open the PSD, paint, and let them auto-reload in Blender using the Auto-Reload addon. So I can essentially watch the final film, while seamlessly painting textures, her face and wrinkles for example.

Adding wrinkles

3DCoat for Body Sculpt

I love 3DCoat for its ease of use compared to ZBrush, offering an intuitive workflow that feels almost as natural as working in virtual reality. Starting with voxels allows you to shape designs without constant remeshing, and the space mouse navigation is flawlessly implemented. Adjusting brush size and intensity is seamless, unlike ZBrush, where you need to open menus for similar tasks. While 3DCoat may not match ZBrush in terms of professional, production-level refinement, it excels as a creative tool, akin to a “3D Photoshop”. It also provides full asset production capabilities, including retopology, UV mapping, baking, and surfacing tools. Performance-wise, it holds its own, enabling real-time sculpting on models with tens of millions of polygons.

I essentially just used basic tools to sculpt the whole body and horns, move, clay, a few alphas, and had a “sketchy” approach, where I just made the armor like if I was drawing it on paper, or in clay. Professional character artists use extremely more complex methods in Zbursh, relying on an array of tools, blocking out forms, retopologizing, sculpting with carefully picked alphas. Here I just wanted to be expressive and design all the details directly by sculpting, in one single step pretty much. For the surfacing I decided to use Substance Painter instead of staying in 3DCoat, to get higher details and more pre-made materials, also as a challenge to use UDIMs to have very high fidelity while still dealing with only one single material and texture set.

Animation: VR with Mocap Fusion & iClone

After extensive research into the pros and cons of various motion capture solutions, VR mocap stood out as the most intriguing option. It’s an underexplored approach, not tied to a single product but a mix of potential setups—some outdated, others entirely untested. Despite its complexity, the appeal lies in its optical tracking capability, offering millimeter-accurate motion rather than the approximations of inertial suits. For instance, when properly configured, raw foot motion can be flawless, keeping feet grounded even on uneven surfaces. In contrast, inertial suits rely heavily on post-processing to generate such data since accelerometers lack positional awareness in 3D space.

Another significant advantage is its cost-effectiveness. For under $1,000, a setup with three Vive trackers and a Quest 2 can provide full-body tracking, including basic finger tracking. The system can then be expanded with additional trackers for elbows, knees, and other joints. Mocap Fusion (available on Steam) further enhances this setup by interpolating shoulder and elbow motion effectively, minimizing the typical IK snapping seen in character animations.

After months of research, I settled on a setup using Mocap Fusion with three Vive Tracker 3.0 units (for feet and hips), two Vive Base Station 2.0 units, and a Meta Quest Pro with controllers for hand tracking. To bring my virtual environment into the process, I imported a blockout of my 3D scene into Mocap Fusion, complete with collision data. This allowed me to act out scenes in my living room while interacting with the actual 3D geometry from my Blender environment. Best of all, I could embody HellGal’s character in real-time, seeing the final results at full scale as soon as the recording ended.

Animation editing in iClone

I exported the mocap takes as FBX files and imported them into iClone, where I had also loaded my environment blockout. This allowed me to select specific takes, refine their placement within the scene, and perform initial mocap cleanup using the Edit Motion Layer tool. The eye mocap, recorded along with the body in Mocap Fusion, was complemented by facial animation and dialogue captured in iClone using Live Face.

To finalize the workflow, I combined everything in Blender. This approach let me independently adjust the timing of body motion, facial animation, and audio while simultaneously refining the edit. By working this way, I could fine-tune shots, dialogue, and actions independently, ensuring they aligned seamlessly during the editing process.

Here are some iClone features I found particularly useful. Motion Direction Control helped accurately position mocap clips in space, while Motion Correction proved invaluable for fixing sliding feet and refining the character’s pose during foot contacts. This ensured a more polished and grounded animation.

One standout feature I utilized more extensively this time was AccuLips. It generates phoneme-based animations directly from dialogue audio and script, storing them in dedicated phoneme morphs or shapekeys. After fine-tuning these settings in iClone for a natural look, the entire AccuLips layer can be exported and edited further in Blender. In Blender’s graph editor, these phoneme animations remain separate from facial mocap shapekeys, allowing adjustments like smoothing or amplifying specific phonemes. This separation was especially helpful for achieving a more natural lip sync, particularly with tricky sounds like “B” and “P,” which iPhone-based mocap doesn’t always handle perfectly.

Blender Pipeline

I added all my animation exports from Mocap Fusion and iClone as strips in the NLA Editor, both for body and facial animations. This setup allowed me to edit each take individually and choose the best segments when actions were repeated during mocap. To refine shot composition and camera animation, I used camera markers, iterating directly within the scene. Between shots, I left ample empty space on the timeline and imported the 3D scene as a clip in the Video Sequence Editor (VSE) within a second scene in the same Blender file.

This approach enabled me to cut the timeline and retain only the portions of each shot I wanted, while simultaneously playing back the final cut. It also allowed iterative refinement across all aspects of the project—animation, cinematography, lighting, and editing—within a single file.

By integrating the entire pipeline into one workspace, I streamlined the process, avoiding the fragmentation and inefficiencies of traditional workflows. Instead of producing individual shots and combining them later based on a storyboard or animatic, this method felt more cohesive, like polishing a single, unified object. From character creation in CC4, mocap editing in iClone 8, to crafting cinematography and the final edit in Blender, the process became far more fluid and efficient. Here some really powerful addons I have tested for this project:

  • HairTool: Easy to learn, with a robust library to kickstart any hairy or furry needs. Fully compatible with CC4.
  • Wobbly Wiggler: Perfect for adding physics-based dynamics. Unlike most tools, it allows simulation not just for tails or ears but also for body bones like the spine, arms, and even fingers—enabling simultaneous animation and simulation.
  • Octa Render: Soon out of beta, Octa Render has been a lifesaver for several projects. With rendering costs reduced by 60x compared to traditional methods, it makes high-quality animation both affordable and competitive with Unreal. Its simplicity is unmatched—a true one-click solution.

My Experience with Blender AutoSetup

The new AutoSetup significantly streamlines the process of sending characters and their animations into a Blender file with a single click. Compared to version 1, which required updates from GitHub, the new dedicated panel and button make the workflow far more intuitive and efficient. I plan to explore further how this setup supports seamless back-and-forth adjustments between CC4 and Blender, allowing for sculpting and customization of character proportions using Blender’s modeling and sculpting tools. This offers a strong alternative to relying solely on ZBrush with GoZ for detailed character modifications.

Here is a really good tutorial on using Blender as an alternative to Zbrush for customizing a character’s design and expression, and one-click synching back to CC4 with GoZ: https://www.youtube.com/watch?v=mgUTZ4GeItQ

The foundation of the character is built entirely in CC4, including the full facial expression set, the wrinkle system, body proportions, and even the Rigify auto-rig for final adjustments in the camera view. CC4 handles all the heavy technical work, allowing me to concentrate purely on artistic customization to align the character with my design vision.

My Thoughts and Suggestions

CC4 truly excels when users not only master its automated features to create characters that closely match their vision but also add a final layer of personal, handcrafted design. This could involve sculpting details in ZBrush or Blender and authoring textures in Photoshop or Substance, giving the character a unique and traditional touch. By developing a custom pipeline that integrates Reallusion tools into your workflow, you can fully own the creative process.

The seamless one-click integration of CC4/iC8 with industry-standard rendering apps like Unreal Engine, Unity, Blender, and Cinema 4D elevates it as a serious production tool. It eliminates countless tedious production steps, offering artists a significant technical advantage and streamlining the workflow.

Related Posts

Click through to learn more about the winners’ portfolios and judge comments

Winner Select: Revolutionizing Miniature Model Creation with AccuRIG

As a seasoned miniature model maker, David specializes in crafting intricate characters for tabletop games like Dungeons & Dragons. His submission, “Fairy Ranger”, earned him recognition in the 2024 Reallusion 3D Contest for Best AccuRIG Characters. By combining meticulous detail with the innovative use of Reallusion’s tools AccuRIG, David creates dynamic, poseable models that captivate a loyal following of wargamers and miniature collectors.

Miniature Model Creator – David (Atlanticus)

David’s journey into 3D artistry began after years of working in visual effects for film and TV. Inspired by his passion for tabletop gaming, he transitioned to designing 3D printable miniatures, blending his fine art background with digital sculpting techniques. “I create characters for board games and painters, with sizes ranging from 32mm to 75mm, focusing on dynamic poses and intricate details”, he shares.

Check David’s Artstation

Increasing Efficiency

The introduction of Reallusion’s tools, particularly Character Creator AccuRIG and ActorCore, transformed David’s workflow. This efficiency has enabled him to produce a new character every month for his growing subscriber base.

“Previously, posing in ZBrush would take hours, tweaking every joint and finger manually. With AccuRig, I can rig a character in just 5–10 minutes, load animations, and create multiple poses in under an hour.”

David (Atlanticus) – Model Creator

David learned about the 3D contest through Reallusion’s newsletter and saw it as an opportunity to push his skills. “The contest requirements aligned perfectly with what I was doing—creating dynamic poses and expressions”, he remarks.

Leveraging Reallusion’s tools, he brought Fairy Ranger to life with expressive facial animations and four unique poses.

The Business of Miniatures

David runs a subscription-based business on Patreon where enthusiasts can access his monthly character packs for as little as $5. Each pack includes five poses and weapon options, catering to both gamers and collectors. Despite the competitive nature of the miniature market, David’s unique designs and efficient workflow make him stand out.

Looking Ahead

David plans to expand his repertoire by exploring creature creation, a challenge he finds both exciting and rewarding. He continues to refine his techniques through professional courses and the integration of Reallusion tools, aiming to scale his business by collaborating with freelance artists to produce even more intricate models.

David’s innovative approach to miniature creation demonstrates how Reallusion’s tools can empower artists to achieve professional results with remarkable efficiency. His journey serves as an inspiration for creators looking to blend traditional artistry with empowering technology in their workflows.

Related Posts

Click through to learn more about the winners’ portfolios and judge comments
3D artist Kay John Yim shares his tips and tricks of his winning entry - The Playful Deity from the 2024 Reallusion 3D Character Contest.

Winner Select: A Modern Twist on Inari Folk Dance | Houdini, iClone & Character Creator

Kay John Yim porfile pic

Kay John Yim

I have long dreamed of creating an animated personal project based on a Japanese deity. As I am deeply inspired by Japanese culture, particularly its traditional attire and mythological lore. Inari Okami, beyond being the deity of prosperity and agriculture, is wrapped in numerous legends and mysteries. This rich variety of lore makes her personality, behavior, and appearance particularly open to artistic interpretation and design.

Three years ago, when I first began learning Character Creator 3, I attempted to create a version of Inari Okami. At that time, my skills and knowledge were limited, preventing me from fully realizing my vision. I took this contest as an opportunity to revisit the character from scratch. This allows me to gauge how far I have progressed in CG character creation.

Kay John Yim’s ArtStation

Starting with Character Creator (CC)

The entire project spanned approximately two months, with the customization of the CC base character taking only a day. It’s a relatively quick process compared to the project’s overall timeline, made possible by Character Creator 4’s morph sliders.

A valuable tip I discovered is that you can input values that exceed the morph slider’s default range. This revelation effectively removed many limitations I had previously encountered in the creation process!

Character Creation: Inari Okami

Traditional Japanese attire follows precise rules governing design, wearing methods, and hairstyles, which would have required extensive research to recreate. Therefore, I chose to create a modern interpretation of the deity (kimono, 3d hairstyle and movements) while preserving key traditional Japanese elements (kimono fabric pattern).

I designed her hairstyle, eye contact, and expressions to convey a playful personality, offering a contemporary twist on the traditional deity’s representation.

Lookdev

Animation Posing in iClone

I began by selecting an appropriate rhythm featuring Taiko drums. Then, I chose complementary ActorCore motions that fit with both the beat of the music and the deity’s personality. To achieve the aesthetic of a filmed dance performance, I established a fixed camera position early in the process. I also focused my editing efforts solely on elements visible within this frame.

Character animation editing in iClone

Additionally, I utilized iClone’s “Look At Camera” function to maintain consistent eye contact between the deity and the audience. This creates a more engaging experience. I primarily used the “Edit Motion Layer” function, manually creating keyframes to seamlessly blend one movement into the next. So I can transition between multiple Actorcore Motions.

Clothing in Marvelous Designer & Houdini

The final aesthetic required approximately 3-4 weeks of iterative refinement. In my experience and workflow, I have found that garments that look decent in the Marvelous Designer viewport do not always translate to final renders, particularly when animating complex garments like kimonos. To address this challenge, I developed a mini “pipeline” connecting Marvelous Designer, iClone, and Houdini.

Garments exported from Marvelous Designer would automatically conform to four different character poses in Houdini. I then rendered these variations using Redshift to evaluate multiple aspects of the design: its fit on the character, behavior under various lighting conditions, and material properties. This procedural approach enabled me to comprehensively assess each design iteration before committing to a final design for cloth simulation.

Marvelous Designer: making the kimono

Although it can be tempting to use low particle distances to high fidelity garments in Marvelous Designer, I recommend maintaining a higher particle distance to optimize performance. The priority should be establishing a strong silhouette while keeping the garment’s mesh as lightweight as possible. When working with cloth simulation specifically, efficiency is best achieved by perfecting the base simulation before adding realistic details such as cloth thickness, buttons, and stitches. This approach streamlines the workflow and allows for better control over the final result (I personally recommend cloth simulations in Houdini as it is a lot more controllable; MD can be unpredictable and frustrating when it comes to cloth simulation).

I converted all garments to quad meshes and maintained a particle distance of 10 or higher before exporting them to Houdini for Vellum cloth simulation. The simulation took over 40 iterations before achieving satisfactory results. Many of my early attempts failed due to fabric catching in the character’s armpits or fingers. This led to an iterative workflow where I would export the problematic simulated cloth as Alembic files into iClone, using them as reference points to edit the character animation and resolve these collision issues.

Testing the cloth

Render Composition in Houdini

One of the primary yet subtle effects throughout the animation was the ground-level fog, which emulated the atmospheric haze commonly used in stage productions to enhance drama and mystique. I created this effect in Embergen, importing the character animations as Alembic files to serve as collision objects interacting with the fog. This added both depth and a layer of secondary movement that complemented the character animations.

VFX fog in Houdini

Another primary effect appears towards the end of the animation: a shockwave + fire spread on the Kimono created by combining an Embergen simulation with cloth PyroFX simulated in Houdini. While Houdini excels at complex object interactions and offers unparalleled iteration efficiency, Embergen is much quicker for simulating effects that do not require detailed external object interactions.

I simulated the shockwave independently in Embergen, then exported it as both VDBs and particles (Alembic) into Houdini. The cloth PyroFX involved a hybrid approach using both SOP solver and Axiom solver. I used an SOP solver to isolate specific point groups from the kimono sleeves and direct their upward spread. These transitional point groups were then fed into the Axiom Solver to generate the final pyro simulation.

VFX shockwave in Houdini

To optimize rendering efficiency within deadline, I exported each animation frame as Redshift Proxies once the animations were finalized. This significantly reduced iterative and final rendering time while preserving the flexibility to refine materials and lighting. I used Fox Renderfarm to render more than half of the final frames. This further expedite final rendering times and reduces strain on my local workstation.

Working with Character Creator

Although the primary judging criteria was animation, I dedicated half of the project time to character design. During this phase, I concentrated on creating still renders to establish my character’s personality and background before even considering the animation. I believe that investing time in refining the character is ultimately more productive, as it helps inform the movements and expressions needed to create a compelling final animation.

I encourage anyone interested in Character Creator to jump right in. Unlike many other programs (such as Houdini or Blender), which require a certain level of familiarity with the interface before you can start using them effectively, Character Creator is highly artist-friendly and requires minimal learning to use well—especially for those with any prior 3D experience.

3D artist Kay John Yim shares his tips and tricks of his winning entry - The Playful Deity from the 2024 Reallusion 3D Character Contest.

Related Posts

Click through to learn more about the winners’ portfolios and judge comments

Angel Alonso’s Dark Explorers Content for Character Creator

Angel Alonso – Character & Environment Designer | Storyboard Artist | Animator | Digital FX Specialist

Angel Alonso: A Mastermind in Animation

Angel Alonso is a distinguished figure in the animation industry, boasting an extensive career spanning over three decades. Since 1990, he has worked in various aspects of production, including character and environment design, storyboarding, 2D/3D animation, and digital effects. Angel has contributed to over 17 feature films and 50 television series, including works for studios like Warner Bros., Disney, and Universal Studios.

His versatility extends to artistic direction and technology development. From traditional animation to experimental shorts, Angel has consistently pushed the boundaries of creative storytelling. Notably, his passion for science fiction has been a recurring theme throughout his career.

“Both Character Creator and iClone are programs in constant evolution. Their development includes regular updates and improvements, making the process of character creation and animation accessible to all levels of user experience. I can confidently say that, over the past few years, there are 3 or 4 indispensable tools in my content creation process, and without a doubt, these two programs are an essential, if not the primary, part of my projects.”

Angel Alonso – Character & Environment Designer | Storyboard Artist | Animator | Digital FX Specialist

The Vision Behind Dark Explorers

Angel Alonso’s latest project, the Dark Explorers content pack for Reallusion’s Character Creator and iClone, reflects his enduring fascination with sci-fi and retro-futuristic aesthetics. The pack is tailored for independent animators seeking high-quality assets for dystopian, horror, or post-apocalyptic narratives.

“I’ve always been captivated by retro-futurism and the themes it encompasses,” Angel shares. “I wanted to create something versatile that animators could use across various genres—from classic post-apocalyptic adventures to eerie dystopian tales.”

Unlike traditional content packs that focus on family-friendly or generic themes, Dark Explorers carves out a unique niche. It diverges from the norm, offering a richly detailed aesthetic inspired by darker, more complex worlds.

“I wanted to break away from the typical family and friend packs that dominate the market. This pack is a step forward—offering more defined anatomies and an array of elements to build immersive environments.”

“Science fiction inspires me because it allows for endless possibilities. It’s a canvas where imagination knows no limits, blending reality with the unknown.”

Angel Alonso – Character & Environment Designer | Storyboard Artist | Animator | Digital FX Specialist

Key Features of the Dark Explorers Content Pack

The Dark Explorers pack stands out for its artistic depth and versatility. Key features include:

  • Highly Detailed Models: From intricately designed character outfits to atmospheric props, the pack ensures a high level of realism.
  • Retro-Futuristic Aesthetics: Drawing from classic sci-fi inspirations, it blends vintage design elements with futuristic motifs.
  • Dystopian and Horror Themes: Ideal for dark, gritty animations, it supports stories ranging from eerie to action-packed.
  • Customizable Elements: Animators can mix and match assets to craft unique characters and settings.
  • 2.0-Level Quality: Angel describes this as “a more refined, second-generation approach,” ensuring polished models and textures.

“This isn’t just another content pack,” Angel notes. “It’s a toolkit for creators to construct entire worlds, allowing their imaginations to run wild.”

Angel’s Workflow: Crafting Dark Explorers

Angel’s creation process for Dark Explorers reflects his meticulous attention to detail and mastery of 3D tools.

  1. Conceptualization
    Angel began with a clear vision rooted in retro-futurism and sci-fi lore. “I sketched ideas that balanced utility with artistry—elements that would evoke curiosity and wonder,” he says.
  2. Modeling and Texturing
    Using tools like Character Creator and iClone, Angel sculpted characters and props with lifelike textures and intricate geometries. He emphasized defined anatomies and detailed finishing touches, elevating the assets above conventional packs.
  3. Experimentation with Styles
    While developing Dark Explorers, Angel explored alternate approaches, including comic-book-inspired and stop-motion aesthetics. These experiments, he reveals, are “ongoing tests for future projects, aiming for a painted or puppet-like visual style.”
  4. Optimization for Versatility
    Angel ensured that the pack’s elements could seamlessly integrate into various animation workflows. Each asset underwent rigorous testing to guarantee compatibility and user-friendliness.

“Since I discovered Character Creator, my approach to creating characters changed radically. It seamlessly integrated into my creative process, offering great versatility with its powerful tools. Overnight, I realized that incorporating it into my workflow not only sped up production but also significantly enhanced the control and quality of my characters.”

Angel Alonso – Character & Environment Designer | Storyboard Artist | Animator | Digital FX Specialist

Future Prospects and Experimentation

Beyond Dark Explorers, Angel is already venturing into new territories. His current experiments involve simplified designs reminiscent of children’s books, comic art, and stop-motion animation. These projects aim to deliver a more illustrative aesthetic, achieved through innovative techniques.

“For now, these are just trials,” Angel reveals. “But I’m excited about the potential. It’s about expanding my creative toolkit and offering animators fresh, unconventional styles.”

Angel Alonso’s Dark Explorers content pack is more than a collection of assets—it’s a reflection of his decades-long expertise and passion for storytelling. By combining retro-futuristic themes with meticulous craftsmanship, the pack provides animators with powerful tools to bring their visions to life.

Whether you’re crafting a dystopian saga or a post-apocalyptic thriller, Dark Explorers is a gateway to richer, more immersive narratives. As Angel puts it, “This pack is my contribution to a community that thrives on creativity and innovation. I can’t wait to see the worlds animators build with it.”

Explore the Unknown with the Dark Explorers Content Pack

Unleash your imagination with the Dark Explorers content pack, a meticulously designed collection blending realistic stylized visuals with detailed anatomy and stunning finishes. Perfect for creators seeking adventure-driven narratives, this pack introduces a group of fearless investigators on a mission to uncover dark events and strange phenomena.

Discover Angel Alonso’s realistic comic style characters in his Featured Content Developer store at Reallusion:

https://www.reallusion.com/contentstore/FeaturedDeveloper/profile/#!/Angel-Alonso/iClone

Follow Angel Alonso

Artstation:
https://www.artstation.com/angelitoon

Deviantart:
https://www.deviantart.com/angelitoon

Instagram:
https://www.instagram.com/angelitoonxd

Facebook:
https://www.facebook.com/angel.alonso.94849

YouTube:
https://www.youtube.com/@angelalonso3266

Related Posts

Michael Corr of Solis Animation offers insights into the making of Rare Americans' The Machine music video, detailing how tools like Character Creator, iClone, and Unreal Engine 5 helped bring this unique small-team production to life.

Rare Americans Debuts “The Machine” Music Video | Character Creator, iClone & Unreal LiveLink

Michael Corr of Solis Animation offers insights into the making of Rare Americans’ The Machine music video, detailing how tools like Character Creator, iClone, and Unreal Engine 5 helped bring this unique small-team production to life.

Michael Corr of Solis Animation

Hi, I’m Michael Corr, a tech artist at Solis Animation in Toronto, Ontario, Canada. For over seven years, I’ve had the privilege of creating incredible worlds with a talented crew whose creativity has pushed me further than I could have ever imagined in the animation industry. Here’s a brief overview of my journey and the amazing people I’ve worked with:

Solis Animation, founded in 2010 by siblings Lou and Les Solis, specializes in 2D “tradigital” animation. Over the years, they’ve worked on notable projects like Comedy Central’s Ugly Americans and Moonbeam City, as well as Gord Downie’s The Secret Path for CBC. I was fortunate enough to join the team during the production of Gary and His Demons, where I was tasked with creating 3D environments and background art for its first season. One of our major successes was achieving a unique aesthetic by blending lush 3D backgrounds with dynamic 2D animation. This accomplishment led to me becoming a more integral part of the team, contributing to many rewarding projects over the years.

A key highlight of my early career was my background work on the music video for Brittle Bones Nicky, by Vancouver-based band Rare Americans. The video has since garnered over 90 million views on YouTube, marking a significant milestone for me and the team. Additionally, I’ve had the opportunity to help develop and refine a production pipeline using Unreal Engine, which has evolved from UE4 to the current version, UE5. Working alongside the talented team at Solis Animation has been an incredibly rewarding experience, and I look forward to many more years of creative collaboration.

In 2021, Solis Animation and Rare Americans co-founded Crooked City Studios, an animation production studio focused on the art of storytelling with animation and music. This partnership led to even more detailed and innovative content, all of which has been a very rewarding experience that I’m quite proud to be a part of.

Using Character Creator

Let’s go over the making of the animated segments in The Machine, a music video by Rare Americans, which utilized Reallusion’s software paired with Unreal Engine 5.

The concept for the music video was created by the band. The protagonist would escape his mundane life by logging into virtual reality to join his friends in lavish affluence. We were responsible for handling the VR segments, which we were going to achieve with animation. The Director, Lou Solis, worked closely with the band to flesh out the concept and determine what was needed for the animated segments. Lou created animatics (timed storyboards) for each animated scene. Once these animatics were approved by the band, Lou and I reviewed each segment to determine the best approach to achieve the right aesthetic for this virtual reality world within the parameters of our budget and schedule.

Meet the lead characters Demaris, Mugasha and Hank

Three main environments were needed: a club, a stadium basketball court, and a Miami-like freeway. Four main characters along with some crowds and secondary characters were also required. The four main characters were based on real-life actors who appear in the live-action segments of the music video. To work within our tight turn-around time, I suggested using iClone 8 and Character Creator 4 and rendering finals in Unreal Engine 5 to then be sent off to our compositing team. We had already been exploring with Reallusion’s software for the pre-viz and development of a short film, so we decided to put in practice these tools to create The Machine.

I was provided with photo references for each of the main characters along with outfit references. To help the viewer quickly associate each actor with their VR counterpart, it was decided to distinguish each character by the main color of their attire: one in pink, one in yellow, and one in green.

First, I needed a few stylized template characters because many characters needed to follow the same kind of look for consistency or visual harmony. Clubs have a lot of people dancing in them, and the stadium requires the most characters. This required using Character Creator 4 to stylize these templates in male and female categories. 

Setting texture map in Character Creator

Motion Editing in iClone

Once all of the character designs were completed and approved by the director and the band, I moved on to iClone 8 to start animating scenes. Lou Solis and I reviewed the animatic (timed storyboard) to determine which Reallusion stock motion capture animations would best fit each scene. Each stock animation would serve as a base template that we ended up modifying and blending back together with relative ease thanks to iClone 8’s timeline features.

iClone 8 offers numerous features designed to speed up workflow. The Edit Motion Layer is user-friendly and it helped me immensely with detailed movement edits. Face Key provides a large amount of expressions to choose from, adding significant character and life to animations. Create Script enables users to type in words that animate the character’s mouth movements automatically. These tools saved me many hours of work while animating.

Editing expressions in iClone

Reallusion’s extensive motion capture library in iClone 8 allowed me to blend quick movements seamlessly. By utilizing idle animations, I ensured that the characters always had some form of movement, eliminating any stiffness. This blend of idle stances with walking loops resulted in more dynamic and interesting animations that went beyond the original motion capture. Additional loops provided by Reallusion included various movements that I could fit into my timeline by cutting the original animations into parts. This flexibility in editing added depth to the characters’ interactions, making them more lifelike.

This blending capability along with the ability to lock the characters’ eyes in the correct directions enhanced the overall animation quality. iClone 8 made it possible to synchronize eye movements with other actions, which made the characters’ performances feel natural. This attention to detail ensured a unified style of animation, bringing all four characters together cohesively. The tools provided by iClone 8 significantly streamlined the animation process, allowing for more creative freedom and efficiency.

Animation Integration: From iClone to Unreal Engine with Unreal Live Link

Since we didn’t capture any behind-the-scenes footage of The Machine at the time, here is an accurate recreation of how this music video was handled and is mainly focused on the use of Reallusion’s software. Hopefully, the following sections will give you an understanding of how it all came together using Character Creator 4, iClone 8 and Unreal Engine 5.3.

Editing in Unreal

When activating the Live Link, I could effortlessly connect iClone with Unreal, enabling me to send characters, cameras and other assets seamlessly between the two programs. This feature eliminated the need for manual transfers, ensuring all elements were properly aligned in both environments.

Scene aligned with Unreal Engine. This made animation editing in iClone simple.

Additionally, the ability to bake all animations to Sequencer and generate Level Sequences directly in Unreal meant that my iClone timeline worked perfectly in Unreal without any additional adjustments. This integration not only improved efficiency but also made the revision process much simpler, allowing me to focus more on creative aspects rather than technical details. Overall, Unreal Live Link was a game changer in my workflow, providing a smooth and efficient way to handle complex animation projects.

The iClone Unreal Live Link plugin significantly streamlines the workflow, allowing creators to seamlessly transfer complex scenes from iClone to Unreal Engine. This integration ensures that all the data is quickly organized and aligned with the Unreal environment, making the process efficient and flawless.

Game changer: iClone Unreal Live Link Plugin

Related Posts

Animating with ActorCore, iClone, Motorica & ElevenLabs AI Tools

Alejandro de Pasquale – Motion Graphic Artist / 3D Animator / Filmmaker / Content Creator

Alejandro de Pasquale

Since the age of 9, Alejandro de Pasquale embarked on a creative journey, crafting his first rudimentary comics and discovering his fervent passion for storytelling. With each passing year, Alejandro honed his creativity, delving into diverse tools and skills to encapsulate narratives across a spectrum of challenges.

From scripting movies to producing motion graphics for various enterprises, Alejandro explored the avenues of storytelling, eventually finding his true calling in breathing life into characters and immersive 3D worlds. It was through the transformative power of software like iClone and Character Creator (CC) that Alejandro delved into the world of 3D animation, discovering new dimensions to his storytelling prowess.

In this animation, and in just five days, Alejandro crafted a compelling animation using ActorCore fight sequences, Motorica motion assets, and iClone’s AccuLips for facial animation. Paired with AI voices and sound effects from ElevenLabs, his project showcases how leveraging diverse tools enables the creation of high-quality animations under tight deadlines.

Wound Film

In discussions with the Motorica team, Alejandro decided to pursue animations evoking a classic test feel. Subsequently, he opted to utilize one of their animation options featuring an injured person navigating an escape route within a scenario sourced from the Unreal Marketplace. However, his ambition extended beyond this initial concept.

Once again, Alejandro aimed to accomplish everything within a tight timeframe of five days, leveraging available resources. For animations, he utilized the following:

  1. ActorCore: Only requiring one fight sequence, he chose to purchase a couple of assets from an ActorCore online library. This flexibility is one of the advantages offered by ActorCore, allowing users to acquire specific assets without committing to an entire package.
  2. B2 Attack Front Kick and Fall Kickout Motorica: These animations were employed to animate the route of the fleeing woman.
  3. Character creation involved using free resources provided by Character Creator, with slight modifications made to the Akika and Eddy characters.
  4. Facial animation was achieved in iClone using AccuLips.

AI voices were sourced from Eleven Lab, while music and sound effects were obtained from Epidemic Sound.

This project exemplified Alejandro’s ability to creatively combine various resources to achieve a cohesive and compelling animation within a limited timeframe.

Follow Alejandro de Pasquale

https://www.alerender.com

https://www.youtube.com/user/alerendersoc

https://www.facebook.com/aleRENDER-216423661706643

https://www.instagram.com/alerender_ae

https://www.artstation.com/alerender

Related Posts