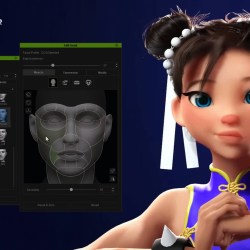
Learn how talented artist Amelia (Prompt Muse) creates lively Pixar-styled Chun Li and brings her to life with poses. The process involves leveraging user-friendly tools Character Creator (CC) and AI techniques, from reference gathering to character modeling, outfit creation, and final touches in Blender.
Prompt Muse
Prompt Muse is a Website and YouTube channel, hosted by Amelia Player & Alex Player, that offers a comprehensive look at the world of artificial intelligence (AI) image generating software, SEO and more. This channel offers tutorials and tips to help users get the most out of the software, while providing a comprehensive look at the industry. In addition, the channel provides the latest tech news and opinions to help keep users informed and up-to-date on the latest trends.
Prompt Muse’s tutorials offer step-by-step instructions on how to use the software, as well as advice on best practices and troubleshooting tips. The tutorials are geared towards both beginner and experienced users, giving them the tools to make the most out of their image generating software.
The channel also provides the latest news and opinions on the AI image generating industry. This includes industry-specific news such as new software releases, updates, and advancements, as well as broader topics such as emerging trends, legal issues, and ethical considerations. This helps keep users informed and prepared for the future of the industry.
Gathering References of Chun-Li using Dall-E 3
Amelia needed to start off by collecting visual references to kick off her project. She does this by using Dall-E 3 to create reference images for her Pixar-styled Chun Li.
Seeking additional inspiration, she scoured Pinterest for more references, compiling them efficiently in Pure Ref — a powerful and free tool designed to gather reference images in one application.
Pure Ref
Using Character Creator
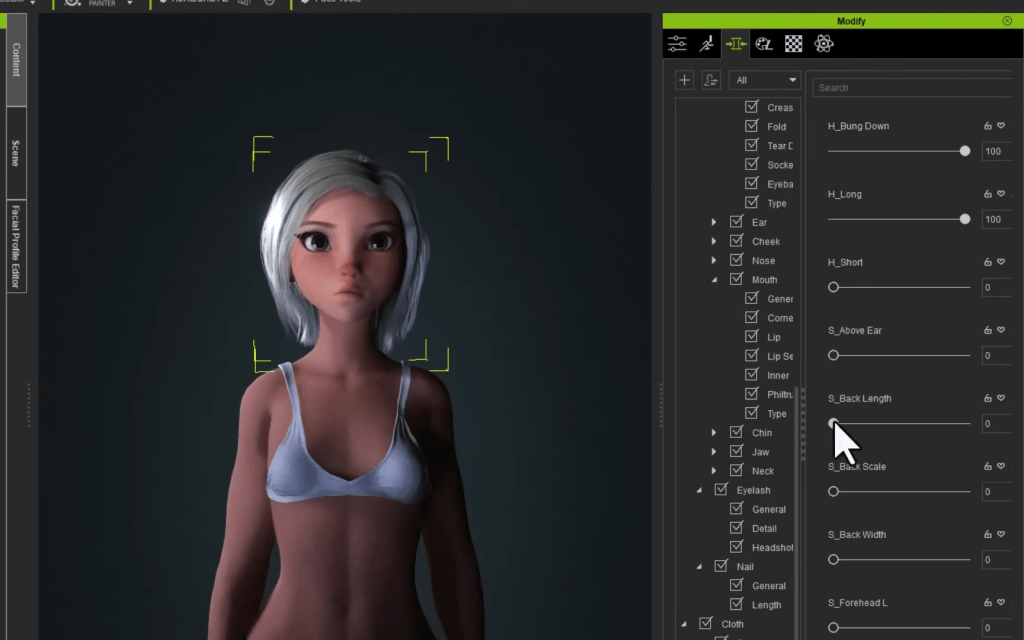
To accelerate the process, Amelia opted for a kit bash technique by combining ready-made assets in Character Creator (CC). Utilizing the free CC base model, Camilla, she employed morph sliders to quickly shape the character.
Use morph sliders in Chracter Creator
The model was then sent to ZBrush for further sculpting, where the ‘Move’, ‘Standard’, and ‘Smooth’ brushes were used to bring out the signature Chun Li personality.
Amelia seamlessly transitioned between Character Creator and ZBrush, refining the base shape and adjusting details like eyes, lashes, and eyeballs. To maintain a stylized look, she replaced realistic textures with bold, bright, and cartoony designs. Her goal was to enhance the overall aesthetic without having the character’s appearance descending into the uncanny valley.
Adjust the eyes
Teeth and hair underwent similar transformations. She crafted custom teeth in ZBrush and sculpted hair purchased from the Reallusion Content Store, using morph sliders to ensure a cohesive and visually appealing character.
Clothes and Outfit on the Blender Market place
By leveraging kit bashing with clothing found on the Blender Market Place, Amelia quickly found a suitable cheongsam and imported it into Character Creator.
By adjusting skin weights and employing repeated processes for each accessory, she effortlessly brought Chun Li’s outfit to life. To texture the character, Amelia utilized the control painting function in ZBrush to restrict the painting area and painted the UVW map using Photoshop.
Simplifying what would be considered a mundane procedure into a simple click of a button, she was pleasantly surprised by the efficiency of the entire process.
Transfer to Blender
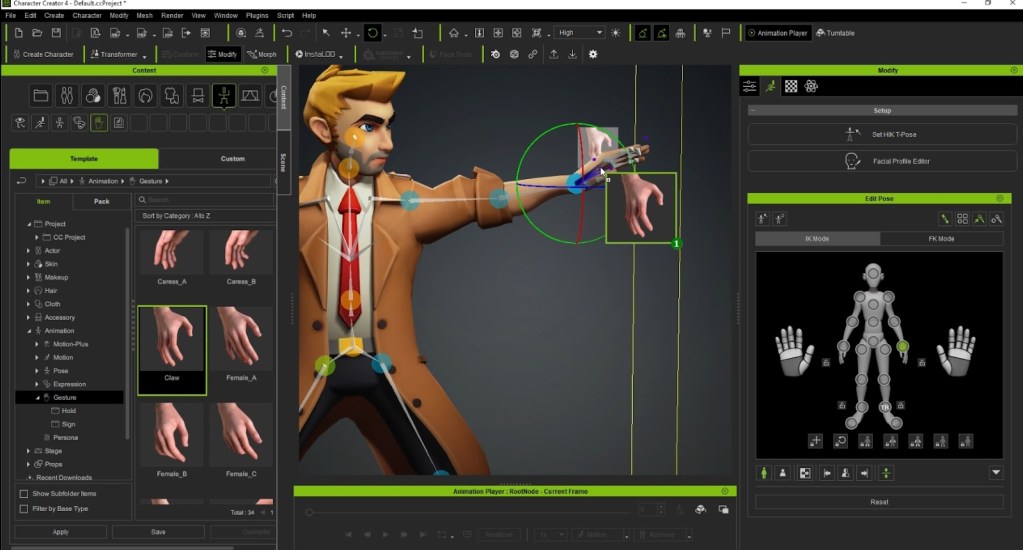
After donning a costume, Amelia posed her character using the edit pose dialogue, adopting a “kung fu pose” and a smiling face using the ‘Facial Profile’ tool.
Afterward, she imported her character into Blender and used “Blender Auto Setup” to easily assign a Blender Metarig to the character.
Final Touches
For the final polish, Amelia fine-tuned the lighting, adjusted a few parameters, and made use of some scene tools to spruce up the backdrop. These finishing touches added additional flair and life into Chun Li.
Hopefully you have gleaned some insights into Amelia’s meticulous workflow of combining advanced tools and creative techniques. In this evolving landscape of character design and animation, her journey from concept to final render is proof that opportunities for artist expression are ripe for the taking.
Michael Pavlovich earned a Bachelor’s degree in Computer Animation from RSAD in 2005. Initially, he contributed to the development of environment and character art for popular video games such as Madden and NCAA Football. Later, he relocated to Austin to join Daybreak Games, where he worked on the creation of art assets for DC Universe Online.
Presently, Michael holds the position of Director of Character, Weapon, and Vehicle Art at Certain Affinity. His expertise lies in implementing iterative pipelines for Certain Affinity artists helping develop renowned video game franchises, including Halo, Call of Duty, and DOOM. To stay updated on his latest tutorial projects, you can visit Michael’s YouTube or ArtStation page.
Sculpting an anatomical model from scratch (for example, starting with a sphere and manipulating the geometry into your human base body) is great exercise for learning the proportions, forms, volumes, and anatomical landmarks of the body! Building up these forms takes time, but you’ll eventually get faster at it!
If you’re pressed for time, starting with a 3D character base mesh can be a helpful way to speed things along – while a base mesh won’t necessarily have the perfect proportions or exact forms your unique character requires, it will provide a generic starting point to start from that contains all the general human landmarks in place, that you can quickly modify to get your character dialed in!
In this article, we’ll explore the newly released Character Creator Base Meshes ( CC character base ) from Reallusion, available for free download and use in your projects!
Click the “Download Now” button and watch the 1 minute video.
The file will download automatically to your computer!
Unzip the contents wherever you’d like, and let’s dig into what we can do!
What’s inside the CC Character Base
After you unzip the file, you’ll see three file formats which we’ll cover individually later in this article, and five varieties of CC character base meshes: a fully neutral base, a realistic male and female, and a stylized male and female. Pick whichever base model makes the most sense to start with depending on what you’re working on!
Topology and UVs
All the 3D character base meshes have nice, uniform quad surfaces, with edge loops built specifically for animation deformations, morphs, and blendshape creation in mind. In fact, each base has identical UDIM UV maps and vertex order, so you can blend between them seamlessly, and are perfect for production pipelines that require vertex and UV consistency between bases.
Textures
The “Topology Maps” folder contains template utility images that you can apply to your meshes that will help you put your facial landmarks and volumes exactly where you want them based on the mesh topology! Inside each FBX format folder you’ll also have base body textures that you can apply to your models: a realistic color map for the realistic bases, and a stylized color map for the stylized bases!
Why use these CC character base?
Here’s the big reason — as highlighted in our previous article, sculpting a character is just the beginning of the excitement. With these character creator bases, once you’ve finished sculpting a static character, you’re just a few button presses away from complete rigging, weights, facial expression morphs. In other words, a character with a myriad of possibilities for animation, simulation, posing… essentially bringing your character to life. You can use them for anything from an animated scene to a posed 3D print, and everything in between!
So long story short, if I make a character and I don’t feel like bringing it to life, no big deal, it’s still a good, predictable, performant mesh to start sculpting on. HOWEVER, if by the time I’m done sculpting my character and I feel like posing it out, have it run around in a scene, or even controlling the characters face with your own using AccuFACE, I’m literally just a few button pushes away from making that happen (some of those button pushes we’ll cover in this article!).
However, if I start with some other base mesh and then decide I want to make it dance around…making a skeleton, skin weights, creating facial morphs, creating a control rig for all that, applying or creating an animation, and more…it’s going to take wayyyyy more than a few button presses to make that happen. So that’s the big plus to me; If I start with these base meshes, animation, expressions, LIFE is right there at my fingertips, seconds away!
A character posed in Character CreatorThe pose transferred back to the high res ZBrush source for 3D printing!
CC character base Overview Demonstration
For each base type there’s also a number of file formats to choose from depending on how you want to work, and what type of software you’ll be using. Here’s a brief overview:
OBJ file: import this single mesh file into anyprogram that accepts .obj files, and begin moving geometry around to transform your initial base mesh into a unique and interesting character!
ZTL file: this is a ZTool file that you can Tool > Load Tool into ZBrush, and just like the .obj workflow, begin modifying to your heart’s content. Unlike the .obj file, the .ztl file Like I mentioned earlier, the even distribution and quad geometry makes sculpting on this base fun and predictable, and just like the .obj file, once you’ve refined your characters body, you’re just a few button clicks away from bringing it to life!
FBX file: this file contains a skeletal rig and facial blendshapes, so in order to utilize these you’ll have to import them into a program that recognizes them. So not ZBrush, but Max, Maya, Modo, Blender, or C4D, etc…import this file and modify the assets as you see fit!
The stylized female base with its .ztl subtools.
FBX
Before we get to the .obj and .ztl formats, let’s look at the .fbx file first. Again, this format has bones and morphs, and also has body textures assigned from its respective folder location. To take advantage of all this, we’ll need to import this file format into a dcc app that supports skeletons and morph targets — Max, Maya, Modo, Blender, C4D, etc… are all good options!
In this case we’ll use Blender to show off basic .fbx functionality, as well to utilize an auto setup plugin called CC/iC Blender Tools. This plugin will not only import our model and ensure the character material and texture setup is authored properly, but also allow us to create a one-button-click control rig for our characters body and face, utilizing the morphs and skeleton found in the .fbx file. This type of auto setup functionality isn’t only for Blender — there’s an expanding suite of options on the Character Workflow Pipeline page, that will allow you to quickly and easily take your creation from Character Creator to Unreal, ZBrush, Marvelous Designer, Sketchfab, and more!
Blender Auto Setup Installation
In this case we’ll utilize the auto setup plugin for Blender, however there are also auto setup tools for other CG software and game engines which you can find on their Character Workflow Pipeline page. To install the Blender plugin:
Go to this page, click on Latest, and download the source code .zip file
In Blender, go to Edit > Preferences > Add Ons > Install, navigate, and select your downloaded .zip file
Check the box for Characters: CC/iC Tools, and in the sandwich menu choose Save Preferences
Now when you hit “N” on your keyboard, you’ll see a CC/iC Pipeline tab to the right side of your viewport.
To check for updates, go back to the AddOn window, click the down arrow for your new plugin, and scroll to the bottom — there is a Check for updates button there.
CC character base Import into Blender Using CC/iC Blender Tools.
Instead of going to File > Import, click on the CC/iC Pipeline tab and click the Import Character button. Your character should import with all the proper materials and textures hooked up.
Note – You can use this same method to import any character exported from Character Creator, complete with hair and clothing as well.
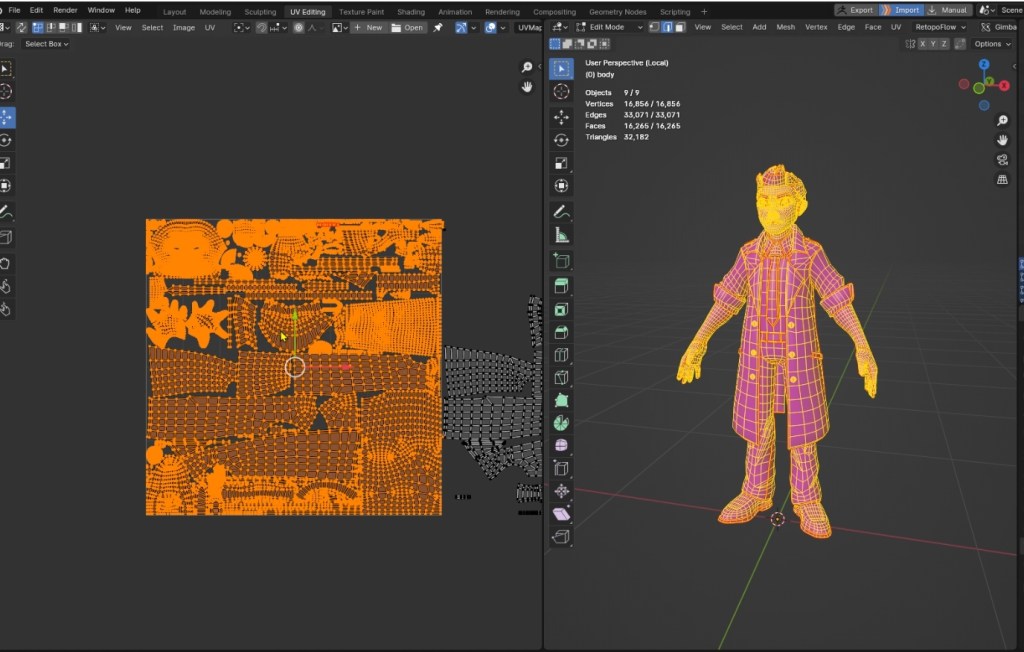
Check out the model’s UV maps in UV Editing mode, and get a look at the textures and materials in Shading mode. In the Shading tab you can see the material structure. You can connect the relevant topology map to get a look at how the sections of the body and head are divided
Skeleton, Blendshapes, and Control Rig
Back in the Layout tab, with your character selected, go to the Data Properties tab to see the character’s expression morphs. Our control rig in the next step will utilize these in various combinations to create incredibly detailed facial animation!
To see our skeleton, select the top character node in your scene, go to the Data tab and open the Viewport Display section. Checking in front will display your character’s skeleton!
Expand the Rigging & Animation tab in the auto setup plugin panel and click the Rigify button to generate a specialized control rig, complete with a full face rigging! Use the dropdown menu in the upper left corner to switch to Pose Mode, then grab the different control shapes on your rig and move them around to pose your character!
Blender FBX Custom Character Creation and CC Import
Now, as you can see from this Reallusion video, you can modify your character right here in Blender, export through the plugin, and drop the result into Character Creator as a CCAvatar — in fact, there’s an entire repository of Blender resources you can check out that will cover that process in detail, and a lot more! However, I’m not super proficient in Blender, so let’s explore the .obj and .ztl options to make a custom character, then bring it to life using Character Creator.
Workflow Demonstration
OBJ Format
As we mentioned before, in the .obj file format, all body parts are consolidated into a single mesh, making it easy to load and edit in any 3D application that supports .obj format.
Import & Sculpting
Since I’m most comfortable in ZBrush, that’s what I’m going to use to modify this .obj file, but feel free to follow along in your favorite modeling application – all we’re doing is moving around vertices.
First I’ll go to Tool > Import, then navigate to the “OBJ” folder in the “CC Character Base” directory, then choose the bodytype I want to start with (for my case, I searched the “05_Toon Neutral_M” folder). Finally I’ll double-click the “Toon Neutral_M.obj” model to import it.
Again, this file will be a single model without a skeleton or expression morphs. Feel free to move the vertices around, changing the volumes and proportions of your character however you’d like! While you’re doing this, there’s a few guidelines to follow:
Keep the naming consistent so we can import the finalized model in Character Creator for conversion into a CC3 plus character. This is easy, just don’t change the default name, and if you do, change it back before you export later.
Do not change the vertex order: no splitting pieces, cutting or extruding faces, etc…
However, feel free to subdivide your model to sculpt details, which you can bake out as a normal map later! If you do subdivide to create a more detailed sculpt during this process, remember to drop down to the lowest subdivision (SDiv 1 in ZBrush) before exporting
Once you’ve completed your sculpt, return to subdivision level one and use Tool > Export to .obj. Give the exported .obj file a unique name – this will be the one we import into Character Creator in the next steps, if you want to bring your character to life!
Character Creator Import
In Character Creator, load in the neutral male toon base, which can be found in the Actor > Character > Base folder in the Content manager. Since we started with the Toon Male, we’ll use that as our base character; if you started with a different body type, use that instead.
Create New Morph Slider button found in the Morph tab
New Morph Slider parameters
Put your CC model into a bind pose by going to Remove > Restore Bind Pose in the Timeline dropdown menu. Navigate to the Morphs tab, and click the plus button to create a new morph slider.
Enter a name for this morph, then load in the obj file you exported earlier in the Target Morph section. Load in the relevant obj key file in the Checksum File Path section, which can be found in the folder of the base type you used. Finally, ensure that you select “Adjust bones to fit morph” to avoid any bone proportion issues, then hit OK.
Back in the Morphs tab,zero out the Currently Used morphs, then click on the Actor section. Search for the morph slider name you created, and set it to 100. Your updated model is now fully rigged, with bones proportional to the body scale — a fully functional CC3+ character! Feel free to apply animations from the Content tab, and pose your characters body and face using Edit Pose and Edit Facial found in the Motion tab.
To learn more about the amazing things you can do with this character type, you can check out the other articles we’ve made, that will walk you through making a custom base character, baking your high res details to normal maps, texturing it, creating custom accessories and clothing for it, and finally animating it, and even using your own face to drive your characters face!
ZTL Format
Finally, let’s talk about the .ztl file format… This format is very similar to .obj — there’s no bones or morphs, and all we’ll be doing is moving around the existing geometry to create our unique character. However, by going to Tool > Load Tool, and choosing the .ztl file from the body type you want to start from, you’ll see this file format contains multiple objects (subtools in ZBrush), rather than one single file like the .obj.
Multiple subtools found in the .ztl format
Just like the .obj, you don’t want to change the naming of these existing subtools. However, you can add as many custom subtools as you want! Shirts, pants, shoes, swords, create and name these as separate subtools, and we can send them over to Character Creator later, along with our body updates.
03_Neutral_M CC_BaseBody.ztl original03_Neutral_M CC_BaseBody.ztl modified, with extra “port” subtools
Sculpt
Mask, move, and sculpt the subtools to create your own unique character. Your “CC_Base_Body” subtool will already have 5 levels of subdivision on it. I usually start on the lowest subdivision, and work my way up through the subdivisions as I add more and more detail. If you need more detail than subdivision level 5 will allow, go to Tools > Geometry and hit the divide button to get more geometry resolution.
Remember, you’re able to append and create more subtools while in ZBrush, named whatever you like, that will send over to Character Creator along with our body changes. Feel free to use polypainting to add color to your high-res sculpt as well.
Base body with polypaint
Load Neutral Base and Restore Pose.Character Creator GoZ Options.
Sending to CC
Once the sculpting is finished, open Character Creator and click Load Neutral Base.Once again, ensure that the character is set to a bind pose using Remove > Restore Bind Pose in the Animation Player. Go back into ZBrush and press the Tool >GoZ All button to send all of your ZBrush subtools over to Character Creator.
You’ll see the GoZ Options panel appear in CC. Ensure that all of the original sub tools are set to Update, while the new ones are set to Create Cloth. This will bind your custom objects to your body automatically!
GoZ base mesh result (left). Base mesh with baked normal detail and polypaint (right).
Further Refinement
If you want to continue having fun and refining your character, like baking your high-res detail and polypaint from your body to your CC mesh, check out this article. Fore more information on creating custom clothing and accessories, including adding cloth simulation, check out this article!
Updated base mesh with custom weapon and animation appliedBase mesh with custom armor and weapon
Final Thoughts
Thanks for stopping by, and keep an eye out for more articles detailing how you can create cool stuff, then get that cool stuff to move around! Also check out these articles for more information on custom character creation, including how you can transfer old projects that have arbitrary geometry (another base mesh, or even dynamesh concept sculpts), and convert it to Character Creator topology so you can take advantage of all the rigging and animation perks we just covered. And remember there are pipeline tools available to transfer it to any number of applications, from Blender to Unreal, and everything in between!
Alejandro de Pasquale – Motion Graphic Artist / 3D Animator / Filmmaker / Content Creator
Alejandro de Pasquale
Since the age of 9, Alejandro de Pasquale embarked on a creative journey, crafting his first rudimentary comics and discovering his fervent passion for storytelling. With each passing year, Alejandro honed his creativity, delving into diverse tools and skills to encapsulate narratives across a spectrum of challenges.
From scripting movies to producing motion graphics for various enterprises, Alejandro explored the avenues of storytelling, eventually finding his true calling in breathing life into characters and immersive 3D worlds. It was through the transformative power of software like iClone and Character Creator (CC) that Alejandro delved into the world of 3D animation, discovering new dimensions to his storytelling prowess.
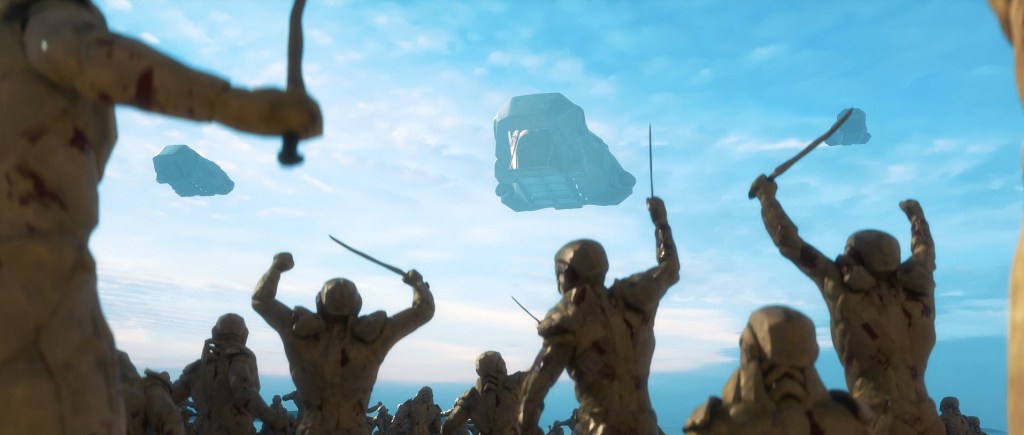
SOLDIER FILM
In his latest short film – SOLDIER , Alejando has embarked on using several tools.
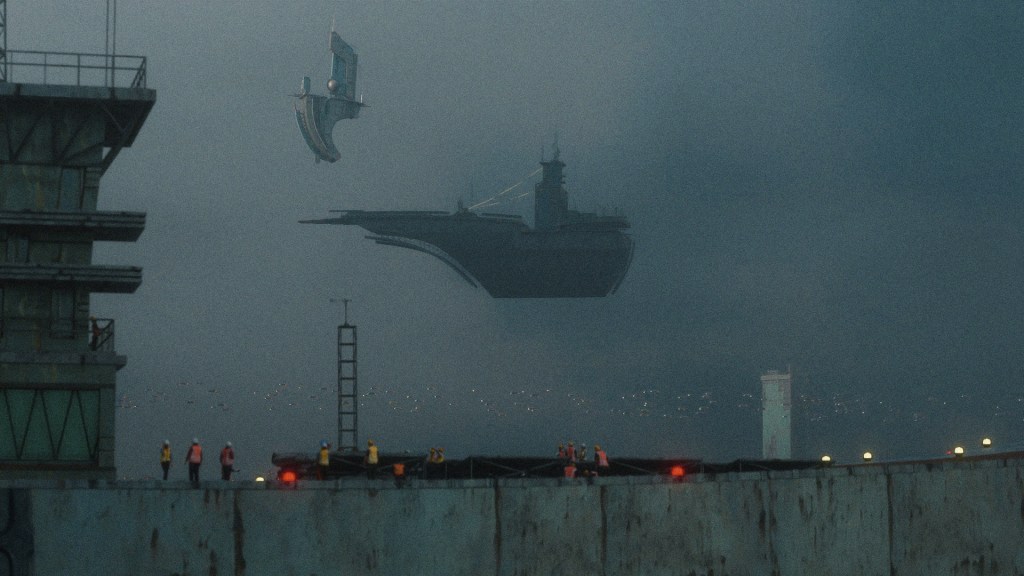
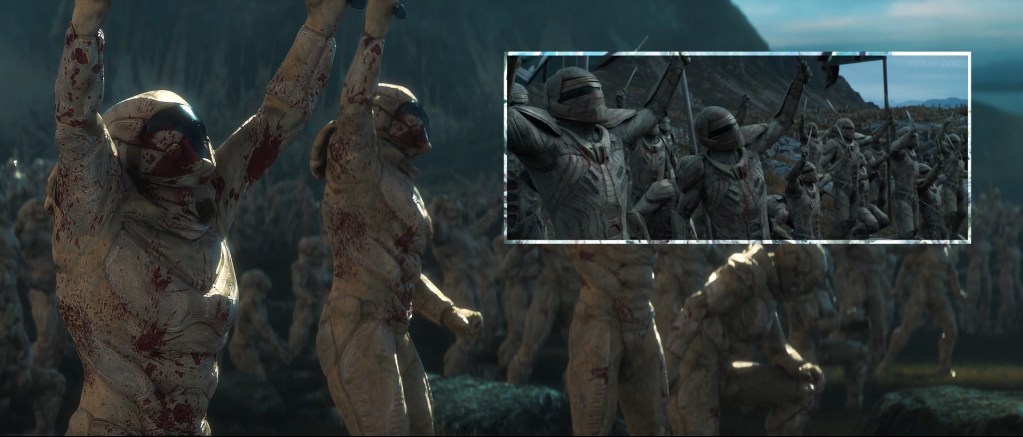
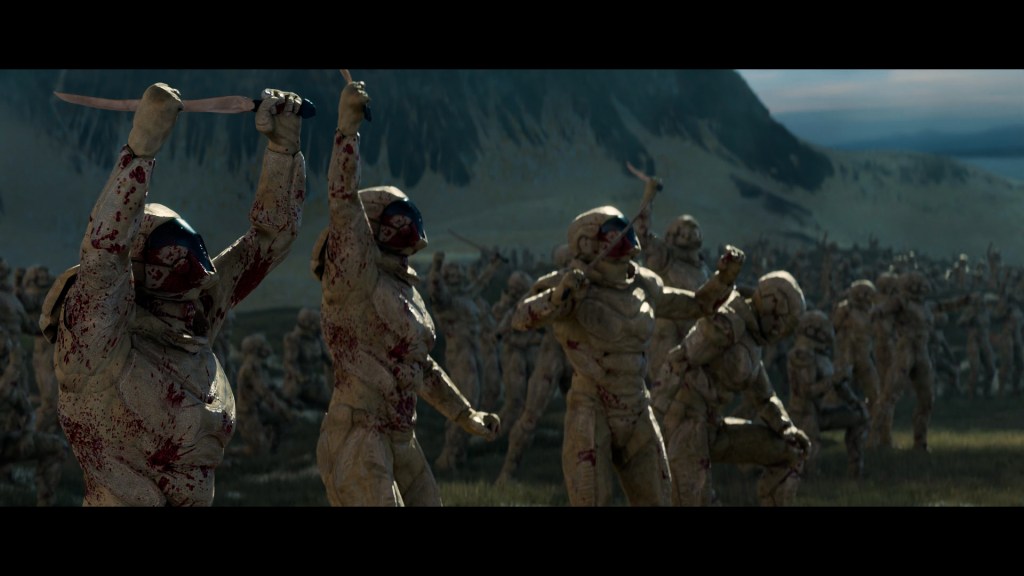
The concept involved utilizing characters and settings from the Unreal marketplace, depicting soldiers surrounding someone attempting to escape. Alejandro de Pasquale employed various tools for the animation process:
Motorica: Utilized for character movements, particularly for creating paths that adapt to the terrain, such as turning corners.
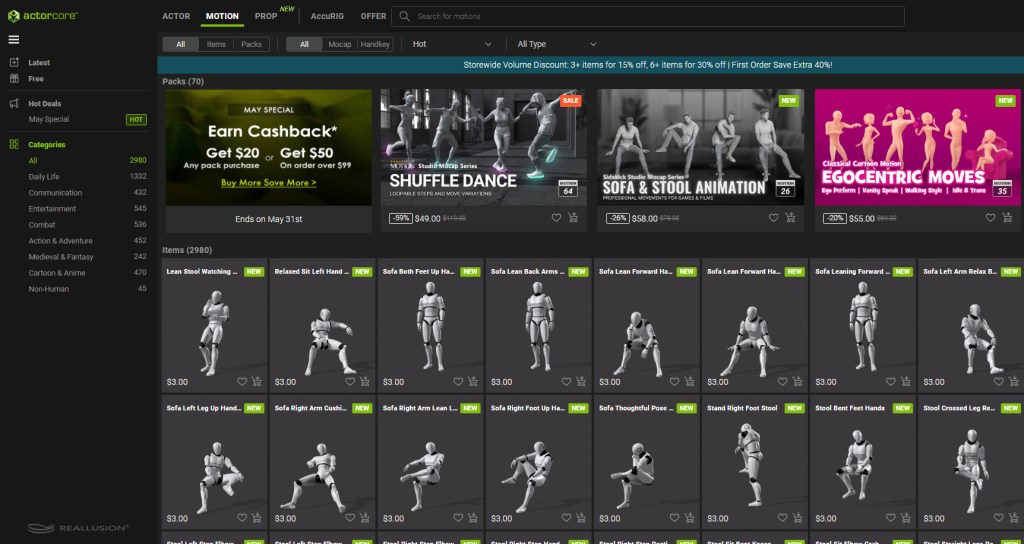
ActorCore Reallusion : Rifle Combat – Assault: This pack provided ideal animations for soldiers patrolling the scene. The animations were downloaded in iClone with the Dummy and then retargeted for use on military robot characters in Unreal.
Mixamo: Used for additional animations to complement the scene.
Epidemic Sound: Provided music and sound effects to enhance the atmosphere of the animation.
This exercise also served as a learning opportunity, allowing Alejandro to become proficient in managing a large number of characters on stage and refining his workflow. For instance, the process involved positioning each character, attaching weapons, executing actions such as shooting, and repeating these steps for all characters. The final assembly was done in Unreal Engine, utilizing Sequencer to orchestrate the movement of characters within the scene.
Welcome to Neriverso, where the captivating world of video games meets the expertise of Neri Neto, a seasoned technology journalist and skilled game programmer. Through Neriverso, Neri shares his profound insights and boundless passion for everything he adores, including video game development!
As a dedicated game programmer, Neri has lent his talents to numerous indie projects, crafting engaging mechanics and contributing to the development of captivating titles. Embrace the Neriverse and embark on a journey fueled by Neri Neto’s unwavering enthusiasm and commitment to his craft and community.
If you have ever felt the urge or desire to be an animator, there is no better time than now with all the tools and features that are available today. When I got into 3D animation over twenty years ago tools like 3DS Max were thousands of dollars and you would be very thankful to work for a studio that provided a floating license but there was no cheap way to get into 3D animation at the time.
COST PER MINUTE OF ANIMATION
Nor was there a cheap way to produce 3D animation back then either. The cost per minute could be astronomical on even a small production. With real-time tools like iClone, the cost per minute has dropped dramatically. Big studio productions with teams of animators and support staff are still expensive but it is now possible for beginners, writers, producers, hobby animators, and just about anyone to produce animations or pre-visualizations at little cost.
If you are a one-person studio or hobbyist, the cost per minute is the cost of your software and other assets you gather up for a project. I’m not saying your time is not valuable, but that time can greatly offset the cost of production making it feasible to be a 3D animator without a huge budget or immediate commercialization.
The drastic drop in cost, including the associated software, opens the field for a lot of new animators, including hobbyists.
NO DRAWING SKILLS REQUIRED
Let’s get this out of the way. 3D animation is not cell animation or hand-drawn 2D animation. It is unique and being a 3D animator does not require drawing skills. It does require eye-hand coordination but nothing near fine art abilities. Imagination and problem-solving will be much more important.
EASY BUTTON
At present, there are a lot of ways to animate but there is still no single “Easy Button” to click that takes care of everything. While the future holds a lot of promise for innovative animation tools, software like iClone for animation and Character Creator for custom characters (actors/avatars) are already available. At present, few applications, if any, rival iClone and Character Creator’s ease of use for beginners and adaptability for professional animators.
When I say there is still no easy button, I don’t mean animation is as complex or as difficult as it used to be. Quite to the contrary, almost anyone with the desire and strong basic computer skills can become an animator. With iClone and its drag-and-drop motions, you can have your first animation produced within hours of downloading the software.
Drag & drop contents easily in Character Creator 4
A FEW THINGS TO BE AWARE OF
It’s a learning experience that depends on the 3D application you choose. The learning curve itself can be greatly reduced by applications like iClone and Character Creator where you start animating immediately and improve as you learn.
Animation is about bringing ideas to life. Creativity and strong storytelling skills are crucial for engaging audiences.
Whether dramatic or comedic, timing is a critical skill. You must understand and grasp the flow of storytelling. This doesn’t mean you have to be smooth and have perfect camera movement or animation. It just means you need to understand how things flow together to create a good animation.
By now some of you may be saying “Wait I’m not a storyteller I just want to be the animator”. YOU ARE a storyteller as an animator. It doesn’t matter if it’s your story or someone else’s, if you are an animator, your animations will shape (tell) the story.
3D animation can be time-consuming and complex if you let it get out of control. Develop good time management skills and be patient with the learning process. Rome wasn’t built in a day, and neither are great animations. Animation can involve collaboration with other artists, animators, and directors. Networking within the animation community can lead to opportunities for learning, feedback, and collaboration on projects.
TOOLS, TUTORIALS & CONTENT
Some new animators can fall into the trap of starting with tools that are overly complicated, slow, and lack real-time functionality and feedback. While these tools like ZBrush, Blender, Maya, Cinema 4D, and 3DS Max can turn out great animations they require equally great skill to do so. If you are just starting on your animation journey don’t over-complicate your learning experience with software that even some pros struggle with from time to time.
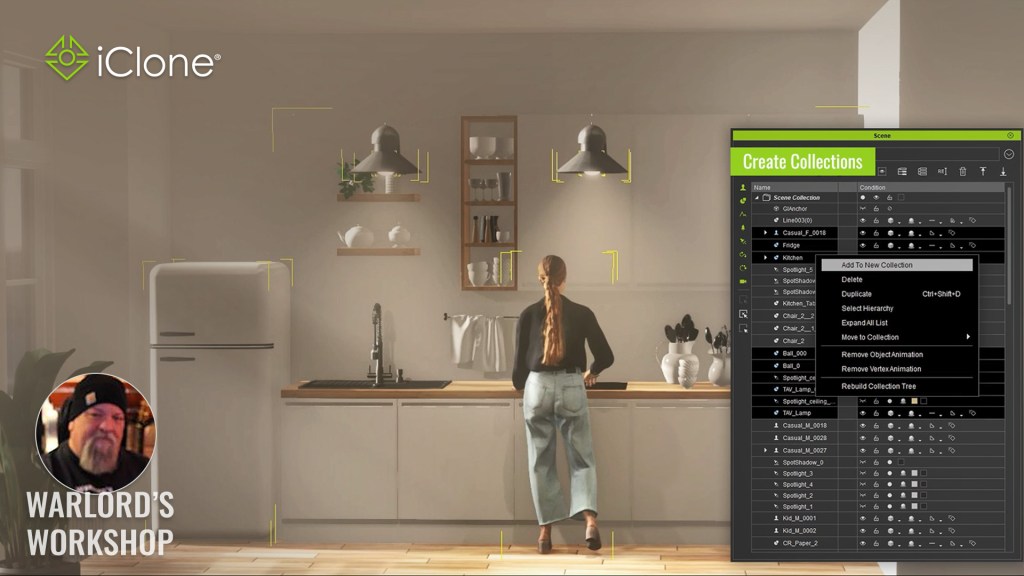
iClone and Character Creator have a huge library of tutorials. First, there are Reallusion Courses, the official and free tutorial resources that strive to provide as much information as possible in as short a time as possible. There is also my “WarLord’s Beginners Guide” section in Reallusion Magazine which is filled with articles and tutorials to get a quick start. Search YouTube and you’ll find many more iClone tutorials from users both amateur and professional. There is no shortage of tutorials available for Reallusion products.
Moreover, you get direct access to over 2,000 3D embedded assets with iClone and Character Creator. Characters, scenes, props, accessories, and other assets are available for download via the Smart Content Manager which keeps track of your free and purchased items.
TERMINOLOGY
I’m not going to list everything here but if you can learn the terminology of 3D animation, you will be ahead of the game. You are not expected to work at the level of detail concerning most of these terms as iClone and Character Creator take care of this for you. You need to be familiar with these terms as they will be mentioned frequently in tutorials and articles.
Modeling: Mesh: A collection of polygons that creates the 3D shape of an object. Vertex: A point where two or more edges meet in a mesh. Edge: A line connecting two vertices in a mesh. Polygon: A basic building block of a mesh, usually triangular or quad-shaped. UV mapping: Assigning a 2D image texture to a 3D model. Normal Map: Another method of detail projected by the map instead of vertex modeling. In the image below you can see the detail of the rifle improve as the normal and diffuse maps are applied. It is typical to model these details into the original mesh then saving the details as a normal map that is applied to a lower resolution version of the mesh to cut down on computational overhead as a map takes less resources.
This example of a high and low poly Character Creator mesh show the vertex, edges and polygons that make up a mesh.Left is a simple example of a 3D box with a map-checking texture applied. The red images on the right are the from box faces when flattened..A prop mesh created from an image utilizing the normal map to add higher-resolution surface details. (Rifle Concept Image by Eddie Mendoza -Deviant Art)
Animation: Keyframe: A point in time where the pose or position of an object is defined. Tweening: The process of automatically generating frames between keyframes for smooth animation. Rigging: Creating a bone structure to control the movement of a character or object.
One of my characters autorigged in AccuRIG with extra bones added in 3DS Max that could be added with Blender.
Materials and Textures: Material: Defines the surface properties of an object, like color, roughness, and reflectivity. Texture: An image map applied to a material for detailed visuals. Bump map: Adds surface detail without changing shape, affecting lighting and shadows. Displacement map: Physically displaces the geometry of the mesh based on the image information.
The rifle mesh and the diffuse texture map used to add visual color detail to the mesh. (Rifle Concept Image by Eddie Mendoza -Deviant Art)This prop rock in iClone 8 shows the mapping channels, in particular the BUMP and HEIGHT maps that provide additional surface details.
Rendering: Render: The process of generating a final image or animation from a 3D scene. Resolution: The number of pixels in the rendered image, affects quality and file size. Anti-aliasing: Smoothing out jagged edges in rendered images.
If this all seems very confusing at this point, don’t worry. As you gain in 3D animation proficiency, knowing the terminology beforehand can make the learning process easier when it all comes together over time.
SUMMARY
Community is key. Connect with other animators online and offline for support, feedback, and inspiration. Find your niche. Explore different animation styles and specializations to discover your passion. Have fun! Learning should be enjoyable. Let your creativity flow and celebrate your progress. You can be an animator with the right software, a little time, determination, focus, and creativity.
MD McCallum – WarLord
Digital Artist MD “Mike” McCallum, aka WarLord, is a longtime iClone user. Having authored free tutorials for iClone in its early years and selected to write the iClone Beginners Guide from Packt Publishing in 2011, he was fortunate enough to meet and exchange tricks and tips with users from all over the world and loves to share this information with other users. He has authored hundreds of articles on iClone and digital art in general while reviewing some of the most popular software and hardware in the world. He has been published in many of the leading 3D online and print magazines while staying true to his biggest passion, 3D animation. For more information click here.
Get Slapped, LLC, a vibrant indie game development studio and multimedia company nestled in Southern California, is renowned for crafting boundary-pushing games that defy convention. With a diverse team boasting decades of professional experience, their creativity flows like a fine jungle juice, blending seamlessly to concoct innovative gaming experiences.
Embracing fresh perspectives, the team welcomes new faces to infuse their ideas into the mix, while honoring the wisdom passed down by industry OGs. Amidst this collaborative spirit, Get Slapped!™ emerges as their latest creation—a slap-stick action comedy arena fighting game with an evolving narrative and an ever-expanding roster of fighters.
To bring their vision to life, the team joined the Reallusion Pitch & Produce program to leverage cutting-edge tools like Character Creator, AccuRIG, Cartoon Animator, and iClone, pushing the boundaries of gaming innovation and delivering an unforgettable gaming experience across multiple dimensions.
“When you’re starting out, finding a software suite that offers flexible aspects of production can be critical. Reallusion has been an amazing jump off point as we push to discover innovative visual storytelling, and hone our pipeline. There’s no doubt we’ll be continuously visiting these tools along our journey.”
Tk Gorgonia – Creative Director / Producer / Virtual Production Specialist
Q: Greetings, and congratulations for being part of the Reallusion Pitch & Produce program! Please share with us the premise of your game Get Slapped!™ and tell us about your team.
Hello! And thank you! We’re happy to be a part of it! Our game Get Slapped!™ is a slap-stick action comedy beat’em up fighting game, with an expanding narrative and roster of fighters. The idea came from fusing the idea of slapping competitions and South Park humor.
Our team is mostly based in Southern California. At our peak we had 40+ members, with many different skills and backgrounds, from over 6 different time zones, all across the globe ! I’m extremely proud and grateful to see what we have accomplished, and to be serving the team.
Q: Your team used AccuRIG to rig unconventional characters for your game. What are the advantages of using AccuRIG? and how were these characters originally created?
Reallusion’s AccuRIG was integral in getting a quick rig on our 3D models in order to test, and have for real time, when giving creative direction on our motion capture shoots. It also provided faster feedback and iteration when improving the overall rig’s movement.
Our Slapican characters are bipedal, but their eyes are essentially where our human chest would be. Early on we would take our character model, and AccuRIG it in less than 15-30 minutes, and be able to achieve improved eyelines for our performances.
Q: Get Slapped has also been experimenting with Cartoon Animator’s 2D capabilities for future updates. Can you share with us why you decided to use Cartoon Animator, and what future projects you have in mind?
Coming from a mocap background, Cartoon Animator always piqued my curiosity on “what if we could mocap 2D animation?”
Thinking of the possibility of exploring different styles and in-game slap dimensions where 2D and 3D characters interact is a fun challenge, and I believe there’s something innovative to be achieved by utilizing such software to explore the next level of 2D production.
Q: For your game, Character Creator has been used to characterize and retarget, to later view and clean up mocap data in iClone. What are the benefits of using iClone versus other mocap cleanup tools?
Utilizing iClonehas been handy for having specific tools and set ups for foot contacts, hand poses, and prop interaction. Overall it’s a more budget friendly solution when starting out and figuring out a pipeline, especially if you want to consider realtime solutions. The learning curve with any software takes some time, but documentation and support from other existing software can be scarce in comparison.
Q: Players will be able to download Get Slapped on STEAM. When will this be available, and where else can fans follow your game?
Early Access is available now on our website getslappedgame.com! Early Access is available for wishlist and soon coming to the Epic Game Store in the upcoming months.
Bradley, a seasoned 3D character designer and modeler, lives and breathes the art of crafting top-tier assets for games and animation. With years of experience as both a freelancer and a contributor at Bungie and Electronic Arts, he has honed his skills across various domains: from digital sculpting and character modeling to creature design, 3D visualization, rendering, and texturing.
Why I chose Reallusion Character Creator and ZBrush Pose Tools
I embarked on the Guyver project to explore what Character Creator Pose Toolscan really do. Posing hard surface objects in a way that ensures correct deformation typically demands a deep understanding of weight painting, binding positions, and, of course, time. However, using Character Creator’s Pose tools simplifies all of these tasks and makes them genuinely enjoyable! Additionally, the Hard and Soft skinning process streamlines rigging for characters. Hard skinning is ideal for objects that shouldn’t deform, while soft skinning allows for bendable parts. Creating a character like Guyver, who wears armor but also has flexible components, becomes both fun and challenging.
Detailed Walkthrough
ZBrush Modeling
Original Published Guyver look. Copyright Kadokawa Pictures Inc.
When creating most of my models, I begin by gathering references for the object, including anatomy images. Then, I embark on shaping the initial blockout. During this stage, my primary objective is to capture the essence of the character. This essence might manifest as unusual body proportions or, in the case of my current model, distinct silhouettes for the helmet, shoulders, arms, and leg armor. As I progress, I meticulously refine each section, ensuring a consistent level of finish throughout the entire character until it reaches completion.
Adding details for Guyver in ZBrush. The polygon count should not exceed 300K quads (600K triangles)
GoZ and AccuRig
Before proceeding with rigging, I ensure my ZBrush scene is tidy by doing the following:
Clean Up: Remove any unnecessary elements.
Naming and Splitting: Assign clear names to objects and split them as needed. This way, I can easily select the relevant components during the rigging process.
Grouping soft mesh and hard mesh accessories
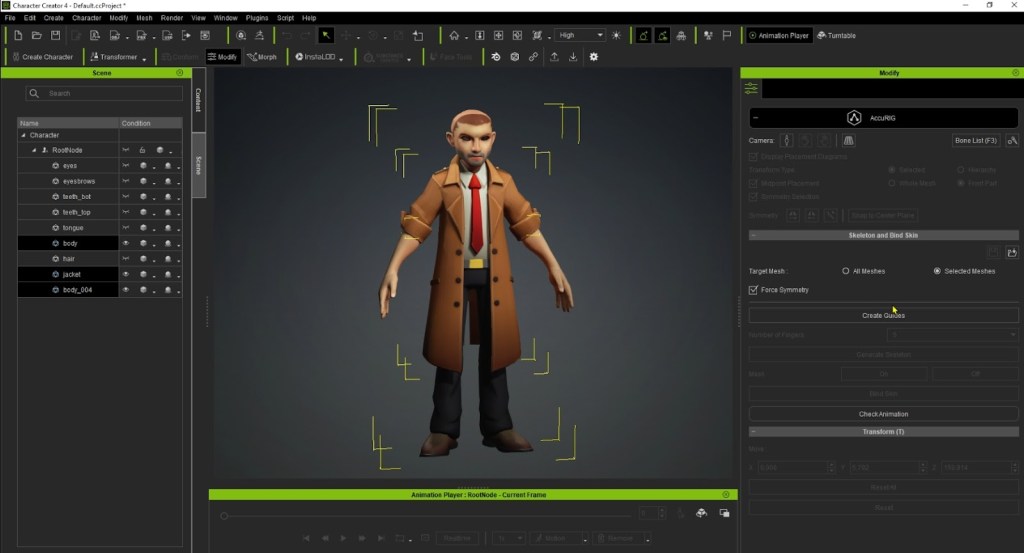
After transferring my model from GoZ to Character Creator 4 (CC4) and positioning my guides, I proceed with the AccuRIG process. Within AccuRIG, I uncheck the ‘All Meshes’ option and instead select ‘Selected Meshes.’ The purpose behind this choice is to ensure that everything I specifically choose will be assigned the soft skinning algorithm, while any unselected elements will be categorized as ‘accessories’ or undergo hard skinning. This distinction is crucial, especially for hard armor components on my character, as it prevents undesired deformation.
After completing these steps, you’ll notice objects marked with a ‘glasses’ icon, which signifies they are accessories. Additionally, objects assigned to soft skinning will be ready. And just like that, you’re all set to begin posing!
Choose selected meshes for soft group accessories. Detailed hierarchy look for Guyver’s armor pieces.
Posing in Character Creator
Now that everything is set up, you have a couple of options for posing your character:
Manual Posing: Select the rig and begin moving and rotating the bones manually. This approach allows for precise control over each pose.
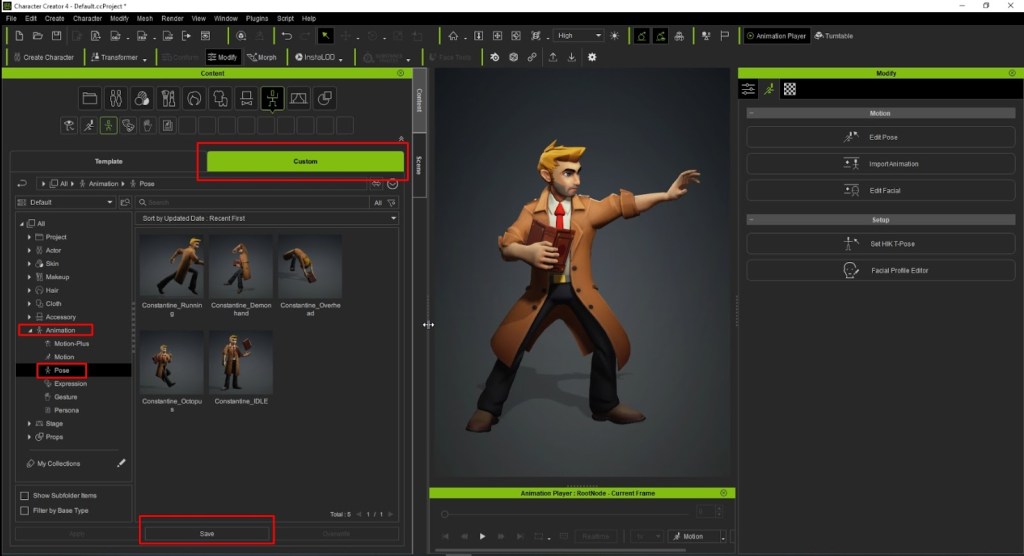
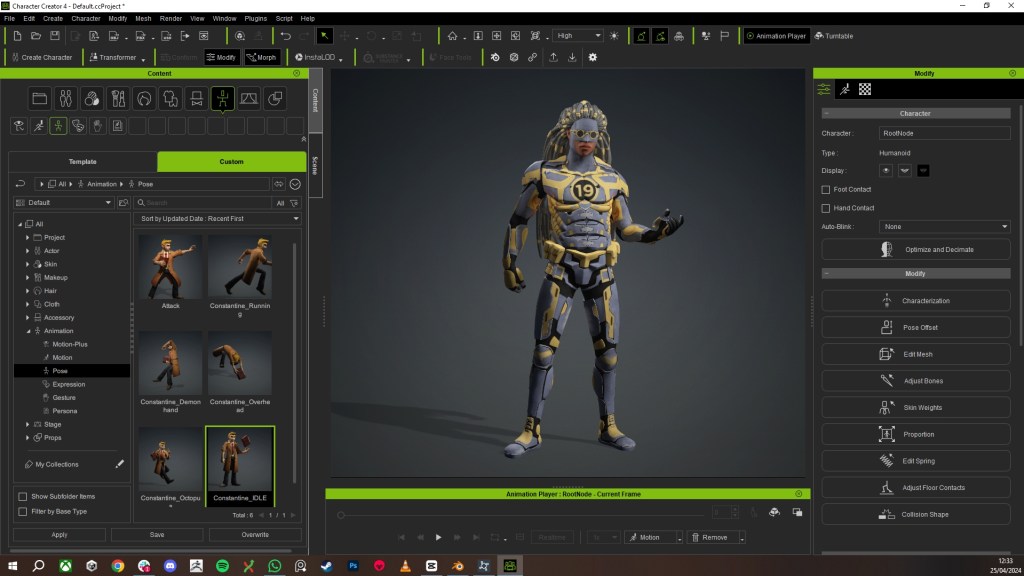
Pose Library: Explore the incredible pose library. Choose from a variety of animations or poses to apply directly to your model.
Hybrid Approach: Feel free to combine both methods for maximum flexibility!
The beauty of this process, as opposed to posing in ZBrush, lies in its flexibility. You’re not committed to a single pose—you can freely explore what feels right or visually striking. Save those poses along the way and continue searching for what truly makes your character stand out. The real magic? You can reuse these saved poses on other characters! Imagine creating a fantastic pose that doesn’t quite fit your current project—no worries, save it for later use!
(Left) Use the animation library and find suitable motions for character poses; (Right) I’ve found some nice poses for Guyver!
For this pose, I adopted a Hybrid Approach. First, I explored the fantastic animation packs available for purchase in Character Creator’s store. I selected a few fight styles and then manually customized them to achieve the unique look I desired.
For my final look, I opted to adjust everything manually. I came across a captivating pose in one of my art books that truly resonated with me. Although this approach might require some additional cleanup, it’s not a concern.
Fine-tuning in ZBrush
After finalizing my pose in Character Creator, which covers about 95% of the work, I turn to ZBrush for the remaining 5%. The advantage of using Character Creator (CC) is that it poses our character at the lowest subdivision level, preserving all the intricate high-level details. In ZBrush, my task is straightforward: I adjust and refine the shape to match the new position provided by the rig. Additionally, I address any clipping issues that may have occurred during the posing process. The end result? A fully posed model that is ready for rendering or 3D printing!
Fine-tuning Guyver’s body details in ZBrushGuyver’s body parts by different grouping
Splitting for 3D Printing
Here are some pro tips for cutting and keying a model in Zbrush for 3D printing:
Clean Splitting: When splitting your model into parts, use Boolean operations to cut and merge the sections that need separation. Keep the connections clean to ensure easy assembly once the figure is 3D printed.
Add Keys: To ensure proper alignment during assembly, add keys (slots or pegs) to the parts that need to be connected. These keys should have some space to account for material shrinkage and deformation.
Edge Cleanup: Create clean edges for each part to avoid gaps and light leaks when assembling the printed pieces. Use tools like “Union Meshing” and “Sharpen Mask” to refine the edges.
Dynamesh Unification: After splitting and keying, use Dynamesh to unify the mesh density and preserve sculpt details. This step ensures a consistent surface for printing.
Remember to consider the material properties (such as shrinkage) and test your design before printing.
Final thoughts
Since discovering and utilizing the Character Creator pose tools workflow, I’ve abandoned all other methods for posing my characters. The process is not only straightforward but also enjoyable and creatively fulfilling. I highly recommend it to anyone seeking a complete process for efficient character posing.
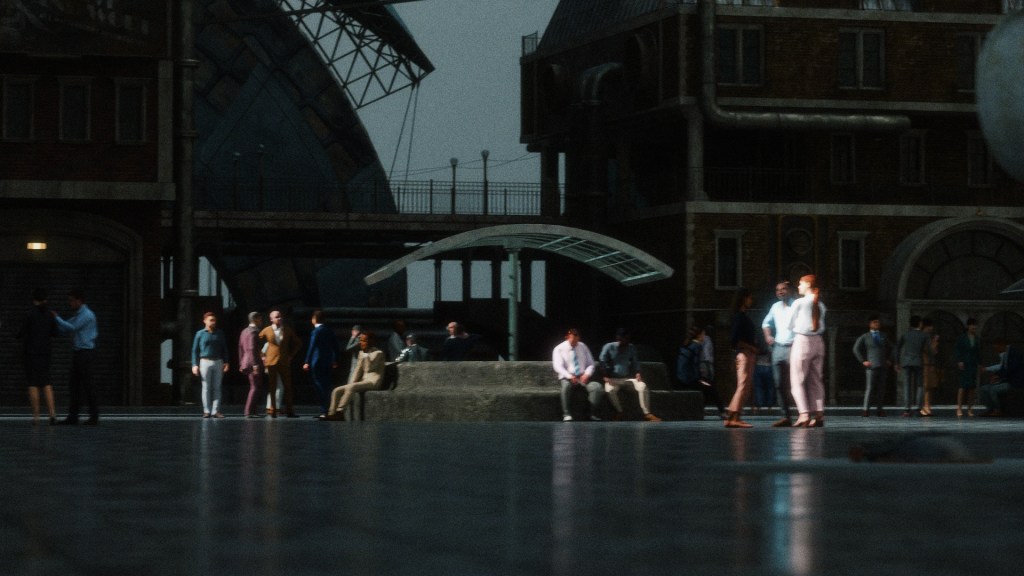
Simulating realistic crowds has long been a challenge in game design and character animation. Fortunately, Reallusion has created iClone Crowd Sim, an advanced tool that can handle these complex simulations in a way that is intelligent and consistent with the environment.
Adding to this great new development are advances in generative artificial intelligence technology, resulting in a truly dynamic solution that, until now, has involved purchasing several additional programs at a very high cost. This tutorial takes you step by step through the creation of crowds using AI to generate textures and the new features in iClone Crowd Sim.
Step 1: Prepare your base characters
The first step is to choose the base characters you will use to generate variations. You can use hyper-realistic character packs offered by Reallusion for Character Creator (CC) or create your own. It will be enough if you have a few to simulate a large population but to work properly, each one must have unique elements.
For this, you can use the “Hair Builder 2 – eGirl” package to increase the attractiveness of your characters with a wide variety of high-quality hairstyles. On the other hand, for clothing selection, you can purchase the “Jackets and coats” package to apply directly to your characters. This pack contains up to 8 types of jackets and coats scanned in 3D in high quality with a low poly methodology designed for video games and film productions.
Step 2: Generate AI facial textures
Export the facial texture of the base character you want to modify from Character Creator. To generate realistic facial textures from these textures we will use Stable Diffusion. An open-source diffusion model in which we will install “Mitsua Diffusion One”, an ethically developed model. Find and download the Mitsua Diffusion One model from its official website and place it in the corresponding folder of your Stable Diffusion model.
Then load the base texture in “Picture to Picture” mode and create a prompt such as: “hyper-realistic facial texture, highly detailed photograph, with very diffuse light”. Generate several images by adjusting the model settings without giving the AI too much creativity until you get satisfactory results.
Currently, it will not be easy for the AI to generate the texture at the resolution and hyper-realistic quality in the details we require. To make up for this we can use Photoaid.com or other similar software to increase the resolution of the generated texture and improve the overall definition.
Before applying the texture I recommend taking it to an image editor in which we overlay the original texture and the generated texture. This way we can replace the parts that the AI has not recreated well (such as ears or nostrils) and that might not put the texture back on the 3D model.
When we apply this texture to the face we will see that the character does not look the same, as we are looking for, but there is still one more step to generate a face different from the original; the texture of normals. To create a normal map taking as a reference our generated diffuse texture we must first convert it to a black and white image. Applying a contrast filter will further improve the result of the reliefs of the face and its definition. Finally, you can use free tools such as SmartNormaps to perform this conversion quickly and at the resolution you want.
Step 3: Generate textures for clothing
You can use AI to generate cool designs and patterns for your characters’ clothes. It is best to start with a basic sketch in a square format, in high resolution and light color so that the texture is easy to multiply on top of the clothing texture. It doesn’t have to be very concrete, the important thing is the silhouette and the space it occupies, create a simple sketch of the design you want to generate.
Generate the image in the same way you generated the face texture and make final adjustments in image editing software if necessary. You can even generate patterns to apply to clothing if your version of Stable Diffusion is available.
AI generates seamlessly tileable texture patterns for clothing texturing.
Step 4: iClone Crowd Sim
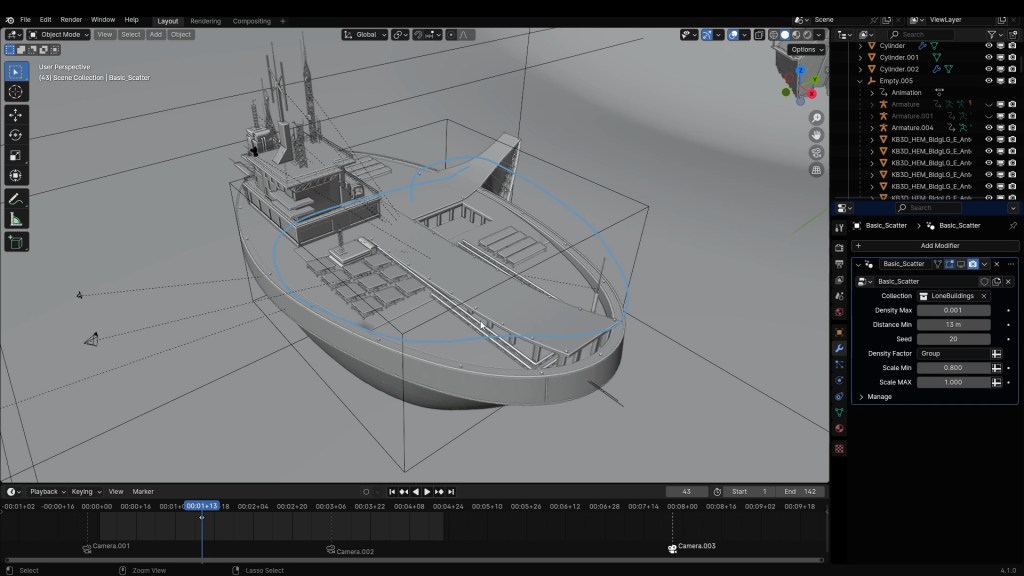
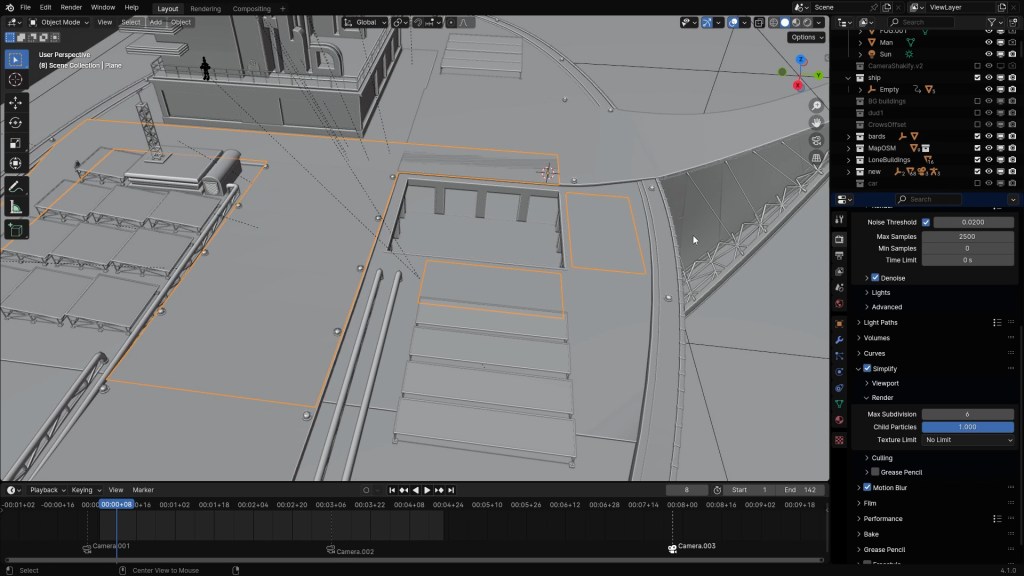
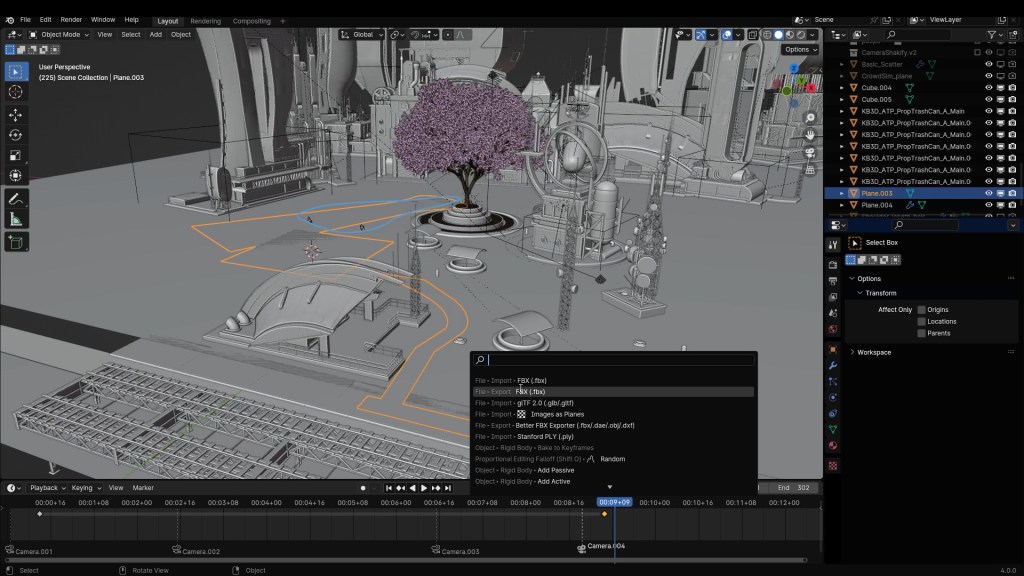
After preparing the characters for our simulation, we’ll proceed to import the scenario from our Unreal Engine project into iClone, where the crowd will be positioned.
Select the “Generate NavMesh” tool in iClone to define the traffic zones automatically. This intelligent tool delimits the areas where the characters can walk on the 3D mesh and generates the margins to avoid collisions.
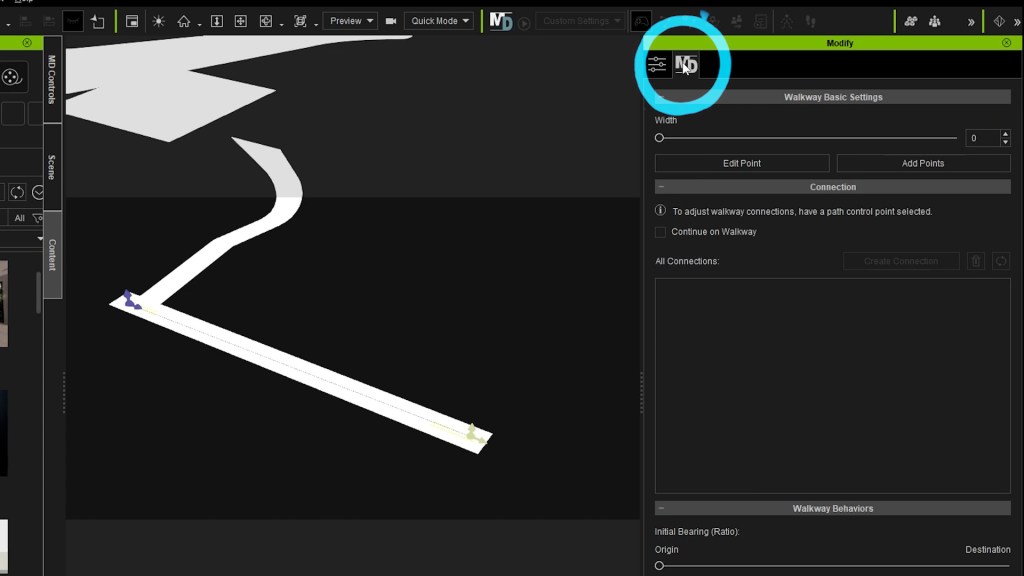
After doing this we can also create paths for the characters to follow using the “Path” tool. This will allow you to control where you want a group of characters to move.
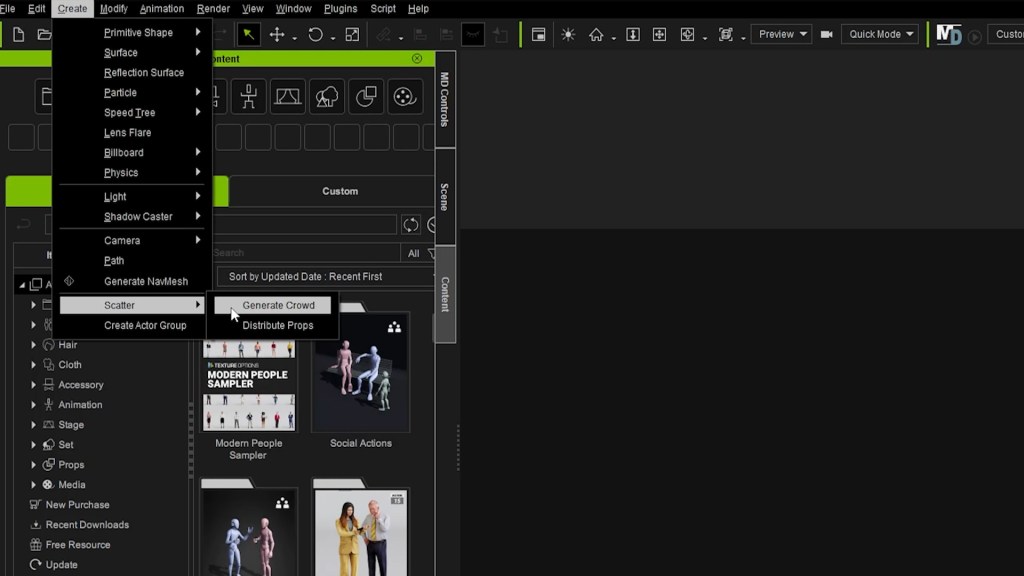
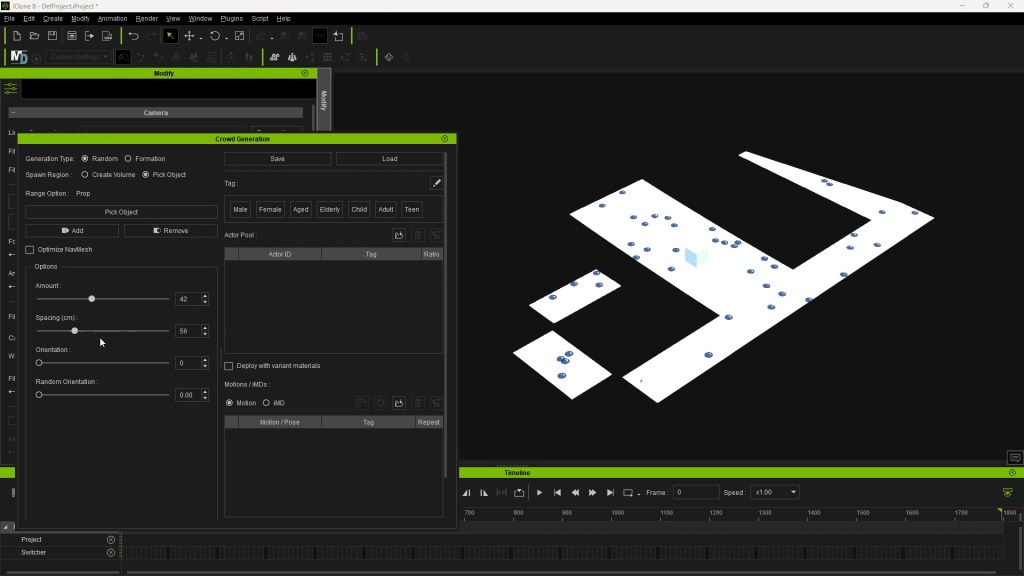
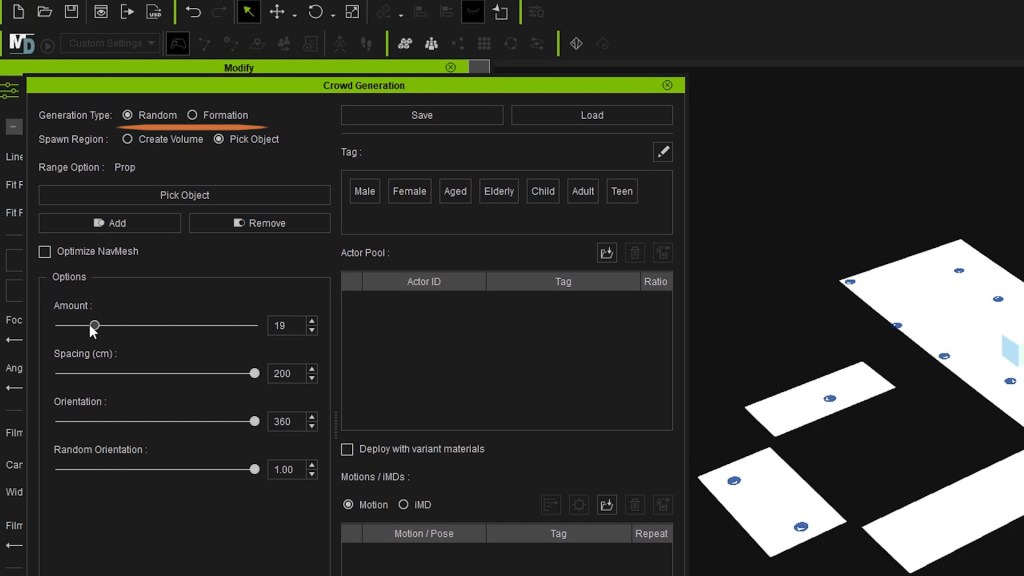
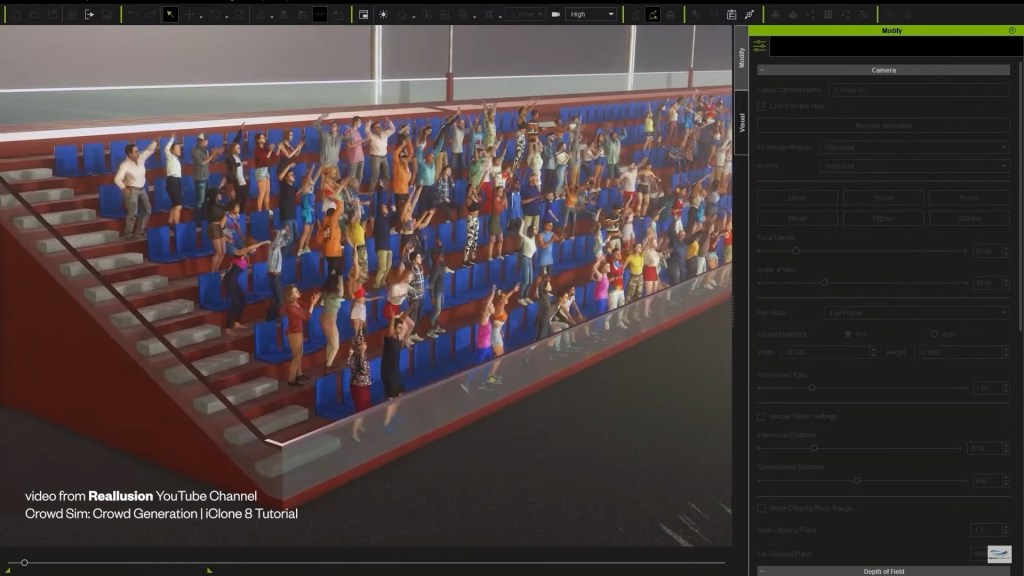
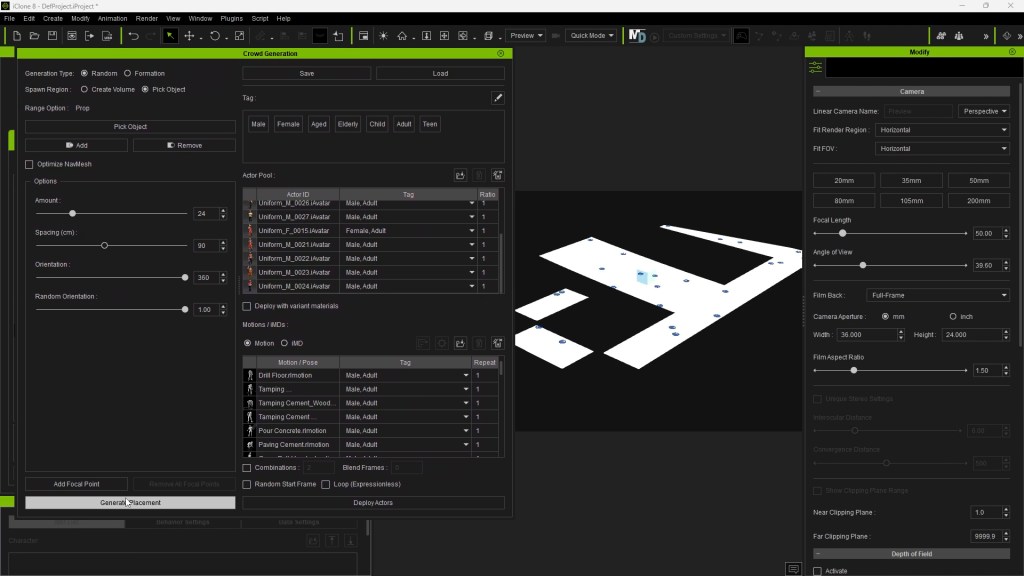
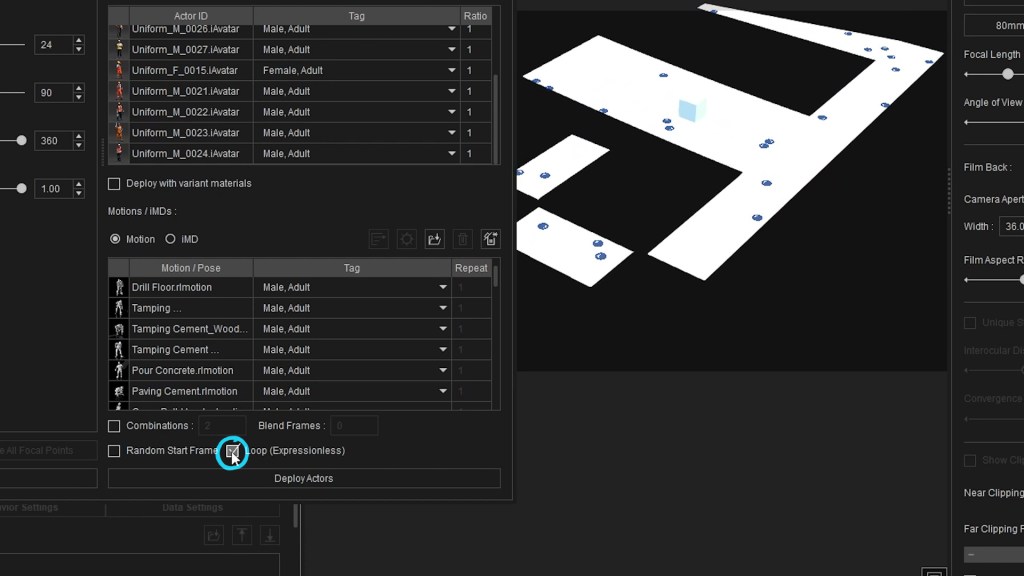
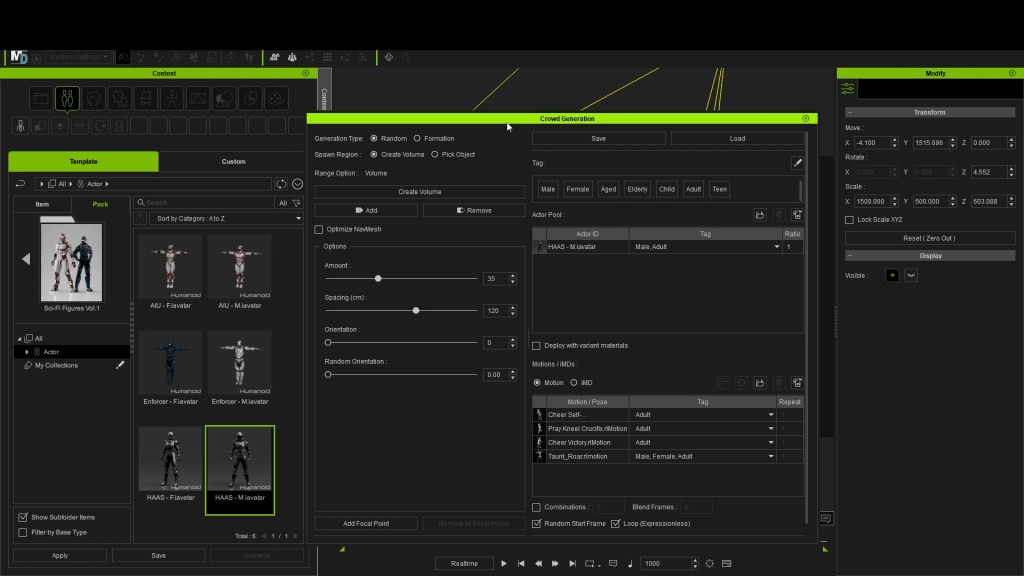
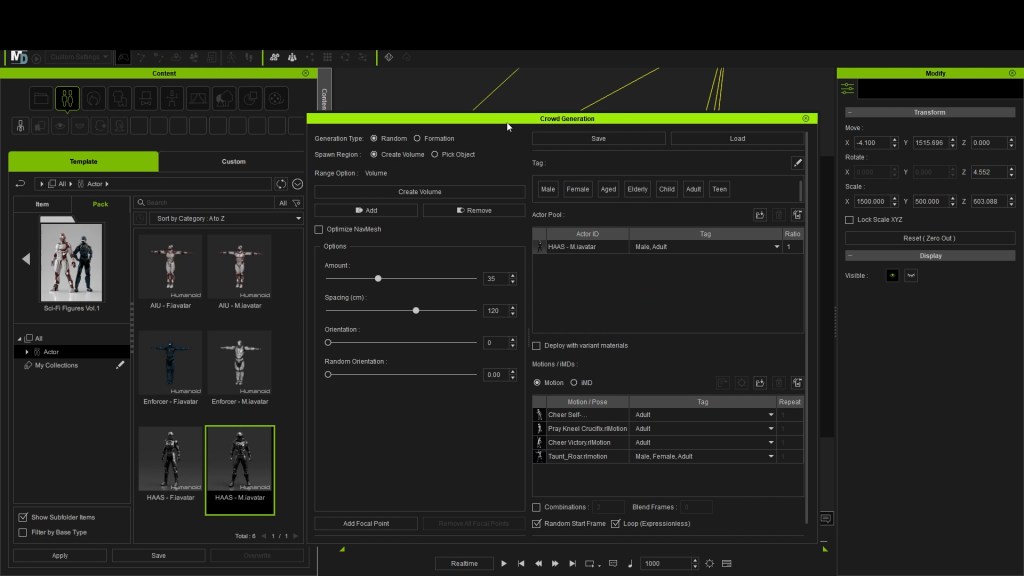
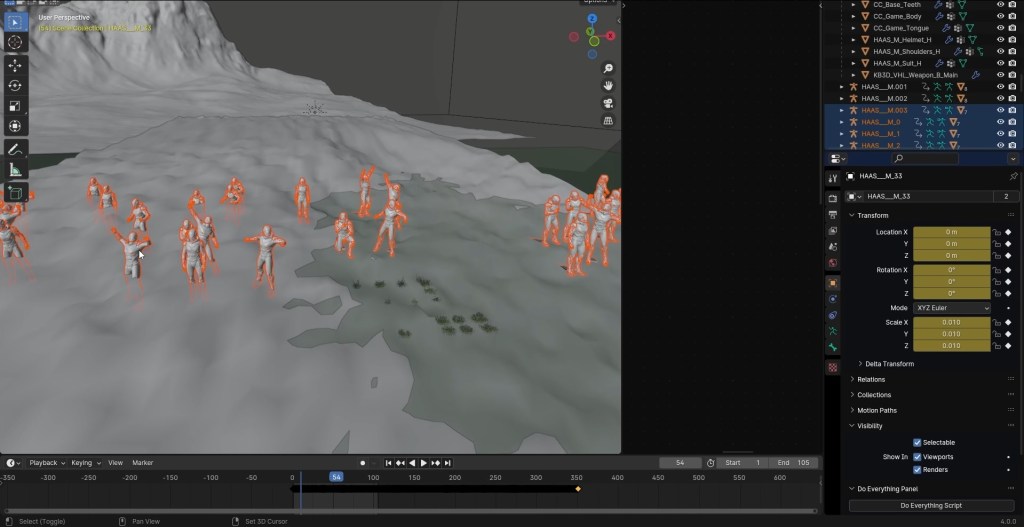
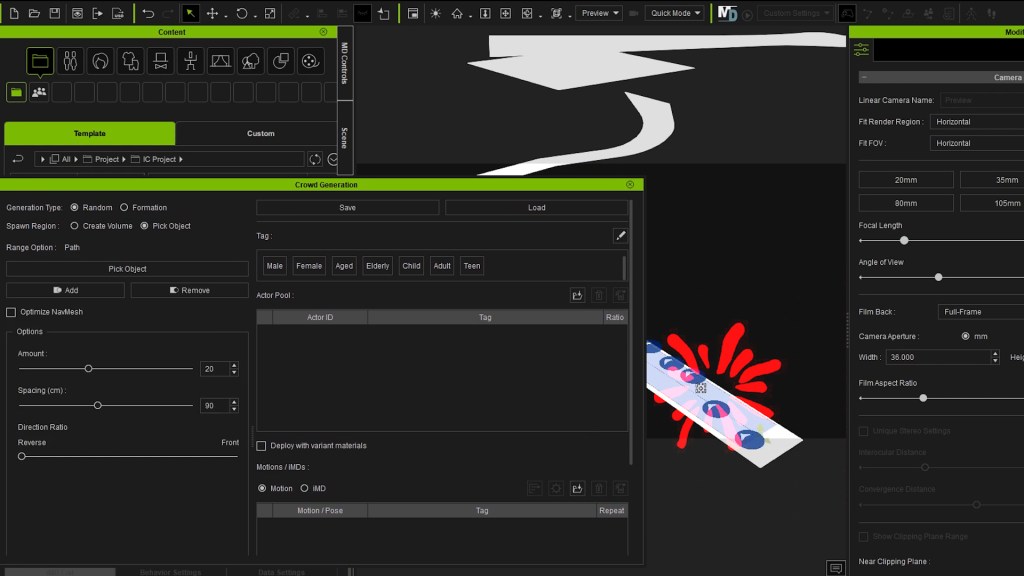
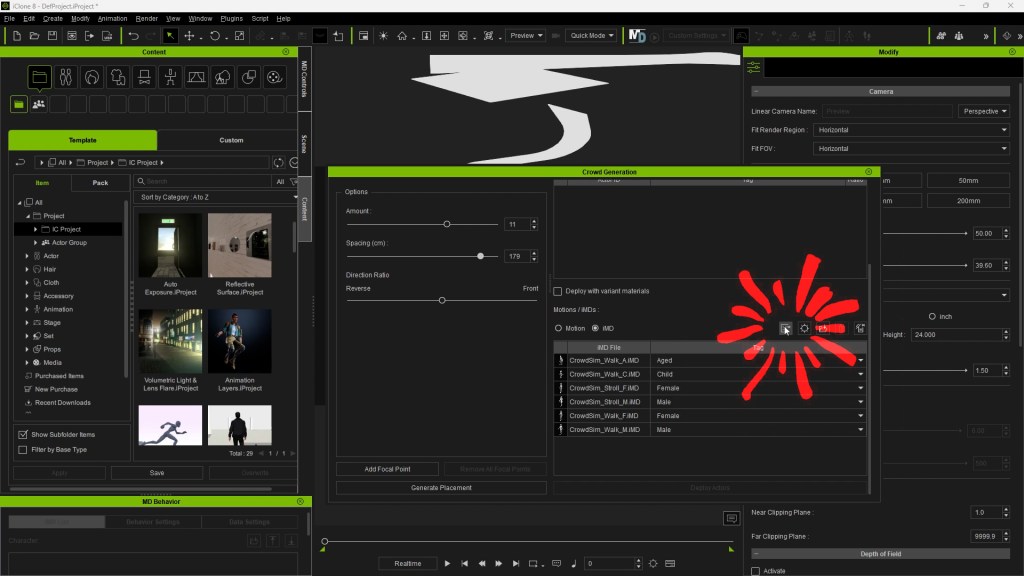
It deploys the “Generate Crowd” menu to populate specific areas with animated characters. The menu allows us to enter characters from our “Content” menu, on the one hand, and movements for the characters on the other.
When introducing several groups of people on stage, it may be necessary to use Navmesh barriers. They are useful because they prevent characters from overlapping during their animations and pedestrians can realistically dodge and avoid obstacles.
Step 5: Export your crowd to Unreal Engine
Finally, we are going to export, in a simple way, the crowd simulation we just created in iClone to Unreal Engine. My aim here is to render a beautiful animation. To do this you need to have the latest version of Unreal Live Link installed so that importing characters into Unreal Engine is faster and more efficient than ever. Remember that you have several tutorials about this process published by Reallusion.
I utilize the Unreal Blueprint to implement the random material feature, allowing for the application of AI-generated textures to both clothing and faces in a randomized manner.
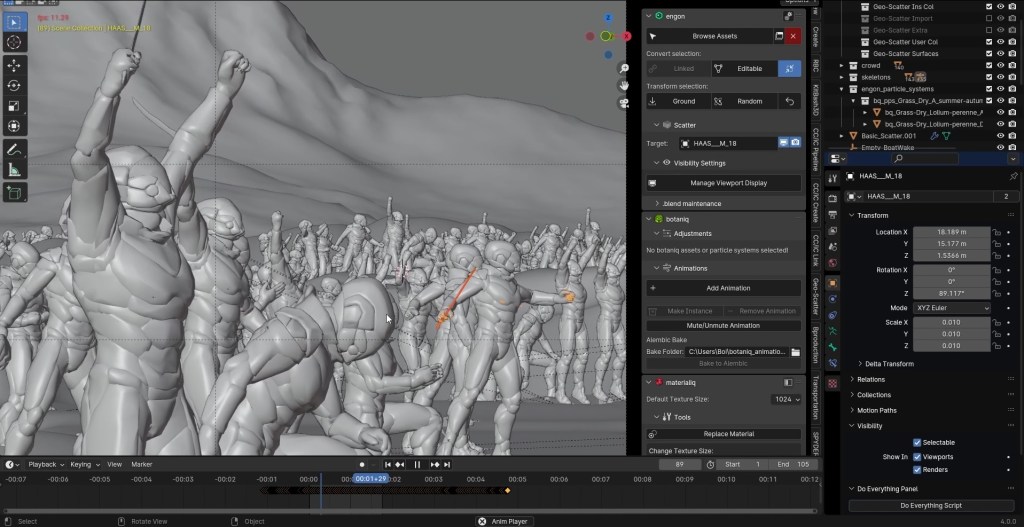
To avoid the repetitive appearance of cloned characters in the imported Unreal Engine scene, we can utilize randomized materials in Unreal 5. These materials not only enable us to change clothing colors but also incorporate AI-generated facial and clothing textures.
While creating these textures involves multiple steps too complex to summarize here, I recommend watching the associated tutorial. It provides detailed explanations of the process, explores texture generation methods, and introduces a technique for creating textures tailored for CC characters, utilizing Reallusion’s hyper-realistic materials upon character import.
That is all! I hope you like the final result and that the tutorial has helped you.
Learn more
Explore iClone for creating 3D character animation
Create crowd animation with iClone Crowd Sim features
What if you have an old project that you want to bring to life using Character Creator, but it’s on legacy topology, or even just a sculpted dynamesh sketch in ZBrush. In this workflow, we’ll take an old ZBrush bust sculpt with arbitrary, non-CC topology, use Headshot v2 to update it to CC topology, which you can then decide if you want to go the body refine GoZ route (see the body workflow article) or the Face Tools route (see the Face Tools workflow article) to fine tune and finish out your character.
GoZ Neutral Base for Scale and Positioning
Our old projects might be in a weird location or scale — let’s bring a neutral base into ZBrush so we can use that as a guide for where our ZBrush mesh needs to roughly be placed. In CC, click Load Neutral Base, and GoZ that over to ZBrush. The pose doesn’t really matter, again we’re just going to use this for scale and positioning.
Load Neutral Base
GoZ Neutral Base to ZBrush
GoZ from Character Creator to ZBrush
Scaling and Repositioning Legacy Projects
In ZBrush, import, open, or load your legacy ZBrush sculpt, and append it to your neutral base. In our case, we’re going to move, scale, and rotate our dynamesh ZBrush bust sculpt to roughly match the head scale and position of the CC neutral base.
Moving and scaling your ZBrush sculpt into place
Prepping the Legacy Sculpt and Export
We’re going to animate our character’s expressions, so remove any “built-in” expressions from your ZBrush sculpt. Don’t worry about adding mouth bags or anything like that; Character Creator will add those for us when it converts our legacy sculpt to CC topology. You can go ahead and delete your neutral base subtools that we used for scale reference, and with your now properly scaled and positioned ZBrush mesh selected, choose Tool > Export > FBX.
Tool > Export
Tip – remove expressions from your sculpt before exporting into CC. We’ll be adding expressions later!
Polycount and Decimation Master
Try and keep your sculpt under 5 million triangles for a more responsive bake in CC later. If needed, go to the ZBrush Plugins menu > Decimation Master, reduce the resolution of your mesh, then export.
FBX Export Options from ZBrush
Importing into Character Creator
Import as Prop
Importing your exported .fbx into Character Creator is super easy; just drag your exported FBX into the CC viewport, and choose the Prop option. Select your prop, and click on the Headshot2 button in your menu toolbar
Launching Headshot 2.0
Align Points placement
Aligning Points
When Headshot v2 launches we’ll automatically be placed into Align Points mode; click the Auto Detection button to automatically place the points from the CC topology head onto your sculpted head. Click and move the points so they correspond to the same areas of the face, matching the placement between the CC head and the sculpted head. If you have shapes that deviate considerably from the base mesh forms, feel free to click to add more points as needed to help the base mesh find your sculpt, such as the exaggerated ears in our case. When you’re done, click on the Head Gen tab at the top of the Headshot v2 interface.
Adding a few more points for extreme shapes
Head Gen
Head Gen – Whole Head option
The Head Gen section allows us to choose what parts of the face or head you want the CC mesh to snap to. If you have a sculpt where only the face is viable, you can choose the face option, or use the Mesh Selection section to fine tune what areas are represented in your sculpt. In our case, since we have an entire bust, we’ll use the whole head.
Refine Mesh
Click on the Refine Mesh tab, and use the “Move”, “Smooth”, “Clone”, and “Project” brushes to match the CC mesh to your sculpt. If your mesh is symmetrical you can use the Symmetry Edit option to speed things up, and you’ll probably want the Conform to Source Mesh checked on, so as you move your mesh, it will snap to your sculpt.
Refine Mesh
Attach to Body
Attach to Body with Source Mesh for our Normal bake
When your meshes match, click the Attach to Body button, and choose the body shape/type that most suits your character. For the texture bake options, we don’t have a polypaint or texture for our sculpt, so we’re going to choose Textureless for diffuse, and From Source Mesh for our normal.
Changing Body Proportions
Right now our character has basic human proportions; let’s make our character a little more unique by using the Morphs tab sliders and/or Morph button in your toolbar to click and pull the proportions of your character around to dial in the exact body you want your character to have.
Using Morphs to change proportions
Attach to body default
Morphs to change proportions
Adding Skin Textures
Since we didn’t have any textures or polypaint to bake to our head, our character is textureless — let’s fix that! In the Content tab, navigate to the skin folder, and double click any of those options to apply a character skin. In our case, we’ll use CC4 Kevin’s textures.
Applying CC4 Kevin’s skin to our character
“Ignore Head Normal Texture” checked on
In the resulting dialog box, use the defaults, but check on Ignore Head Normal Texture; this will keep our baked Headshot normal map instead of replacing it with Kevin’s.
Applying Teeth and Eye Materials
We’ll apply teeth and eye materials in the same way; Navigate to the teeth and eye sections of your content browser, and double click any of them to apply it to your character.
Applying teeth to our textureless character
Applying eyes to our textureless character
Expression Wrinkles
At this point, you can also apply the neutral expression wrinkles, Kevin’s expression wrinkles, or wrinkles from the Wrinkle Essentials pack if you have those. You can use these expression wrinkles as-is, or as a base for your Face Tools fine-tuning pass, or get rid of them entirely and sculpt them yourself, again using the Face Tools plugin.
Expression Wrinkles content
Neutral Expression Wrinkles
Kevin Expression Wrinkles
Deep Saggy Wrinkles from Wrinkle Essentials Pack
Finishing Your Character
In conjunction with expression shapes and wrinkles, we also have the body to consider — at this point in the Headshot workflow, you can choose whatever workflow works best for you.
CC Model with skin textures applied
Updated ZBrush head and body sculpt
CC updated with the Substance Painter bake & texture pipeline
“The Goblin Body and Gear” article will walk you through refining the body sculpt and texturing in Substance 3D Painter, and the section just above this one will show you how to take the result of that workflow into Face Tools, where you can then refine the face shapes and expression wrinkles.
Goblin Body & Gear Workflow
Vampire Face Tools Workflow
Or, you can jump right into Face Tools: the “Vampire Face Tools” article will walk you through how to refine your base head, expression shapes, and expression wrinkles, and then show you how to follow back up with a refined body that matches your head.
Either direction you take is completely up to you; Character Creator can support however you like to work, and remember, you can ALWAYS open files, relink, and refine at any point, in any order. Character Creator is the ultimate flexible solution for character creation — the technical heavy lifting is provided by the suite of easy to access, low barrier to entry tool sets, and allows you, the artist, to focus on compelling visual storytelling!
About The Author
Michael Pavlovich earned a Bachelor’s degree in Computer Animation from RSAD in 2005. Initially, he contributed to the development of environment and character art for popular video games such as Madden and NCAA Football. Later, he relocated to Austin to join Daybreak Games, where he worked on the creation of art assets for DC Universe Online.
Presently, Michael holds the position of Director of Character, Weapon, and Vehicle Art at Certain Affinity. His expertise lies in implementing iterative pipelines for Certain Affinity artists helping develop renowned video game franchises, including Halo, Call of Duty, and DOOM. To stay updated on his latest tutorial projects, you can visit Michael’s YouTube or ArtStation page.