首頁 » Page 44

Anyone can Create Professional Animations with Cartoon Animator 5.2 Motion Pilot

Veteran Cartoon Animator user and developer Garry Pye has been working with Cartoon Animator (CTA) for over a decade and has made the journey from casual animator to the role of 2D Community Manager for Reallusion. Now working alongside his 15 year old daughter Maddison, together they sat down to showcase just how easy the new Cartoon Animator 5.2 Motion Pilot makes 2D animation.

With a layered scene setup in Stage Mode, Garry and Maddison demonstrate the tools and features of Motion Pilot and how anyone can now produce real time smooth, professional results in minutes. 
Cartoon Animator has long been the easiest and fastest way to create 2D animation. With Cartoon Animator you can produce quality projects in no time, regardless of your skill level in animation. Cartoon Animator makes animating easy for everyone, and today we’re going to show you how.

With the latest update to Cartoon Animator 5.2, we see the introduction of Motion Pilot, which gives you total control over the movement of your actors and props, controlled in real time using mouse movements, with variable parameters set by you. 

Motion Pilot gets rid of the need for hours of keyframing your animation, because now you can control your characters like puppets using your mouse, while you record the motion. Motion Pilot is more like acting than animating.  It makes everything easier and faster, but more importantly it makes animating so much fun for people of all ages and skill levels. Without any previous knowledge or experience of 2D animation, anyone can use Motion Pilot to create smooth results in minutes. 
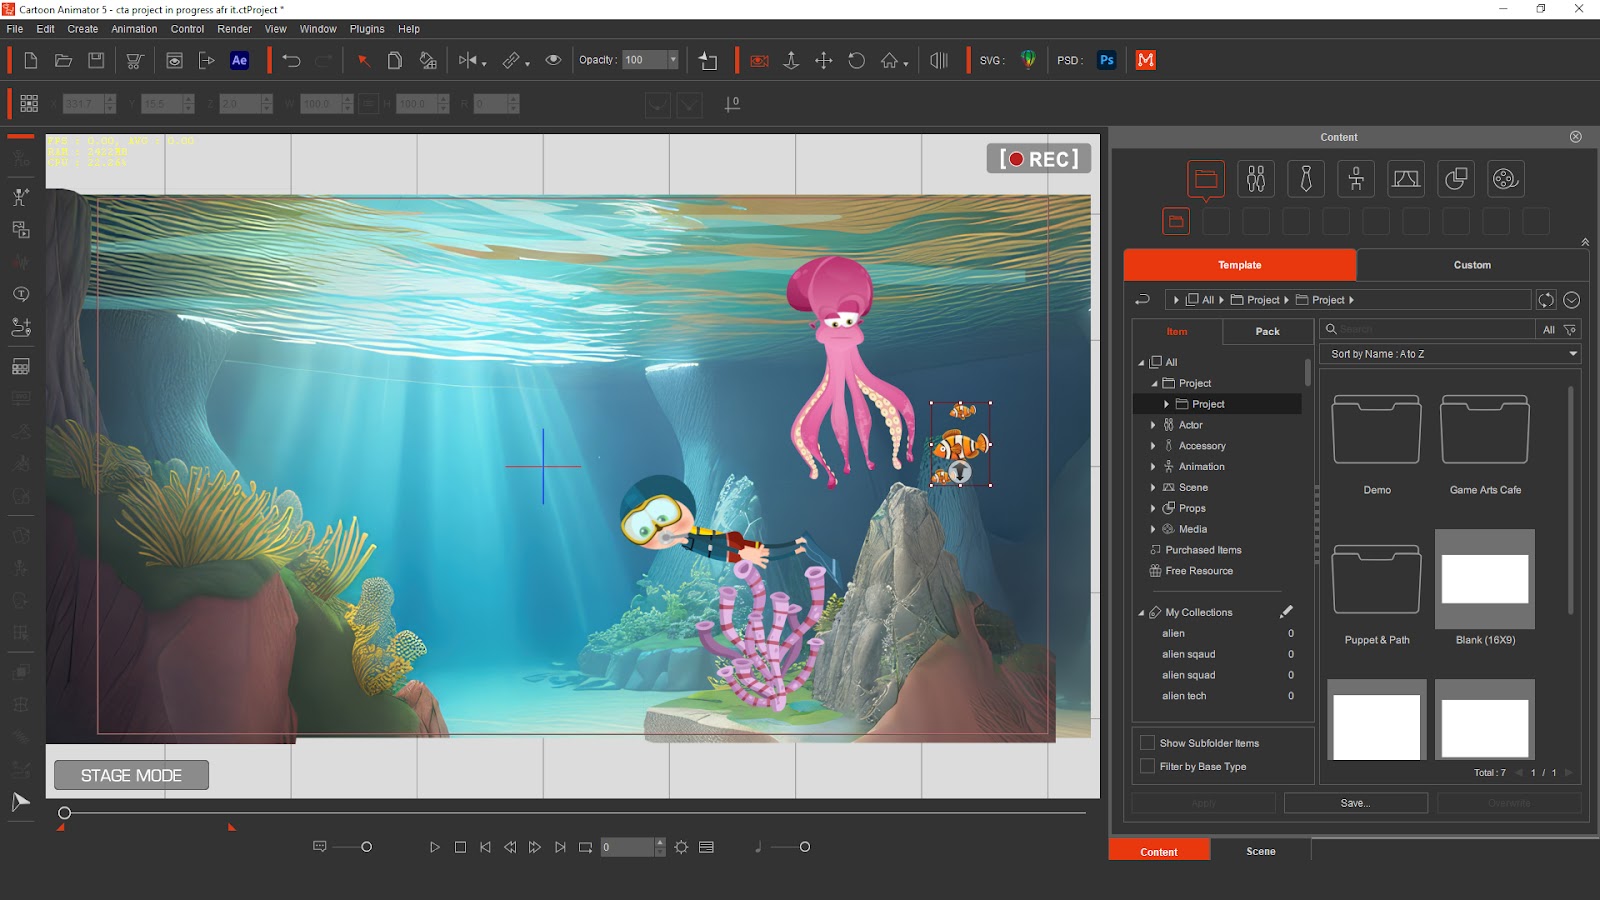
In the screenshot above we have a scene set up in Stage Mode. This scene was bought in as a Photoshop PSD file, maintaining its layers so we can move our actors around inside the scene, both in front of and behind objects and then move our camera about to create a sense of depth to our scene. 

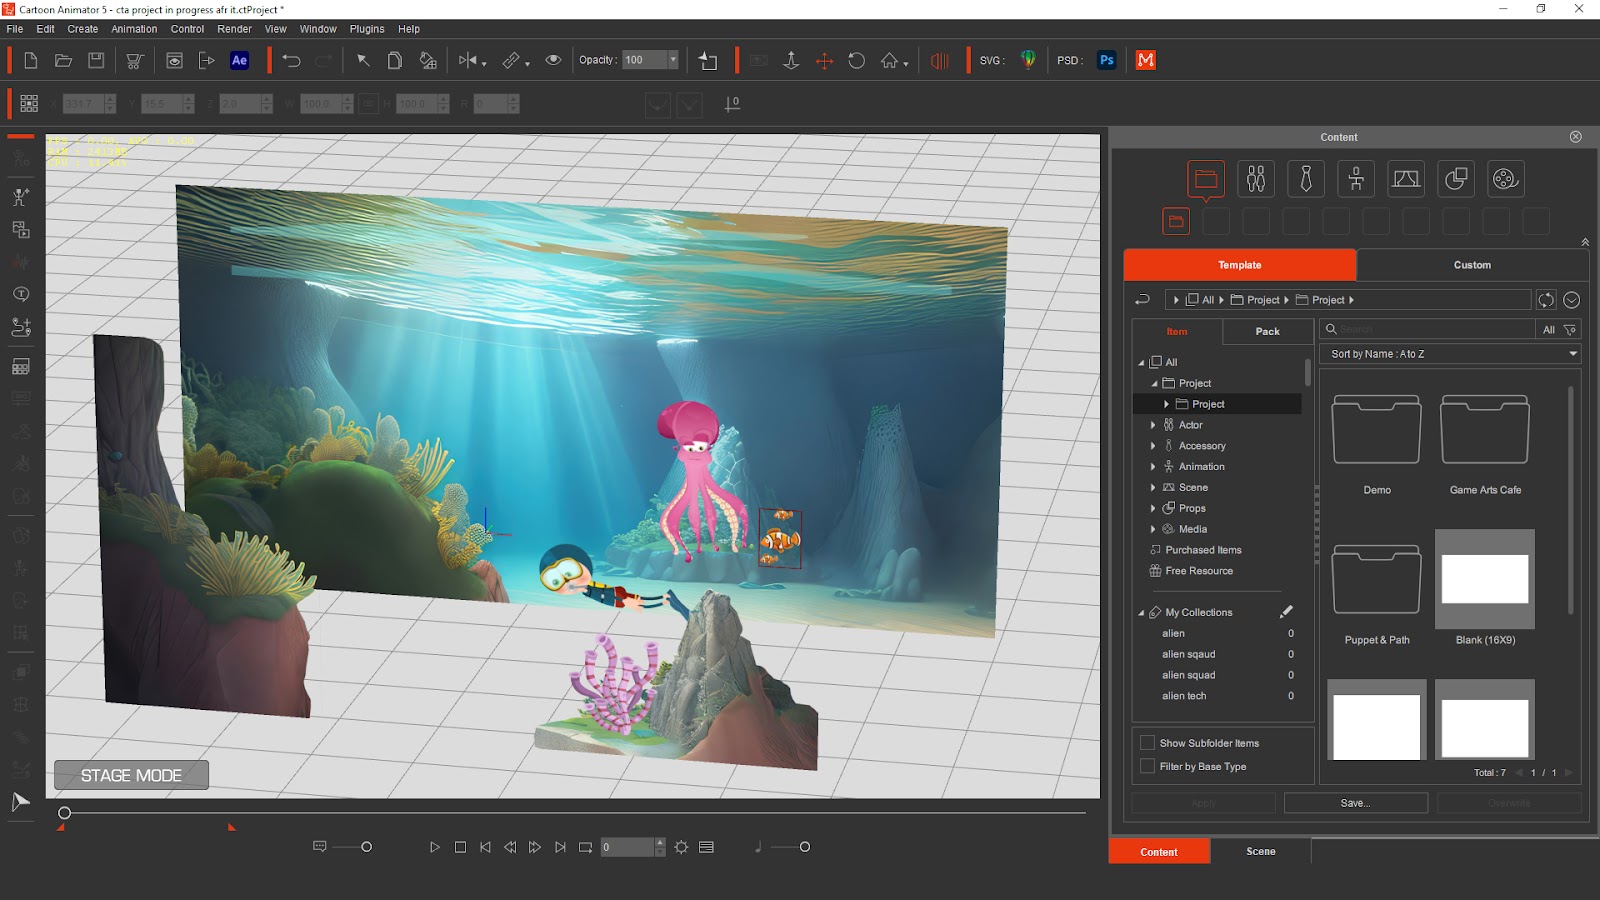
You can instantly switch to 3D view to see where all your characters and prop elements sit on the stage, as shown below.
To introduce an actor to your scene, you can simply drag and drop them from your Content Manager. By adding any one of the hundreds of premade motions to your actor, we could have our scuba diver swim instantly, without the need to keyframe his movement or draw individual frames. Cartoon Animator‘s premade motions do all the hard work and give perfect results every time. 

With Motion Pilot, you can now make the scuba diver automatically swim as you pilot him around the screen using your mouse. In Motion Pilot, there is a section called Motion. Check the Blend Motion box, then drag and drop your swim motion onto the text box. If you only want him to swim forwards, scroll up to Face Cursor, and turn that off so he doesn’t flip direction as he swims.

Position your scuba diver to where he will begin in your animation and then before recording the screen you can select practice so you can rehearse you motion. Once you click Preview, move your mouse over the scuba diver and hit the space bar and watch him come to life and swim, following your mouse movement in real time. 

You can change the speed at which an actor moves using the Speed slider. 

Once you have rehearsed your animation, do the same again, only this time hit Record, to capture all of your characters animation in real time. Moving your character around feels more like playing than animating, as you become the actor and put your performance into their motions.

From frame zero, hit Play on the timeline and watch your new animation playback. What would have taken hours of tedious keyframing and animation skills has been completed in mere seconds thanks to Motion Pilot and has produced the smoothes result possible. 
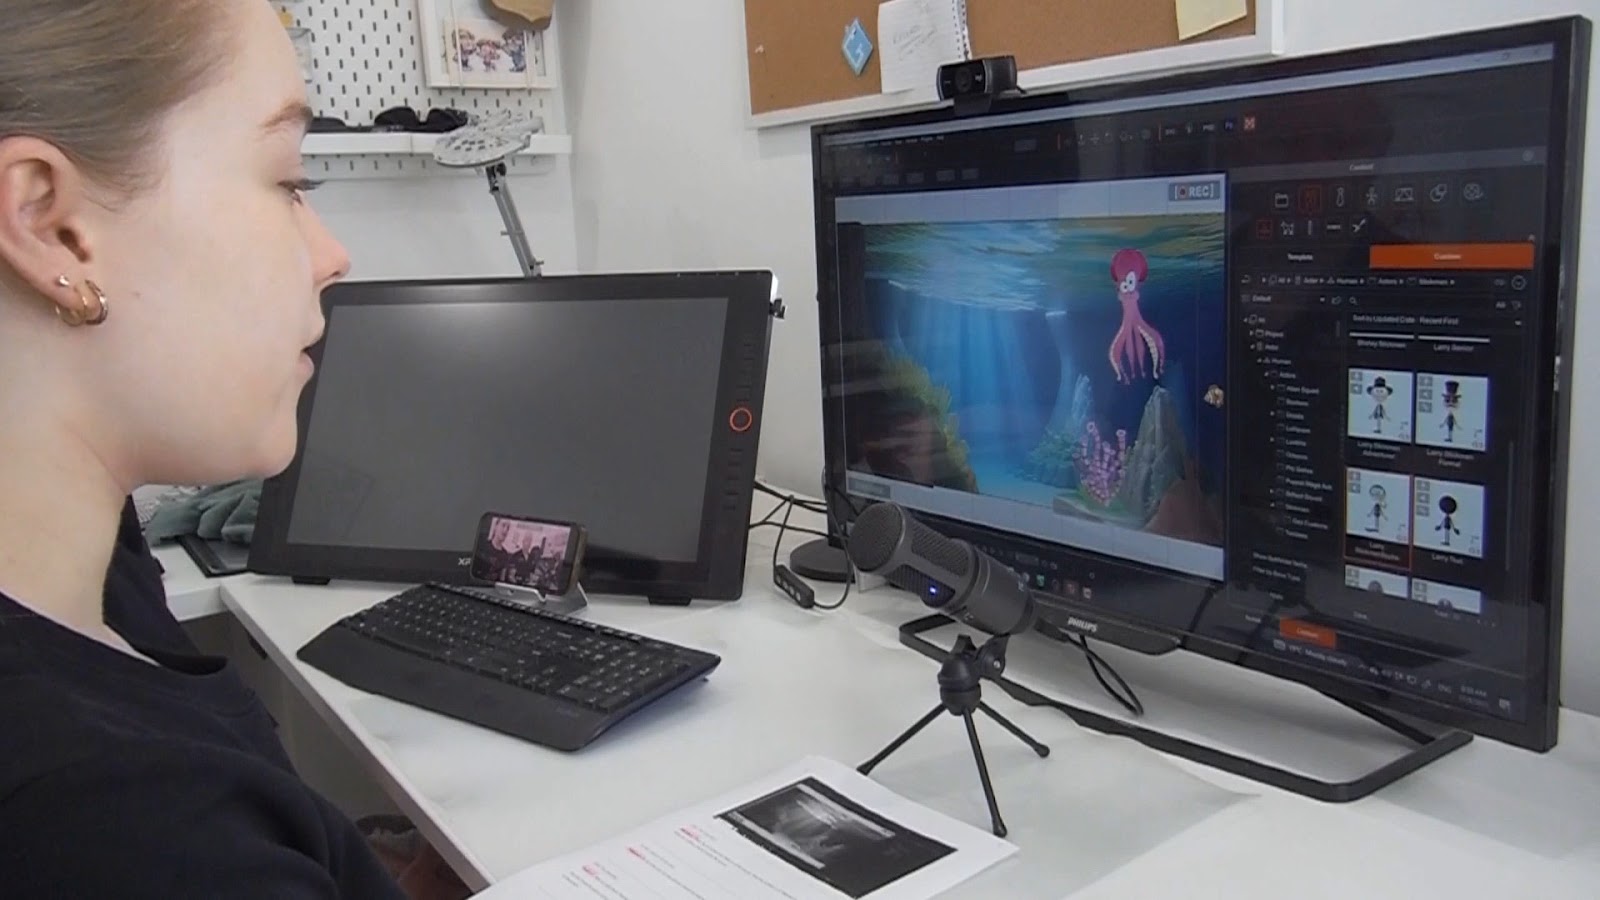
Even after you have completed many frames of animation, Cartoon Animator allows you to rewind through your project and add new animation or even alter the animation you have created so far. 

The octopus actor in our project has Spring Bones built into his body rig, which you can apply yourself to any CTA actor. Spring Bones allow character parts like limbs, hair and accessories to wobble and bounce about in real time automatically, with no need for keyframing from the animator. Spring Bones dramatically reduce the amount of time it takes to produce 2D animation and at the same time provide realistic and smooth motion results.

Instead of adding a motion to the octopus like we did with the scuba diver, this time we were able to  be the puppeteer and move him about while we record his movements in real time. After recording the motion of the octopus, we could playback our animation to see your octopus and scuba diver swimming together.

Animation has never been so easy or fun! You can control any character or prop using Pilot Motion. Moving them about like a puppet and just recording it to make an animation in real time.
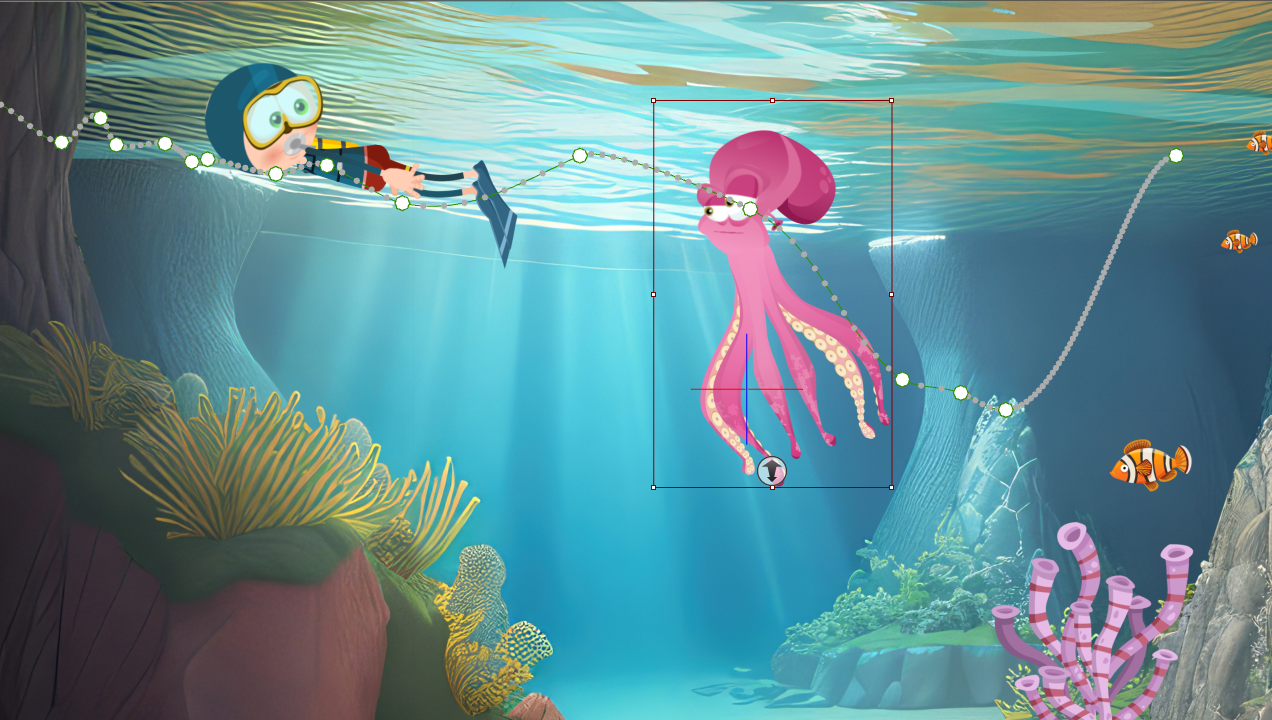
We were able to pilot the fish in our scene using the same real time puppetry applied to the octopus. In addition, using a Motion Pilot feature called Flock Settings, we could make duplicates of the fish and have them follow the leader. Flock Settings give the option to select multiple items as the children, following the parents with preset time delays and in various patterns. This is the ideal way to create animations of groups like swarming insects or random swirling leaves blowing about in the wind. Again, the type of animation that would otherwise require a high degree of skill and a large volume of time to execute, can be done in seconds.  

Even though Motion Pilot makes animation fast, fun and easy, it is still an incredibly powerful tool that gives you total control over your animation. For instance, we saw that Maddison and I could animate the Octopus in real time just by moving the mouse around. But even after the motion is recorded, we can still go back and add more character animation to our actors. 

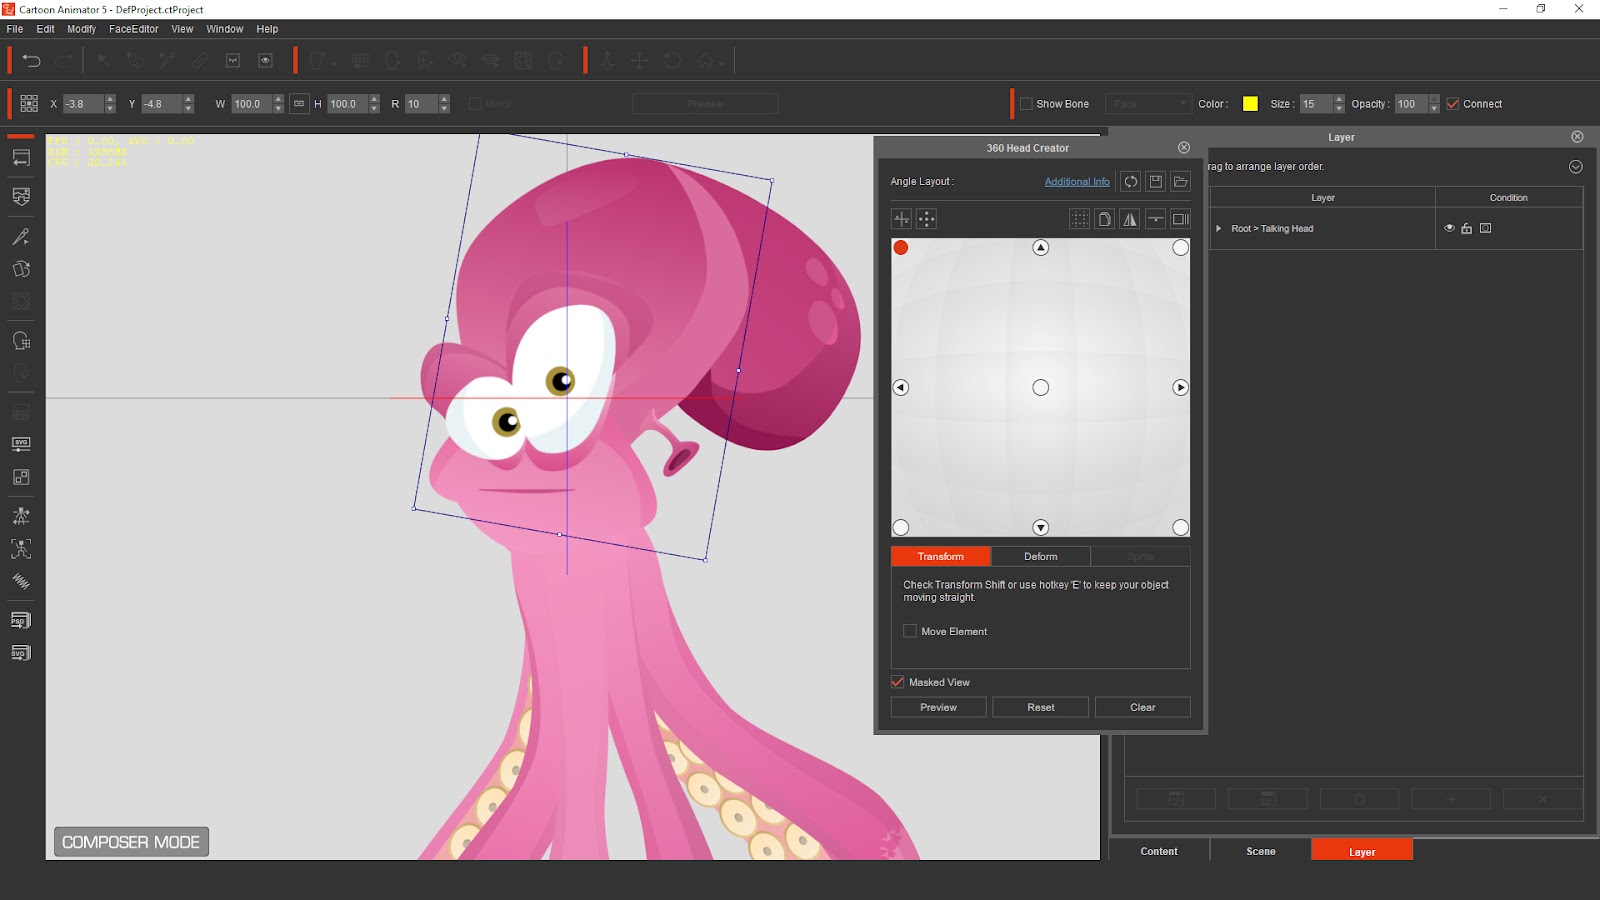
Using Cartoon Animator‘s 360 Head function,  we were able to make the octopus turn its head in the direction it’s swimming. We could keyframe the rotation of the actors head and even add in facial animation like blinking and lip syncing to voiceover tracks.
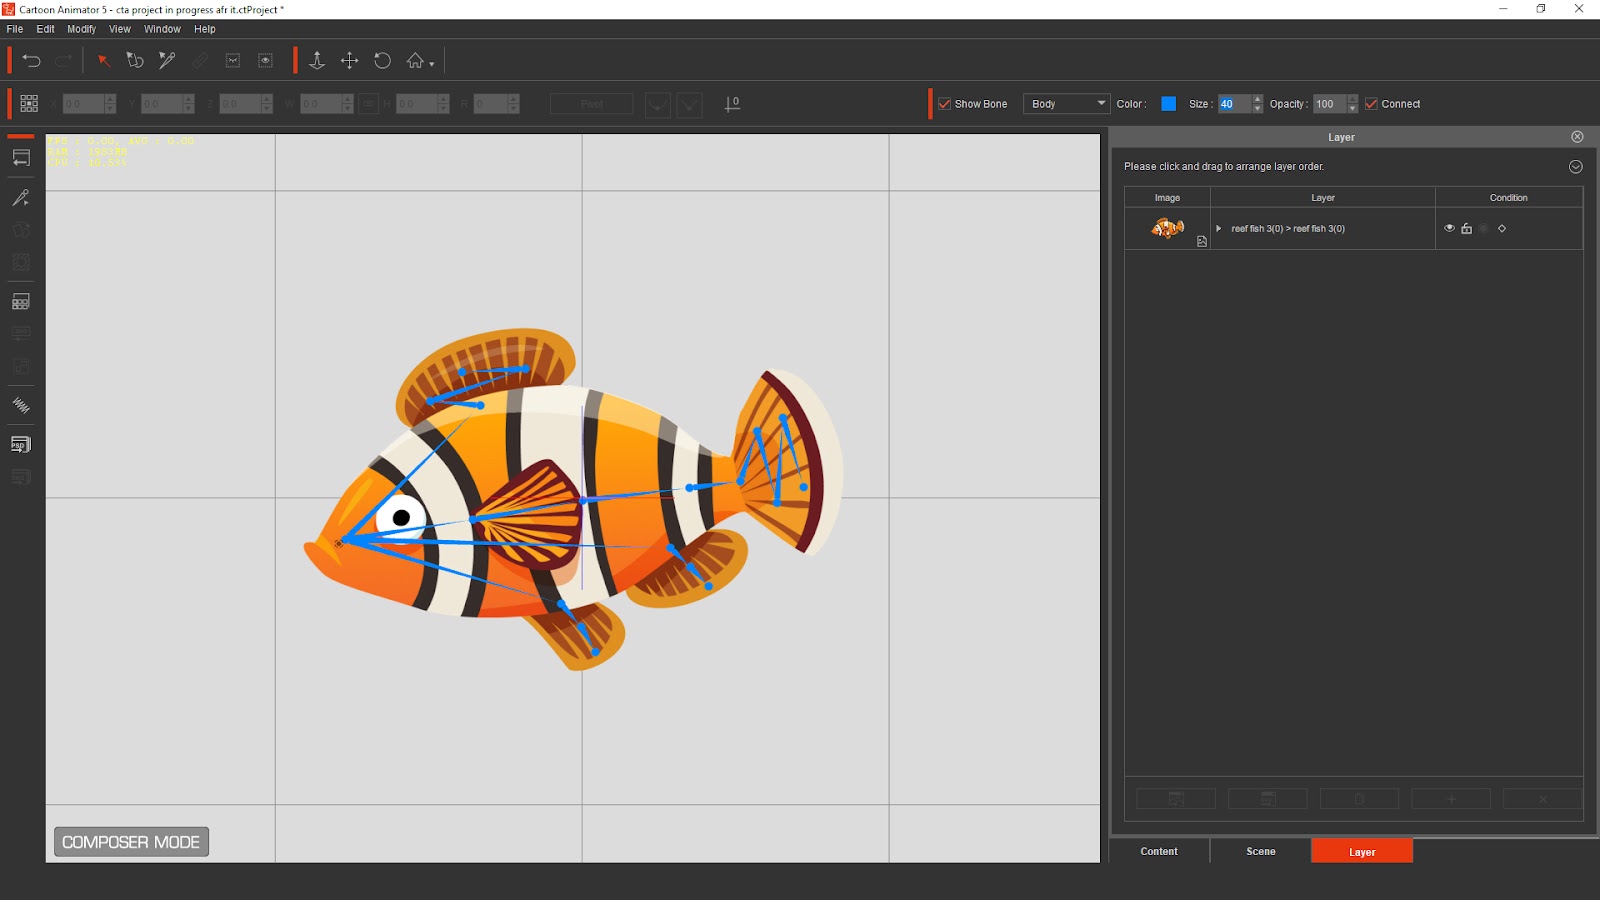
Spring Bones were easily added to the flat PNG fish props to make them move in a more dynamic way, as shown in the image below. Then, using the Wave function of Motion Pilot, we were able to have the fish move automatically, controlled by parameters we set. For instance, by adjusting the Y-axis of the Move Amplitude, the fish will now bob up and down in the water on its own. And changing the Loop Duration determines how fast or slow this motion is.  You can even tell Cartoon Animator whether you want the fishes movement to be constant or random.
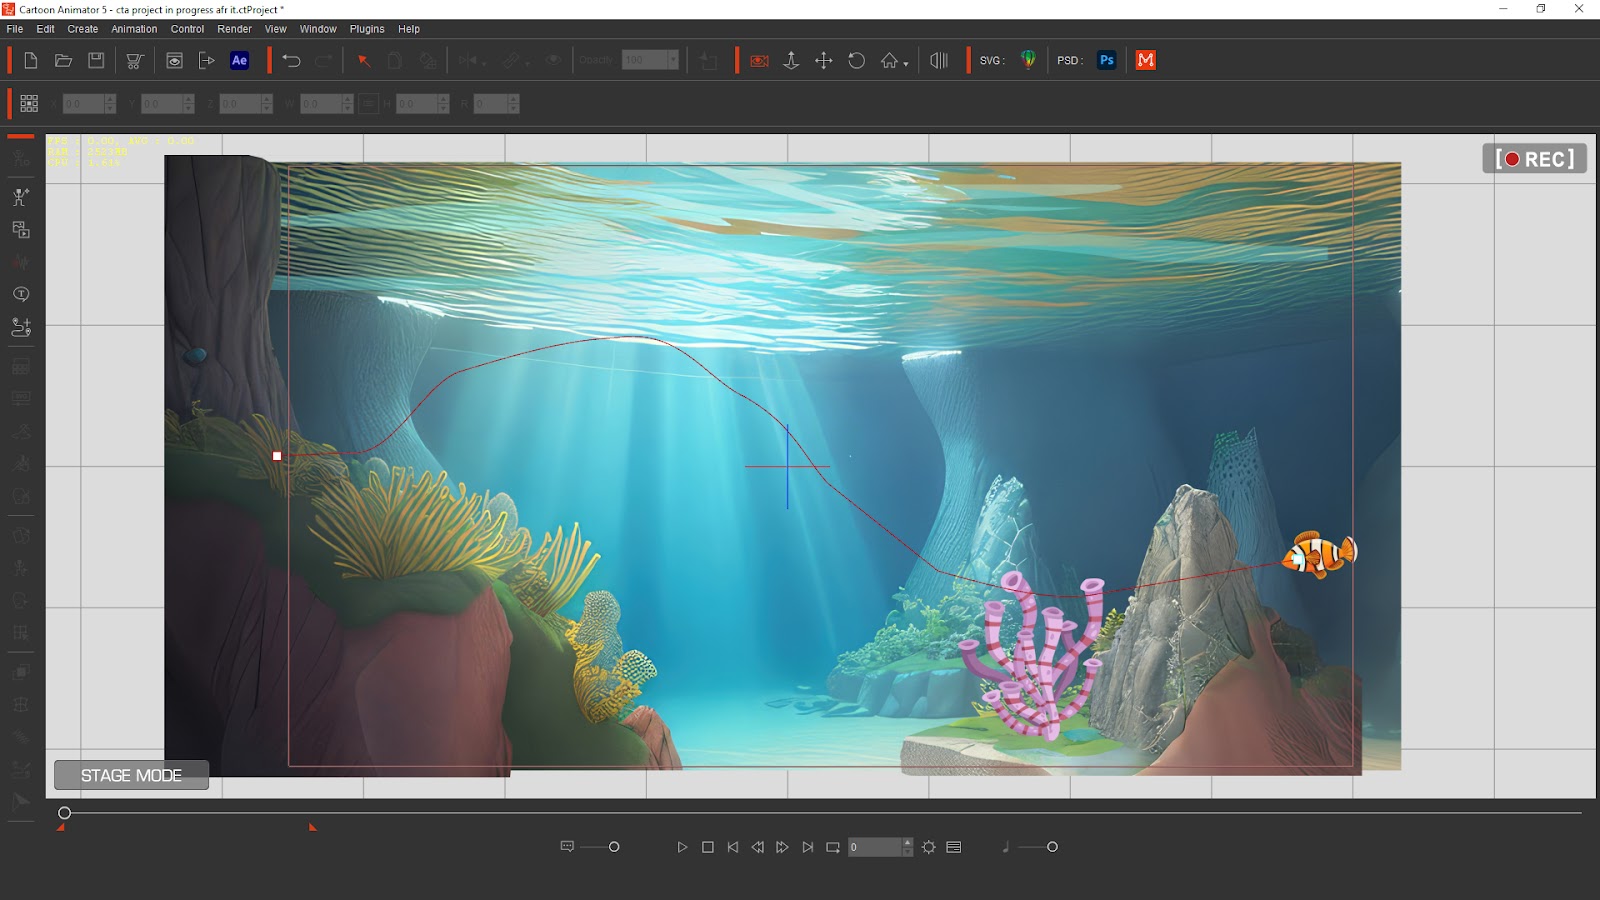
As well as puppeting your actors in real time, you can create a specific path that your actors can follow, so you have total control over their movement. After plotting a path with mouse clicks, you can link your actor to the path, which it will follow as the animation plays, and you can determine how long it takes for the actor to progress along that path. In the image below, the red line is the path that has been manually drawn for the fish to follow. 
Your actors don’t have to just move side to side and up and down either. In Cartoon Animator you can build your scenes so they have camera depth. All of the elements in your scene are layered, from close to camera, to all the way off in the distance. This means you can have your actors move in front of and behind objects and control this during live recording with Motion Pilot by adjusting the Z-axis. We were even able to use the Scale function to make actors become larger as they move closer to camera, and smaller as they move further away. 

There are lots of different ways you can control your actors with Motion Pilot, and changing the parameters for how they move is fast and easy, and give instant results that you can preview before recording your final movie.

Finally, you can decide whether you want your actor to move in time with your mouse or using the Lazy Mouse function, you can have the actor follow along at a slower, smoother pace.

You are not limited to just the actors in your scene being controlled by Motion Pilot. You can control other scene elements as well, to help bring your scene to life in a dynamic way. When we set up our scene and added the sponge as a static prop, we were able to add our own custom bones to the sponge to give it a simple skeleton. Then we turned some of those bones into Spring Bones, giving them flexibility. Using Motion Pilot, we were able to set the rotation on the prop so it gently moves side to side, as if affected by the water current, and it does this automatically as our scene plays. 

By making the Tween frames Random, the motion looks more natural, and then we can set the Loop duration to make the sponge gently sway about during our scene, while the rest of the action takes place around it. 
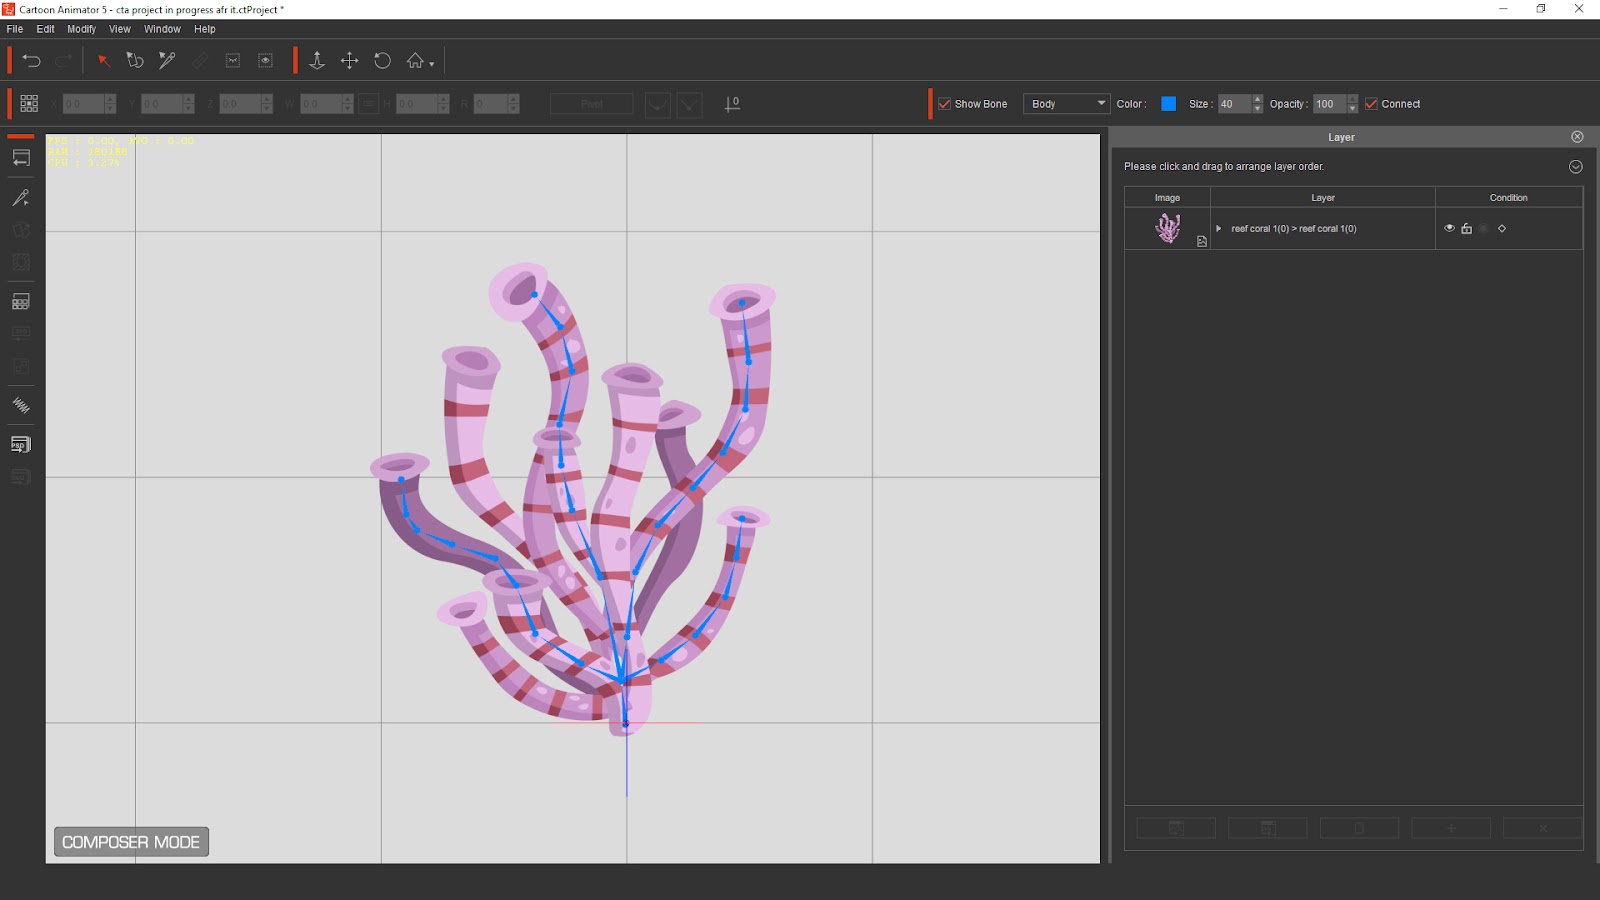
You can apply this style of automated motion to any item in your scene, meaning everything can move in its own unique way. We could even apply the wave motion to the water current prop at the top, creating the illusion of the water constantly moving. By applying Spring Bones to this prop, it appears to flex and wobble about when we applied a simple Wave motion to it, helping to bring our scene to life. 

Getting the exact look you want is as easy as changing the values in the menu, for instant results. You can make them as realistic or as exaggerated as you want! 
Maddison and I had so much fun working together on this Motion Pilot project. Anyone of any animation skill level, advanced, amateur or even zero experience, can be producing quality animation instantly with CTA5 now. You don’t have to do anything but have fun, because Cartoon Animator and Motion Pilot do all the work for you, making the process feel more like playing than animating. 

Learn about Cartoon Animator:
https://www.reallusion.com/cartoon-animator/

Discover CTA Motion Pilot:
https://www.reallusion.com/cartoon-animator/puppet-animation.html

Follow Garry Pye:
https://www.facebook.com/garrypyeanimations/

Turn Your Manga into Animated 2D Characters with Cartoon Animator and After Effects

The Winner Tips & Interview series covers practical workflows and techniques shared by winners from the “2023 Animation At Work Contest”. To let users see the full spectrum of the Cartoon Animator pipeline, we are introducing projects that received attention and credit from the community. Let’s now take a look at “Valiant Seven” to see how Astrovique worked her magic with Reallusion Cartoon Animator (CTA).

About Astrovique

Greetings! My name is Astrovique. I’m a full-time illustrator and hobbyist animator. I often create fan art to exhibit and sell at conventions in Australia such as SMASH!, Oz Comic Con, and Supanova. On the sidelines, I also have a webcomic that I’m working on known as Valiant Seven and oftentimes find myself animating characters from my series. I’m also a massive memester and would just about animate anything that I find myself laughing at and sharing that laughter with others.

How I Discovered Cartoon Animator and why I used it

I stumbled upon this software through the Animation at Work competition. About a month after the competition had already started, I saw a sponsored ad on Instagram and thought, “Why not give it a shot?” I’m always eager to learn new software and see what I can create. I selected Cartoon Animator 5 as one of my production tools due to its free-form deformation tool and spring dynamics. I was intrigued by the idea of picking up a new program on the fly, and it turned out to be a user-friendly choice with educational resources readily available to guide me through the process. I particularly appreciated the character rig tool, which allowed me to easily manipulate my character’s limbs and keyframe them, while the applied spring dynamics responded to the movement. The deformation tool proved invaluable for creating quick and simple motions for my characters.

Why did I choose this topic?

I was drawn to the Comics and Art Animation category because I have an existing webtoon series that I wanted to explore further in various digital media, including illustrations and animation. This contest presented an opportunity to create a short animated trailer for my series, and I am satisfied with the result.

My Creation Process

Step 1 – Storyboard

To begin, I crafted a rough storyboard outlining the composition and timing of each scene in sync with the trailer’s music. Underneath each rough sketch would be general notes of how it would be timed to the beat of the trailer music.

Step 2 – Drawing Unique Characters

After finalizing the composition, I worked on detailed character drawings, ensuring that various parts like hair, head, eyes, and clothing were on separate layers for animation. I dedicated extra time to make the final shot in the trailer as detailed as possible, given the limited timeframe that I had.

Step 3 – Animation

I imported each scene into Cartoon Animator 5, utilizing different layers that needed animation. I used the free deform tool and character rig tool to manipulate and rig them in the program. Additionally, I applied spring dynamics to smaller details, such as strands of hair, to respond to specific keyframes rather than animating them manually.

Step 4 – VFX Composition

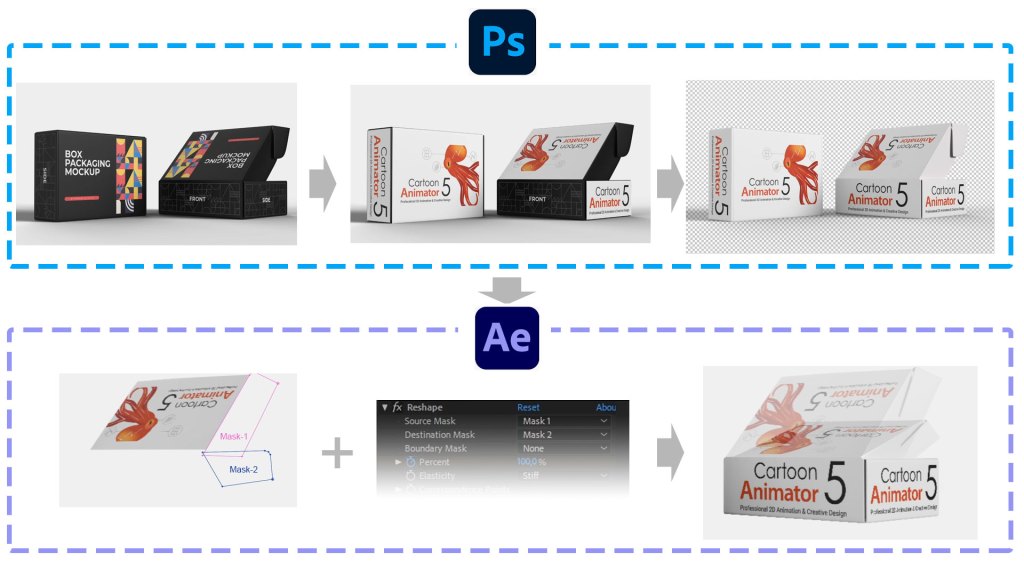
Once all the scenes were animated, I exported them as a PNG sequence and imported them into After Effects. There, I edited each shot to match the music, and I used the puppet tool to animate complex layers and create unique distortion effects during scene transitions.

Interview with Astrovique

Q: What do you think makes a winning entry to competitions like this? How does someone make their entry stand out in the crowd and really grab the judges’ attention?

A: Honestly, having something that is uniquely yours and fits whatever category you’ve entered is the best way to go about in a competition like this. On top of that, remember to have fun with what you create! I participated in this competition because I wanted to create an exciting trailer featuring my characters in action scenes, all while learning new software and enhancing my drawing and editing skills.

Q: Some of you are quite new to Cartoon Animator, while some of you would now be considered veterans of the software. For those of you who are new to Cartoon Animator, what surprised you most about working with this 2D animation software?

A: I’ve only been using Cartoon Animator 5 for about a month, so I’m relatively new to the program. However, I managed to pick up a lot in a short time thanks to its user-friendliness. Despite being a new user, I found it straightforward to learn, with abundant resources and tutorials available. The most exciting feature I discovered was the ability to capture mouth movements for lip-syncing and body animations for 2D characters, which I think is a fantastic addition.

Q: Did you find the process of creating characters and content for your entry easy and enjoyable? And how did you find the experience of animating your project with Cartoon Animator? Were there any specific challenges you had to overcome? And if so, how did you overcome them?

A: Creating characters was relatively straightforward since they were already established. My experience with Cartoon Animator has been a positive one! The learning curve isn’t too steep, and anyone can pick it up. My main challenge was finding time to work on the animation alongside my regular job and daily life while learning new software. Additionally, creating initial storyboards and coming up with compelling scene compositions for events that hadn’t occurred in my webtoon were specific challenges. I wish I could have added more details to my drawings, but I’m still happy with the end results.

Q: As a Cartoon Animator user, if you had to choose only one tool or feature of CTA that is your absolute favorite, what would it be?

A: If I had to pick one feature out of them all I would choose the deformation tool. A very simple and straightforward tool to use that allows you to capture movement quickly and easily.

Q: What is your best piece of advice to other Cartoon Animator users who might be considering entering contests like this in the future?

A: Familiarize yourself with the program as much as you can and have characters or illustrations ready beforehand so you don’t rush towards the end. Have a clear plan of what style you want for your animation, the music you’re going to use, and the voice acting you’ll need in your animation, so you are able to schedule everything efficiently and maintain consistent quality in your work.

Q: Now that this year’s contest is finalized, what does the year ahead hold for your work? Are there specific projects you are working on? How does Cartoon Animator fit into your future plans?

A: Some plans I have for the future are continuing my webcomic on the sidelines, drawing more original illustrations and animating some of these illustrations!

Follow Astrovique

Instagram | https://www.instagram.com/astrovique/
YouTube | https://www.youtube.com/@astrovique

TikTok | https://www.youtube.com/@astrovique

WarLord’s Workshop Review: A Look at CC4 ZBrush Face Tools

ZBrush has long been recognized as a powerhouse of 3D sculpting and painting with innovative tools, techniques, and a user interface that is very unconventional but very usable. Once you’ve spent some time with ZBrush you can begin to appreciate its value to the 3D community.

ZBrush can sculpt the finest details into a mesh whether it be an aging, realistic character with weathered old leathery skin to detailed armor, or finely engraved jewelry. It’s long been recognized as a 3D tool that punches way above its weight class in terms of pure artistic “enablement” if that is a word.

While Character Creator 4 does indeed create 3D mesh characters it does so from base or original meshes reducing the need to rely on pure artistic sculpting or technical rigging. It does not produce character meshes from scratch which is the domain of tools like ZBrush that can and often do require advanced skills. On the other hand, ZBrush is not known for its character rigging either, which is one of the strong suits of Character Creator 4.

Put them both together and you have basically supercharged Character Creator 4.

ROBUST GoZ FUNCTION

Face Tools is the kind of GoZ functionality we’ve always wanted. It packs a lot into the time it takes to make the trip back and forth from ZBrush to iClone with the click of a button. The Face Tools control panel is packed with one click morphs for testing and editing along with detail and diffuse functionality. Just the diffuse feature alone is a great improvement and that is not counting the rest of the features in the Face Tools control panel.

Left and Middle: Face Tools Menu (in ZBrush). Right: A few of the layers that import from CC4.

EASY INSTALLATION

Face Tools installation is a very simple process. Use the Reallusion Hub to install the plug-in and you should see a Face Tools button (with a character loaded) on the modify menu. Do your thing in Character Creator 4 with the sliders to define your character, add Skin Gen, and things like that if desired. Once your character is ready to go into ZBrush for heavy-duty work you press the Face Tools button.

The first time you press that button it will check to see if the GoZ functionality is installed and then do so. It will ask you which version of ZBrush to use if you have more than one version installed.

That’s it. Worked flawlessly for me and there was no need to manually copy some GoZ files like many users had to do with the original GoZ feature.  

ZBRUSH LAYER’S FUNCTION

The tool relies heavily on the Layers function in GoZ to keep track of changes within the mesh. When you go to layers you will see there are several layers there already. Since Layers is being used you need to use an existing layer or create a new one to make changes. The Face Tools control panel image above shows just a few of the available layers that transfer over to ZBrush.

MY FIRST TEST

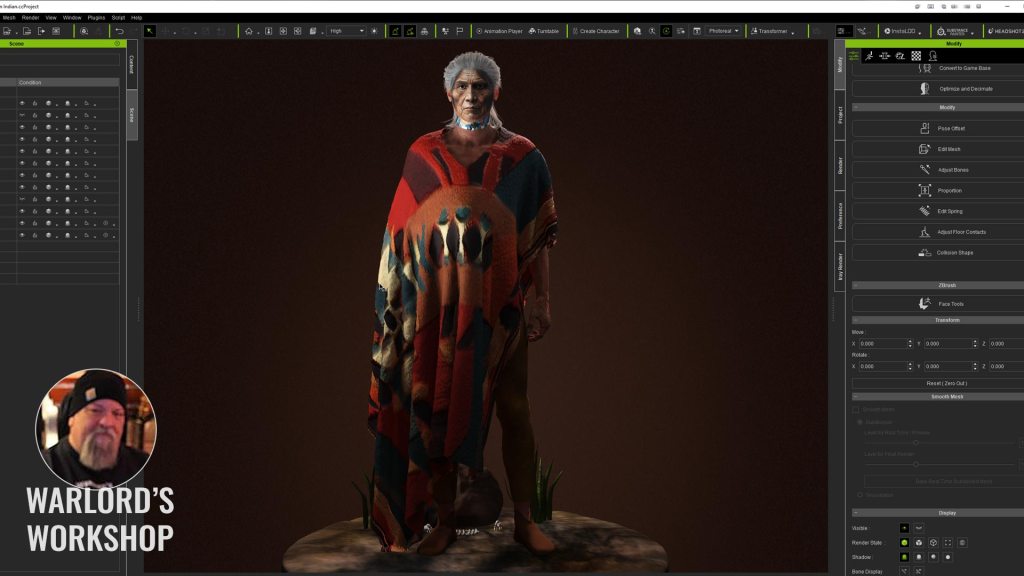
Just to see what Face Tools was about I loaded a base mesh and then jumped over to an online AI image generator to create a facial image of an older Native American Indian male. I used Leonardo AI for this particular image, and it really made the character pop without a lot of interaction from me.

I sent the mesh over to ZBrush with all the options checked that I could find or made sense as I had not read the manual yet wanting to see how far I could get just using it. There is very little learning curve with this tool if you are proficient with ZBrush and CC4. By proficient I mean able to follow instructional steps to move forward as you don’t have to be a power user.

As I said earlier, layers rule the day as you need to create a new layer or use an existing layer to make changes in ZBrush. This is nothing new to seasoned ZBrush users. Layers are powerful and record your changes.

At this stage, I can add more detail to wrinkles or add more skin texturing if desired. Enhance what is already there or cut in new wrinkles that match some of the AI-generated head image. I never ran into a snag along the way. It was one of the few times the experience was frustration-free.

Left: CC4 Character, Middle: CC4 Character with Detail, Right: CC4 Character Diffuse Polypainting

I will list Kai’s quick start tutorial in the resources section at the bottom of this article. When I said I didn’t read anything, that didn’t mean I didn’t WATCH anything. So with Kai as my guide, I flew through the process like I knew what I was doing and that Is a plus when you can do that on your first run with any new plugin or tool. I made the clothing and accessories in Marvelous Designer.

CHARACTER CREATOR 4 TOON WOLF TOUCHUP

Since the early days of Character Creator, I created several toon sliders and some extreme reshaping sliders to morph characters like the Toon Wolf I’m using in this example. I loaded a generic base in CHARACTER CREATOR 4 and applied the slider to the full extent.  The slider was based on reshaping the existing base mesh at the original low poly count for GoZ.  It might have been created as far back as CC1 since it seems I’ve always had these morphs around to test with.

PHOTOSHOP RETOUCHING

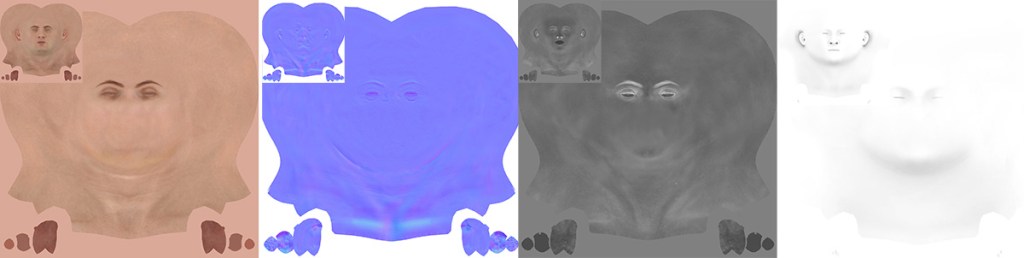
I sent all the different maps like diffuse and normal over to Photoshop to remove things like the mouth, nose, and ear sections so they wouldn’t interfere in the anthropomorphic wolf skin. If you don’t remove these details, they can show up on the character in the wrong places or show a badly distorted human ear where the original ear was located on the base mesh.

Removing some of the skin features through the various channels with Photoshop. Used the clone tool to clone clean areas over the features that were removed.

You can use the image editor of your choice for the same task. In this example, I didn’t change the texture until the end of the process.

TIP: If you still see two black nostrils after editing the maps in the various channels then you need to change the shader from Human Skin to PBR and the black nostrils will disappear.

TO ZBRUSH

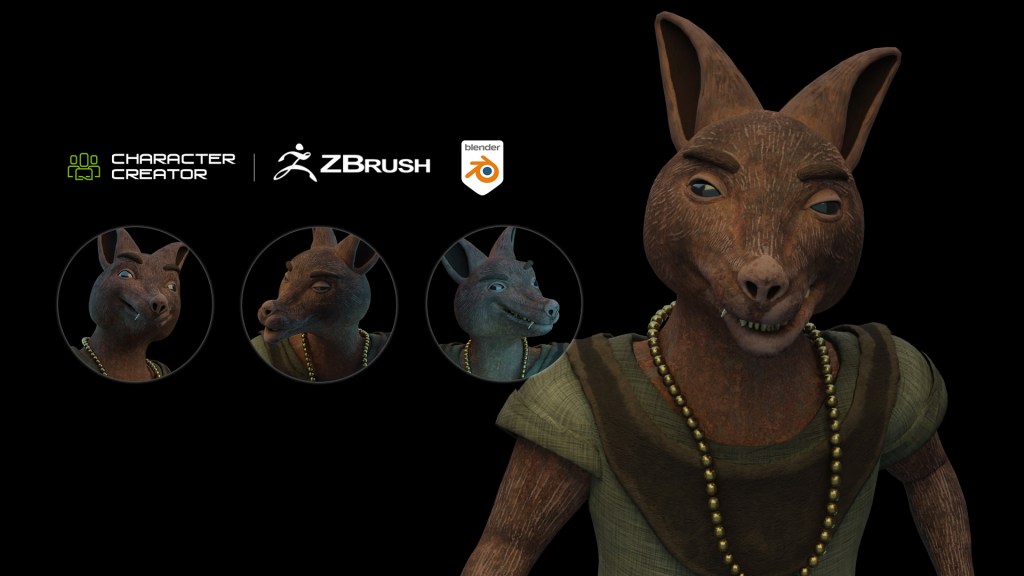
Next up was sending the head over to ZBrush with the Head Tools plugin so I could correct some problems with the teeth sticking through the lips due to the extreme reshaping and low poly count. The Face Tools menu in ZBrush makes it easy to quickly select a morph like Mouth Smile or Mouth Frown to check on the teeth penetrating the skin.

This is Face Tools in its basic usage. We could also create more wrinkles, and/or modify existing wrinkles while adding other details like skin textures, wounds, scrapes and bruises if needed, and much more.

RESHAPING THE SKIN OVER THE TEETH

As I went through the morph buttons in the Face Tools menu, I used the Move tool with horizontal symmetry turned on to pull the skin over teeth or gums when they poked through.

Selecting a morph in the Face Tools panel and using the move tools to bring the lips out over the teeth and gums.

This requires using the aforementioned layers in ZBrush to make edits and you can make edits to the wrinkles and other modifications or add more detail to the skin surfaces as long as you do not alter the polycount like any GoZ function. You cannot increase or decrease the polycount as it has to match the model it will be transferred to.

TIP: When I needed to do body shaping and head shaping, I did the body first with the regular GoZ function then used Face Tools to Create a new head mesh instead of Relinking to the original GoZ mesh.

DIFFUSE WORK

The next step was changing the diffuse map from a human skin tone to a tone more suitable for a toon wolf. To do this I turned on the Diffuse channel in the Face Tools ZBrush menu then went to Polypaint -> Paint from Texture (in ZBrush) to transfer the existing skin texture which we could alter or paint over.

I turned off the diffuse button in the ZBrush Face Tools palette and noticed the original coloring remaining was now painted on the head. I selected the material in ZBrush I was going to use for the and got to work. For the purpose of this review, I kept it very simple.

Simple two-material texture painting.

After transferring back to iClone I then dressed the Toon Wolf in clothing similar to what a jazz musician might wear to complete the look of a laid-back, saxophone-playing anthropomorphic wolf with his nose and mouth scrunched up playing the saxophone with no penetration from the teeth or gums. I dragged and dropped in a 2D ai-generated background of a stage to dress things up a bit.

What used to be a tedious character to work with because of the extreme shapes forced on the low poly base mesh had become a pleasure to work with no penetration problems even when using the wrinkle system heavily.

Saxophone model “Saxophone” (https://skfb.ly/oo97B) by Matt Caddie is licensed under Creative Commons Attribution (http://creativecommons.org/licenses/by/4.0/). Beard from the Beard and Brows Builder pack.

I’ve been using ZBrush for several years and consider myself to be a typical user, not a power user by any means, and I found Face Tools to be simple to use, easy to grasp, and somewhat intuitive which is not a word generally associated with ZBrush. This GoZ function is much more powerful and including the ability to paint in ZBrush and transfer to iClone without mapping will be a time saver and eliminate some of the buzzkill that type of housekeeping work can bring with it.

SUMMARY

If you use ZBrush with iClone then Face Tools is worth a look. Take the trial for a test drive and decide for yourself.

MD McCallum - WarLord

MD McCallum – WarLord

Digital Artist MD “Mike” McCallum, aka WarLord, is a longtime iClone user. Having authored free tutorials for iClone in its early years and selected to write the iClone Beginners Guide from Packt Publishing in 2011, he was fortunate enough to meet and exchange tricks and tips with users from all over the world and loves to share this information with other users. He has authored hundreds of articles on iClone and digital art in general while reviewing some of the most popular software and hardware in the world. He has been published in many of the leading 3D online and print magazines while staying true to his biggest passion, 3D animation. For more information click here.

Make a Compelling Promo Video with Animated 2D Characters For Cartoon Animator

The Winner Tips & Interview series covers practical workflows and techniques shared by winners from the “2023 Animation At Work Contest”. To let users see the full spectrum of the Cartoon Animator pipeline, we are introducing projects that received attention and credit from the community. Let’s now take a look at “Bringing to live” to see how Nandor Toth worked his magic with Reallusion Cartoon Animator (CTA).

About Nandor Toth

Hi, I’m Nandor Toth, and I am from Hungary. I used to study veterinary medicine in Budapest, and treating dogs, cats, and horses was my daily life. But a decade ago, I was lucky to switch to another interest, which is animation. I love my job, and I am grateful to have a job that is also my hobby and where I can express my creativity. I think about my work almost all the time, even when I’m walking, swimming, or mowing the lawn.

My main strengths are creativity, a sense of beauty and drawing, and creating cartoon characters. I have been working with some main clients including BOSCH, Liqui Moly, and RTL. My main areas of work include Motion Graphics, Explainer videos, Visual effects, Cartoon Animations, Logo animation, Mascot animation, Opener videos, and Whiteboard animation. I like challenges and I wanted to challenge myself in the competition as I have never participated in any competition before. The “Business & Commercial” category seems the closest category related to my background, as I have created animations for my previous clients that require a similar mindset.

How I Discovered Cartoon Animator

I’ve been working in animation for 13 years, and I’ve been improving my skills all the time. Every day, I think about what field of animation I can express myself better and how. I first found it on YouTube in a video comparing it with two other software, but I liked Cartoon Animator 5 more, and then I installed it on my computer in March 2023.

When animating, I think the ease of adding movements and modifying them is really important. And making professional movements is also vital for my work. Besides Cartoon Animator, I finished the project with the help of other software, such as Procreate, Illustrator, After Effects, and Audacity. Though it took me some time to finish, I am glad to share how I made it with Cartoon Animator.

My Creation Process

Step 1 – Ideation and Script Writing

I immediately started brainstorming when the competition kicked off. My goal was to showcase the software’s user-friendliness and my own skills. It wasn’t the first scene that came immediately to mind, but the core storyline: a cute superhero doing magic on a laptop. Then came the challenge: someone had to display the superhero character. This gave me the idea of having a cartoon artist to draw him, but he can’t animate him, instead the Cartoon Animator comes into the picture, which he gets as a gift from his lover. Then the ideas started coming like an avalanche, later I had to take some things out of the script, I had so many ideas.

Step 2 – Drawing Unique Characters

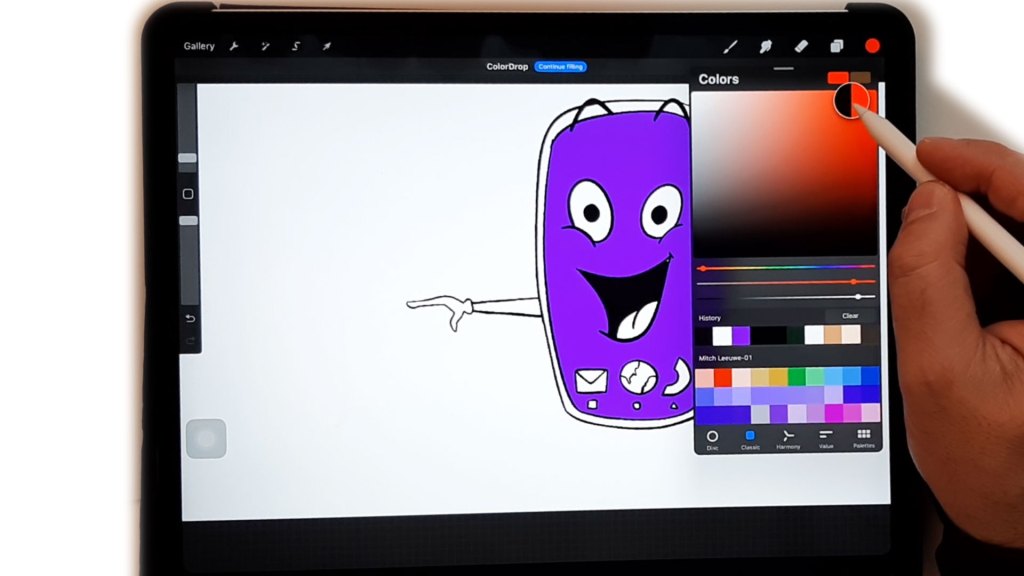
After several days of scripting, I began drawing the characters on my iPad using Procreate. I first sketched their simplified skeleton in blue, followed by a black outline sketch, and finished with detailed lines and coloring.

Step 3 – Vectorization

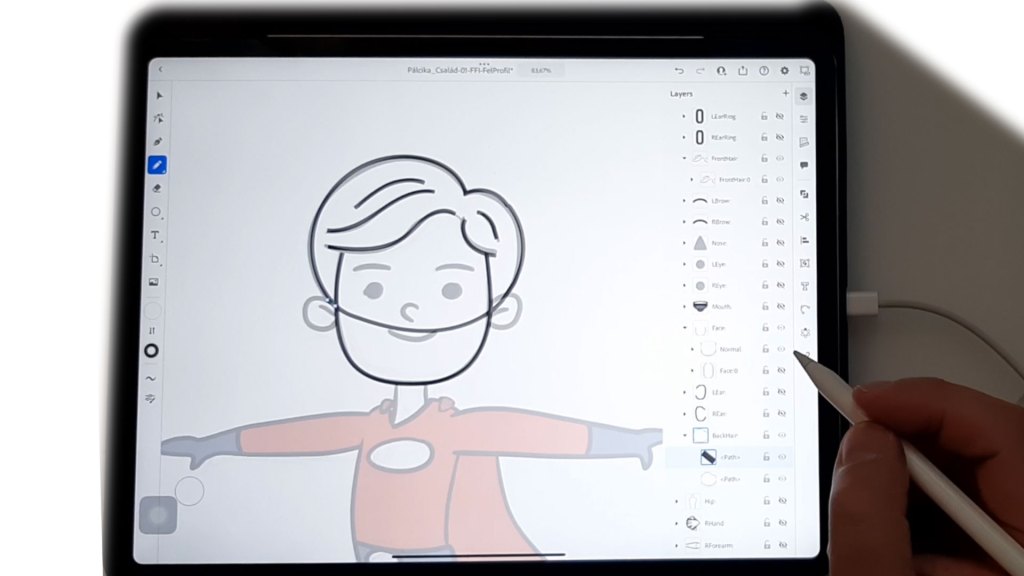
The next step involved vectorization. I opened the character template file and imported the JPGs exported from Procreate into an Illustrator file, reducing the visibility of the imported JPGs to 20-30%. I made the lines of the template file invisible, leaving the enclosing layers empty, where I drew the body parts. I positioned the bones and then exported them to an SVG file.

Step 4 – Animation

I launched Cartoon Animator 5, imported the background graphics and characters, and placed the background elements in 3D space. I adjusted the characters one by one in Composer Mode. For the facial animation setup, I made the necessary modifications, followed by 360 Head Creator adjustments. I recolored the sprite hands in SVG Color Adjustment. In Spring Editor, I removed hair and some clothing elements. Then, I proceeded with character animation.

Step 5: Adding Effects

In the next phase, I added effects to enhance the video’s impact. Most of these were free downloadable effects, while some were part of the standard package. To achieve subtle movements of the iPad in the stock video, I used Motion Tracking to analyze and connect the animated Cartoon characters from CTA5 to the Null.

Interview with Nandor

Q: What do you think makes a winning entry to competitions like this? How does someone make their entry stand out in the crowd and really grab the judges’ attention?

A: For an animation to be a winner in the “Business & Commercial” category, I think it has to meet several factors (I’ve ranked them in order of importance, with the most important ones at the top):
-be special, unique: different from the rest
-present the story in a creative way
-to convey the clearest possible message with the simplest possible graphics
-it is advantageous if the main character is likable to the majority of the audience (especially if he is cute)
-be pleasing to the eye, with no distracting graphic elements (e.g. too much vibration, flickering, flashing)
-it can be spectacular, but be careful with it, because it’s like spice: if you put too much in, people run away screaming 🙂

Q: Some of you are quite new to Cartoon Animator, while some of you would now be considered veterans of the software. For those of you who are new to Cartoon Animator, what surprised you most about working with this 2D animation software?

A: As I just started using it in March 2023, I consider myself a newcomer to CTA. I have never come across such good animation software that moves characters in such a professional way, and I can save the movements and add new movements made by others so easily, and even edit them back and forth. For me, this is probably the most important benefit of the program. There are many other advantages, but the one I mentioned is one that I use for all my animations.

Q: Did you find the process of creating characters and content for your entry easy and enjoyable? And how did you find the experience of animating your project with Cartoon Animator? Were there any specific challenges you had to overcome? And if so, how did you overcome them?

A: Yes, I found the job relatively easy compared to the end result. In other similar software, it would have been much harder and slower. A challenge for me was the scene where the superhero is facing us and pointing the magic wand at us. As the deadline was approaching, I didn’t have time to make a character in another view, so I took advantage of the 360 head rotation I had done beforehand, so I turned the head towards us, I also made a version of the magic wand facing us, while the half sideways turned body is covered by the laptop monitor in front of the character 🙂

Q: As a Cartoon Animator user, if you had to choose only one tool or feature of CTA that is your absolute favorite, what would it be?

A: 360 Head Creator, Spring Editor and the latest Motion Pilot (end result looks amazing!)

Q: What is your best piece of advice to other Cartoon Animator users who might be considering entering contests like this in the future?

A: First, learn to use at least a basic level of this wonderful software. Then: unleash your creativity, and free your mind: don’t bother to come up with a story, go for a walk, a bike ride, or as I do: swim a lot, because that’s when the best ideas come 🙂

Q: Now that this year’s contest is finalized, what does the year ahead hold for your work? Are there specific projects you are working on? How does Cartoon Animator fit into your future plans?

A: I want to learn more about the software and will use this knowledge to make “Demo Reel” videos. Videos that I will be proud of. But what I will be MOST PROUD of in my whole life is winning the first prize in the “Animation@Work Contest 2023 Business & Commercial” category! Thank you so much!

Follow Nandor Toth

Website | https://SuperAnimation.net

LinkedIn | https://www.linkedin.com/in/n%C3%A1ndor-t%C3%B3th-2285a128b/

From AccuRIG to Custom Bone and Facial Blendshape Design – a Comprehensive Character Creator Workflow

About the Artist

I am Marcel Brynard, an artist with a background in architecture. I have worked some years at a bronze sculpture studio in Cape Town and have worked as draftsman & set-designer, 3D modeling sets for popular series such as Netflix’s One Piece. In my personal art, I am inspired by my visits to various archeological sites. 

My love for sculptural forms intertwines with a fascination for the chimeric and arcane, resulting in art that exudes story-telling and mysticism. 

Embracing digital tools, I intend to explore new possibilities, intersecting architecture and sculpture. Fueled by a love for these things, I am working on an animation project titled “Transcendental Rebirth,” narrating the transformative journey of two shamans on a pilgrimage. One of the main characters for this project is featured in my following workflow.

Workflow Introduction

The art of character animation has witnessed a remarkable transformation in recent years, thanks to the integration of advanced software tools and the creative synergy of various platforms. This article explores a comprehensive workflow for crafting a stylized and emotive humanoid character, focusing on the creation of detailed facial expressions. 

By harnessing the combined power of Character Creator 4 (CC4), ZBrush, Adobe Substance Painter, and Blender, artists can unlock new possibilities in character animation, resulting in characters that truly come to life.

For me, the animating of a rigged character has in the past seemed a daunting and tedious task, especially when it comes to realistic, mathematical movement. Having been introduced and acquainted with CC4 however has made the process far speedier and far less laborious. Now it is super simple and quick to rig my character, most of the weights have been automatically painted by CC, and I have access to a large range of complex human movements which I can sync to my stylized character in a relatively easy process.

I. Character Sculpting and Modeling in ZBrush

Creating a compelling humanoid character begins with ZBrush, a digital sculpting software known for its powerful and intuitive tools. In this initial stage, I breathe life into my character by sculpting and detailing the character’s form, from head to toe.

I start the process by sculpting the character’s base mesh, establishing the character’s anatomy and overall proportions. With multiple subdivision levels I can add details, and ZBrush excels at capturing them. I can add subtle features like wrinkles, blemishes, and scars, making the character’s face more realistic and believable. 

A very useful feature from CC4 is the GoZ compatibility with Zbrush. I can export all low-res versions of my subtools directly to CC4 with the click of a button, then in CC4 I can very quickly & easily rig my character and access various poses & animations in the CC4 library. Then, again with the GoZ button in CC4, I can send a posed version of my character back to Zbrush where I can maintain all the high-res details on the newly posed model.

I could for example send to Zbrush from CC4 a version of my T-pose character as holding a staff or a weapon, or with, for example, a frightened facial expression. This is a very powerful workflow for 2D concept art, 3D renders and figurine design for 3D printing.

II. Texturing in Substance Painter

Once the character’s form and details are sculpted in ZBrush, it’s time to move to Adobe’s Substance Painter, a tool that specializes in creating stunning and detailed textures for characters and objects. I can easily export my high-res version of the sculpture as FBX as well as the low-res version, and in Substance Painter I can bake those high-res details of the high-poly mesh onto the low-res mesh, optimizing the performance of the software while maintaining the sculpted details. The FBX export plugin for Zbrush makes the transition seamless.

I use Substance Painter’s extensive texture libraries and tools to apply realistic textures to the character. For the skin, clothing, and any other materials I use a combo of smart-materials and various generators and masks. For this specific character I want it to have the look of a ceramic sculpture that has come to life.

III. Character Rigging and Animation in Character Creator 4

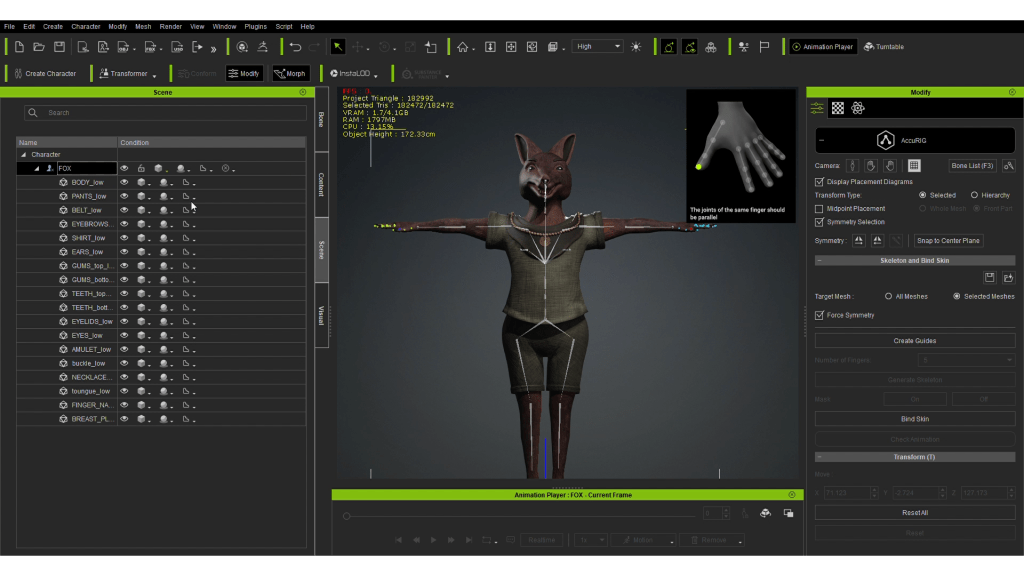
With the character’s textures applied, it’s time to prepare it for animation. CC4 is an invaluable tool for rigging and animating. In CC4, I establish the character’s rig, using AccuRig mode to define bones and joints that will control movement. I place the facial bones roughly into position, as I will further manipulate and prepare them in Blender.

IV. Further Bone Manipulation in Blender

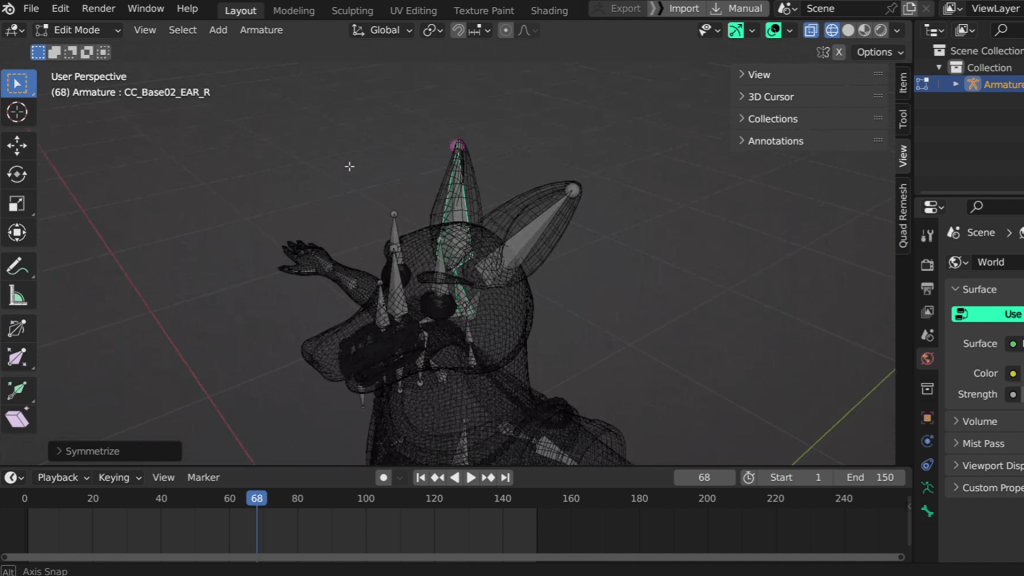
Blender, an open-source and versatile 3D software, is where I further manipulate the rig generated with CC4. I export from CC4 an FBX with its rig, and import it into Blender. Here I can add additional bones for example the Ear bones. Once I’ve created the extra bones and placed the facial bones in their positions, I check the Weight Painting for the various vertex groups and make appropriate changes and additions in Weight Paint Mode. I then reimport the FBX into CC4 where I can review and assign the new bones as spring bones (in the case of the ears) and I download an HIK expressions profile from CC4 which I then load onto the character. I export a new FBX this time “with facial expressions” and when I import it into blender it comes in with Shape Key information.

V. Shape Keys in Blender

Using my Expressions Frame Map as reference (generated from CC4), I can start working on the expressions along the Timeline in Blender’s Dope Sheet. I read for example “Brow Raise Inner Right” for frame number 16 and appropriately sculpt that expression, making sure to change the value of the Shape Key from 0 to 1 before sculpting the change. I can sculpt as well as use bone animations and weight painting to achieve my various expressions. For some expressions only sculpting is needed, for others, for example “Jaw Open” bone animation works well. I create Shape Keys to define a variety of facial expressions – from smiles to frowns, and everything in between, checking through the list of expressions as found in CC4’s Expression Map, checking inside of CC4 what the different expressions should look like on a human, for reference when needed.

Once I’ve sculpted, animated and weight-painted the various Shape Keys, I export a single FBX from Blender and import it into CC4 again, this time it contains all the Expressions information. I can check the results using the “Edit facial Expressions” function in CC4. If there are any mistakes or flaws I can revert back to Blender and improve the Shape Keys.

VI. Animations in CC4

When I am happy with the expressions results, I can choose from an extensive library of animations within CC4, I can preview these animations in the animation previewer and see that all my facial expressions work along with the various body motions. I can easily export any animation of my choice in FBX format, with the model as well as the animation included.

VII. Render in Blender

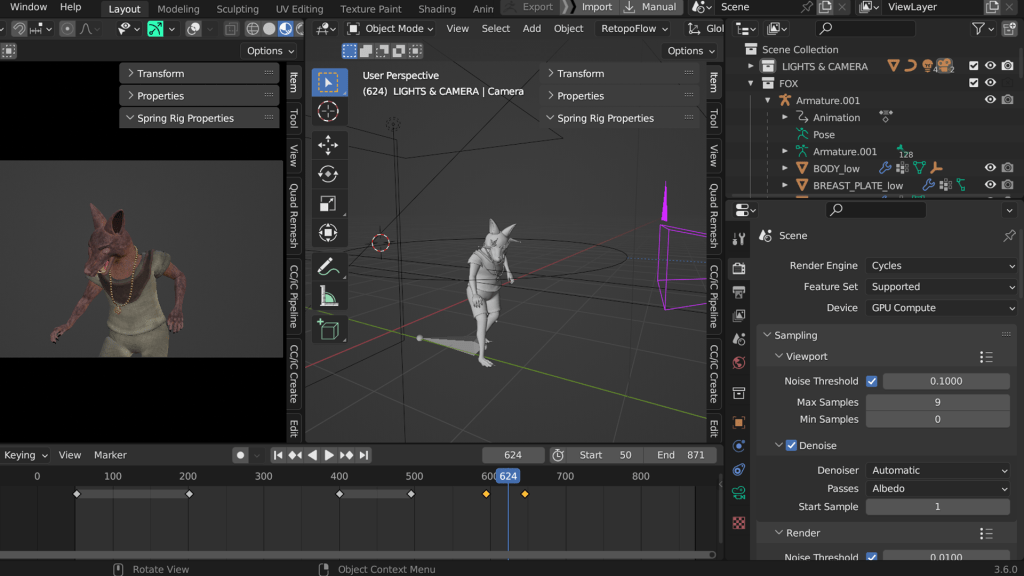
In Blender I can then import the FBX with full animation included and set up my camera and lights as desired. I render it out in Cycles and export my frames to Adobe Premiere where I can compile the final video.

Conclusion

The integration of Character Creator 4, ZBrush, Substance Painter, and Blender into a comprehensive workflow has transformed character animation. I can now create my stylized humanoid characters that convey a rich range of emotions through facial expressions with a relatively easy workflow. Especially since I can download a whole range of animations from CC4 this saves me a lot of time and frustration.

The result is a character that comes to life with vibrant facial expressions, adding depth and authenticity to storytelling, gaming, and other forms of visual media. The possibilities are endless, and the evolution of character animation continues to astound and captivate audiences and artists worldwide.

More Info about Character Creator 4: https://www.reallusion.com/character-creator/

Renowned Director Debuts Mech vs. Giant Slugfest with iClone & Character Creator

The following is an interview with Cesar Turturro, an accomplished film director who received the prestigious 2022 Epic MegaGrant in recognition of his exceptional work on “Invasion 2040.”

Q: Hi Cesar, please tell us a little bit about yourself.

Hi, let me start from the beginning. Back in 2004, I embarked on my filmmaking journey with my inaugural war feature film, delving into the 1982 Malvinas War. For this project, I crafted VFX close-ups, seamlessly blending real images with 3D animation. Subsequently, I directed my maiden documentary on the same subject for The History Channel, featuring over 60 minutes of compelling air combat animations.

Continuing my creative exploration, I ventured into the realm of fan films, garnering some worldwide attention with a production centered around Robotech. Notably, the film garnered substantial attention in Japan, accumulating over 200,000 views within a single day.

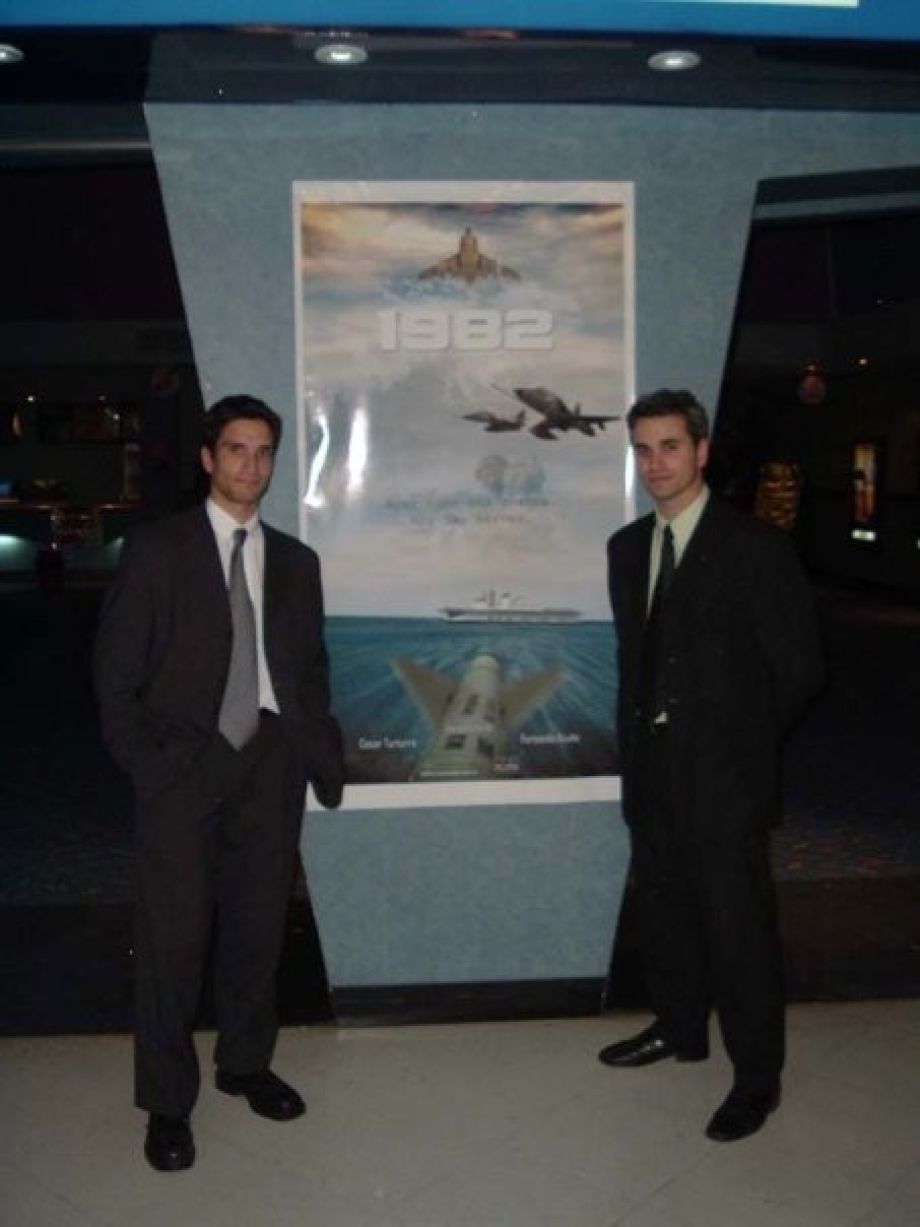
Cesar Turturro and Fernando Acuña as Co-Directors at the Premiere of 1982, Estuvimos Ahi in 2005
At the panel of Robotech Academy 2014 at Comic-Con in San Diego

Q: How did you come up with the idea of creating the science fiction film “Nick 2040”?

Building on my previous experiences, I took a significant leap into creating my own science fiction realm named “Invasion 2040”. This transformative endeavor has spanned over seven years. Along the way, I secured an Epic MegaGrant, and our project caught the attention of Reallusion, leading to our participation in their Pitch & Produce program.

Taking yet another stride forward, I elevated the production to a cinematic level with “Nick 2040”, shooting in 6K using RED cameras. The post-production was meticulously rendered in 4K, thereby completing the trilogy of short films. This final installment serves as a proof of concept for an ambitious feature film, currently in the pre-production stage.

Achieving this is contingent upon having a significant portion of the VFX groundwork completed before filming. Presently, I am actively engaged in this preparatory phase — every scene, character, animation, and VFX test crafted for the short film is seamlessly integrated into the overarching feature film. This dual role enables me to serve as both co-director and VFX director.

Q: Please describe your workflow with Reallusion software.

Phase 1 – Create realistic characters with Headshot and Dynamic Wrinkles

I begin by initiating a facial scan of the robot using Reality Scan. Simultaneously, utilize Headshot to generate a face based on a photo. In parallel, I employ ZBrush to amalgamate both models, creating a mesh that closely resembles the target appearance and utilizing the mesh and the texture generated in iClone via the Headshot plug-in in Character Creator. Once finalized, I transfer all components to Unreal Engine to generate the robot’s face within a Metahuman framework. Additionally, I conducted a scan of the clothing to enhance the overall realism in the final rendering.

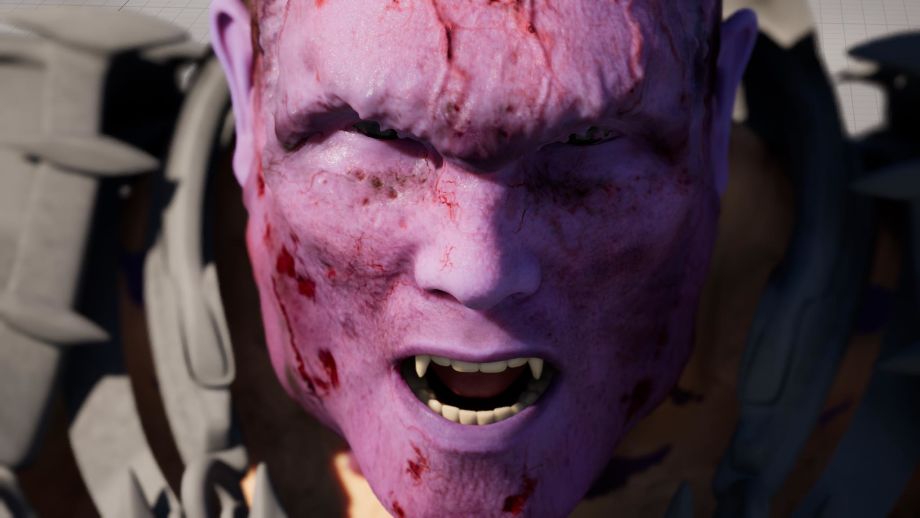
Highly detailed head of the giant using ZBrush and AccuRIG

I meticulously crafted the antagonist, a towering giant, by intricately detailing the facial features. Drawing inspiration from the expressions of Metahumans, I ventured beyond conventional methods. Employing Blender, I seamlessly merged an AccuRIG body with a Metahuman face, yielding a remarkably satisfying outcome.

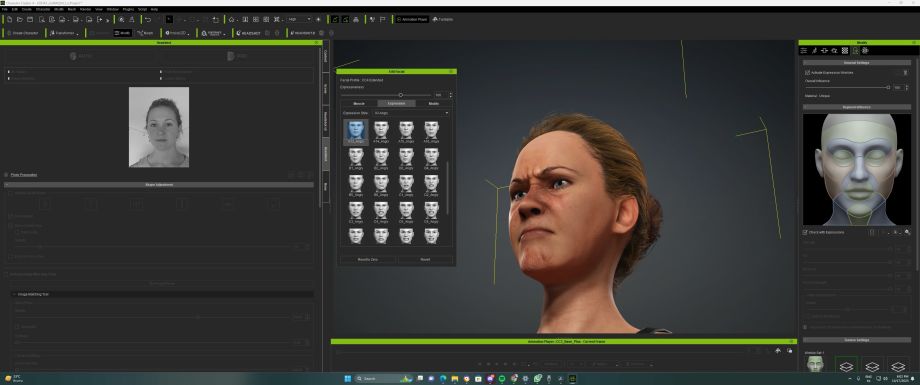
Our breakthrough involved generating facial animations through Dynamic Wrinkles. This allowed us to achieve lifelike expressions on both the protagonist’s face and the characters featured in the invasion scenes.

Certain scenes necessitated the recreation of the real actress’s face, which was impractical using conventional shooting methods. Leveraging the Headshot plug-in, I scanned the actress’s face and refined the mesh using ZBrush in conjunction with CC4. Subsequently, I animated it in iClone 8 and seamlessly transferred all data to Unreal Engine via Live Link, producing an astounding result.

Harnessing the advanced capabilities of CC4’s custom character Dynamic Wrinkles and employing facial mocap, I effortlessly executed intricate facial expressions within mere minutes.

Phase 2 – Animate the fighting scene with iClone and ActorCore

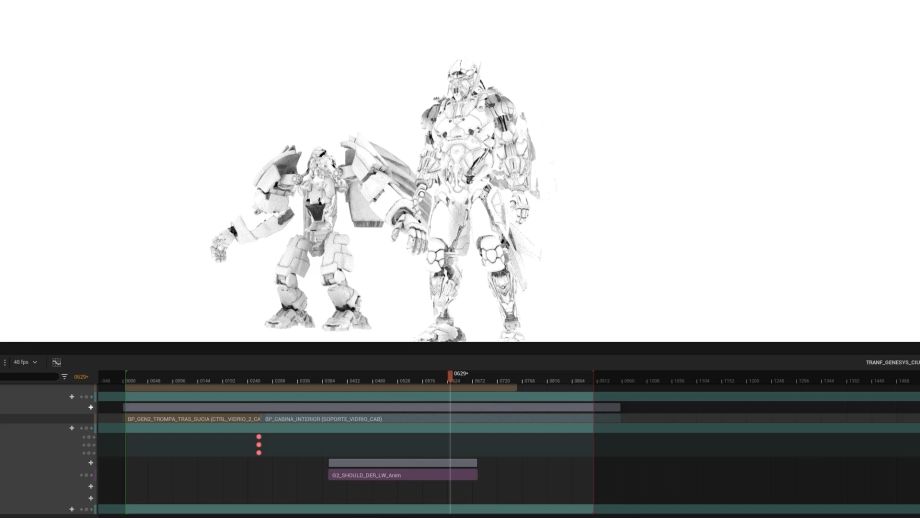
The integration of iClone played a pivotal role in refining the animation of the transformation in “Invasion 2040”. This was particularly crucial as the character seamlessly rises, and places hands on the ground, while simultaneously undergoing a dynamic metamorphosis into a robotic form.

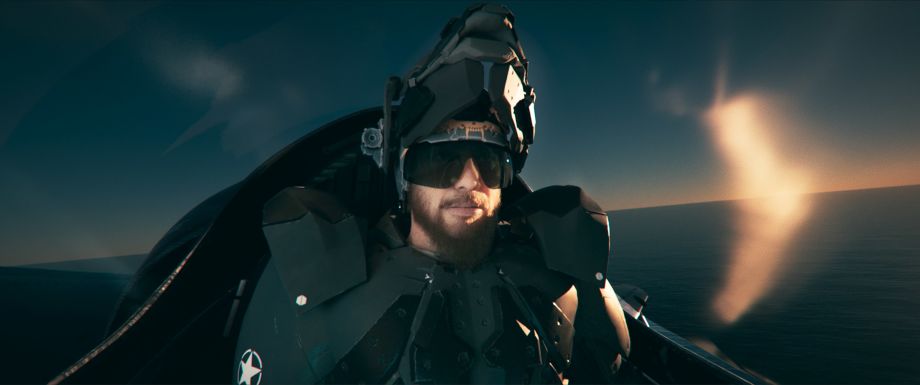
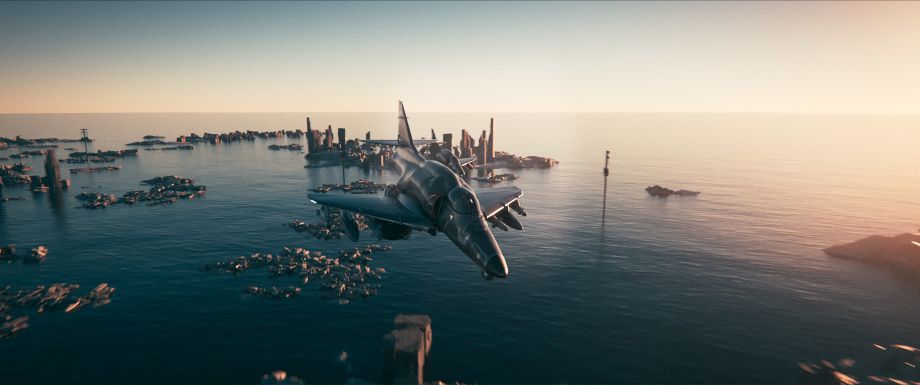
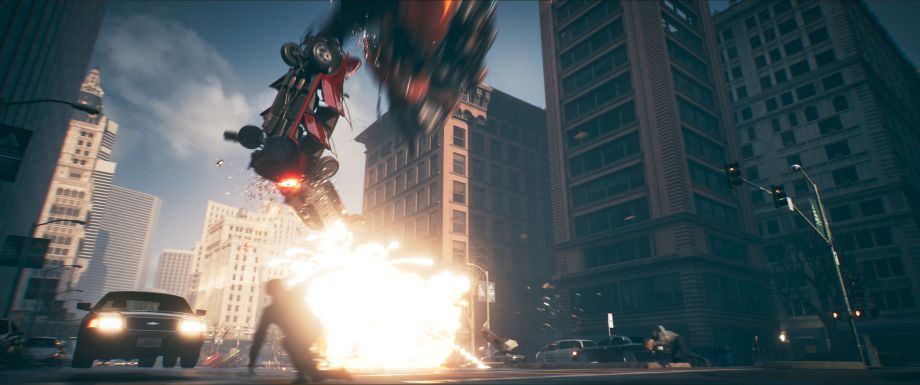
The invasion scene in “Nick 2040” was meticulously crafted in Unreal Engine, featuring a blend of characters sourced from different platforms — some from Metahumans and others from iClone. Leveraging the practical and easily processable Actorcore scans, obtained through iClone’s Live Link, proved ideal for seamlessly incorporating various animations from the “Run For Your Life” pack, perfectly complementing the intensity of the invasion shots. To achieve a cohesive scene, I cloned the iClone animations onto the skeletons of the Metahuman characters in Unreal.

The climactic final combat between the robot and the Jumper was a two-part process. Initially, I choreographed the movements of both characters through Mocap, personally executing the choreography and refining the contacts for impactful hits within iClone. These animations were then transmitted via Live Link to Unreal for rendering. Simultaneously, the fight scene featured additional sequences sourced from fight sequences available on Reallusion’s Marketplace, enhancing the overall dynamic and intensity of the confrontation.

Reallusion and iClone 8 have been instrumental in empowering me to create intricate animated scenes, featuring epic battles between giants and robots. These scenes, serving as the essence of my films, are brought to life through the robust features integrated into my workflow pipeline. The capabilities offered by these tools, particularly in the realm of CG and animation, play a pivotal role in realizing the vision and complexity inherent in my cinematic creations.

Phase 3 – Immediately preview the results with Unreal Live Link

The Live Link enhancement stands out as truly remarkable. The process of sending animations to Unreal is both seamless and stable. Correcting any movement is a straightforward task — I make adjustments in iClone, ensuring I adhere to the specified start and end times on the timeline. Subsequently, through the Unreal Sequencer, I effortlessly replaced the animation, completing the process with just a few clicks. In a matter of moments, the updated animation is prepared and ready for rendering.

The timecode sync render has also revolutionized my workflow. Now, I can seamlessly transfer objects to iClone, animate characters, and use those objects as references. The remarkable part is the speed at which I can send the animation to Unreal, taking mere seconds. This streamlined process has made animation exceptionally simple and fast, marking a significant improvement in my efficiency and creative capabilities.

Q: Why choose Reallusion?

We are currently finalizing the storyboard, shooting, budget, and VFX plan for “Nick 2040” — an essential undertaking that forms the backbone of our feature film. In a compact animation studio, where tasks are inherently complex, our team of few artists has found immense capabilities through this process.

  • Stability: The entire process is marked by absolute stability, with zero instances of crashes.
  • Speed: Animations exceeding 1000 frames are transferred to Unreal in less than a minute. Remarkably, the processor and GPU often remain unburdened during this swift process.
  • Organization: I streamline my workflow by saving diverse animations in iClone’s Content Browser. This allows for quick retrieval and utilization in various scenes of the film, as virtually all necessary sequences are conveniently stored there.
  • Practicality: Incorporating animations from various sources, including Noitom mocaps, Mixamo animations, and Unreal character animations, is a breeze. A simple drag-and-drop action from the Explorer to iClone seamlessly integrates these animations into the project.

As we near completion, the trailer provides a glimpse of our work, and we eagerly anticipate the release of the final short.

Learn More

Related Posts

The Future of 2D Animation with Motion Pilot

Remember when creating even a tiny-animated scene was like climbing Mount Everest?

Artists would be glued to their desks for days or even months. And, oh boy, mastering the art of sketching and painting those cool backgrounds and 2D character animations? That was a long journey.

Quick Animations? Yes, Please!

Now, picture this: a sky full of playful creatures, our hero flying high, some chill floating fish, and more. Add a stunning backdrop to that. Sounds like a lot, right?

Just take a look:

An epic scene like this could eat up days or even months. But what if I told you, you could whip it up in an hour, maybe even less? Yep, you read that right!

Enter Cartoon Animator. 

The brilliant minds at Reallusion had a lightbulb moment. They thought, “How can we make animation easier and faster?” And guess what? They tackled the headache of dealing with tricky timelines and keyframes. And from that, the superstar feature was born: Motion Pilot and Motion Path Animation.

MOTION PILOT: The Most Valuable Player

With Motion Pilot, you’re in the driver’s seat. It lets you animate on-the-go. Just hit “RECORD”, wiggle your mouse, and boom!

Your animation is alive and kicking. So that epic scene we talked about? Instead of hours, you can nail it in a few seconds. Whether you’re bringing to life a bunch of fireflies, fish, or jellyfish, it’s as easy as pie.

Plus, Cartoon Animator throws in some extra goodies to this tool. One being the Motion Pilot control set called “Flock” – this nifty feature allows you to move one element and the rest follow suit. 

That’s how all these Jellyfish were animated together. It’s like magic! And get this: setting things up might take longer than the actual animation. That’s how cool and easy Cartoon Animator is.

Apply AI Tech to 2D Animation

Isn’t it remarkable how technology is transforming the way we do almost everything? Animation is hopping on that tech express train, too.

Back in the day, jaw-dropping animations were limited to the hands of artists who spent years honing their skills. But guess what? With the dawn of new-age AI technology, those intricate processes are evolving rapidly.

A Stroll Down Memory Lane

Have you ever watched those vintage videos showcasing bulky, room-filling computers?

You know, the ones that looked more like a maze of machinery than helpful gadgets? Hard to believe, but those were the granddaddies of the sleek laptops and tablets we effortlessly use today.

Steve Jobs and his Apple team stirred the tech world with their iconic 1984 commercial. A dystopian setting, a large oppressive screen, and then BAM! A determined woman shatters the screen. It was Apple’s manifesto, shouting out loud: “Computers are for everyone!” 

It’s almost poetic to think that today, little toddlers, with their innocence, can navigate devices and watch their favorite cartoon on platforms like YouTube. That same revolution is happening with animation, and Cartoon Animator is the ticket.

New Era for Graphic Animation

Art, in its essence, is a form of expression. Traditionally, to be an “artist” was a badge earned after years of training or, in some cases, a natural flair inherited from the muses. The art world was somewhat of an exclusive club, with entry reserved for the gifted and trained. But just like those old computers morphed into today’s user-friendly devices, the art landscape is experiencing a seismic shift. Thank AI for that!

Ground-breaking tools like Midjourney and Dall-E 3 are acting like magic wands, democratizing art creation. You might not have gone to a fancy art school or even doodled beyond stick figures, but these AI-powered platforms don’t discriminate. They’re designed to make everyone feel like an artist. Just think of a vision, plug in your ideas, and voila! You have a piece of art ready!

Reallusion’s Animation Revolution

But this tale isn’t just about static art; it’s also about bringing art to life – yes, we’re talking about animation. The animation world used to be a labyrinth of complex processes, understood only by those who dedicated years to its study. Enter companies like Reallusion. They looked at the intricate maze of animation and thought, “Why can’t this be simpler?”

Their answer to that was Cartoon Animator — that is as fun as it sounds. Reallusion, with its user-focused approach, wanted to ensure animation wasn’t just left to the experts.

Think about it: The joy of watching a 2D character animation you imagined spring to life on screen, moving and interacting just as you envisioned. And the best part? You don’t need a degree or years of experience. The platform is incredibly intuitive. It’s like those magic coloring books where you just add water, and the colors appear – but for animation!

Embracing the Dawn of New-Age Animation

With the strides we’re seeing in tech, tools like Cartoon Animator are becoming more potent. They’ve rolled out features like Motion Pilot, which has made the animation process even simpler. Using this tool is as easy as playing a video game!

If my pitch has tickled your curiosity, here’s some fantastic news: You can dive into the animation world headfirst with a FREE TRIAL of Cartoon Animator.

In Conclusion

As we stand on the threshold of a vibrant future in animation, it’s clear as day that the walls and barriers that once existed are tumbling down. With every advance in AI and user-friendly 2D animation software, we’re stepping closer to a world where everyone – yes, everyone – has the toolkit to weave their stories, paint their dreams, and animate their ideas.

Animation is not just about watching and admiring anymore; it’s about creating, experimenting, and reveling in the joy of bringing art to life. So, why just be a spectator? Jump in, splash around in this vast ocean of possibilities, and watch as your creative waves ripple far and wide! 

About Mark Diaz – Animator, Online Teacher, TED Speaker, Director

With a background of 10+ years in the film industry at Autumn Leave Films, and with over 30 short films produced to this date, Mark belongs to a group of animators who love to share everything they know about animation, from pre-production, animation, to post-production.

He established 2D Animation 101, aiming to equip future animators with all the necessary techniques and tips to help them do better projects. He is obsessed with rapid learning techniques and student results. A course is only good when the student succeeds.

Know more

2D Animation Software for Cartoon Maker | Cartoon Animator

FREE for 30 days plus over 1,700 ready-made assets:

2D Animation Software Download | Cartoon Animator

———————————————————————————————————————————————————————————————————

The original article is written by Mark Diaz and also featured on Creative Bloq.

WarLord’s Workshop – Film School 101: Shooting Dialog

Dialog is a common element in visual storytelling and while its basics are easy enough, its execution can be a bit tricky for beginners and even experienced animators if you don’t do a little research on the subject. Just as you need video editing skills, you’ll also need to properly set up cameras for dialog. 

While we can shoot standard dialog with one camera, it can be a bit boring unless the conversation is well-written, well-animated, and riveting.  

In live action they have physical cameras and in animation we have our software-based equivalents with a good amount of control in terms of internal attributes. Using the iClone camera system is very simple as most of us learn right away. Using cameras effectively takes a little more time and maybe we can cut down some of that learning curve for you. 

Using cameras in general can fill volumes of books and more videos than there are viewers to watch them. With this in mind, we will stick to the basics of shooting dialog. You’ll learn the basic rule of shooting dialog and I’ll point you to resources of when to bend and break that rule. 

Yes… I know some of you have a real dislike of rules and you didn’t get into this to be told that rules exist. The great thing is that you can ignore them and move along on your animation journey if you so desire. As an Indie we all like to chart our own path but keep in mind… we need an audience to play to.  

Whether it’s for financial or artistic/creative reasons we need to make sure we don’t lose our connection to the viewers by losing audience focus with bad camera angles. There is already enough to keep up with in the animation game, so many opportunities to drop the ball, that we need to shore up what we can control when we have the opportunity. 

THE 180 DEGREE RULE FOR DIALOG 

The rule states that the camera should stay on one side of an imaginary line between two characters so that each character always appears to be facing the same direction, regardless of where the camera is positioned. 

Masterclass.com

In other words, don’t change the direction of view in a two-person dialog for each or any character. The characters always need to face the same direction on the screen without regard to camera positioning. Otherwise, it can get confusing to the viewer if a character or even both, for that matter, are suddenly facing the opposite direction at different times during the course of the dialog.  

There is a lot more to it than this, so I recommend you search out and study the rules of dialog if you aren’t already familiar with them. Keep in mind that as the creator or producer you ALWAYS know what is going on, but the audience hasn’t read the script.  

In filmmaking, the 180-degree rule is a cinematography principle that establishes spatial relationships between on-screen characters. The rule states that the camera should stay on one side of an imaginary line between two characters so that each character always appears to be facing the same direction, regardless of where the camera is positioned. When you keep your camera on one side of this imaginary line, you preserve the left/right relationship of your characters and help the audience maintain a sense of visual consistency. This means that no matter what type of shot you use, the viewer still knows where everyone in the scene is located. 

Masterclass.com

We all know that rules are made to be broken but I would tread lightly in doing so with a vital conversation. What may seem like a cool shot to you may be confusing to the audience. Interest could wane if the viewer cannot keep up with the onscreen conversation because they are too busy questioning the jarring change of direction from an inconsistent camera angle. 

This rule seems very straightforward and don’t overthink it but it can be a hard concept to grasp or to convey when you first start to implement it. It’s also very easy to misunderstand what the safe area of the rule is and how it affects camera usage. Diagrams representing this rule tend to be simplified because it is a simple concept.  

THE OVER-THE-SHOULDER SHOT 

If, like the image below, you see a camera on each side that doesn’t mean this is the way an “over the shoulder” shot must be made. It’s just the extreme edges of the safe camera area. Cameras can go anywhere in the green area and maintain the continuity of the conversation. This is a very simplified example. 

In the image above you can see the female and male dialog actors and the blue line that bisects them marking the Safe Camera Area on one side and the No Camera Area on the other side. This image is an extreme example of an “over-the-shoulder” shot. 

While you can see some of the available camera positions don’t interpret this as being the only camera positions you should use. Focus more on being on the proper side of the bisecting line when setting up the individual camera shots. Once you get a pairing you like then it’s advisable to stick with it. Don’t get fancy for the sake of fancy. Let the cameras tell the story with consistency so the viewer doesn’t miss any important plot points. 

Below is an excerpt of my initial research (including ChatGPT and Bing Chat) and it checks out as a solid list of reasons why you should pay attention to this rule. 

– The 180-degree rule is a fundamental guideline in filmmaking that helps maintain spatial continuity and visual coherence in a scene. Here’s a summary of why it’s important: 

– Maintains spatial consistency: The 180-degree rule ensures that the spatial relationships between characters and objects in a scene remain consistent. This is crucial for the audience’s understanding of the scene’s geography and the characters’ positions within it. 

– Preserves screen direction: By adhering to the 180-degree rule, filmmakers maintain the same screen direction for characters and objects throughout a scene. This consistency helps viewers follow the action and maintain a sense of visual orientation. 

– Enhances continuity: Maintaining the 180-degree rule contributes to visual continuity, making it easier for viewers to connect individual shots and understand the flow of the narrative. This consistency is vital in avoiding confusion and distractions. 

– Creates a natural look: When you break the 180-degree rule, it can result in jarring or disorienting shifts in perspective. Sticking to the rule helps maintain a more natural and fluid visual experience for the audience. 

– Facilitates editing: Following the 180-degree rule simplifies the editing process by providing a range of shots that cut together smoothly. This allows for seamless transitions between different camera angles and perspectives. 

JUMPING THE LINE 

This refers to throwing all this out the window and crossing the bisecting line of the scene. It’s not always bad either. 

In indie filmmaking, there will always be those who jump the line, break the rule, and come out on top. I’m not an expert here by any means so I will give you some more references to check out so you can make up your own mind.  

CONCLUSION 

While we all have our own ideas as to how a shot should be framed or presented, we do need to keep in mind what the industry has trained the audience to expect. It might be wise to not step outside of the norm unless there is a compelling reason to do so from a storyline viewpoint. 

After all, the story is the most important part of all this, and we don’t need to be distracting the audience without good reason to do so. Rules are there for consistency and are not intended to stifle creativity but to aid in getting that creative story across to the audience. 

VIDEO RESOURCES

Sight Unsound – https://www.youtube.com/watch?v=yTaPI3nsH88 Crossing the Line. How and Why it’s Done. 

StudioBinder – https://www.youtube.com/watch?v=iW0bKUfvH2c The 180 Degree Rule in Film (and How to Break the Line) 

Camber Film School https://www.youtube.com/watch?v=e-QbgIpK3zM Breaking the 180 Degree Rule for BETTER Storytelling – Crossing the 180° Line Examples in Movies  

Jesse Trible – https://www.youtube.com/watch?v=jmCpFbZ20Fg – The 180° Rule (And How to Break It) 

Garrett Sammons – https://www.youtube.com/watch?v=7H1EtLBhB9k&t=226s – DON’T CROSS THELINE!!! | 180 Degree Rule Explained 

WEB RESOURCES

Masterclass – https://www.masterclass.com/articles/understanding-the-180-degree-rule-in-cinematography 

Indie Film Hustle – https://indiefilmhustle.com/180-degree-rule/ – What The Heck Is The 180 Degree Rule? – Definition And Examples 

Adobe – https://www.adobe.com/creativecloud/video/discover/what-is-the-180-degree-rule.html – Channel the 180-degree rule for compelling cinematography. 

Animating Dialog – Peter Haynes – Reallusion Magazine

MD McCallum - WarLord

MD McCallum – WarLord

Digital Artist MD “Mike” McCallum, aka WarLord, is a longtime iClone user. Having authored free tutorials for iClone in its early years and selected to write the iClone Beginners Guide from Packt Publishing in 2011, he was fortunate enough to meet and exchange tricks and tips with users from all over the world and loves to share this information with other users. He has authored hundreds of articles on iClone and digital art in general while reviewing some of the most popular software and hardware in the world. He has been published in many of the leading 3D online and print magazines while staying true to his biggest passion, 3D animation. For more information click here

WarLord’s Workshop Beginners Guide: The Timeline Simplified

A timeline is perhaps the most important basic concept that an animator must grasp. The timeline allows animations to happen. Allows action to take place. In most cases a timeline is demonstrated with the simple act of moving a primitive like a box across the screen. While that adequately shows what a timeline does in its most basic form… it’s not much fun. 

With that in mind, we are going to replace the primitive with an aircraft. Something that will make this exercise a little more interesting to animate. 

BACKGROUND 

I remember the first time I had to deal with a timeline. The concept eluded me at first because until then everything I did was static, digital art. Mainly for illustration and web graphics.  I had gone from Corel Paint to Photoshop, Windows was a beast that required backups if you worked with it and the growing demand from the web meant moving onto audio and video with apps like The Real Player and this new kid on the block, Flash. 

If you were involved with web graphics or site development in the early days of the internet, Flash was a real boon to your workflow. This was particularly so in the mid-1990s when 33.6kb was a common speed before any type of consumer broadband was even on the horizon. Security issues weren’t on the minds of many web developers either. We were just trying to get meaningful, interactive websites deployed which took a lot of time and expense.  

I knew Flash was vector graphics and was capable of animation and that was the extent of it all. The only “timelines” I was familiar with back then were in video editing but for some reason, the connection wasn’t made to what a timeline really meant. 

If you are reading this and you have no idea what the timeline is then you are not alone, as a lot of us have been there, but it is a concept you must eventually grasp.  

The timeline is quite possibility the most single important concept/tool that must be understood to be an animator. You don’t have to use curves even though they greatly improve animation. You don’t have to blend motions or use reach targets, but you do have to understand the timeline. 

KEYFRAME 

What is a keyframe? From StudioBinder

A keyframe, also written as “key frame,” is something that defines the starting and/or ending point of any smooth transition. That something can be a drawing in animation or a particular frame of a shot when dealing with film or video. Any shot, animated or live action, is broken down into individual frames. You can think of keyframes as the most important frames of a shot that set the parameters for the other frames and indicate the changes that will occur throughout as transitions.  

You won’t really have to be concerned with a keyframe or what they are during this exercise, but it is a term you need to be aware of and become familiar with during your animation journey. 

The timeline is quite possibly the single most important concept/tool that must be understood to be an animator.

MOVE THE AIRCRAFT 

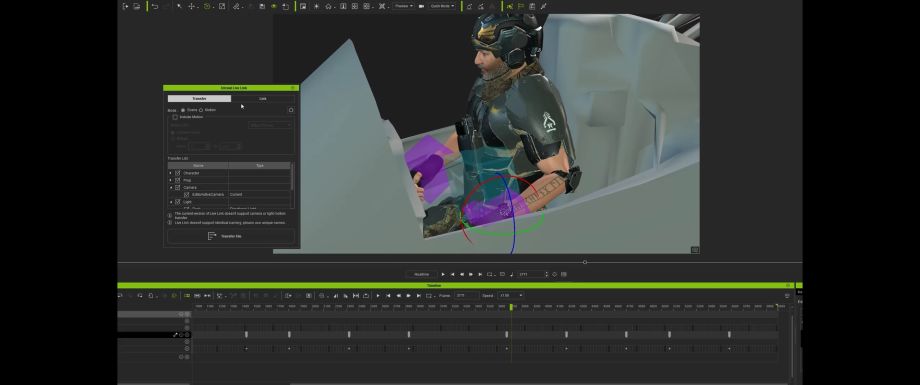
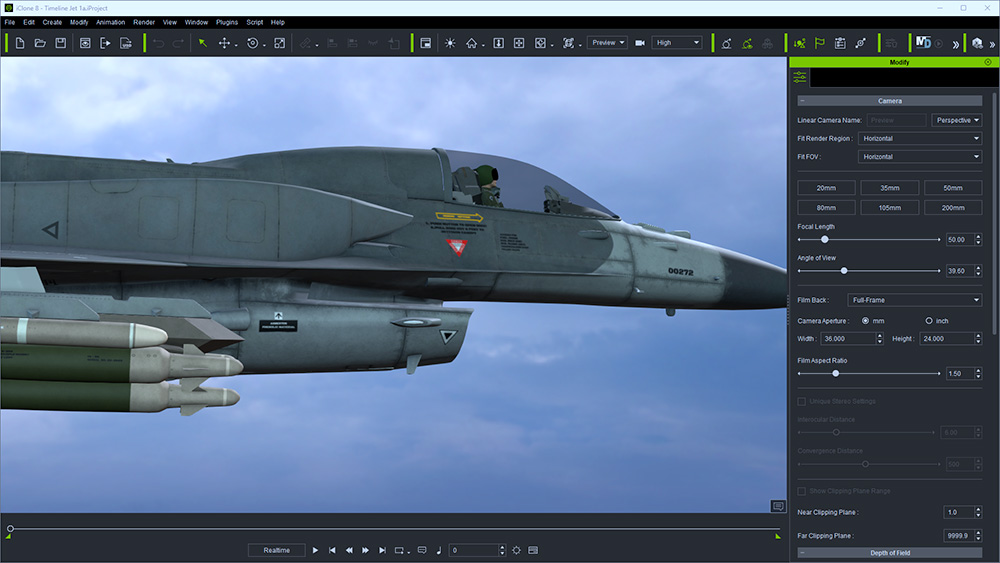
For this scenario, I used the free S-14 Jet over at Sketchfab  (“S-14 Fighter Jet (High Poly)” (https://skfb.ly/owLXP) by Kamran Mughal is licensed under Creative Commons Attribution (http://creativecommons.org/licenses/by/4.0/) as it comes configured for flight with the landing gear retracted and had a nice cockpit too.   

I loaded a Pilot character into the cockpit in a sitting position and placed the hands near the joystick and throttle on each side.  Any iClone humanoid character will work, just remember to link the character to the aircraft.  

The first method. Move the jet.

THE STEPS 

Step 1: Load the aircraft. Set the aircraft shadow to “Receive Only” in the Scene Manager. 

Step 2: Load, link, and position the pilot within the aircraft. Set the Pilot Shadow to “Receive Only”. 

Step 3: Load a sky from CONTENT->SET->SKY in the Content Manager. I used “Cloudy” sky. 

Step 4: Set the Z axis on the sky to something like –10000 to lower the sky and fill the viewport with clouds. This may vary depending on the sky you chose. 

Note: MAKE SURE YOU ARE ON FRAME ZERO (0) 

Step 5: Select the PREVIEW camera and pull back until you see the aircraft and a lot of sky.  

Step 6: Use the Zoom tool to zoom out and the Pan tool to move the Aircraft to the left of the viewport.  

Step 7: Move the Play head slider to the last frame or click on the end button.  

Step 8: Use the move tool to move the aircraft towards the opposite side of the screen until the nose of the aircraft is almost off-screen. 

Return the play head to the start and play the animation. You will notice two things immediately. It takes a while for the aircraft to get going and moves very slowly across the screen. 

And… Congratulations as you have just created your first keyframes with the beginning and the ending frames of the aircraft movement. IClone takes care of everything in-between hence the term tween or tweener, which is not commonly used in iClone terminology but is a general animation term you may run across. 

The first problem in this exercise is the default curve that starts and stops each motion. If you don’t know what a curve is then just follow along as you need to be a little more familiar with animation before we go into curves. Curves are not a beginner’s topic for most new users but the sooner you understand and properly use curves the more polished your animations will be.  

THE FIX FOR THE CURVE 

Step 1: With the plane selected, open the timeline by pressing the Show Timeline button in the play area. Hold down the Alt button and scroll the middle mouse button until the complete timeline is visible.   
 
Step 2: Right-click on the last keyframe (small green symbol on the right side of the timeline) and select Transition Curve.  

Step 3: Change the transition curve from Default to Linear. The aircraft should now be moving at a constant speed between keyframes. 

THE FIX FOR THE SLOW SPEED 

To speed up the aircraft as it goes across the screen you need to select the last keyframe on the right (in the timeline with the aircraft selected) and move it towards the left to about halfway. You have now doubled the speed of the aircraft.  Keep moving this keyframe to the left to increase speed.  

You should now see the relationship between the aircraft and the timeline as it gives the animator an opportunity to mark the beginning and end of this animation (the fly across), its duration, and speed. 

MOVING THE AIRCRAFT OFF-SCREEN 

If you want the aircraft to move from offscreen left to offscreen right, then all you need do is move the play head to the first keyframe (frame 0 in the case), and with the aircraft selected move it to the left until it is offscreen enough to not be seen. 

Do the same thing on the last keyframe of the animation and move the aircraft offscreen to the right. You must be on the first frame and last frame as instructed above for this to work. It uses those frames as a starting and ending point and then creates the frames in between.  

NOTE: To increase the distance the aircraft flies you will need to zoom out far enough to have the space needed for the longer distance. 

How did this Involve the Timeline? I used it to time the movement from frame 0 to the last frame which captures the movement of the aircraft.  

A video tutorial covering both methods described in this article.

MOVE THE SKY 

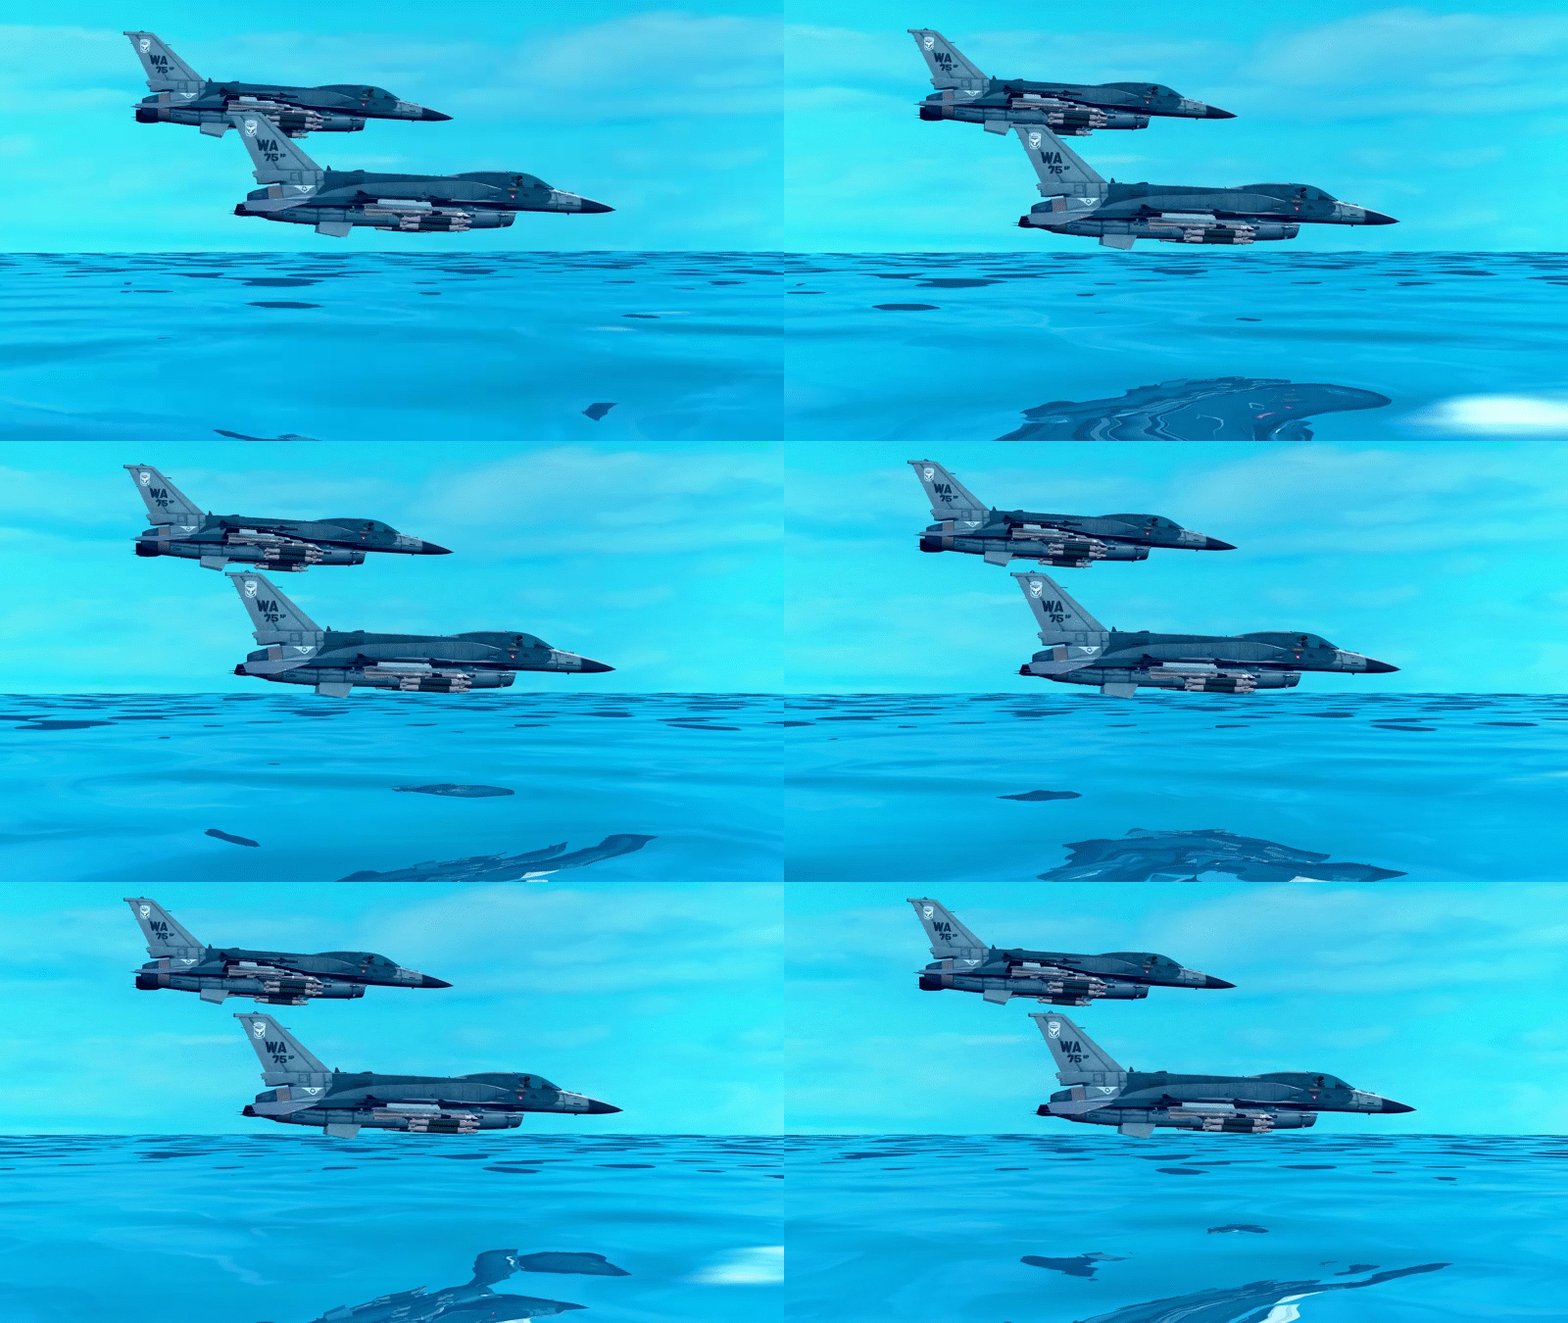
For one plane it does not really matter if you move the aircraft or the sky. If, however, you have several aircraft then it becomes much easier to move the sky (one object) versus multiple aircraft objects.  

This is my preferred method of making this type of shot with multiple objects. This also allows for easy animation of the various aircraft bobbing up and down or moving about. It cannot be done with a standard sky but instead, it needs to be a prop so it can be moved and keyframed. 

Method two… move the sky.

THE SKY PROP STEPS 

I used Props->Props->3D Space->Dome as the sky.  

  • Increase the Dome scale to 2000 
  • Add a cloudy sky to the Dome diffuse channel or Drag and Drop it directly on the Dome. 
  • Add Water, I used Water 8 in the Still Normal folder. 
  • Set the Water to –100 Height, 270 Direction (so it will flow opposite the direction of the aircraft) Water size to 1000. 
  • Set Wave Size to around 335 to increase size. Set Wave Speed to around 100. 
  • While at Frame 1 move the Sky down to the water or its edge just a little below the surface.  
  • At Frame 1 select the sky and move it all the way to the left while still being able to grab the gizmo to move it. 
  • Go to the last frame and move and move the sky to the right side of the screen making sure not to go too far or the curve of the dome may show. 
  • We now need to select the last keyframe (last frame) and right-click then select Transition Curve and select Linear. You will see a short preview. Now the sky should move smoothly from the first to the last frame. 
  • If you duplicate the Aircraft, make sure to select the Aircraft and the Pilot. Relink each pilot to its appropriate aircraft if you get a popup message regarding strange behavior from links. 

As you can see it doesn’t take that much for a simple animation of moving an object or objects across the screen, up and down or in any direction for that matter. You would basically do the same steps for launching a rocket changing the object to angle across or go straight up for a launch. 

This is for props, walking characters are another issue as they depend on distance and speed to not have foot sliding issues. If, however, you want to fly a superhero across the screen then the same principles would apply.  

CLOSING 

The timeline will hold the keys to the animation kingdom and the more you understand what it can do, the more complex your animations can be. What you have seen here is just a starting point. And, in this case, particularly, utilizing the manual and Reallusion resources will limit frustration while you grow as an animator. 

MD McCallum - WarLord

MD McCallum – WarLord

Digital Artist MD “Mike” McCallum, aka WarLord, is a longtime iClone user. Having authored free tutorials for iClone in its early years and selected to write the iClone Beginners Guide from Packt Publishing in 2011, he was fortunate enough to meet and exchange tricks and tips with users from all over the world and loves to share this information with other users. He has authored hundreds of articles on iClone and digital art in general while reviewing some of the most popular software and hardware in the world. He has been published in many of the leading 3D online and print magazines while staying true to his biggest passion, 3D animation. For more information click here