Mike’s career in the creative industry is nothing short of extraordinary. With over two decades of experience, he has worked with AAA companies, leading high-profile projects and mastering both 2D and 3D realms. His clientele includes industry titans like Hasbro, Electronic Arts, Dimension Films, and Sideshow. Recently, Mike, a Clio award laureate, joined Microsoft Games as an Art Outsourcing Manager. His journey is a testament to his relentless pursuit of creative excellence.
Why I chose Character Creator and Pose Tools
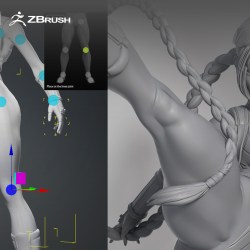
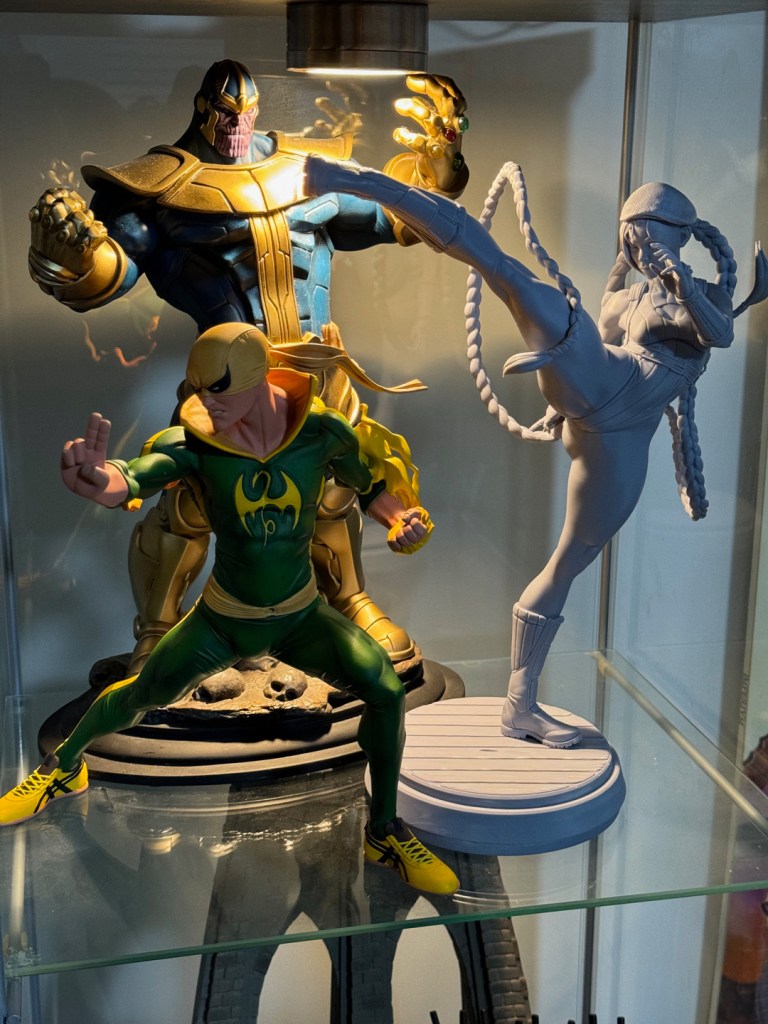
Ever since I started collecting statues of my favorite comic book heroes, I’ve been captivated by their dynamic poses. I aim to infuse this dynamism into my sculptures, but it’s no easy task! Before discovering Reallusion’s Character Creator, I relied on Transpose Master in ZBrush for posing. It was functional, but far from ideal, and quite destructive. Once a pose was set, altering it was a challenge.
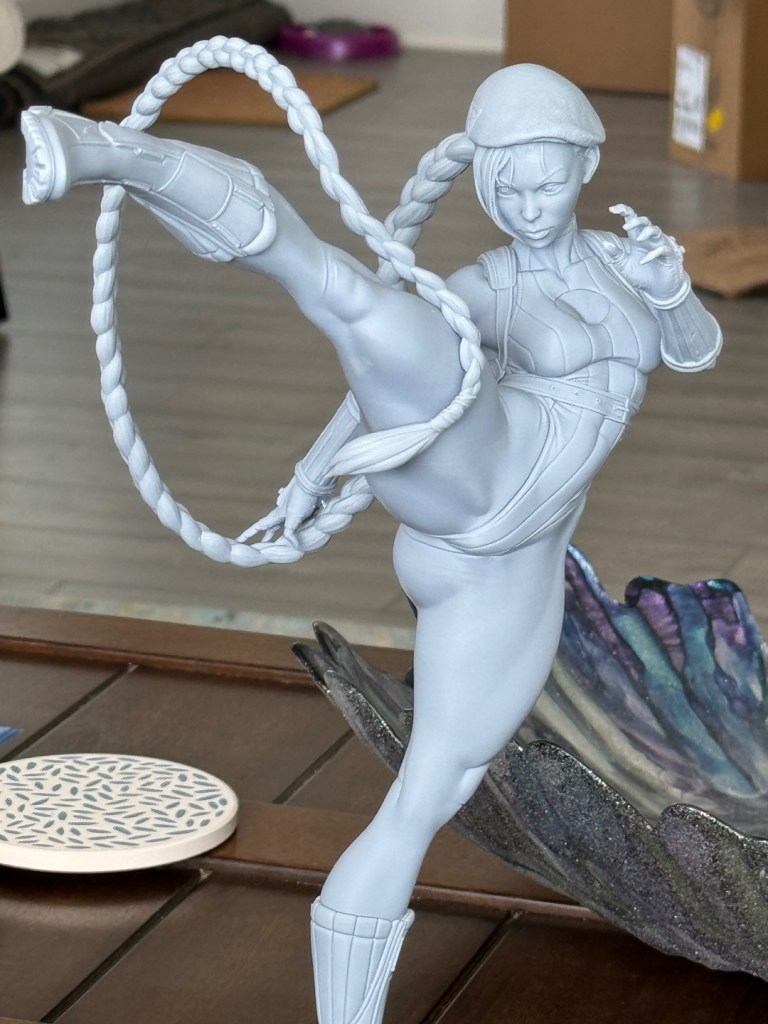
Then came Character Creator Pose Tools, a game-changer with its user-friendly interface and flexibility. It allows me to experiment with multiple pose iterations before finalizing. No matter how well-sculpted, textured, or detailed a character is, a weak pose can undermine the entire piece. When I decided to sculpt Cammy, I knew her pose had to be powerful. Thanks to Character Creator, I was confident I could achieve it.
Detailed Walkthrough
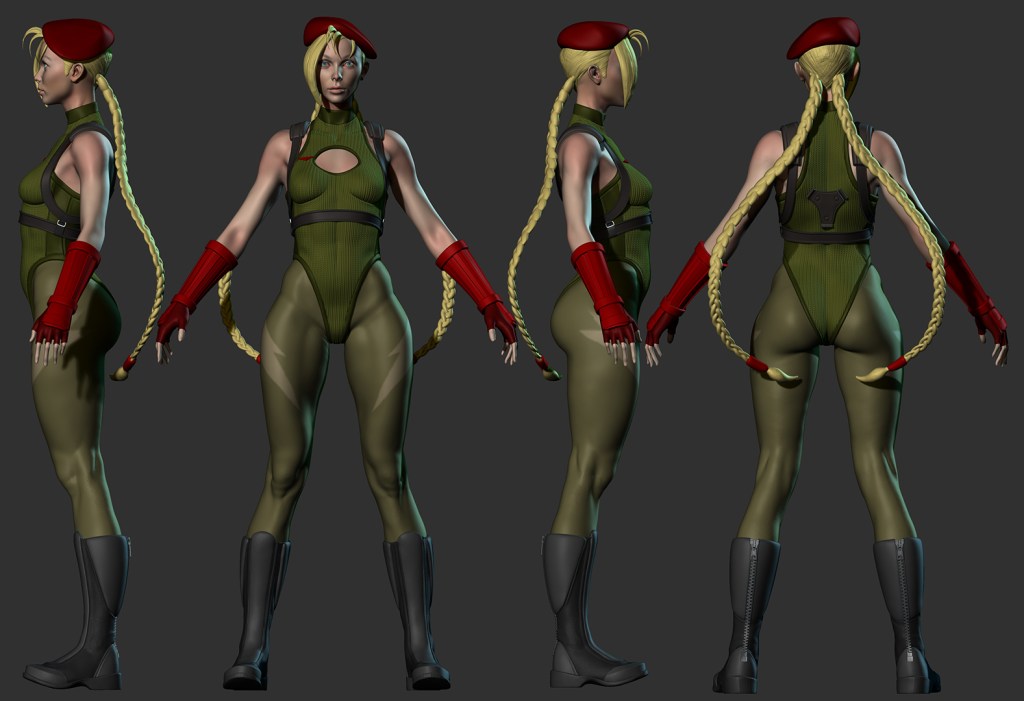
ZBrush Modeling
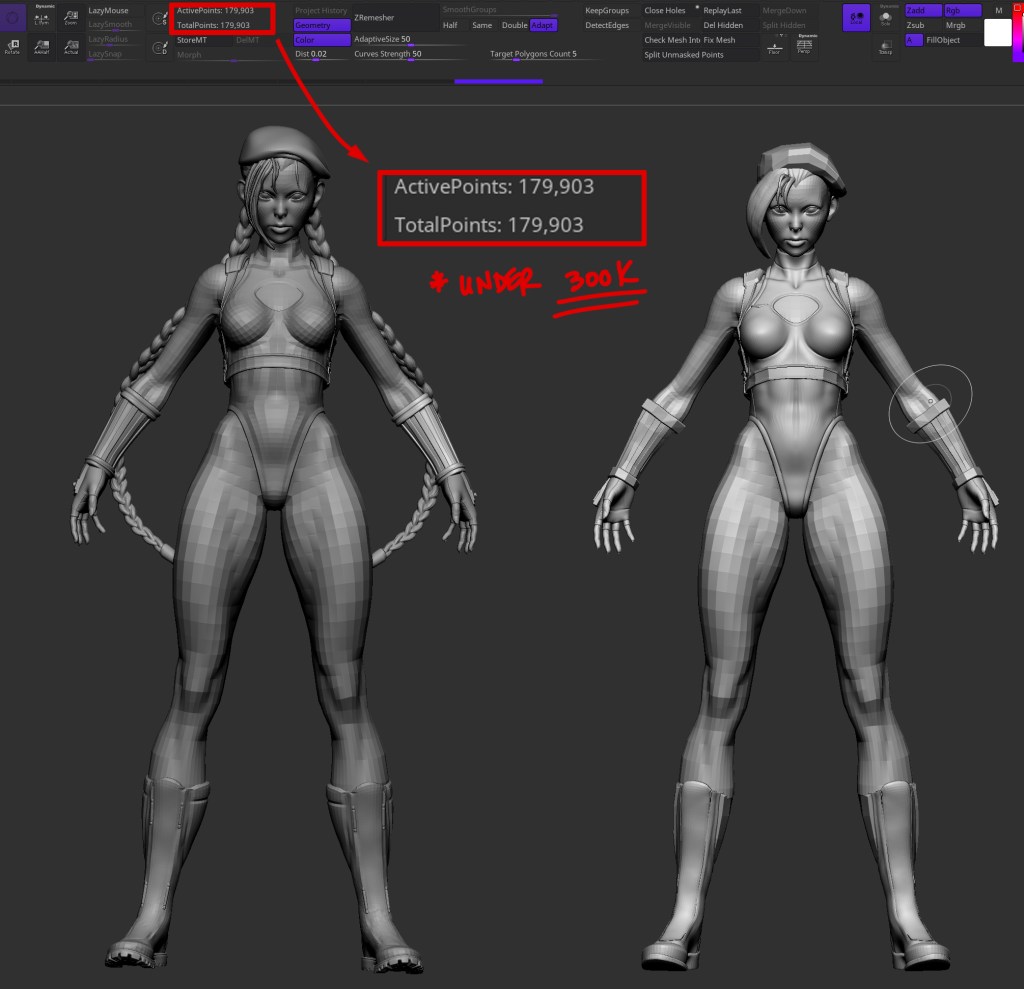
My process for preparing Cammy to go from ZBrush to CC4 is very similar to the one I use for ZBrush posing. The key is to ensure a low-poly mesh that gracefully supports intricate details at higher subdivision levels. Equally crucial is a topology with loops that accommodate joint deformation. Naturally, this is my initial step before assigning polygroups for effortless selection, aiding in isolating tricky parts for detailed sculpting.
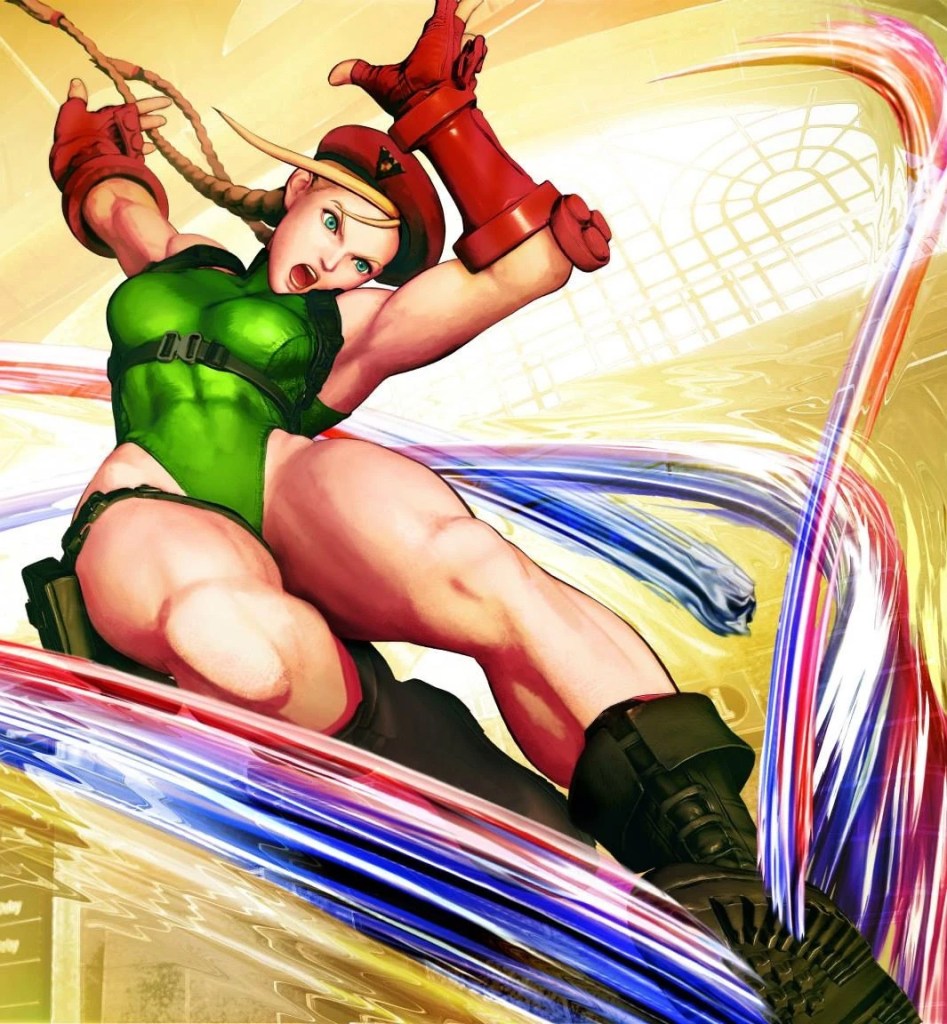
Original Capcom Cammy Art – StreetFighter 5. Copyright Capcom
GoZ and AccuRig
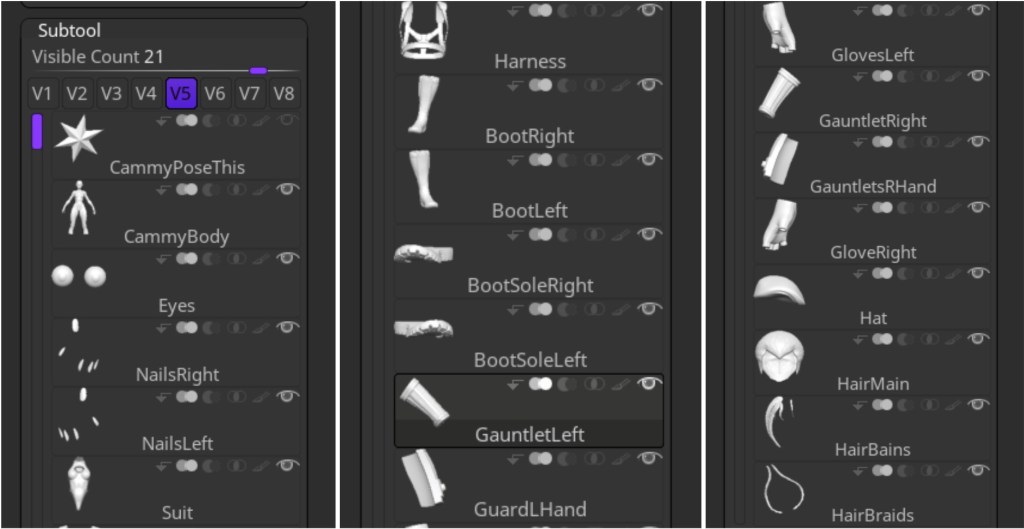
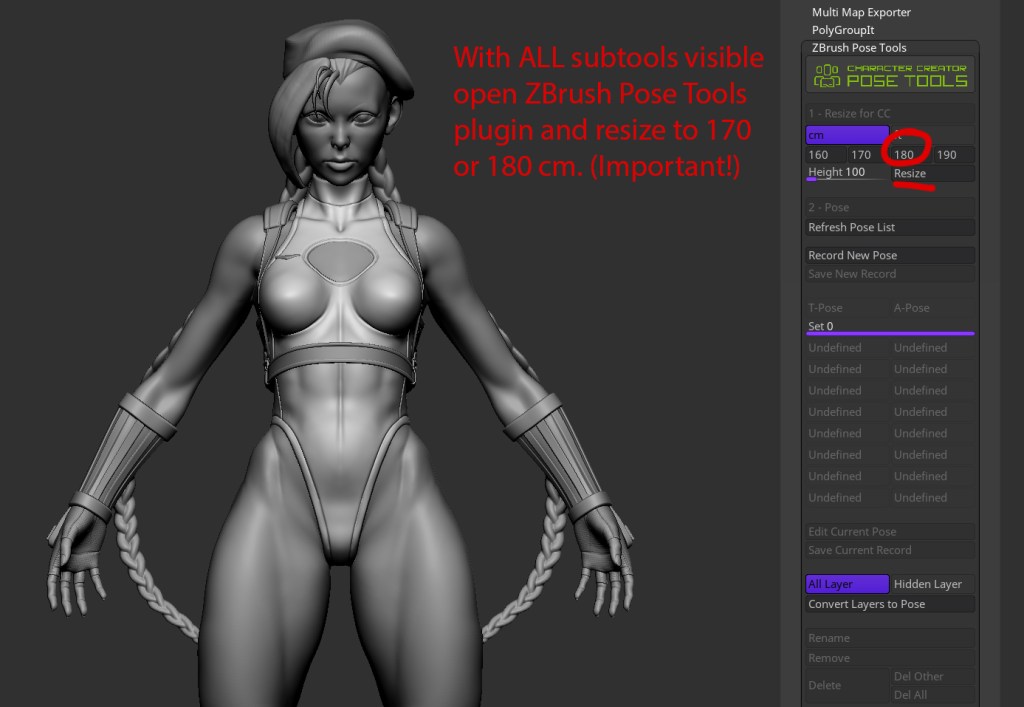
Seamlessly moving a file between ZBrush and Character Creator requires some preparation. I begin by ensuring each element is named for easy identification in AccuRig (organization is key). With all subtools in view, I utilize the PoseTools plugin to scale down my model before exporting it to CC via GoZ.
ZBrush Modeling
I chose to exclude Cammy’s exaggerated ponytails, as posing them in ZBrush later would be simpler. By toggling off their visibility along with the base, I can send the remaining elements to CC4 for AccuRigging. It’s crucial to uncheck ‘All Meshes’ and check ‘Selected Meshes’; thus allowing me to choose only the components I wish to deform organically.
Posing in Character Creator
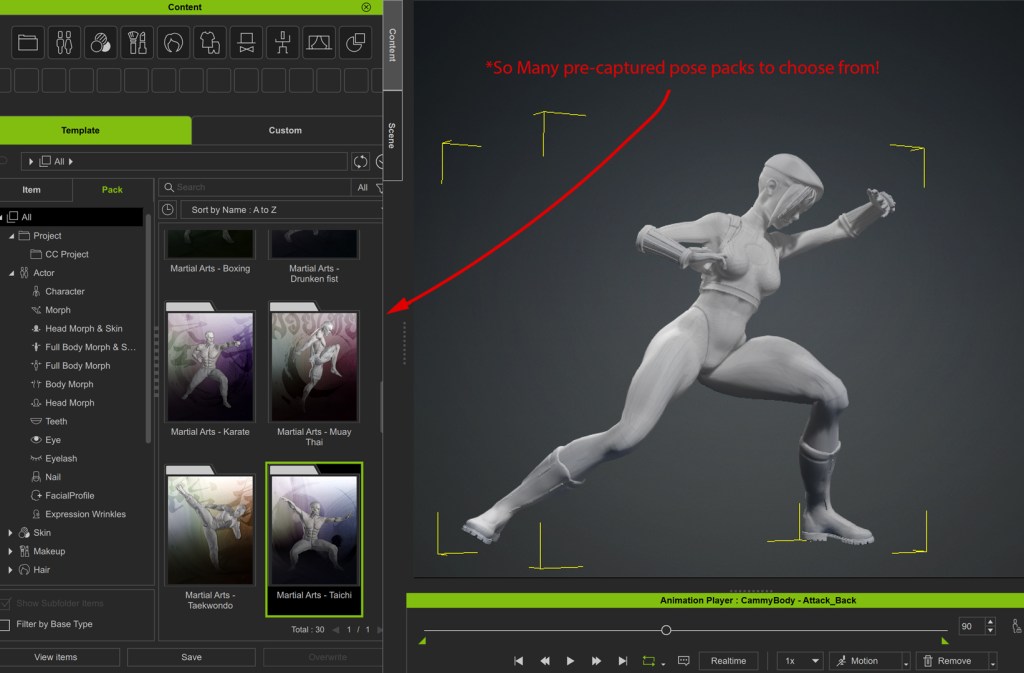
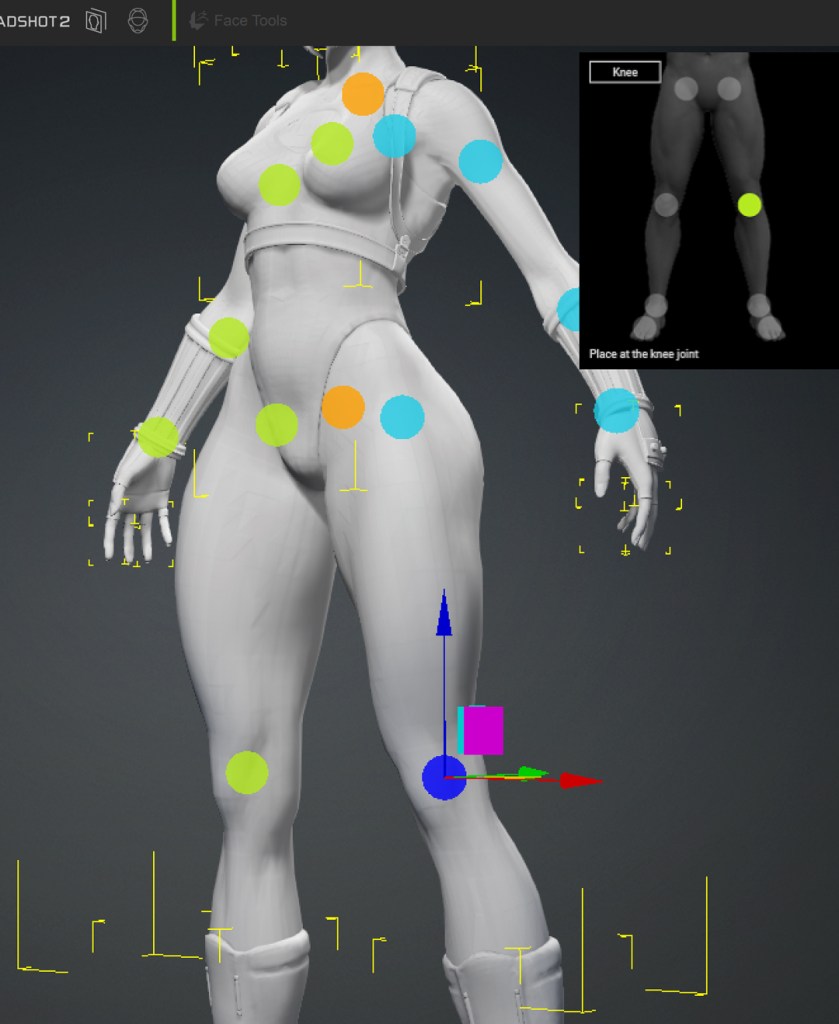
Once the AccuRigging process is complete and pose dots are fine-tuned, it’s time to bring Cammy to life! I had a few options: manual posing, using the motion library, or a blend of both. Character Creator boasts an impressive motion-captured library, perfect for selecting the ideal animation or static pose.
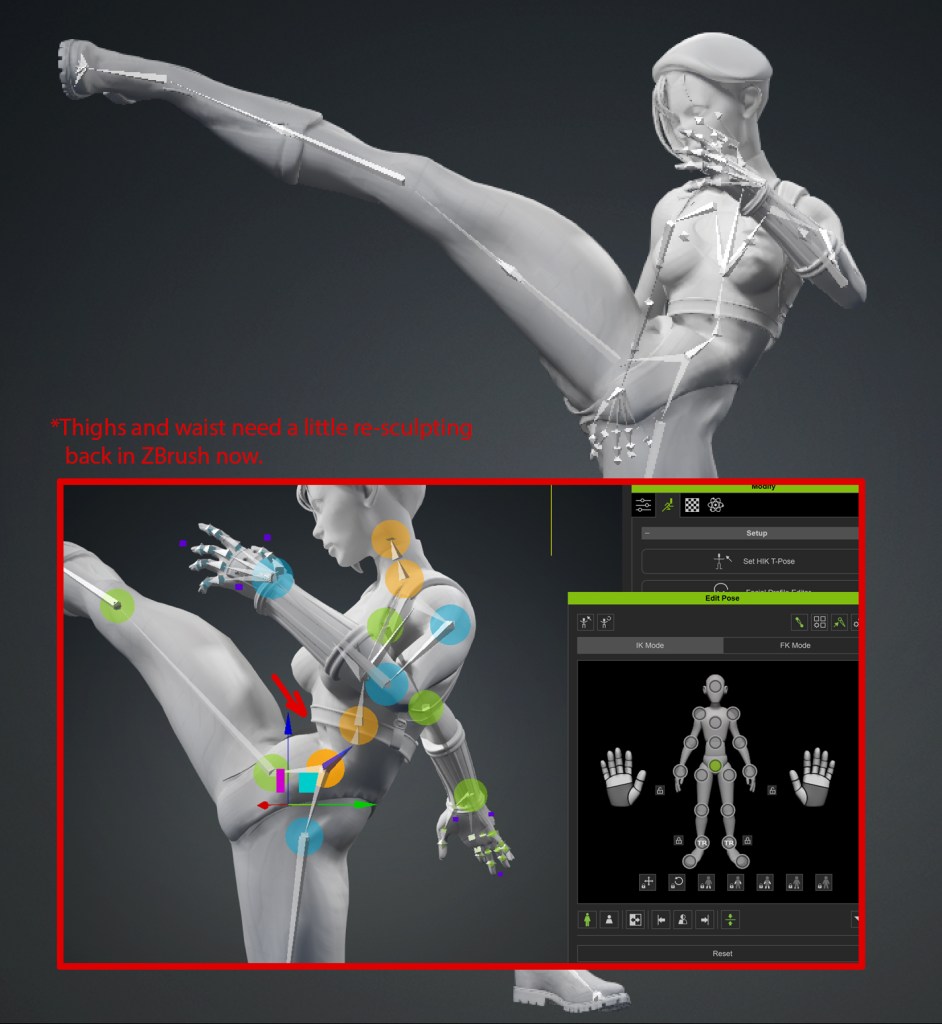
As a non-animator, this feature is a godsend! The Reallusion store also offers additional pose packs for purchase. For Cammy, I had a distinct pose in mind, so I opted for manual posing. The focus was on conveying weight distribution and kinetic energy, vital elements for a dynamic pose.
Fine-tuning in ZBrush
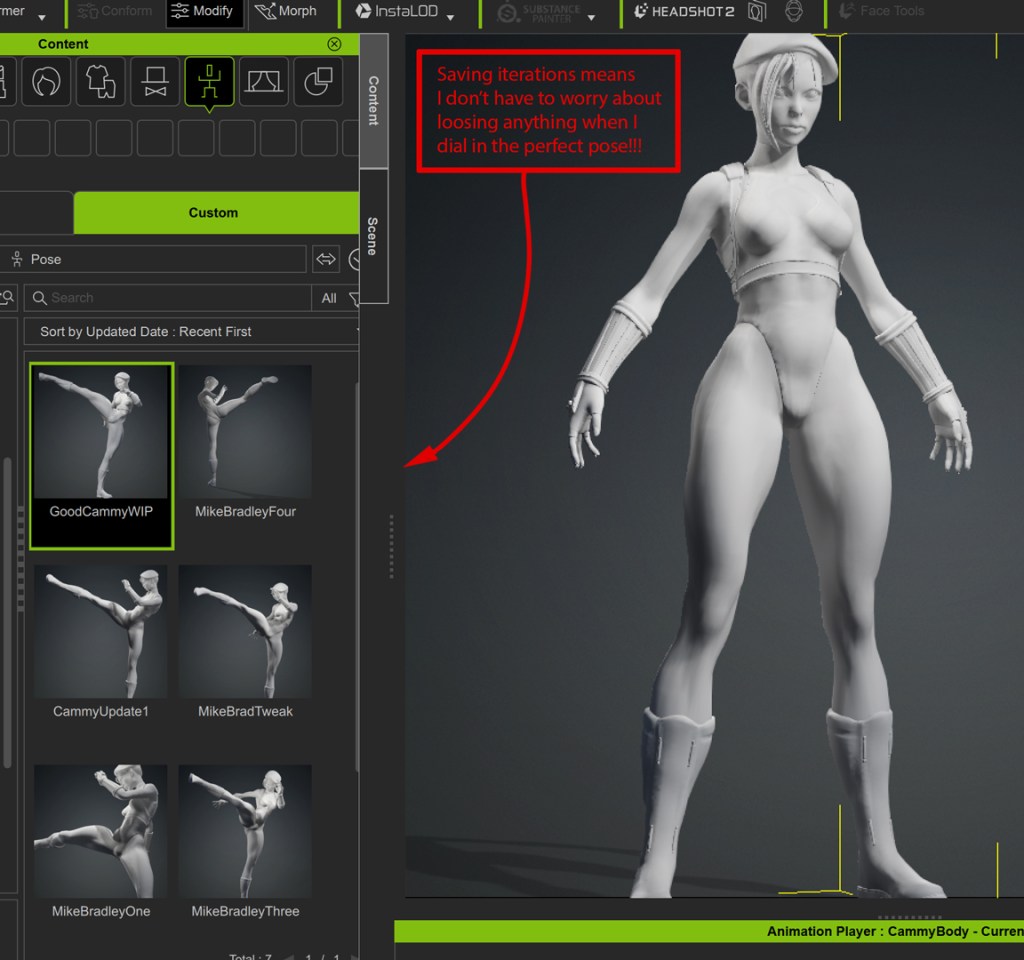
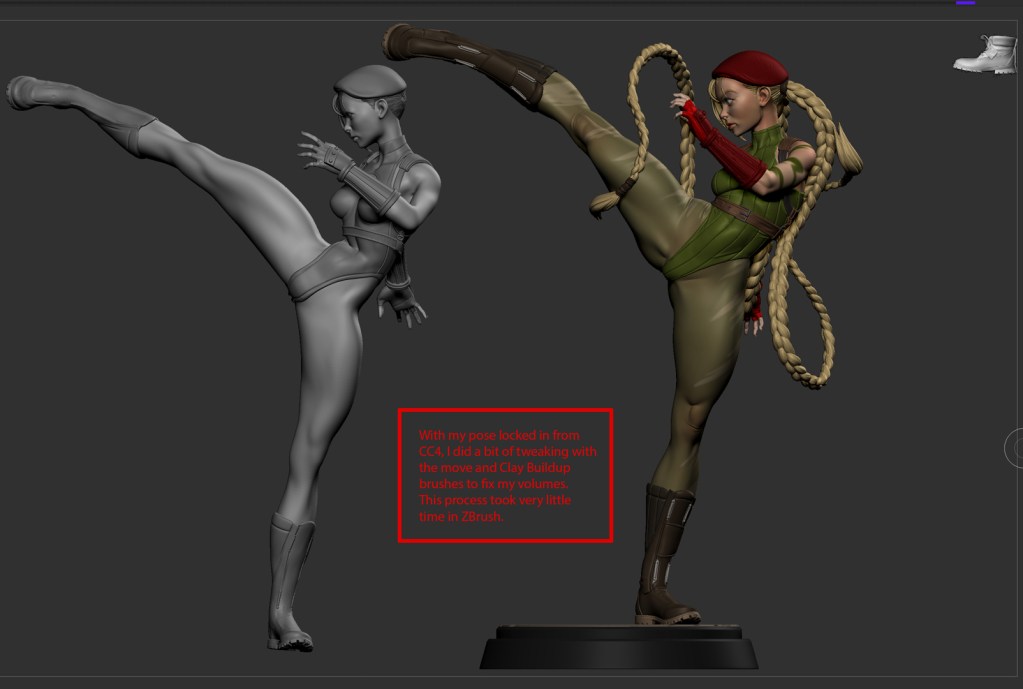
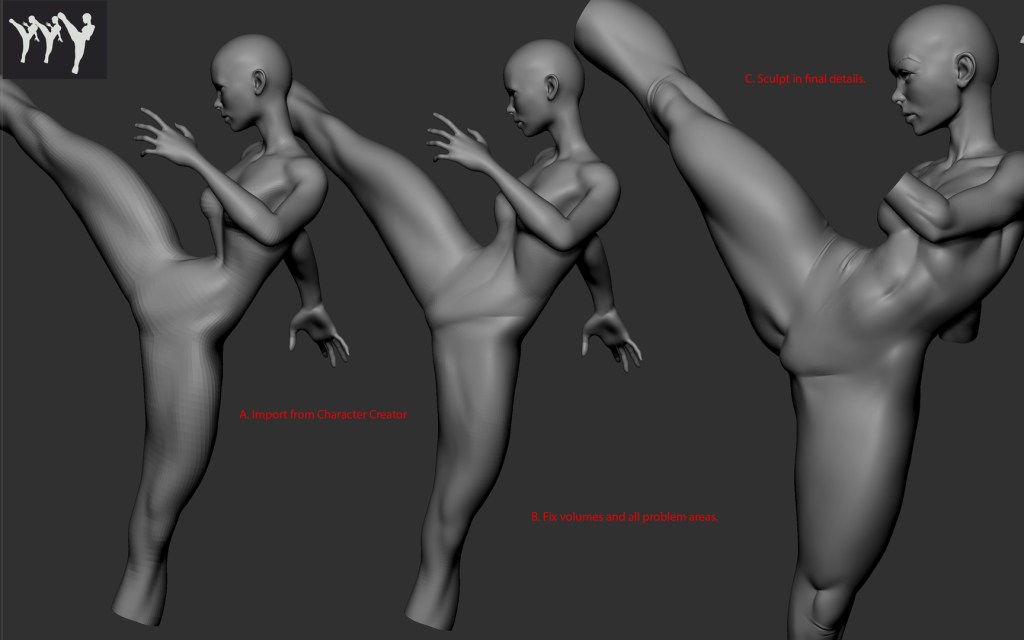
Having refined Cammy’s pose in CC4’s Edit Pose window and diligently saved iterations, I’m on the home stretch. I bypassed ‘Weight Painting’, leaving minor compression areas to address. No worries, though! A quick return to ZBrush lets me rectify any anatomical issues, then reintroduce the hair and base. With the pose finalized, re-sculpting problem areas is a breeze. I typically employ a trio of brushes – Move, Clay Buildup, and Dam Standard – to infuse volume and detail into my sculpt.
Create a turntable podium for Cammy
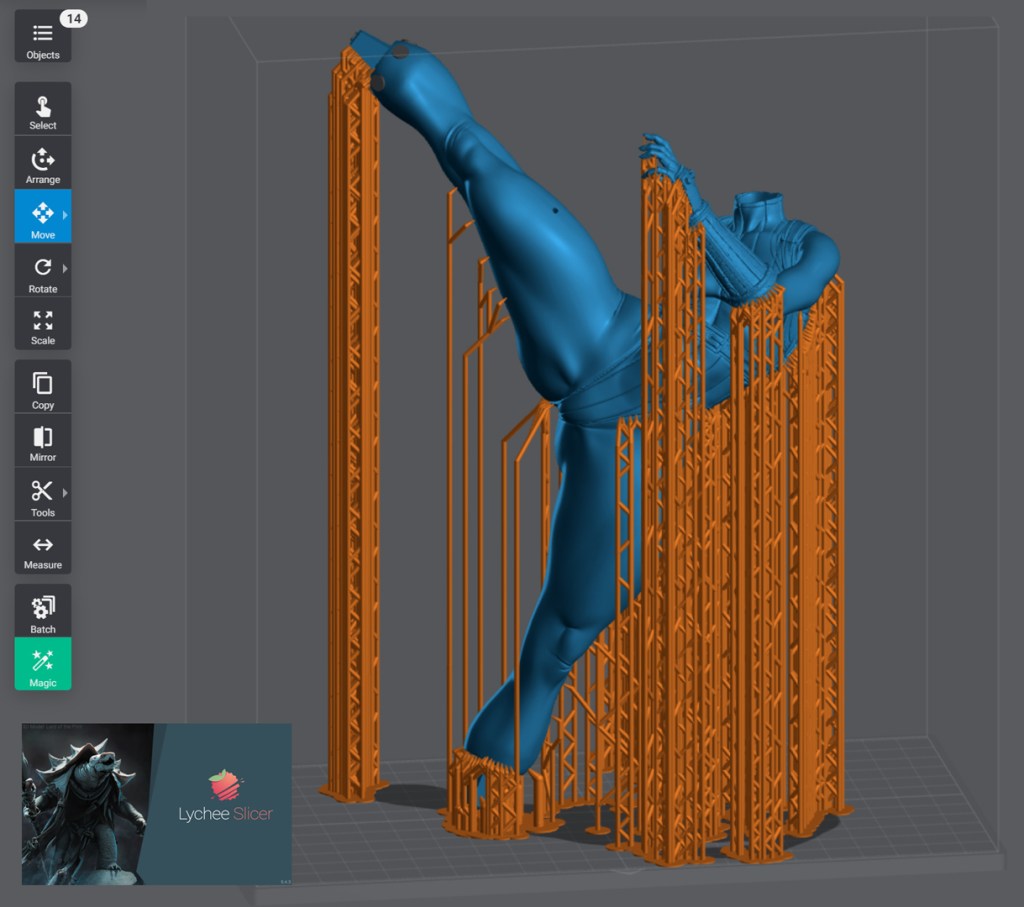
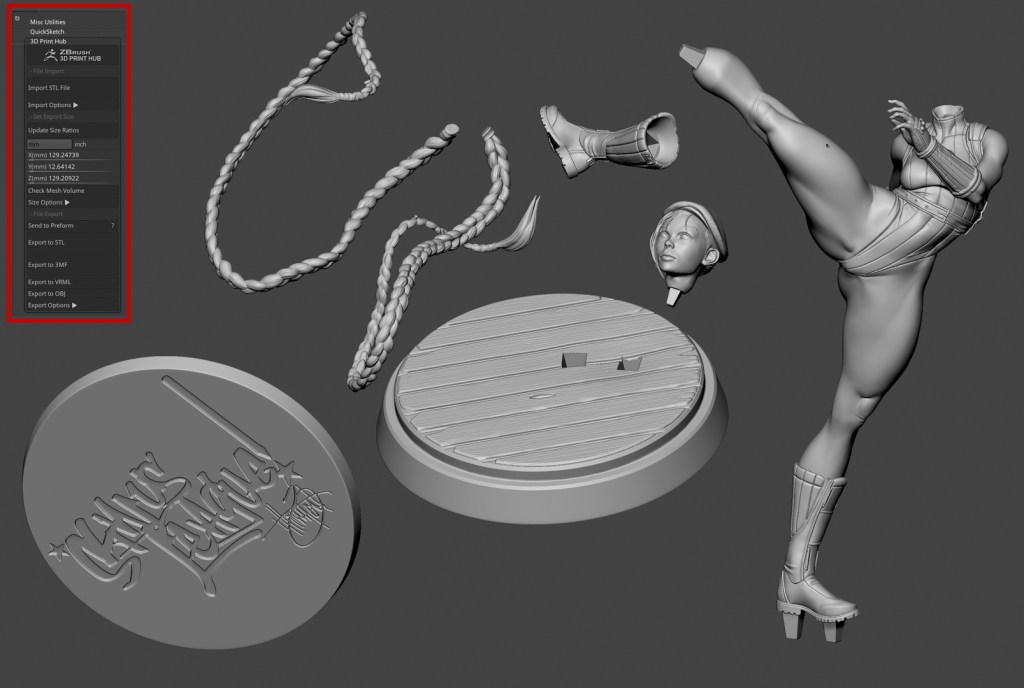
Upon finalizing the pose and detailing, I utilized ZBrush to ready my model for 3D printing. With a vision of a 1/6th scale statue, I employed Scale Master to aptly size all my subtools. Then, I strategically DynaMeshed the parts together. The final steps involved cutting and keying everything, followed by using the 3D Print Hub to convert the parts into .stl files, ready to be sent to Lychee Slicer. This meticulous process ensures a seamless transition from digital sculpting to physical manifestation.
Final thoughts
Integrating Character Creator into my workflow has been a game-changer. As a long-time ZBrush sculptor, I yearned for a tool that could help me swiftly generate poses for iterative and future sculpting. Character Creator not only fulfills this need but does so with an intuitive learning curve. I’m particularly fond of the pose libraries and body morphs that CC4 offers. This software has become an invaluable addition to my pipeline, and I eagerly anticipate the advancements in its future iterations.
Richard Mans is a New Zealand-based artist and filmmaker renowned for his fantastical short-form videos. His acclaimed 2011 animated short film “Abiogenesis” garnered widespread acclaim, winning awards and enjoying an extensive festival run globally. He also focused on animations and user experiences for prototype display technologies in the Automotive industry, where Mans continued to innovate.
Excited by the possibilities of high-quality real-time rendering, he is now dedicated to creating captivating short-form videos. “Fuzzyrealms” serves as his online portfolio, showcasing his latest works. Passionate about crafting brief glimpses into fantastical worlds, Mans finds inspiration in daily creativity. Follow him on Instagram, YouTube, Facebook, TikTok, or subscribe to his mailing list for updates.
Act out your dreams
My initial idea is very loose. No storyboards, I just dream and edit shots in my head. Once I settle on an idea I put on my motion tracking suit (I use a Perception Neuron 3 suit) and start acting out the characters in the scenes, this process helps me further refine my idea.
I record my Motion Capture directly in iClone using the Motion Live Plugin. I find that seeing my motion capture in realtime on a human character helps me troubleshoot issues with the motion capture performance that I may not see using a plain Motion Dummy.
Refine your performance with iClone
Two tools in iClone that I always use for editing my motion capture are the Smooth Filter and the Edit Motion Layer tool.
The Smooth Filter (found in the Curve Editor) eliminates any unwanted jittering noise that is usually in the raw Motion Capture Data. Sometimes I may not even notice the jittering until my final render when I’ll notice what looks like the character skipping frames. So I find It’s good practice to start with the Smooth Filter.
I use the “Edit Motion Layer” tool to fix more obvious issues like hands passing through the character’s leg, and correcting the character’s posture.
Give it soul
Once I’m happy with the edited motion capture, I blend various facial animation clips (from Reallusion’s “Digital Soul” pack) in the timeline. This way I can quickly create a natural-looking facial performance that matches my motion capture.
Simulate a crowd in iClone
Looking at reference videos (on YouTube) of busy streets in New York City reminds me that there’s often a flow of pedestrians walking down a street. For example, groups of people moving in one direction tend to stick to a certain side of the path. So I create two paths with characters flowing in opposite directions to achieve this effect. Then add a few more people to a third path in the distance to give the scene more depth.
Creating crowds of characters can be taxing on system resources, so preferably every character needs to end up in the final camera shots. So I restrict the paths to areas where I imagine the camera shots will go.
Send everything to Unreal Engine
Transferring everything to Unreal Engine is very straightforward using iClone’s “Unreal Live Link” plugin. First under the “Transfer File Settings” I deselect “Place Actors in Scene” and select “Bake all animations to sequencer” then transfer my two main Characters. Then I change the “Transfer File Settings” to “Exclude Morph Targets” and transfer all the other characters (the crowd). This way everything is optimized and organized nicely into Sequences in Unreal Engine.
Now that everything is transferred to Unreal Engine, I play with my cameras in Unreal Engine until I’m happy with my shots and the camera cuts in Sequencer.
Dress it up with Cargo
With the performances and cameras in place, I use Cargo (a plugin by KitBash3D) to dress up the shots.
Cargo gives me access to a huge library of assets that I can instantly import into Unreal Engine. I simply select the asset in the Cargo interface, click import and after a few seconds the asset loads in Unreal Engine with all the materials applied.
Finishing touches and thoughts
I add color grading and VFX elements (like the dust particles at the end of this short) using Adobe After Effects. Then sound effects and music using Adobe Audition. I love playing around with the sound and music, it’s where the short really comes to life.
Thanks for joining me through this process and I hope you’ve gained some valuable insights into creating short-form animations. With tools like iClone, Unreal Engine, and Cargo, the possibilities are endless. So, whether you’re an aspiring filmmaker or a seasoned pro, keep pushing the boundaries of creativity and never stop dreaming big! Please check out my @fuzzyrealms social media channels to see more of my work. Thanks!
Generative building creation comes in many forms including extrusion-based, agent-based, and procedural. More complex generative applications like CityEngine can create an entire town or city but can be extremely complex to learn if you are unfamiliar with procedural generation.
iClone’sBuildingGen plugin is the opposite of complex with Reallusion’s typical “easy to use” approach as you only need to keep up with a few things. We can learn its basics with primitives as used in the tutorial below, or the supplied building pack and the new French Style pack.
There are a couple of things you must pay attention to, or you will get, what seems to be, very chaotic results when the plugin is simply doing what it was instructed to do.
One errant dropdown menu choice or checkbox in the plugin concerning Levels or Type can produce unexpected results. Understanding why this happens can open the door to using your own or other building kits. As long as the kits provide separate walls, floors, and a few other necessary components that the plugin needs, BuildingGen can use them to create custom buildings.
While this plugin has a slight learning curve, it is not a complicated tool; all one has to do is wrap their head around exactly what they are telling the plugin to do.
If, for example, you add the short trim wall to the top level and forget to uncheck the default first level checkbox you get a combination of the regular wall and short trim wall on the first and top floors creating what looks like a jumbled-up mess but was in fact what you told the plugin to do by failing to uncheck the proper checkboxes.
Left: A properly created customer BuildingGen package. Right: Same package with only a couple of mistakes in checkboxes. This is covered in the tutorial.
Learning the Basics
I thought the easiest way to learn the plugin was to create a new BuildingGen package using the props that came with the plugin or the French-style pack. Using these, instead of a custom or third-party building kit would help me to understand what is happening and why it happened. This is because I would be working with props that I know are sized right and will work with the plugin. If you get unexpected results with these props, then you know you have an error.
While this did help me to learn the plugin, it was still a bit confusing with the actual windows, doors, and other props getting in the way of a clear view and now I needed to learn how to import props of differing sizes. I decided to create a building package (simple template) out of primitives that come with iClone.
One of the most important things I discovered was it does not matter how precise building pieces are in dimensions as you can alter the scale on any axis to make it a 2-, 3-,4- or whatever meter package. By this I mean does the floor take up 2 X 2 grid squares or 3X3, 4X4? We get to determine that by resizing the components to whatever size meets our needs for that particular building package or we can just go with the native sizing. All the plug-in needs to run without error is a floor and wall prop so this is where we will start in the tutorial. After this, we will add the other components.
The tutorial shows each step for the wall, floor, door, window, and Pillar. Some of you will pick it up quickly after watching the first floors and walls packaged and won’t need to watch the entire video but each component is covered for those that want to see it all come together. Once you’ve built your first successful package you apply the same principles to custom kits.
NOTE: I start with the floor. Scale it first as in the video tutorial. It serves as the visual guide for the sizing of the remaining walls, doors, windows, and pillars. Most building kit components will not need to be rescaled, but they still can be if you need to. This makes the plugin very flexible in terms of importing our own custom-made props that might not be exact in dimensions.
NOTE: In Kai’s tutorial on external assets, he talks about having to center an object and reset its transform so it will be at the world center with a proper pivot. This is necessary because many building kits have assets spaced out across the workspace which sets their pivot points to the center of the entire project, not each prop within the kit. In my template example, we are building the props at the world center so there is no need to reset the transform as required in Kai’s tutorial.
Toon Castle
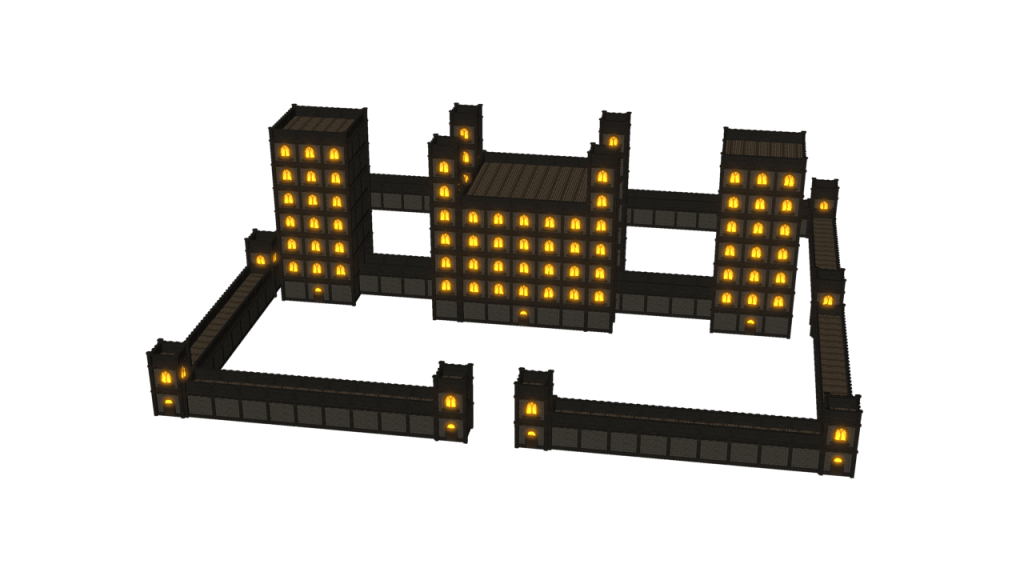
This was a fun project. It came from Sketchfab and not all the parts are used but it does have the necessary doors, windows, and pillars the plug-in needs for a basic building package. I made a floor 4 X 4 grid squares out of primitive and gave it a wood plank texture for the floor.
This tutorial demonstrates how to import the usable parts of the building kit, create a custom BuildingGen package from those parts, and then make a castle with buildings, towers, and walkways surrounded by castle walls within minutes.
Think Outside the Box
There are a lot of building kits out there, but you won’t be able to use all of the components in them like oddly shaped walls or roofs. However, you can use the regular walls, doors, windows, and pillars so look for those items in particular when searching for kits. If there are windows and doors but no walls, then grab the texture(s) from the building and create your walls out of primitives using the textures from the kit.
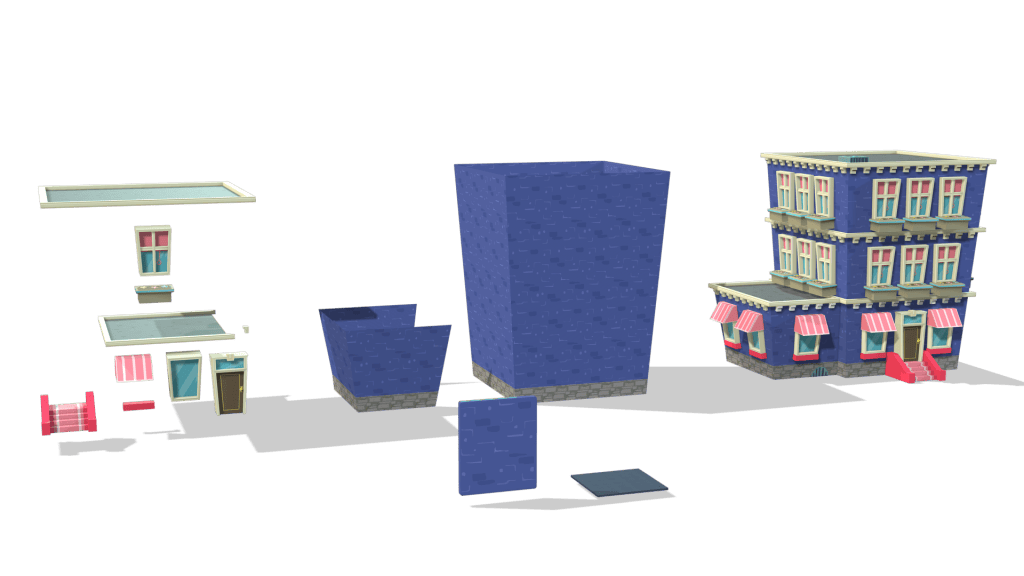
The Toon House from Sketchfab is a good example of using parts from a kit and making your own for the parts that may be missing due to the way the model is created. In this case, there was no separate wall or floor. The walls were two different, irregular meshes versus a wall.
To remedy this, I created a wall and then used the eyedropper tool in materials to grab the texture from the irregular walls and transfer it to my newly made wall component. All I had to do was scale it which is easy using the window and other props as size guides. I repeated the same process for the floor prop. This method is detailed in the template tutorial.
The image below shows the various parts of the Toon House and the irregular walls. In front is the wall and floor I made to work with the other kit components to be able to make toon houses.
Left: Individual parts in the kit that can be used. Middle: The irregular walls. Right: The original Toon Building. Front: The wall & floor created from primitives.
French Style Atrium Building
As I wrote earlier my first try at learning the BuildingGen plugin used props from the French Style pack to create a conservatory/atrium-style building like a fine arts center. I was looking for an elegant style with old-school vibes and large windows but not just plain windows. The AT windows in the pack made it work. I also had to correct the texture on the window glass when making the package so it would be transparent with some reflection mapping. This only had to be done on one window to change all of them.
In my testing example below, I used the custom BuildingGen package to create the major structures then built out the connecting walkway and used roof props for a different roof. I later learned I could have used the plugin to create the walkways as I did for the castle walls in the Toon Castle tutorial.
CAUTION: The video below has audio.
Below is the final package for the Atrium building for those that have the French Style pack and want to re-create the basic building package.
The secret to BuildingGen is… there is no secret.
Just pay close attention to the checkboxes and dropdown menu selections for each item. If you get an erratic result, go back to your packager and make sure the affected level doesn’t have conflicting or multiple props. The drop-down menu Type and Level Checkboxes can create a great custom-building package or a nightmare of conflicting parts with just a couple of errant checkboxes.
Quick Tip
You can make an interior hallway with BuildingGen using a two-sided wall or a wall turned 180 degrees to face the interior instead of the exterior.
From the Product Page: This product contains tons of props, and buildings with different structures can be quickly produced using the building gen plug-in. In addition, I have prebuilt the assembled buildings and even prepared the streets and scenes, so even people without a plug-in can enjoy the fun of this pack.
Digital Artist MD “Mike” McCallum, aka WarLord, is a longtime iClone user. Having authored free tutorials for iClone in its early years and selected to write the iClone Beginners Guide from Packt Publishing in 2011, he was fortunate enough to meet and exchange tricks and tips with users from all over the world and loves to share this information with other users. He has authored hundreds of articles on iClone and digital art in general while reviewing some of the most popular software and hardware in the world. He has been published in many of the leading 3D online and print magazines while staying true to his biggest passion, 3D animation. For more information click here.
The Creative Media Industries Institute (CMII) has been at the forefront of integrating cutting-edge technology into its curriculum, ensuring that students are well-prepared for the dynamic world of media and entertainment.
Professors at Creative Media Industries Institute in Atlanta, Georgia , James Martin and Max Thomas, have been instrumental in this innovation, particularly in the fields of Advanced Visual Effects (VFX) and 3D Animation. Leading the way with projects focused on helping students develop their storytelling skills along with a valuable introduction to core technical requirements that will help them compete in the everchanging world of 3D animation and VFX.
CMII Professor James Martin, 3D Animation
Professor James Martin’s approach to teaching 3D Animation (CMIS 4160) is a testament to how modern tools can revolutionize education. Using Reallusion iClone software, Martin introduces students, many of whom are first-time animators, to animation through practical, real-world production scenarios. The course is structured around three comprehensive modules: Character Animation, Crowd-Simulation creation, and Motion Capture Animation cleanup.
“Reallusion iClone provides an accessible yet powerful toolset for students to immerse themselves in the world of animation. By simulating real-world production scenarios, students not only learn the technical skills but also understand the workflow and collaboration required in the industry.”
James Martin, CMII Professor 3D Animation
3D Animation CMIS 4160
25 Students – 16 Weeks – 3 Modules
Character Animation: In this module, students delve into the fundamentals of character animation. They learn to create and edit animations using the Timeline and Non-linear editing techniques in iClone. This hands-on approach helps students grasp essential concepts such as Transition Curves, Motion Blending, and Pipeline exporting. Through custom motion creation, they explore face, body, and hand animation, which are crucial skills for any aspiring animator.
Crowd-Simulation Creation: This module introduces students to the complexities of creating large-scale character animations to bring scenes to life. By working on crowd simulations, students learn to manage and animate multiple characters simultaneously, a skill highly valued in the industry.
Motion Capture Animation Cleanup: In the final module, students engage with motion capture data, learning how to clean up and refine this data for use in their projects. This involves applying motion editing and Motion Layer editing techniques to character rigs, combining keyframing and curve editing to achieve performance animation.
The Role of Discord in Learning
A significant innovation in Martin’s course is the integration of Discord as a teaching tool. This platform fosters a sense of community and accountability among students, allowing them to share their work, receive peer feedback, and grow collectively. Peer reviews on Discord are crucial as they enable students to critique, respond to feedback, and refine their projects in a collaborative environment.
The curriculum is delivered through a blend of online and lab-based instruction, supplemented with highly curated tutorials, assessments, and live training. Over 16 weeks, students benefit from lectures, demonstrations, and materials provided by Reallusion and curated by Professors James Martin and Max Thomas. The use of Discord extends the learning environment beyond the classroom, enabling students to remain engaged with their projects and peers.
3D Animation Student Showcase
Throughout the semester, students showcase their work on Discord, culminating in final projects that highlight their skills and creativity. These projects demonstrate the comprehensive knowledge and competencies they have acquired, setting the stage for successful careers in animation. Each semester the CMII invites students to showcase their work at a public event that allows students to present their semester projects and receive opportunities to to engage with local businesses, university administrators and fellow students.
Top 10 Student Animation Projects from each 3D Animation module: Character Animation, Crowd Sim, Mocap Cleanup
Module 1: Character Animation: Alex Criss
Module 1: Character Animation: Ian Chasse
Module 2: Crowd Simulation: Alex Criss
Module 2: Crowd Simulation: J Wilson
Module 2: Crowd Simulation: Travis Le
Module 2: Crowd Simulation: J Clark
Module 3: Mocap Clean Up: Ian Chasse
Module 3: Mocap Clean Up: Alex Criss
Module 3: Mocap Clean Up: J Clark
Module 3: Mocap Clean Up: Emily Tran
Continuing Innovation at the CMII – Preparing Students for the Evolving Animation Pipeline
The innovative teaching methods and tools employed by Professors James Martin and Max Thomas at CMII exemplify the institute’s commitment to providing cutting-edge education. By integrating tools like Reallusion iClone and platforms like Discord, they prepare students not just to enter the world of animation but to excel in it. The skills and experiences gained in these courses equip students to contribute to the vibrant entertainment industry in Georgia and beyond.
At the Creative Media Industries Institute (CMII), the curriculum is designed to provide students with a comprehensive understanding of the animation pipeline, ensuring they are well-equipped to navigate the ever-evolving landscape of digital media and animation. The courses emphasize the importance of mastering a wide range of tools and technologies, connecting students to industry-standard software and practices.
The teaching pipeline at CMII is meticulously designed to mirror real-world production workflows. Students begin with foundational skills in modeling and animation, gradually progressing to more complex tasks such as rigging, motion capture cleanup, and integrating animations into interactive environments. This structured approach ensures that students not only learn the technical skills but also understand the workflow and collaborative nature of the industry.
Reallusion Toolset and Workflow Curriculum
Students at CMII are introduced to a robust pipeline of character and animation tools, essential for a career in animation and VFX. The curriculum covers:
Reallusion Character Creator and iClone for learning how to create and animate highly transferable characters for games, films, virtual production and AEC visualizations and simulations.
Unreal Engine: Students learn to integrate their animations into Unreal Engine, a leading platform for creating interactive experiences and real-time 3D content.
Nvidia Omniverse: The integration of Nvidia Omniverse allows students to collaborate and simulate complex scenes, leveraging real-time ray tracing and AI-enhanced workflows.
Unity: Unity’s versatile platform is used to teach students about creating interactive animations and game development.
Maya: An industry staple, Maya is employed for character rigging, animation, and VFX, providing students with a strong foundation in professional-grade software.
Generative AI workflows as an artist’s tool and how to incorporate AI into the creative process.
Lifelong Learning in a Rapidly Evolving Industry
The courses at CMII emphasize the necessity of lifelong learning. With technology and industry standards constantly evolving, students are encouraged to stay aware of the latest developments and continuously refine their skills inside the institute and beyond. The comprehensive training in various tools like Reallusion and Unreal ensures that graduates are adaptable and ready to tackle the challenges of the competitive animation and entertainment industry.
James Martin, CMII Professor 3D Animation
By equipping students with a diverse skill set and a deep understanding of the animation pipeline, CMII prepares them for a future in an industry that demands both versatility and specialization. The integration of tools like Unreal Engine, Nvidia Omniverse, Unity, ZBrush, Blender, and Maya ensures that students are not only proficient in current technologies but are also prepared to adapt to future advancements. This comprehensive education model fosters a culture of lifelong learning, essential for success in the rapidly evolving world of animation and VFX.
Reallusion is offering the following benefits for educators and students:
Copenhagen, Denmark – May 22, 2024 – Rokoko, the leader in affordable motion capture technology, is thrilled to announce the launch of the Headcam. Designed to address the long-standing issues of cumbersome, bulky helmets and the impracticality of iPhones dangling over your face, the Headcam offers a non-intrusive, portable, and versatile solution for real-time face capture at an accessible pre-order price of just $495.
Goodbye Bulky Helmets
Everyone has seen footage of large, uncomfortable, and restrictive helmets used by motion capture actors. Rokoko’s Headcam eliminates these issues with its lightweight, ergonomic design, offering unrestricted freedom of movement without the neck-aches. Weighing just 240 grams, the Headcam features a high-resolution 60 fps camera, dimmable LED lights, and a built-in microphone, all housed within a perfectly balanced and adjustable head rig.
“We created the Headcam to solve the problem of the bulky and often comically impractical helmet that has dominated the facial motion capture industry.. As the demand for animation and 3D content continues to explode, we believe it’s crucial to offer tools that are not only effective for professionals but also accessible to creators at all levels.”
Jakob Balslev | Founder and CEO of Rokoko
Empowering creators in the age of 3D and animation
In line with Rokoko’s product ethos, the Headcam is designed to be workflow-agnostic, and can integrate with AccuFACE, Faceware, and VSeeFace for a multitude of use-cases. Furthermore, Rokoko’s new Face Capture app for Android also comes with its own mocap solver, which is included free for the first 12 months with pre-orders, and syncs the Headcam directly to their Studio software enabling real time full-body performance capture. This adaptability makes the Headcam an essential tool for a wide range of animation and 3D projects, from indie animators to professional studios.
Facial mocap with iClone’s AccuFACE
“AccuFACE plugin for iClone is an AI facial tracker powered by NVIDIA RTX GPU, capable of capturing facial expressions from Rokoko Headcam and conventional video files to empower remote collaboration with performers around the world.”
Enoc Burgos | Director of Marketing at Reallusion
Balslev continues that “Camera-based solutions are often impractical, but essential for face capture since sensors can’t be placed on the face. There’s a clear lack of sensible solutions for smooth face filming. With the Headcam, we’ve addressed this need and are excited to see what our community will create with it.”
The Headcam can be pre-ordered today for $495, with worldwide shipping starting early August.
Rokoko is a pioneering company in the field of motion capture technology, with offices in Copenhagen, Athens, and San Francisco, serving over 300,000 users in more than 125 countries. We are dedicated to empowering creators with tools that bring their digital characters to life in the most intuitive and efficient ways possible.
One problem that faces any animator is content. Props, terrains, characters, and all those things that go with making an animated production. For a lot of animators, it seems there is never enough content anyway, whether it was purchased, freebies, or homemade.
It wasn’t that long ago that there wasn’t much content available for animators in any form. There has long been content for image renders, but in times past and even today, a lot of those assets are too poly-heavy to be used in animation. The computational overhead would bring a lot of computers to a crawl. A workable framerate would be almost impossible to achieve.
A lot of early iClone users learned to make content for their projects. Reallusion was a leaner company as most are in their early days, and the focus was on software development. They still managed to provide a lot of great content but as I stated earlier, there is never enough.
Flash forward to today where there is a staggering amount of content available for iClone. Reallusion, by itself, is releasing more content on a regular basis than I can keep up with as a writer. Reallusion content has always been professionally made with best practices and has proved to be exemplary in visual quality and construction.
In addition to the Reallusion Content Store, there is the Marketplace that is open to third-party iClone content developers. These assets run the range from professional to budget-friendly. There is also a rating system for the content developers and their products by users who have purchased any of those products.
Then there is ActorCore, a website full of characters and motions that can give a boost to any project. Professionally produced content from animators… for animators is a core strength of Reallusion content and ActorCore is at the forefront.
In terms of general content available, you can storm a castle, fly into space, have a talk show, a hospital drama, a daytime drama, a daytime hospital drama… the possibilities are almost endless.
There is so much content available currently that it can be a bit confusing to new users as to which store to use and what their purpose is. The Software Store, Content Store, Marketplace, and ActorCore all serve different purposes so let’s take a look at what these stores provide.
iClone Unreal Live Link – a cinematic pipeline from iClone to Unreal Engine. Don’t panic over the listed price. The plugin was designed for large studios so there is a free Indie Live Link program that you can use if you qualify. Annual gross revenue from design work must be less than USD 100,000. You can get more info at the bottom of the live Link page. There is also a free 30-day trial.
The Content Store really must be seen to be believed. There are so many professionally produced assets from Reallusion and select developers that it is difficult to convey in words. Just to say it has characters, props, and other 2D/3D assets is a vast understatement.
It is a vault of 2D and 3D goodies that can improve a project and remove the burden of asset creation allowing you to focus on animating and telling a story.
There are themes, genres, and one-off custom creations that you can use in your next production from a children’s cartoon to a historical documentary. The Content Store contains a huge inventory and mixture of assets that meet just about any need.
Actorcore
ActorCore is another store loaded with content and bills itself as a “One-Stop platform for 3D motions, characters, and rigging due to its vast amount of assets available for immediate download”.
Not only are there 3D motions and characters, but there is also the free character auto-rigger, accuRIG. This free download is a powerful character rigging tool that allows you to map out or create enough bones to get quality animation.
Features of ActorCore:
3D Motions:
ActorCore provides a vast library of high-quality 3D motion assets suitable for various applications, including games, films, interactive projects, architectural visualization (arch viz), training, simulations, and digital twins.
These motions are meticulously designed to meet different demands and themes, ensuring the best quality and accessibility.
Whether you’re animating characters for a business simulation, a training program, or a cinematic project, ActorCore has you covered.
3D Characters:
ActorCore’s 3D characters come in different styles, catering to diverse needs.
Photorealistic People: These characters are created from 3D scans, resulting in highly realistic human models.
Sci-Fi, Fantasy, Historical, and Toon Figures: These characters are crafted using Character Creator, offering versatility and creativity.
The characters are animation-ready, and you can easily import them into your preferred application with specific download formats for optimal rendering quality.
They feature color and material variations, allowing you to customize skin, hair, outfits, and accessories to create unique actor styles.
The character rigs are complete, ensuring realistic animation from head to toe. With consistent facial topology, you can edit expressions and control lip-sync.
ActorCore’s 3D Viewer offers complete customization for mobile viewing, web embedding, and content sharing.
With the preview window, you can easily assemble uploaded characters or try out motions in ActorCore, and enjoy the best viewing experience with a customized camera view, light setting and motion list.
Smooth Transitions and AAA Motion Production:
ActorCore employs a specially designed motion system for seamless transitions between primary and secondary stance modes.
Each motion pack undergoes a strict design process to deliver the best quality and meet project expectations.
Multi-Platform Support:
ActorCore’s massive 3D character animation library is compatible with all major 3D programs.
You can easily retarget motions to selected characters and find step-by-step guides and tutorials for each program.
ActorCore is compatible with Unreal Engine, Unity, Maya, MotionBuilder, Blender, 3ds Max, Cinema 4d, Nvidia Omniverse, and, of course, iClone, Character Creator and Cartoon Animator.
The Marketplace
A lot of what I wrote earlier about the Content Store is also true of the Marketplace with the content of the marketplace being produced by users and third-party content developers. In no way does this mean the quality of assets is inferior to the Content Store, they are just sourced from the public instead of in-house.
The Marketplace contains over 200,000 assets from budget-friendly to high-end assets and everything in between. The marketplace also operates as a community store that has a rating system for vendors and products so you can have an idea as to the quality of the product and read or leave feedback.
There are so many talented developers in the Marketplace that it can be hard to choose what to download. Some people draw inspiration from the characters they see in the Marketplace and create stories to match those characters.
One of the advantages of using the Reallusion Marketplace is the access to free trial content. You can select Trial Content from the Marketplace, download them via the Content Manager to try before purchasing. If you are satisfied with the trials, then you can directly add them to your cart for checkout.
You can think of the Marketplace as a huge world bazaar stuffed full of 2D and 3D assets of all sorts from all sorts of places and creators.
Reallusion Prime
Reallusion Primeis not a store but an annual subscription service that provides access to a library of digital assets, including characters, animations, props, and other 2D and 3D animation assets, which users can use in their animation projects.
Membership Cost: For an annual fee of $99, you gain access to a range of perks and discounts.
15% Off Storewide: As a Prime member, you enjoy an extra 15% discount on all your purchases throughout the year. This discount applies to both software and content available in Reallusion’s online stores, including the online Software Store, Content Store, Marketplace, and ActorCore.
Bonus Points: When you shop in any of the Reallusion stores, you receive 500 Bonus Points each month. These points can be redeemed for future purchases.
Renewal Offer: When it’s time to renew your membership, you can do so for just $79/year.
Wide Selection of Assets:
2D & 3D Animation Software: Access professional animation tools with perpetual licenses (no subscription required).
Branded Content Assets: Explore a wide variety of 2D and 3D assets.3D Motions, Actors & Auto-Rigging: A one-stop platform for all your 3D needs.
Community-Created Asset Creations: Discover content from the developer community.
Flexible Subscription: You can cancel your Prime membership anytime if needed.
Reallusion Prime provides substantial savings, exclusive offers, and a wealth of creative resources for animation and content creation. Subscribing to Prime can significantly enhance your budget and creative toolkit.
Not long ago Reallusion launched an authoritative structure Reallusion Workgroup for small studios or enterprises to no longer have to share private account credentials among teammates. The solution involves designating managers and administrators responsible for licensing and purchasing software and assets for the staff. They also require the capability to allocate and oversee licenses while maintaining control.
With the Prime for Team plan, contractors are able to deliver their work in a secure, private environment, ensuring confidentiality. This plan is specifically tailored for collaborations, to accommodate two versatile usage scenarios: outsourcing services and group projects. Whether you’re leading a seasoned production house, steering a startup studio handling client productions, or seeking collaboration with contributors for your creative ventures, Reallusion Workgroup is a helper to elevate your entire production process.
Summary
There is no way to properly convey the sheer amount of 2D and 3D content available in the Content Store, Marketplace, and ActorCore. All the stores are setup for easy purchase and download with assets being available through the Smart Content Manager for iClone and Character Creator or formats friendly to most of the industry-leading 3D software applications.
If you are undecided about purchasing a Reallusion product you can rest assured that a lack of content will not be a problem and for some can be a deciding factor when looking for animation tools.
FAQ
Where can I download Reallusion content assets?
You can download assets from the Reallusion Content Store and Marketplace, which offer characters, motions, props, and environments for tools like Character Creator, iClone, and Cartoon Animator.
Are Reallusion Marketplace assets safe to use?
Yes. Marketplace assets are reviewed by Reallusion and sold by verified developers, ensuring compatibility with Reallusion software and reliable downloads.
What is the difference between the Reallusion Content Store and Marketplace?
The Content Store features curated content packs created by Reallusion and certified developers, often sold as bundles and supported with official customer service. The Marketplace, on the other hand, is a community-driven platform where independent creators sell their own assets directly to users. Marketplace items are typically sold individually and may include trial downloads, while the Content Store focuses more on professionally packaged asset collections.
Can you try Reallusion Marketplace content before buying?
Yes. Many assets in the Marketplace offer a trial download feature, allowing users to test content before purchasing. This “try before you buy” approach helps creators evaluate whether an asset fits their project before committing to a purchase.
Can you sell your own assets on the Reallusion Marketplace?
Yes. Creators can become Marketplace developers and sell their own characters, motions, props, and other digital assets to the global Reallusion community.
Digital Artist MD “Mike” McCallum, aka WarLord, is a longtime iClone user. Having authored free tutorials for iClone in its early years and selected to write the iClone Beginners Guide from Packt Publishing in 2011, he was fortunate enough to meet and exchange tricks and tips with users from all over the world and loves to share this information with other users. He has authored hundreds of articles on iClone and digital art in general while reviewing some of the most popular software and hardware in the world. He has been published in many of the leading 3D online and print magazines while staying true to his biggest passion, 3D animation. For more information click here.
Groundbreaking character workflow for leading studios worldwide
From character design and modeling to animation, Reallusion is revolutionizing the 3D industry with innovative pipelines with ZBrush, Unreal Engine, Blender, Omniverse that automate character production without sacrificing creative flexibility. Reallusion’s extensive content ecosystem provides ready-made models and motions suitable for various mediums, including games, films, architectural visualization, digital doubling, and twinning. Character Creator stands out as the premier character creation platform, while iClone offers the most intuitive real-time animation editing. Combined with the rich asset library on ActorCore, character designers and artists can achieve impressive results at unprecedented speeds.
Calling for passionate and exceptional 3D artists
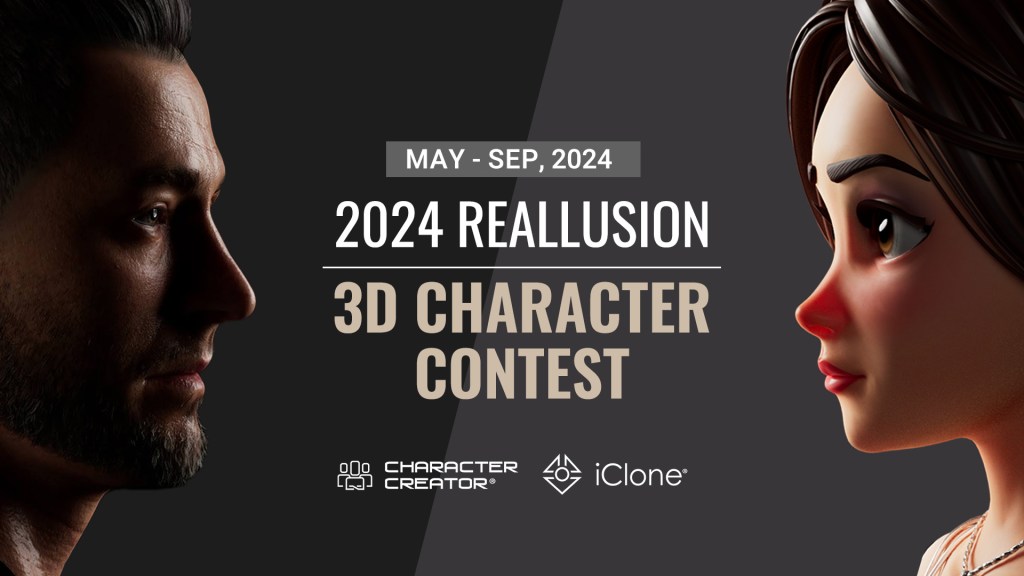
The 2024 Reallusion 3D Character Contest offers the 3D art community an excellent opportunity to experience industry-leading solutions and learn from seasoned professionals. It’s also a great platform to showcase your talent and skills to a global audience, gain valuable feedback, and see how you compare with your peers. Reallusion invites all enthusiastic 3D artists to participate, including concept artists, character artists, 3D scan artists, animators, digital modelers, and sculptors. Discover how easily iClone and Character Creator can enhance your existing artistic pipeline and how ActorCore provides the foundation to rig any character for real-time animation.
Explore fully-licensed Reallusion software for 3 months
Reallusion is excited to welcome new artists by offering free 3-month access to its software and plugin suites for qualified applicants with exceptional skills. To apply, simply submit your online portfolio (like ArtStation) for review. This one-time offer includes the chance to experience Character Creator, iClone, AccuFACE, Headshot, Face Tools, and Unreal Live Link.
Sponsored by the biggest names in the 3D industry with a $45,000 prize pool
This event is sponsored by top names in the animation industry, with $45,000 in cash and products up for grabs. Physical prizes include NVIDIA RTX-4070 laptop and full mocap solutions from Rokoko and Noitom. Software prizes include KitBash3D Cargo, Texturing.xyz, 3Dconnexion, Keen Tools and a Maxon One license that includes ZBrush.
Reallusion is also honored to have well-regarded judges such as ZBrush Guides founder and Blender expert Pablo Munos, and renowned Blender filmmaker Martin Klekner.
Contest categories for submission
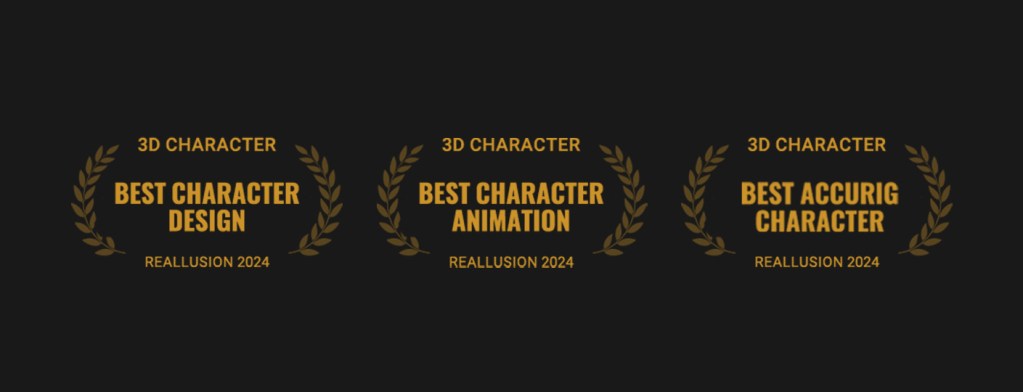
The 2024 Reallusion 3D Character Contest features three main categories: “Best Character Design,” “Best Character Animation,” and “Best AccuRIG Character.” Each category offers unique cash and product prizes. The “Best Character Design” and “Best Character Animation” categories are further divided into “Realistic” and “Stylized” subcategories, mirroring their respective prize distribution models. In all, there are five contest categories:
Best Character Design (Realistic & Stylized)
Best Character Animation (Realistic & Stylized)
Best AccuRIG Character
Gain exposure, win prizes, and become a partner
Besides cash awards and special prizes, Reallusion will offer distinguished contestants featured on renowned 3D media sites. Selected artists may also be invited to join the digital content creation ecosystem and monetize their work, or be contracted for showcase projects. What are you waiting for? Join now and submit your entry before September 1 to win big!
Reallusion continues its legacy of advancing character design and animation workflows across premier 3D software platforms. With the introduction of Unreal Engine 5.4, Reallusion proudly presents CC UE Control Rig, empowering Unreal Engine users to seamlessly animate CC characters using the familiar Metahuman interface for full-body animations. To mark this milestone, Reallusion is releasing two complimentary sample characters, Nia and Kevin, which can now be downloaded for free.
The CC Control Rig, meticulously crafted using Unreal Blueprint, is compatible with both Unreal Engine versions 5.3 and 5.4. It can be effortlessly integrated with essential tools including CC Auto Setup and Unreal Live Link to streamline the workflow from Character Creator to Unreal. Direct character transfer, automatic digital human shader assignment, and simplified control rig setup are just a few of the benefits that CC UE Control Rig adds to the developer’s arsenal.
Animate characters imported from Character Creator, Actorcore and AccuRig with CC UE control rig
CC characters enable a versatile character and motion ecosystem powered by Reallusion offerings
Despite Unreal Engine 5.4’s recent introduction of UE Modular Control Rig and notable advancements in Metahuman animation, preparing fully customized or original IP characters for UE animation remains difficult. Addressing this challenge head-on, Character Creator offers unparalleled freedom in character customization, streamlined ZBrush pipeline integration, and access to the diverse Reallusion content ecosystem. By employing CC topology, full auto-rigged characters, whether they be realistic humans, cartoon personas, or humanoids, can be smoothly transferred into Unreal Engine.
Reallusion offers a versatile CC character and motion ecosystem
Beyond characters, Reallusion provides an extensive array of ActorCore mocap animations. Once a suitable motion pack is chosen, dynamic animations within iClone can be effortlessly deployed or generated. These animations can then seamlessly import into Unreal via LiveLink or FBX, resulting in substantial time savings in production.
Animation can be seamlessly imported into Unreal via LiveLink or FBX
Complete support for the CC3+, AccuRIG, and ActorCore crowd characters
Aside from providing extensive support for CC characters, the CC UE Control Rig also accommodates custom-made models by having biped models undergo the automatic rigging process in AccuRIG. Moreover, when dealing with large 3D crowds, movements of low-poly characters sourced from ActorCore can be tweaked using the UE Control Rig, enabling adjustments to facial expressions and body movements. By integrating these capabilities with CC mesh decimation tools and iClone Crowd Simulator, massive crowd simulations can be readily incorporated into any project at minimal production cost and time.
Unlock the limitless possibilities of characters from Character Creator, ActorCore, and AccuRIG.
Fulfilling the needs of final-stretch production in Unreal Engine
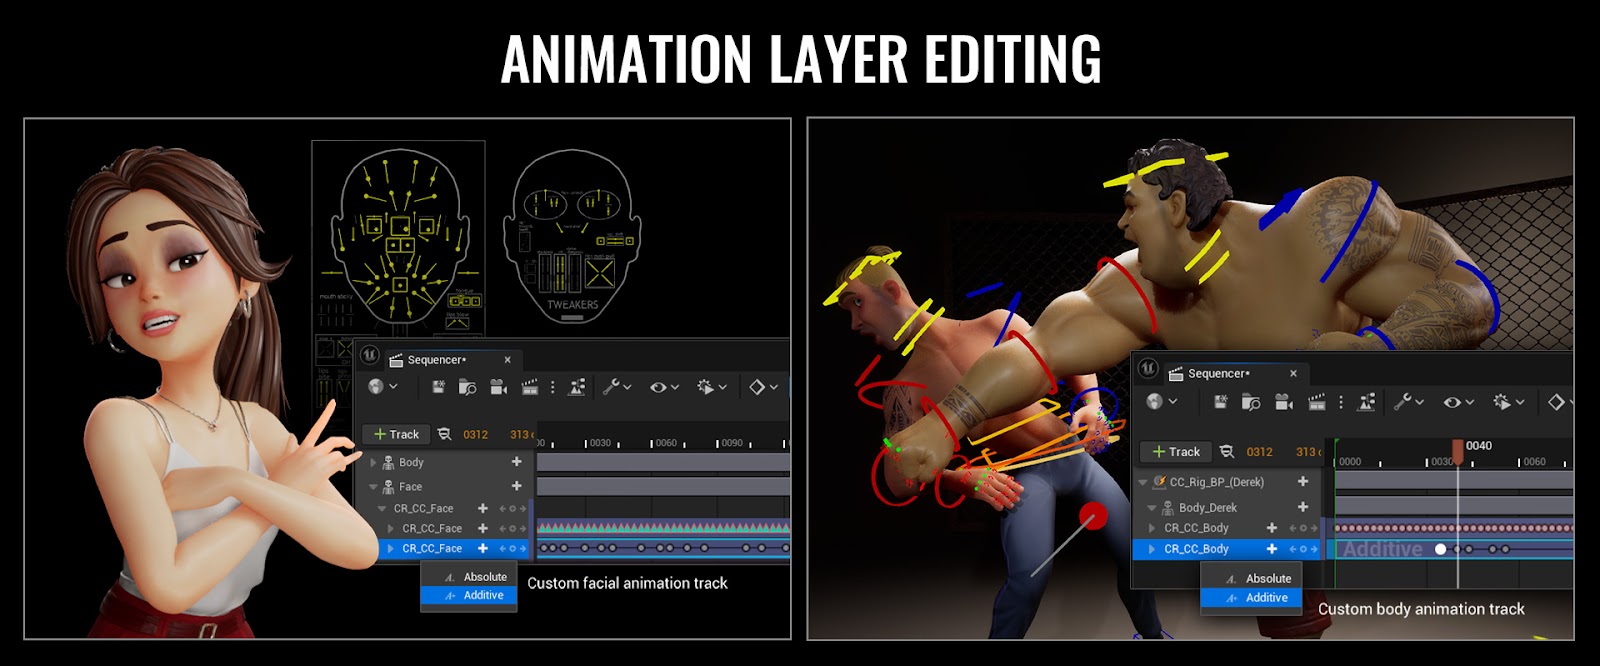
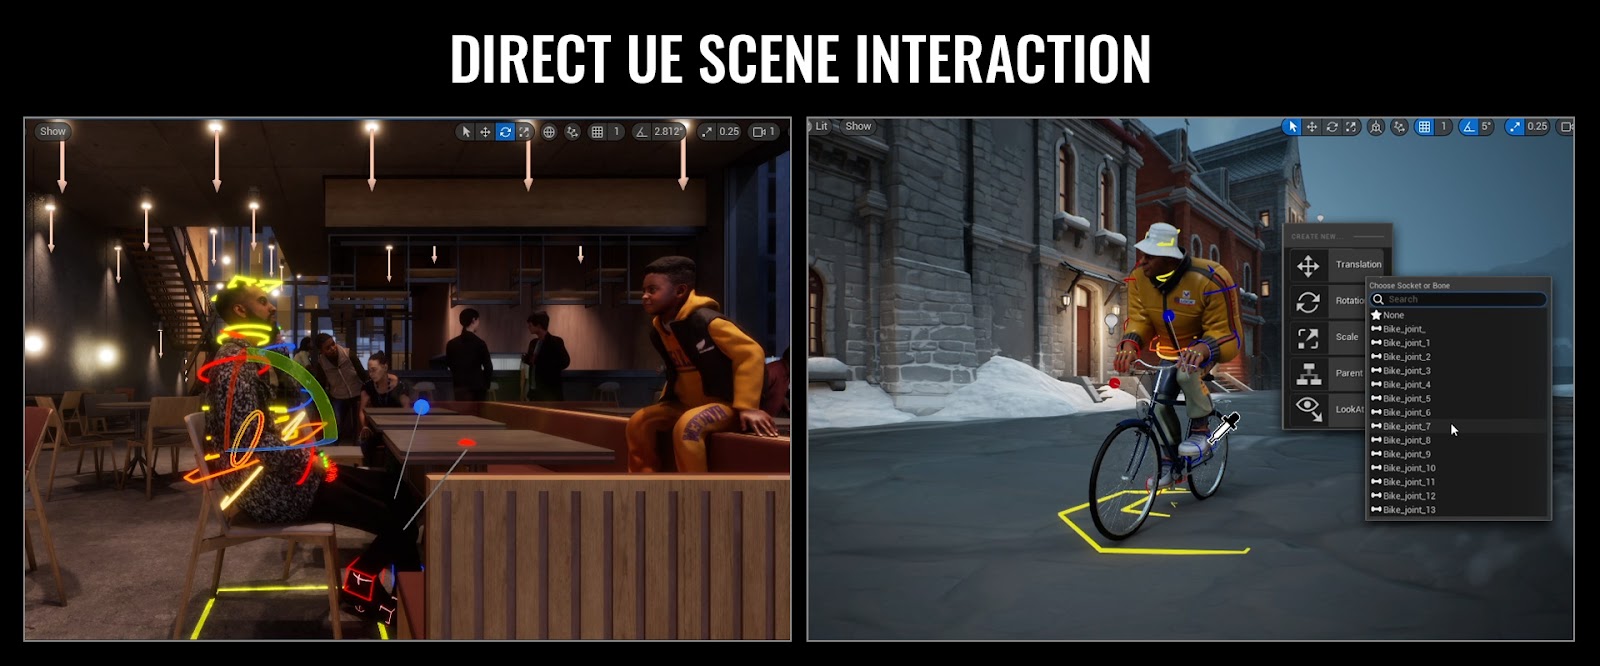
The CC UE Control Rig empowers directors and animators to effortlessly refine CC characters’ facial expressions and postures within Unreal Engine for the ultimate polish on a finished production. This tool facilitates smooth integration of characters into their environments, precise interaction with objects, and even reach constraints such as hand or foot placement on moving vehicles. Moreover, harnessing CC characters enhances the creation of expressive talking animations, realistic wrinkle dynamics, and refined body and gesture controls.
Charles Chen, Reallusion CEO, notes: “Our long-term aim has been for CC to stand as the premier solution for original, animatable characters in Unreal. With the introduction of CC UE Control Rig, we’ve taken the final step towards full CC character integration to achieve that vision.”
Free Reallusion plugin and sample projects are accessible to all enthusiasts
CC UE Control Rig is a complimentary plugin accessible for download on the UE Marketplace. To encourage widespread adoption to the robust and practical features of CC UE Control Rig, Reallusion is providing two sample projects, Kein & Nia, for free download.
Character Giveaway – Download Nia and Kevin for Free!
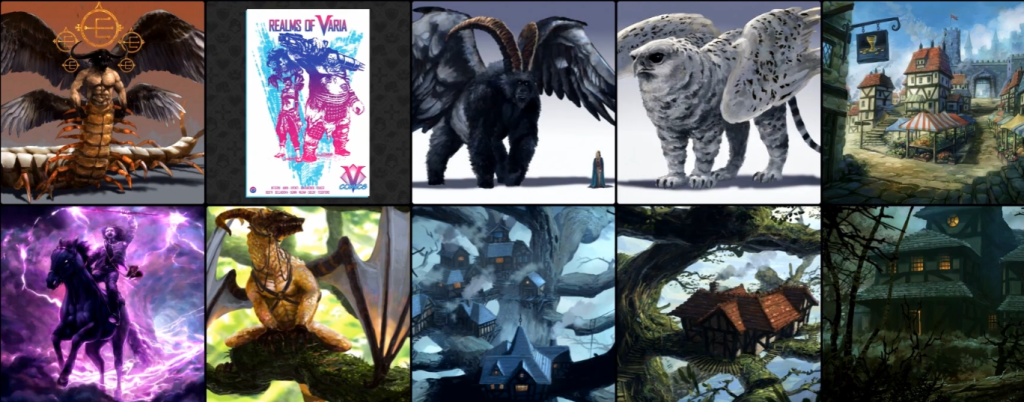
Hey everyone, my name is Davey Baker and I’m a digital painter working in the entertainment industry. My roles often include 2D/3D concept art for computer games and 2D illustrations for TTRPG. I’m lucky enough to have had many years of experience working with some of the best companies in the business, including Wacom, Intel, Corel corporation, 20th Century Fox, Imagine FX. I’ve worked across a range of positions, from creating promotional material for software/hardware companies, 2D illustrations for board games, 2D/3D concept art for video games to comics and album covers. One of the achievements I am most proud of is earning the title of “Corel Painter Master Elite”.
Firstly, I have to admit that I’m not an animator. Yes that’s right, I have zero experience in this field other than a couple of failed walk cycles, many years ago. This being said I have, however, always had a great interest in animation. As children most of us enjoyed the wonderful world of cartoons and I’ve no doubt this contributed to my love of art. Fast forward to my years as a young adult and those cartoons and comics stayed firmly with me but had now evolved, animations were not only for children’s entertainment.
I remember watching Fistof the North Star for the first time. This was the first 2D animation adult film I’d ever seen. I was an instant fan and others such as Akira, Ninja scroll, Devilman, soon became firm favorites. These films absolutely fascinated me. They were all hand painted like those early cartoons of my childhood, but now incredibly, teams of people told their stories of fantasy horror and futuristic doom, in full length films. For me, the traditional-looking hand-painted backgrounds always impressed me the most and inspire me to this day. They’re truly beautiful works of art and more importantly, they’re alive with the magic of 2D animated drawings!
As I mentioned earlier, I have no skills or knowledge of how to animate drawings and you might be wondering why I am here telling you all this. Well, I’ve always had that burning desire to tell my own stories. So I started looking for animated overlays to add to my 2D art, hoping it would take my still images to the next level. Unfortunately, I soon found this just wasn’t enough, I wanted more control and customization over my scenes. So I started looking again, this time for 2d Animation software. This is when I found Cartoon Animator and I’m happy to say it was exactly what I was looking for and more! Let’s get into some of the tools I’ve used in making my first animated sequence.
Create animated drawings without keyframing using Motion Pilot
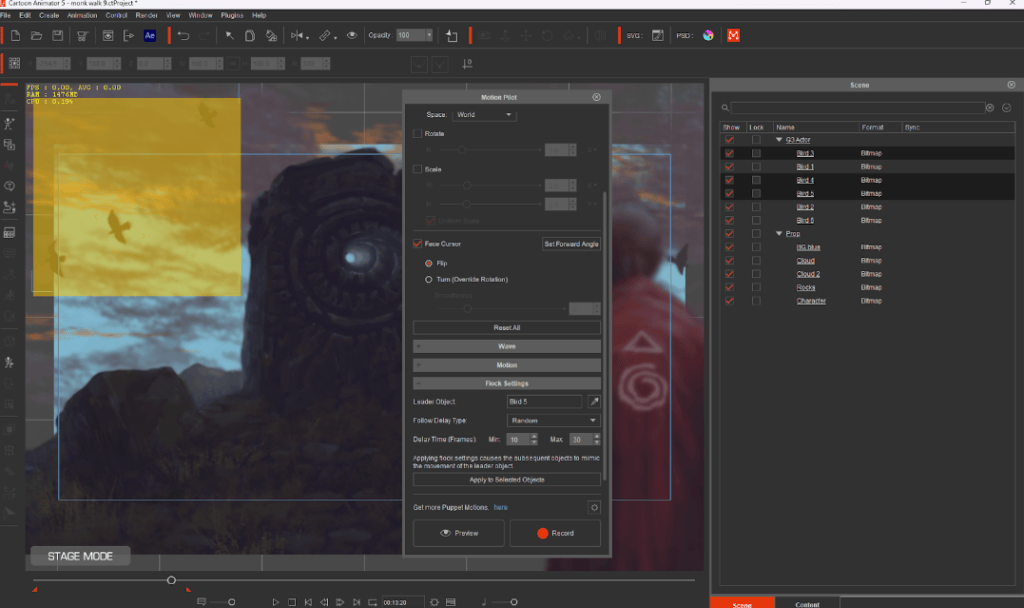
I would like to start with something new to CTA 5, that is the Motion Pilot feature. This amazing tool has various ways to animate drawings and plenty of settings within CTA to finetune everything, before and after. The “Flock” settings were something I particularly enjoyed playing around with, the results and speed to get there were also nothing short of impressive.
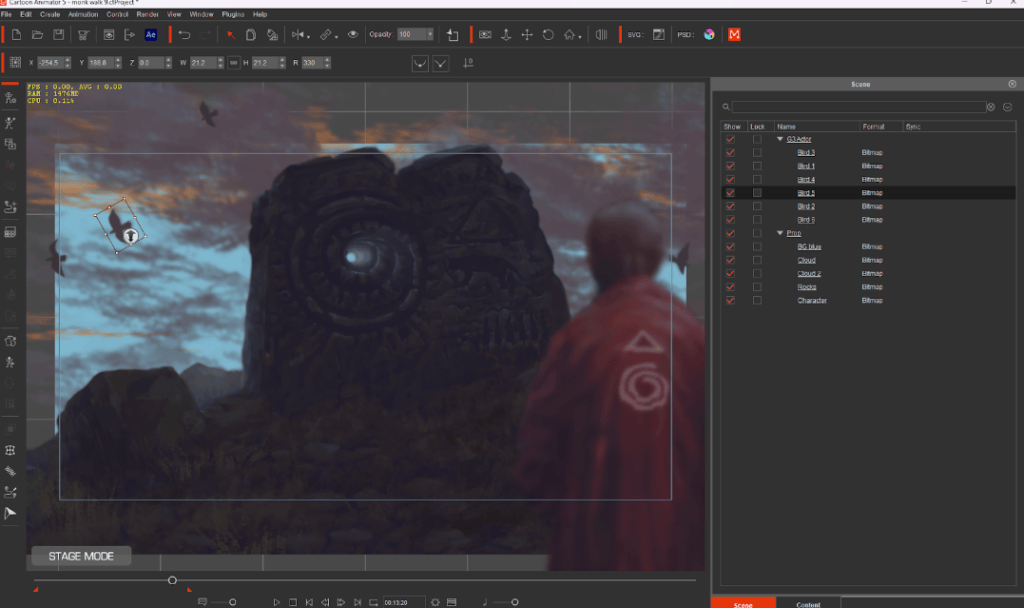
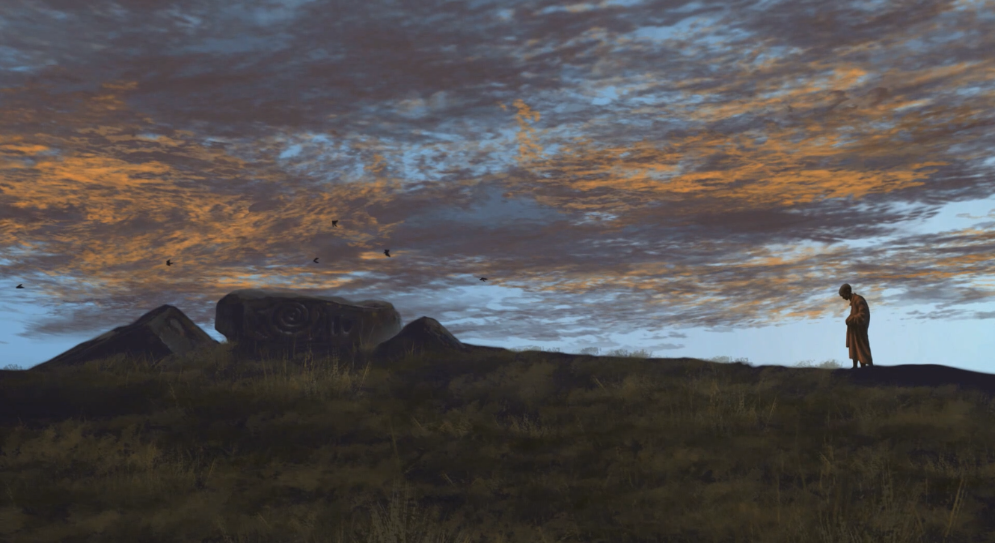
You may be surprised to learn that all the birds’ movements in these scenes were captured in real time. What does that mean? Well, by using the new Motion Pilot and selecting a leader, then box selecting the rest of the flock, you can click “Apply to Selected Objects”.This now means once you start to move the lead bird across the screen the whole flock will also follow a similar path in relation to their original positions.
The “Random” setting also allows the starting point of each bird’s animation to have a delay resulting in a nonuniform realistic flight progression. So, once you hit “Record”, the leader can follow your cursor and the flock will follow for the duration of the scene — so simple! I also tried this with a bunch of characters but added a walk preset to the group via the motion dropdown… and it worked perfectly. Super quick and fun for animated drawings, and fully customizable too.
The fastest way to rig 2D characters for animation using Character Composer
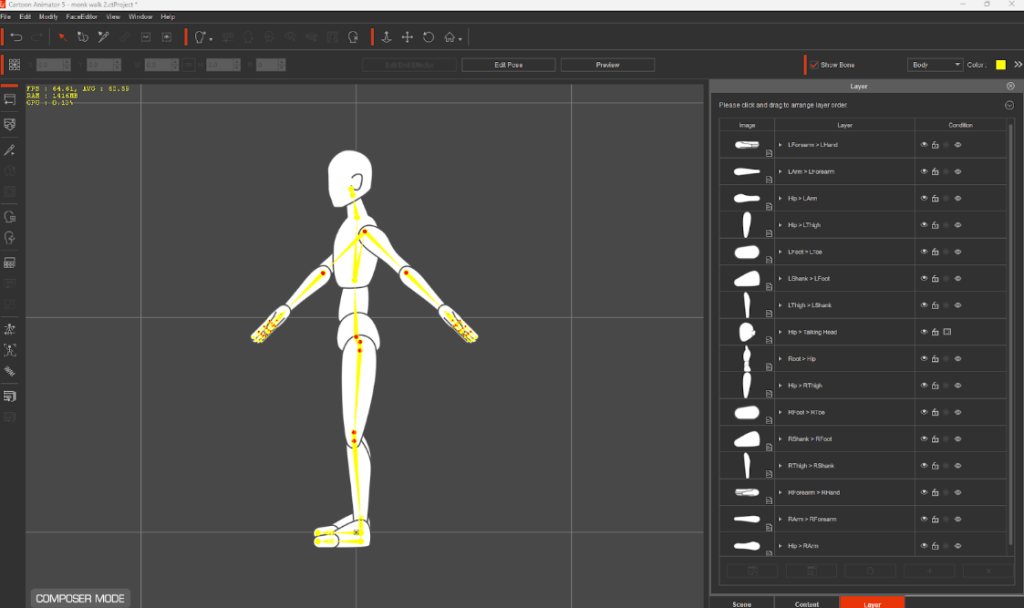
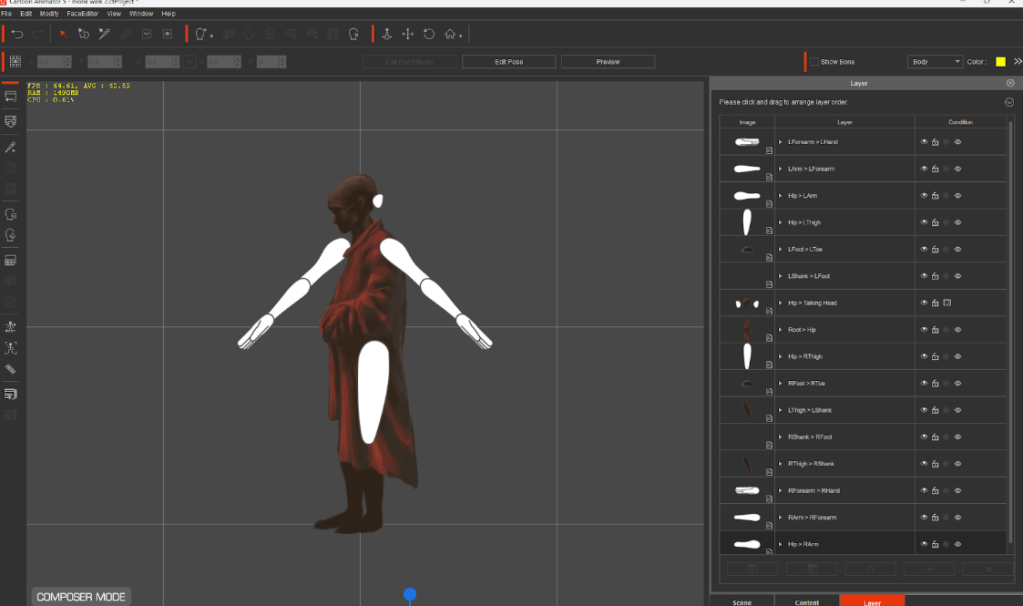
Next, I wanted to add a walk cycle to my 2D character animations. This was made easy by selecting one of the existing CTA 5 dummy actors, swapping out the body parts with my own and applying a preset 2D motion animation from the extensive library.
The premade walk cycles that you can also customize are nothing new to CTA but well worth mentioning, as they have saved me days, sometimes even weeks, of trial and error. As a complete beginner I was pleasantly surprised to get professional animated drawings with ease, and managed to progress through my ideas quickly. If I’d tried this manually I may have given up after numerous unsuccessful attempts. I should add there are enough presets in the library to keep you busy for a long time but if you are an animator, there is obviously no shortage of tools to create everything from scratch.
Bringing animated drawings to life using FFD transformation
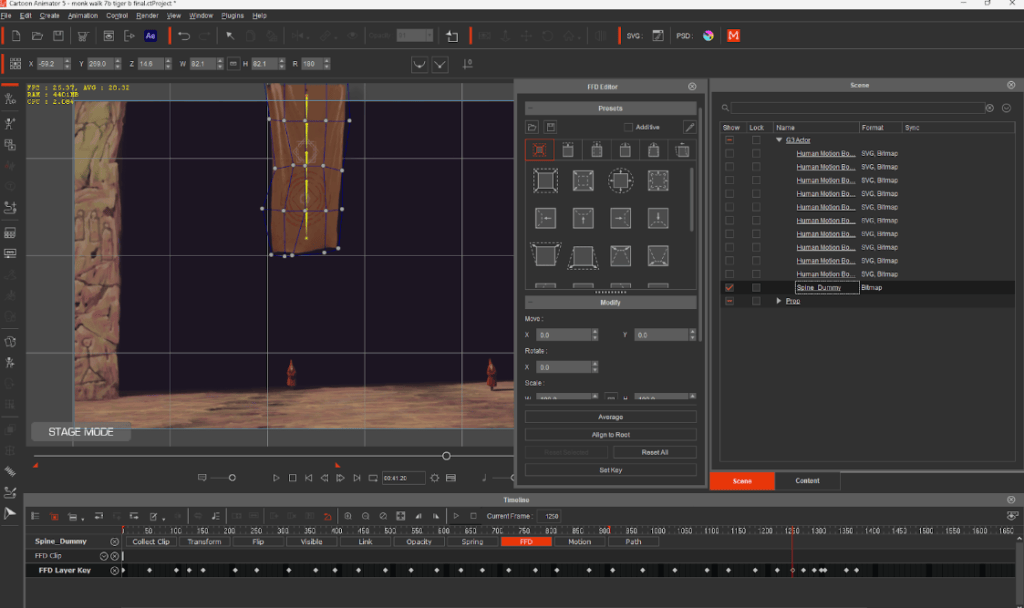
Finally we have another new feature called the FFD Editor. This reminds me of a free transform tool often found in 2D painting software. Once you open the FFD editor, you’ll notice a grid section appear over the item you currently have selected.
The grid has a bunch of circular points at each intersection that can be dragged around to distort your image. You will automatically create a new keyframe whenever there is a change to one of these points on different parts of the timeline. So you move some points to distort the shape, scrub along the timeline and make another change — easy-peasy! The newly created keyframes under the FFD tab can still be moved up and down the timeline to change the transition speed but you can also right-click on each one and use some transition presets, like smooth, accelerate, etc. The default is set to linear, and you can see the current status appear whenever you hover your cursor over each keyframe.
The potential for this tool is endless and although manually creating keyframes and adjusting by hand may seem like it’s slow… imagine drawing each frame traditionally, there would be hundreds! This would also be impossible for me to do with my style, as each image would be unique and the transition between them glitchy. It simply wouldn’t work. The fact that this function now exists opens many doors to animated drawings of different styles! Overall I couldn’t be happier with CTA 5 as a 2D animation software, and I’m really looking forward to learning more as I progress through all the other functions. I can’t wait to continue animating my story and I know I’ve barely scratched the surface with what CTA 5 can do! Happy animating guys!