首頁 » Page 34

How a Digital Painter creates Animated Drawings with Cartoon Animator

Davey Baker

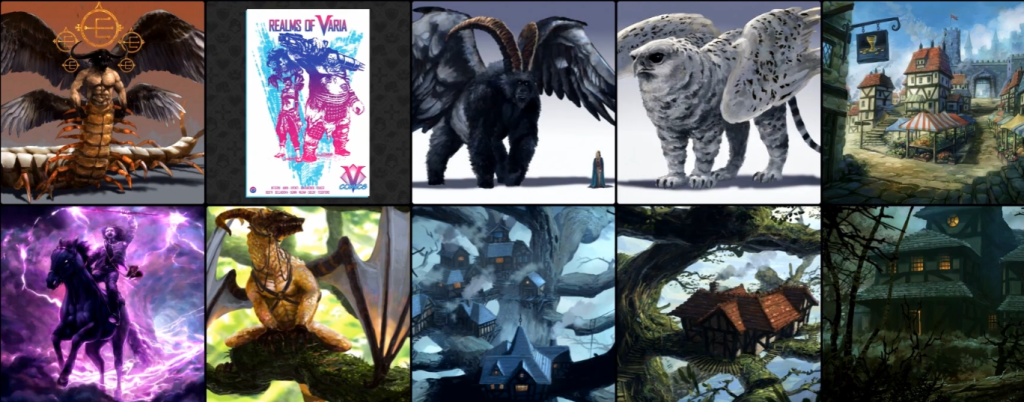
Hey everyone, my name is Davey Baker and I’m a digital painter working in the entertainment industry. My roles often include 2D/3D concept art for computer games and 2D illustrations for TTRPG. I’m lucky enough to have had many years of experience working with some of the best companies in the business, including Wacom, Intel, Corel corporation, 20th Century Fox, Imagine FX. I’ve worked across a range of positions, from creating promotional material for software/hardware companies, 2D illustrations for board games, 2D/3D concept art for video games to comics and album covers. One of the achievements I am most proud of is earning the title of “Corel Painter Master Elite”.

Firstly, I have to admit that I’m not an animator. Yes that’s right, I have zero experience in this field other than a couple of failed walk cycles, many years ago. This being said I have, however, always had a great interest in animation. As children most of us enjoyed the wonderful world of cartoons and I’ve no doubt this contributed to my love of art. Fast forward to my years as a young adult and those cartoons and comics stayed firmly with me but had now evolved, animations were not only for children’s entertainment. 

I remember watching Fistof the North Star for the first time. This was the first 2D animation adult film I’d ever seen. I was an instant fan and others such as Akira, Ninja scroll, Devilman, soon became firm favorites. These films absolutely fascinated me. They were all hand painted like those early cartoons of my childhood, but now incredibly, teams of people told their stories of fantasy horror and futuristic doom, in full length films. For me, the traditional-looking hand-painted backgrounds always impressed me the most and inspire me to this day. They’re truly beautiful works of art and more importantly, they’re alive with the magic of 2D animated drawings!

As I mentioned earlier, I have no skills or knowledge of how to animate drawings and you might be wondering why I am here telling you all this. Well, I’ve always had that burning desire to tell my own stories. So I started looking for animated overlays to add to my 2D art, hoping it would take my still images to the next level. 
Unfortunately, I soon found this just wasn’t enough, I wanted more control and customization over my scenes. So I started looking again, this time for 2d Animation software. This is when I found Cartoon Animator and I’m happy to say it was exactly what I was looking for and more! Let’s get into some of the tools I’ve used in making my first animated sequence.

Create animated drawings without keyframing using Motion Pilot

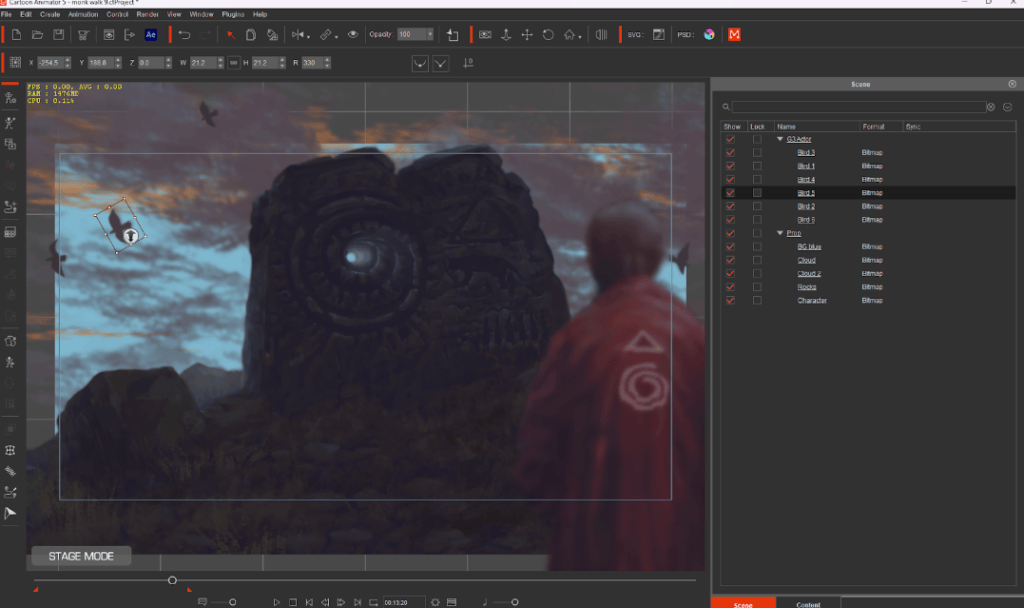
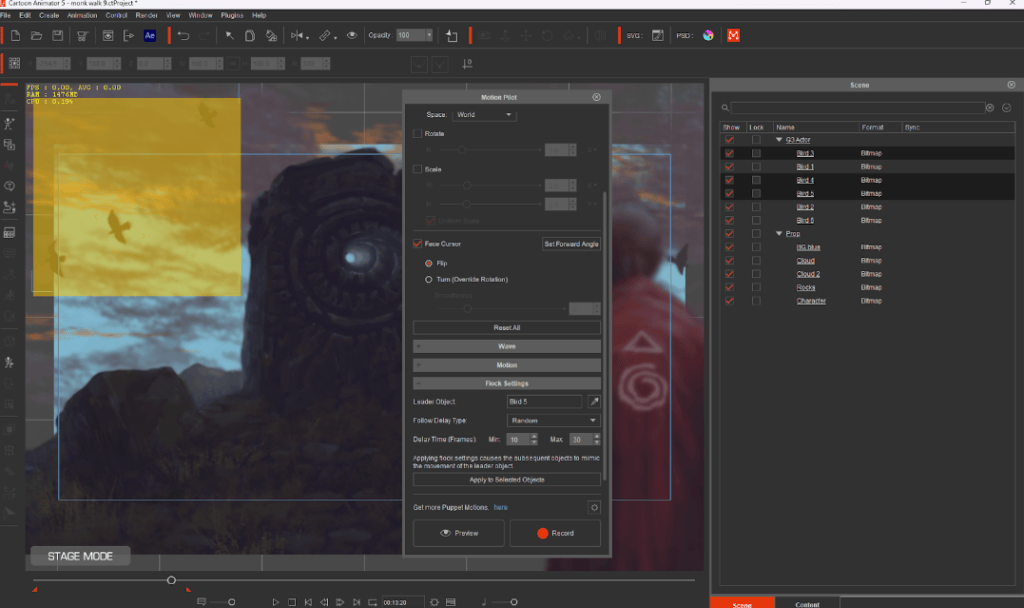
I would like to start with something new to CTA 5, that is the Motion Pilot feature. This amazing tool has various ways to animate drawings and plenty of settings within CTA to finetune everything, before and after. The “Flock” settings were something I particularly enjoyed playing around with, the results and speed to get there were also nothing short of impressive.

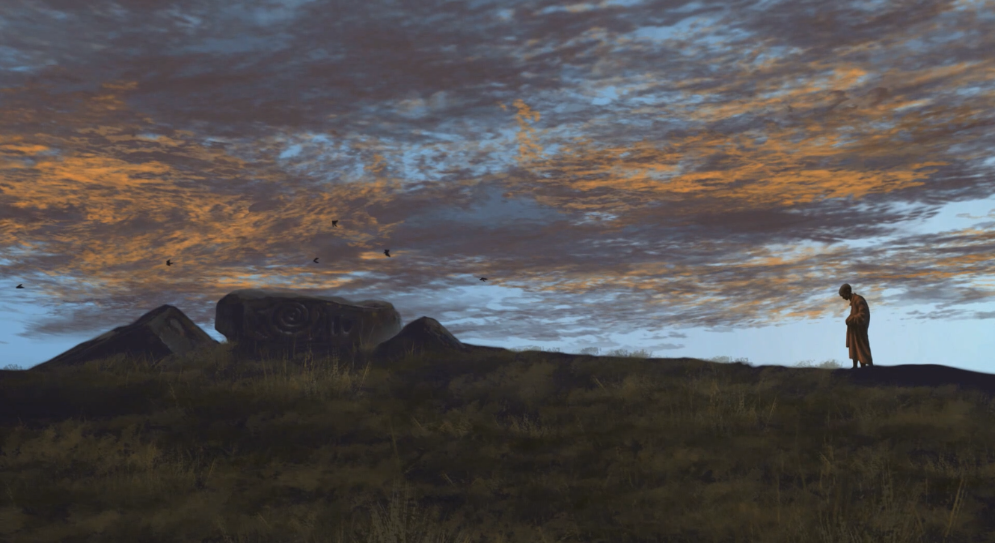
You may be surprised to learn that all the birds’ movements in these scenes were captured in real time. What does that mean? Well, by using the new Motion Pilot and selecting a leader, then box selecting the rest of the flock, you can click “Apply to Selected Objects”.This now means once you start to move the lead bird across the screen the whole flock will also follow a similar path in relation to their original positions. 

The “Random” setting also allows the starting point of each bird’s animation to have a delay resulting in a nonuniform realistic flight progression. So, once you hit “Record”, the leader can follow your cursor and the flock will follow for the duration of the scene — so simple! I also tried this with a bunch of characters but added a walk preset to the group via the motion dropdown… and it worked perfectly. Super quick and fun for animated drawings, and fully customizable too.

The fastest way to rig 2D characters for animation using Character Composer

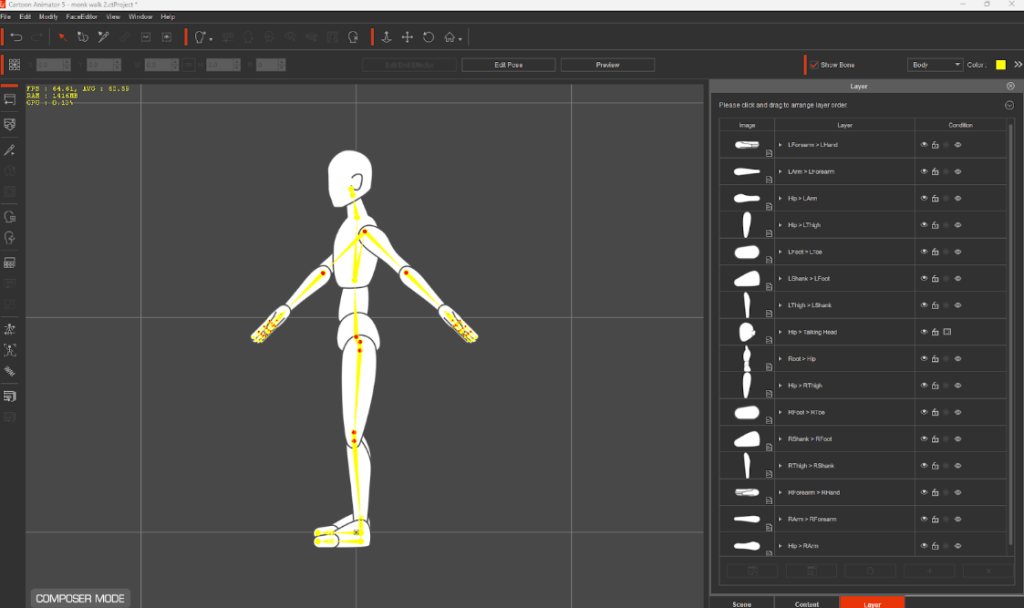
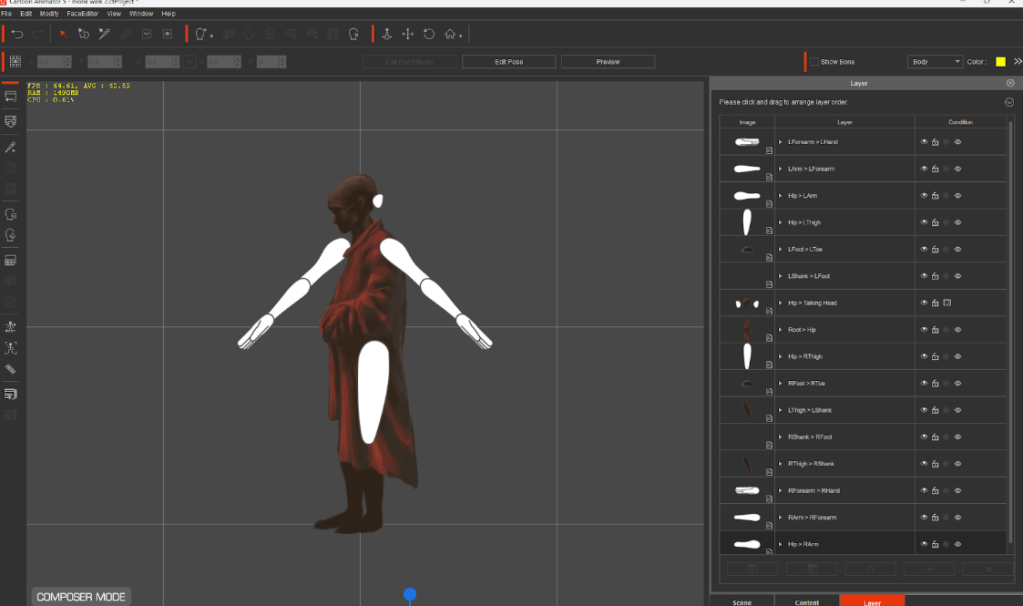
Next, I wanted to add a walk cycle to my 2D character animations. This was made easy by selecting one of the existing CTA 5 dummy actors, swapping out the body parts with my own and applying a preset 2D motion animation from the extensive library.

The premade walk cycles that you can also customize are nothing new to CTA but well worth mentioning, as they have saved me days, sometimes even weeks, of trial and error. As a complete beginner I was pleasantly surprised to get professional animated drawings with ease, and managed to progress through my ideas quickly. If I’d tried this manually I may have given up after numerous unsuccessful attempts. I should add there are enough presets in the library to keep you busy for a long time but if you are an animator, there is obviously no shortage of tools to create everything from scratch.

Bringing animated drawings to life using FFD transformation

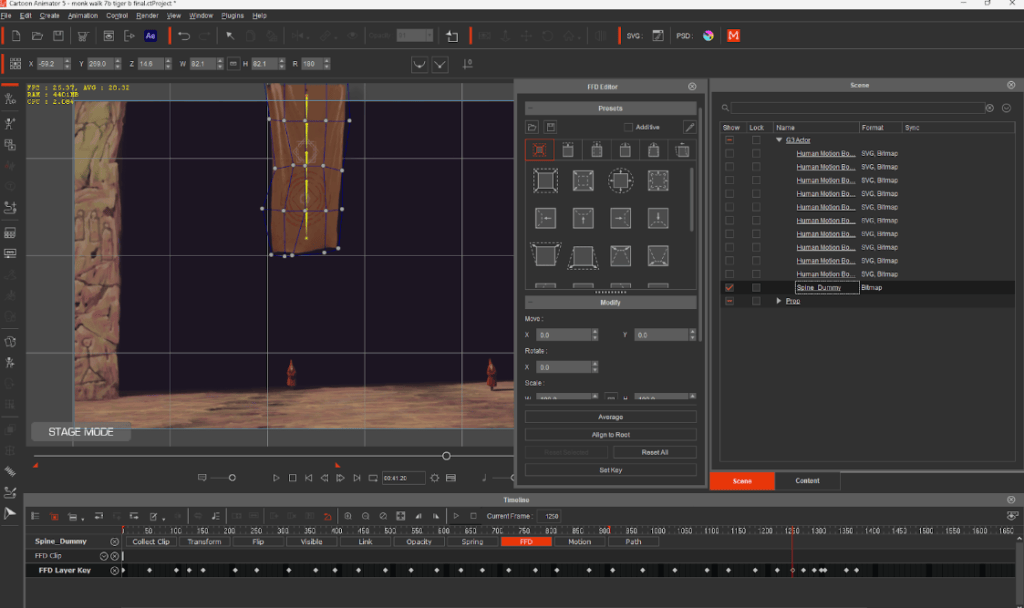
Finally we have another new feature called the FFD Editor. This reminds me of a free transform tool often found in 2D painting software. Once you open the FFD editor, you’ll notice a grid section appear over the item you currently have selected.

The grid has a bunch of circular points at each intersection that can be dragged around to distort your image. You will automatically create a new keyframe whenever there is a change to one of these points on different parts of the timeline. So you move some points to distort the shape, scrub along the timeline and make another change — easy-peasy! The newly created keyframes under the FFD tab can still be moved up and down the timeline to change the transition speed but you can also right-click on each one and use some transition presets, like smooth, accelerate, etc. The default is set to linear, and you can see the current status appear whenever you hover your cursor over each keyframe. 

Why I recommend Cartoon Animator as 2D Animation Software

The potential for this tool is endless and although manually creating keyframes and adjusting by hand may seem like it’s slow… imagine drawing each frame traditionally, there would be hundreds! This would also be impossible for me to do with my style, as each image would be unique and the transition between them glitchy. It simply wouldn’t work. The fact that this function now exists opens many doors to animated drawings of different styles!
Overall I couldn’t be happier with CTA 5 as a 2D animation software, and I’m really looking forward to learning more as I progress through all the other functions. I can’t wait to continue animating my story and I know I’ve barely scratched the surface with what CTA 5 can do! Happy animating guys!

Follow Davey

YouTube : https://www.youtube.com/@DaveyBakerArt 

Instagram: instagram.com/daveybaker_art 

Learn More

Official product page:

2D Animation Software for Cartoon Maker | Cartoon Animator

FREE for 30 days & get 1,700+ ready-made assets:

2D Animation Software Download | Cartoon Animator

Related Posts

————————————————————————————————————————————————————————————

The original article was written by Davey Baker and is also featured on Cartoon Brew.

Tips for Beginners – iClone 8

There are a lot of questions out there that don’t merit an article but deserve an answer and when combined with other tips and tricks can smooth out your animation journey. With this in mind, there will be some future articles like this one that focus on multiple tips having to do with iClone.

In this article, we are going to focus on some tips for beginners to provide some easy alternatives to more complex actions until your skills have improved. Some of these may also save some time and frustration for longtime users too.

Using Visibility to Simplify Complex Actions

Sometimes experienced animators can forget how confusing linking and attachment is to new users with no 3D background. New users might not even know those tools exist as there is so much to learn, but they can grasp visibility on and off very easily. This is an alternative method to linking as both can accomplish the same task, but visibility works without having to know anything about Reach Targets.

For example, take the simple everyday task of picking up an object like a drink. This is one of those motions that, unless necessary, should be implied with camera cuts that show everything but picking up the drink. The actor is shown approaching the object, looking at it, then the camera cuts away to another view and then cuts back with the drink in hand.

An easy fix, but depending on the script or direction, you may be forced to show the entire interaction of picking up the drink. If you have to keyframe most or all of this motion with Reach Targets, then that gets into intermediate to pro-level experience, but visibility can save the day.

We will use two drinks. One drink in the character’s hand with visibility off and one drink on the table or countertop where the drink will sit with visibility on. 

I’m generalizing from here (refer to the video for more details).

Place the drink into the character’s hand first by positioning and attaching it to the hand. Then use a motion or keyframing to get the character to the table or countertop. You can just have the character already standing at the table by the drink if you wish.

NOTE: In this example, I used two motions from the Shopping pack.  Market_CustomerBasket_Pick_M_01 and Market_CustomerBasket_Pick_M_01 edited in the timeline for the parts relevant to picking up an object.

The whole thing hinges on TURNING ON the visibility on the drink attached to the hand and TURN OFF visibility for the drink sitting on the table. This must be done on the SAME FRAME so one is instantly visible while the other is instantly invisible. No timing issues, no Reach Targets, and minimal keyframing.

The plus side is it is easier to duplicate the drink in hand for the static drink with easy placement since it’s just detach and toggle off visibility.  Again, see the video below for more details on the process.

NOTE: When allowed, it might be more judicious to use a camera cut to show the character within reaching distance of the drink instead of approaching it to eliminate the extra animation of handling the drink when a camera cut will fulfill your needs. Don’t over-animate.

Radial Blur to Mimic Circular Motion

Not all motor vehicle props have free-moving wheels that you can animate. Other props like pulleys or any rotating part fall into the same category. While you might get away with not having animated parts on props you cannot say the same for car wheels.

In some cases, the wheels, tires, and everything else were exported as a single mesh that cannot be extracted for whatever reason. This is where the radial blur image steps in. Use your image editor to edit the diffuse map and apply a radial blur to the tire and wheel texture. This implies the spinning of the object.

You can alter the other maps like normal, metallic, and roughness, but you can remove those maps if necessary for the car wheel and tire.

It’s not an elegant solution but it works as long as the spinning objects are not close to the camera. This also eliminates more manual animation.

There is yet another solution such as placing a separate tire and wheel prop over the original, then animate the movement.

Image Manipulation

I’m not implying that no one reads the manual. In a perfect world where all of us intensely studied the manual versus the real world where some of us don’t even know a manual exists… I highlight the simple tool of the RIGHT CLICK MENU when dragging and dropping images into an iClone scene.

This is an often-overlooked tool for beginners who are already learning as much as they can as fast as they can. This has been covered before in articles and tutorials but is worthy of mention again as so many users seem unaware of this right-click menu option.

Instead of using the usual LEFT CLICK when you grab an image to drag and drop into iClone, use a RIGHT CLICK instead and you will be presented with a menu about what to do with the image.

Using the Right-Click Image Manipulation Menu

Dummies for… Lots of Things

Dummies are basically proxies or go-betweens to get something done that is not native to the application. In its basic form, a dummy is a low poly object like a box (four faces that are not visible in the render) that can be attached to or between objects for more control over attributes like transform and scaling. You can attach Particles to a dummy which the Prop Distribution tool can then see and utilize.

There are many uses for dummies including:

  • Positioning and Scaling: Dummies can be used to precisely position and scale objects within your scene. Instead of directly manipulating the objects themselves, you can use dummies as reference points for alignment and sizing or group scaling.
  • Animation Control: Dummies can act as control objects for animating other objects or characters. You can parent objects to dummies, allowing you to manipulate them collectively or independently during animation sequences.
  • Camera Targeting: When setting up camera movements, dummies can serve as targets for the camera to focus on. This allows for smooth and controlled camera movements, especially in complex scenes.
  • Proxy Objects: Dummies can be used as stand-ins for more complex objects or characters during the initial stages of scene creation. This can help improve performance while you’re still working on the overall composition of your scene.
  • Organization: Dummies can help organize your scene hierarchy by acting as parent objects for groups of related elements. This can make it easier to manage and manipulate complex scenes with multiple objects and characters.
  • Scene Center Point or Checkpoints: Dummies can be used individually or in groups to center your camera on to jump around within a scene. This can speed up scene creation by providing shortcuts to work areas without having to manually reposition the preview camera every time.
  • “Look At” Control: A dummy can add more versatility for cameras or props to look at as they can be animated independently of the target to do things like view certain parts of another prop. This can add a small measure of control beyond the built-in “look at” feature in iClone.

As iClone has matured there is less need for dummies as many functions are built-in, but there is a lot to keep up with and they have their place in the right situation, particularly for beginners that might not know all the available tools and functions.

Linking Versus Attaching

This has been covered many times, but it is always worth going over again as the concept is very simple but necessary knowledge. If you want to save items with a character, then ATTACH them. They will become accessories parented to the bone you selected during the attachment process.

If you want to animate the accessory like dropping it or letting it go, then you will need to switch to a LINK as ATTACH is not editable on the timeline where Link is as far when to Link and Unlink.

NOTE: There is an attachment hierarchy to keep in mind. You may find yourself attaching an accessory to another accessory, but it attaches to the character bone NOT the accessory. To attach one item or accessory to another you need to DETACH the main accessory and then attach the second item to that accessory. After this reattach the original accessory to the proper bone and the parenting will be correct for pivot points.

“Bulldozer” by wzah520 is licensed under Creative Commons Attribution (http://creativecommons.org/licenses/by/4.0/)

These are just a few of the tips I’ll be passing along because they’re small details that make for better animations and create a pleasant animation experience. A lot of tips that work in earlier versions of iClone still work in the current version.

Not everything can be documented in the manual, because… you know… we all read that immediately, right??? Seriously, it’s hard to keep up with everything and even if you did read the manual first, you’d need almost superhuman comprehension and retention to remember everything.

Hopefully, some of these tips will help smooth the road ahead for you and if you have a tip or trick you want to share then please do so in the comments.

NOTE: There is an excellent tutorial on advanced mesh level extraction and attachment for Character Creator. See the video below for more information.

Character Creator

Mesh Extraction

MD McCallum - WarLord

MD McCallum – WarLord

Digital Artist MD “Mike” McCallum, aka WarLord, is a longtime iClone user. Having authored free tutorials for iClone in its early years and selected to write the iClone Beginners Guide from Packt Publishing in 2011, he was fortunate enough to meet and exchange tricks and tips with users from all over the world and loves to share this information with other users. He has authored hundreds of articles on iClone and digital art in general while reviewing some of the most popular software and hardware in the world. He has been published in many of the leading 3D online and print magazines while staying true to his biggest passion, 3D animation. For more information click here.

Populating a futuristic KitBash3D City with iClone Crowd Simulation

This article is featured on BlenderNation

Onur Erdurak

I’m Onur Erdurak, a director, writer, and 3D artist from Turkey and I love telling stories. I earned my bachelor’s degree in Cinema from Izmir University of Economics. While studying in Izmir, I applied and got accepted to the Erasmus Student Exchange Program and studied Cinema in Slovenia for a year.

While studying I made my first short film with no budget, one location, and one actor – which was with my uncle. Luckily my uncle Kemal Erdurak was already a professional actor so I put my skills in VFX, writing, and everything in between to the test, and with the help of a great team we made; my debut short film “STRANDED”. The film premiered at the Cannes Film Festival Short Film Corner in 2018.

Currently, I am a Fulbright grantee, and I am pursuing an MFA degree at Loyola Marymount University in Los Angeles. After a few failed attempts over the years trying to learn Blender. I finally got started after watching Ian Hubert’s “World Building in Blender” video. This was when the COVID-19 pandemic struck, I viewed this as a chance to enhance my skills and knowledge.

After a couple of months of learning, I started @blendreams to share my creations. “Blendreams” got started as and still is my passion project. I share my renders and animations over there and share what I’ve learned during my journey on my YouTube channel as tutorials. I am incredibly grateful that this passion project now has over 100,000 followers on Instagram.

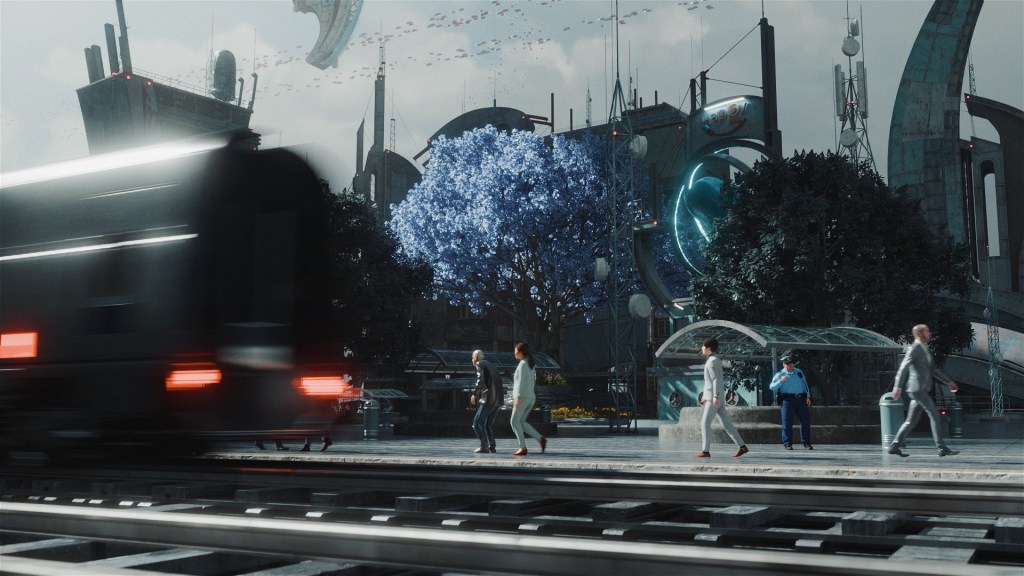
For my next project, I’ve been experimenting with easy ways to create animated Crowds; as this is one of the most difficult, and tedious parts of animation. I wanted to test iClone’s Crowd simulation tools on a large scale city, and share my experiences of using it for populations and Dune 2 inspired scene.

“The crowd simulation tools in iClone 8 are incredibly efficient at populating scenes with high-quality 3D actors featuring facial expressions. This capability allows me to quickly fill out my scenes, enabling me to focus on the finer details of my scene.”

Onur Erdurak – Director / Write / 3D Generalist

First the location with KitBash3D

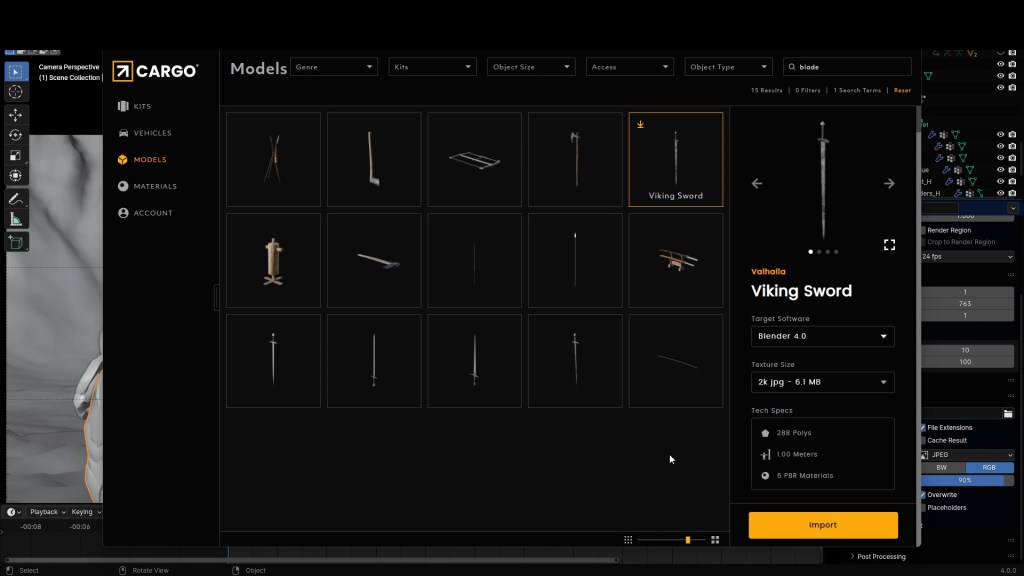
I needed a location for my scene to take place in, and I knew it was going to be a futuristic dystopia. I used KitBash3D Cargo; it is a software that holds the entire asset library of KitBash3D. Any of their assets can be imported into all the popular 3D software with one click with Cargo. They also have a bunch of free assets here and a full free kit called Mission to Minerva. Using that kit, I’ve built this environment inside Unreal Engine, and we did some virtual production tests at home on a TV. Melis Caner is the actress in these shots.

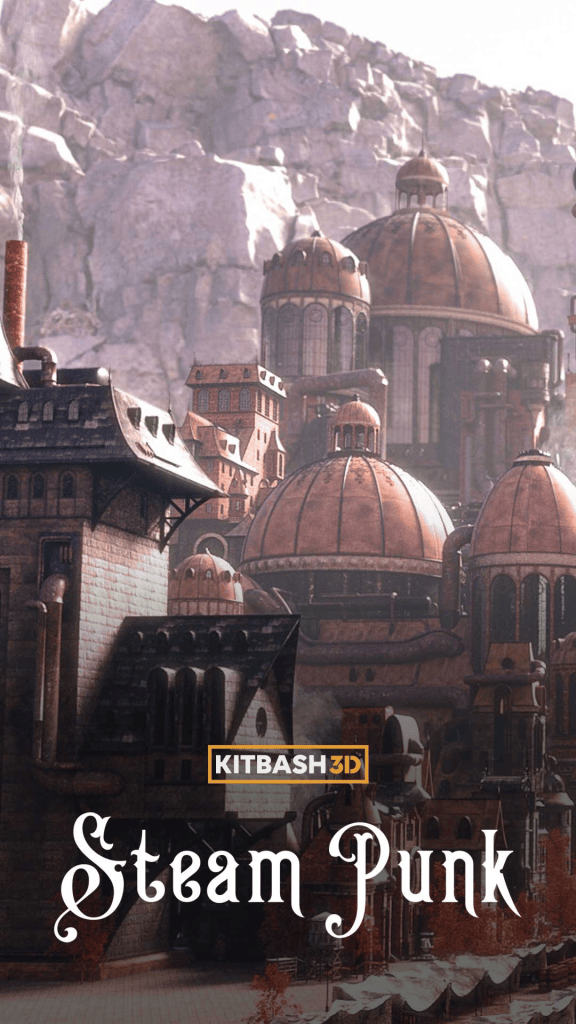
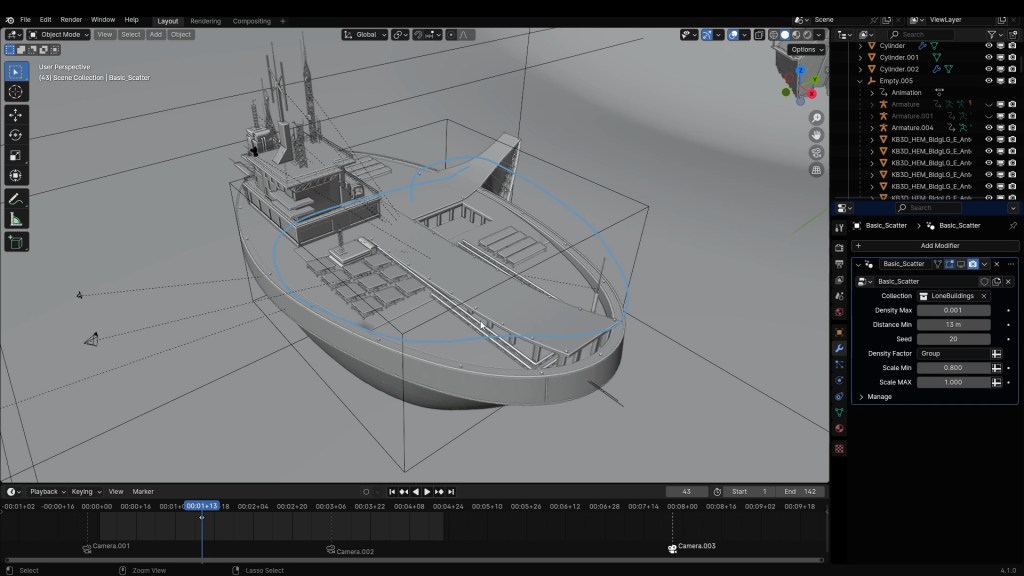
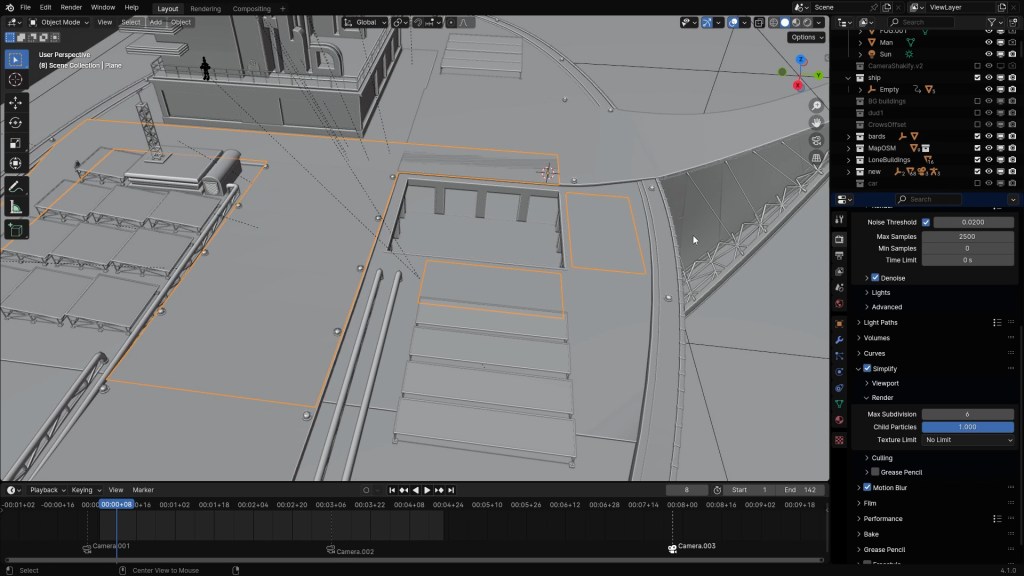
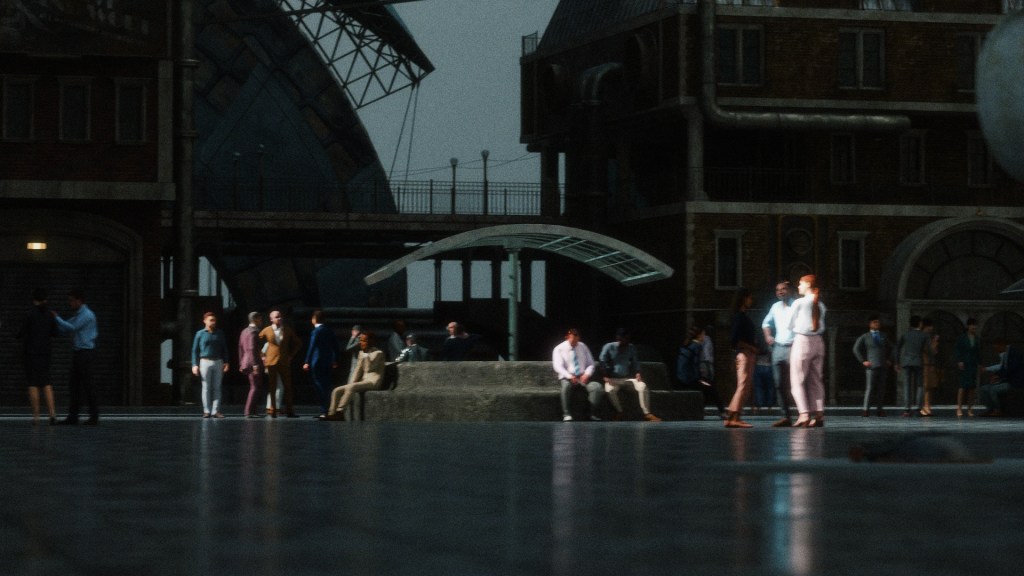
Back to our Metal City – using KitBash3D CARGO, I got a bunch of building models from the “Heavy Metal” and “Steam Punk” kits. After importing in the models, it is a lot like playing with toys. Blocking the buildings together to create the city center. For the wide shots of the city, I used this geometry nodes set up. I have some of the buildings in a different collection and they are distributed on this plane using a basic distribution setup in geometry nodes.

Using iClone to simulate crowds

Reallusion recently introduced crowd simulations inside iClone, these crowds can be exported out to any 3D software, and they are super-fast way to create realistic crowds.

First, when I open iClone:

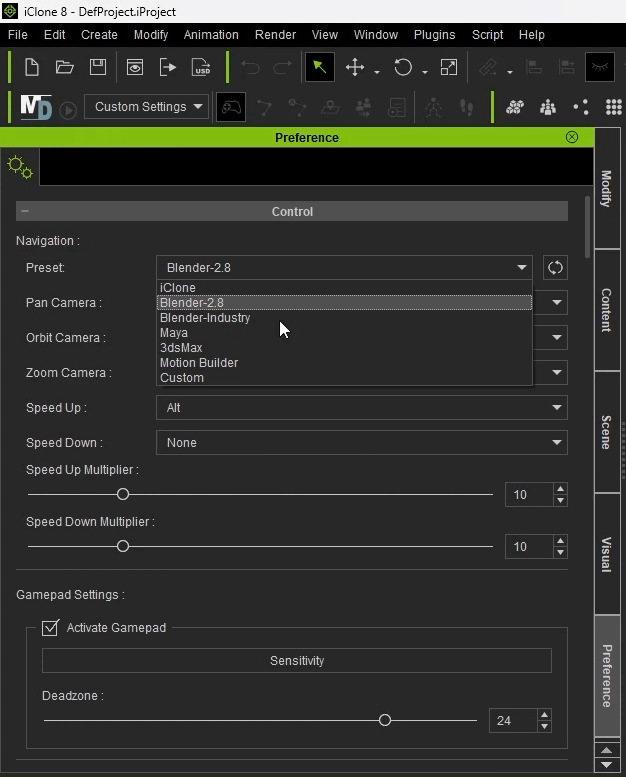
I go to Edit -> Preference -> change the preset to Blender so the navigation buttons are familiar.

This preference is saved and I only had to do it once.

Then, go to edit again, project settings this time, and change the frame rate of the project. I set it to 24 frames per second.

These are the crowd simulation types inside iClone:

  1. Actor Group
  2. Volume Blocks
  3. Walkways
  4. Navigation Meshes
With iClone crowd simulation set spawn points, control density, orientation, and formation.

Unless you choose the “Expressionless” option for these actors come in with facial animations.

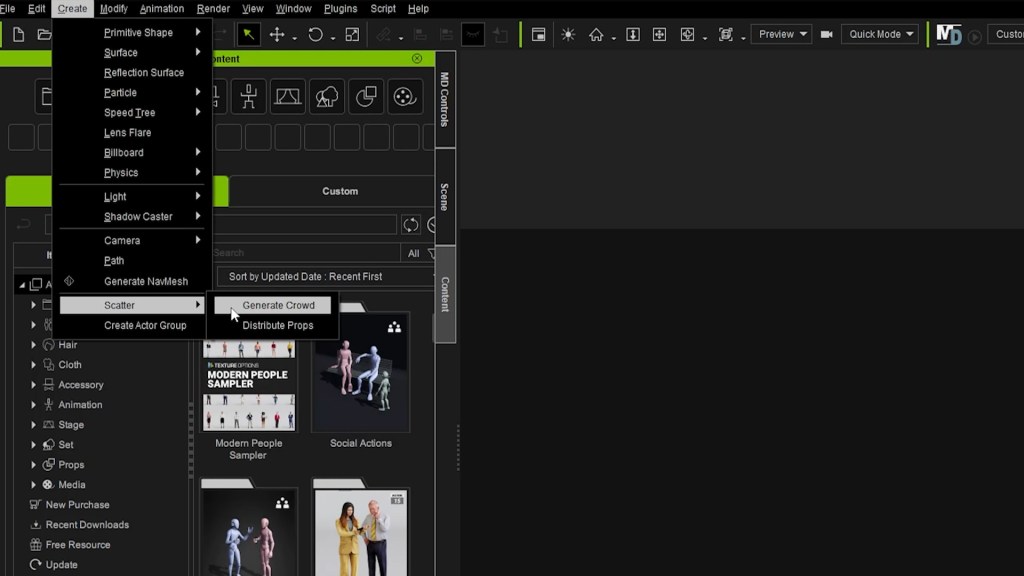
To create the other types of crowds, we go to:

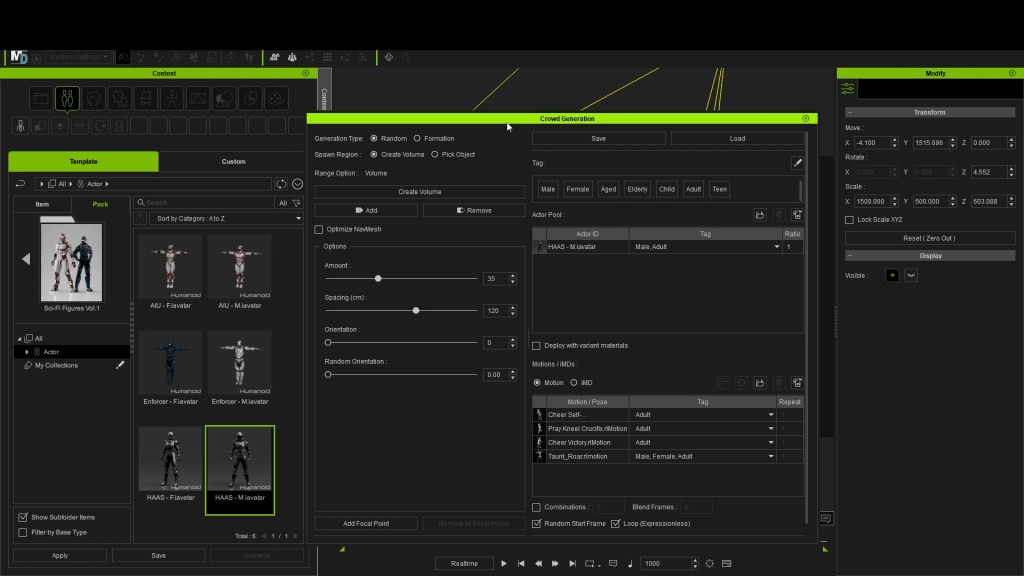
Create -> Scatter -> Generate Crowd

Generate crowd in iClone

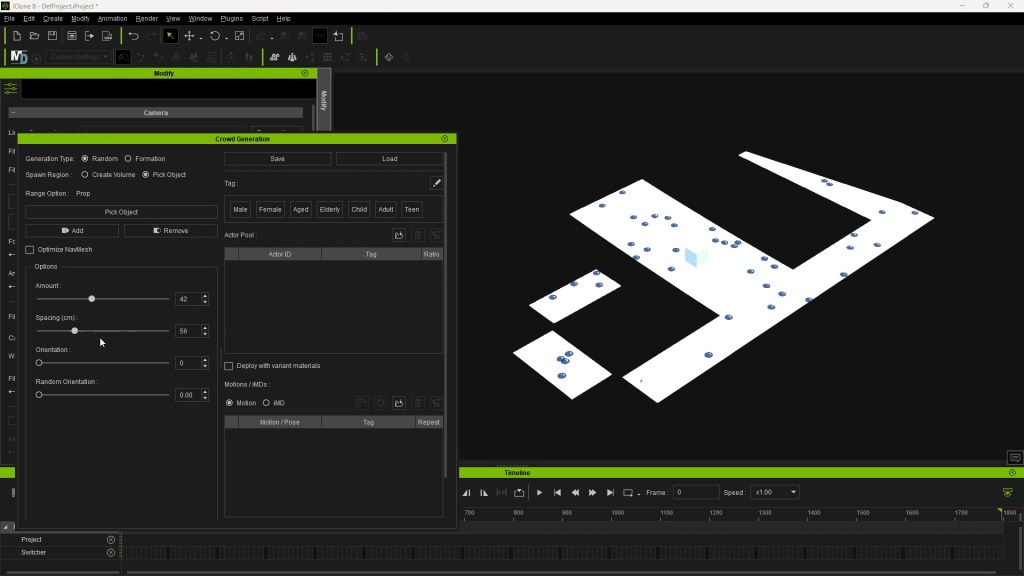
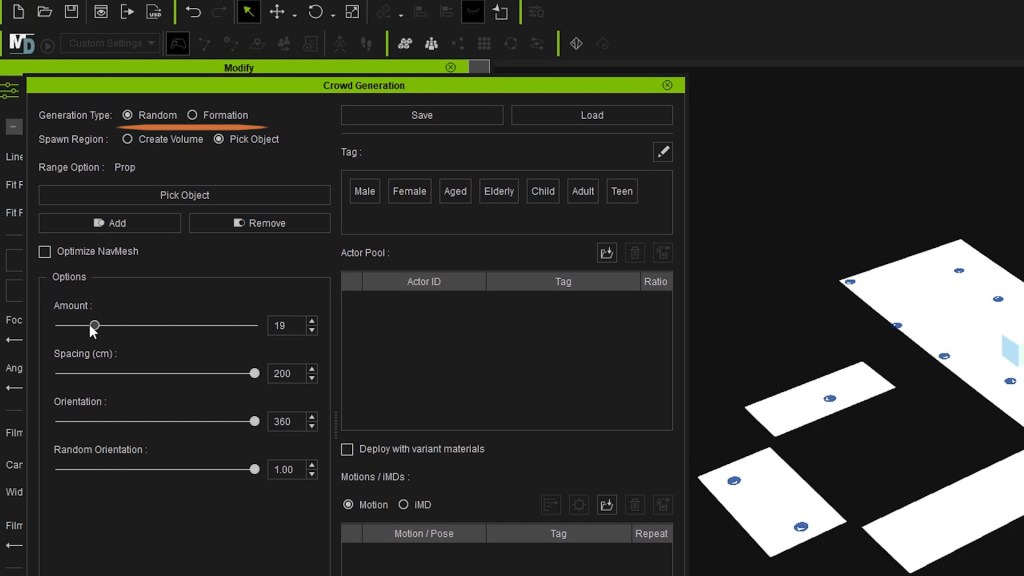
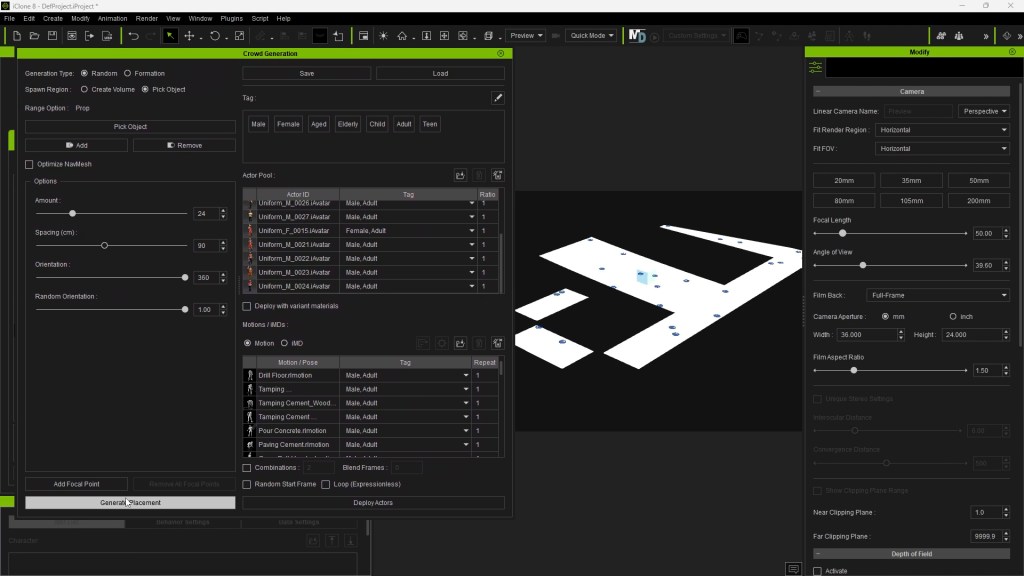
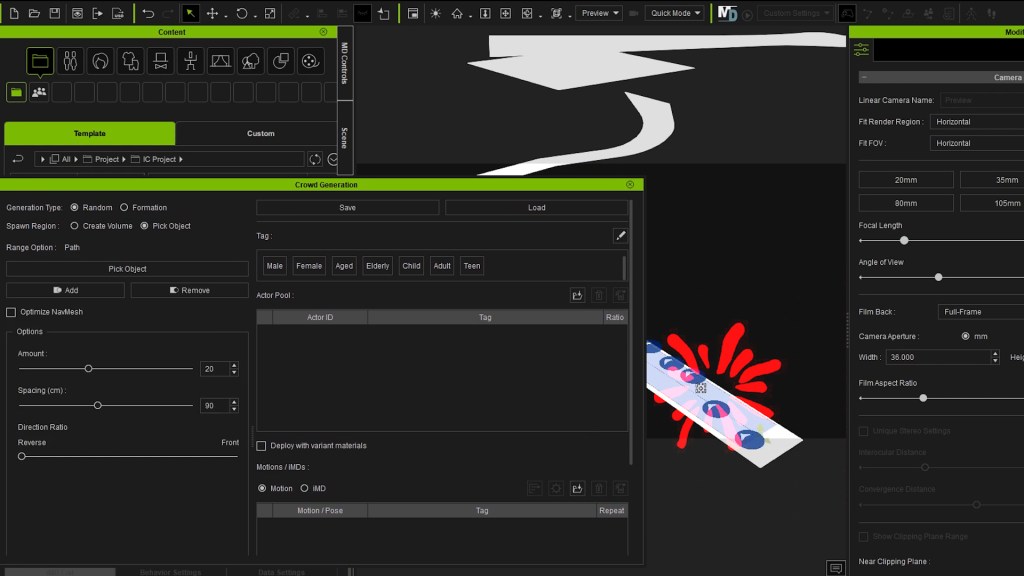
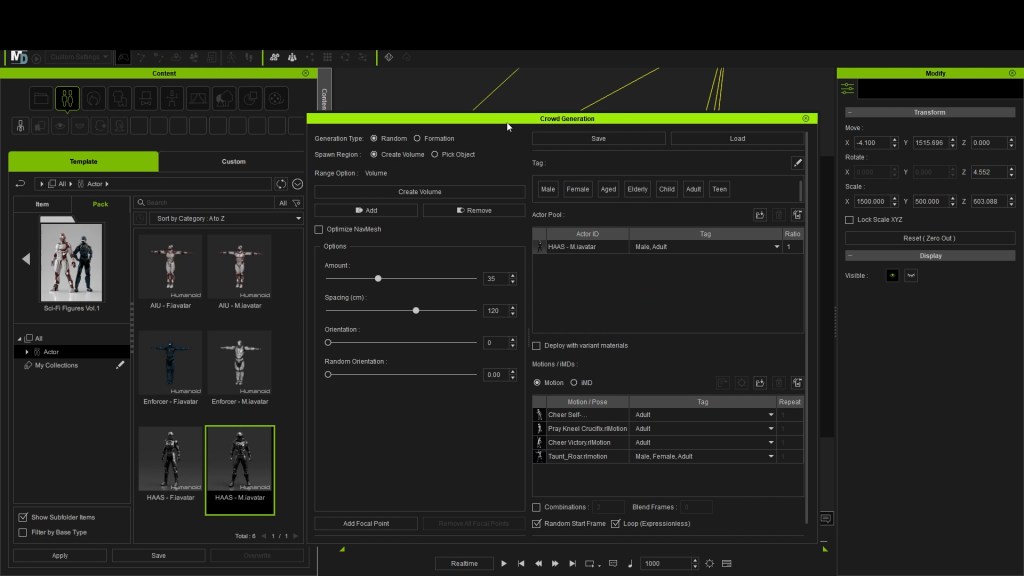
This opens this dialogue box and makes things little more complicated and more exciting. With it we can create the area we wish to scatter crowds in. With the “Create Volume” checked, if I click and drag, I create a volume. This volume can be moved and scaled. The number of characters changes as the scale of the volume changes.

With “Pick Object”, I can choose a surface to scatter the crowd in. This surface can also be a custom modelled surface.

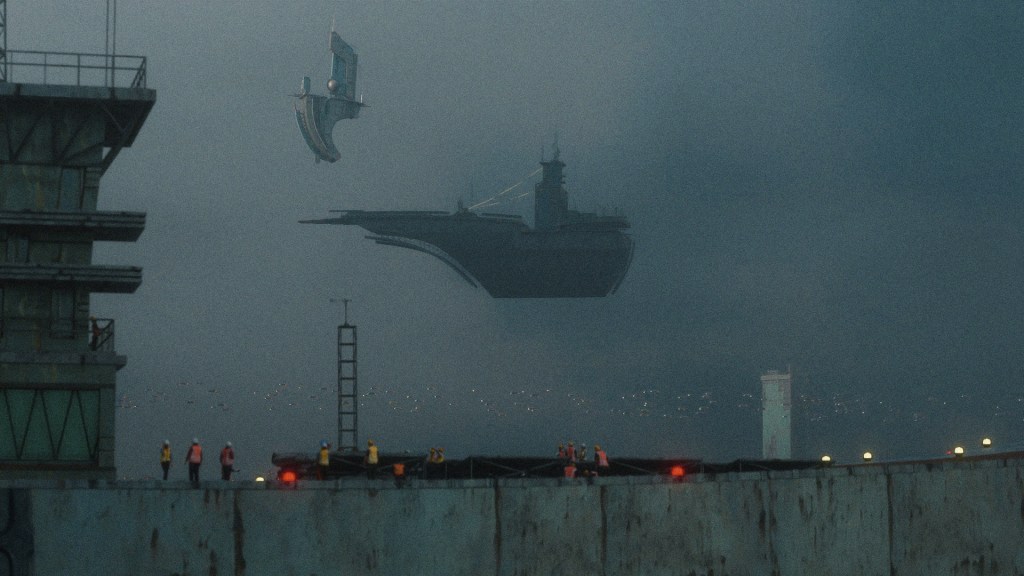
Adding construction worker crowds to the ship

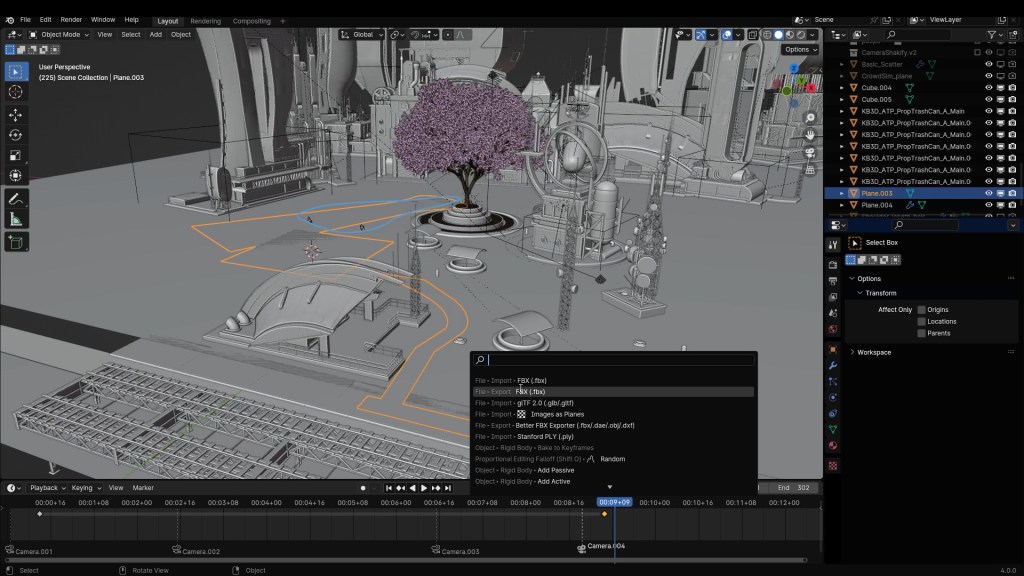
I want to put a crowd simulation of workers on top of this ship. I modeled the surface out of a plane in Blender. Then exported it out as an “FBX”. Import it into iClone, and choose that as the surface. Back to our crowd sim dialogue box.

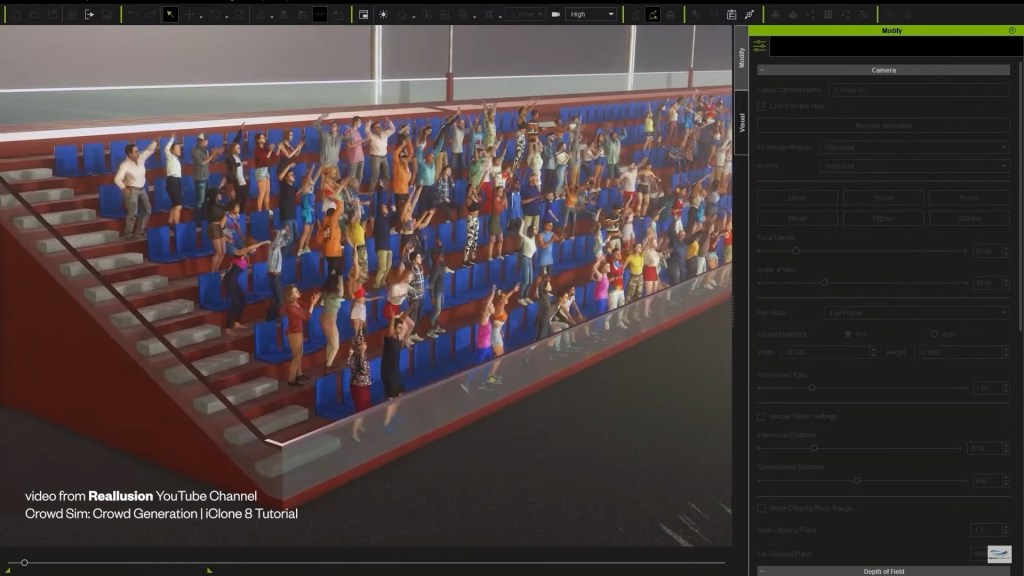
We have a bunch of options here. I go for random, but “Formation” can be used for crowds in stadiums, theaters or for creating army formations.
After adjusting the settings, we have to bring in our actors into the Actor Pool and animations into the motion pool.

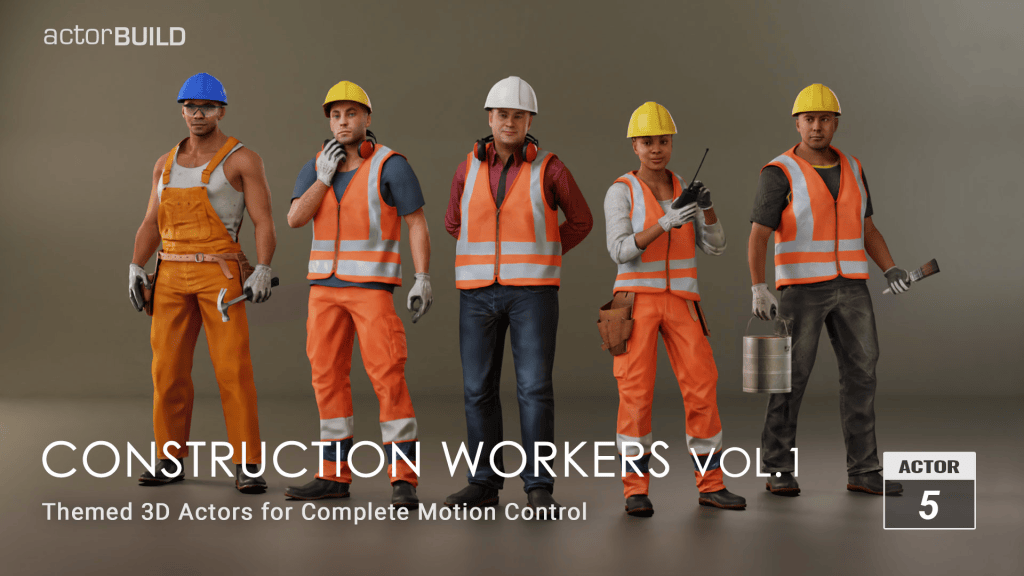
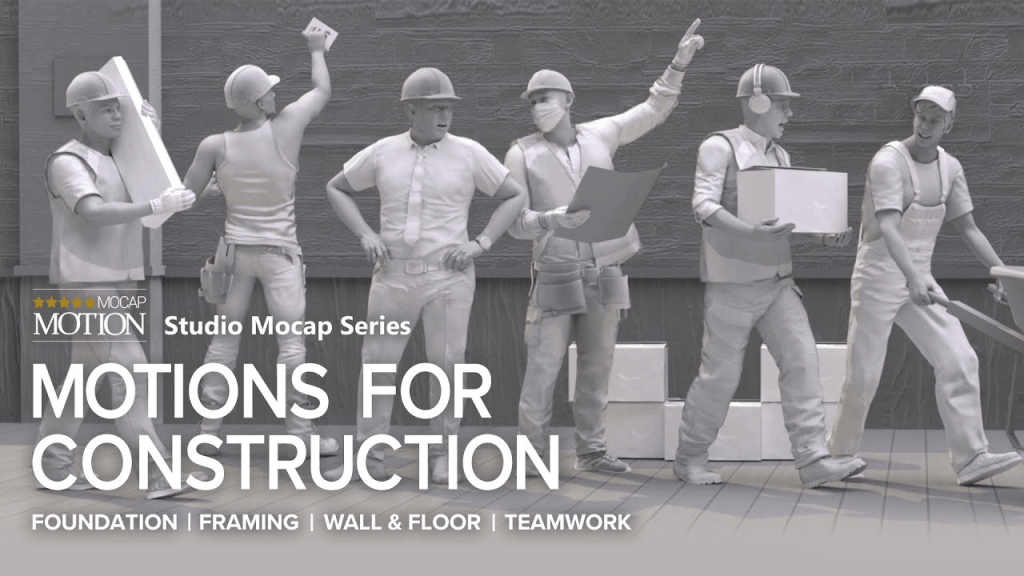
Mixing different animation packs and actors together, many types of combinations become possible for any use case you might have for crowds. I used actors from “Construction Workers Volume 1″ and “Factory Workers Vol.2” and animations from the “Motions for Construction” and “City life” packs.

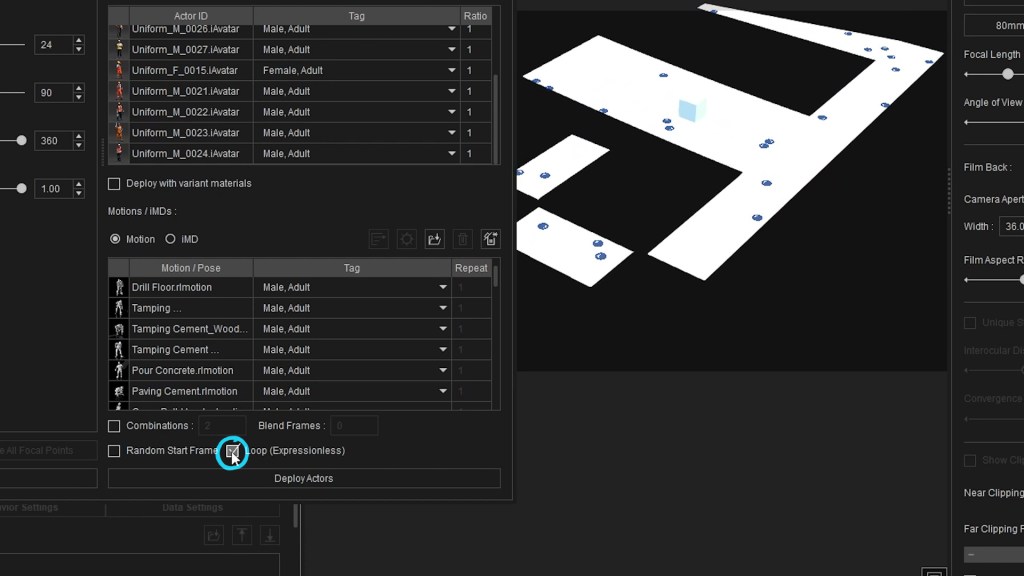
Clicking on “Generate Placement” is basically changing the seed value, randomizing the placement of the actors. Clicking on “Deploy Actors” throws the actors into the scene, choosing animations from the motion pool with the fitting tag.

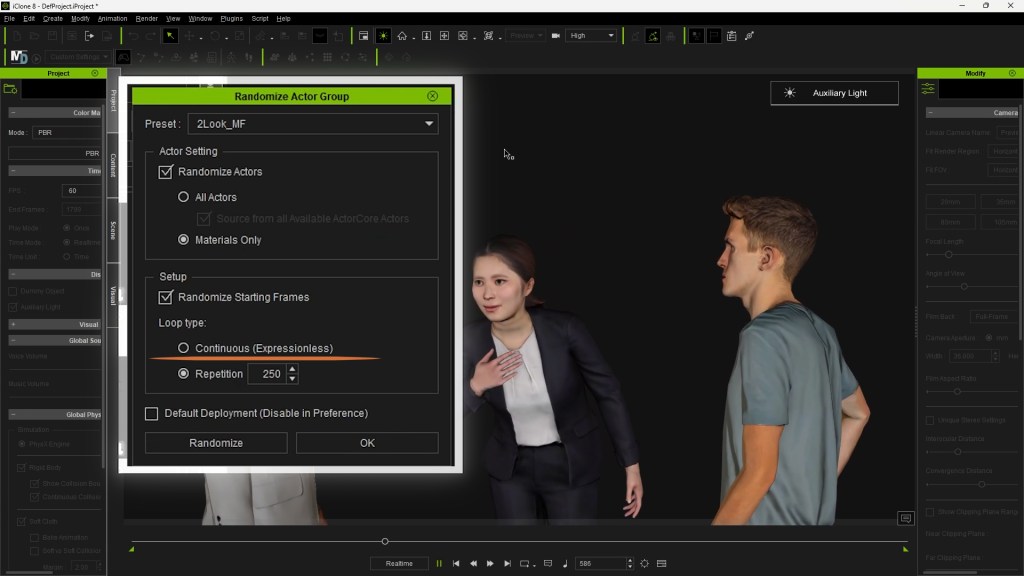
We can also add manually any custom tags to actors or animations. After their animations are assigned, they will start moving around. Their animations, however, will end and they will freeze at their final frame. But, if we click on the loop, their animations will loop.

Click drag and box select all of our actors animated.

Then go to FILE-> Export-> Export FBX. Make sure it is set to Blender and 24 frames per second. Click Range and adjust the animation length. Max texture size 1K should be enough. Convert image format to -> JPEG

Create a folder and export it out.

Inside Blender, you can just import it as FBX. I usually prefer using the CC Blender tools add-on to import anything that is coming out of Character Creator or iClone. Although in this case, importing as “FBX” worked just fine.

Walkways and Crowds for the City Center

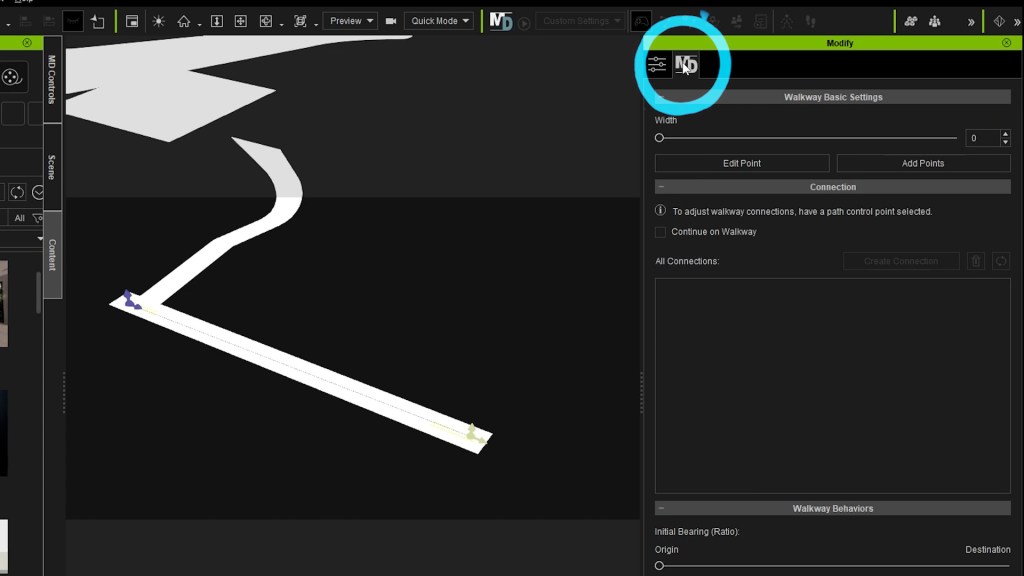
For the city center, I plan to create different walkways and crowds, using all the crowd sim types available inside iClone. I model a basic surface with a plane where I want to have the crowds. Export it as “FBX” and import it into iClone. Go to create and choose path, to create the first walkway. Click to create a walkway, then press “escape” when you are done.

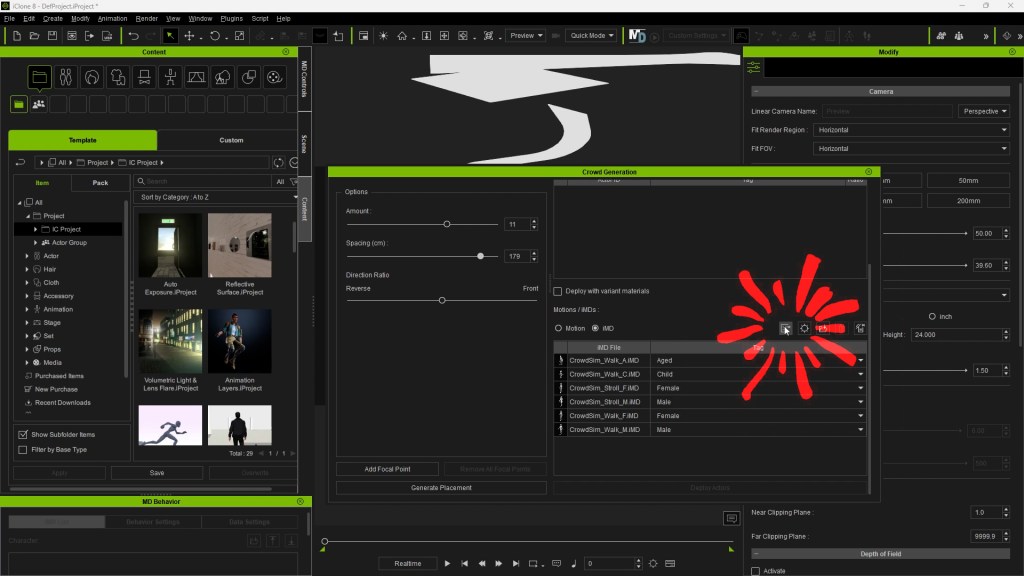
Under the Motion Director (MD) panel, I can adjust the width of the walkway. Create, scatter, generate crowd, pick object, then click the walkway. This time I will choose the “iMD” option here, instead of “motion”. Having selected a walkway as the object, I can click on this and get all the iMD walking animations in here.
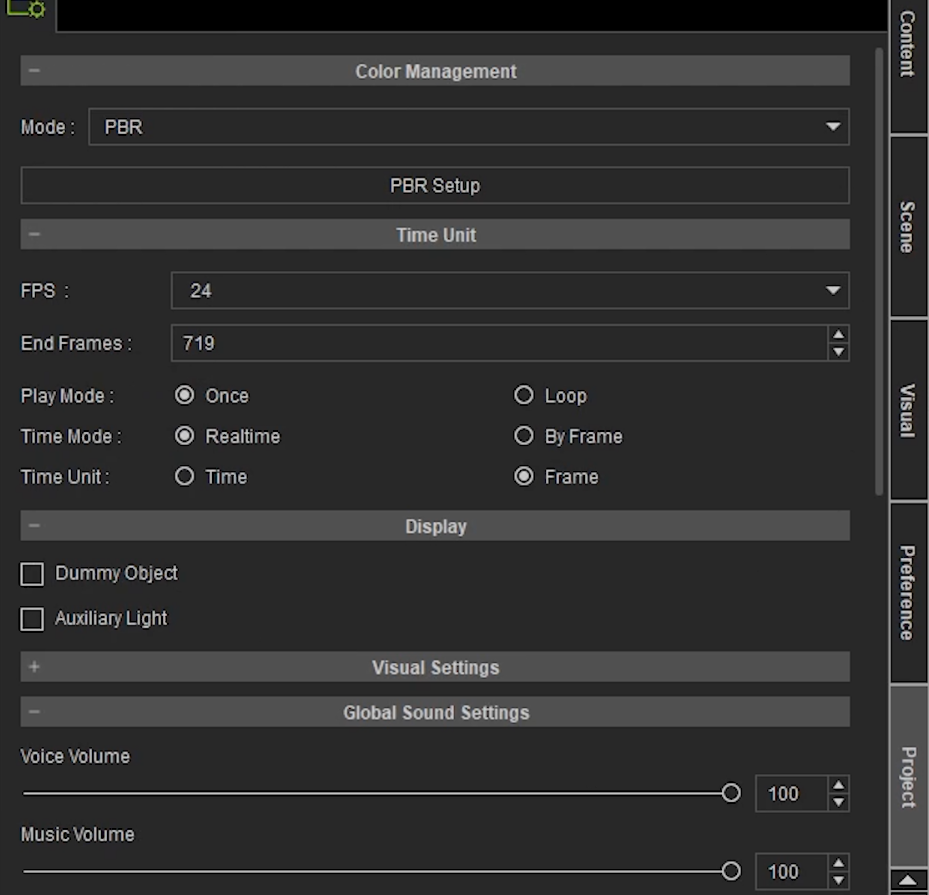
With deploy actors, the actors get in position but there are no animations. For that, we have to click the “play” on the Motion designer play button here. This takes us to the Motion Director workspace.

Choose “Record Selected” from this drop-down menu, select all the actors in the scene and play to the desired length. With iMD animations the actors are smarter as they will avoid each other, and walk back on the path once they reach the end. After the playback is at about 200 frames, I stop it.

Then I used some actor groups then, created volume for more crowds. Export them out to a folder, import them into Blender and we have our city center.

Creating Custom Crowd for Dune Inspired Scene

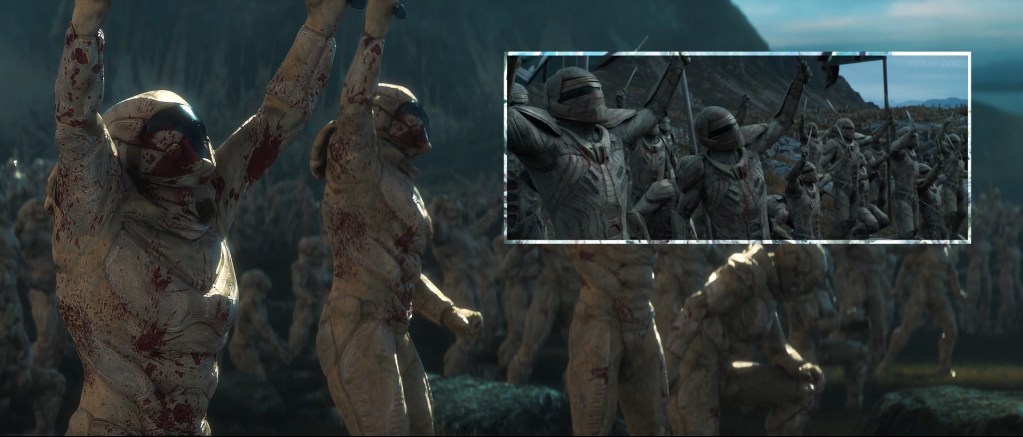
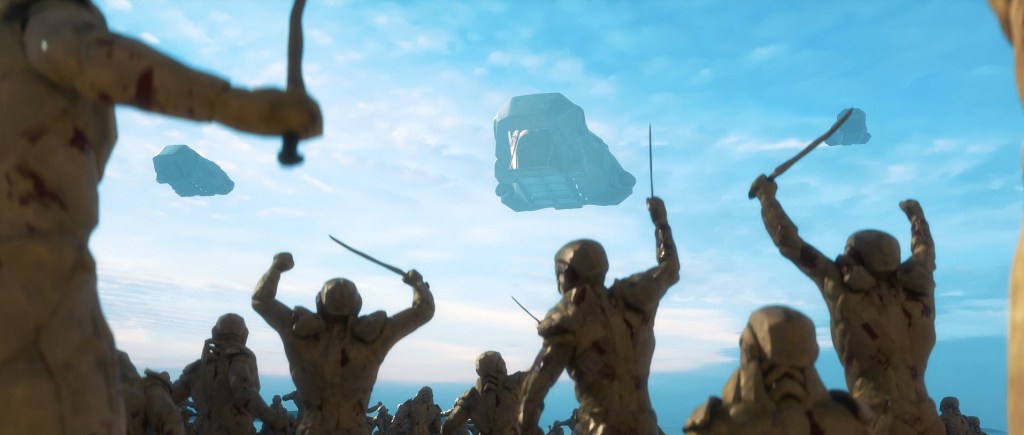
Inspired after watching Dune: Part Two I wanted to see if I could create a similar scene of this shot with the iClone crowd simulation.

Dune: Part 2 courtesy of Warner Bros. Pictures

I first started in Blender, creating the environment and the atmosphere. I suggest this video for a detailed explanation of my process:
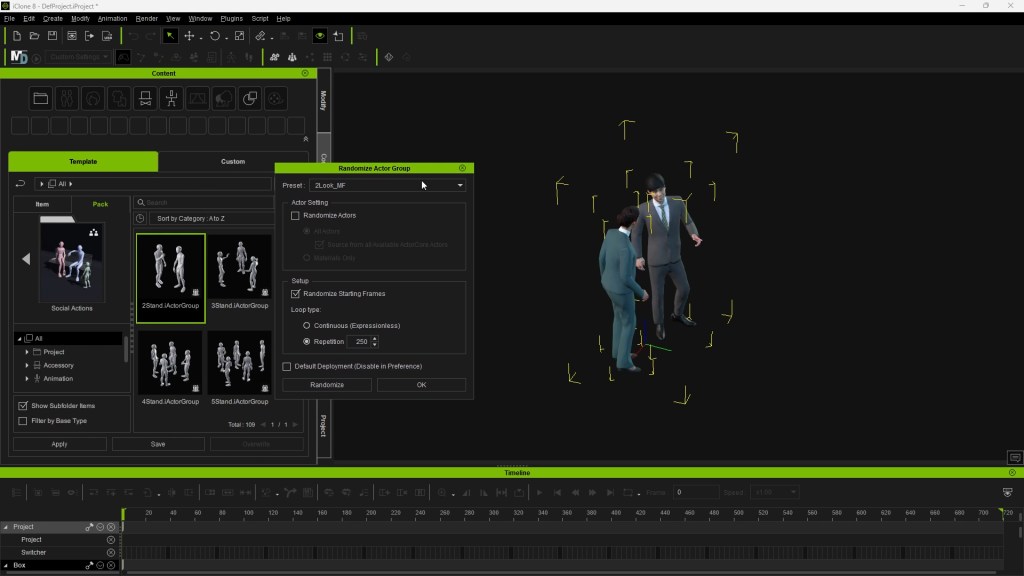
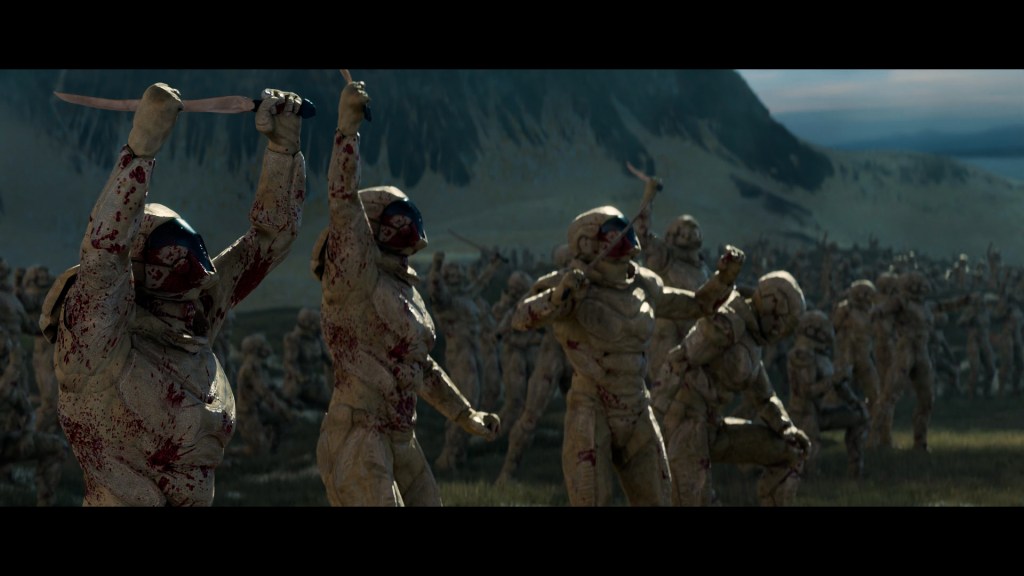
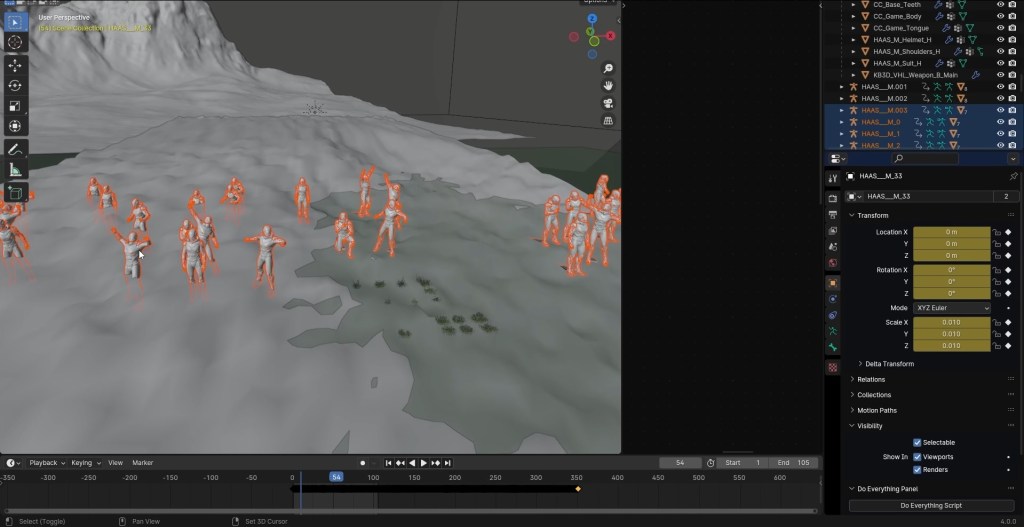
Using a character from the pack “Sci-Fi Figures Vol. 1” I used the character “HAAS – M”. I hand placed the 3 in the foreground and the rest of the actors were scattered using the “Create Volume” in iClone.
I worked on its textures for like a day, mixing in different types of sand textures and texture painting blood on them.
Dune scene recreated with iClone

To create the knife from the film I imported a sword model from KB3D Cargo and changed it in blender to look like the “Crysknife” from the film.

I downloaded some animations from ActorCore, searching things like “victory”, “celebration”, “Keeling”, “praying”. Then I threw those animations with the character, and I was almost done. I checked random start frame and loop check boxes.

Deploy actors, import them into Blender. Swap their textures with the custom one I worked on in Blender.

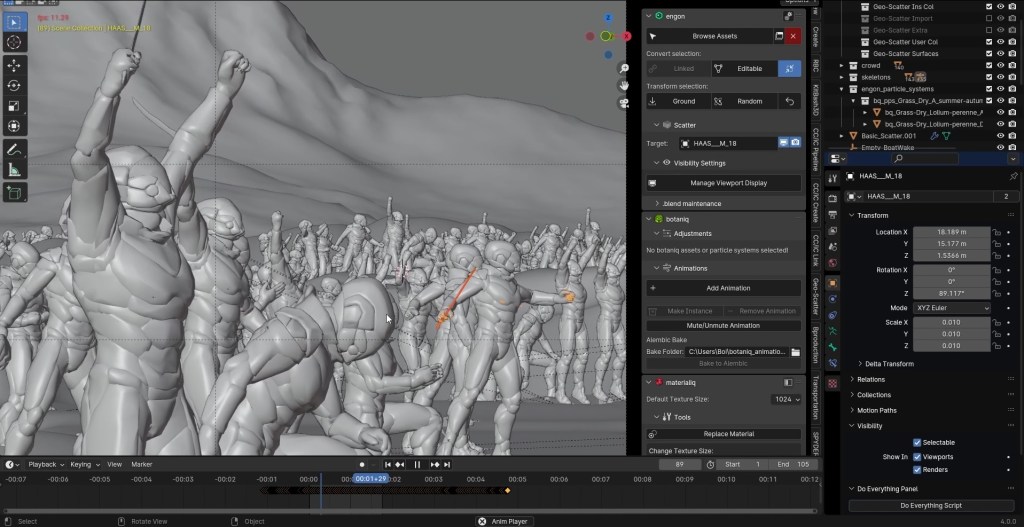
Then to increase the numbers even more, I used a little bit of geometry nodes. You can find the set up I used in this video:

I placed some more Crysknifes into their hands, render it out, a little bit of color grading and we have the final shot.

Follow Onur Erdurak

Website:
http://blendreams.com/

YouTube:
https://www.youtube.com/@onurerdurak

Instagram:
https://www.instagram.com/blendreams/

Twitter:
https://twitter.com/blendreams

TikTok:
https://www.tiktok.com/@blendreams

Related Posts

————————————————————————————————————————————————————————————

The original article was written by Onur Erdurak and also featured on BlenderNation.

Posing John Constantine as a MultiVersus Character in Blender

This article is featured on BlenderNation

Renan Fabricio

My name is Renan Fabricio, a 3D Character Artist from Brazil with 7 years of experience in the game industry. I currently work at Revolving Games. Most of my career has been remote due to the lack of game studios in Rio de Janeiro when I started.

Initially, I worked on various projects creating one or two characters each. In 2019, I pursued full-time remote opportunities and was hired by a Brazilian indie studio to develop a vertical slice for the Soulslike game Deathbound. During that year, I designed 7 characters for the demo, which helped secure investment from Tate Multimedia, allowing us to complete the game. I’m proud of this achievement, though I am no longer with the studio.

For the past two and a half years, I’ve been a 3D Artist at Revolving Games, working on undisclosed projects.

A vertical slice of some characters made for Deathbound.

Introduction – Posing characters in an existing game

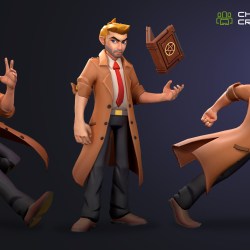
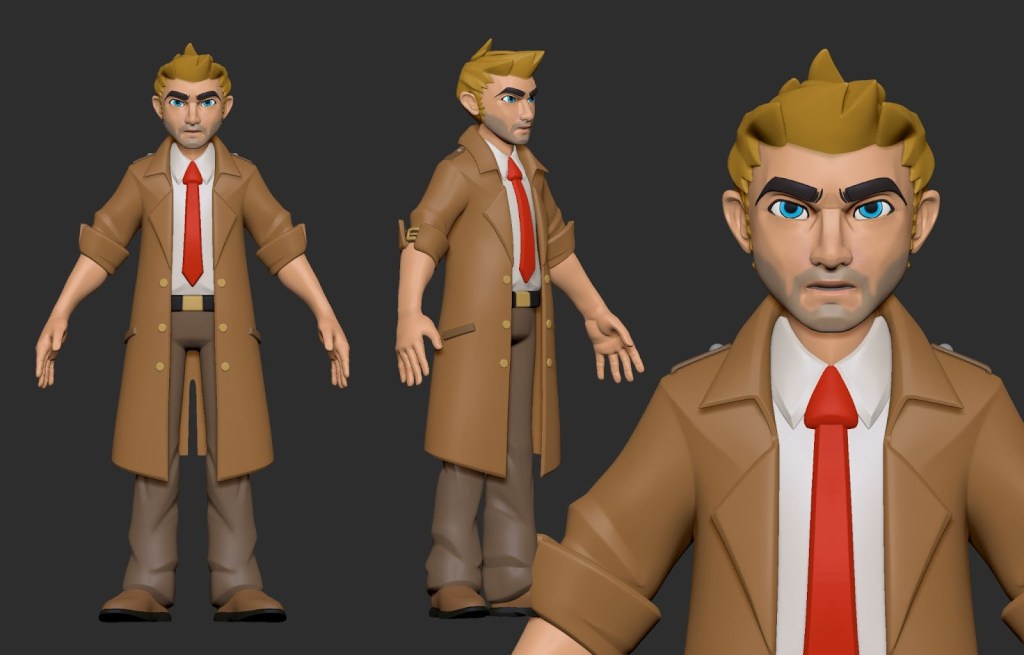
Constantine, a DC character, holds a special place in my heart and in the hearts of many Brazilians due to the 2005 film starring Keanu Reeves. With this in mind, I decided to create a 3D stylized version of Constantine from the comics, as this game features DC characters. This article will not only demonstrate the workflow of character creation but also posing characters in Character Creator.

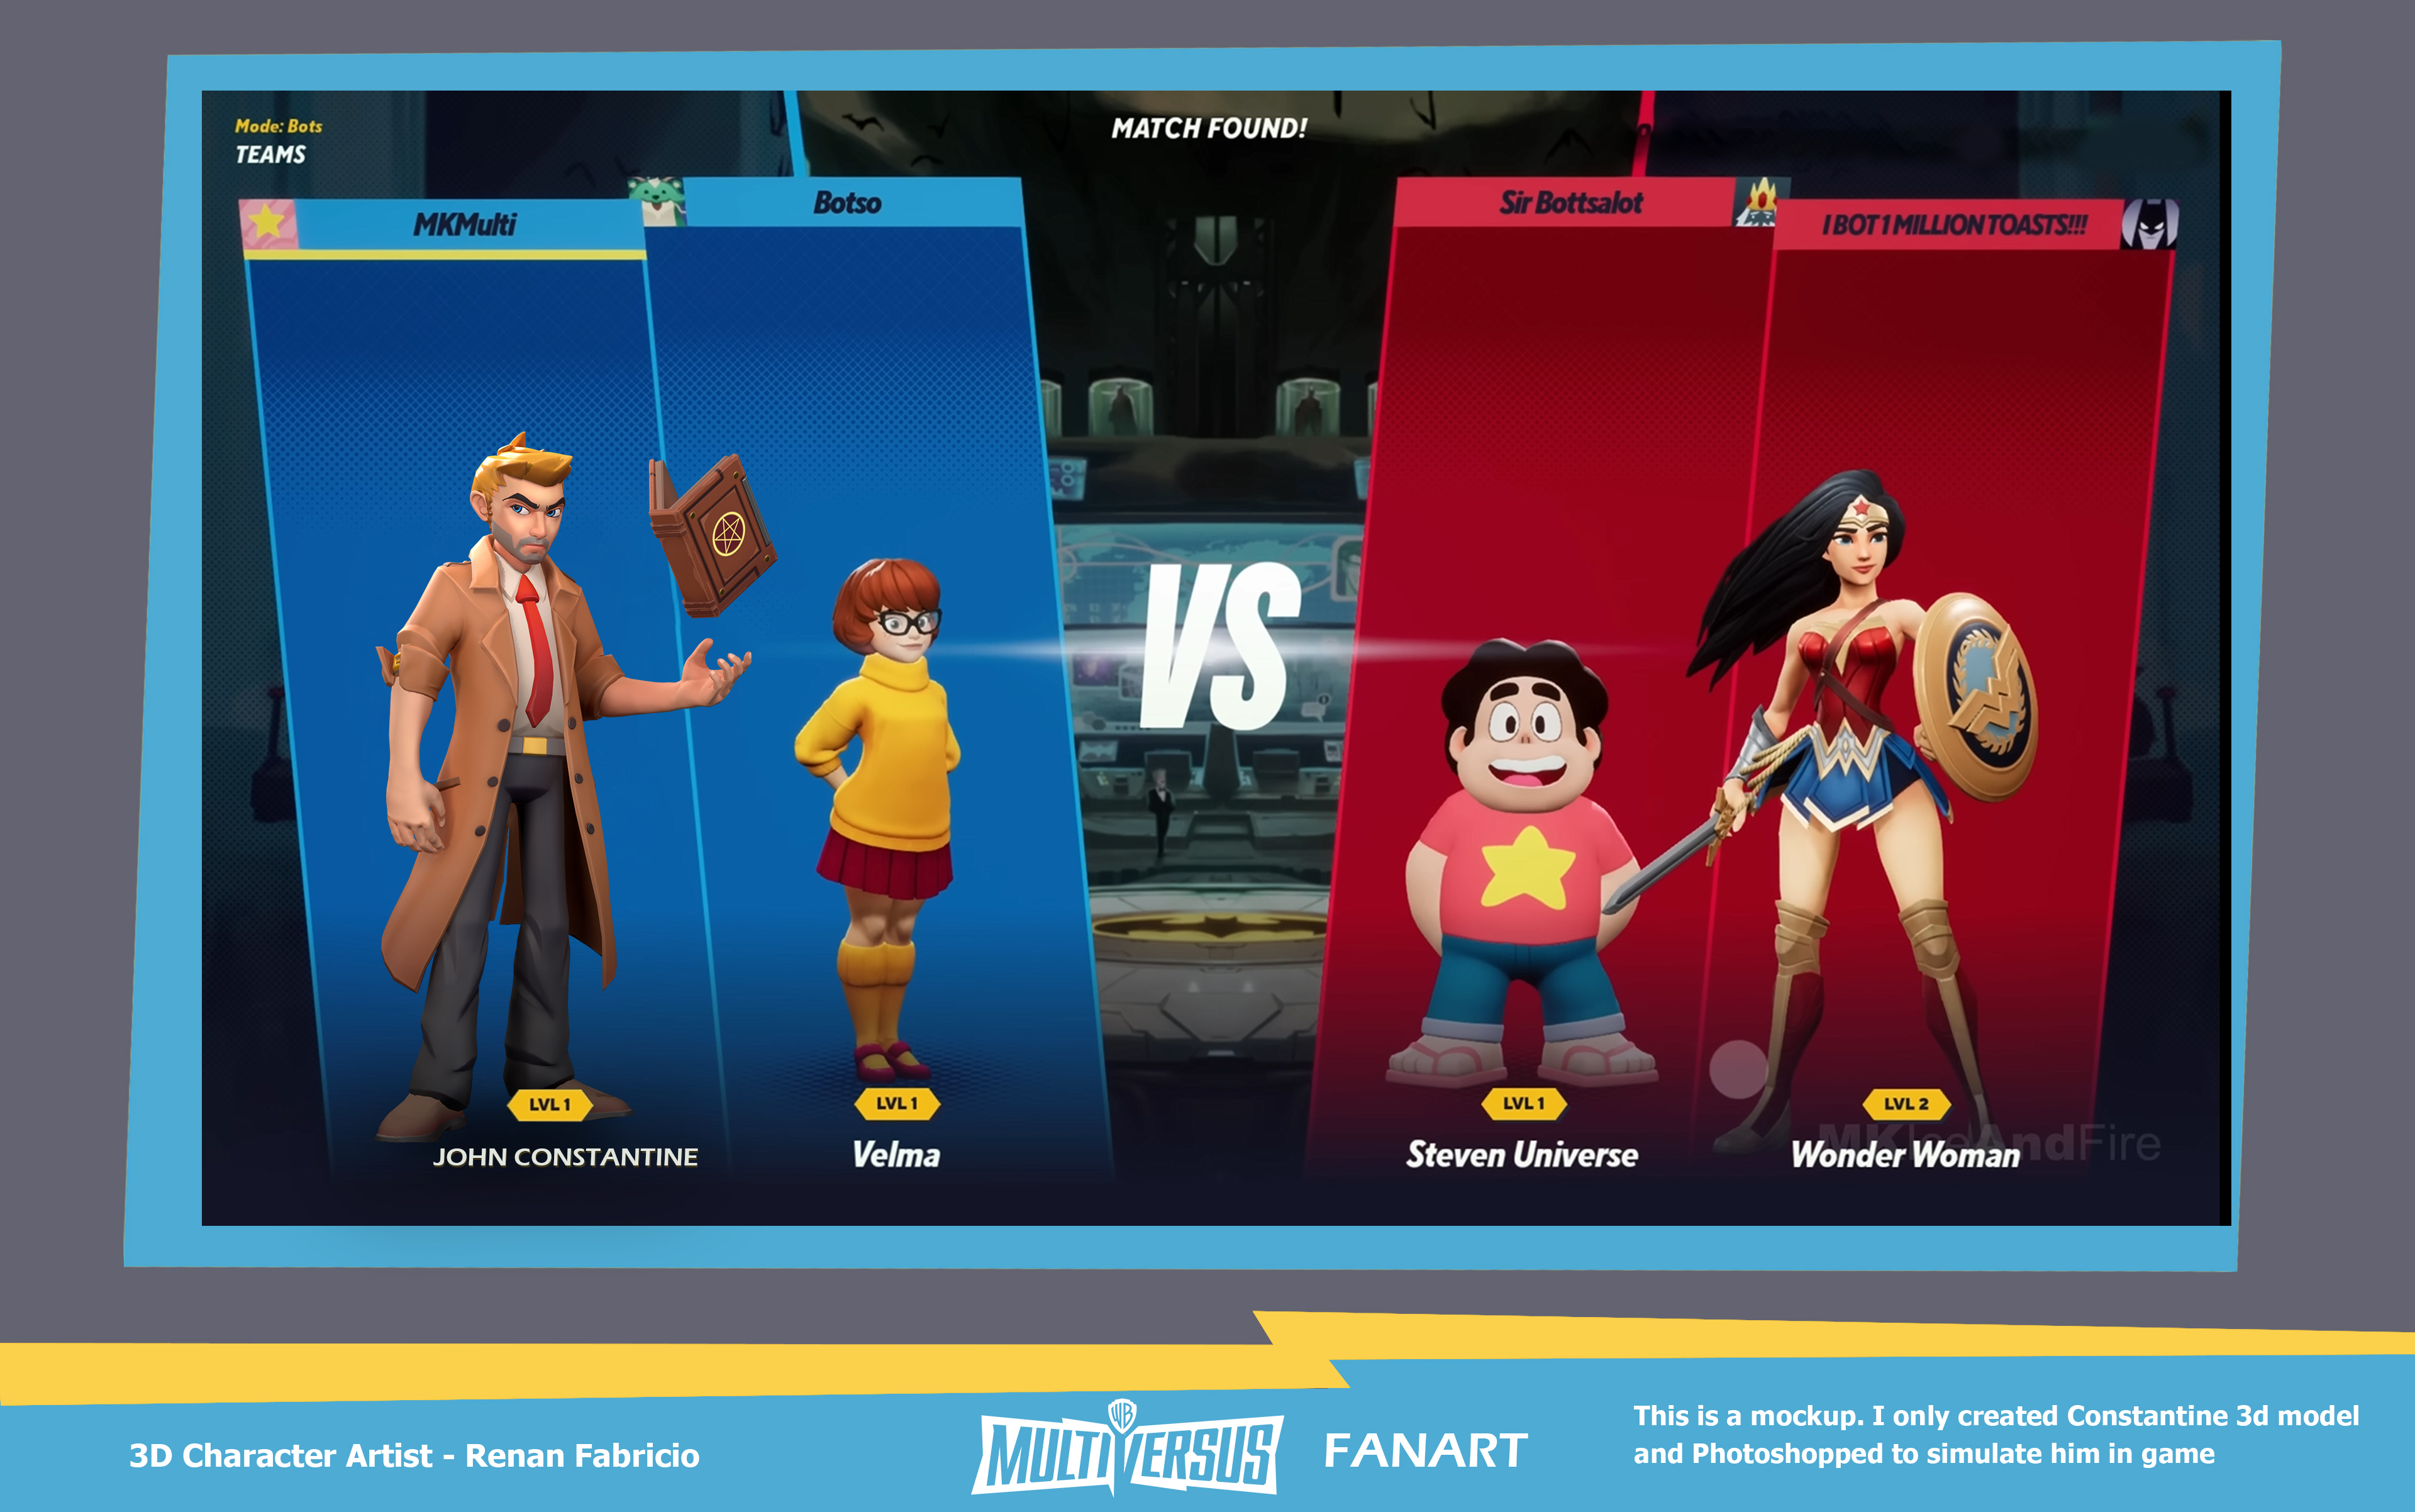
My personal fanart project of Constantine for the MultiVersus Game

Driven by my love for fighting games and the desire to work on projects like Multiversus, I sought out someone on ArtStation who was creating Multiversus fan art concepts. I wanted a collaborator who could create a 2D concept, allowing me to focus on the 3D design. 

I found Francisco Matias, also a Brazilian, who graciously accepted my invitation and created 2D concepts of Constantine. You can check out his portfolio. I am very grateful to him for believing in this collaborative fan art project.

Every time I embark on a long personal project, I strive to incorporate a new software, addon, or technique into my workflow. This approach ensures that my process becomes more efficient, faster, and stays aligned with industry standards.

Previously, I noticed that posing characters in ZBrush took a considerable amount of time and was one of the most challenging steps for me, especially since I am not a professional rigger. Posing seemed quite daunting, particularly when I needed to create multiple poses for the same character. I aimed to showcase the character in at least four different poses, along with additional props, to highlight various aspects of the design.

I began my search for auto rigs on YouTube and stumbled upon an incredibly detailed tutorial of Character Creator 4 on Michael Pavlovich’s channel. I highly recommend checking it out, as it enabled me to start working in CC4 in less than a full day.

Blockout in ZBrush

During the blockout stage, my primary focus is on resolving proportions. It’s much easier to address this early on rather than having to make adjustments later with multiple subtools. Following this, I block out the main shapes of the character and its clothing, ensuring that the silhouette works effectively. The meshes may appear messy at this stage, but they serve as a base for the subsequent step, which involves retopology in Blender.

Timelapse of the blockout stages.

Retopology with Blender Add-on

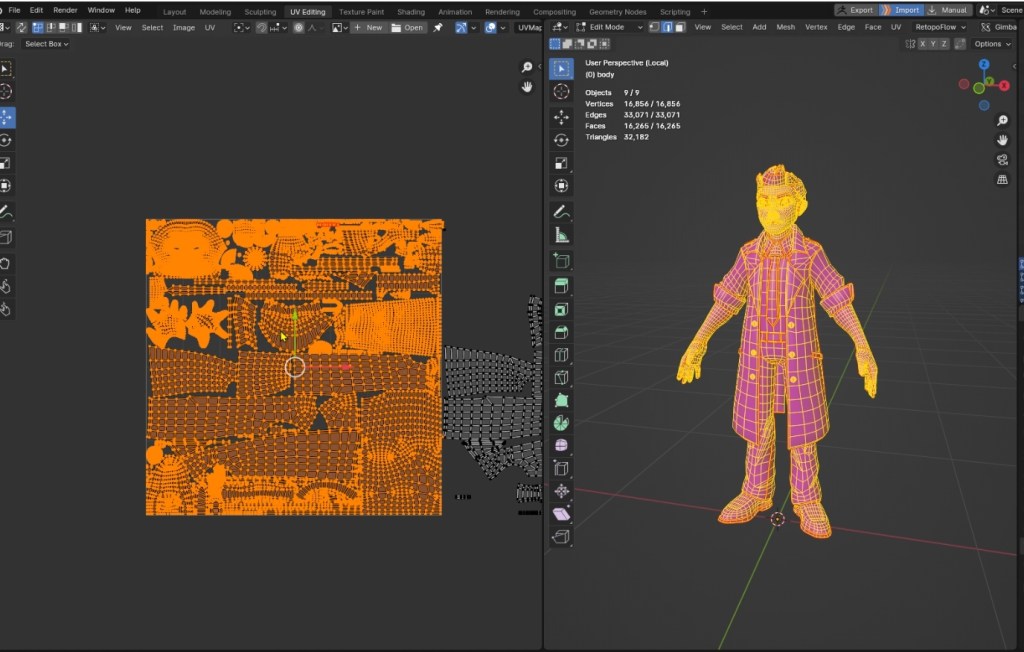
I’ve been using Blender for about three years now, and I’ve been thoroughly enjoying my time with it. I’d like to recommend a paid add-on called RetopoFlow for anyone interested. While I used to do retopology in 3ds Max or TopoGun, I always aim to consolidate my workflow within a single software. 

I’ve found Blender to be incredibly powerful for retopology tasks, including making seams and unwrapping UVs. Investing in RetopoFlow has significantly sped up my workflow and streamlined my retopology process.

Using RetopoFlow addon in Blender.

UVing with Blender Addon

Another paid Blender add-on that I absolutely love is UV Packmaster. It automates UV mapping in an incredibly organized manner, unlike anything I’ve seen before, and it’s remarkably fast. 

What’s more, it allows you to seamlessly transition between manually organizing your UVs and automatically filling in gaps with less important shells. This significantly reduces the time spent on UV mapping and streamlines your workflow. Additionally, it includes quadify tools, making it particularly effective for cylindrical objects, belts, straps, or even thin and straight UV shells.

Returning to ZBrush with the new topology geometry, I utilized it as a base mesh to create the high-poly model. Given that the character features simplified information and a stylized design, this process was expedited.

Texturing

I won’t delve into every layer of my textures. Instead, I’ll emphasize the importance of grayscale in stylized characters. In Substance Painter, you can easily access this feature by clicking on the Display Settings icon, enabling post effects, and accessing color correction. Set the saturation slider to 0, allowing you to consistently monitor your values while creating the texture.

In my endeavor to emulate Constantine within the context of an existing game, I thoroughly examined grayscale and color variations. This involved capturing screenshots of my character and creating mockups in Photoshop using screenshots from the game. 

Many games offer media kits available for download on their websites, which provided me with additional resources for testing Constantine in various scenarios. This process was instrumental in evaluating how effectively my character matched the color values of the game.

How I check my grayscale values in Substance Painter.

Furthermore, I highly recommend studying texture references directly from the game itself. Analyze how skin textures are painted, observe the colors of materials like leather, and note any presence of color gradients on characters. These insights can greatly inform your own character design process.

Props

For the props, Francisco created a sheet with action poses for movesets. I selected several poses and allotted myself one full day to work on each. I applied the same grayscale and mockup testing approach to these assets to ensure they balanced well with the character.

Rigging Before Posing Character

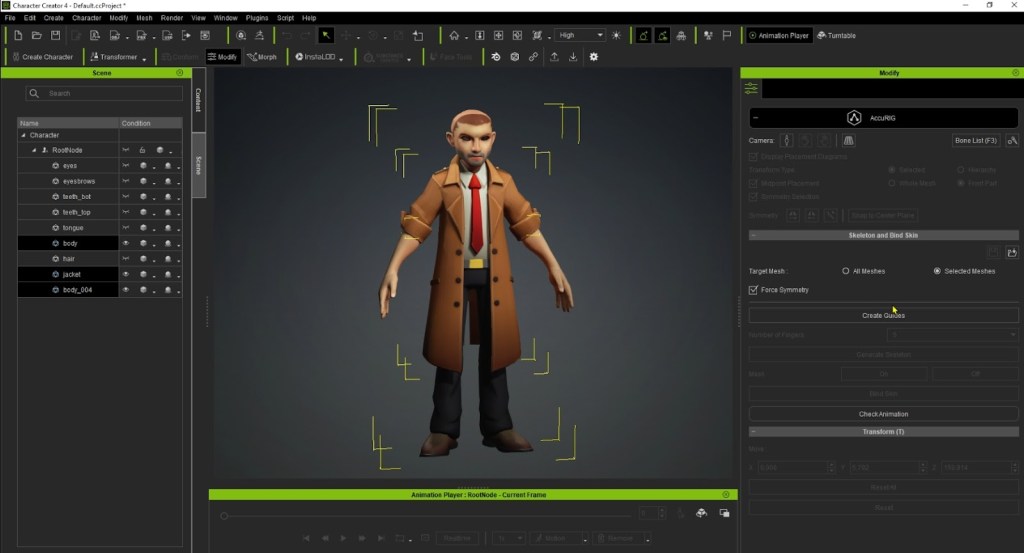
To begin, I imported my FBX character into CC4. When rigging, I selectively choose the parts that I wanted to be influenced by the bones. Therefore, elements such as hair, eyes, and teeth were temporarily hidden.

Immediately, you can recognize the power of rigging in CC4. The AccuRIG grants you the ability to edit every aspect and provides image references before you press the auto-generate button. As someone not well-versed in professional rigging, this feature saved me from a lot of headaches.

After auto-rigging, there are plenty of animations you can use to test your character and ensure everything is working correctly.

Posing Characters in Character Creator

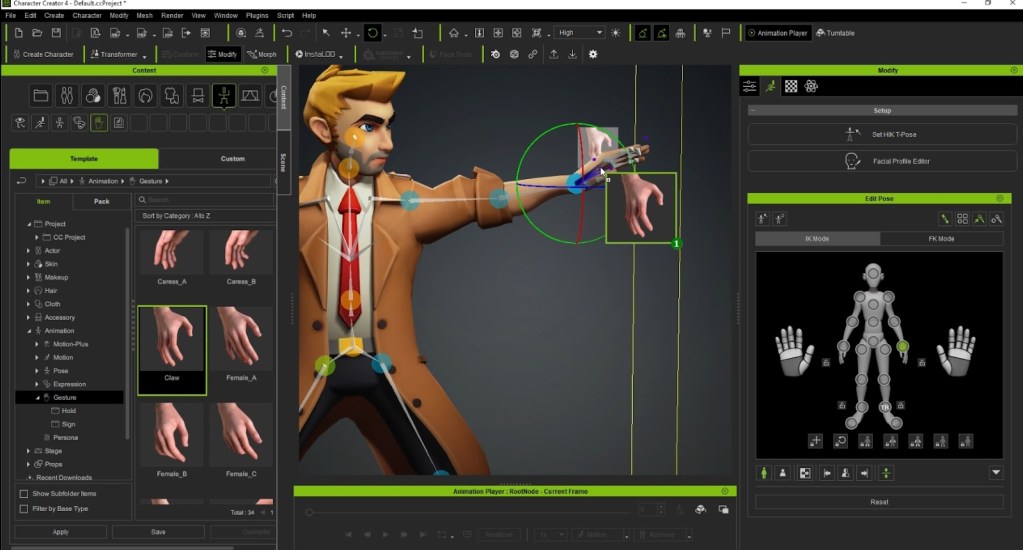
In this article, I utilized one of the moves that Francisco drew. You can either start posing from scratch, as I did, or use an animation and pause at a suitable keyframe to begin from there.
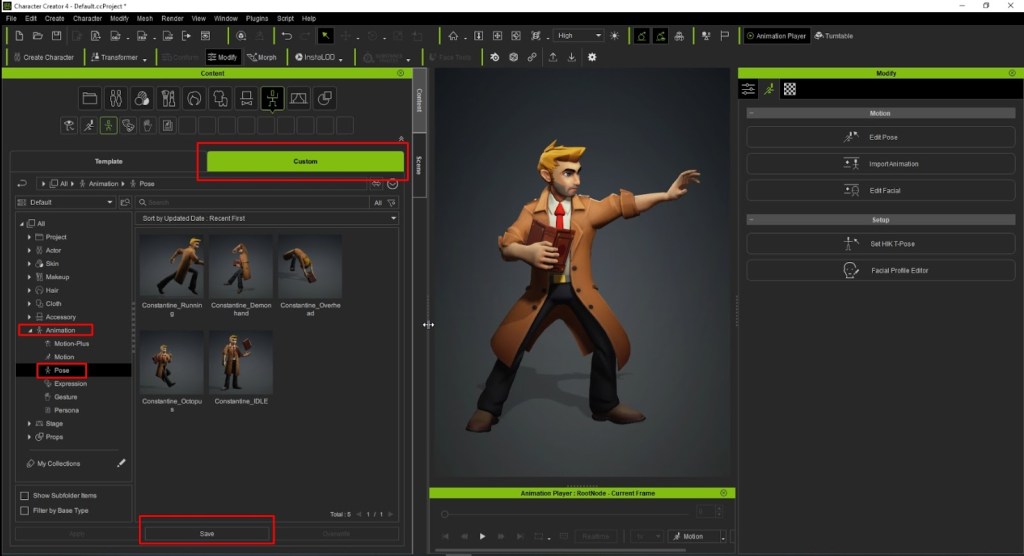
Posing the character inside CC4.

One of my favorite features of CC4 is the ability to apply presets of hand gestures. This feature saves a ton of guesswork and prevents your character’s hands from looking broken. 

Simply click, drag, and paste the hand gesture you want to apply. Additionally, the hands controllers on the right side of the screen are game-changing. You can click, hold, and drag the palm of the hand to open or close it. It almost feels like cheating because of how effective this feature is for posing your character

Another fantastic feature of CC4 is the ability to save your poses as presets. This means that I’ve saved previous poses, and if I wanted, I could easily revert to them and make adjustments. All you have to do is save the pose, and then double-click to apply it to your characters. This functionality adds a layer of flexibility and convenience to the posing process in CC4.

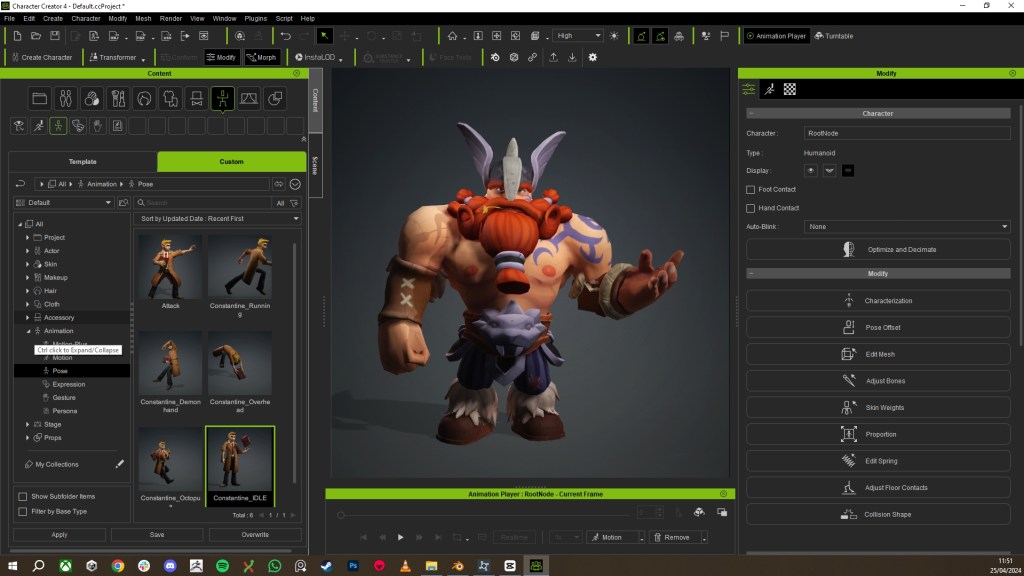
These poses can be applied to other characters too. The presets are compatible with characters from CC4, allowing you to create poses, save them as presets, and apply them to your characters later on. This flexibility enhances the usability of the poses and streamlines the posing process for various character designs.

Refining Poses in Blender

After achieving a satisfactory auto rigging and initial pose, I imported my model back into Blender to start refining it. First, I painted out some weight influences from bones that I didn’t want affecting certain areas, like the head, and then adjusted the arms slightly.

Creating a character that interacts with a prop is always a challenge, so I spent extra time refining the angles of the book and the hands. Integrating CC4 into my pipeline proved to be worth it, as it streamlined the process. We’ve all seen beautiful artwork pieces in artist portfolios that are only shown in T or A poses, often because posing characters can be daunting and time-consuming. With CC4, I found it much easier to achieve dynamic poses.

For the clothes, I used sculpting brushes in Blender. The main brushes I used were Grab, Smooth, Pose, and Mask. I separated small objects like buttons and the tie to prevent distortion but ended up stretching the buttons slightly to add a dynamic feel to the gesture.
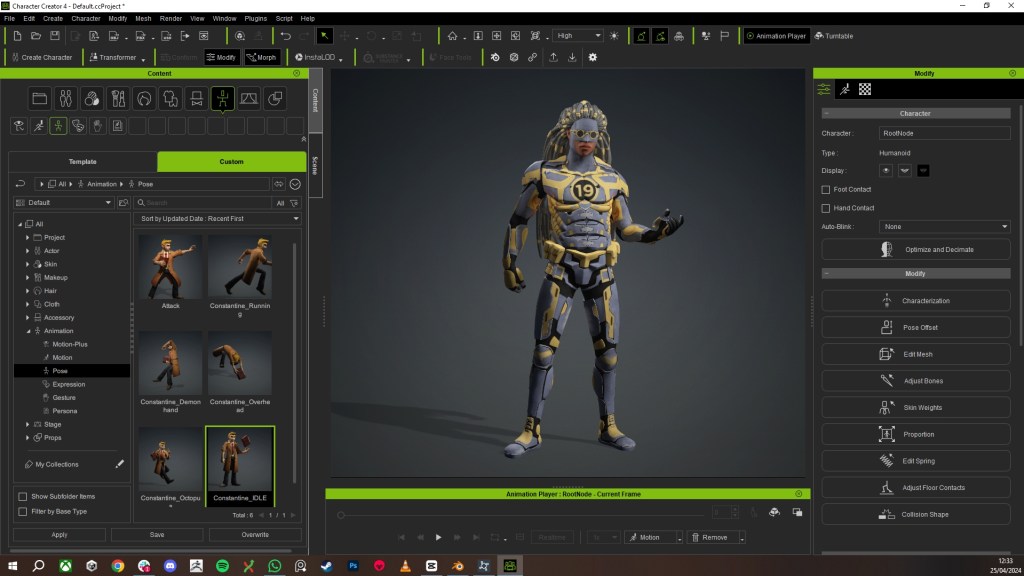
It’s important to view your character from all angles, but I focused primarily on the angle that Constantine would be viewed from in a 3D fighting game.
Conclusion

All poses were created starting in CC4. For a more in-depth look at my process, I’ve created a video detailing the entire creation journey.

That wraps up my overview of creating this character. I want to extend my gratitude to Reallusion for recognizing my work and providing me with the opportunity to showcase my workflow with CC4.

A special thanks goes to Michael Pavlovich for his outstanding tutorial videos on how to use CC4. They were incredibly helpful and made the final steps of my personal project much easier to complete.

Related Posts

————————————————————————————————————————————————————————————

The original article was written by Renan Fabricio and also featured on BlenderNation.

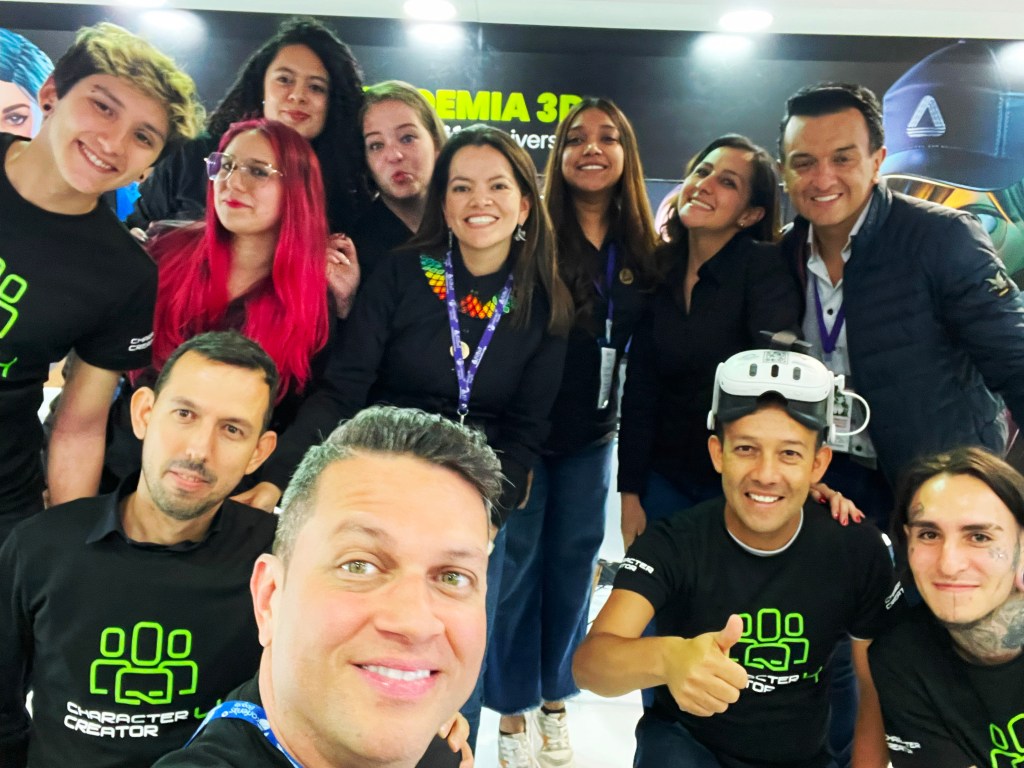
Reallusion at 2024 FILBO Colombia with Libel Academy

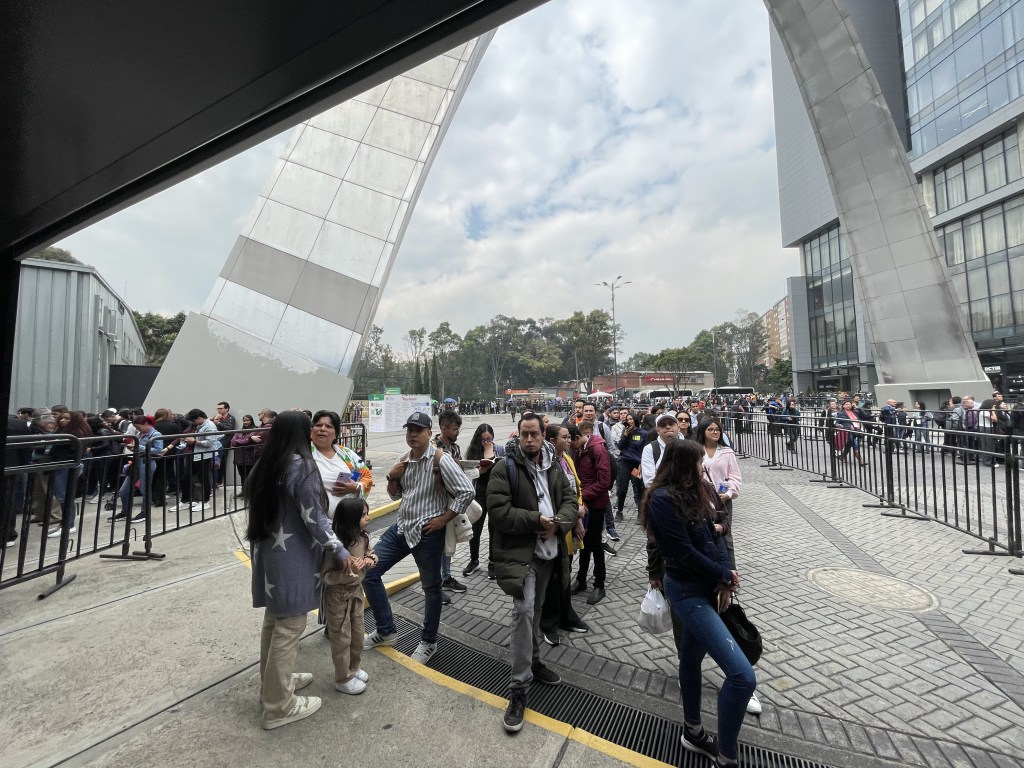
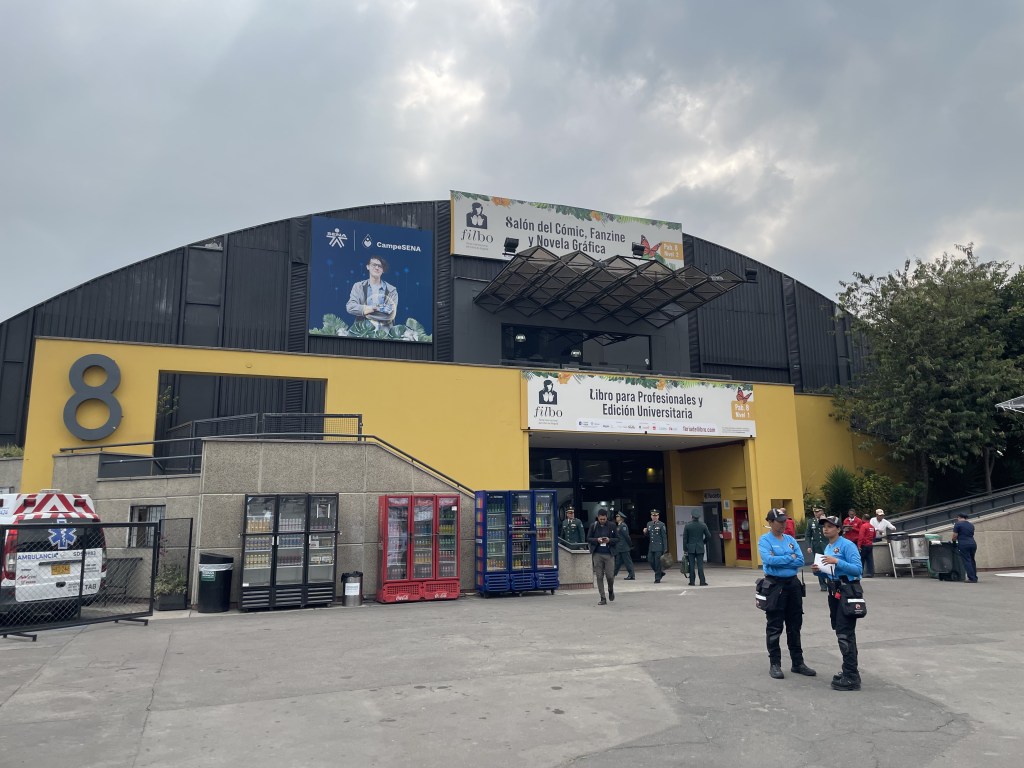
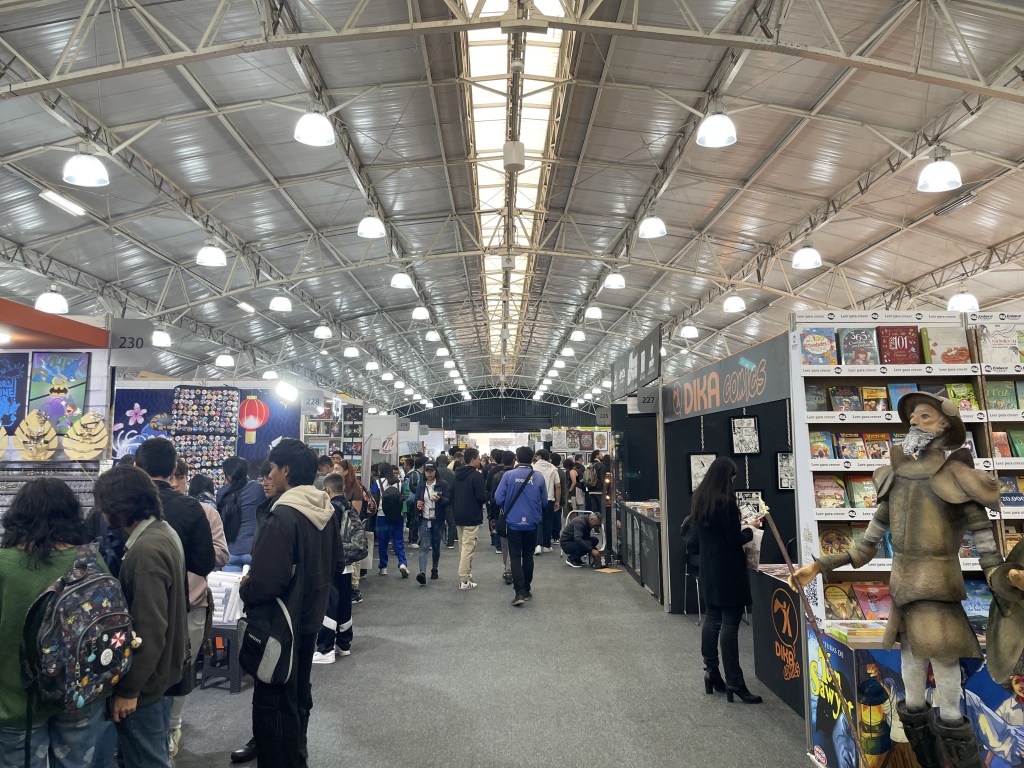
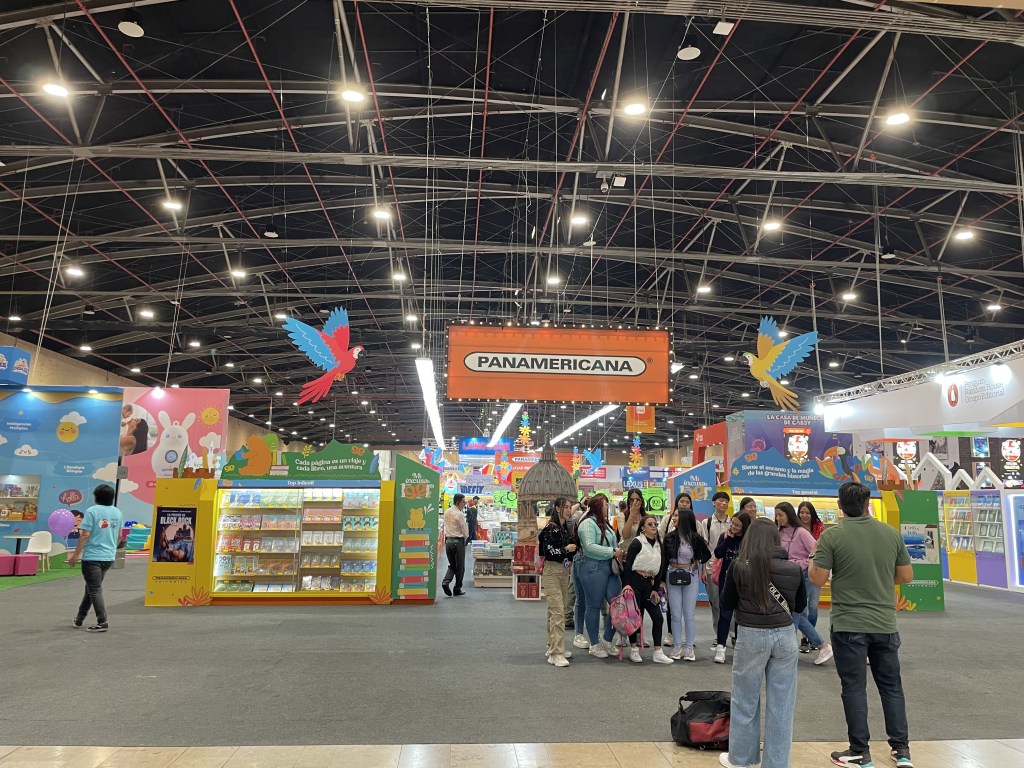
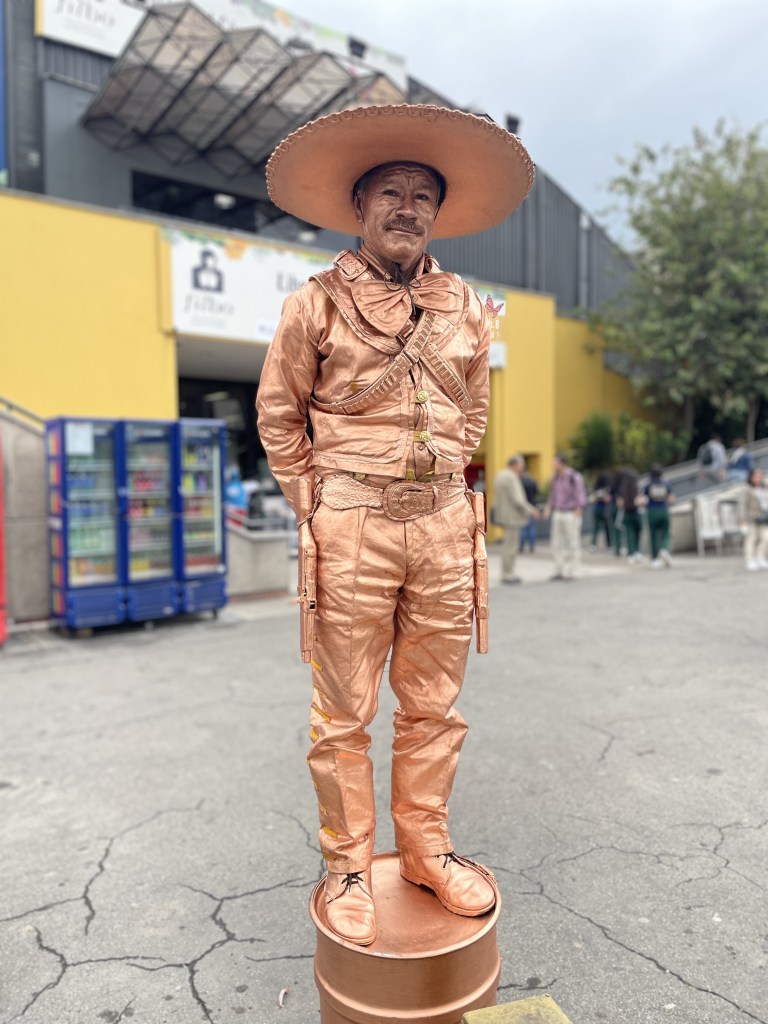
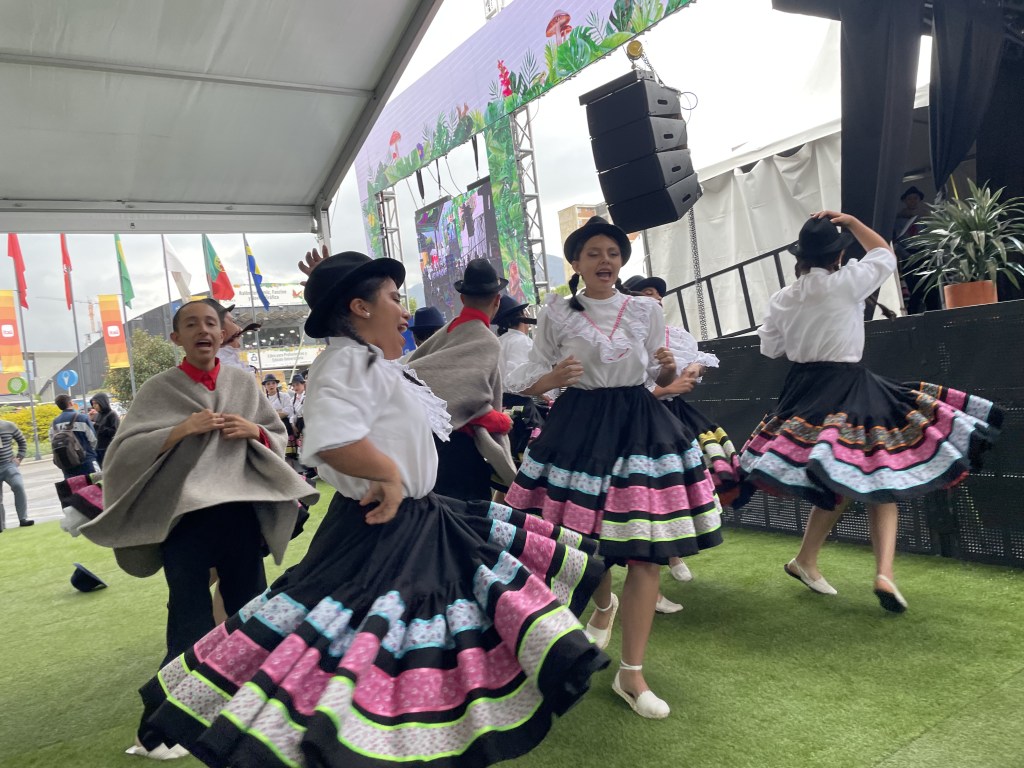
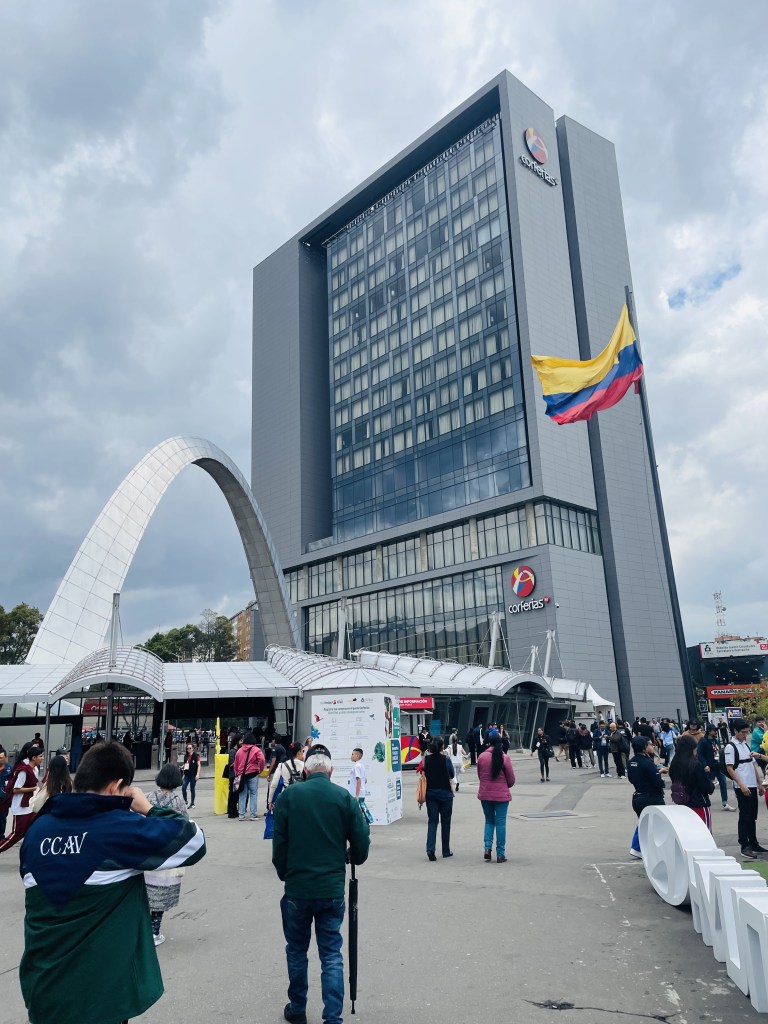
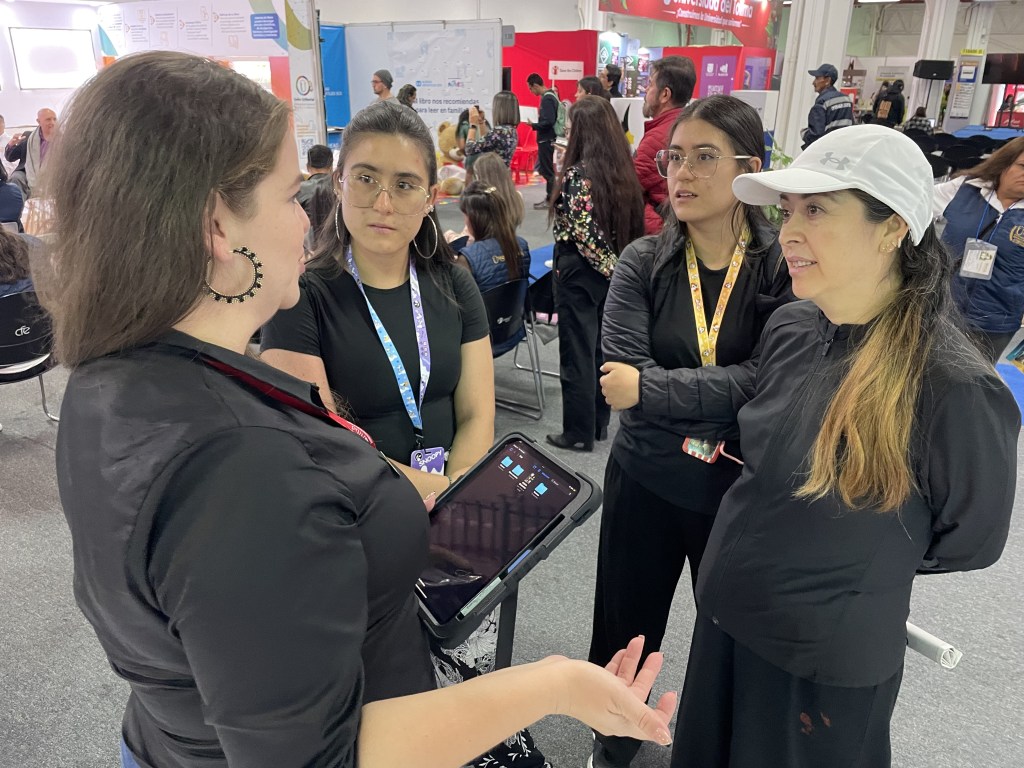
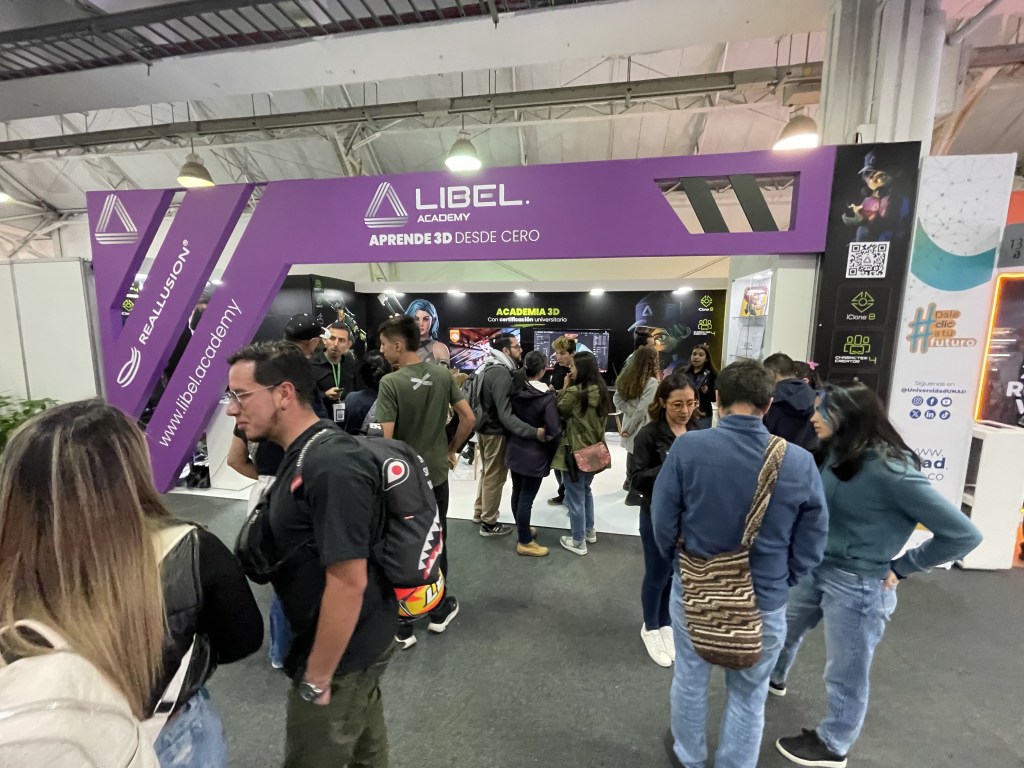
The 2024 International Book Fair (FILBO) in Bogota, Colombia captivated over 600,000 attendees, immersing them in a vibrant celebration of literature and the written word. Spanning two dynamic weeks, FILBO served as a nexus for authors, exhibitors, and bibliophiles alike, offering a rich tapestry of cultural engagement. From enlightening talks to hands-on workshops, from enriching training sessions to captivating book presentations, the fair was an unmissable gathering for all lovers of literary arts.

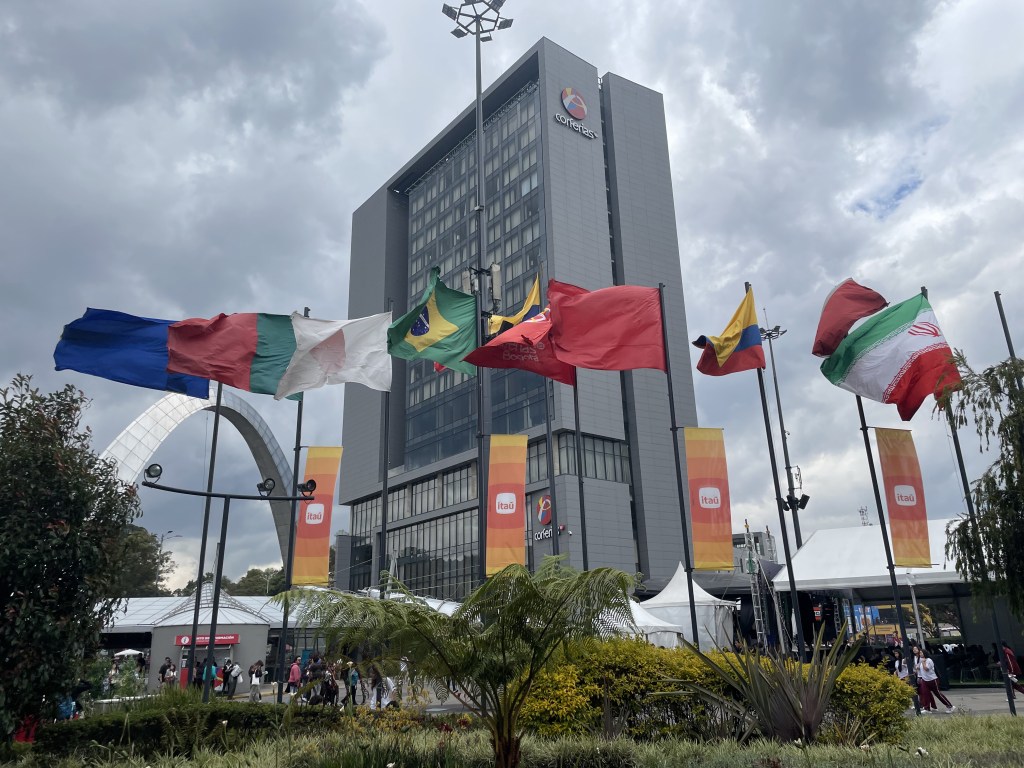
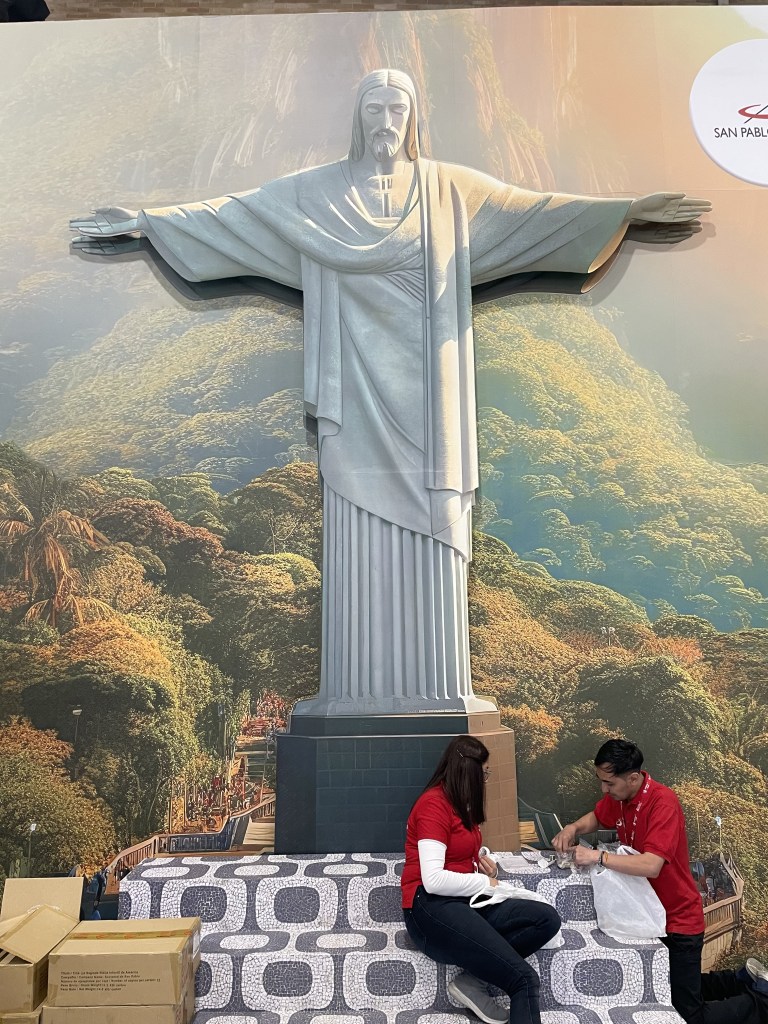
An unforgettable highlight of this year’s FILBO was the esteemed presence of Brazil as the special guest country, lending an extra layer of cultural depth and diversity to the event. The eminent Brazilian president, Lula Da Silva, graced the occasion with his presence, inaugurating the festivities and adding his unique voice to the celebration of literature.

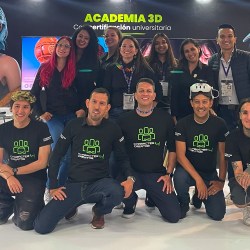
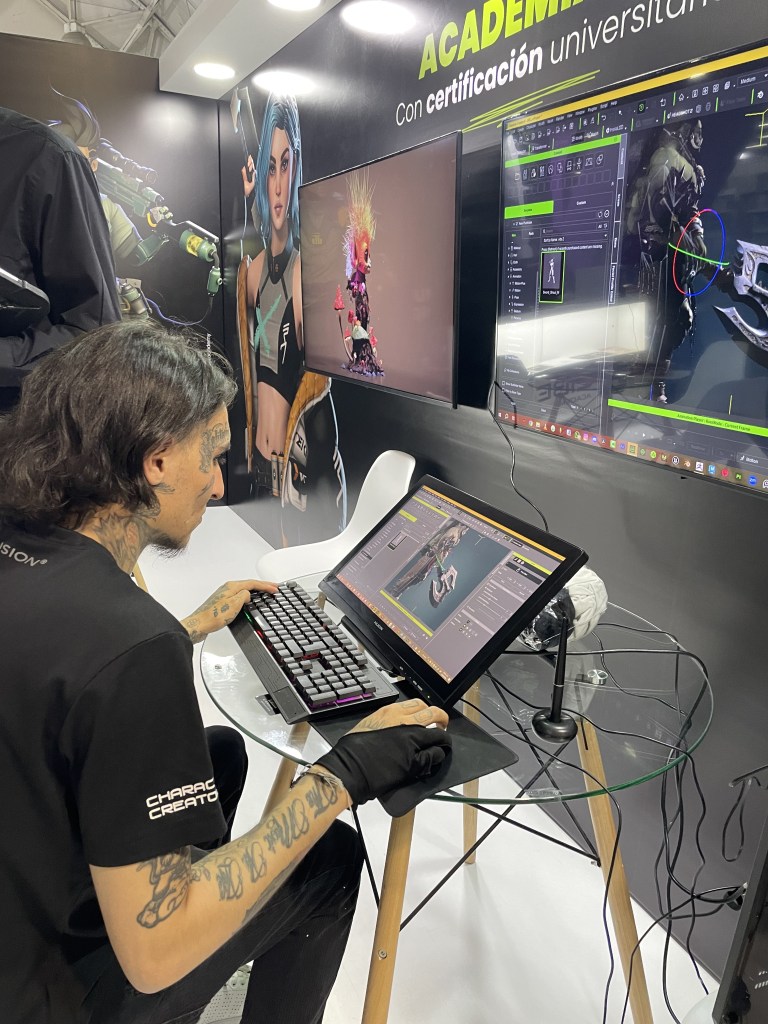
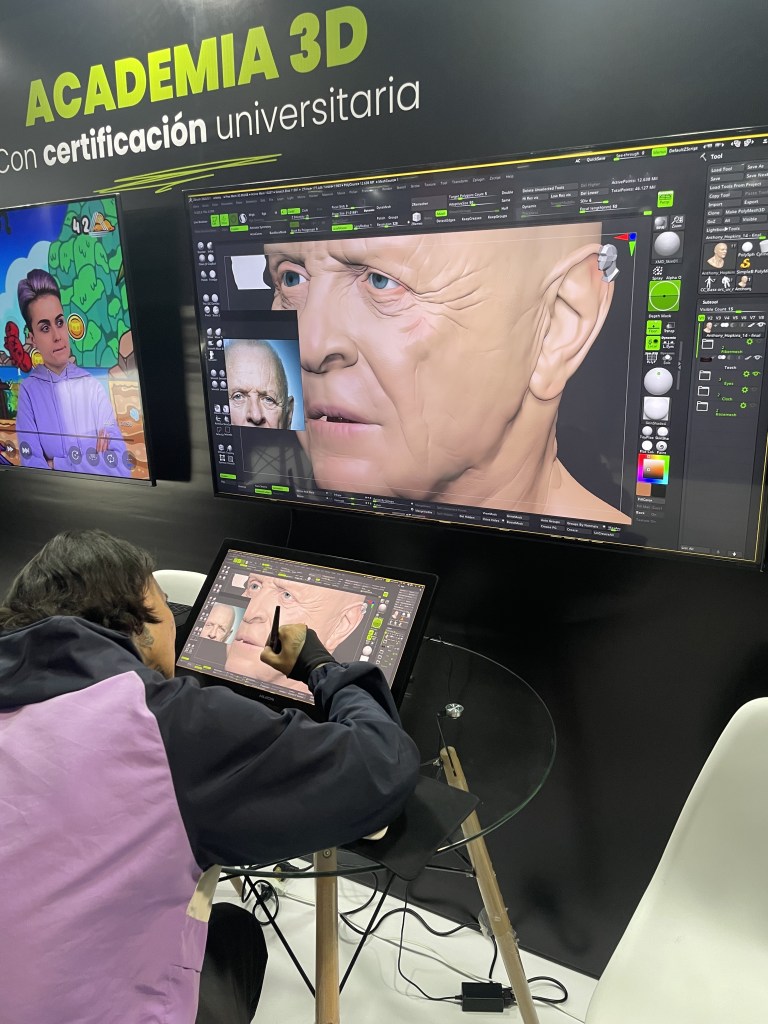
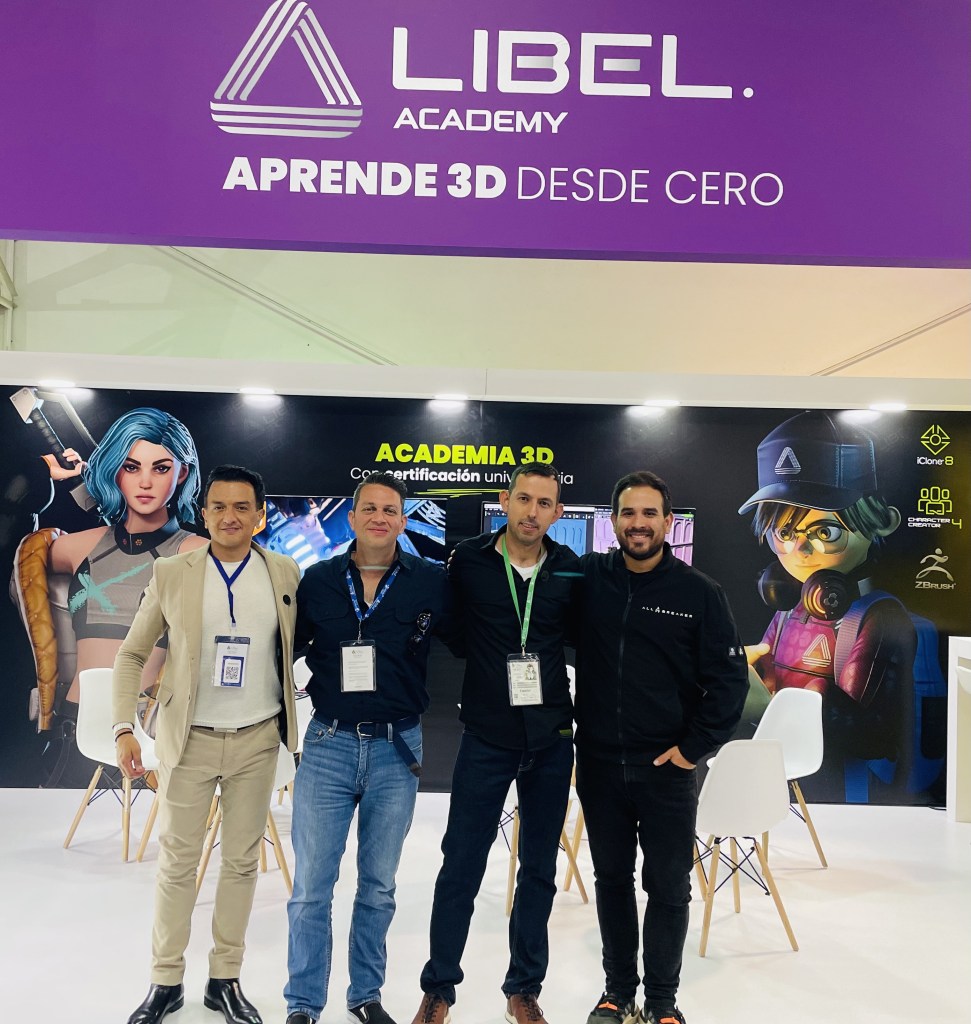
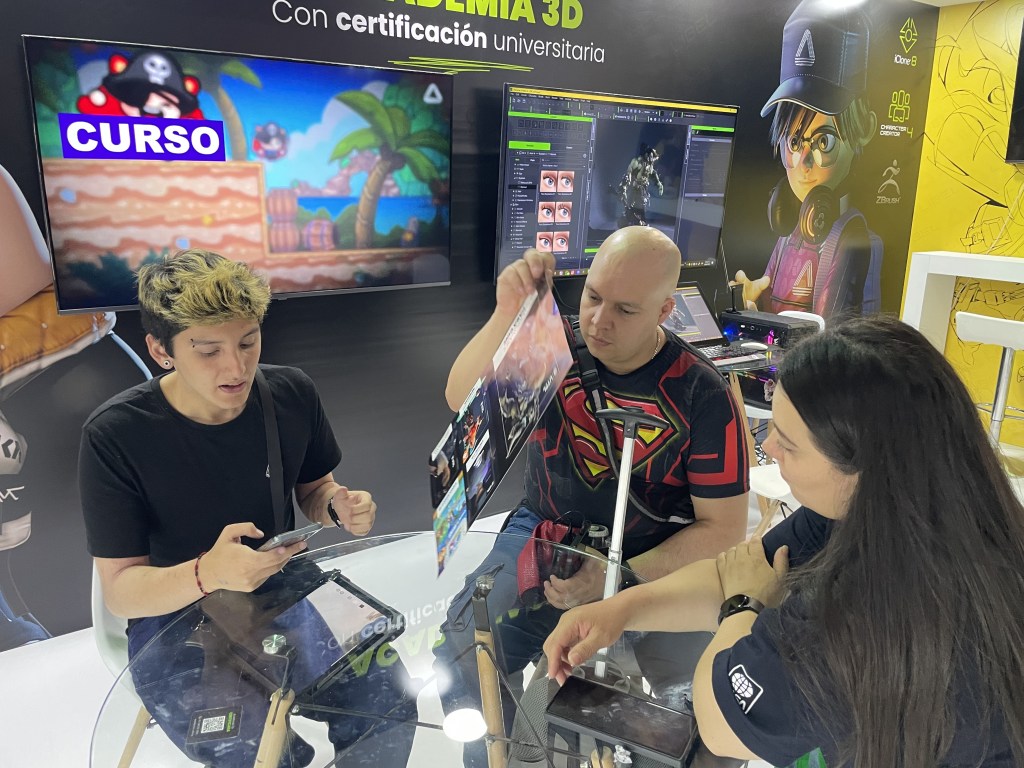
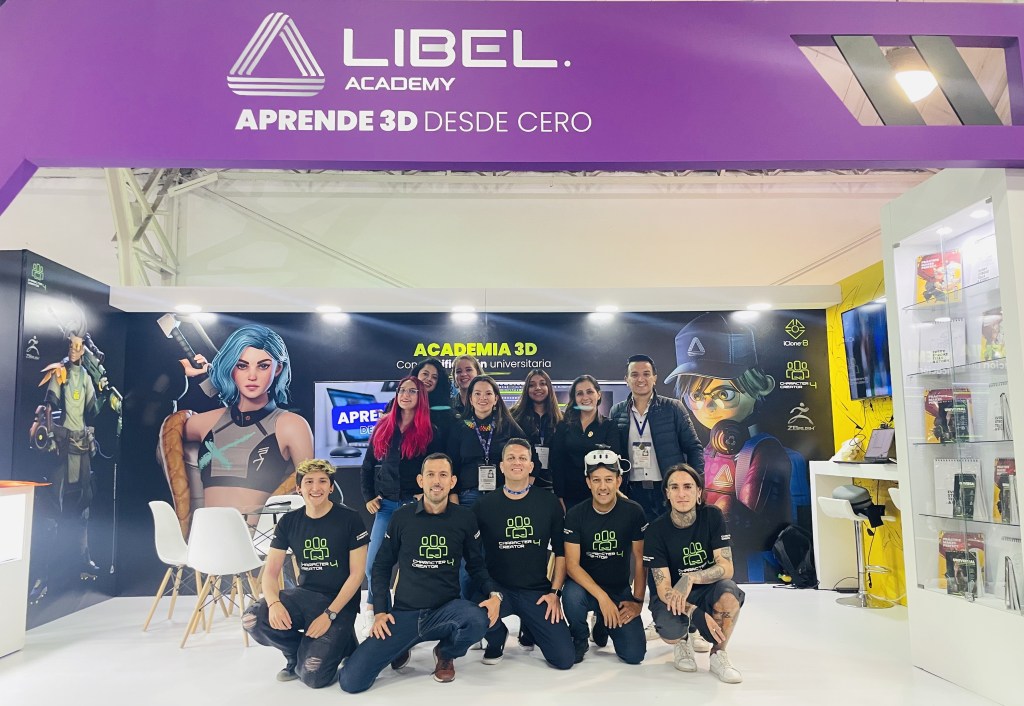
Moreover, the event witnessed a groundbreaking collaboration between Reallusion and Libel Academy. Together, they introduced the latest advancements in digital art and animation through cutting-edge Master courses featuring ZBrush and Character Creator. This collaboration underscored Reallusion’s steadfast dedication to the Latin American market, reaffirming its commitment to nurturing innovation and creativity in the region’s burgeoning digital art scene.

FILBO 2024 not only illuminated the power of literature to unite cultures but also showcased the boundless possibilities of digital creativity, leaving an indelible mark on all who attended.

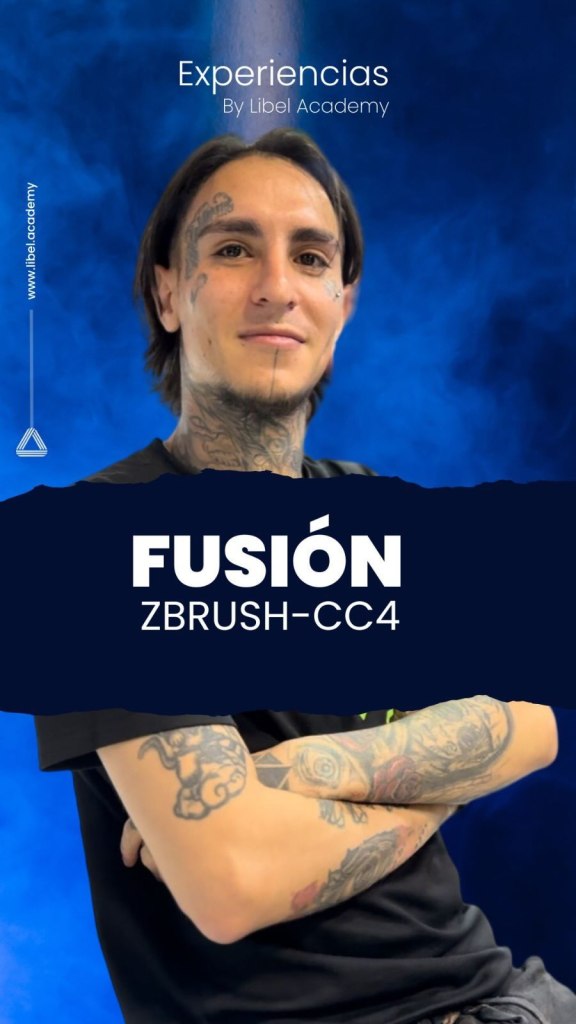
At the event, Libel Academy unveiled its newest Master Course featuring ZBrush + Character Creator 4, a collaboration certified by the Ecuadorian UTPL University (Private Technical University of Loja). Renowned for its expertise in digital art and animation, Libel Academy showcased an array of comprehensive Master Course packages, each designed to elevate skills and proficiency in cutting-edge 3D software.

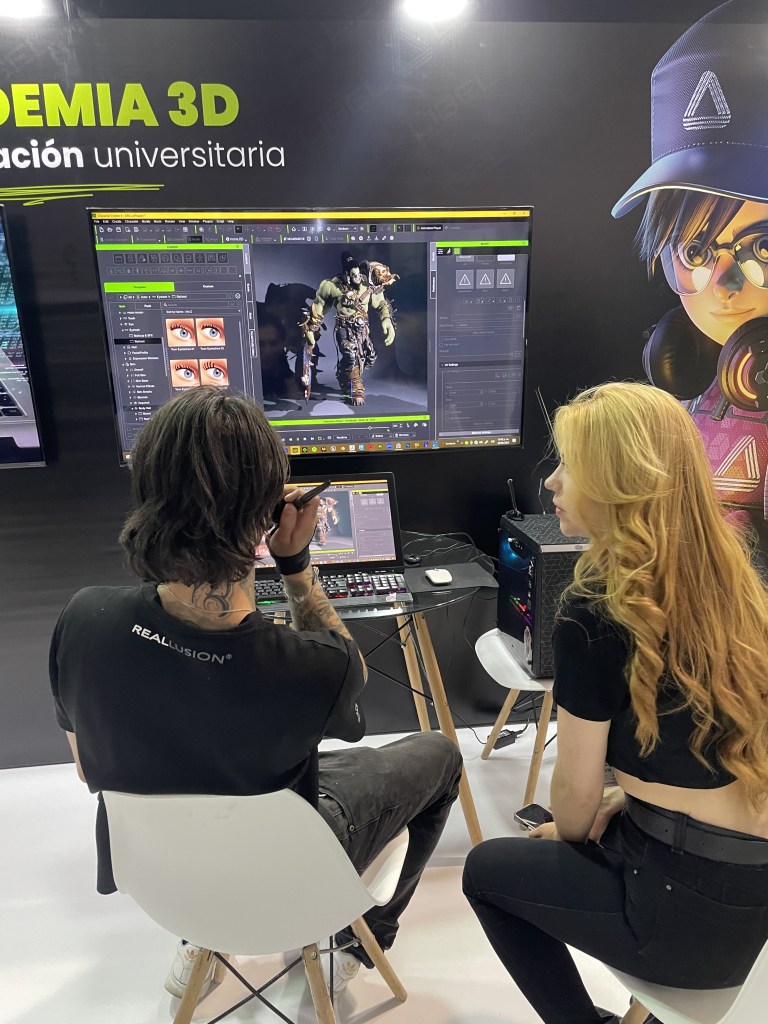
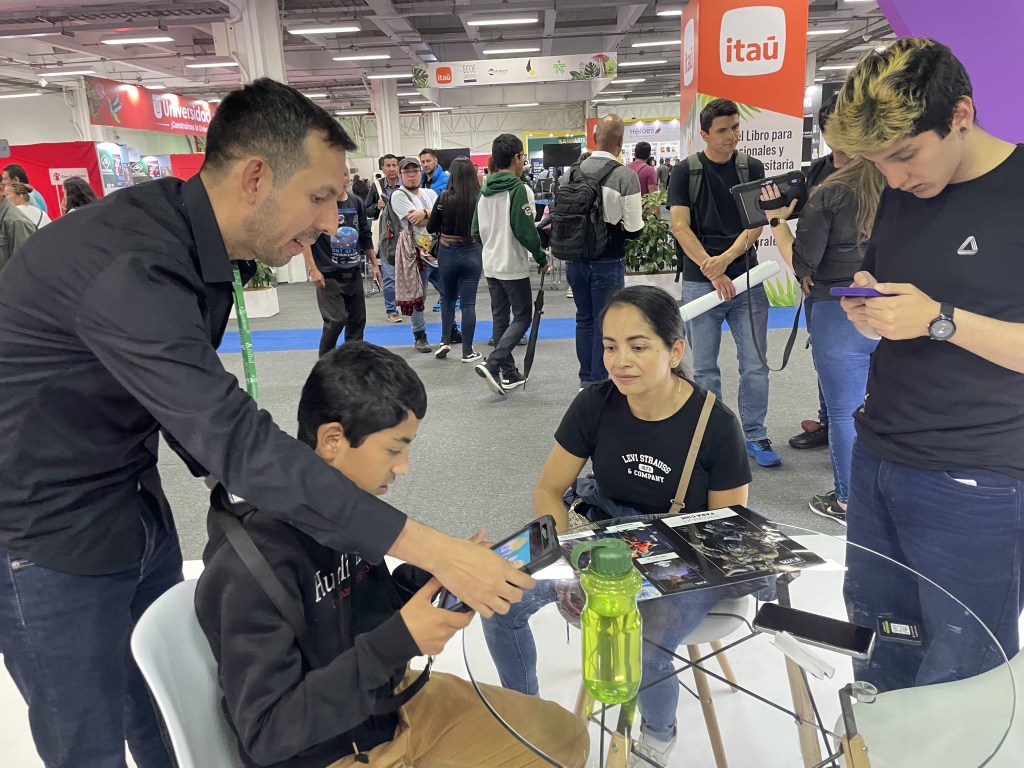
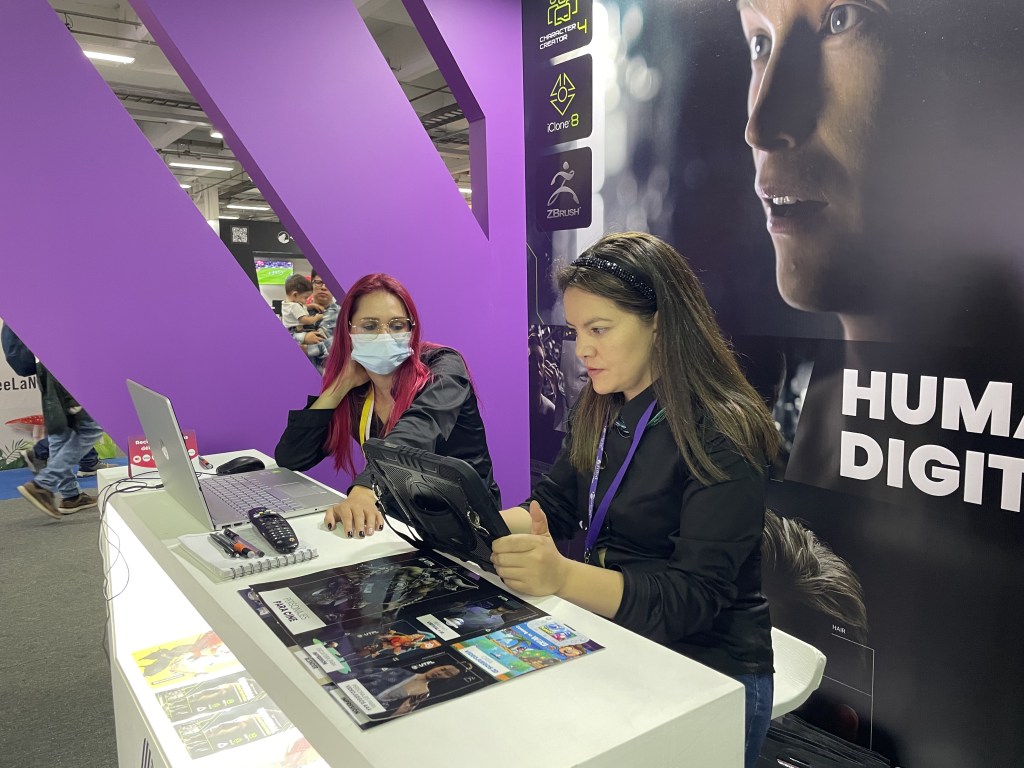
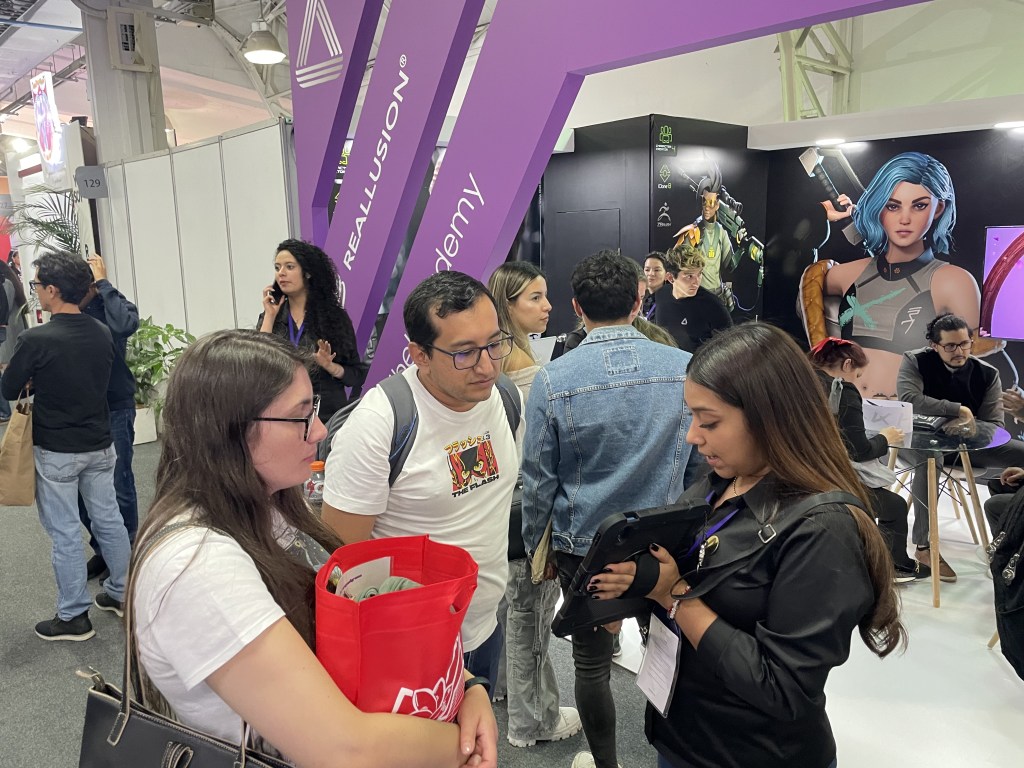
Attendees were treated to an immersive experience, delving into the intricacies of popular tools such as Character Creator, iClone, ZBrush, Blender, and more. From beginner fundamentals to advanced techniques, participants had the opportunity to explore the latest advancements in digital artistry firsthand. Expert instructors guided attendees through hands-on sessions, offering invaluable insights and fostering a dynamic learning environment.

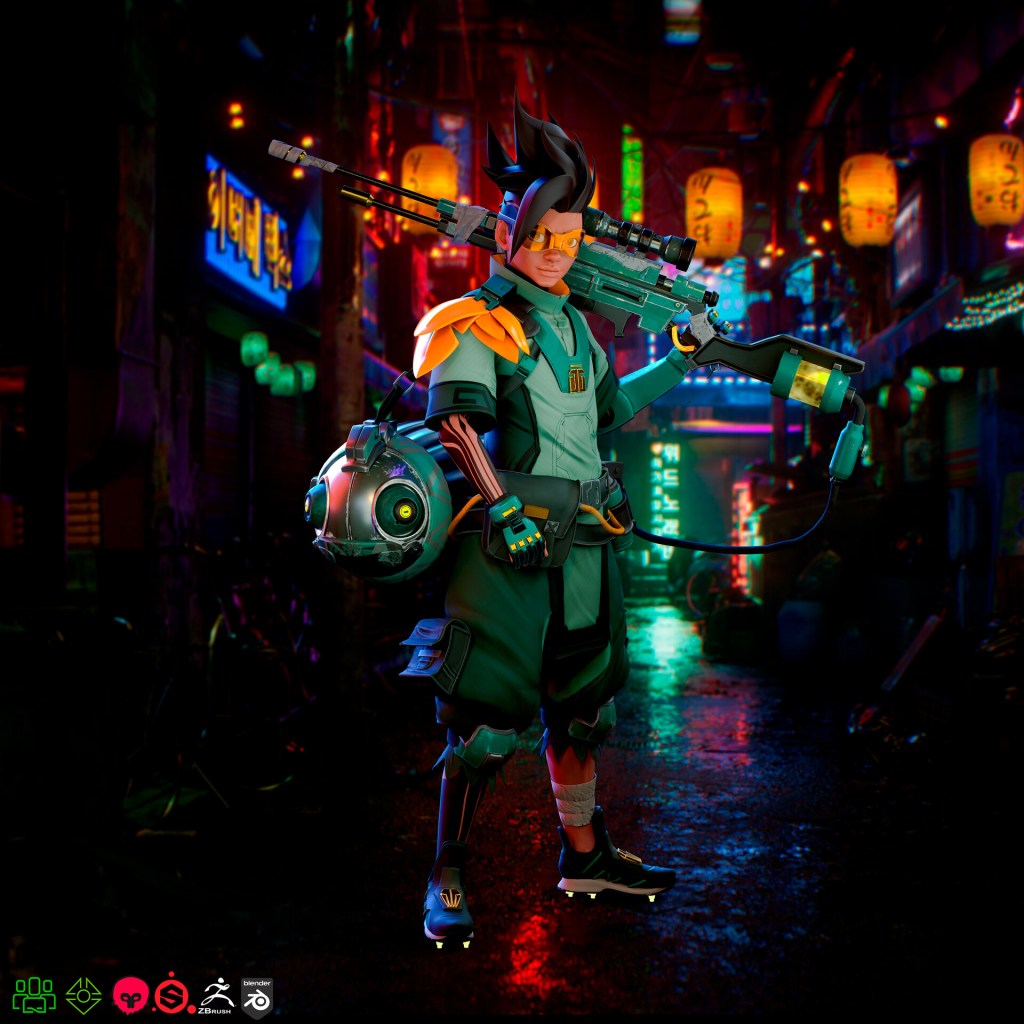
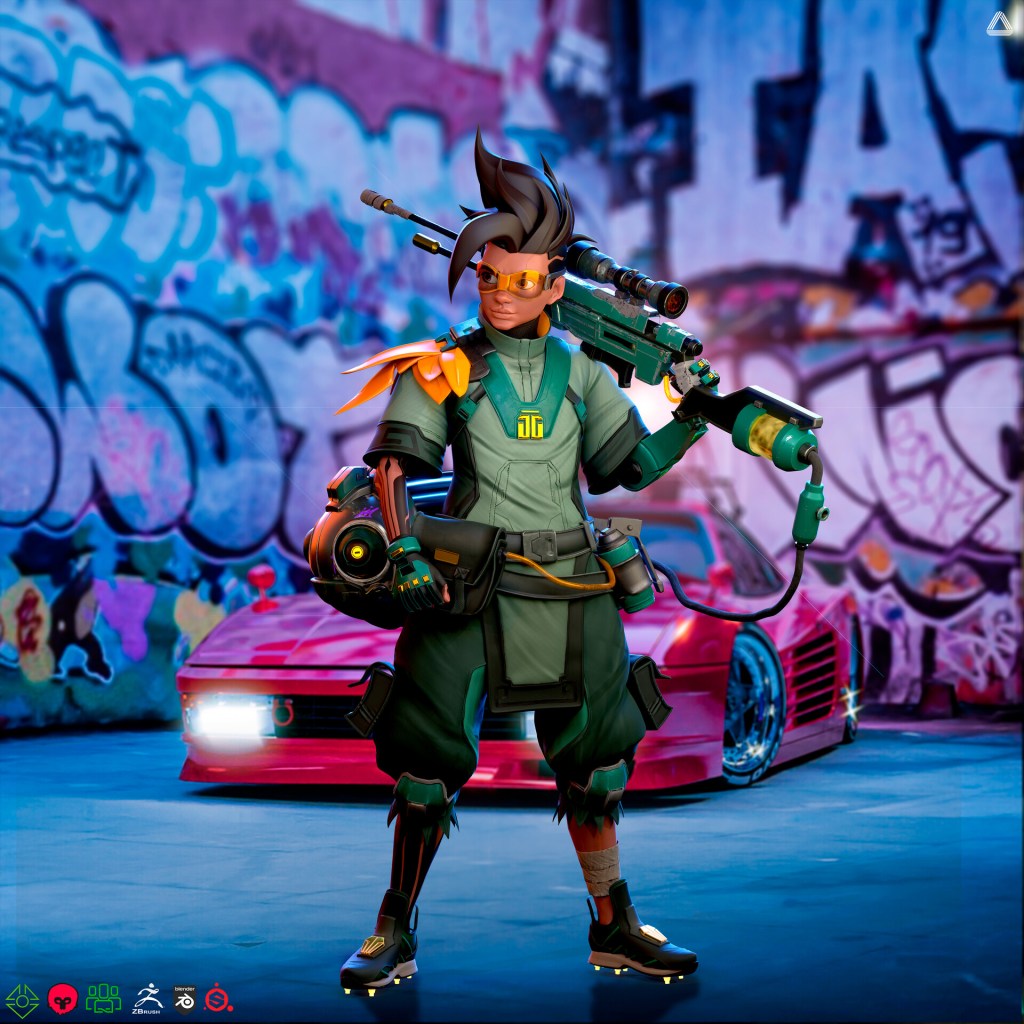
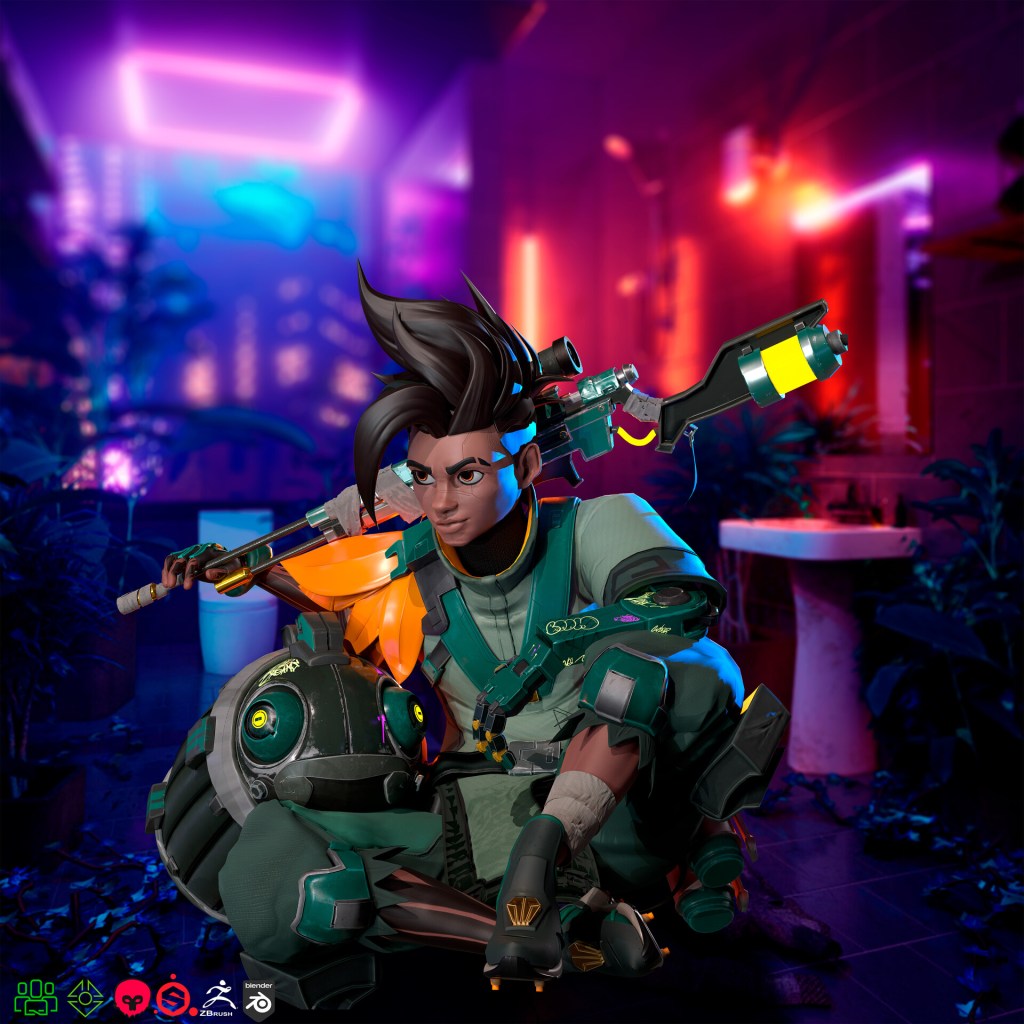
A standout moment at the event was the introduction of Libel Academy’s newest Master Course, crafted by the skilled hands of Duai Sebastian, a distinguished Colombian character artist renowned for his expertise in Blender, ZBrush, Character Creator, and iClone. Duai’s masterful creation, the ZBrush + CC4 course, centered around his CyberMaya character, represents a pinnacle of digital artistry.

Attendees were captivated by Duai’s live demonstrations, where he unveiled the intricate process behind character creation and repurposing using ZBrush with Character Creator. His expertise brought to life lifelike and dynamic characters, showcasing the boundless potential of these tools in the hands of a master craftsman.

Duai Sebastian’s collaboration with Libel Academy marks a significant milestone, reaffirming the institution’s commitment to delivering top-tier education in digital arts.

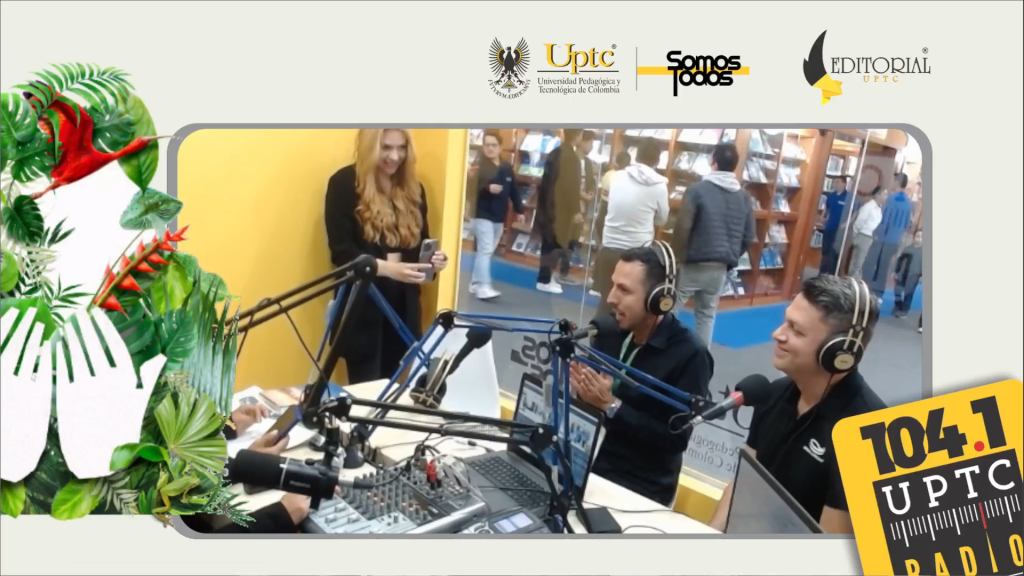
During the 2024 Bogotá Book Fair, Enoc Burgos, Reallusion’s Marketing Director, and Gilberto Funez Diaz, Libel Academy’s Managing Director, were invited for a live interview by UTPC University Radio. During the event interview, they discussed Reallusion’s real-time technology and its alliance with Libel Academy’s certified Master Courses.

They shared with audiences how this partnership aims to make modern animation technology accessible to everyone, including Colombian universities looking to modernize their curriculums with faster and more efficient tools compared to traditional, expensive animation methods.

Amidst the bustling ambiance of the 2024 Book Fair, a moment of celebration and recognition emerged as Libel Academy and Reallusion proudly showcased the remarkable achievements of two of their brightest talents. David Pinzón (International Project) and Esteban Cifuentes (Action Figures), distinguished students of Libel Academy, stood as shining examples of the transformative power of education and dedication.

Both individuals, fueled by their passion and armed with their Character Creator skills honed through Libel’s courses, have seamlessly translated theory into practice, contributing their expertise to real-world professional projects. Their success stories serve as testament to the efficacy of Libel Academy’s educational programs and reaffirm the institution’s commitment to nurturing the next generation of digital artists and innovators.

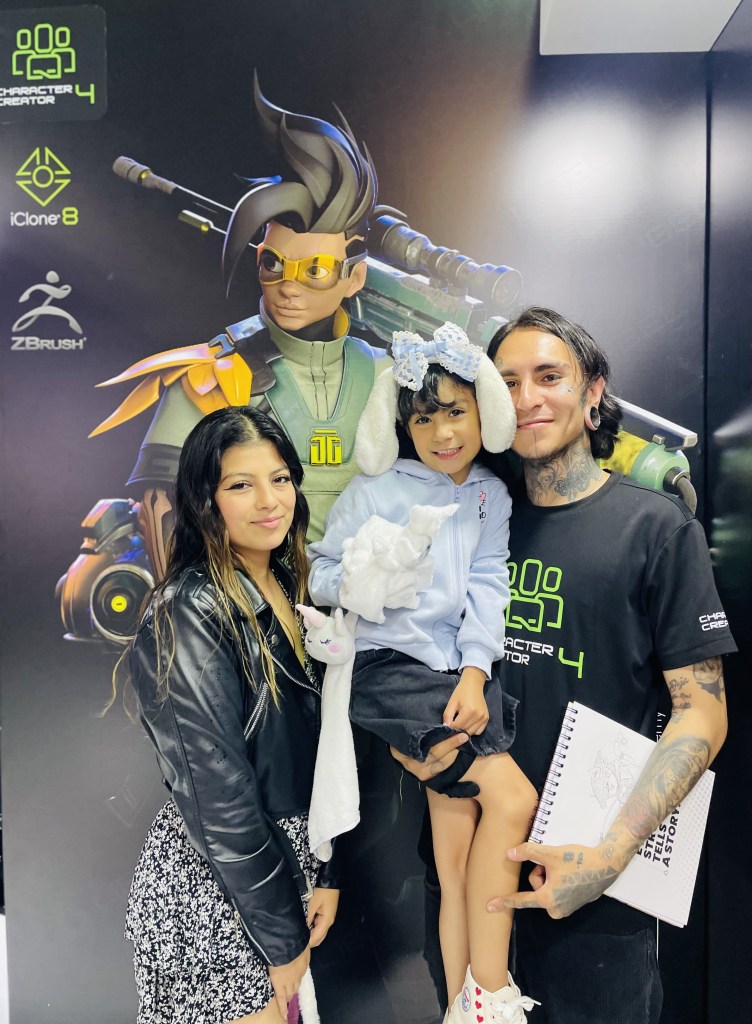
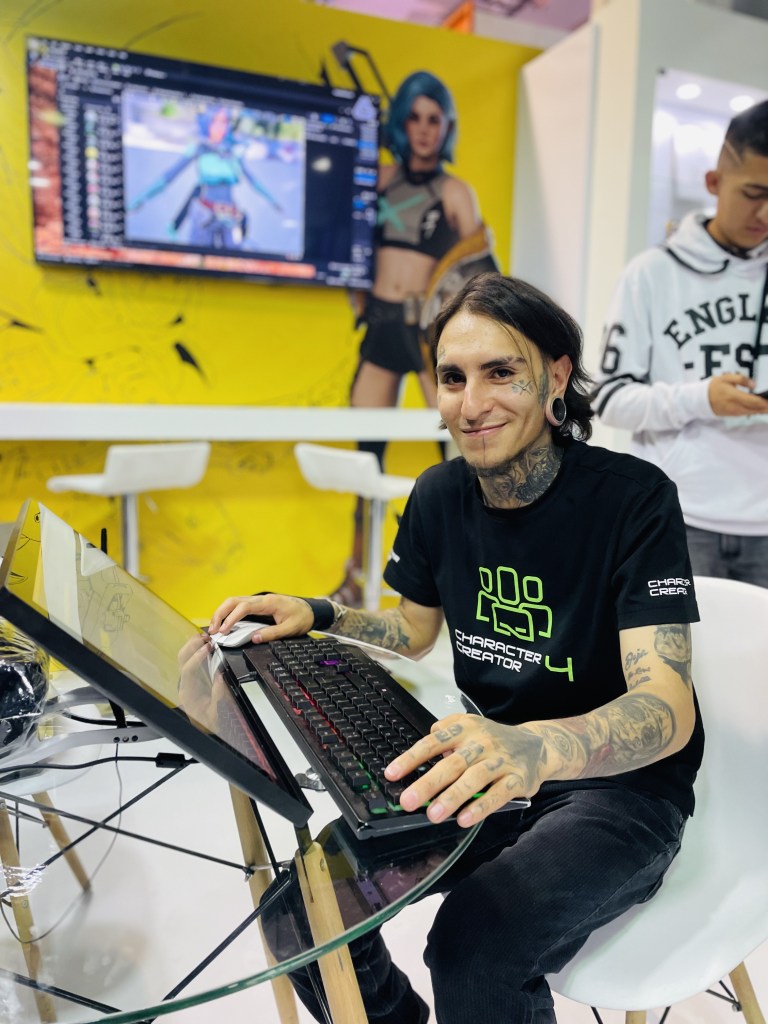
Wrapping up their dynamic presence at the 2024 International Book Fair in Bogotá, Reallusion and Libel Academy once again illuminated the event with their cutting-edge contributions to real-time animation technology. Serving as a hub for professionals, students, and enthusiasts alike, their booth buzzed with live demonstrations, immersive training sessions, and insightful personal interactions.

Attendees were not only treated to the latest advancements in real-time creation but also empowered to expand their knowledge, refine their skills, and forge meaningful connections. The unwavering dedication and collaborative spirit of the entire team at Libel Academy ensured that the event was a resounding success, setting the stage for even greater achievements in the future.

Related Post

African Tour: Director Dom Fred presents Reallusion Tools

African Tour: Director Dom Fred presents Reallusion  Tools
African Tour: Director Dom Fred presents Reallusion Tools

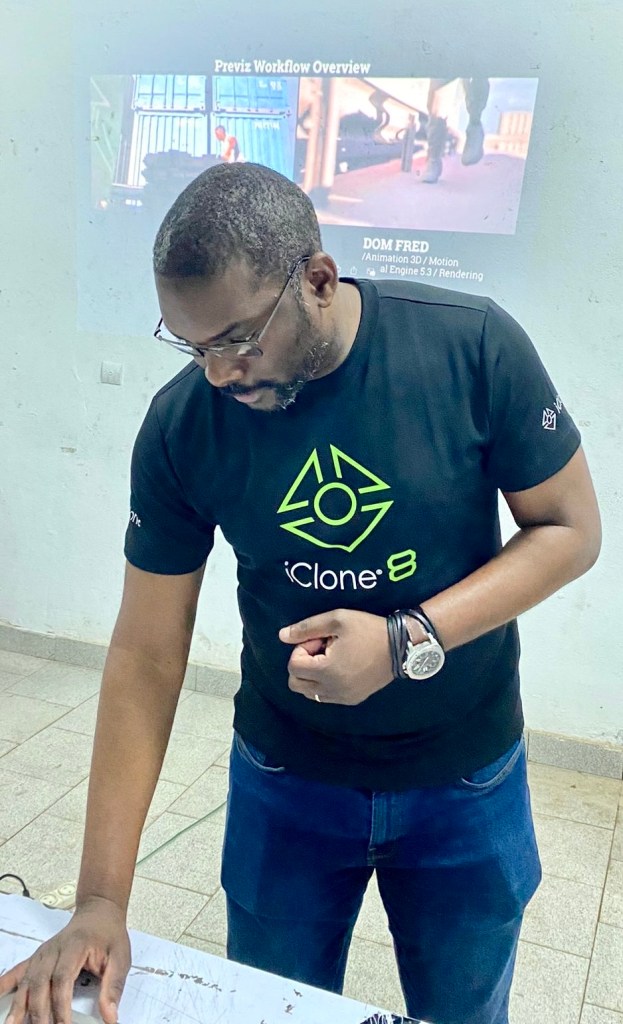
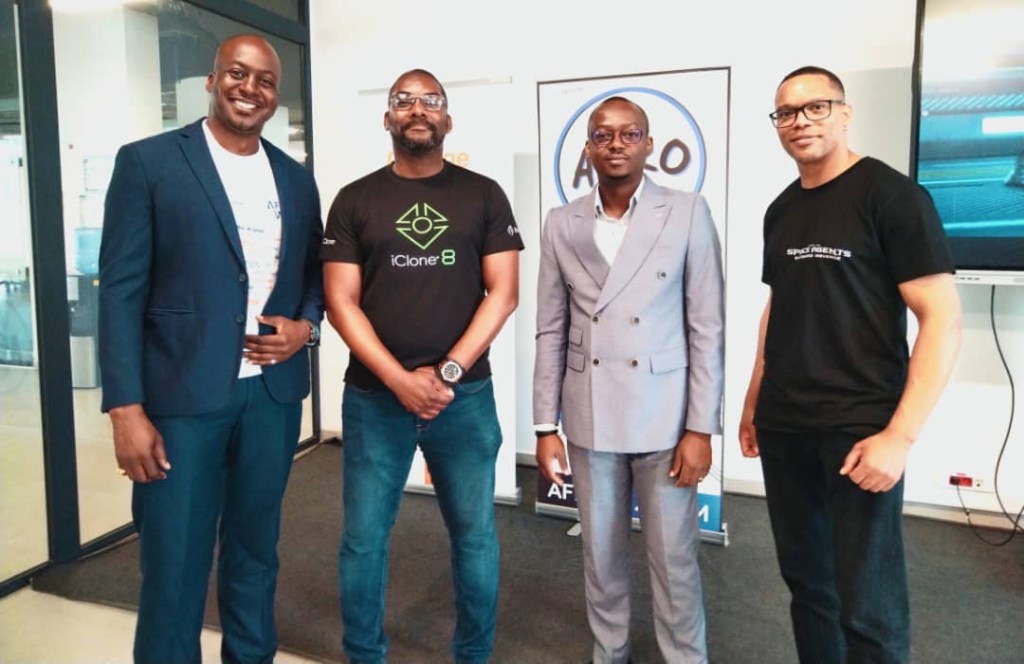
On an exclusive tour in Africa, specifically in Côte d’Ivoire, the African champion country of CAN 2023. Franco-Congolese director Dom Fred, director of the animated science fiction film Space Agents: The Mysterious Ax, and his collaborator Alick Macaire, screenwriter and co-producer, were invited by Nancy the General Director of Cinema Majestic CI.

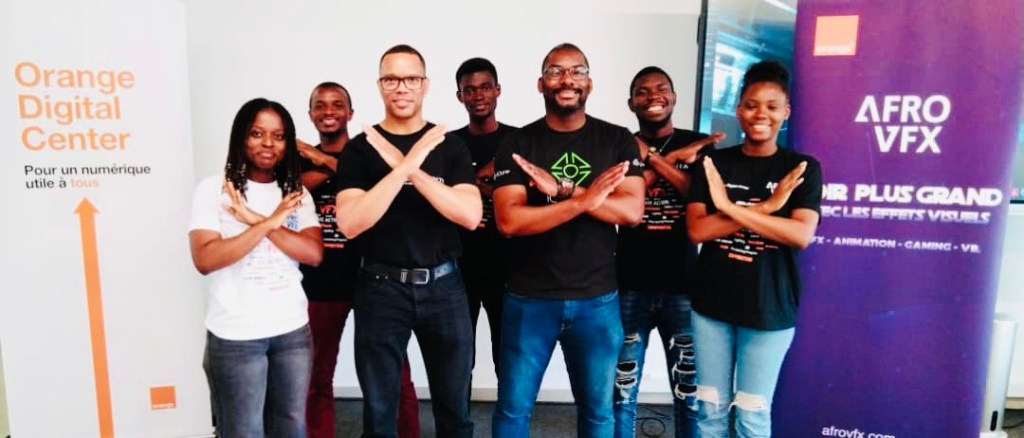
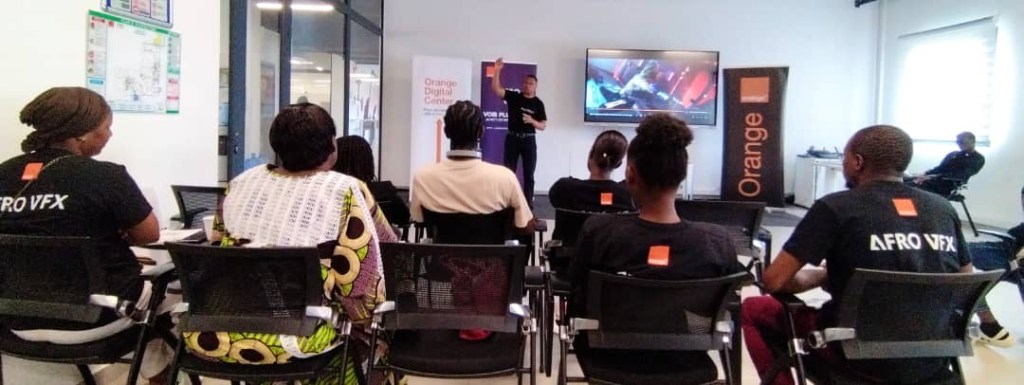
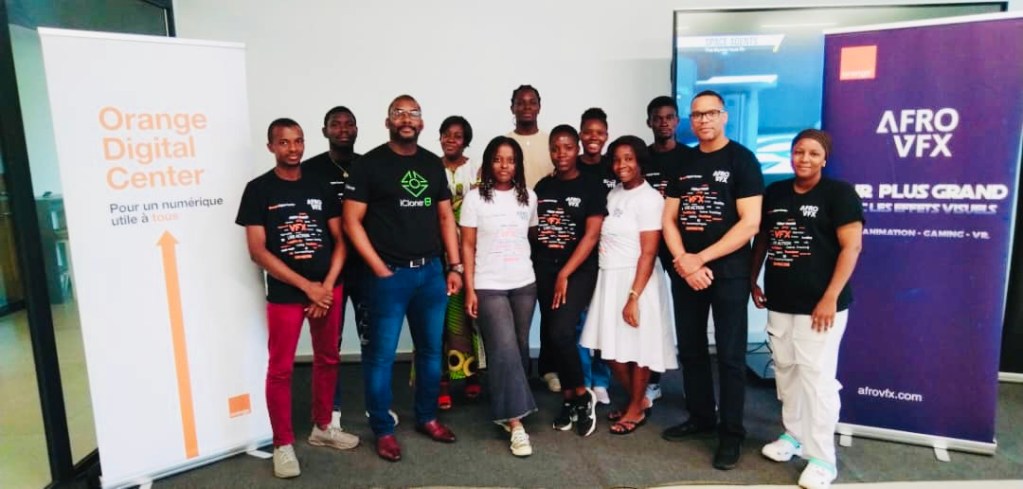
During their stay, they presented to top technology institutes such as INSAAC and Orange Digital Center on behalf of AfroVFX, showcasing the 3D production pipeline of one of the first animated films produced in real-time with Unreal Engine 5, released in 2021.

AfroVFX

A highly anticipated visit by Dom Fred and Alick to the Orange Digital Center in Abidjan, Côte d’Ivoire, with co-founder Éric M’Boua and students of the AfroVFX training program. After several months of virtual discussions with the director of the first science fiction feature film made using Unreal Engine, this in-person meeting at the Orange Digital Careers Training Center was a significant milestone.

This opportunity was made possible thanks to the unprecedented broadcast of the film Space Agents in Africa at the Majestic. The students were able to demystify the technical and creative aspects of the software from Epic Games and discuss with Co-Producer Alick the nuances of the self-production pipeline and the history of the project, which was developed over three years.

This marks the beginning of a creative, technical, and continental cinematic journey, highlighting the abundant talent on the African continent.


Director Dom Fred highlighted the remarkable contribution of Reallusion and its products, including Character Creator, iClone 8, and ActorCore, which significantly enhanced production efficiency and saved time.

During the film screenings at Majestic Ivoire and Prime de Côte d’Ivoire, the audience was impressed by the high-quality 3D renderings. Local media outlets, including Radio Nostalgie, Radio Trace FM, La Chaine Nationale RTI on Allume la Télé by Jean Michel Onnin, La Chaine Lifetv on Wam by Willy Gavara, and the NCI channel on Cheick Yvhane’s La Télé d’ici, welcomed the director to discuss Space Agents and the various production tools used in its creation.

Director Dom Fred emphasized the value of his partnership with Reallusion and the powerful tools they offer to independent studios. He highlighted that these tools enable studios to achieve results comparable to major studios in the animated film industry, both in 2D and 3D. He stressed that the success of animation projects could be greatly enhanced with the new tools from Reallusion.

Dom Fred Film and his team extend their gratitude to the various partners who made the African tour a success.

Follow Dom Fred:

Website:
https://www.domfredfilm.com/accueil

LinkedIn:
https://www.linkedin.com/in/dom-fred-films-81904194/

YouTube:
https://www.youtube.com/channel/UCaEVZPzkWUsg9Wti9Cao4Vw

Facebook:
https://www.facebook.com/profile.php?id=100063571358642

Vimeo:
https://vimeo.com/spaceagentsmysteriousax/videos

Related Posts

iClone Toon Shader test by Veteran Animator Angel Alonso

Angel Alonso, 30 year animation veteran and iClone animator

This video showcases a render test by Angel Alonso, a seasoned 30 year veteran in animation industry. Angel utilizes Character Creator and iClone to bring characters to life, often employing ZBrush during the creation process for added detail and precision.

For this particular project, he integrated a bit of color grading using Hitfilm to enhance the visual appeal and achieve the desired look.

What sets Angel’s work apart is his unique technique for achieving toon lines. He employs an old macro he developed years ago for Photoshop, which allows him to extract these lines effectively, adding a distinct and stylish touch to his animations.

Angel’s deep understanding of various software and his innovative approach to animation make his work stand out in the industry. By blending traditional skills with modern technology, he creates compelling and visually stunning animations that capture the audience’s imagination.

This render test is a testament to Angel’s dedication to his craft and his continuous pursuit of excellence. Follow along to see more of his creative journey and the fascinating techniques he employs in his projects. 🎨 #Animation #CharacterCreator #iClone #ZBrush #Hitfilm #Photoshop #ToonLines

Discover Angel Alonso’s realistic comic style characters in his Featured Content Developer store at Reallusion:

Follow Angel Alonso:

Artstation:
https://www.artstation.com/angelitoon

Deviantart:
https://www.deviantart.com/angelitoon

Instagram:
https://www.instagram.com/angelitoonxd

Facebook:
https://www.facebook.com/angel.alonso.94849

YouTube:
https://www.youtube.com/@angelalonso3266

State-of-The-Art Animation Studio adopts iClone Character Creator

Patrik Forsberg – Owner at Stiller Studios

Patrik Forsberg – Stiller Studios

Stiller Studios stands as an internationally acclaimed “tech marvel” production company, boasting a global network of creative talent. Their primary objective is to craft high-end feature films and series characterized by relatable characters and captivating narratives, leveraging their revolutionary proprietary technology. With a steadfast commitment to pushing creative boundaries through innovation, Stiller Studios specializes in developing tailored solutions for virtual production, 3D animation, green screen workflows, and real-time filmmaking techniques.

Located in central Stockholm, their state-of-the-art studio facility is fully equipped to undertake groundbreaking projects utilizing cutting-edge tools such as VR, deep data, and motion capture. Through close collaborations with top talent worldwide, the studio aims to establish itself as a frontrunner in digitally-driven storytelling.

At Stiller Studios, filmmakers are provided with the necessary resources to realize even their most ambitious visions. Their production model revolves around principles of quality, flexibility, and fostering an empowering work environment conducive to artistic exploration. With a core belief in the transformative power of storytelling, Stiller Studios seeks to offer fresh perspectives to global audiences. Recently, for their project REDMASK: Hand Book for Superheroes, team has embarked on using Character Creator, and iClone with Unreal Engine.

With a constant stream of exciting projects in development, the studio actively seeks opportunities to challenge conventional norms surrounding visual storytelling. Together with their partners, Stiller Studios is dedicated to shaping the future of the filmmaking medium.

“Stiller Studios loves technology that makes storytelling faster, more creative, more engaging and more fun to play around with. And I think that is what iClone and Character Creator are doing.”

Patrik Forsberg – Owner at Stiller Studios

Q: Greeting Patrik, and welcome to our Feature Stories. Kindly share with us your journey from using traditional animation tools like Maya, to real-time applications like Character Creator, iClone and Unreal Engine.

Hi! Thanks for having us. We started with advanced motion control and green screen workflows back in 2009 where we really found our place within the CGI and VFX world. After we’d worked with that for a few years we naturally ventured into motion capture as well to combine our CG environments with CG characters. Over the years we’ve experimented with practically every 3D and Digital Content Creation (DCC) software out there, even leading new workflows and technology research in some of them, such as Unreal Engine – and tied good relationships with companies like Epic Games to engineer new tools and technologies with them.

We have been going a bit back and forth in DCC softwares, but somehow always found our way back to Unreal Engine as that solution has always proven to deliver what we need for our projects and clients. 

As for Character Creator 4 and iClone 8 – we had tried previous versions of iClone a few years prior and found the toolset interesting, but it didn’t meet our needs for the projects we did back then. We then revisited the Reallusion suite for our new projects where we learned about all the new features Reallusion has created for Character Creator and iClone 8.4. The team was more or less blown away by how perfectly it fit our workflow pipeline and was super happy to integrate CC4 and iClone 8 into our pipeline.

“We revisited the Reallusion suite for our new projects where we learned about all the new features Reallusion has created for Character Creator and iClone 8.4. The team was more or less blown away by how perfectly it fit our workflow pipeline and was super happy to integrate them into our pipeline.”

Patrik Forsberg – Owner at Stiller Studios

Q: You mention that your film project REDMASK, while be unique in its style and workflow. For high-end film studios like Stiller, what would you say are the advantages of working with software like iClone, and Character Creator with Unreal Engine? How much speed can you save with the iterative power?

A lot! Coming from traditional live action filmmaking I prefer to work closely with my actors to see their performance to be able to really get the material I want to tell the best possible story. As I can with iClone 8.4 and AccuFACE see their performance in real time, in engine, I can tweak the performance and capture the emotions and movements I need with direct feedback instead of having to wait for animation dailies that can often time take several days for even skilled animators.

To be able to use motion capture and have a DoP set cameras directly after the motion capture shoot saves me an incredible amount of time and I can get going with the first draft of the edit almost directly after the shoot – a workflow impossible in traditional hand animation. 

Q: Working with Character Creator and the GoZ workflow to ZBrush, how is it possible to go from a sketch to a fully animatable character in less than a day?

Using the power of the slider workflow in Character Creator, our character artists can quickly start out with the CC3+ base meshes and then using the morph sliders get a rough idea of what the sketch looks like, then they can jump into ZBrush to capture the more stylized details from the sketch, such as the brows, cheekbones, etc.

But as we’re using an already finished super high quality base for our models, our character artists don’t have to go in and do retopo, UV map and all that. They can instead focus on the artistic side of character creation instead of the technical. That is what makes it possible with Character Creator to go from sketch to animatable character in a day. That character we can then use in our motion capture sessions and keep building on it whilst recording motions down in the studio. Iterating and saving time!

“That is what makes it possible with Character Creator to go from sketch to animatable character in a day. That character we can then use in our motion capture sessions and keep building on it whilst recording motions down in the studio. Iterating and saving time!”

Patrik Forsberg – Owner at Stiller Studios

Q: Based on your vast experience with professional animation tools what are the great animation features found in iClone? How would you compare these to traditional handkey animations?

202405iClone offers a lot of tools found in other DCC packages, things you’d expect in an animation software such as IK/FK rig animation, a timeline for key poses, curve editor with splines, animation layers, retargeting of bones, etc. What makes iClone instantly stand out from the rest is the huge library of premade animations, poses, expressions and motion capture files built in iClone and more you can download and use with ActorCore to get you going forward more quickly with your project.

This puts iClone at an advantage. However what makes iClone not only stand out, but exceed the competition and take a massive huge leap vs. the traditional packages is the incredible workflows found in its artificial intelligence powered AccuLIPS and AccuFACE. I won’t go into detail about what they do and how we use every feature in them here, but let me just say that these two tools have got to be the biggest time saver tools for animation in a long time.

“What makes iClone not only stand out, but exceed the competition and take a massive huge leap vs. the traditional packages is the incredible workflows found in its artificial intelligence powered AccuLIPS and AccuFACE. I won’t go into detail about what they do and how we use every feature in them here, but let me just say that these two tools have got to be the biggest time saver tools for animation in a long time.”

Patrik Forsberg – Owner at Stiller Studios

The results we’ve gotten with iClone in literary minutes really goes above and beyond. Animating a 4 minute long sequence with captivating facial animation perforce and lip syncing would’ve taken even a skilled animator days or even weeks in a traditional DCC software. We can achieve the same result almost instantaneously after setup in iClone 8 – it’s that quick.

“The results we’ve gotten with iClone in literary minutes really goes above and beyond. Animating a 4 minute long sequence with captivating facial animation perforce and lip syncing would’ve taken even a skilled animator days or even weeks in a traditional DCC software. We can achieve the same result almost instantaneously after setup in iClone 8 – it’s that quick.”

Patrik Forsberg – Owner at Stiller Studios

Some cleanup and tweaks will always be needed of course, but it does 90% of the job and time in real time. We can also have someone doing the motion editing in the same project simultaneously whilst we’re recording in the studio and even have a DoP set cameras in real time too. All working together in the same Unreal Engine project. Time is money, so you can probably figure out why we love it so much. 

Follow Stiller Studios

LinkedIn:
https://se.linkedin.com/company/stiller-studios

Instagram:
https://www.instagram.com/stillerstudios/

Facebook:
https://www.facebook.com/stillerstudios

YouTube:
https://www.youtube.com/results?search_query=stiller+studios

Related Posts

————————————————————————————————————————————————————————————

The article is also featured on Creative Bloq.

Create Pixar-Styled Street Fighter Chun Li using Character Creator & Blender

This article is featured on BlenderNation

Learn how talented artist Amelia (Prompt Muse) creates lively Pixar-styled Chun Li and brings her to life with poses. The process involves leveraging user-friendly tools Character Creator (CC) and AI techniques, from reference gathering to character modeling, outfit creation, and final touches in Blender.

Prompt Muse

Prompt Muse is a Website and YouTube channel, hosted by Amelia Player & Alex Player, that offers a comprehensive look at the world of artificial intelligence (AI) image generating software, SEO and more. This channel offers tutorials and tips to help users get the most out of the software, while providing a comprehensive look at the industry. In addition, the channel provides the latest tech news and opinions to help keep users informed and up-to-date on the latest trends.

Prompt Muse’s tutorials offer step-by-step instructions on how to use the software, as well as advice on best practices and troubleshooting tips. The tutorials are geared towards both beginner and experienced users, giving them the tools to make the most out of their image generating software.

The channel also provides the latest news and opinions on the AI image generating industry. This includes industry-specific news such as new software releases, updates, and advancements, as well as broader topics such as emerging trends, legal issues, and ethical considerations. This helps keep users informed and prepared for the future of the industry.

Gathering References of Chun-Li using Dall-E 3

Amelia needed to start off by collecting visual references to kick off her project. She does this by using Dall-E 3 to create reference images for her Pixar-styled Chun Li.

Seeking additional inspiration, she scoured Pinterest for more references, compiling them efficiently in Pure Ref — a powerful and free tool designed to gather reference images in one application.

Pure Ref

Using Character Creator

To accelerate the process, Amelia opted for a kit bash technique by combining ready-made assets in Character Creator (CC). Utilizing the free CC base model, Camilla, she employed morph sliders to quickly shape the character.

Use morph sliders in Chracter Creator

The model was then sent to ZBrush for further sculpting, where the ‘Move’, ‘Standard’, and ‘Smooth’ brushes were used to bring out the signature Chun Li personality. 

Amelia seamlessly transitioned between Character Creator and ZBrush, refining the base shape and adjusting details like eyes, lashes, and eyeballs. To maintain a stylized look, she replaced realistic textures with bold, bright, and cartoony designs. Her goal was to enhance the overall aesthetic without having the character’s appearance descending into the uncanny valley.

Adjust the eyes

Teeth and hair underwent similar transformations. She crafted custom teeth in ZBrush and sculpted hair purchased from the Reallusion Content Store, using morph sliders to ensure a cohesive and visually appealing character.

Clothes and Outfit on the Blender Market place

By leveraging kit bashing with clothing found on the Blender Market Place, Amelia quickly found a suitable cheongsam and imported it into Character Creator.

By adjusting skin weights and employing repeated processes for each accessory, she effortlessly brought Chun Li’s outfit to life. To texture the character, Amelia utilized the control painting function in ZBrush to restrict the painting area and painted the UVW map using Photoshop.

Simplifying what would be considered a mundane procedure into a simple click of a button, she was pleasantly surprised by the efficiency of the entire process.

Transfer to Blender

After donning a costume, Amelia posed her character using the edit pose dialogue, adopting a “kung fu pose” and a smiling face using the ‘Facial Profile’ tool.

Afterward, she imported her character into Blender and used “Blender Auto Setup” to easily assign a Blender Metarig to the character.

Final Touches

For the final polish, Amelia fine-tuned the lighting, adjusted a few parameters, and made use of some scene tools to spruce up the backdrop. These finishing touches added additional flair and life into Chun Li.

Hopefully you have gleaned some insights into Amelia’s meticulous workflow of combining advanced tools and creative techniques. In this evolving landscape of character design and animation, her journey from concept to final render is proof that opportunities for artist expression are ripe for the taking.

Related Posts

————————————————————————————————————————————————————————————

The original article was written by Prompt Muse and also featured on BlenderNation.