首頁 » Page 62

How to Animate Natural Lip-sync for a Hip-hop Song

iClone, Omniverse Audio2Face Deliver Accurate Singing Animations for Rap Music Video
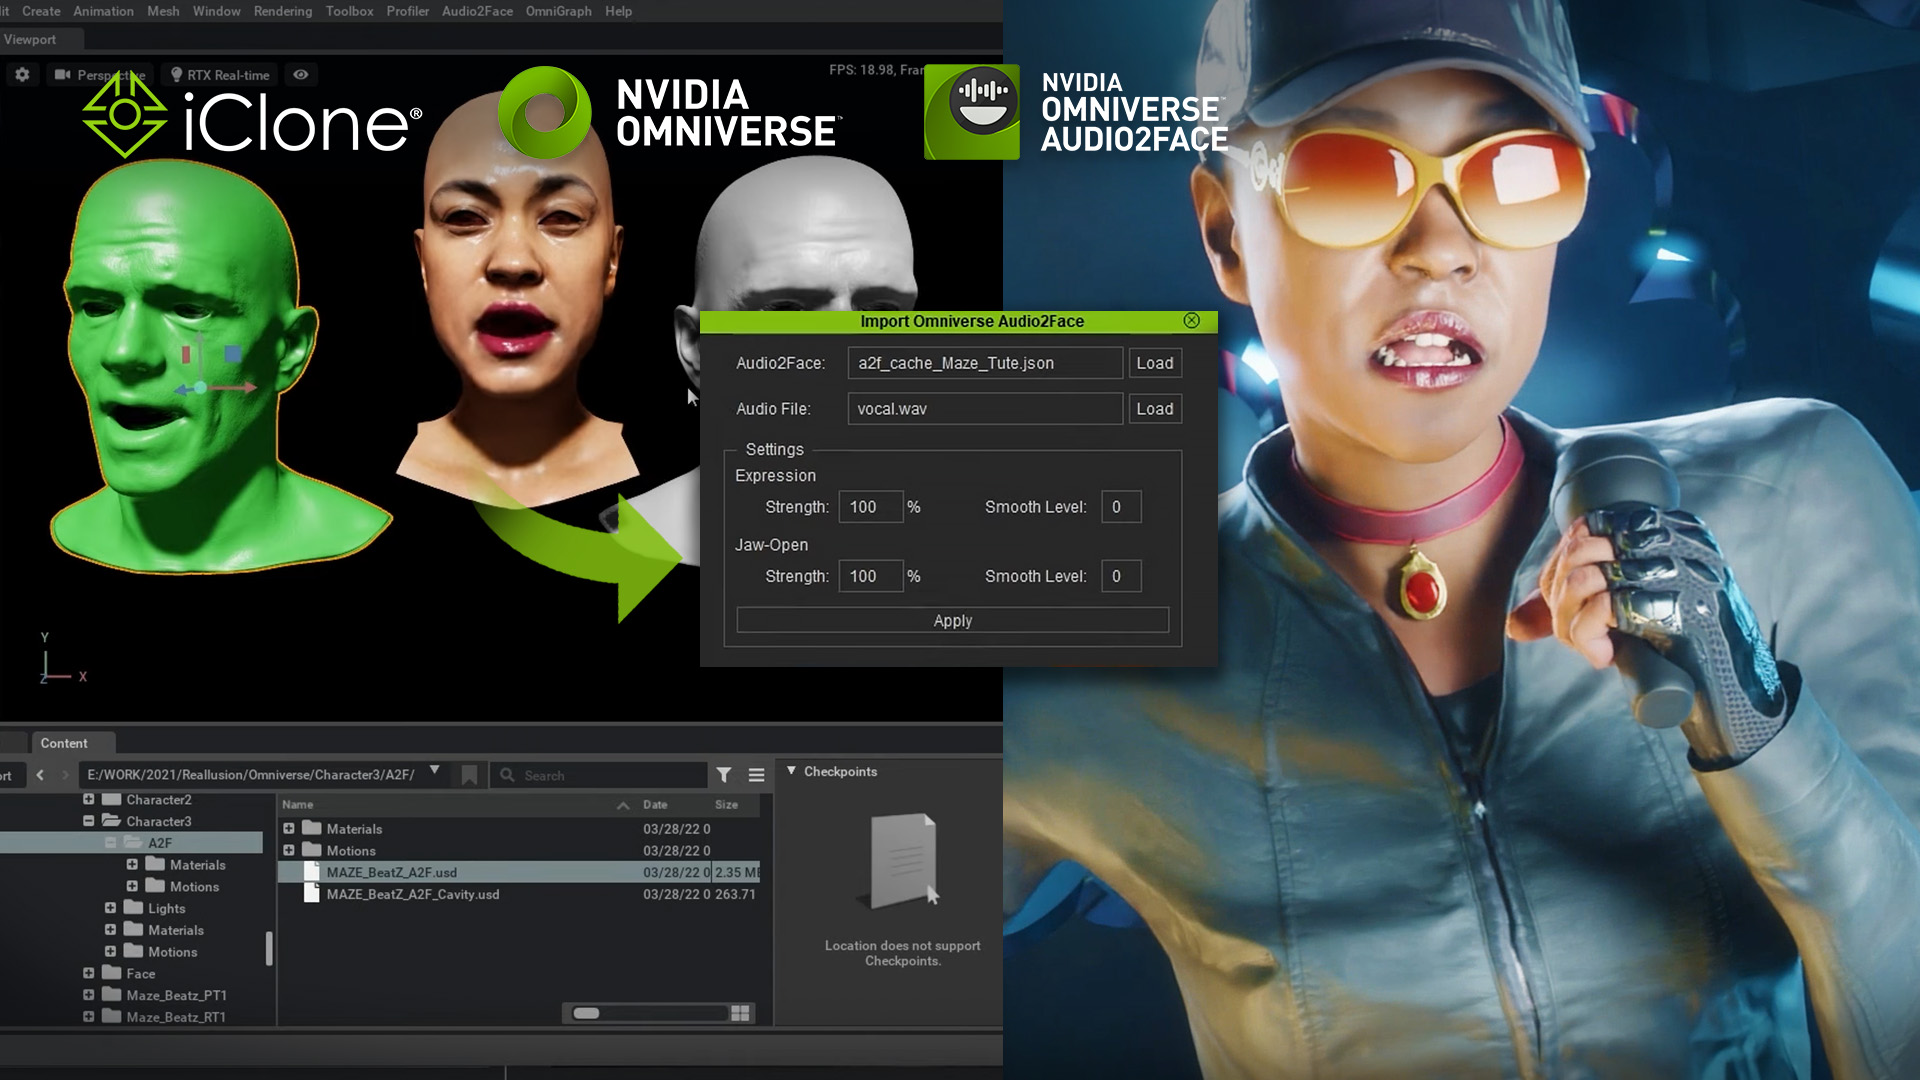
Film director Solomon W. Jagwe, the co-founder of Sowl Studios and the creator and director of The Adventures of Nkoza and Nankya, shows how he achieved accurate lip-sync animations for a rap song using Character Creator, iClone, and Omniverse Audio2Face.

The Challenge

As a 3D animation storyteller and filmmaker, one of the most challenging aspects of the process of bringing out a convincing performance from a performance actor, has to do with making sure the lip sync is well done and that the soundtrack matches the lip movement so the viewer is not distracted and instead focuses on the story. Now, if you are an indie filmmaker on a budget and with a small animation team, that challenge is multiplied many times over, because you have to work with limited resources, time and funding. That means that you have to constantly be on the lookout for ways to efficiently accomplish your facial animation tasks. 

When NVIDIA Omniverse and iClone partnered to create a solution that made the facial animation workflow way more efficient for indie filmmakers, I knew I had found a solution to bringing to life the story I had in mind. 

The Final Result

You can check out the music video showing the successful result. Below are the workflow I took to create the Maze BeatZ Rap music video, using Audio2Face for the facial animation, using the Perception Neuron Suit to capture the body mocap, refining the facial and body animation in iClone, and rendering the final animation in Omniverse with Path Tracing.

How I Created the Song

The first step I took to create the Maze BeatZ video, was to come up with the rap song. I am not a rapper, but thankfully, there is already a rap track that comes with Audio2Face. The one I used as a starting point is labeled rap_NV_Project1_JDB.wav, which can be found under the Audio Player tab wave source. The initial problem I faced was that I needed my rap star to be a female artist, and yet the rap track was that of a male voice. A quick solution was taking a trip to Adobe Audition, and applying a pitch shift to the rap track, and voila! I had my female rap artist voice.

Another aspect I needed to add was a rap beat to the empty rap song. So I partnered with a young and very talented Ugandan artist, whose awesome music I chanced up during my music research on YouTube. His name is Andereya Baguma.  Once the song creation was done, my attention turned to bringing my female rap artist to life. 

How I Created the Female Rap Artist

For the starting point of the body of the character, I used Alisha, because I needed a middle aged Afrocentric character. I also made sure to use the Export version of the character because I needed to send the completed model to Omniverse for rendering.

I wanted my rap star to have a cool rap outfit, so I opted for the Leather Outfit. Again using the Export version, which is highly recommended if you ever need to export your character for use outside of Character Creator or iClone.

To round out the cool outfit for my rap star, I picked up some realistic looking glasses and a beautiful hat . I stayed in the realistic realm because I needed the character to look great when rendered in Omniverse. 

I used Character Creator to assemble the model and prepare it for the trip to iClone so I could use Motion Live and the Perception Neuron Studio suit to capture the body mocap, and also prepare the rap artist for the facial animation creation using Audio2Face. 

I absolutely love working in Character Creator because of the multiple ways you can fine tune your character to create a unique result. The smart gallery plugin in Character Creator makes it very easy to import all your purchased items, and apply them to your model inside of Character Creator. I was able to further refine my model using the morph and sculpting tools.

After I completed refining my rap artist in Character Creator, I exported the character as an iAvatar to iClone. You can send the model directly from Character Creator to Audio2Face, as a USD file, but I needed to make a trip first to iClone since that is where I was going to do all my animation both for the body and face.

How I Animated the Face and Body of the Rap Artist

To get my model ready for 3D animation, I loaded the iAvatar character I exported from Character Creator, into iClone and set up some initial lighting and also imported a stage from Daz Studio, where the rap artist was going to perform.

The cool thing about Character Creator characters is that they come fully ready for both facial and body animation inside of iClone. Reallusion offers several truly powerful plugins in the Motion Live platform, that extend the animation power of iClone. I relied heavily on the Perception Neuron plugin for the body mocap.
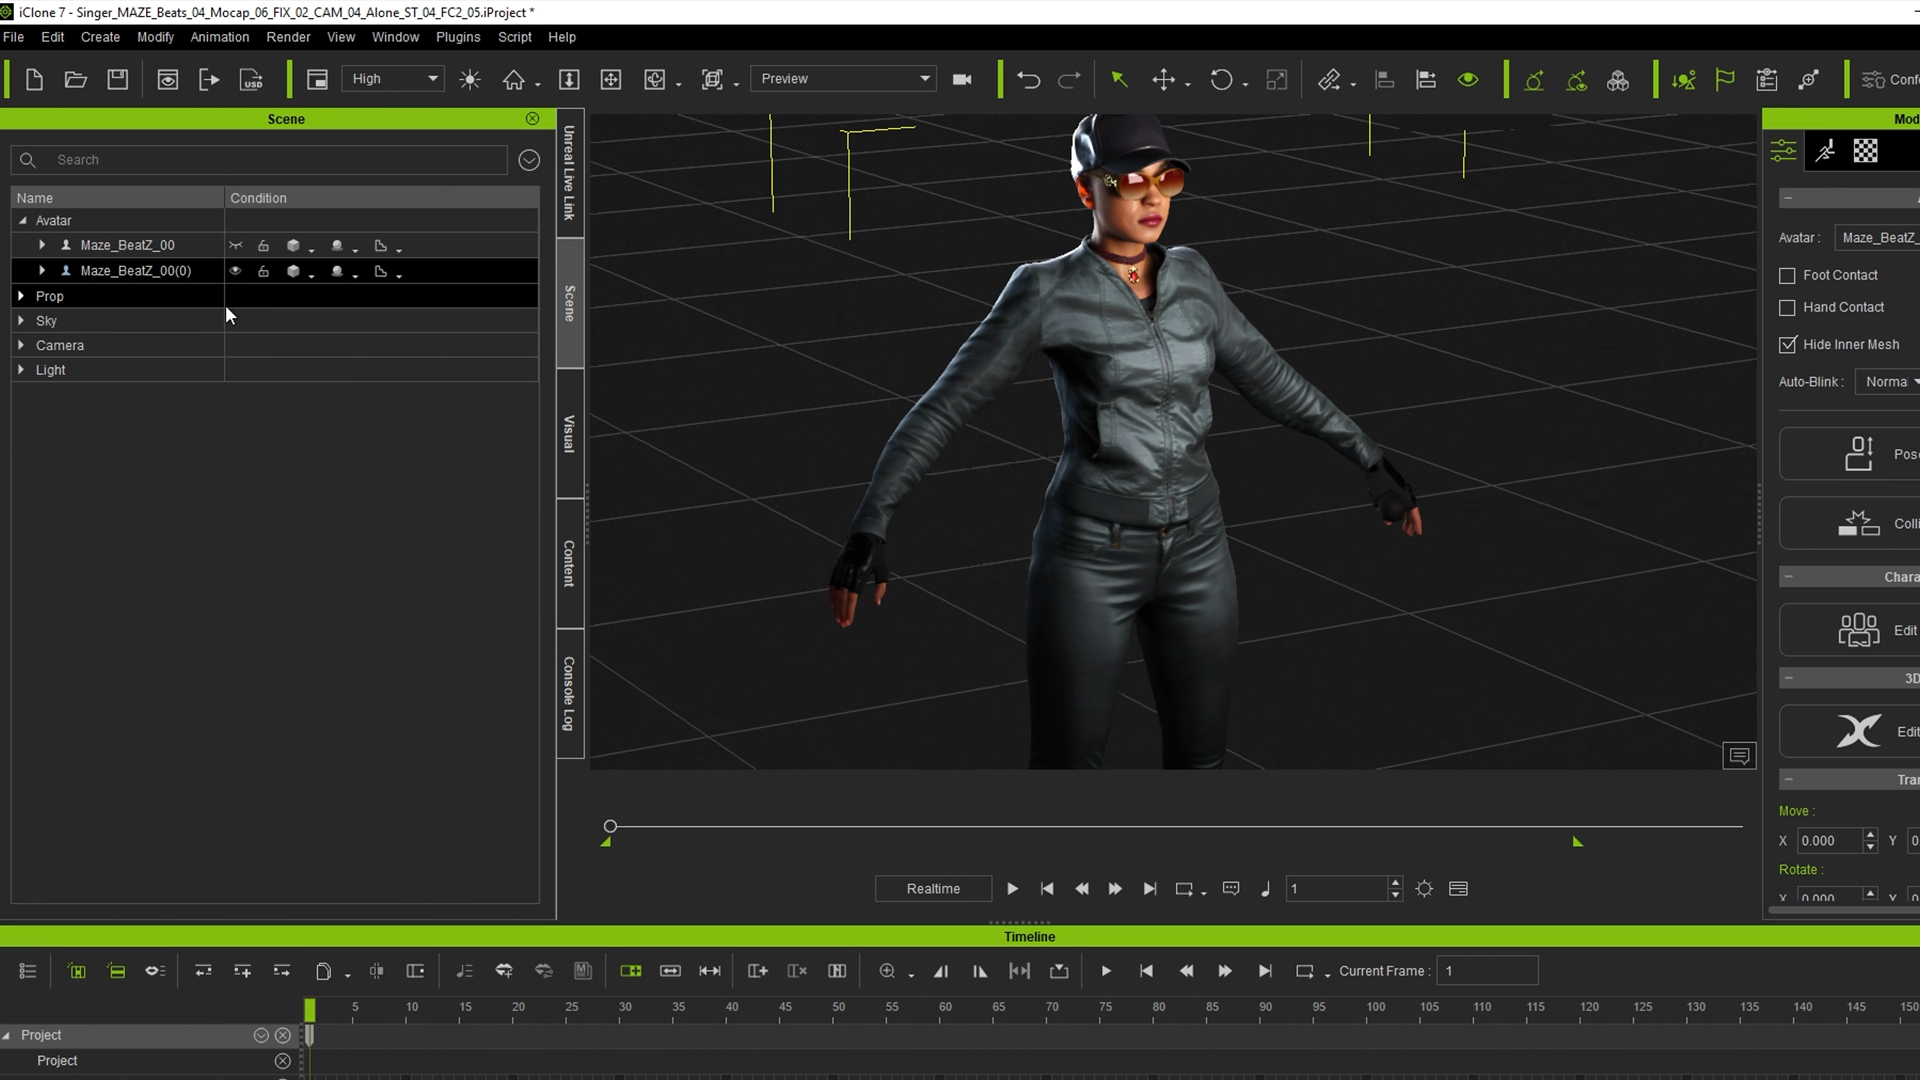
I used the Perception Studio Suit from Noitom, to capture the dancing sequence of the rap artist. My 15 year old daughter volunteered to play the part.  After recording her rap performance, I saved the iClone mocap files from the Perception Neuron Suit session, into the Motion folder so I could repurpose them and apply them to my iAvatar after creating the facial mocap in Audio2Face.

Once I had the base body mocap done, I then exported my Character from iClone as a USD file, to Audio2Face. I made sure to check the “Include Omniverse Audio2Face Mesh” check box in the Export USD dialogue box. That step is extremely crucial because it offers Audio2Face the ability to recognize your character’s face so you can use the AI to create the facial mocap from an audio file.  I also made sure to select the render mode. I chose to export both the RTX and the Path Tracing render mode as 2 separate versions of my character, so I could have the option to preview the animation in real-time as well as render the character using the Path tracer in Omniverse.

I imported my rap artist character into Audio2Face and began the process of using the built in AI to transfer the facial motion capture data derived from the rap vocal wave I mentioned in the earlier steps of this workflow. 

Audio2Face Highlighted Steps

I was blown away at how well Audio2Face was able to use the vocal of my female rap artist to create the lip sync animation! Audio2Face also offers several powerful tools under the Emotion tab, that make it possible to add nuanced lip movements after the ai applies the data from the audio file onto the characters head. 

After applying the Facial mocap to the head of my character in Audio2Face, I exported the data as a json file, with just the lower part of the face.

I imported the JSON file with the lower facial animation from Audio2Face, into iClone, and applied it to the Rap Artist character using the Omniverse plugin. 

Audio2Face does an awesome job of capturing the nuances of the voice in the audio track, but one thing that it wasn’t able to capture, at least as of the writing of this article, is the tongue movement and the eye expressions that one needs to create a convincing facial performance. I believe a solution is in the works for future versions of Audio2Face, but for my video, I turned to the amazing animation tools inside of iClone to add those much-needed facial animation nuances.

One of those awesome tools is called AccuLips. I was able to take advantage of the text-to-speech power of AccuLips to create an added layer of facial animation which included tongue movement.

I was able to further refine the lip sync animation with the Lip options, which gave me access to the individual visemes to fix any area of the mouth movement that needed improvement.

The final step of the facial animation was to add some blinking and more custom upper-face, facial animation to give my rap artist some personality. I used an iPhone X to capture myself performing along to the rap vocal. For capturing the data from the iPhone X, I used the Live Face plugin in the Motion LIVE inside of iClone together with the Live Face iOS app from Reallusion.
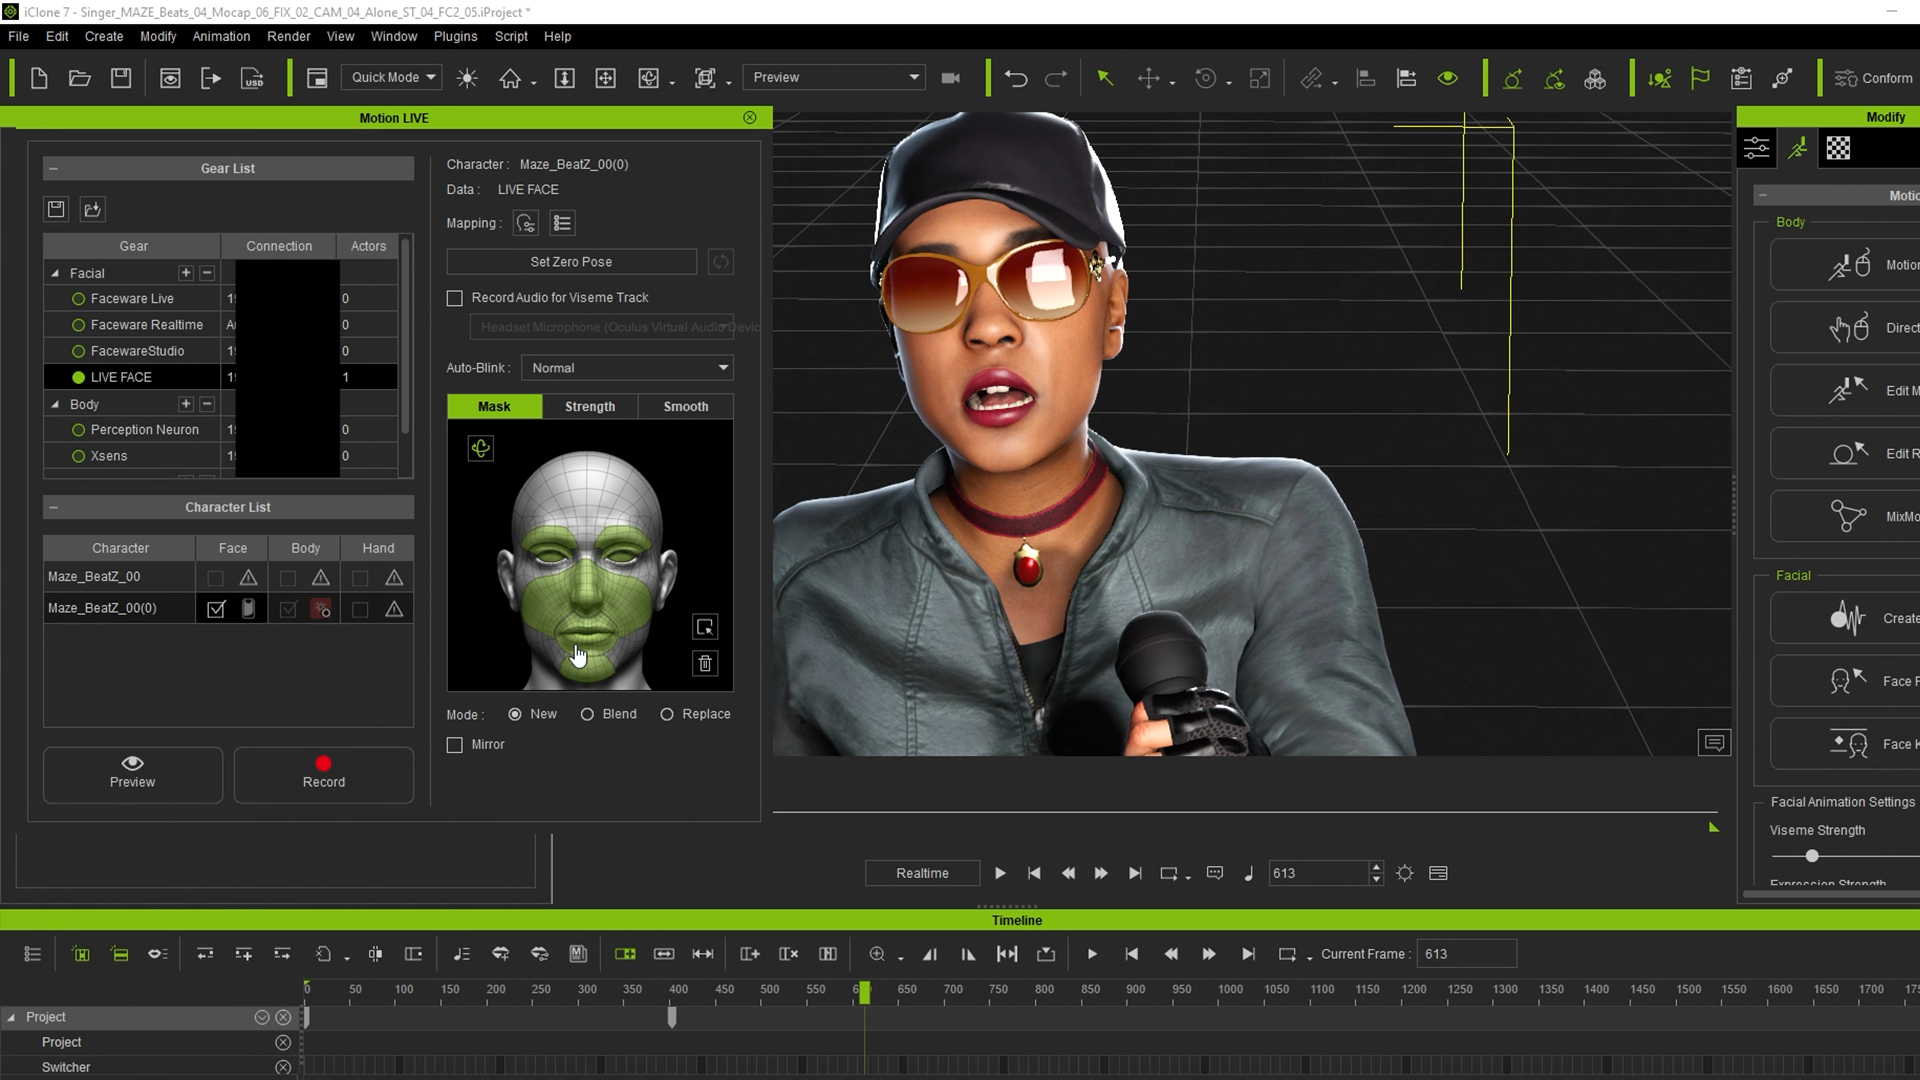
I was also able to use the iClone mocap editing animation tools to adjust the Perception Neuron data. I loaded the mocap file I had saved from the session with my daughter, and applied it to my character. iClone made it so much easier to edit the mocap from the Perception Neuron Studio, captured using Axis Studio from Noitom. 

With the Edit Motion Layer tool, I was able to fix the fingers of the character and add the grasping of the microphone that she used in the final video. 

How I Setup and Rendered the Final Video in Omniverse

Once I was happy with both the facial animation and the full body animation, I selected my rap artist character and exported her as a USD file from iClone to Omniverse. I exported 2 versions, one for RTX and another for Path Tracing. Doing it that way offered me the flexibility of choosing whether to render using Path tracing or Real-time rendering in Omniverse.

Exporting as Path Tracing has the advantage of providing Omniverse with a character that has a beautiful skin shader that supports subsurface scattering (SSS). The Character Creator models come prepared with a beautiful skin shader that looks great when rendered with path tracing in omniverse, but they also take longer to render compared to the RTX version.  

I loaded my rap artist into a scene I had prepared using a set I exported from Daz Studio as an FBX, and loaded into iClone. I used iClone to set up the audition stage, and also placed the character in the focus area, which I then used to set up different cameras that I knew I would need to render from once I got to Omniverse. It’s truly awesome that Omniverse supports all the lighting and camera animation from iClone.

I set up some additional lighting inside of Omniverse to bring the stage to life and to add camera movement. To preview the animation before rendering, I set the display in Omniverse to real-time, which made it very easy to iterate and make camera and lighting adjustments.

I rendered the final animation using Path Tracing. Having a good GPU goes a long way toward speeding up your renders in Omniverse. I also used the built-in denoiser to help speed up the renders. 

For rendering I used a custom machine from the team at Puget System, that has an NVIDIA RTX 3090. This made a huge difference in turning around the final music video. Rendering at 2K can take up a lot of space, so I recommend having an external SSD drive with plenty of space, especially if you end up with an audio file that is longer than 2 minutes.

Final Thoughts

I highly recommend the Omniverse, Audio2Face, Character Creator, and iClone combo solution as a go-to facial animation workflow in your storytelling journey and I believe they will make a huge difference in your project. So go ahead and give them a try.

NVIDIA offers Omniverse and Audio2Face as free downloads. Realluson also offers the Omniverse iClone Connector as a free download that you can find inside of your Omniverse Launcher. Reallusion offers versions of iClone and Character Creator for you to try out before you decide to purchase. If you don’t have a motion capture suit or don’t own Character Creator, you can use the amazing characters and mocap from ActorCore, the 3D people and mocap animation Library.

Winning Tips & Tricks: The Making of Jasper Hesseling’s “Jessica Rabbit” Showcase

The “Winning Tips & Tricks” series covers practical workflows and techniques shared by winners from the “2021 iClone Lip Sync Animation Contest”. To let users see the full spectrum of the iClone facial pipeline, we are introducing projects that are rendered with different 3D engines including; Unreal, Unity, iClone, Blender, and Cinema 4D.  Let’s now take a look at Jasper Hesseling’s: “Jessica Rabbit”, combining Character Creator (CC3) / iClone workflow and awesome iClone native render.

Jasper Hesseling

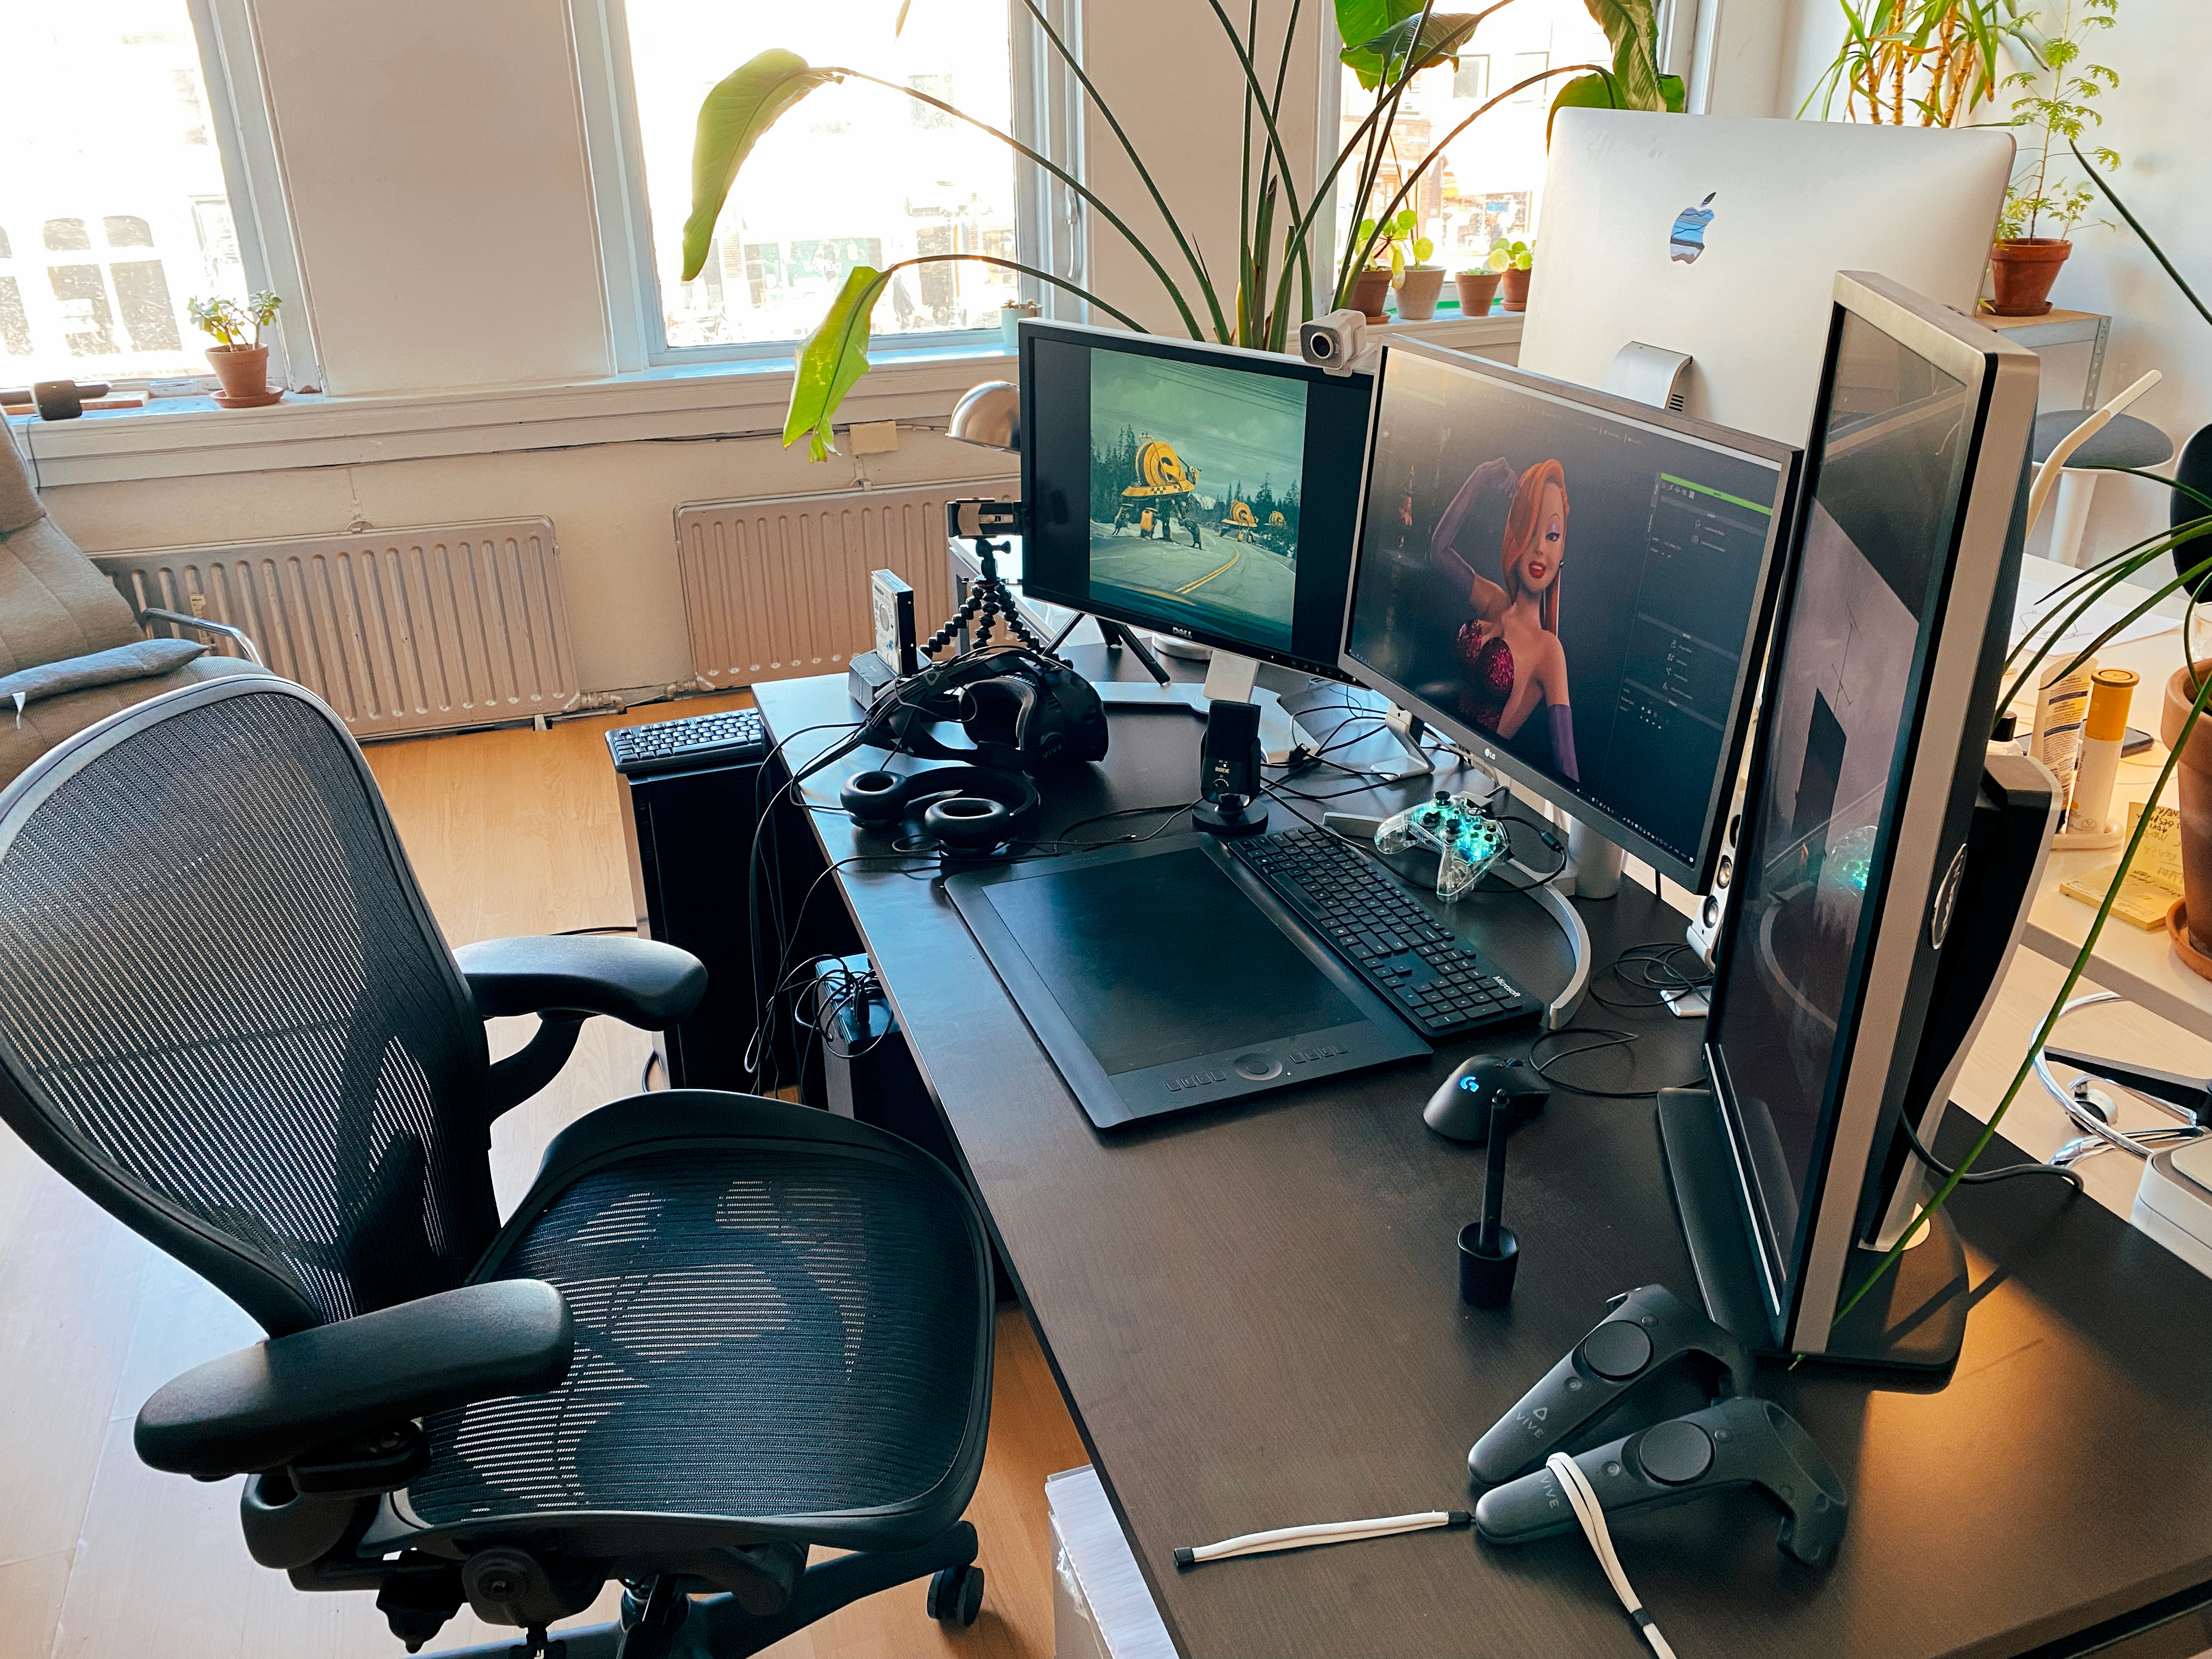
My name is Jasper Hesseling. I’m a solo 3D artist for more than 15 years. Based in Utrecht the Netherlands, I create under the name “Mayonnaise”. Mayonnaise as a name came up because I sometimes have the feeling that I create the visual sauce for concepts and ideas next to the fact that it is a very popular sauce in the Netherlands to emphasize my roots. From traditional 3D model and sculpting to texturing, rigging, and animation, I am an all-around 3D artist that understands how to leverage the advantages of each 3d tool and assemble them into the ideal animated character pipeline. Originally my background is in motion graphics but I transitioned to 3D art and animation because therein lies my passion.

Why I created this showcase 

I am a fan of Jessica Rabbit since I was a child. Her charm and radiant character are something really special that I wanted to present to the competition. With the use of my talent and paying details to capture her likeness, I hope my submission can be seen as a tribute to the iconic film “Who Framed Roger Rabbit”. During the competition, I thought my 3D skills would be a good asset and help me bring my A-Game. But I think, in the end, the ultimate goal of this is to test my creativity while having fun!

How I do it with iClone

Step 1: Finding reference

References are very important – I think a lot of people usually forget about them. I found a lot of materials online. Some are actually original still frames from the movie without all the character poses, and I also had very nice finds from some fan art. It was difficult to find some images from the side of the head, so I really need to guess what it’s gonna look like. The program that I use here is called PureRef. It’s pretty handy and you can use this as a window to drop in all your reference materials, or just let it lid somewhere else on your screen.

Step 2: Cloth modeling in Cinema 4D

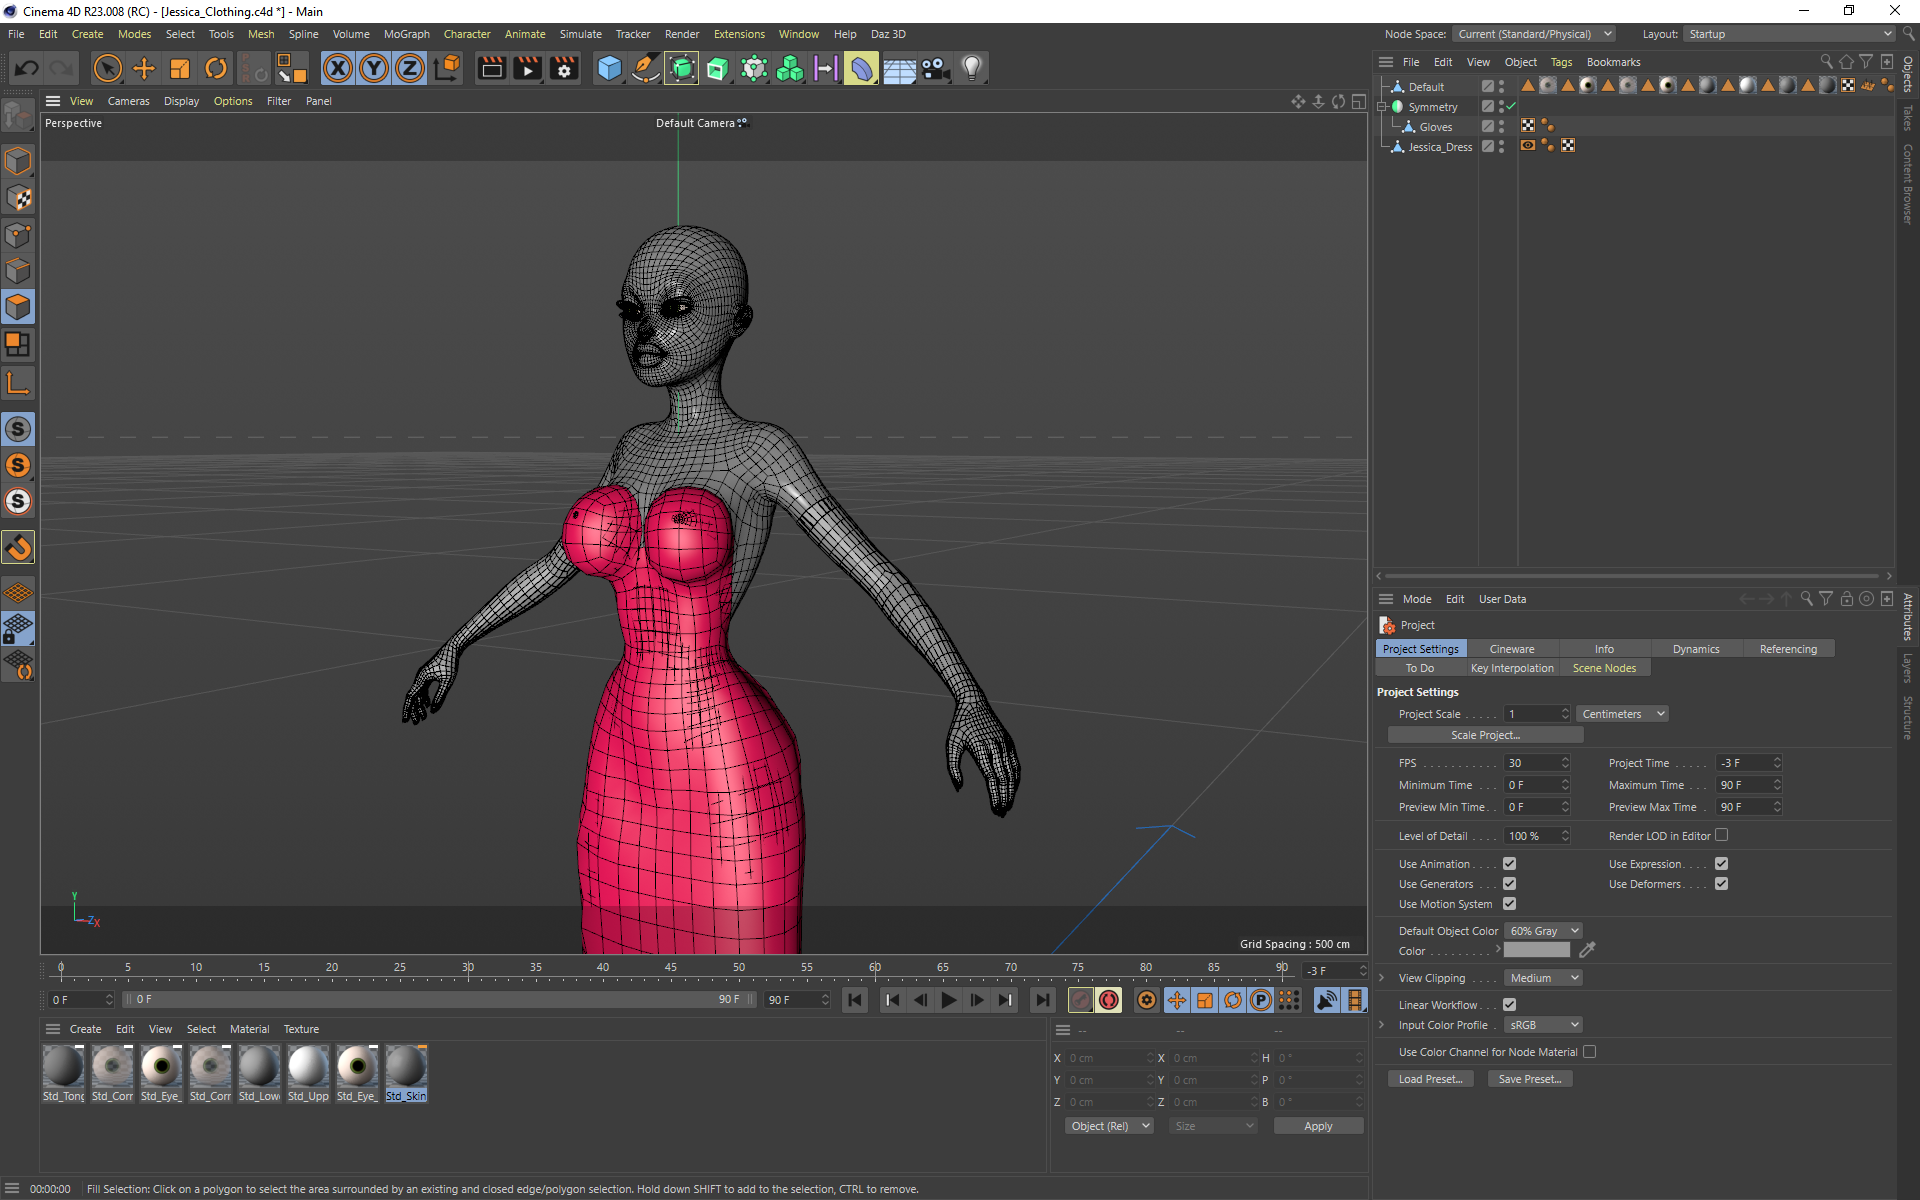
The dress was poly-modeled in Cinema 4D, and I changed the breasts a bit, pulling them closer together. It’s a basic approach that allows me to get some proper cloth UVs out there. With me following the meshes, the deformation and the weight painting are pretty solid as well. Now there’s an option to actually hide clothing, or hide stuff under the clothing. But I just wanted to be flexible and sometimes it doesn’t really work well when you export because when you hide stuff in the meshes inside of Reallusion (software), then you get a triangulated export so this is not really perfect.

Step 3: Accessories – Gloves, Dress, and the Shoes

I used the hair materials for the glove, and it’s because the hair material has this nice anisotropic and specular going over the surface. This allows you to mimic silky fabric. You can play around with the settings and adjust the shininess or roughness. It also works well with normal maps on the Modify Tab, even on the wrinkling parts.

As for the dress, I used a texture that created myself. I created that in the Substance Designer, and it’s actually available through my website. You can change the color and it works pretty well. I was pleased with the result that actually came out of its shader. It’s nice to play around with the texture, making things shiny and bling-bling.

The shoes are from my own Reallusion webshop, but they came very handy in this case. They are available for you guys if you would like to have them inside your collection.

Step 4: Facial appearance and Make-up

For the rest, I hand-painted the texture out and I am using Substance Painter. But it was pretty simple because it’s so toony, and I didn’t really have to go in there and do a lot of details. Creating a comic style for animated characters is simple, all you need is to match up with the whole reference library that I had on her. There weren’t many details in terms of texturing. But pay attention to some details like the bump map, just to break it up a little bit, and the lipstick is just shiny as it can be.

Step 5: Edit the hair in ZBrush

The hair is a low poly model, and I use sub-division inside of Reallusion so it’s working pretty fine. And you can just use brushes to adjust the hair. Another big tip for you guys is that when using ZBrush, the scaling is pretty large coming from Reallusion, so what you need to do is change the dynamic brush scale to about fifty (the number that I normally I use), and now you get a proper brush size going.

I use the move topology brush, which allows you to move things without moving the rest of them. It just focuses on cross meshes. So if I do like a standard move the whole meshes change.

Rotate the hair, select the Display Properties table and click the “double” button. That will give you a better vision when editing the inner hair. Click the GoZ button and you’ll be back to Character Creator and see the result.

Step 6: Earrings creation and Lighting settings

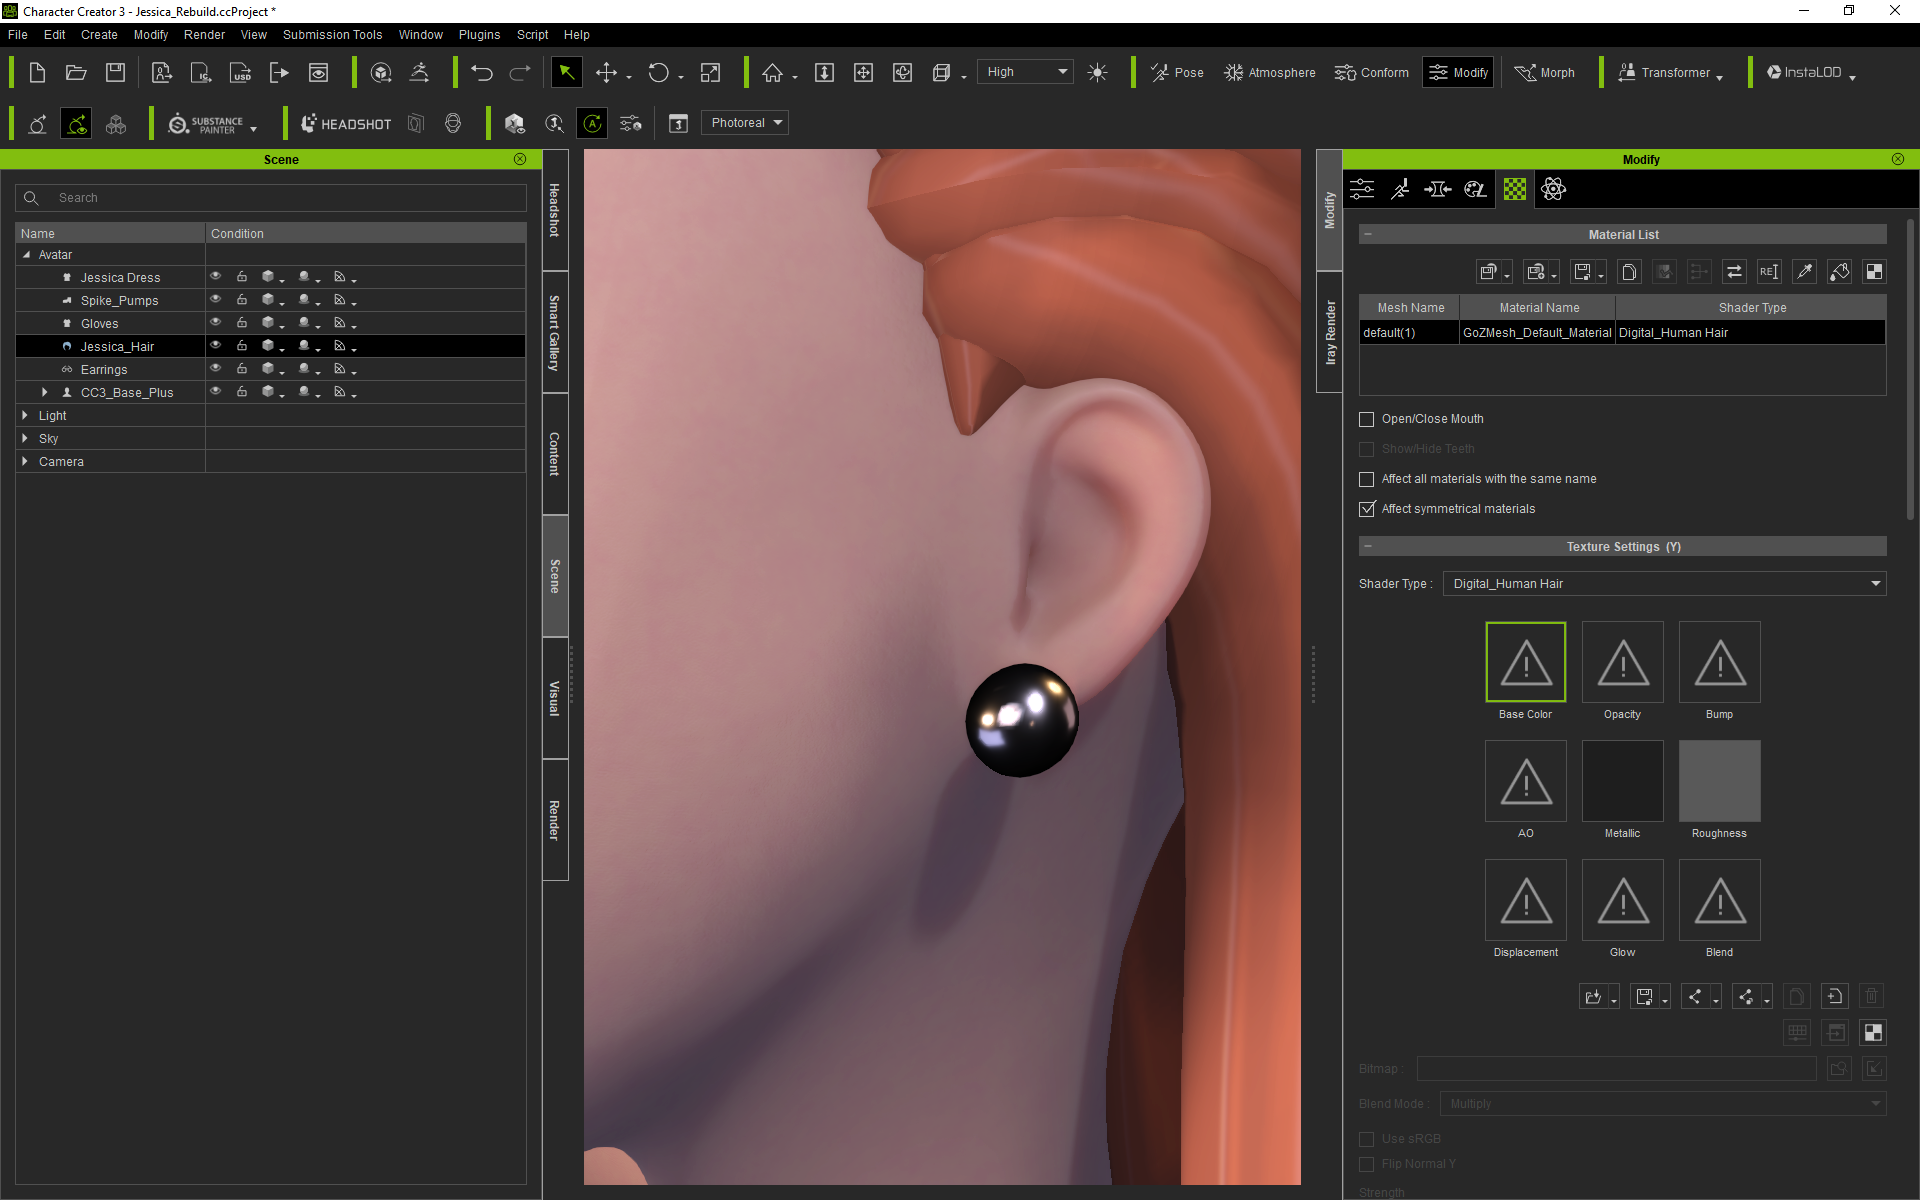
The earrings were pretty easy, it’s just to wear. What I did is make attributes out of those ones so that they will follow the head. Another thing that is really important is the lighting. Looking at the whole scene, it’s pretty simple. Select the minimal mode so you can see what it consists of. Since it was a lipsyncing contest, I’m just focusing on the lips, and no need to build the whole theater. I turned on the auxiliary light, and we will get some more detail in here. One important tip is to start doing the character poses and block the animation and create.

Step 7: Camera settings and the Environments

Once you’ve completed the lighting, then you can start working on the camera. I started with a medium one. Because the background was pretty minimal, you can see the total view. With a lot of darkness in there, it was quite forgiving to use only basic meshes in the background. I even use the meshes that were inside here to mock up the curtains. I got my inspiration from there and with a little clever lighting, you can actually just use the darkness. Tip: No light is also lighting as well! You can also apply some PBR here. I used the shader, change the tangent type to green color, and I use diffuse color and play around with the settings here. I use an HDRI in the background to shine and get some nice reflections going on in the dress, but the main lights are in the scene as you can see. I use a very strong key rim light to actually create this sole stage sheen a bit like a spotlight that’s following her around.

Final Step: Post-production in After Effects

So once when I was done with the animating in iClone, I rendered the whole thing, and it gave me a PNG sequence. I would have preferred an open EXR 32-bit so you can actually tweak the colors a bit more. But for now, it was okay. And what I did in After Effects is actually bringing it back to 24 frames per second, so that the animation was really looking choppy and fit the whole style a bit more. And I tweak the colors a bit more of course.

Final Thoughts and Conclusions

That’s it, it’s quite amazing that you can actually get results like this in like two weeks of production time. Looking at the whole finished thing in two weeks it’s quite amazing!

Follow Jasper Hesseling:

Website:
https://www.artstation.com/mastajappa
https://www.youtube.com/user/mastjappa/featured
https://www.instagram.com/mayonnaise3d/
https://80.lv/talent/p/jasper-hesseling

YouTube channel with over 8 Million subscribers brings Children’s stories to Life with Cartoon Animator

Gabriel Escalona – 2D Animator | Lunacreciente YouTube channel

LunaCreciente is a YouTube channel that uses Cartoon Animator to create engaging and catchy music videos, and more, for early childhood learning. With over 8 million subscribers to date, this channel is a shining example of how Cartoon Animator is being used to produce quality 2D animations in record time to draw audiences in.

In his interview with Reallusion, Gabriel Escalona talks about how Cartoon Animator provides him with tools that allow him to work fast without sacrificing quality. 

“I’m not a professional animator. And that’s the reason why Cartoon Animator software is perfect for me, because it has premade character motions that I can use and edit. I can simply drag and drop motions on to my characters and the hard part of animating is already done for me!”

Gabriel Escalona – 2D Animator | Lunacreciente YouTube channel

3D Render Engines for iClone: Choosing The Best (Part 1)

Comparison of Omniverse, Unreal Engine 5, and Maya V-Ray for 3D Real-time Animation

Introduction

José Tijerín is a digital illustrator and 3D sculptor who has created a video game “Dear Althea” to be launched on the Steam.  His “We’re Besties” content pack is currently selling in the Reallusion Content Store.

In this tutorial, José shares his way of working with Character Creator  and iClone to get fantastic results in Omniverse, Unreal Engine 5, and Maya V-Ray render engines. Then he compares the results and gives his personal opinions on each one of them.  This tutorial will help users to discover new possibilities for showcasing their 3D sculpt and animation work.

Prepare A Character

The first step would be to create a character in Character Creator, however, I’m going to skip this step because I have already written an article with a tutorial video on how to create a cartoon-style character.

Now we are going to add movements to this very same character. In order to bring it to life, we can take advantage of ActorCore’s fantastic motion library.

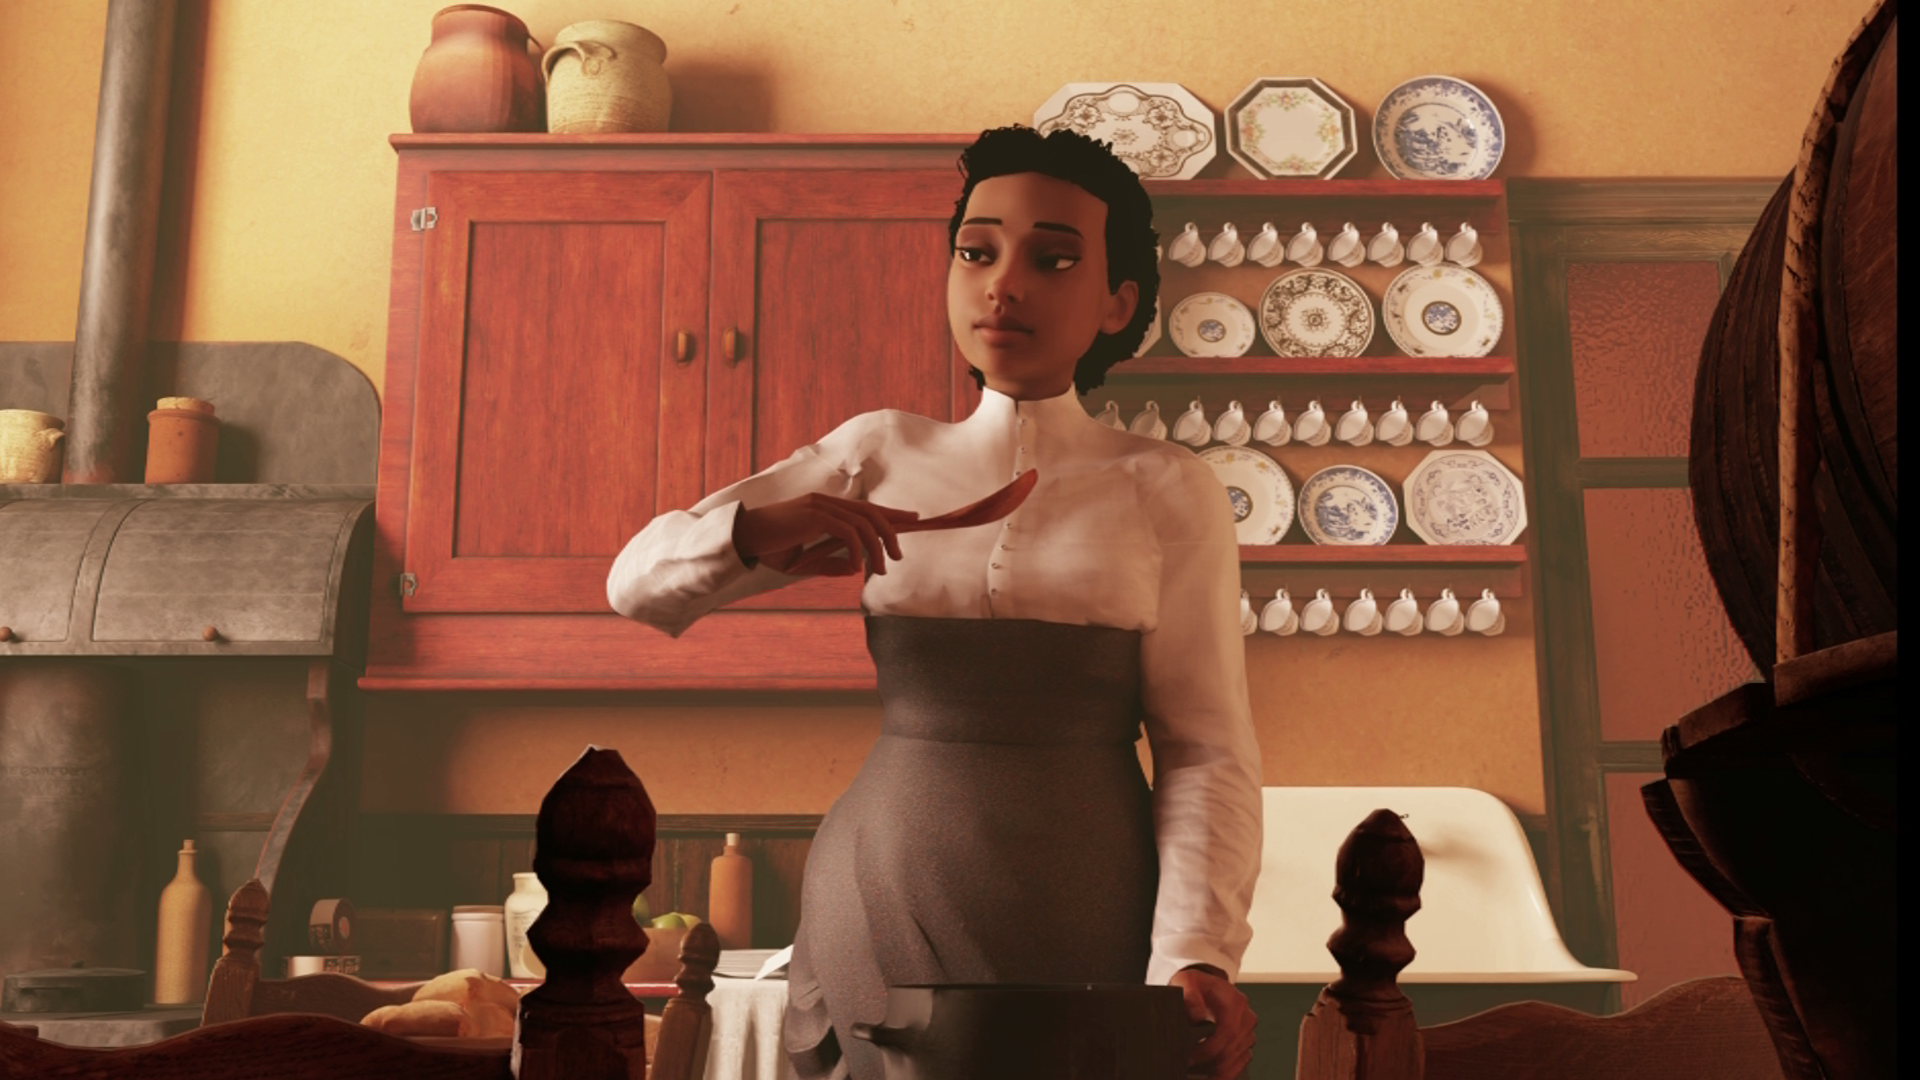
Once we have selected the desired character animation, we’ll just have to apply it to the character and adapt it to the scene we want represented in iClone. In my case, I had to select an animation of a cook stirring contents in a pan and another motion for taste-testing with a spoon. In order to make the 3D animations fit the scene, I had to connect the spoon to the hand, fix the other hand to the pan handle, and adjust all of the movements to fit the character I was working with. Finally, I animated the character’s gestures and eyes to bring her to life, which is without a doubt, the funnest part of the whole process.

NVIDIA Omniversef

Let’s start with the NVIDIA Omniverse platform, an application that is easy to download and completely free to use: Just register an account on their website and download the program. I’m adamant that everyone should try this software at least once due to its simplicity, usefulness, fun, and ease of use.

Once we have it installed, go back to the open project in iClone and look for the USD export button at the top of the program. In the subsequent pop-up window you can configure various aspects of the export, but in our case the default setting will work as they are. Next, click on the Export button to take the whole project along. We can click the Send to Server button to send it directly to Omniverse, but in my case, I’ll just work off of a scenario already prepared in the program.

Export an iClone project to NVIDIA Omniverse (image credit: José Tijerín)

Now, we will export our files to a folder and open the NVIDIA Omniverse Launcher – if not already opened. The Omniverse Create application can be found and launched from the Library menu. 

For my project, I just need to load a scene in which the character will be introduced. To do this, go to the File menu and click on the Add Reference option. Don’t worry if the character enters with whitish skin – thanks to iClone’s intelligent export system to Omniverse – all of the skin texture parameters will be adapted to the program. 

To apply the textures to a model in Omniverse, we first have to click on the model by clicking either on the 3D model or on its name in the list to the right and apply new material. Afterward, you’ll notice that the lower right window will be filled with the material properties applied to the model. These material properties will be editable after clicking on the material symbol. 

Apply textures in Omniverse Create (image credit: José Tijerín)

Applying the textures to the material is very simple, we only have to look for the folder with the textures in the Content window and drag the textures to different sections that make up the material and configure it in an intuitive way. 

For other occasions, as in the case of cartoon-style hair, we’ll need a special material. To apply a different material to an object, we have to right-click on it. In the floating menu that appears, click on the Create menu and, inside it, look for the Materials menu. For this example, I’ll choose one of the predefined Presets of the OmniHair material.

Character hair creation (image credit: José Tijerín)

In case of problems with the 3D animation, such as objects in Attach mode not moving correctly, you should go back to iClone and bake the animation. To do this, go to the timeline. In the CC3 Base Plus section, go to the Collect Clip track and select the entire animation track. Once selected, right-click and perform Add MotionPlus tro Library from the pop-up menu. Then find the custom animation in the content menu and apply it to the character. And in the situation where the facial expressions don’t work, you will have to update the programs and re-export the character.

The Three Different Render Modes in Omniverse

Next topic is on the Omniverse render modes, which is really impressive stuff. If we go to the top of the viewport we can see the lightbulb symbol. Click on it to see three types of rendering that Omniverse has to offer:

  • RTX Real-Time is one we have been seeing so far, which corresponds more or less to the traditional lighting of video games.
  • RTX Path-Traced is the strong point of the program.
  • Iray Photoreal is the most accurate of the group, but it is slow and computationally heavy.

One of the main differences between the rendering modes is the rendering time. For my project, the scene is complex in terms of lighting and textures, so to avoid noise in the video, the render times are quite long compared to the incredible speed that Omniverse usually offers.

Omniverse render mode: RTX Real-Time (image credit: José Tijerín)

The RTX Path Traced result is excellent with rendering speed so fast and of such high quality that you can work on the project while rendering without a problem. This gives you the possibility to tweak the scene without having to wait for the render to update; something that can speed up the production by a lot.

Omniverse render mode: RTX Path Traced (image credit: José Tijerín)

Finally, Iray Photoreal is NVIDIA’s bid to become one of the major rendering engines dedicated for the big screen. Compared to other industry-standard render engines, it can be plagued with some small shader problems in certain situations. However, judging by the color transmission present in the left-over food, it tends to give better results than other modes and can be quite impressive for some scenes.  

Omniverse render mode: Iray Photoreal (image credit: José Tijerín)

As you may have noticed, unlike the other modes, the rendering of translucent material does not work by default. So to make it work, we have to go to the Iray menu to the Render Settings section to find the Caustic Sampler option. When we activate it, we get a result that is quite impressive, even for a very simple scene.

Comparison of render modes of Omniverse (image credit: José Tijerín)

Render with RTX Path-Traced 

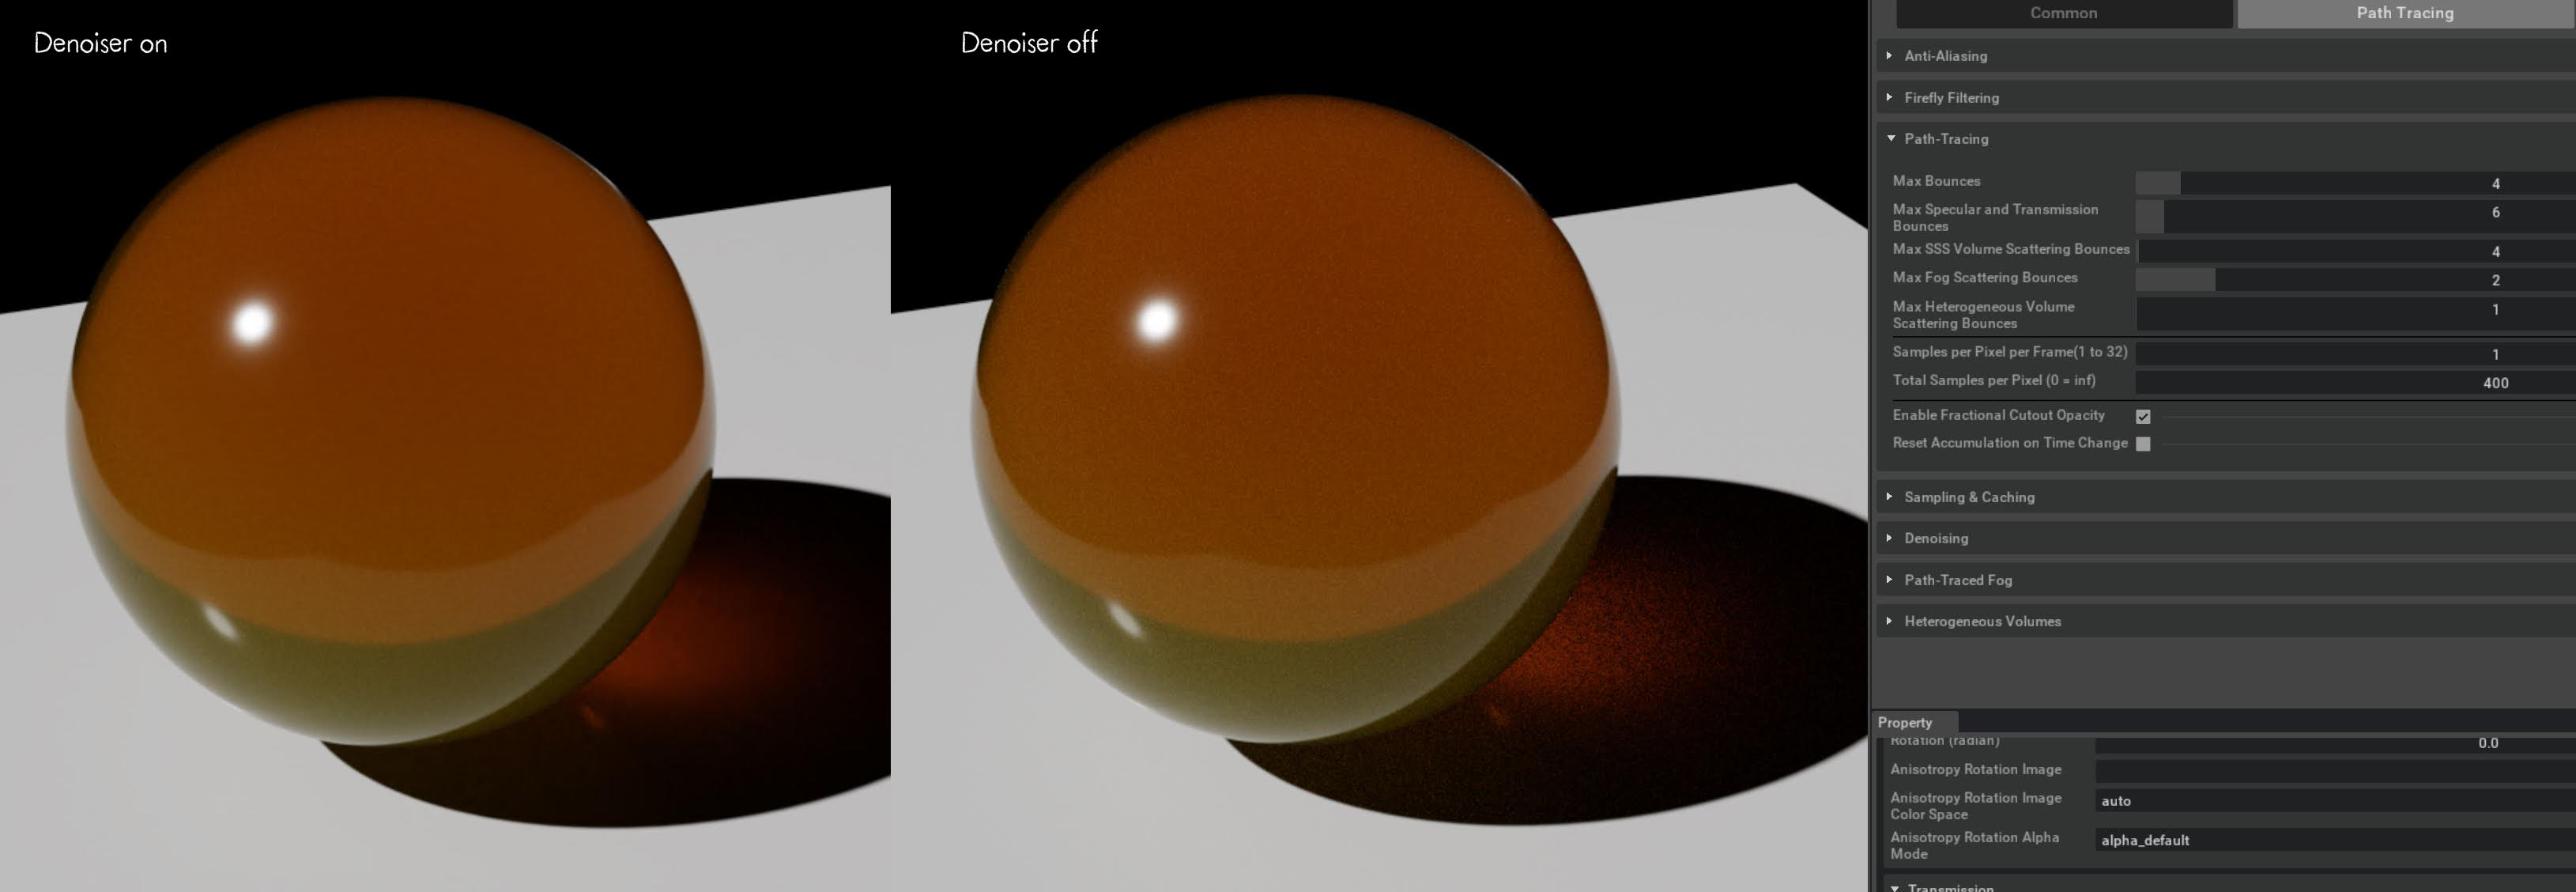
However, given the complexity of the operations to be performed to achieve this result, the time required for this mode to completely remove noise and achieve high definition is very time-consuming compared to the other modes. So I recommend choosing the intermediate mode to work in for good, responsive results.Now that we have chosen a render mode, let’s see how to go about rendering a scene. If we go to the Render Settings menu, we can find the Path Tracing rendering menu. Inside we can find two important sections: Path-Tracing and Denoising. To explain these parameters we are going to render a complicated material like the pre-defined material for honey.

Comparison of render modes of Omniverse (image credit: José Tijerín)

In the first section, we find the Total Samples per Pixel parameter. The higher the number, the greater the number of samples and the higher the quality, but at the cost of longer render times.

The second section is the Denoiser, a system that many 3D programs have been using for some years now. This system detects the noisy areas in the render and softens them. However, you have to bear in mind that the more samples you have to work with, the better the results will be.

Now that we have the basics set up, let’s render the animation by going to the Rendering menu and in the drop-down menu open the Movie Capture menu. In this window, we can configure parameters such as frame rate and resolution. Just select the option to Use Current (RTX Path Traced) and set the number of samples per pixel. When we are done we just have to assign a destination folder for the output images and hit the Capture Sequence button. 

The final result is quite good and we have obtained it in a very short amount of time compared to traditional renders.

Comparison of render modes of Omniverse
Comparison of render modes of Omniverse (image credit: José Tijerín)

Unreal Engine 5

Downloading and installing Unreal 5 is completely free, although we must have enough space on our hard disk and some previous knowledge of 3D programs to learn the engine.

Once Unreal is downloaded and installed, we are going to import the animations from iClone. To do this it is advisable to put both programs (iClone and Unreal) side-by-side on the same screen to optimize workflow. Once we have opened both programs, we must go to the Unreal Settings menu and click on the Plugins menu. In the pop-up window, type “Live” in the Search section to check if Live Link and iClone Live Link plugins are activated. 

You’ll notice that the new Live Link menu resides next to the Details menu. If we click on the Source button in this menu, we can access the drop-down menu and select the iClone Live Link option and then click Ok to accept the port number.

 iClone Live Link with Unreal 5 (image credit: José Tijerín)

iClone Unreal Live Link

After everything is ready on the Unreal side, we’ll go back to iClone for a moment to make the connection. To do this, we need to deploy the Unreal Live Link menu by going to the Plugins menu. After clicking on it, one should see the Unreal Live Link menu with the options for Transfer and Link. Make sure the Transfer option is selected and go to the bottom of the window and click on Transfer File.

After waiting a few minutes, we’ll have the imported character with all of its materials already configured. Next, we’ll need to link the animation to the transferred character by going back to the Unreal Live Link window in iClone and clicking on the Link button. Again, we have to go to the bottom of the window and click on the Active Link option. If you come across some problems with the linking process, you can click on the character and go to the Details window to diagnose the errors. Under the Animation section, make sure to set Animation Mode to Animation Plane.

Recording Unreal Animation

Now it’s time to record character animation in Unreal. To do so, go to the Sequence Recorder window where we will introduce the models we want to record into the Actors list. Once this is done, simply press the Record button and, when the countdown is over, press the Play button in iClone. When the animation has finished, we have to press the StopAll button in Unreal.

When we do this, a pop-up window will appear at the bottom right of the screen so that we can open the sequence directly. Now that the iClone portion of the process is complete, we can close the application to focus on the Unreal scene. As you can see, in addition to the models we have imported, the models linked to the animation sequence now appear in the scene. We can remove them from the scene so that they don’t get in the way while we work. 

If there are textures that you have forgotten to put into iClone, you can still apply them to the materials in Unreal. If we press Ctrl+Spacebar we can access the project content menu. Just import the textures into a folder and create a material. Double-click on the material to access the Material Graph, a graph view where you can drag the textures and connect them to the appropriate channels.

Record animation in Unreal (image credit: José Tijerín)

Once we have connected the textures, we just have to scale the material and drag it to the Materials section in the corresponding element of the model. Now that we have all the materials ready and the scene prepared, we are going to render the video. In the Sequencer window, we have to click on the film plate button to access the Render Movie Settings menu, where we can configure parameters such as the output format or the size of the frames. When we have finished configuring the parameters we just have to give it a destination folder and click on the Capture Movie button.

The result is really amazing for a video game rendering engine thanks to the revolutionary Lumen technology.

Unreal 5 render result with Lumen (image credit: José Tijerín)

If we remove Lumen, the same scene would look as below because the light would not bounce off of the walls in the room. Not having a system that bounces light into the shadows makes the light contrast too abrupt, even if the image was later retouched in post-processing.

Unreal 5 render result without Lumen (image credit: José Tijerín)

Continue reading in Part 2…

3D Render Engines for iClone: Choosing The Best (Part 2)

Comparison of Omniverse, Unreal Engine 5, and Maya V-Ray for 3D Real-time Animation

V-Ray for Maya

This tutorial is going to be carried out with V-Ray for Maya. Keep in mind that although the program works in a similar way in some applications, in others it does not. The common factor is the high price of the one-year license. If you have never used Maya or a similar advanced 3D program before, be warned that the barrier to entry can be prohibitive, with a high price tag. 

We are going to import the iClone animation into Maya to use V-Ray. This time, just select the scene elements, go to the File menu and select the Export menu to save the file in FBX format.

A floating window will appear in which we will have to select the Maya 3D preset from the different presets. Then make sure to export all the frames and click on the Export button.

Export an iClone project to V-Ray (image credit: José Tijerín)

To import the FBX file into the scene, we can drag it directly into the program or we can go to the File menu and look for the Import button to find the file on the computer. As long as we don’t separate the FBX file from the folder with the rest of the textures, the model will be imported together with the materials and textures. Unfortunately, we will have to recreate all the materials so that they are all V-Ray materials and appear correctly in the render. However, in order not to repeat what I already explained in the tutorial I talked about at the beginning, I’m going to skip all the creation of the character’s materials.

I’ll just remind you of the basics of rendering the scene. If we click on the Render Settings button, a floating window will appear. In it we will have to configure the animation parameters, the size of the frames, the type of samples to be used by V-Ray (which is in the Bucket option) and finally we will have to add the Denoiser element to eliminate the pixel noise that may arise.

V-Ray render settings (image credit: José Tijerín)

Detailed Comparison of Three Render Engines

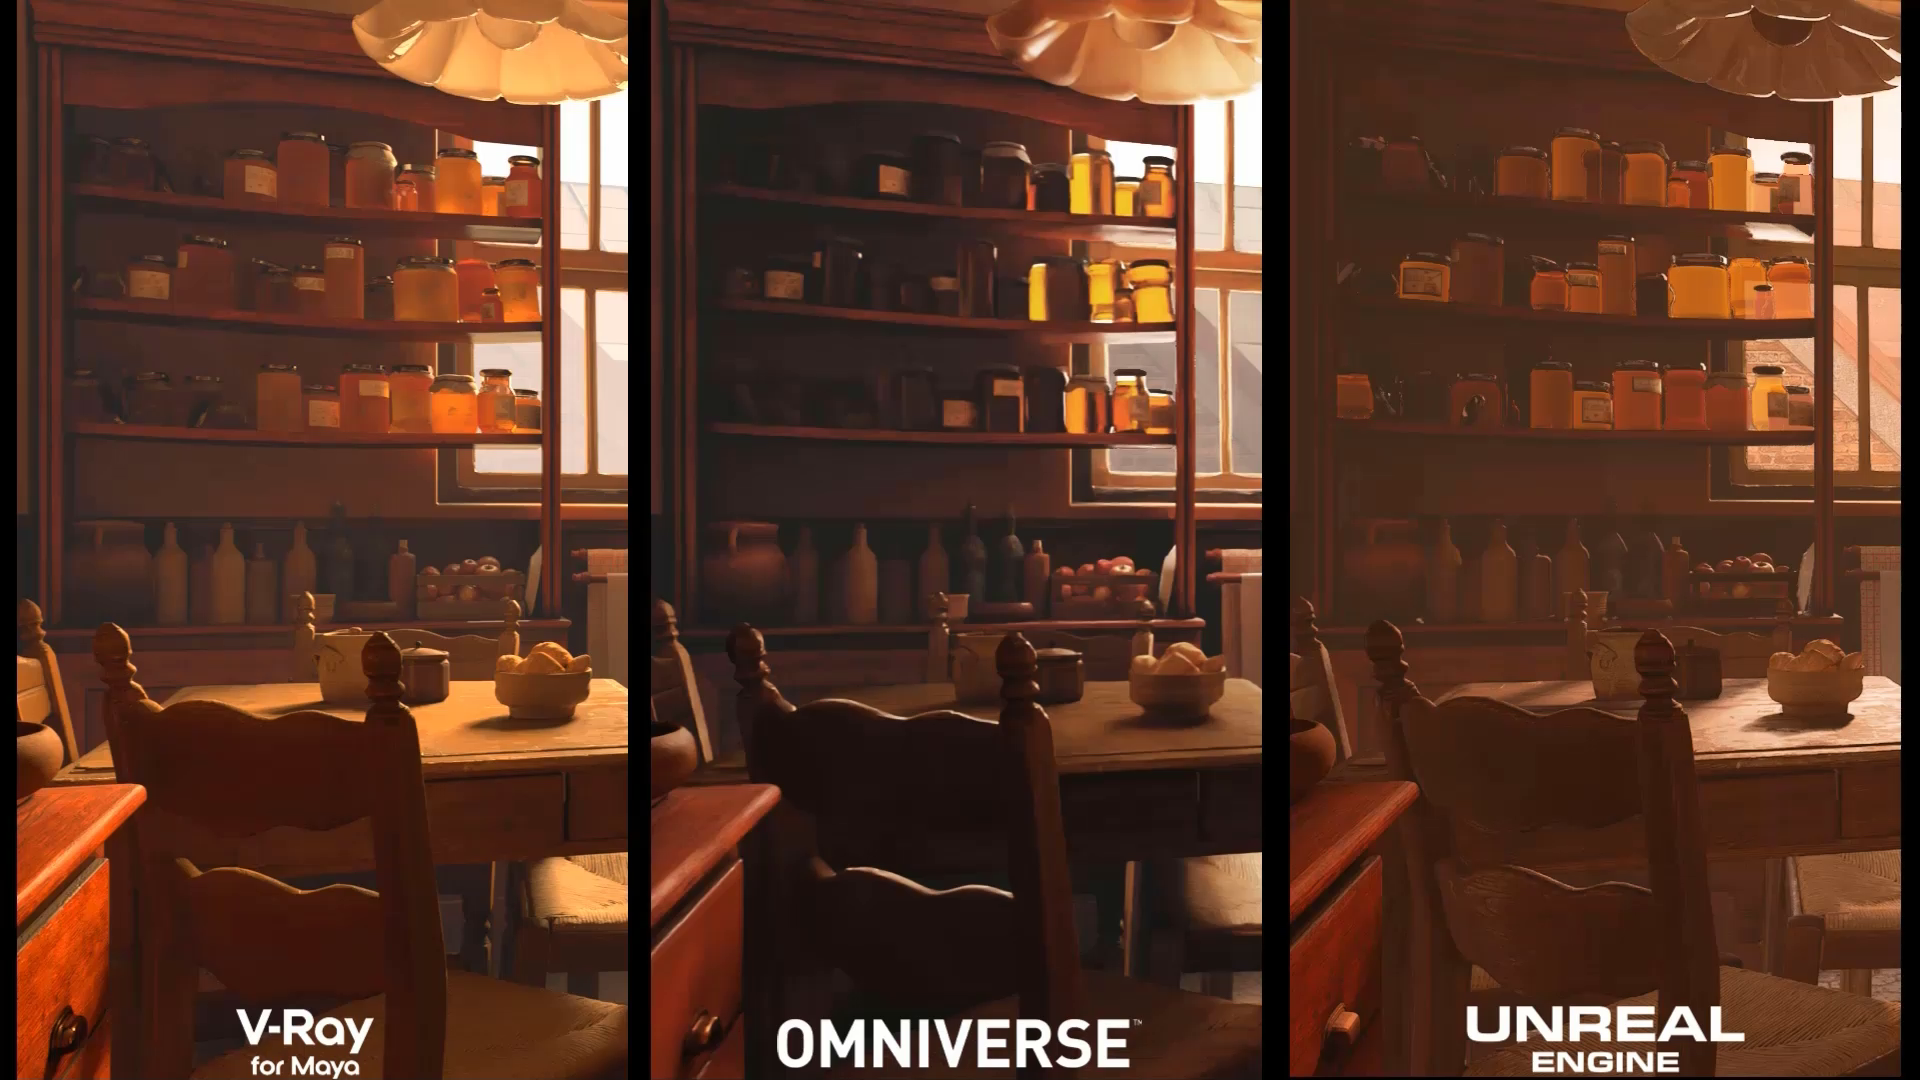
The Denoiser in V-Ray does a spectacular job, you can easily turn it on and off in the Frame Buffer window by going to the Layers menu. The rendering with V-Ray is without a doubt the one that offers the most polished result. The lighting has an incredible quality and softness and V-Ray’s handling of complex materials is also completely realistic, like the way in which light passes through honey in the glass jars. It should be noted that, unlike the previous programs which are free, Maya and V-Ray are priced.

We get a decent result in Omniverse, but it does not distribute the light as well as in the previous case. However, if we use Omniverse’s photo-realistic render, the result is quite good. Unreal gives a rather poor result which we can manage to improve with some tricks and effects. 

Comparison of 3 render engines (image credit: José Tijerín)

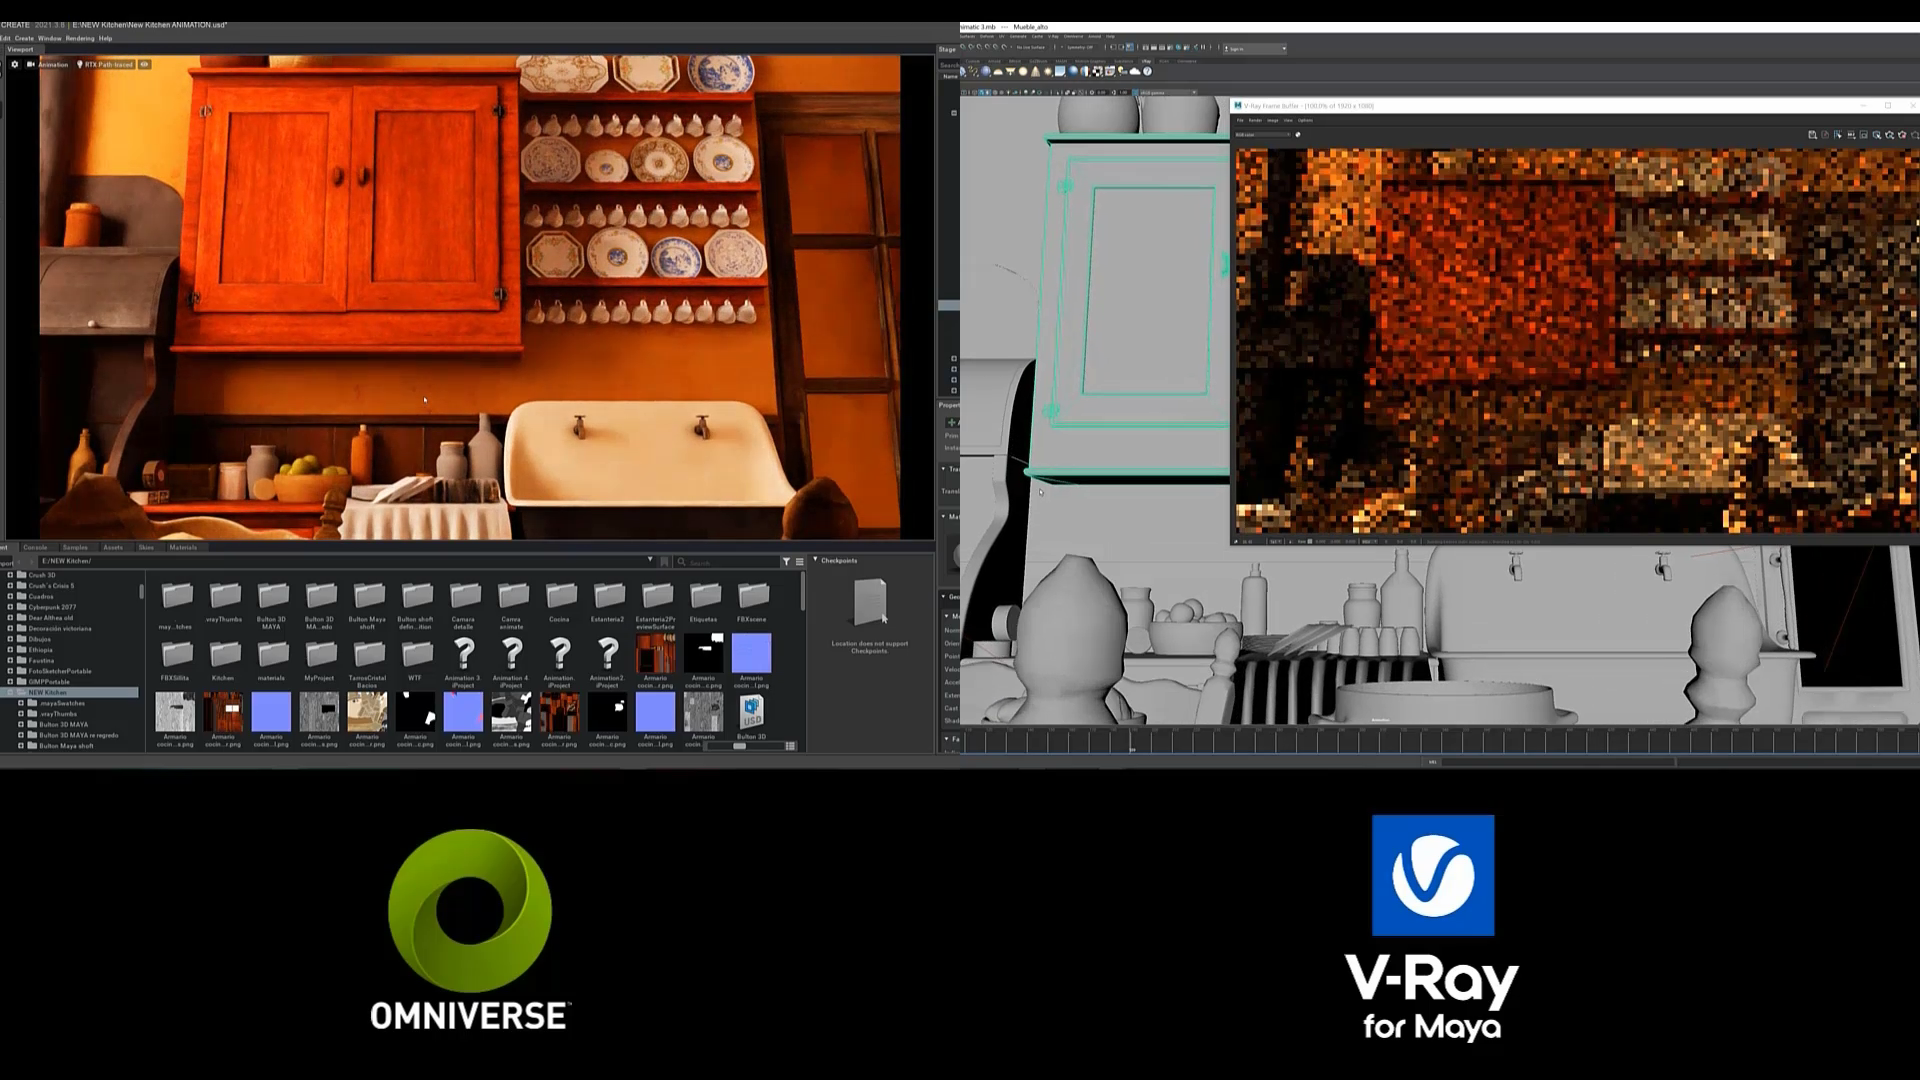
Continuing with the comparisons, it is clear that a big drag on V-Ray and other rendering engines is the time taken to render each frame with pixel noise removed. Thanks to V-Ray’s default Denoiser, this only takes 18 minutes.  It has to be said that this not only affects the final result but also the workflow. When working on 3D scenes, it is really useful to see the results in real-time. This can help us to spot errors, save time checking how the render is coming along, or even allow us to be more creative.

Comparison of render engines (image credit: José Tijerín)

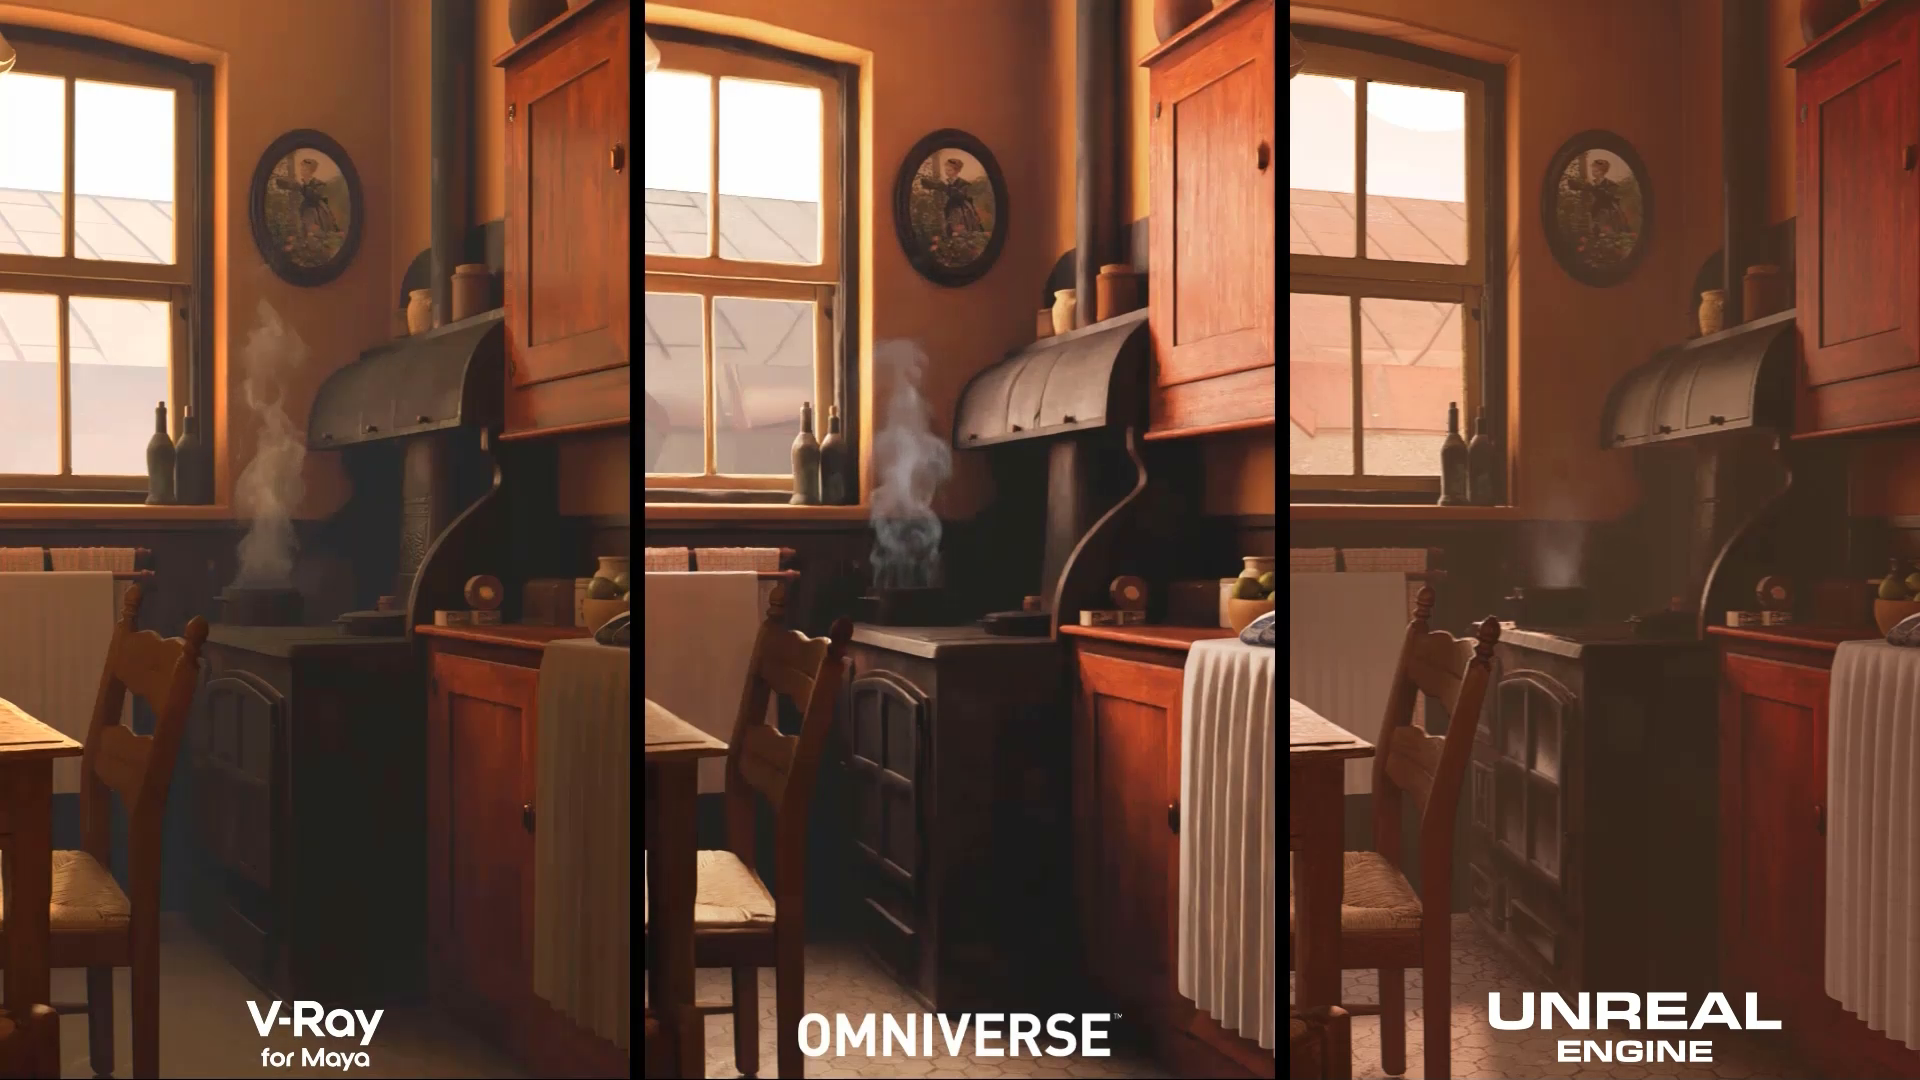
As for fluid simulations, apart from Unreal which can only use particle effects, both Maya and Omniverse give perfect results, however, the winning edge goes to Omniverse. Unlike the tediousness of working with Maya’s fluid simulations, and the dearth of options in Unreal, Omniverse allows you to edit the simulations in an accurate, intuitive, and hassle-free manner.

Comparison of 3 render engines (image credit: José Tijerín)

We can also compare the performance of the Denoiser in the different renders. In this case we also have to leave Unreal aside, because Lumen uses a completely different system. In this detail of a larger 4K render we can clearly see how both V-Ray and Omniverse denoiser does an excellent job.

Without de-noise, V-Ray renders still hold up with a more polished result and less noticeable noise, yet in Omniverse, the noise becomes less uniform and is noticeable in the overall image. Omniverse gives the best result when Denoiser is enabled across all renderers. It has to be said that the 10 minutes it takes for V-Ray to render the scene is a big hit to its advantage in this department compared to Omniverse’s near instantaneous solution.

Comparison of 3 render engines (image credit: José Tijerín)

Personal Opinions

I will end by giving my personal opinions as a professional who uses these programmes. 

These comparisons may be more or less accurate and I have no doubt that, at the rate these engines are evolving, this tutorial will probably be outdated in a short time. However, I hope that it has clarified your doubts and shown you new possibilities to enhance your work.

V-Ray for Maya: Powerful for Large Productions

V-Ray is a very powerful render engine that is used for all kinds of big productions, but that stands out above all for offering a hyper-realistic solution in both lighting and materials, which can be configured to achieve really complex results. It does a fantastic job with integrating computer generated imagery with live-footage. V-Ray is well-prepared to deal with really challenging scenes such as forests and cities, giving a superb and hyper-realistic result. This engine comes at a significant cost, but it can be installed on a large number of 3D programs, including Unreal Engine itself.

image credit: Marvel

Omniverse: Fast and Easy for Collaborative Workflow

Omniverse is a tool that is becoming essential for productions with tight deadlines. In my case, jobs that used to take days to render, I can now deliver with Omniverse on the same day. The fact that it is free and very easy to learn to use also makes it the best engine to start learning 3D and get good results from day one. Although it is new, the programme is constantly being updated, adding new functions and possibilities for free, which indicates that it is a programme with a lot of potential and a great future. These updates have made it the program that works best with Character Creator and iClone.

Having a direct link between both programs allows us to work better, without worrying about the compatibility between formats and materials, so we save a lot of time. So it is highly recommended to bring our characters and animations to Omniverse if we want to get amazing results in a short time. 

The biggest problem with Omniverse is that it is not as flexible as other programs. This is because it was designed to work closely with other programs. It is better to create and assemble the scenario in another program and then export it to Omniverse. Fortunately this is easy given NVIDIA’s facilities for importing work, for example, directly from Maya. 

This makes it even more advisable to work in Omniverse together with Character Creator and iCone, so that both complement each other and benefit from each other’s advantages. Many of the difficulties I encounter when rendering in the program could be solved if the program included, in addition to progressive rendering, a Bucket system like V-Ray; Something I hope they will incorporate in the future. The rendering problems that can be found in the program can be avoided, although it is advisable to always render at a higher resolution than the one we need to get a higher quality image.

image credit: NVIDIA Omniverse

Unreal Engine 5: Made for Video Games

Unreal Engine 5 Lumen and Nanite systems have revolutionized the world of real-time graphics. There are now film productions using this software in real-time because of its versatility and turn-around. The way it works with iClone in real-time is arguably what makes Reallusion the best choice for animating any production using Unreal. And this also applies to the world of video games, for which Character Creator and iClone have been designed from the ground up.

Working with iClone and Unreal Engine at the same time saves a lot of time and trouble, allowing us to be more creative. It’s great that even textures and materials can be passed to Unreal seamlessly, giving an amazing result. Metahumans can also be animated in iClone with the same degree of realism thanks to its incredible graphics allowing the scenes to translate well to other render engines. Having taken into account various important factors of production, I believe Reallusion presently has the best solution for giving life to digital characters.

If you are thinking of making a hyper-realistic video game, even as a beginner, this is the program for you. Not only because it is free and easy to use thanks to its node-based system, but also because of the ease of use with other programs and the great number of tutorials and features that it has to offer.

If that wasn’t enough, we can finish by saying that in recent times several of the main video game developers are developing their most impressive titles in this programme. Learning to use it can facilitate access to these studios or, at very least, come close to the quality of these blockbusters. 

image credit: Unreal Engine

I hope you like and enjoyed this tutorial. Remember to watch the video so you don’t miss any detail in the process that was covered here. Don’t forget to visit Reallusion for more online video tutorials and go to Steam to add “Dear Althea” to your wishlist.

Back to Part 1

befores & afters: How you can access Hollywood-style digital make-up effects

This article is featured on befores & afters.

Special thanks to befores & afters journalist Ian Failes for reporting on how Hollywood SFX make-up artists utilize Character Creator and SkinGen to successfully expand their business beyond their industry into animations, games, AR/VR, and much more.

Ada Productions gives filmmakers and content producers access to high-quality SFX makeup, which are digital alternatives to traditional prosthetic makeup. With the benefit of being reusable, SFX makeup comes in easily adjustable designs that can fulfill a variety of needs.

The main aim is for people to have access to really high-quality cinematic effects. […] We want others to have the ability to create something very quickly, very easily.

Simone Boria, CEO of Ada Productions

Both founders have extensive industry experience for the past 30 years. Simon Boria, the CEO, and founder of Ada Productions has worked as an art director, fashion and theatre designer, and broadcast journalist, and has taught film and media art analysis at the University of Art and Design Linz.

Stuart Sewell, another pillar of Ada Productions, has an impressive record as a prosthetic makeup and animatronics artist for Hollywood films since the 1990s. His SFX makeup have contributed to famous titles such as Frankenstein, Saving Private Ryan, The Hours, The Sea Inside, Lost in Space, and many more. What motivated Simone to found Ada Productions was the inevitable wave of digitization within the entertainment industry.

There was a worry that practical prosthetics would be removed from film altogether, but actually I think it’s like a complementary thing. I’ve seen quite a few makeups that have been enhanced by digital.

Stuart Sewell, Chief Product Designer of Ada Productions
This creation relied on the DMFX design tools by Ada Productions.

With an open mind toward CGI production, they have had many trials with different 3D tools. In the end, they settled on Reallusion’s pipeline solutions due to unrivaled convenience and interoperability. The Reallusion ecosystem of solutions allows for seamless connection with other 3D software, enabling them to transfer their interdisciplinary knowledge, immense experience and artistry into the digital realm.

With something like iClone and Character Creator, what I like about them is that they’re iterative and elastic. They allow you to change things on the fly.

Stuart Sewell, Chief Product Designer of Ada Productions

Download Character Creator: https://bit.ly/37k0wp8

Learn more about SkinGen Premium Plug-in: https://bit.ly/3KDjMwx

Learn more about Ada Productions: https://dmfx.tools/

SkinGen assets by Ada Productions: https://bit.ly/3vdmUbJ

Read the full article on befores & afters: https://beforesandafters.com/2022/03/31/how-you-can-get-access-to-these-hollywood-style-digital-make-up-effects/

Character Creator 4 – Create Animated Personalities

Work in Progress : Part Three 

In the latest WIP III video, we’d like to show how artists can create accentuated characters with their unique set of expression styles. With the newly introduced Expression Profile Editor, designers can use native modelling morphs and bone tools to reshape expressions. Artists can take advantage of the FBX workflow between Blender, Maya, and 3ds Max to create custom expression morphs, to make batch facial updates back to Character Creator.

Furthermore, Delta Mush helps you smooth the messy parts of the mesh, either to fix the cloth distortion or to clean facial morphs. Character Creator 4 enables everyone to produce high-quality models which are ready for animation for well-crafted personalities.

Expression Editor: Native Morph Slider Editing

With well-constructed interface, users can easily adjust different angles of characters’ facial features. Not only does the succinct thumbnail design make editing more intuitive – what you see is what you get – but the Modify panel also enables users to tweak each morph slider in detail. Without the aid of any third-party tool, artists are encouraged to use Edit Mesh to design their own customized morph sliders in Character Creator 4.

Red dots in each thumbnail are parts controlled by the morph slider. Artists can edit the mesh of each slider to customize the characters’ stylized expressions.

Blink animations are probably the most challenging area for making characters unique and come alive. In Character Creator 4, blink animations rely on five distinct morph sliders: Eye Blink, Eyelid, Eyelash, Eyeballs, and Eye Look.

By adjusting the source morph target shape of these sections, each expression morph slider can be revised, and with the use of the Mesh Edit tool, one can quickly overcome these obstacles. Lastly, having finished the eye animations for one side of the face, artists can use the Mirror tool to instantly apply the same slider settings to the other eye.

The Mirror function can be seen at 3:11.

Besides modeling morph targets, Character Creator 4’s Bone Adjustment feature can be used to modify specific facial expressions and mouth motions that is often inextricably linked to jaw movements. Freely design nuanced emotions by customizing the mesh of each morph slider. Customizations to the mesh editing, bone adjustments, and morph target models can be saved to custom sliders.

The Quick Update feature refreshes the iClone Muscle Edit data along with facial mocap to give unique styles of animation to your characters that is hard to emulate.

Bone adjustment – Jaw

The Highlight feature can promptly update the viewport to preview changes made to the morph sliders, which is very useful for fixing morph shapes while checking specific expressions and performances. In addition, morph sliders that are activated during playback are clearly listed under the Currently Used section of the interface.

Besides the existing Expression Editor, Character Creator 4 provides Mesh and Expression Set for exporting individual facial morph sliders in sequential frames, which are editable in third-party 3D software, with which you are familiar with. Consequently, artist taking advantage of the seamless GoZ pipeline process between Character Creator and Zbrush can update their custom expression shapes on the fly, with a simple click of a button.

Single slider update – GoZ  

Ⅰ. Once you’ve made your adjustments using expression sliders, you can bake your work as a component of the character’s expression profile. 

Ⅱ. Press the GoZ button to export it from Character Creator (CC) to ZBrush for advanced editing.

Ⅲ. Export those edited profiles back to CC using Re-Align function to update the newly designed expressions on your characters.

Expression Editor: External Blendshape Editing (FBX/OBJ)

Beyond fixing CC3+ characters, you can take a custom rigged character from Blender or other 3D applications and add an entire personality within hours. Directly import FBX blendshape files from Blender, Maya, 3ds Max, Unity, Unreal, Motion Builder and Cinema4D, just to name a few.

Most importantly, the Batch Update feature of Character Creator 4 enables you to import/export the enormous expression files all at once. Less tedious than ever, the new painless workflow gives precise results in a very short period of time.

Batch update – FBX Pipelines : Blender
Batch update – FBX Pipelines : Maya
Batch update – FBX Pipelines : 3ds Max

Mesh Smoothing Tool: Delta Mush

Besides the Expression Editor, Character Creator 4’s Delta Mush helps artists to mesh smooth the characters’ facial expressions and body topology, including outfits, shoes, and even the patterns on their clothes! Whole or partial mesh can be cleaned to achieve proper topology. This is especially useful for characters with faulty or irregular mesh as a result of intensive model processing.

• Fix cloth distortion

• Clean facial morphs

You can check the 3D Character Creation & Animation webpage for more information about the free upgrade offer, feature comparison, and FAQs. If you’re interested in the Character Creator 4 motto of “Enlivening any Character” and “Animating any Rig”, you can refer to the article ‘Working in Progress: Part One. It’s also recommended to watch the Sneak Peek review narrated by Russell Midfield, who precisely explains each feature. For more technical details, please have a look at our latest New Features Introduction.

If you have further questions, please contact our Support Team, or join the discussion at Reallusion Forum.

Winning Tips & Tricks: The Making of Petar Puljiz’s “Dear Rosie” Showcase

The “Winning Tips & Tricks” series covers practical workflows and techniques shared by winners from the “2021 iClone Lip Sync Animation Contest”. To let users see the full spectrum of the iClone facial pipeline, we are introducing projects that are rendered with different 3D engines including; Unreal, Unity, iClone, Blender, and Cinema4D.  Let’s now take a look at Petar Puljiz’s: “Dear Rosie”, combining workflow in Character Creator, iClone, Marvelous Designer, Blender, and Unreal Engine.

Petar Puljiz

Hello! I’m Petar(Peter) Puljiz, originally from Split, Croatia. I describe myself as a visual producer and artist, but I work in many roles. Currently, my main role is Visual Artist in Lowly from Trap Nation where I produce and publish experimental visual content for music. My current focus is based on virtual humans, and their implementation and representation on digital/virtual platforms. One of my virtual humans is mister visual, which I will write more about soon.

Why did I create this showcase? 

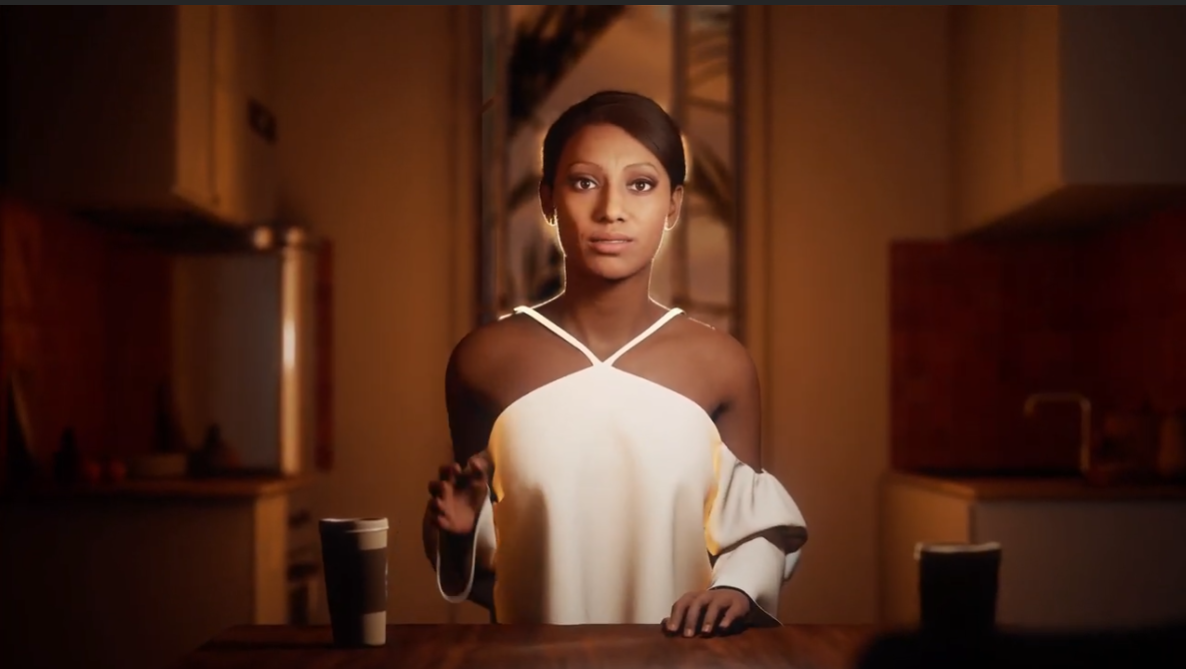
The goal of this project is to explore what’s the most fun and painless way to animate complex characters such as Metahuman with a variety of tools. I used to believe in a lie that I would be able to get character animation straight from motion capture. But then I found I was a bit naive, because it requires a lot of data-cleaning for the captured motion data, and that’s just the way it is. Since I’m getting into a new storytelling format – virtual influencers – I need a lot of tools in a one-stop-shop solution, and a more streamlined process to animate MetaHuman. The iClone Lip Sync Animation Contest was a great motivation to free up time and dive into their tools. So I set up some criteria, took a deep breath, and dove into iClone!

A quick summary of my workflow

  • After refining the Rokoko mo-cap data, I used iClone’s Motion Layer Editor to create several natural body movements emphasizing the character’s talking animation, including hand contact on the table, and grabbing and releasing the cup prop.
  • Like the other contestants, I used AccuLips to drive the main lip-sync animation and observed the Unreal render in real-time via the iClone to Unreal Live Link.
  • Instead of using a facial mo-cap, I chose to blend subtle emotional expressions using iClone’s Face Puppet and made final detailed tweaks via MetaHuman’s facial controller.

I relied on Marvelous Designer to create the character’s unique dress and gave it a dynamic animation within an environment built up in Blender. Now you know the outline, let me just break down the details of each production phase.

How I do it with Reallusion Tools

Preparation: Concepting my character

First, I step into the shoes of my female character, Rosie and describe her personality, situation and anatomy. I try to look at the world from her point of view. It helps me to know how she acts and behaves in certain situations, which will ultimately reflect in the 3D animation.

Step 1: Rokoko – mocap, gloves, and suit: preparation work and motion data capturing

I used a Rokoko Smartsuit and its Smartgloves for motion capturing. The first reminder for you would be: Please get used to the suit! Because the suit is very tight, it will restrict your movement when performing. Don’t be afraid to stretch the costume to extend your body movement — you need to feel comfortable first!
Mocap animation provided me with an awesome block-out for movement; it gave me great timing and canvas to animate. After the mocap session was over, we prepared the data to retarget from Rokoko to iClone via 3DXChange. It’s easier if you have a plugin, but this is a good way to do it too.

Step 2: iClone – clean up, additive layer for the body, Acculips for mouth animation editing, and Facial Puppet for the rest of the face

Here we are, the moment of truth! I start to click around, seeing all the tools, I take a brief look at official documentation to get a much clearer vision. I begin placing a Metahuman dummy and ExPlus face in the scene with additional props that my character will interact with and setting up an additive layer to manipulate the mocap animation data and fix root motion. All the while using IK controls to get bigger moves and polishing it with FK controls later on. I parent the cup of coffee to the hand bone, and when it leaves it on the table I deactivate it. I fell in love with Reach Targets — ain’t gonna lie! For hand placement, I used ReachTargets so the hands stay on the table, and then deactivate it when the arm needs to be raised.

For fingers, Gestures help me to create main keys and then I polish them manually. After the body, I started with the face, and the first item is the mouth, using AccuLips to create the main layer of animation editing. Then I used iPhone LIVE FACE to get a good foundation for the rest of the face.

After the mouth, I did the eyes, eyebrows and nose. For the whole time, I had a second monitor with Unreal Engine and Live-Link turned on to exactly see what I’m getting, not relying solely on the iClone viewport.

Step 3: UE4 – Record 3D animation and ControlRig clean up and additive layer.

Unreal Engine

Once I finished with character animation in iClone, I transferred the animation data to Unreal via Live Link and Take Recorder. Disable the Reduce Keys option because we want to preserve all of that “juicy” animation (raw data). Also, I set up all my keyframes in Linear, because every frame is keyframed and you wouldn’t want auto-smooth or curves as they can create errors.

In Unreal, I import animation on our character, bake data to Control Rig and play with it a little bit. I spent some time here, just to clean up stuff we don’t need and put some more fine-tuning, especially for the face.

Step 4: Import the baked animation sequence from Unreal Engine and convert it to Alembic with a fixed table prop

Once done and satisfied with the animation editing, I bake ControlRig Animation Sequence to get an animation asset from it. With that, I export animation in FBX format. From there we import to Blender to convert it to an Alembic file which will be imported to Marvelous Designer.

Now, bake an animation asset from the control rig animation in Unreal Engine 4, and export it as FBX to Blender. Convert the animation asset to Alembic cache and send it to Marvelous Designer for cloth simulation.

Step 5: Marvelous Designer garment and simulation

The goal here was to test the pipeline and create small interactive cloth details. After importing the Alembic file, apply the motion to simulate the cloth animation.

Step 6: Transferring from Unreal Engine 4 to Unreal Engine 5

Our simulation is done and ready to be imported to Unreal. Once every setting is completed in Unreal, I continue to finish our scene and lighting. And after a couple of hours of adjustment, voila! That’s how I complete it, and now I’m ready to send all the animated files for full render.

Hope you enjoyed reading my tips and tricks!

Development Studio creates game on hit Reality TV Show: BIG BROTHER

Dr. Finn Krewer | Head of Development, 9th Impact

Dr. Finn Krewer – Founder / Head of Dev at 9th Impact

Finn Krewer is a founder and head of development at 9th Impact with responsibility for the development of Big Brother: The Game. Finn has been developing games since he was 14 starting on Xbox 360 and has developed on consoles, desktops, web and mobile for over 15 years.

He has worked as technical lead on franchise projects including Biker Mice, Danger Mouse and now leads the multi-disciplinary team dedicated to Big Brother: The Game. Finn received his bachelor and doctorate of computer engineering from National University of Ireland, Galway for his work on FP7 funded AI project SI-Elegans and his work Neural Network FPGA design and ultra-wideband medical radar applications.

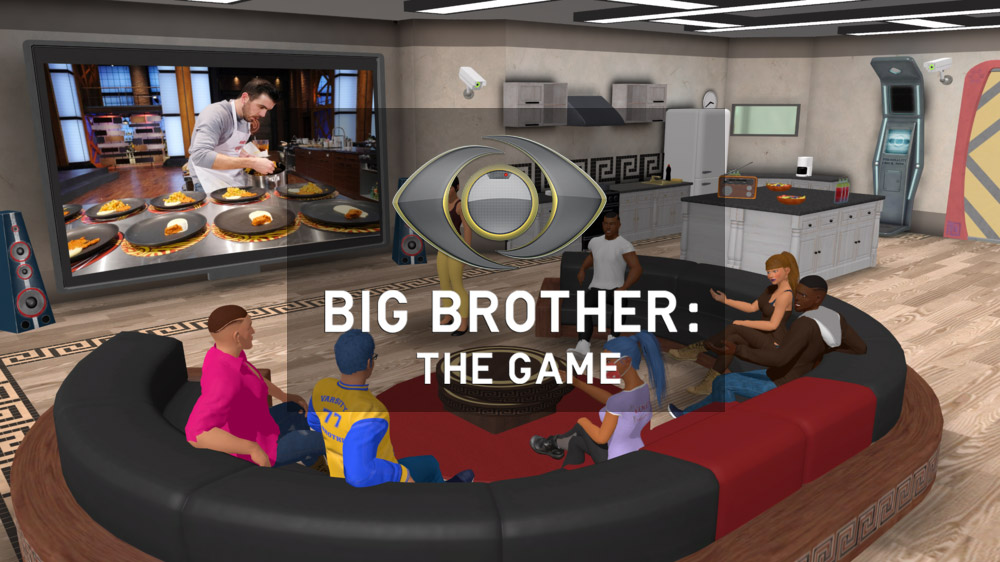
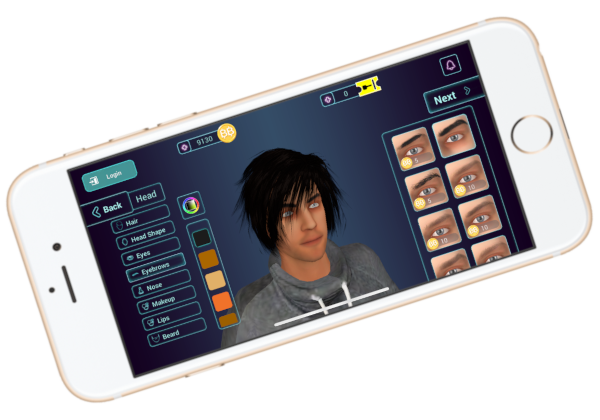
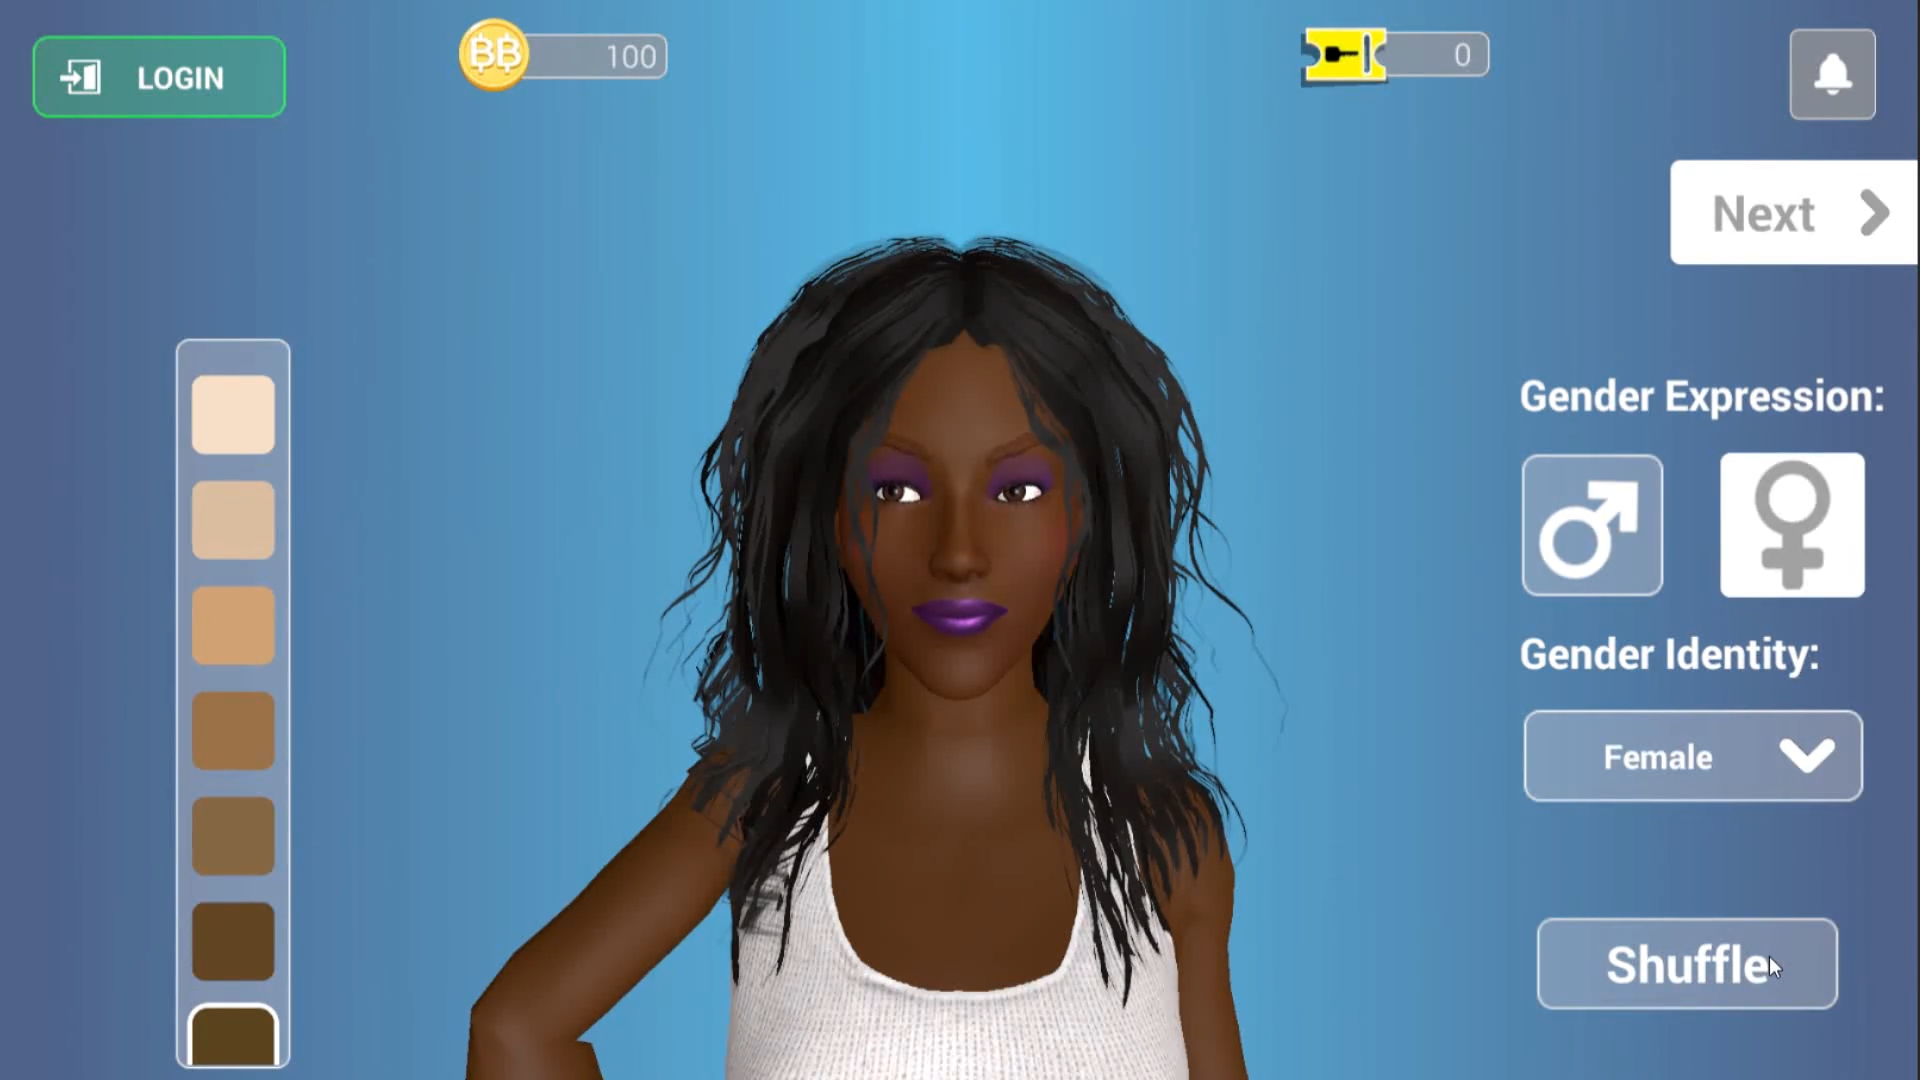
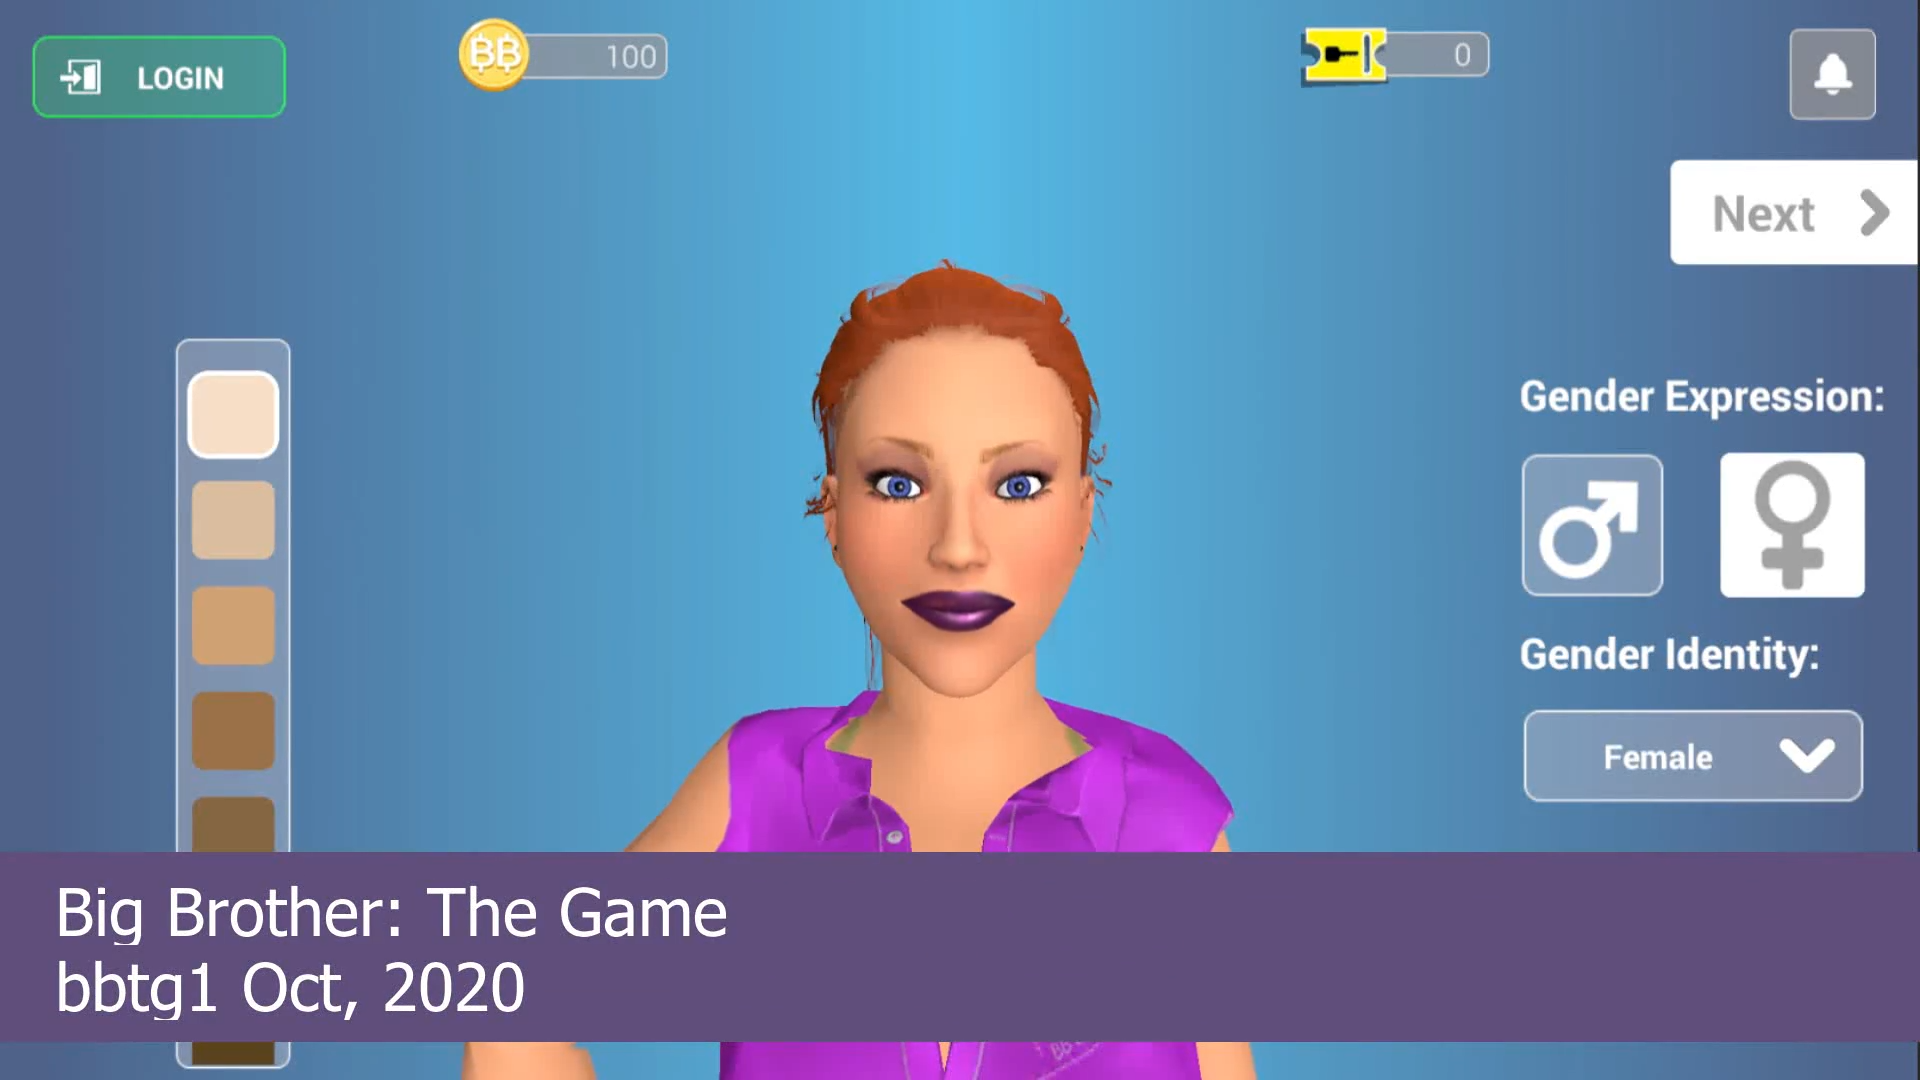
Game development studio 9th Impact uses Character Creator to generator over 1 million character variations for hit reality TV show game: Big Brother.

” Character Creator is a very fast workflow where conforming and skinning is immediate and without designer intervention except in some edge cases. The availability of a large clothing library for Character Creator also allows us to use and customize stock outfits.”

Dr. Finn Krewer | Head of Development, 9th Impact

Q: Hello Finn, and welcome to our Reallusion feature stories. Kindly introduce 9th Impact Studios, and the game development that your studios specializes.

9th Impact is a game development studio who partners with TV studios to make the official games of TV shows. We design games that fans of the TV show will love, so we don’t focus on any one particular genre of game. We are a small team but carry out game design, development, art production, testing and publishing in-house, which gives us tight co-ordination across disciplines and the ability to undertake complex and technically challenging projects.

Many of our games are cross-playable on different devices and we develop for mobile, PC, Facebook and Switch. Typically our games are localised into many languages. 9th Impact have created the official games of Biker Mice from Mars, Danger Mouse, Sunny Bunnies and Big Brother and have 2 new TV titles in development.

Q: Your team is currently working on Big Brother: The Game, based on the hit television series. Could you share with us the vision behind creating the game? How do the mechanics emulate what happens in the show, how do contestants participant in this experience?

Big Brother is the most watched TV show in history – 500 series have aired across 69 markets, producing over 28,000 episodes. So we knew that a large proportion of the global population would have watched Houseguests on TV competing in Big Brother.

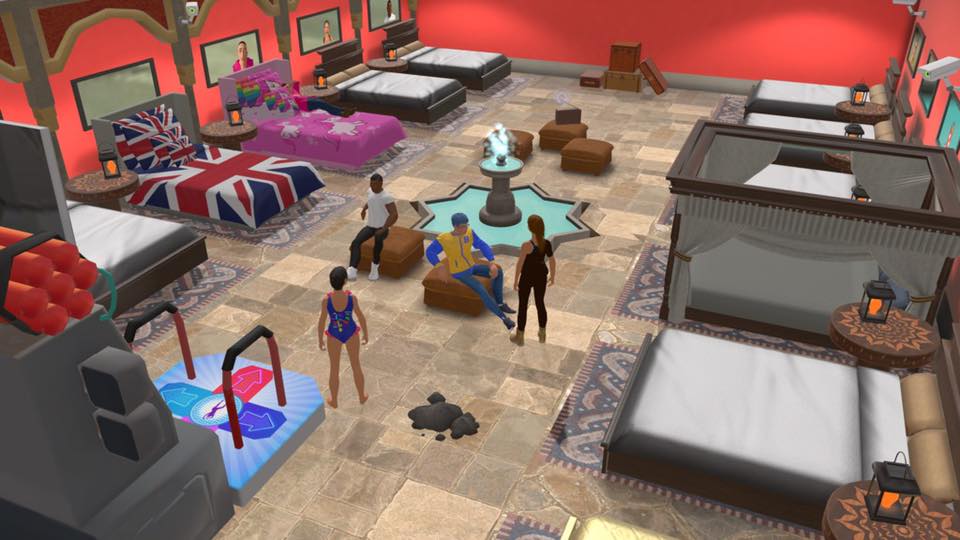
The vision of the game was to create an official season of Big Brother where the TV audience could become the Big Brother Houseguests, using their mobile phone or PC as their portal into a virtual Big Brother House. The game is played in real-time, so the experience is slower than what you might expect from a mobile game, but becomes very immersive. A player is place in a House with 7 other real players. They get to know their Housemates and communicate via chat, voice messaging and private messaging. The latter is important for making secret alliances and plots!

Each day players compete in a mini-game to become Head of House. The Head of House chooses the nominees for eviction. There is Power of Veto competition that allows the winner to take one of the nominees “off the block” and force the Head of House to select another Housemate. At the end of the day, the Houseguests all vote on which nominee to evict.

The last remaining Houseguest is the winner of the House and continues to the next Tier. There are 7 Tiers in total and the winner of the Tier 7 House wins the grand prize. The prize fund increases with the number of players up to $1,000,000 with a guaranteed minimum of $50,000.

Q: With the Character Creator ecosystem, your team was able to create high quality avatars for the game. How were you characters originally made, and what made you decide to use Character Creator? What advantages does this application bring to game development studios?

Originally we would develop one base character that we would then create clothing for using tools like Marvellous Designer, Blender and Maya. The biggest effort in this path is the iterative conforming and skinning of clothing and accessories onto the base character.

In Reallusion Character Creator this is a very fast workflow where conforming and skinning is immediate and without designer intervention except in some edge cases. The ability to autohide elements of the base character which are hidden by clothing also decreases vert count and decreases clipping, in turn this decreases the need to conform and reskin multiple times.

The availability of a large clothing library for Character Creator also allows us to use and customize stock outfits to the Character Creator base character. Once conformed and skinned the clothing can then be directly used by the game engine.

Q: Season 2 of Big Brother will include over a million character variations. Typically what is your creation process like and how long does it take to create characters for the game?

The individual character variations are broken into slots which are available in the game such as Hair and Outfits. Each variation is prepared in Character Creator on a standard body which does not change. This allows the character to be built from multiple sections such as Hair, Outfit, Feet. Very basically the process includes selection of variation, application to the base character, conforming, skinning, skinning correction and pose testing in Character Creator.

The export pipeline then takes the required mesh and textures out to the engine. Finally, during engine import the Character Creator plugin is used to set up standard options and the UMA plugin is used to set up the options for the imported slot with all metadata and textures. Changing to Reallusion as our core character art toolset for season 2, reduced our production time by half and improved the quality of the output.

Q: When does Big Brother Season 2 begin, and how can the community join in on the fun?

Big Brother: The Game is available right now and players can join the competition by getting the game on App Store, Google Play, PC download and it is coming to Steam soon.

App Store:  http://bit.ly/bbtg-app

Google Play: http://bit.ly/bbtg-gp

PC (Windows): www.bigbrother.game/download

Steam:  https://store.steampowered.com/app/1388050/Big_Brother_The_Game/

Follow 9th Impact:

Website:
https://9thimpact.com/

Facebook:
https://www.facebook.com/9thimpact/

Twitter:
https://twitter.com/9thimpact