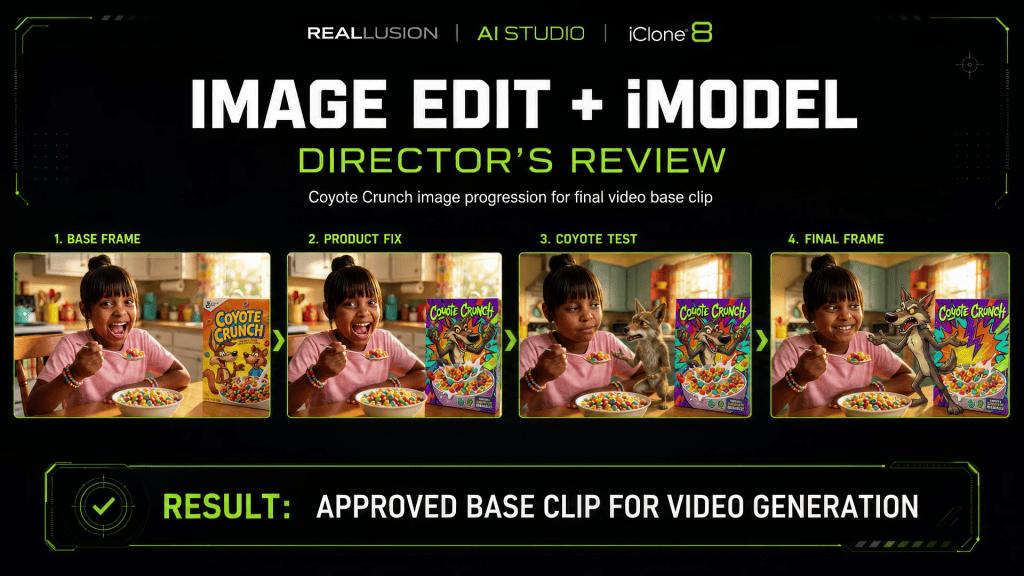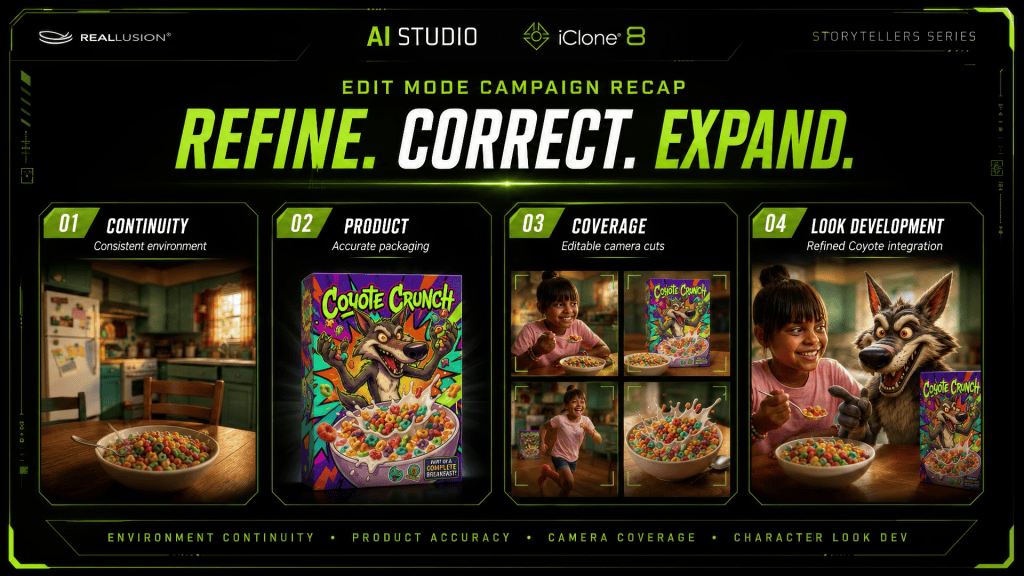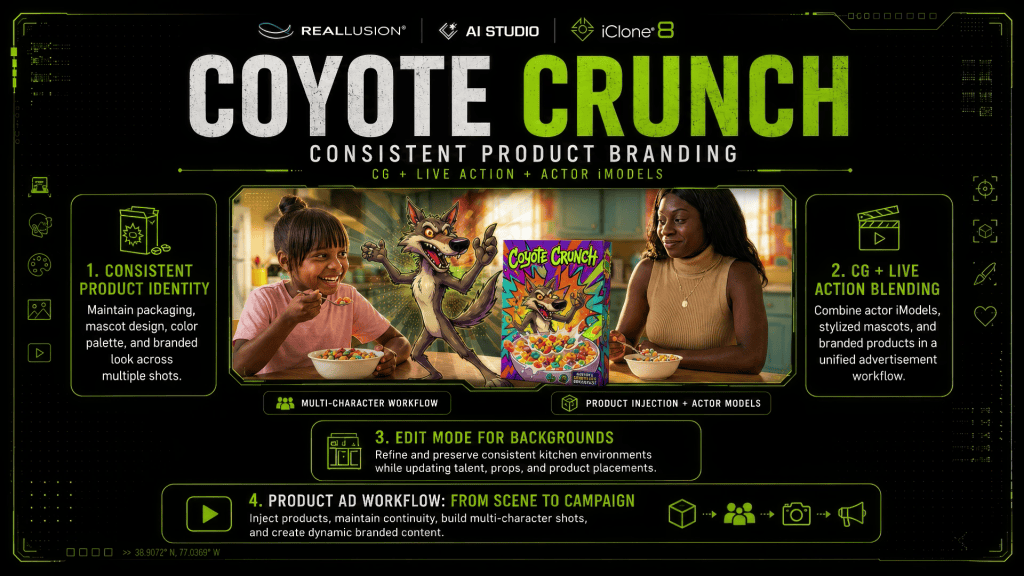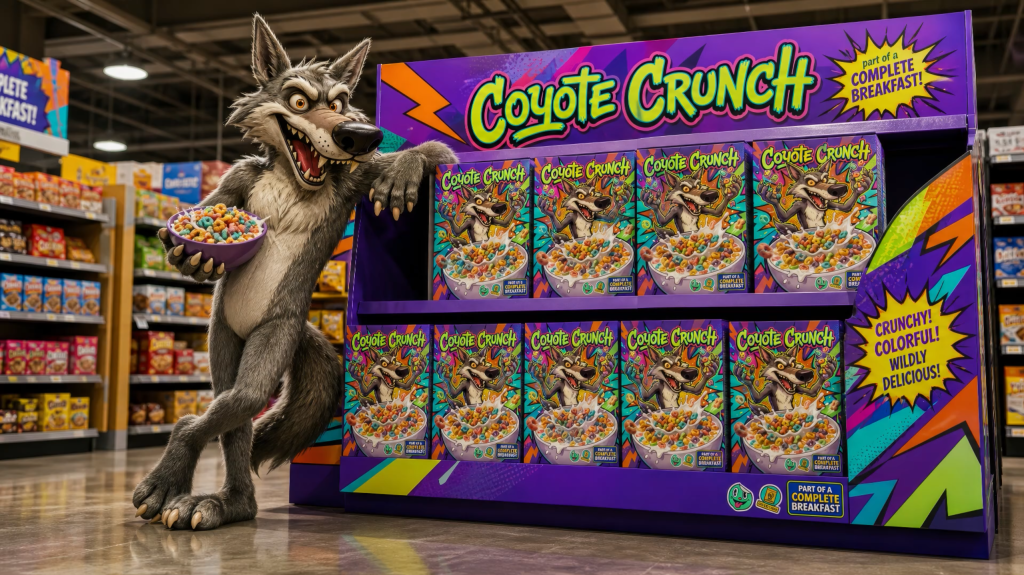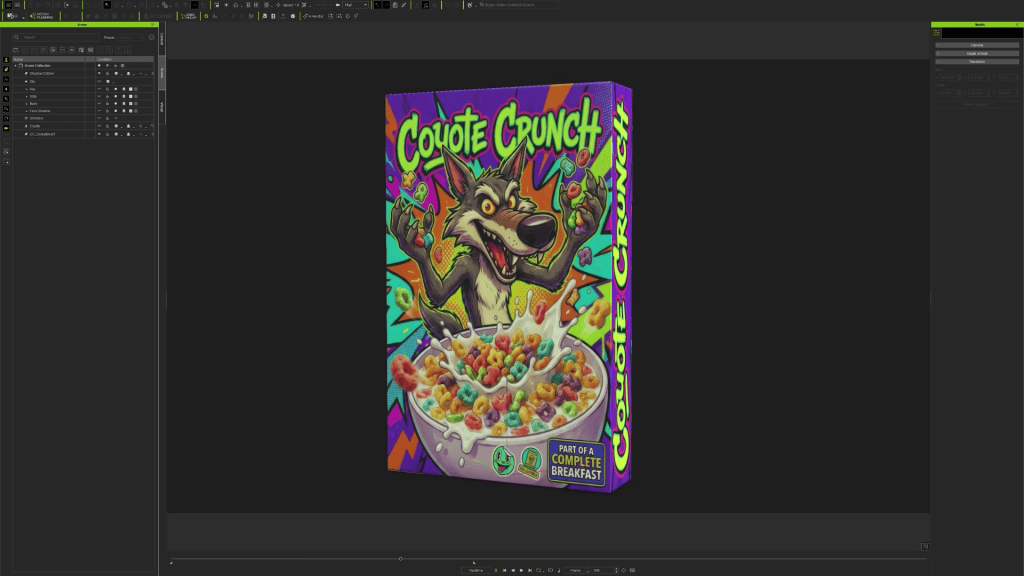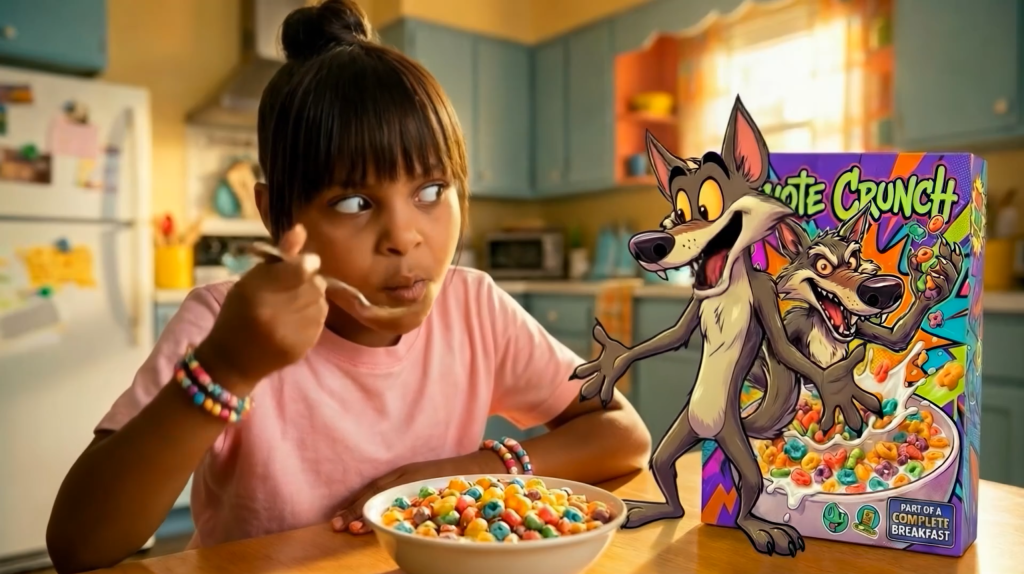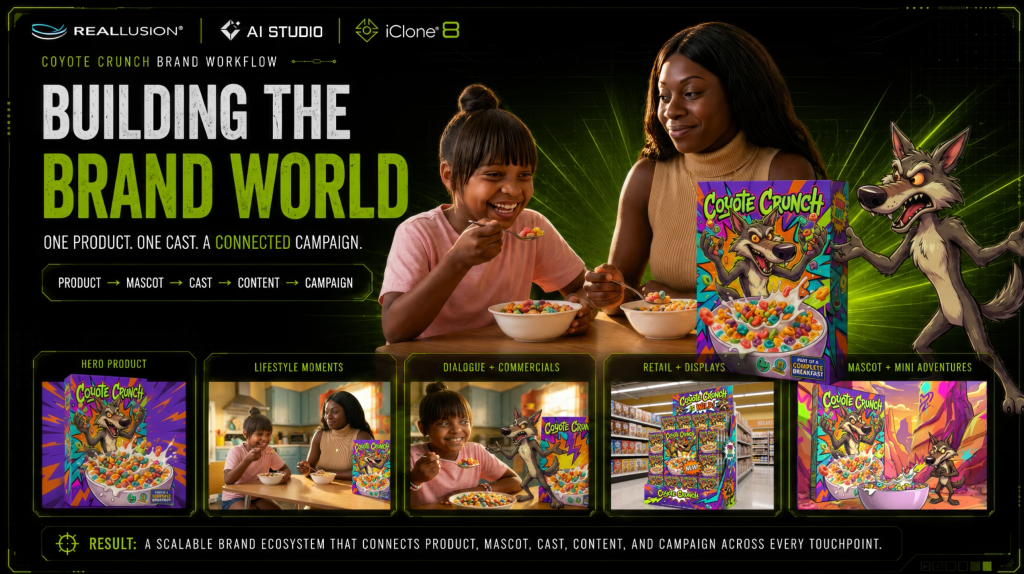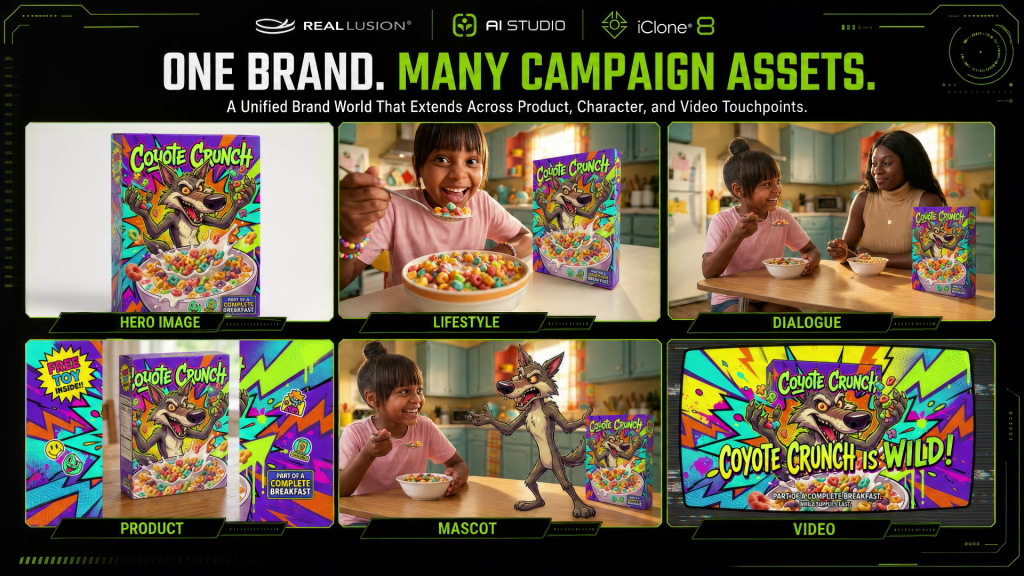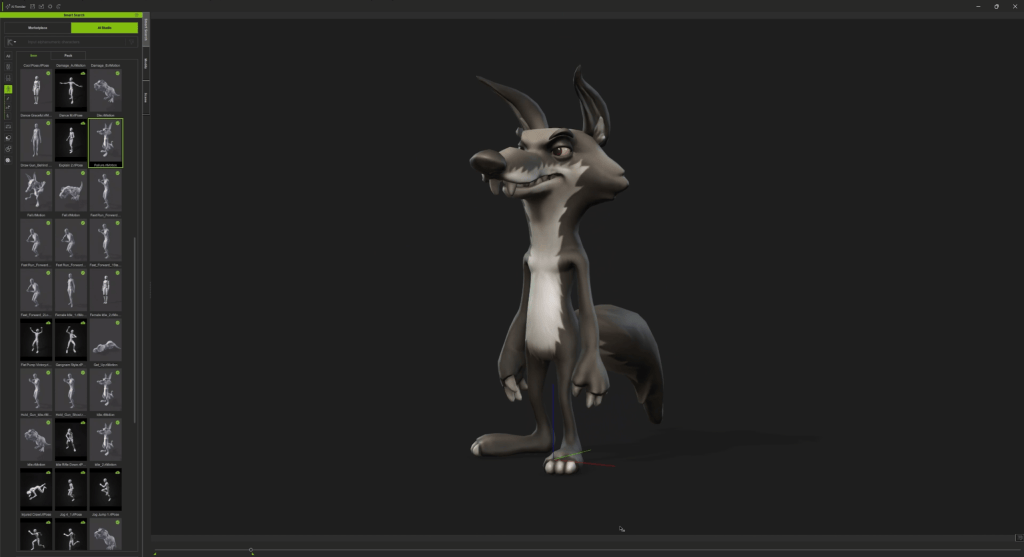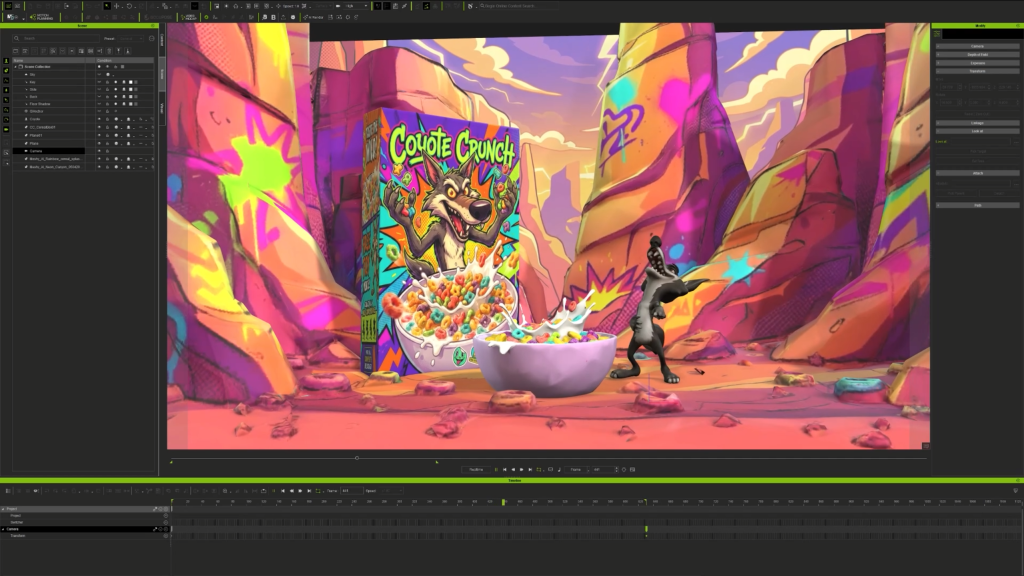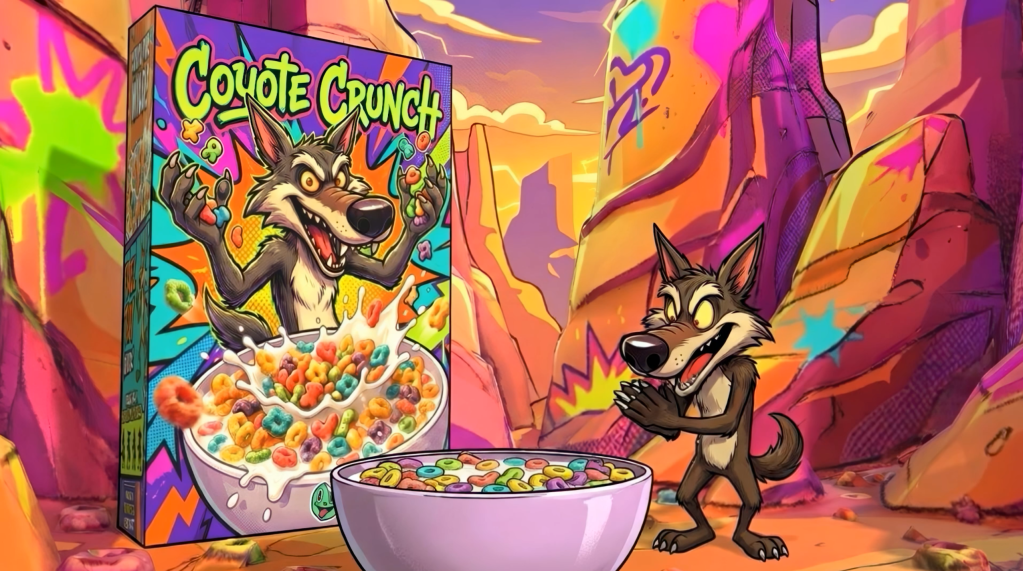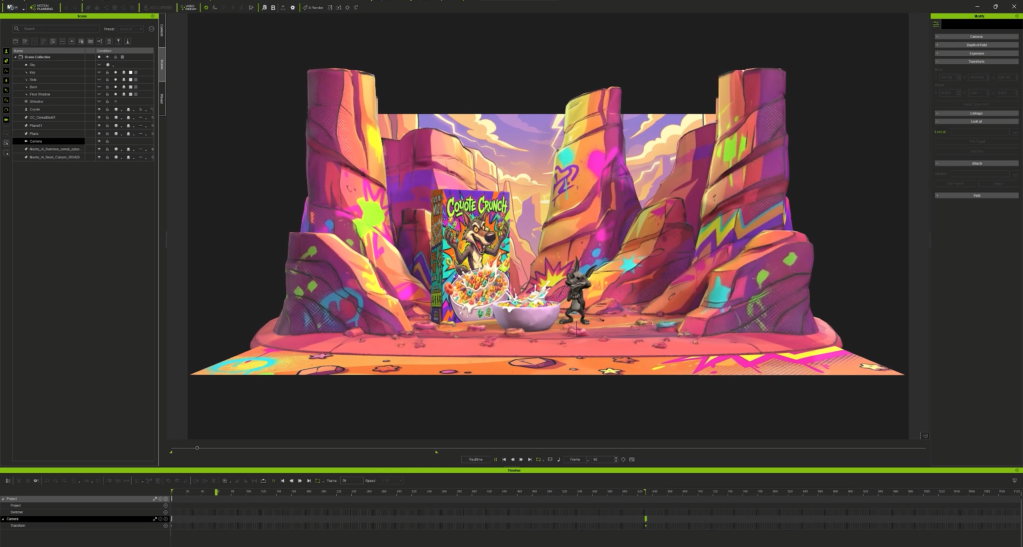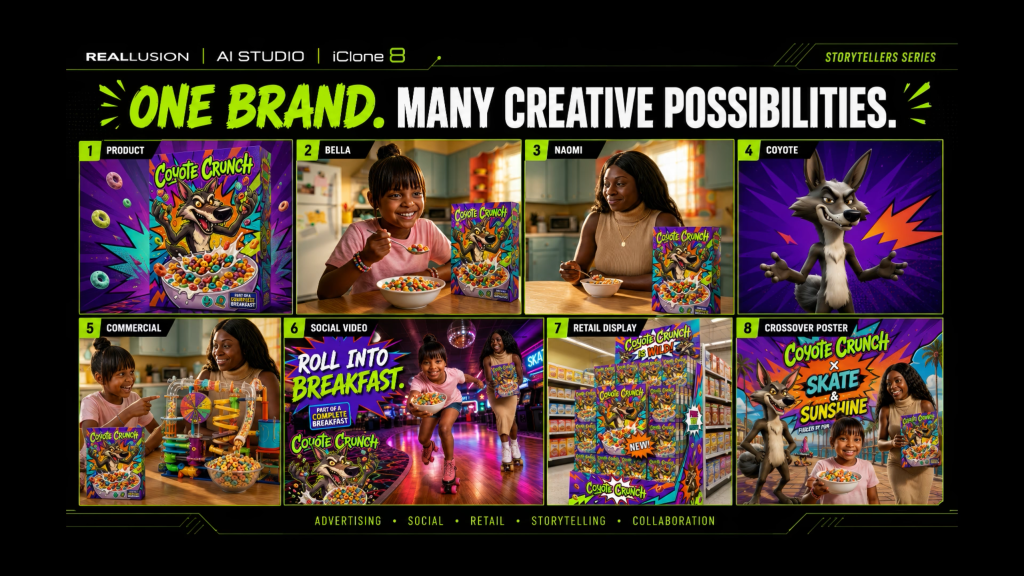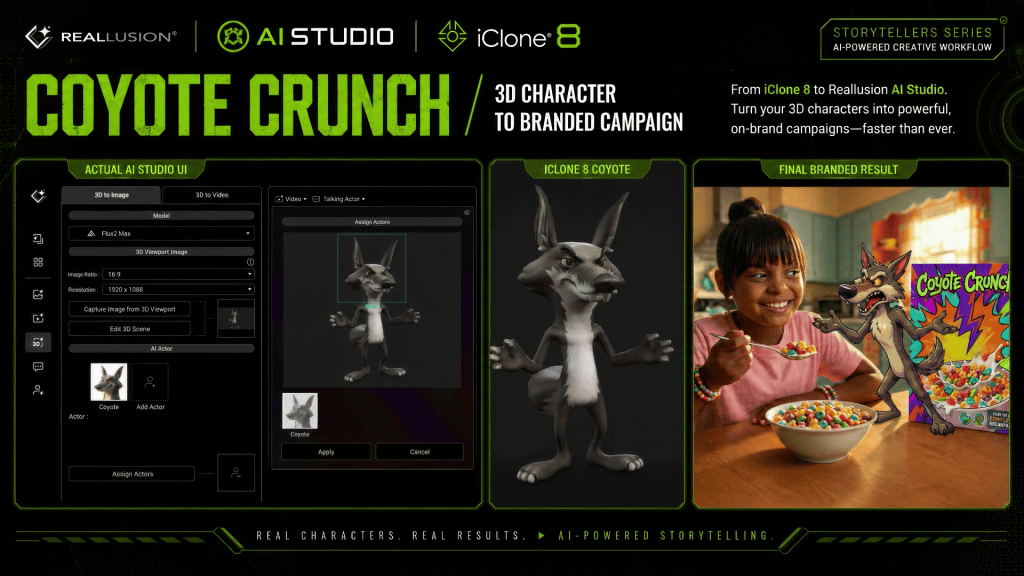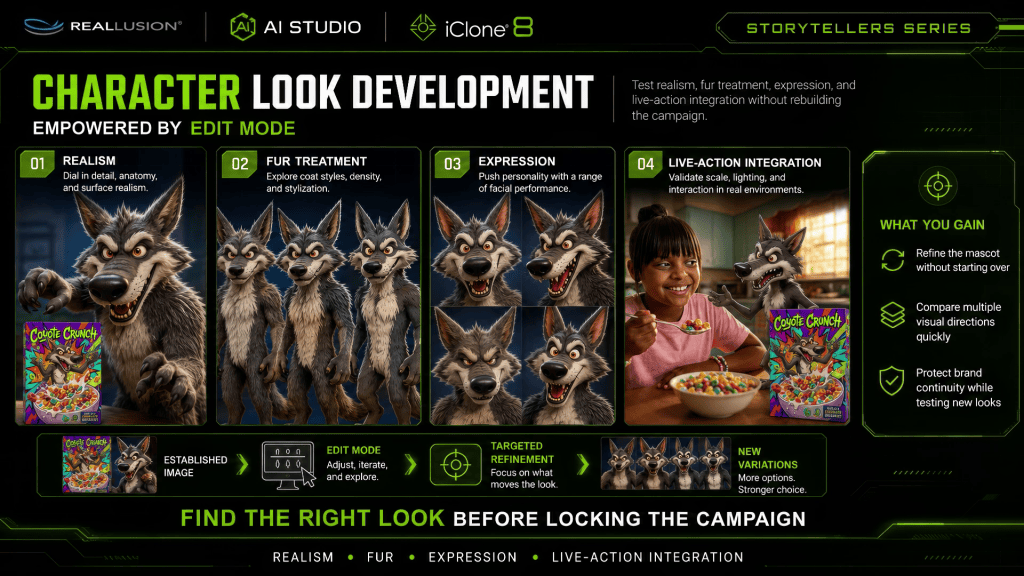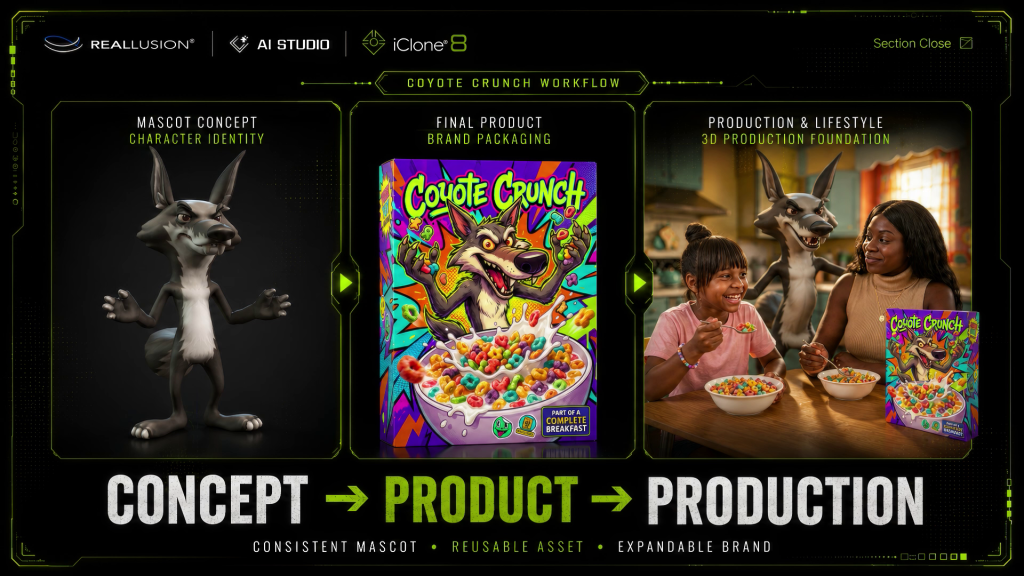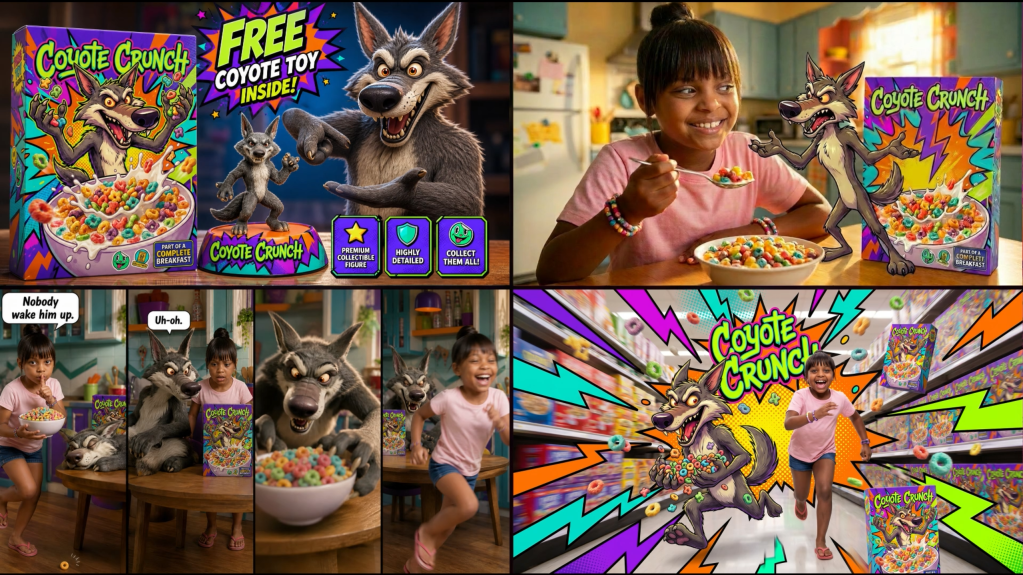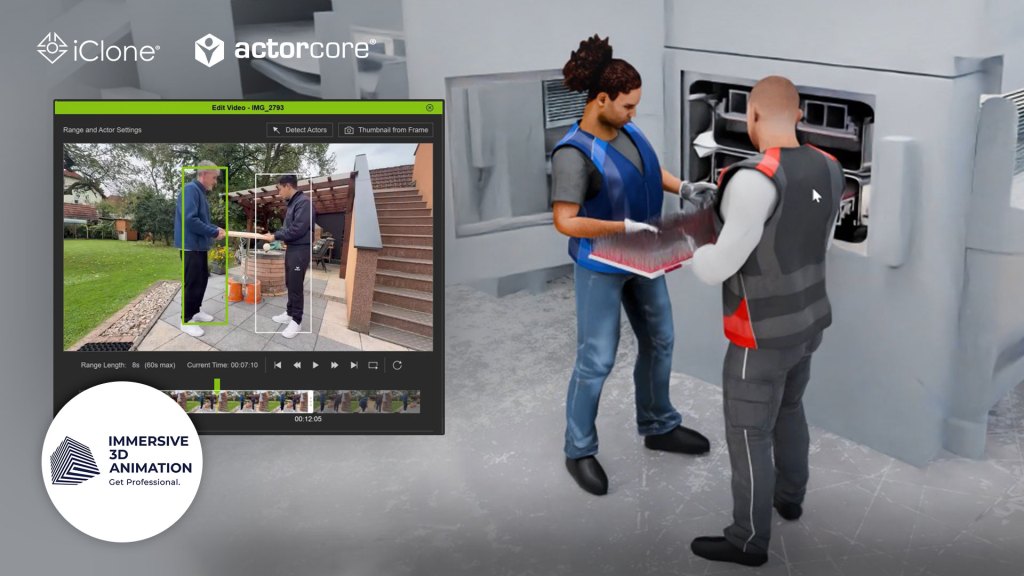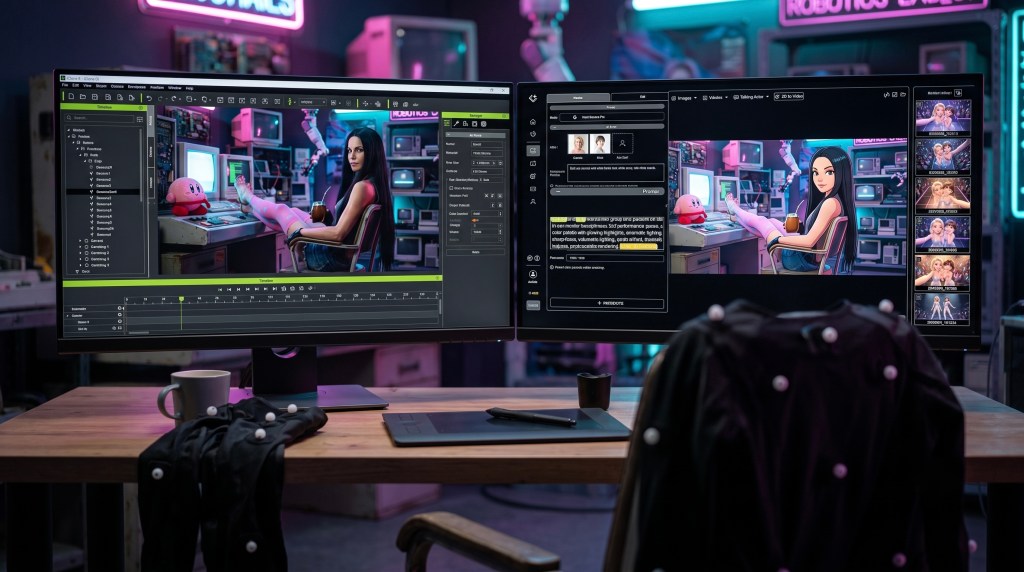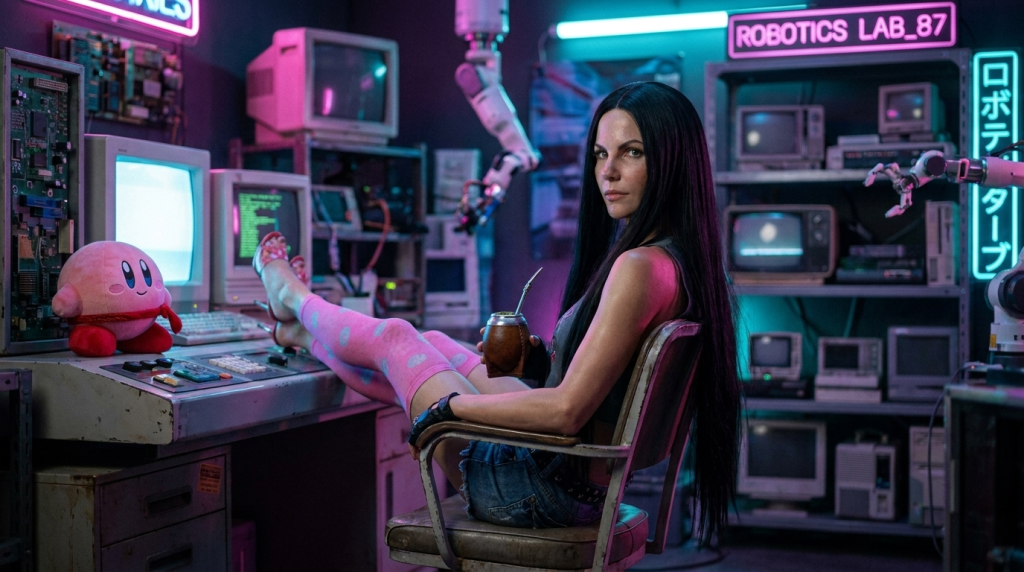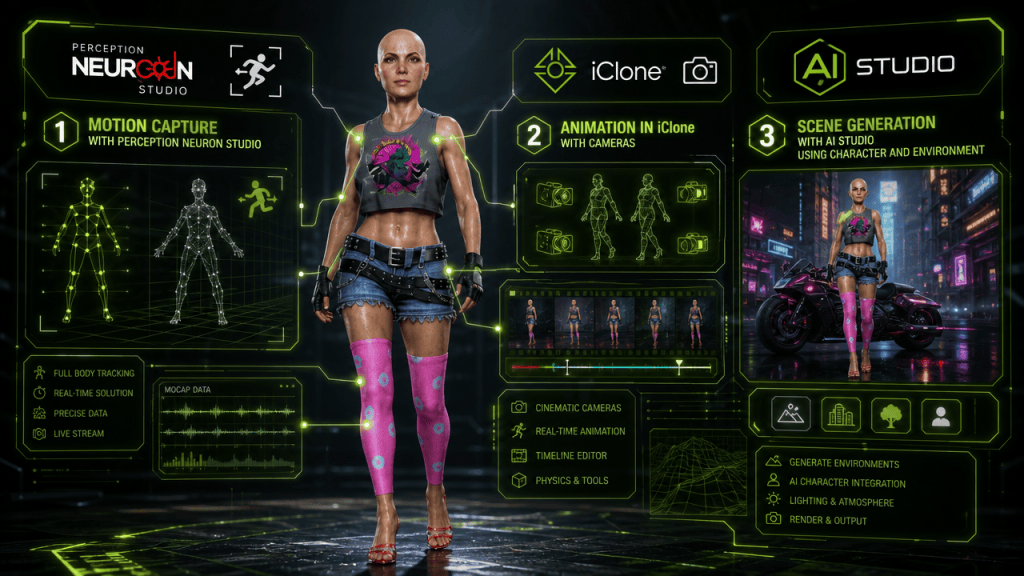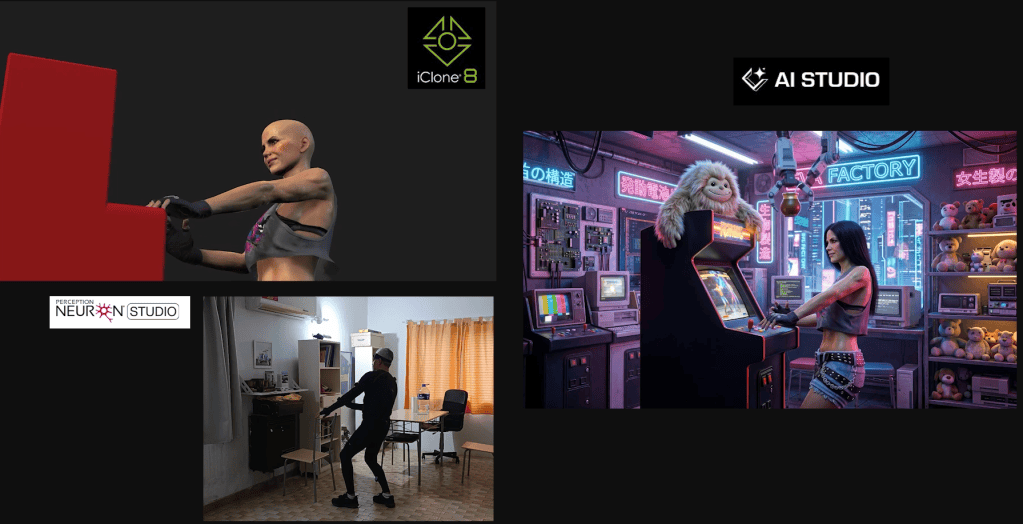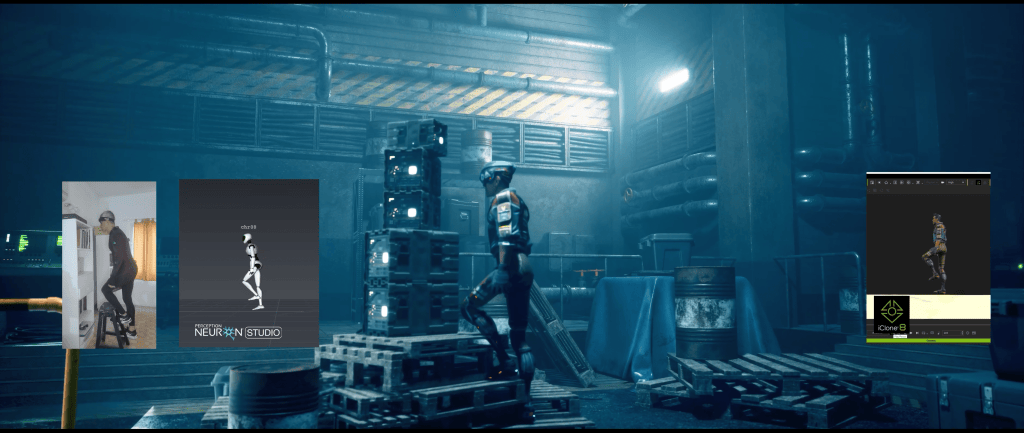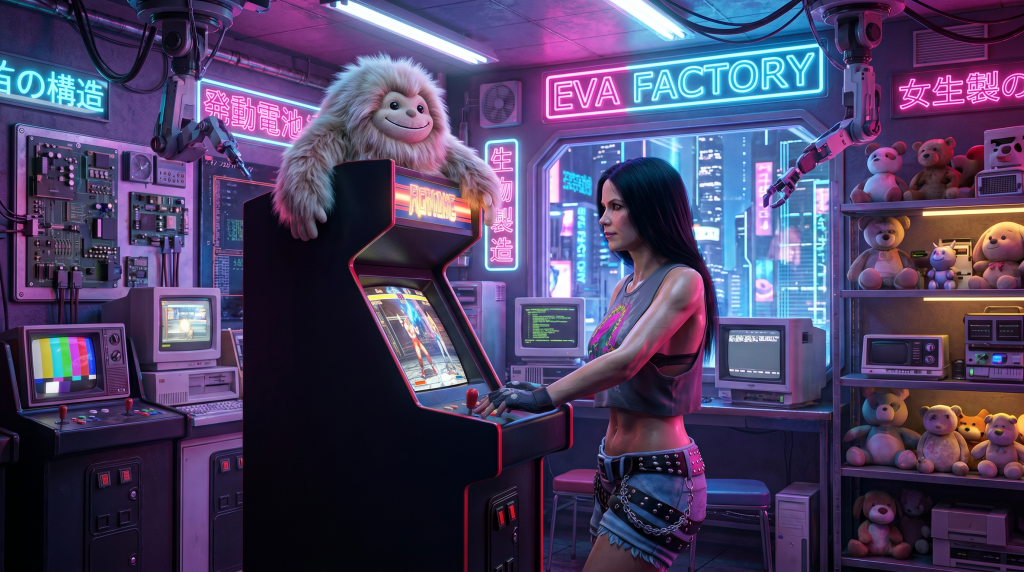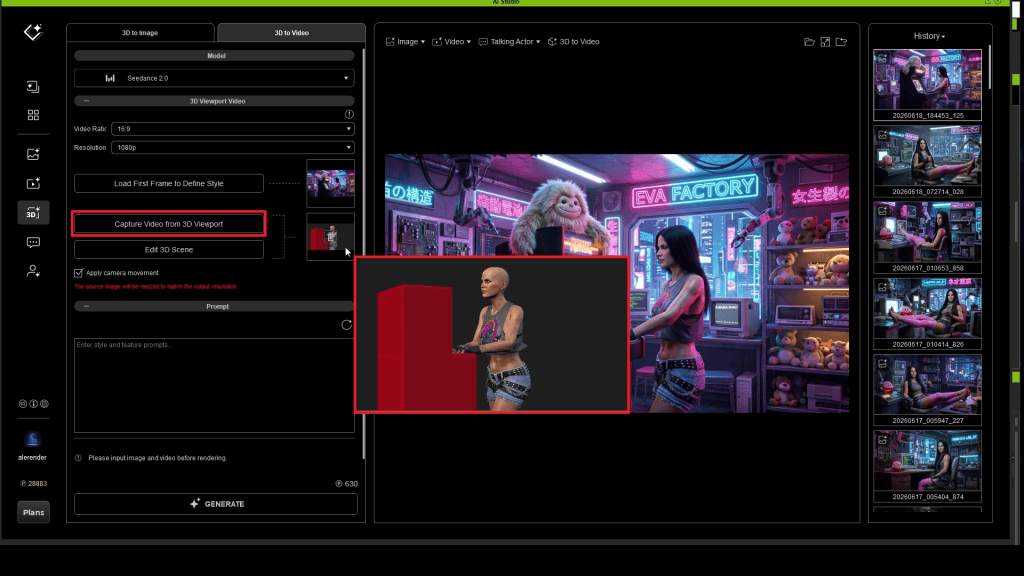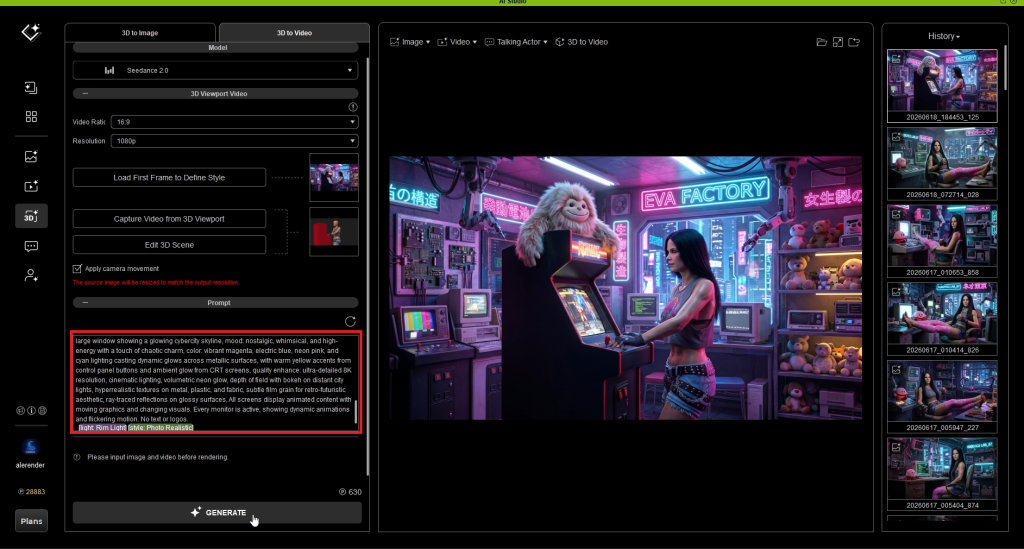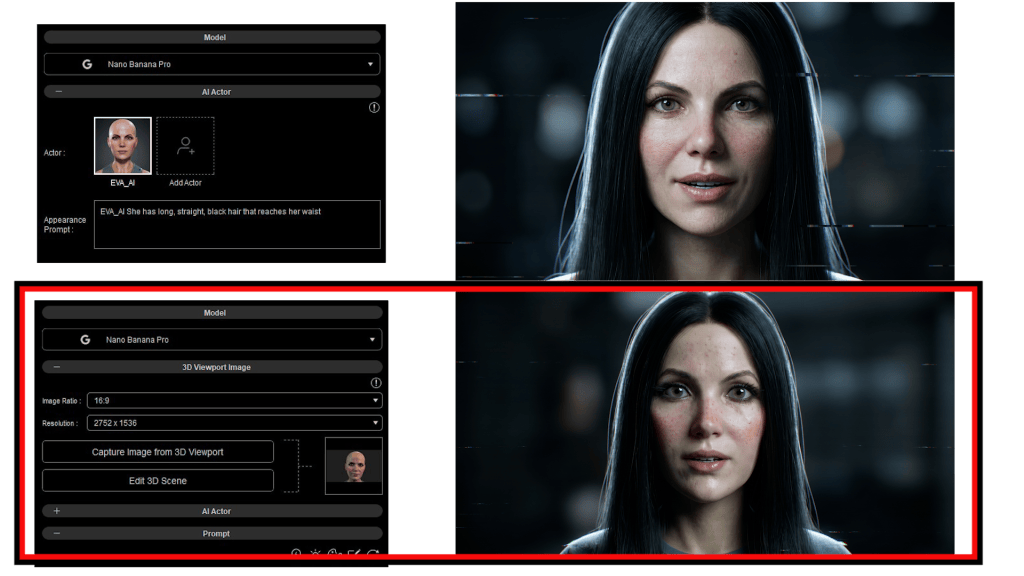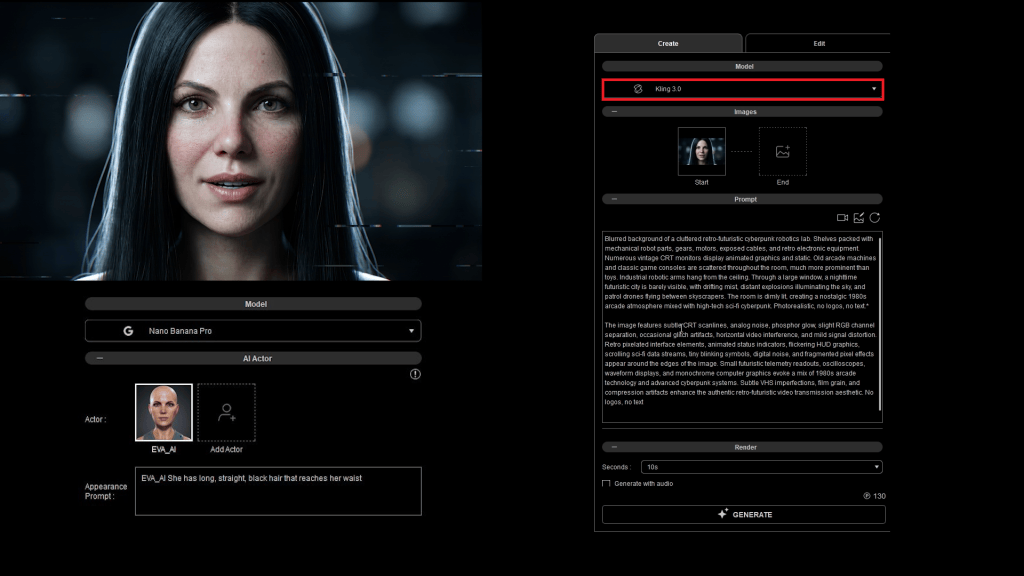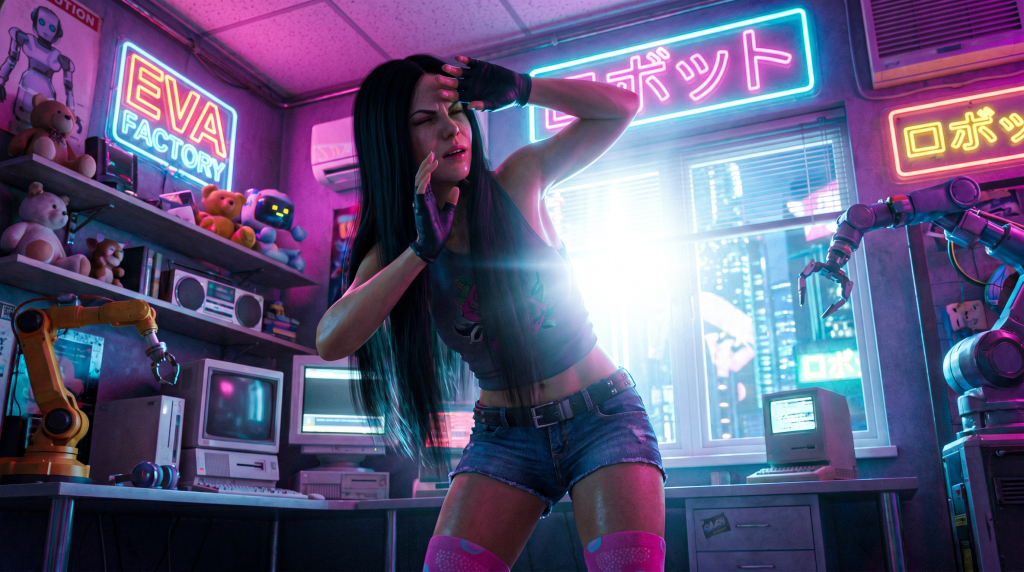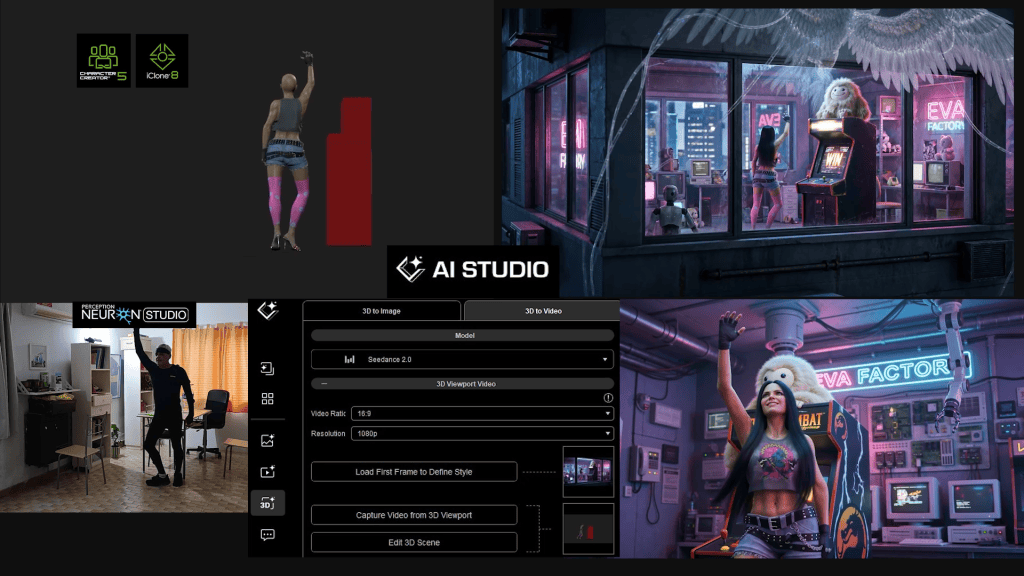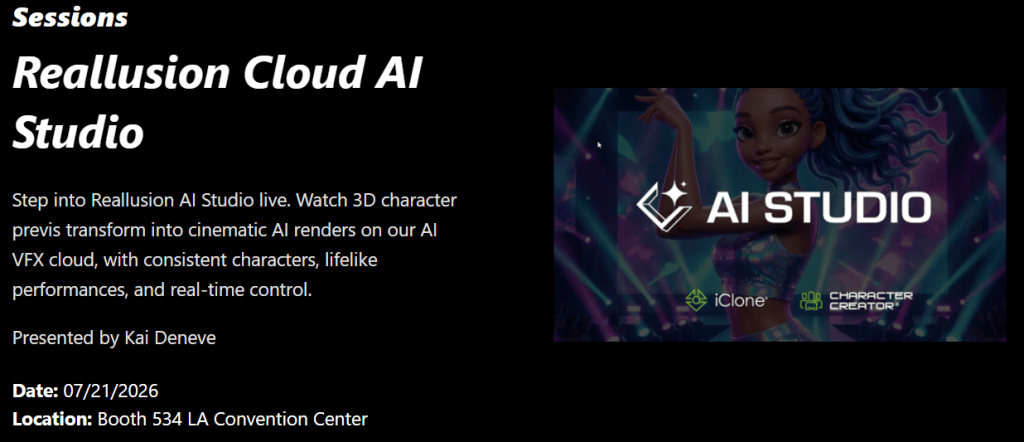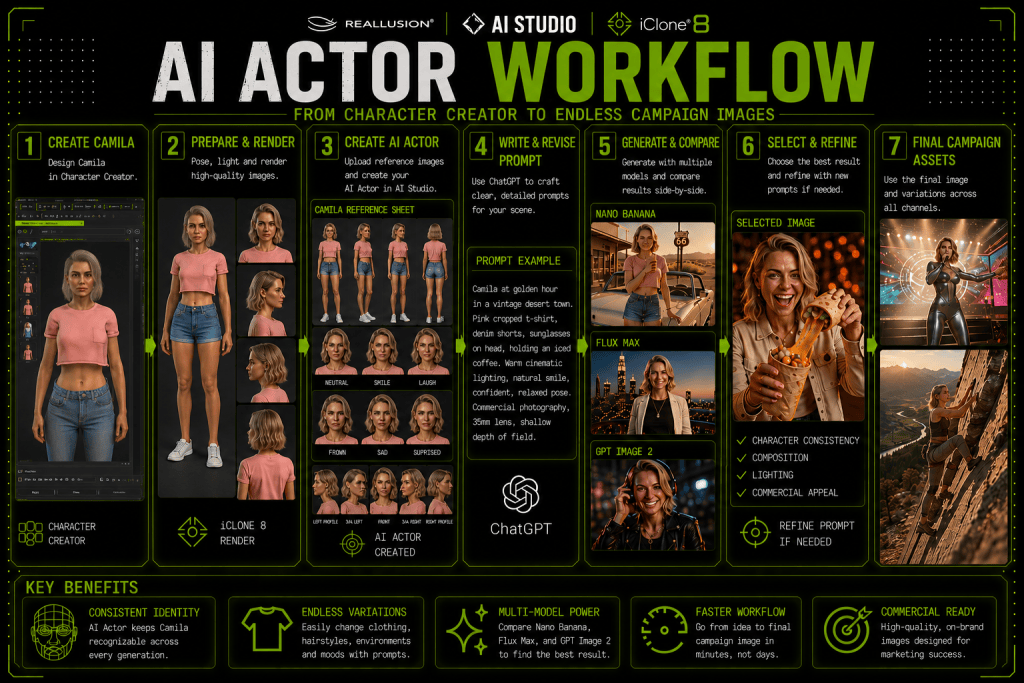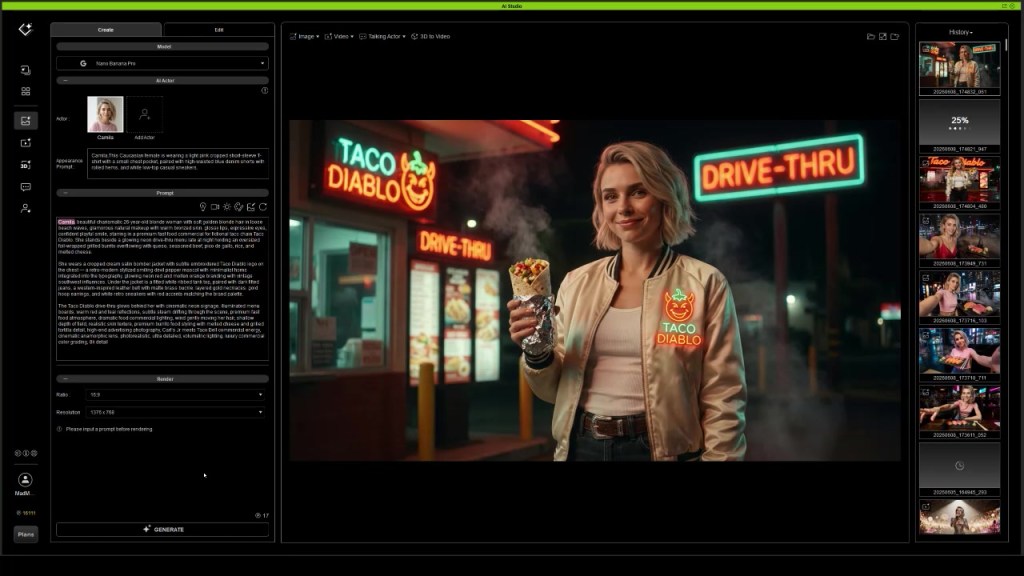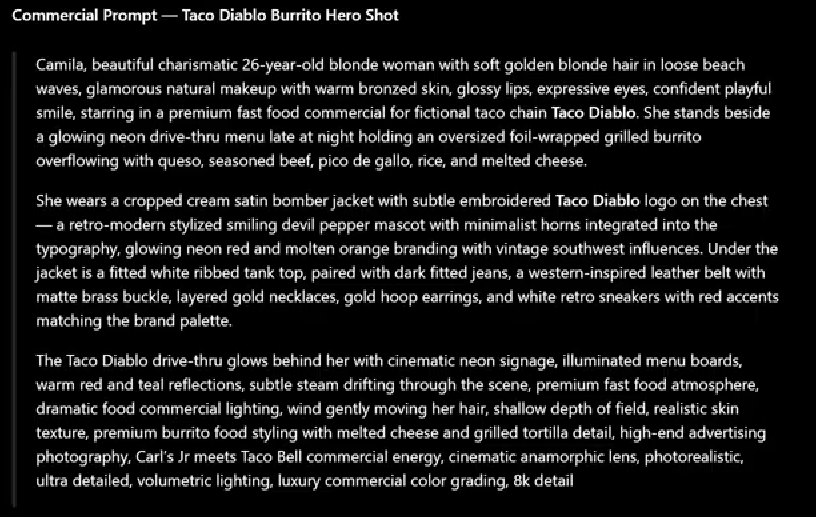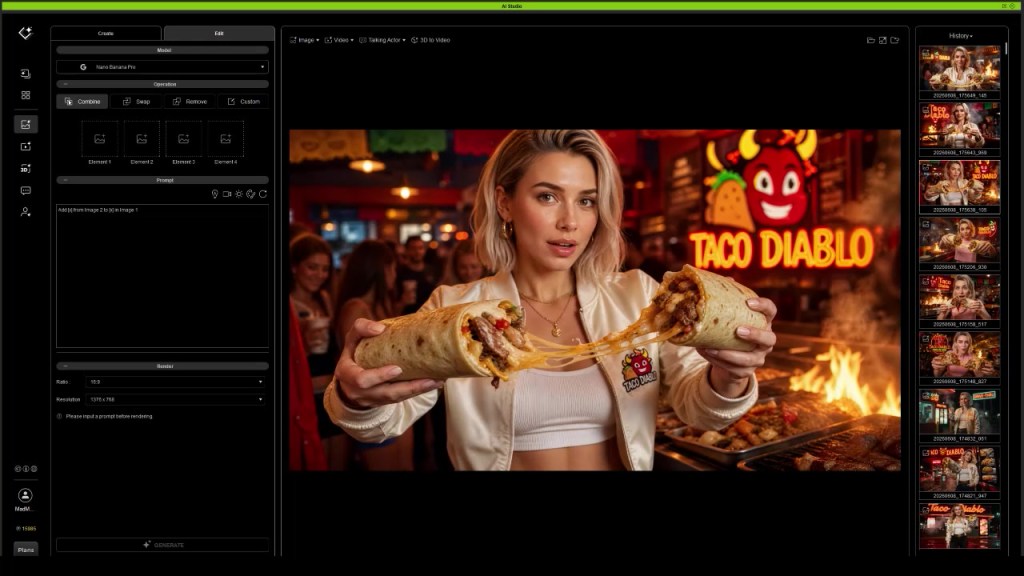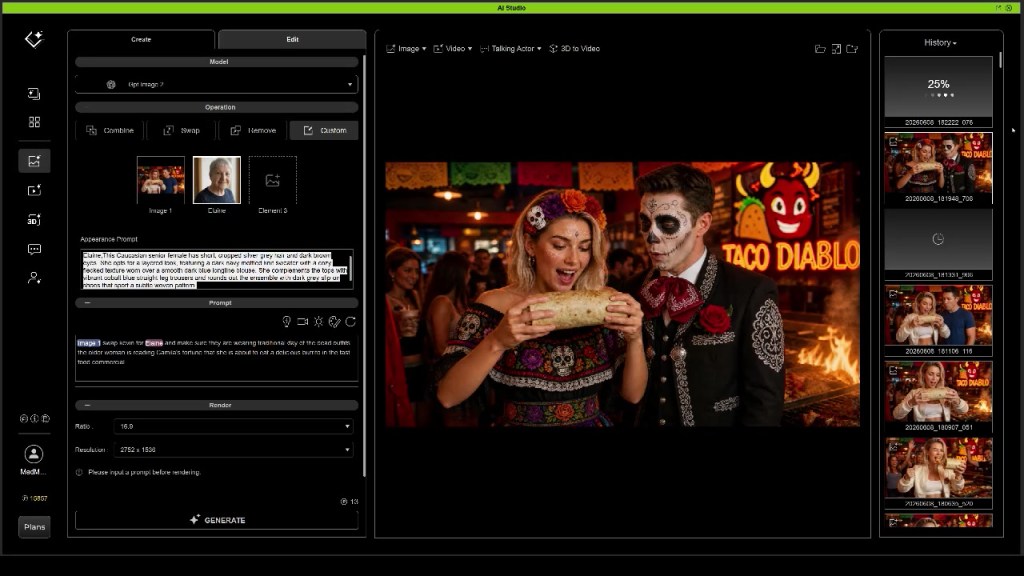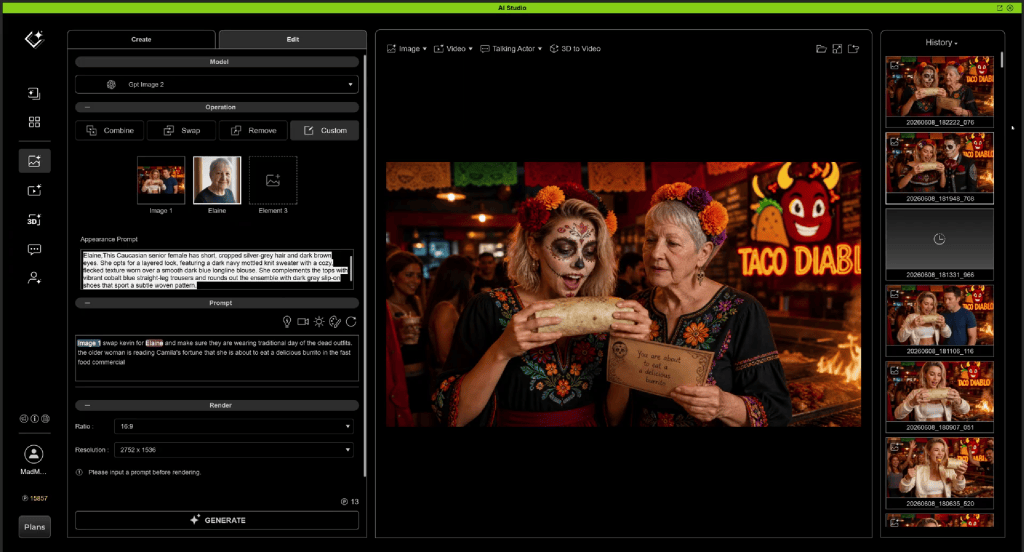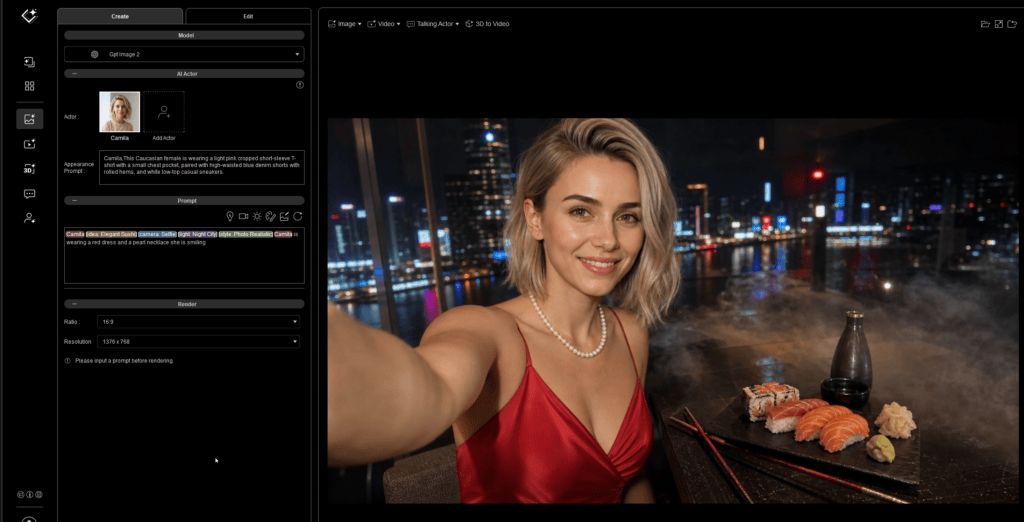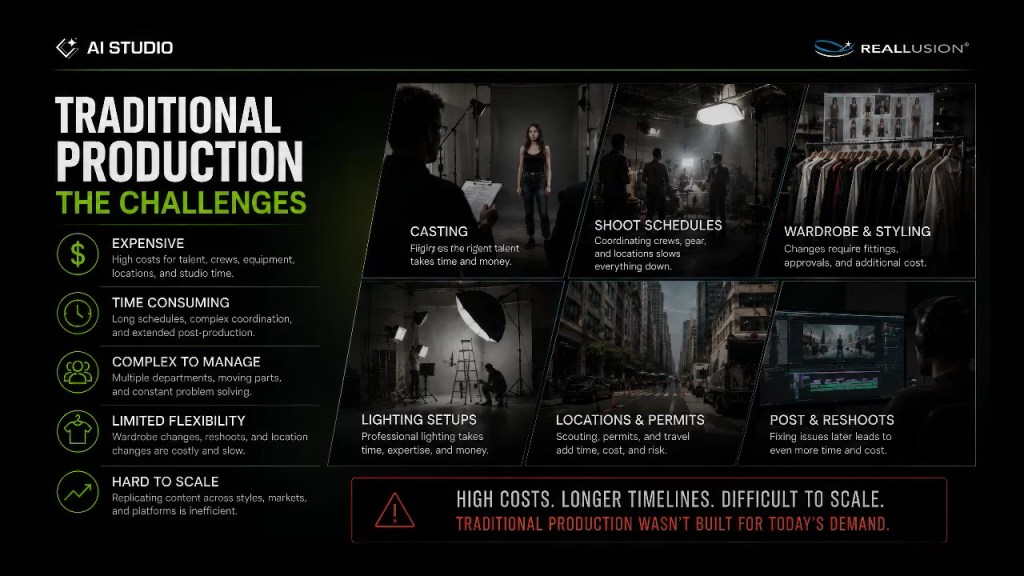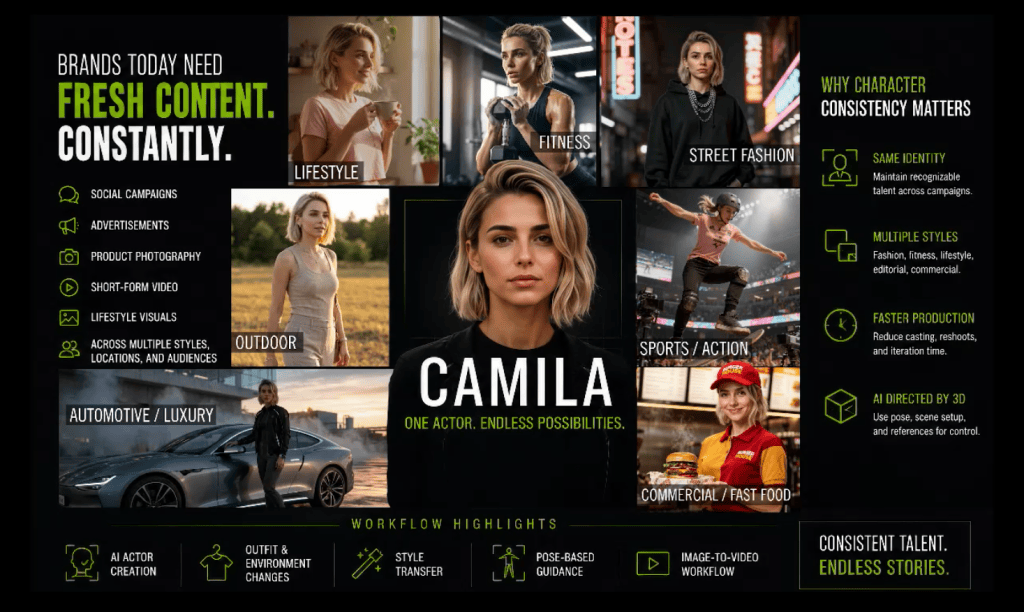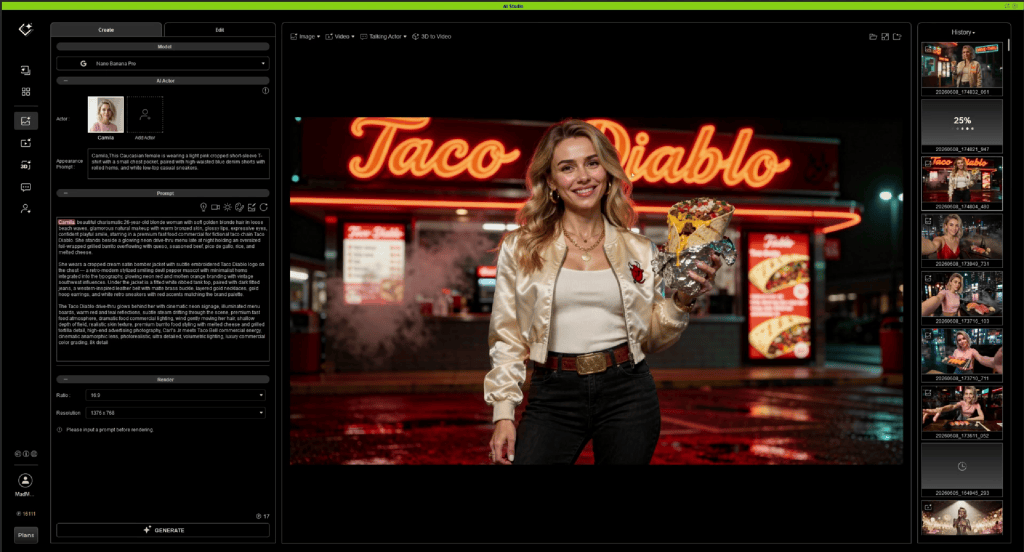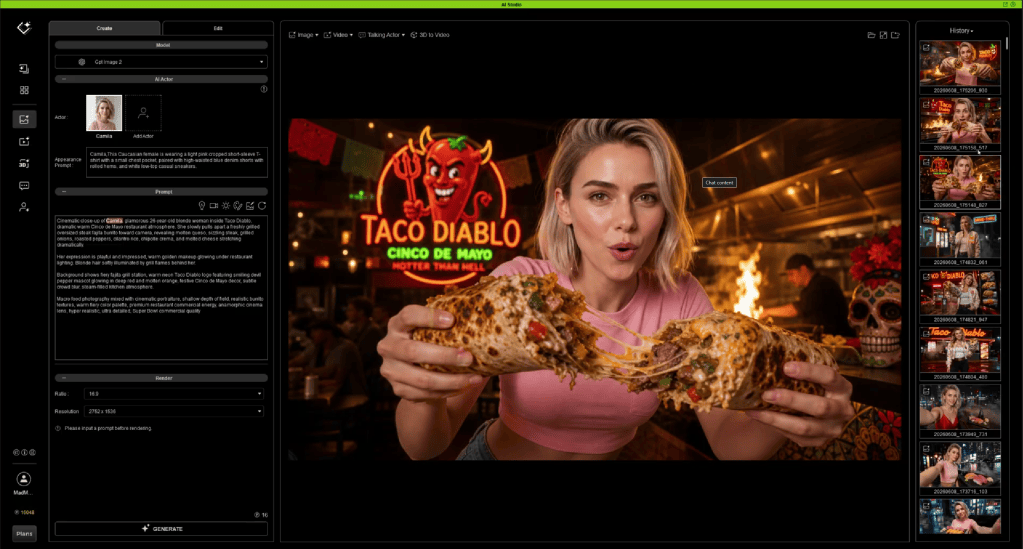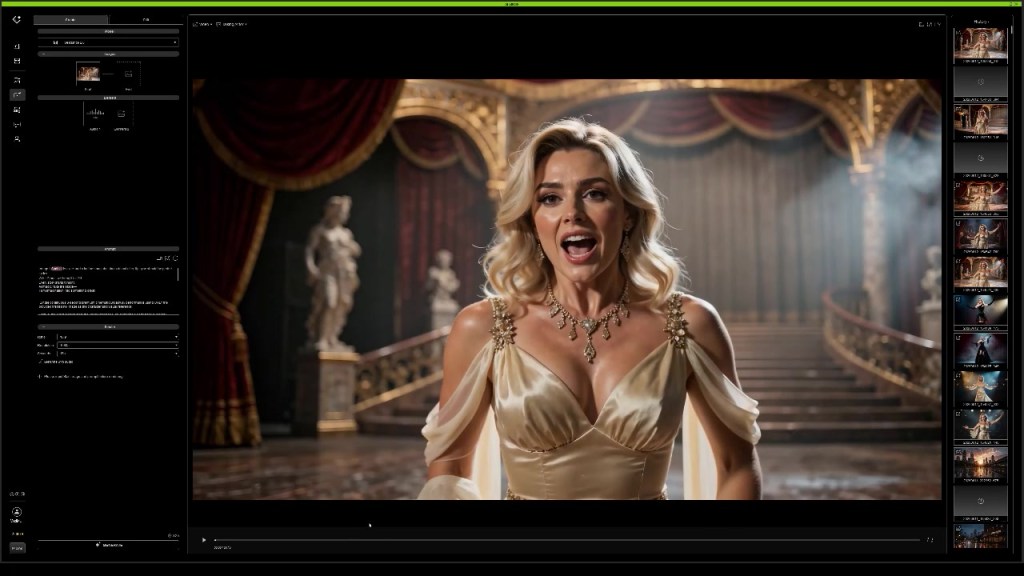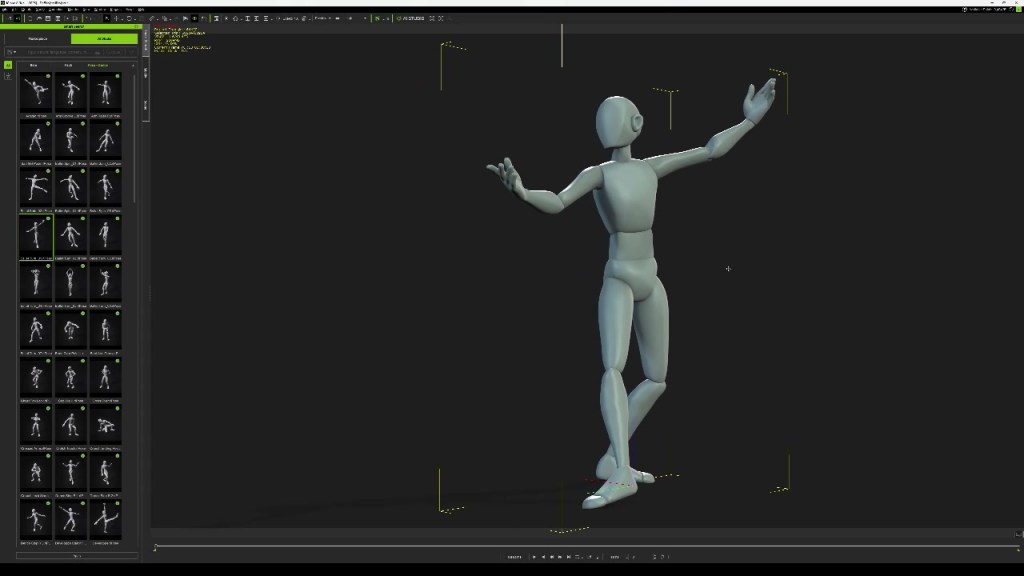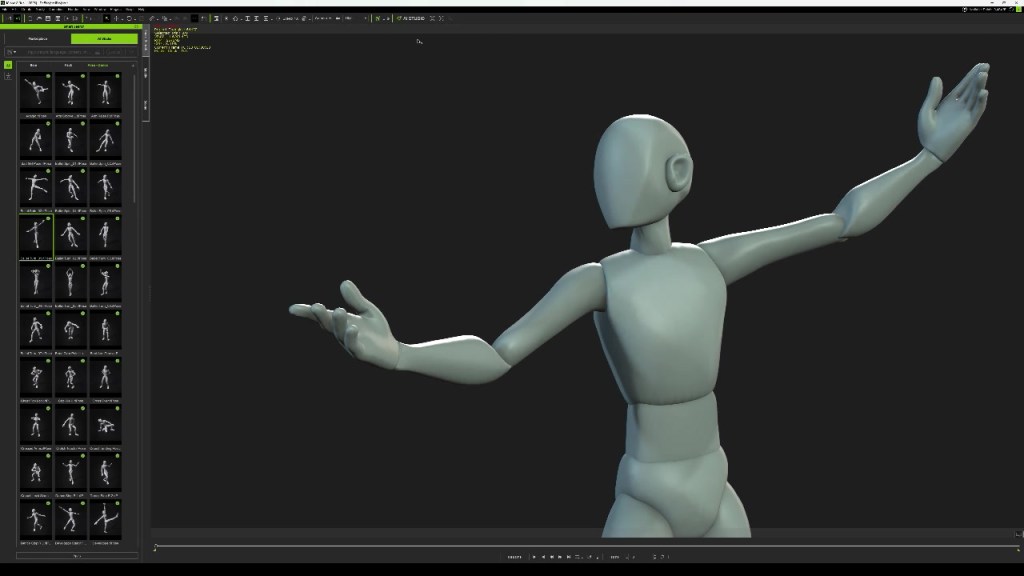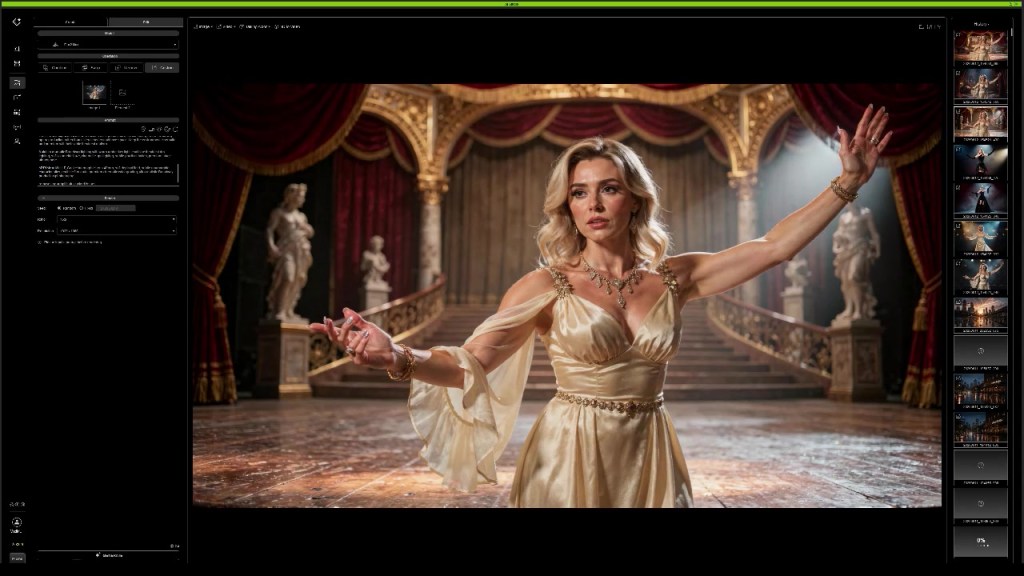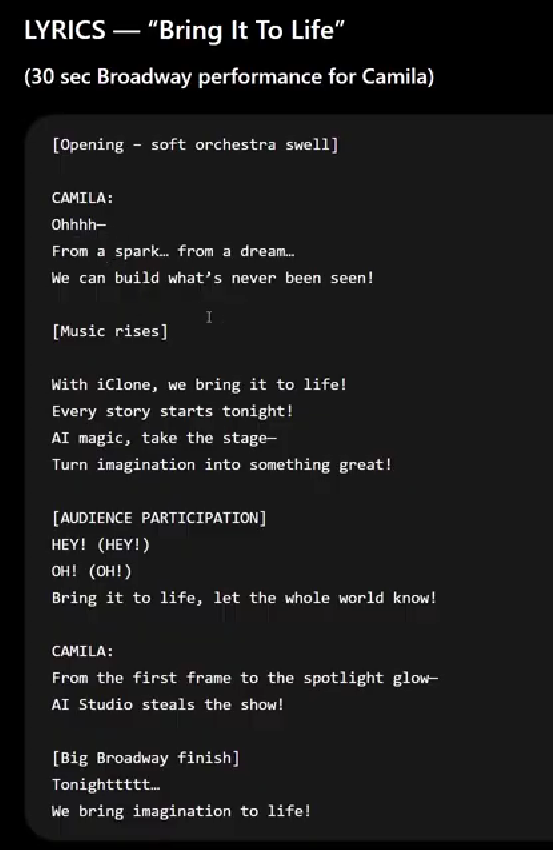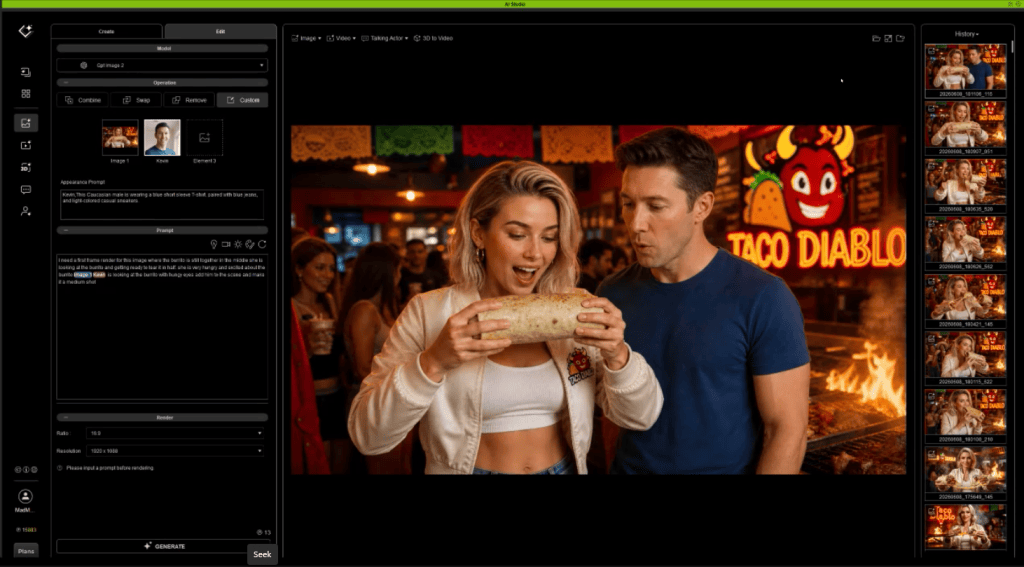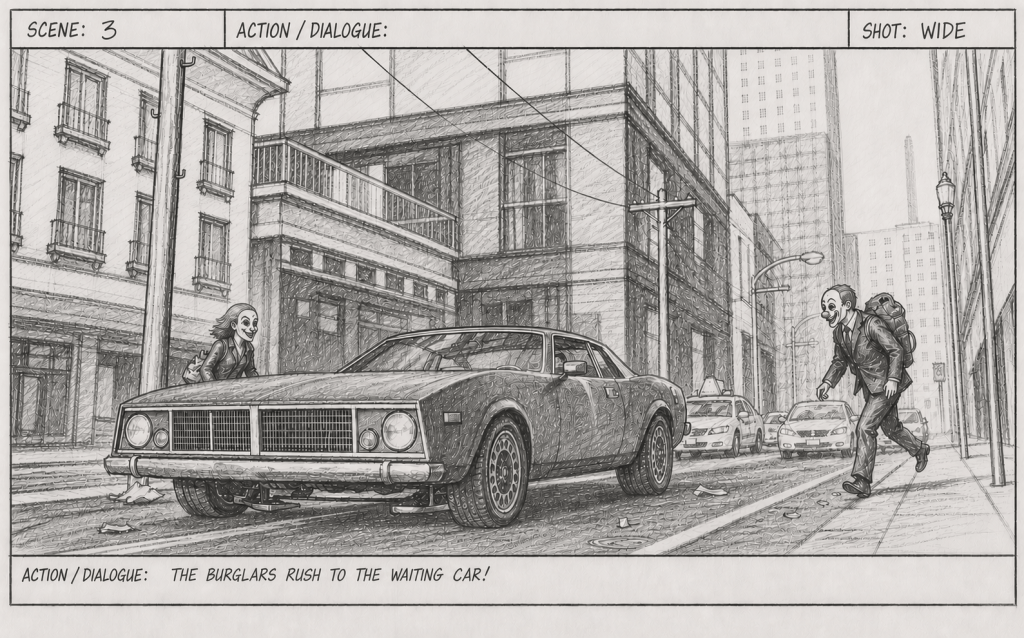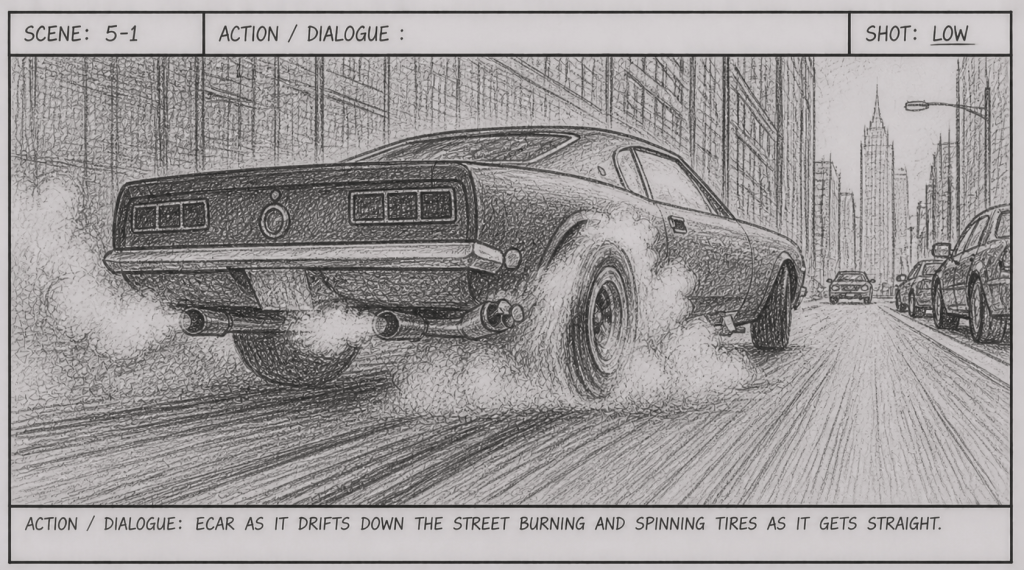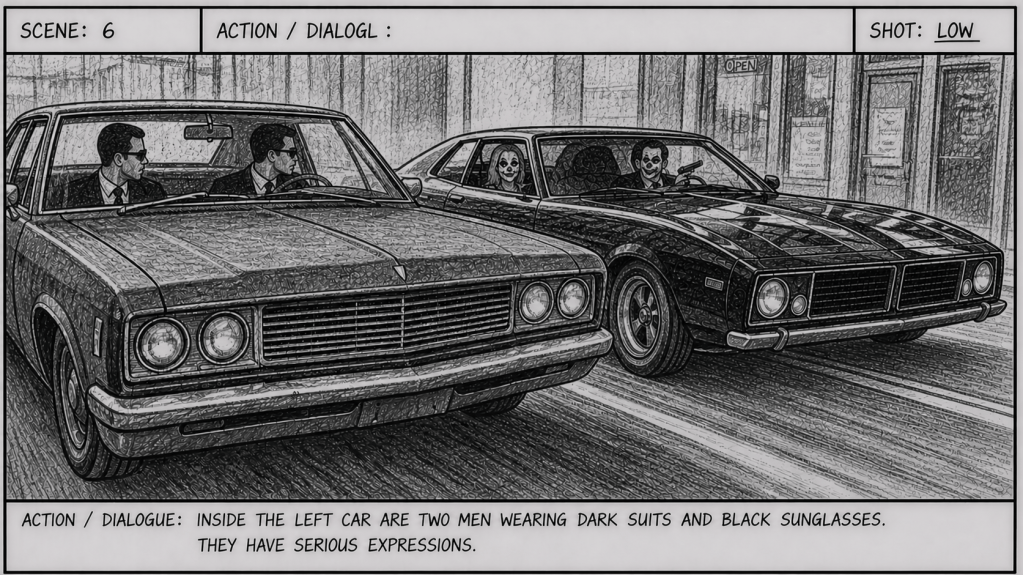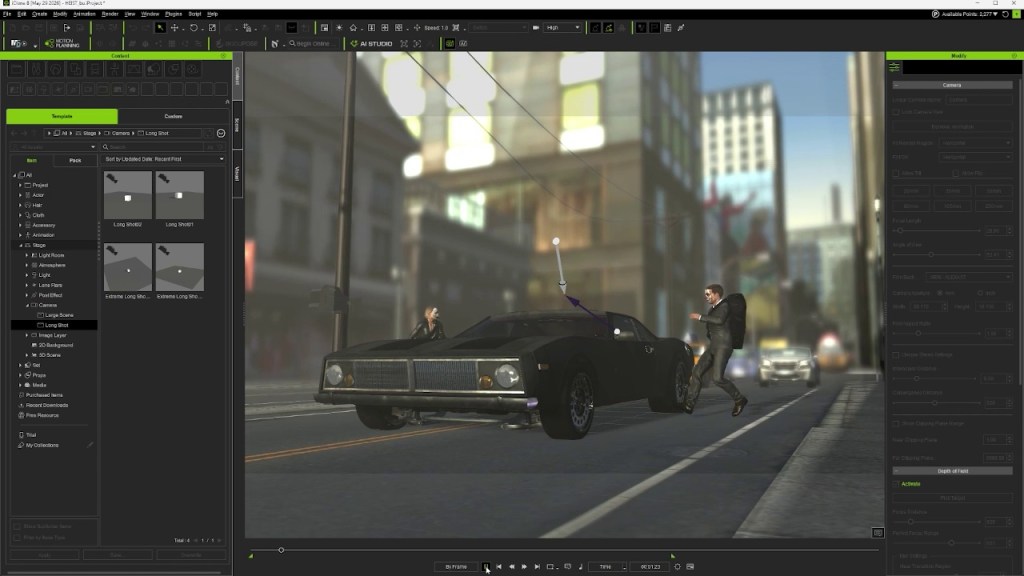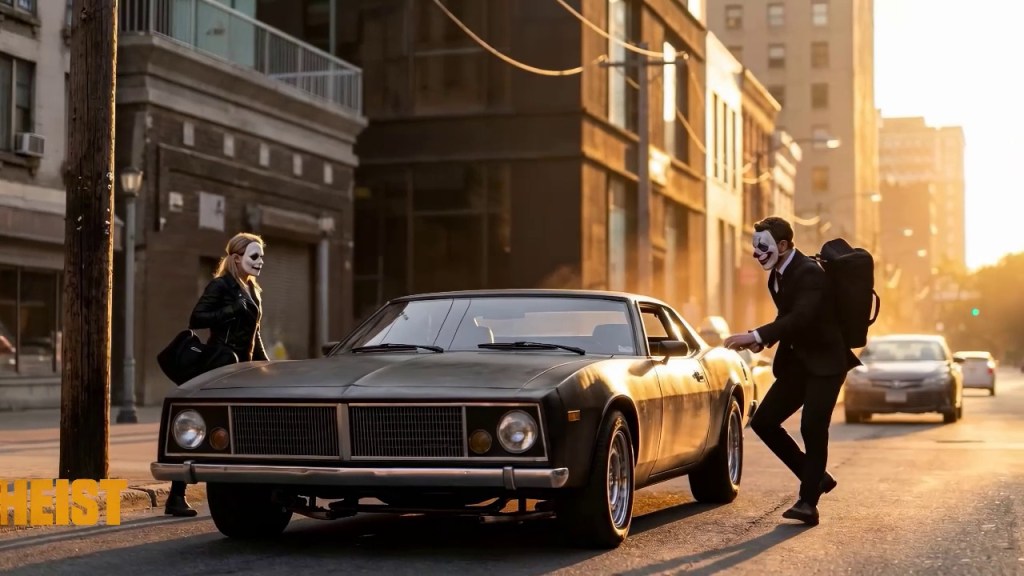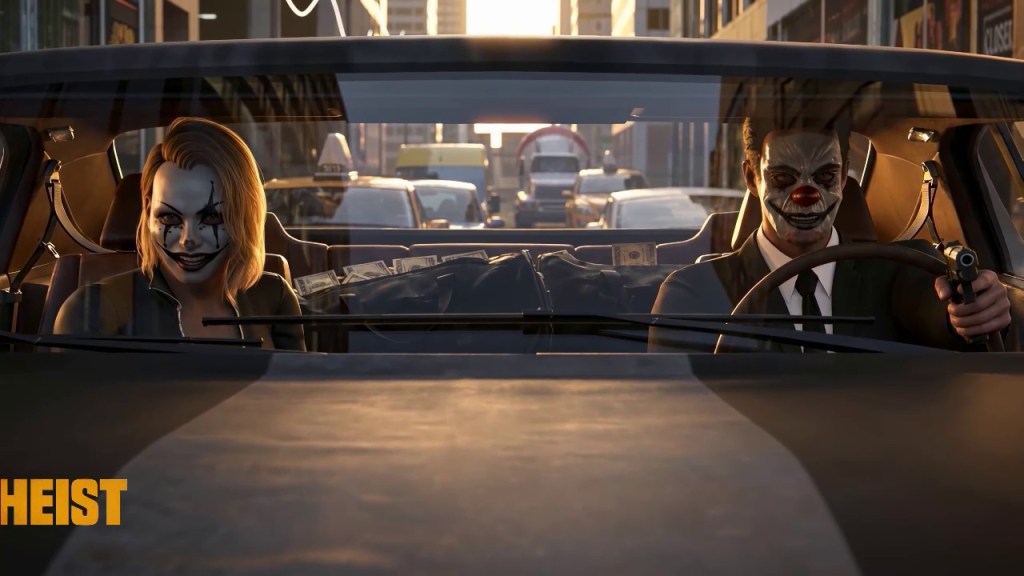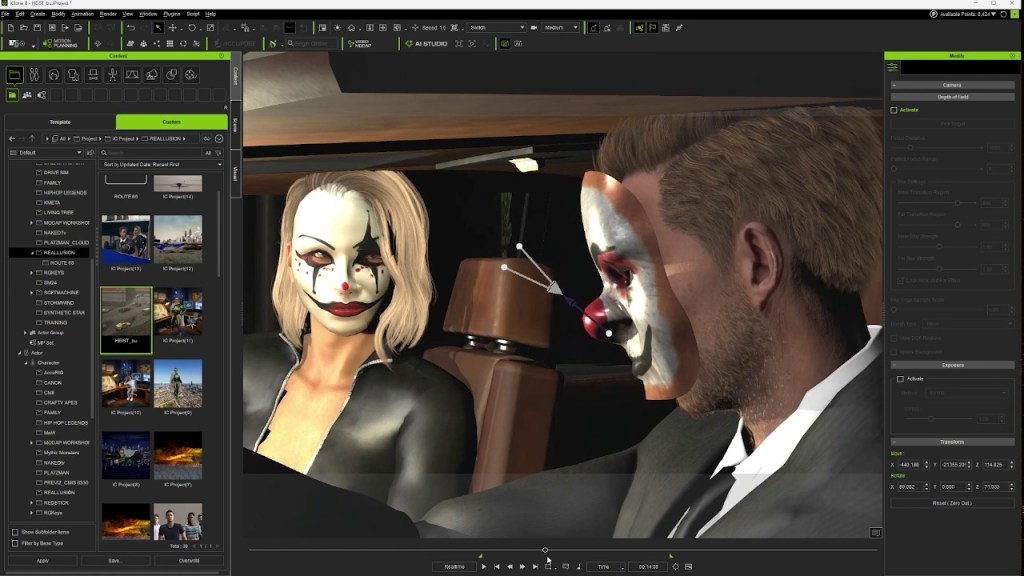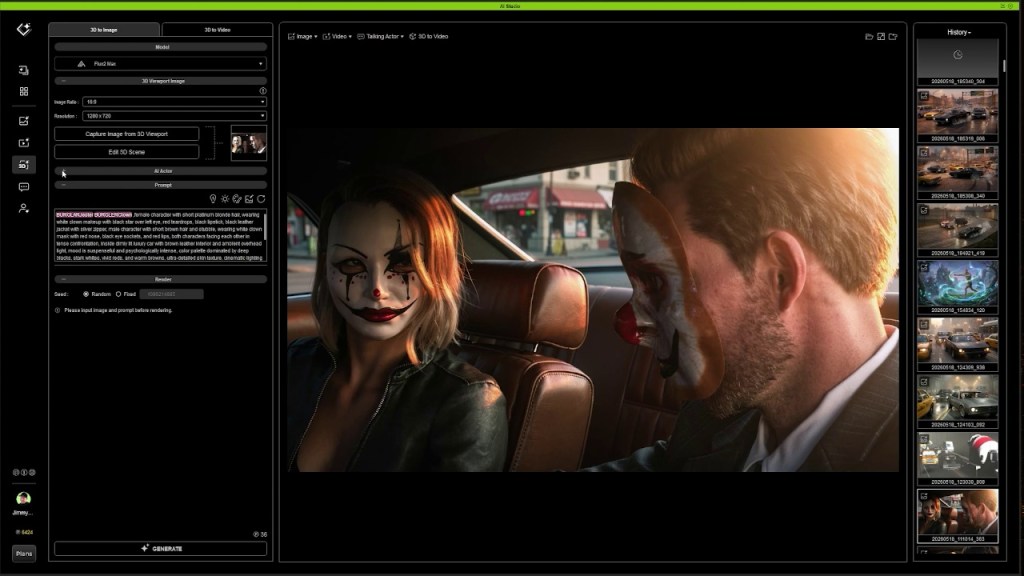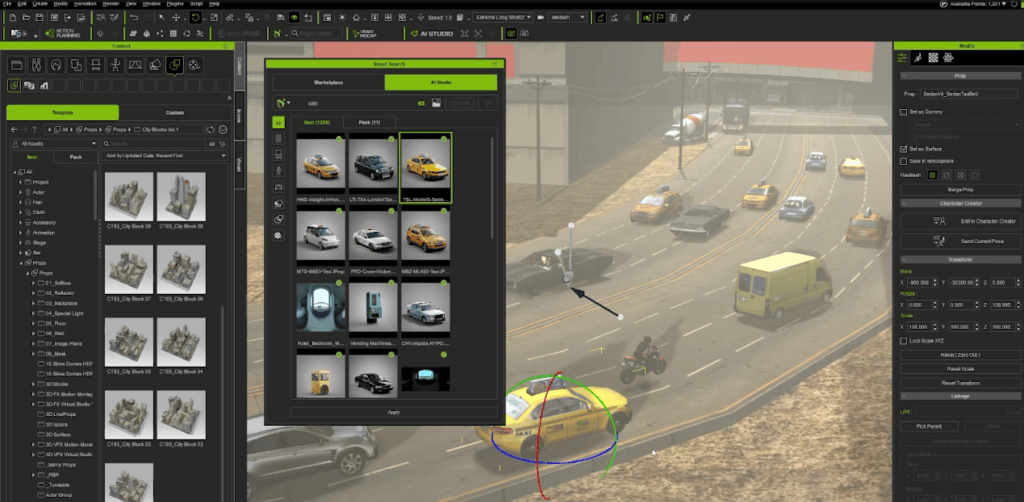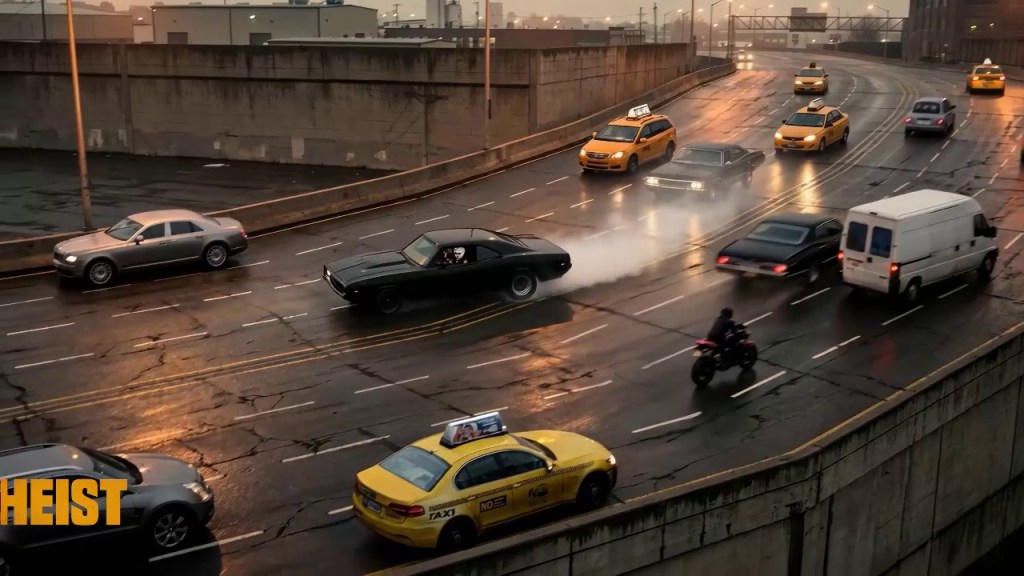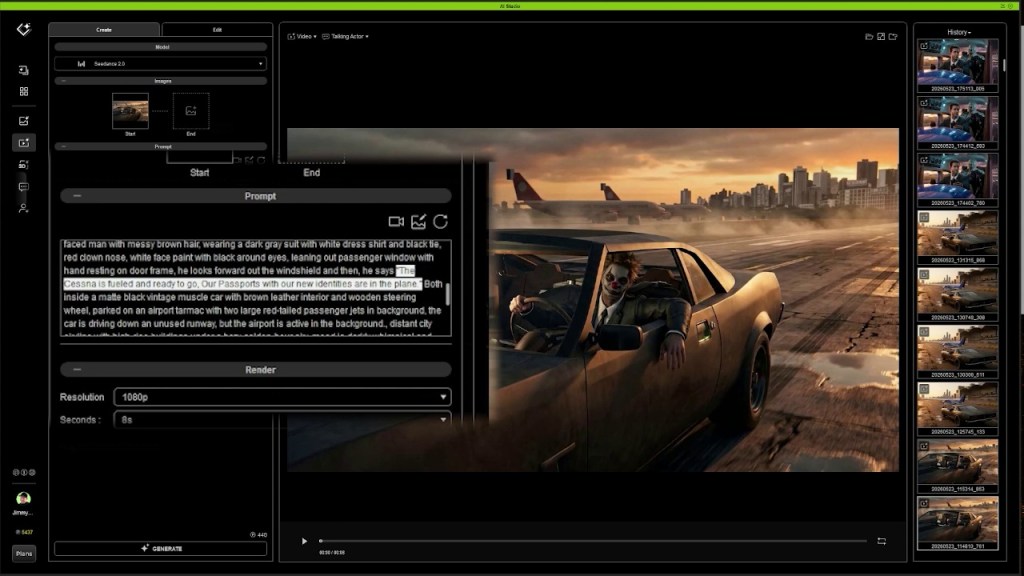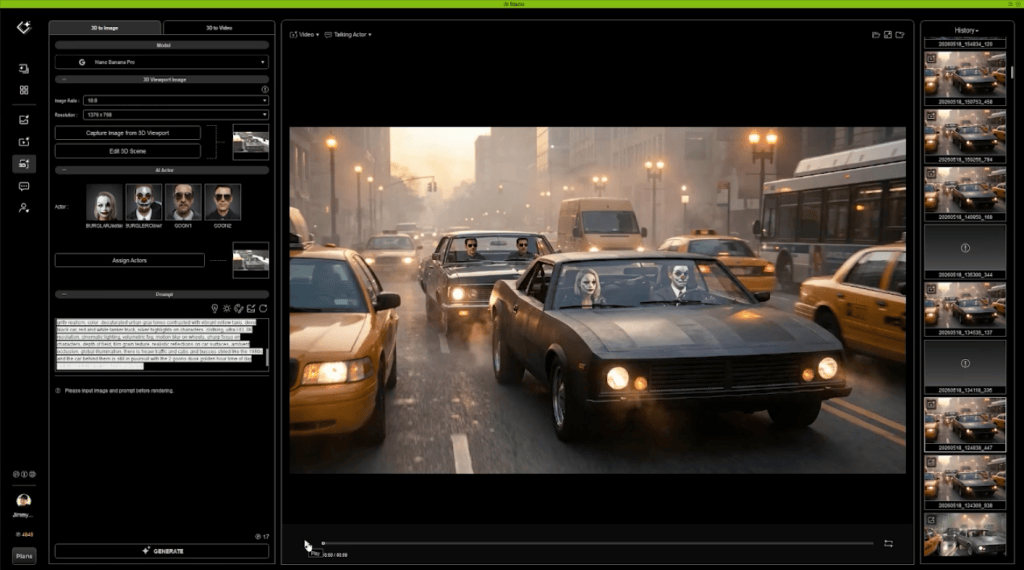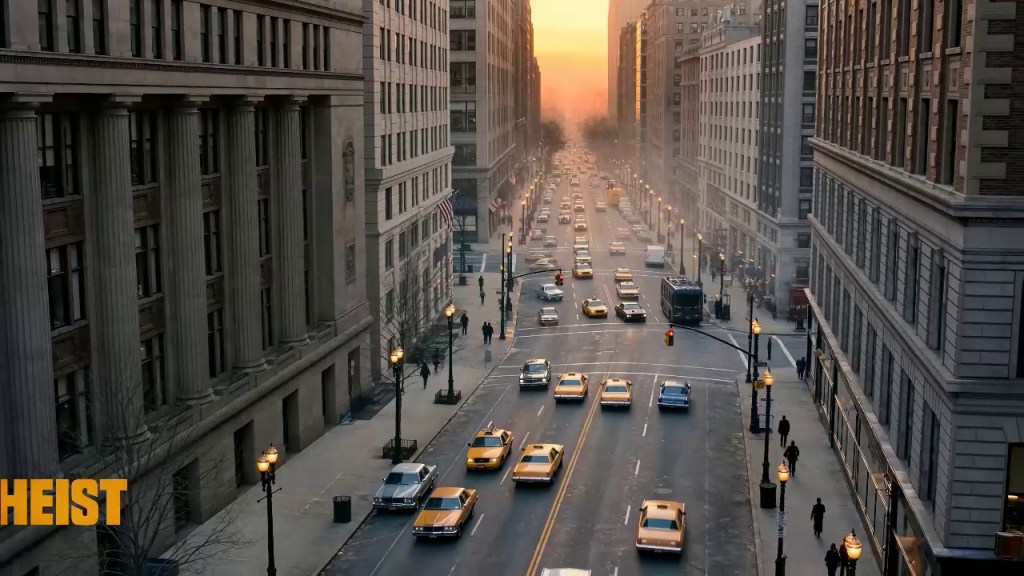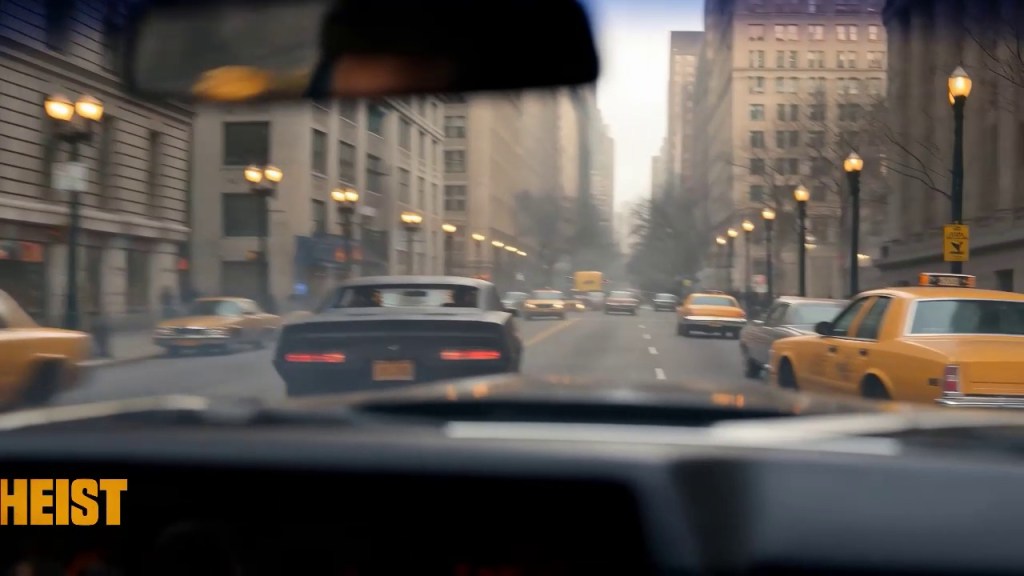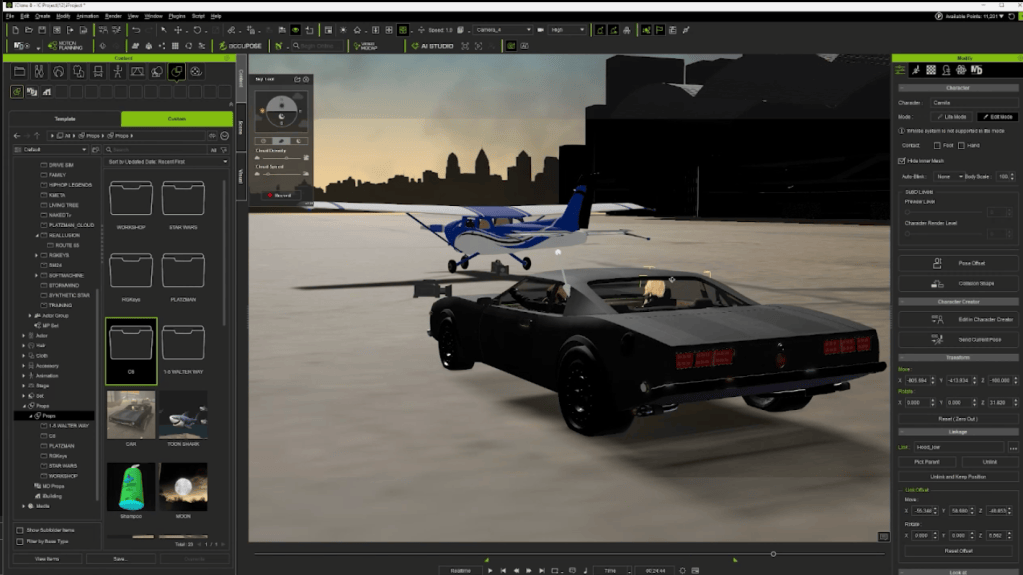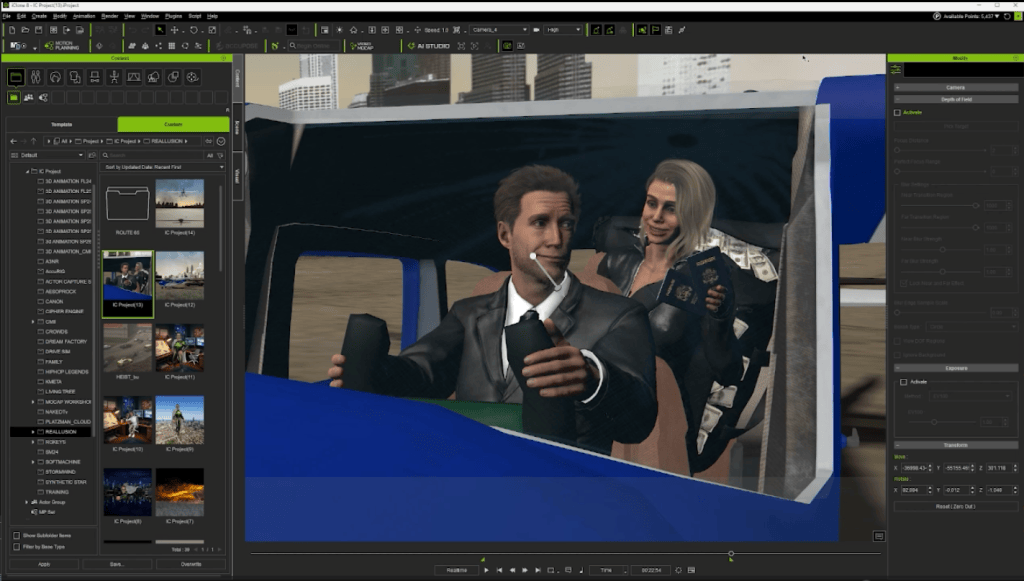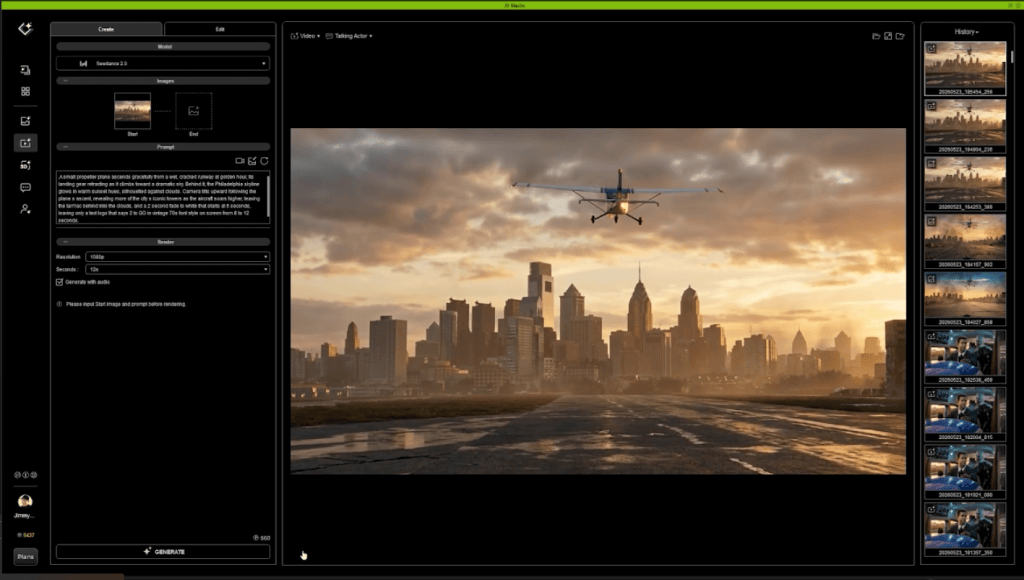
Reallusion has launched AI Studio, a new platform built on a powerful premise: your hard-earned 3D skills are not a liability in the AI era; they are your ultimate advantage. Instead of forcing artists to start over with unpredictable text prompts, AI Studio uses 3D as a precision control layer for cameras, motion, and layout, while letting AI handle the visual richness, expressions, and physics.
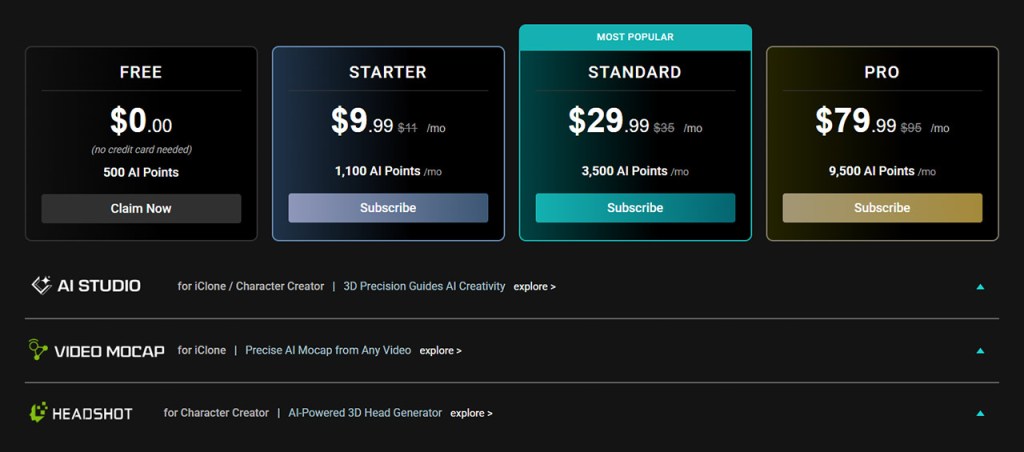
AI Studio is now available with Early Access for iClone 8, Character Creator 5, and Character Creator 4 Full Members, who receive one free month of the Starter Plan, including 1,100 AI points, full feature access, and the complete 3D Previz content and AI Actor library.
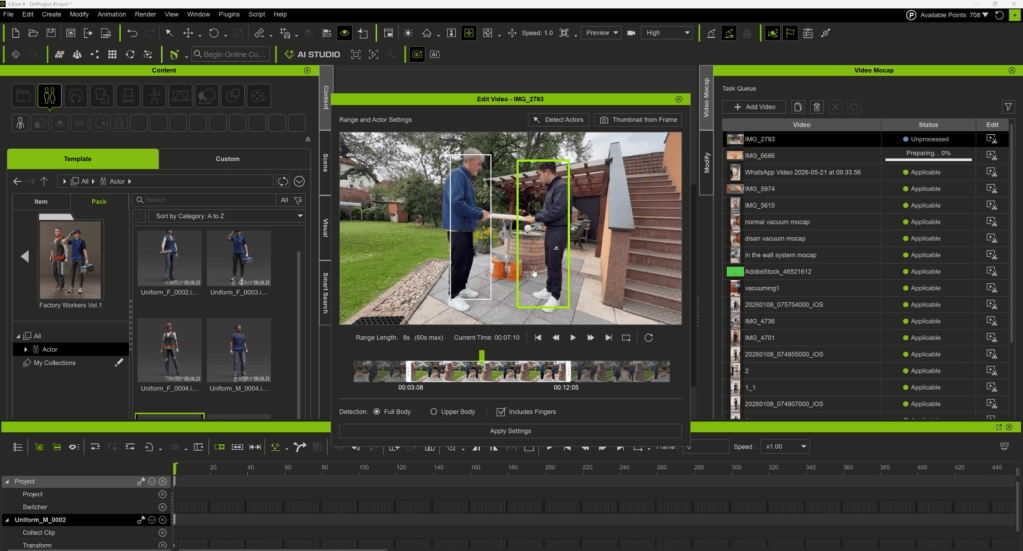
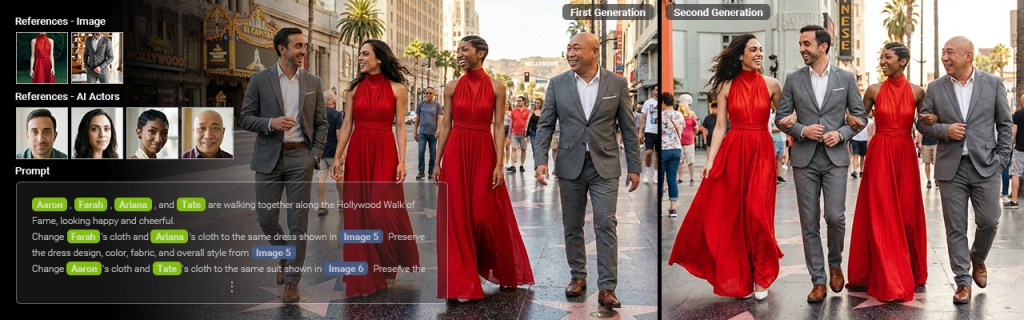
AI Studio translates your exact 3D scene (spatial layouts, camera settings, and character animation) directly into AI inputs. You build the scene and frame the shot in 3D, then pass it directly to the AI to generate the final image or video without the guesswork.
Multi-Model Integration
Artists can swap between leading AI models within a single environment to match the specific needs of any shot:
A centerpiece of this launch is the native integration of Seedance 2.0, widely recognized as the most advanced video generation model on the market for interpreting precise 3D spatial data. Seedance 2.0 understands the mechanics of the 3D world like no other video model, making it the perfect counterpart to iClone.
Absolute Cinematic Fidelity: Complex camera paths, including crane shots, dolly moves, and multi-axis orbits, carry through faithfully. For the first time, even instantaneous camera switching and multi-camera cuts translate perfectly from the 3D viewport to the AI output.
Preserved Character Motion: The model accurately honors complex character movements and keyframed choreography, ensuring all spatial relationships and timing established in your 3D software remain completely intact.
Fluid Camera Enhancement: Seedance 2.0 rigorously respects your creative intent. Instead of altering your framing, it optimizes the execution by smoothing out camera translations and rotations for more realistic and natural results while keeping your original direction intact.
Advanced Multi-Shot Prompting: Seedance 2.0 interprets camera terminology flawlessly. Even when using just a single start frame or start-end frame images as a reference, you can simply type in different shots and how you want them, and the model will execute a phenomenal, physically accurate result.
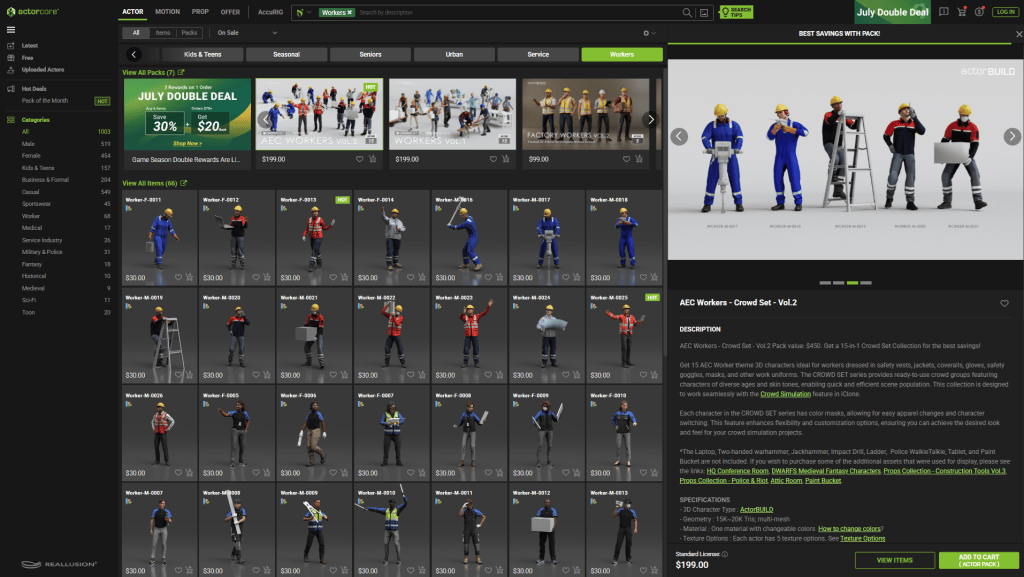
Build Your Scene First: 5,000+ 3D Previz Contents
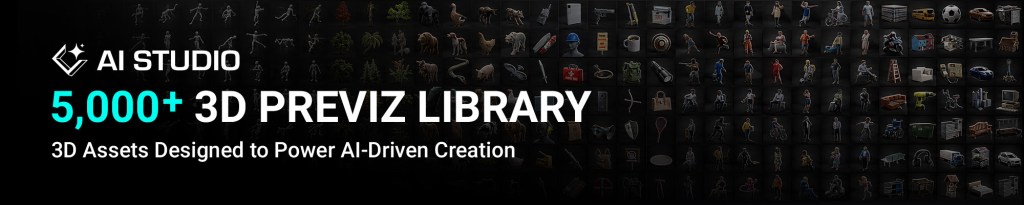
What makes 3D-guided generation immediately practical is the depth of the library behind it. Reallusion has handpicked over 5,000 contents from its massive library and optimized them specifically for AI creation.
The library covers poses, posed people, interior furnishings, buildings, animals, trees, plants, and vehicles.Artists can fully populate and compose a scene to have a vision before they actually start generating.
The full 5,000+ 3D content library is available to AI Cloud subscribers at no additional cost, while free-tier users have access to a curated selection of 200 sample assets to get started.
Resolving Character Consistency with AI Actor Creator
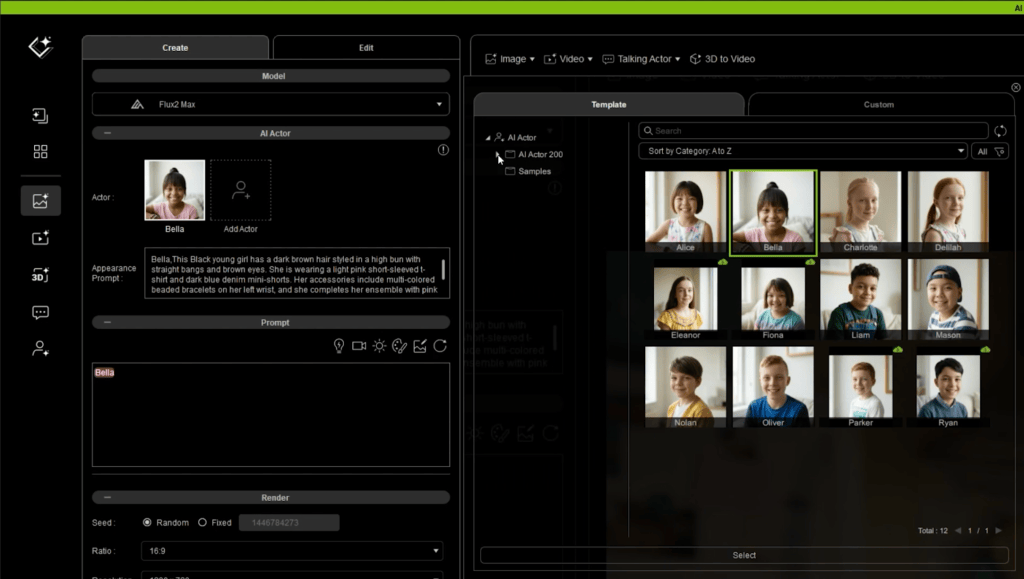
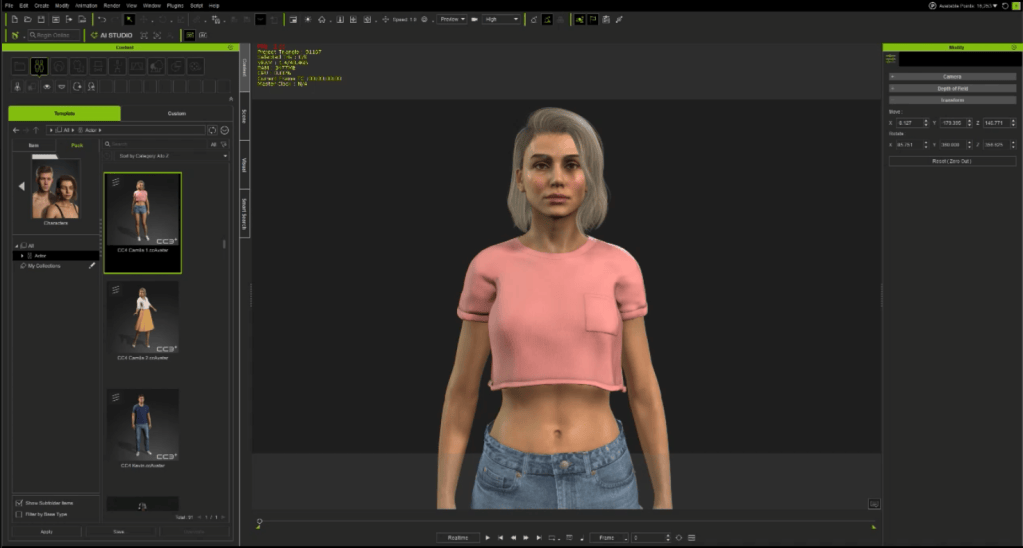
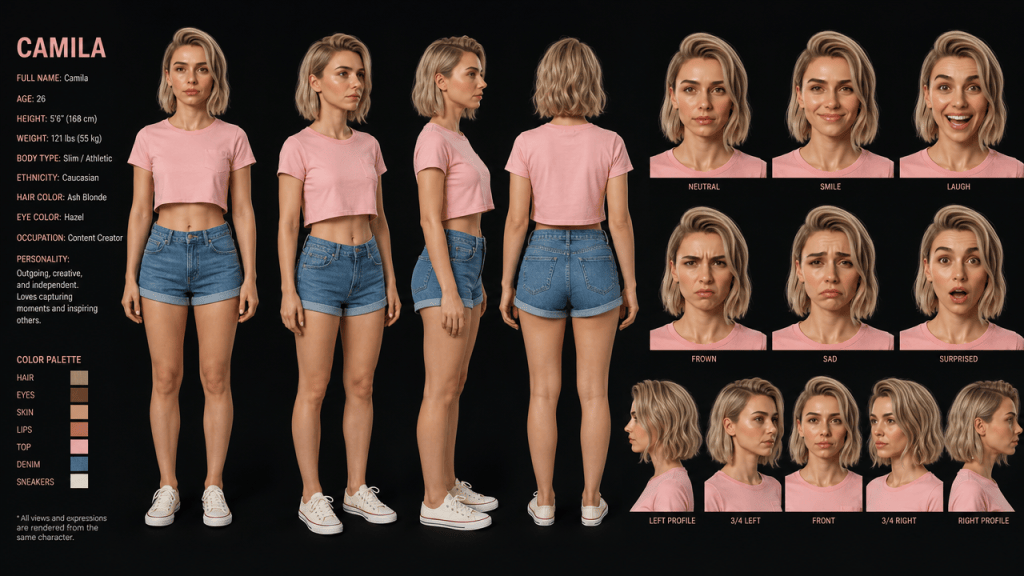
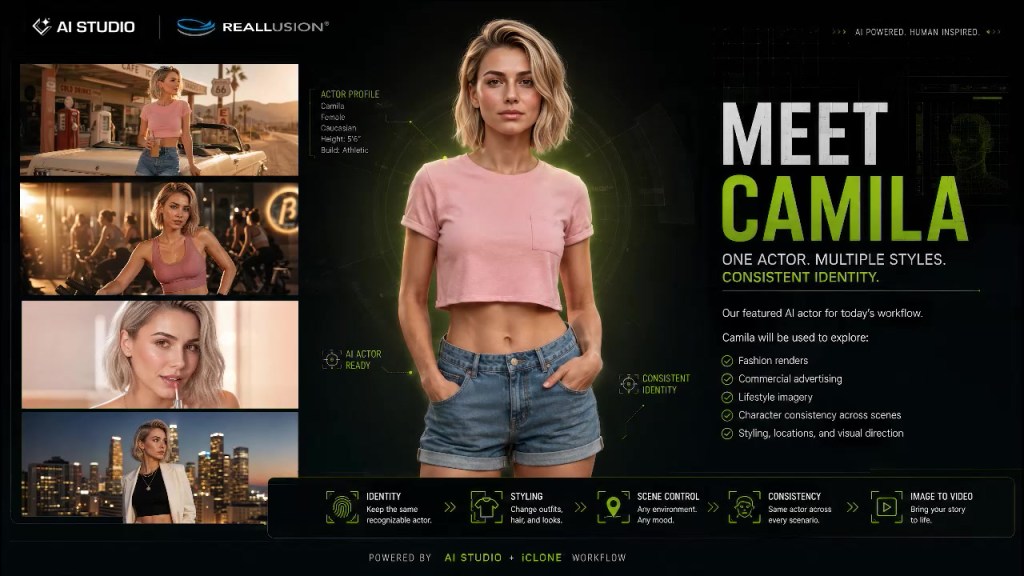
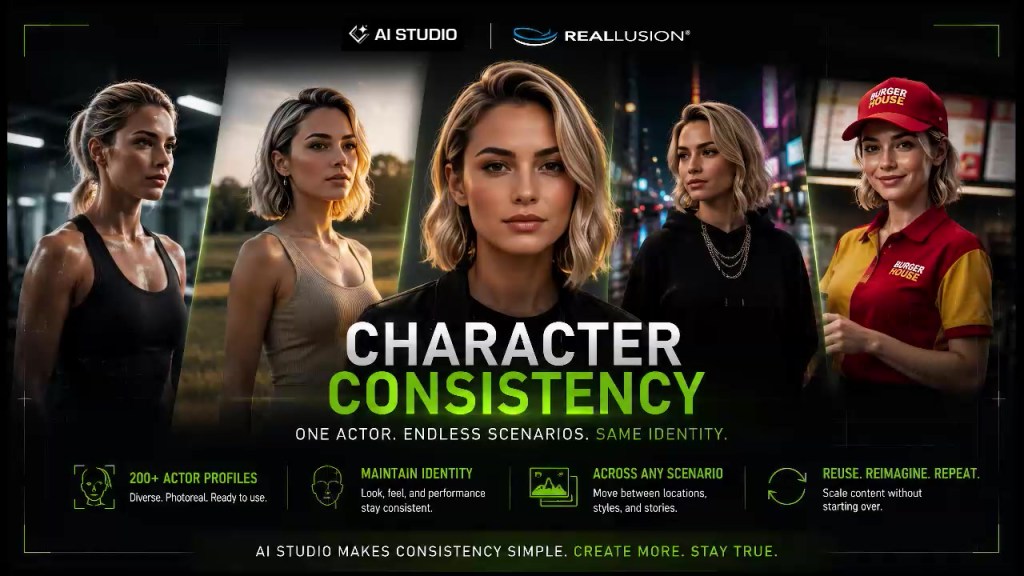
AI Studio solves the classic “AI drift” problem with AI Actor Creator. You can generate consistent AI Actors (iModels) from your own 3D characters or from a few reference photos. For artists who build their own characters, they have both the 3D asset and the AI version. Unlike flat AI generation that locks characters into a single platform, this dual-layer approach ensures true creative ownership and total flexibility to export your character to game engines, 3D printing, or broadcast animation.
Consistent Character Sheets: The AI Actor Creator generates sheets of up to 14 images across multiple angles and expressions, locking in a visual identity that remains stable across different environments or styles.
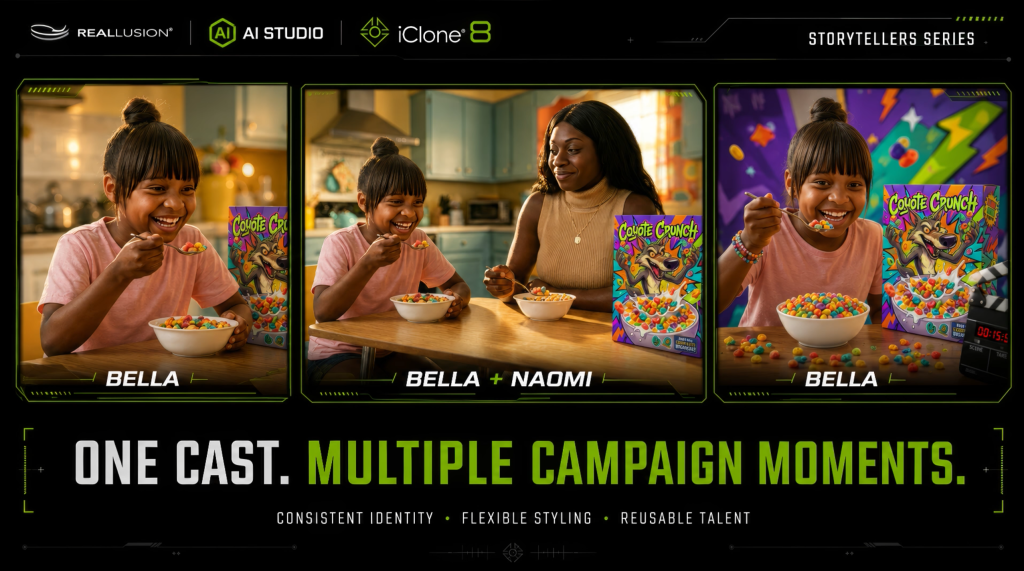
Multi-Actor Scenes: You can assign multiple named AI Actors within a single scene, and each will maintain its individual identity even as visual styles shift from cinematic to sketch or toy-like treatments.
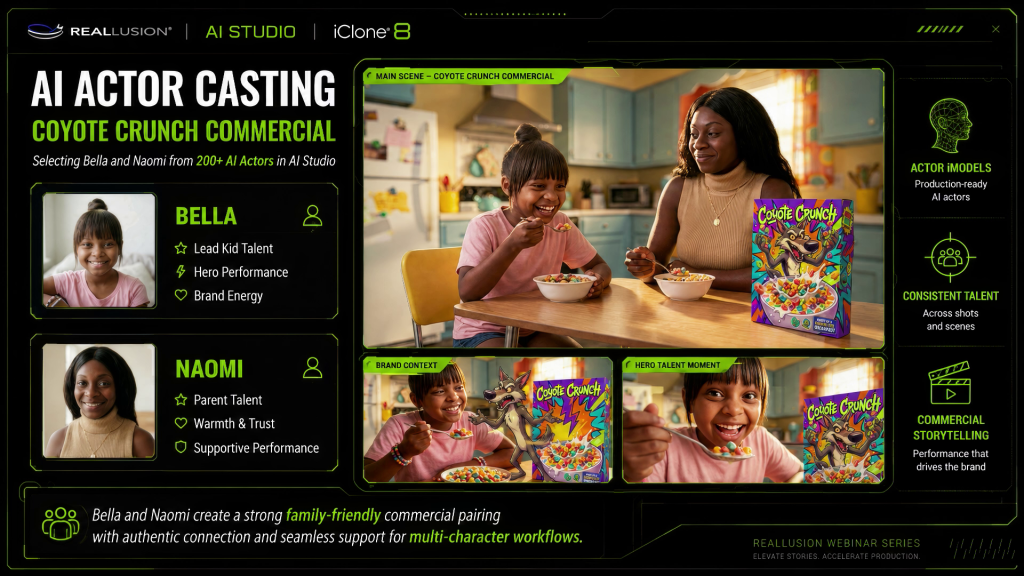
200 Production-Ready AI Actors: For projects that need to start immediately, AI Studio includes a library of 200 ready-to-use AI Actors (iModels) spanning realistic digital humans, stylized characters, aliens, and creatures. The complete 200+ actor roster is fully unlocked for AI Cloud subscribers, while free tier users can access 12 starter actors to begin exploring.
Advanced Voice and Filmmaking Dialogue Tools
AI Studio extends beyond visuals by offering a full suite of performance tools that let you direct digital actors like a filmmaker. The workflow automatically detects languages and supports multiple input types, allowing you to generate text-to-voice using default voice options, upload a reference voice for cloning, or directly import your own audio files.
Lip-Sync and Performance: Turn static portraits into speaking characters or synchronize voice lines to existing video footage with frame-accurate precision.
Multi-Character Dialogue Orchestration: Assign independent voices to multiple characters within a single scene, keeping full control over the delivery sequence, speaking pace, and emotional tone per performer to build natural, story-driven conversations.
Prompt-Driven Dialogue: Alternatively, advanced video models like Kling 3.0 and Seedance 2.0 support native audio generation within the prompt itself. This introduces a separate, highly efficient creation path, allowing you to generate contextual dialogue and ambient sound alongside your video content using nothing but text prompts.
All-in-One AI Generation and Enhancement Toolkit
AI Studio consolidates the creative workflow by providing built-in tools that help you start faster with the basics and understand how AI features operate in intuitive ways. This complete environment supports everything from rapid conceptual testing and quick editing to the final visual enhancement of your project.
Start-End Frame Video Generation: Provide the AI with your start and end frames, and let the video model creatively fill in the gaps. This allows the AI to dream up smooth, dynamic transitions and cinematic actions between your key beats while respecting your narrative goalposts.
Production Templates: Easily handle common tasks and discover how tools work through intuitive setups for text-to-image generation, element swapping within existing visuals, animating still images, and replacing actors in video footage.
Editable Prompt Presets: Jumpstart your ideas with ready-made combinations of lighting, camera angles, and styles, allowing you to fine-tune the prompt for total creative control.
Built-in Upscaling: Raw AI generations often come with resolution limits to image and video. The built-in upscaling tool closes that gap during final enhancement, sharpening fine details like eyes, skin textures, reflections, fire, and fabrics to bring your work up to professional broadcast standards.
Early Access Now Open
AI Studio is now open for Early Access. If you are a Full Member of iClone 8, Character Creator 4, or Character Creator 5, you have immediate access to this new workflow ecosystem.
To get started, please upgrade your software to the latest version via the Reallusion Hub. Once updated, you can immediately redeem your complimentary one month of the AI Studio Starter Plan.
TL;DR: This tutorial walks through the complete 10-step Character Creator 5 to Blender workflow used to build Barnabe — the half-bat mascot from The Grimsleys stylized vampire family pack. Starting from CC5’s SubD HD base mesh and Proportion Editor, the character is sculpted in Blender via GoB morph transfers, then returned to CC5 for texturing, rigging, and final assembly — including custom-modeled wings and a signature top hat. The workflow demonstrates how the Character Creator 5 to Blender pipeline, powered by Blender Auto Setup, makes professional stylized character creation both efficient and accessible.
About The Grimsleys Pack
Barnabe is one of six premium stylized vampiric characters in The Grimsleys — Stylized Vampire Mixer, a content pack developed by Vivid Mesh Studio in partnership with Mythcons, built exclusively for Character Creator 5 and iClone. The pack includes the full family: Thaddeus (the imposing patriarch), Belladonna (the elegant matriarch), Lilith (the angsty teen), Morty (the mischievous troublemaker), Bram (the chaotic toddler), and Barnabe (the bat mascot). All six characters come with custom clothing, hair, skins, facial profiles, and 60 ActorMIXER presets — ready for animation in sitcoms, Halloween shorts, stylized games, or any project that calls for gothic-whimsical characters.
Step 1: Laying the Foundation with the Proportion Editor
The process starts inside CC5 by loading a base mesh utilizing the CC5 SubD HD system. Instead of jumping straight into heavy sculpting, the first goal is to rough out the exaggerated proportions of the stylized bat. The Proportion Editor handles this — scaling bones directly to establish a solid base silhouette before any external modeling happens.
Step 2: Sending to Blender (SubD Level 1 or SubD Level 2)
Once the structural foundation is in place, it’s time to push the shapes further. Using the GoB function in Blender Auto Setup, the character is sent to Blender as a Morph at SubD Level 1 or SubD Level 2 resolution.
Step 3: Sculpting the Character
With the character in Blender, the geometry can be pulled into the stylized bat shape.
The Sculpting Process: Using a mouse, keyboard, and Blender’s Grab brush, you can quickly establish the primary forms.
Masking: If you want to restrict your detailing to certain areas without affecting the rest of the mesh, utilize Blender’s Auto-Masking functions in conjunction with Face Sets.
Step 4: Returning to CC5 as a Morph
Once the primary sculpting reaches a sufficient point, the character is sent back to Character Creator using the GoCC function. Because this was a Morph Editing session, the character returns as a Character Morph.
Step 5: Mesh Corrections and Adjustments
Back in CC5, the heavy sculpting has likely distorted some internal geometry. Now is the time to replace any deformed eyes or teeth with fresh ones. After replacing those elements, use the Proportion Editor again to make any final structural adjustments to the rig and base mesh if necessary.
Step 6: High-Resolution Detailing in Blender
With the base clean and corrected, the character goes back to Blender one more time — but this time at the highest SubD resolution. This allows for sculpting finer, high-resolution details without worrying about breaking the core mesh.
Step 7: Crafting the Wings
A bat isn’t a bat without its wings. Staying in Blender, the wings are created from basic mesh planes — subdivided and shaped to match the stylized aesthetic, UV unwrapped, and given basic textures.
Step 8: Saving Assets and Returning to CC5
Using the Blender Auto Setup add-on, the newly created wings are saved as an Asset. Then, the core character is sent back to CC5 using GoCC — again returning as a morph.
Step 9: Texturing
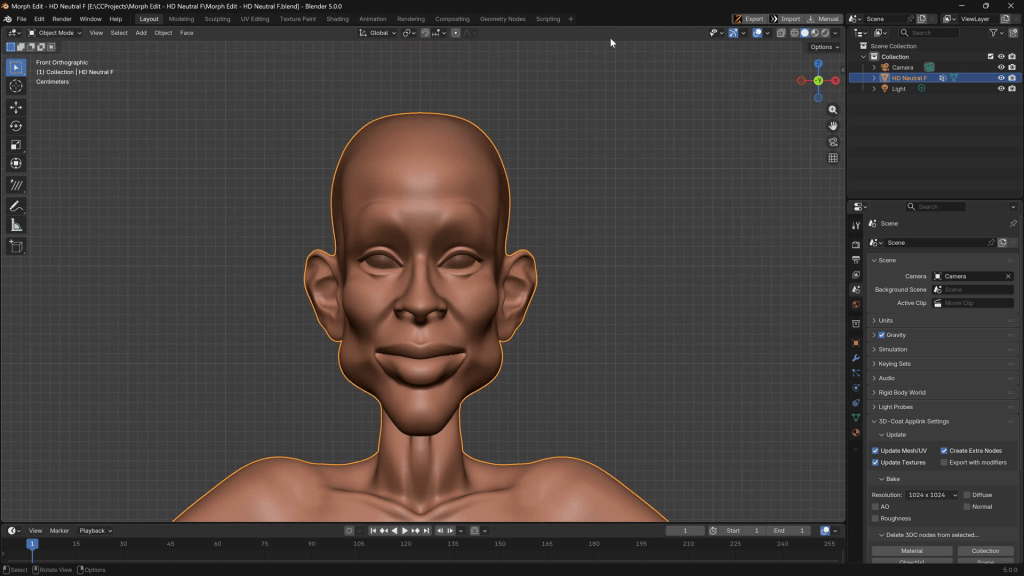
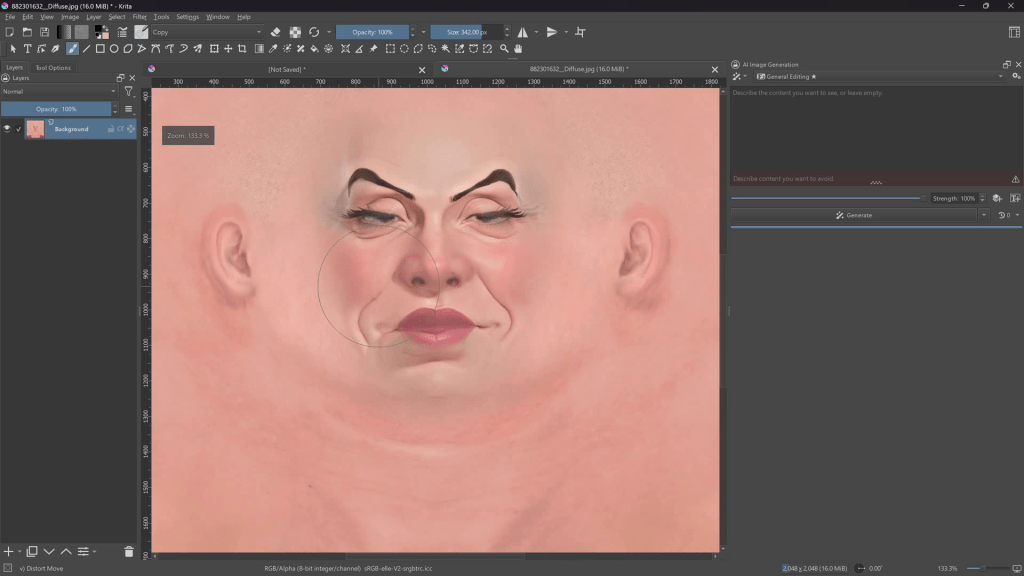
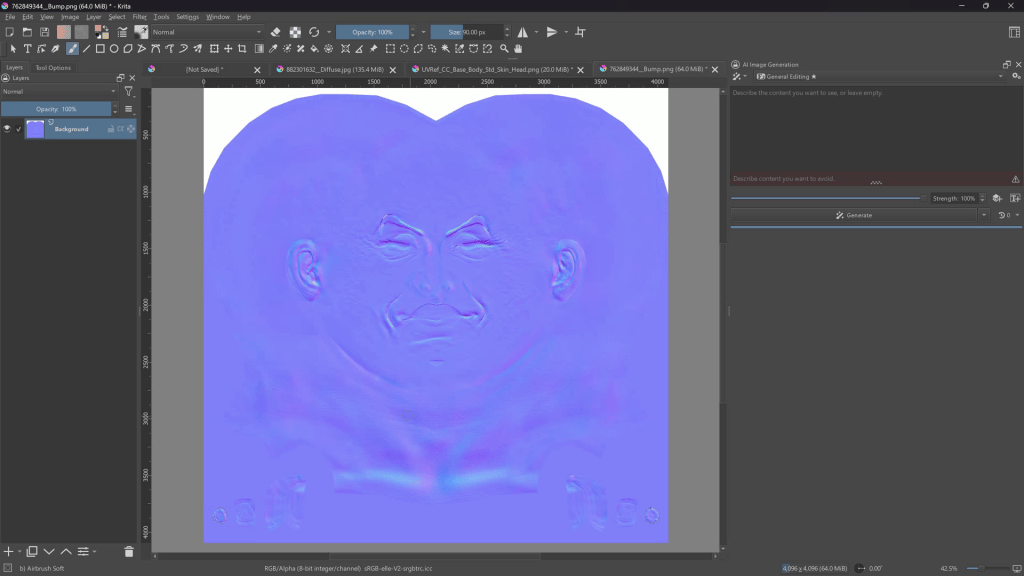
Back in CC5, the character’s textures are adjusted using CC5’s built-in skin presets. For specific stylized variations, textures are taken into Krita for basic painting.
Note: While Krita works well for basic edits, a dedicated 3D texture painting app (such as 3D-Coat, Substance Painter, or Blender) is highly recommended for more complex material work.
Step 10: Final Rigging and Accessories
Finally, with the character back in CC5 and the wing assets imported, skin weights are transferred to the wings so they articulate properly with the rig. To finish the look, pre-created accessories — like Barnabe’s signature top hat and red bow tie — are attached, and the character is complete.
Conclusion
This Character Creator to Blender workflow shows how a professional stylized character can be built by moving back and forth between CC5 and Blender — without starting from scratch. CC5’s SubD HD system and Proportion Editor provide the structural foundation.
Blender handles the creative sculpting and custom asset creation, and GoB/GoCC transfers keep the pipeline non-destructive throughout. Once you get the hang of these morph-based round trips, the process becomes second nature. Barnabe and the rest of The Grimsleys family are available now on the Reallusion Content Store.
Mythcons
Greetings, my name is Peter Alexander. In this demonstration, I’m going to walk you through how you can leverage Character Creator 5‘s new ActorMIXER as a powerful stepping stone to create unique, stylized characters. We’ll use the CC Base Mesh as our foundation, and ActorMixer will provide the next layer from which to build, making professional character creation that much easier. For this demo, I’ll be creating a stylized version of Arnold, using the Blender Autosetup pipeline, which is both cost-effective and efficient for creating characters and assets.
Use the Proportion Editor to block out exaggerated silhouettes before sculpting. Scaling bones inside CC5 first saves significant time in Blender and establishes correct proportions early.
Send characters to Blender as Morphs, not final exports. GoB morph transfers keep the pipeline non-destructive — changes come back to CC5 as editable Character Morphs.
Replace internal geometry (eyes, teeth) after heavy sculpting. Aggressive stylization in Blender often distorts these elements; swapping in fresh ones back in CC5 is faster than trying to fix them.
Build custom assets like wings at the scene origin (0,0,0). Centering geometry before rigging prevents bone offset issues when transferring back to CC5 for skin weight assignment.
Start from a professionally built base rather than from scratch. Packs like The Grimsleys provide production-ready stylized characters with ActorMIXER presets, saving weeks of character development time.
FAQs
Do I need Blender to use The Grimsleys pack?
No. The Grimsleys pack is ready to use directly in Character Creator 5 and iClone. Blender is only needed if you want to follow the behind-the-scenes sculpting workflow described in this tutorial or further customize the characters.
What is the GoB/GoCC transfer in Blender Auto Setup?
GoB sends a character from CC5 to Blender for morph editing, and GoCC sends it back. The key advantage is that changes return to CC5 as non-destructive Character Morphs rather than permanent mesh edits, so you can always dial adjustments up or down.
Can I use this CC5-to-Blender workflow for my own original characters?
Absolutely. The same 10-step pipeline — Proportion Editor, GoB morph transfer, Blender sculpting, GoCC return, and final rigging — works for any stylized character you want to create with Character Creator 5 and Blender.
What version of Character Creator do I need for The Grimsleys?
The pack requires CC v5.06 or above (and iClone v8.70 or above for animation). It also includes 60 ActorMIXER presets for blending and generating character variations.
Does this workflow require ActorMIXER?
The sculpting workflow itself does not require ActorMIXER. However, the Grimsleys pack includes ActorMIXER presets that let you blend the six family members into new stylized variations — which is a powerful creative extension of the base characters.
In modern game development, characters are no longer simple visual assets—they are the emotional core of the player experience. For studios focused on storytelling, building believable characters quickly and efficiently is essential. This is where Character Creator 5, Reallusion’s powerful 3D animation software, becomes a game-changing solution.
Spanish indie developer Indigo Studios has embraced this technology as part of its production pipeline. Known for crafting narrative-driven mystery and adventure games, the studio relies on Character Creator 5 and Unreal Engine to bring complex characters to life for its upcoming detective title, The Family Crypt.
Through their development diary, Indigo Studios demonstrates how modern tools empower independent developers to create their own characters, design realistic performances, and produce cinematic storytelling without the overhead traditionally associated with AAA pipelines.
Indigo Studios: A Story-Focused Indie Developer
Founded by Kim Planella and Judit Hierro, Indigo Studios is an independent game development studio based in Spain. The duo combines experience from film, theater, and audiovisual production with game design to create immersive interactive stories. In the past, they have been candidates for the Reallusion Pitch & Produce program with their game LUCIDUS MORTEM.
Their games are known for several defining characteristics:
Narrative-driven gameplay
Atmospheric environments
Deep character development
Original soundtracks
Cinematic presentation
Rather than focusing solely on mechanics, Indigo Studios prioritizes emotional engagement and mystery-driven storytelling.
Their portfolio includes projects such as:
Seven Doors
Charon’s Staircase
The Last Case of John Morley
Portrait of a Torn
Lucidus Mortem
Each title emphasizes story, puzzle-solving, and character interaction. This creative philosophy makes advanced character tools like Character Creator 5 especially valuable in their pipeline.
Indigo Studios’ newest project, The Family Crypt, is a psychological murder mystery set in 1932.
Players take on the role of Inspector Julian Artemis Banks, a detective investigating a disturbing case involving the mysterious deaths of six members of the Von Haffenhoven family.
Unlike traditional detective games, The Family Crypt introduces gameplay built around reading facial expressions, body language, and emotional cues. Players must interpret characters’ reactions, identify lies, and uncover hidden motives.
To achieve this level of narrative depth, the development team needed realistic character animation, believable facial performances, and efficient character pipelines.
Their solution: Reallusion Character Creator 5 integrated with Unreal Engine 5.6.
Character Creator 5: A Modern Human Creator for Games
Creating realistic digital humans has traditionally required multiple complex tools, extensive sculpting work, and technical rigging knowledge. Character Creator 5 simplifies this process by providing a powerful human creator designed specifically for real-time production pipelines.
For small studios like Indigo Studios, this drastically reduces development time.
Instead of spending weeks constructing base models and rigs, artists can focus on storytelling and design—areas that truly impact the player experience.
Creating Inspector Julian Artemis Banks
In their development diary, Indigo Studios walks through the process of creating the game’s main protagonist: Inspector Julian Artemis Banks.
The character is a complex figure—a detective haunted by past experiences who must unravel a web of secrets surrounding the Von Haffenhoven murders.
Using Character Creator 5, the team began by establishing the fundamental character base.
This allowed them to experiment with:
Facial proportions
Age and personality traits
Skin textures
Hair and wardrobe
Within minutes, the team could iterate through multiple versions of the character until they found a look that matched the narrative vision.
For game developers, this ability to quickly create your own character and iterate on design ideas is invaluable.
Rapid Character Design for Storytelling
One of the biggest advantages of Character Creator 5 is its ability to empower the character designer with intuitive tools.
Traditional pipelines often require separate artists for modeling, rigging, texturing, and animation preparation. With CC5, many of these steps are streamlined into a single environment.
This allows small development teams to:
Experiment with visual styles quickly
Refine character personalities through appearance
Adjust facial structures for emotional expression
Maintain consistent topology for animation
For Indigo Studios, this meant they could concentrate on creating characters that support the narrative tone of The Family Crypt.
Seamless Unreal Engine Integration
A crucial component of Indigo Studios’ workflow is Unreal Engine 5.6, which powers the game’s real-time rendering and gameplay systems.
Character Creator 5 integrates directly with Unreal through Reallusion’s Unreal Live Link.
This integration allows developers to:
Transfer characters instantly to Unreal
Maintain skeleton and rig compatibility
Preserve facial expressions and animation controls
Synchronize updates in real time
For indie developers working with small teams, eliminating manual import pipelines saves enormous amounts of production time.
Instead of wrestling with technical issues, artists can focus on creating engaging characters and environments.
Realistic Facial Performance and Lip Sync Animation
Because The Family Crypt revolves around reading characters’ emotions and expressions, facial performance is critical.
Character Creator 5 provides tools that make high-quality 3D character animation more accessible, including facial rigging systems compatible with modern animation tools.
These capabilities allow Indigo Studios to create scenes where subtle facial movements communicate suspicion, fear, or deception—an essential mechanic in their detective gameplay.
Efficient Workflows for Indie Developers
Indie developers often face significant constraints: small teams, limited budgets, and tight production schedules.
Character Creator 5 addresses these challenges by offering a production-ready character pipeline.
Key advantages include:
Speed: Artists can build realistic characters in hours instead of weeks.
Consistency: Characters maintain a clean topology optimized for animation.
Compatibility: Assets transfer smoothly between software environments.
Scalability: Teams can quickly produce multiple NPC characters.
For story-driven games that require large casts, these efficiencies are crucial.
Indigo Studios combines several tools to create its characters and animations.
Their workflow includes:
Character Creator 5: Primary character creation platform.
Unreal Engine 5.6: Game engine powering rendering and gameplay.
Reallusion Unreal Live Link: Real-time synchronization between CC5 and Unreal.
Additional tools commonly used in similar pipelines include:
Maya for animation refinement
ZBrush for sculpting
Substance Painter for texture detailing
Together, these tools create a flexible ecosystem for modern character production.
Why Character Creator 5 Is Valuable for Narrative Games
Narrative-driven games rely heavily on believable characters.
Players must feel connected to the people they interact with. If characters appear stiff or artificial, the storytelling impact diminishes.
Character Creator 5 helps solve this challenge by enabling developers to:
create emotionally expressive characters
maintain consistent animation rigs
support cinematic storytelling
produce realistic digital humans quickly
For Indigo Studios, this technology allows them to maintain a high visual standard while still operating as an independent studio.
The Future of Character Creation in Indie Games
The tools available to independent developers today are more powerful than ever.
Platforms like Character Creator 5 democratize character production, enabling smaller teams to compete with larger studios.
For narrative-focused developers, this means:
faster prototyping of characters
improved storytelling through animation
higher visual fidelity
more immersive player experiences
As technology evolves, the line between indie and AAA production continues to blur.
Conclusion: Empowering Creators with Character Creator 5
Indigo Studios’ development diary for The Family Crypt highlights how modern tools are transforming the character creation process.
By integrating Character Creator 5, Unreal Engine, and Reallusion’s Live Link technology, the studio can efficiently design realistic characters that support their cinematic storytelling goals.
For 3D animators, game developers, and digital creators, this workflow demonstrates how accessible high-quality character production has become.
Whether you are an indie developer building your first game or a professional studio expanding your pipeline, Character Creator 5 offers a powerful platform to create your own character, animate expressive performances, and produce engaging interactive stories.
If you want to explore the future of 3D character animation, Character Creator 5 is a tool worth adding to your creative arsenal.
Character Creator 5 is a professional 3D character creation and animation tool used to design realistic digital humans for games, animation, and virtual production.
Can Character Creator 5 work with Unreal Engine?
Yes. Character Creator 5 integrates seamlessly with Unreal Engine through Reallusion’s Unreal Live Link, enabling real-time character transfers and animation updates.
Is Character Creator 5 suitable for indie developers?
Absolutely. The software simplifies complex character creation processes, allowing small teams to produce professional-quality characters efficiently.
Does Character Creator support facial animation and lip sync?
Yes. Character Creator provides advanced facial rigs that support expressive performances and lip sync animation for cinematic storytelling.
What industries use Character Creator?
Character Creator is widely used in game development, animation production, film previsualization, virtual production, and interactive storytelling.
TL;DR: This tutorial covers the complete Character Creator 5 to ZBrush accessories, armor, and cloth physics workflow used to equip three alien creature characters for animation and rendering. Starting from sculpted HD bases built with Character Creator 5 and ZBrush, the guide tackles three production challenges: linking a weapon to a character’s hand via Pick Parent, attaching rigid and conforming armor pieces using Transfer Skin Weights, and configuring cloth physics on a cape — including both real-time simulation and an offline Marvelous Designer–to–Alembic pipeline for cinematic shots.
This is the second installment in digital sculptor Óscar Fernández’s alien creature series. The first article covered the HD sculpting workflow from concept to motion-ready character. Here, those same creatures — an insectoid, a crustacean, and an amphibian — get outfitted for production using CC5, Substance Painter, iClone, and Marvelous Designer. All three characters will be available as a content pack on the Reallusion Content Store.
This article focuses specifically on outfitting characters with weapons, armor, and cloth — the production steps that come after the base character is sculpted and rigged. If you are interested in Óscar’s HD GoZ sculpting workflow and how these alien creatures were built from scratch, please check:
Hello everyone! I’m Óscar Fernández, a digital sculptor and educator specialized primarily in figures for 3D printing. Before we start working on the mesh, we need to set the direction for our work. Once again, I’ve turned to the talent of KithKart to define the conceptual design and aesthetics of these three characters. We opted for a visual narrative based on terrestrial biology applied to alien environments.
The Insectoid
This character stands out with a slender and vertical silhouette, featuring elongated limbs that suggest speed. Its design features segmented biological armor that protects vital areas without sacrificing mobility.
The insectoid concept
The Crustacean
A creature with a massive build, a low center of gravity, and broad shoulders. Its body is covered by a heavy exoskeleton, with textures evoking a crab or spider crab shell, including irregularities and micro-details of wear and tear.
The crustacean concept
The Amphibian
This specimen features more rounded volumes and skin with a wet, elastic appearance characteristic of anurans. Unlike the previous ones, its morphology is less rigid, with a prominent torso and powerful yet fluid limbs.
The amphibian concept
Before diving into the process of how they came to life, I’d like to mention that these three aliens, as well as the three previous designs, are available in the Reallusion Content Store. So, if you like the final result, you can work with them directly in your own projects.
Establishing Alien Proportions in CC5
The starting point for all three cases will be identical and fundamental to ensuring the technical compatibility of the model. We’ll start by loading the new “HD CC5 Neutral Base,” a mesh that, as we already know, features a rigging system and topology optimized for the most demanding deformations.
Before any intervention, we’ll place the character in a neutral pose. From here, we will use the native CC5 morphs to define the global proportions. This is the time to establish the height, shoulder width, leg length, etc., and the primary volumes that will serve as the foundation for our sculpture.
Once we have the base structure, the next step is to send the model to ZBrush. We will use the GoZ button to send the character directly to ZBrush. At this point, we will skip any texture maps and keep the default subdivisions. Our goal is to receive a clean and lightweight geometry in ZBrush, ready for the organic sculpting process to take over.
Morph the character with Proportion Editor in Character Creator 5 (CC5), then send to ZBrush for further sculpting via GoZ plus.
Sculpting the Aliens in ZBrush
We’ve already covered the sculpting process in ZBrush in previous videos, so we won’t repeat it, but we will recap the key points to keep in mind for everything to work perfectly:
Don’t modify the model’s topology.
Don’t delete subdivision levels.
Don’t alter the default pose.
Don’t rename the Subtools.
Reducing Finger Count Without Breaking the CC Rig
One of the recurring challenges when working with base meshes is the limitation in the number of fingers. The “HD CC5 Neutral Base” has a standard five-finger structure, but for our alien species, we need to alter this configuration without compromising the integrity of the mesh. This is where we’ll apply an incredibly simple but effective technical trick:
For our frog, we’re going to convert the 5-finger hand into a four-finger hand. The procedure is simple but requires some precision. We mask the middle finger and, using the TrimDynamic tool, we collapse the polygons onto themselves until their volume is reduced to an imperceptible scale. After controlled smoothing, the finger visually disappears, but the topology remains intact for the CC5 engine.
Reducing CC character’s finger count without breaking the rig
And in the case of the crustacean, we take this method even further. We apply the same principle to the middle and ring fingers, achieving a three-fingered hand with a much more aggressive and functional silhouette for its design. This system is vital: it allows us total creative freedom in ZBrush while maintaining the weight mapping and the original bone hierarchy of Character Creator, avoiding export errors or strange deformations in animations.
Beyond these structural alterations, the workflow follows the logical sculpting methodology we already know. We’ll start with the proportions and primary volumes at the lowest subdivision levels. We must try to hold back and only increase the polygon load as the shapes demand higher resolution for fine detail.
When defining the features of our species—whether it’s the more humanoid face of the insect or the broadened shapes of the amphibian—we must make an effort to adapt our sculpture to the model’s original topology. We can isolate the head and load the CC5 reference texture. This allows us to visualize the deformation regions in real-time. Respecting these guides while sculpting ensures that when it’s time to apply expressions, the muscles and facial folds behave with absolute naturalness, no matter how extreme the creature is.
Load CC5 reference texture to visualize the deformation regions in real-time
When reaching the detail phase, we must check the behavior of the fingers we had hidden. When increasing the subdivision level, the default subdivision may try to recover volume in the collapsed areas or generate certain pinching in the mesh. To fix this, we will again collapse any residual polygons and apply controlled smoothing, which will remove any trace of the original base mesh.
ZBrush Polypaint
With the sculpture finalized and the topology respected, we enter the Polypaint phase. Although I feel comfortable with volumes, color is something I’m particularly bad at, but luckily, I can count on KithKart again to give me a hand. Out of all the proposals she offered for each character, these are the ones we finally chose:
For the insectoid, we opted for a palette of earth tones and olive greens, looking for that natural camouflage to break up its slender silhouette.
For the crustacean, the approach is the opposite: we work with highly saturated organic reds and tonal variations on the edges to simulate calcium wear and the impact of the environment on its shell.
Finally, for the amphibian, the technical challenge is the transition. We apply soft gradients as if we were painting with an airbrush to simulate that permeable and moist skin, adding irregular spot patterns to help define the torso volumes.
The color guides of CC5 HD Alien Mixer Pack ver2
Having these color guides before actually starting to paint in ZBrush is a total lifesaver since we know beforehand that the artistic base is solid and will work perfectly once we export everything back to CC5.
Returning to CC5 with GoZ Plus
With the sculpting and Polypaint phases finished, it’s time to return our specimens to the Character Creator 5 ecosystem. For this process, we will use the CC GoZ Plus plugin, which, as we know, completely automates the data transfer and map generation.
In the export settings, we’ll select subdivision levels 0 and 1. This ensures a lightweight base mesh for animation, but with the geometric support necessary for the normal maps. We’ll activate the automatic generation of all maps so that CC5 correctly interprets our Polypaint and the sculpted detail.
After pressing “All” and returning to the CC5 interface, the final step is the Update. But first, we must ensure the “Adjust bone to fit morph” option is active, though we could also adjust the bones automatically later, as we already know. Since we made a fairly extreme alteration of proportions in ZBrush, this function will automatically relocate the internal skeleton to match our new sculpture.
ZBrush to Character Creator 5 GoZ Plus workflow: subdivision export settings, GoZ Options, and baked UV texture maps
Now that our three characters are prepared, let’s move on to the three challenges we’ve set for this project. We’ll start with the simplest one.
Linked Weapon — Attaching Accessories with Pick Parent
With the three characters ready and articulated in CC5, we’re going to tackle the first of our challenges: the integration of linked accessories.
Since KithKart handled the conceptual weight of the entire project, I turned to her again for the weapon design. She proposed several creative directions with a variety of silhouettes ranging from technological to arcane.
Different weapon design in CC5 HD Alien Mixer Pack ver2
Each proposal had something I particularly liked, so I decided to combine the most powerful elements of the different designs.
I kept the base structure and silhouette I liked from KithKart’s sketches, but decided to sculpt it with a twisted, organic wood texture in ZBrush, integrating that central eye as a biological energy focus. On this occasion, I’ve decided to keep the object fairly simple and apply the details directly in Substance Painter.
To send it to Substance, we need UVs, so I sent our accessory to RizomUV via its free plugin, which works great in ZBrush. Now we just have to export a low-poly version (at the lowest subdivision level) and a high-poly version (at the highest level) in FBX to do the baking within Substance itself and start playing with texturing.
I used some Smart Materials as a base and added layers on top with dirt, micro-wear, tonal variations, etc., until reaching the final result. Once the final texture maps are exported, we return to Character Creator 5. Here, we load the original low-poly mesh and link each map to its corresponding channel within the materials section. The result is a visually complex but polygonally lightweight staff.
Staff weapon accessory pipeline: ZBrush sculpt to RizomUV unwrap to Substance Painter texturing for Character Creator 5
The process of linking the staff to the hand is incredibly simple.
First, we position and orient the accessory using the transformation Gizmo, ensuring an ergonomic fit with our character’s hand anatomy. Once placed, we go to the Attach section and activate the Pick Parent function. We just have to click on the hand’s geometry to establish that dependency hierarchy.
From this moment on, the staff is anchored to the hand node. When applying any animation or modifying the character’s pose, the accessory will maintain its relative position and respond coherently to the arm’s kinematic chain.
CC5 Pick Parent attaching a staff weapon to an alien character’s right hand using the Attach panel in Character Creator 5
All right, with the accessory linked and responding to every movement, we’ve completed the workflow for rigid objects. Let’s head to the next challenge.
Armor — Rigid Binding vs. Transfer Skin Weights
For the armor design, the starting point was KithKart’s original concept, beginning with the helmet and upper pieces. However, when moving it to 3D, we encountered a common production challenge: what works aesthetically in 2D doesn’t always translate with the same strength in 3D.
After the first block-out tests, I felt the original design lost its presence in complex camera angles.
That’s why we decided to change the armor design. I looked for a more aggressive and functional segmentation, creating plates that not only protect but also emphasize that slender, alien silhouette. Since the character itself was already finished, the armor’s shapes practically emerged on their own.
For the texturing of the armor, we followed a workflow identical to the staff: we ran the pieces through RizomUV to get the UVs, exported low and high meshes to bake in Substance, and started texturing. I started texturing the helmet and saved the material to apply it to the rest of the armor pieces.
Insectoid armor breakdown: ZBrush sculpt vs textured pieces — helmet, shoulder pads, chest armor, wings, and boots for CC5
Now it’s time to move the pieces to CC5. Although everything can be sent at once, I prefer to send them one by one to check the behavior of each part individually. To prevent GoZ Plus from having to check all subtools, I’m going to move each piece to a new ZBrush document and export it from there using only subdivision level 0, deactivating color, normal, and displacement maps since we’ve already generated them in Substance Painter.
We plug the maps into the corresponding slots, and everything is ready. If the textures don’t look right when plugged in, it’s because we worked in DirectX while texturing, and CC5 uses the OpenGL standard; just expand the UV panel and flip each one vertically, and everything will look perfect.
Once we have all the armor pieces in CC5, we must decide how they will behave mechanically. Here, the workflow splits into two strategies depending on the piece’s function.
For elements that must maintain absolute rigidity, such as shoulder pads, forearms, or knee pads, we’ll opt for the method we saw with the staff: we load them as accessories and link them directly via Pick Parent to the corresponding bone. This ensures the piece moves with the limb without suffering any elastic deformation.
However, for pieces that cover complex flexion areas, like the breastplate or footwear, we need the mesh to follow the character’s volume. For this, we will use the Transfer Skin Weights tool. When applying the default preset for the breastplate, CC5 automatically calculates which part of the torso’s weight should influence the armor. In the case of the shoes, the specific footwear preset ensures that the sole and instep follow the foot’s movement naturally.
CC5 armor rigging: Transfer Skin Weights presets for chest and shoes alongside Pick Parent for rigid forearm and knee pieces
Once the pieces are linked, we can apply animations and poses to our character, and we see that the armor responds perfectly to the deformation of our character’s skeleton.
Cloth Physics — Real-Time and Offline Simulation
The third major technical challenge is the implementation of cloth physics, and for this, we will focus on the crustacean. I wanted to give him the air of a wandering warrior, a pilgrim, or something like that, and nothing communicates that narrative better than a cape worn out by miles and miles.
Concept art by KithKart: crustacean alien in a weathered pilgrim cape — the cloth physics reference for the CC5 workflow
The third major technical challenge is the implementation of cloth physics, and for this, we will focus on the crustacean. I wanted to give him the air of a wandering warrior, a pilgrim, or something like that, and nothing communicates that narrative better than a cape worn out by miles and miles.
We’ll start by exporting our crustacean base from ZBrush at a low subdivision level to use it as a collision avatar. This time we’ll use Marvelous Designer to create the garment. So, once the character is imported, we start tracing the pattern for the cape. Designing on the actual model allows us to see in real-time how the fabric folds and deforms on the fly, reinforcing that image of a weary traveler. It is this physical behavior, and not just the visual aspect, that ultimately infuses the creature with soul and purpose before returning it to our main engine.
Marvelous Designer cape pattern and 3D drape on the crustacean alien — cloth creation for the CC5 physics workflow
For now, the shapes will be clean, and we’ll add the tears later in Substance.
To create the cape’s tears, the first step in Substance Painter is to change the project shader. By default, the transparency channel is deactivated, so we change the mode to pbr-metal-rough-with-alpha-blending. Once this is done, we manually add the Opacity channel to our Texture Set. Now the software is ready to process invisibility.
We create a Fill Layer where we deactivate all channels except opacity, setting it to zero. On this layer, we apply a Black Mask. By painting with white on the mask, we are “revealing” the fill’s transparency. We will paint manually on the mask to create those tatters and holes along the edges of the cape. The best part is that, thanks to the previous shader change, we see the result of the tears in real-time while painting.
We export the maps and load the garment and textures into CC5 as we’ve seen before.
Substance Painter alpha-blending shader and opacity mask for painting cape tears on the crustacean’s cloth for CC5
At this point, we’re going to look at two different workflows.
The first and simplest is to let CC5 handle the physics in real-time: Originally, the cape is imported as a rigid accessory, so the first step is to perform a Transfer Skin Weights. By doing this, CC5 stops treating it as a static object and officially turns it into a piece of clothing (cloth) linked to the skeleton.
With the garment ready, we ensure that physics are activated in the Project Settings. Now comes the crucial part: the Physics Weight Map. In my case, I preferred to paint directly in ZBrush. The logic of this new map we’re going to create is as follows: white areas are those that will be affected by physics and wind, while black areas will remain anchored to the body, without physical movement, but with the typical deformations of a cloth object.
First, we paint the entire garment white, and then we can go to the lowest subdivision level, mask the edge loops of each piece, increase the mask size, invert it, and paint in black. With this, we can generate the new map from Polypaint and export it. Once the map is applied in the Modify panel, all that’s left is to adjust the friction and elasticity parameters. The result is immediate: our frayed cape now collides with the crustacean’s hell in a totally organic way.
CC5 cloth physics setup: Transfer Skin Weights, PhysX activation, and physics weight map for the crustacean’s cape
Now let’s look at another, slightly more sophisticated possibility with a brutal result. For more cinematic shots where cloth realism is much more important, we leave behind real-time physics and enter an offline simulation workflow. The goal is to capture every fold and movement of the cape with total physical precision.
In iClone, I generated the character’s specific animation, saved it, and then loaded it into CC5 because we have a very interesting option when exporting that we’ll see now. When exporting it as an FBX from CC5, we use the Marmoset preset with a critical configuration: we select Mesh and Motion at 30 FPS.
Here, the professional trick lies in the export range: we set the initial frame as Bind Pose and add a 60-frame physics transition before the actual action begins. These 60 frames are vital; they act as a safety margin that allows the fabric to move from its resting state to smoothly adapt to the shell’s volume and the character’s initial posture, avoiding jerky pulls or failed collisions when the animation starts.
CC5 FBX export settings for offline cloth simulation: Marmoset preset, Mesh and Motion at 30 FPS, BindPose with 60-frame physics transition
Back in Marvelous Designer, we remove the static avatar and replace it with this new animated FBX. Thanks to our frame planning, we see how the cape settles naturally over the crustacean’s anatomy before it takes its first step. We activate the simulation recording and let the Marvelous engine calculate the dynamic behavior frame by frame.
Once the capture is complete, we export the cloth geometry as an Alembic (.abc) file. At this point, we deactivate all textures in the export; we don’t need them because we already have our Substance Painter maps.
Marvelous Designer Alembic export: simulated cape on the crustacean with textures deactivated — geometry-only export for CC5 and iClone
This Alembic file contains exclusively the position of every vertex in every frame. When importing it into Marmoset or back into iClone, it synchronizes perfectly with the character’s animation, achieving cinema-level cloth behavior that reacts with inertia, weight, and perfect collisions.
Conclusion
What I like most about Character Creator 5 is that it has broken technical barriers that previously seemed insurmountable. As you’ve seen, even someone like me, without prior training in the field of animation, can achieve professional-level results thanks to such an intuitive and powerful workflow. If you liked these three new creatures, remember that you can find them available in the Reallusion Content Store, along with a huge amount of premium content with packs and elements provided by leading certified artists.
ÓSCAR FERNÁNDEZ / DIGITAL SCULPTOR
Óscar Fernández is a freelance digital sculptor from Spain, specializing in creating figures for 3D printing. With deep expertise in ZBrush, he is known for crafting highly expressive characters that capture both personality and motion. His work stands out through the meticulous attention to facial expression, muscle definition, and dynamic posing, giving each sculpt a strong sense of tension and storytelling power.
All three alien characters featured in this tutorial — the insectoid, the crustacean, and the amphibian — along with the three creatures from the previous article, are available on the Reallusion Content Store. The pack includes fully rigged characters with HD sculpt detail, custom textures, and the accessories and armor shown in this workflow. They are ready for animation, rendering, and further customization in Character Creator 5 and iClone.
Key Takeaways
Use the finger-collapse technique to alter digit count without breaking the rig. Masking and collapsing unwanted fingers with TrimDynamic preserves CC5’s bone hierarchy and weight mapping, enabling alien hand configurations that animate cleanly.
Choose the right attachment method for each asset type. Pick Parent for rigid pieces (weapons, shoulder pads); Transfer Skin Weights for conforming pieces (breastplates, footwear) — mixing both on a single character produces realistic armor behavior.
Flip UV maps vertically when textures baked in DirectX look wrong in CC5. CC5 uses the OpenGL standard; a simple vertical UV flip in the UV panel corrects the mismatch without re-exporting from Substance Painter.
Add a 60-frame physics transition before the action starts in offline cloth simulation. This buffer lets fabric settle naturally onto the character before animation begins, preventing collision failures and jerky movement.
Start from a professionally built base to accelerate production. The HD Alien Character Pack provides fully rigged, sculpted creatures ready for customization — saving weeks of character development.
FAQs
Can CC5 create characters with fewer than five fingers?
Yes. While the HD CC5 Neutral Base ships with a standard five-finger structure, you can collapse unwanted fingers in ZBrush using the TrimDynamic brush without deleting any topology. Character Creator 5 preserves the original bone hierarchy and weight mapping, so four-fingered, three-fingered, or other non-standard hand configurations animate cleanly — ideal for aliens, fantasy creatures, or stylized characters.
Can CC5 simulate cloth physics?
Yes. CC5 supports real-time cloth simulation using physics weight maps and collision volumes. Paint a weight map to define which areas of a garment move freely (white) and which stay anchored to the body (black), then adjust friction and elasticity parameters. For higher-fidelity cinematic results, CC5 also supports an offline workflow — export your animated character as FBX, simulate the cloth in Marvelous Designer, and bring the result back as an Alembic (.abc) file for frame-perfect playback in iClone or Marmoset Toolbag.
Can CC5 attach weapons or props directly to a character’s hand?
Yes. CC5’s Pick Parent function lets you link any rigid accessory — weapons, staffs, shields, tools — to a specific bone with a single click. Once attached, the accessory follows the arm’s kinematic chain through any animation or pose. Position and orient the object with the transformation gizmo first, then use Pick Parent to click on the target geometry.
Can CC5 automatically rig armor and clothing imported from ZBrush?
Yes. When you send armor or clothing pieces from ZBrush via GoZ Plus, CC5 automatically skins them to the base character. For pieces that need to conform to the body (breastplates, boots), the Transfer Skin Weights tool calculates the correct weight distribution using built-in presets. Rigid pieces like shoulder pads can be linked directly to bones via Pick Parent instead, keeping them deformation-free.
Can CC5 handle extreme proportion changes made in ZBrush?
Yes. After sculpting significantly altered proportions in ZBrush — elongated limbs, oversized heads, non-human body plans — CC5’s “Adjust bone to fit morph” function automatically relocates the internal skeleton to match the new silhouette. This ensures that even radically stylized or alien characters retain full animation capability, including motion capture, facial morphs, and lip sync.
How Lil’ Iguana Uses Reallusion Tools to Teach Life-Saving Lessons
Animation with a Purpose
For over twenty-five years, Lil’ Iguana’s Children’s Safety Foundation has been dedicated to protecting children from accidents, injuries, and abduction through engaging educational media. What began as a live-action puppet series evolved into award-winning content broadcast on PBS and television stations nationwide.
Today, with the development of Little Iguana Safe and Sound, the foundation has embraced modern 3D character animation workflows to deliver safety lessons in a format that resonates with today’s preschool audience—combining heartfelt storytelling with cutting-edge 3D animation software like Character Creator and iClone from Reallusion.
Featured in:
From Puppet to 3D: The Evolution of Lil’ Iguana
Lil’ Iguana first debuted in the late 1990s as a kind and quirky puppet character on Boston’s WABU-TV. Directed and edited by Russ Barry and produced by Bonnie Silva, the half-hour episodes earned multiple awards and national broadcast distribution.
As children’s media consumption evolved, so did the foundation’s production approach. Moving into 3D animation was not simply a stylistic decision—it was strategic. Animation allows creators to:
Visualize scenarios safely and clearly
Simplify complex safety topics
Use repetition, music, and colorful characters
Reach digital and streaming platforms more effectively
The new 3D animated series format preserves Lil’ Iguana’s charm while expanding creative possibilities.
Why Safety-Focused Animation Matters
Children often struggle to process abstract danger. Animation transforms those lessons into approachable, memorable stories. When paired with simple songs and repetition, the message stays with them.
James Tomaszewski Sr., Executive Producer and Founder of the foundation, explains:
“Safety-focused animated shorts like The Aisle of Lost Children are important because they help children learn critical life skills in a way that children naturally connect with through storytelling, music, and engaging characters.”
James Tomaszewski – Senoior Executive Producer and Founder of the foundation
Bonnie Silva reinforces this:
“The hope is that if children enjoy these safety-focused stories, they’ll remember a phrase, an action, or a song that could help them or even save their lives.”
Bonnie Silva – Independent Producer at Lil’ Iguana Children’s Safety Foundation
The Creative Foundation: Writing for Young Minds
Award-winning children’s writer Jeffrey Scott (Muppet Babies, Dragon Tales, Teenage Mutant Ninja Turtles) brought decades of experience to the project. Having written 960 scripts, Scott emphasizes simplicity as the key to effectiveness.
His approach remains consistent:
Understand the audience deeply
Study the characters until you can think like them
Keep lessons simple and repetitive
For The Aisle of Lost Children, he crafted the song “When I Feel Lost”, built on straightforward lyrics:
Lyrics: “When I feel lost, don’t know my way, I find a helper to save the day.”
Transitioning to 3D animation required a modern pipeline. The production team adopted Reallusion’s Character Creator, a powerful human creator and character designer tool that streamlines technical setup.
Renown 3D character artist and animator – Anthony Evans from Digital Puppets UK explains:
“I’ve been working with a program called Character Creator from Reallusion. It kind of automates a lot of things for you. It allows you to get more creative with the design work while getting really nice professional-looking characters.”
Anthony Evans – 3D Character Artist, Animator, Developer
Instead of building every technical element from scratch—topology, rigging, facial systems—the team started from a production-ready character base. This allowed them to focus on creativity rather than repetitive technical labor.
Solving Stylized Character Challenges
Lil’ Iguana is not a standard human character. His stylized features—large eyes, unusual facial proportions, distinct teeth placement—created technical challenges.
Facial blend shapes are especially difficult in stylized characters. Achieving clean “O” and “R” mouth shapes for dialogue can require extensive manual tweaking.
Character Creator provided tools to experiment and refine:
Facial sliders for nuanced expressions
Custom morph adjustments
Blend shape editing
Rig-ready deformation systems
This flexibility made it possible to maintain the character’s unique look while achieving clear lip sync animation.
Lip Sync Animation and Expression Clarity
For preschool audiences, clarity is essential. Mouth shapes must read cleanly. Expressions must exaggerate slightly without breaking believability.
Using Reallusion’s iClone animation tools, the team could:
Test phoneme shapes quickly
Adjust facial deformations
Fine-tune emotional reactions
Sync dialogue to song sequences efficiently
The result is expressive, readable animation that enhances storytelling instead of distracting from it.
Streamlining the Production Pipeline
In traditional 3D workflows, character setup can take weeks. Manual retopology, rigging, weight painting, and facial system development consume valuable production time.
By using Character Creator as the foundation, Lil’ Iguana’s team reduced:
Technical setup time
Rigging errors
Deformation inconsistencies
Cross-application export issues
This efficiency with Character Creator and iClone allowed more time for story refinement, animation polish, and musical integration.
Integrating with Other Tools
While Character Creator handled the character base and iClone handled the facial and body animation systems, the broader pipeline likely included:
Unreal Engine for real-time rendering
Maya or Blender for scene layout
Audio production tools for song recording
Editing platforms for final compositing
Reallusion tools are designed to integrate smoothly into larger ecosystems, reducing friction between software applications.
As Russ Barry notes:
“It was a seamless workflow using Reallusion’s Character Creator and iClone to bring the Lil’ Iguana character into Unreal Engine for the final shots. The technology is at a point where the barriers are coming down between applications.”
Russ Barry – Independent Producer, Director, Editor
This interoperability is critical for production teams.
The Role of Music in Memory Retention
The song “When I Feel Lost” is more than a catchy tune—it is a mnemonic device.
Research consistently shows that music enhances memory retention in children (see educational cognition studies – [link to stat source]). By combining:
Simple rhyme schemes
Repetition
Clear action steps
The production transforms abstract safety guidance into actionable recall.
In animation, timing and expression amplify these lessons. Visual storytelling reinforces lyrical instruction.
“When I feel lost, it really does the trick as far as teaching safety to children. I think by using a catchy melody and the rhymes, we make it memorable so that they can hear it in their head after the fact.”
Why 3D Animation Software Is Ideal for Educational Content
Modern 3D animation software enables educational creators to:
Visualize scenarios safely
Repeat scenes from multiple angles
Adjust pacing quickly
Localize content for different markets
Unlike live action, animation allows complete environmental control. This is particularly valuable for demonstrating situations like becoming separated from a caregiver in a store.
The medium removes fear while preserving seriousness.
Creative Freedom Without Technical Barriers
One of the greatest advantages of using Character Creator and iClone is creative focus.
When the technical setup is simplified:
Artists iterate faster
Directors test emotional beats quickly
Writers see scripts visualized sooner
Producers control budgets more effectively
This empowers smaller teams to produce broadcast-quality content without AAA-scale resources.
Scaling Educational Impact
Lil’ Iguana’s move to 3D animation positions the foundation to scale its impact:
Digital streaming platforms
International localization
Interactive safety content
Expanded episode libraries
By adopting a streamlined character pipeline, the foundation can produce more stories without compromising educational integrity.
For animation studios, content creators, and educational producers, this project demonstrates that modern pipelines can:
Reduce production time
Improve facial animation consistency
Simplify character customization
Enhance lip sync animation workflows
Character Creator serves as a stable technical foundation while leaving creative decisions fully in the hands of the artists.
Conclusion: Animation That Saves Lives
Lil’ Iguana’s Children’s Safety Foundation proves that 3D character animation is not just entertainment—it can be transformative.
By combining simple, emotionally intelligent storytelling with production-ready tools like Character Creator and iClone, the team delivers safety lessons in a format children naturally embrace.
For studios looking to create meaningful content, modern 3D animation software offers both efficiency and creative depth. And when storytelling and technology align, animation becomes more than art—it becomes impact.
From Game Roots to Scalable Animation: NEVERSEEN PRODUCTIONS Reinvents Its 3D Pipeline
NEVERSEEN PRODUCTIONS and Yassine Lahrichi
NEVERSEEN PRODUCTIONS is an audiovisual studio born from deep roots in the international video game industry and driven by a forward-looking vision of animated storytelling. Founded by professionals who spent over a decade working on globally recognized franchises, the studio brings together expertise in concept development, game design, level design, project management, visual effects, and both 2D and 3D character animation. Its founders contributed to iconic titles such as Donald Duck, PK Super Donald, Rayman, Rabbids, King Kong, Prince of Persia, Rainbow Six, and Star Wars—projects that shaped generations of players and set high standards for interactive storytelling.
In 2008, this multidisciplinary background crystallized into the creation of NEVERSEEN PRODUCTIONS. The studio’s name was a deliberate statement of intent: to explore creative territories not yet fully revealed, and to push beyond conventional boundaries of audiovisual production. From the outset, Neverseen positioned itself at the crossroads of animation, technology, and innovation, with a strong emphasis on building sustainable, future-ready production methodologies.
At the heart of this vision is Yassine Lahrichi, Managing Director and co-founder of NEVERSEEN PRODUCTIONS. Since the late 1990s, Yassine has worked at the intersection of creativity and technology, beginning his career in the international video game industry. During nearly a decade at Ubisoft, he held senior roles including designer, lead game designer, lead level designer, and 3D environment artist. His work contributed to major franchises such as Rayman, Prince of Persia, and Rainbow Six, as well as high-profile collaborations with Disney, Universal, and LucasArts.
In 2007, Yassine co-founded Neverseen Productions with the ambition of building a studio capable of bridging high-end production values with emerging technologies. As Managing Director, he supported and produced major television programs, including Max Adrenal’in, Morocco’s first TV show dedicated to extreme sports, and Rachid Show, one of the country’s most-watched talk shows. Today, he continues his work as a writer and director of 3D animated series, actively contributing to the structuring of the Moroccan animation sector and the international visibility of its creative talent.
What follows is a first-person account of a pivotal moment in Neverseen’s evolution after being introduced and trained by CharacterCreator and iClone expert Dom Fred — this hands-on training reshaped not only the studio’s tools, but its entire approach to character creation and 3D animation production.
A Pivotal Moment for Our Studio
We recently hosted an intensive on-site training with Dom Fred focused on Character Creator and iClone, and the timing could not have been more critical for our studio. This was not about adding new software to our toolbox. It was about fundamentally rethinking how we approach production. Our objective was clear: evolve our pipeline toward something faster, more scalable, and more cost-efficient—without compromising the broadcast-level quality that our projects demand. We needed a system that could support ambition rather than quietly limit it.
For years, we relied on a traditional and proven character and animation workflow. Characters were built from scratch, one by one, following a familiar but heavy sequence: retopology, UV layout, texturing, rigging, deformation testing, and then animation—shot by shot, file by file, across multiple tools. It’s a solid approach, and one we know well. But it becomes increasingly fragile when production scales up, and deadlines tighten.
When you need to deliver complex stories with rich worlds and dense scenes, this kind of pipeline starts influencing creative decisions in subtle but very real ways.
When Production Constraints Shape Storytelling
Anyone working in animation knows this moment. You start suggesting instead of showing. You move the action off-screen. You reduce the number of characters in a scene. You simplify choreography. Not because it’s creatively better—but because the cost of doing more becomes too high.
Crowd scenes, in particular, are unforgiving. A lively marketplace, a celebration, or a large group reacting together can multiply production time exponentially. Over time, those constraints begin to shape the language of your storytelling.
This training marked a genuine turning point for us. What we adopted was not simply a faster way to do the same work. It was an assisted, production-ready system where many of the most time-consuming technical foundations are already solved, reliably and consistently.
That shift alone changes everything.
Character Creator: Rebuilding the Foundation, Once
The first major transformation came from Character Creator. In a classic pipeline, every character rebuilds the same technical questions from the ground up: topology choices, facial readiness, rig stability, and deformation reliability. Even with templates, there is always a phase of validation and correction that consumes time and introduces risk.
With Character Creator, we start from a base that is already designed for animation production. The topology is clean. The rig is complete. Facial expression systems are already in place and ready to perform. Most importantly, the technical architecture is stable and consistent across characters.
That consistency is invaluable. It removes weeks of technical iteration and dramatically reduces uncertainty. Instead of asking whether a character will deform correctly, we can focus on whether it looks and feels right.
From Concept Art to Production-Ready Character
Starting from concept art or illustration, the process becomes highly assisted. Rather than rebuilding everything from zero, we use guided tools and smart adjustments to quickly converge toward the right proportions, silhouette, and facial identity.
This doesn’t mean sacrificing originality. On the contrary, it allows us to spend more time where it actually matters: refining textures, defining materials, shaping hairstyles, designing clothing, and adding accessories that bring personality and cultural specificity to the character.
The difference in production time is dramatic. A character that might previously have taken two full weeks to build and validate can now be achieved in roughly two days—even for complex designs. The reason is simple: the technical foundation is already there, and it works.
That alone fundamentally changes scheduling, budgeting, and creative confidence.
iClone: Rethinking Animation at the Sequence Level
The second major acceleration came from iClone. Traditionally, our animation workflow followed a strict rule: one shot equals one animation file. This approach is disciplined, but it fragments the creative process. Managing continuity across shots becomes harder, and versioning overhead grows quickly.
With iClone, we can work at the sequence level. Characters, cameras, and performances live together on a unified timeline. That shift changes the creative dynamic immediately.
Staging becomes more fluid. Rhythm and pacing are easier to evaluate. Camera language can evolve organically alongside performance. Instead of stitching shots together after the fact, we shape the sequence as a whole.
Speed That Enhances Quality
iClone’s animation ecosystem is rich—libraries, retargeting tools, blending, layering, transitions—but the real gain is how directly we can work. What used to require multiple exports and back-and-forth steps now happens in a single environment.
This makes mock-up and previs a central creative tool rather than a luxury. We can block out a scene quickly, test intent and pacing, validate camera choices, and then refine progressively. Iteration becomes lightweight.
That speed is not just about efficiency. It’s a quality multiplier. When experimentation becomes affordable, creative decisions improve. You test more ideas. You reject weaker ones sooner. You arrive at stronger solutions without burning time.
Scaling Ambition Without Scaling Cost
One of the most immediate impacts of this pipeline upgrade is what we can now afford to show on screen. Scenes that were previously considered risky or too expensive become viable again.
A busy Moroccan souk filled with movement and variation. A traditional wedding celebration with dozens of guests dancing, clapping, and interacting. These are scenes that carry cultural richness and emotional weight—but they are also production-heavy.
With our previous workflow, we often had to simplify these moments. Now, we can populate, vary, choreograph, and stage complex action far more efficiently than before. Not by lowering standards, but by removing unnecessary technical friction.
An Open, Flexible Production Ecosystem
Another crucial advantage is flexibility. Character Creator and iClone work seamlessly together, but they are not a closed world. They integrate well with broader pipelines and other tools.
The iClone to Unreal workflow, in particular, is a major advantage for real-time production. At the same time, we can still rely on external tools for sculpting, advanced detailing, or specialized tasks when needed.
That openness gives confidence. Adopting this system does not mean abandoning existing strengths—it means amplifying them.
The Human Factor: Translating Tools Into Methodology
Beyond the software itself, Dom Fred made a decisive difference. He didn’t just explain features. He helped translate the tools into a working methodology tailored to our production reality.
He was practical, generous with his knowledge, and deeply aware of real-world constraints. He helped the team build the right habits, avoid common pitfalls, and structure a pipeline that actually holds up under production pressure.
This was not theoretical training. Within weeks, we saw tangible results: faster decisions, successful tests, a more confident team, and a new ability to scale ambition without scaling cost at the same rate.
A New Production Phase for NEVERSEEN
Thanks to this training, we are entering a new phase of production. Our pipeline is faster, more cost-efficient, and significantly more flexible—while fully preserving the artistic standards required for broadcast content.
This is not an incremental improvement. It is a genuine step change for our studio. Most importantly, it restores something essential: the freedom to let storytelling lead, rather than production constraints.
We are excited about what this unlocks for our upcoming projects—and about the stories we can now afford to fully show on screen.
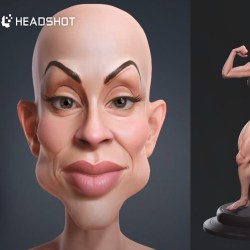
Reallusion, the leader in 3D character creation software, announced the release of Headshot 3for Character Creator 5 (CC5), the industry’s most streamlined solution for creating professional-grade digital doubles. Designed to bridge the gap between 2D reference and production-ready 3D characters, this next-generation plugin introduces a suite of powerful features, including proprietary AI image-to-3D reconstruction, spline-based head shaping, and advanced texture generation.
To celebrate the launch, Reallusion is offering an Early Bird special, allowing users to secure Headshot 3 at a significantly discounted rate from now until May 31st, 2026.
The Power of Proprietary AI: High Precision & Worldwide Diversity
Headshot 3 represents a massive leap in digital identity. Reallusion has developed a proprietary AI model specifically for accurate image-to-3D head reconstruction. Trained on a vast dataset of high-resolution facial scans, this model interprets facial landmarks, depth cues, and subtle anatomical features from 2D images with unprecedented clarity.
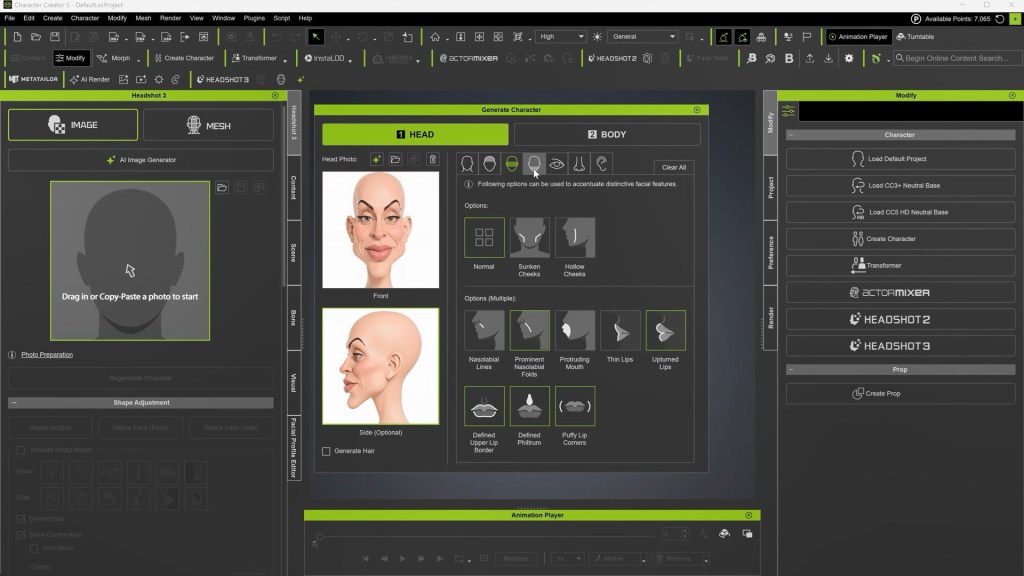
Complementing this technology, Facial Feature Presets add essential depth structure and help capture distinctive details that AI may not fully detect from front-facing images alone. This powerful combination of AI reconstruction and precision presets enables highly accurate digital doubles while supporting diverse ethnicities and all age groups, ensuring each digital human faithfully reflects its real-world counterpart.
Revolutionary Prompt-to-Image: Make Every Photo a Perfect Shot
In addition to importing custom photos, Headshot 3 introduces a groundbreaking AI Image Generator powered by Google Nano Banana Pro. This integration enables artists to generate high-quality, front-facing images from simple text prompts or transform their own photos into polished, production-ready results. It also provides precise references for facial profiles and body proportions, ensuring an accurate overall likeness.
The AI further refines your source imagery by automatically adjusting facial expressions to a neutral look, correcting camera angles for a straight-on view, balancing lighting, removing stray hairs, and enhancing resolution up to 4K—providing a flawless foundation for sharper facial texture generation.
Ultimate Shape Refinements & Texture Enhancements
To ensure the digital double matches the subject in physical 3D space, Headshot 3 offers advanced refinement tools that address real-world photography challenges:
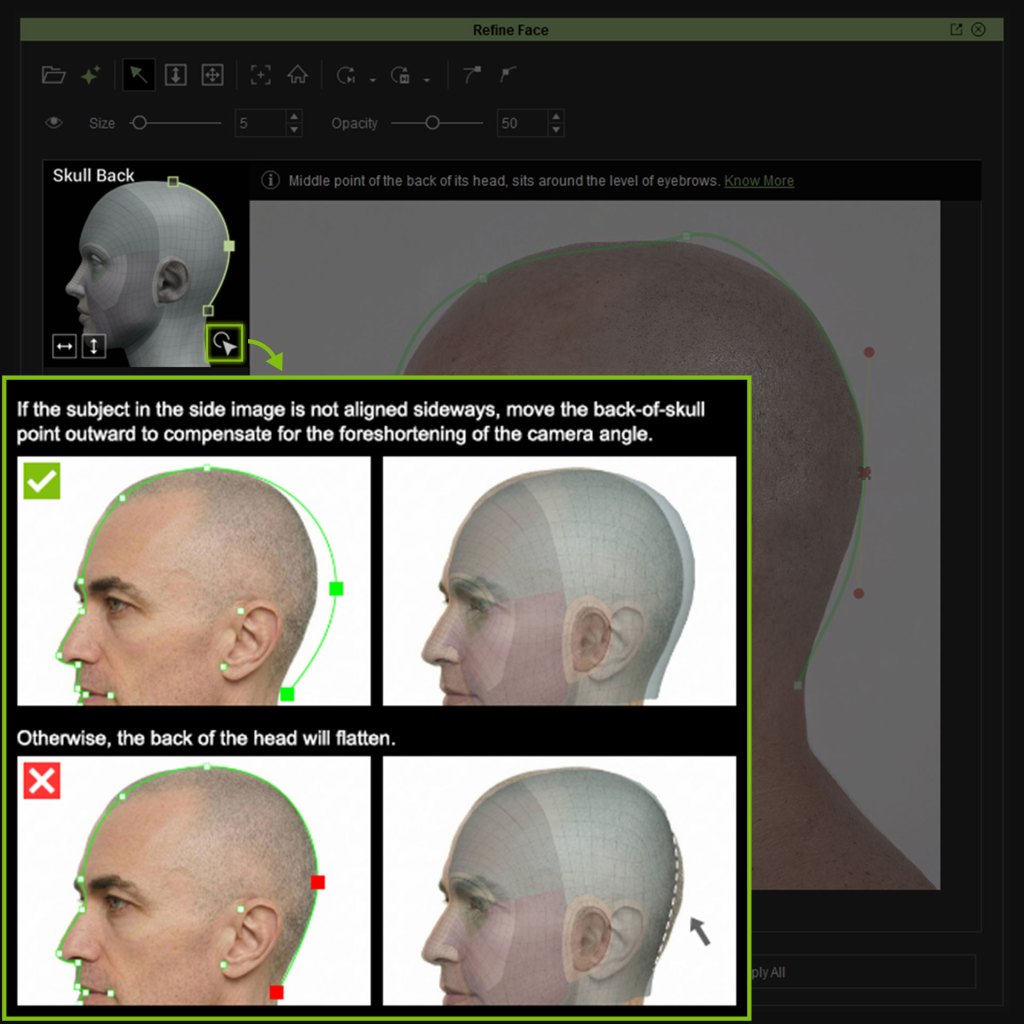
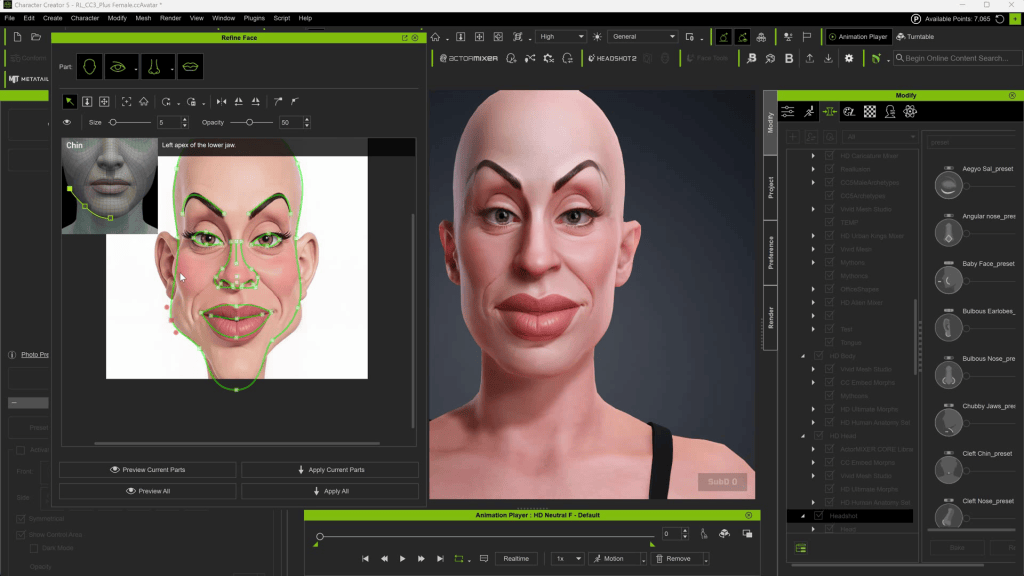
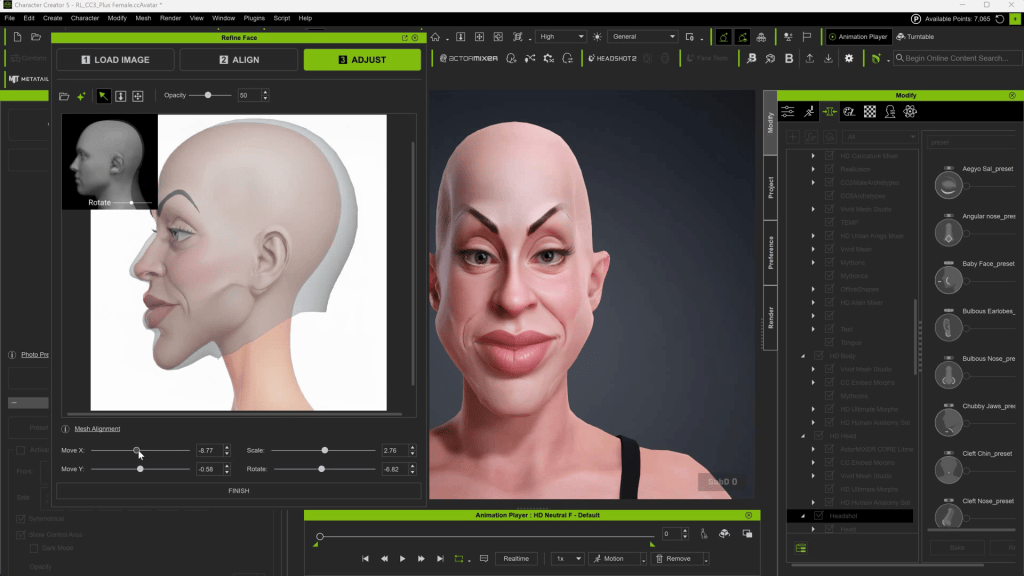
Spline-Based Mesh Shaping: Bezier curves trace facial contours with surgical precision. A key innovation is the fully independent front and side adjustments—planar front morphs never alter the depth of side profiles, and vice-versa. This system is purpose-built for complex anatomy such as double eyelids, deep-set eye sockets, or distinct nasolabial folds, all while maintaining perfect CC topology for optimized animation.
Intuitive 3D Sculpt Morph System: Optimized for Character Creator 5, this system allows artists to hover over a control region and adjust the mesh shape using directional mouse movements. This eliminates the need to manually locate specific sliders, streamlining the sculpting process.
Post-Lens Correction: To bridge the gap between photography and 3D modeling, the new Face Plane Perspective Slider quickly corrects fisheye distortion common in smartphone photos, restoring accurate physical proportions.
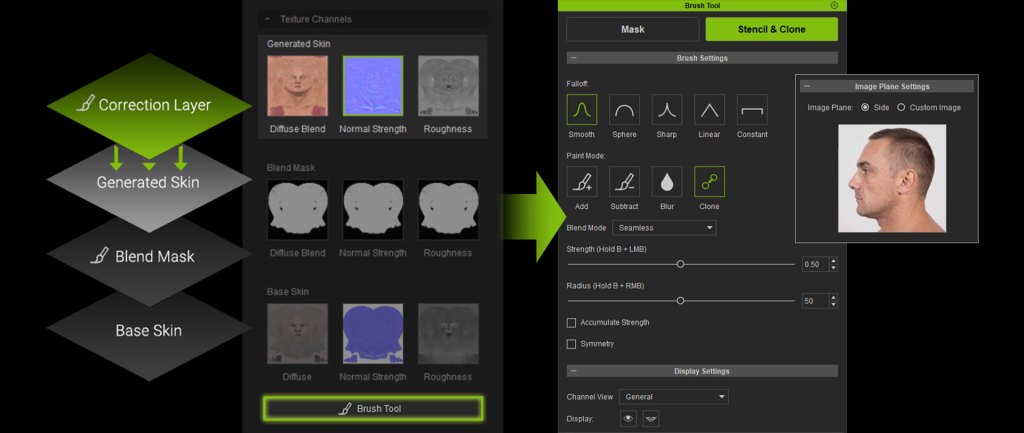
Blend Mask Editing: Achieve seamless integration between generated facial textures and the underlying skin base. Using the mask brush or prebuilt templates, artists can easily remove unwanted elements projected from the source photo—such as shadows, hair, eyelashes, scars, or lip lines—resulting in a clean and cohesive head model.
De-lighting & Skin Redness: The de-lighting feature removes uneven shadows to produce clean albedo textures, while the skin redness tool restores a natural, healthy tone by correcting color imbalances.
Primary & Secondary Normal Generation: Artists now have granular control over skin details. The generator extracts two levels of detail: Primary for broader features like muscle definition and deep wrinkles, and Secondary for micro-details such as pores and fine lines.
Complete Character Integration
Headshot 3 goes beyond the head to create a Full-Body Digital Double. By utilizing full-body reference photos, the AI automatically generates a matching body shape to complement the character’s face. Whether the subject is an athlete or an elderly individual, the tool provides an instant, cohesive character build that is fully rigged and ready for animation within the Character Creator 5 ecosystem.
Ultra Value Bonus — Headshot Morph 1400+
As an exclusive launch incentive, every Headshot 3 purchase includes the Headshot Morph 1400+ Pack ($99 value) for free. Previously, Headshot Morph 1000+ established itself as the world’s most comprehensive facial morph system, designed to achieve the professional detail of high-end 3D scan models.
Headshot Morph 1400+ builds on this foundation with expanded benefits for Headshot 3, adding CC5 HD workflow support, new preset sliders for more precise facial construction, and enhanced sculpt morphs for a more intuitive and flexible post-adjustment experience.
Early Bird Availability
Headshot 3 is available now as a powerful addition to the Character Creator 5 workflow. Professionals and enthusiasts alike are encouraged to take advantage of the Early Bird Offer, which runs until May 31st, 2026. This limited-time promotion provides the best value for artists looking to integrate high-efficiency digital double creation into their production pipelines.
Creating a Fantasy Character with CC5, ZBrush, and Maya
Darko Mitev – CG Generalist, Art Director
Darko Mitev
My name is Darko Mitev, and I am a CG Generalist with over 15 years of experience in the VFX, Animation, and Game Cinematics industry. Throughout my career, I have had the privilege of collaborating on a variety of exciting projects, pushing the boundaries of visual storytelling and character design.
In this article, I will guide you through my complete process of creating my latest artwork titled “The Life of a Guardian.” This piece represents not just a technical endeavor but also a journey of creativity and inspiration. I will share insights into the tools and techniques I utilized, specifically focusing on Character Creator 5, ZBrush, and Maya.
We will delve into each stage of the creation process, from the initial concept sketches to the final rendering. You will learn how I approach character design, the importance of anatomy and proportion, as well as the thought process behind creating textures and materials that bring my characters to life.
By the end of this article, you will not only have a clearer understanding of my workflow but also practical tips that you can apply in your own artistic endeavors. Whether you are an aspiring artist or a seasoned professional, I hope to inspire you to explore and experiment within the realms of digital art. Let’s embark on this creative journey together!
“Bringing a default character from Character Creator 5 into my Maya workflow allowed me to refine proportions quickly and build on a production-ready topology, giving me the confidence to focus on creativity rather than technical limitations.”
Darko Mitev – CG Generalist, Art Director
Base sculpt and Character Creator HeadShot
I started the project with a very quick and messy exploration of shapes in ZBrush for iPad, allowing my creativity to flow without the constraints of precision. The portability of the iPad made it easy to explore various designs in different environments, from the comfort of my sofa to a local café where inspiration struck. Once I had something that resonated with me and sparked excitement, I transitioned to the desktop to refine the proportions more carefully by bringing in a default character from Character Creator 5 (CC5).
This process was integral, as working on a larger screen enabled me to meticulously adjust finer details that would enrich my overall design. In the later stages, my confidence grew significantly because I knew I was planning to utilize the Headshot 2 plugin in CC5, which promises to streamline and enhance the workflow by wrapping the generic CC5 topology to my sculpt. This integration not only saved time but also ensured that the final result would maintain a high level of quality and coherence, marrying my initial vision with the advanced capabilities of CC5. The entire journey has been a balance of intuition and technical skill, making it both challenging and rewarding.
“Headshot plugin in Character Creator 5 wrapped the CC topology to my sculpt extremely well, saving time while maintaining high-quality results that matched my original artistic vision.”
Darko Mitev – CG Generalist, Art Director
Once in CC5, I launched Headshot 2, and the automatic alignment was actually very accurate because I spent a little bit of time preparing my mesh in ZBrush. I refined the points mostly on the ears and a few on the lower eyelids, and went to the next step.
Once the wrapping was complete, I used the brush system to further refine the placement of the topology on the ears. I must admit I pushed the topology on the ears to the very limits, but with a bit of manual refinement, it ended up working really well.
When I was done with Headshot, I picked the option to attach my custom head to a generic male body, and I had a custom character ready to go. At this point, I picked a grey material for the body because I wanted to focus on the forms, and I fired up the new ActorMIXER in Character Creator 5.
“Using ActorMIXER in Character Creator 5 let me explore multiple body and facial variations in minutes, making it easy to experiment with proportions and quickly evolve the character design.”
Darko Mitev – CG Generalist, Art Director
ActorMIXER + ZBrush Refinement
I spent way too long playing with this new tool, haha. I think I made 4 or 5 completely different versions of my character. I tried short and chubby, tall and skinny, and everything in between. The same goes for the face. I ended up pushing the character a lot more towards a realistic look. My initial concept was kind of stylized with a lot more pushed proportions, but through my exploration phase with ActorMIXER, I settled on a somewhat realistic facial structure.
When I was done, I was happy with how the character was looking overall, but I lost some of the key features on his face. So, I used GOZ Plus to send the character back to ZBrush and refine and resculpt some of the facial features.
With the face adjusted to my liking, I sent the character back to CC5 using the GoZ plugin and started playing around with different skin materials and accessories, like adding hair, swapping different eye colours, etc.
“Using GoZ to move the character between Character Creator 5 and ZBrush made it easy to refine sculpted details and then return to CC5 for materials, accessories, and further adjustments without breaking the workflow.”
Darko Mitev – CG Generalist, Art Director
High Frequency Details
TIP: Make sure you set up the displacement scans in the shader for all the materials and select Displacement in the settings of GoZ Plus; otherwise, the plugin will try to generate the high-frequency details based on the Normal Map, which is less accurate.
For the pore enhancement, I used Texturing XYZ maps to hand-sculpt some more details.
I intentionally sculpted the wrinkles and pores with higher intensity than normal because I knew I would bake all of this as an 8K displacement, and I would have the chance to control the intensity in the shader itself.
Texturing
Since I already had the character in ZBrush with all base textures loaded, I baked it to Polypaint and started to hand-paint some details like the colours of the scar on the chin, some darkening around the eyes, etc.
I also used this chance to paint out a bit of texture stretching on the ear from the original projection. This was a destructive process because the Polypaint was then baked back to a colour map when I sent the character back to CC5, but I wanted to limit the amount of software I use for this project. It was a nice little challenge.
Once back in Character Creator 5, I used the CC5 SkinGen plugin to add more normal map details to the face, as well as some bruises, dirt, and adjust the texture to be less saturated and tinted slightly towards yellow/green.
CC5 Face Tools for Blend Shapes
When the character was done, I used Character Creator’s Face Tools for ZBrush to refine some of the facial shapes and enhance the overall realism of my design. These tools allowed me to focus on minute details that are essential for creating a lifelike appearance. Because of the custom features I sculpted, such as the double-baggy lower eyelids, I had to tweak some of the shapes to work well with my character, ensuring they seamlessly blended with the rest of the facial structure.
“Character Creator’s Face Tools for ZBrush allowed me to refine subtle facial shapes and expressions, giving me the control needed to enhance realism while ensuring the features worked seamlessly with the character’s overall facial structure.”
Darko Mitev – CG Generalist, Art Director
Additionally, I experimented with various textures and colour palettes to give the skin depth and character, while also adjusting the lighting settings within the software to see how different lighting conditions could affect the final look of my model. This meticulous process was not only rewarding but also crucial to bringing my vision to life in a way that resonates with the audience.
Armour and Accessories
I modeled the armour and the sword directly in Maya using poly modeling, paying careful attention to the intricate details that would bring these elements to life.
To ensure that the design was both functional and aesthetically pleasing, I experimented with various shapes and structures, tweaking them until they aligned perfectly with my vision. Some of the fabric was sculpted in ZBrush, where I focused on capturing the natural folds and textures that would typically be found in actual garments.
Afterward, I retopologized the fabric in Maya to maintain a clean mesh while preserving the high-resolution details from the sculpting process, ensuring that every part of the model would render beautifully in the final output.
Maya Auto Setup for Character Creator
“With the Character Creator Auto Setup for Maya, the character imported with a full skeleton, skinning, shaders, and even the facial rig already configured, allowing me to focus immediately on look development and rendering instead of technical setup.”
Darko Mitev – CG Generalist, Art Director
With the Armor done, I imported it into CC5 and did a very basic skinning to the skeleton. I did not spend much time refining it because the Armor was going to receive a full custom rig in Maya, so there was no point in doing the same thing twice.
Once in Maya, I used the free Character Creator Auto Setup for Maya to import the character with full skeleton and skinning data, as well as shaders and even a Facial Rig.
The Maya Auto Setup is also fully equipped with HDRI tools, lighting presets, and a simplified view of all the materials with the most useful parameters exposed to sliders for easy adjustment.
All I had to do was activate the Arnold Subdivision on the geometry of the head and body, and the plugin took care of most of the setup for me. This let me play with the sliders to get the right roughness and saturation levels of the skin and really dial in the look I wanted.
Groom, Render, and Composition
For visualizing the beard and eyebrows initially, I used the card-based system, but once in Maya, I converted that to the XGen Groom system for higher quality. I generated sculpt meshes from the head and grew the hair on them, then wrapped the scalp geometry to the face, which allowed me to use the XGen groom seamlessly with the facial rig as well.
Render Exploration
After all this, the setup was done. I started really having fun with the storytelling. I made a lot of different poses and different expressions to really showcase the character. I wanted to depict the life of a late medieval, early Renaissance fantasy general. That is why I explored situations when he is happy, angry, stoic, intimidating, in the middle of a combat, etc.
The environment was assembled directly in Maya using assets that I already had and some Megascans assets as well. I went back to CC5 and quickly assembled one more character that I dressed in a suit of armor right out of Reallusion’s Content Store.
I imported the second character using the same Auto Setup script, which brought the character in with a full body rig, and that allowed me to reference him multiple times in various poses to create interesting compositions.
Finally, I simulated a quick torchlight FX in Houdini and brought it to Maya as VDB.
Lighting
The lighting for the scenes was fairly straightforward. I used an HDRI light primarily to establish the mood and the main fill light of the scene. I then created a classic three-point light setup. I positioned a key light in a Rembrandt Lighting style in front of the character, added a subtle rim light to separate him from the background, and very faint fill light from the front to fill in some of the darkest shadows.
I then created Per Light AOV, separating the contribution of every light to its own render layer, which allowed me to turn lights on and off in comp, change their colour, etc.
Along with these render passes I included all the other render passes needed to rebuild the Beauty render along with Cryptomatte for easy masking.
Composition
The compositing was very simple for this project. I used Davinci Resolve and Fusion to do the compositing and colour grading.
First, I reassembled the beauty and did basic colour correction by masking certain parts using Cryptomattes. Then I added a few layers of dust and flying debris to help the render feel more dynamic.
Next, I used the velocity pass to add motion blur to the sword because it is in mid swing, and it needed some movement. Lastly, I added the Film Look Creator to finalize the look.
Summary
This concludes my entire workflow for creating this project, which has been an incredible journey filled with learning and creativity. I am very happy with how the final renders turned out, as they truly reflect the vision I had from the beginning. The process taught me valuable lessons about design and execution, and I am looking forward to creating a lot more similar projects like this in the future. Each new venture presents an opportunity to refine my skills further and push the boundaries of my creativity, and I am excited to see where this passion will take me next.
If you want to check more of my work, you can check out my links below.
Character Creator 5 is a professional 3D character creation and animation tool used to build realistic digital humans for games, cinematics, animation, and real-time projects. Artists can quickly generate a detailed character base, customize facial features, clothing, and materials, and export fully rigged characters to tools like Maya, Unreal Engine, and Blender.
How does Character Creator 5 integrate with ZBrush?
Character Creator 5 integrates with ZBrush through the GoZ workflow, allowing artists to send characters directly between the two programs. This enables sculpting high-resolution details such as wrinkles, pores, and facial structures in ZBrush, then returning the model to Character Creator to continue with materials, rigging, and animation preparation.
Can Character Creator 5 characters be used in Maya?
Yes. Characters created in Character Creator 5 can be exported to Autodesk Maya using the Maya Auto Setup plugin for CC. This tool automatically transfers the character with skeleton, skin weights, facial rig, shaders, and materials, making it easy to begin lighting, rendering, or further rigging without complex manual setup.
What is Headshot 2 in Character Creator?
Headshot 2 is a plugin for Character Creator that converts images or custom sculpts into fully rigged 3D heads. It can wrap Character Creator’s production-ready topology onto sculpted meshes, allowing artists to quickly transform concept sculpts into animation-ready characters.
Why do artists use Character Creator for game and cinematic characters?
Artists use Character Creator because it dramatically reduces character production time while maintaining high-quality results. With tools like ActorMIXER, SkinGen, FaceTools, and Headshot, creators can experiment with designs, refine realism, and export fully rigged characters ready for 3D animation, game engines, and cinematic rendering pipelines.
For Blender animators working in advertising, the hardest part of cinematic character work isn’t the final render — it’s everything that has to happen before it. Character creation, rigging, performance capture, lip sync, crowd building, and cloth behavior can eat up weeks before a single lighting decision gets made. And when you’re a solo artist, there’s no team to absorb that load.
This case study looks at how Istanbul-based 3D director Ateş Savaşeri used a hybrid Character Creator to Blender workflow — built on Character Creator 5, iClone, and Blender Auto Setup — to reinterpret the elevator scene from Revolver entirely on his own.
Meet the Artist and the Project
Istanbul-based 3D artist and director Ateş Savaşeri knows that reality intimately. Working primarily in commercial production, he builds films almost entirely on his own — handling character, performance, animation, lighting, and camera as a single unified process.
When Character Creator 5 was announced, Savaşeri was eager to show his collaborators in Turkey what the new feature set made possible for commercial production. His original plan was modest: a short test segment from the elevator scene of Revolver for his showreel.
The first results changed his mind.
“After seeing the initial results, I became very excited and felt it shouldn’t remain just a short test,” he recalls. The project expanded into a complete 3D reinterpretation of the scene — a main character in two visual variations, a hotel lobby crowd, tension-driven close-ups, and a full cinematic final render handled in Blender.
A Hybrid Character Creator to Blender Workflow for Solo Artists
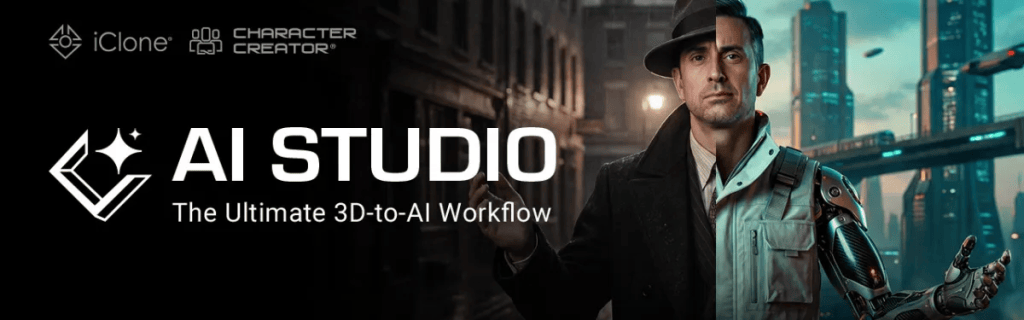
For Blender animators, one of the biggest workflow questions is how to bring high-quality rigged characters and believable performance into Blender without fragmenting the project across disconnected tools. Savaşeri’s answer is a three-stage CC5 to Blender pipeline where each tool does what it does best, and the handoffs stay fluid.
Stage 1 — Character Creation in CC5
Identity, topology, morphs, clothing, hair, and the facial system are built in Character Creator 5.
Stage 2 — Performance in iClone
Body motion via Video Mocap, lip sync via AccuLIPS, facial keys, look-at behaviors, and object interactions are layered in iClone.
Stage 3 — Cinematography in Blender
Environment, lighting, camera, final materials, physics refinements, and the final render are completed in Blender — with the character brought in via Blender Auto Setup and kept connected through Data Link.
What makes this Blender workflow work, Savaşeri emphasizes, is that Blender isn’t just the render stage. It’s where the final creative decisions get made.
Character Creator 5: A Higher-Quality Character Base for Blender
Subdivision That Survives Close-Ups
Savaşeri’s first impression of CC5 wasn’t about aesthetics — it was about control. “Being able to switch between subdivision levels lets me work without overloading the scene, and then push subdivision higher at final render for better output. That meets the expectations of the advertising industry I work in.”
That high-poly character base paid off directly in Blender. When he needed to rebuild the character’s beard using Blender’s particle system — because the original beard produced small shadow artifacts in close-up renders — CC5’s dense topology gave him the surface resolution he needed to recreate it exactly as he wanted. The same structure enabled more precise, smoother weight maps for hair and clothing simulation inside Blender.
Facial Detail That Carries Emotion
In close-ups, CC5’s surface detail changed how the character read on camera. Wrinkles, lines, and subtle facial features kept the character from looking overly smooth or artificial.
The facial details of a character in Character Creator 5
“The way wrinkles around the mouth, nose, and eyes behaved during natural facial movement really strengthened the character’s expressive power.
Those small details moved the character away from feeling mechanical and brought it closer to something alive. Sometimes it’s not the big movements that carry emotion, but the smallest micro-expressions.”
Ateş Savaşeri, 3D artist and director
The HD Eye System
CC5’s improvements around the eye — the eyelid, tearline, occlusion, and gaze behavior — were equally critical. “The eye no longer felt like a detached artificial element. It felt like a living part of the face. In this scene, the eyes were one of the most important areas carrying the character’s emotion.”
Character Creator 5 HD eyes library
ActorMIXER for the Hotel Lobby Crowd
For the hotel lobby, Savaşeri needed a believable crowd without sacrificing a day on each background actor. He turned to ActorMIXER.
“What I liked most was how quickly I could experiment. I was able to generate character variations that felt like they belonged to the same world in a very short time. Whatever number of characters the scene needed, I could build them comfortably. I didn’t have to reduce or simplify the scene because of time or energy.”
Ateş Savaşeri, 3D artist and director
Create crowds fast with Character Creator 5 ActorMIXER function
For commercial production, where scope often shrinks to fit the schedule, that’s the difference between a world that feels populated and one that feels compromised.
iClone: Where the Character Performance Comes Alive
Scene Objects in the Loop
Savaşeri used iClone to move scene objects, not just characters. He brought the elevator walls into iClone to define the character’s movement boundaries accurately and used iClone’s Linkage feature to attach the character’s weapon. The Look At feature handled posture and gaze direction in tension-heavy close-ups.
The Look at function in iClone
“Objects like this shouldn’t behave like simple props — they need to feel like an extension of the performance. This connected system didn’t just give me technical convenience; it opened up a space that directly contributed to the believability of the scene.”
Ateş Savaşeri, 3D artist and director
Video Mocap: From Intention to Motion in Minutes
For character animation, Savaşeri used iClone’s Video Mocap — recording his own body performance on video and transferring it directly to the character.
“With this method, I got around 80–85% of the motion in a very short time. That’s exactly what made it valuable. Instead of starting from scratch, I had a strong base to work on.”
Ateş Savaşeri, 3D artist and director
Animate characters fast with iClone AI Video MocapThe result of using iClone AI Video Mocap
From there, he refined the weak or off-tempo sections in iClone, adjusting weight, timing, and emphasis shot by shot.
Face Puppet + Face Key: Building Facial Expressions in Layers
Savaşeri didn’t build the character’s facial performance with a single tool. He started with Face Puppet, recording short layers of facial expressions and combining them on the Timeline to create the base performance — much the same way Video Mocap gave him a strong starting point for body motion.
iClone face puppet
From there, he went back over that structure with Face Key, refining the intensity of each expression, adjusting transitions, and tuning the small facial details one by one.
“I don’t think of the face as a single unit, but as a relationship between different regions. The mouth may say something while the eyes say something else. The eyebrows may tense slightly, but the mouth may not immediately follow. Sometimes the real emotion emerges in those small timing differences.“
Ateş Savaşeri, 3D artist and director
iClone face key
Blender Auto Setup and Data Link: The Bridge That Doesn’t Break
This is the part of the Character Creator to Blender workflow that matters most for Blender animators — and it’s where Savaşeri is most emphatic.
“Blender Auto Setup and Data Link didn’t function merely as tools for transferring a character from one program to another. They worked more like a connection system that let me move forward without breaking the film into pieces.”
Ateş Savaşeri, 3D artist and director
Arriving in Blender Without Starting Over
When the character crossed from CC5 and iClone into Blender, Savaşeri didn’t feel like he was starting from scratch. Shaders, rig, hair, and clothing came across intact, leaving him free to focus on what Blender does best.
Critically, Blender was where most of the final decisions happened. Lighting, camera, environment, and atmosphere were built there — but so were the final character refinements:
Hair behavior tuned to the needs of each shot
Clothing motion controlled in specific regions
Material transitions refined for realism
Physics responses re-evaluated per scene
Final touches on eyes, skin, beard, and overall facial feel in close-ups
“When the character arrived in Blender, it wasn’t finished — on the contrary, it was just starting to reach its final form. The biggest advantage Blender Auto Setup gave me was preserving the core structure of the character while still leaving room for those final creative and visual decisions.“
Ateş Savaşeri, 3D artist and director
Revisions Without the Pain
The real test of any pipeline is what happens when something changes. In commercial production, that’s constant.
Set up the character and scene in iCloneTransfer to Blender with the Blender Auto Setup Data link functionFinal render in Blender
“If this transfer pipeline hadn’t been so flexible, even small changes would have meant repeated export-import cycles, making the process heavier. But because the programs were connected through Data Link, I could reflect changes across them much more fluidly. What usually exhausts a project isn’t the creative decisions — it’s repeating the same technical steps over and over again.”
Ateş Savaşeri, 3D artist and director
Why a Character Creator to Blender Pipeline Matters for Commercial Production
For Savaşeri, the broader impact of Reallusion tools on advertising work comes down to one principle: keeping the distance between the initial idea and the final result as short as possible.
The other part is what unlocks at the scale of a single artist. “These tools make it possible to achieve, on a smaller scale, what used to require larger teams and heavier production pipelines. It makes not only imagining an idea possible, but actually testing it and pushing it toward completion.”
But Savaşeri is careful about the framing. “These tools don’t magically solve everything on their own. Their real strength is redirecting the artist’s or director’s energy to the right place — away from repetitive technical tasks and toward thinking, experimenting, and shaping the emotional layer of the work. In the end, what reaches the audience isn’t the software. It’s the emotion and narrative you’re able to create with it.”
Looking Ahead
Savaşeri is candid about his own result: “I can’t say I reached my ideal outcome one hundred percent, but that’s mainly about the time I had available for this project.”
He’s now beginning work on a new short film, where he plans to explore more of the toolset he hasn’t yet used. For a solo Blender-based director in commercial production, the validation of this Character Creator to Blender pipeline — and its ability to stay connected from concept to final image — is the foundation on which everything else will build.
“I don’t see these tools simply as tools that increase speed.
They help distribute the production load more intelligently and sustainably.“
Ateş Savaşeri, 3D artist and director
Key Takeaways: Best Practices for a Character Creator to Blender Workflow
For Blender artists considering a CC5 + iClone hybrid pipeline, Savaşeri’s experience on Revolver surfaces a few concrete lessons:
Treat Blender Auto Setup as a bridge, not an export. Characters arriving in Blender should be ready for final creative decisions, not locked in. Hair, cloth, materials, and physics can — and should — be refined on the Blender side.
Let Data Link keep the pipeline alive during revisions. The flexibility matters most when the brief changes.
Use CC5’s subdivision strategically. Work light, render heavy. Lean on the high-poly base for close-up detail work inside Blender.
Start body motion with Video Mocap, finish it by hand. 80–85% in minutes, then refine for weight, timing, and emphasis.
Treat AccuLIPS and Face Key as foundations, not final answers. The believability is in the refinement.
Bring scene objects into iClone, too. Walls, props, and weapons all benefit from being part of the connected pipeline.
ActorMixer is the practical answer to crowds. Don’t shrink the scene to fit the schedule.
FAQs
How do I send a Character Creator character to Blender?
Use the free Blender Auto Setup add-on. It imports CC5 and iClone characters into Blender with shaders, rigs, hair, and clothing intact — so you can continue refining the character natively in Blender without rebuilding materials.
Can I animate a Character Creator character in Blender, or should I use iClone?
Both approaches work. iClone offers faster character animation through Video Mocap, AccuLIPS lip sync, and Face Key facial animation, then transfers the performance into Blender via Data Link. Many solo artists use iClone for performance and reserve Blender for cinematography and final render — exactly the workflow covered in this case study.
How do I get Character Creator and iClone for my Blender project?
Character Creator and iClone are available from the Reallusion website with flexible subscription or perpetual license options. Trial versions are available, and the Blender Auto Setup add-on is free from the official plugin page.
Ateş Savaşeri
Ateş Savaşeri is a 3D artist and director based in Muğla, Turkey, working primarily for the advertising industry. A graduate of Ankara University’s Department of Radio, Television and Cinema, he began his career in Istanbul as a film editor before expanding into cinematography, animation, and directing — an arc that shaped the way he sees production today.
“I don’t think of a scene as simply an image that looks good,” he says. “Character, performance, lighting, camera, editing, and rhythm are different layers of a single narrative.” That conviction is why he gravitates toward hybrid workflows that combine the speed of real-time tools with a more cinematic final image.
Alongside commercial work, Savaşeri continues to write and produce personal projects exploring nature, environmental issues, and the tense bond between people and the systems they live within. He now produces most of his work from a small animation studio he built at home on Turkey’s southern coast, where he remains drawn most of all to the process itself — the path from the first spark of an idea to the final image.