首頁 » Page 2

Think Tank Artists Redefine Character Creation with Character Creator 5

Overview

Traditional character pipelines ask students to build every stage from scratch — proportions, topology, rigging, weighting, facial setup — before they ever see their character move. By the time the rig finally works, the deadline is already in sight, and the creative decisions are behind them.

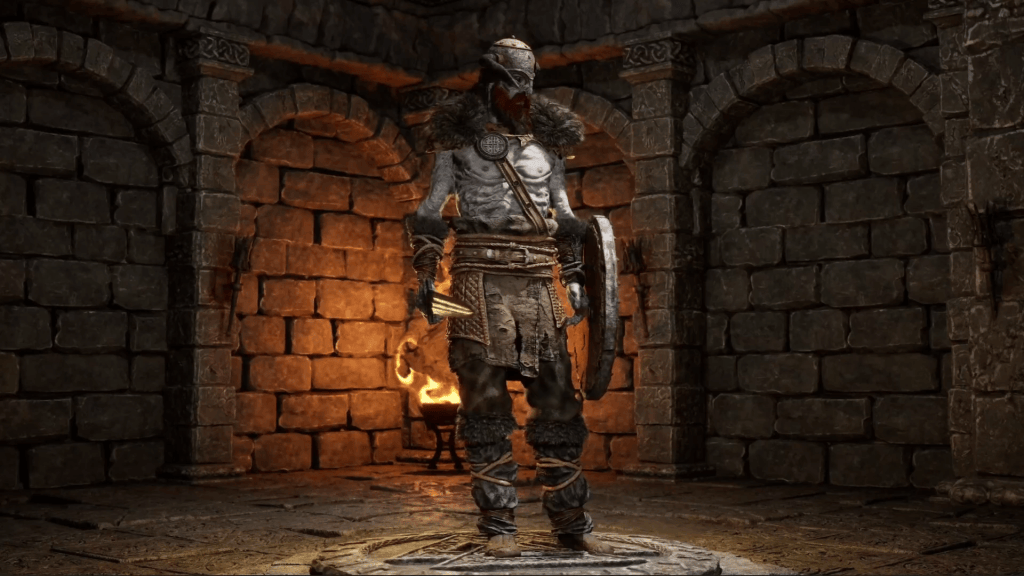
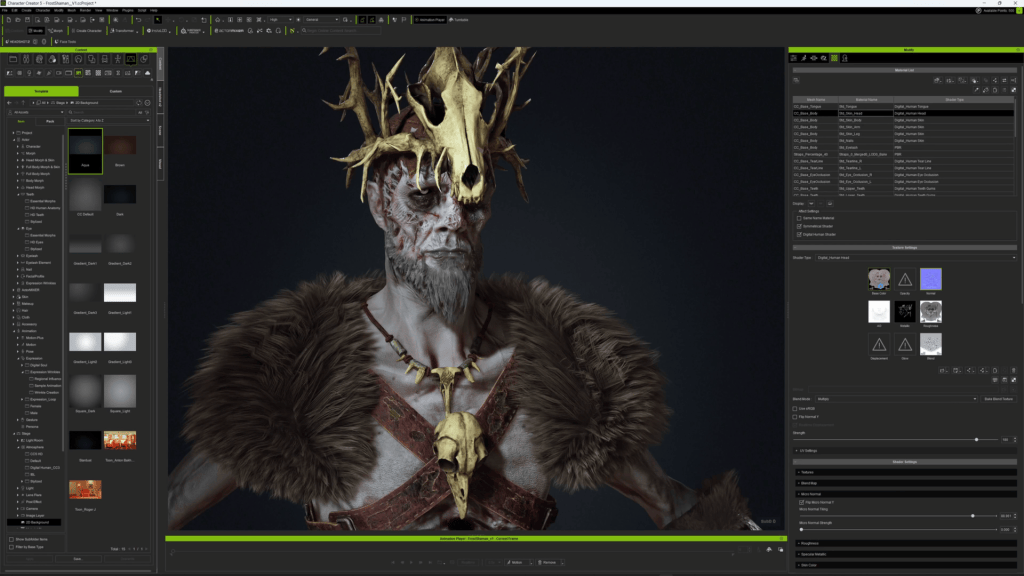
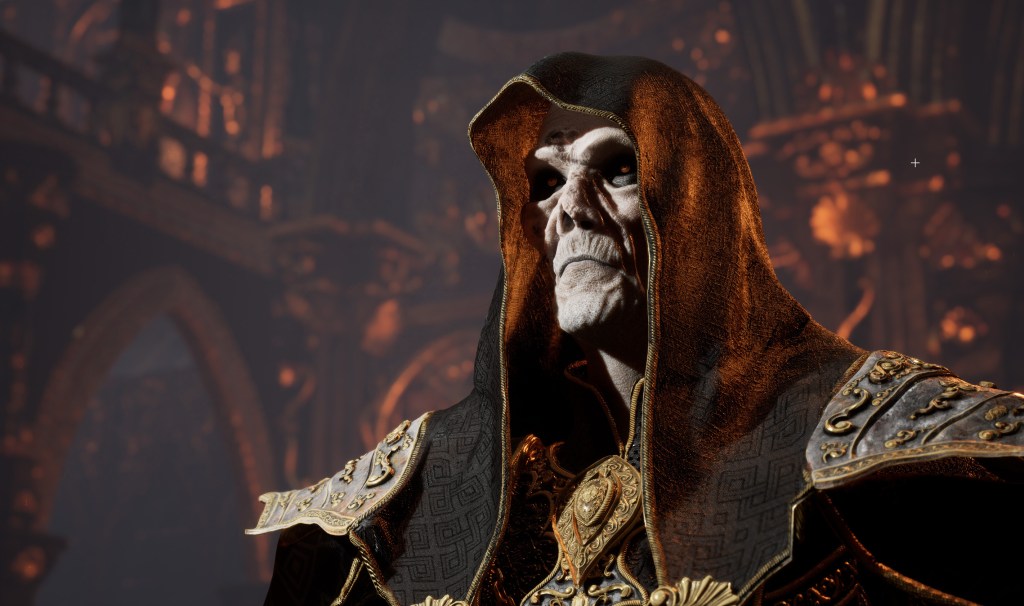
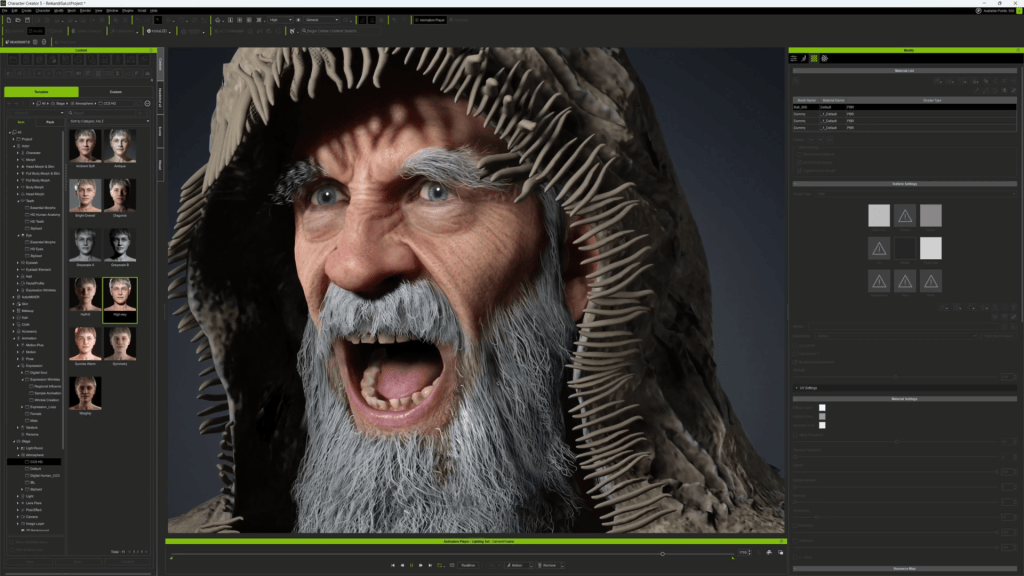
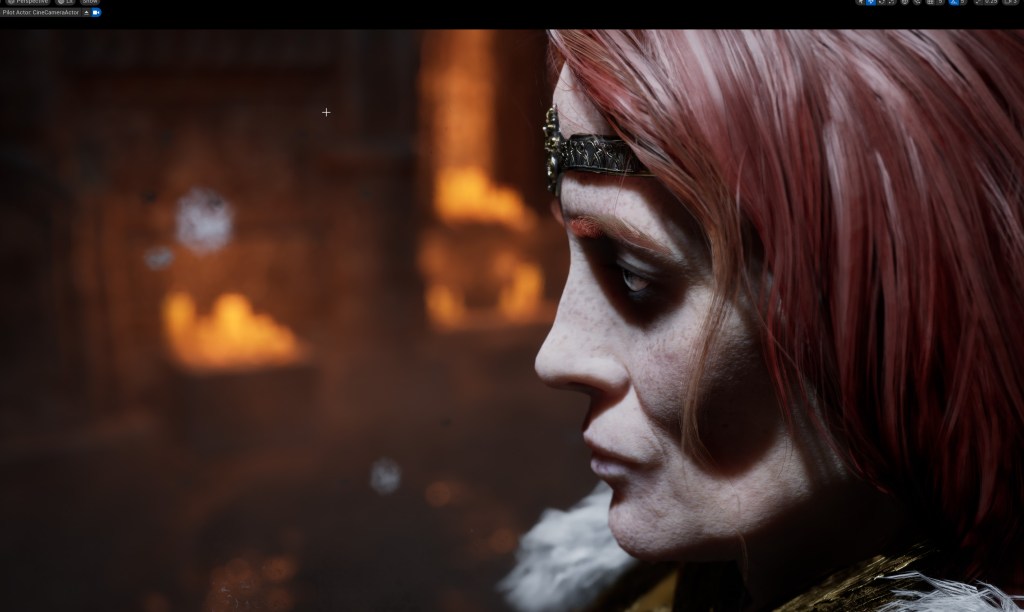
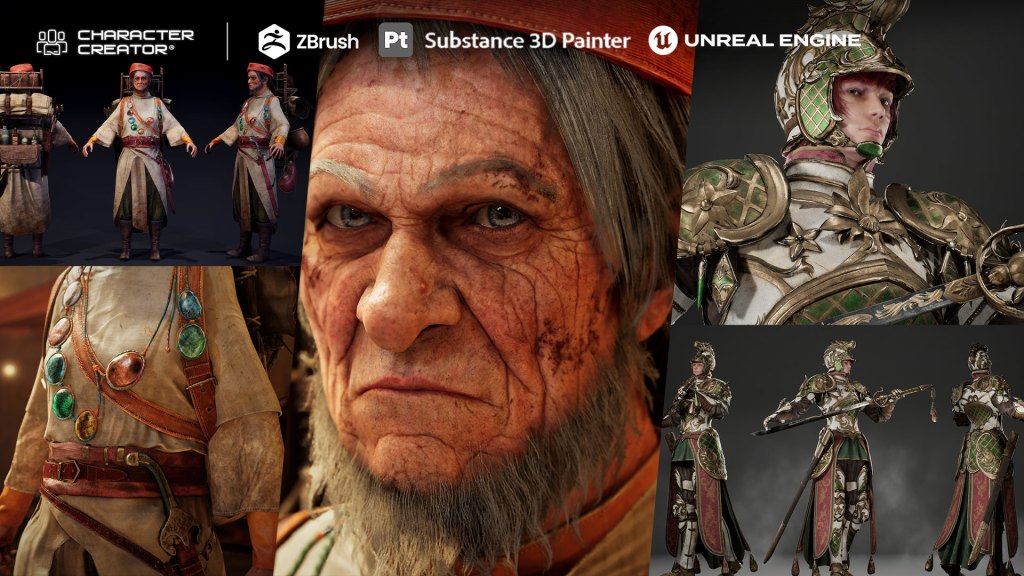
A different approach is emerging inside programs like Think Tank Training Centre, where mentors are guiding students toward hybrid Think Tank character creation workflows that fold Character Creator 5 into established high-end pipelines. Claudia Marcucci and Marco Meier — two Advanced Term students working on very different projects — both used CC5 as the connective tissue between ZBrush, Substance Painter, and Unreal Engine 5. Their results show what the pipeline unlocks at either end of the spectrum: creative acceleration on one side, game-ready precision on the other.

Meet the Artists and Their Projects

Claudia Marcucci is a 3D character artist from Milan, currently studying Character for Games at Think Tank Training Centre. Her path into character work has been deliberate — after training as a 3D generalist in Italy, she took Scott Eaton’s anatomy course to deepen her figure work before joining Think Tank to push further into character specialization.

During her third Advanced Term, she developed Travelling Merchant, encouraged by her term supervisor, Saurabh Jethani, to experiment with Character Creator as part of her pipeline.

“I decided to implement it in my pipeline after seeing how Saurabh’s character was taking life during our recorded lessons by using it, week after week.”

Claudia Marcucci, student at Think Tank Training Centre

Marco Meier approached CC5 from a different angle. From the start, he knew he wanted a fully game-ready character with a complete rig and working cloth simulation — and CC5’s MetaHuman integration gave him a specific reason to rebuild his pipeline around it.

“From the start, I knew I wanted a fully game-ready character with a complete rig, cloth simulation, and with the CC5 update introducing the MetaHuman feature, I saw a great opportunity to integrate the CC workflow to save time and streamline the process.”

Marco Meier, student at Think Tank Training Centre

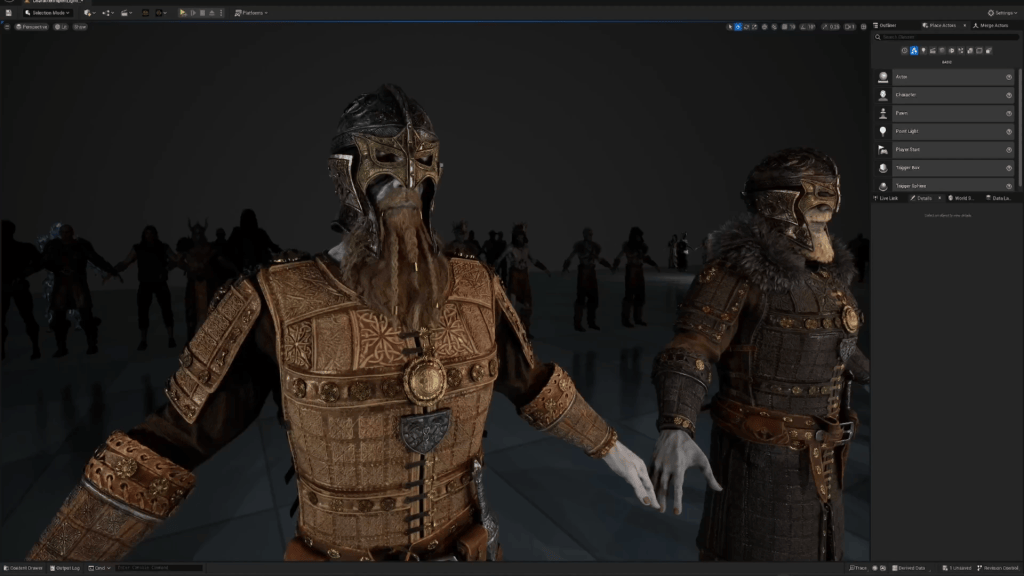
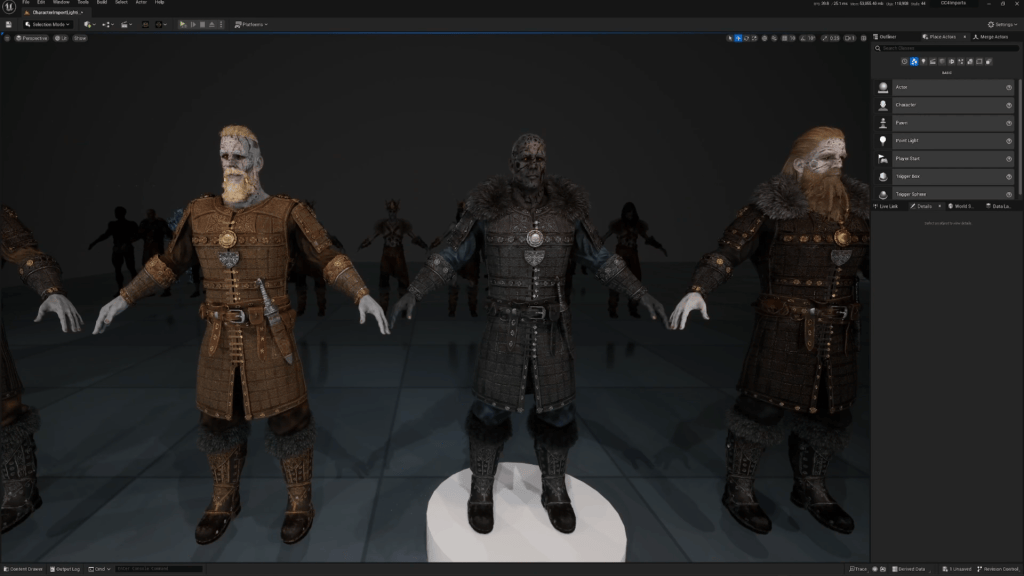
Both characters converged in Unreal Engine 5, fully rigged and Auto-Setup-ready, despite starting from very different creative briefs.

The Hybrid Think Tank Character Creation Workflow: Why It Matters

For students, the hardest part of character work is rarely the sculpt. It’s the weeks of technical setup that stand between a finished model and a posed, animated shot — and that’s where CC5 is changing the Think Tank character creation workflow.

  • Stage 1 — Start inside Character Creator 5 or from the Reallusion base
  • Stage 2 — ZBrush for sculpting, with Character Creator 5 compatibility preserved
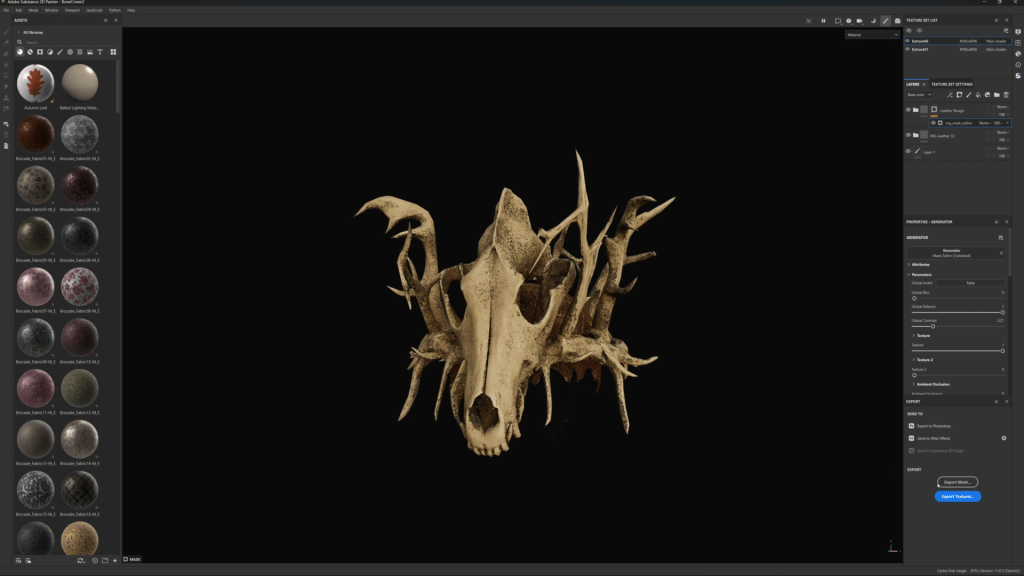
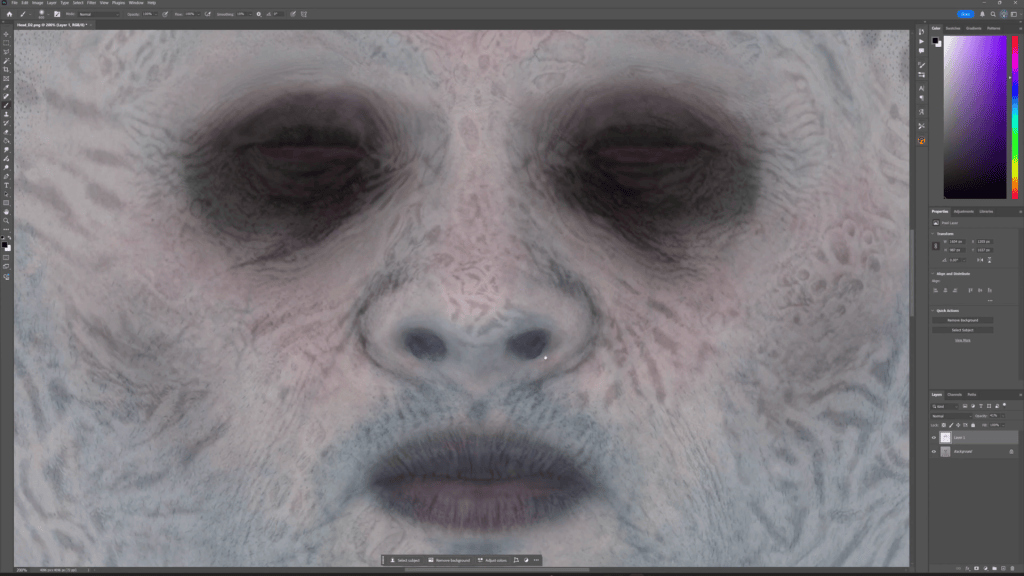
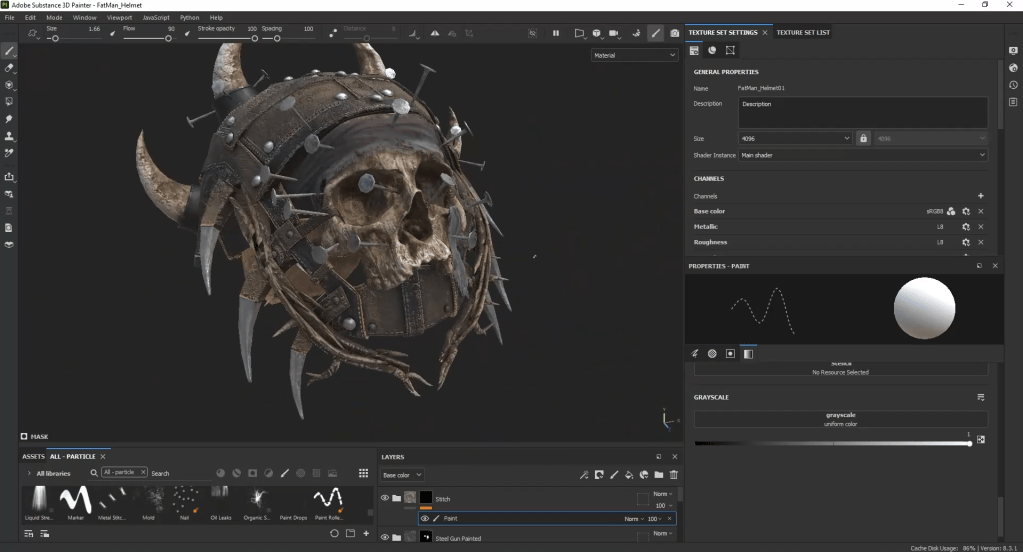
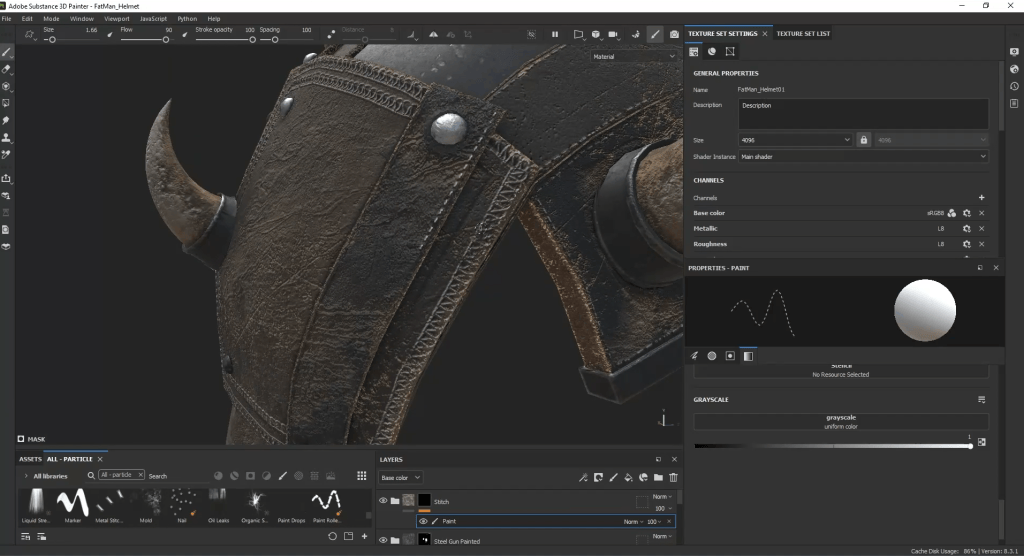
  • Stage 3 — Substance Painter for texturing
  • Stage 4 — Back into Character Creator 5 for rigging and skin weighting
  • Stage 5 — Send to Unreal Engine 5 via Auto Setup

Character Creator 5 in Claudia’s Workflow: Acceleration Through Immediate Feedback

Claudia’s use of CC5 is about compressing the distance between sculpture and movement. She wanted to see her character pose, emote, and react well before she was deep into final detail — and the pipeline rewarded that curiosity.

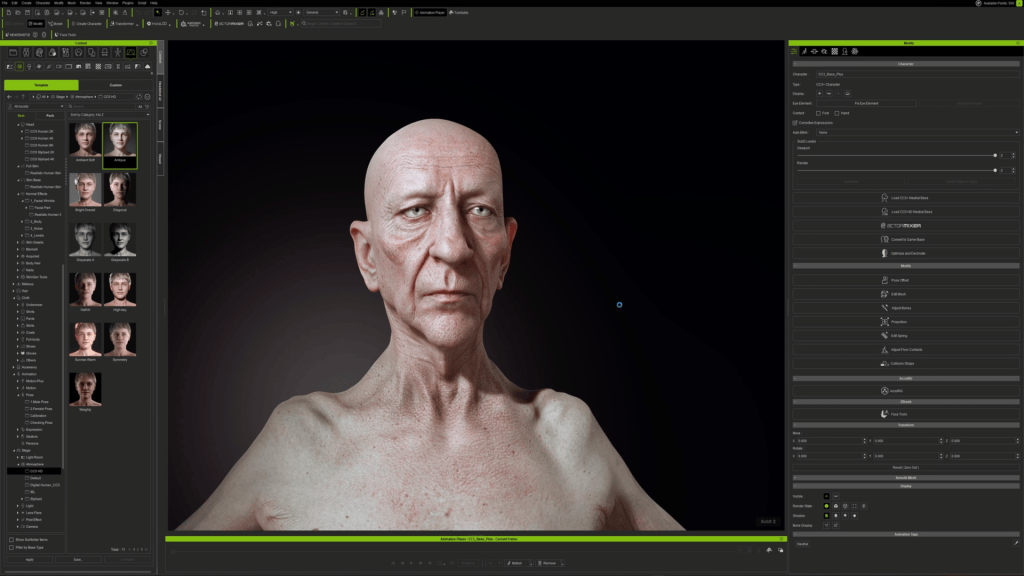
Starting from the Reallusion base — but flipped

Claudia began from the Reallusion Free Fully-rigged 3D Character basemesh, but deliberately chose the opposite gender of her final character. The constraint forced her to exercise anatomy and sculpting without leaning on the initial base.

To protect the pipeline, she applied Reallusion’s topology maps as a texture directly in ZBrush, keeping the loops in the right place even after heavy sculpting. She describes it as essential prep — not a nice-to-have.
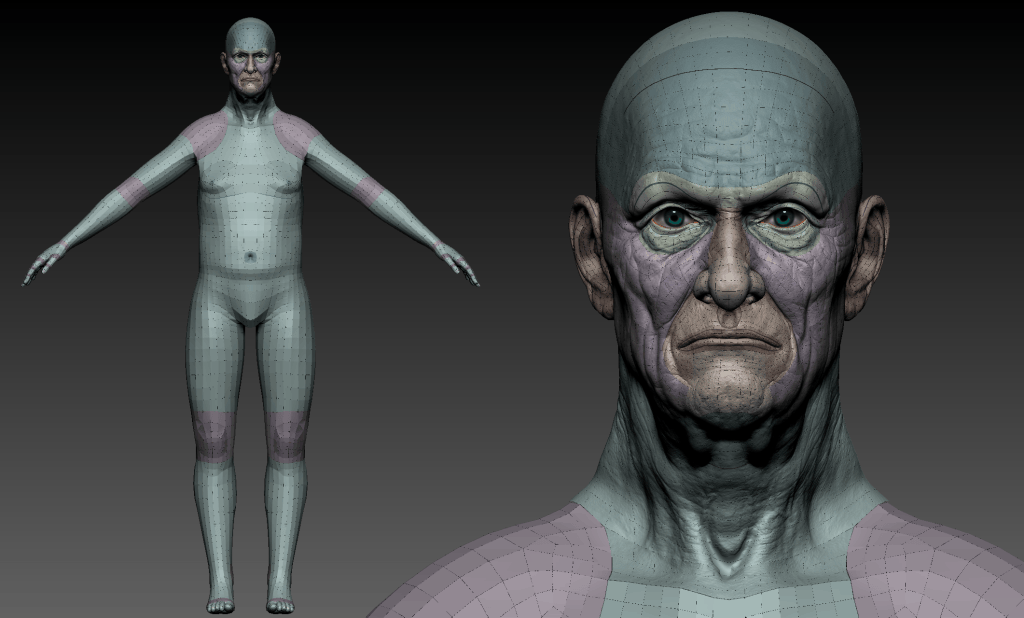
GoZ iteration between ZBrush and Character Creator 5

Once the sculpt reached a strong stage, she used GoZ to bring the body into CC5 to check that the rig and deformation actually worked.

“It was really satisfying to see one of my characters taking life.”

Claudia Marcucci, student at Think Tank Training Centre

That early validation is the core of her case for the pipeline. Instead of discovering deformation problems at the end of the project, she caught them while they were still cheap to fix.

Transfer Skin Weight for clothing, directly inside Character Creator 5

After baking high-to-low and texturing everything in Substance Painter, Claudia brought the clothes and props into CC5 to skin them.
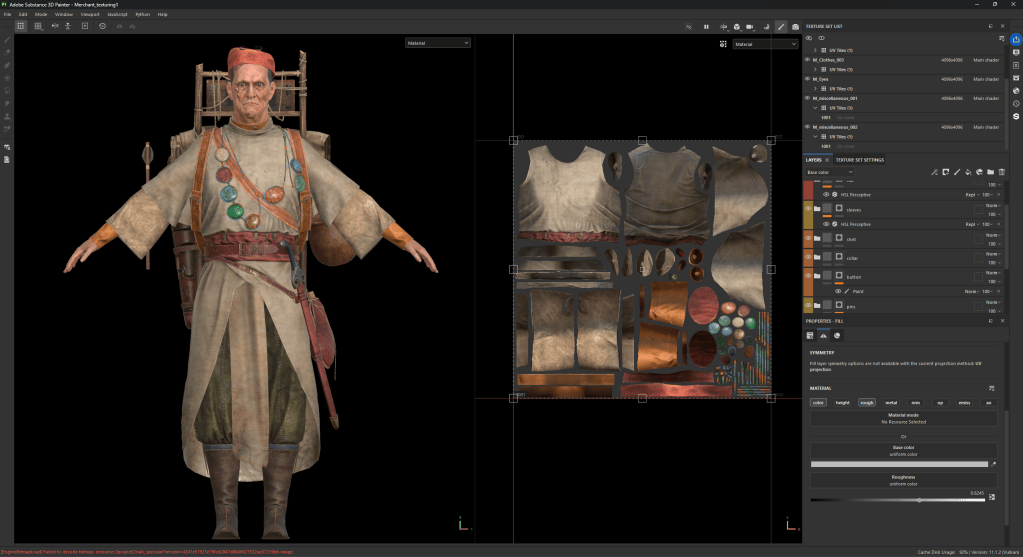
“Thanks to the implemented skin weight painting system CC has, I skinned everything directly in it, without having to constantly export and reimport from other softwares.”

Claudia Marcucci, student at Think Tank Training Centre

For the garments, she used Transfer Skin Weight to start from a cloth template and then refined the result by painting manually — a hybrid approach that respects the tool’s automation without surrendering artistic control.

Into UE5 with Auto Setup

With the character rigged, Claudia brought it into Unreal Engine 5 using the Reallusion Auto Setup for UE (All-in-One) plugin. The plugin assigned the skeleton and shaders on import — and crucially, made the character compatible with the MetaHuman Control Rig for both face and body.

She then imported animation from Character Creator, retargeted it, and combined it with her own keyframed animation directly in UE5’s sequencer.

“CC5 really helped me accelerate the character setup and rigging. Being able to see the character you worked on moving and being able to replicate realistic facial expressions was incredible, even from a really early phase.

As a student character artist, this pipeline helped me accelerate this technical stage and dedicate more time on the character creation stage.”

Claudia Marcucci, student at Think Tank Training Centre

Character Creator 5 in Marco Meier’s Workflow: A Game-Ready, MetaHuman-Rigged Result

Where Claudia’s pipeline is about speed, Marco’s is about control. His goal was specific from the outset — a fully playable character with a working MetaHuman rig and cloth simulation — and CC5 sat at the center of the pipeline that delivered it.
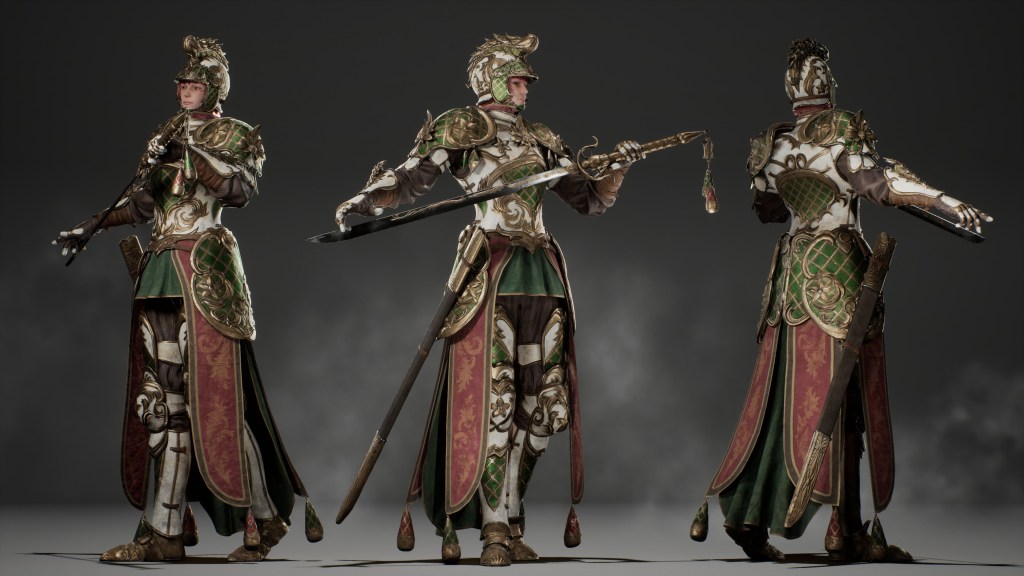
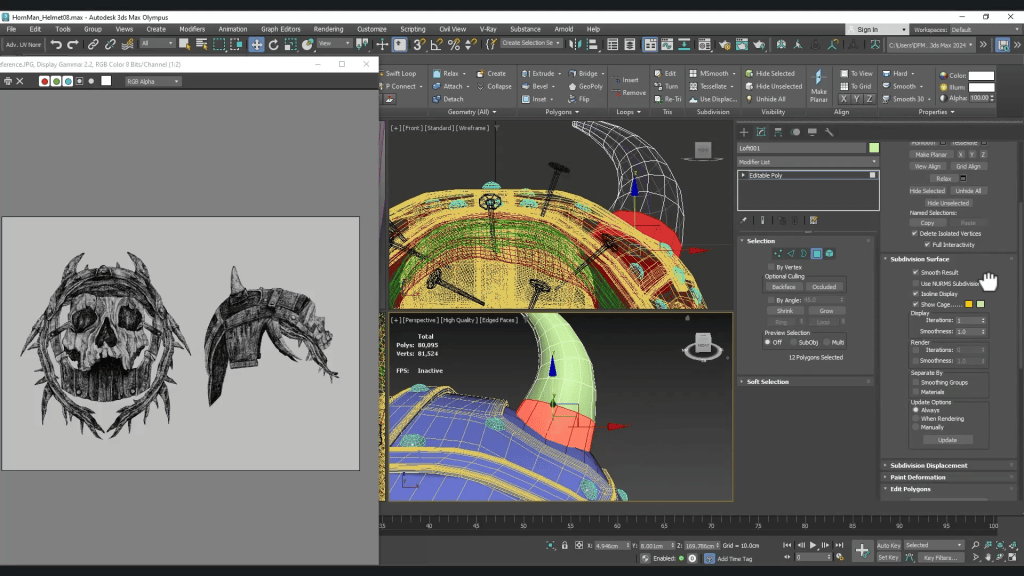
Marco eyeballed proportions from his concept inside CC5, then used GoZ to move into ZBrush for the full sculpt, including armor and ZWrap-driven skin detail. The discipline in his process shows up in how he protected the CC base body throughout:

“The main thing I had to be careful about was not destroying the original topology or any of the accompanying assets, so I could send it back cleanly. Importantly, I also verified that the vertex IDs were preserved so CC5 could still recognize the mesh on import.”

Marco Meier, student at Think Tank Training Centre

Vertex ID preservation is the single most consequential technical step in this kind of workflow — without it, CC5 can’t re-recognize the mesh, and the facial rig breaks. Marco refined topology in Maya against the official CC facial topology guide to keep everything intact, then baked it in Marmoset Toolbag and textured it in Substance Painter.

Back in CC5, he handled weight painting directly, making manual adjustments where the automation fell short — particularly on the hands — and used CC5’s built-in animations to test the rig before finalizing. For cloth simulation, he built a lower-resolution proxy mesh and drove the visible cloth from it inside UE5, keeping high-res detail on the visible asset and physics performance on the driver.
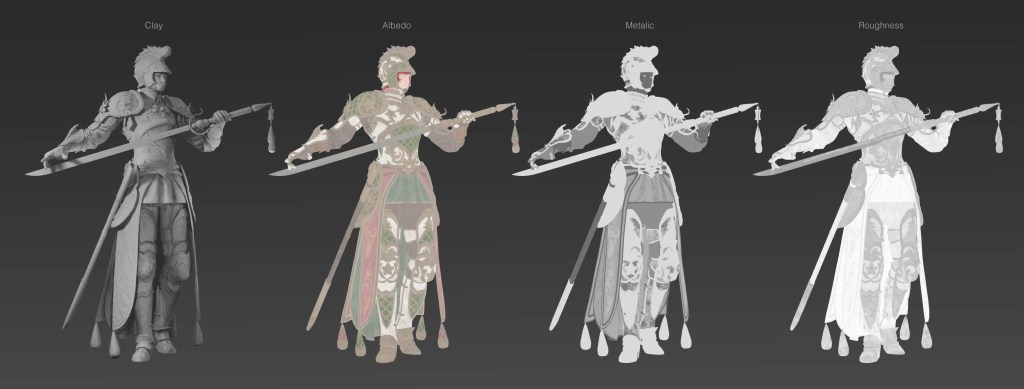
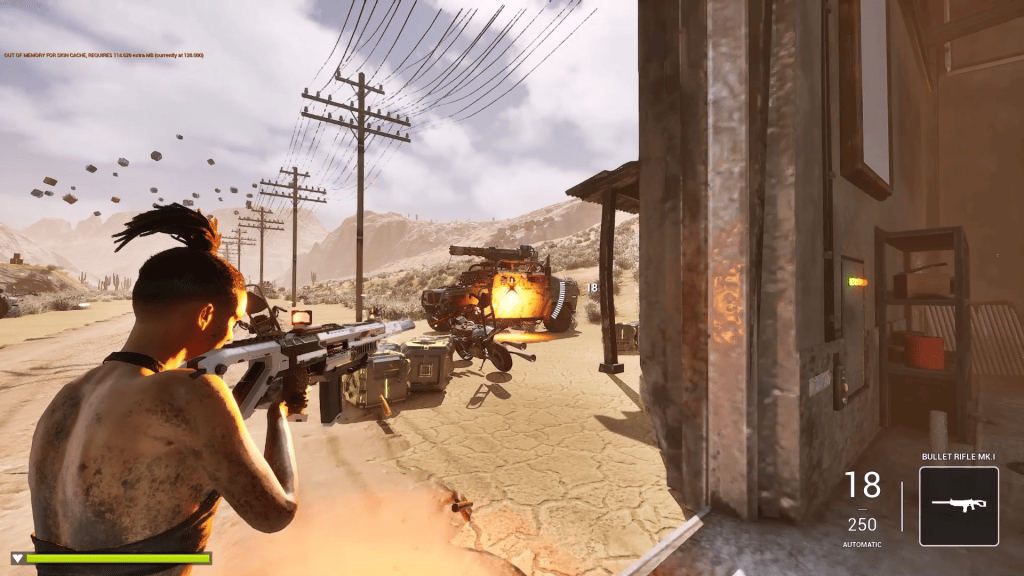
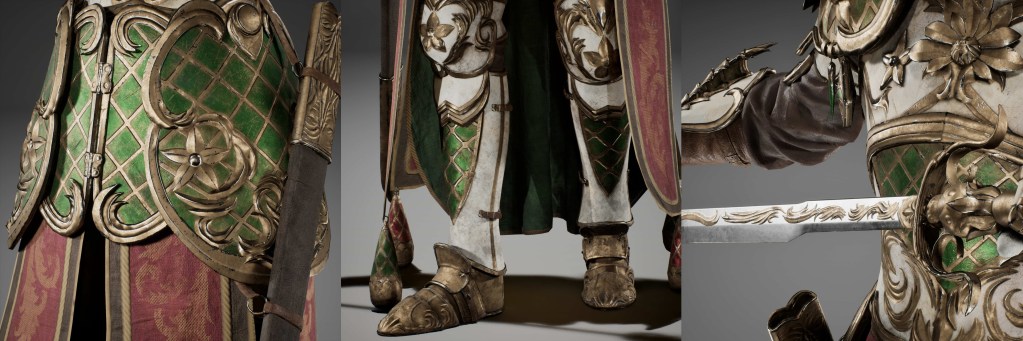
The final character arrived in Unreal Engine 5 with the MetaHuman rig fully wired up via Auto Setup, Substance Painter textures applied, and cloth simulation active — ready to pose or drive as a playable character.
Industry Insight: What This Means for Character Art Education

The Think Tank case highlights a broader shift in how character art is being taught. For a decade, mentorship-heavy programs focused almost entirely on sculpting and texturing craft, leaving rigging and real-time integration as separate specializations. The job market increasingly expects character artists to deliver assets that move — not just models that render well in ZBrush.

Folding CC5 into a Think Tank character creation workflow doesn’t replace the fundamentals. Students still learn anatomy, topology, UVs, and detail sculpting the hard way. What changes is where their time goes in the back half of a project. Instead of spending the final weeks hand-weighting a rig that a tool can generate in minutes, they spend those weeks making the character act — or in Marco’s case, making it genuinely playable in an engine.

That’s a meaningful reallocation of student attention, and it tracks with where games, virtual production, and real-time cinematics have been heading for years.

Look Ahead

Claudia’s reflection captures what the pipeline validated for her as a student:

“As a student character artist, this pipeline helped me accelerate this technical stage and dedicate more time on the character creation stage.”

Claudia Marcucci, student at Think Tank Training Centre

Marco’s outcome — a fully game-ready, MetaHuman-rigged character with working cloth simulation — validates the same philosophy from a different direction: that the technical stages don’t have to consume the entire schedule. For artists entering the industry now, the takeaway is less about one tool and more about a mindset: treat rig, weight, and integration as solvable early, so creativity has room to breathe at the end of the project rather than getting squeezed.

Key Takeaways: Best Practices for a Hybrid Character Pipeline

  • Apply Reallusion’s topology maps in ZBrush early. Sculpt as freely as you want — just keep the loops where the rig expects them.
  • Protect vertex IDs through every round trip. CC5’s facial rig relies on them, and losing them is the most avoidable failure in the pipeline.
  • Use GoZ to validate deformation, not just hand off. The value is catching rig problems while they’re still cheap to fix.
  • Skin garments with Transfer Skin Weight, then paint manually. Start from a template, refine by hand. External rigging tools are rarely worth the time on student projects.
  • Build proxy meshes for real-time cloth. High-res garments belong on the visible character; physics belongs on the low-res driver.
  • Let the Auto Setup plugin close the loop into UE5. Skeleton, shaders, and MetaHuman Control Rig compatibility should arrive configured, not be rebuilt.

About the Artists

Claudia Marcucci is a 3D character artist based in Milan, currently specializing in Character for Games at Think Tank Training Centre. After training as a 3D generalist in Italy, she studied figure work under Scott Eaton before joining Think Tank to deepen her character specialization. Her Advanced Term project Travelling Merchant was developed under the supervision of Saurabh Jethani, and marks her first full integration of CC5 into a sculpting-first pipeline.


Check Claudia’s ArtStation

Marco Meier is a 3D character artist focused on game-ready production pipelines. His Advanced Term project was built around a specific goal — a fully playable, MetaHuman-rigged character with working cloth simulation — and his workflow reflects a precision-first mindset that treats CC5 as a production anchor rather than a shortcut.

Check Marco’s ArtStation

FAQs

Can I start from a custom sculpt and still use CC5’s facial rig?

Yes, provided you preserve CC5-compatible topology and vertex IDs. Claudia projected Reallusion’s topology maps onto her ZBrush sculpt; Marco refined topology in Maya against the official CC facial topology guide. Either approach keeps the facial rig functional — and both artists verified vertex IDs before reimport.

Does CC5 work with MetaHuman in Unreal Engine 5?

Yes. Using the Auto Setup for UE (All-in-One) plugin, CC5 characters import with the MetaHuman Control Rig applied to both face and body, making them ready to pose or animate in the UE5 sequencer.

How do I get Character Creator 5?

CC5 is available through the Reallusion Software Store. Reallusion offers a free trial, and the Auto Setup plugins for Unreal, Blender, Maya, 3ds Max, and Unity are free downloads.

Can I use CC5 animations directly, or do I need a separate mocap tool?

Both work. Claudia used animations from AccuRIG and CC5 directly, retargeted them to her character in UE5, and combined them with keyframed animation in the sequencer. Marco used CC5’s built-in animations specifically to test and refine his rig before final export.

Related Posts

Discover how relative.berlin leverages Character Creator 5 and iClone 8 for an AI-integrated 3D pipeline to build complex, populated VR simulations.

AI and 3D-Driven VR Simulation for German Civil Security Research

relative.berlin

As relative.berlin, we’re a creative studio focused on developing distinctive animations and immersive experiences. Exploring emerging technologies (especially machine learning and AI) is a core part of how we work, and it continually shapes the way we approach new projects.

By integrating AI into our workflow, we were able to create rich, densely populated environments for VR and scale our creative ambitions in ways that would have been difficult with traditional pipelines alone. In the sections below, we share how we made it happen.

The Project: XR Security Lab

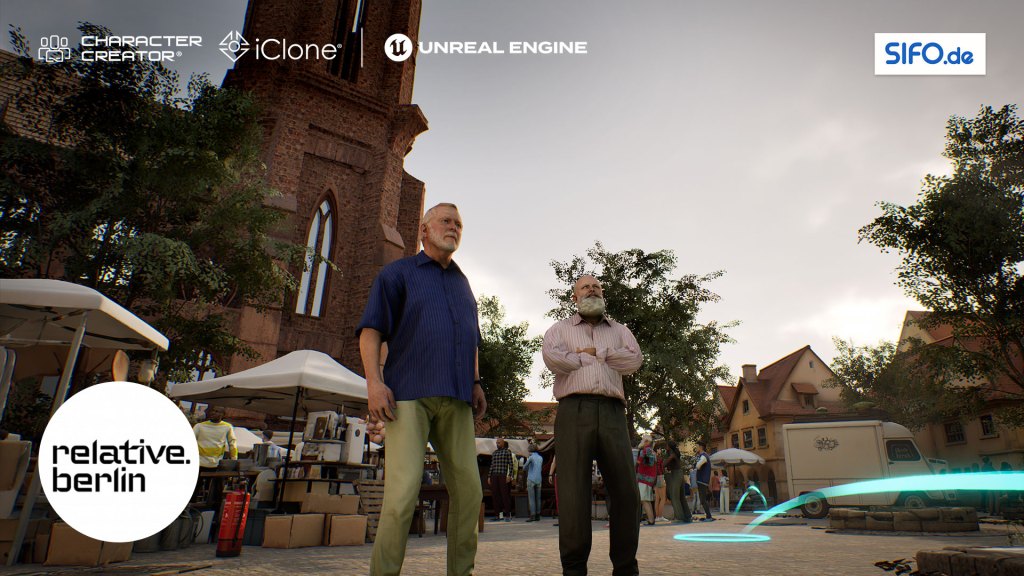
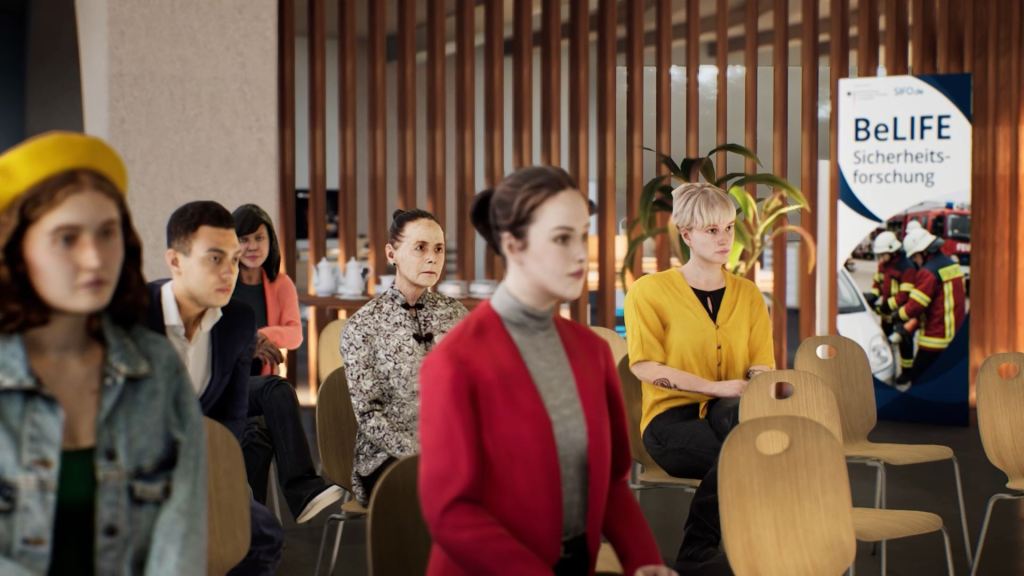
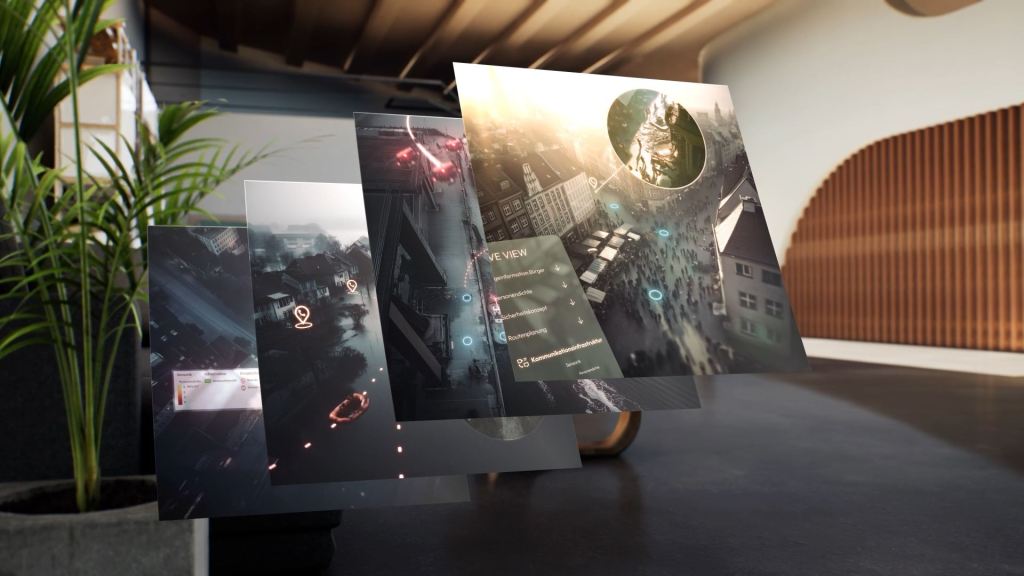
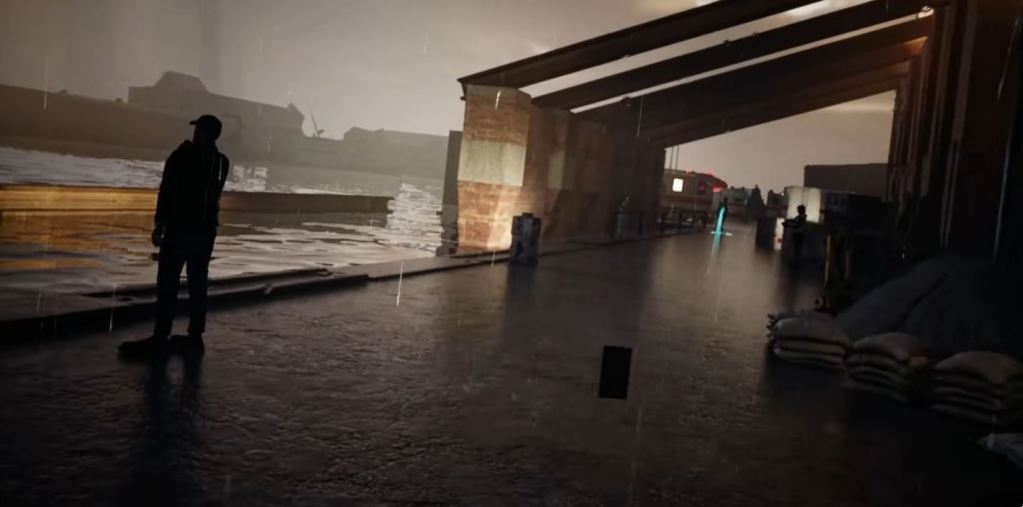
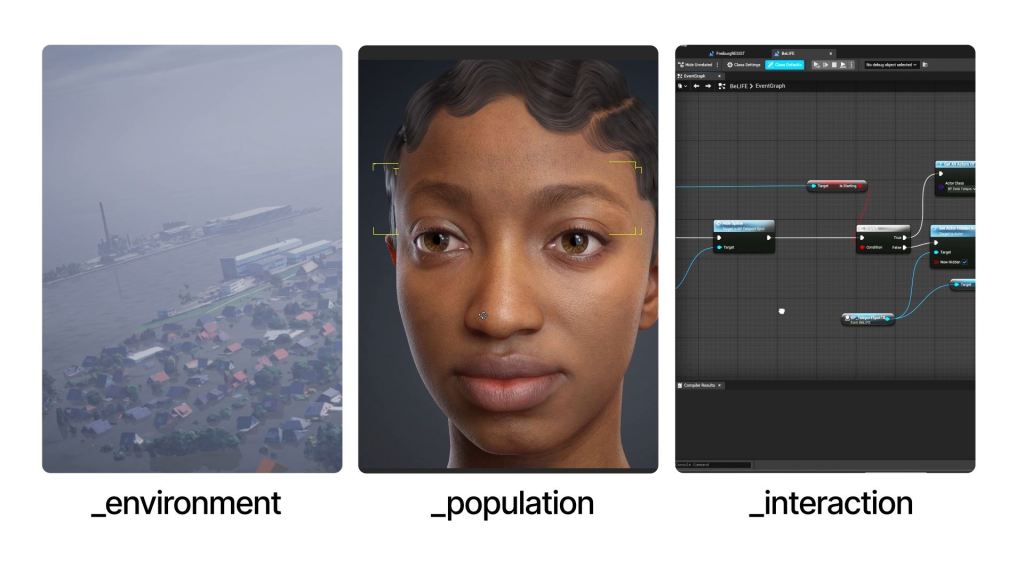
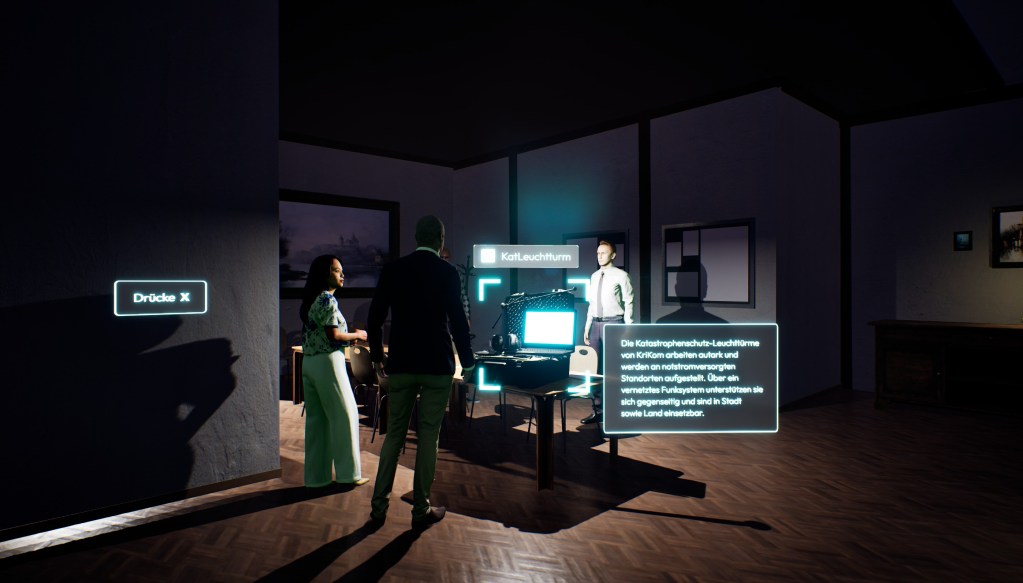
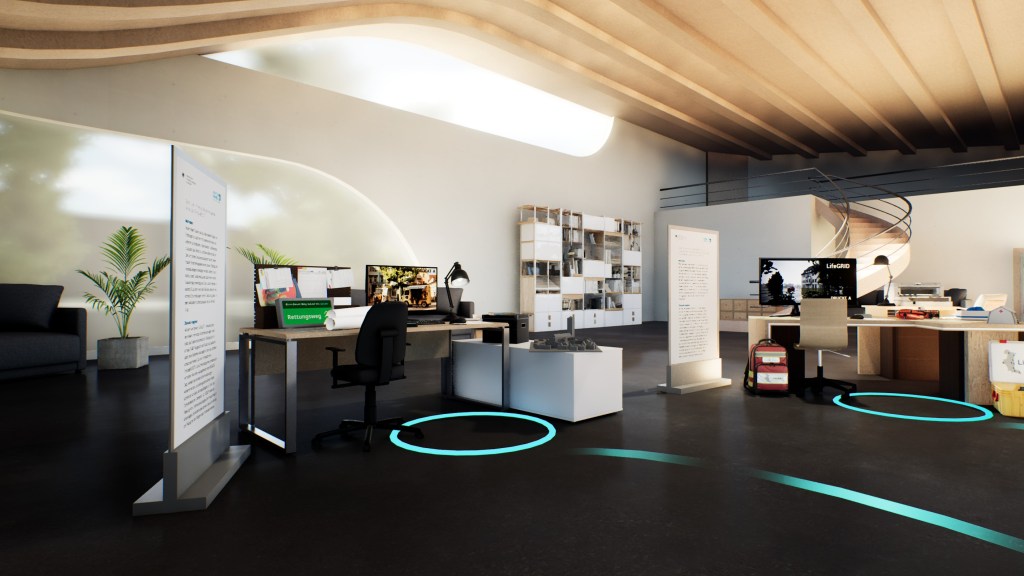
XR Security Lab is developed on behalf of the project Accompanying Research SifoLIFE: Effective and Sustainable in Practice (BeLIFE), which is funded by the Germany’s Federal Ministry of Research, Technology, and Space (BMFTR). For this initiative, we set out to create a VR experience that brings civil security research into a safe, repeatable virtual environment. To achieve this, we built five detailed urban scenarios, each representing complex situations such as extreme weather events or large-scale incidents. These virtual environments can be explored from multiple perspectives, making emergency procedures, response measures, and cause-and-effect relationships far easier to understand.

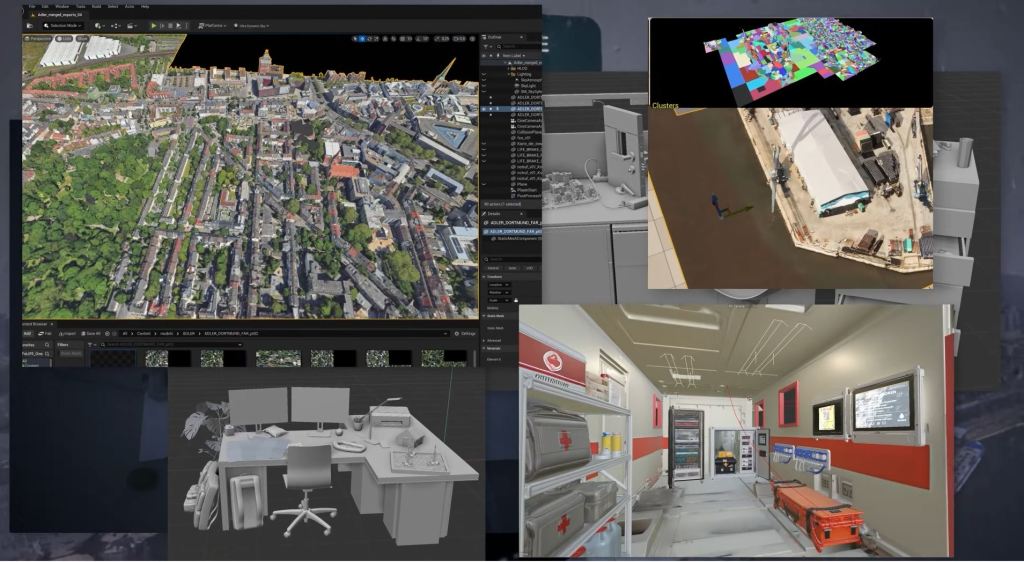
Business simulation scene from the XR Lab Project

Overcoming the Creative and Technical Challenges

The challenge was both creative and technical: we had to design and build an entire VR experience from the ground up, ensuring it was not only visually compelling but also ran flawlessly on consumer-grade hardware.

Building the Cast with Character Creator

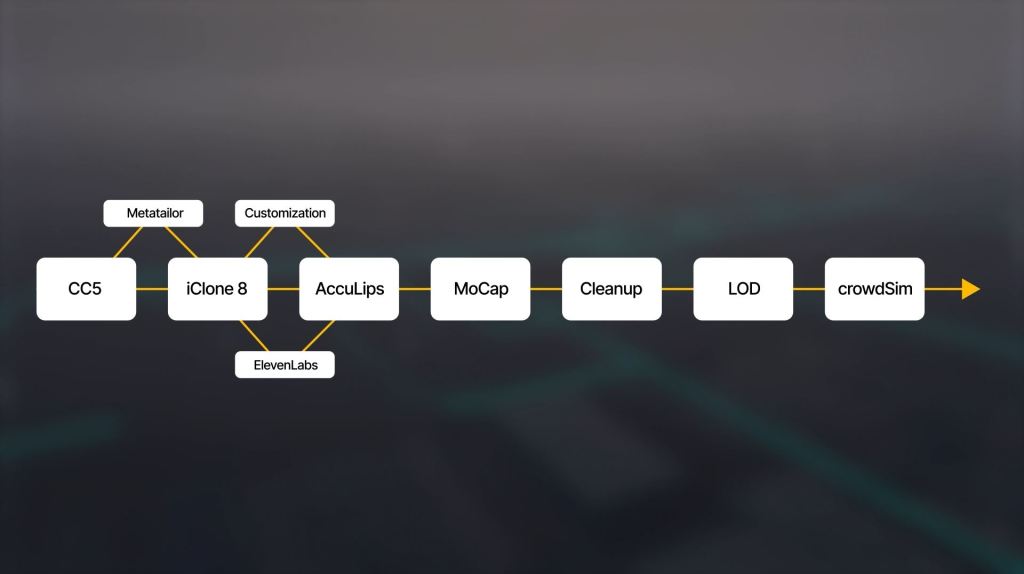
Our character pipeline is built entirely around Reallusion’s Character Creator and iClone. Reallusion was kind enough to provide us with software licenses to support the production, and we immediately got to work building our cast in Character Creator 5

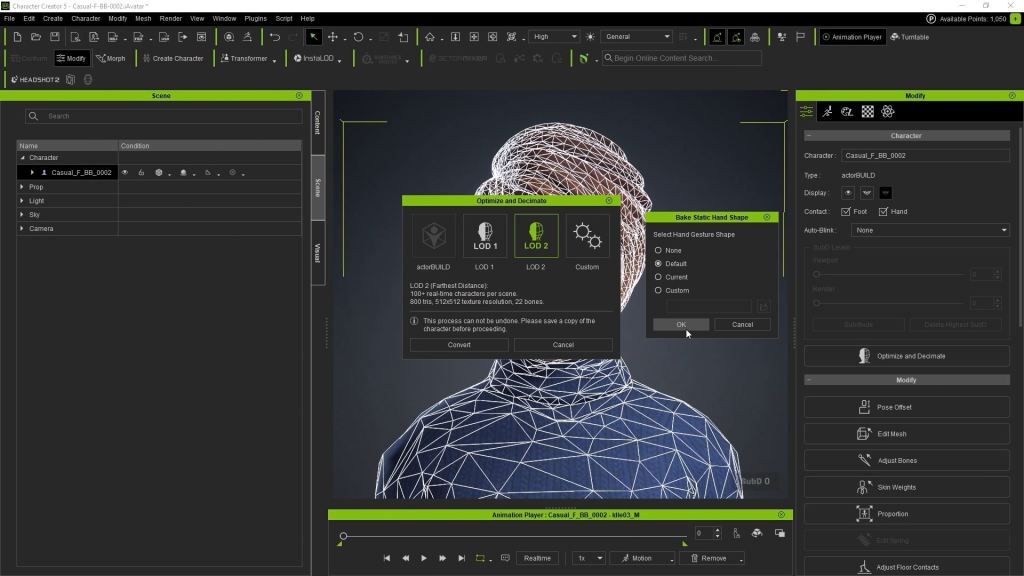
Selecting the LOD level within Character Creator

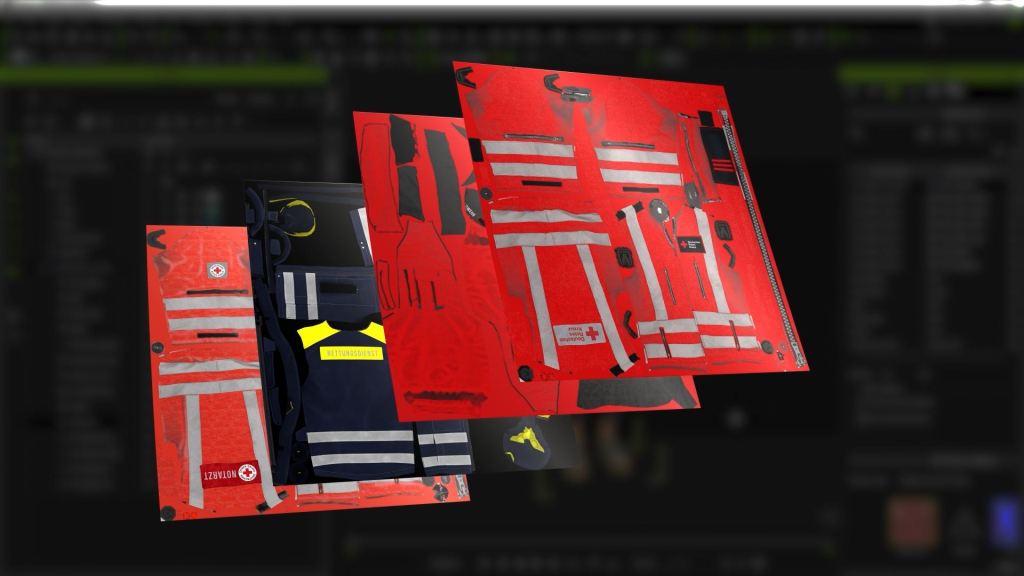
To populate scenes quickly with a wide variety of background characters, we used the Reallusion Content Store as a starting point, pulling from their extensive library of 3D people scans and clothing. From a single outfit, we utilized Character Creator’s cloth variation tools to seamlessly swap materials, change colors, and add decals, generating a huge variety of looks highly efficiently. For specialized service uniforms, we modeled the garments ourselves to match current real-world specifications, using tools like MetaTailor to ensure a perfect fit on our character models.

For crowd generation, we also used 3D animations and crowd characters from the ActorCore Asset Store. With over 5,000 motions and 1,000 scanned humans, we selected a variety of crowd characters and significantly accelerated our production. Thanks to the intuitive AI Deep Search, which supports keywords, natural language, and even image-based queries, we were able to find what we needed quickly. The low-polygon 3D people are fully rigged for facial, body, and finger animation, and include complete color variations, enabling efficient crowd generation.  

Automating Logic & AI-Assisted Environments

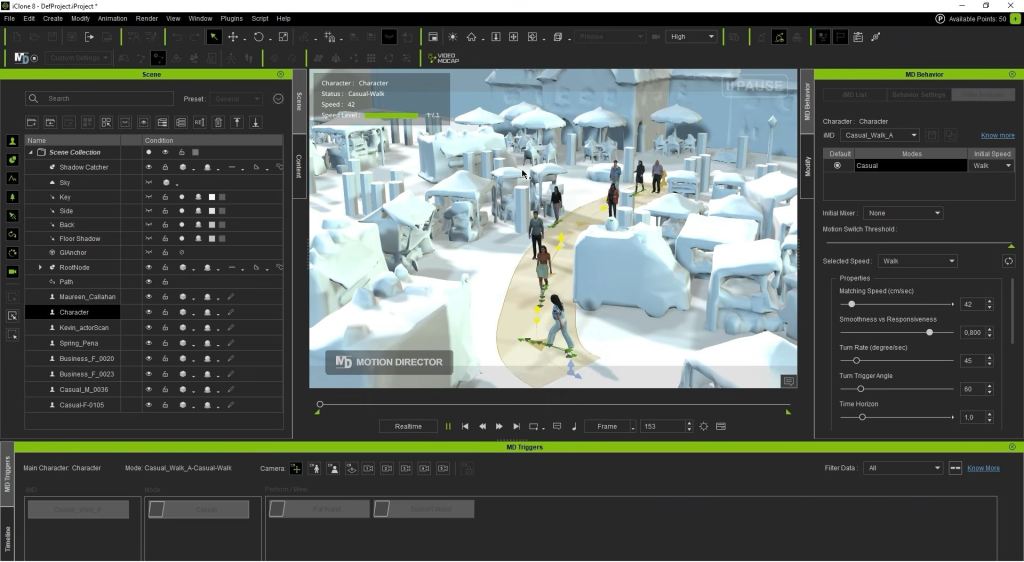
With iClone 8.7, we utilized the new Motion Planning Plugin to automate character logic. Its node-based graph editor allowed us to create intelligent agents that navigate our scenarios autonomously, making our simulations significantly more realistic and faster to build. Simultaneously, the environment team focused on capturing each city’s unique identity. We used a hybrid approach, combining traditional asset libraries with AI-assisted 3D tools. We experimented with platforms like Hunyuan and Tripo, which allowed us to generate buildings and landscape elements directly from image prompts. This helped us create localized architecture that felt specific to each distinct location.

“With iClone 8.7’s Motion Planning, we automated character logic for our VR project — autonomous, reproducible, fast to build. The same workflow is also useful as a stable motion base for AI video-to-video, keeping multiple camera perspectives coherent in complex scenes.”

Marc-André Müller – CoFounder / Technical Director at relative.berlin

Motion Capture and Dialogue Generation

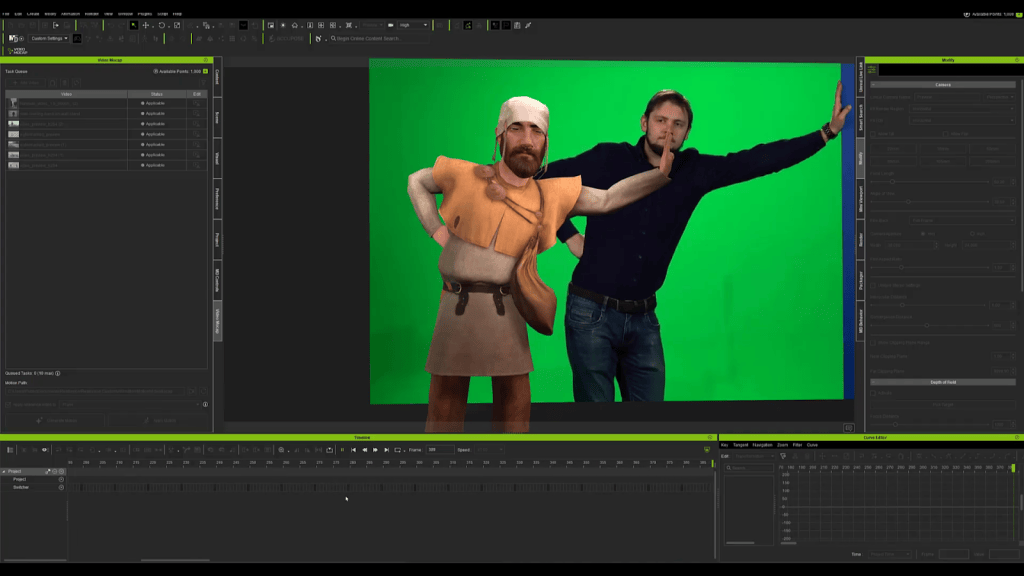
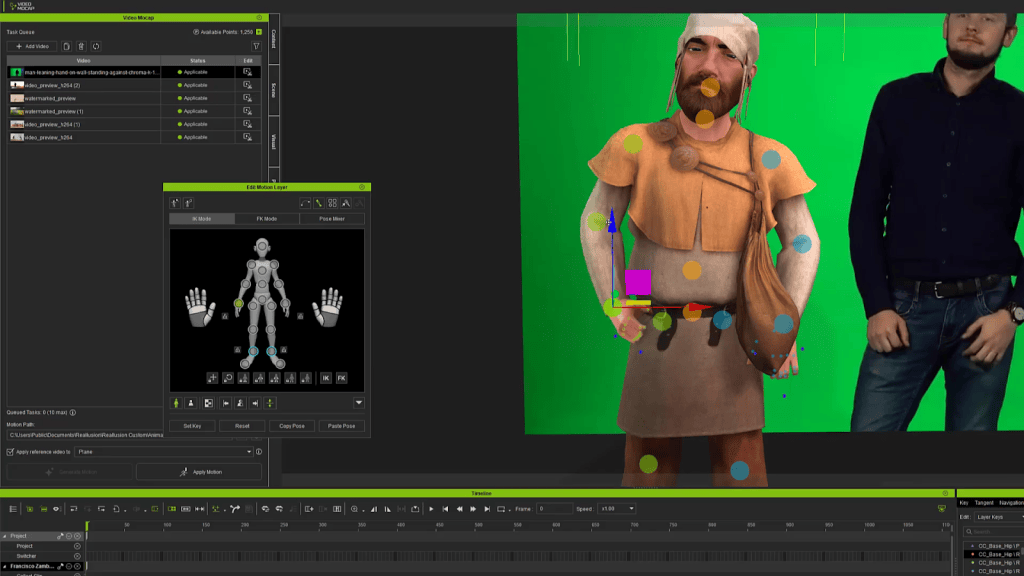
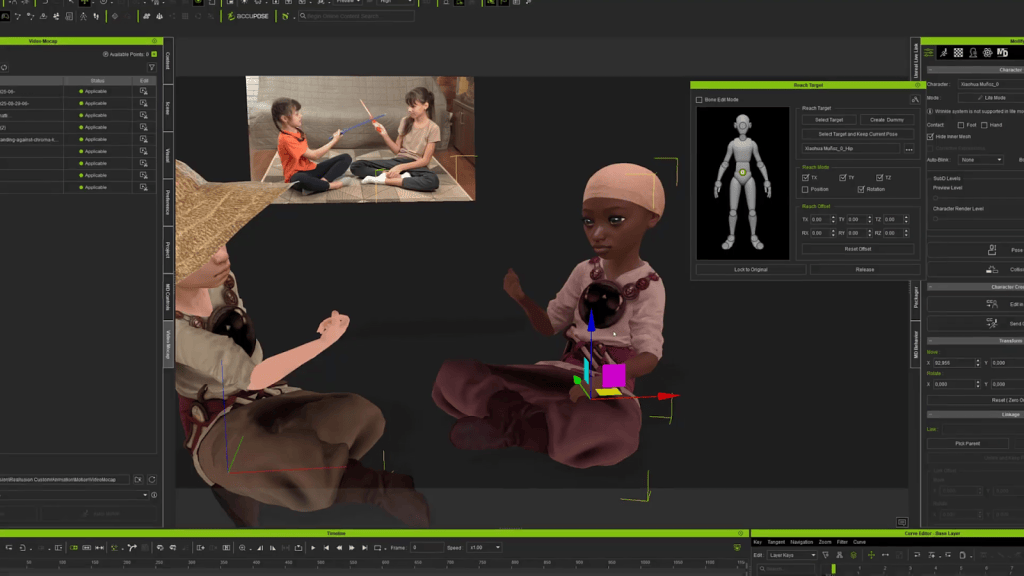
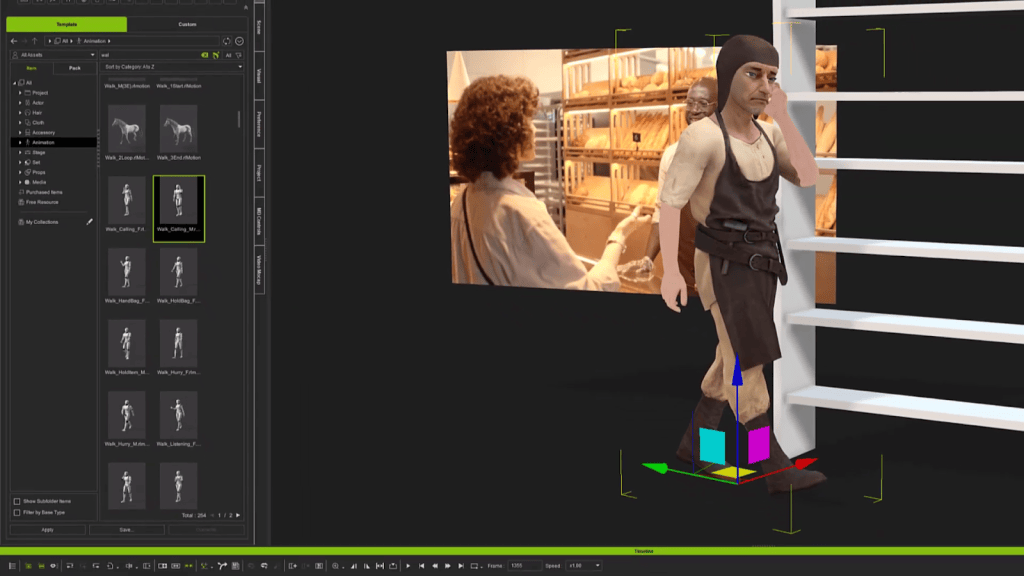
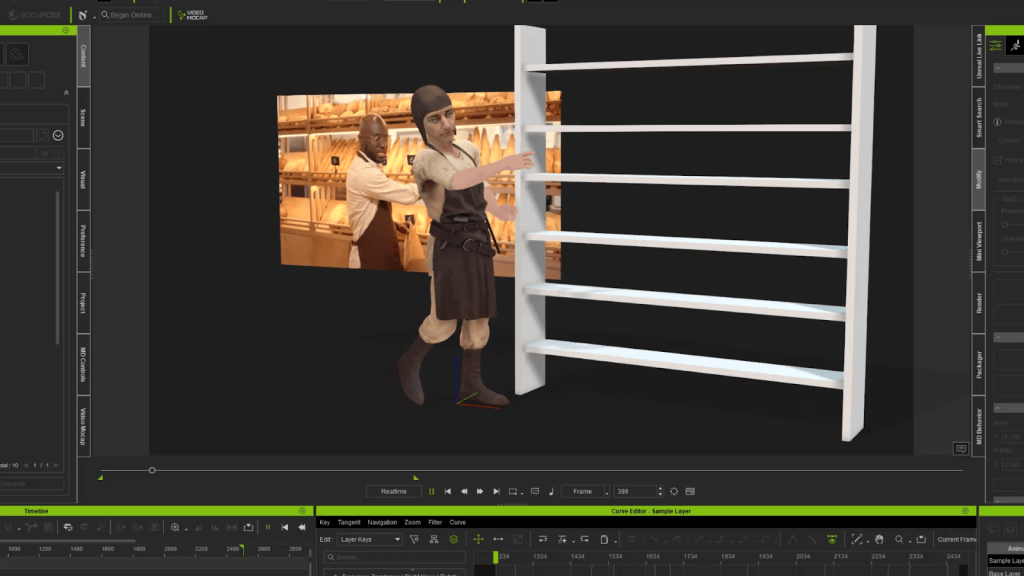
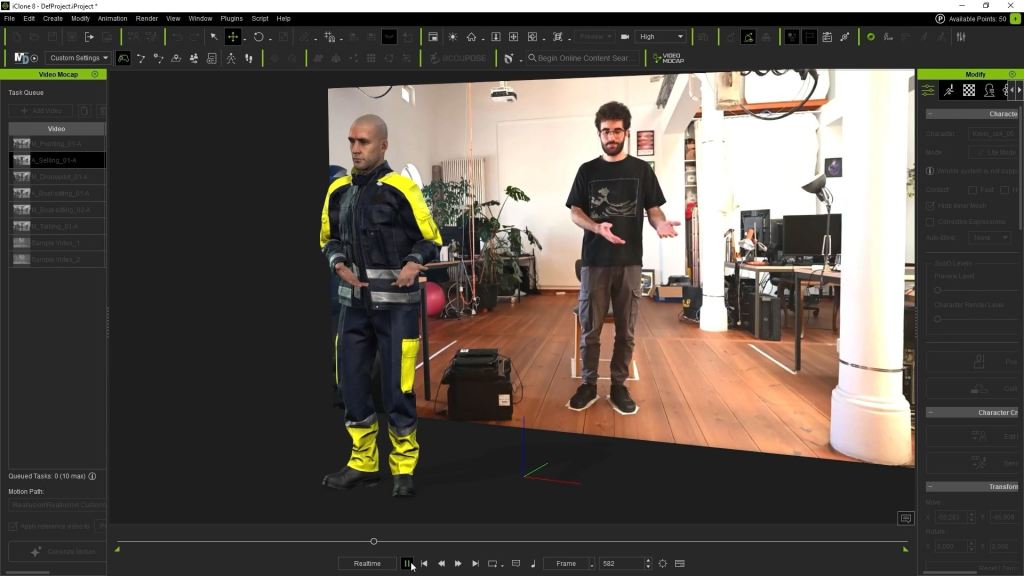
For character motion, we started with in-house recordings and filmed our own team performing the specific actions we needed. Then, we used iClone Video Mocap to turn that raw footage into usable motion capture data. From there, we brought everything into iClone for retargeting and cleanup. We made quick corrections to fine details, such as shoulder alignment, foot contact, and hand placement.

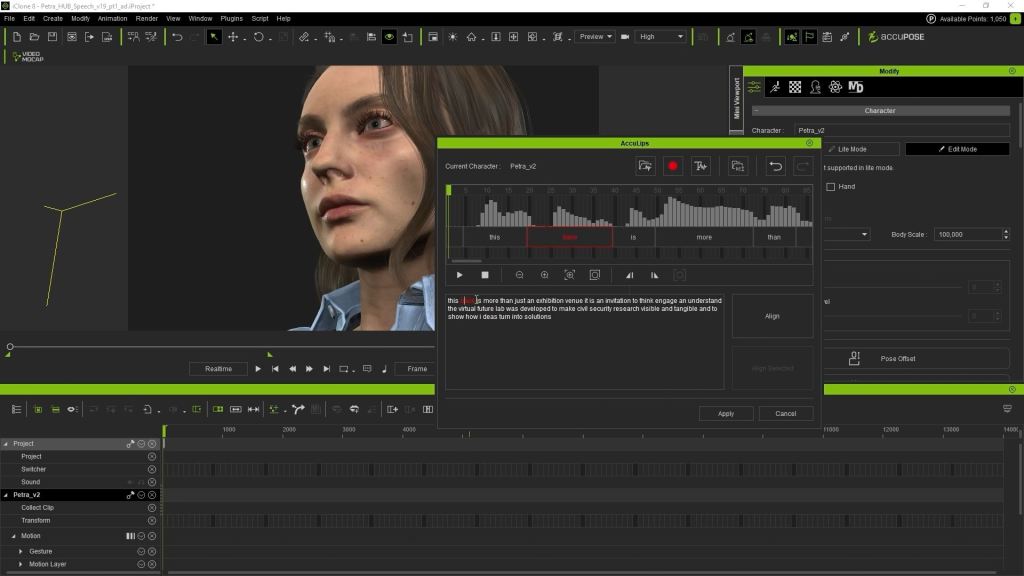
We iterated until the performance was completely ready for the scene. For dialogue, we generated the voice lines with ElevenLabs. We imported the audio directly into iClone and used AccuLIPS to automatically generate lip-sync data. We then did a fast polish pass where needed, which ultimately saved us a massive amount of time in animation.

Unreal Engine Integration and Optimization

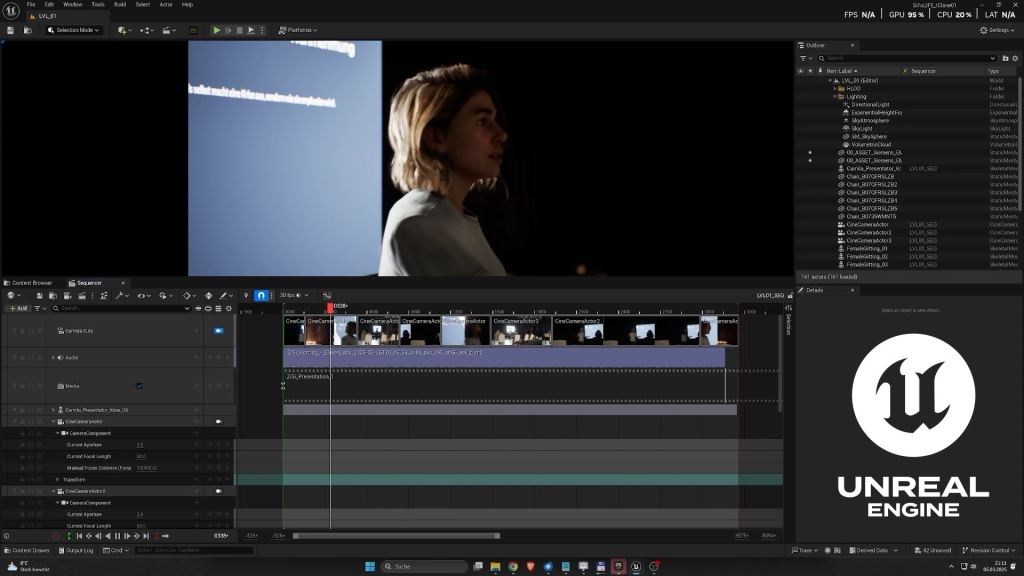
Finally, everything came together in Unreal Engine, where we staged and timed our animated characters directly in Sequencer. To keep the VR scenes running smoothly, we focused heavily on performance early in the character pipeline. Before exporting from Character Creator, we used its built-in InstaLOD integration to generate multiple Levels of Detail (LOD) for each character. This crucial step helped us reduce render costs and manage draw calls in complex shots, ensuring the experience stays highly responsive in VR.

The exported animation from iClone is now ready for composition in Unreal Engine

Conclusion

Having a consistent pipeline across the whole production was what kept things moving. It helped us stay organized, iterate quickly, and keep the quality steady from our early tests all the way to the final scenes. That structural foundation meant we could put our energy where it belongs: into the creative aspect of the work. Specifically, by shaping performances, building the world, and refining the user experience instead of getting slowed down by technical overhead, we were able to bring the XR Security Lab to life.

This project is funded by the Federal Ministry of Research, Technology, and Space in Germany

Framework programme of the Federal Government 2024 – 2029 Security is of fundamental importance for freedom, quality of life, and prosperity. With its framework programme “Research for civil security 2024-2029”, the Federal Ministry of Education and Research is investing in tomorrow’s security, and working to ensure that people in Germany enjoy the best protection possible – both in everyday life and in disaster situations. Civil security research is key to improving security in all spheres of life in society without disproportionately limiting people’s freedom.

Quick intro of the Project: SIFO.de

Full PDF Download

FAQs

How does Character Creator speed up this project?

Character Creator and the Reallusion Content Store played a pivotal role during the process. Character Creator’s cloth variation tools blend well with MetaTailor tools. This workflow blends seamlessly to swap materials, change colors, and add decals on the customized outfit, giving us high efficiency in character customization.

Why is Video Mocap being considered for the animation?

The team has explored both motion-captured suits and AI mocap solutions. After testing, we have found out that we can actually depend on the iClone Video Mocap plugin to get the initial motion, and do some minor motion editing in iClone to get the final animation.

How quickly can we customize a background character?

You can quickly grab a content pack from the Reallusion Content Store and start editing the character from there. For the clothing, in Character Creator, there is a quick way to do it with the MetaTailor Plugin.

Related Posts

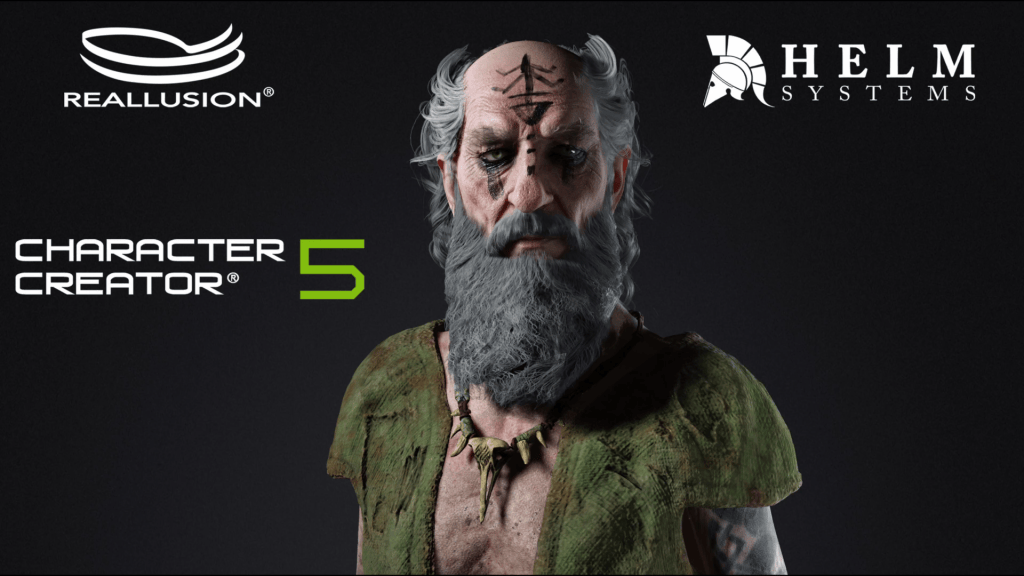
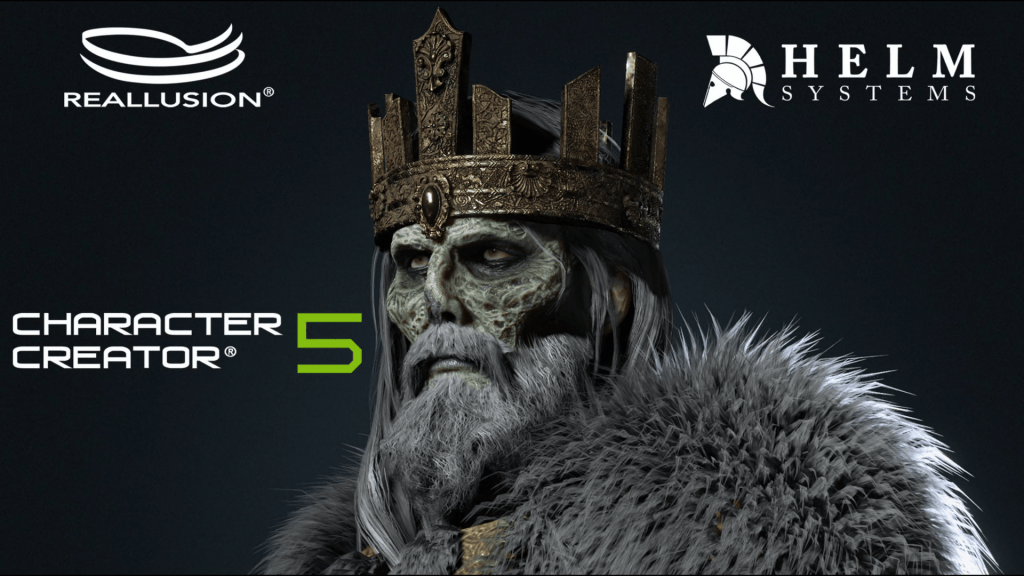
Character Creator 5 Review by Game Developer HELM Systems

Character Creator 5 Review by Game Developer HELM Systems

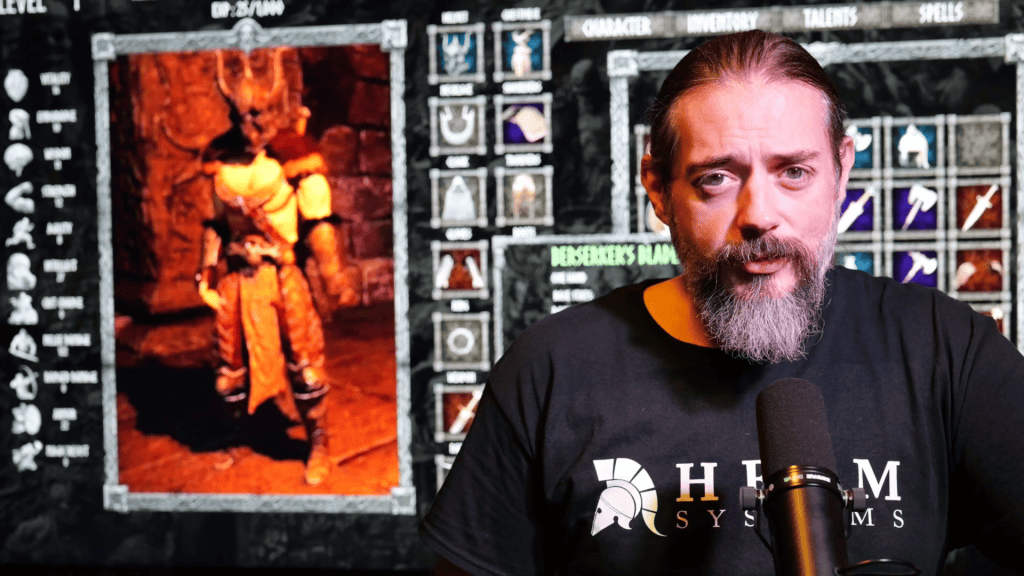
Helm Systems: Why Character Creator 5 Matters to Modern Game Developers

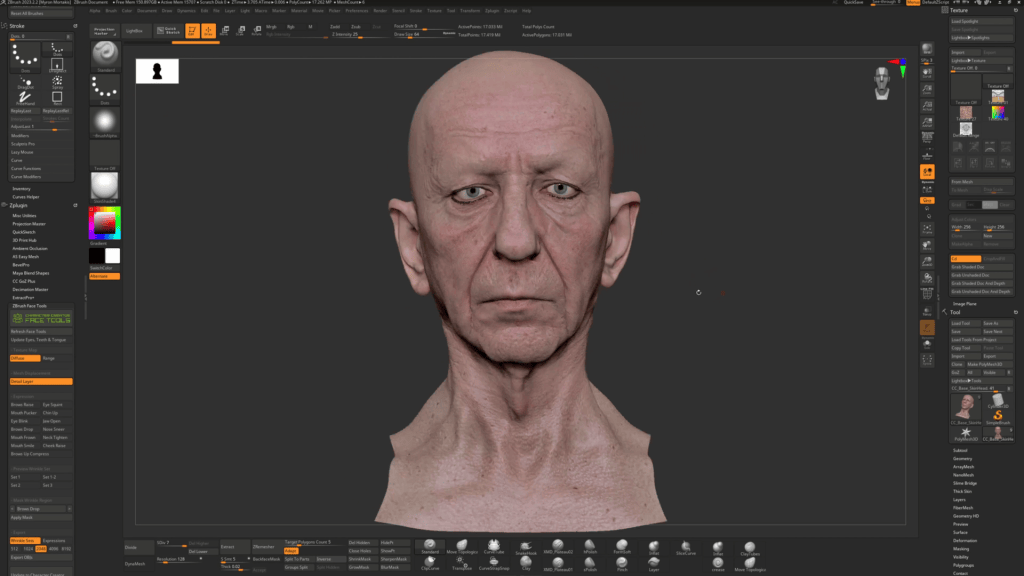
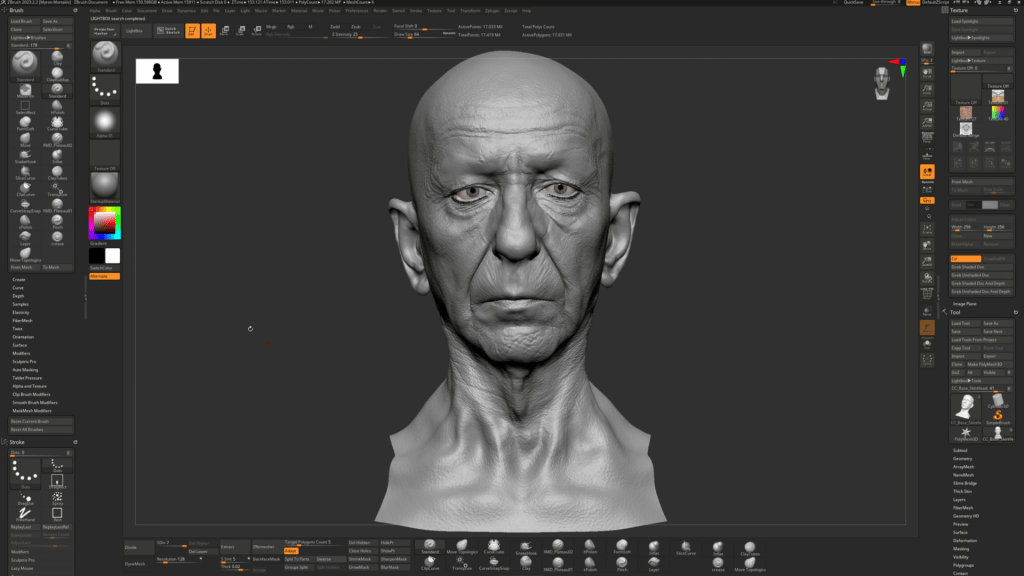
Myron Mortakis

When a studio with more than two decades of Unreal Engine expertise calls a tool “a must-have in any game development workflow,” it’s worth paying attention. HELM Systems, led by founder and CEO Myron Mortakis, recently reviewed Character Creator 5 (CC5)—and their verdict was clear: this is the most powerful 3D character animation and creation solution available today.

For studios looking to create their own character with production-ready quality while maintaining efficiency, Character Creator 5 (CC5) represents a major evolution in the character pipeline.

Who Is HELM Systems?

Founded in 2005 in South Florida, HELM Systems began as an independent game development studio and evolved into a full-scale production house specializing in interactive software solutions across multiple industries.

Over the years, HELM Systems has:

  • Released 3rd-person action games and VR titles
  • Developed proprietary IP, including The SoulKeeper®
  • Built aerospace visualization systems
  • Created interactive museum exhibits
  • Produced virtual conferences and live concert prototypes
  • Received an IGF Award nomination
  • Secured an Epic Games Unreal Dev Grant

Their work has been featured in IGN, PC Gamer, Kotaku, UploadVR, and Aviation International News.

This is not a hobbyist studio testing new tools. HELM Systems operates at a high professional level across gaming, VR/AR/XR, enterprise applications, and simulation. Their production standards are demanding.

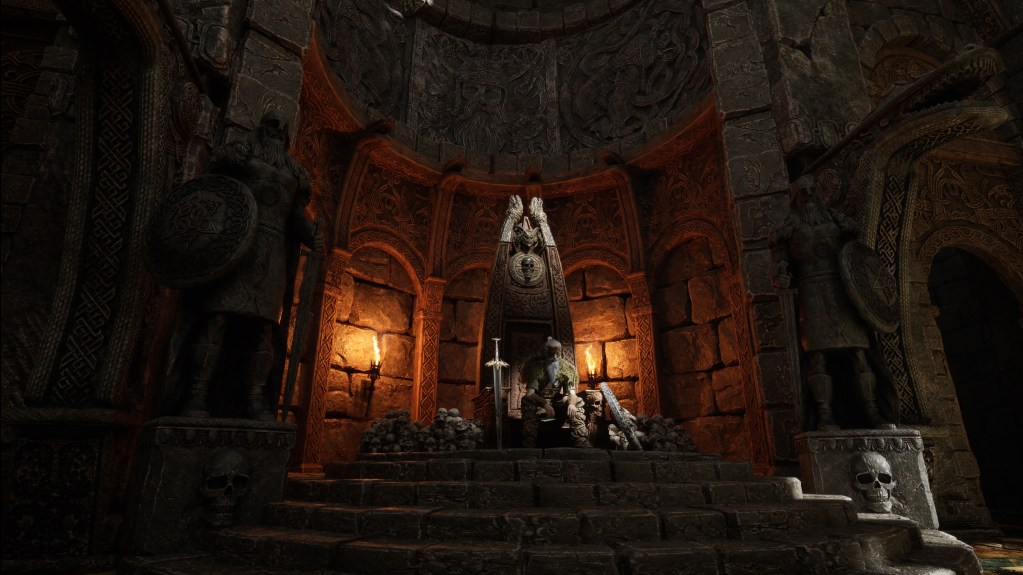
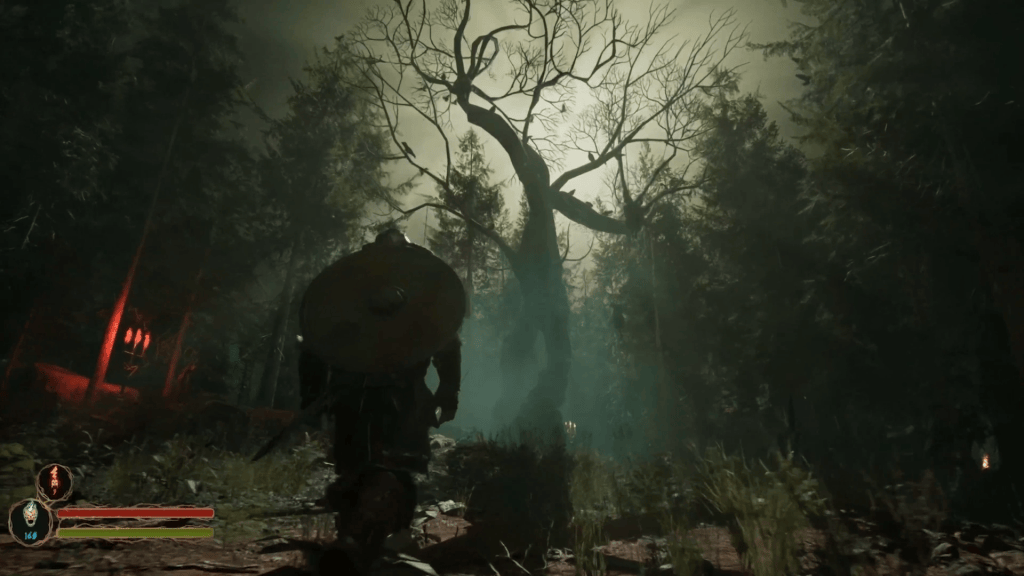
Also, we have heard about an Unannounced Dark Fantasy RPG from Helm Systems where they will be using the latest tools from Reallusion. Stay tuned for more.

Why HELM Systems Adopted Character Creator 5

In his review, Myron Mortakis describes Character Creator 5 as:

“Whether you’re a triple a or indie game developer, a virtual production outfit, or a content creator, Character Creator 5 is the most powerful and versatile three d character and avatar creation tool available.”

Myron Mortakis –  CEO & founder of HELM Systems

HELM Systems had already integrated Character Creator 4 and iClone 8 into their pipeline. They were satisfied. But according to Myron, Reallusion surpassed their own high bar with Character Creator 5.

For a studio currently developing a photorealistic next-generation project using Unreal Engine 5 and NVIDIA RTX technologies, the requirements are clear:

  • High-detail cinematic characters
  • Playable modular meshes
  • Optimized AI “cannon fodder” characters
  • Seamless Unreal Engine integration
  • Efficient iteration workflows

Character Creator 5 delivered across all these categories.

Building a Modern Character Base

A major challenge for studios today is building a flexible, scalable character base that works across cinematic, gameplay, and optimization scenarios.

Character Creator 5 enables developers to:

  • Start from a highly refined anatomical base
  • Adjust facial and body structures with precision
  • Control skinning and weight maps
  • Manage PBR materials in detail
  • Prepare assets for engine-ready export

For studios looking to empower a character designer or technical artist, Character Creator 5 removes repetitive technical barriers while preserving full creative control.

Seamless Unreal Engine 5 Integration

For HELM Systems, Unreal Engine 5 is central to production. Therefore, skeletal compatibility and asset transfer reliability are non-negotiable.

Myron highlights that Character Creator 5 is:

  • Fully compatible with Unreal Engine 5
  • Skeletally aligned with engine default systems
  • Easily transferable between applications and engines
  • Fully compatible with Unreal’s MetaHuman ecosystem

This compatibility allows developers to leverage both Character Creator 5 and Unreal’s MetaHuman tools without rebuilding rigs or reauthoring skeletons.

For small teams, this efficiency is critical. Time saved in technical troubleshooting translates directly into more time for polish and innovation.

“For Unreal Engine developers, skeletal compatibility and seamless asset transfer are non-negotiable. CC5 integrates so cleanly with Unreal Engine 5 that it removes friction from the character pipeline entirely.”

Myron Mortakis –  CEO & founder of HELM Systems

Advanced Sculpting with GoZ and ZBrush

A standout feature in HELM Systems’ workflow is CC5’s seamless integration with ZBrush via GoZ.

Using Character Creator 5 ’s powerful face tools, developers can:

  • Transfer character heads to ZBrush
  • Fine-tune anatomical skin details
  • Manually sculpt expression wrinkles
  • Modify facial micro-details
  • Seamlessly return assets to Character Creator 5

This eliminates time-consuming export/import loops.

The same workflow applies to full-body sculpting, allowing HELM Systems to use CC5 as a foundational human creator before layering custom sculpted detail in ZBrush.

For developers who demand absolute control over realism, this hybrid workflow offers the best of both worlds: procedural efficiency and handcrafted precision.

Modular Armor, Clothing, and Gear Systems

Modern games require modular systems. Characters need swappable armor sets, clothing variations, and attachable gear.

Character Creator 5 enables:

  • Sculpt-ready base meshes
  • Armor built directly onto anatomical foundations
  • Proper skin weighting
  • Clean deformation for gameplay

This modular flexibility supports scalable asset creation, especially important in open-world RPG and action adventure projects like HELM’s upcoming titles.

Substance Painter and Material Control

Material fidelity matters more than ever in next-gen rendering pipelines.

Character Creator 5 integrates seamlessly with Substance Painter, allowing:

  • Advanced texture painting workflows
  • Easy export and reimport of texture maps
  • Photoshop adjustments
  • Full PBR parameter control

Developers can fine-tune:

  • Normal maps
  • Roughness values
  • Metallic properties
  • Specular intensity
  • Micro normal scaling

This granular material control ensures cinematic-level detail while maintaining performance budgets.

Built-In Production Tools That Reduce Overhead

While Character Creator 5 integrates with major tools like Unreal Engine, ZBrush, and Substance Painter, it is also fully capable as a standalone solution.

It includes:

  • Cloth and hair simulation
  • Wrinkle generation
  • Collision calculations
  • Mass conforming
  • Full anatomical adjustment
  • Weight map control

For smaller studios without large technical art teams, this built-in functionality reduces pipeline complexity and overhead.

Optimization Tools for Performance-Friendly Assets

One of the most overlooked strengths of Character Creator 5 is its optimization toolkit.

Myron emphasizes that CC5 offers:

  • Geometry management tools
  • Skeletal optimization
  • Material and texture map control
  • Level of Detail (LOD) flexibility

This allows developers to tailor characters for:

  • Cinematic close-ups
  • Mid-range gameplay
  • Background AI characters

The ability to scale detail dynamically makes CC5 valuable not just for AAA production but also for indie studios working within strict performance constraints.

Expanding the Ecosystem with Plugins and Add-Ons

Character Creator 5 ’s capabilities expand even further with plugins and official add-ons, including:

  • Additional morph packages
  • Teeth assets
  • Hair libraries
  • Clothing systems
  • Headshot plugin
  • Reallusion ecosystem integration

When combined with iClone 8 for 3D character animation and advanced motion workflows, studios gain a complete end-to-end character pipeline.

This ecosystem-driven flexibility is one of Reallusion’s greatest competitive advantages.

Who Should Use Character Creator 5?

According to Myron, Character Creator 5 is ideal for:

  • AAA developers
  • Indie game studios
  • Virtual production teams
  • Content creators
  • Simulation and enterprise developers

Whether you’re building a cinematic dark fantasy RPG or an aerospace visualization platform, Character Creator 5 adapts to your pipeline.

If your goal is to create your own character with high-quality results while maintaining efficiency, this tool belongs in your workflow.

“With Character Creator 5, we maintain full control over every anatomical detail, material parameter, and optimization layer—without sacrificing speed. It allows us to focus on building great games, not fighting technical limitations.”

Myron Mortakis –  CEO & founder of HELM Systems

The Business Case for Character Creator 5

Beyond features, Myron approaches tools from a business perspective.

He emphasizes:

  • Cost-effective production
  • Milestone reliability
  • Efficient iteration cycles
  • High-quality output with smaller teams

In today’s competitive market, studios cannot afford bloated pipelines. Character Creator 5 enables lean teams to deliver visually competitive products.

“Character Creator 5 isn’t just another tool in our pipeline—it’s a must-have. It delivers next-generation character quality while maintaining the efficiency a modern studio demands, regardless of team size.”

Myron Mortakis –  CEO & founder of HELM Systems

Conclusion: A Must-Have for Modern Character Pipelines

HELM Systems’ review of Character Creator 5 is not casual praise—it is a production-tested endorsement.

For game studios developing next-generation experiences in Unreal Engine 5, CC5 offers:

  • Unmatched character customization
  • Seamless engine integration
  • Professional sculpting workflows
  • Advanced material control
  • Performance optimization tools
  • Ecosystem-wide compatibility

Whether you’re a seasoned character designer, a technical artist, or a studio head planning your next IP, Character Creator 5 stands as one of the most versatile and powerful tools in the modern 3D animation software landscape.

If you want to future-proof your pipeline and reduce production friction, now is the time to explore CC5.

Follow Helm Systems

Website:
https://www.helminteractive.com/

The SoulKeeper Game:
https://thesoulkeeper.com/

The SoulKeeper Twitter:
https://twitter.com/soulkeepergame

FAQs

What makes Character Creator 5 different from previous versions?

CC5 introduces enhanced Unreal compatibility, improved sculpting workflows, expanded optimization tools, and deeper integration with mainstream production software.

Can Character Creator 5 be used for Unreal Engine 5?

Yes. CC5 is fully compatible with Unreal Engine 5 and aligns with its skeletal systems and MetaHuman framework.

Is Character Creator 5 suitable for indie developers?

Absolutely. It streamlines workflows, reduces technical overhead, and enables small teams to produce high-quality character assets efficiently.

Does CC5 support modular character systems?

Yes. Developers can create modular armor, clothing, and gear systems directly on top of the character base.

Can CC5 work with ZBrush and Substance Painter?

Yes. It integrates seamlessly with ZBrush via GoZ and supports full PBR workflows with Substance Painter.

Related Posts

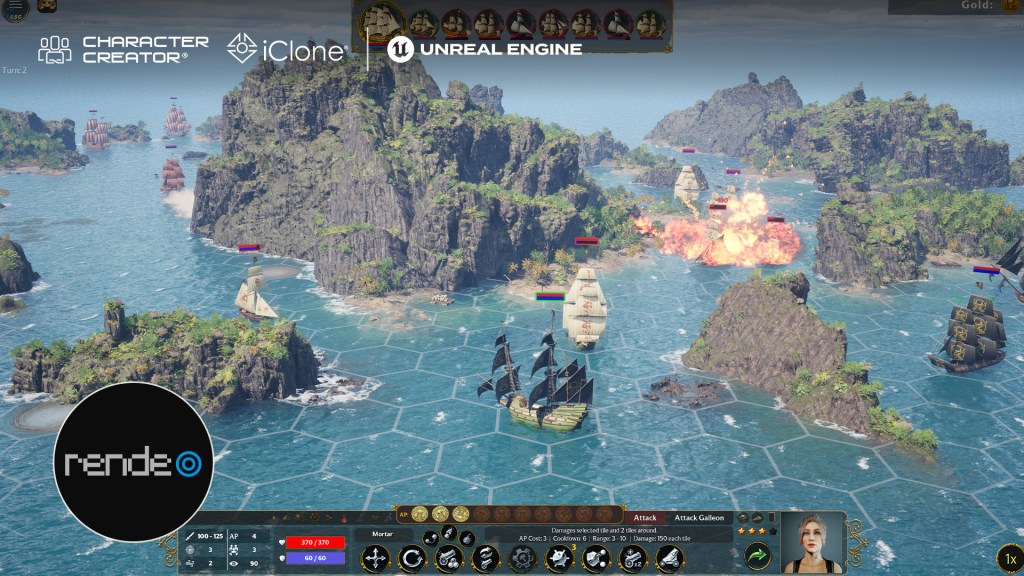
Discover how the veteran development team at Rendeo—known for their work on the Mafia series and Crime Boss—is using Character Creator 5 and iClone to "de-technicalize" their 3D pipeline and create AAA-quality pirates and captains in record time for their original game, BattleSail.

How “Mafia” Devs Speed Up AAA Game Character Production with Character Creator 5

Rendeo Games

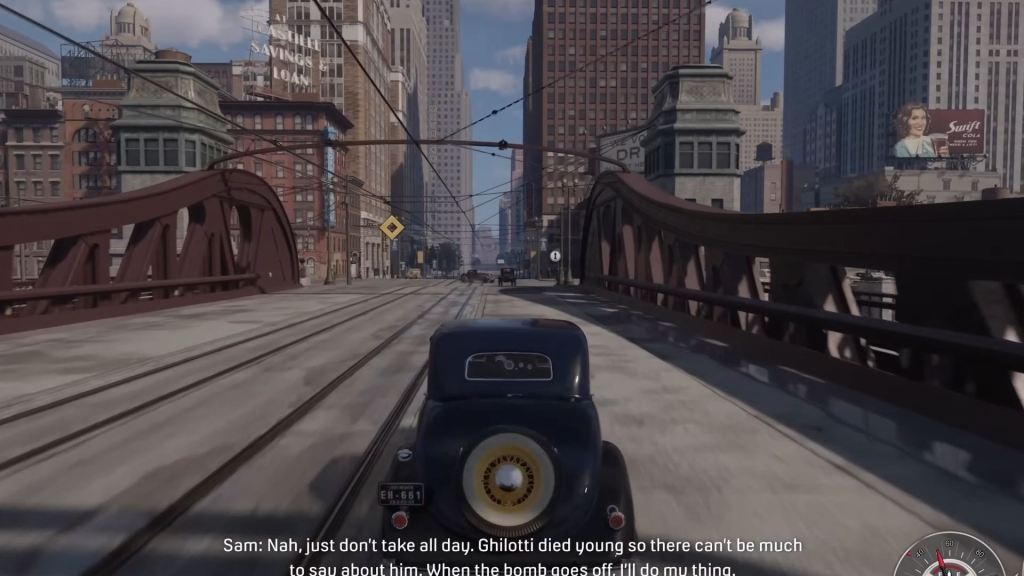
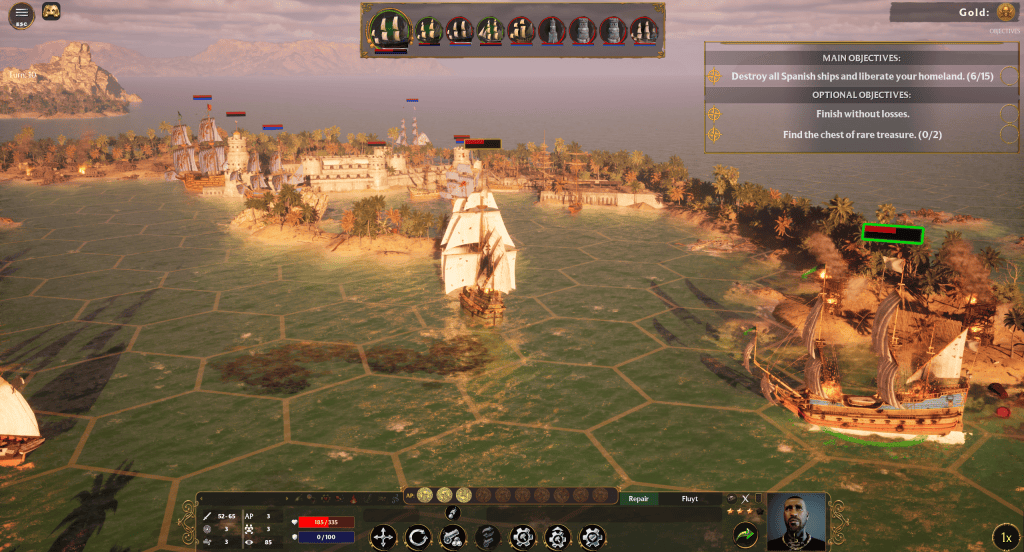
Hi everyone, we are Rendeo. We are a team of developers who have worked on major titles such as Mafia, Mafia: Definitive Edition, Mafia: The Old Country, Crime Boss, and others. We are currently developing our own game, Battle Sail.

To help us bring the characters of this game to life, we rely on Reallusion software alongside our other tools. Here is a look at how Character Creator and iClone help us build our game’s battle captains and pirates.

The Challenges of Making BattleSail

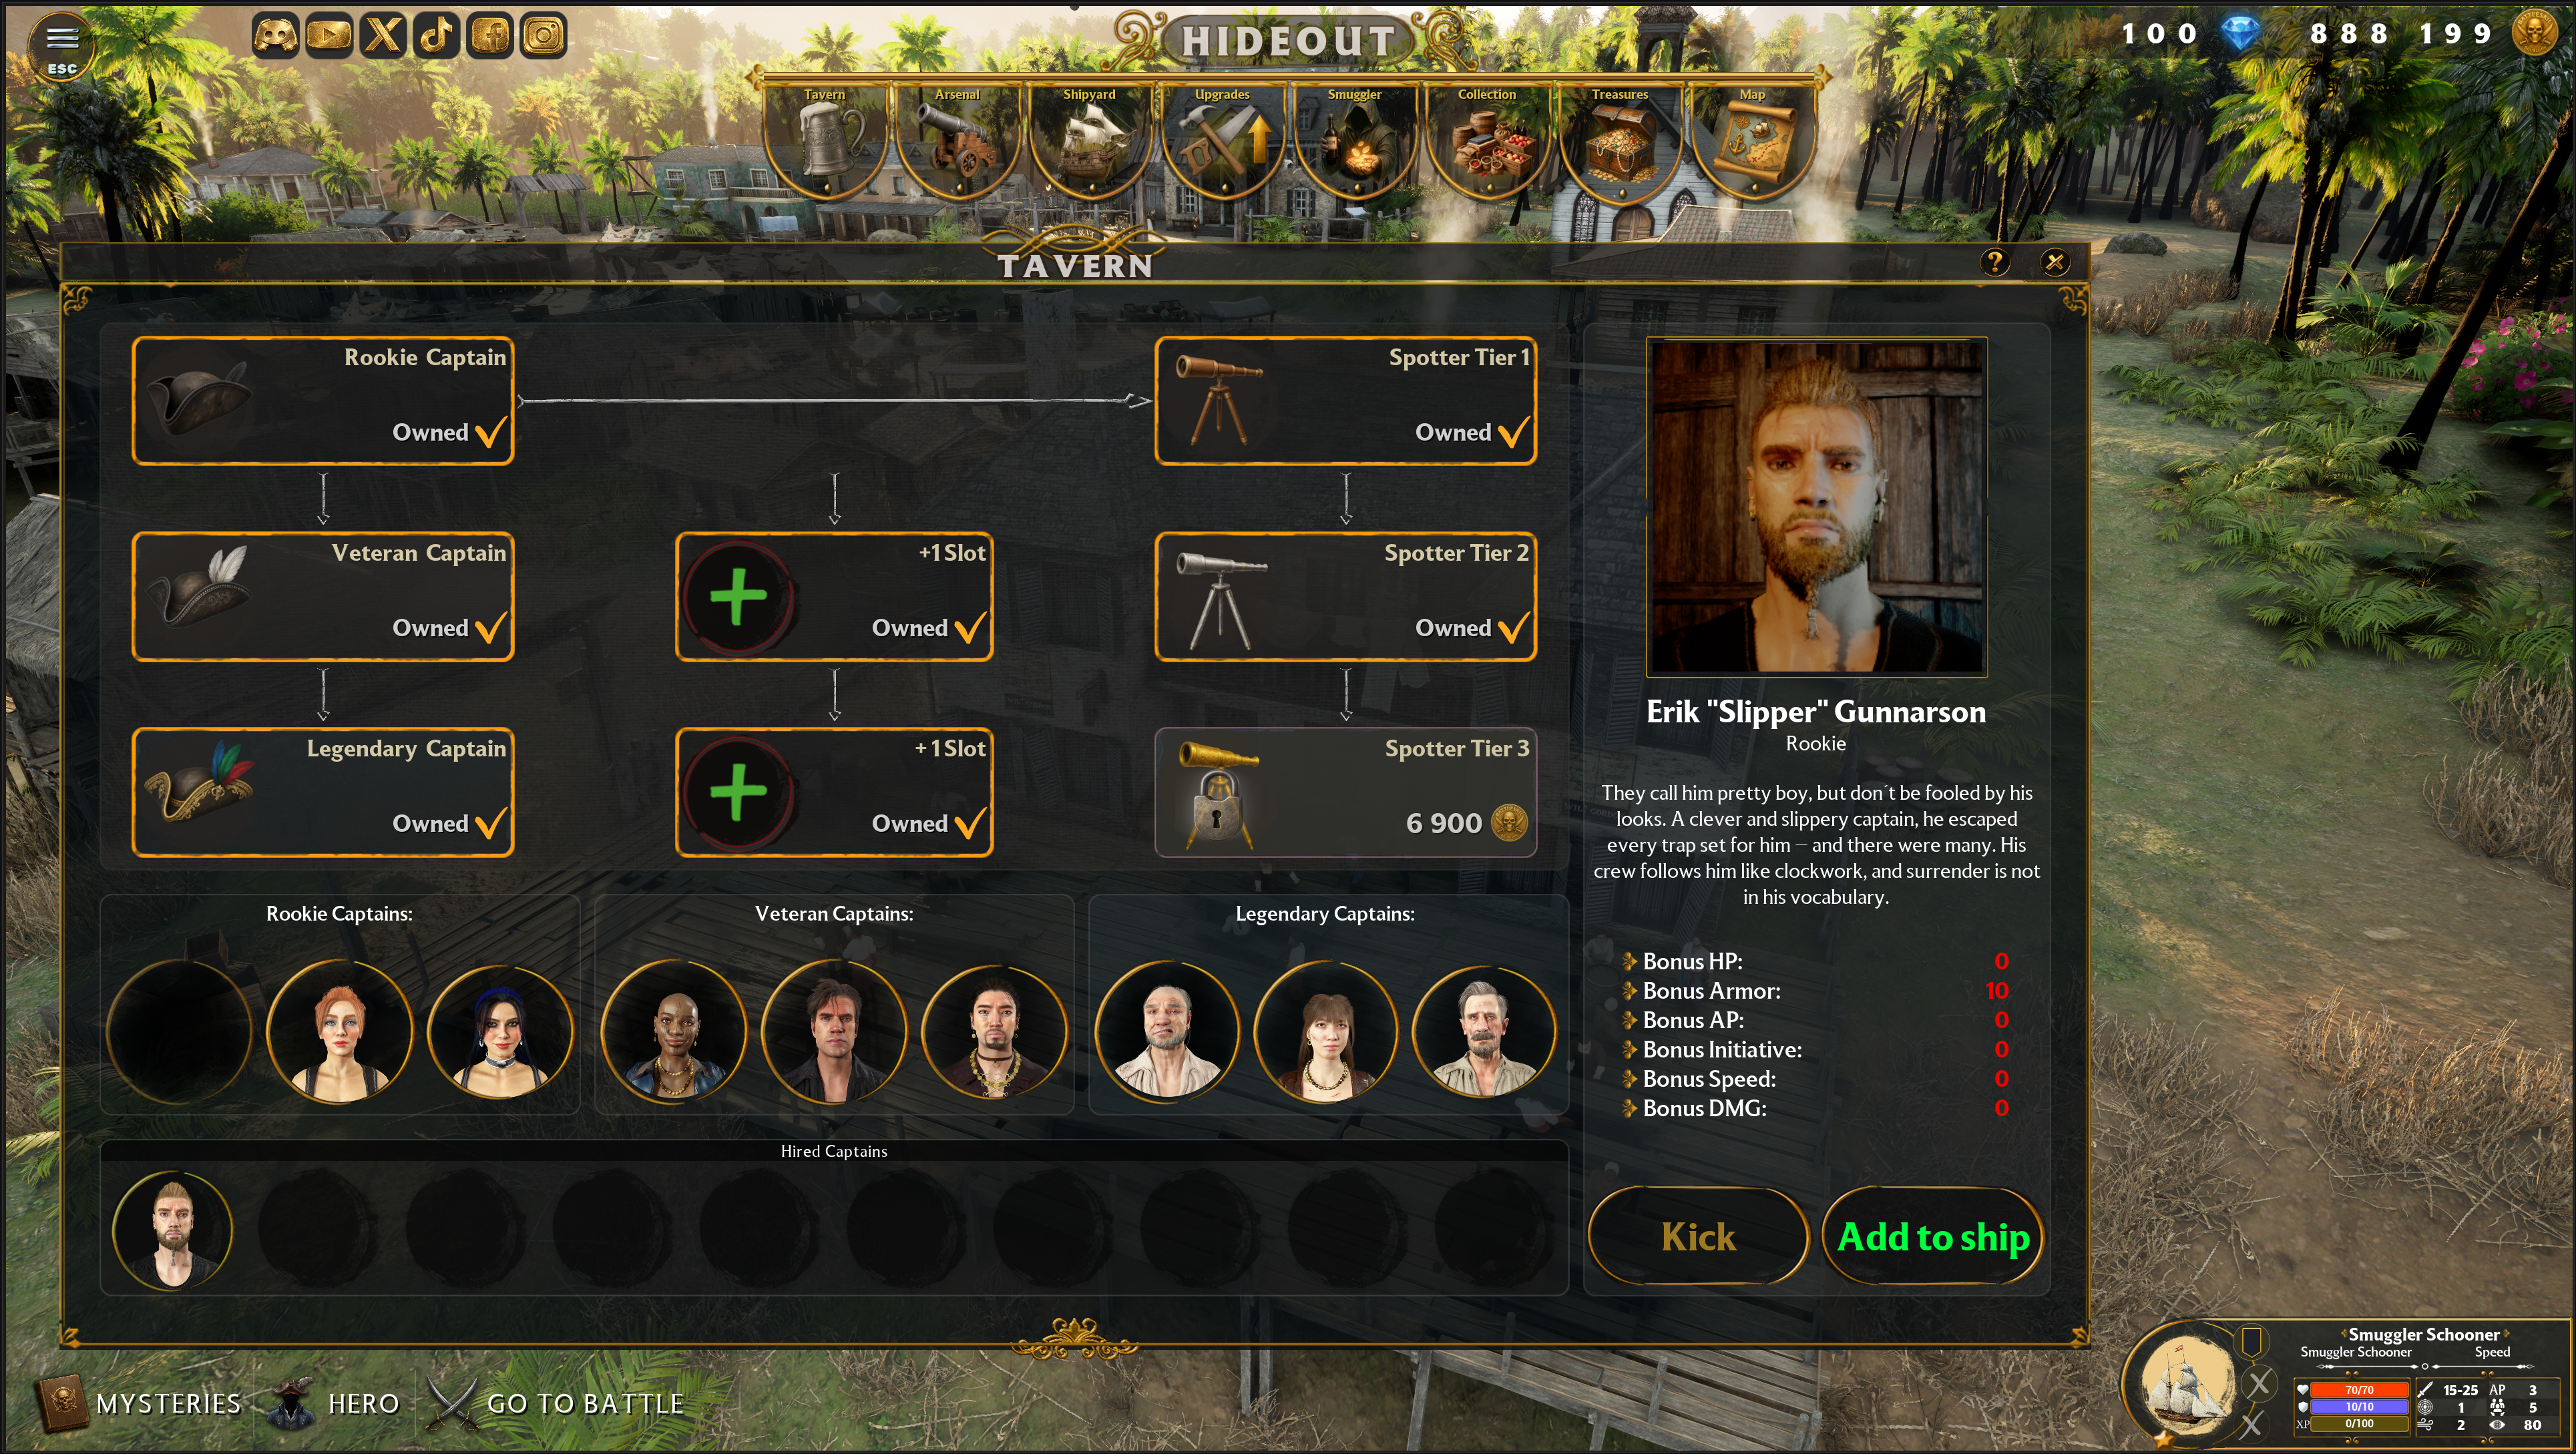
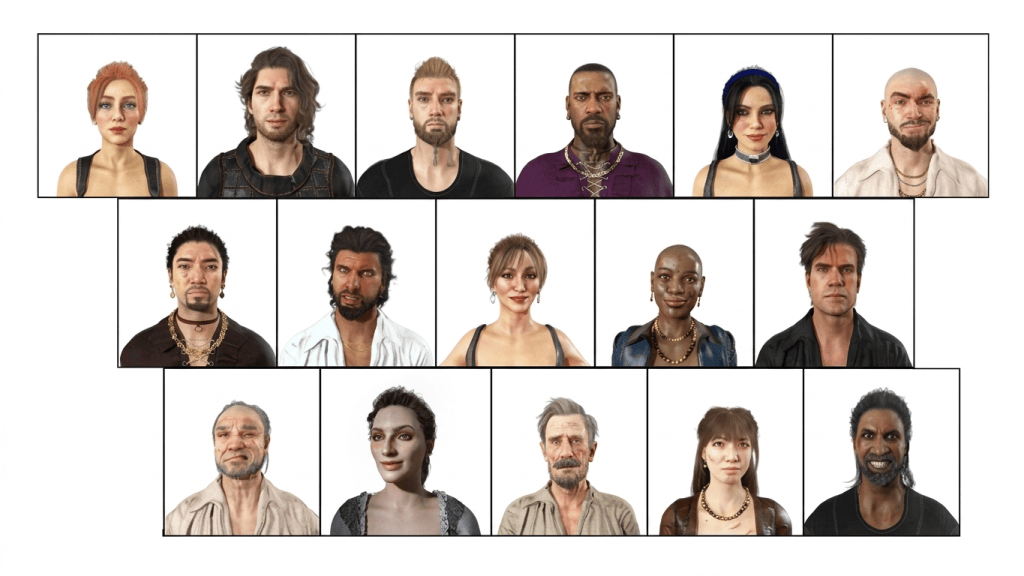
BattleSail is an action tactical strategy game. The challenging part of the game production is to create and sculpt hundreds of different styles and ethnicities of captains and soldiers into an animatable AAA game character. As the battles progress, the captain will grow older, gain scars and dirtiness, and grow out their hair. Our main hero captain is 100% made with Reallusion’s Character Creator, and this workflow of character customization fits our game purposes perfectly, allowing us to carry out the gameplay during our production.

In the game, you play as a captain, commanding a fleet of crew for naval battles. The game also embodies rich cultures to attract players worldwide. We promise that this will also be a multiplayer game, and more captains and main heroes will join the game.

ActorMIXER: Ten Times Saved for AAA Game Character Production

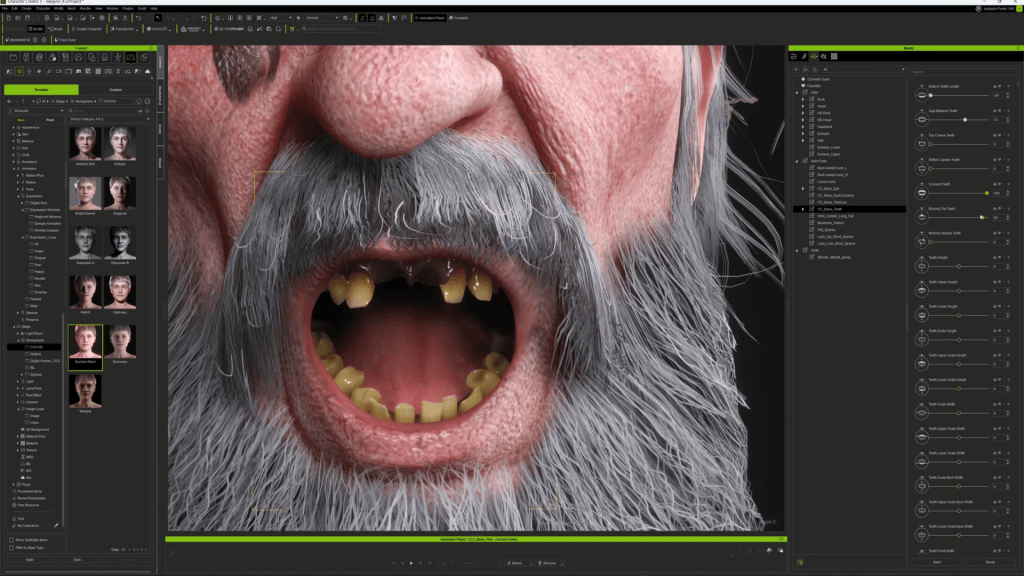
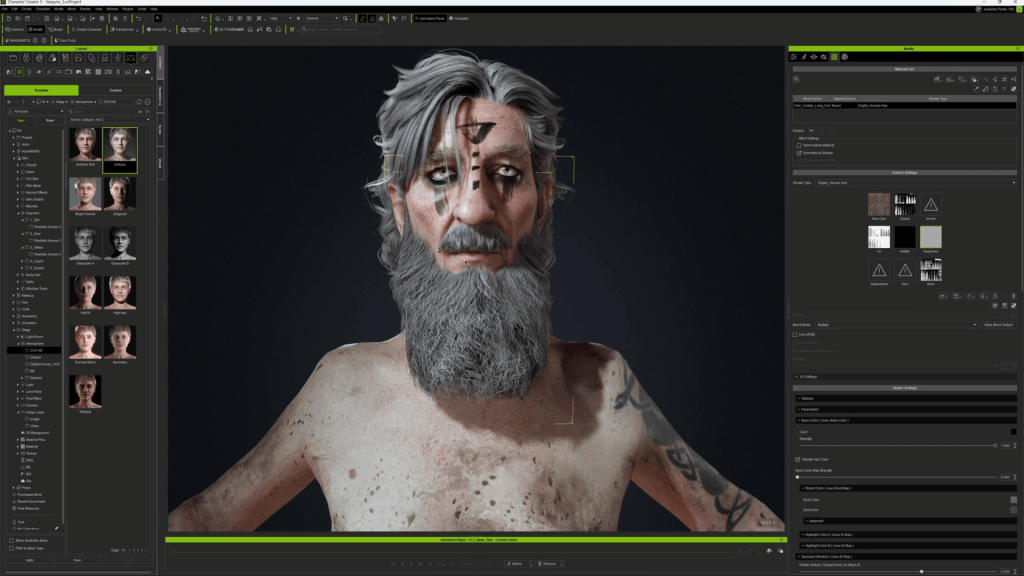
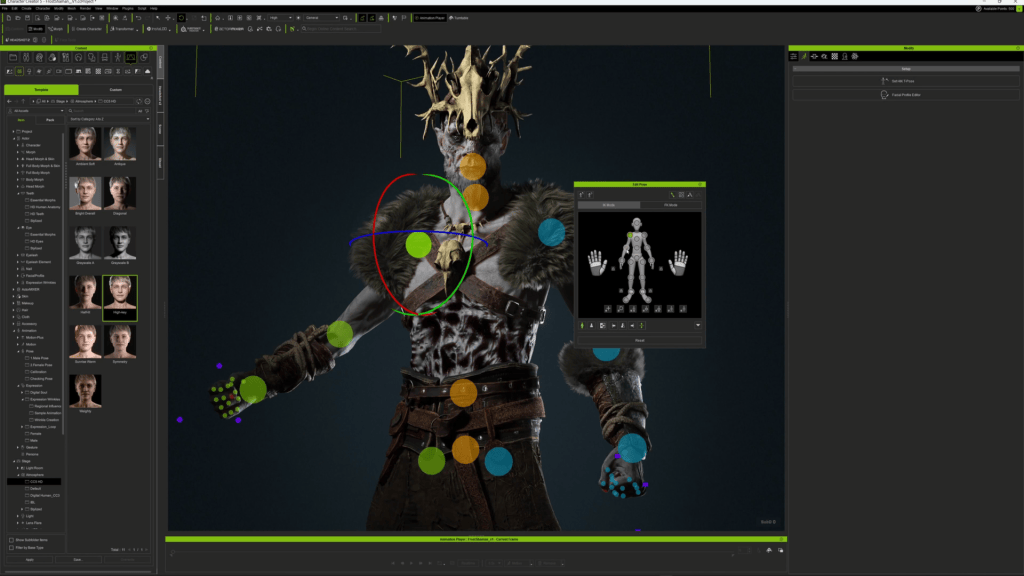
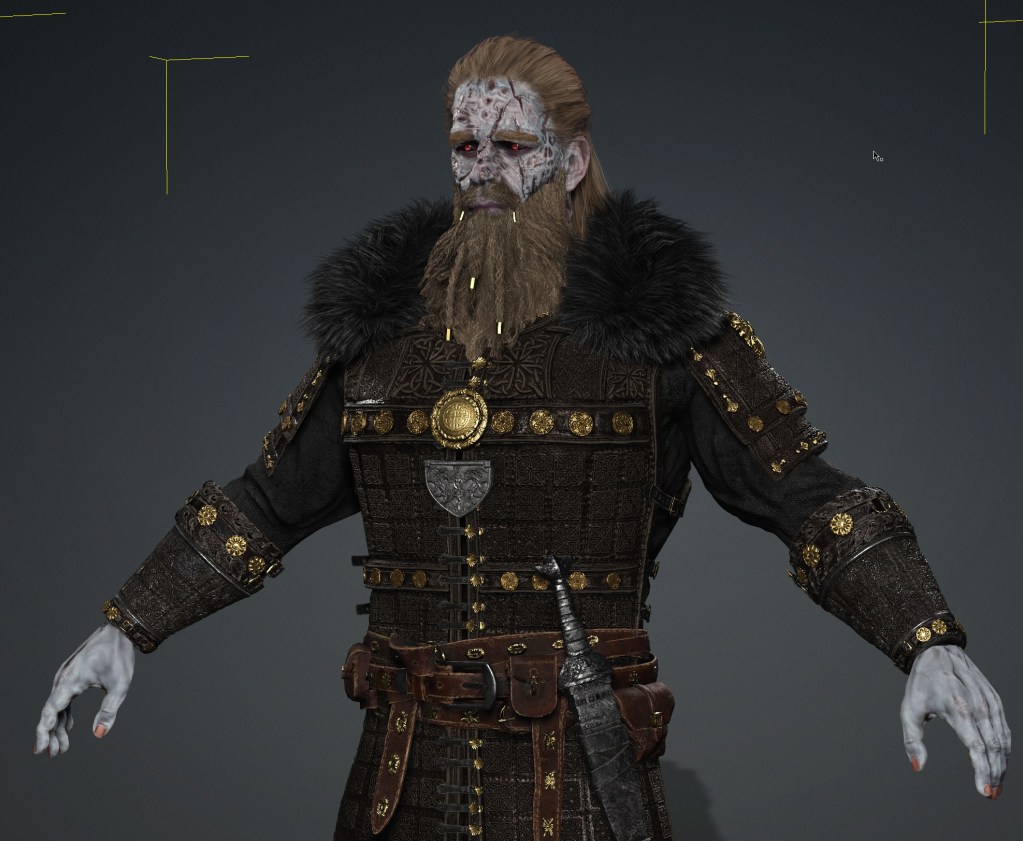
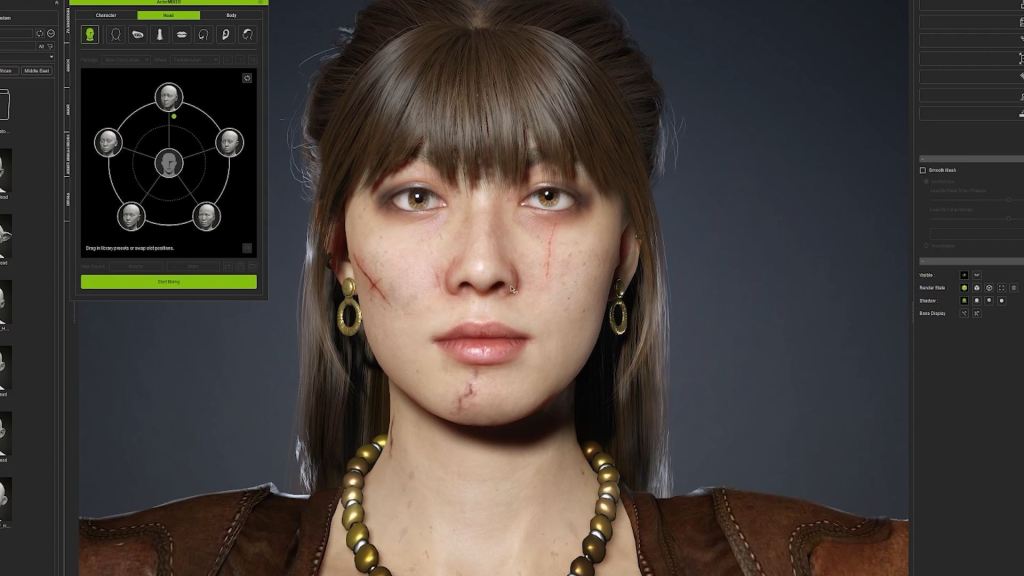
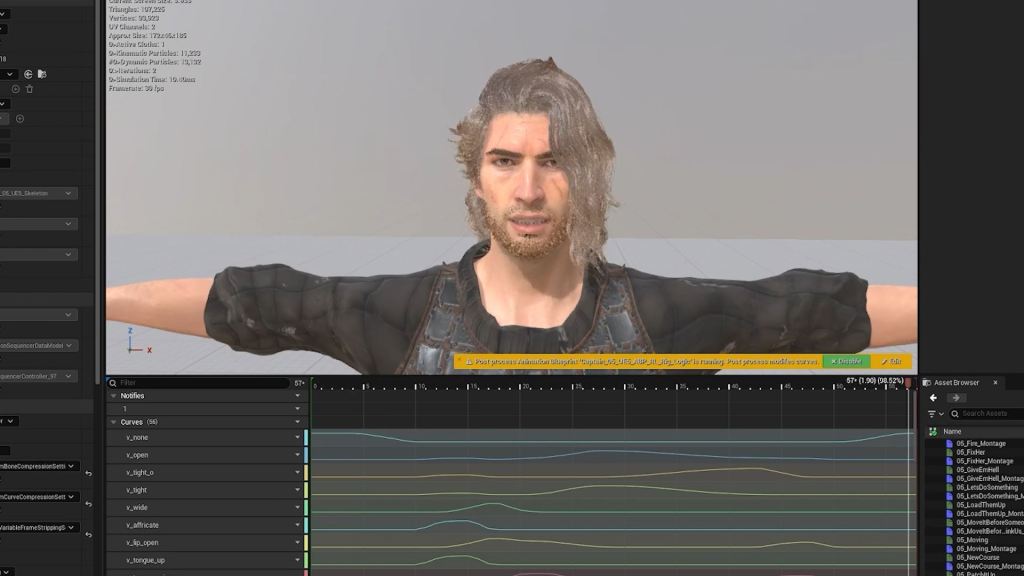
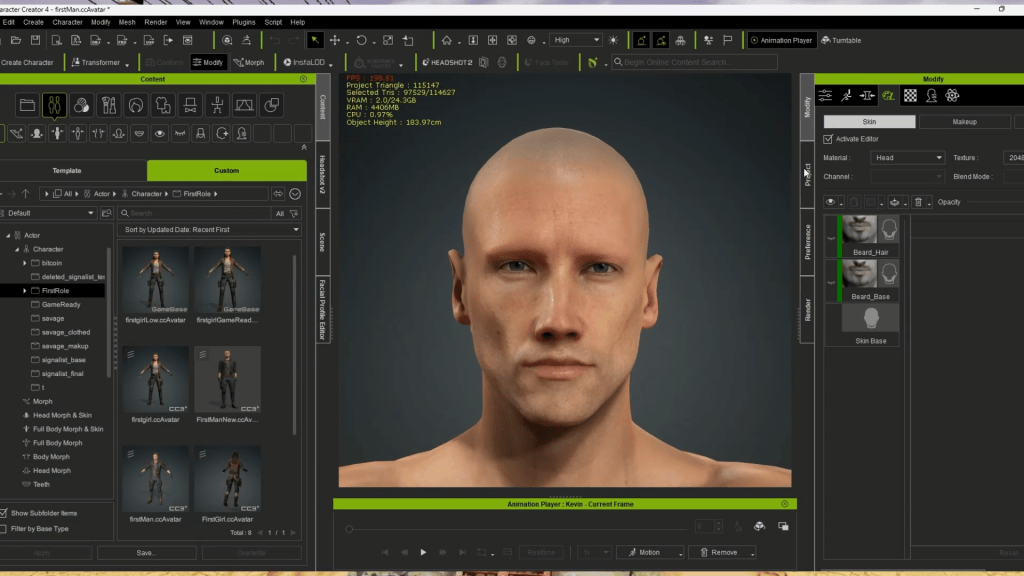
In our workflow, we use Character Creator 5 primarily for detailed facial creation. Thanks to its nearly endless options, we can adjust our battle captains down to the smallest detail. We have complete control over everything—from the overall skull shape down to specific features like the lips. We can immediately check these features against the exact animations we need, and even refine details like adding earrings to a captain. After making a change, a single click allows us to instantly preview the character that is fully rigged and skinned with animation.
To set up race and facial archetypes extremely quickly, we utilize the ActorMIXER tool for Character Creator 5. This allows us to set basic shapes on all levels of the face (including head shape, eyes, nose, and mouth) simply by choosing presets and sliding between types. This lets us rapidly prototype the base of a character.

ActorMIXER is a pivotal tool in Rendeo’s character creation workflow.

“In the past, we used to take 12 people in one week to create one AAA game character design. With ActorMIXER Plugin for Character Creator, our AAA game characters production time was saved at least 5 to 10 times.”

Radim Bacik, CEO and Art Director | Rendeo

At any time, we can go back and fine-tune skin details (like adding scars to our pirates) and immediately verify the animation and facial deformation with one click.

BattleSail Gameplay. Get your very first taste as a captain of the seven seas!

Rapid Animation and Lighting in iClone

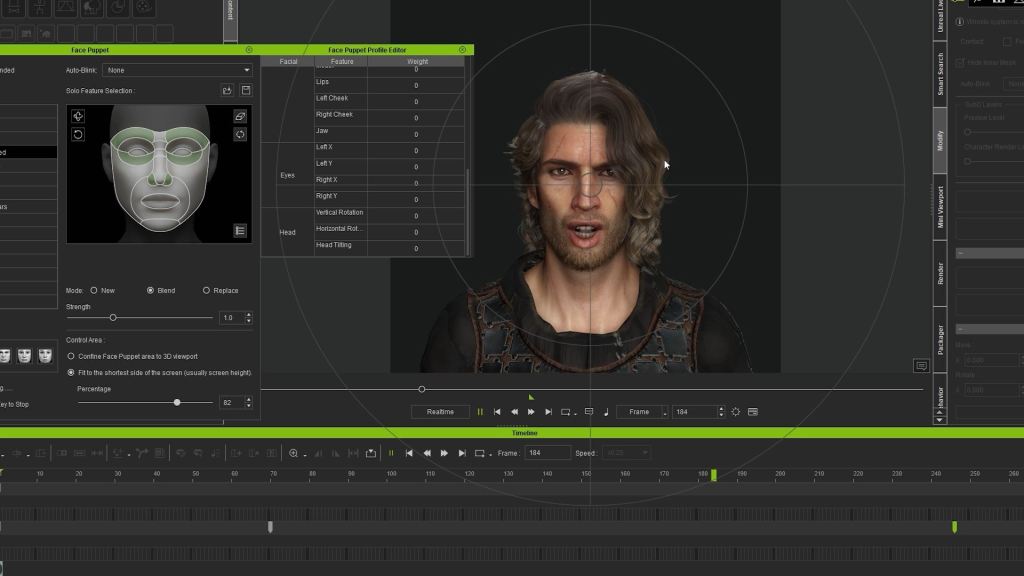
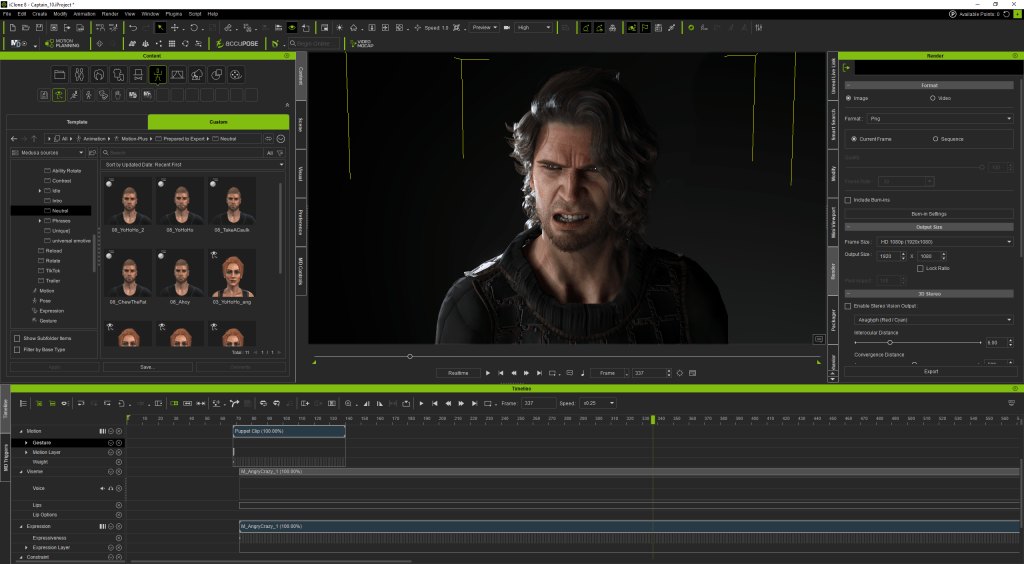
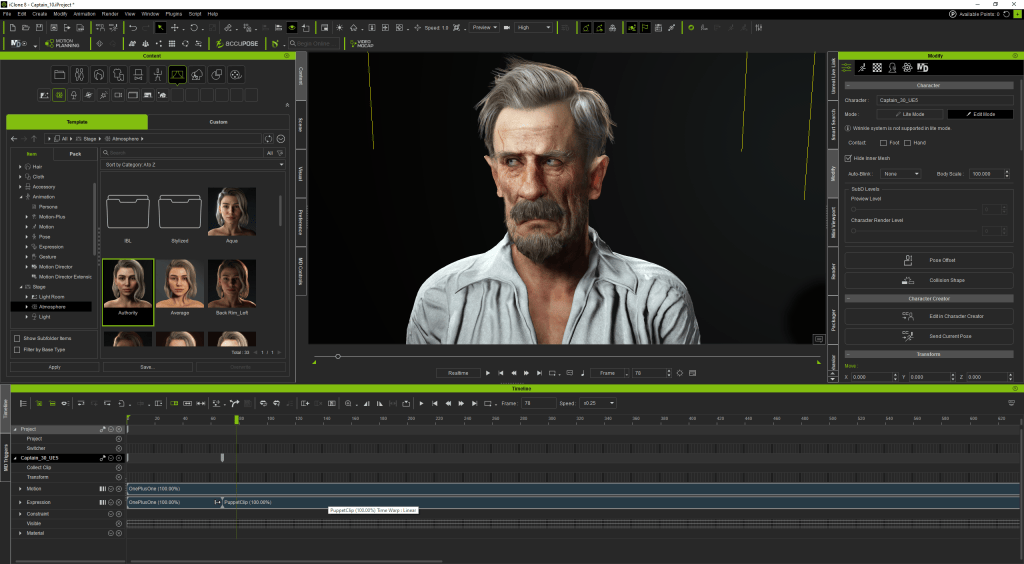
Our work is also significantly accelerated by iClone’s built-in tools. For instance, Stage Light lets us preview and adjust lighting for our short renders in seconds. When it comes to animation, iClone’s toolset is invaluable. We use Face Puppet to quickly test and prototype animations directly from recorded voice audio.

The built-in Face Puppet feature in iClone for emotive facial animation.

By rapidly converting audio into phonemes, we can generate lip-sync data very efficiently. In a short amount of time, we can refine the speaking animation using various tools to perfectly match our creative vision. The best part is that we do all of this within a single software environment. There is no need to constantly jump between 3D editing software, rigging programs, and animation tools. Everything stays in iClone.

Seamless Unreal Engine Integration

Ultimately, the characters must perform inside the game environment. Rendeo Games chose Reallusion software largely due to its robust and seamless integration with Unreal Engine.

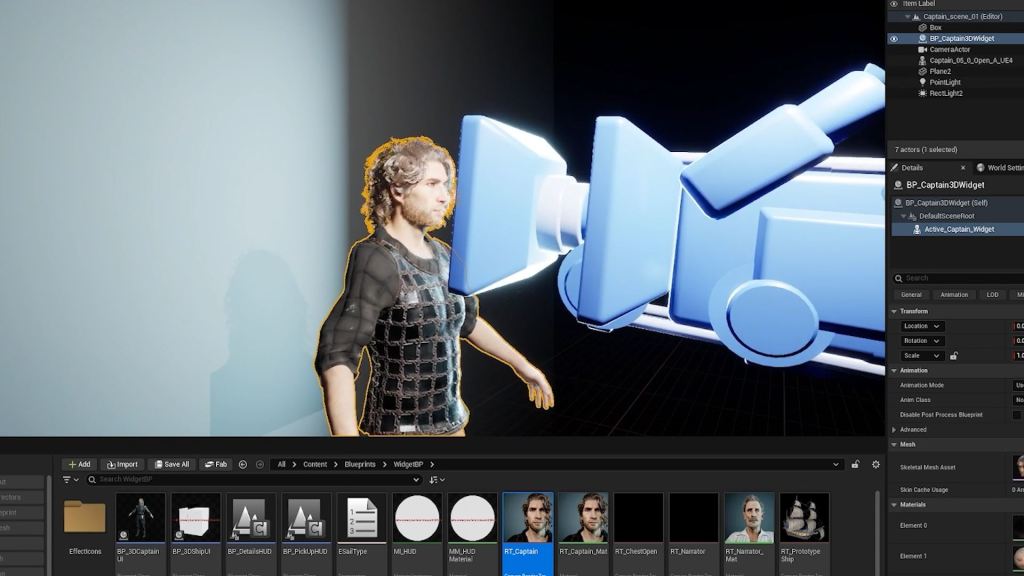
Changing the camera and lights in Unreal Engine

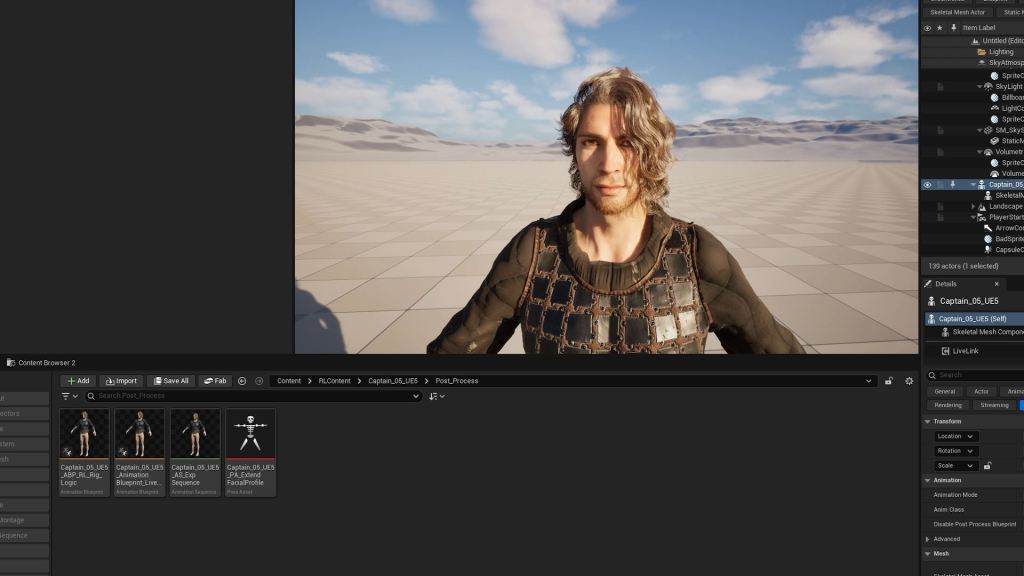
At any point during the character iteration process, we can export a character to Unreal Engine with just one click. Therefore, our developers can drop the pirate or captain directly into a scene to immediately test how the face and materials will look in our BattleSail game.

Because the export process is incredibly simple and clear, the data exported from iClone connects directly into Unreal Engine through Blueprints without any limitations. Once inside Unreal Engine, the team can refine and time their animations quickly, allowing for fast iterations and final polish.

Conclusion

Thanks to Character Creator and iClone, we have managed to completely de-technicalize our character pipeline, adapting it entirely to the needs of our artists and animators. With the boring complex side removed, we can fully focus on creating great content. Characters that used to take us weeks to build can now be created at the required AAA-quality in a fraction of the time.

What’s Next for Rendeo

The game veterans in Rendeo have an ambitious plan to promote the game worldwide. The game is scheduled to release in 2026, and is now looking for publishers in China and the Asia Pacific Market. If you would like to grow your business with Rendeo, please reach out to Radim Bacik, the CEO and Art Director of Rendeo.

Rendeo Official Website

Play the BattleSail Demo on STEAM

FAQs

How does Character Creator 5 aid in detailed character facial creation for games like BattleSail?

Character Creator 5 enables detailed facial creation with nearly endless options, allowing adjustment of skull shape, specific lip forms, and small details like earrings, with instant animation previews.

What is the role of ActorMIXER in the Rendeo character pipeline?

ActorMIXER rapidly sets up race and facial archetypes through presets and sliding adjustments, allowing Rendeo to quickly prototype base character shapes like head, eyes, nose, and mouth.

How does Rendeo achieve efficient animation and Unreal Engine integration?

Rendeo utilizes iClone 8’s Face Puppet for rapid lip sync from audio, refines animations, and exports characters with one click to Unreal Engine, connecting data via blueprints for seamless iteration.

Do I need a large studio budget to use this workflow?

No. One of the greatest advantages of the Reallusion ecosystem is its accessibility for indie developers, solo content creators, and mid-sized studios. It provides AAA-quality character generation and motion capture integration at a fraction of the cost and time of traditional studio pipelines.

Related Posts

Building RageFall MMORPG Characters with CC5 and Unreal

TL;DR:

  • Character Creator 5 is an essential tool for indie game developers creating high-quality, game-ready MMORPG characters.
  • TrueMotion Studio successfully built a robust character pipeline for their MMORPG RageFall, leveraging Character Creator 5, Unreal Engine, ZBrush, and Substance Painter.
  • The workflow enables the creation of highly customizable characters with optimized meshes, textures, and universal rigging, directly integrating with leading game engines.
  • Indie studios can achieve AAA visual fidelity and efficiency in character production without extensive traditional rigging or sculpting overhead.

For indie game developers aiming to create high-impact MMORPGs, generating a diverse cast of characters efficiently and with AAA visual fidelity is a critical challenge. This article details how Character Creator 5, Reallusion’s comprehensive 3D character design software, serves as the cornerstone of a streamlined pipeline that solves these production hurdles, as demonstrated by TrueMotion Studio for their ambitious title, RageFall.

Creating Game-Ready Characters for Unreal Engine with CC5

For modern game studios, the ability to create your own character efficiently—without sacrificing visual quality—is no longer a luxury, but a necessity. As real-time engines like Unreal Engine continue to push fidelity forward, studios need a character designer and human creator who can keep pace. TrueMotion Studio’s debut game, RageFall, demonstrates how a smart, scalable pipeline built around Reallusion Character Creator 5 and Unreal Engine enables ambitious 3D character animation for next-generation games.
TrueMotion Studio: Built by Gamers, for Gamers

TrueMotion Studio is an independent game development team founded by gamers with a shared vision: to create immersive, high-impact experiences that blend deep gameplay, compelling worlds, and modern technology. Rather than chasing trends, the studio focuses on long-term player engagement through meaningful systems, rich lore, and carefully crafted characters.

Their flagship project, RageFall, marks the studio’s first major release. From the outset, TrueMotion knew that characters would play a central role in this MMORPG—not only as avatars for gameplay but also as storytelling tools that anchor players emotionally in a fractured post-apocalyptic world.

To achieve this without ballooning production costs, the team embraced a real-time character pipeline built around Character Creator 5, Unreal Engine, and a flexible ecosystem of industry-standard tools.

https://store.steampowered.com/search/?developer=TrueMotion%20Studio

RageFall: A Post-Apocalyptic World Shaped by Choice

RageFall is a post-apocalyptic third-person extraction shooter and vehicular combat MMORPG set in a world devastated by a mysterious force known as the Signal. Players join competing factions, fight for survival in hostile zones, and uncover the truth behind humanity’s collapse.

Blending PvE and PvP gameplay, RageFall is designed as a high-risk, high-reward experience where player decisions matter. Characters must feel grounded, believable, and diverse—capable of representing different factions, playstyles, and narrative paths.

This ambition placed heavy demands on the studio’s character pipeline, especially when it came to scalability.

The Challenge: Scaling Characters Without Compromising Quality

Like many indie studios, TrueMotion faced a familiar challenge: how to build high-quality, game-ready characters at scale without relying on massive teams or lengthy manual processes.

Traditional character workflows often involve:

  • Sculpting from scratch in ZBrush
  • Manual retopology and UV layout
  • Custom rigging and facial setup
  • Repeated export and test cycles in Unreal Engine

While effective, this approach becomes difficult to sustain when a game requires dozens—or hundreds—of character variations.

TrueMotion needed a character base that was production-ready, flexible, and fully compatible with Unreal Engine animation systems.

Why Character Creator 5 Became the Foundation
Reallusion Character Creator 5 (CC5) emerged as a core solution because it solves several problems simultaneously:
  • Integrates cleanly with Unreal Engine
  • Provides a production-optimized character base
  • Delivers consistent topology and skeletal structure
  • Supports advanced facial systems comparable to MetaHuman Creator

Instead of rebuilding technical foundations for every character, the team could start from a reliable base and focus on creative differentiation.

Designing Characters Faster with CC5

A Smarter Way to Create Your Own Character

Character Creator 5 allows artists to quickly generate characters using guided morphs, sliders, and presets. Starting from a neutral base, TrueMotion artists can adjust proportions, facial structure, and body type with precision—without breaking deformation or animation integrity.
This approach transforms character creation from a technical bottleneck into a creative process.

Rather than spending weeks on setup, artists can iterate rapidly on:

  • Faction identity
  • Costume silhouette
  • Facial personality
  • Gameplay readability

Facial Systems Comparable to MetaHuman Creator

One of CC5’s most important advantages is its HD facial control system, designed to align with modern real-time facial animation standards.

Character Creator 5 characters use a facial structure and control philosophy that closely mirrors MetaHuman Creator, making them ideal for Unreal Engine pipelines.
This allows:

  • Clean facial animation blending
  • Compatibility with facial mocap solutions
  • Efficient lip sync animation
  • Expressive dialogue-driven performances

For RageFall, where story and player choice intersect, this level of facial control helps elevate narrative moments without introducing unnecessary complexity.

Clothing, Gear, and Customization

In a post-apocalyptic world, character identity is often expressed through clothing and equipment. CC5 supports layered clothing systems that allow artists to build modular outfits without constant mesh conflicts.

TrueMotion integrates CC5 characters with external tools such as:

  • ZBrush for high-detail sculpting
  • Substance Painter for texture realism
  • 3ds Max and Maya for asset refinement

Once assets are finalized, they are easily re-integrated into Character Creator, preserving skin weights and animation compatibility.

From CC5 to Unreal Engine: A Clean, Reliable Pipeline

Unreal Engine-Ready Characters

Character Creator 5 exports characters that are immediately usable in Unreal Engine, with correct scale, skeletons, and material setups. This eliminates much of the trial-and-error often associated with character imports.
For RageFall, this meant:

  • Faster iteration inside Unreal Engine
  • Reliable animation playback
  • Consistent lighting and shading results

By maintaining a predictable pipeline, TrueMotion could focus on gameplay and world-building rather than technical troubleshooting.

Here’s a summary of the character production pipeline elements:

Workflow StagePrimary Tools UsedKey Output/Benefit
Character Base & RigCharacter Creator 5Game-ready rigged meshes, unique faces, universal skeleton
Costume & Outfit SculptZBrushHigh-detail sculpts, intricate patterns
Material & TextureSubstance Painter, Marmoset ToolbagPBR textures, optimized materials, stylized looks
Props & Accessories3ds MaxModular assets, customizable weapons, vehicles, armor
Engine IntegrationUnreal Engine, Character Creator Auto Setup PluginReal-time optimized assets, LODs, automated import
Cinematics & AnimationAutodesk Maya, Unreal EngineEmotional cutscenes, complex animations

Animation and Performance Testing

Once characters are in Unreal Engine, animation becomes the next critical step. CC5 characters work seamlessly with Unreal’s animation tools, including control rigs, state machines, and blend spaces.

For rapid testing and previs, the studio also leverages Reallusion’s animation ecosystem, allowing quick validation of movement, combat stances, and gameplay actions before final implementation.

This workflow enables faster feedback loops and better collaboration between artists, designers, and engineers.

Comparing CC5 and MetaHuman Creator in Game Development

While MetaHuman Creator excels at photorealism, CC5 offers distinct advantages for game studios:

  • More flexible body and proportion control
  • Faster iteration for large character casts
  • Easier customization for stylized or hybrid realism
  • Broader export and pipeline flexibility into UEFN

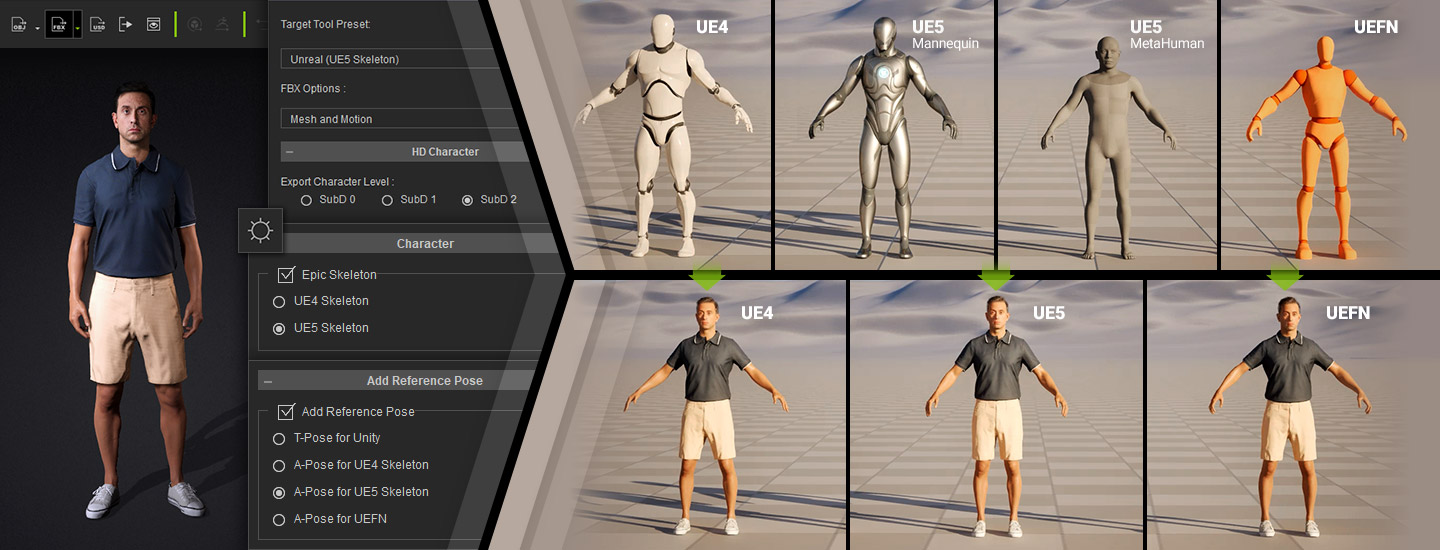
Character Creator and iClone support skeleton export optimized for both UE4 and UE5, with bind pose presets tailored for MetaHumans and UEFN. This upgrade ensures accurate motion retargeting and responsive real-time game control. Through AutoSetup and LiveLink integration, animations can stream directly from CC and iClone into Unreal Engine, while edits made in Unreal can be seamlessly sent back for a fully bidirectional workflow.

For RageFall’s diverse factions and modular customization goals, CC5 proved to be the more adaptable solution.

Production Efficiency Without Artistic Compromise

One of the biggest wins for TrueMotion Studio has been efficiency. Characters that once took weeks to fully build can now be produced in days—without sacrificing visual quality or animation reliability.

This efficiency allows the team to:

  • Populate the world with more NPCs
  • Support ongoing live-service updates
  • Expand narrative content post-launch

In modern game development, this scalability is essential.

A Pipeline Designed for Indie Studios

TrueMotion’s experience with RageFall highlights a key takeaway: powerful character pipelines are no longer exclusive to AAA studios.

By combining:

  • Character Creator 5

  • Unreal Engine
  • Industry-standard DCC tools

Indie teams can achieve production values that rival much larger studios—while retaining creative control.

Conclusion: Building the Future of Game Characters

RageFall represents more than a debut title—it’s a case study in how modern 3D animation software empowers smaller studios to dream bigger.

Through the use of Character Creator 5, Unreal Engine, and a streamlined real-time workflow, TrueMotion Studio demonstrates how to create your own character systems that are scalable, expressive, and production-ready.

For game developers looking to accelerate character creation without compromising quality, Reallusion’s ecosystem offers a powerful path forward.

Follow TrueMotion Studio

FAQs

How do I export a rigged character from Character Creator 5 to Unreal Engine?

To export a rigged character, use Character Creator 5’s dedicated Export function, selecting the “Game Base” mesh option and choosing “Unreal” as the target preset. This ensures optimized topology, PBR materials, and a compatible skeleton. For the most streamlined process, install the Character Creator Auto Setup plugin in your Unreal Engine project, which automates material and skeleton configuration upon import.

What is the difference between Character Creator 5 and traditional 3D sculpting software for MMORPG characters?

Character Creator 5 provides a full-body character base with pre-rigged skeletons and adjustable morphs, allowing for rapid character generation and customization without extensive manual rigging. Traditional sculpting software like ZBrush excels at high-detail organic modeling but requires manual retopology, UV mapping, and rigging for game engine compatibility, making it more time-consuming for base character creation.

Can indie studios achieve AAA character quality with Character Creator 5?

Yes, Character Creator 5 enables indie studios to achieve AAA character quality by providing high-fidelity base meshes, advanced material options, and seamless integration with industry-standard sculpting and texturing tools like ZBrush and Substance Painter. This hybrid workflow allows for both rapid production of diverse characters and the artistic freedom to add unique, high-detail elements.
Why does TrueMotion Studio use multiple software like ZBrush and Substance Painter with Character Creator 5?

TrueMotion Studio uses Character Creator 5 for its efficiency in generating rigged character bases, while leveraging ZBrush for high-detail sculpting of unique costume elements and Substance Painter for creating custom PBR textures. This multi-software pipeline maximizes each tool’s strengths, combining Character Creator 5’s speed with the artistic freedom and detailing capabilities of other specialized applications.
Related Posts

Video Mocap for Beginners

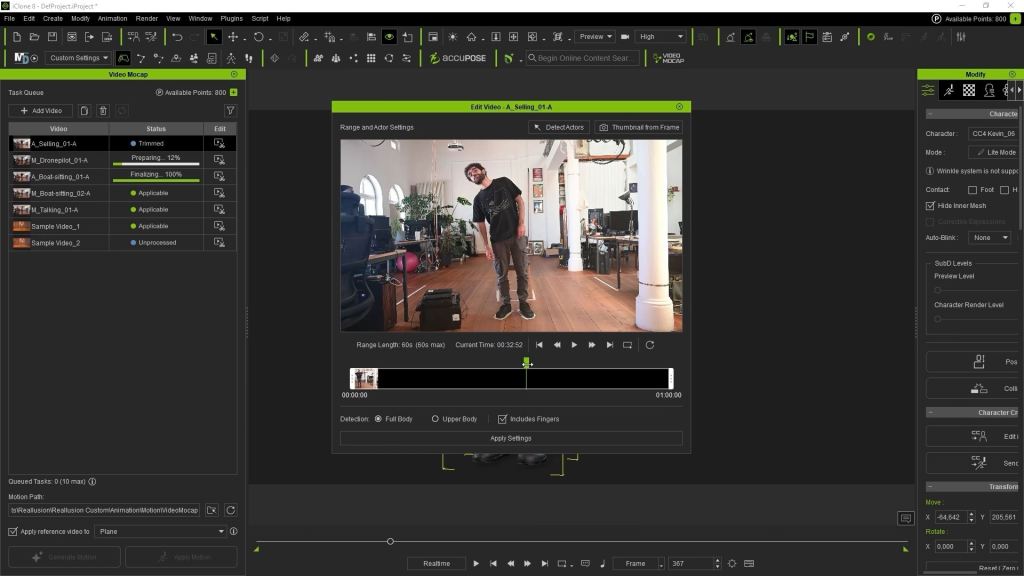
The AI MoCap Plugin released by Reallusion for iClone is so simple to use that it almost needs no beginner’s guide, but, as is the case with tech, it can be confusing to get started. We will take a look at the simple process of translating videos into a complete motion capture motion that can be used on any iClone or Character Creator character.

While the plugin appears to be very forgiving of the quality of the video, it never hurts to develop and use best practices, so we employ that habit from the beginning. This doesn’t mean that you shouldn’t try to capture a motion under less than perfect circumstances, it just means to be mindful of what the mocap translation has to work with.

I can remember using video motion capture a long time ago when apps like IPI Soft were released. While it was a bit revolutionary, it did have its drawbacks. A lot of jitters for one thing, and jitter was hard to eliminate either live or in post. Another problem was that it literally translated everything from posture to performance with zero forgiveness.  This required preplanning and realizing that you would have to deal with cleanup no matter what.

There was a lot of “noise” back then, and mocap suffered for it. Not so today with AI assisting in the process, so it’s basically just editing.

Stacking Motions

I’m not sure if this is the right term, but what I mean is, do not just limit yourself to one short motion before converting. Stack several motions together with a second or two in between so you can edit the motions by breaking them on the timeline and saving them as separate motions. In my testing, I recorded far more video than needed or allowed, which is 60 seconds of video.

Since it is a video, we can edit that video for total control over what is processed. This makes planning paramount. So, try to get as many motions as possible from each clip conversion.

Here is an excerpt from Google AI Overview for more information:

For the iClone Video Mocap plugin…  …the actual motion capture generation is limited to 60 seconds per task, with longer source videos automatically trimmed or requiring you to trim them first to get the best results. Each 60-second segment processed costs points, so maximizing the 60-second window is efficient. 

The AI Squared tutorial later in this article shows an example of stacking clips to get the most out of each video for mocap conversion.

A Quick Look at Features

From the Reallusion website:

  • Capture Challenging Pose Transitions: Track body turns and posture shifts with unwavering stability.
  • Detect Upper Body and Finger Movement: Produce talking performances with precise hand gestures
  • Reproduce subtle and delicate performances: Capture nuanced movements and aesthetic details in every action.
  • Precise Footstep Detection: Maintain accuracy throughout complex and fast-paced foot movements.
  • Multi-Angle Tracking: Accurate side, back, and rotational tracking.
  • Handles Minor Camera Shifts: Counteracts camera shakes and unsteady shots.
  • Works Well with Real World Videos: Handles dim lighting, busy backdrops, and patterned wear.
  • Multi-actor Interaction: Handle group footage with a single-performer focus with isolated framing and tracking focus.
  • Turn talking videos into animations: Transform ordinary monologue videos into dynamic full-body animations, or focus on upper-body performance for precise dialogue delivery.

As stated in the last bullet, the plugin works well with real-world videos and lighting, but it never hurts to limit distractions when possible and develop some good practices when you have the time and space to do so.

Lighting and Background

If cameras are involved, then lighting is important. As I said earlier, this is not meant to discourage a quick capture in less-than-ideal lighting, but we do need to provide stable, bright lighting without washing out the video performance if possible. It doesn’t have to be perfect. I used home lighting for my capture tests in this article and had no problems with it.

Again, not an ironclad requirement, but simplifying your background for the captures can’t hurt. It’s less noise for the plugin to work with. I had a set of French doors with solid brown curtains, so I set up in front of them. It was flanked by two table lamps that helped with the lighting and was already empty of objects, being a doorway.

Acting (Practice)

You can always wing it, but like most things in life, it’s better to prepare for it. Decide what you are going to do. Even simple motions need some practice as you might want to even consider overacting some mundane tasks to get enough motion for “acting”. Everyday motion is not necessarily the same as an “acting” everyday motion for dramatic effect. I used primitive props to keep my hands anchored to a certain area and avoid drift.

Recording

Footage, lots of it. This doesn’t mean taking hours of footage, but multiple video takes will result in a bigger pool of video footage to draw motions from, so don’t be stingy with the takes. Get several takes of each motion and pull out the best footage to edit together for the final mocap clip in your favorite video editor. Like most animations, how much effort you put in now will show in the final result. You want the best of the best for your mocap.

Cameras Used

The cameras I tested were the Samsung A54 Phone and an old 1080p Logitech C922 Pro webcam on a phone tripod, and both worked flawlessly. Since one of my work computers is by that doorway, I used the USB webcam so the video would be recorded directly to the desktop. Neither camera is premium, with the phone camera being much newer and more advanced, but a bit more effort to offload.

Bottom line is I could use the cameras I already had… down to the oldest webcam with no problems. This also gave me the bonus of working with equipment I already knew and trusted. The webcam was also an advantage in that its files were much smaller than the Samsung phone recordings, like 50 megs vs 200 megs or more.

Example One: Operating a Console

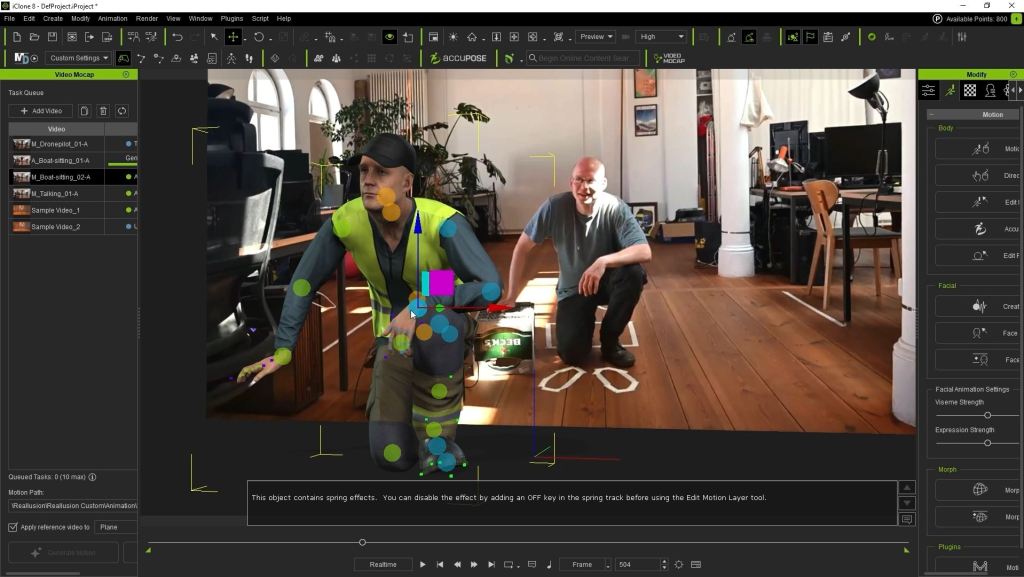
For this one, I pulled out my music keyboard and stand so I would have a reference for the console, as I didn’t want my hands all over the place. What I had in mind was a good filler motion for wide use while being simple enough for a test. Having a generic console motion was one I could certainly add to my motion library.

I was thinking of sci-fi scenes where busy motions in the background are needed, like a command center or a ship’s bridge. Having a motion that randomly moves a character’s upper body and limbs in relation to a control surface can be used in a lot of situations. My biggest problem was not treating it like a musical keyboard. I didn’t want to play music… I wanted to operate a transporter or security console, so I had to fight the urge to “keyboard” it as an instrument, but it was a solid reference point.

Example Two: Piloting a Plane

This example was possibly the first motion I mocapped with IPI Soft way back when. It was memorable enough that I used the same technique for reference props.  Instead of a Christmas Tree stand I used in this capture I used a bathroom plunger in the original version, but the result was a reference point to anchor my arm and hand motions to. The plunger was a bit short, and having just cleaned up from Christmas, the stand of our fake tree worked just fine, so my arm didn’t “drift” all over the cockpit or possibly outside of the cockpit, requiring cleanup.

So, there I was, in the living room on a short stool with one hand around one half of a Christmas tree stand and the other hand ready to flip invisible switches, twist some knobs, or whatever I needed to look like I was doing something. The shot involved quick camera shots from outside the cockpit, so all I needed was motion, and it didn’t have to be complex motion.

Example Three: AI Squared

In this test, I used Midjourney-generated videos from images as the video for the AI mocap conversion video. It’s a very simple process of describing what you want in a prompt to Midjourney, like:

full body shot of a young lady talking to another person off-screen on a white background.

A very basic prompt for a basic motion with good lighting, a clean background, and a black screen pause between the AI-generated clips. Like the other videos, I assembled and edited the clips in Vegas Studio, so only this video needed no trimming as it was less than 60 seconds.

I stacked a long dance motion with a few individual motions, like talking on a phone or speaking to a person off camera, with black screens between them to easily identify the break between motions. This actually had the effect of making one of the motions start off-center as the previous motion ended on the other side of the screen and then started from the far side, creating a jump.

The capture needed some cleanup, but it was minimal positioning that didn’t amount to much.

The Process in Review

This is where I thought I would be putting together a major tutorial, but it turns out that only a few basic steps are needed.

  1. Drag in or load the video clip.
  2. Trim the clip to the desired length.
  3. Generate the motion.
  4. Apply the motion.

It is just that simple to use.

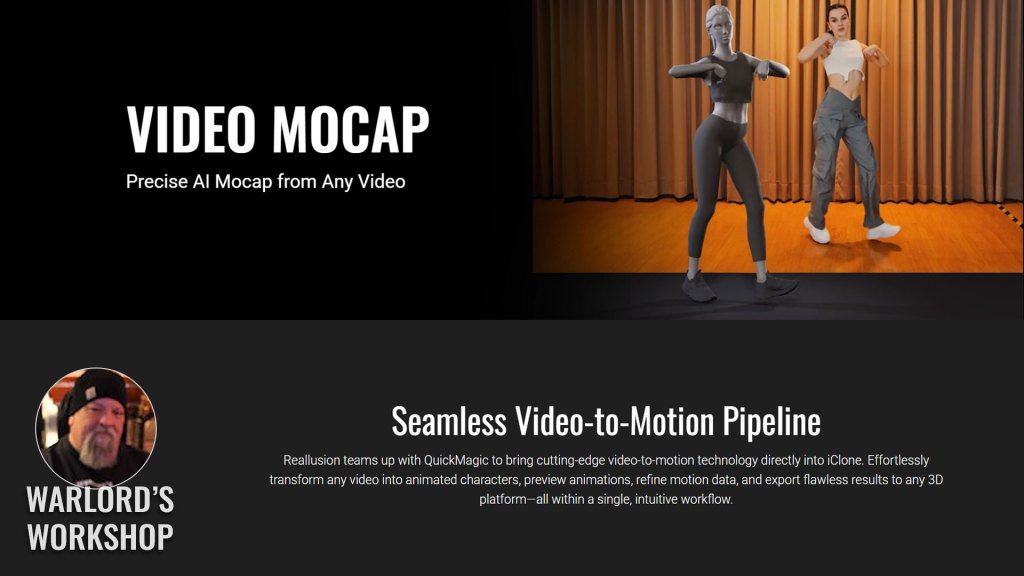
Behind the Scenes – Quickmagic Integration

All of the magic happens behind the scenes, but here is more information from Reallusion.

  • Workflow: Users can import any video clip, and the Video Mocap Plugin uses QuickMagic’s cloud-based engine to generate editable 3D animation.
  • Capabilities: The system supports full-body tracking, upper-body gestures, and detailed finger tracking.
  • Pricing: The service typically operates on a pay-per-use basis via “DA Points” for video processing. $2.50 US per motion as of this writing.
  • Cleanup Tools: Since AI mocap often has artifacts like foot sliding, the integration allows users to use iClone’s native tools (Foot Contact, Curve Editor) to refine the data instantly.

Summary

This was another one of those assignments that I had no idea how it would go, and it turned out to be a complete no-brainer with practically no learning curve.  You follow the four steps mentioned in the conversion process, and the AI takes care of the rest. I have to hand it to QuickMagic and Reallusion for a seamless integration of tools that not only makes sense but is very convenient.

If AI in general weren’t so new to many of us, there wouldn’t even be a need for a “getting started” tutorial, and I don’t think in all these decades I have ever said that about animation software. The environment and lighting are very forgiving, making spontaneous filming of certain motions worry-free, but again, it’s always good to start with “best practices,” so we create a positive habit from the start. Control the shooting environment as much as is practical to maintain continuity of work.

All in all, this was a very positive experience and another boon for beginners to be able to create custom motions with something as simple as a phone camera or webcam, then turn that into a motion!

With AI knocking down hurdles and empowering almost anyone to be a filmmaker or storyteller, the time has never been better to get in on the newest evolution of digital animation and art.

MD McCallum - WarLord

MD McCallum – WarLord

Digital Artist MD “Mike” McCallum, aka WarLord, is a longtime iClone user. Having authored free tutorials for iClone in its early years and selected to write the iClone Beginners Guide from Packt Publishing in 2011, he was fortunate enough to meet and exchange tricks and tips with users from all over the world and loves to share this information with other users. He has authored hundreds of articles on iClone and digital art in general while reviewing some of the most popular software and hardware in the world. He has been published in many of the leading 3D online and print magazines while staying true to his biggest passion, 3D animation. For more information click here.

Reallusion Announces 2026 Vision: Redefining 3D Production through the Power of Hybrid AI

As the AI revolution redefines the creative landscape, Reallusion is proud to unveil its latest technology roadmap, positioning the company at the forefront of the next era of hybrid media creation.

By embedding powerful AI into generative stages while simultaneously pushing the boundaries of traditional 3D workflows—through cinematic RTX Rendering, upgraded image-to-3D in Headshot 3, precision AccuFace 2 capture, CC character Wrapping Tools, Image to Cloth, and realistic Joint Corrective Morphs —Reallusion is empowering artists to bridge the gap between imagination and photorealistic reality.

Evolution of the Professional 3D Workflow

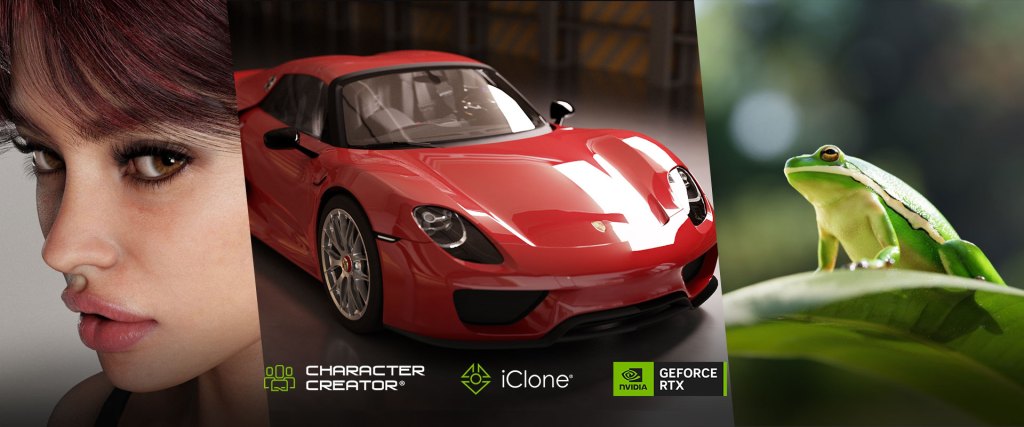
RTX Render: Achieve Cinematic Path-Traced Realism

Elevating render quality has long been a shared desire among our users. Reallusion is proud to fulfill this highly anticipated milestone by introducing RTX rendering as a free update. Developed in close collaboration with NVIDIA, this integration leverages advanced RTX technology to deliver the cinematic quality of path-traced rendering at near real-time speeds.

Harnessing the power of RTX GPU and DLSS technology, artists can showcase their work at its absolute best with exceptional clarity and performance. Highly optimized for Reallusion’s digital human shaders, RTX rendering offers precise control over hair, skin, and subsurface scattering, bringing characters to life with unprecedented realism.

Beyond digital humans, RTX unlocks new possibilities across commercial visualization and industrial design, enabling richer, more immersive visual experiences. With dynamic time-of-day transitions, adjustable cloud density, and natural atmospheric motion, achieving perfect lighting has never been easier.

Headshot 3: Next Level of Lifelike Digital Double Generation

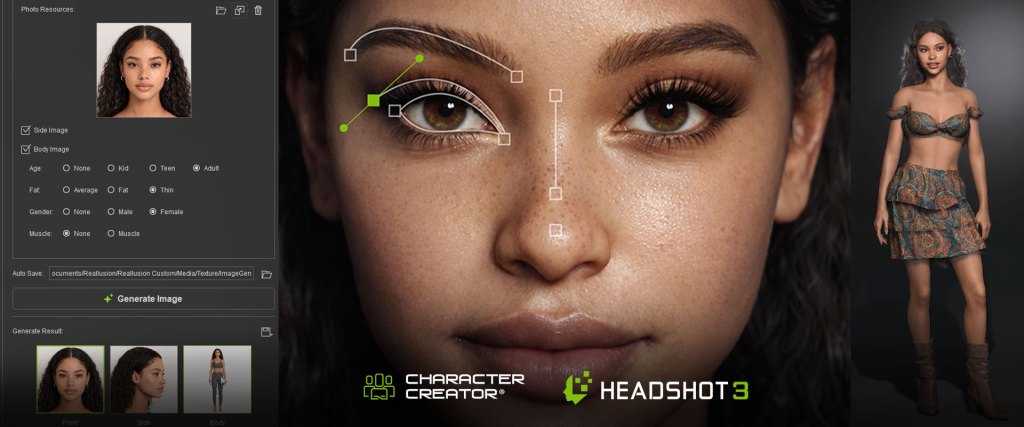
Headshot 3 represents a massive leap in digital identity. Reallusion has developed and trained a proprietary AI model specifically for accurate image-to-3D head reconstruction. Trained on a vast dataset of facial scans, this model better interprets facial landmarks, depth cues, and subtle anatomical features from 2D images. As a result, it produces a more precise head mesh with improved topology, enhanced identity preservation, and more accurate proportions.

In addition, Headshot 3 has included a range of powerful new features designed to achieve significantly higher likeness and precision. This includes 4K AI image generation from text prompts, spline-based head-shape refinement with fully controllable Bézier adjustments for portrait and profile, and built-in lens correction.

Users can also take advantage of texture channel enhancement and intuitive mask brush tools to effortlessly remove shadows and blemishes. For even greater accuracy, new body matching capabilities support full-body image measurements, ensuring accurate proportions for a more faithful digital double.

To celebrate this release, Reallusion is currently offering an exclusive prelaunch offer, allowing users to secure Headshot 3 for free by purchasing Headshot 2 before its official release.

AccuFACE 2: Highly Accurate, Lips and Facial Tracking

With the introduction of the new HD facial profile in Character Creator 5, Reallusion has correspondingly upgraded its motion capture capabilities with AccuFace 2. Adopting a newly trained tracking system optimized specifically for CC5 characters, this major update delivers exceptional accuracy and responsiveness.

The system captures even the most subtle high-frequency lip-sync details for natural expressions and speech. With support for both live webcam input and video-based tracking, AccuFace 2 offers flexible capture workflows without compromising quality.

When combined with video motion capture, you can produce high-quality facial and full-body animation seamlessly within the Reallusion toolset.

Character Mesh Wrapping: Open The Gateway to the Character Creator Ecosystem

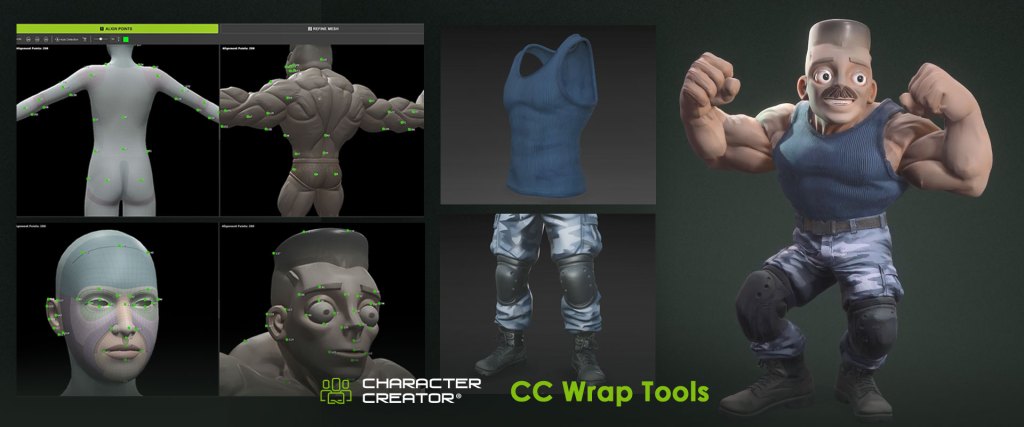
As AI-generated 3D models become increasingly prevalent in the industry, integrating these static assets into professional animation pipelines has become a vital need. To address this, Reallusion is introducing CC Wrap.

This powerful tool allows you to effortlessly wrap any models—alongside traditional 3D models and cloth meshes—into standard Character Creator (CC) topology.

By conforming to CC topology, this technology acts as a gateway to the entire CC & iClone ecosystem. You can seamlessly access Reallusion’s extensive asset libraries and instantly transform static meshes into fully functional characters, completely ready for highly detailed facial expressions and body animations.

In addition, detailed 3D outfits can be created from image references, featuring automatic skin weighting that significantly streamlines the entire character creation workflow.

Joint Corrective Morphs (JCM): Ensure Anatomical Accuracy with Realistic Muscle Deformation

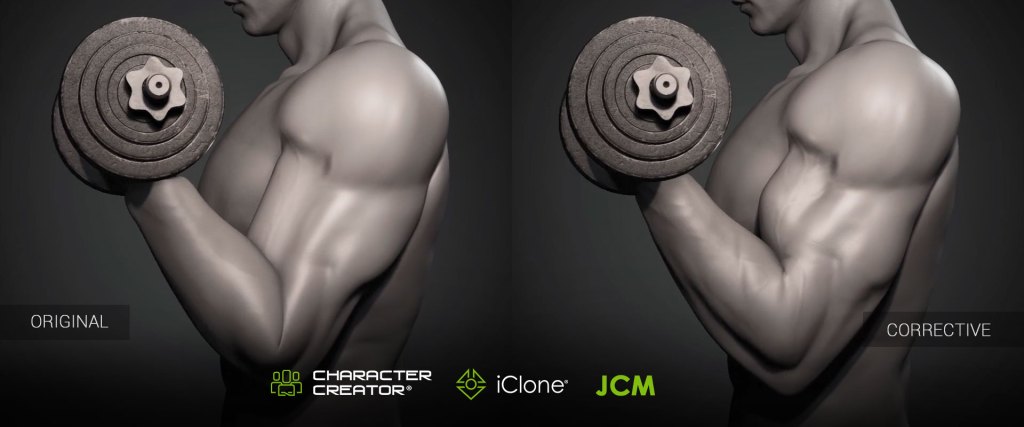
In our continuous pursuit of more realistic animation quality, Reallusion is proud to introduce Joint Corrective Morphs (JCM) as a free update. This new feature delivers enhanced accuracy for body shapes across a wide range of poses.

Built on a joint-based deformation system, this technology goes beyond basic shape correction for extreme poses. It produces more natural and realistic muscle deformation, ensuring characters maintain anatomical integrity during complex animations.

Empowering Creativity with Generative AI

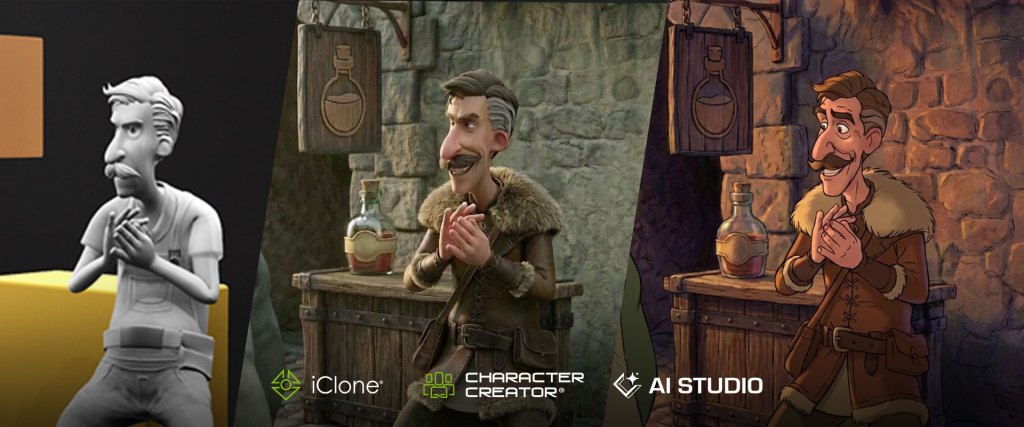
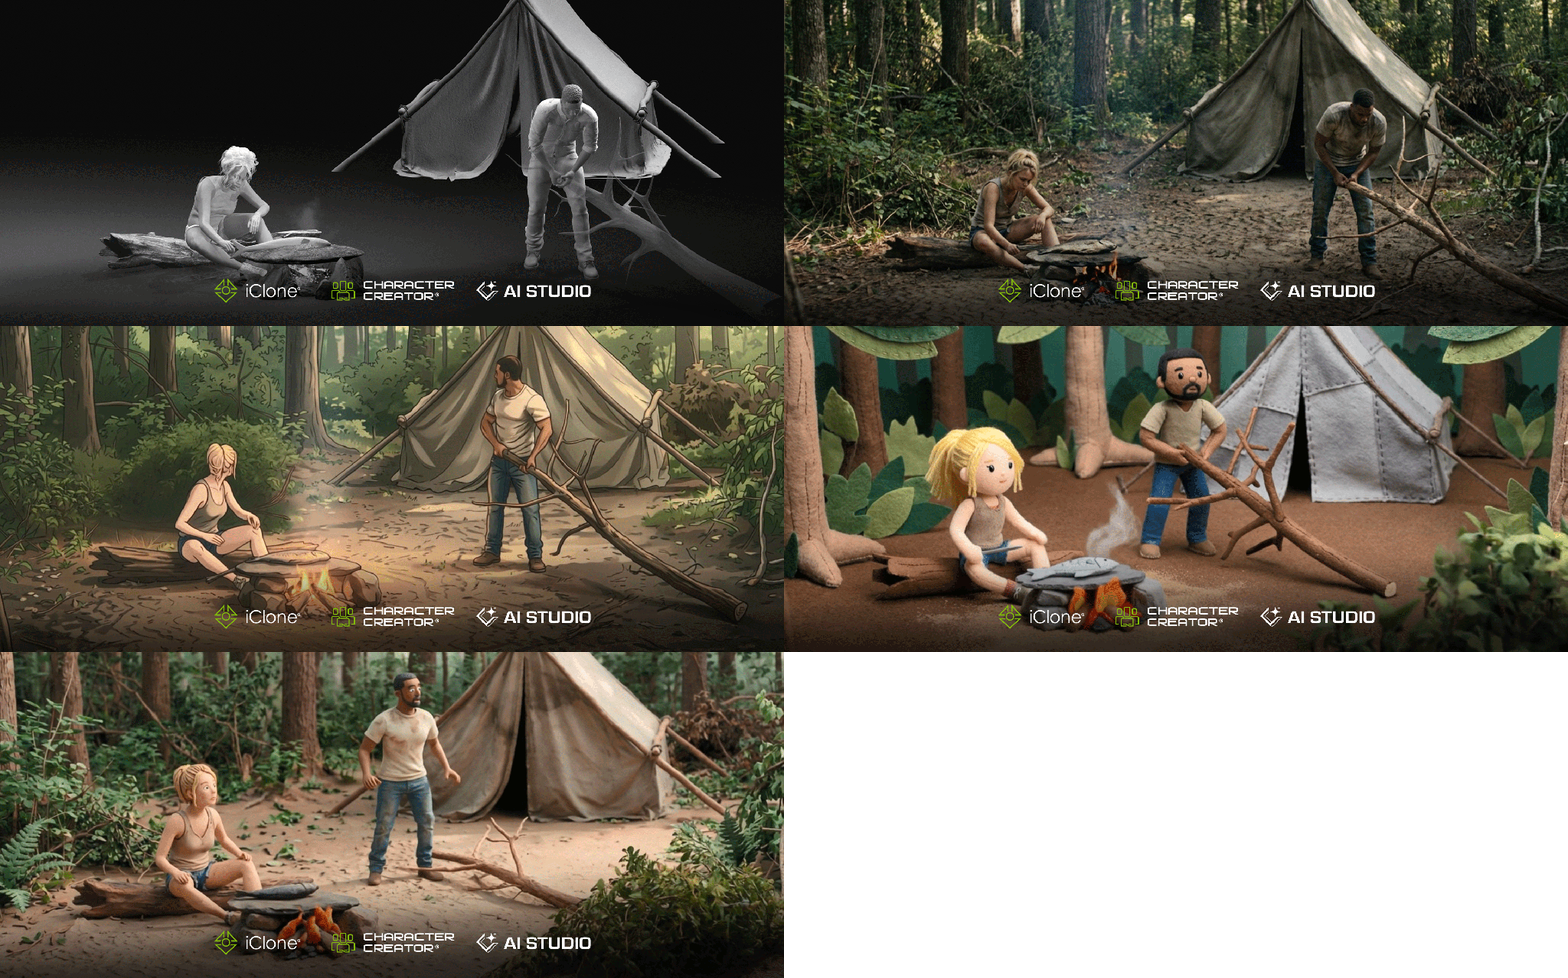
AI Studio:  3D Previs to AI Render – Effective Hybrid Production 

AI Studio is a true game changer for iClone and CC users, instantly transforming 3D previs projects into photorealistic images and videos. It also supports stylized rendering, allowing you to tailor visuals to your unique creative vision.

The built-in AI Actor Creator ensures character consistency across every shot while delivering natural, lifelike dialogue and performances.

These AI-powered tools also enable precise character interactions and camera control, guided by iClone motion data and reference footage. Powered by Reallusion AI Cloud services, the entire pipeline is streamlined for maximum efficiency without the need for additional hardware.

Unlocking True Creative Freedom

iClone 9: Rig anything. Animate everything.

Take a first look at how we’re unlocking true creative freedom in 3D character production. No longer limited to human characters, you can add skeletal structures to any model.

You can retarget motion between characters with matching hierarchies to ensure consistent animation transfer. Use custom Control Rigs for precise animation control, apply squash and stretch for expressive deformation, and add spring dynamics and secondary motion with ease.

By enabling collision-aware simulations, artists achieve greater flexibility and control in every stage of animation.

Stay Ahead of the Curve: Choose Your Access

Reallusion is dedicated to keeping our users at the vanguard of the CG-AI transformation, providing the cutting-edge tools needed to ensure peak production efficiency.

To maintain that competitive edge, you now have flexible ways to integrate these upcoming innovations into your pipeline. By joining our Subscription plans, users will automatically receive updates to the latest versions and all these great upcoming features at no additional cost. Alternatively, users can choose to acquire Permanent Licenses upon their official release dates.

Related Posts

Create Your Own Stylized Character – An Easter Bunny: Character Creator to Blender Workflow

In the high-stakes world of digital media, the ability to create your own character with speed and artistic precision is a vital skill. Whether you are an independent artist or a professional character designer, bridging the gap between a standard human-creator tool and a fully customized, stylized asset is key to a modern 3D pipeline.

This workflow breakdown explores how we leverage the combined power of Character Creator 5 (CC5) and Blender to build a stylized Easter Bunny. By utilizing a solid character base and advanced 3D animation software techniques, you can achieve cinematic results without sacrificing production efficiency.
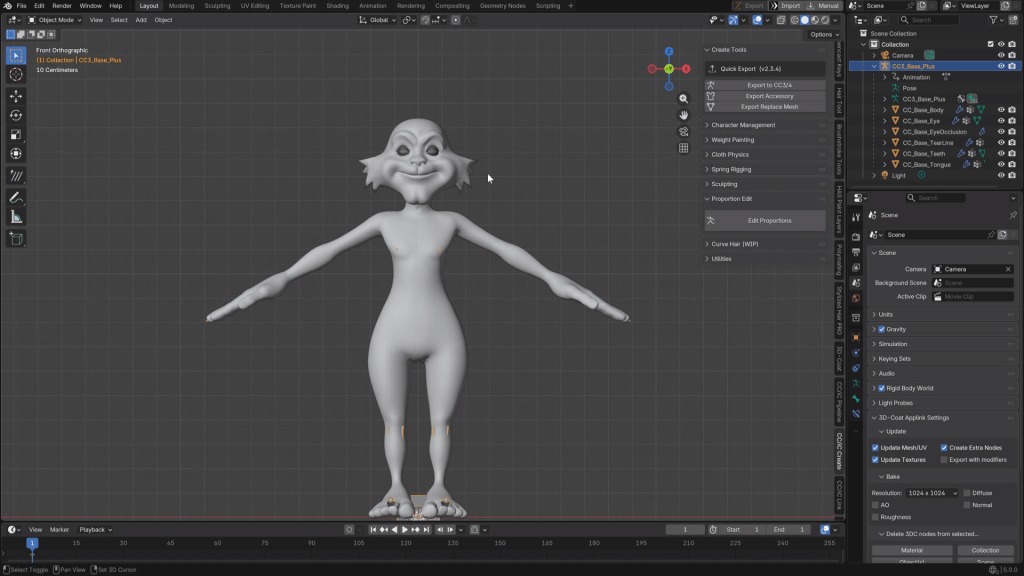
1. Establishing the Silhouette: Base Proportions & Pipeline

Every iconic character designer knows that a successful design begins with a readable silhouette. The process begins inside Character Creator 5 using the Proportion Editor on a standard neutral character base.
By dialing in the general body shape—adjusting limb length, torso width, and head scale—we establish the foundational cartoon proportions before ever touching a sculpting brush.

The Character Creator Blender Pipeline Export

Once the rough shape is set, the model is sent over to Blender using the Blender Auto Setup free add-on. A key choice here is exporting the character as a fully rigged armature rather than just a morph. This is a critical step for any character designer because it allows for much more complex geometry modifications and advanced texture painting later in the pipeline without breaking the underlying rigging.

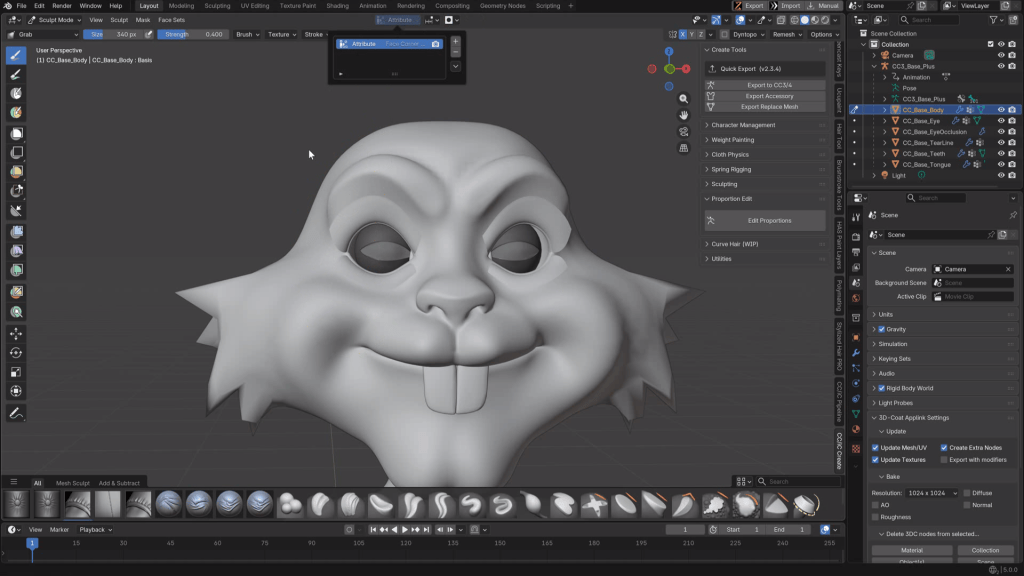
2. Pushing the Geometry: Stylized Facial Sculpting

When the model arrives in Blender, the real work begins. For this stylized bunny, working at SubD1 provides the perfect “sweet spot” of resolution.

Sculpting Fur and Features

Working at this level offers enough geometry to grab and pull distinct tufts of fur directly out of the facial mesh, yet it remains low enough to easily manage broad structural changes. While this aggressive mesh-pulling isn’t suited for realistic humans, it is highly effective for exaggerated designs in 3D character animation.

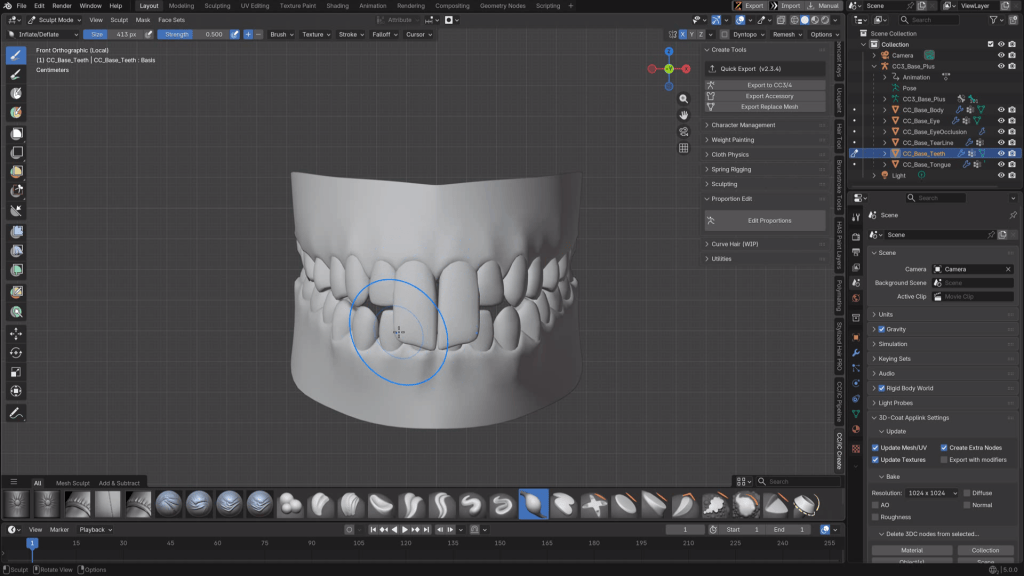
Custom Jaw and Teeth Modifications

One of the most drastic modifications involves the character’s mouth. The jaw is heavily manipulated, and standard teeth are hidden to make way for custom-modeled cartoon buck teeth.

Important Note: Extreme facial modifications require extensive care to ensure they don’t break when accommodating CC5’s wide range of standard facial expressions and lip-sync animation. There is a significant difference between prepping a character for a specific project versus the Reallusion Content Store.

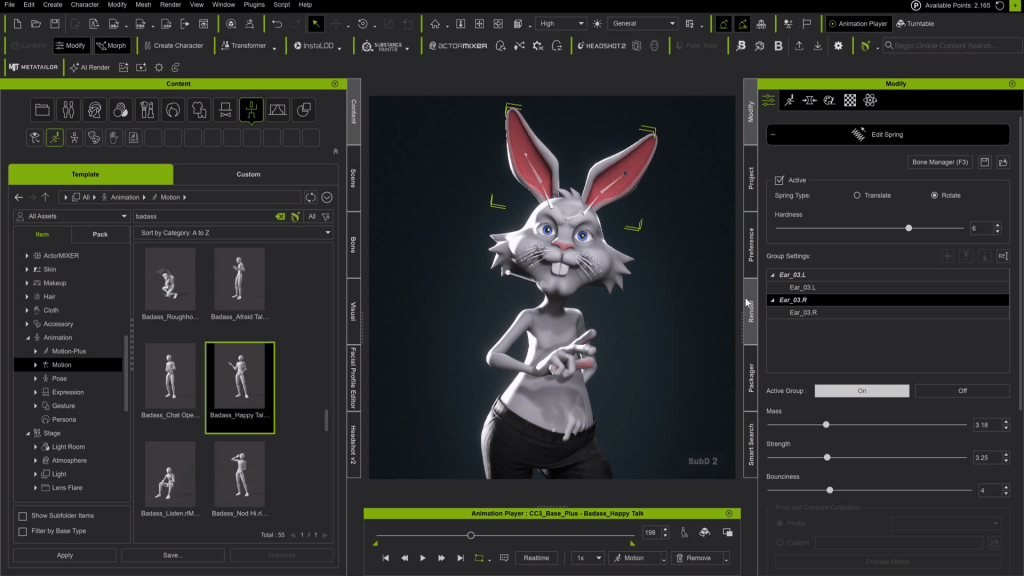
3. Dynamic Accessories: Ear Construction & Rigging

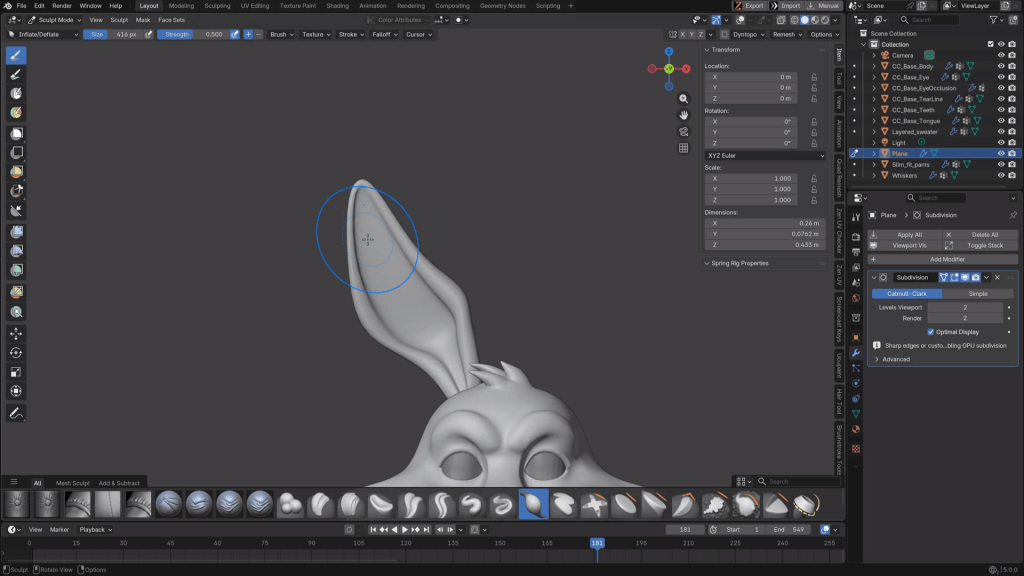
To give the rabbit its signature look, the large ears are modeled from scratch in Blender. Starting from a simple flat plane, the ear shape is mapped out, inset to create the inner ear cavity, and extruded for thickness.

The 0,0,0 Origin Rule

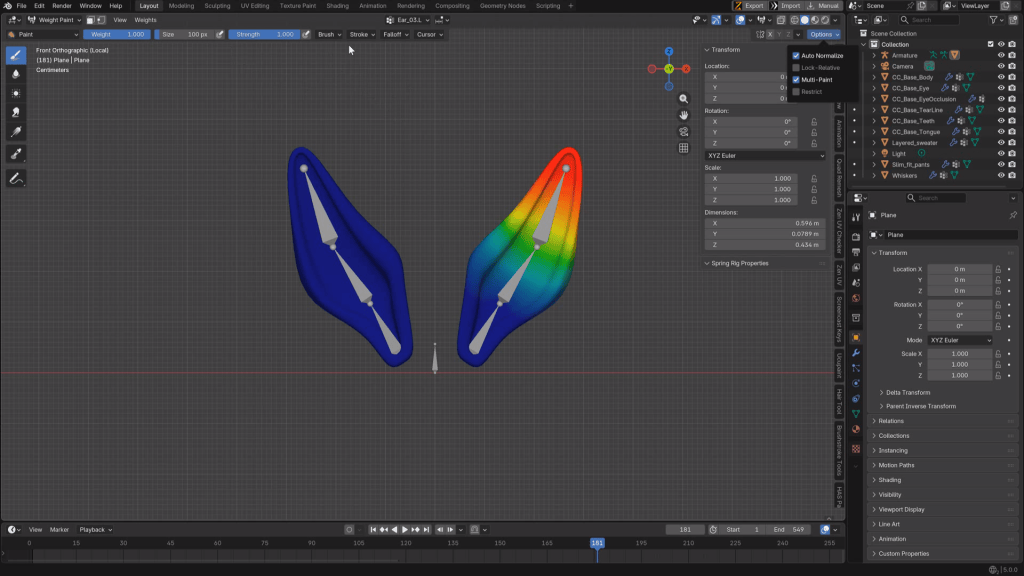
Before these ears are rigged for 3D character animation, a crucial pipeline step must be taken: the geometry is dropped down to the absolute center of the scene (the 0,0,0 origin).

If you build an armature with an offset origin, the bones will often float off-axis when you attempt to set up spring bone physics back in CC5. By centering the asset first, smoothing the vertex weights, and applying a gradient tool for a clean transition, we ensure flawless dynamic secondary animation once the ears are parented to the character’s head.

4. Procedural Texturing: Achieving the Stylized Look

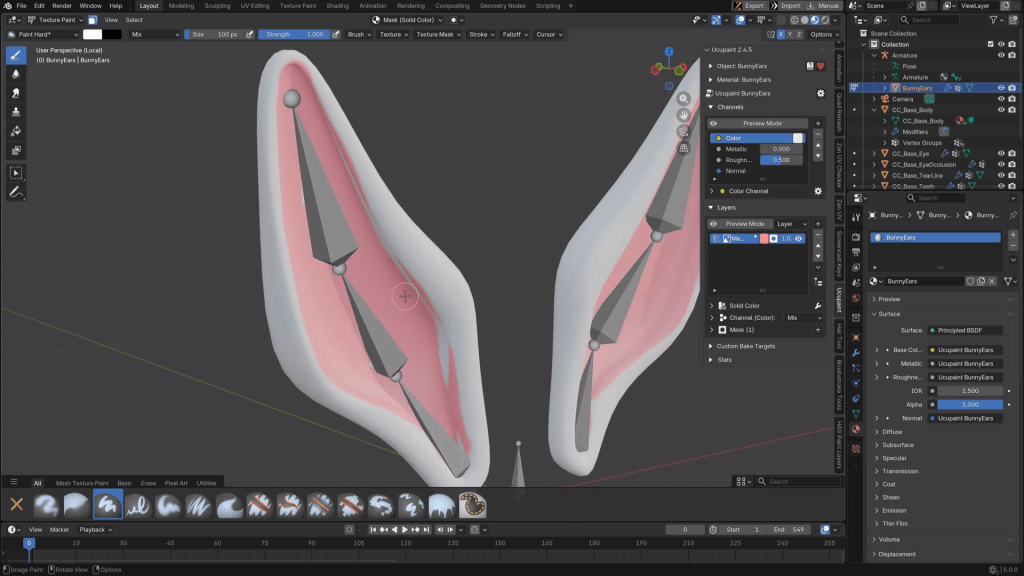
For texturing the stylized fur and skin, the workflow utilizes UCU Paint directly inside Blender. While external programs are industry standards, UCU Paint offers a remarkably robust layered system right in the native viewport.

By stacking procedural effects, generating noise, and baking the lighting directly into the base color, we can achieve a highly appealing, hand-painted aesthetic. Once the textures are baked and saved, the procedural nodes are removed to keep the asset clean for export.

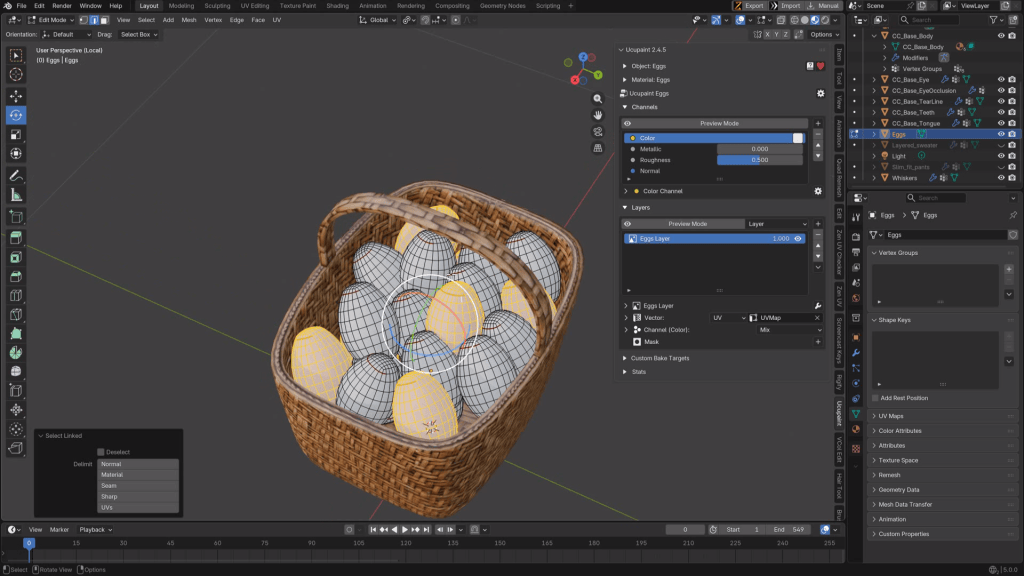
5. Building the Scene: Custom Easter Props

No Easter Bunny is complete without his deliveries. We jump back into Blender’s modeling tools to create a custom wicker basket from a subdivided cube.

Using edge loops and basic shaping tools, a handle is formed, and a woven procedural texture is applied. The basket is then filled with a cluster of smooth, colorful eggs, giving the character immediate context and charm for future 3D character animation sequences.

6. Final Assembly

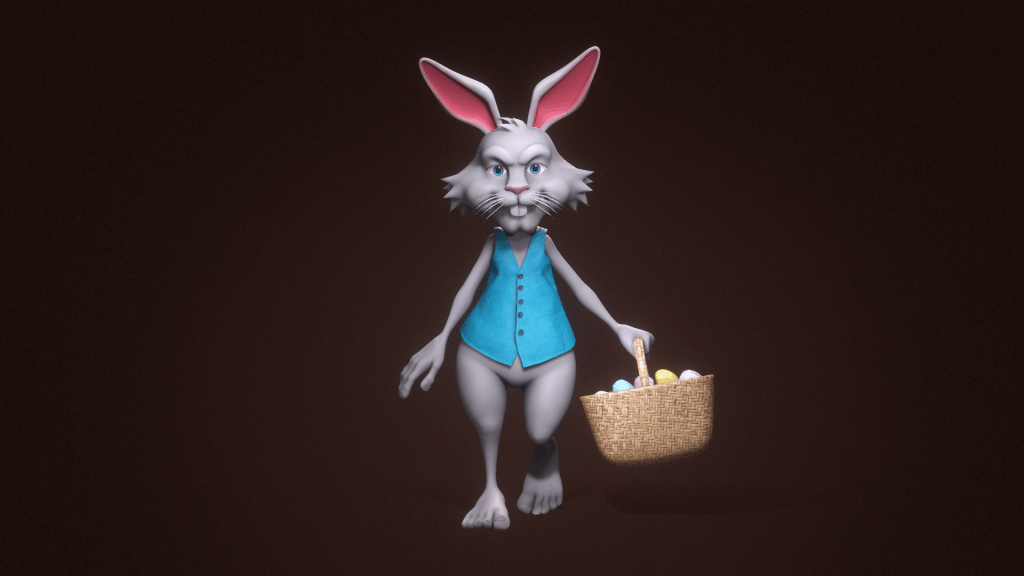
The final step brings all the custom Blender assets back home to Character Creator 5. The custom ears are parented to the head with spring physics applied, the baked textures are slotted into the materials, and the basket is placed in the character’s hand.

The result is a fully rigged, highly stylized, and animation-ready character created in a fraction of the time a traditional scratch-build would take.

Conclusion: Elevating Your Character Pipeline

By following this structured pipeline—from the initial character base in CC5 to the stylized sculpting in Blender—you can create your own character that bridges the gap between technical reliability and artistic flair. Whether it’s mastering 3D character animation or perfecting custom geometry, this hybrid workflow is the most efficient way to build high-quality characters in 2026.

Mythcons

Greetings, my name is Peter Alexander. In this demonstration, I’m going to walk you through how you can leverage Character Creator 5‘s new ActorMIXER as a powerful stepping stone to create unique, stylized characters. We’ll use the CC Base Mesh as our foundation, and ActorMixer will provide the next layer from which to build, making professional character creation that much easier. For this demo, I’ll be creating a stylized version of Arnold, using the Blender Autosetup pipeline, which is both cost-effective and efficient for creating characters and assets.

Visit Mythcons’ ArtStation

FAQs

Why use Character Creator base as a starting point for Blender? Why not model directly in Blender?

Starting with a CC5 character base saves a massive amount of time on technical fundamentals. While you can model directly in Blender, using the base ensures you have professional topology, UV maps, and a fully functional skeleton right away. This allows you to skip the tedious rigging and skinning process and jump straight into the creative sculpting and design.

What is the function of the Blender Auto Setup Plugin? Is it free?

Yes, it is a free plugin provided by Reallusion. Its main function is to automate the import/export process between Character Creator and Blender. Beyond setting up complex shaders and mapping the rig, it features a powerful Data Link function. This allows you to sync and transfer your character, scene, lighting, and camera with one click, ensuring total consistency between both environments.

How to get Character Creator & iClone for my Blender project?

You can download Character Creator (CC) and iClone (IC) from the Reallusion website. Starting from 2026, Reallusion offers flexible options: you can choose from various subscription plans (monthly or annual) for low upfront costs or purchase a perpetual license for permanent ownership. Trial versions are also available to test the workflow, and the Blender Auto Setup tool is available on their official plugin page.

Related Posts

AI Video Mocap Brings Studio-Level Productivity to Indie Game Developers

Creating game NPCs with Character Creator and iClone

Indie and double-A games are booming, but one challenge remains: animation is expensive. NPCs require massive amounts of motion, including idles, interactions, walk cycles, daily routines, and countless variations. Traditional mocap can help, but equipment costs only pay off with repeated use. Pre-made motion packs save time initially, yet they rarely match your exact needs, and manual adjustments can erase those time gains.

Enter Video Mocap: a fast, lightweight solution that captures motion from everyday video. This article José Antonio Tijerín walks us through the full process, from building NPCs in Character Creator 5 to generating custom motions for them using iClone’s Video Mocap.
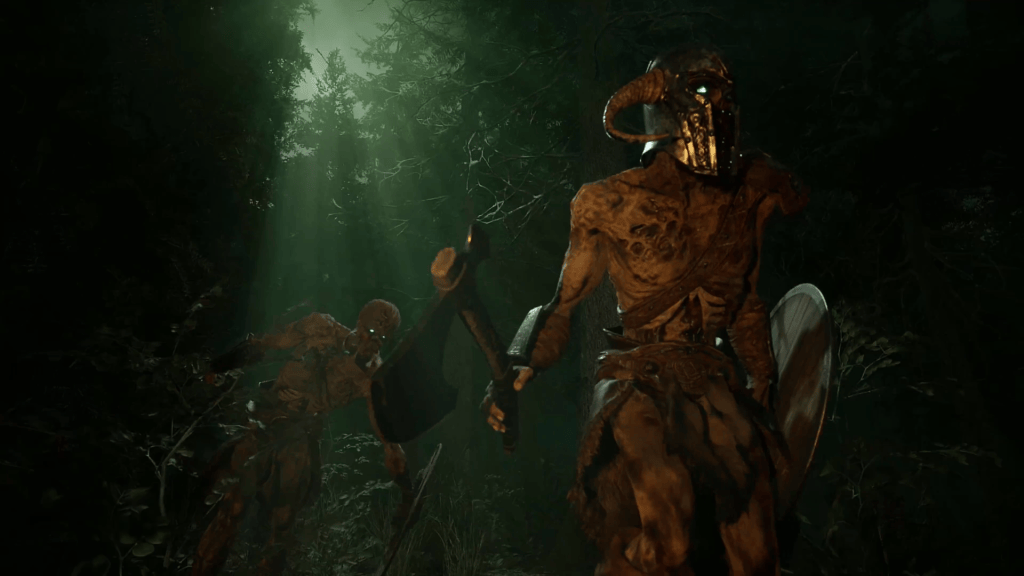
“The iClone Video Mocap workflow is so lightweight that motion capture stops being a tedious process and becomes a tool you can use anytime to generate NPC actions.”

José Antonio Tijerín – Digital Illustrator and 3D Sculptor

José Antonio Tijerín

I’m José Antonio Tijerín, a digital illustrator and 3D sculptor. I’m the creator of the video game “Dear Althea” on Steam and the content pack “We’re Besties”, which is available in the Reallusion Content Store.

Generate a Full NPC Roster from a Single Base

We’ll start by rapidly building a roster of NPCs in Character Creator. With ActorMixer, you can take a single base character and generate a wide range of variations in body shape and facial structure while keeping the style consistent. Layer in texture changes, and you can scale NPC diversity quickly, which is ideal for towns, street scenes, and large management-style populations.

Easily Switch to Game-Ready Low-Poly Characters

Character Creator also solves the production side of NPC scale. You are not locked into one quality level. Start with high-fidelity characters for close-ups, then convert the same NPC into lighter, game-ready versions for crowds and background use without rebuilding. For more aggressive optimization, Optimize and Decimate can further reduce complexity by unifying the character and add-ons into a single low-poly result.

Capture Motion Whenever Production Needs It

The Video Mocap workflow is so lightweight that motion capture stops being a tedious process and becomes a tool you can use anytime to generate NPC actions. Footage can be recorded with your phone, and it doesn’t need to be high resolution. Avoid uploading oversized videos, as they can slow down the generation process. What matters is a clear performance: the performer should be fully visible, the camera should remain static (eye level works best), and the motion should reflect natural human movement. Video Mocap is designed for live performances, not for cartoon characters or stylized animation.

Turn Raw Capture into Game-Ready Motion Fast

Video Mocap gives you a strong motion base fast, but what makes the workflow production-ready is iClone’s motion editing. Like any mocap approach, you may see issues such as minor joint jitter, finger vibration, or unstable ground contact in sitting and leaning poses. The difference is you’re not stuck with raw output. With iClone, you can quickly reduce unnecessary keys, stabilize posture and contact, and refine timing so the motion loops cleanly and behaves predictably in-game. That combination turns Video Mocap from “AI capture” into a complete animation pipeline where you can fix what matters and keep iterating without losing days to cleanup.

“With iClone, you can quickly reduce unnecessary keys, stabilize posture and contact, and refine timing so the motion loops cleanly and behaves predictably in-game.”

José Antonio Tijerín – Digital Illustrator and 3D Sculptor

Blend Captured Motion to Fix Missing Data

Sometimes reference footage isn’t ideal, especially when legs aren’t visible. In a one-button pipeline, that would be a dead end. A practical workaround is pairing captured upper-body performance with a compatible motion from iClone’s library, including premium motions from ActorCore, the largest motion libraries in the industry, then retiming and blending so the final animation feels coordinated. It’s a very game-dev way to work: take the best part of each source and assemble a result that ships.

Source Video As The Ground-Truth Reference

It’s tempting to treat video input as disposable once motion is extracted, but the footage remains useful. It’s your ground truth for timing, direction, orientation, and interaction accuracy. If your character needs to align with an object like a lean, a prop, or a surface, the original performance is still the best guide for making the motion feel intentional rather than procedurally close enough.

A Smooth Handoff to Unreal Engine 5
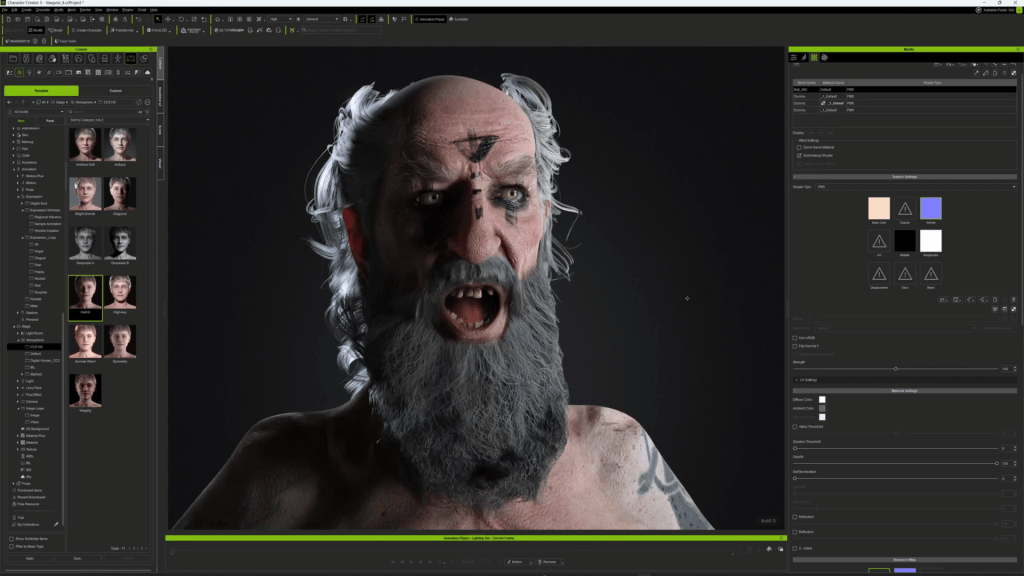
The handoff to Unreal Engine 5 is designed to be smooth, so moving characters and animations across tools doesn’t become a pipeline headache. With the updated Live Link and Auto Setup workflow, you can transfer from iClone to UE5 with minimal friction, keeping materials prepared and animations intact so your NPCs are ready to drop into a playable scene fast.
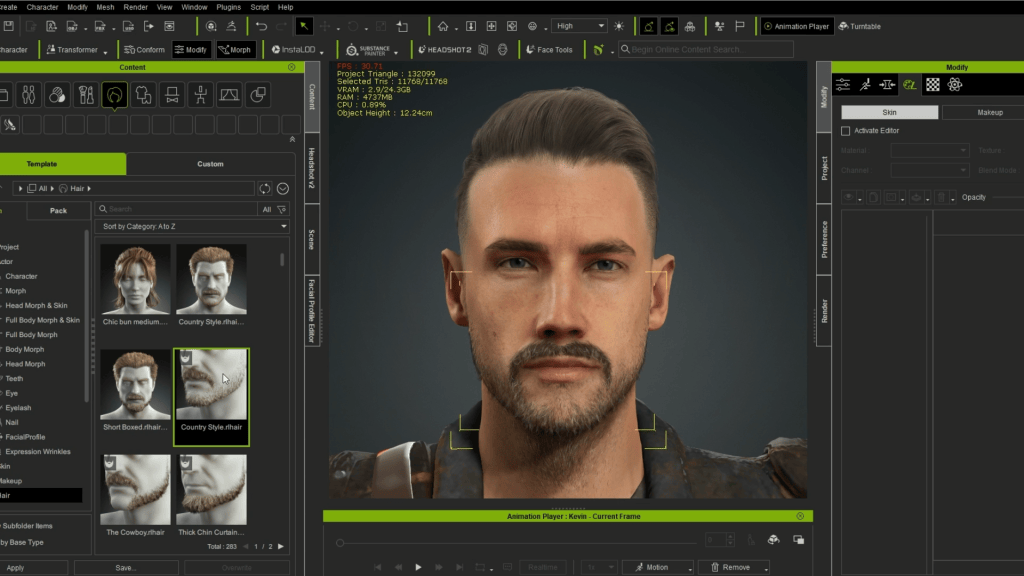
Studio-Level Leverage for Indie and Small Teams

Video Mocap is built to give smaller teams studio-level production leverage, so you can generate believable NPC motion on demand without big budgets, specialized gear, or infrequent capture sessions. Combined with Character Creator’s ability to generate and optimize NPCs at scale, you get a workflow that keeps up with how indie and mid-size teams build games today: fast iteration, reusable assets, and practical results.

Related Posts