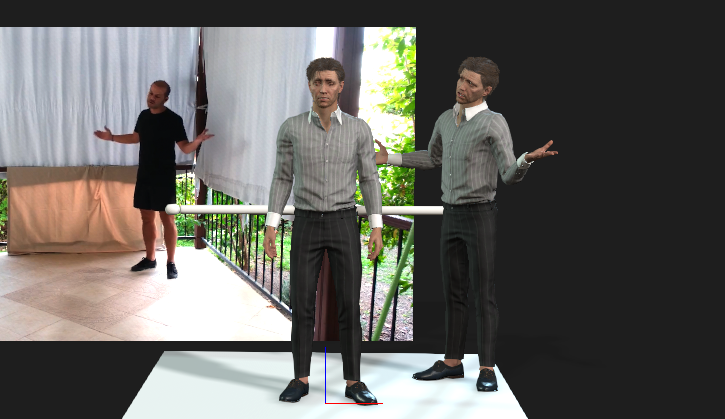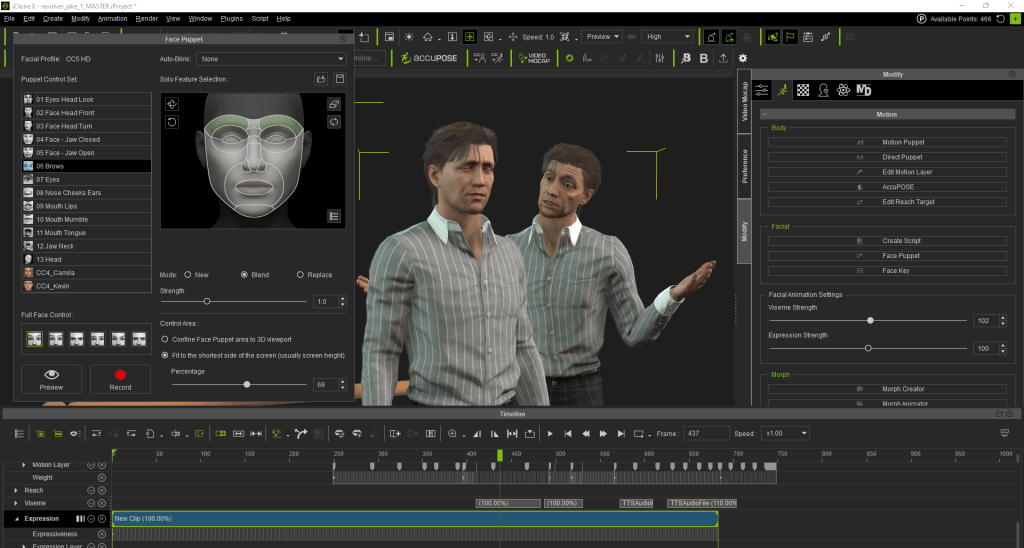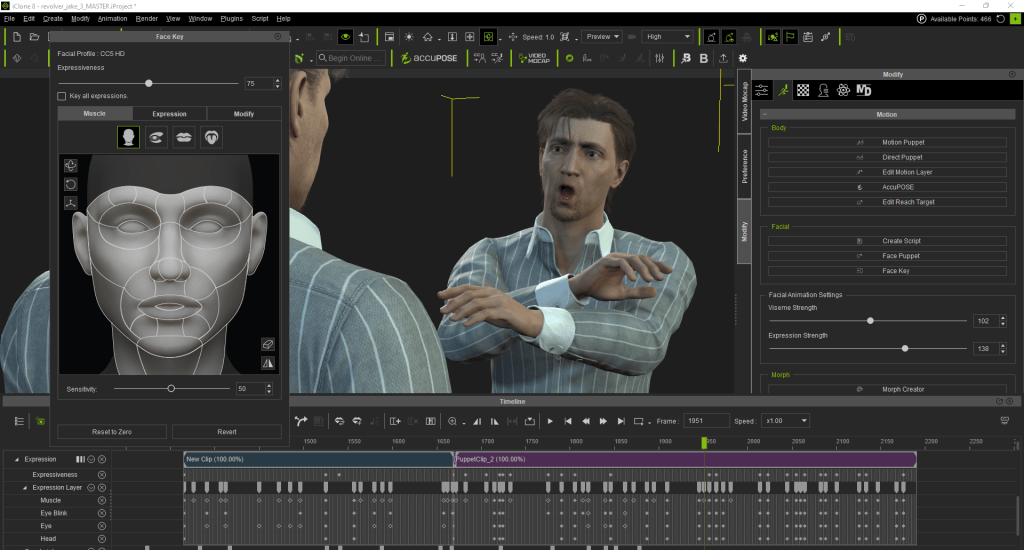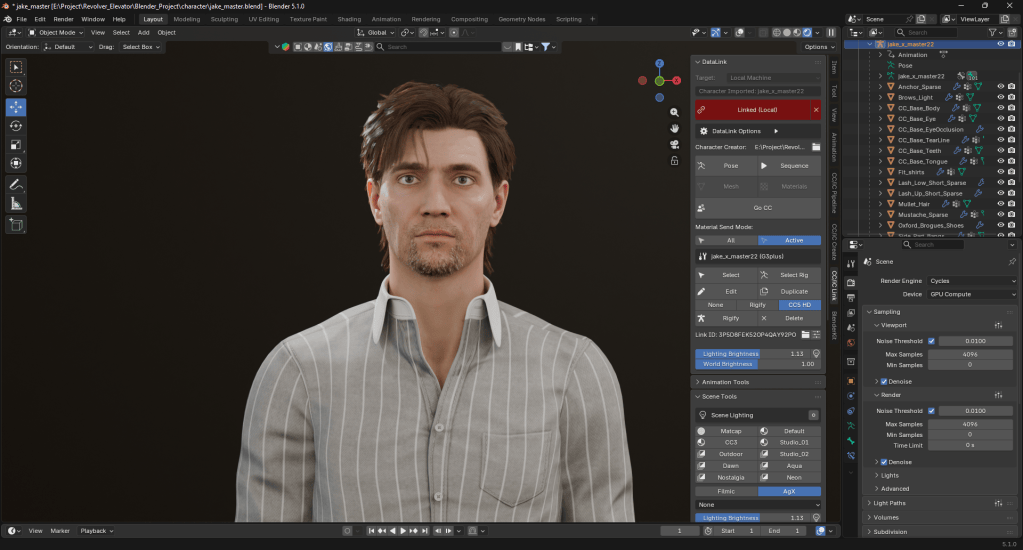
首頁 » Page 6

Create Your Own Character for Blender with Character Creator 5

A New Standard for Blender Character Creation

For Blender artists looking to create their own characters without sacrificing realism, flexibility, or production speed, character creation has long been a complex, fragmented process. From sculpting and retopology to texturing, rigging, and animation prep, building a usable character base often takes weeks—sometimes months.

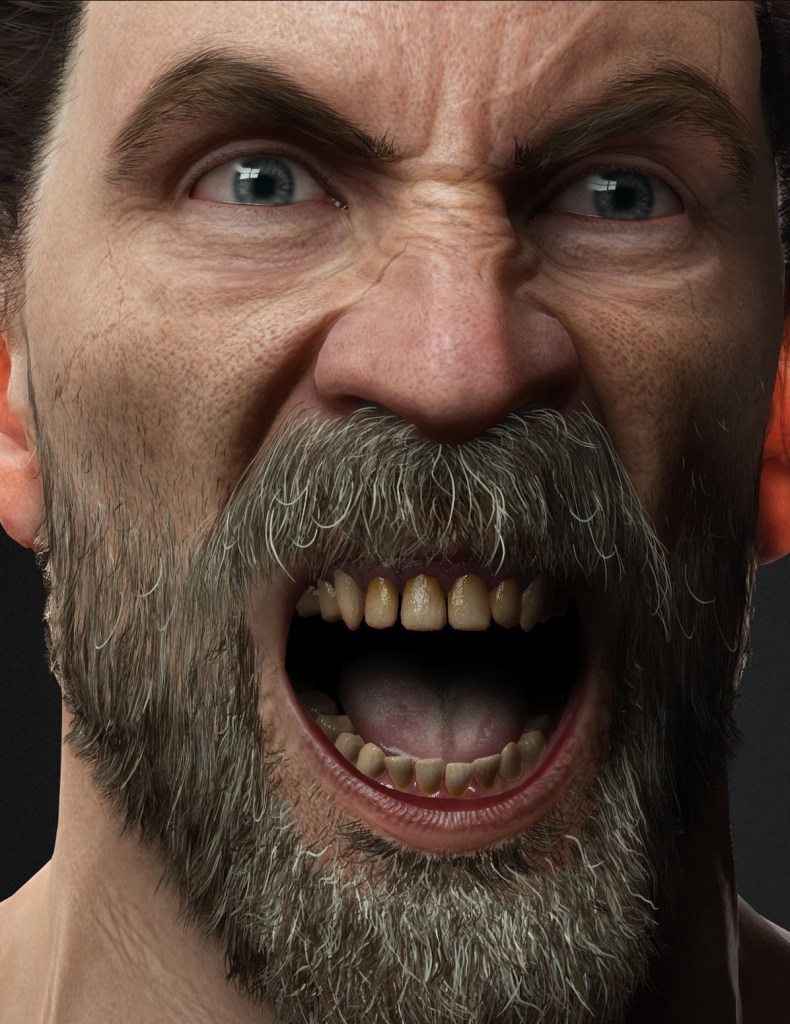
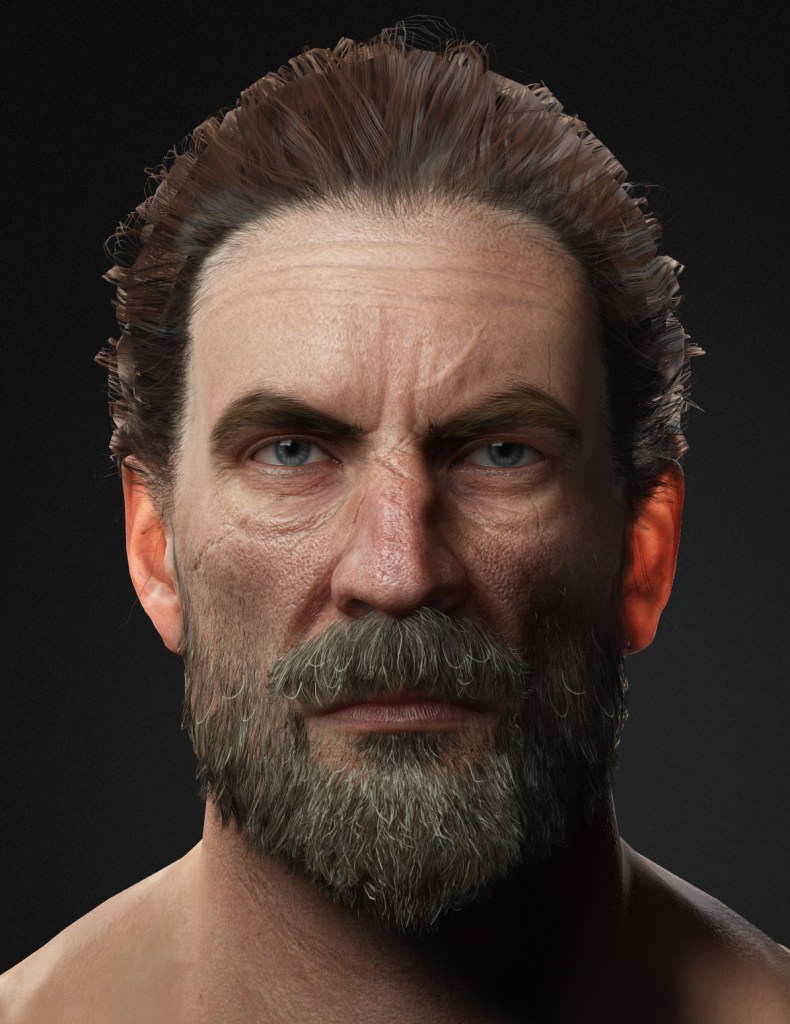
That workflow is changing. In their in-depth review of Character Creator 5, the team at Orbit Valley explores how Reallusion’s latest tools integrate seamlessly with Blender to deliver a streamlined, high-quality character designer pipeline for modern 3D animation software users.

This article breaks down Orbit Valley’s experience, insights, and production philosophy—showing how Character Creator 5, iClone, Blender, and real-world 3D character scans work together to empower artists, studios, and content creators.

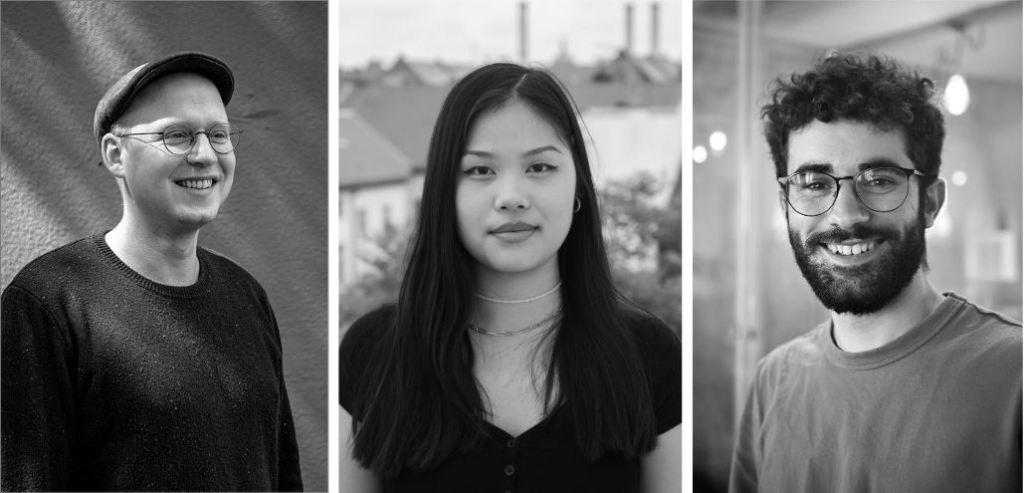
Rasmus Rørbæk | Phichet S.B

Founded in March 2023, Orbit Valley was established with the goal of operating as an end-to-end production company capable of blending disciplines, formats, and creative philosophies.

The studio’s founders—Rasmus Rørbæk and Phichet S.B.—originally connected through a shared passion for music. While their peers focused on sound creation, Rasmus and Phichet naturally gravitated toward the visual dimension, shaping identities, atmospheres, and moving imagery that complemented musical expression.

Phichet brings an extensive background as a freelancer, specializing as a VJ, 3D animator, and editor, with deep experience in commercial production environments. Rasmus, a graduate of The National Danish Film School, trained as a cinematographer after years working independently as a director and filmmaker.

Both founders were shaped by a strong DIY ethos, valuing adaptability, experimentation, and cross-disciplinary workflows. Orbit Valley’s creative philosophy embraces the idea that there are no fixed rules—only tools and intentions. Their inspiration draws heavily from meditation and mindfulness, influencing their desire to create from a grounded, conscious state rather than rigid technical frameworks.

This mindset made them an ideal team to evaluate Character Creator 5 as a flexible Blender human creator rather than a closed or prescriptive system.

Why Character Creation Is a Bottleneck for Blender Artists

For many Blender users, character creation represents the most time-consuming and technically demanding part of the pipeline.

Common pain points include:

  • Sculpting anatomically accurate human forms
  • Achieving production-ready topology
  • Generating realistic skin materials
  • Building facial rigs suitable for animation
  • Preparing characters for motion capture or performance animation

While Blender excels as a general-purpose 3D animation software, it is not purpose-built as a character designer. Orbit Valley recognized that the challenge wasn’t Blender itself—but the lack of an efficient, standardized character base to build from.

This is where Character Creator 5 (CC5) enters the workflow.

Character Creator 5: A Production-Ready Character Base

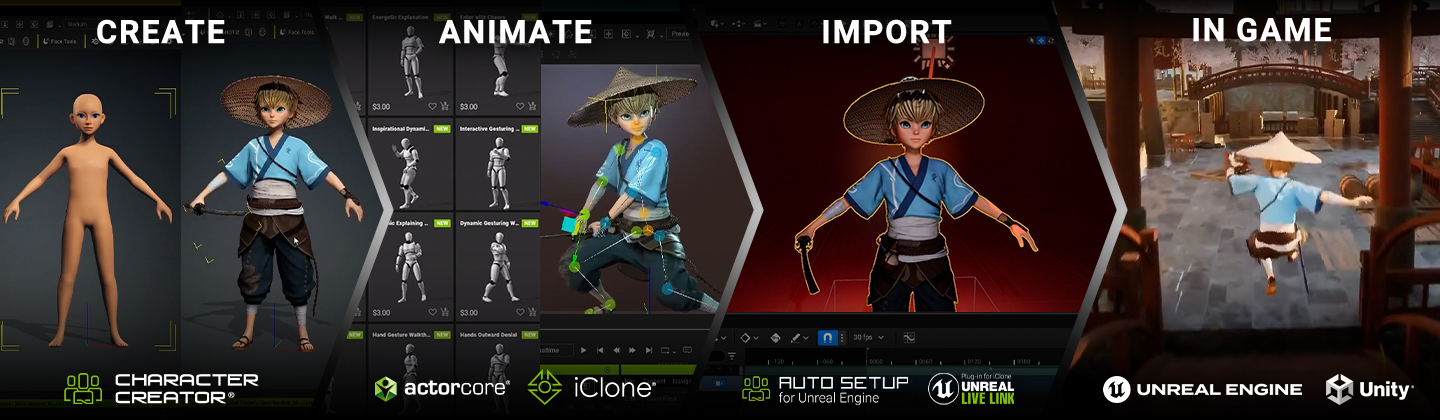
Character Creator 5 is designed to give artists a high-quality, animation-ready human character from the start. Rather than replacing Blender, CC5 acts as a powerful front-end system that feeds clean, consistent assets directly into Blender’s ecosystem.

Orbit Valley highlights that CC5 excels in three core areas:

  1. Speed – Characters can be created, customized, and exported in a fraction of the time
  2. Consistency – Topology, UVs, and rigs remain stable across characters
  3. Interoperability – Assets move cleanly between CC5, iClone, and Blender

For artists who want to create your own character without reinventing foundational work each time, CC5 provides a dependable starting point.

Integrating Character Creator 5 with Blender

One of the most important aspects of Orbit Valley’s review is the non-destructive relationship between Character Creator 5 and Blender.

Rather than locking artists into a proprietary environment, Reallusion supports Blender as a first-class destination.

Blender-Ready Assets from Day One

Characters exported from CC5 arrive in Blender with:

  • Clean, animation-friendly topology
  • Fully functional facial and body rigs
  • PBR materials compatible with Blender’s shading system
  • Consistent scale and orientation

This allows Blender artists to immediately begin refining, shading, lighting, and animating—without technical cleanup.

A True Blender Human Creator Workflow

Orbit Valley emphasizes that CC5 functions as a Blender human creator, not a replacement for Blender’s creative control. Artists remain free to sculpt, stylize, or push realism further inside Blender while benefiting from CC5’s robust foundation.

Leveraging Real-World Data with 3D Character Scans

A standout feature in Orbit Valley’s workflow is the integration of 3D character scans.

By capturing real human data and feeding it into Character Creator 5, artists can achieve an exceptional level of realism while maintaining full editability.

From Scan to Animation-Ready Character

Orbit Valley describes a streamlined process:

  1. Capture real-world facial or body data using scanning tools
  2. Import scan data into Character Creator 5
  3. Align and refine scans using CC5’s morph system
  4. Generate clean topology and textures
  5. Export directly to Blender or iClone

This approach bridges the gap between reality and digital performance—making CC5 a powerful hub for scan-based workflows.

Headshot 2: Turning Photos into Production Characters

Another key component highlighted in the review is Character Creator Headshot 2.

Headshot 2 allows artists to generate detailed, realistic human heads from photographic reference—dramatically reducing setup time.

Why Headshot 2 Matters for Blender Artists

For Blender users, Headshot 2 offers:

  • Rapid generation of realistic facial proportions
  • Seamless integration with CC5’s morph system
  • Full compatibility with Blender export pipelines

Orbit Valley notes that Headshot 2 is especially valuable for commercial projects, music visuals, and narrative content where likeness and emotional connection are essential.

iClone: Real-Time Animation and Performance Control

While Character Creator 5 handles character generation, iClone plays a critical role in animation.

Orbit Valley highlights iClone as a real-time animation hub that complements Blender rather than competing with it.

Why Use iClone with Blender?

The combined workflow offers several advantages:

  • Real-time preview of motion and performance
  • Facial animation and lip-sync tools
  • Motion capture integration
  • Rapid iteration before final Blender rendering

Once animation is finalized in iClone, characters can be sent back to Blender for lighting, shading, and final output—preserving creative flexibility while saving time.

The Advantages of the Reallusion + Blender Pipeline

Orbit Valley’s review makes it clear that the real strength lies in using these tools together.

Key Benefits at a Glance

  • Faster character creation without sacrificing quality
  • Reliable character base for multiple projects
  • Scalable workflows for studios and freelancers
  • Easy onboarding for new team members
  • Compatibility with modern production pipelines

For studios, this means predictable results. For solo creators, it means focusing on storytelling instead of technical hurdles.

Designed for Modern Content Creators and Studios

Orbit Valley emphasizes that Character Creator 5 isn’t limited to one type of user.

It benefits:

  • Blender animators building narrative projects
  • Content creators producing short-form media
  • Production houses needing scalable character pipelines
  • Indie filmmakers working with limited resources

By reducing friction, CC5 allows creators to iterate faster and explore more ideas.

Conclusion: A Smarter Way to Create Your Own Character

Orbit Valley’s review of Character Creator 5 reveals a powerful truth: modern character creation doesn’t have to be slow, fragmented, or overly technical.

By combining Character Creator 5, iClone, Blender, and real-world scanning tools, artists gain a flexible, professional pipeline that respects creative freedom while delivering production-ready results.

For anyone looking to create your own character, streamline their Blender human creator workflow, and elevate their 3D animation software pipeline, Reallusion’s ecosystem offers a compelling solution.

Follow Orbit Valley

Website:
www.orbitvalley.com

Instagram: 
https://www.instagram.com/orbit.valley/

FAQ

Is Character Creator 5 suitable for Blender users?

Yes. Character Creator 5 is designed to export clean, Blender-ready assets while preserving creative control.

Can I use my own 3D character scans?

Absolutely. CC5 supports scan data, making it ideal for realism-focused projects.

Does iClone replace Blender animation?

No. iClone complements Blender by handling real-time animation and performance, while Blender remains the final rendering and refinement tool.

Is Headshot 2 required?

No, but Headshot 2 significantly accelerates realistic face creation.

Is this workflow suitable for studios?

Yes. The consistency and scalability make it ideal for production environments.

Related Posts

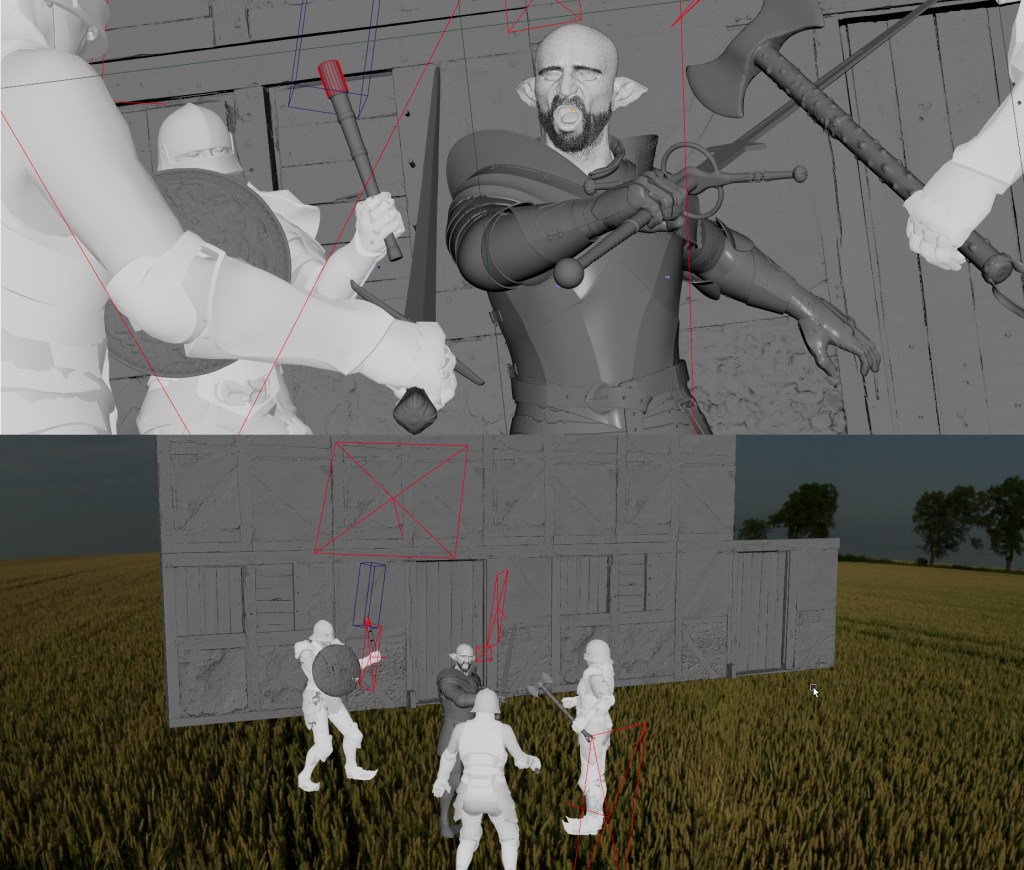
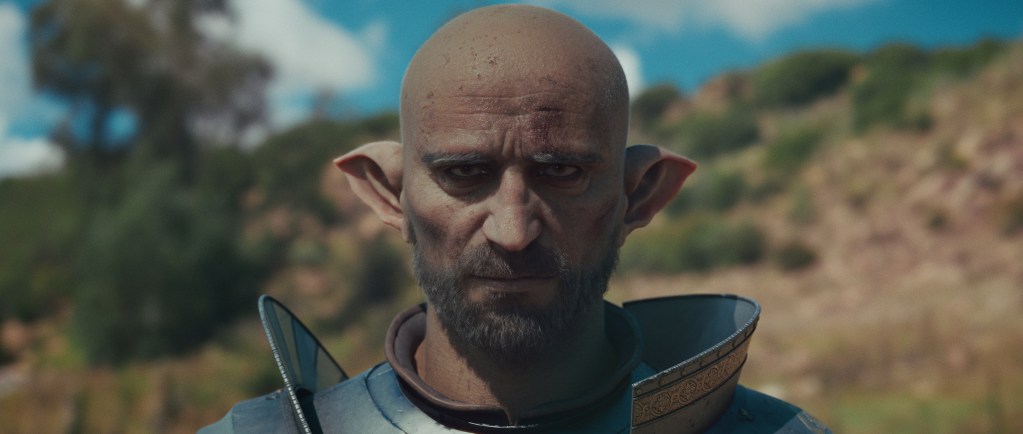
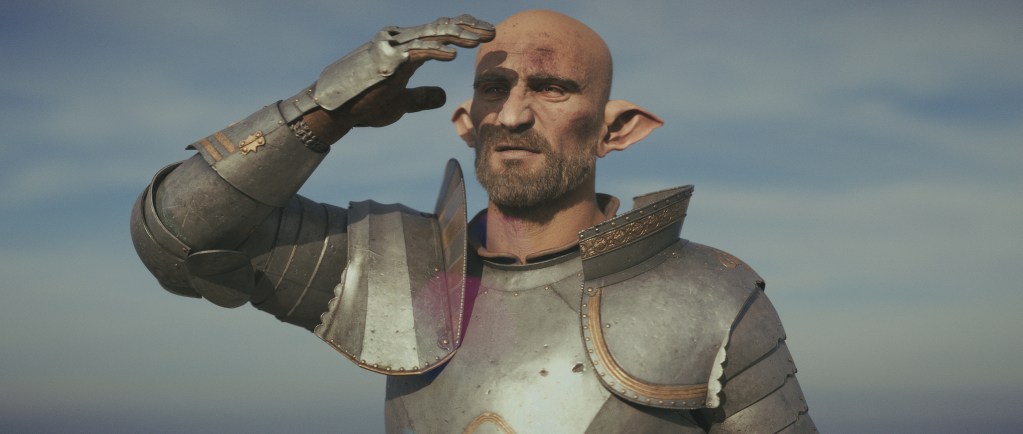
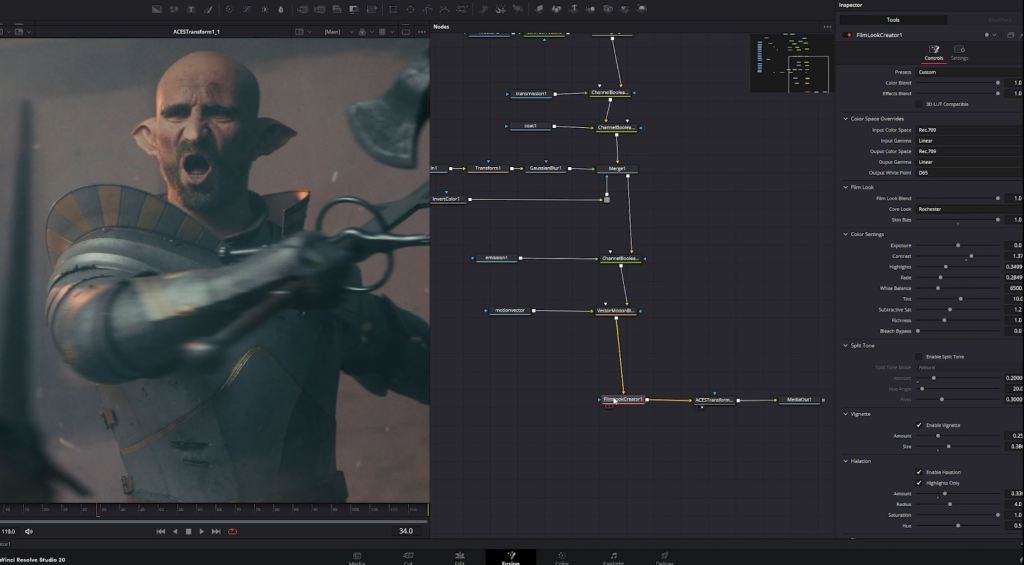
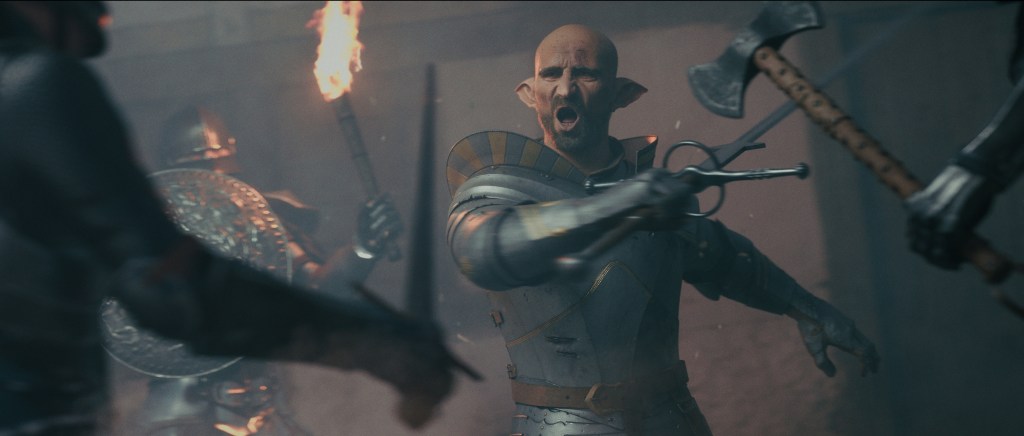
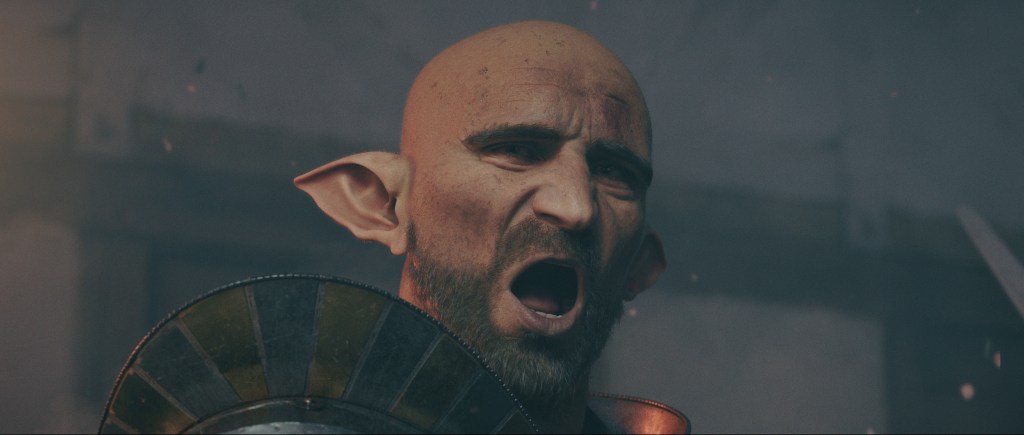
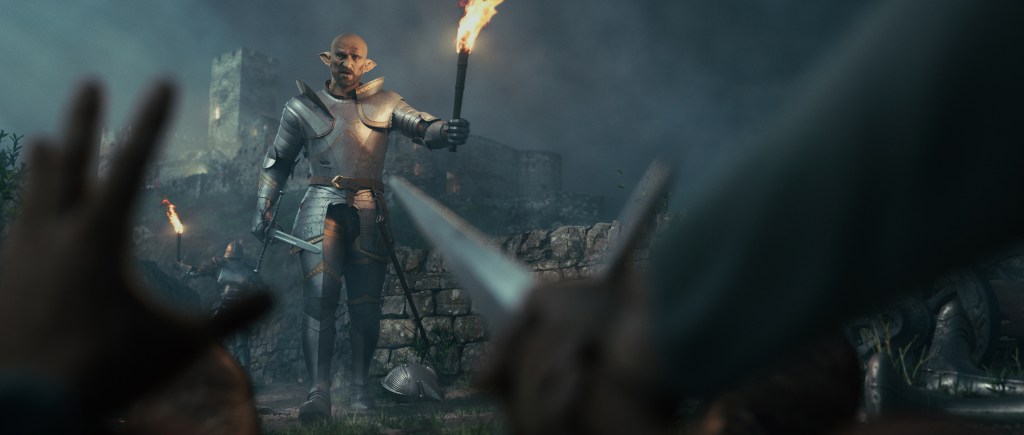
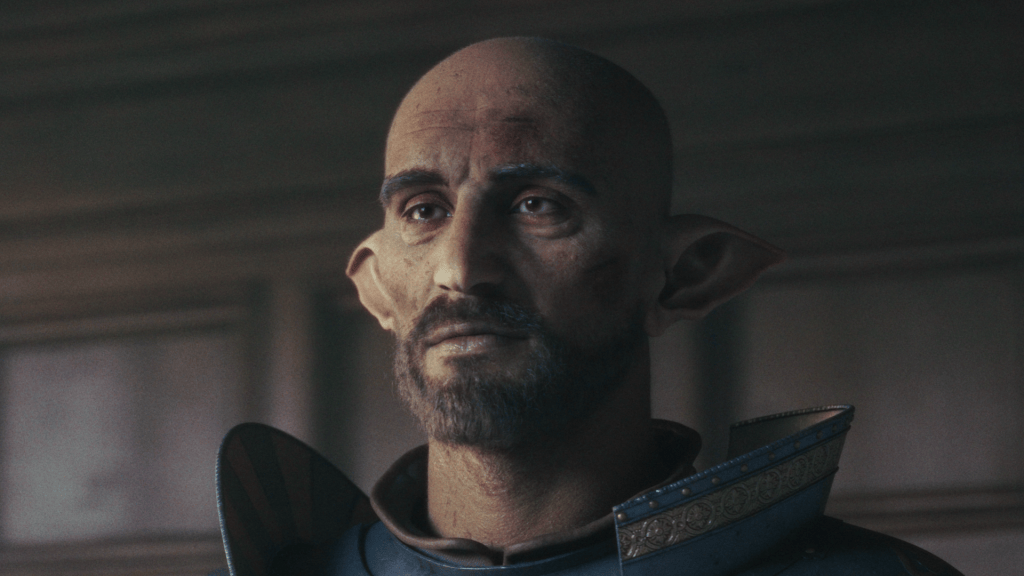
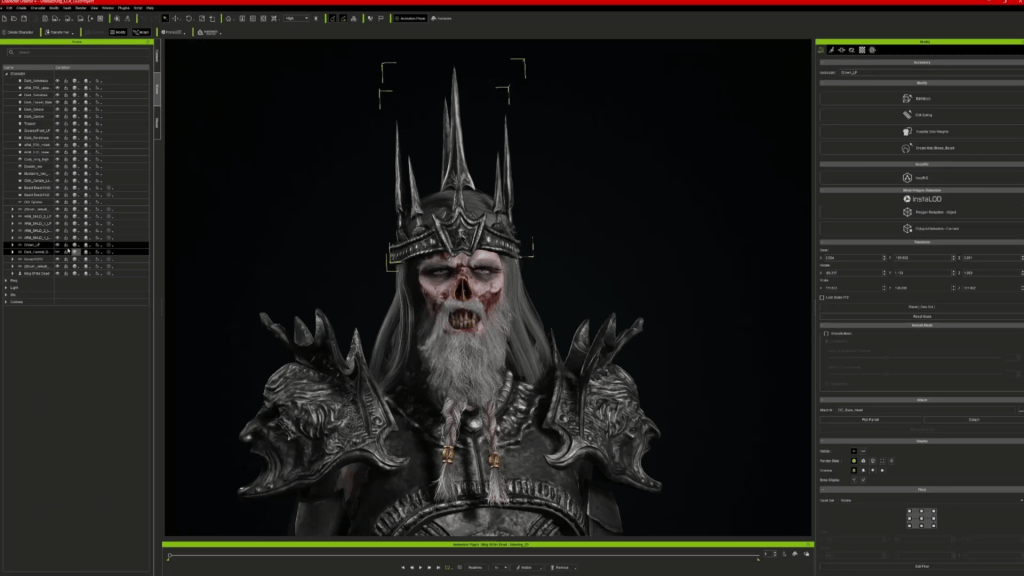
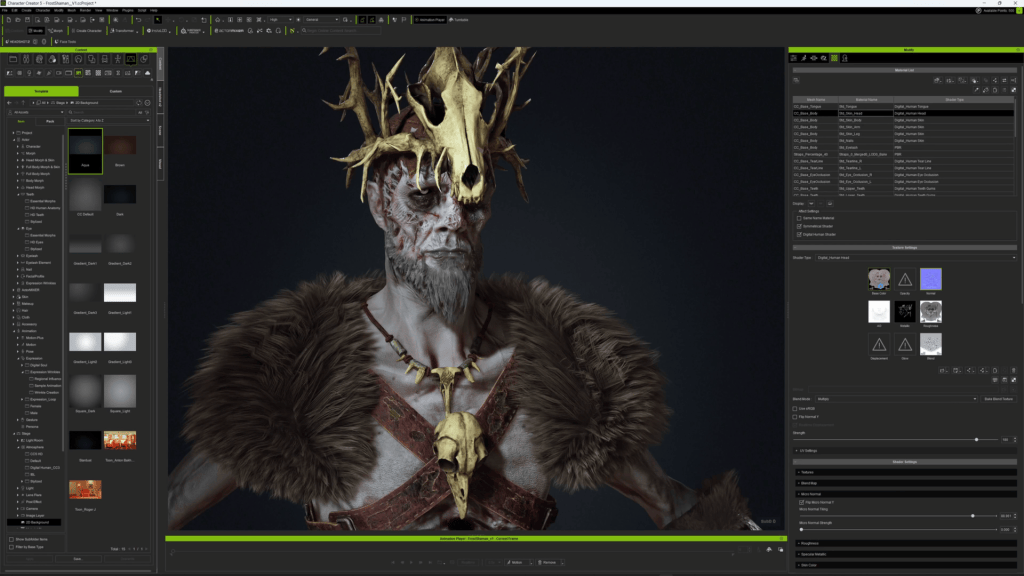
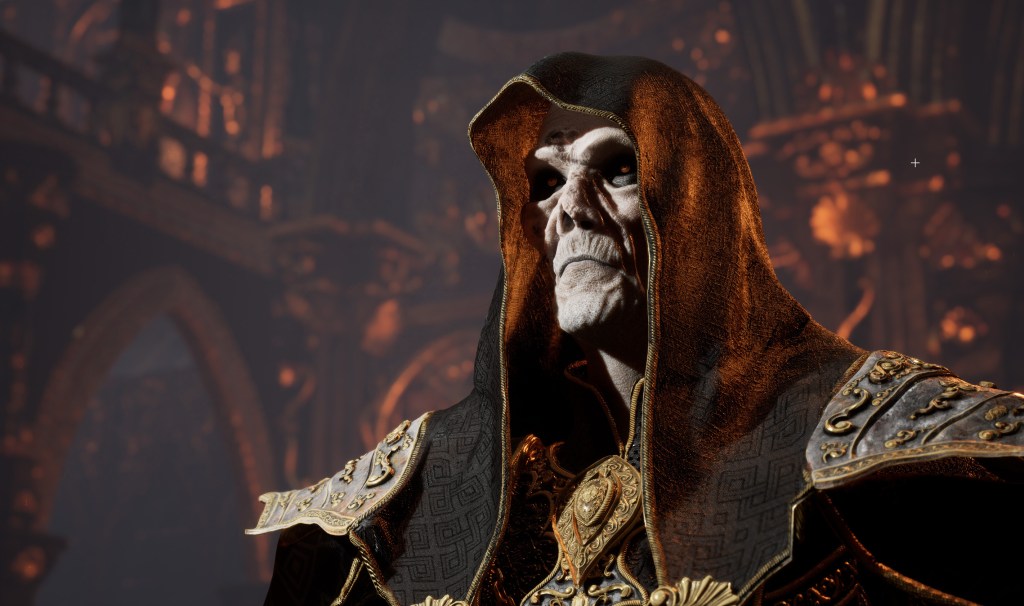
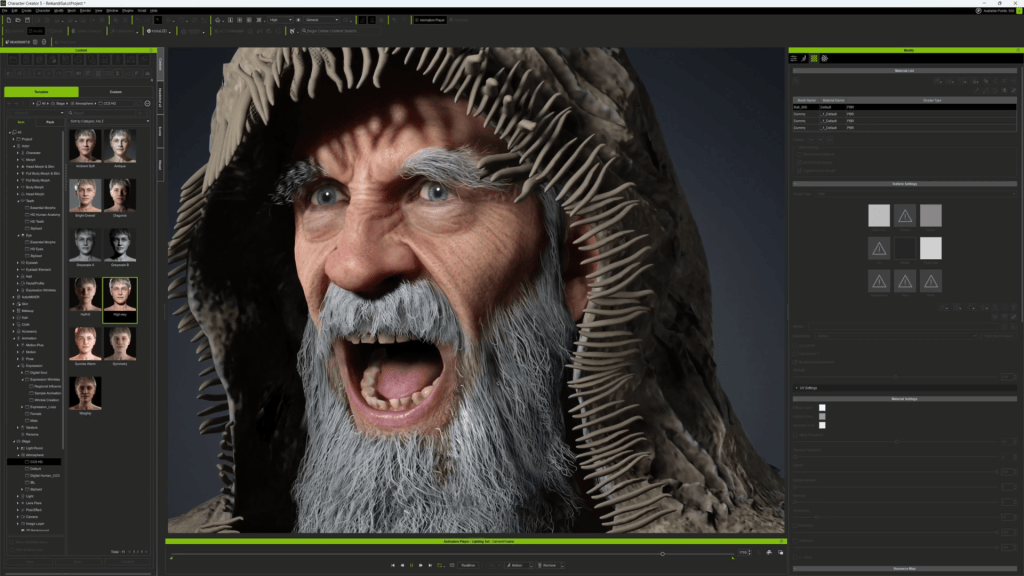
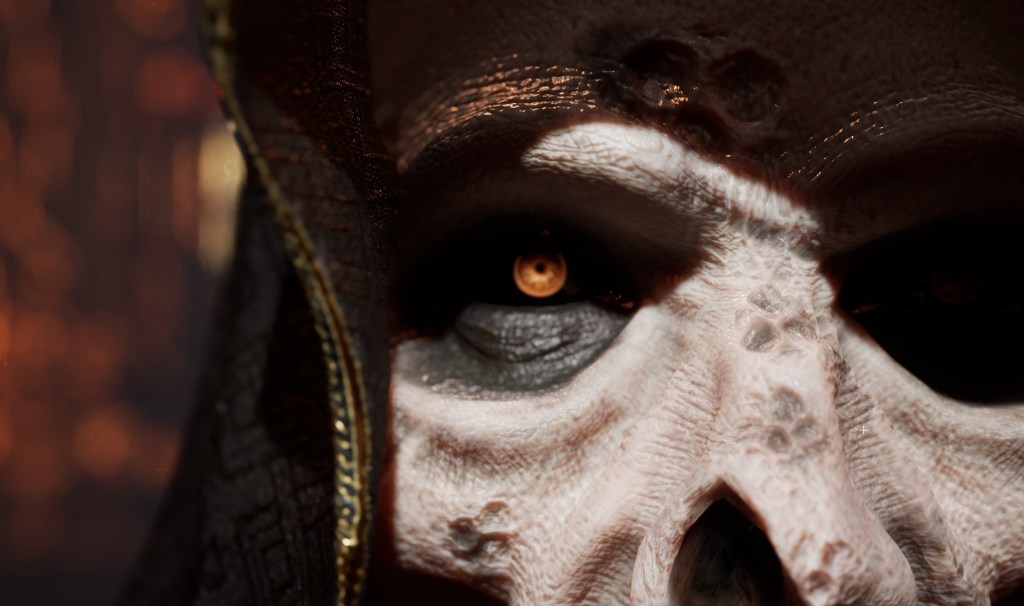
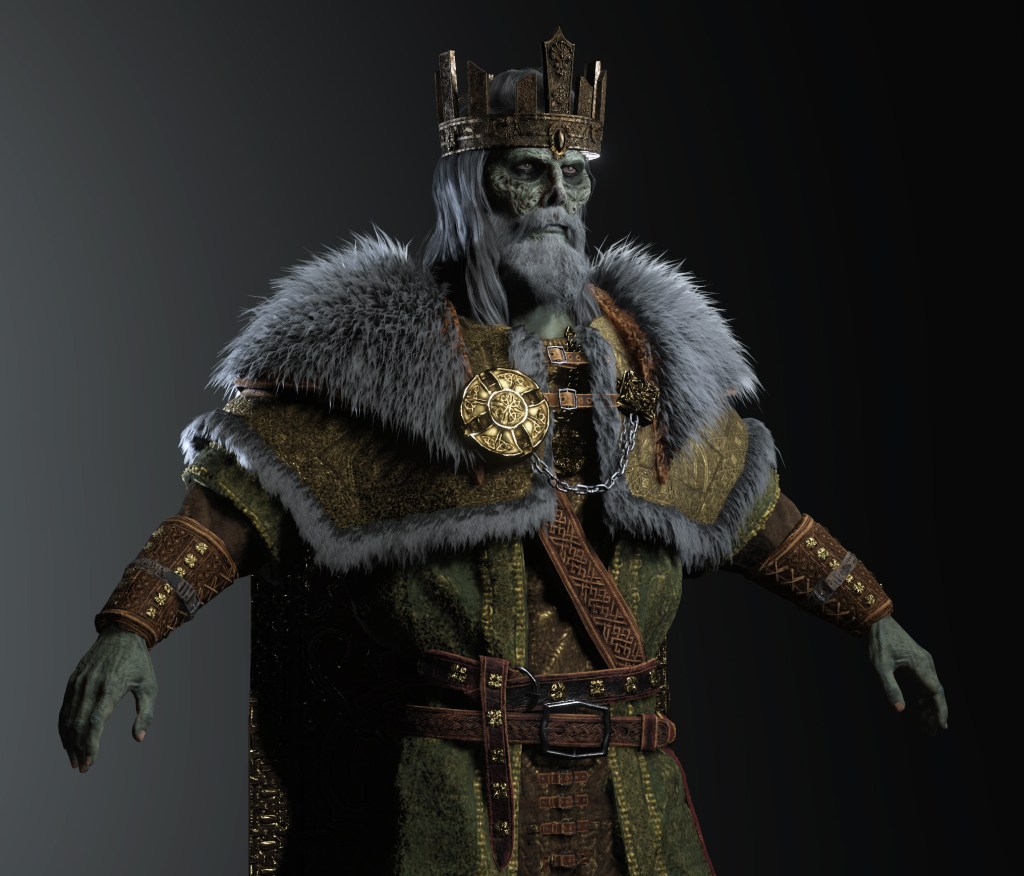
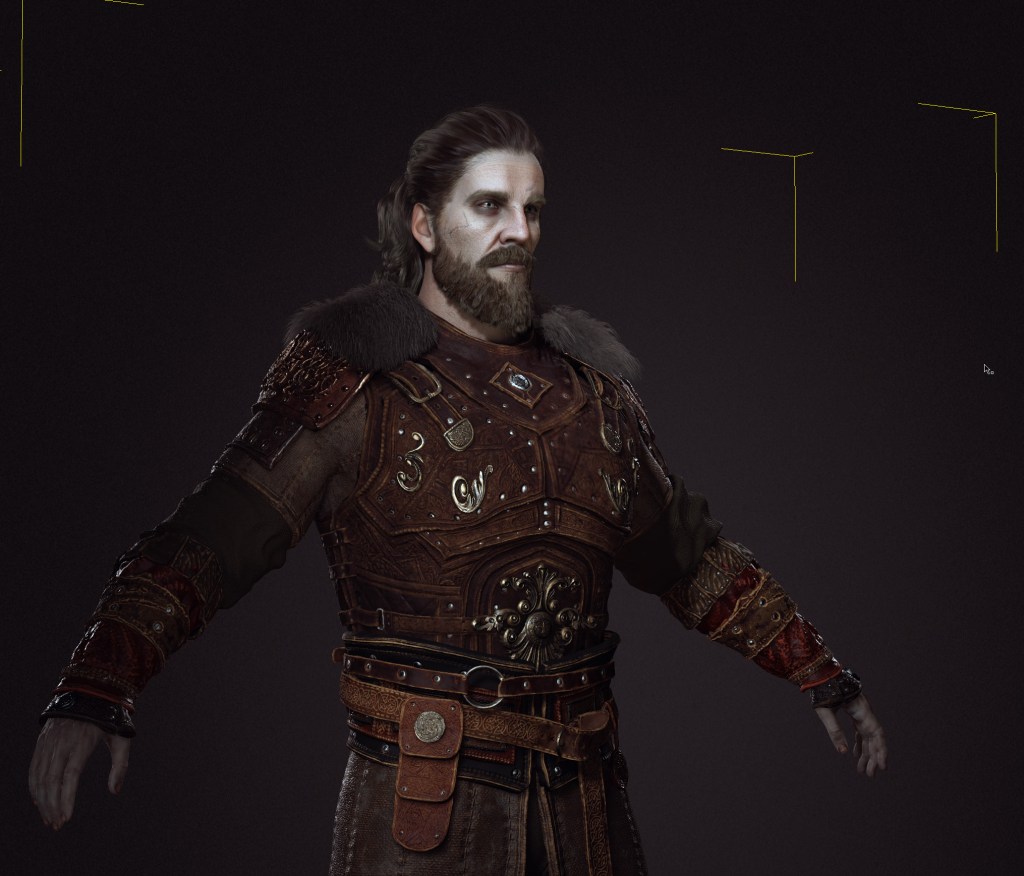
Creating a Knight King “Sardon” with Character Creator 5

Eva Sophie Cringle

Hi, my name is Eva Sophie Cringle, also known as Evanyla. I am a 3D Character Artist with five years of professional experience, currently working as a freelancer and lecturing at universities. In this article, I will guide you through my complete Character Creator 5 pipeline, from start to finish, using my character Sardon as an example. Along the way, I will share some practical tips and small insights that helped me achieve this outcome.

Check out Eva’s ArtStation

This is the diagram of my own pipeline, utilizing CC5 and 3rd-party software:

Outline for my personal pipeline utilising CC5 and adjacent software

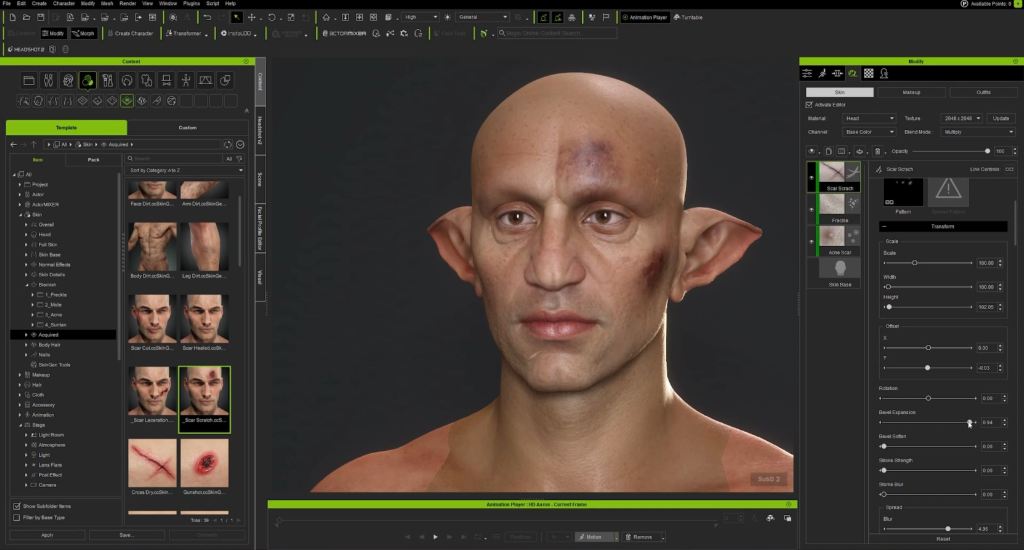
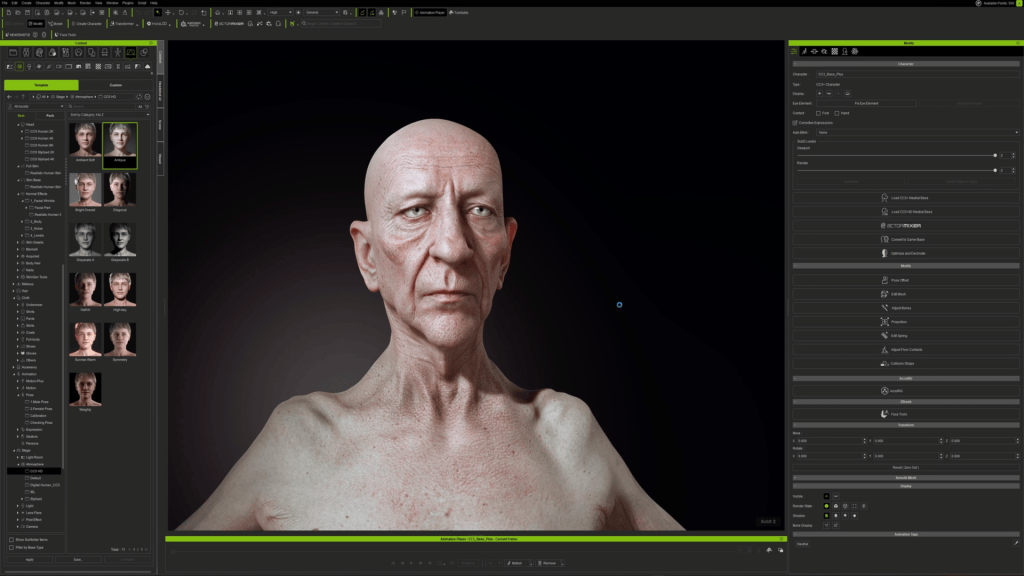
1. HD base, morphs, & ActorMIXER 

HD Basemesh Aaron with Actormixer.

Character Creator 5 provides two HD base bodies: Aaron (male) and Ariana (female). Since Sardon is a male character, I chose Aaron as my starting point. The HD base allows for the mesh to be subdivided back and forth depending on usage.

I began with a concept sketch, which served as my primary reference throughout the process. As this was a solo project, I allowed myself to iterate freely and adjust the design organically.

Starting from the base body, I adjusted the height to 194 cm (6’3″) and added muscles using the HD Body morphs (Modify > Morphs > HD Body). 

I did not replace the base skin textures (except for an added hairline). Instead, I added body hair, stubble and eyebrows from the Content Browser. I also slightly adjusted the skin hue towards red and olive tones (Modify > Textures > Select Body > Activate Skin Colour > Adjust). 

ActorMixer for face morphs.

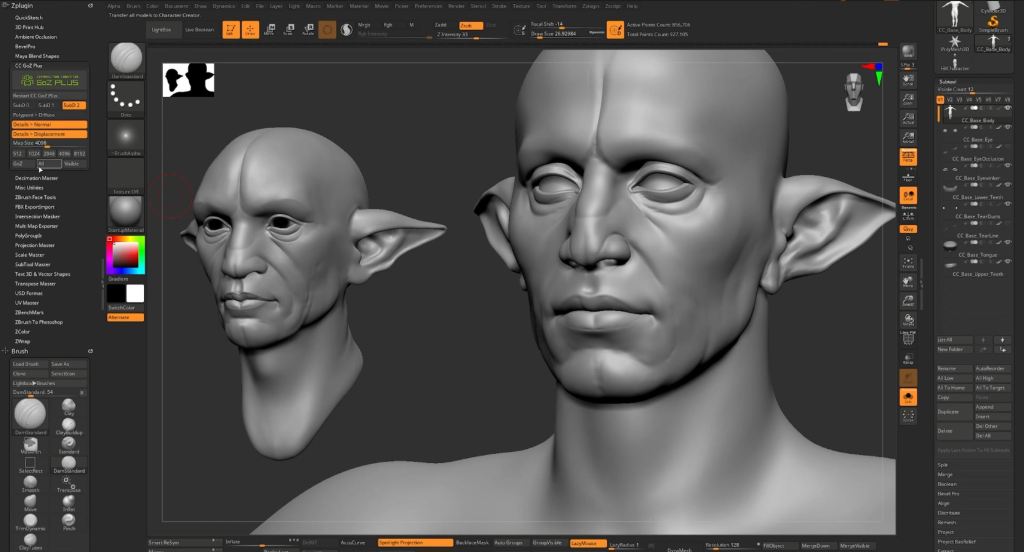
For the face, I used ActorMIXER to establish a rough foundation for head shape, ears and eye placement. I intentionally left finer facial details for later. Once satisfied, I ensured the model was set to SubD0, selected it, and sent it to ZBrush via GoZ using the default options.

(Before and after) Concept art (Evanyla) and basemesh adjustments 

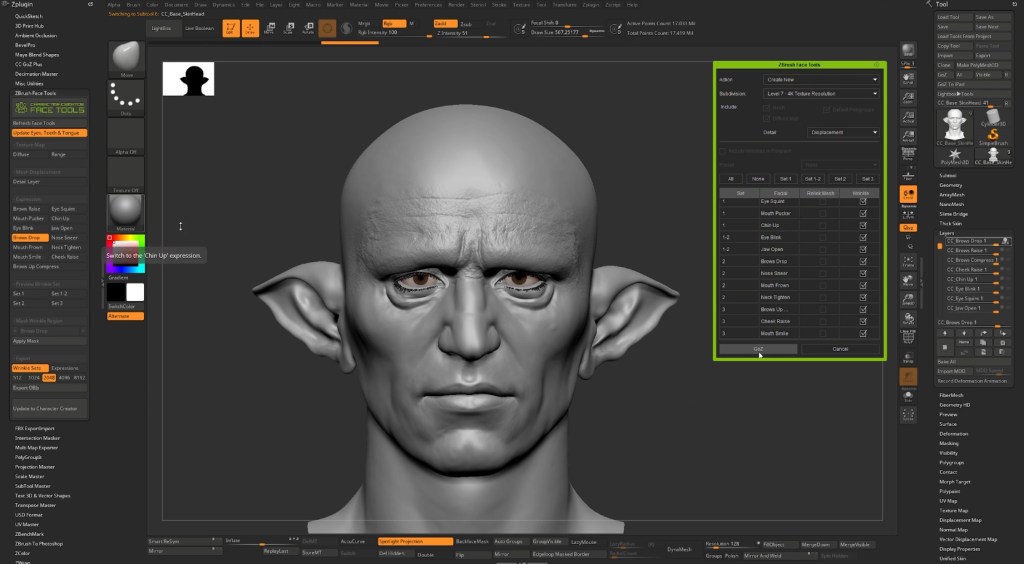
2. Reshaping the face in ZBrush with GoZ 

If you are not planning to make significant changes to the body, you can safely send the character in an A-Pose. If you intend to modify body proportions, sending a character with a T-Pose via GoZ Plus is required.

In ZBrush, I reshape the facial structure primarily using the Move brush, although other brushes can be used as needed. I recommend hiding the eyelashes during this process, as they tend to be visually distracting. Even if the eye area is altered, CC5 provides tools to correct this later.

For characters that require heavier detail, such as deep wrinkles, scars or damage, I separate the workflow as follows. 

2.1 Reshaping only 

I keep the subdivision level relatively low, as only the lowest subdivision is sent back to update the base mesh. The main tools I use are the Move brush and lasso masking to establish the overall form. Once satisfied, I select GoZ All (Tool > GoZ All) to send the mesh back to Character Creator. When CC5 reopens, I check the dialogue window. 

  • Good outcome: the window displays “Update” at the top. Proceed as normal.
  • Bad outcome: the window displays “Create Cloth” at the top. This indicates a mismatch. Possible fixes include:
    • Ensure the character in CC5 is still in SubD0 and unchanged in pose 
    • Make sure no additional SubTools were added in ZBrush 
    • Confirm that no meshes were renamed in ZBrush 
    • Try GoZ on the active subtool only 
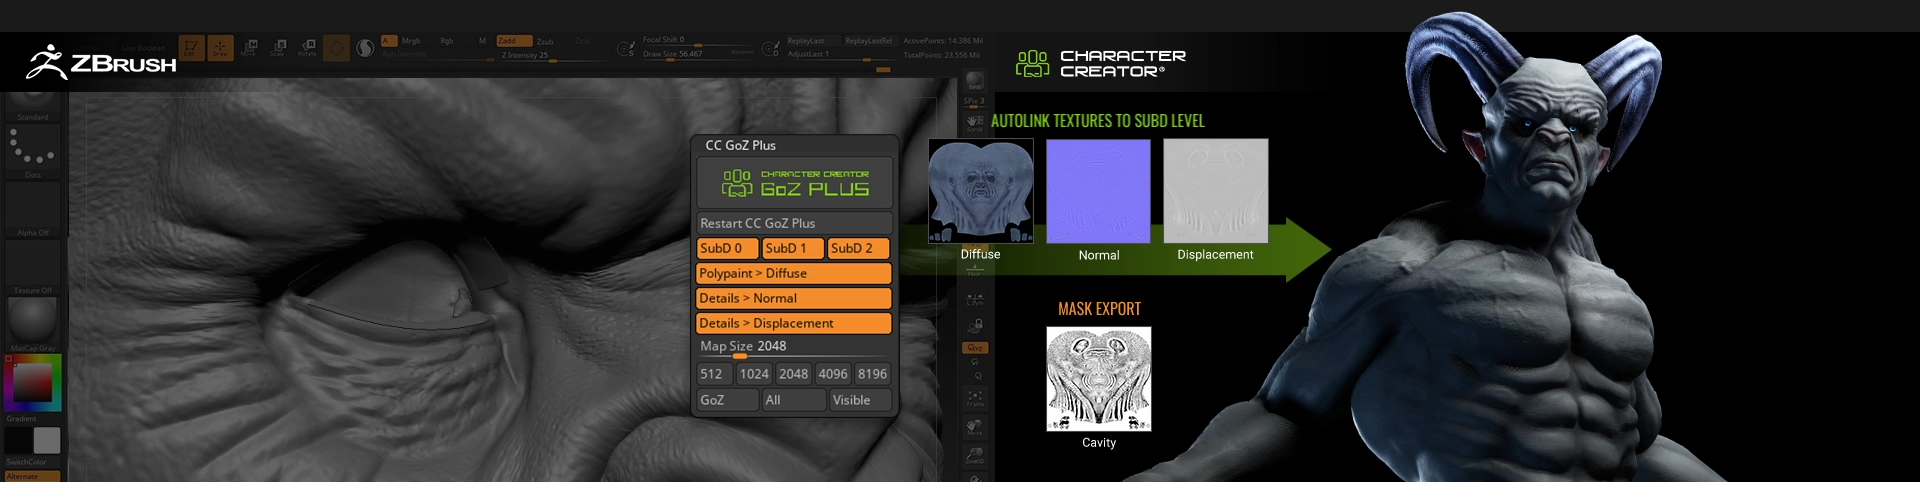
    • Try GoZ+ (ZPlugin > CC GoZ Plus), disable all texture maps, set SubD0 and press All 

If none of these resolve the issue, this step may need to be redone, as some mismatches cannot be corrected. 

2.2 Skin sculpting 

(Before and after) Facial reshaping and surface details 

For characters with more surface detail, I first complete the reshaping step above and confirm the base mesh updates correctly in CC5. I then return to the ZBrush file, delete unnecessary SubTools, usually keeping only the head unless body sculpting is required.

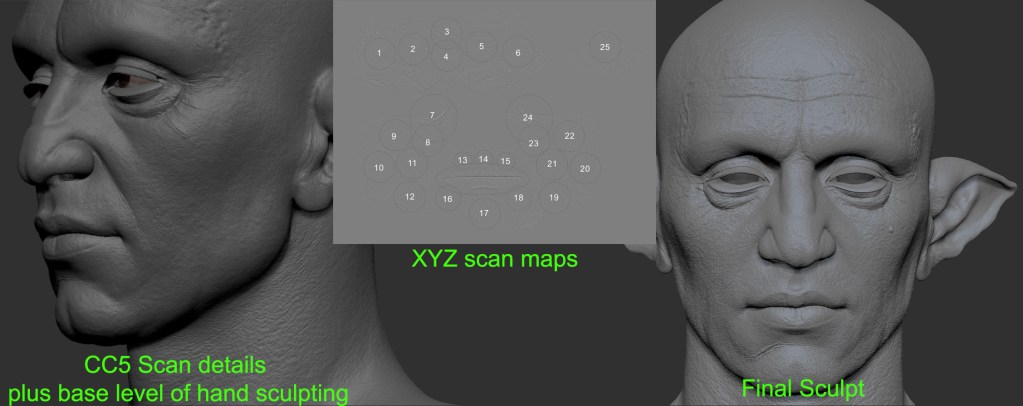
I subdivide the mesh to a higher resolution and sculpt wrinkles, scars, pores and other details. I strongly recommend working with layers for flexibility. Once sculpting is complete, I export the high-poly mesh (ZPlugin > FBX Import Export). 

From CC5, I export the character again in the same pose as an OBJ, including textures. This is used as the low-poly base for baking and texturing.

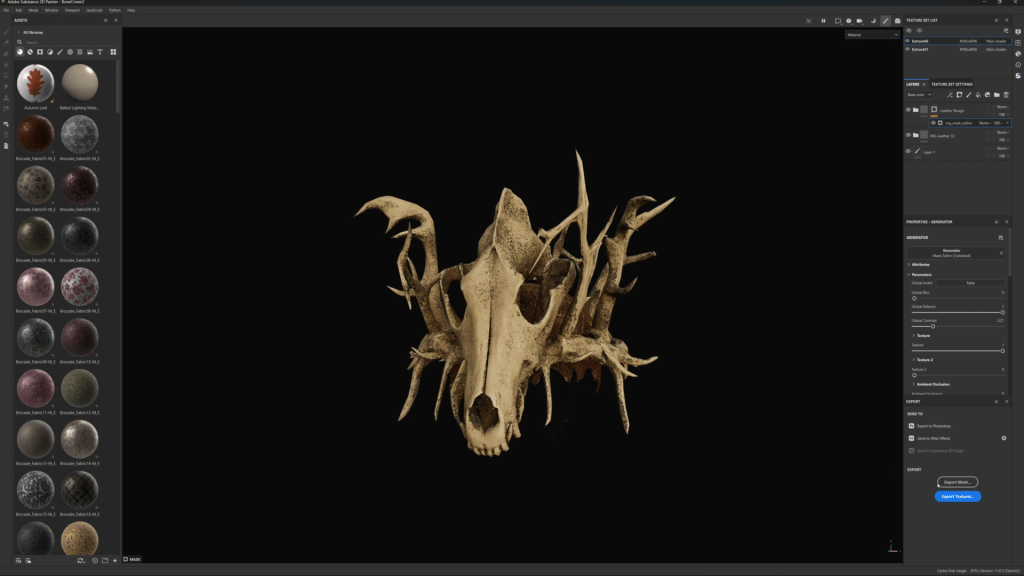
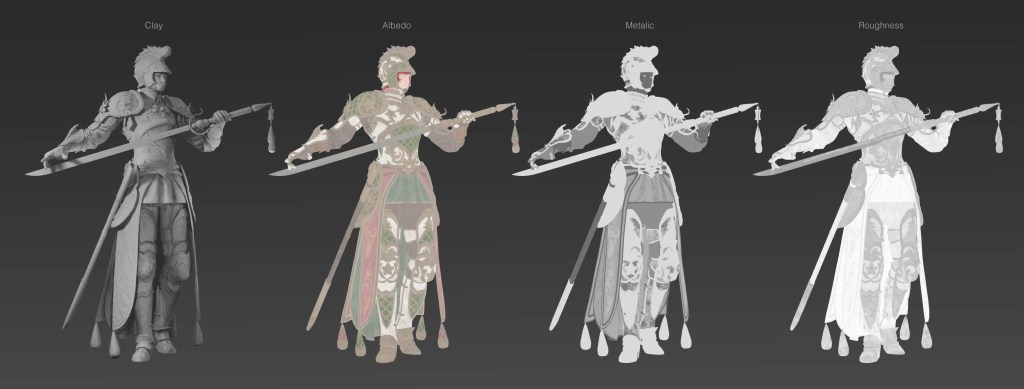
In Substance Painter, I import the low-poly OBJ and load the existing head and body textures as resources. I then bake using the high-poly FBX, adjusting the cage until there are no visible errors. I typically bake at 4K resolution and downscale later if required. 

In the texturing stage, I reapply the diffuse textures using fill layers and make adjustments. This is also where I define the hairline. Make sure to use the official Character Creator export preset for Substance Painter, available in the documentation: 

https://manual.reallusion.com/Character-Creator-4/Content/ENU/4.0/15_Substance_Painter/Exporting-Textures-from-Substance-Painter.htm

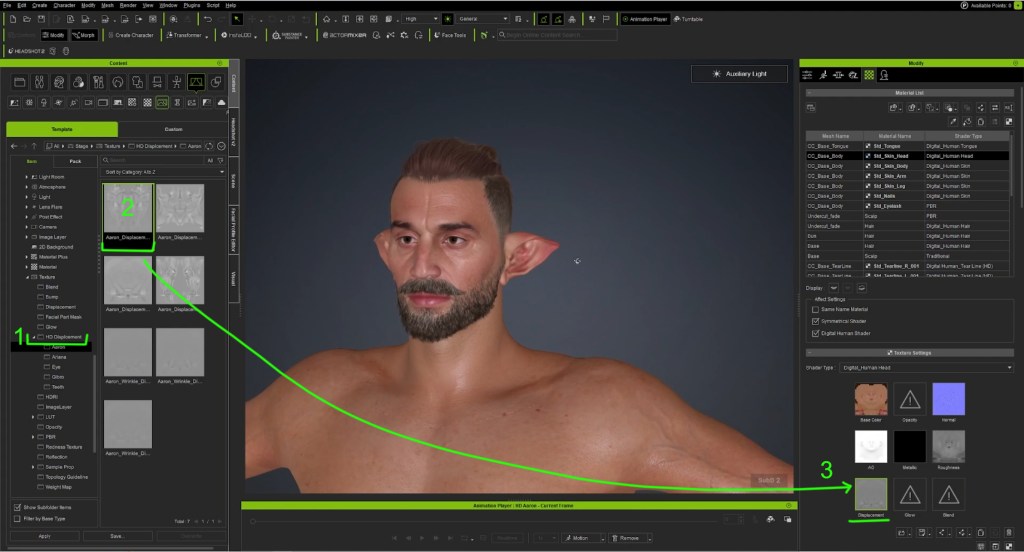
Back in CC5, I drag and drop the new texture maps into the corresponding slots (Modify > Textures). 

Tip: Update the wrinkle diffuse map as well (Modify > Expression Wrinkles > Textures), otherwise the standard textures may show through. 

3. Fixing and miscellaneous adjustments 

(Before and after) Fixing lashes and eye elements

After updating the face, small mismatches can appear in the eyes, blinking or lashes. These can be corrected using: 

  • Fix Eye Element (Modify > Attribute
  • Correct Eye Blink (Character > Correct Eye Blink
  • Correct Lashes (Character > Correct Lashes > Position > Correct Position

3.1 Optional custom eye texture 

(Before and after) Sardon’s custom eyes

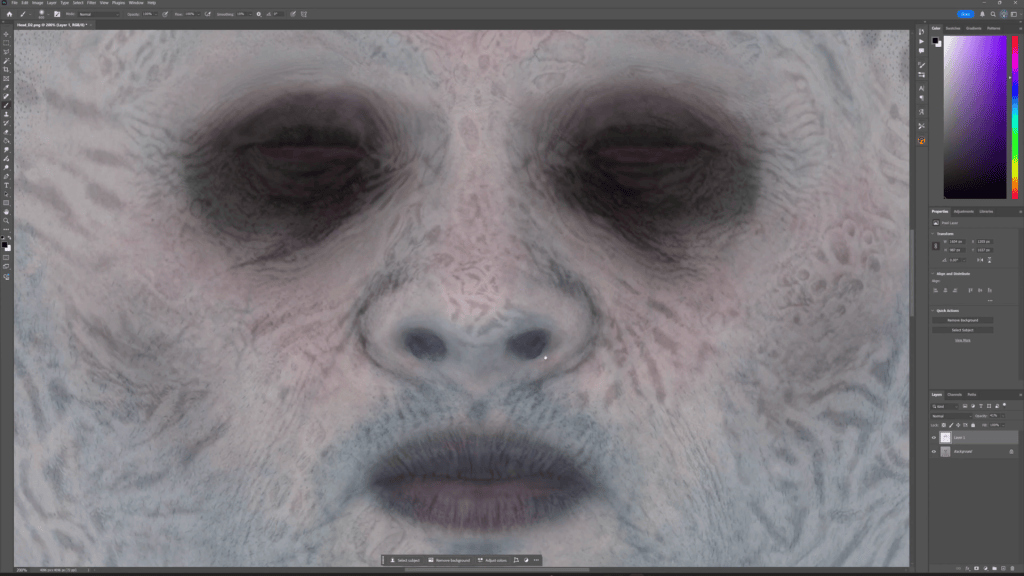
I often replace the eye texture entirely. You can either use existing eye assets or create your own based on the CC5 eye shader. I export the diffuse texture and open it in Photoshop.

(Modify > Textures > Eyes). I photograph my own eye using flash, cut out the iris and pupil, remove reflections, and adjust the shape. Since the texture is mirrored, this cleanup is essential. I then adjust the colour as needed. For Sardon, I used a hazel tone.

4. Creating clothes, hair, and armour 

Before creating clothing, I strongly recommend setting up a modified A-Pose.

The main improvement over the default A-Pose is using splayed hands. These can be found here (Content > Animation > Gestures). Sculpting gloves becomes significantly easier, and texture baking produces fewer errors due to better cage wrapping between fingers.

I also mirror the pose (Modify > Motion Pose > Edit Pose > Mirror), as the default A-Pose is slightly asymmetrical.

(Before and after) Modified A-Pose

Once complete, I save the pose to my custom library for later use. (Content > Custom > Animation > Pose > Save).

I then export the full character as an OBJ using the current pose. 

Tip1: For very muscular characters, export both SubD0 and SubD2 versions. Muscle definition can differ between subdivision levels, which may cause mismatches later. 

Tip2: I first import the model into Maya to remove unnecessary geometry such as hair, underwear, and other unused elements, keeping only what I need. I then export a cleaned OBJ for further work.

4.1 Marvellous Designer

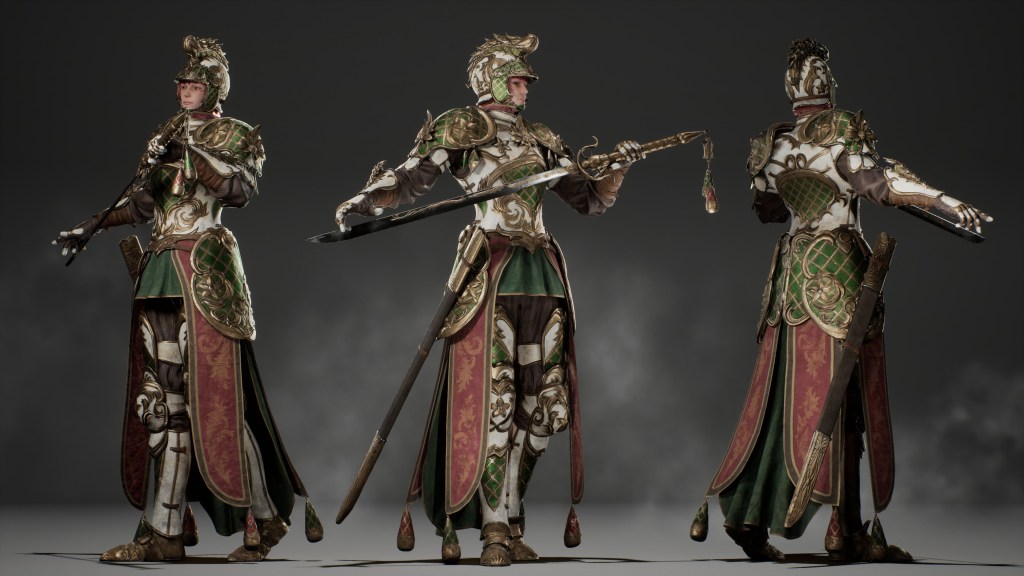
Clothes made in Marvelous Designer, sculpted details in ZBrush

I usually start clothing in Marvelous Designer as it allows me to create patterns and folds. I import the OBJ and recreate patterns either from reference or from scratch. I keep complexity in check and decide early whether details are better handled in MD or sculpted later in ZBrush.

Often, I bring garments directly into ZBrush as high-poly meshes for further sculpting, then later retopologize in Maya or TopoGun. This requires more welding but can still be efficient depending on the garment type. 

Tip: Technically speaking, you could export your CC5 Character with motion to simulate a catwalk with realistic cloth movement. 

4.2 ZBrush

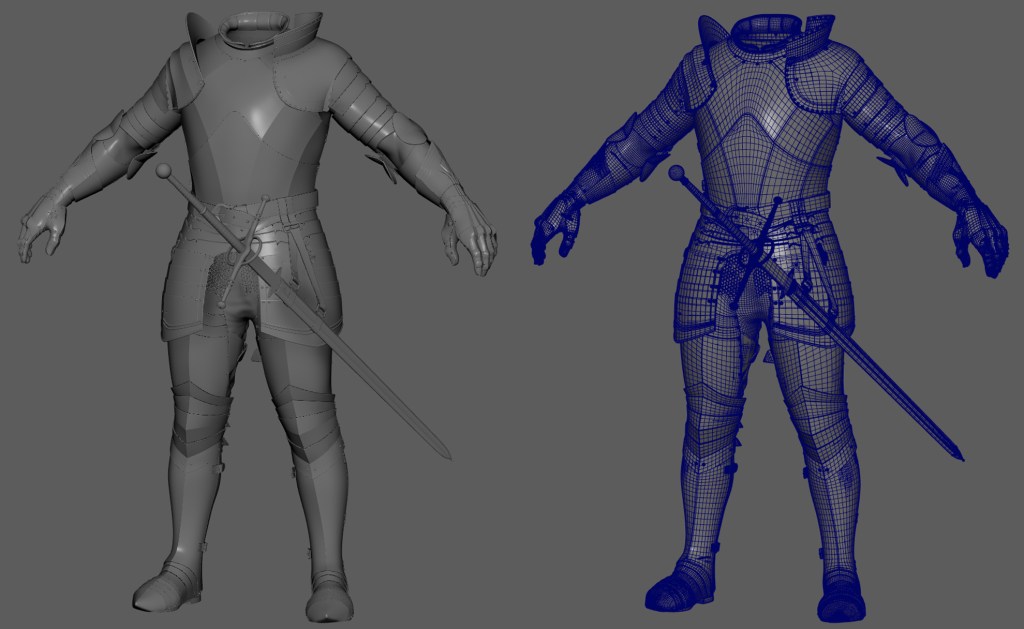
Armour sculpted within ZBrush. Hands utilise the splayed hands for reduced baking errors.

In ZBrush, I import both the SubD0 and SubD2 body meshes as sculpting references. For armour, my workflow typically follows this sequence: 

(Mask with lasso > Extrude zero thickness > Unmask > Mask by border > Invert mask > Soften mask > Polygroup > ZRemesher (half or same, with polygroups) > Extrude > Bevel or further edits using ZModeler.) 

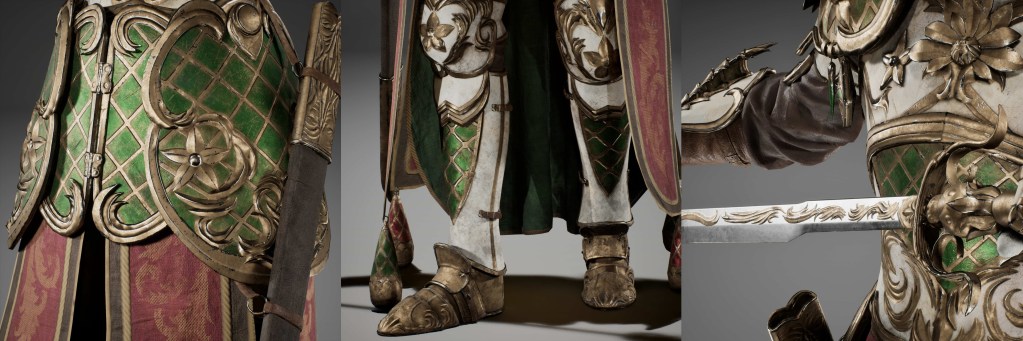
Some pieces benefit from quick retopology in Maya before refining further in ZBrush, especially armour that requires clean edge flow. For ornaments, I strongly recommend using IMM brushes instead of alphas. IMM brushes create real geometry rather than projected detail, resulting in cleaner bakes. They also do not require extremely high subdivision levels. 

Tip1: After placing IMM ornament meshes, decimate them to reduce polycount without visible quality loss (ZPlugin > Decimation Master). 

Tip2: If the sculpt becomes too heavy, split the mesh into multiple files to keep ZBrush responsive. For Sardon, I had it split between Clothes, Armour, and Scabbard + weaponry. 

4.3 Maya 

In Maya, I create hair cards using GS CurveTools (Paid Plugin for Maya). After importing the character, I delete unnecessary geometry, such as the body and teeth, and begin setting up materials.
I mark the hairline in Photoshop or Substance Painter to guide placement and darken the scalp where hair emerges. Since I was satisfied with CC5’s hair shader, I reused its textures instead of switching to XGen or Fibershop. I add a temporary hairstyle in CC5, export the diffuse and opacity textures, and reuse them in Maya. 

For hair materials, I assign a Lambert shader, load the textures, and enable Alpha Is Luminance on the opacity map. In Viewport 2.0, I enable depth peeling at the highest quality. 

Tip1: For debugging hair layers, duplicate the material and apply high contrast rainbow colours to the diffuse texture inside Photoshop. 

Hair shader using the Bucket tool:

Hair cards made in Maya with GS Curvetools vs Final render in CC5.
Tip: To test hair, export it as an OBJ file, open a clean Maya scene, combine and smooth it if needed, and then export it again. In CC5, adjust the transform if necessary and apply the hair shader using the Bucket tool.

5. Import back into CC5

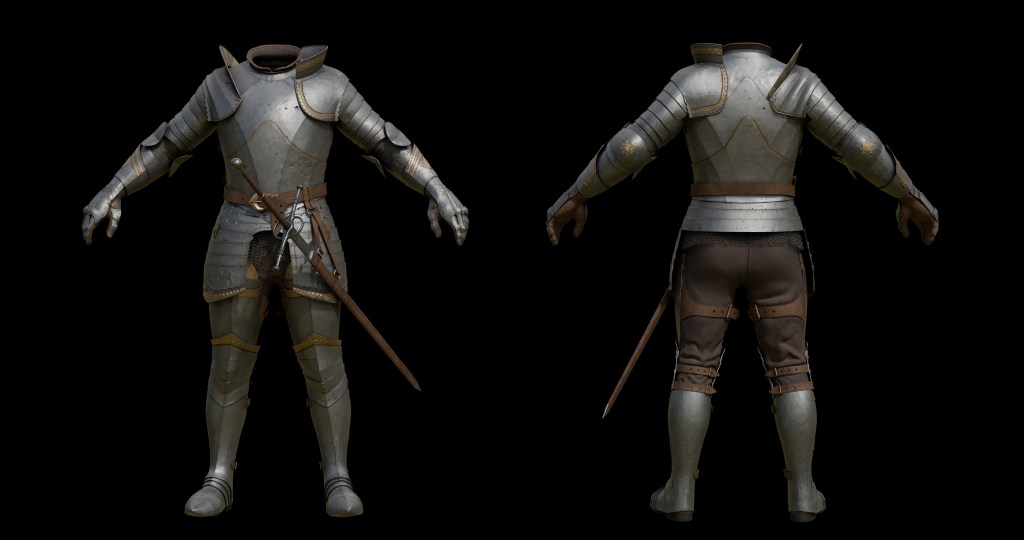
Once clothing, hair, and armour are retopologized, UVed, and textured, I import them into CC5 as props (Create > Prop). 

Tip: Import related items in batches rather than combining everything into one object. 

If an offset occurs on import, you can either correct it via (Modify > Attribute > Transform) or adjust the character pose to match (Modify > Motion Pose > Edit Pose). If the meshes appear blocky, ensure that you smooth the edges before exporting from Maya.

6. Setting up textures and materials
Assigning textures to the meshes, Weight painting adjustment on the poleyn (knee armour)

With all meshes in place, I assign materials (Modify > Textures) by dragging and dropping from the file browser. I leave normal and displacement maps until last, as they prompt additional options.

To elevate the flat faulds (layered plating around the waist), I created a custom mask for the displacement. With tessellation level on max, multiplier at 0.5 and grey scale value at 0 (Black = noelevation).

Tip: If physics are planned, ensure simulations are enabled (At the top row > “Rigid body simulation” and “Soft cloth simulation”).

7. Technical art 

To ensure custom meshes conform to the character correctly, they must be bound to the skeleton and weighted properly. Select the mesh and assign a parent bone (Modify > Attribute > Attach). If the bone is difficult to select, click on any body part. Then use the dots inside the panel to choose from the list.

Once parented, the object will move along but not deform. Select it again and use “Transfer Skin Weights”. Choose the appropriate clothing type. Defaults work for most items, but shoes and gloves should not use the default setting. For the Sabatons, I had to combine them with the actual leather shoe beforehand, as your character can only wear one pair of shoes. 

Weight painting adjustment on the poleyn (knee armour)

After binding all items, test deformation using the debug animations in the playbar. These include full-body and more limb-focused movements (Animation player > motion > Body rig).

Tip: You can pause the animation or even pose to get your mesh where you need it to be for testing. You can return into A or T pose at any time. 

Weight painting adjustments are usually necessary, especially for armour. This mode can be performance-heavy, so save the scene frequently. Armour often needs rigid behaviour, but to save time, I often focus on parts close to joints like the pauldron and couter armor pieces. I then check to which bone I can assign 100% of the weights to, to make sure I get the least deformation and most natural movement. 

Here is what I changed:

  • Pauldron: 100% clavicle bone 
  • Couter: 100% elbow share bone 
  • Tassets: 100% waist bone 
  • Poleyn: 100% knee share bone 

If you have imported any clothing items or armour that covers any body part, you can select it and enable the option to “hide body mesh” (Modify > Attribute >). Then click on the body parts which you want to make invisible. 

Tip: Do not delete the mesh where that information is stored. I recommend creating a “Dummy mesh”, which you can rename to “Do not delete”. I gave my character piercings on his chest, which I named “disappiercing” so I always know which mesh I can select to change the hidden body parts.

8. Setting up a render 

8.1 Pose and Express 

Posing Sardon to scream dramatically.

With everything prepared, I begin posing. This is where character personality really comes through. Choose a well-lit atmosphere and start posing (Content > Stage > Atmosphere).

Tip: If performance drops, switch from High to Quick mode temporarily. (Top bar) 

Save poses to the Custom tab for iteration. I usually refine each pose three to four times, checking from all angles to make sure the pose is readable and has no clipping. In the Expressions tab, I experiment with facial expressions to match the character’s personality and save those as well. For Sardon, I chose a proud sneer. 

8.2 Lighting 

Adding and adjusting lights within the scene

I prefer full control over lighting, so I create custom light sets based on existing HD presets (Content > Stage > Atmosphere > CC5 HD).

A strong fill light, clean rim lights, and controlled shadows are key. Good lighting can elevate a model, while poor lighting can undermine even strong work. You can add custom lights to your scene via (Create > Light >). In the modify panel, you can change the attributes to fit your needs. 

Tip: Introduce subtle temperature variation between lights, such as a warm fill and cooler rim light for greater contrast.

8.3 Turntable 

For my portfolio, I always include turntables. Both digital and physical turntables can be used. CC5 allows you to rotate the scene, character or lights independently. I usually render one light turn and one character turn and combine them in DaVinci Resolve .

9. Rendering 

Lighting adjustment, slight camera adjustment.

In the render settings (Ctrl + 3), I disable the background to allow transparent output. Open the render layout (Ctrl + 5) to access all of the controls for exporting. You can always add other windows like the playbar via (Window > ). 

9.1 Images 

One of many renders, many just differ slightly in pose, angle or lighting

I render my shots in Ultra HD as PNG files with maximum anti-aliasing. Post-processing is handled in Photoshop. Camera focal lengths usually sit between 80 and 105 mm, with depth of field disabled. You can find the camera settings by selecting them in the Scene tab. For action shots, I use a lower focal length for added dynamism. 

Tip: Very high focal lengths can cause viewport artefacts. Reduce the value until they disappear.

9.2 Videos 

Turntable renders within DaVinci Resolve

I render videos in standard HD MP4 format: one light-only turntable and one character turntable. Speed and direction can be adjusted in the turntable settings. If you want to add a turntable to your scene, click on the icon in the playbar.

10. Post-processing in Photoshop 

Before and after-post processing.

I organise renders using Artboards for clarity. The size is the same as the renders (3840 x 2160). Once everything is placed, I begin final adjustments.

I selectively sharpen high contrast areas using the sharpen brush rather than applying a global filter. Dodge and burn to enhance depth, emphasising rim lights and toning down overly bright areas to fake additional shadow.

I rarely colour correct, unless necessary or to boost certain areas of interest.

10.1 Secret metal trick 

A neat little trick to make the metalness richer in post-production.

For metal-heavy assets, duplicate the layer and apply a Curves adjustment. Push the curves up and down until a strong colour variation appears, then merge and reduce opacity. Mask the layer and paint the effect selectively. This adds subtle richness and variation to metal surfaces. 

11. Summary 

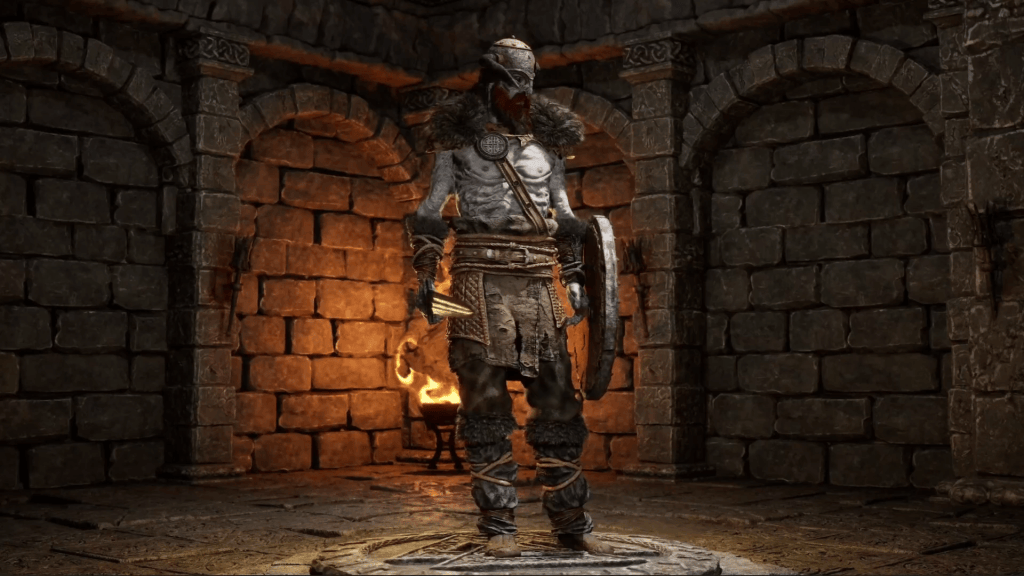
Final render of Sardon

This concludes my complete Character Creator 5 workflow and how I integrate it into my broader character pipeline. I am very happy with how Sardon turned out, and I look forward to my next character project, where I want to go deeper into the advanced tools. If you want to see more breakdown shots and renders, you can view my portfolio here: 

ArtStation: https://www.artstation.com/evanyla 

80LV Talent: https://80.lv/talent/p/evasophieevanyla-cringle 

LinkedIn: https://www.linkedin.com/in/eva-sophie-cringle-295367183/ 

Related Posts

Emmy Award-Winning Producer Develops Unity Indie Games with CC & iClone

For most of his career, Mike Wuetherick worked inside large studios, surrounded by character artists, riggers, animators, and graphics engineers. He shipped games, led Unity’s film team, collaborated with Disney and Netflix, and even won an Emmy for CG production work.

Today, he is building an ambitious cyberpunk indie game largely on Unity by himself.

The difference between those two worlds is not just team size. It is the tools.
For Mike, Character Creator and iClone have become the foundation that makes solo, production-quality game development possible.

Mike Wuetherick

Mike Wuetherick has spent more than 25 years working across games, film, and real-time production.

He shipped multiple commercial titles early in his career, including Pac-Man games and a Katamari project at Namco. From 2016 to 2023, he worked at Unity, starting in product management before moving on to lead the company’s film and virtual production initiatives.

During his time at Unity, Mike collaborated closely with Oats Studios, contributing to the production of Adam Episodes 2 and 3, where a small, elite team pushed real-time CG storytelling to cinematic quality.

He also worked with Disney Television Animation on projects including Baymax Dreams and Sherman, combining real-time technology with character-driven animation. The Baymax Dreams project was later recognized with a Technical Emmy Award in 2018, highlighting the impact of real-time pipelines in broadcast animation.

Alongside these productions, Mike ran a dedicated motion capture stage in Vancouver, supporting facial, body, and performance capture workflows for film and episodic projects.

Check out Mike’s Personal Website

What’s He Building on Unity? Dystopia Punk: Zero Hour

Mike’s current indie project is Dystopia Punk: Zero Hour, a cyberpunk, near-future co-op game built on Unity.

Set in a world dominated by powerful governments and corporations, Dystopia Punk focuses on four-player online missions. Players work together to infiltrate facilities, hack systems, fight enemies, and complete objectives across a series of mission-based maps. Rather than a massive open world, the game uses carefully designed environments that support different play styles, from stealth to direct combat.

The game is built in third-person, a deliberate design choice. For Mike, character customization only matters if players can actually see their character in action. Animations, outfits, and movement are part of the experience, not something hidden behind a first-person camera.

Mike is aiming to release an early playable version within the year, targeting summer if possible.

Mike’s Indie Game Pipeline 

While Dystopia Punk is a solo project, the pipeline behind it is closer to what you would expect from a small studio:

  1. Character creation and assembly in Character Creator
  2. Clothing authored in Marvelous Designer, refined in 3ds Max or Blender
  3. Rigging, skinning, and optimization handled inside Character Creator
  4. Performance and facial animation created in iClone
  5. Export to Unity, where runtime customization and gameplay systems take over

Character Creator sits at the center of this workflow. Everything else connects to it.

Why Character Creator Is the “Core of Everything”

Mike describes his current workflow with a simple reality check: when you are a one-person team, you do not have the luxury of rebuilding character pipelines from scratch.

In a studio environment, character production is distributed across specialists. In solo development, those responsibilities still exist, but the person handling them is the same one designing gameplay, writing code, and building levels.

Character Creator replaces an entire layer of production overhead.

Built for a One-Person Team

For Mike, the value of Character Creator is not one single feature. It is how many traditionally separate tasks are solved in one place:

  • Rigging and skinning
    Character Creator allows him to auto-rig with AccuRIG and skin characters quickly, with live skin weight painting that is far faster and more intuitive than traditional DCC workflows.
  • Wrinkles and expression systems
    Upgrading characters from CC4 to CC5 instantly adds wrinkle maps and higher-quality deformation, improving realism without redoing work.
  • SkinGen for layered detail
    SkinGen is essential for Dystopia Punk’s cyberpunk aesthetic. Tattoos, decals, and layered skin details can be added and adjusted rapidly, making iteration painless.
  • Hair Builder for game-ready hair
    Mike relies on Hair Builder rather than custom groom pipelines. It allows him to mix, adjust, and recolor hair components while keeping performance suitable for real-time games.
  • Optimization tools for game character

Depending on the project, Mike uses Game Base conversion, LOD generation, and the Remesher to tailor characters for runtime performance. These tools are available when required, without forcing a separate optimization pipeline.
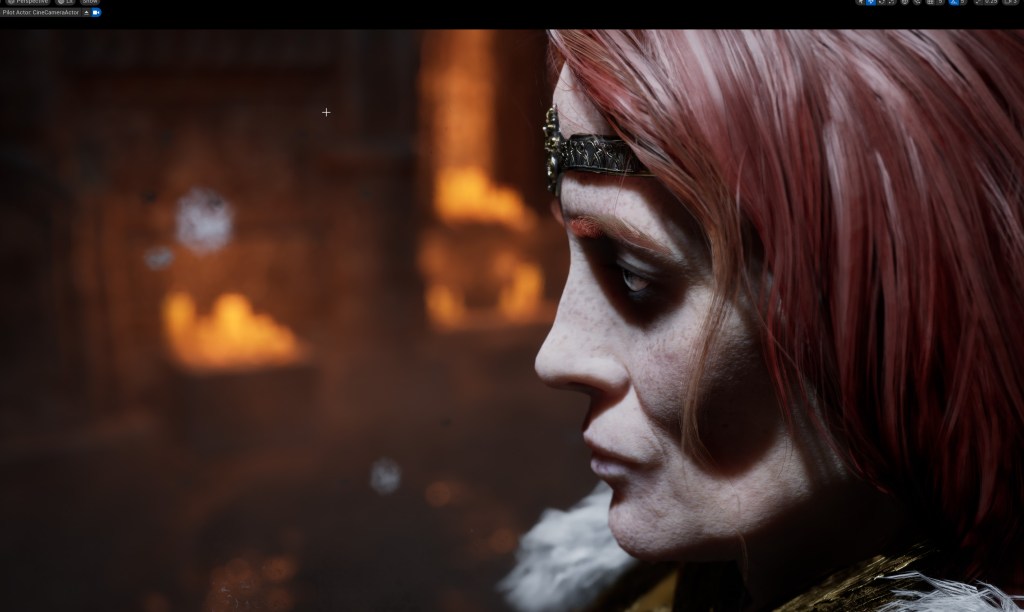
Runtime Customization in Unity

Inside Unity, Mike has built custom systems that extend what Character Creator provides. Clothing and body part masking, modular outfit combinations, and mix-and-match customization all happen at runtime.

Character Creator provides the structured, consistent foundation that makes these systems possible.

Taken together, these features allow Mike to handle character creation at a level that would normally require multiple dedicated roles.

iClone for Performance: Face + Body + Hands That “Just Sync”

Animation is another area where solo developers often struggle. Traditional motion capture pipelines rely on multiple tools for body, face, and hand capture, followed by time-consuming alignment and cleanup.

Mike has managed those pipelines before. At Unity, he ran a full mocap stage using professional systems.
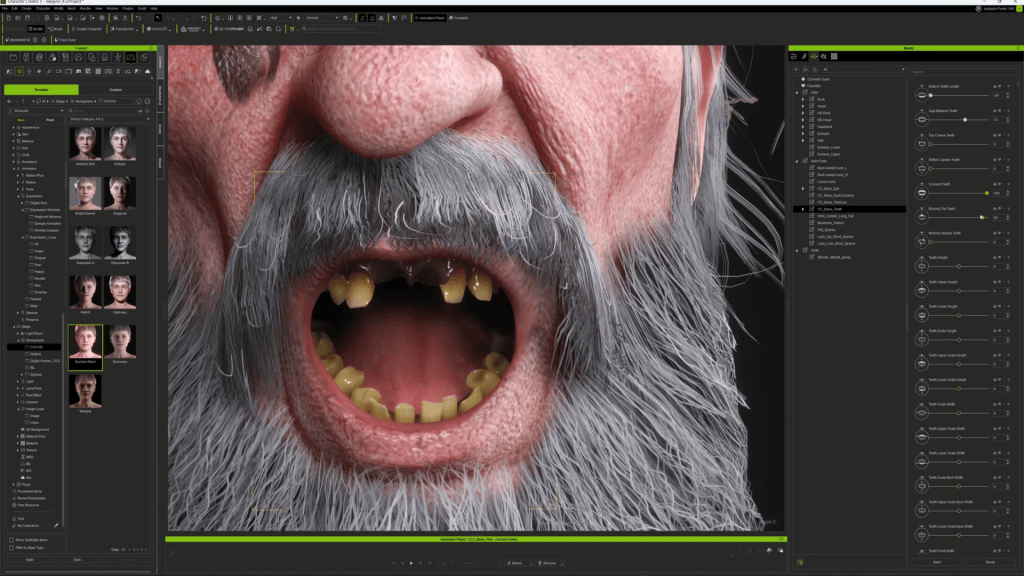
With iClone, the experience is fundamentally different.

Mike used AccuFACE for facial mocap

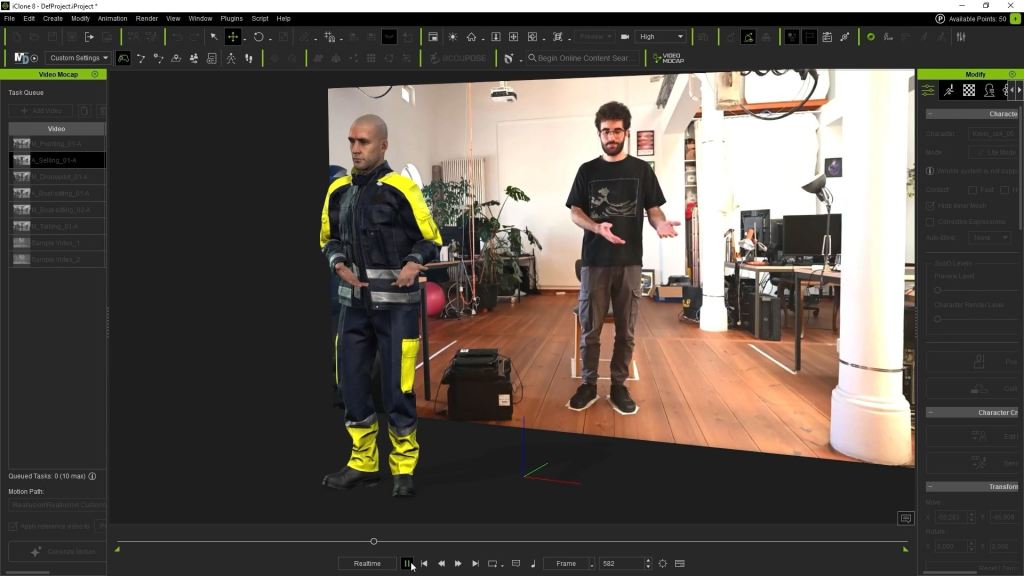
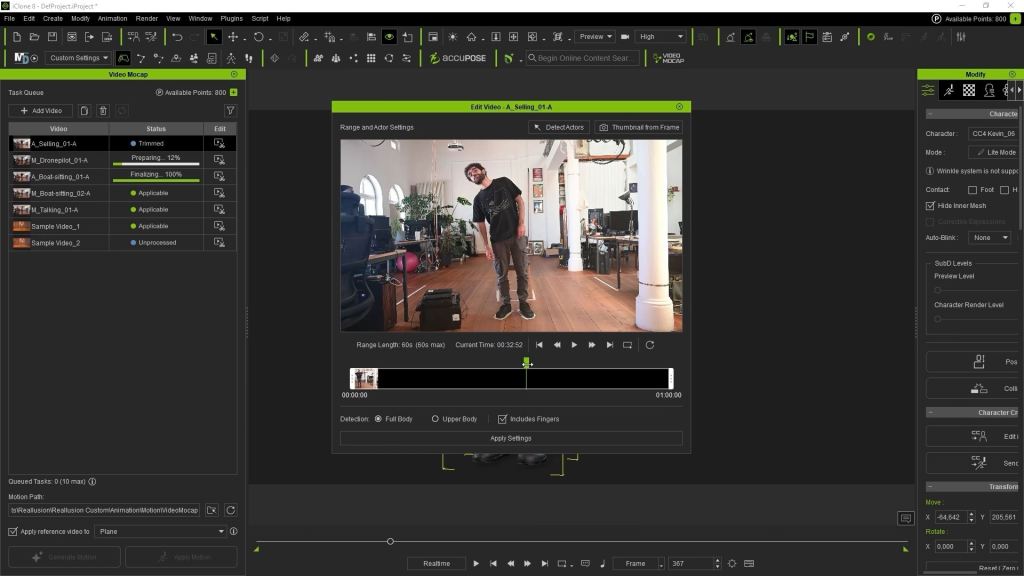
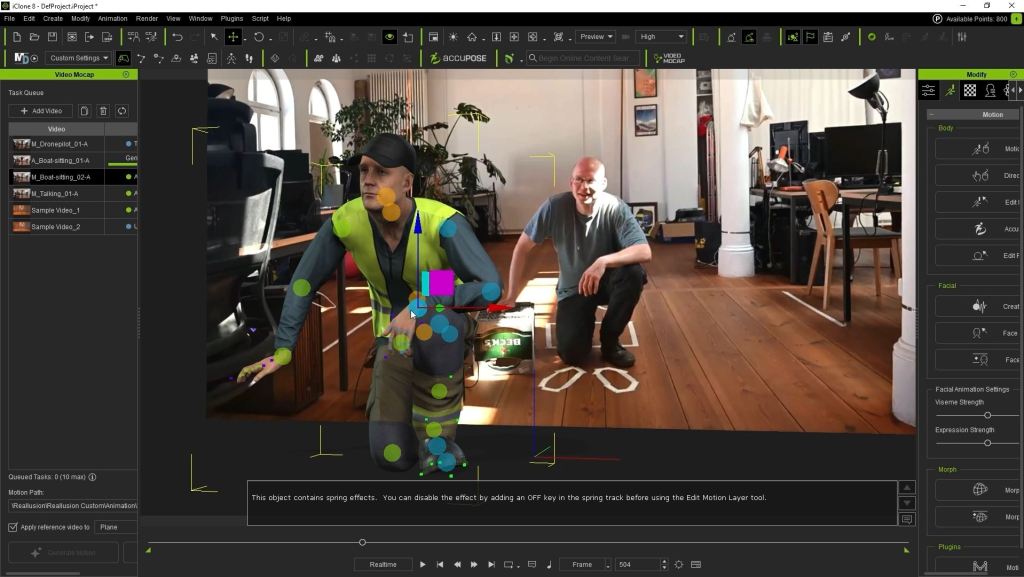
Facial animation, body motion, and performance data are unified in a single environment. Mike uses Faceware regularly and has also worked with Rokoko suits, though he notes that hardware setup time can be a barrier. This is why he is particularly interested in video-based mocap, which aligns closely with how animators already work—by recording reference footage.

For Mike, iClone removes technical friction and lets him focus on performance rather than data management.

ActorCore for Background Crowds

Character Creator is not only used for hero characters.

To populate environments quickly, Mike relies heavily on ActorCore. With ready-to-use characters and animation libraries, he can block out crowd scenes and background activity in minutes rather than days. This is especially important for creating the sense of a living city in Dystopia Punk.

Unity Auto Setup: The Real Indie Superpower

One of the biggest challenges for solo developers is rendering quality. Skin, eyes, hair, and wrinkles are notoriously difficult to set up correctly without dedicated graphics engineers.

Mike has fought those battles before.

With Unity Auto Setup, he does not have to anymore.

Whether working in HDRP or URP, Auto Setup ensures that characters exported from Character Creator arrive in Unity with shaders, materials, and wrinkle systems configured correctly. The result is predictable, production-ready visuals without weeks of shader development.

For a one-person team, that reliability is invaluable.

The Time Savings: Months vs Days (And a Two-Week Game)

Mike often compares his current workflow to his experience producing at scale.

In a traditional studio environment, even with multiple character artists and outsourcing support, it could take three to four months to complete a single production-ready character.

Using Character Creator, Mike can build a new character in a couple of days.

That difference compounds quickly.

As proof, he points to Free Dive, a small third-person game he built during a game jam. Using Character Creator and iClone, he was able to create characters and ship a complete playable experience in two weeks.

For Mike, that project was a turning point. It demonstrated that solo development was not just possible, but sustainable.

Conclusion

Mike Wuetherick’s journey—from Emmy-winning virtual production to solo indie game development—highlights a fundamental shift in how characters are made.

Character Creator handles the foundation.
iClone handles performance.
Auto Setup makes Unity integration dependable.

Together, they allow one developer to work at a level that once required entire teams.

For indie creators and small studios, that changes what is realistically achievable.

Related Posts

Houdini artist Kay John Yim used Character Creator and iClone animating a mesmerizing short inspired by Satoshi Kon

Mesmerizing masquerade inspired by Satoshi Kon – Character Creator, iClone and Houdini Pipeline

Houdini artist Kay John Yim used Character Creator and iClone animating a mesmerizing short inspired by Satoshi Kon
Houdini artist Kay John Yim used Character Creator and iClone to animate a mesmerizing short inspired by Satoshi Kon

John Yim

Hi I’m John Yim. I am a Chartered Architect and CGI Artist based in London. Obsessed with creating beautiful imagery, my passion has taken me beyond architecture into fashion design, character design, and landscape design, enriching my artistic vision with fresh perspectives and diverse influences. As an architect, classical architecture and ballet speak to my artistic DNA. I have always loved how extravagant, ornate architecture and elegant ballet movements complement each other so naturally.

At the same time, modern anime has been my greatest inspiration for personal projects—even more so than live-action films or CG animations. Of all the anime I have watched, dance sequences capture something essential about the medium—a unique energy, mesmerizing rhythm, and playfulness that can only be achieved when animators have complete control over every frame transition and moment of stillness. These moments embody the spirit of anime in a way that has always resonated deeply with me.

Follow John Yim’s Instagram

Project “Big Heart” started as a simple weekend experiment with a playful mocap anime I found on Reallusion ActorCore. As I added more details and drew inspiration from music videos, it gradually evolved into one of my most ambitious CG projects yet, spanning nearly a year. I wanted to blend both sides of myself—the anime enthusiast and the architect—together in a single fantastical CGI project.

Character Creation & Character Animation

Out of all the 3D software I use, CC, iClone & Marvelous Designer remains the ones I have not replaced with Houdini. Houdini’s character rigging and animation capabilities are powerful but overly technical and counterintuitive. Without any formal training in rigging or animation, CC & iClone simply works better for my needs. Its intuitive interface lets me focus on being an artist rather than getting bogged down in technical problem-solving.

I kicked off the project by creating 2 characters in CC, in which I used the body morphs to tweak their height, body shapes and facial features.  Then I exported them to iClone, downloaded three motion sets from ActorCore and blended them together to create the initial sequence. Those ended up becoming the final sequence of the animation, in addition to a couple more motion sets that I gradually added later on.

Edit Motion Layer is my go-to iClone tool. It lets me manually keyframe character movements using IK joints, which was crucial, especially for fine-tuning the characters’ hands to avoid colliding into their clothes in simulations down the line.

Looking back at my earlier projects, “Henshin” and “The Playful Deity”, one notable critique is how the characters looked and moved identically—at times creating an uncanny effect. In reality, even the most rehearsed dancers exhibit natural variations in their movements.

To create character variation without significantly increasing rendering time, I used two character bases—one female and one male—five different hairstyles, and three costume variations. This approach provided just enough diversity to avoid the identical uncanny appearance while maintaining the dance troupe’s visual cohesion. For the movements, I vary the mocap through one of two methods: either adding an extra layer with keyframes on top of the mocap data, or slightly shifting the mocap keys. I believe subtle variation serves the best here, because there is something mesmerizing about perfectly-synced movements while excessive variation can be distracting.

Cloth Simulation

I used Marvelous Designer for the initial cloth fitting, and used Houdini to add details (stitches, hems, garment thickness, zips and buttons).  While Houdini is more than capable of creating garments from scratch, it still lacks the real-time feedback of Marvelous Designer, which disrupts my creative flow during cloth-fitting.

MD Cloth fitting
Mask painting

Two things mattered most when creating the garments. First, I tried to avoid overlapping cloth as much as possible—Vellum in Houdini hates overlapping geometry. Second, particle density settings needed some thought. I kept particle distance at 10 units minimum. A lot of tutorials say to crank it down to 2 for more detail, but I found that just made simulation times ridiculous without much payoff. 10 units was the sweet spot for me.

Once I had all the garments fitted to the character A-pose, I converted everything to quad meshes and exported as welded OBJ files straight into Houdini, as OBJ was the only format that kept material data from Marvelous Designer intact during export. I split the imported OBJ by materials and applied different Vellum properties to each piece. Then I painted masks to control what simulated and what did not. Usually I masked out the entire back and waist area, using Point Deform to stick those parts directly to the character animation. This gave me a hybrid setup where some parts followed the character rigidly and other parts simulated freely.

Cloth simulation

While a lot of Houdini artists prefer using the Remesh node to convert everything to triangles before running Vellum – as triangles capture more detail with fewer points- I personally preferred quad meshes as they worked good enough in most cases without the trouble of deforming the triangular mesh back onto the quad mesh afterwards for rendering.

Vellum parameters do not correspond to real-world values and their behavior changes based on mesh density, so achieving a specific fabric appearance requires extensive trial and error. For final simulations, I typically use 20 substeps and 200-400 constraint iterations for multi-layered cloth simulations. Once I was satisfied with the simulation (an iteration process that took months), it was simply a matter of using Point Deform to attach buttons, chains, stitching, and seam details onto the simulated clothing.

Final render still

Hair Simulation

In preparation for hair simulation, I started with iClone Hair Mesh as the base, then used “Cards to Curves,” an HDA found on GitHub — a simple solution for hair mesh conversion in Houdini. During early test simulations, I realized that apart from the main character’s long hair, the other hairstyles simply did not move enough to make a noticeable difference, even when blown by wind. Consequently, I only simulated the long hair and kept the remaining hair meshes exported from iClone, intact without modification. The main takeaway is that one must add “glue” as a Vellum constraint to prevent individual hair strands from becoming excessively separated during simulation. I also used “Pin to Target” Vellum constraint to keep the upper portion of the hair attached to the scalp, which reduced simulation times.

FX Simulation

I used Axiom Solver for the pyro sims and Embergen for the fog and shockwave sim. In order to add more depth to the final shots, I experimented with creating ground-level fogs using Embergen.  I exported the animated characters and a poly-reduced geometry of the environment, then imported them into Embergen as collision geometry. The fog is created from a box volume with randomized vortex noise. The collision geometry would then interact with the fog.  Then I exported the simulated fog as VDB into Houdini.

I also used one of Embergen’s shockwave presets to create the heart-shaped shockwave in the final shot. The only change I made was swapping the emission source to a heart-shaped geometry, then I exported both the volume as VDB and the particles as Alembic into Houdini.  I rendered the particles with an emissive material in the final render to add an extra layer of detail on top of the VDB shockwave.

Embergen: fog
Embergen: shockwave

Since both Axiom and Embergen are exceptionally fast pyro solvers, the challenge in FX simulation for this project shifted from optimizing simulation time to perfecting the timing — particularly for rapid simulations like the shockwave effects. Rather than simulating over and over again in Embergen, I used “retime” and “timeshift” in Houdini to shift the VDB’s timing around to match the overall rhythm of the dance in a way that felt satisfying.

Some shots contain less movement than others. To ensure the sequence consistently feels animated and dynamic, I added falling petals throughout all the shots. The petals are Houdini Vellum simulations that were essentially reused across all sequences. This addition also enhanced the fantastical quality of the final render.

CGWorld has shared a workflow by Junichi Akimoto demonstrating how to create a similar setup: https://cgworld.jp/regular/202303-hcb-129.html

Environment

The environment draws inspiration from the Castle of Sammezzano in Tuscany, one of the finest examples of Moorish Revival architecture. The castle features 365 rooms, each with unique and elaborate Moorish decoration, though it sadly remains abandoned today.

In appreciation of this remarkable interior, I began recreating several of its two-story spaces in Rhino five years ago, though it has only recently become possible to incorporate the model into animated sequences due to its size. The breakthrough that made the model usable was straightforward: using a render farm to run polyreduce operations on the model. It had not occurred to me earlier that I could utilize a render farm for Houdini operations beyond rendering alone. This saved me from countless crashes and headaches.

Rendering

Once I was satisfied with all the simulations, I exported everything as Redshift Proxies. This essentially pre-processed geometry for rendering, which saved considerable time during iterative render tests when lighting and materials were the only remaining variables at this stage. Based on test renders, I estimated it would require at least six months of continuous rendering on a local workstation with dual 4090s. This was impractical, as I still needed to use my workstation for other work during that period.

Environment rendering

Upon further investigation, I discovered that “Bokeh” was the main culprit in the long rendering times.  Simply by turning off bokeh I have cut down the final rendering time from 6 months to less than 2 months. The remaining challenge at this stage is to composite depth of field to all the rendered sequences in Nuke, which is something I have been postponing for years.

Compositing

Learning to composite in Nuke was one of my personal goals for the year, and it proved essential for this project, particularly in reducing rendering time. I use Nuke primarily for adding depth of field, lens/heatwave distortion, and chromatic aberration to the final renders.

Screenshot from Nuke

On the left is a typical script in Nuke. After testing three different nodes — ZDepth, Pxf_ZDepth, and Bokeh — I narrowed it down to either Pxf_ZDepth or Bokeh.

Pxf_ZDepth offers decent quality with nearly real-time results, making it genuinely enjoyable to use, especially with the ability to pick directly on screen and shift the focal plane to the selected spot. Bokeh produces the best quality but runs much slower than Pxf_ZDepth, and lacks interactive focal plane selection. I opted for Pxf_ZDepth to maintain workflow efficiency during early stages, then switched to Bokeh for final rendering for the best quality.

Switching to DaVinci Resolve from Adobe Premiere Pro was another personal goal for the year, as Resolve excels in all aspects of editing in terms of speed, features, and color correction. Resolve allowed me to bring ACEScg renders directly from Nuke and perform non-destructive color correction. It also includes an excellent built-in denoiser that rivals Neat Video—a third-party plugin that had to be purchased separately for Premiere Pro. Additionally, exporting videos in Resolve is multiple times faster.  The only obstacle was that I had to take the time to retrain my muscle memory.

Different ways of adding bokeh in Nuke

Afterthoughts

“Big Heart” stands as one of my most enduring projects to date, spanning almost a year from ideation to completion, with the primary takeaway being the meaningful improvements that can be achieved through subtle variations in hairstyle, clothing, and movement, as well as the efficiency that compositing can bring to a CG project.  This project reinforced my conviction in the power of procedural workflows in Houdini—once I established the pipeline, I could iterate between Houdini and iClone to update expressions and motions without redoing any of the technical setup.

While I appreciate the intuitiveness of animating in iClone, the inability to see real-time changes in clothing and hair while adjusting poses remains a persistent pain point. I plan to integrate iClone more closely with Houdini’s native rigging to address this, particularly with Houdini 21’s new machine learning tools for simulation—a challenging path I am nevertheless prepared to pursue.

At the time of writing, Reallusion AI Render has also been released. Like many artists online, I initially held strong reservations about the flood of AI imagery and videos, as the majority lack artistic intent and represent low-effort output … the antithesis of art. However, Reallusion’s AI Render in iClone revealed a new level of control that demonstrated how artists could art direct generative AI using ComfyUI. I did a week-long experimental project utilizing a combination of CG and AI tools to bring myself and my CG model into a professional photoshoot setting.

AI was mostly used for iterating through different expressions and upscaling for the final render.  Although it required significant effort to combat AI hallucination and control the output, I believe that with advances in finer controls, AI Render and ComfyUI could become powerful tools in a CG artist’s arsenal. With the release of Reallusion Character Creator 5, which introduces ActorMIXER and more detailed skin textures, creating character variations for multiple-person shots has become significantly easier. I am genuinely excited to explore integrating both AI Render and Character Creator 5 into my workflow in future projects.

Related Posts

Characters for Unreal: Character Creator 5 Meets MetaHuman

Introduction: Where Cinematic Vision Meets Character Technology

In today’s real-time production landscape, the ability to create your own character with speed, precision, and cinematic intent has become essential for previs, virtual production, and modern filmmaking. At the forefront of this evolution is Final Form Studios, led by director and in-camera VFX specialist Stephen Wilcox, alongside producer and creative director Shiho Moriya.

Based in Tokyo, the husband-and-wife team blends cutting-edge 3D animation software with a filmmaker’s eye and a producer’s discipline. While Wilcox drives technical innovation through Character Creator 5, iClone 8, and Unreal Engine, Moriya oversees creative and production workflows end to end—ensuring that every character, scene, and previs sequence communicates emotional clarity and practical intent. Together, they have built a pipeline that transforms early ideas into director-ready visuals, helping creators reach their own “final form” long before cameras roll.

Stephen Wilcox

Stephen Wilcox is a director and in-camera VFX specialist with 7 years of experience using Unreal Engine for previsualization, LED virtual production, and real-time pipelines.

Based in Tokyo, he has led previs and LED virtual production for Japan’s largest TV/film studios, international DJ tours, and high-profile branded content.

With a background in cinematography, Stephen brings a filmmaker’s eye to cutting-edge CG workflows, blending creative direction with technical precision. His work bridges the gap between directors and technical teams, ensuring the entire production crew is aligned from previs to post.

Shiho Moriya

Shiho Moriya is a bilingual (Japanese/English) producer and creative director based in Tokyo. She oversees both creative and production workflows across live-action and CG projects.

With a background in visual design and a strong artistic eye, Shiho brings a refined aesthetic and emotional clarity to every project. She manages the full production pipeline from concept development to final delivery, blending creative vision with clear communication and technical precision.

Her ultimate goal is to help every client and creator reach their own “final form.” She listens deeply, identifies creative and logistical challenges, and acts as a bridge between vision and execution, ensuring every idea is both beautifully realized and practically delivered.

Stephen Wilcox and Final Form Studios

Stephen Wilcox is a director and in-camera VFX specialist with over seven years of experience using Unreal Engine for previs, LED virtual production, and real-time pipelines. Based in Tokyo, he has led previs and virtual production workflows for Japan’s largest film and television studios, international DJ tours, and global branded campaigns.

Unlike purely technical CG vendors, Final Form Studios was built from a cinematography-first mindset. Wilcox and his team understand how previs must serve directors, DPs, and on-set crews—not just technical departments.

“We don’t just make things look good. We make them work on set.”

Stephen Wilcox – CEO of FINAL FORM LIMITED / FOUNDER / DIRECTOR

Why Previs Demands Better Characters

Traditional previs often relies on low-detail proxy models or default characters that fail to communicate tone, emotion, or scale. This disconnect can lead to:

  • Misaligned creative expectations
  • Inefficient LED stage planning
  • Expensive revisions during production

Final Form Studios addresses this by upgrading previs characters into near-final digital doubles, ensuring everyone—from directors to lighting teams—shares the same visual language early in the process.

Below we show the original MetaHuman characters that were used in the first draft of the previs.

From MetaHuman Previs to Director-Ready Characters

MetaHuman Creator has become a popular starting point for Unreal Engine previs due to its speed and realism. However, Wilcox found limitations when MetaHumans were pushed beyond early blocking stages.

Common challenges included:

  • Limited body proportion control
  • Clothing layering issues
  • Reduced flexibility for stylized or cinematic character bases

This is where Reallusion Character Creator 5 (CC5) morphing technology becomes transformative.

Character Creator 5: A True Human Creator for Previs

Character Creator 5 functions as a powerful character designer and character base generator, allowing artists to rapidly iterate on both realistic and stylized humans while maintaining clean topology and animation-ready rigs.

CC5’s ActorMixer: Fast Foundations

Wilcox begins his workflow using the Character Creator 5 ActorMixer, blending multiple body and head presets to quickly establish believable proportions.

This approach allows teams to:

  • Match character silhouettes to casting intent
  • Adjust anatomy for camera angles
  • Create multiple variants without starting from scratch

For previs, this means characters instantly feel intentional rather than generic.

Facial Control Beyond MetaHuman

While MetaHuman Creator excels at realism, Character Creator 5 offers deeper facial slider control, enabling finer adjustments for:

  • Age progression
  • Facial asymmetry
  • Emotional readability at mid and wide shots

These subtleties are crucial for previs where performance and blocking must read clearly—even before final casting decisions are made.

Character Creator’s HD Face control gives you fine-grained control at the same level you’d expect inside MetaHuman Creator—jaw, lips, cheeks, brows, eye micro-movement—but with the added benefit of being fully editable before you ever hit Unreal. For previs and director reviews, that’s huge. We can iterate on performance, test facial beats in iClone, and walk into Unreal Engine with characters that already feel locked creatively.

For Unreal Engine teams, it removes friction. You’re not rebuilding performances or rethinking rigs—you’re just pushing creative decisions forward faster, with more control and a lot more flexibility across different pipelines.

“What changed the game for us with Character Creator 5 is how closely the facial control system now aligns with MetaHuman. You’re working with a comparable facial skeleton and a dense, production-ready control set, which means facial animation, lip sync animation, and mocap data translate cleanly without fighting the rig.”

Stephen Wilcox – CEO of FINAL FORM LIMITED / FOUNDER / DIRECTOR

Hair and Facial Hair Layering

One of Character Creator’s standout advantages is its layered hair system. Instead of relying on single groom assets, Wilcox stacks multiple hair elements to create fuller, more cinematic silhouettes.

This is especially useful when:

  • Matching concept art
  • Supporting harsh or stylized lighting
  • Preparing characters for LED volume environments

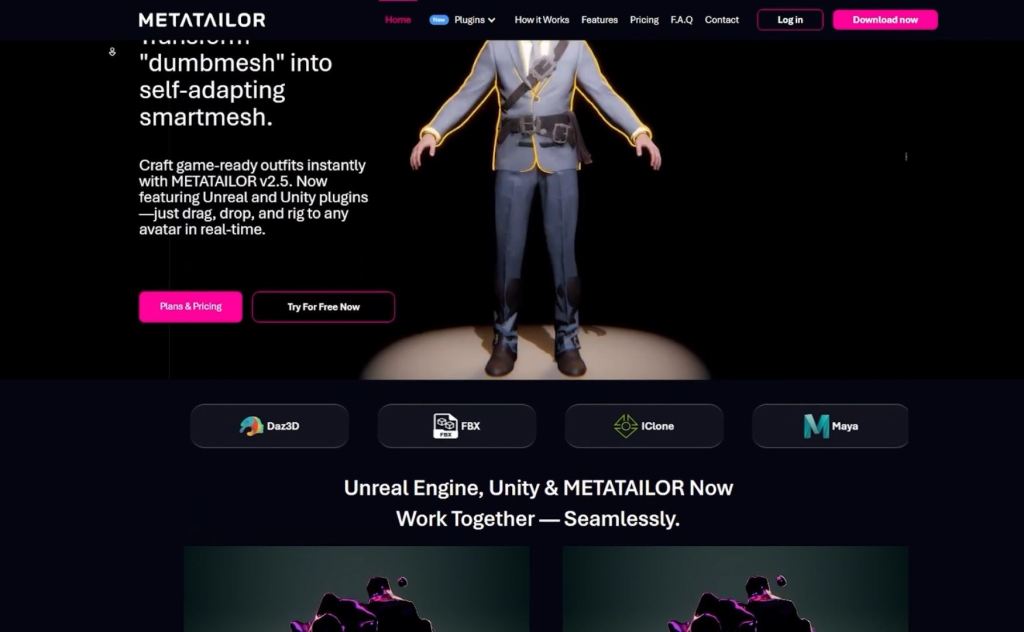
Clothing That Actually Works: MetaTailor → CC5

Clothing often breaks previs pipelines. Poor layering, clipping, or rigid deformation can undermine otherwise strong character work.

Final Form Studios uses MetaTailor, then imports garments into Character Creator 5, where:

  • Clothing layers correctly
  • Weight painting behaves predictably
  • Garments remain animation-ready

This eliminates hours of manual cleanup and ensures characters remain usable throughout production.

iClone 8: Animation and Performance Refinement

Once characters are finalized in CC5, they move into iClone 8 for performance testing and motion polish.

Facial Tests and Lip Sync Animation

iClone enables rapid lip sync animation and facial testing—critical for previs dialogue scenes. Directors can evaluate:

  • Emotional timing
  • Eye direction
  • Performance clarity

Without waiting on final animation passes.

Motion Capture Cleanup and Blocking

Wilcox emphasizes controller-friendly blocking, allowing directors to iterate on performance beats before committing to high-fidelity motion capture.

This hybrid approach combines:

  • Mocap realism
  • Animator control
  • Fast iteration cycles

Sending Everything Cleanly into Unreal Engine 5.6

One of Reallusion’s biggest strengths is its clean Unreal Engine pipeline, which includes the free Unreal Auto Setup tool that automates the task of Digital Human shader assignment and characterization for Unreal Engine. Characters, animations, and facial data transfer reliably—preserving hierarchy, materials, and performance data.

Inside UE 5.6, Final Form Studios previews:

  • Arctic base environments
  • Interior ship scenes
  • Full previs sequences from Time Traveler’s Diary

This allows previs assets to transition smoothly into:

  • LED virtual production
  • In-camera VFX
  • Final pixel workflows

Why CC5 + Unreal Outperforms MetaHuman Alone

MetaHuman Creator is powerful—but it isn’t designed to be a full previs character system on its own.

Character Creator 5 advantages include:

  • Full body and proportion control
  • Superior clothing workflows
  • Faster iteration for directors
  • Easier stylization when realism isn’t the goal

By combining MetaHuman where useful and CC5 where flexibility matters, Wilcox builds a hybrid pipeline that delivers both realism and control.

A Production-Ready Pipeline, Not Just Assets

Final Form Studios’ pipeline supports:

  • 3D scanning
  • Motion capture
  • Unreal Engine environments
  • LED volume alignment

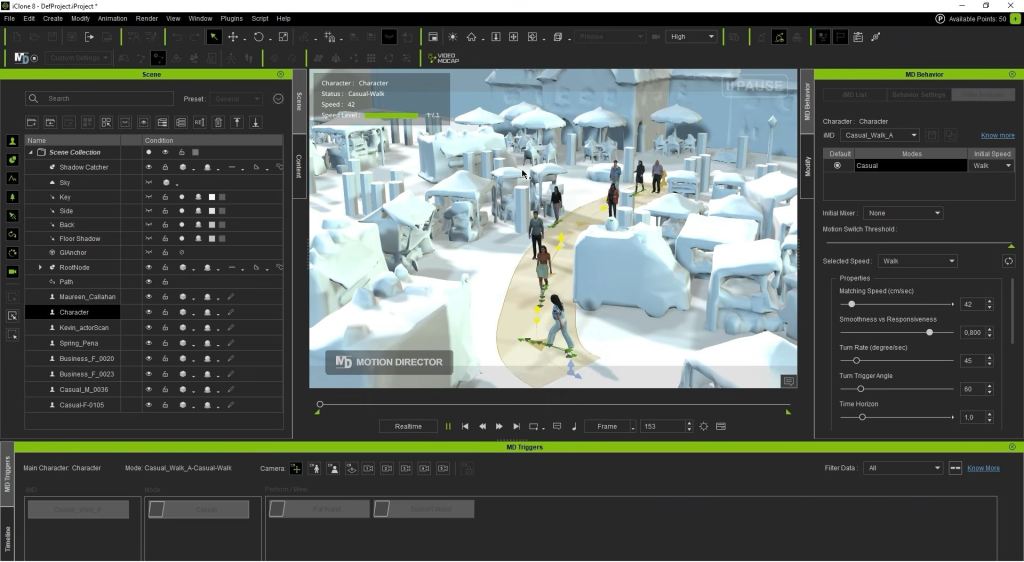
Because Character Creator and iClone integrate cleanly with Unreal, previs assets remain valuable throughout the entire production lifecycle. The iClone Motion Director system debuts game-play controls to drive characters, apply motion triggers and dynamic cameras to direct scenes in real-time.

Learn more about UEFN / GASP Game Control Integration:

Why “Final Form” Matters

The studio’s name reflects its philosophy: every project has a truest version waiting to emerge.

“From concept to camera – We help creators reach that final form.”

Stephen Wilcox – CEO of FINAL FORM LIMITED / FOUNDER / DIRECTOR

Reallusion tools make that transformation faster, clearer, and more collaborative.

Who This Workflow Is For?

This pipeline is ideal for:

  • Directors planning complex scenes
  • Studios preparing LED shoots
  • Production houses minimizing reshoots
  • Indie filmmakers scaling up quality

If you want to create your own character for Unreal with precision and speed, CC5 provides a future-proof solution.

Conclusion: The Future of Previs Is Character-Driven

Stephen Wilcox and Final Form Studios demonstrate how previs has evolved from rough blocking into a creative decision-making engine. By pairing Character Creator 5, iClone 8, and Unreal Engine, filmmakers gain unprecedented control over character, performance, and visual intent.

For anyone working in 3D character animation, Reallusion’s ecosystem offers not just tools—but a smarter way to tell stories before the camera ever rolls.

Follow Final Form Studios

FAQ

Is Character Creator 5 better than MetaHuman Creator?

CC5 offers greater flexibility in body, clothing, and stylization, while MetaHuman excels at quick realism. Many studios use both.

Can CC5 characters be used directly in Unreal Engine?

Yes. CC5 characters transfer cleanly with rigs, materials, and animation support.

Is iClone necessary for this workflow?

iClone significantly improves animation testing, lip sync animation, and mocap cleanup before Unreal import.

Who benefits most from this pipeline?

Directors, previs teams, LED volume productions, and indie filmmakers seeking cinematic-quality characters early.

Related Posts

Character Creator 5 for Blender: Martin Klekner’s Review

Building believable digital humans has traditionally been one of the most complex and time-consuming challenges in 3D animation software. From anatomy and topology to rigging and animation readiness, many artists struggle to move beyond a simple character base and into production-ready results. Today, however, creators like Martin Klekner are proving that it’s possible to create your own character efficiently while maintaining artistic control—thanks to modern character designer tools like Character Creator 5.

Through his ambitious animated universe Heroes of Bronze, Martin demonstrates how a streamlined human creator pipeline can empower solo artists and small teams to produce cinematic-quality 3D character animation at scale.

Martin Klekner

Martin Klekner is a freelance director and CG artist based in Prague, Czech Republic. Widely respected as a Blender specialist, Martin is also an instructor at CGBoost.com and a lifelong enthusiast of Ancient Greek history.

His passion culminated in Heroes of Bronze, an original animated universe set in Ancient Greece between the historic battles of Marathon (490 BC) and Plataea (479 BC). The project captures not only the grandeur and heroism of the era, but also its brutality, humanity, and mythic atmosphere.

What makes Heroes of Bronze especially compelling is Martin’s openness in documenting his workflow. Rather than guarding techniques, he actively shares the tools and methods that allow him to generate, animate, and manage hundreds of characters—a feat that would be nearly impossible without a modern character creation pipeline. Here he shares his review on Character Creator 5 for Blender.

The Challenge of Scaling Characters in 3D Animation

For most artists working in Blender or other 3D animation software, character creation presents several bottlenecks:

  • Time-intensive modeling from scratch
  • Inconsistent topology across characters
  • Manual rigging and skin weighting
  • Difficulty maintaining realism at scale

When building an entire animated universe populated by soldiers, civilians, heroes, and background characters, these problems multiply quickly.

Martin needed a solution that would let him:

  • Create unique characters rapidly
  • Maintain visual consistency
  • Animate characters instantly
  • Integrate seamlessly with Blender

This is where Character Creator and iClone became foundational to his animation process in Blender.

Character Creator 5 as the Foundation of the Pipeline

A Production-Ready Character Base

Character Creator 5 provides a professional-grade character base that eliminates the need to sculpt anatomy from scratch. Every character begins with clean topology, correct proportions, and animation-ready geometry.

For Martin, this meant:

  • Zero time spent rebuilding rigs
  • No topology cleanup
  • Immediate compatibility with animation systems

Instead of reinventing the wheel, he could focus on design, storytelling, and performance.

Morph-Based Character Design at Scale

Using Character Creator 5’s advanced morph system, Martin quickly transforms base meshes into unique individuals. Facial structure, body proportions, age, muscle definition, and ethnicity can all be adjusted non-destructively.

This approach allowed him to:

  • Populate armies with believable variation
  • Create heroes and background characters from the same base
  • Maintain anatomical realism across the project

For any character designer working on large-scale scenes, this morph-driven workflow is a game-changer.

Automatic Rigging and Instant Animation

One of the most powerful advantages highlighted in the video review is the automatic character rigging.

Every character created in Character Creator:

  • Is fully rigged out of the box
  • Supports body and facial animation
  • Works immediately with motion data

Martin emphasizes that he can simply drag and drop animations onto characters—no manual setup required. This alone saves countless hours and dramatically lowers the technical barrier for character animation.

But the new Character Creator 5 tool that is really impressively powerful is the ActorMIXER PRO feature that allows you to instantly generate an unlimited variation of characters, that really makes the mind boggle. Blender users can craft limitless characters by blending and evolving existing character assets in real-time.

CC5 ActorMIXER tool allows anyone to craft limitless characters by blending and evolving existing character assets

Facial Animation and Expressive Performance

Beyond body motion, Character Creator 5 characters support detailed facial animation, enabling realistic expressions essential for cinematic storytelling.

Whether for close-up hero shots or subtle background performances, Martin can:

  • Add believable facial expressions quickly
  • Maintain consistency across characters
  • Avoid complex facial rig setups

This is especially valuable for creators transitioning from Blender characters that lack standardized facial rigs.

iClone: Real-Time Animation Power

While Character Creator handles design and preparation, iClone becomes the animation engine.

In Martin’s workflow, iClone allows:

  • Real-time animation previews
  • Rapid iteration on motion
  • Efficient handling of large crowds

By combining Character Creator 5 and iClone, artists can move from static character base to animated performance in minutes—not weeks.

Blender Integration: Best of Both Worlds

Seamless Blender Character Workflow

Despite being deeply rooted in Blender, Martin does not abandon his preferred tools. Instead, Reallusion complements them.

Characters created in Character Creator are exported cleanly into Blender, where Martin:

  • Refines materials
  • Adjusts lighting
  • Renders final shots

This hybrid pipeline ensures that Blender characters benefit from Reallusion’s strengths without disrupting existing workflows.

Avoiding Common Blender Character Pitfalls

Traditional Blender character workflows often struggle with:

  • Inconsistent rigs
  • Non-standardized topology
  • Difficult retargeting

By starting with Character Creator, Martin bypasses these problems entirely, giving him reliable, animation-ready assets every time.

Creating Hundreds of Characters Without Burnout

Perhaps the most striking takeaway from Martin’s review on Character Creator is the scale.

Martin openly states that Heroes of Bronze would not be possible without Reallusion tools. Generating and animating hundreds of characters manually would be unrealistic for a solo creator.

With CC5 and iClone, he achieves:

  • Speed without sacrificing quality
  • Consistency across scenes
  • Sustainable production pacing

This makes the tools equally appealing to:

  • Independent creators
  • Small studios
  • Educational programs
  • Production houses
Martin openly states that Heroes of Bronze would not be possible without Reallusion tools. Generating and animating hundreds of characters manually would be unrealistic for a solo creator.

Why Reallusion Stands Out for 3D Character Animation

Key Advantages at a Glance

  • Instantly rigged characters
  • Professional topology
  • Scalable character variation
  • Facial animation support
  • Blender-friendly workflow
  • Real-time animation with iClone

For anyone serious about 3D character animation, these benefits translate directly into faster production and higher-quality results.

Conclusion: A Smarter Way to Create Your Own Character

Heroes of Bronze proves that powerful storytelling no longer requires massive teams or impossible budgets. By combining Character Creator 5, iClone, and Blender, Martin Klekner demonstrates a modern, efficient approach to 3D character animation.

For artists, studios, and educators looking to create your own character, streamline production, and unlock scalable animation workflows, Reallusion’s tools offer a proven path forward.

Ready to build your own animated universe? Explore Character Creator and see how far your ideas can go.

Follow Martin Klekner

Website: 
https://www.heroesofbronze.com/

Patreon: 
https://www.patreon.com/MartinKlekner

Instagram: 
https://www.instagram.com/mklekner/

YouTube: 
https://www.youtube.com/channel/UCgUXNKRLilvorphztVi2DvA

Twitter: 
https://twitter.com/mklekner

ArtStation: 
https://www.artstation.com/martinklekner

DeviantArt: 
https://www.deviantart.com/martinklekner

FAQ

Can Character Creator be used with Blender characters?

Yes. Character Creator exports cleanly to Blender, making it ideal for artists who want professional rigs with Blender rendering.

Is Character Creator suitable for solo artists?

Absolutely. As shown by Martin Klekner, it enables solo creators to build large-scale animated projects efficiently.

Do I need iClone to animate CC characters?

While optional, iClone significantly speeds up animation and is highly recommended for real-time workflows.

Can I create unique characters or do they all look the same?

CC5’s morph system allows extensive customization, ensuring every character feels distinct.

Is this pipeline suitable for production studios?

Yes. The scalability, consistency, and speed make it ideal for both indie and professional pipelines.

Related Posts

CC5 x ZBrush: Create a HD Sci-Fi Vanguard (7/7)- Refining Materials and Look Development

This article is the final chapter in our seven-part CC5 HD GoZ Pipeline Series, covering the complete workflow from CC5 base creation to ZBrush sculpting, Substance 3D Painter texturing, and final rendering.

In Part 6, we finalized materials, refined textures, and brought everything back into Character Creator 5 for validation. For Part 7, we move into the final stage: posing the character, matching facial expression, and rendering cinematic images using Marmoset Toolbag 5.

Pablo Munoz Gomez

Hello, my name is Pablo Munoz Gomez, and I’m an enthusiastic 3D concept and character artist who is deeply committed to the spread of knowledge. My expertise lies in 3D sculpting, visual development, and engaging in mixed-media projects. I take immense pride in being the creator of Pablander Academy, serving as an outlet for showcasing my work, sharing my workflows, and assisting fellow artists in honing their skills across a wide range of subjects.

Finishing with a dynamic pose

I begin by choosing a motion from the Parkour Content Pack tab in Character Creator 5. The Pack section includes a wide range of motion and animation packs you can download or purchase. For this project, I used a Parkour pack as a starting point.

After dragging the animation onto the character, I scrub through the timeline until I find a frame with strong potential. Once a promising frame is identified, I switch to the Modify tab and use Edit Pose under the Motion section.

In the pose editor, I rotate joints to refine balance, weight distribution, and silhouette. I usually toggle off the joint dots to reduce visual clutter while adjusting the center of gravity.

Working with intent is critical. I give each pose a simple backstory so the body language makes sense. In this case, I imagined the character running while charging an energy orb between their hands. That narrative explains the cupped hands and forward-leaning torso, keeping the pose coherent rather than arbitrary.

Matching the Facial Expression

A strong pose needs a matching facial expression. In CC5, I use Edit Facial from the Motion section. Under the Expression tab, CC5 provides a range of base expression presets that can be selected as a starting point.

After choosing a base emotion, I switch to the Muscles tab and fine-tune specific facial areas. The workflow mirrors body morphing: select a facial region, then use middle-click drag to sculpt the expression. Subtle adjustments here have a major impact on believability.

I always save finished poses to my personal pose library so they can be reused on other characters or future projects. Building a strong pose library quickly pays off in both speed and consistency.

Exporting the Posed Character to Marmoset Toolbag 5

To send the posed character into Marmoset Toolbag 5, I use the CC Auto Setup plugin for Marmoset. Installation is straightforward: place the plugin folder into Marmoset’s plugin directory and restart the application.

In CC5, I export via File → Export → FBX, selecting Clothed Character so armor, accessories, and external props export alongside the base mesh. In the FBX settings, I choose the Marmoset Toolbag preset, set Export Type to Mesh and Motion, and enable Current Pose to export a single posed frame rather than an animation.

The exporter generates an FBX, a JSON file for material mapping, and a texture folder. This allows the plugin to automatically detect and assign assets during import.

Auto Import and Material Setup in Marmoset

Inside Marmoset, I open the CC Auto Setup plugin window, select the exported FBX, and click Import. The plugin reconstructs the scene with materials and basic lighting already in place.

This is an excellent starting point, but I usually customize lighting and materials to better match the intended mood and story of the character.

Emissive and Displacement Tweaks

Some imported materials include emissive channels that are fairly subtle by default. By opening the material properties and increasing Emissive Intensity, UI elements or suit accents can be made to stand out more clearly.

If displacement maps are present, small scale adjustments can enhance details such as iris curvature or subtle surface relief. These minor tweaks add realism without overcomplicating the setup.

Building Custom Lighting

I typically disable the default world lighting generated by the plugin and load a low-contrast HDR as a neutral ambient base. From there, I sculpt the lighting manually using explicit light sources.

To position lights intuitively, I create a spotlight and temporarily switch the viewport camera to look through the light itself. This makes it easy to adjust key and rim lighting while observing the render view in real time.

For the glowing energy orb between the hands, I add an Omni light, tint it blue, and increase intensity. Omni lights work well for spherical sources because they emit light evenly in all directions and interact naturally with nearby surfaces.

Always tweak light color, angle, and intensity to bring out the materials and silhouette you want. Presets are fine as a base, but custom adjustments make the scene read correctly for each pose and character costume.

Camera, tone mapping, and depth of field

I create a dedicated Render Camera and set the resolution and aspect ratio. For full-body characters, I often use a portrait orientation.

Under Tone Mapping, I switch to ACES for a more cinematic color response, then adjust the field of view to control perspective. Depth of field is enabled using ray tracing, with Sticky Focus set by middle-clicking on the character’s eye. Keeping the eyes sharp helps anchor the viewer’s attention, even when hands or limbs fall slightly out of focus.

Scene view with shadow catcher plane visible alongside the rendered character.

Composition and Final Touches

Before rendering, I check for silhouette clarity and tangents, making sure limbs or props do not overlap in confusing ways. A shadow catcher plane helps ground the character so they don’t appear to float.

In the render settings, I confirm that the Render Camera is selected, then render all images with transparency enabled. Exporting with an alpha channel allows for flexible compositing later.

In Photoshop, I usually add a subtle background, atmospheric haze, and soft rim glow. Small painted details like dust or particles help transform the image from a raw 3D render into a narrative frame.

Final Thoughts

This pipeline turns Character Creator 5 into the connective tissue that binds sculpting, texturing, and rendering into a seamless creative loop. By leveraging tools like Actor Mixer, subdivision level support, and the Dynamic Wrinkle system, technical friction is reduced and iteration stays fast.

The tight integration with ZBrush, Substance Painter, and Marmoset Toolbag 5 allows you to move from a rough silhouette to a polished final render without breaking flow. The result is a workflow that is efficient, non-destructive, and artist-driven from start to finish.

Related Posts

CC5 ActorMIXER: Quick Look

The new ActorMIXER and ActorMIXER Pro plugins are a beginner’s dream for creating new characters while greatly speeding up the character development process for professionals and hardcore hobbyists. While anyone can use this new plugin, it really excels at empowering beginners to develop their own characters and character styles. What used to take years of development is now just hours or less.

What is ActorMIXER?

ActorMIXER is exactly what the name suggests. It mixes parts of characters to create unique characters or family characters like siblings or different generations of the same family. It is based on a simple wheel concept that allows us to mix between different head, body type and bone dimensions by sliding a mixer dot to different morphs on a clock-face type of control.

ActorMIXER versus ActorMIXER Pro

ActorMIXER comes with Character Creator 5 and includes some sample morphs to get you started on the journey to more unique characters. This basic tool will allow you to acquaint yourself with its features and benefit from the free sample resources included.

ActorMIXER Pro comes with all the features of ActorMIXER plus many more including the Core Library of morphs, Random Face Generator, and the ability to create and save our own Customer Mixer. The standard free version is available to everyone while the Pro version is a commercial plug-in that will appeal to professionals and beginners with its advanced features.

Will Any Character Mesh Work with ActorMIXER

From my testing, ActorMIXER works only with CC3+ characters and up. Non-Character Creator meshes will deactivate the ActorMIXER option. If you have been around morphing for any time, then you know it has built-in restrictions depending on what you want to do. It is not unusual to have to conform to a certain topography and other features, so this is to be expected.

While inconvenient, it’s understandable when you look at some character mesh topology available today, particularly on AI-generated characters. Even when generated in quads the UV Maps can be a chopped-up nightmare to deal with. As long as the character is from the iClone/Character Creator pipeline, CC3+ at minimum… the mixer is available for further modifications.

Mixer Wheel – Nondestructive Blending

The mixer wheel… the backbone of ActorMIXER is a perfect example of how Reallusion simplifies animation with its “dial-in” mixer interface. Intuitive and easy to use the mixer wheel allows us to move a “mixing dot” around the wheel between morphs which changes the character features on the fly for immediate feedback.

This includes the body or head, and the head is broken down into many different parts. There are a lot of options in the Head tab alone with the ability to dial-in the head, head shape, eyes, nose, mouth, chin, ears, and forehead.  Then there is the Body tab with three choices of Body, Body Ratio, and Body Shape.

The mixer wheel covers a lot of territory and while greatly simplifying the process for all users.

Random Face Generation (Pro)

This is a very quick solution for unique characters. We can generate faces based on collections of morphs we have available, and we can choose the location of the morphs to control what morphs are used. In fact, I had to choose the location for it to work. I have my assets on a separate drive so that created quite a shock when I clicked the Random Face button and it created an alien from a group of alien head morphs I was testing earlier.

It took me a minute to catch onto what was going on. No matter what I did, it generated an alien. Reluctantly, I looked at the documentation (this is how spoiled I’ve become using Reallusion products that I rarely look at a manual).  I needed to point my template folder to the location of the morphs, in this case the Core Library location, since I had a custom install path.  It had picked up the custom alien morph heads I had saved as the customer path was pointing to the right location, but the template assets were at another location so it couldn’t find them. I pointed the Template location to the proper folder, and everything fell into place.

After I got this little hiccup sorted it was on to exploring the new feature which took all of a minute or less because you literally push a button. It couldn’t be easier. The morphs in the target location control how the random face is generated. If you want an Asian female face you use the Random Face panel to choose a location that holds the applicable morphs.

After this, you can just click the button and see the face change with each click, as it will generate the face from whatever morphs are available in the selected location, including male and female, if in the same location. While there have been many face generators over the years, this one stands out for ease of use and speed. Practically no learning curve if you are already familiar with morphs, or a little learning curve otherwise.

Like the mixer wheel, just dive it and go for it, nothing there is brain surgery or rocket science. Just good old morphing with a modern slant that overcomes many of the old morphing limitations of the past.

Core Library/Custom Library (Pro)

Key Features include:

  • 40+ HD 3D Scanned Heads
    Includes diverse head presets categorized by ethnicity, age, and gender.
  • Structural Facial Blending
    Mix and reshape individual facial features (brow, chin, etc.) or entire heads with precision.
  • HD Skin Textures
    Real human face scans available in 2K and 4K, fully blendable with any head shape.
  • Ethnic Diversity Presets
    • Asian: 10 head presets, 10 skin textures
    • Caucasian: 14 head presets, 14 skin textures
    • African: 10 head presets, 9 skin textures
    • Middle Eastern: 10 head presets, 10 skin textures
  • Gender Balance
    Supports balanced male and female character generation.

Custom Mixer Wheels

The earlier tutorial shows how to get started with this great new feature of the Pro version that allows us to create and save custom mixer wheels we have put together for characters or families. If you load up a mixer wheel with stock or HD morphs you can save those wheels with the simple controls on the bottom of the Mixer panel. It can be a full or partial wheel and contain a mix of morphs as long as are CC3+ or above character class.

This includes all available morphs from character, body, head and so forth. After saving the custom wheels are available in the content tab with the other morphs.

It’s a great way to keep track of what you are using and to be consistent across the project by always having the same morphs at hand that were used in the project earlier.

My Morph Workflow: Character Creator 5/ZBRUSH

My personal workflow for creating custom morphs is to transfer, via GoZ, a CC3+ or CC5 character into ZBrush from Character Creator 5. I generally use the Create function and sometimes I even clear my GoZ cache in ZBrush. I rarely use the Relink function even though I should explore this option more. This is more born of first use habits than practical, but it works for me.

I prefer to work with the multi-level density mesh instead of the optimized single level mesh. This provides more “meat on the bone” to work with as it gives me a denser mesh to manipulate with brushes and other tools. I can also use the Level slider in ZBrush to move between density levels for sculpting. I can create or modify morphs in 3DS Max but ZBrush is just a more intuitive app for me for that sort of thing. Maya and Blender are great 3D morph tools as well.

After I bring in the mesh and switch to the highest density, I use brushes in ZBrush to mold and sculpt or rather re-sculpt the original Character Creator mesh into a new head, body or both. As of this writing I have mostly experimented with head morphs and had no frustration in learning the process to create custom morphs for the mixer wheel.

I send the finished morphs back into Character Creator 5 with CC GoZ from ZBrush to finish the round trip.

Creating Mixer Assets

This simple panel comes with a lot of options to save all or any part, or any combination of parts, of your character morphs for future use and this includes related items like sliders.

This one panel simplifies the process of what to keep. If you modify the head only, then you can save the head only if you wish to do so.

Once again Reallusion comes through making this a very easy task with its Create Mixer Assets panel.

How to Approach ActorMIXER as a Beginner

First and foremost, it is nothing to be worried or intimidated about. While the actual creation of morphs can be a bit past beginners’ level, we do not have to create morphs to use the mixer wheel. It would not surprise me to see Mixer Packages in the marketplace and store for those that don’t create their own. Not everyone is a modeler but if you have software capable of re-sculpting character meshes then give it a try as basic morphs can be easily achievable for a lot of users.

As to the mixer wheel itself… just dive in. It’s not that complicated and mostly self-explanatory depending on your level of experience. At its basic level we simply need to only move the mixer dot to see immediate changes in the character.

Don’t be afraid to experiment with mixing different morphs. Sometimes piling morphs on top of morphs will have unintended consequences but the mixer wheel eliminates that. As mentioned earlier and on the website, it is a non-destructive blending of morphs. If you need to go back to the original form before any morphs, then all we have to do is move the morph dot back to the center of the wheel and the character is restored or hit the restore button.

There is no reason to not embrace this new plugin to expand your current character library because, if you haven’t figured it out yet, we can never have enough characters as animators. Using a generic character can lead to confusion on the professional level as that character may be used by many different studios and users, so ActorMIXER gives us an easy tool to make unique characters.

If you aren’t sure how to start just click one of the ActorMIXER buttons and let it create a male or female base character, and you can use the wheel to dial in the look you want based on the morphs on the wheel. Don’t forget the Head and Body tabs too!

Summary

ActorMIXER is another great tool from Reallusion that holds true to the company’s tradition of creating easy to use software tools for complex animation tasks.

Since Character Creator came out way back at version one, I have steadily reduced my use of other 3D apps to make characters except for ZBrush. Even my old standby that I used all these years, 3DS Max is seeing less and time on the screen. Character Creator, for me, is easier than reinventing the wheel every time I need a new character or unique characters for crowd filler.

Reallusion’s latest release is another leap in user-friendly 3D character creation technology, and their mission brings animation to anyone who wants to be involved in it.

ActorMIXER

Manual

User Interface

Opening ActorMIXER Panel

Base Character Option

Modes for Editing and Mixing

Random Face Generation

MD McCallum - WarLord

MD McCallum – WarLord

Digital Artist MD “Mike” McCallum, aka WarLord, is a longtime iClone user. Having authored free tutorials for iClone in its early years and selected to write the iClone Beginners Guide from Packt Publishing in 2011, he was fortunate enough to meet and exchange tricks and tips with users from all over the world and loves to share this information with other users. He has authored hundreds of articles on iClone and digital art in general while reviewing some of the most popular software and hardware in the world. He has been published in many of the leading 3D online and print magazines while staying true to his biggest passion, 3D animation. For more information click here.

How Ali Tomineek Turns Himself into an Animated 3D Character with Character Creator & Blender

Ali Tomineek

My name is Ali Tomineek. I’m an artist and 3D creator born and raised in Phoenix, Arizona. To be clear, I’m a Hip Hop Artist. Not just a rapper. Everything I do is rooted in Hip Hop culture.

The way I animate, direct, write, and tell stories all comes from that same foundation. Hip Hop isn’t just something I listen to, it’s how I see the world.

I’ve been creating music and videos for over 15 years, but my journey into 3D animation began around six or seven years ago. Like many self-taught artists, I learned Blender through YouTube tutorials, online articles, and community forums. In 2021, I started posting my viral celebrity animations featuring my signature animated character, Lil’ Ali. Those videos quickly took off, reaching over 100 million views, and opened doors to collaborations with brands like BET, ESPN, Hulu, and NBC.

Check out Ali’s Instagram

Using Character Creator to Move Fast Without Losing Style

Speed is everything in animation. The faster I can move from an idea in my head to a character on screen, the better.

Character Creator has been a massive part of that process for me. It removes a lot of the tedious and time-consuming steps that usually slow character creation down. With just a few clicks and morphs, I can turn a concept into a fully realized character.

Sometimes I use Character Creator purely as a brainstorming tool, building out the base of a character before sending it over to Blender for final detailing and scene work. Other times, I’ll create an entire character start to finish directly inside Character Creator. That flexibility is insane. It lets me adapt my workflow based on the project instead of forcing every idea into the same pipeline.

FACE-ing My Fears: Solving Facial Animation and Lip Sync

No character feels alive without facial expression. But for a long time, facial animation was honestly the most intimidating part of my workflow.

I used to animate facial expressions and lip sync completely by hand. Every syllable. Every mouth shape. It was painfully slow. I tried optimizing by creating libraries of saved mouth poses to reuse during lip-sync sessions, which helped a bit, maybe ten percent faster. But I knew there had to be a better way.

That’s when I discovered AccuFACE for iClone.

AccuFACE gave me something I’d been searching for for years: a reliable facial motion capture solution. I could track facial motion from pre-recorded video or even stream my performance in real time directly onto my character’s face.

Watching my digital character mirror my expressions for the first time was wild. It felt like seeing a digital version of myself come to life. Almost like watching your kid say their first words. I’m not a dad, but that’s the closest comparison I’ve got.

Feeling Crowded: Building Worlds with ActorCore

When I think about 3D animation, I don’t just think about individual characters. I think about entire worlds. Concerts. Sporting events. Parties. Full environments that feel alive.

But here’s the problem: you can’t build a believable world without people. And animating dozens or hundreds of characters one by one is a nightmare. Try filling a nightclub scene with 100 dancing characters and your computer will probably tap out before you do.

That’s where ActorCore comes in.

ActorCore handles the heavy lifting by letting me generate, simulate, and animate crowds quickly. With just a few clicks, I can populate a scene with characters that move naturally and independently. Background crowds are one of those subtle details that people don’t always notice when they’re done right, but they’re impossible to ignore when they’re missing.

Communication Is Key: Blender and Reallusion Working Together

Blender is home base for me. Everything eventually ends up there.

That’s why Reallusion’s Auto Setup for Blender is such a big deal in my workflow. I often need to work iteratively, bouncing back and forth between Character Creator and Blender while refining a character or animation. Knowing that the tools communicate cleanly gives me peace of mind.

I don’t have to worry about losing data, breaking shaders, or dealing with weird crashes when using Blender DataLink. I can focus on creating instead of troubleshooting. When software actually works together instead of fighting each other, it makes high-quality visuals feel way more achievable.

The Magic of 3D Animation

Over the past six or seven years, I’ve really come to understand the power of 3D animation. Being able to mimic life, express emotion, and tell stories visually feels like magic.

Animation makes the impossible possible. It lets us communicate beyond language. That’s something I’ve admired since I was a kid watching movies like A Goofy Movie or Shrek. Even back then, I knew I wanted to create my own 3D animated film one day.

That wasn’t a dream or a vague goal. It was a promise. A commitment to keep going, no matter how long it took.

Now, looking at the characters and worlds I’m able to create today, I’m proud of how far I’ve come. And I know this is only the beginning.

Related Posts