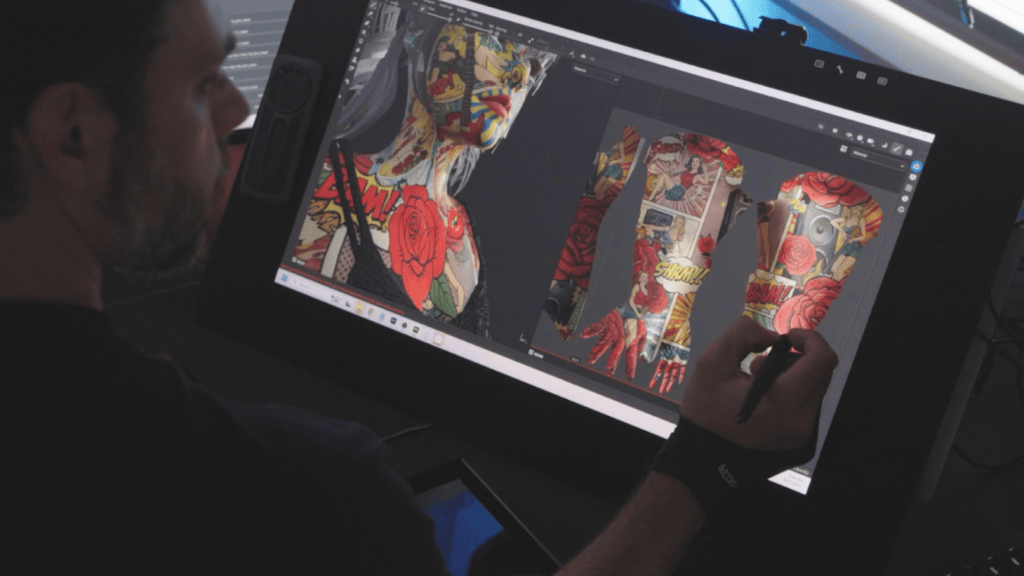
I’m Nick Shaheen, a radiologist by profession and a CG artist by passion. My journey into animation started in an unexpected place—medical illustration. Early in my career, I spent a fair bit of time creating motion graphics and anatomical visuals to help explain complex medical concepts. That experience taught me the power of visual storytelling and deepened my appreciation for animation as a way to communicate ideas dynamically.
Over time, my work expanded beyond medical visualization into character animation and motion design. I’m always looking for ways to refine my process and bring more life to my work, and discovering Reallusion’s tools opened up new creative possibilities that I hadn’t explored before.
Art is all about experimentation and learning from failure. The faster you can move through that cycle, the more chances you have to refine your work. That’s why I’m excited about CC4D, a powerful plugin that bridges Character Creator and Cinema 4D with Redshift.
What is CC4D
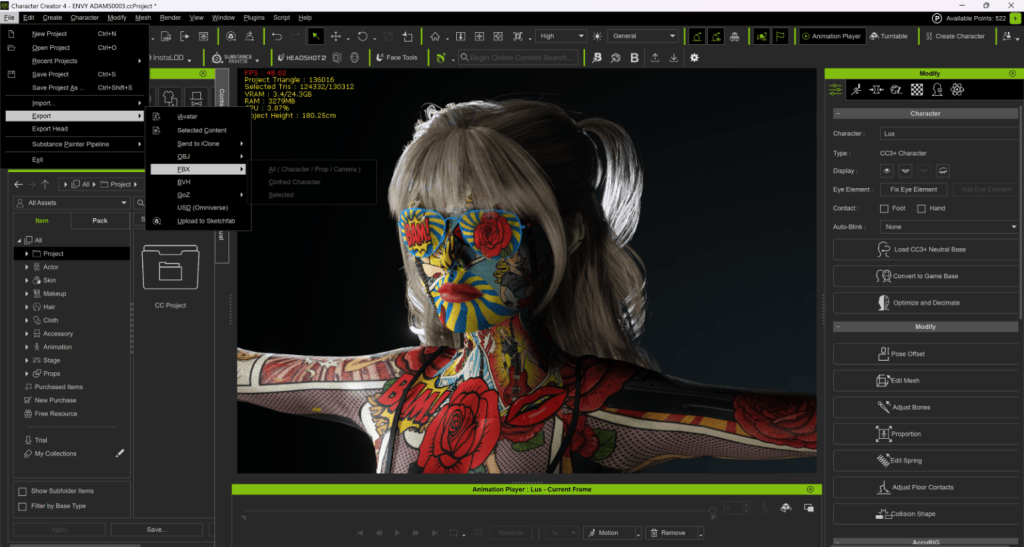
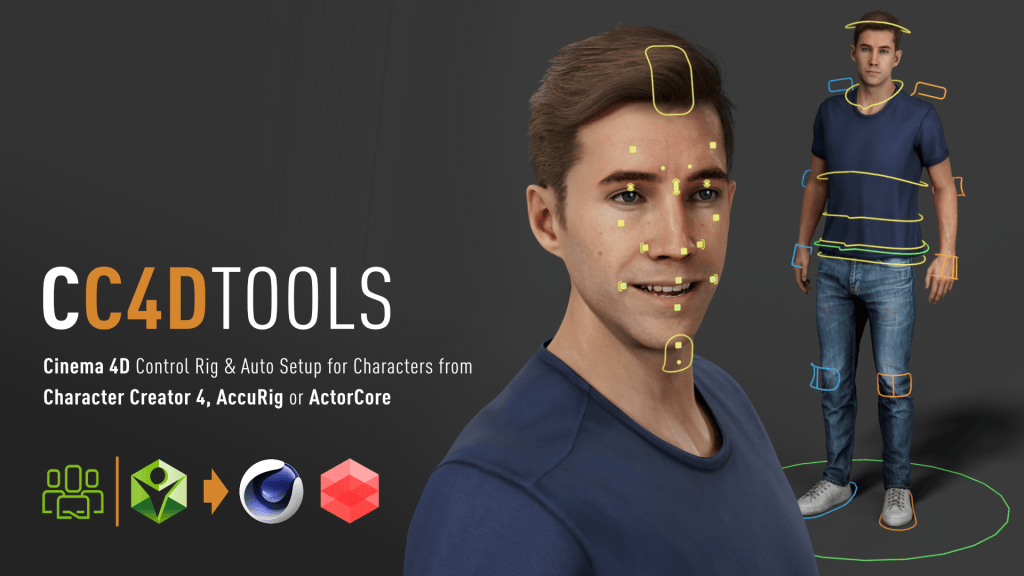
Developed by Reallusion partner Benjamin Broschinski, CC4D extends Character Creator’s ecosystem into Cinema 4D through an extensive toolbox designed for seamless character import, material setup, and animation management. It’s the ultimate bridge for artists who love Cinema 4D’s creative environment but want to harness Character Creator’s digital human quality and rigging precision.
Why CC4D Matters
1. Instant Redshift Setup
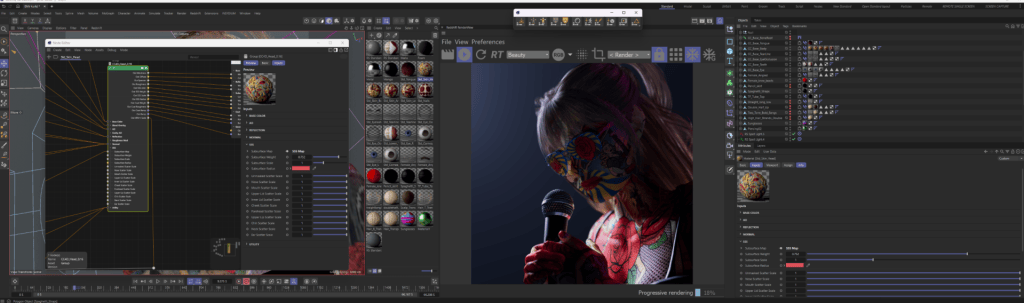
Bringing characters into Cinema 4D used to mean lots of time spent on manual node cleanup. CC4D automates that entire process in just a few clicks. Diffuse, roughness, subsurface scattering — all the essentials are correctly assigned without touching a single node.
2. More Time for Creativity
Instead of fighting technical bottlenecks, you can focus on stylizing characters, experimenting with lighting, and pushing the overall look of your scene.
3. Animation-Friendly Pipeline
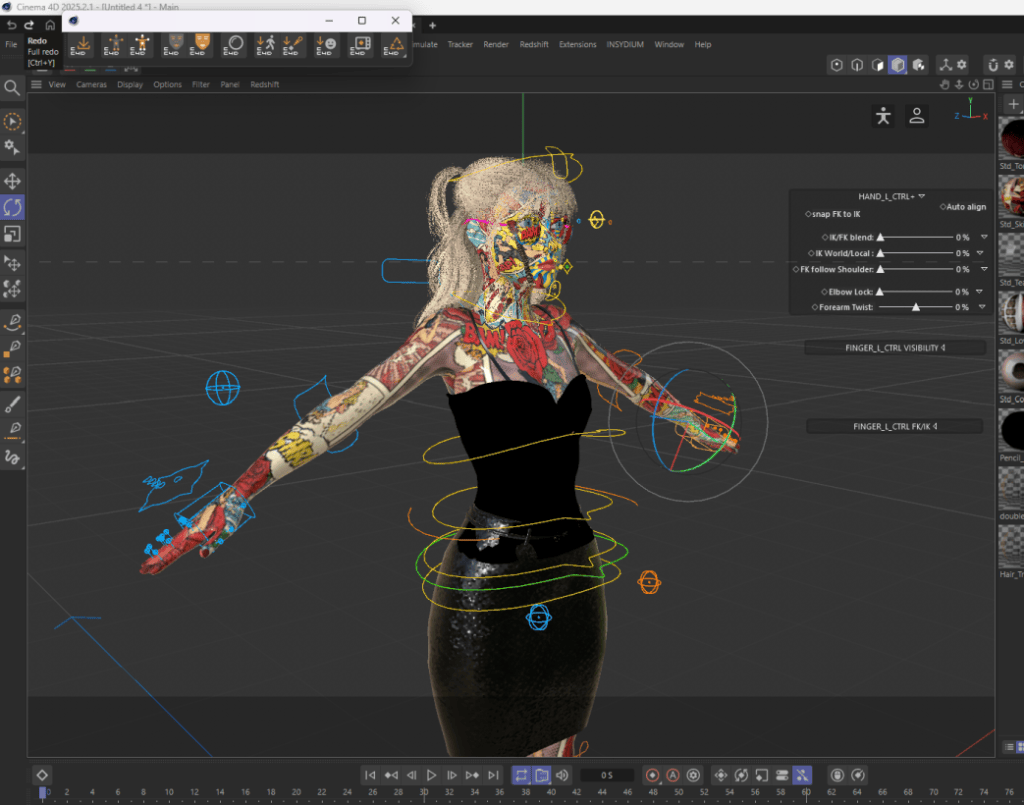
CC4D doesn’t stop at materials. It can also import face and body rigs, giving artists who prefer Cinema 4D’s character tools a clean way to handle animation from start to finish.
4. Iterate at Speed
Creative work is messy. You try things, fail, adjust, and try again. CC4D accelerates that loop, letting you experiment more often — and every extra cycle makes the final result stronger.
For my recent project Envy, CC4D made the difference between spending hours on technical prep versus spending those hours crafting mood, stylization, and storytelling.
Final Thoughts
Failure is part of every artist’s journey, but the right tools can help you fail forward — faster. With CC4D, you can skip technical roadblocks and spend more time where it matters most: crafting compelling stories, experimenting with style, and bringing your characters to life.
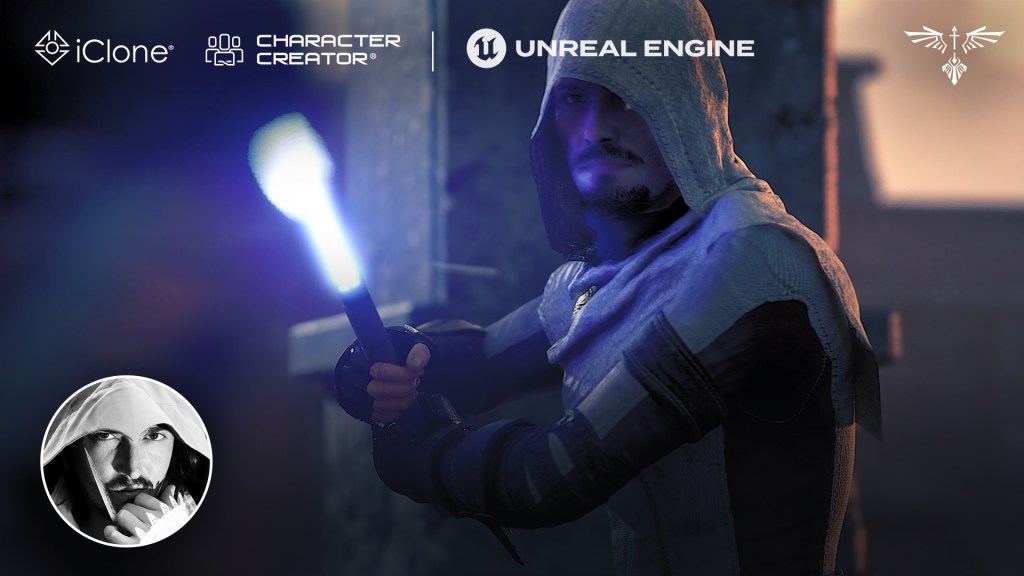
As a 3D artist, I often combine Blender, Unreal Engine, and iClone to tell stories and bring digital characters to life. I’m always searching for tools that make animation both faster and more expressive. I was genuinely intrigued by Laser Sword Pack’s potential, and after putting it to the test, I can confidently say: the paired motion system is an absolute game-changer.
Hailing from Chicago, Libertas developed a passion for filmmaking early on. His love for the AAA game Assassin’s Creed led him to create videos about the game, which can be found on his channel, Libertas Video. He also produces a series of Assassin’s Creed-inspired micro-short films, such as “Modern Assassin Training Session”.
Despite his shoestring budget, Libertas enjoys crafting characters and costumes, bringing them to life in his YouTube short films. During the day, he is the Director of 3D of a production house and runs Libertas Video as a solo 3D generalist by night. He enjoys spending his free time creating characters, costumes, and props for his digital actors.
In this article, Erik takes a moment out of his precious time to introduce the “Laser Sword Pack”.
Inside the Laser Sword Motion Pack
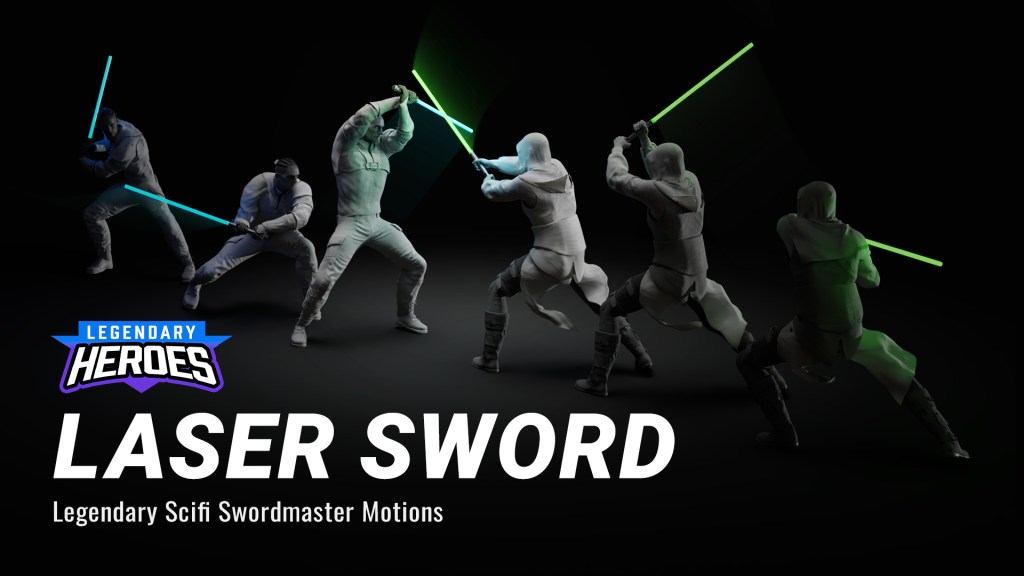
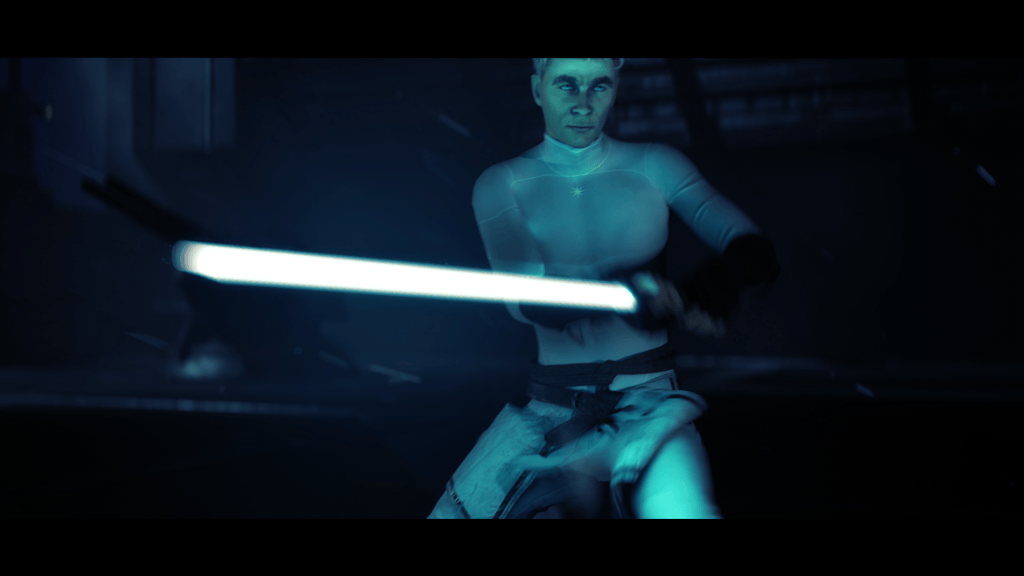
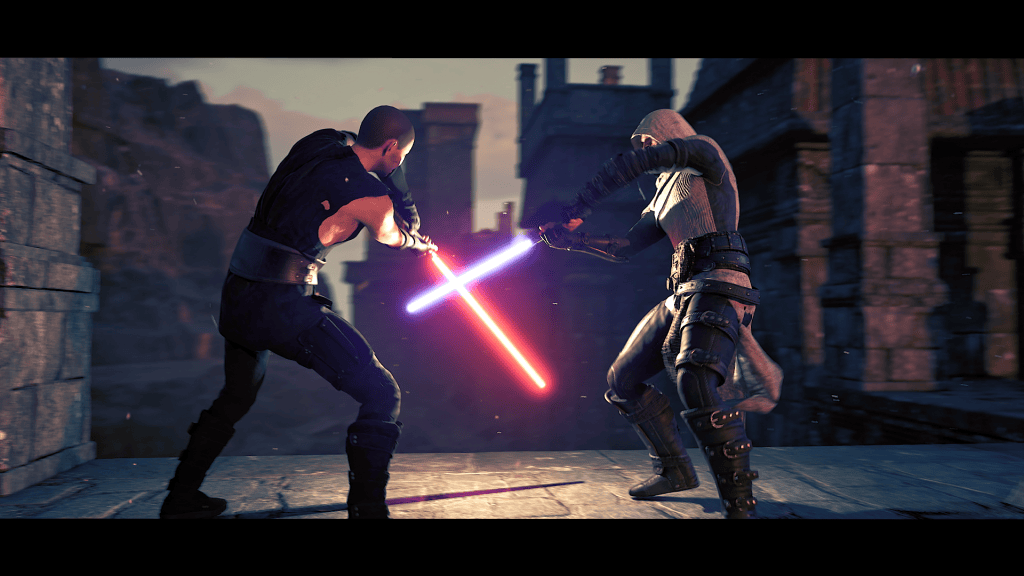
This Laser Sword Pack offers 41 animations across four categories: “Sword Duels”, “Win or Lose”, “2v1 Battles” and “Combat Stances”—the pack also comes with 2 types of Laser Sabers that support RGM customization for lighting adjustment. Made by Hollywood veterans, the Monkey Chow Animation Studios‘ professional stunt team is the people behind the motions, delivering unbeatable quality.
Matched Motions: True Choreography from the Pros
The pack comes with paired combat animations—each move precisely matched between two characters, one attacking and one defending. It’s similar in approach to Reallusion’s Hand-to-Hand Combat Pack, which I reviewed a few years back, but this time the focus is on weapon-based combat. The result feels cinematic, coordinated, and dynamic right out of the box.
How the Laser Sword Pack was Made by Monkey Chow Animation Studio: A Side-by-Side Comparison.
While I often use my Sony Mocopi Pro for solo motion capture, recording both sides of a duel can be slow and repetitive. This pack solves that problem completely. Every sequence comes from professional stunt performers, delivering real choreography with flips, spins, and reactive movement that’s difficult to capture solo.
Animated Props: The Secret Weapon
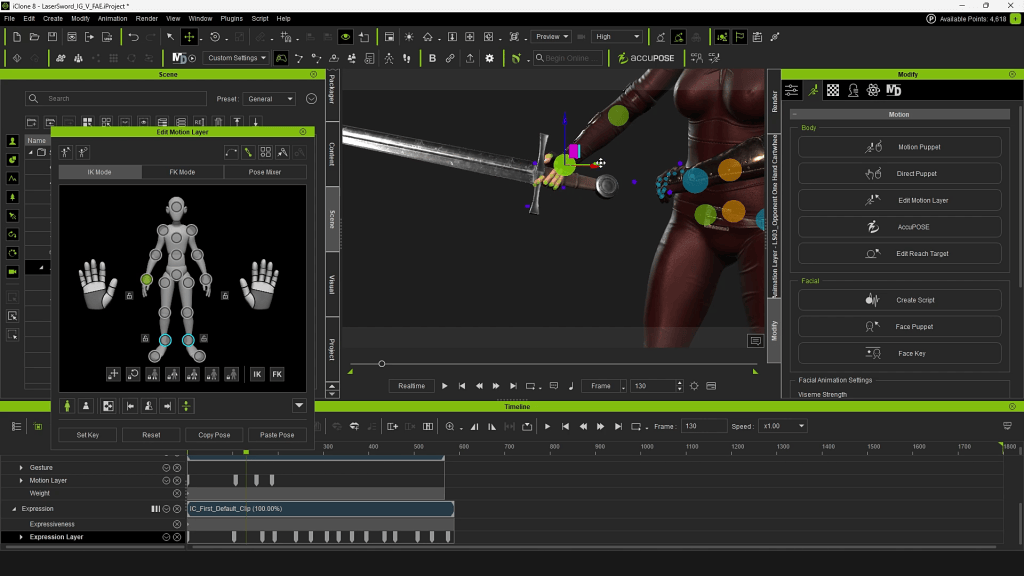
One feature that really surprised me was iClone’s animated props. I’ll admit—I hadn’t paid much attention to them before. But in this pack, they truly shine. Every time you apply a motion to a character, a corresponding laser sword is automatically added and animated in sync. That means the weapon stays perfectly aligned in the character’s hands during all those high-speed swings and clashes. Even better, it helps when aligning characters for impact points, ensuring that every strike connects visually and believably.
At first, I thought having “laser swords” might limit my options since I’m not creating Star Wars fan films. But it turns out, this feature is incredibly versatile. Simply line up your own weapon model with the laser sword, parent it to the prop, and then hide the original blade. The result? Your sword moves with the exact same fidelity—giving you dynamic, realistic motion in a fraction of the time.
Ideal for Cinematic Duels
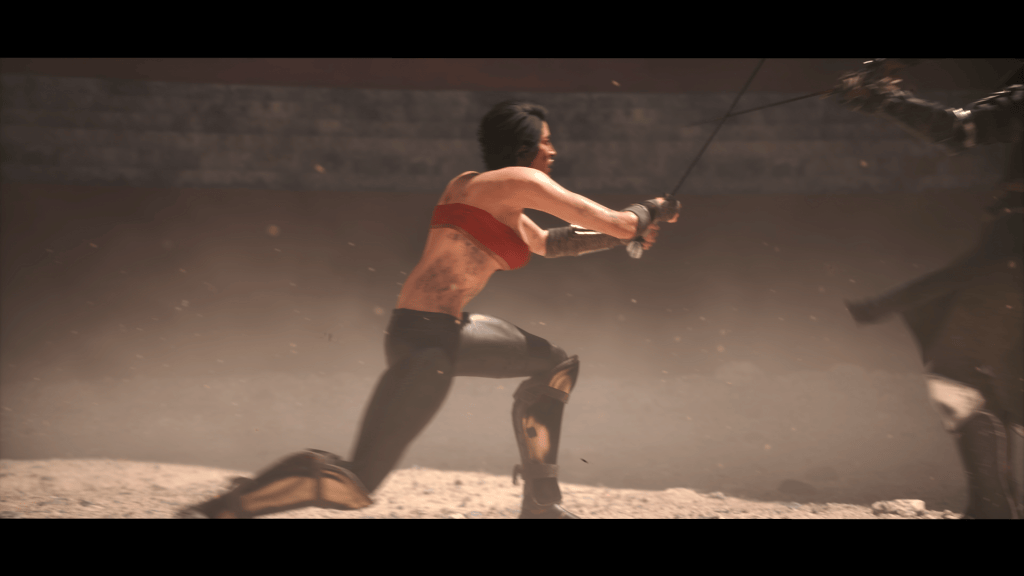
Although these motions are stylized for laser sword duels, they’re easily adaptable for two-handed weapons—katanas, longswords, or even spears for the double-bladed sequences. With a few tweaks, the choreography can fit any fantasy or sci-fi project.
The Verdict
The Laser Sword Motion Pack is a must-have for anyone aiming to create fluid, cinematic fight scenes without spending weeks in mocap or manual animation. Just drop in your custom characters, apply the motions, fine-tune a few alignments, and render your sequence—it’s that simple.
If you liked the look of the characters in my demo, many of their outfits come from my own Libertas Armory packs, which you can find linked below. And if this pack caught your attention, I’ve reviewed several other Reallusion motion packs on my channel—definitely worth checking out if you’re building your own 3D action library.
The 2024 2D Animation at Work Contest left us with a collection of fascinating entries. This time, our star Cartoon Animator lecturer, Mark Diaz, hand-picked 9 award-winning animation techniques depicted from three contest winners:
Stephen Townsend, who won 1st place for Business & Commercial.
Sasapitt Rujirat, who won 2nd place for Comic & Art.
Weronika Posemkiewicz, with an honorable mention.
About Mark Diaz of 2DAnimation101
Enthusiastic about both animation and teaching, Mark Diaz is the CEO and Founder of 2DAnimation101. As a dedicated online instructor, he has guided over 52,000 students worldwide in developing their animation and drawing skills.
Mark is also a TED Talk speaker, presenting “Can Anyone Become a Genius?” Beyond teaching, his versatile talents extend to filmmaking, where he has worked as a Short Film Director and Editor for Autumn Leave Films.
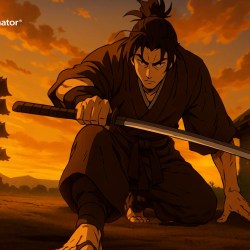
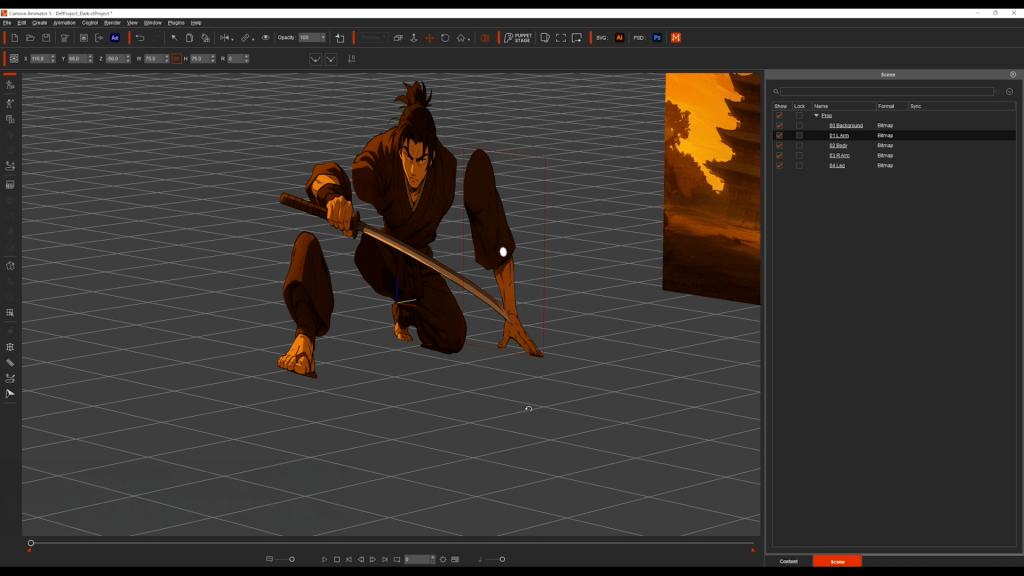
I start by generating a stylized samurai with ChatGPT. Then, break the image into parts: arms, legs, torso, and head. Each piece was cleaned and exported from Photoshop as individual PNGs. Inside Cartoon Animator, I imported the parts and placed them at different z-depths, so in the 3D view, you can see that all parts are positioned differently. But when looking at it through the correct angle, the elements merge into one cohesive picture.
After that, I’ll move on to animation. I used the transform tool for big movements, and the FFD (Free From Deformation) tool to simulate depth, making the samurai feel like he’s stepping toward the camera. In the end, what started as a flat image becomes a dynamic warrior in motion.
Technique 2: Instant 3D City
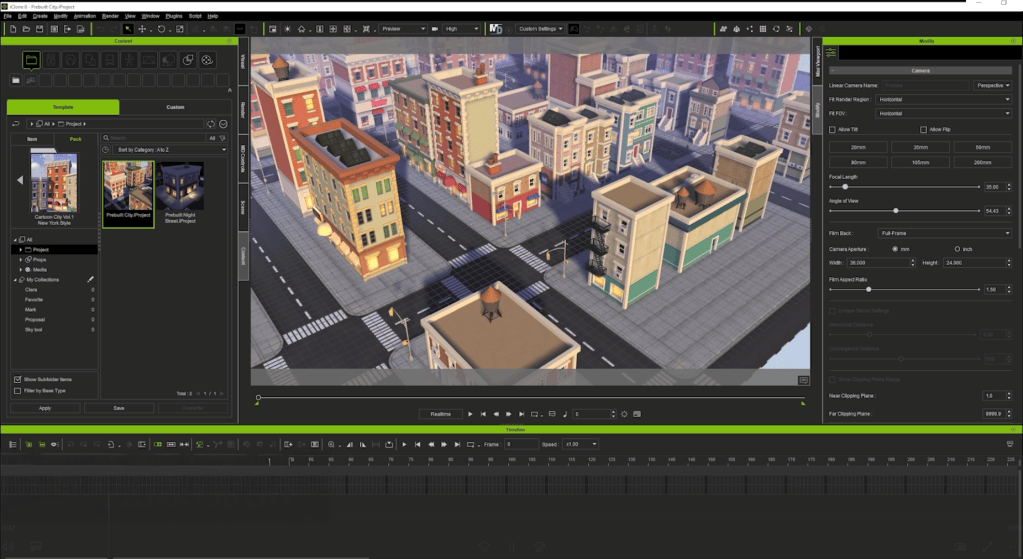
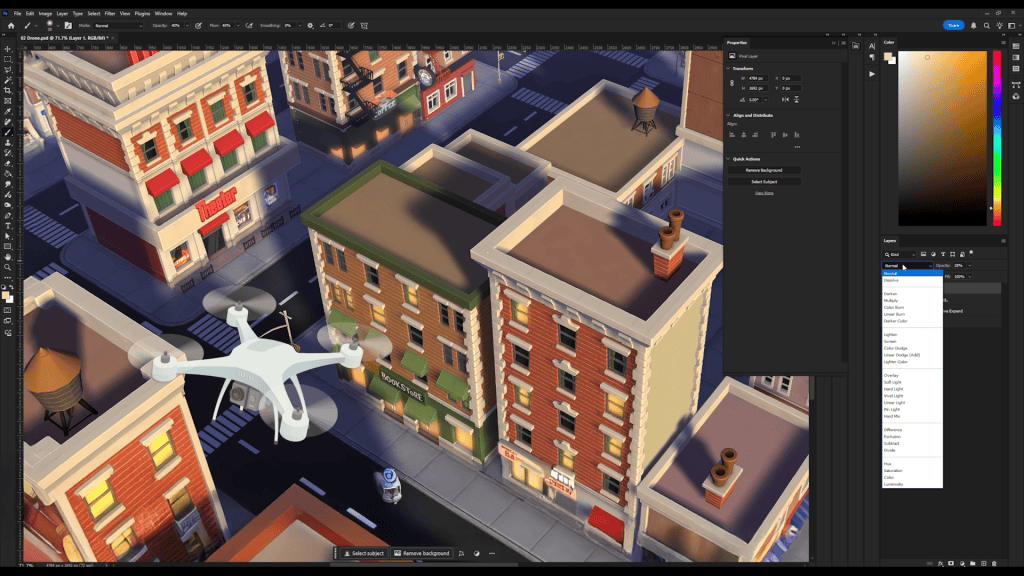
Stephen, the winner in the Reallusion contest, modeled a full city from scratch. Which is impressive, but time-consuming! Here’s my shortcut: I used iClone with pre-built 3D assets. Just drag and drop, and in less than 10 seconds, I’ve saved hours of modeling. Then I took a few screenshots at different angles — and just like that, I got a full city background.
Technique 3: Motion Pilot for Drone Animation
I grabbed a drone image from Freepik, adjusted its perspective in Photoshop. To match the scene, I added a warm color tone on the drone, and I encourage you all to customize it when using this technique. In Cartoon Animator, I animated the background using a simple transform and flew the drone using Motion Pilot. I disabled the face cursor, boosted the Y-axis depth. Then simply hit the record button, move my mouse, and I have the animation ready. It instantly feels like a drone flying through a cinematic sky — no complex keyframes needed.
Technique 4: Paths for Car Traffic
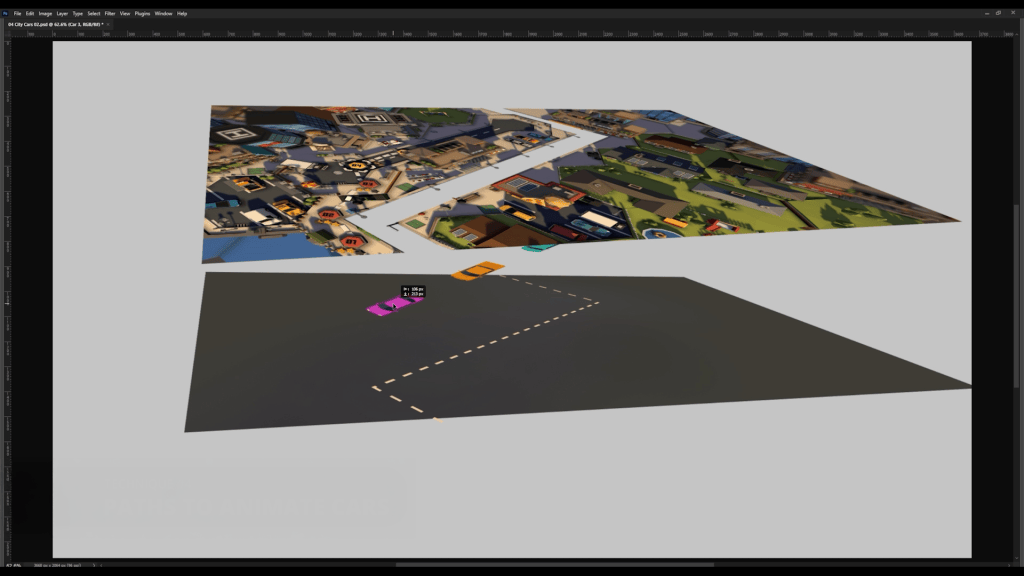
For this technique, I understand that a lot of people don’t have iClone or have time to learn Blender, so instead I went to Sketchfab, searched for a cartoony city, and took a screenshot. I layered the scene like a sandwich: road at the bottom, cars in the middle, and city buildings on top.
Between layers, I placed a shadow element and had the cars pass under it, adding to the realism of the environment. Then I animated one car with the path tool, duplicated it, staggered the timing, and created a flowing city scene full of moving traffic. Animating in Cartoon Animator is so easy that anyone can do it.
Technique 5: Motion Pilot for Flock Animation
To simulate movement in space, I started with a space background and drew a single star. In Cartoon Animator, I duplicated the star many times, activated the Motion Pilot flock mode, and set the delay to uniform.
After that, I simply moved my mouse — and all the stars followed in formation, creating a parallax-style flight effect. Then I brought in a spaceship and animated it using Motion Pilot with “Face Cursor” mode disabled. The result is a space chase that feels alive.
Technique 6: 360 Head Masking for Phone Scroll Animation
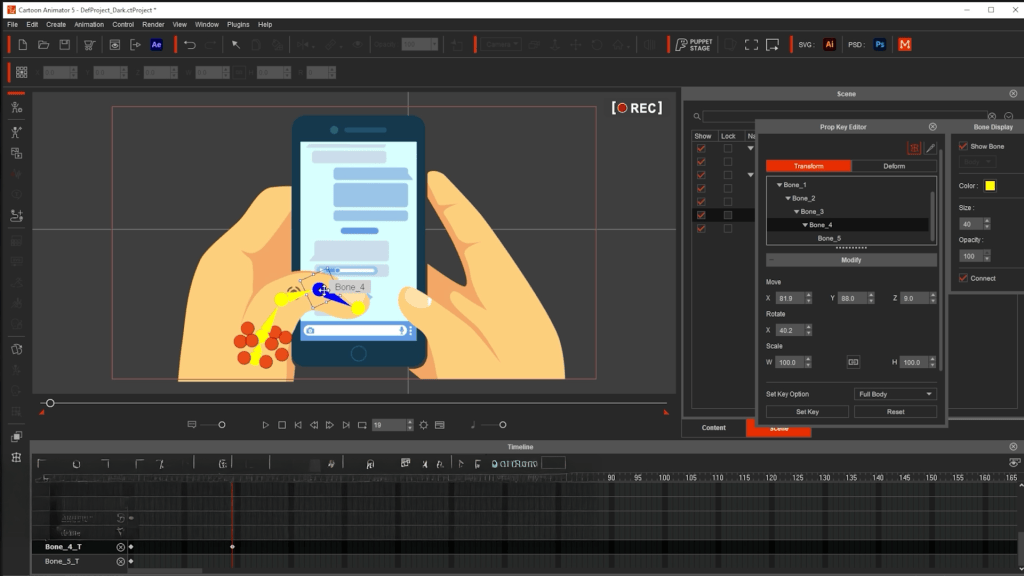
This is a clever technique demonstrated by Stephan’s entry. For this, I got an illustration of hands holding a phone and separated the thumb and screen layers. Inside Cartoon Animator, I used the masking feature normally meant for facial rigs to keep all face elements inside. Now, what if, instead of a mouth, I placed a long scrolling screen, and instead of the face, I put a screen? We get an animatable smartphone!
So I just animated the thumb flicking up and down and moved the content behind it. The outcome made the phone scroll realistically, powered by Cartoon Animator’s facial animation tools.
Technique 7: Masking for Classroom Scene
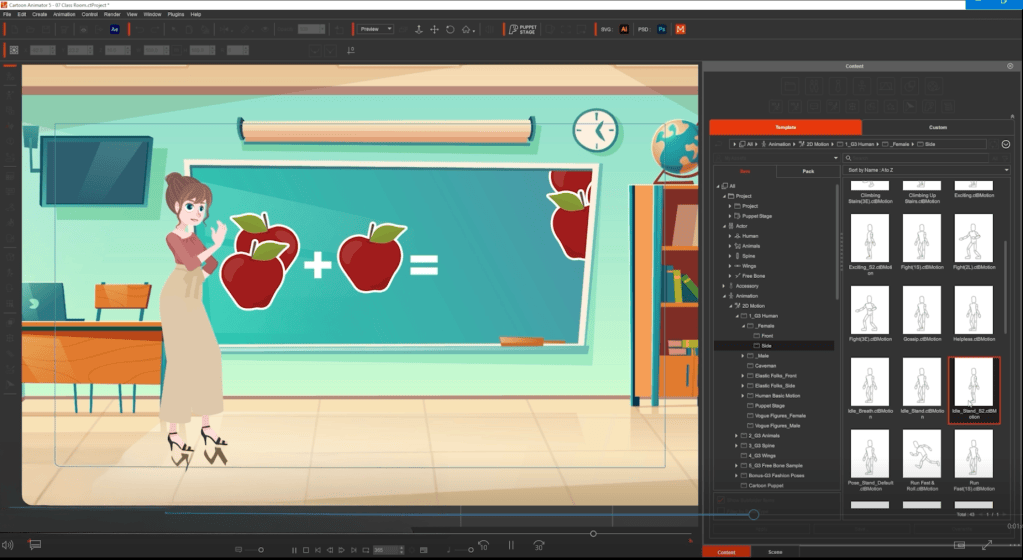
I split a flat classroom illustration into two layers: the chalkboard and the rest of the room. That turns the board into a window. Behind the board, I added animated content, like apples appearing for a math lesson. I used an AI-generated voice with 11 Labs, added lip sync in Cartoon Animator, and dragged in pre-made motion clips for the character. With just a few layers and smart masking, the scene feels like a live cartoon lesson.
Technique 8: Enforcing Background Consistency with 3D
Want multiple camera angles in a consistent world? I could spend days learning Blender and building a 3D environment, but iClone serves as a nice alternative.
I picked a pre-built 3D set, positioned cameras from different angles, exported the images, and ran them through an AI tool to turn them into cartoon backgrounds. And now I have all the matching scenes with consistent style — all done in minutes, not days.
Technique 9: Creative Use of FFD
I found a gooey slime image and imagined a character interacting with it. After isolating the slime in layers, I drew a long slime trail and a thicker layer, then brought everything into Cartoon Animator.
Using Freeform Deformation (FFD), I animated the slime stretching and bouncing as the character moved across the scene. With just two layers and FFD, the illusion is complete, with the character pulling on a sticky, viscous substance.
Conclusion
So there you have it! Download the FREE Cartoon Animator trial in the link below and bring your first animation to life using these techniques. And if you want to go deeper, I hosted a full webinar where I break down each technique step by step. Check that video to start mastering your animation journey. Also, special thanks to Stephen Townsend, Sasapitt Rujira,t and Weronika Posemkiewicz. It’s their talented techniques and selfless sharing that contributed to this article. To support them, it would be nice if you like and share their articles with your friends and family!
Brian P. Dean – Visual Effects / Animator / Director
Brian P. Dean
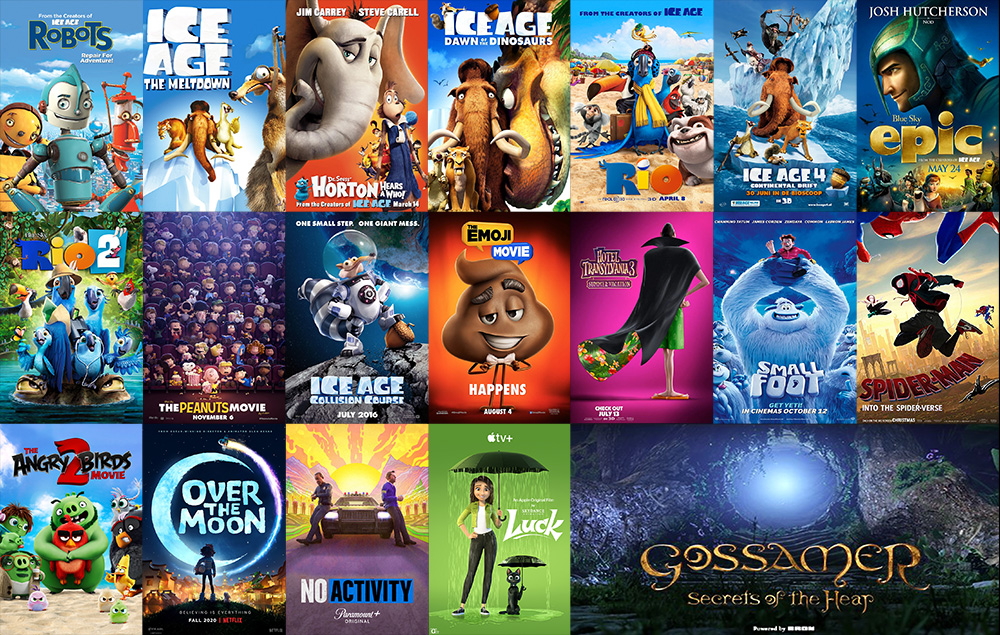
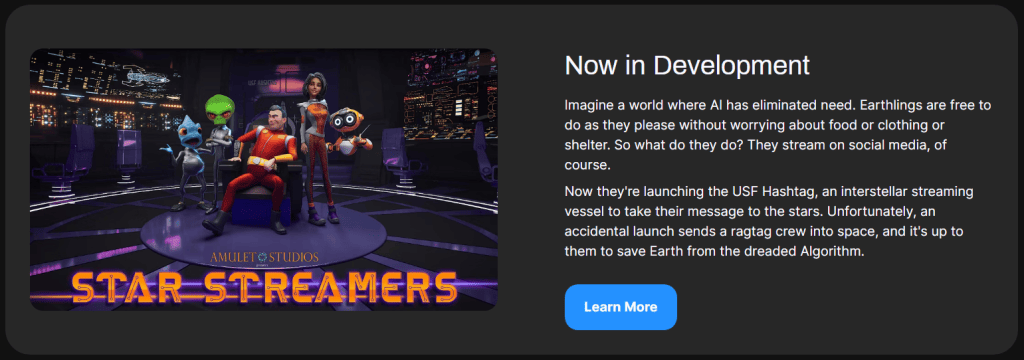
Brian P. Dean is a highly respected animator with over 20 years of experience at studios such as Blue Sky Studios and Sony Pictures Imageworks. His portfolio includes Robots, Ice Age, Spider-Man: Into the Spider-Verse, and Over the Moon. Today, Dean is co-founder of Amulet Studios, where he pioneers real-time workflows in Unreal Engine to develop original projects like Star Streamers.
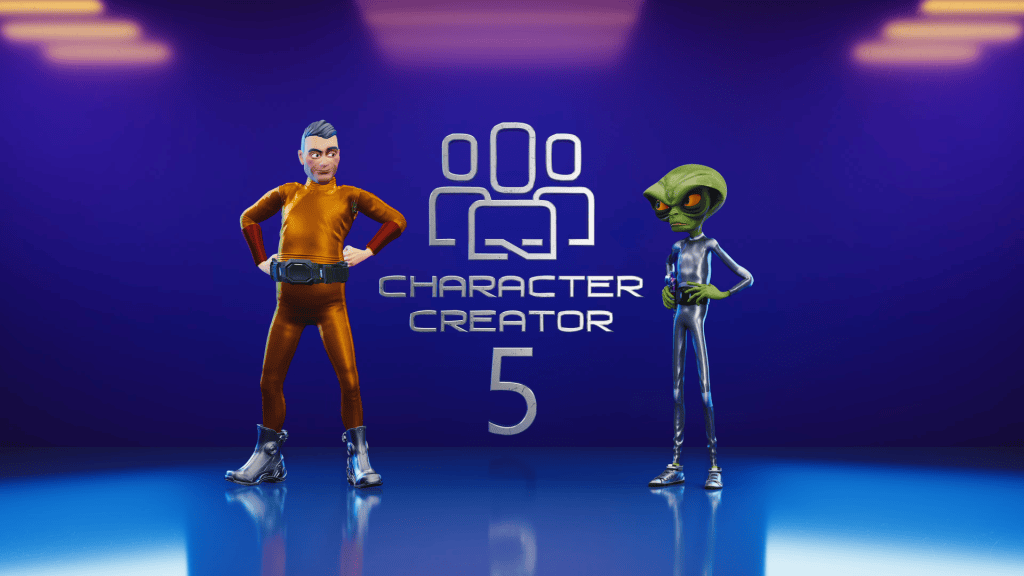
In his latest review video, Dean dives into Reallusion’s Character Creator 5 (CC5)—a powerful update for 3D character artists, animators, and studios looking to push realism, speed, and compatibility further than ever before
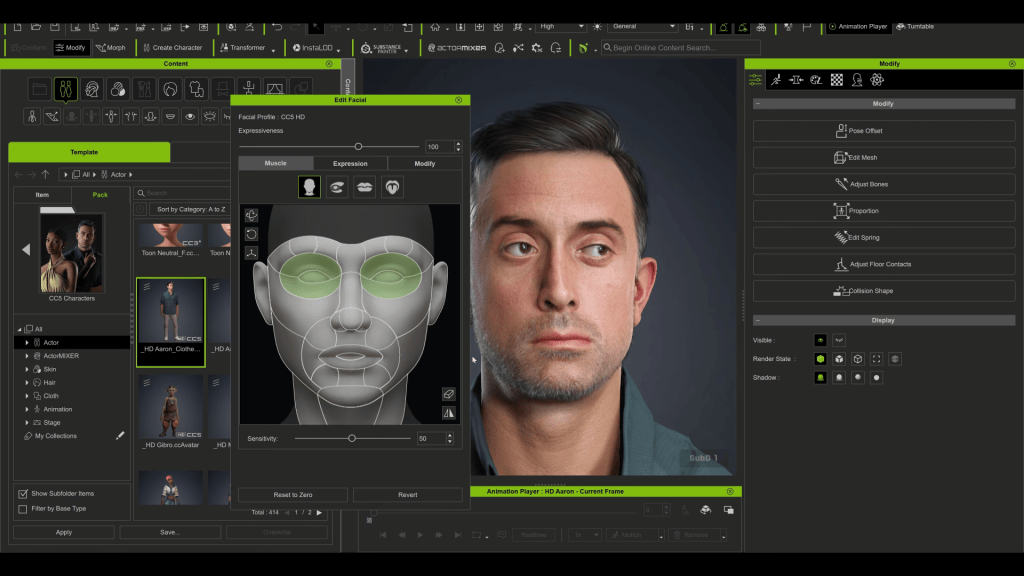
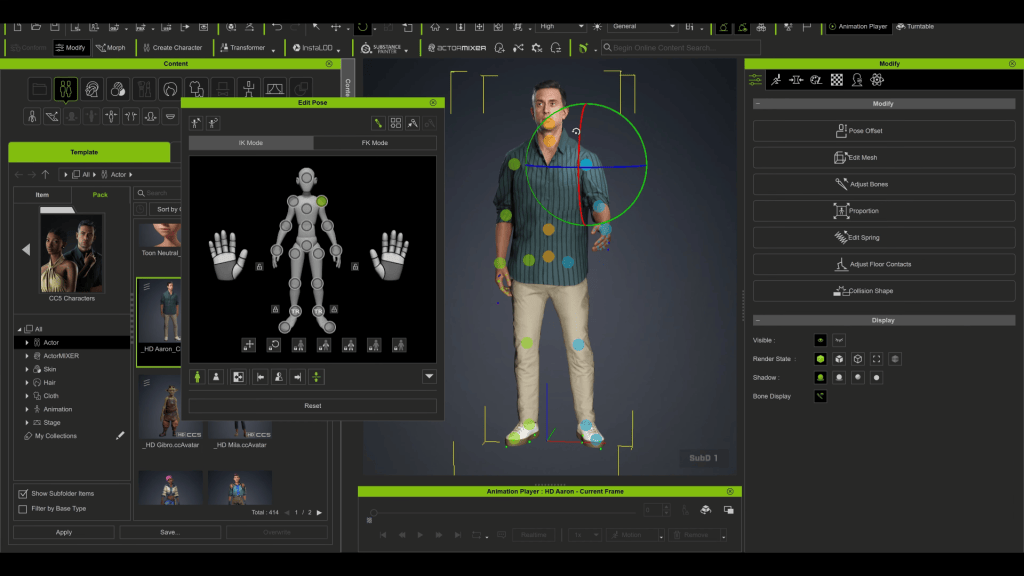
Character Creator 5 (CC) is Reallusion’s standalone tool for building fully rigged 3D characters. Artists can start from a base mesh or preset, then refine their design with morph sliders for face and body. Characters can be stylized, realistic, or fantasy-inspired, and are automatically prepared for animation with complete body and facial rigs.
ActorCore, a massive motion library for quick animation.
Export compatibility with Unreal, Unity, Blender, Maya, 3ds Max, and Marmoset via the free Auto-Setup tool.
These features already made CC a go-to for many creators in CC4.
So, what’s new in CC5?
The Big Upgrades in Character Creator 5
Higher Resolution & More Detail
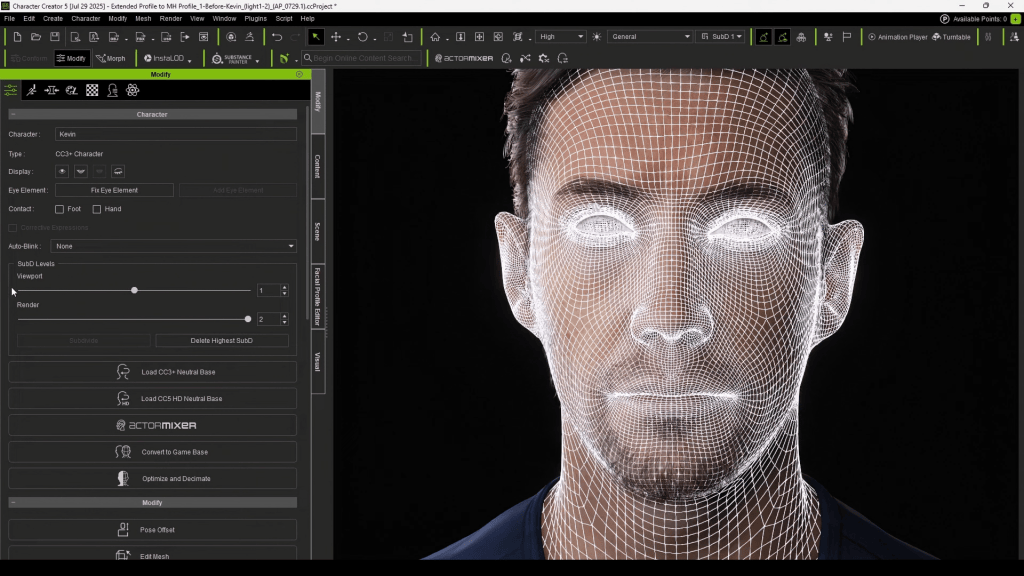
CC5 introduces a new character profile with higher mesh resolution. This unlocks more geometric detail—perfect for sculpted wrinkles, exaggerated stylized surfaces, and realism that previously relied only on normal maps.
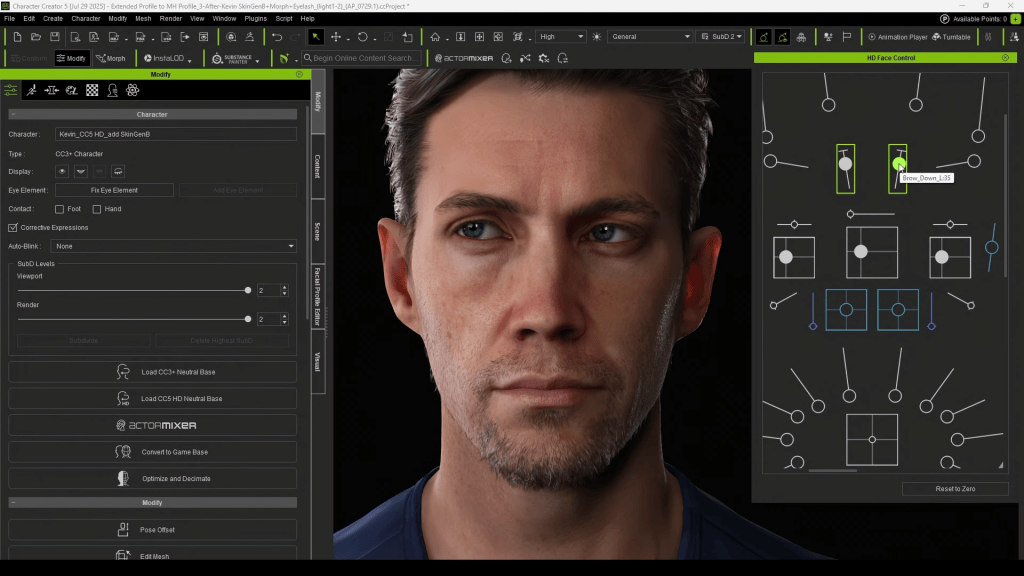
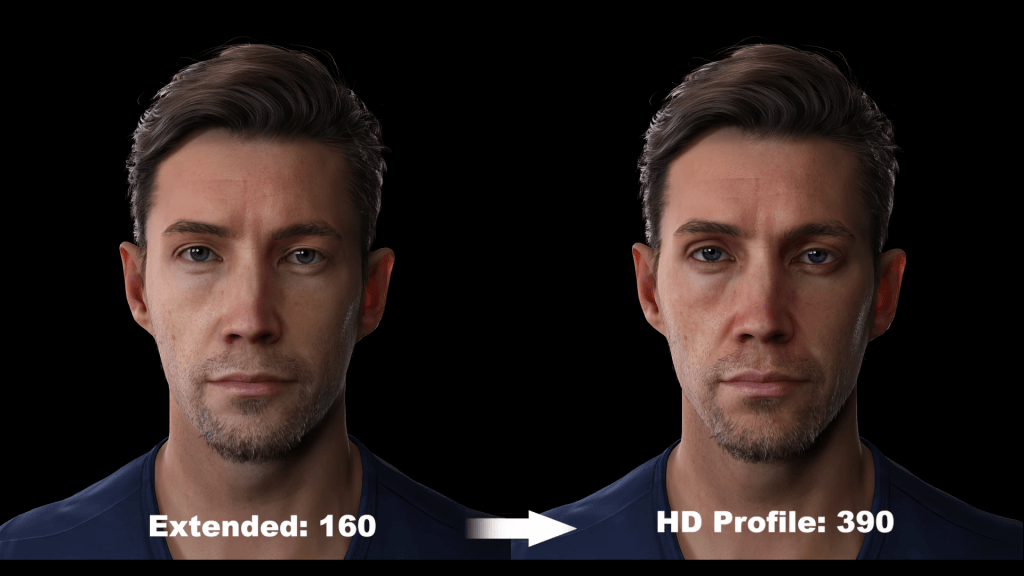
With additional morph shapes, animators gain finer control over facial expressions and subtle body movements.
4K–16K Textures
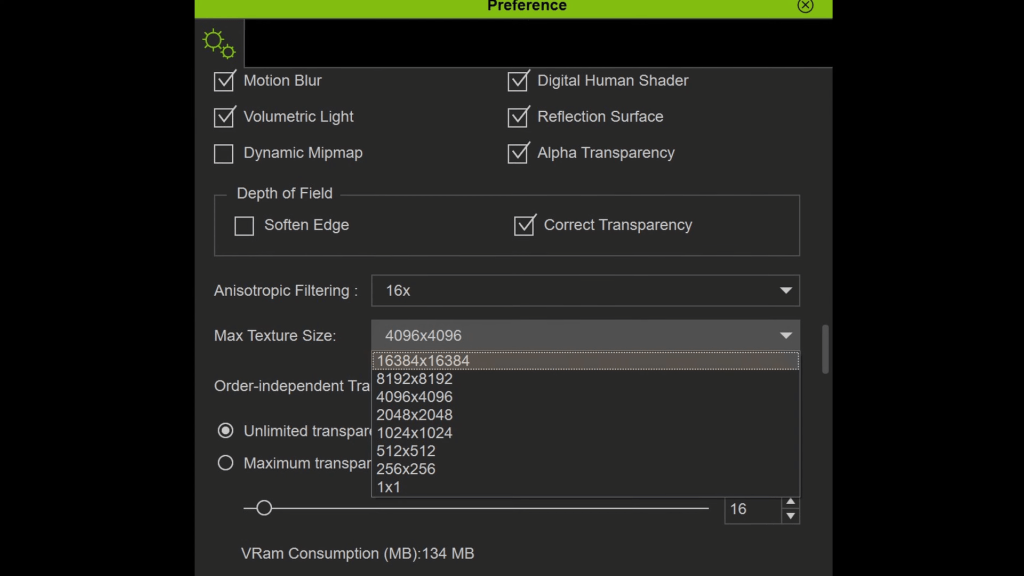
While 4K textures cover most needs, CC5 now supports 8K and even 16K texture editing for production teams pushing ultra-high fidelity. For stylized creators, this flexibility ensures artwork holds up across formats, from cinematic close-ups to VR.
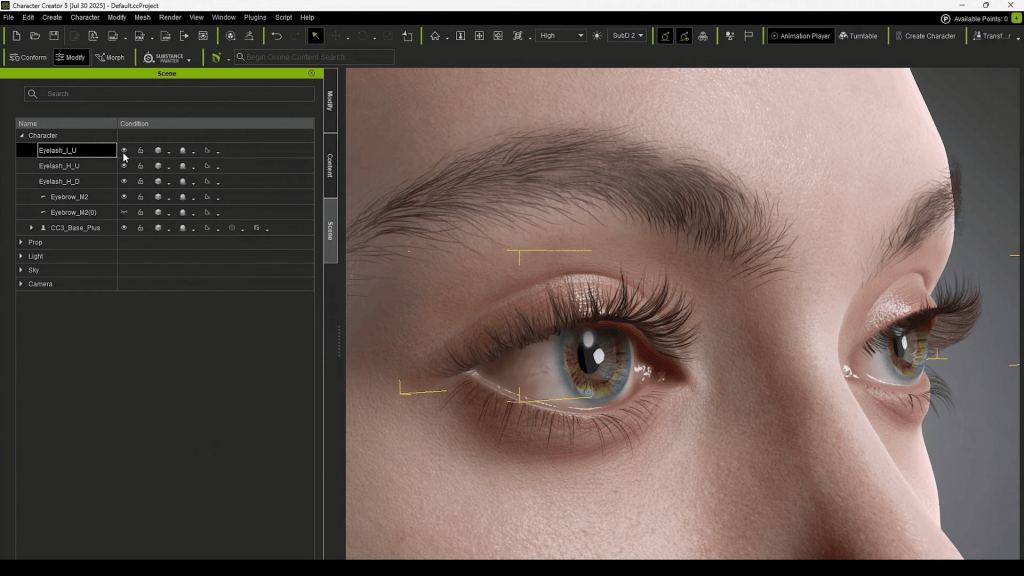
Revamped Eyelashes & HD Eyes
CC5 revamps character eyes and eyelashes:
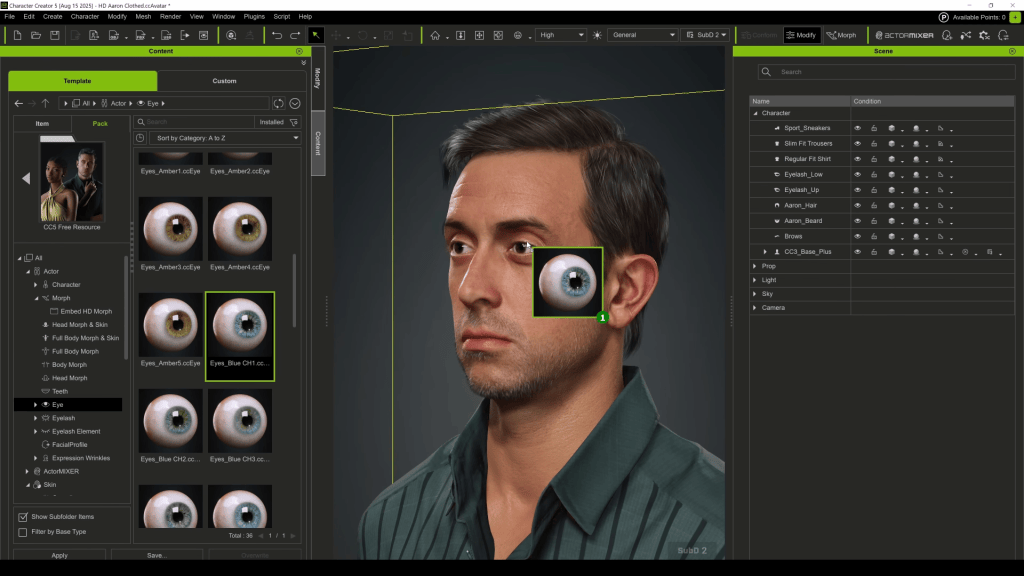
HD Eyes provide higher resolution textures, adjustable iris size, and detailed color customization for expressive, lifelike results.
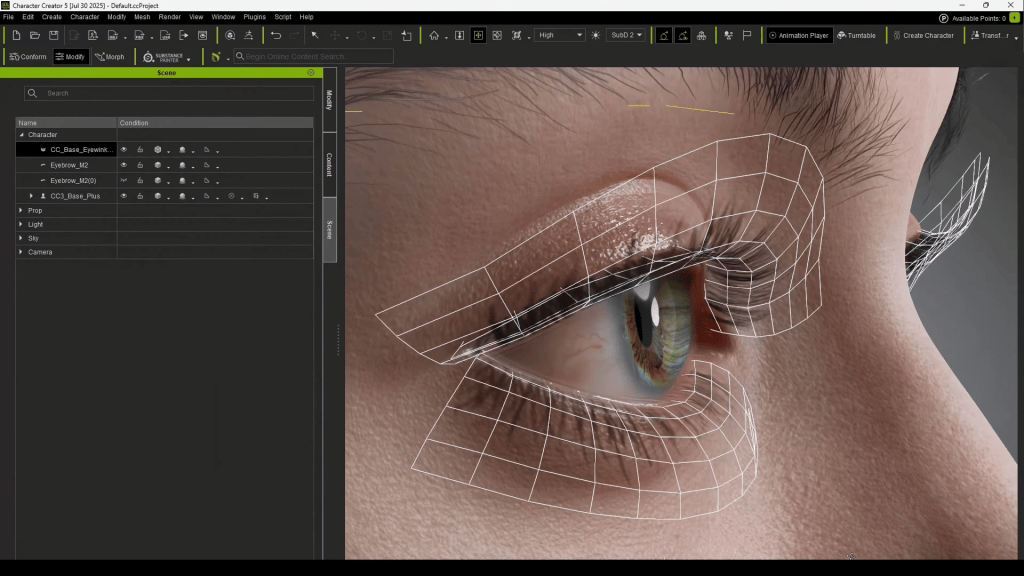
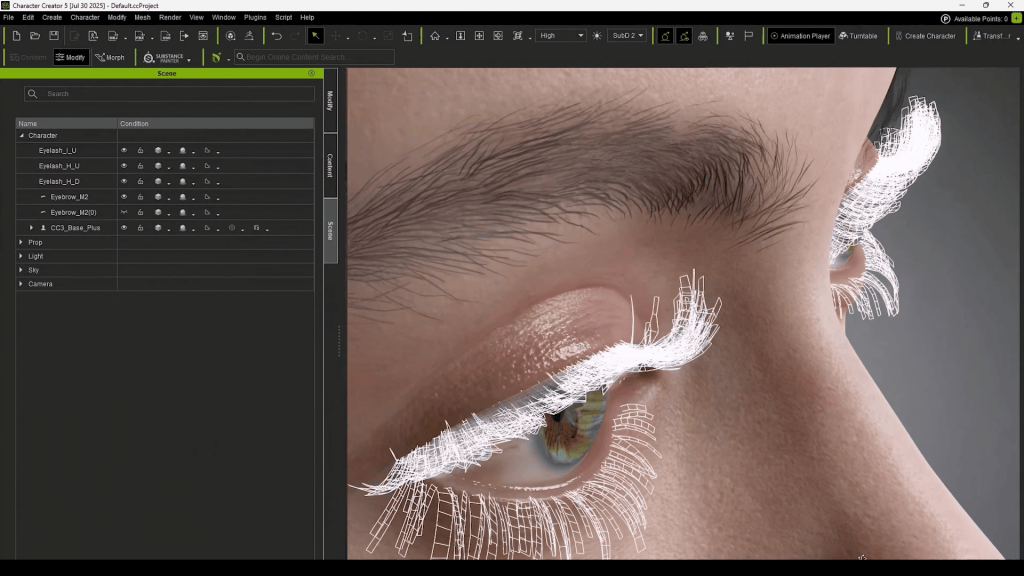
Eyelashes are now fully geometric rather than texture-based, giving natural volume and control over top/bottom lashes independently.
Actor Morphing System
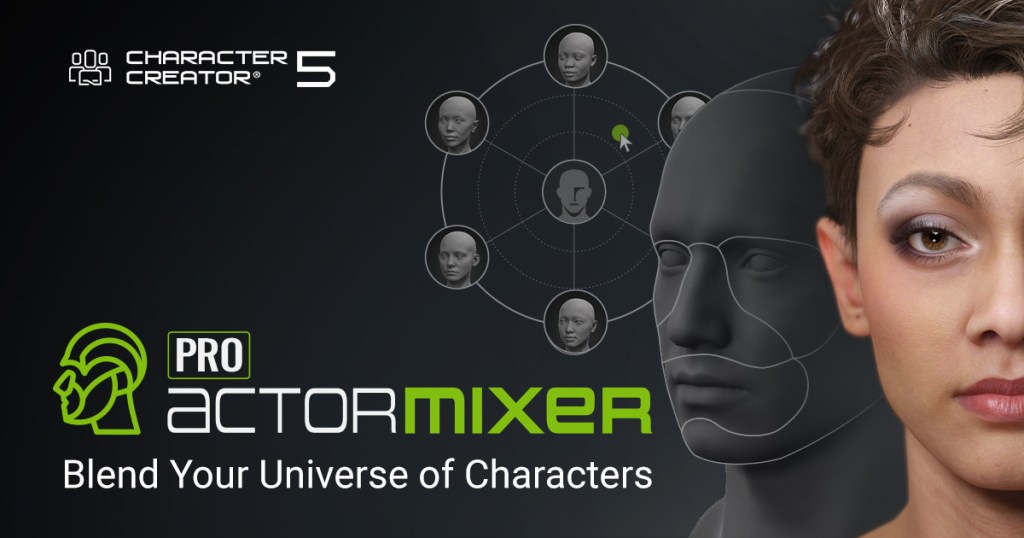
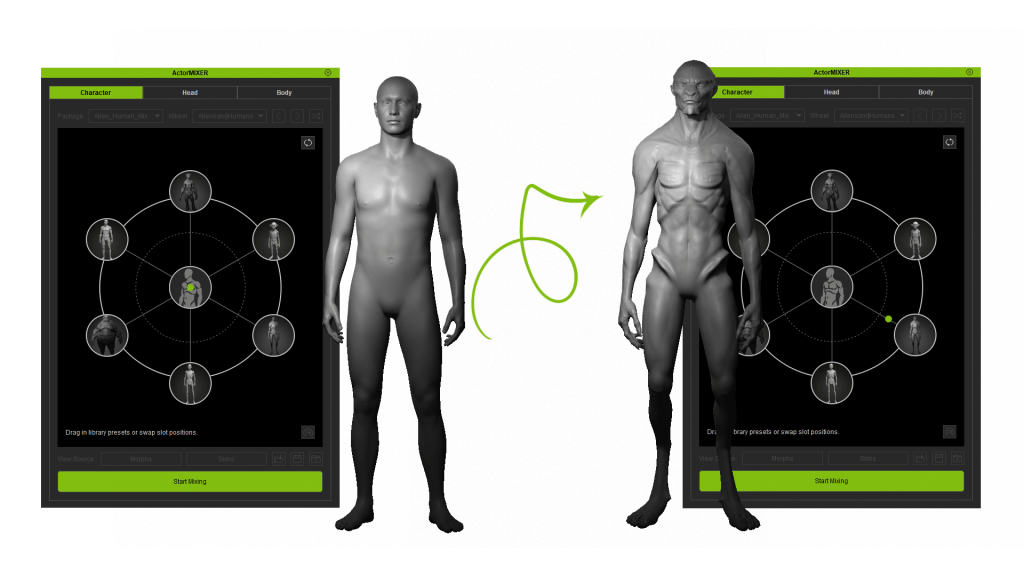
Character Creator 5 introduces ActorMixer, letting artists blend and combine features from multiple characters. Whether adjusting entire body presets or just tweaking a nose shape, this feature accelerates custom design workflows.
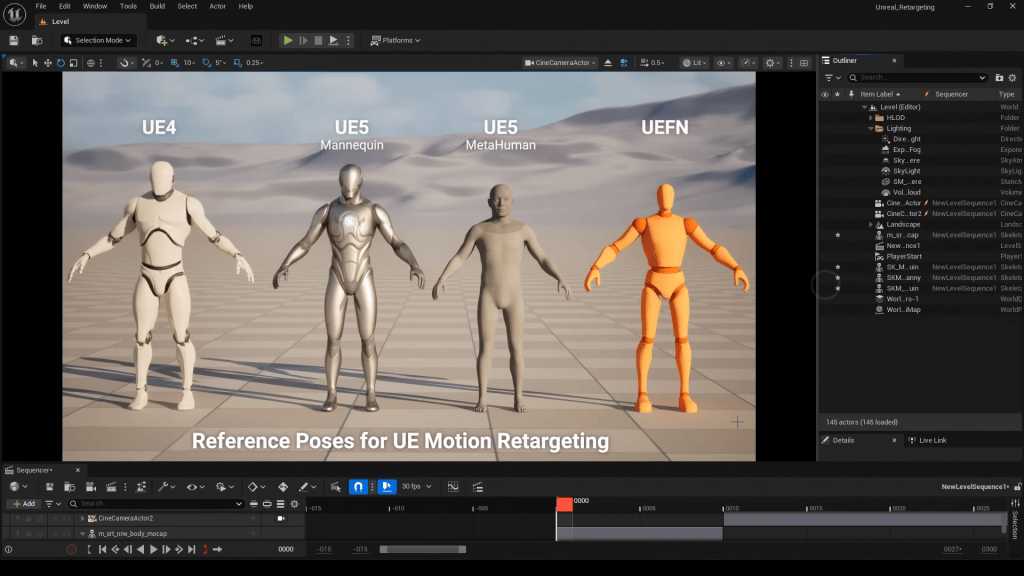
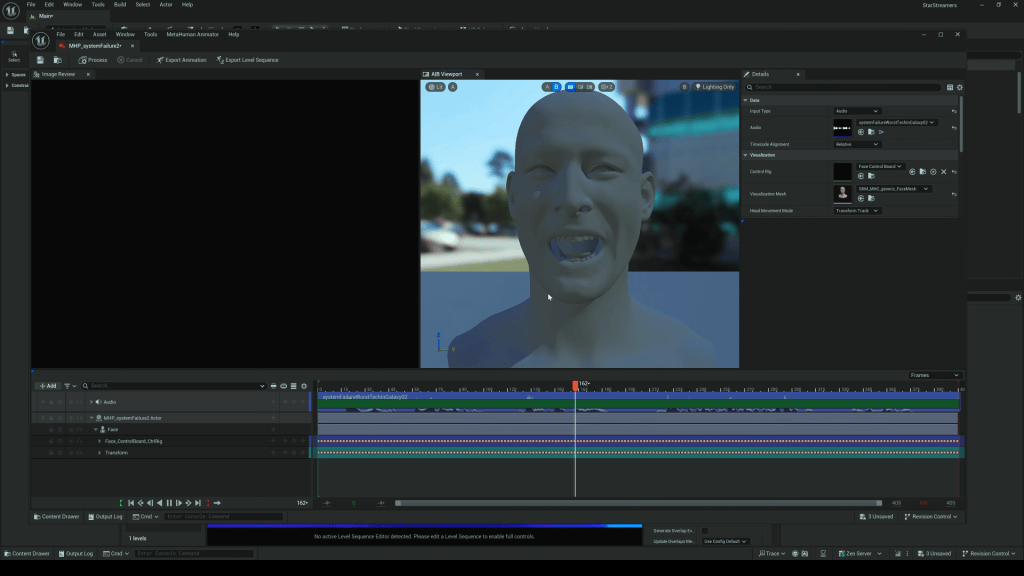
Perhaps the most impactful update: Character Creator 5 is now fully compatible with Metahuman and Unreal skeletons. This eliminates tedious conversion steps that Dean described as time-consuming in past workflows. Artists can import CC5 characters directly into Unreal Engine and take advantage of Metahuman tools such as audio-driven lip sync and the facial Control Rig for facial animation.
Dean highlights this as a massive time and cost saver:
No more third-party plugins.
No more rebuilding characters as Metahumans.
Direct access to Metahuman tools for CC5 characters.
Real-Time Animation in Action
In his video, Dean demonstrates the power of this compatibility:
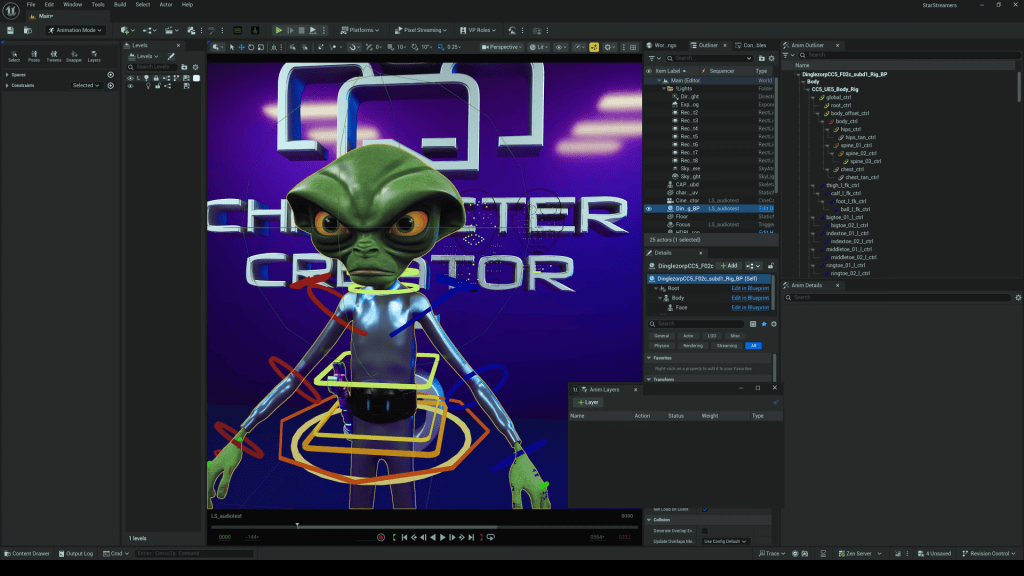
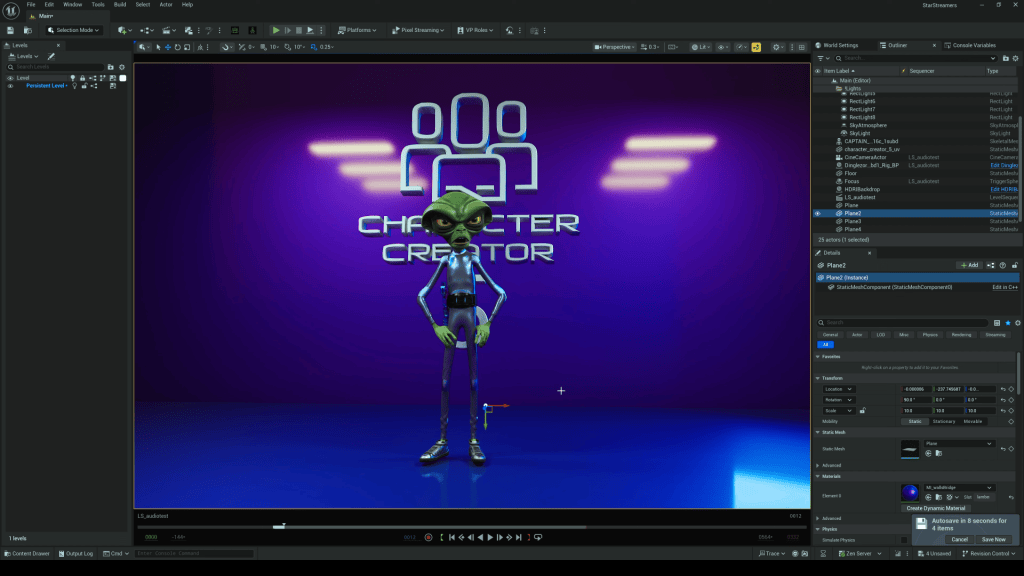
He imports a CC5 character, Dinglezorp, into Unreal Engine.
He applies Metahuman’s audio-based facial animation tool for instant lip sync.
He layers ActorCore body animations for full character performance.
The result: a seamless fusion of workflows that blends the best of CC5 and Unreal Metahuman technology.
Why CC5 Matters for Animators and Studios
Character Creator 5 isn’t just an incremental update—it’s a workflow revolution. Key benefits include:
Creative Freedom: Build stylized, realistic, or fantasy characters without being locked into one style.
Faster Production: Save time with direct Unreal/Metahuman compatibility.
Scalability: Suitable for indie creators and large studios alike.
Cost Efficiency: Fewer plugins, fewer conversion steps, and reusable characters from CC4 to CC5.
Future-Proofing: With 8K+ textures and real-time integration, CC5 is built for the next generation of animation pipelines.
Conclusion: Brian Dean’s Verdict
After testing CC5, Brian Dean concludes that the Metahuman compatibility and upgraded detail make this the strongest version yet. For anyone working in 3D animation—whether for games, film, or virtual production—Character Creator 5 delivers freedom, efficiency, and professional-grade results.
Yes. The base mesh remains the same, but CC5 allows more subdivisions and morph sliders. You can upgrade old characters without starting from scratch.
Does CC5 only work with Unreal Engine?
No. CC5 supports export to Unity, Blender, Maya, 3ds Max, and Marmoset. Unreal integration is a highlight, but not the only option.
Do I need Metahuman to use CC5?
No. CC5 is a standalone character creator. Metahuman compatibility is optional, designed to give users more flexibility in Unreal.
Is CC5 suitable for indie creators?
Absolutely. While production houses can scale CC5 for large projects, indie creators benefit from its one-stop solution for character design, rigging, and animation.
Onur Erdurak is a director, writer and 3D generalist from Turkey with a deep passion for storytelling and visual effects. He holds a bachelor’s degree in Cinema from Izmir University of Economics and expanded his cinematic knowledge through the Erasmus Student Exchange Program in Slovenia.
His early career was defined by Stranded, a no-budget short film that premiered at the Cannes Film Festival Short Film Corner in 2018. Since then, he has honed his VFX and CGI skills, developing a unique filmmaking style that blends practical storytelling with digital enhancements.
In 2025, Onur finalized his studies in MFA from Loyola Marymount University, where he continued to push the boundaries of storytelling. His creative project, Blendreams, shares his 3D renders and animations with a growing audience of over 140,000 followers on Instagram and YouTube.
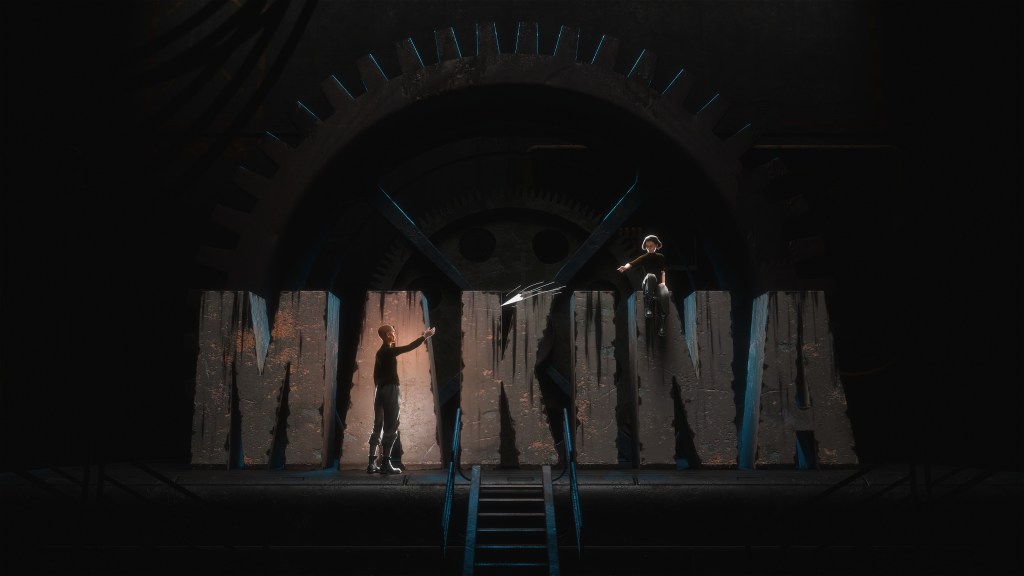
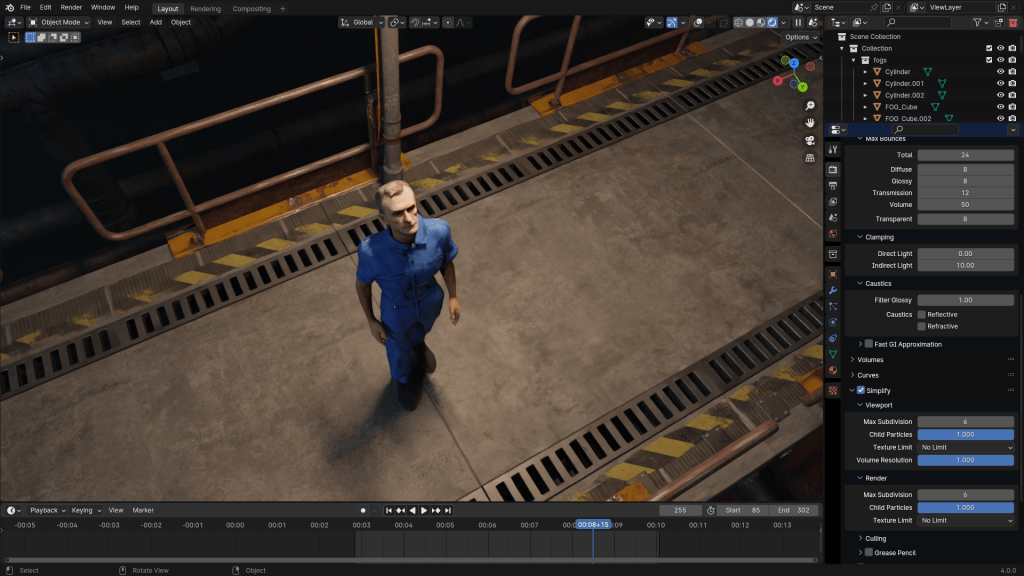
Onur Erdurak, is now bringing his dystopian vision Makina to life using Reallusion tools like Character Creator, iClone, and ActorCore. In this project he integrates Blender into his workflow, leveraging animation for previsualization and set extensions for this live action film. Discover how his innovative process bridges indie filmmaking and advanced 3D technology.
Unveiling Makina: A Dystopian Tale
Creativity is contraband deep underground; weary worker Tim complies, until Page’s rogue paper plane flutters past the Supervisor’s gaze, leaving Tim to decide whether to betray the girl or risk the madness the regime foretells.
The teaser was created early in pre-production, way before the filming begun, as a tool to explore and communicate the film’s atmosphere, tone and creative vision. The final film is entirely live-action, complemented by select CG shots and VFX enhancements.
How Character Creator and Reallusion Tools Helped Character Development
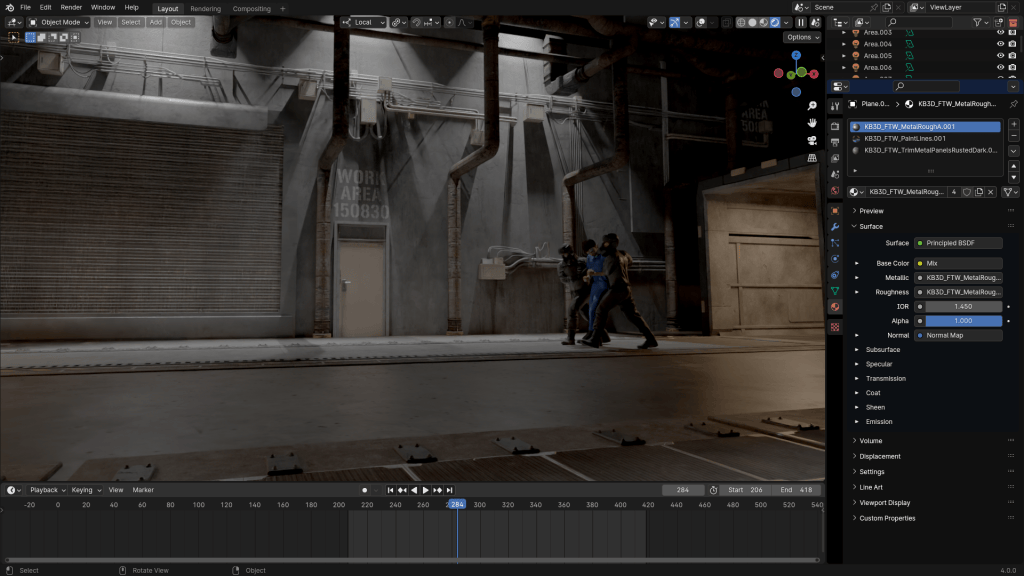
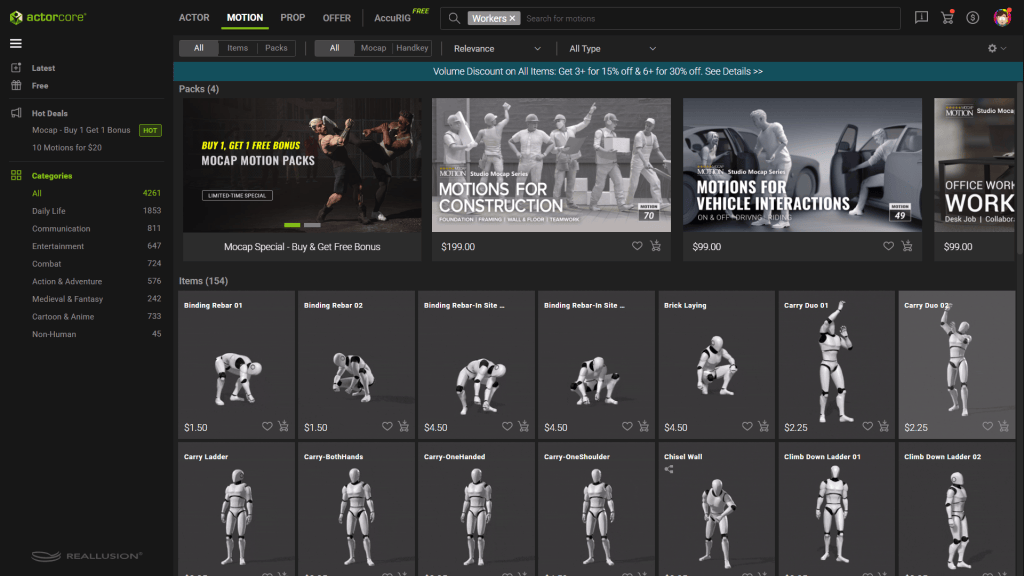
Even though MAKINA is going to be live-action, Onur planned to incorporate ActorCorecharacters and animations in the final production. CG set extensions where used to convey the massive scale of this world, and ActorCore characters and animations, combined with iClone’s crowd simulation, would help populate these scenes to create realistic crowds.
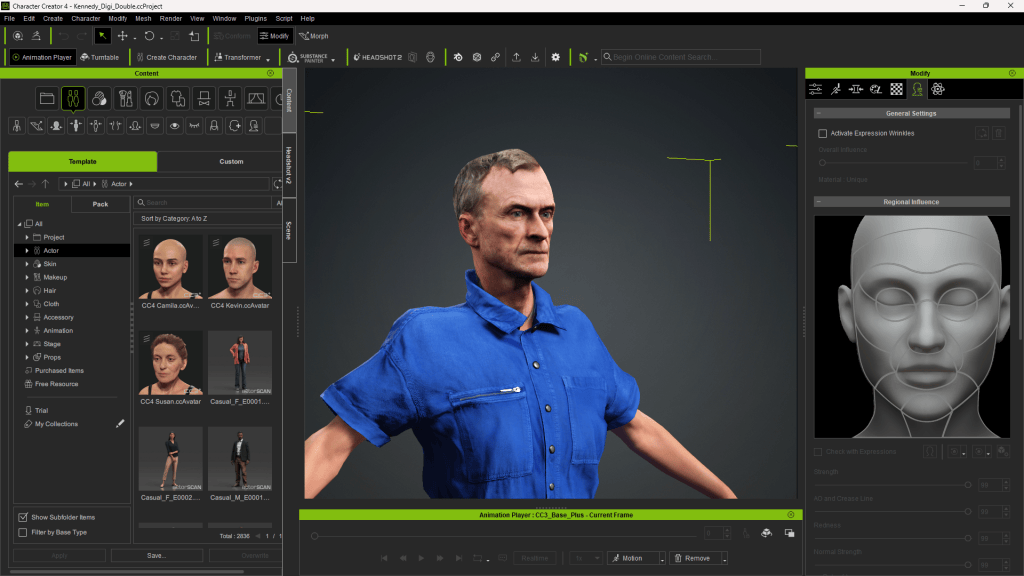
Before casting or filming began, Onur usedCharacter Creator 4 (CC4) to design his core characters. These weren’t placeholders—they were visual blueprints with emotion, tone, and style.
Erdurak sought to create distinctive characters beyond the default Metahuman appearances. He began by crafting characters in Character Creator 4 (CC4), then imported them into Unreal Engine 5. Utilizing the Mesh to Metahuman feature, he converted these models to leverage Metahuman Animator for facial performances. This process resulted in more unique and personalized characters.
“Character Creator is my go-to for designing the characters I envisioned for the script.”
Onur Erdurak – Director / Writer / 3D Generalist
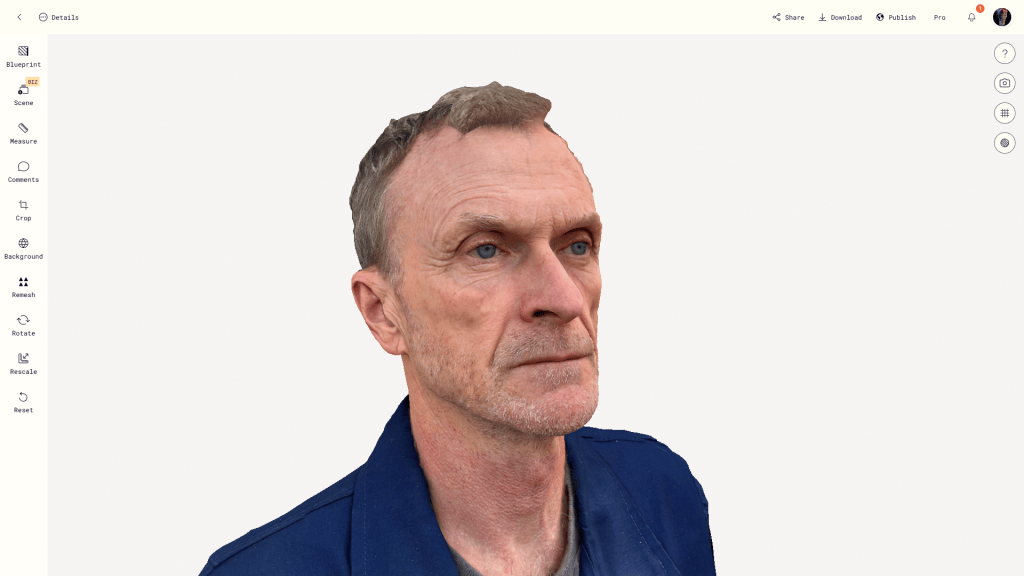
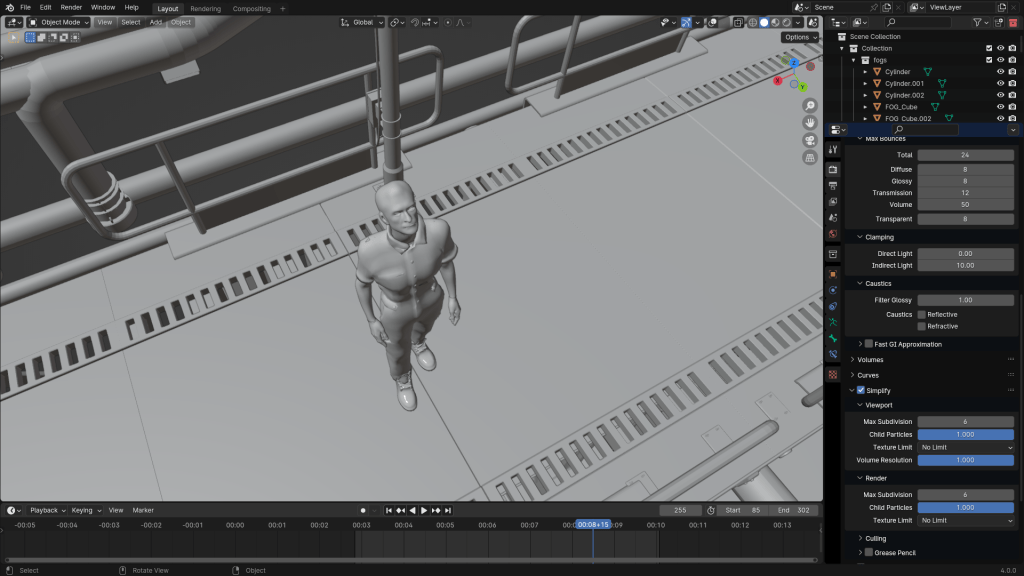
For specific scenes, Erdurak employed the free AccuRIG tool to rig characters from the BMS Post-Apocalypse Kit. He created this digital double using a head scan processed with the Headshot 2 plugin for Character Creator.
By customizing facial features, body types, clothing, and expressions, he was able to shape Tim’s tired resignation, Page’s youthful rebellion, and the Supervisor’s cold authority—all without hiring actors or building costumes. This gave the team a solid visual reference for casting and wardrobe decisions down the line.
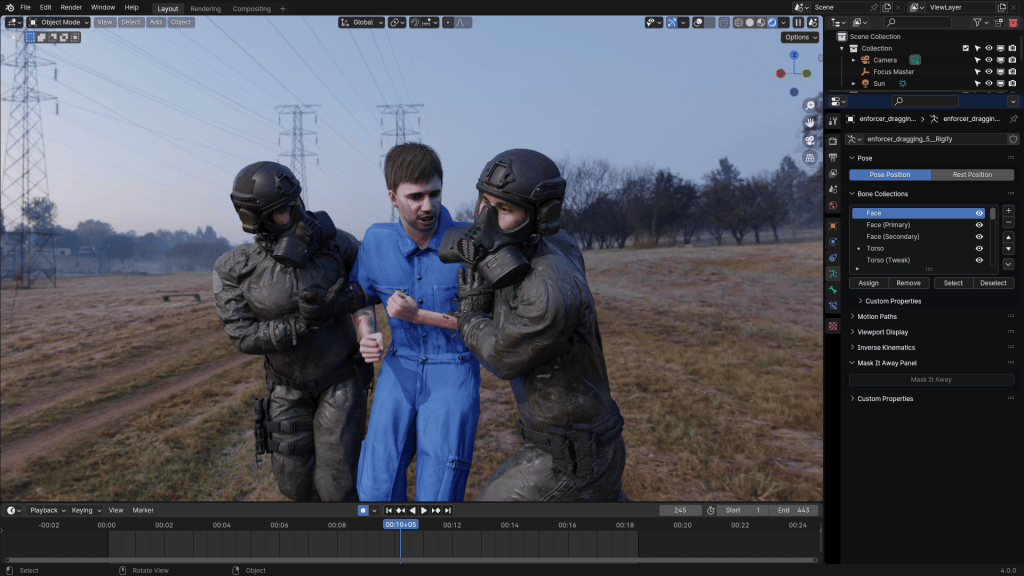
Notably, in a scene where two enforcers drag a worker, the enforcers were sourced from the BMS Kit, while the worker was a digital double of Erdurak himself.
“The performances were motion-captured by three people. I was the one acting for my digital double. The two others were Bryon Qiao who was the motion capture expert on set. And Melis Caner (Melniverse) she was also helping me with the pre-viz by acting as one of the characters, and she ended up acting as one of the characters in the final live-action film.”
Onur Erdurak – Director / Writer / 3D Generalist
Previsualization and Motion Capture Integration
To meticulously plan Makina, Erdurak utilized Unreal Engine for previsualization, employing Metahumans and LiDAR scans to create a 1:1 match with the actual filming location.
“I used Polycam to create LiDAR scans of the actual filming location, allowing for a 1:1 match between the Unreal Engine previs and the on-set shoot.”
Onur Erdurak – Director / Writer / 3D Generalist
Motion capture played a pivotal role in this process. The entire film was previsualized using ROKOKO motion capture tools: two headcams, one suit, and gloves. Using Rokoko’s Smart Suit Pro II, Erdurak captured performances to swiftly navigate the planning phase.
“We were able to go through the entire script, all the actions, all the blocking and movements. Motion capture allowed me to move through the planning phase incredibly quickly.”
Onur Erdurak – Director / Writer / 3D Generalist
This approach enabled comprehensive rehearsals of the script, actions, blocking, and movements, laying a solid foundation for the live-action shoot.
Using iClone and ActorCore for Lip Sync Animation and Previz
Erdurak relied on iClone to animate Makina’s concept scenes, helping him craft cinematic sequences before actual filming began. By using iClone’s real-time animation capabilities, he was able to quickly test different shots, camera angles, and character interactions.
Once the characters were designed, Onur brought them into iClone and ActorCoreto build animated sequences. These were more than storyboards—they were fully animated scenes with dialogue, lip sync animation, motion capture, and environmental lighting.
With ActorCore’s motion packs and iClone’s real-time engine, he was able to:
Block camera movements and lighting.
Animate facial expressions and dialogue.
Test emotional beats without expensive rehearsals.
To ensure the motion capture data aligned seamlessly with the film’s vision, Erdurak used iClone 8 for synchronization and cleanup. This step was crucial in refining the animations before integrating them into the final production.
“I used iClone 8 to sync and clean up the mocap data that made it into the final film.”
Onur Erdurak – Director / Writer / 3D Generalist
Here’s an example of the animated concept art scene he created for Makina: Watch it on Instagram
Blender Workflow and Crowd Simulations
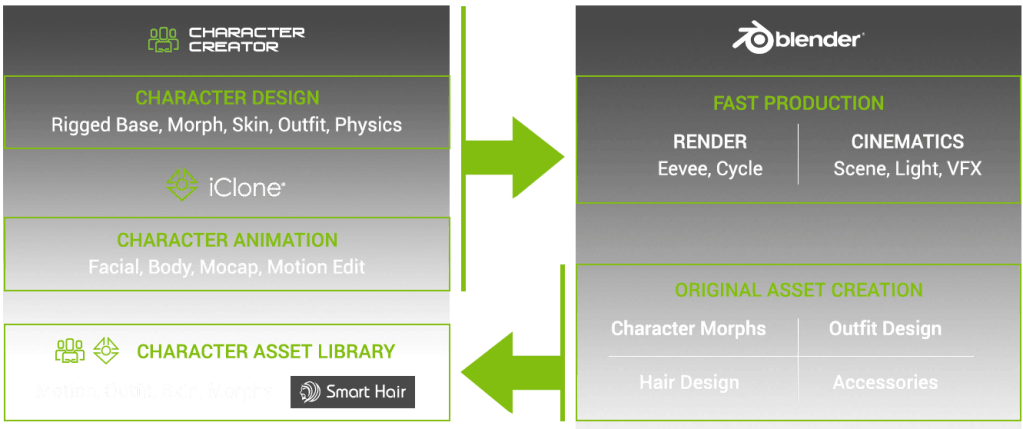
Integrating Reallusion tools with Blender was a significant aspect of Erdurak’s workflow. He utilized the Blender Auto Setup plugin to streamline the process, facilitating smooth transitions between Character Creator, iClone, and Blender. Sharing his expertise, Erdurak produced tutorials to assist others in mastering this workflow:
A dystopian underground society isn’t complete without crowds of workers. Instead of casting dozens of extras, Onur used iClone’s crowd simulation tools. By pairing ActorCore characters with iClone’s real-time engine, he created realistic background characters—walking, working, and blending into the scenes.
These resources offer practical insights for both beginners and experienced artists aiming to enhance their skills and streamline their projects.
Why This Workflow Matters for Indie Filmmakers
Creating a short film—especially a sci-fi or dystopian one—used to require huge teams and budgets. Onur Erdurak’s approach to Makina exemplifies the harmonious integration of live-action and digital techniques. By leveraging advanced tools and motion capture technologies, he brings a unique dystopian world to life, challenging the boundaries of traditional filmmaking. His dedication to sharing knowledge further enriches the creative community, inspiring others to explore and innovate within their own projects.
By using tools designed for 3D animation, he was able to:
Design characters before filming.
Create previz scenes that improve on-set direction.
Use crowd simulation to add depth and scale.
Keep production agile, visual-first, and collaborative.
This is a blueprint for how indie filmmakers can embrace tech, without losing narrative focus.
FAQ
What software did Onur use to create characters for Makina?
He used Reallusion’s Character Creator 4 for modeling and iClone with ActorCore for animation and previz.
Is Makina a 3D animated film?
No, it’s a live-action short that uses 3D tools extensively for previsualization, character design, and crowd animation.
How does iClone help indie filmmakers?
iClone provides real-time 3D animation, lip sync, and camera blocking, helping filmmakers plan scenes efficiently.
Can I learn 3D filmmaking tools as a beginner?
Yes! Onur Erdurak shares free tutorials that walk through his process step by step.
What are the benefits of combining Reallusion and Blender?
Reallusion speeds up character creation and animation, while Blender offers detailed customization, lighting, and rendering.
Greetings, my name is Peter Alexander. I am a character designer and 3D generalist who works with Character Creator 5 (CC5) and related pipelines. The recent updates to the Blender Auto Setup have made me more excited about CC4 character design than ever. Thanks to the brilliant developers, character design in Blender using CC4 assets is very streamlined and is a viable solution for those who do not have access to ZBrush or other licensed software.
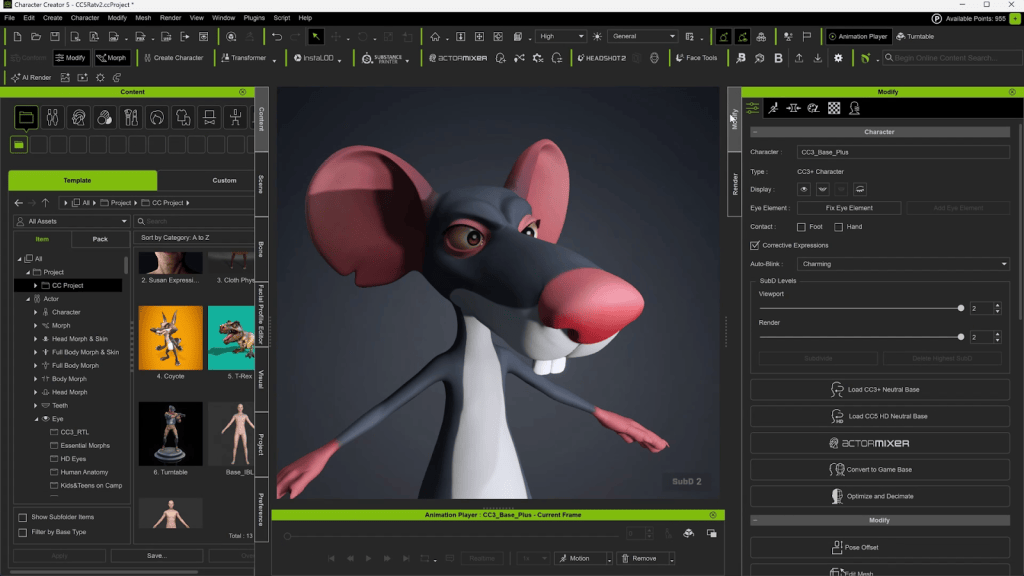
In this article, I’m going to explore some ofCharacter Creator 5‘s new features, focusing mostly on the HD pipeline. Character Creator now supports two subdivision levels, adding a vast amount of mesh definition, which can be enhanced further with normal maps. The extra geometry allows for more possibilities with how far the base mesh can be stretched. Whereas previously a design like this was only barely achievable, now the geometry rests comfortably in this shape, allowing for enhancements like a better facial expression profile.
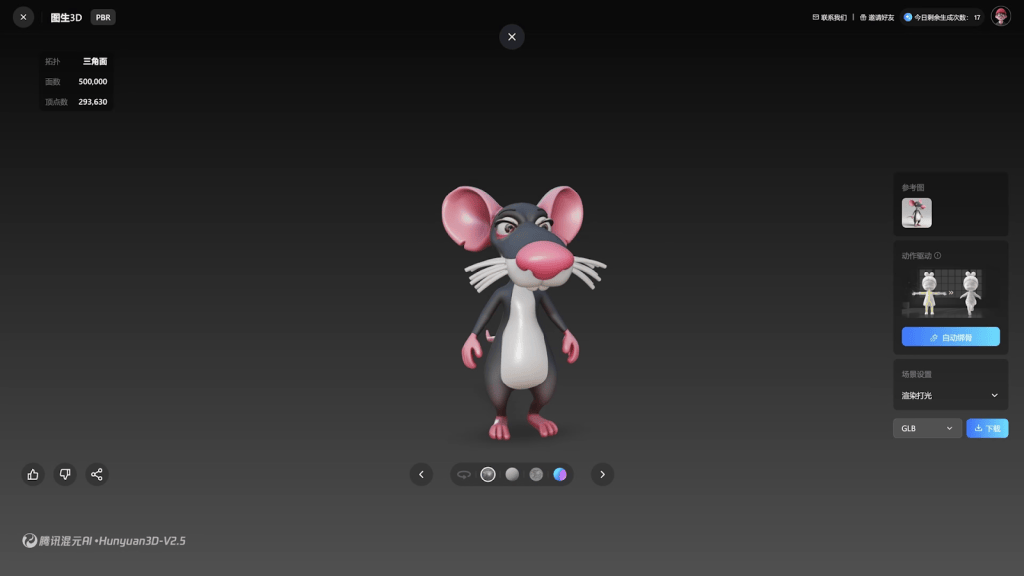
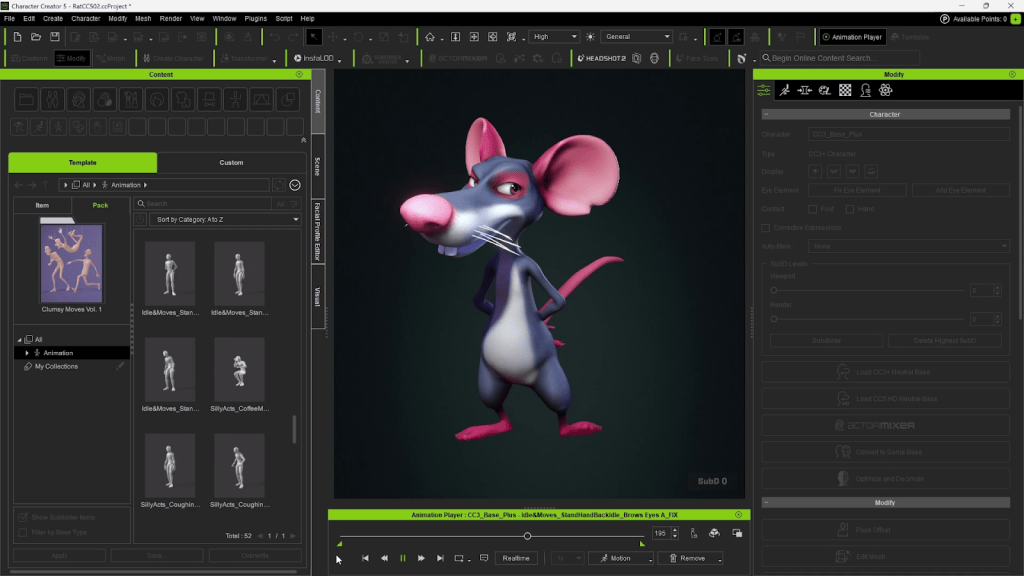
For this tutorial, I’m going to stretch the mesh over this AI-generated rat character. Once I clean up the mesh after wrapping, I’ll give it some basic polypaint and sculpted details, then send it back to Character Creator 5 at SubD 2. From there, I’ll clean up the mouth shape, add some expressions usingFace Tools, add a tail and whiskers, then send it to Unreal to take advantage of that pipeline’s features. Let’s dive in!
Prepping for the Wrap
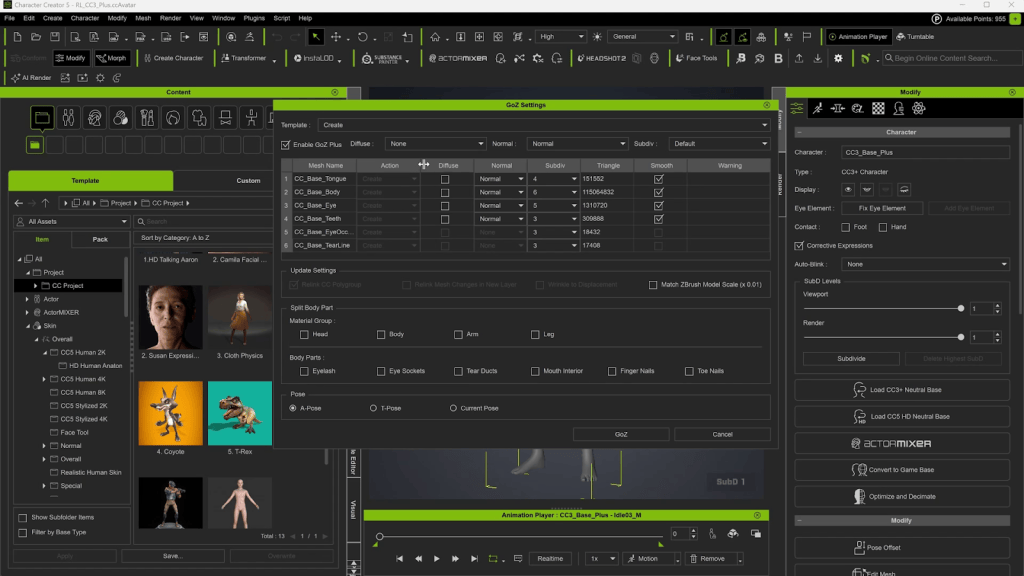
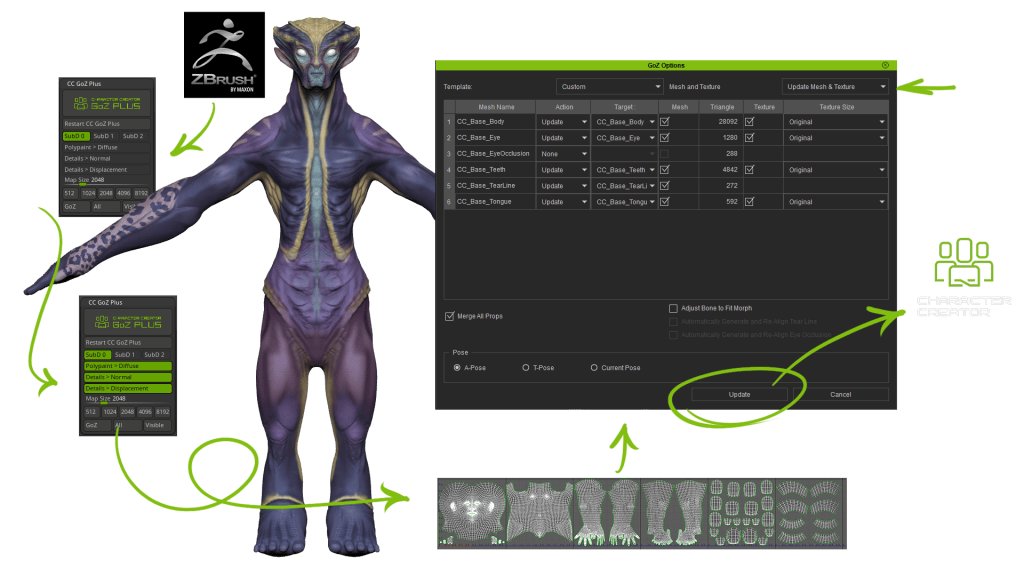
I’ll start by loading up the CC5 HD base mesh. Then I’ll send it over to ZBrush using the GoZ Plus. The HD Base loads with one Sub Division Level. You can add another subdivision if you want. Or you can add it later. GoZ Plus can send up to 7 Subdivision levels, though usually 5 or 6 is enough. Even though you’re generating extra subdivision levels in ZBrush, only 2 are supported on the CC5 side. The extra levels will be used to generate more detailed normal maps.
Generating an AI Mesh
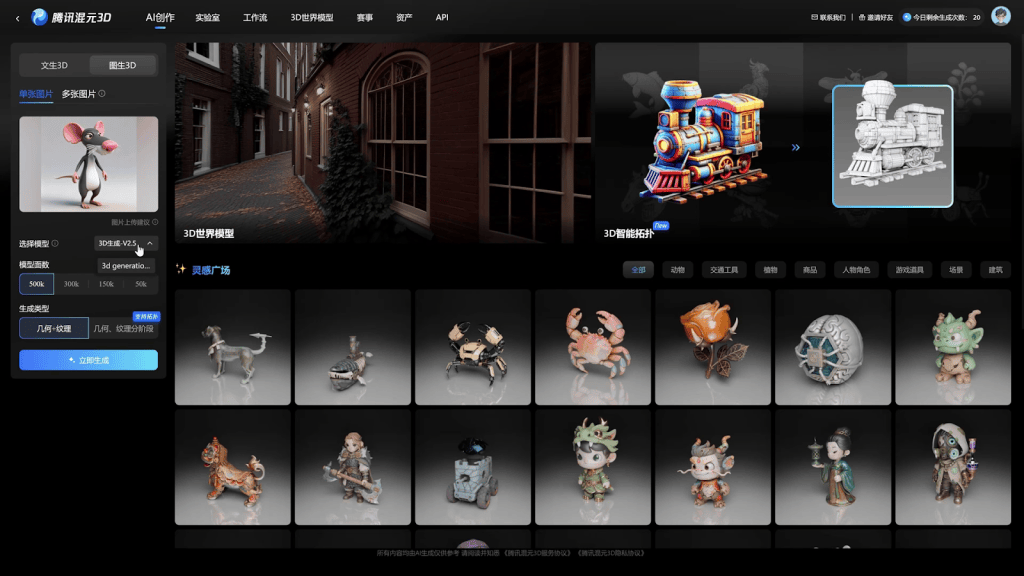
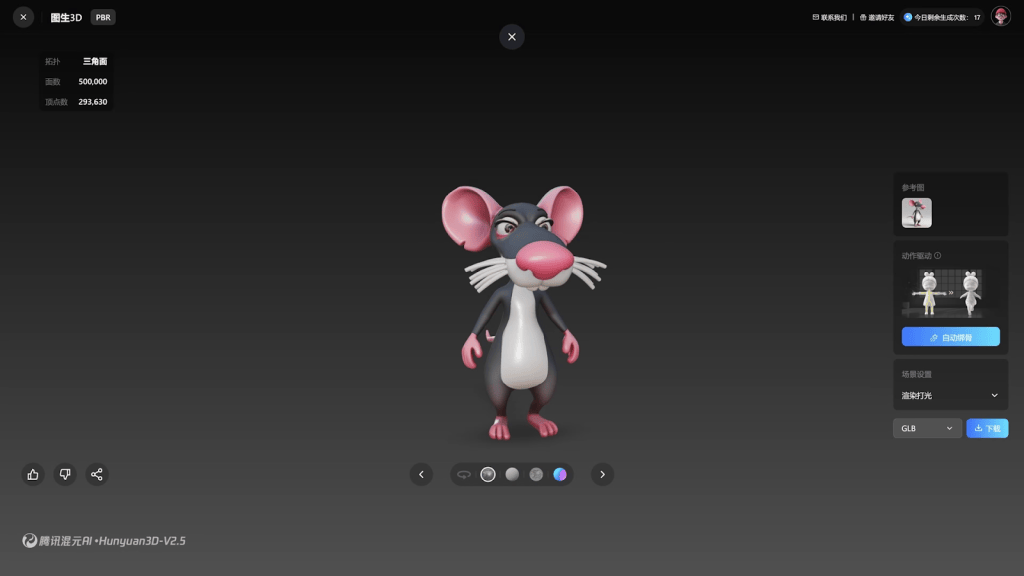
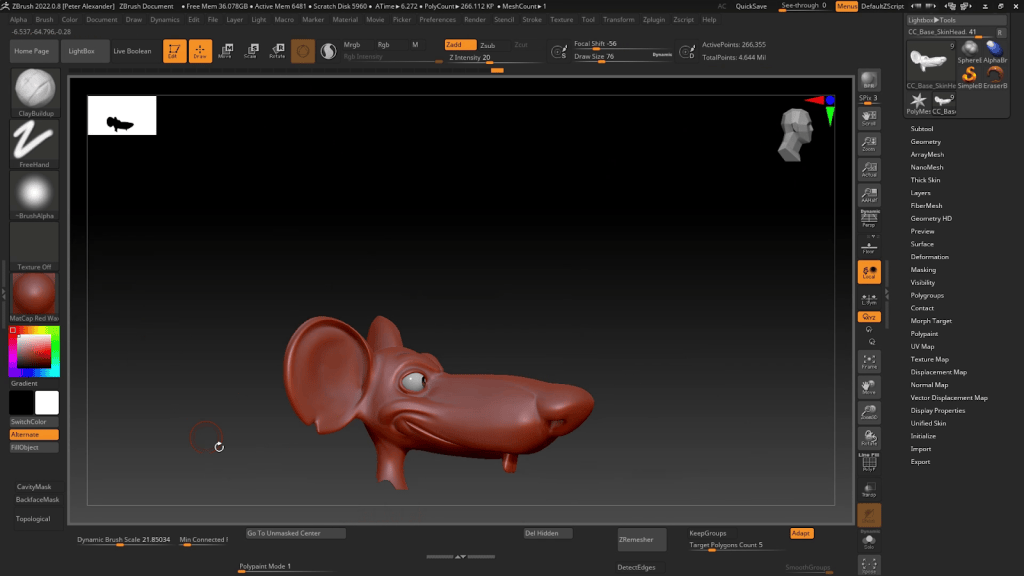
I’m using a free service called Tencent Hunyuan 2.5 to generate this mesh from an AI reference. I’ll export it as an FBX and then load it into ZBrush. Then I’ll insert that Subtool into the Ztool right under the “CC_Base_Body”.
Wrapping the Base Mesh
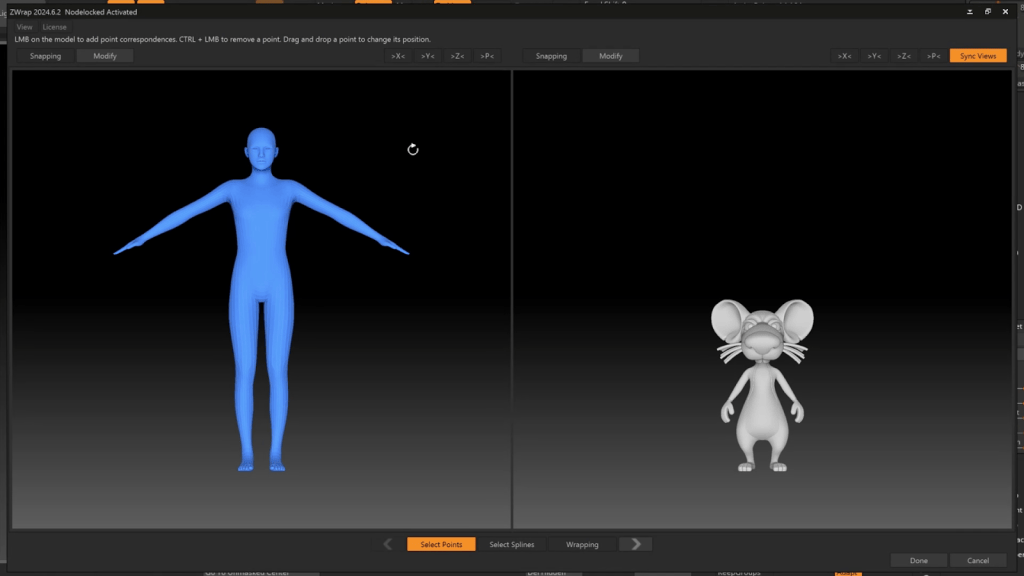
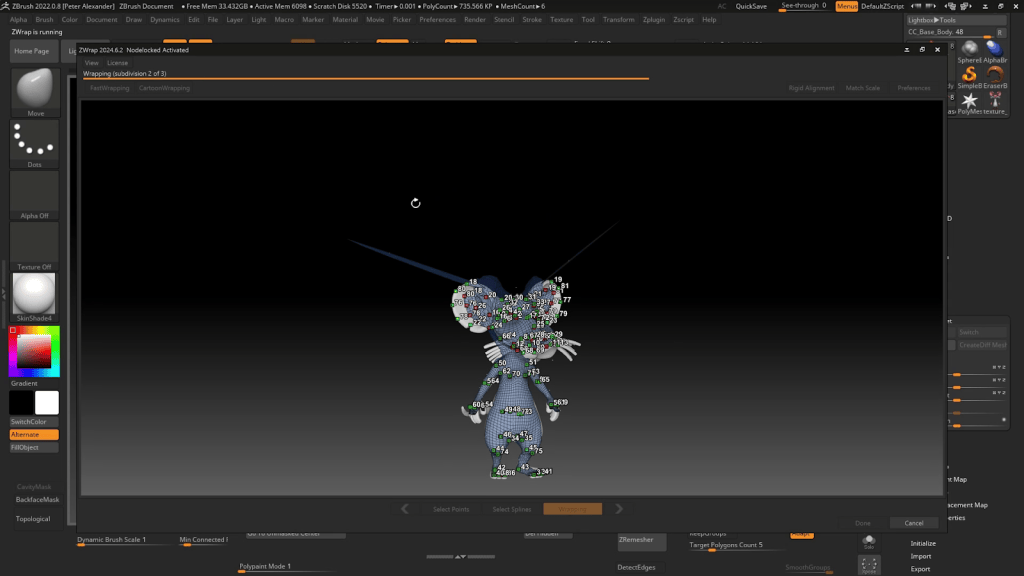
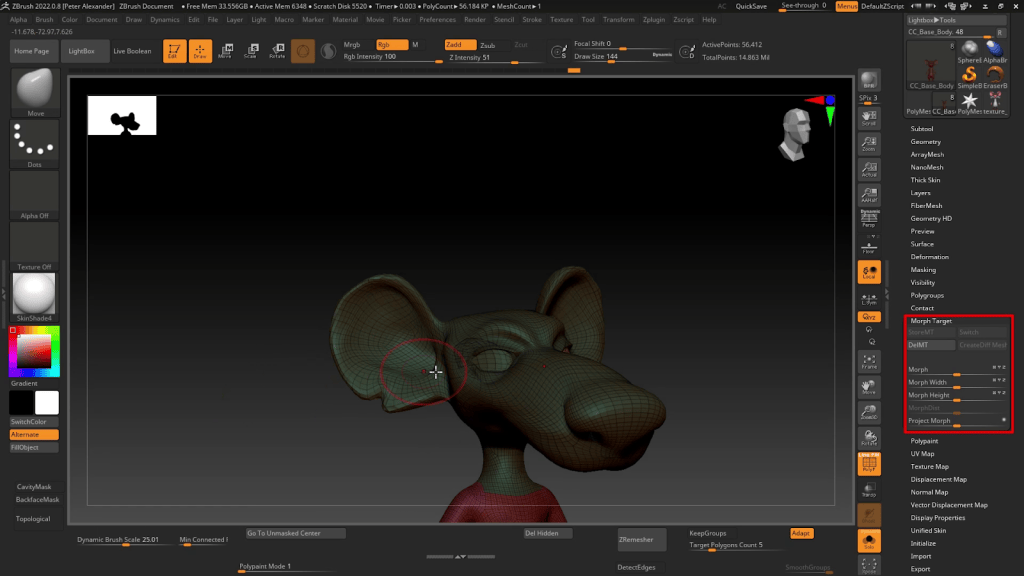
Next, I’ll use a paid add-on called Zwrap to wrap the base mesh around the reference mesh. Before you do that, you’ll want to create a Morph Target for the CC_Base_Body. This will allow you to more easily correct aspects of the mesh after wrapping.
Zwrap functions much like Headshot. You line up corresponding points on the two meshes and then initiate the wrapping process.
Fixing the Wrap
Once the wrapping is complete, areas of the mesh will have to be corrected, such as the eye sockets and inner mouth, as well as the tear ducts and eyelashes. If you mask everything except those areas, you can dial out the deformed areas and manually align the corrected areas to the current body shape. This can take a bit of practice to master, but you’ll get it if you stick with it. It basically involves a lot of masking, smoothing, and using the gizmo.
Having a morph target saved allows you to selectively fix areas of mesh that have been badly deformed or are incompatible with the reference mesh, such as the hands and feet.
Adding Color
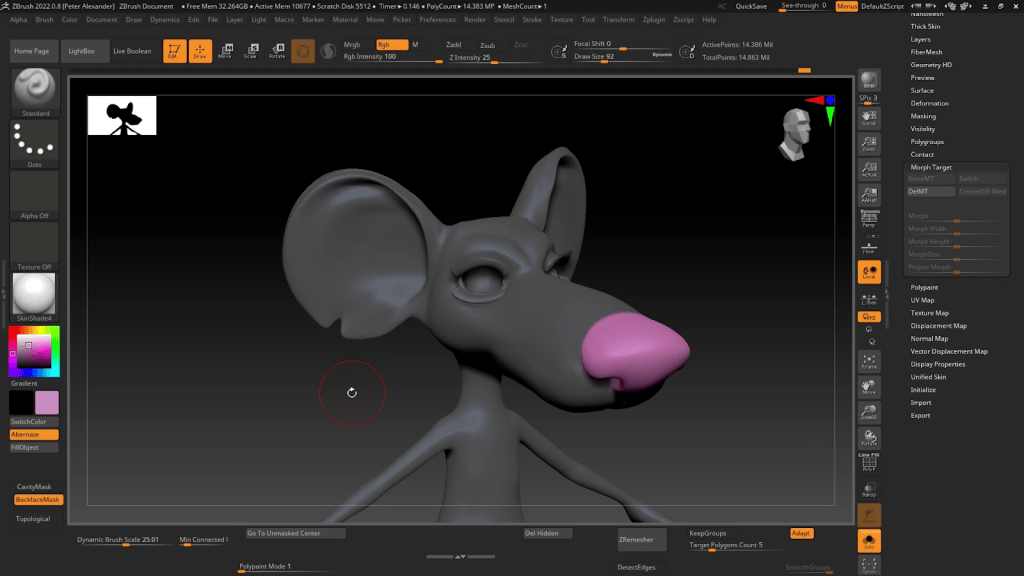
Now that all my details are in place, I will add some basic polypaint so that I can easily generate textures using the GoZ Plus process. This character is very exaggerated, but almost basic in his colors, so I can just paint them by hand. You can transfer the colors from your reference mesh, but in this case, it’s about the same effort to just paint them.
Polypaint works based on mesh density, so more subdivisions allow for more polypaint details. However, these colors will be baked onto textures that do not depend on mesh resolution, and since these are basic colors, 2k should be enough resolution.
Using GoZ Plus HD
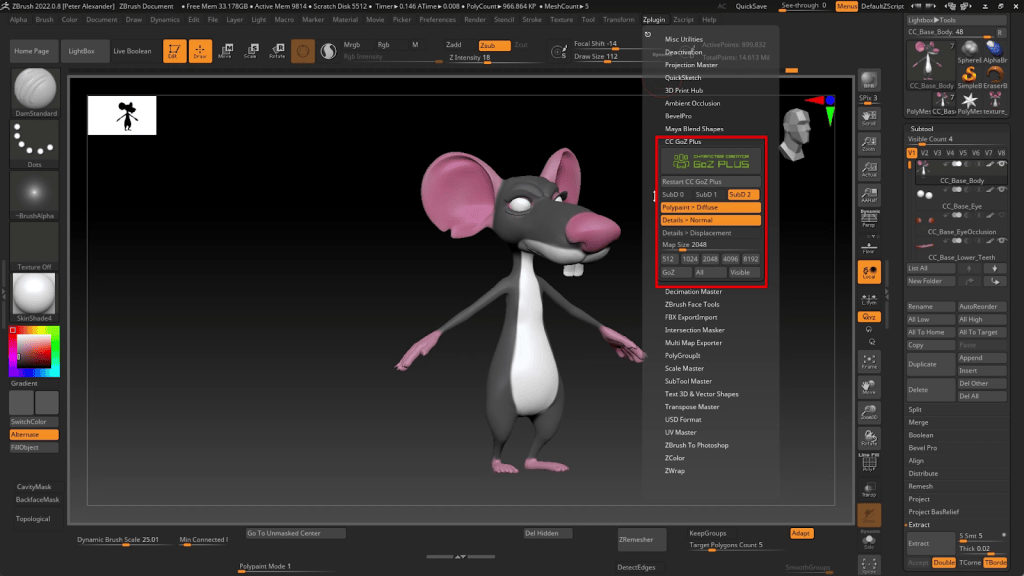
The character is now ready to send over to CC5. Go to the GoZ Plus panel and adjust your settings as needed. The GoZ Plus panel now includes the new Subdivision levels. For this project, I’m adjusting the settings to create data for SubD 2. If you select all SubD levels, it will create the normal map for each level, adding tothe file size. Since you can do this as needed in Character Creator, I will keep those options unchecked. In addition, the GoZ Plus panel now supports 8k resolution and Displacement Maps, which can add a new dimension of detail to the character when combined with SubD 2.
Initiating the HD Transfer
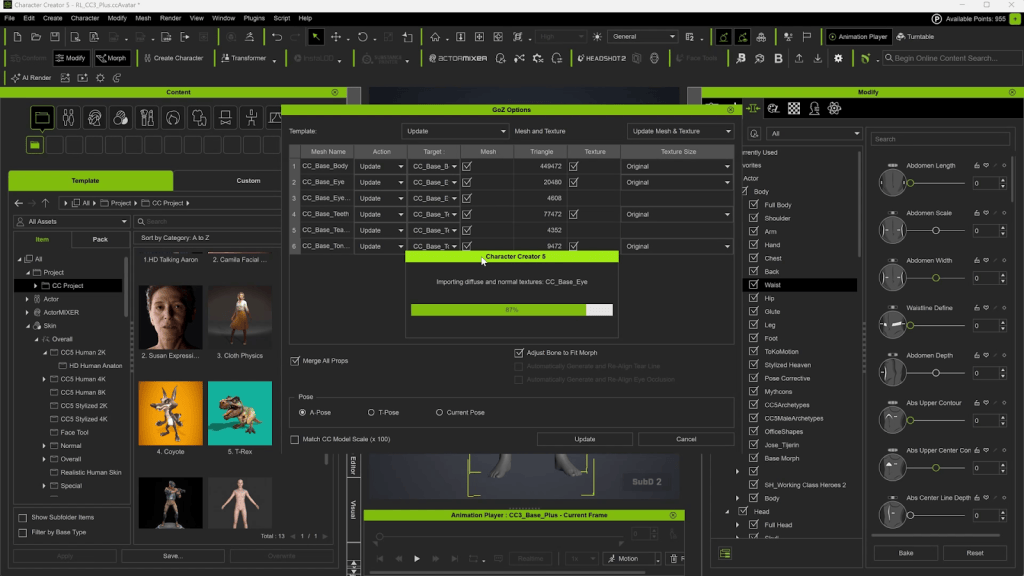
Make sure you choose a Subdivision Level; otherwise, the normals will be generated to accommodate no subdivisions, and no SubD data will be transferred. After you initiate the GoZ Plus Transfer, it will go through a script that will create the diffuse and normal maps if those options are checked. When the script finishes, it will send that data to CC5 and place the maps in the proper material slots, and will have transferred the SubD data.
I did not create polypaint data for the eyes, teeth, or tongue, so I will fill in that data using the texture settings and by replacing the materials with those of prefab assets.
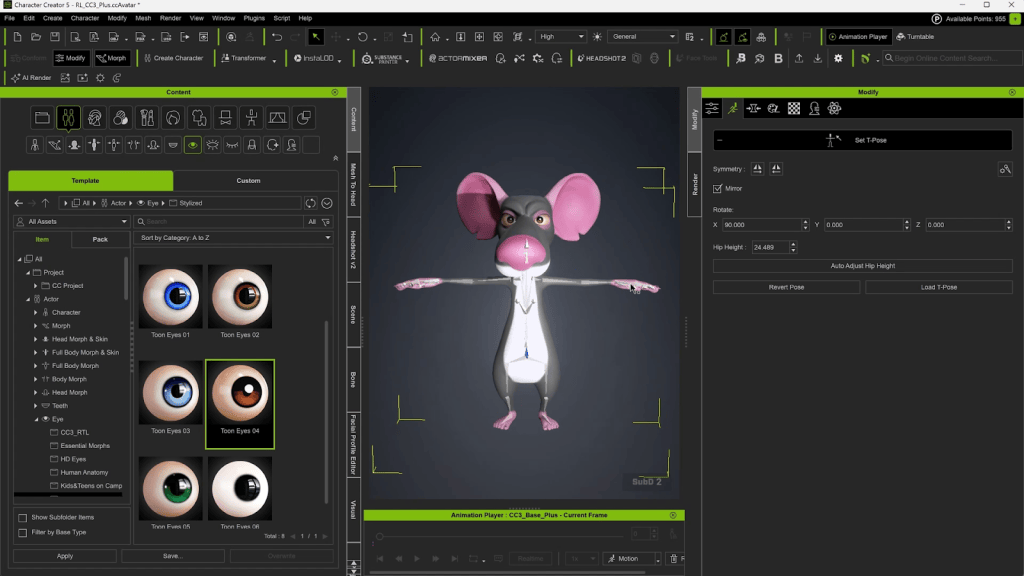
Set HIK T-Pose
If your reference mesh has a different pose, you can give your character a proper T-Pose using the “Set HIK T-Pose” function. This will ensure compatibility with all humanoid animations in iClone.
Eyelash Correction
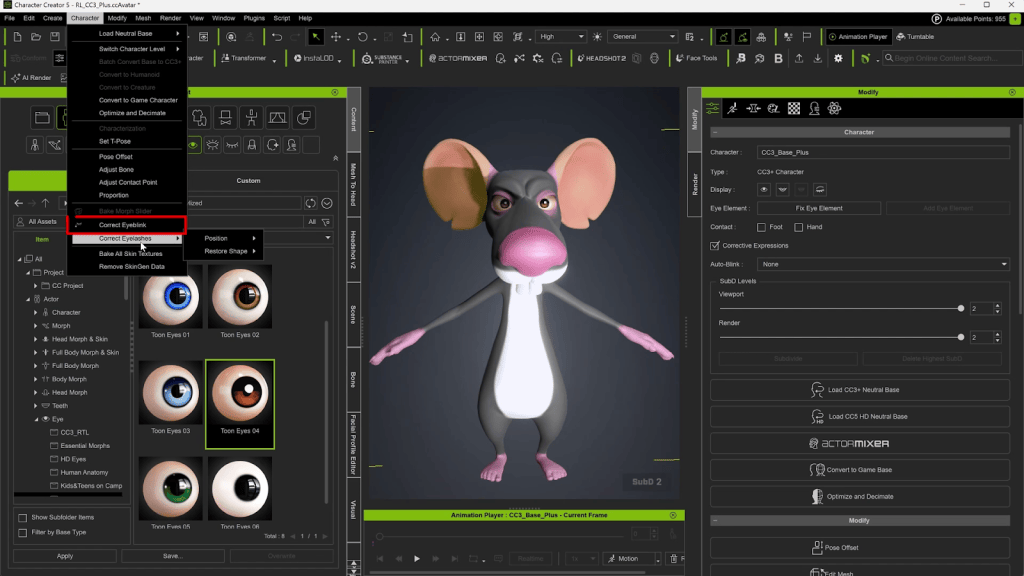
In addition to the “Correct Eyeblink” function, Reallusion has introduced a “Correct Eyelash” command, which saves a tremendous amount of time (as those who’ve created content for the Marketplace come to know).
Although this figure is more stretched than detailed, you can see the difference in stretching quality when you dial down the subdivision levels.
Mouth Correction
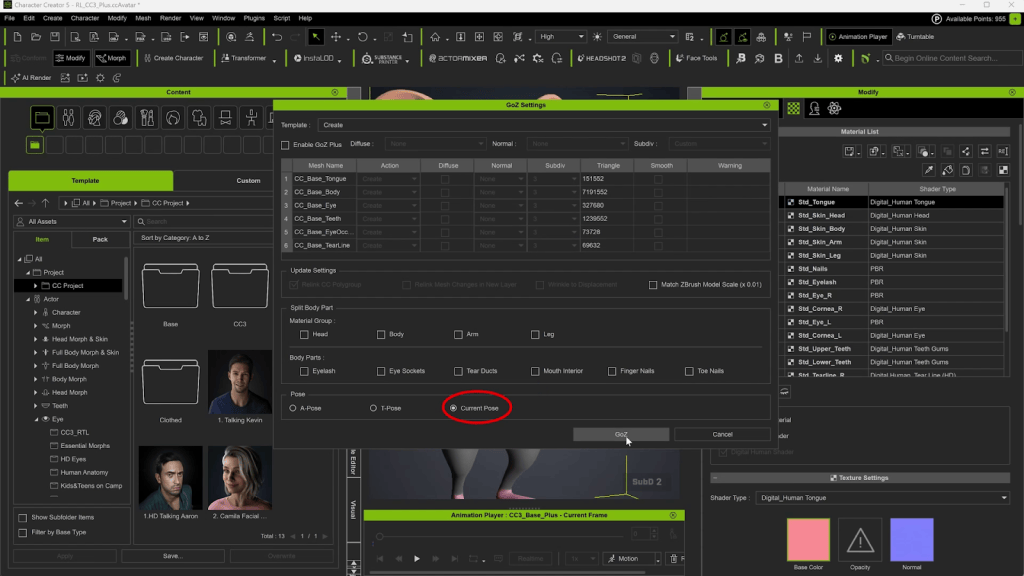
A common issue with wrapping meshes is that the mouth has deformation issues. In order to correct the mouth, go to the “Edit Facial” menu, and dial the “jaw open” slider. Then send the character to ZBrush using the “Current Pose” so that the mouth stays open.
In ZBrush, we’ll need to correct issues without changing the rest of the character too much. Any issues with the mouth being open involving the neck should be addressed in the Facial Profile Editor or Face Tools, not with this edit. When you’re finished, send the character back over to ZBrush and close the mouth.
Face Tools
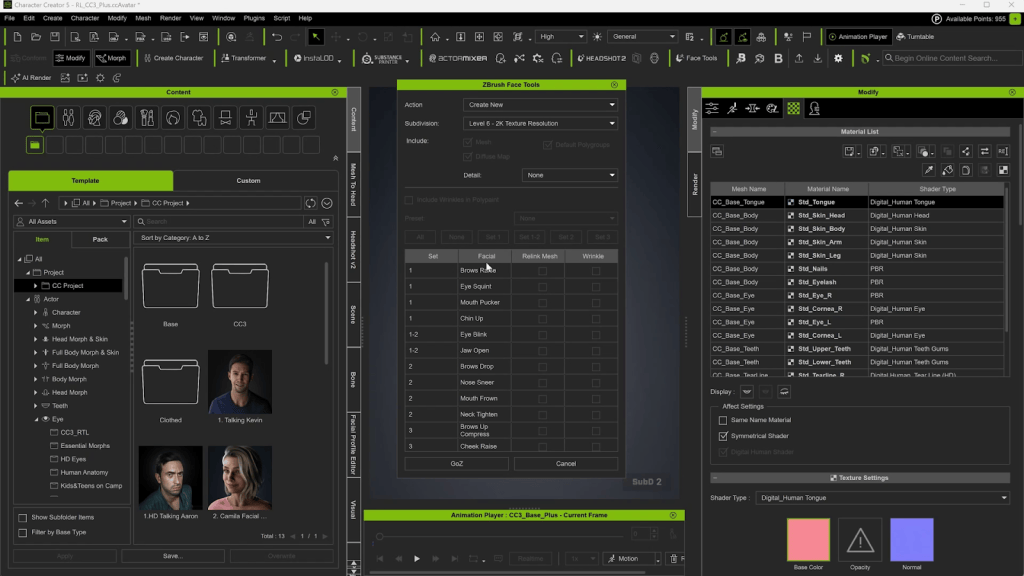
Now I’m going to edit the facial profile. This can be done using Face Tools or using the Facial Profile Editor. For this pipeline, both involve ZBrush. Face Tools allows you to do it in one sculpting session and create wrinkle maps, whereas the Facial Profile Editor allows for more complete editing. The best of both worlds is to start with Face Tools and then finish with more refined editing using the Facial Profile Editor.
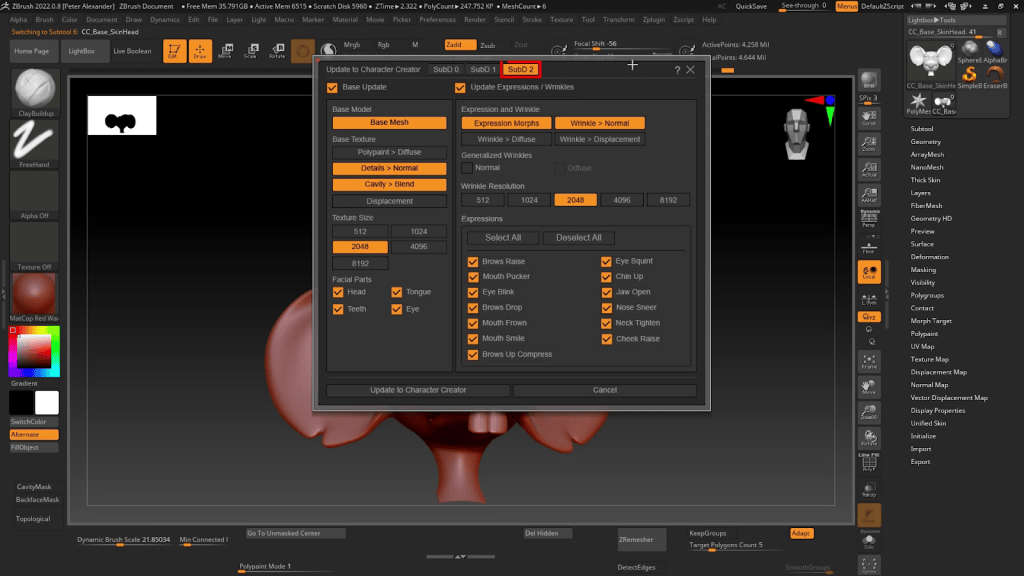
Once the editing is done, initiate the transfer to CC5. This is another script, and it will prompt you with options for the process. Make sure you enable “SubD2” in the process if you’re working at that level.
Adding a Tail
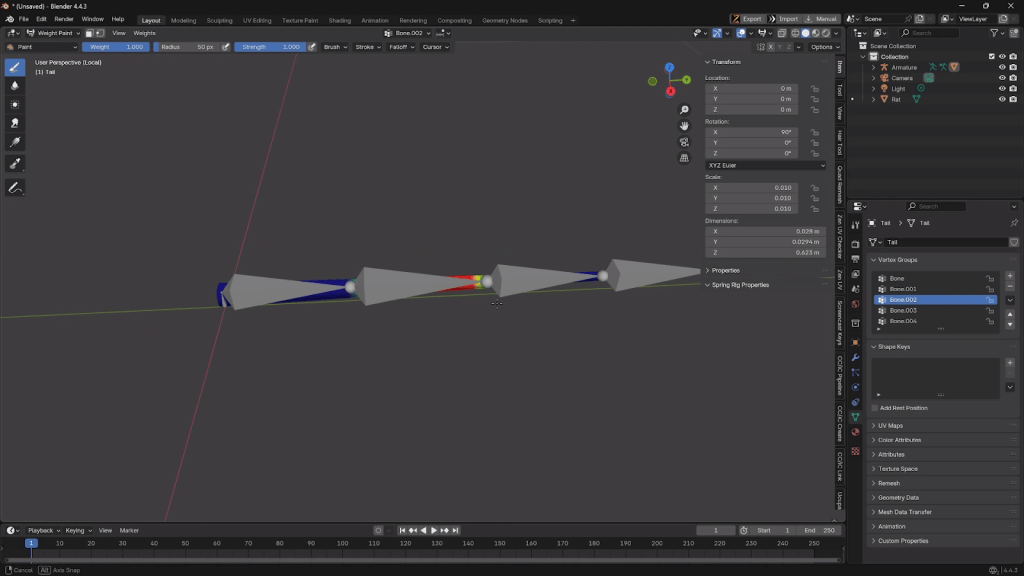
I created the tail very quickly by exporting the main body mesh to Blender and basically using it as a source for duplication and extrusion. The mesh can be sent using the OBJ or FBX export, or through the Blender Auto-Setup add-on. I rigged the tail with basic bones, painted the skin weights, then imported the Tail as an FBX using the Prop Import option. Rigged items must always be imported as a prop first, not an accessory.
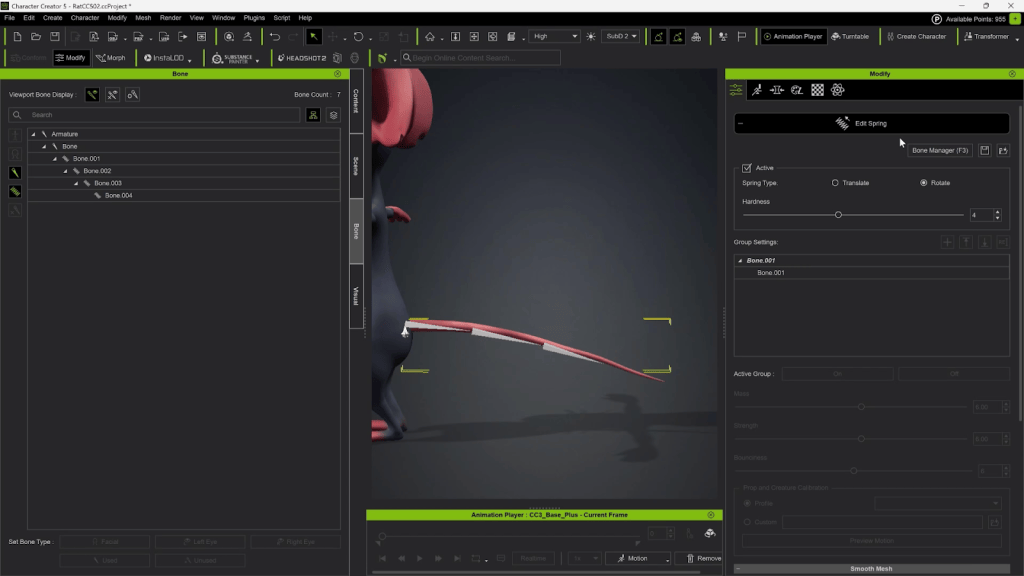
I attached the tail to the “Pelvis” bone, and then assigned the tail some spring bones to give it dynamic motion when he walks.
This rat is now ready for the Unreal Engine pipeline. And since it is compatible with Reallusion’s library of animations and iClone’s expression tools, I can give the character a unique personality, fitted to its design.
Unreal Export
I will start by exporting to Unreal Engine and selecting the UE5 Skeleton. Click the gear icon to load more options for export, choose “SubD 0” under “HD character”, and make sure “Smooth Mesh” is checked. Once imported into Unreal, you’ll have access to the Unreal Engine Control Rig, giving even more facial control within that pipeline. The UE facial rig provides an industry-standard solution to facial animation and refined control.
It’s a new day for Character Creator, and I’m excited to see how CC5 will be leveraged by large and small projects as the Reallusion suite of 3D tools embraces a new dimension of detail and integration. Thanks for reading this tutorial, and I look forward to seeing you apply these exciting techniques in your own creative journey.
Óscar Fernández is a freelance digital sculptor from Spain, specializing in creating figures for 3D printing. With deep expertise in ZBrush, he is known for crafting highly expressive characters that capture both personality and motion. His work stands out through the meticulous attention to facial expression, muscle definition, and dynamic posing, giving each sculpt a strong sense of tension and storytelling power.
Oscar Fernandez’s HD Alien MIXER pack is available now!
Overview
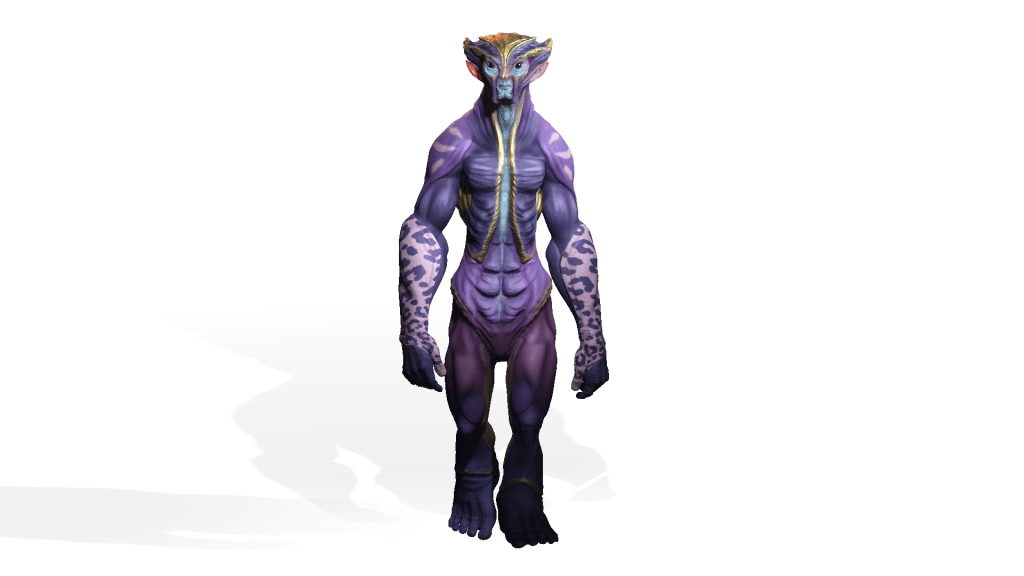
Hello everyone, this time we’re going to continue with another of the most important improvements in Character Creator 5 (CC5), focused on character creation. In the previous article, we saw how to create this humanoid alien using CC’s new HD base mesh, subdividing it up to level 7 in ZBrush, generating color, normal, and displacement maps automatically, and adjusting the intensity of those maps independently for each subdivision level in CC5.
In this tutorial, we’ll show how to turn custom characters into ActorMIXER sliders and blend them with other characters to create infinite variations. Starting with three unique alien designs, you’ll see how ActorMIXER Pro transforms them into reusable Mixer Assets, ready to combine with CC5’s powerful libraries for generating an endless cast of characters.
Character concept art
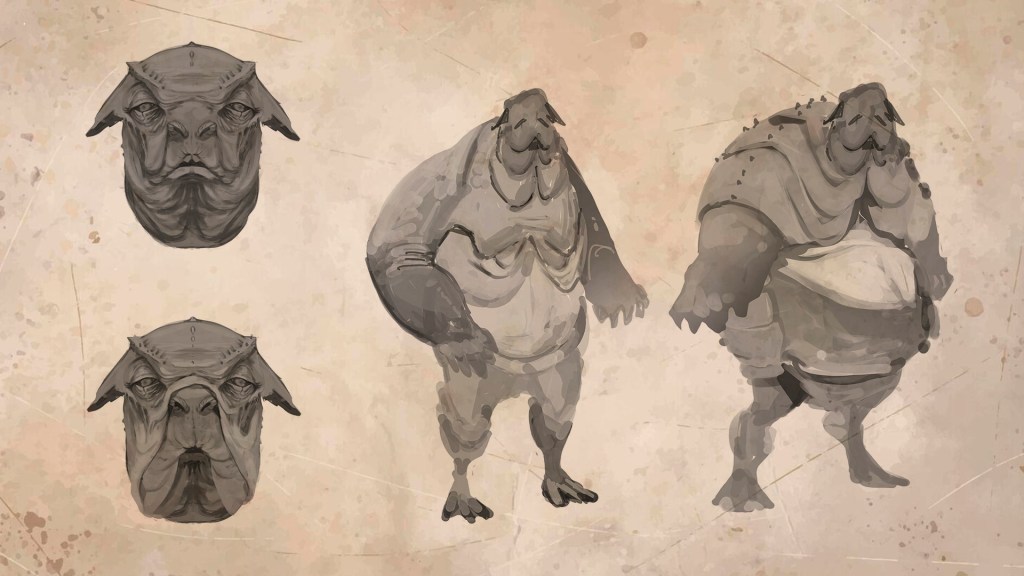
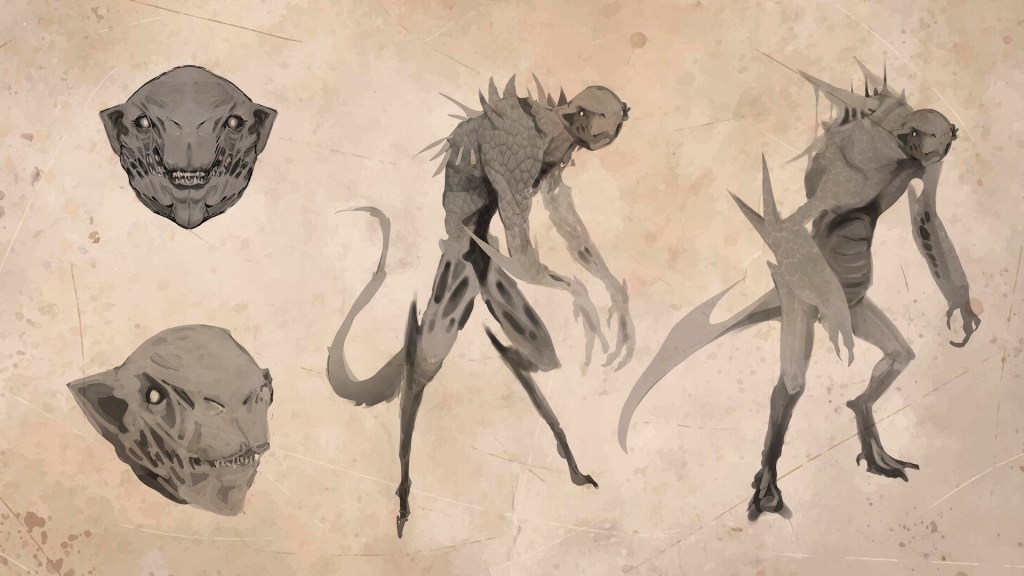
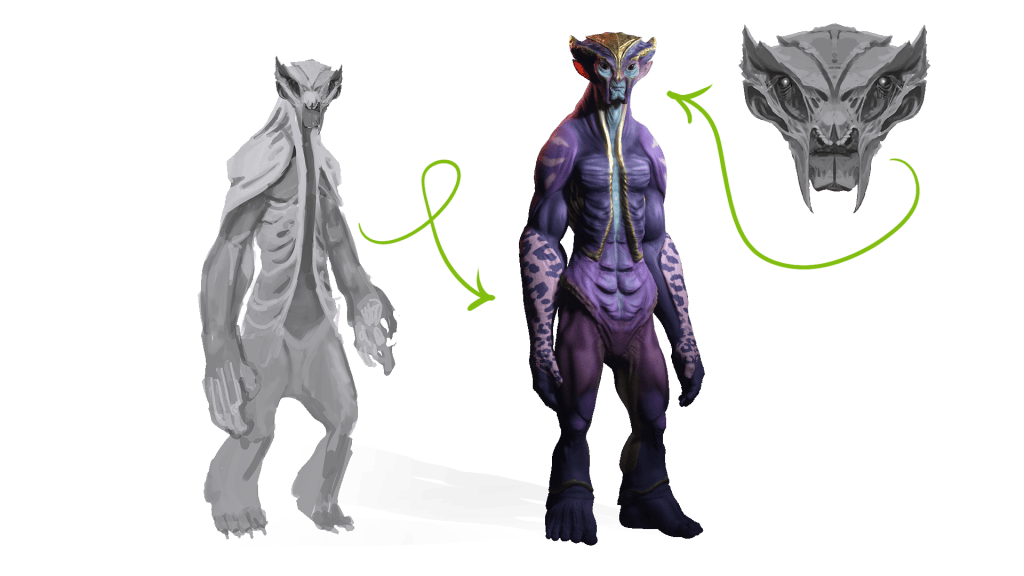
My name is Oscar Fernández, and before diving into the next new feature, let’s create two more characters using the same workflow as in the previous article. First, we’ll start with the concept art for two new team members. Together with Kithart, we looked for two designs that were completely opposite to each other and very different from the first model, which could be considered a bit more neutral.
In the sketches Kithart sent me, we can see that one of them will be extremely fat, slow-moving, and with a calmer look, while the other had to be a relentless predator, fast, agile, and with an evil edge.
The new characters
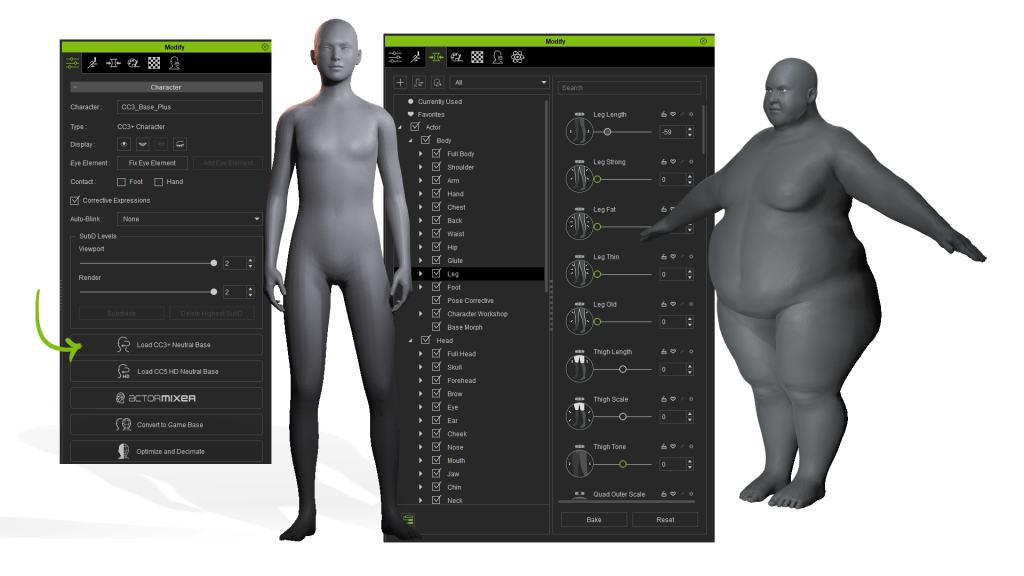
We’ll quickly walk through the construction of both characters in parallel. We start with CC’s new base mesh and use the program’s native sliders to “feel out” the main proportions, which lets us quickly and intuitively capture the essence of the character.
Once the first adjustments are made, we send the character over to ZBrush. We press the GoZ Plusbutton and, for now, in the settings we’ll tell it not to send any map—so we uncheck color and normal maps and leave subdivisions at default. With everything else as is, we press GoZ and our character loads automatically in ZBrush.
Now we can start sculpting. My recommendation for these early stages, when we’re searching for the character’s primary shape, is to use brushes that deform the mesh (like Move or even DamStandard), but avoid those that add or remove material (such as any Clay variants). This way, we stay faithful to the initial topology, ensuring the best results later for expressions and Face Blending.
This is a good time to recall our four sacred don’ts:
Don’t modify the model’s topology
Don’t delete subdivision levels
Don’t change the default pose
Don’t rename Subtools
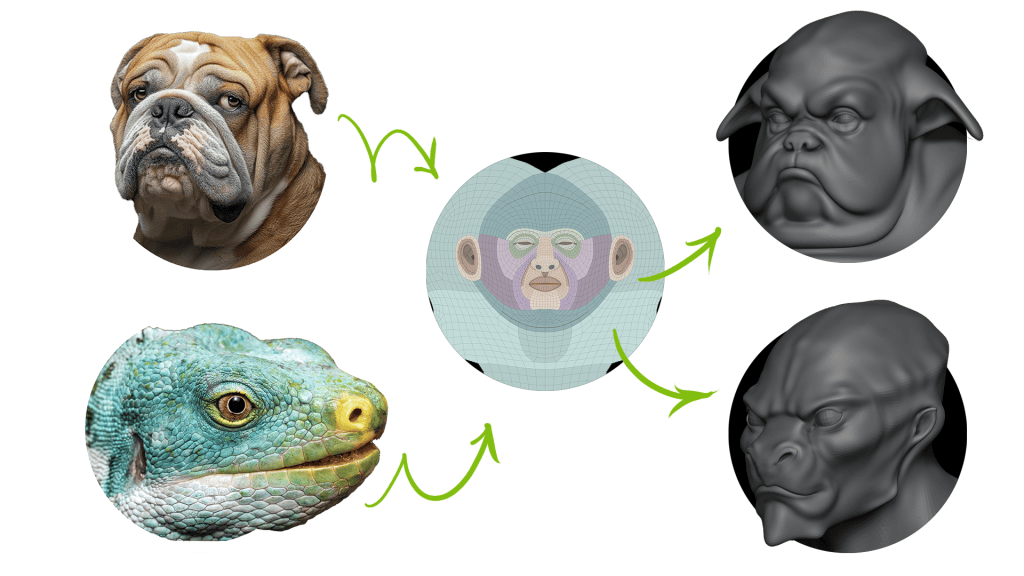
For the first model, that stubborn personality with slightly clumsy movements reminded us of a bulldog, so we leaned into that look for the face. You can see how the base mesh, even starting from a human face, gives us amazing versatility to play with features like the nose or lips. For the second model, we wanted something much more aggressive and emotionless, so we went for a reptilian face, something lizard-like. All while preserving topology integrity, especially in the primary regions.
With the faces done, we move on to the bodies, where each one takes a completely different direction:
The bulldog’s body challenge is creating solid secondary and tertiary forms to properly express body fat volumes.
For the reptile, one of its defining features is digitigrade legs. To make sure animations behave correctly, we’ll move the ankles to the start of the toes. Again, this shows how versatile the base mesh is, even for such extreme changes.
As for the hands, we go from the bulldog’s chubby paw to the reptile’s lean, clawed hand.
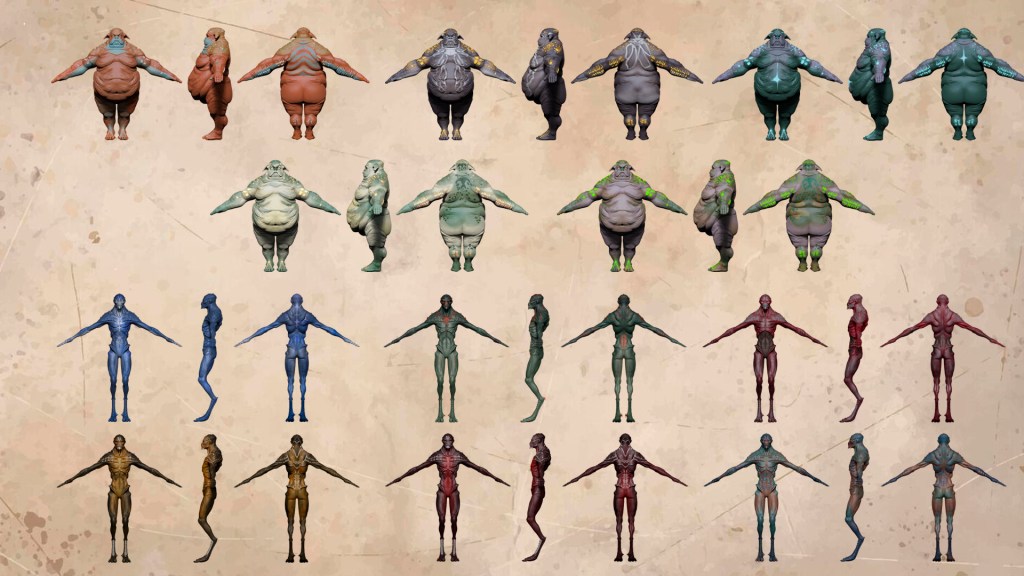
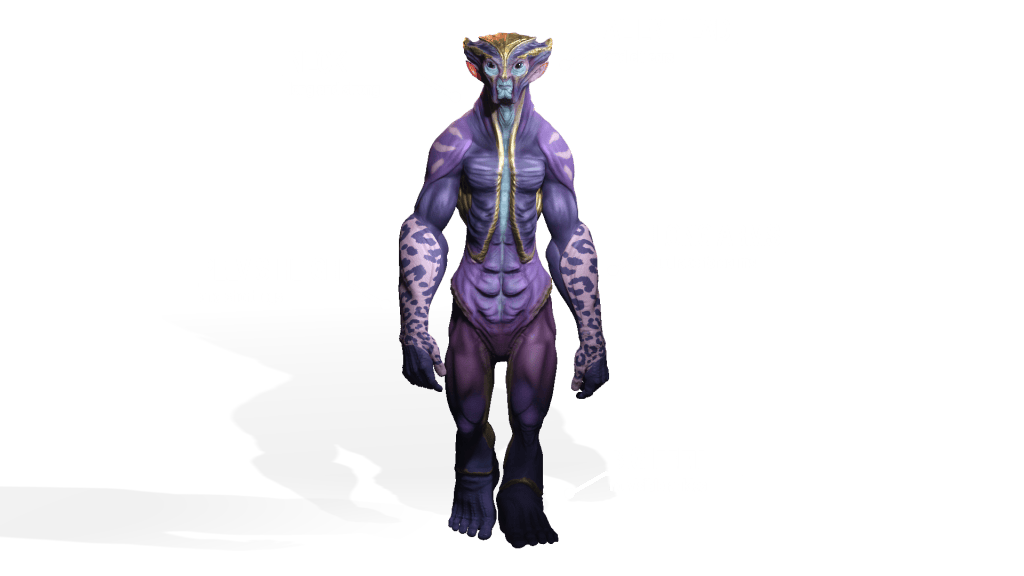
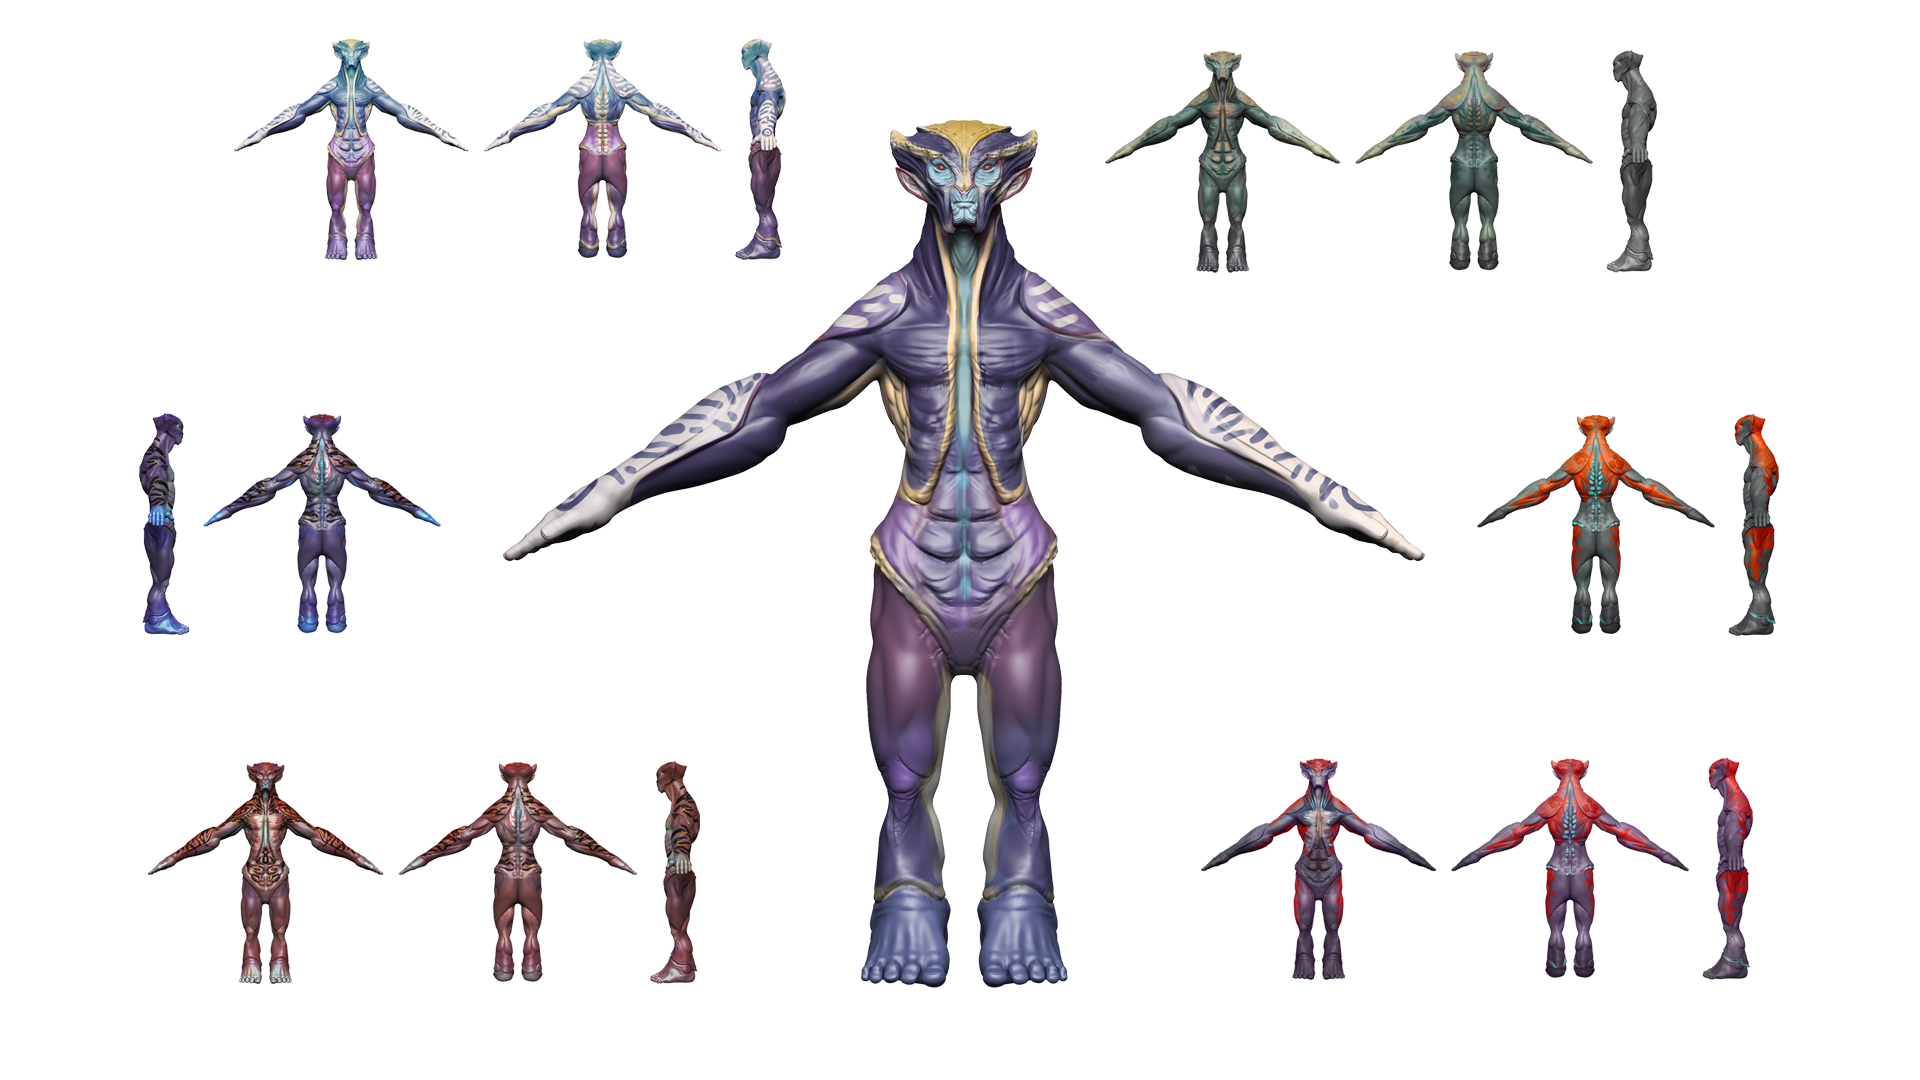
Finally, we add fine details like skin texture, scales, spines, etc.—sculpting shapes, using alphas for textures, or Chisel-type brushes for more intricate forms. Once again, I relied on Kithkart for the color phase, for which he sent me the following proposals. We needed all the characters to belong to the same world, but with completely different color palettes, while keeping some golden/metallic areas as a unifying element, like a shared trait of their planet.
As before, texturing is done entirely in ZBrush with Polypaint, applying gradients for base color, masks, alphas, and hand painting for finer details.
Sending back to CC5
Once our models are finished sculpt-wise, we can bring them back into CC. One thing to note: we don’t even need to keep the original file where we made the first edits. Just load the neutral base mesh, and you can connect your character to it.
We’ll start at level 0, this time checking all the maps so GoZ Plus generates them automatically. When updating in CC, we tick “Adjust Bone to Fit Morph” so the bones automatically adapt to the new proportions. In the lizard’s case, you’ll see the ankle joint goes exactly where we want it, since CC automatically matches polygons to joints.
After verifying everything works with some body and facial animations, we subdivide once in CC5 and return to ZBrush to export the maps and mesh for level 1.
Repeat for level 2, and our characters are complete.
Here’s a quick extra trick: creating a mask for golden metallic areas.
Export the diffuse maps for each body part and open them in Photoshop. Create a new layer, fill it with black.
Use color range selection on the golden areas and fill them with white on the black layer.
Save the map and drag it into the “metallic” slot in CC5, tweak settings, and done. This simple method lets you add metallic zones and other effects directly in CC5.
Adaptive animation in iClone
I’m not much of an animator… Well, let’s be honest, I don’t know how to animate at all. But thanks to CC’s motion libraries and some tweaks in iClone, I created a custom walk cycle for each character. In iClone, I loaded an animation that fit each one and slightly adjusted body parts using “Edit Motion Layer”. Since we do this on the first frame, the modification carries through the whole animation. Select start and end frames, save, and apply it in CC5.
For finishing touches, I’ll load eye and teeth textures from CC’s library, keeping the mesh as is but applying the materials.
3D print-ready workflow
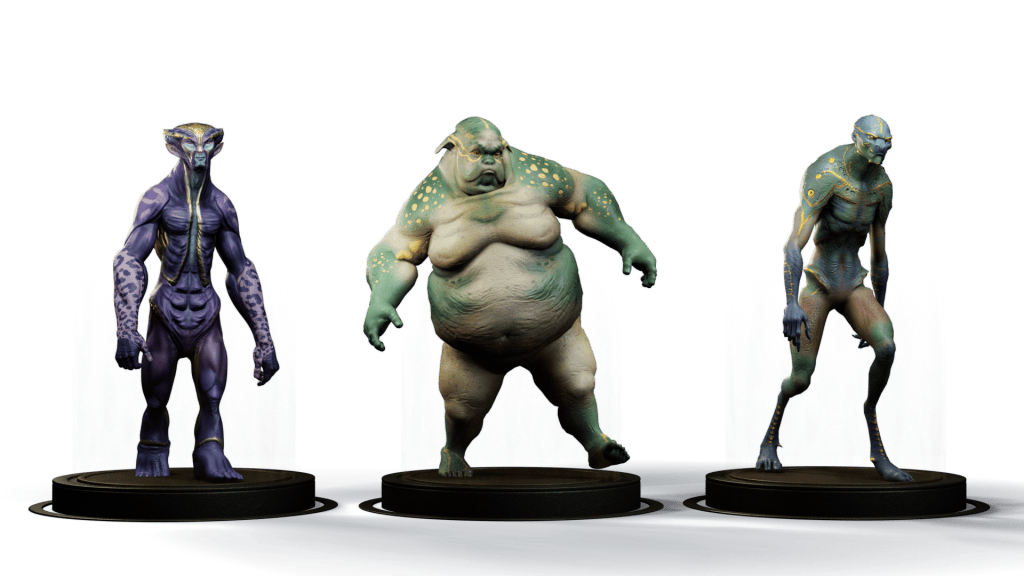
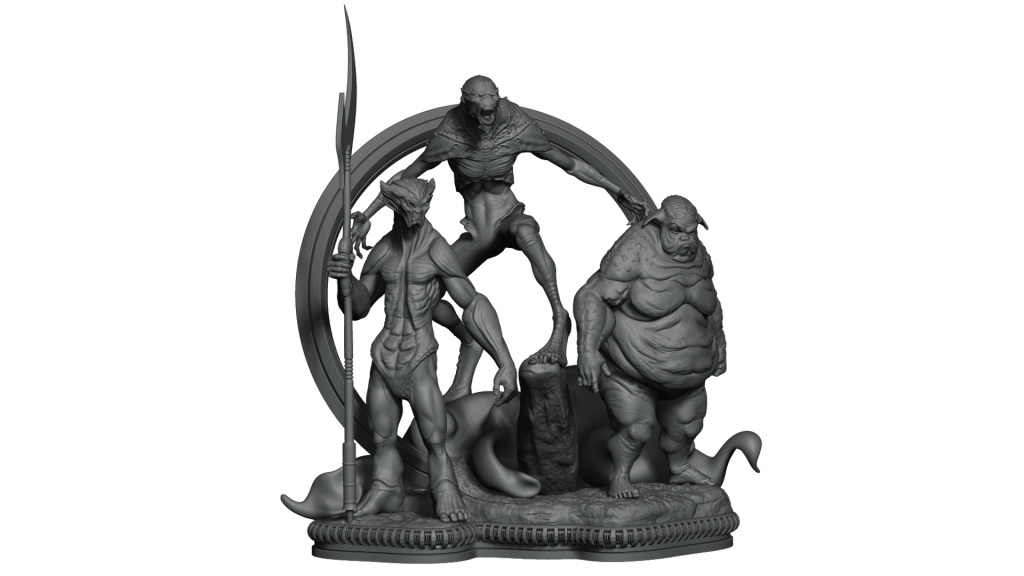
I couldn’t resist bringing this workflow into my own field—figure creation for 3D printing. I posed each character in CC5 and saved a separate file for each. Using SubTool Master, I loaded them all into the same project, arranged them, built a simple base with some extras, and it’s done!
For a true final piece, much more work would be needed, but what you see on screen took me under an hour—including posing all three characters and building the base. Imagine what we could achieve with a good idea and dedicated time and care.
ActorMIXER Pro
Now we move on to the main topic of this article: ActorMIXER, the new plugin for Character Creator 5. It provides an intuitive and fast system for creating and customizing characters. It allows non-destructive deformation of the head, full body, or individual facial features simply by dragging the mouse.
The best way to understand it is by continuing with our project. With CC5 installed, the simplest way is to open Reallusion Hub and install the plugin there, although you can also download it directly from Reallusion’s website.
How to create MIXER assets
The first step is to create “Mixer Presets” so ActorMIXER can use them as targets in the mixing wheels.
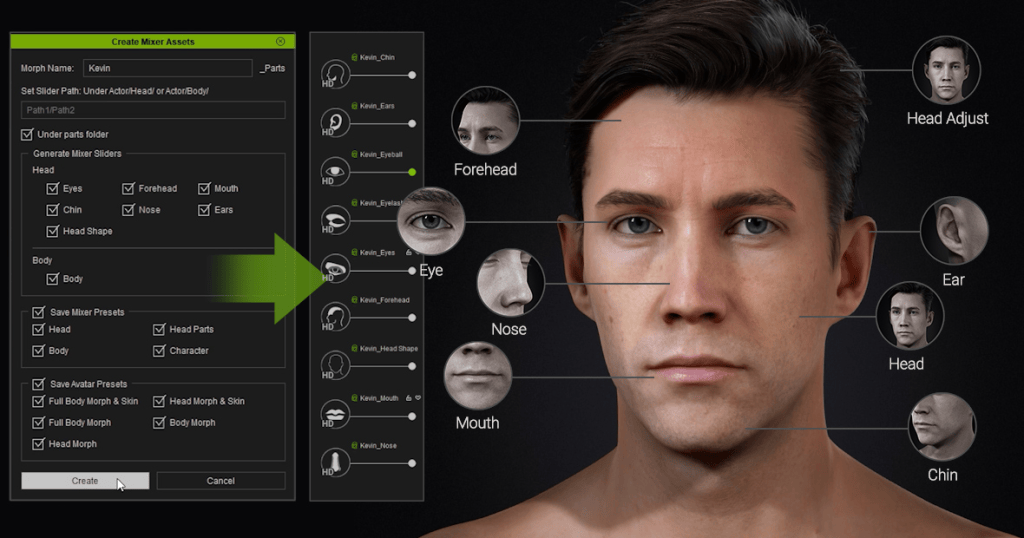
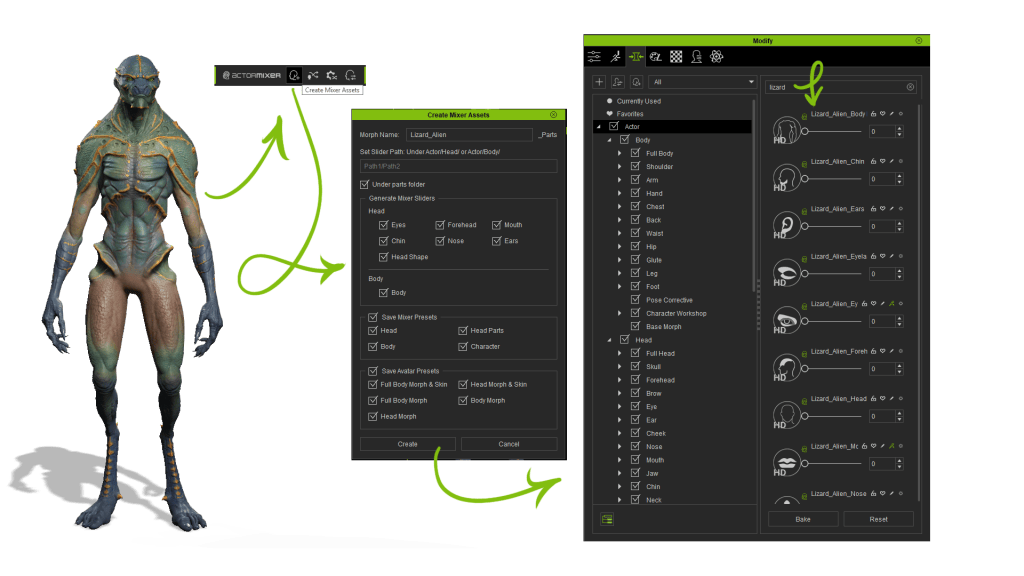
1. Load a character and open the “Create Mixer Assets” panel (from the ActorMIXER toolbar icon or Plugins > ActorMIXER > Create Mixer Assets).
2. Configure the Mixer Assets:
Enter a name and path for the custom slider. Tick “Under parts folder” so the generated slider is placed correctly. In our case, we’ll enable all checkboxes for a full slider set and also mark “Save Avatar Presets” so the sliders appear in the Morphs panel.
3. Click “Create.” The system splits the character into different parts controlled by the generated Mixer Sliders. This produces gallery items, facial and body sliders, and skin materials for texture swapping.
4. Repeat for the other characters. Note: the subdivision level you select determines the type of Mixer Sliders created—“Mixer Sliders” for SubD 0, and “HD Mixer Sliders” for SubD 1 or 2.
The “Mixer Sliders” are the ones affected by ActorMIXER’s blending operations. We’ll take a closer look at this later.
Individualization
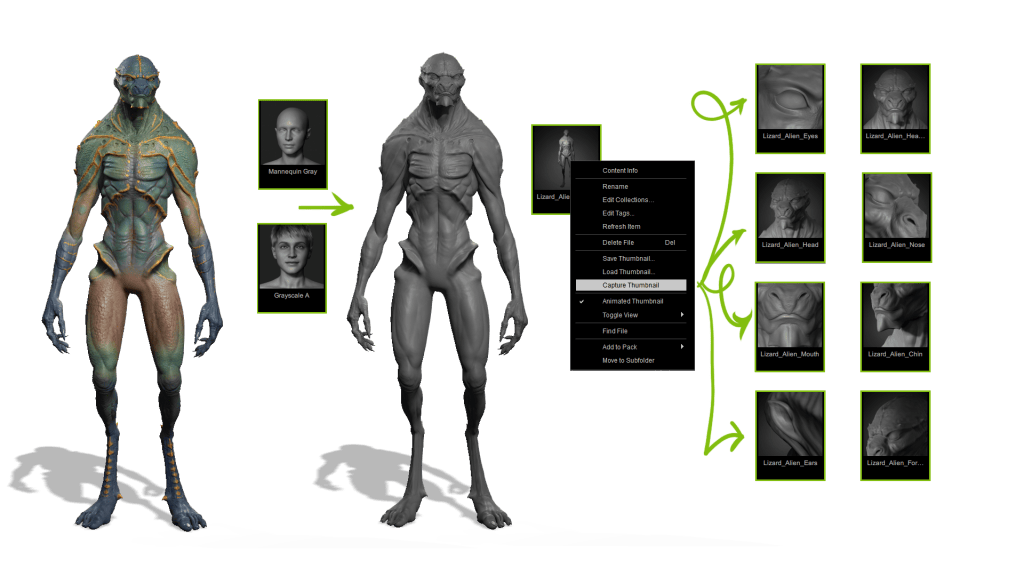
We’re ready to start mixing, but first, let’s make custom thumbnails for each character with the same style as the default ActorMIXER ones. This step is optional, but if we’re doing it, let’s do it right!
Load a character and pose it similarly to the default thumbnails. Since we need to focus on volumes when building characters, apply the grayscale atmosphere and “Mannequin Gray” material so textures don’t distract us. I also tweak the ambient light for softer shadows and boost intensity to brighten the character.
The goal is to align the camera angle with the ActorMIXER thumbnails. Then go to the relevant section and click “Capture Thumbnail” to update. Repeat across sections, using the originals as reference. Do this for all three characters and everything looks super professional.
ActorMIXER (Editing mode)
For better performance, set character subdivision to 0 or 1 (depending on your system) and use 2K skin textures for preview. With everything ready, we finally launch ActorMIXER: open it from the Modify menu, the toolbar, or Plugins > ActorMIXER.
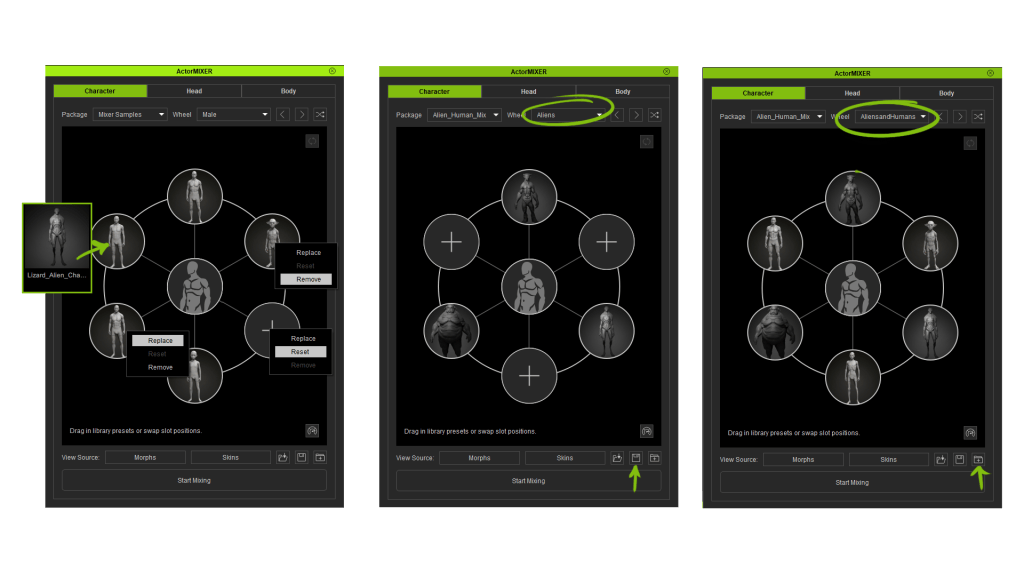
Once open, choose the base character mesh. In our case, we’ll pick Base Male as a starting point, since the characters I plan to make should look more human than the creatures we built earlier. ActorMIXER opens in Editing Mode, where we can create our own mixing wheels with the presets we generated.
Select each category and drag-drop the presets. Categories auto-sync with the Content Manager gallery for efficient selection. Right-click a target to replace, reset, or delete it. Drag and drop to reorder or swap targets. It’s important that each wheel has at least three targets.
If we want to reuse the wheels we’ve created, we can save them as a Mixer Layout file (*.ccMixerLayout). Just click the ‘Save Wheel Set’ button and choose either ‘Save Active Wheel Set’ (to save only the current wheel) or ‘Save All Listed Wheel Set’ (to save every wheel across all categories).
I’m going to create another wheel where I’ll include our characters along with some others from the gallery to enrich the results even more. ActorMIXER Pro comes with the ActorMIXER PRO CORE Library and the HD Human Anatomy Set as a free bonus, so I’ll also add a few elements from those libraries, as well as from the base library.
The last thing we need to know about Editing Mode is that we can also group multiple mixing wheels into a Mixer Package. This allows us to easily reuse our setups, share them with other users, or transfer them to another computer without rebuilding the wheels from scratch. Just press “Save Package”, select the folder where you’ve saved your wheels, give the package a name, and you’ll be ready to quickly load your custom wheels anytime.
ActorMIXER (mixing mode)
Once the wheels are configured, we can start blending the shapes. To access Mixing Mode, click the “Start Mixing” button at the bottom of the panel, then simply drag the green dot in any direction within the wheel. As you move it, the character in the scene transforms, blending the features of the “Mixer Presets” we set as targets.
You’ll notice two concentric circles in the display. If we place the green dot inside the inner circle, the shapes blend with our presets but with a stronger influence from the base character. If we move it to the outer circle, the presets carry more weight in the mix. Keeping this in mind, we can go through each category, refining the forms until the character is finished.
Once we’re done, we stop mixing by pressing the active “Start Mixing” button again. From here, the only step left is to apply the skin by dragging it directly from the Content Manager. When we’re satisfied with the result, we close ActorMIXER. But that’s not the end—we can continue fine-tuning with sliders until we achieve the desired outcome.
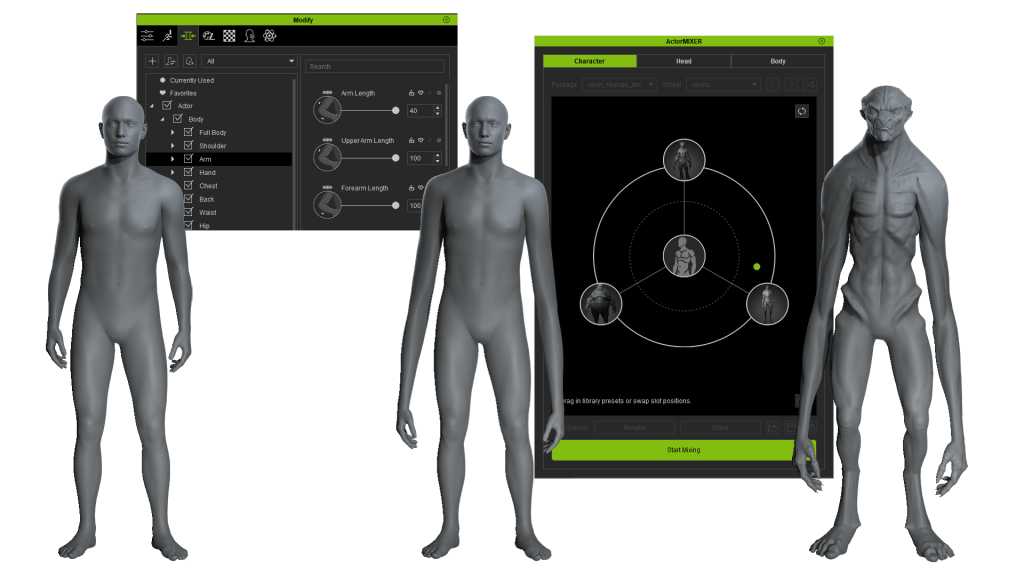
Since we’re talking about sliders, let’s cover a few considerations that can help in character creation. Sliders with the green ActorMIXER icon are affected by the mix, while those without the icon remain unchanged. This is very useful when we want to keep certain features intact.
For example, let’s create a second character where we modify arm and leg length, along with some other elements, using the general Mixer Sliders. When we begin mixing, these traits remain unchanged—super useful for designing members of the same family who retain common traits.
We can also apply a pose or facial expression and perform the entire mixing process with the character already posed. This gives us a more dynamic, detailed view of how the blends affect appearance and body language, allowing for even more precise and consistent design.
Now for the finishing touches: CC5 has improved eyes with greater HD detail, direct iris control (adjusting both size and color), eyelid shading, realistic tear line/occlusion effects, and enhanced eyelashes. We also have new controls for teeth, which we can use to polish our character further.
With our character complete, the last step is to ensure everything works properly. To do this, we can add a facial animation to see how it behaves, along with a body animation to confirm everything moves as expected. The results are fantastic, so now we just need to save our new creation. Open the Content Manager, go to the Custom > Character tab, and click Add.
As we’ve seen, ActorMIXER provides an incredibly intuitive way to create an infinite variety of characters in such a simple manner that it becomes almost addictive. But these aren’t the only new features—so stay tuned for more from Character Creator 5!
FAQ
Can I mix with my own character in ActorMIXER?
Yes, but you’ll need ActorMIXER Pro. The Pro version allows you to convert your own custom characters into Mixer Assets and blend them with other characters for unlimited variations.
How to enrich the content of ActorMIXER?
Purchasing ActorMIXER Pro includes the ActorMIXER Core Library, which contains over 40 scan-level HD heads covering a wide range of ethnicities, genders, and ages. Additionally, if you own CC5 Deluxe, you’ll receive the HD Human Anatomy Set with 12 fully rigged characters (6 male, 6 female) that can be directly mixed for full-body variations.
If I want to create my own ActorMIXER Assets, what should I pay attention to?
Follow the golden rules: don’t modify topology, don’t delete subdivision levels, don’t change the default pose, and don’t rename subtools. When creating Mixer Assets in CC5, choose the right subdivision level (SubD 0 for Mixer Sliders, SubD 1–2 for HD Mixer Sliders) to ensure compatibility and smooth blending.
Can I design and mix while the character is posed and expressing emotion?
Yes. ActorMIXER Pro supports mixing with poses and facial expressions applied, giving you a more dynamic view of how blends affect both appearance and body language. This makes it easier to design consistent, production-ready characters.
Does ActorMIXER Pro support stylized and realistic designs?
Absolutely. It works with both styles, letting you mix your own creations with the PRO CORE Library and HD Human Anatomy assets.
Óscar Fernández is a freelance digital sculptor from Spain, specializing in creating figures for 3D printing. With deep expertise in ZBrush, he is known for crafting highly expressive characters that capture both personality and motion. His work stands out through the meticulous attention to facial expression, muscle definition, and dynamic posing, giving each sculpt a strong sense of tension and storytelling power.
Oscar Fernandez’s HD Alien MIXER pack is available now!
Overview
With the arrival of Character Creator version 5, artists can enjoy revolutionary improvements, including an HD character design workflow with subdivision support, enhanced shaders, and the next generation of the facial animation system.
In this article, we’re going to explore the workflow to create this character, putting CC5’s new features to the test by designing this humanoid alien. Instead of sticking to the classic human proportions, we’ll see how the program behaves when we make things a little more challenging.
I’m Óscar Fernández, and I’ll be guiding you throughout this process using only two programs: CC5, which will handle almost all of the technical processes automatically. ZBrush, where we’ll unleash our creativity and focus on the artistic side of the project.
For the creation of this character, we’ll start from a sketch by KithArt, a young concept artist I’ve collaborated with several times before. She’ll be responsible for designing this character and the ones to come.
So, without further ado, let’s dive in!
1. Loading a neutral base in CC5
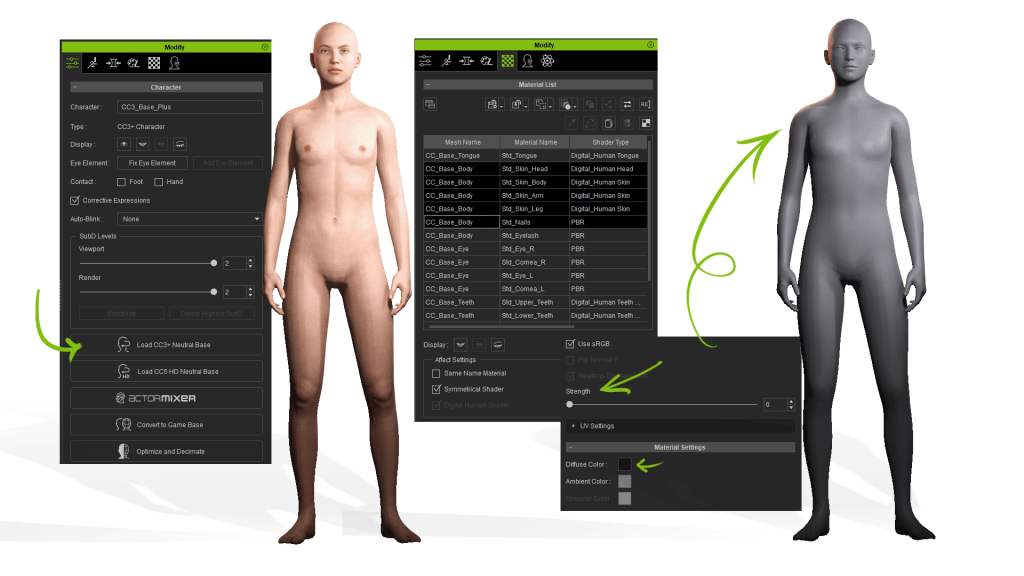
Once we’ve opened CC5, we simply press “Load Neutral Base” to load Character Creator’s new mesh. This mesh has perfect topology for sculpting and animation, optimized UVs, and the robust skeletal rigging we’re already used to from previous versions. It also includes a significant update to the eye mesh.
For now, I want to focus only on volumes, so I’ll go to the materials tab, select different body areas, set the strength to 0, and darken the Diffuse to gray. This way, we can better appreciate basic changes.
2. Setting basic proportions in CC5
Now we’ll start setting the basic proportions of our character using the program’s sliders. For the body, I’ll mainly adjust the pelvis height—since our character will have short legs—and the size of the hands and feet.
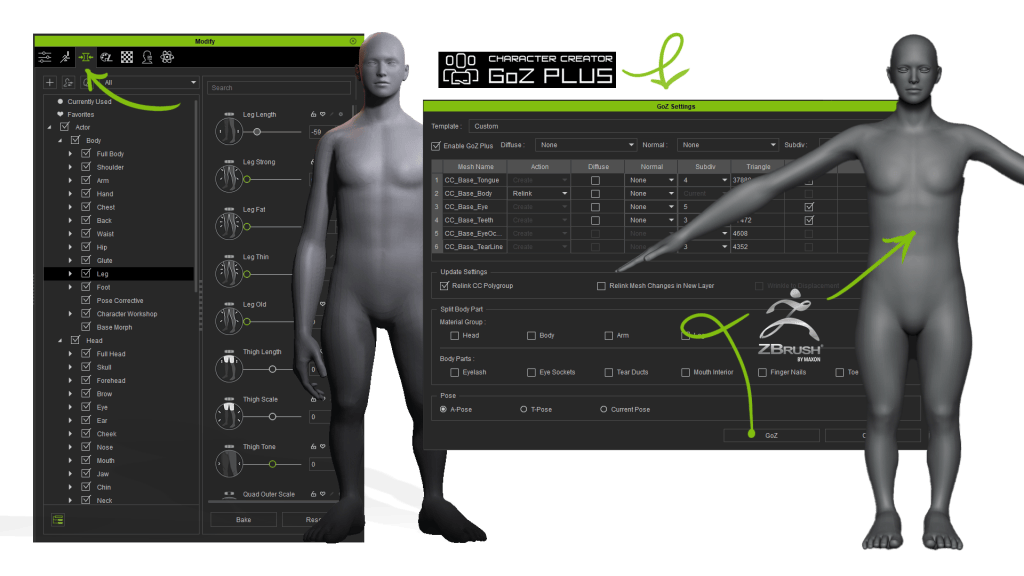
Personally, I like checking communication between programs from the beginning, so after making some first adjustments, I’ll send the character to ZBrush. We press the GoZ Plus button, and for now, we’ll make sure not to send any maps, colors, or normals, and we’ll keep the default subdivisions. With the rest of the values as is, we press GoZ, and our character loads directly into ZBrush.
Here it is, everything is working as expected, so let’s head back to CC5 to continue adjusting the head and face proportions. The sliders allow me to separate the eyes and change their tilt very easily—something that would take more effort sculpting directly in ZBrush. After a few more tweaks, we go back to GoZ Plus to send the model again. This time, the “Relink” action appears automatically since the connection is already established. Boom! We’ve got the changes loaded into our model.
3. Starting the sculpting process in ZBrush
Now we’re ready for the fun part, but before diving in, we need to keep a few key rules in mind:
Don’t modify the model’s topology.
Don’t delete subdivision levels.
Don’t alter the default pose.
Don’t rename the Subtools.
With that clear, we can begin sculpting in ZBrush. In these early stages, where we’re looking for the general shape of the head or face, we should try to adapt to the model’s facial topology. This ensures facial deformations work perfectly later when we apply expressions. To better visualize these regions, we can isolate the head and load the texture provided by CC5.
My advice: take it slow, build the model step by step, and don’t rush to higher subdivision levels. Start broad, then move to detail.
4. Test with GoZ Plus
As I mentioned earlier, I prefer moving gradually and making sure everything works as expected. So from time to time, I send the character back to CC5 using the new GoZ Plus plugin.
In the plugin options, we only select Lv0, with no maps or textures. Once updated in CC5, we can test everything by loading animations, whether full-body or face-only.
5. Real-time adjustments
Sometimes CC5 sliders are more practical than sculpting directly in ZBrush. We can make corrections anytime, then send them back to ZBrush to continue sculpting and adding details. While shaping the character, we can repeat this back-and-forth workflow as many times as necessary.
6. Secondary and tertiary forms
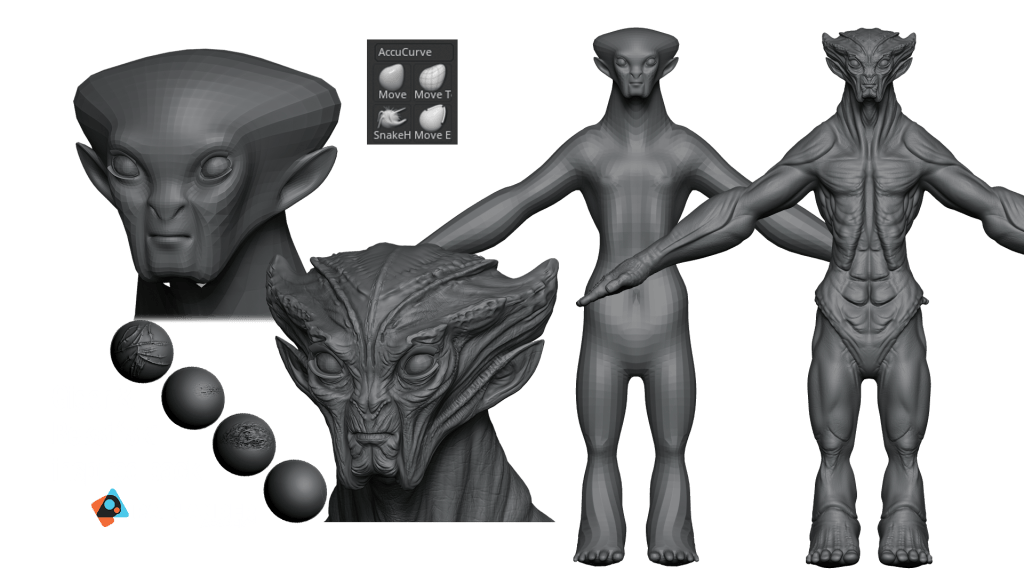
Now we’ve got a solid base shape that works great in CC5, so it’s time to add secondary and tertiary forms. So far, we’ve mainly ensured the facial structure aligns with the base mesh topology. Now we’ll start adding character through anatomical volumes that give our model a unique and expressive look. I’ll also use Pablo Muñoz’s incredible brush pack inspired by Giger and Beksiński to add extra details.
We’ll do the same with the body by defining muscles, large skin folds, and natural body curves. These early changes are key for making the character work at medium distance…
7. Bone and pose fixes
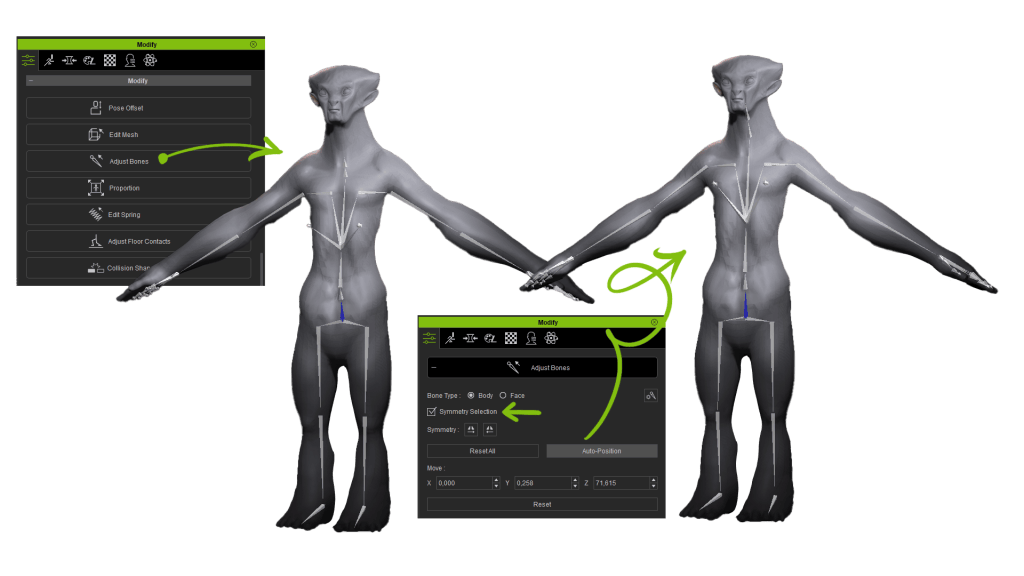
If our character doesn’t follow the typical human form, the skeleton might be slightly misaligned, or animations may behave oddly due to extreme proportions. Again, the solution is super simple. To adjust the skeleton to the body, we just press “Adjust Bones”, enable symmetry, and run an automatic adjustment for both the body and face.
If we want to tweak the default pose or fix animation issues, we can use the “Pose Offset” tool to select body parts and adjust them. For example, here we solve fist collisions just by slightly modifying the offset.
8. Adding color with polypaint
Once again, I turned to KithArt for help with design and color palettes. Out of all the proposals, we’ve chosen this one.
The final step in ZBrush is texturing our character with Polypaint. We’ll use the SkinShade material to avoid color contamination and apply gradients, masks, and manual painting techniques to color the character. This stage is really fun and gives our character its true identity. With all sculpting details and color information in place, we can wrap up the character’s creation. At this stage, we can push to subdivision level 7, achieving an extremely high poly count without sculpting or texturing limitations.
9. Adaptable subdivisions & auto texture baking
Now we reach one of CC5’s most powerful new features: subdivision compatibility and automatic texture baking. As we’ve seen, the new GoZ Plus works a bit differently than before. Let’s see how to handle it.
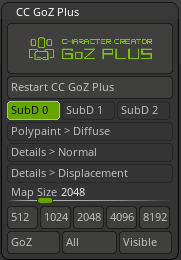
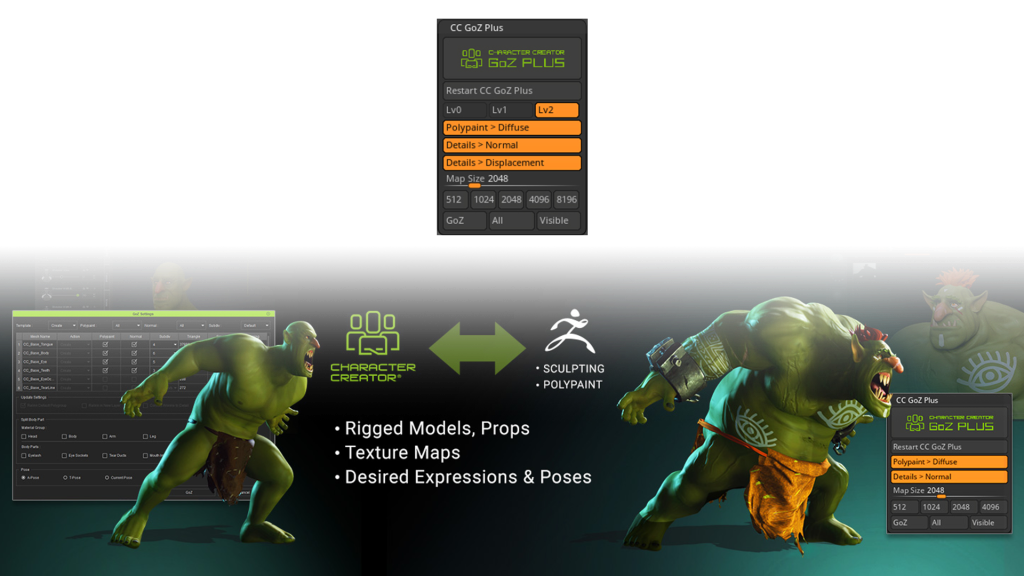
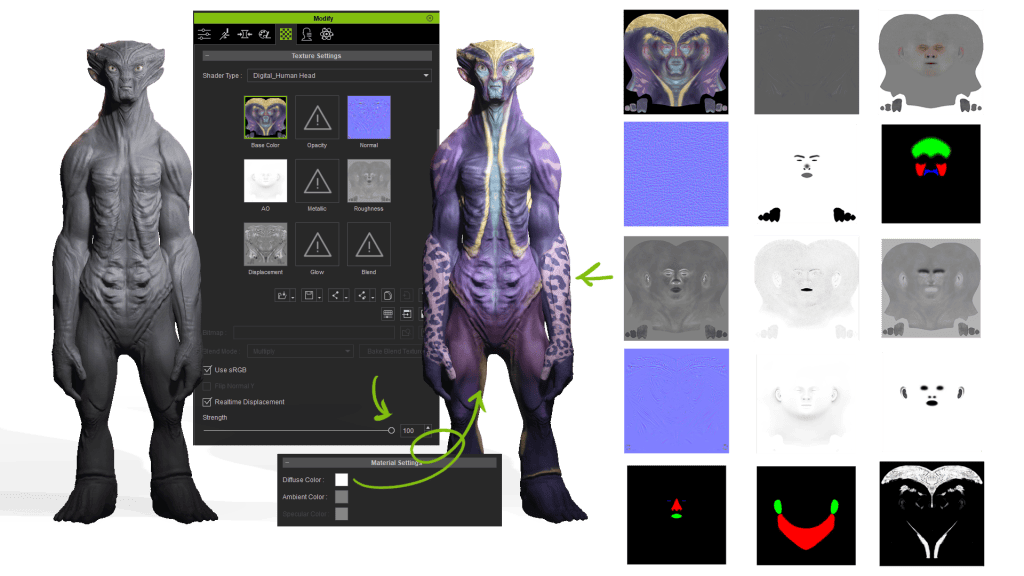
So far, we’ve always sent the model from ZBrush to CC5 at Lv0 without textures. Now it’s time to generate normal and displacement maps for details, plus the diffuse map from our Polypaint. We’ll select Lv0 and press the corresponding buttons for each map. By pressing “All”, all textures are generated automatically using the base mesh’s UDIMs. Once baked, we simply update the model in CC5, and they load automatically. In my case, I’ll skip updating the eye diffuse to keep the original texture.
Now the textures are loaded, but we can’t see them yet because earlier in the project we had set intensity to 0. So we select the different body parts, raise the strength to 100%, and reset Diffuse to white. With one click, everything integrates in CC.
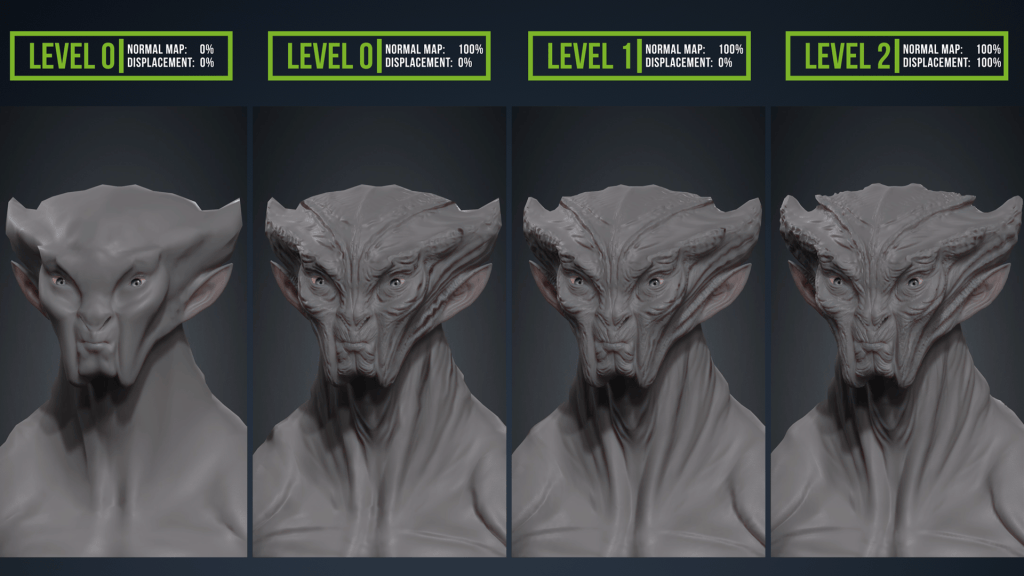
This was already possible in CC4, but here comes the innovation: We subdivide once in CC5 and go back to ZBrush. From GoZ Plus, we activate Lv1 and all its textures, press “All” again, and regenerate them automatically. Back in CC5, we update only the textures, and immediately we see a big difference between the two models. But that’s not all—we can repeat the process again by subdivision to Lv2 in CC5, enabling Lv2 with textures in GoZ, updating in CC5 one last time, and voilà… the difference is striking!
On top of that, CC5 lets us work in ultra-high resolution. We can see the polygon density at each subdivision level—from Lv0 (unsmoothed mesh) to Lv1 (already dense), up to Lv2 (where no detail escapes our control). GoZ Plus generates optimized maps for each subdivision, and we can tweak intensity across levels depending on our needs. For instance, at Lv2 with displacement at 100%, the vertex shifts add spectacular improvements to the silhouette, with more natural shadows and enhanced fine detail beyond what normal maps provide. Here’s a clear comparison showing the power of subdivision levels and auto displacement baking in CC5.
Conclusion
This update allows us to take our ZBrush models to the highest level of detail, and with just one click, transfer everything into CC5 as a fully animatable character. From there, we can still apply morphs, textures, clothing, hair, and accessories, while keeping all of CC’s facial and body animation capabilities: motion libraries, motion capture, voice-based lip-sync, and pose/animation editing. And this is just one of CC5’s new improvements—don’t miss the other exciting features still to be discovered!
FAQ
Can I animate ZBrush characters directly in Character Creator 5?
Yes. With CC5’s GoZ Plus bridge, you can transfer your ZBrush sculpts, bake textures automatically, and animate them with body motions, facial expressions, and lip sync.
Do I need to retopologize my ZBrush sculpt before sending it to CC5?
No. CC5’s neutral base mesh has clean topology and is animation-ready. You only need to sculpt details and then bake displacement and normal maps for transfer.
How does CC5 handle HD subdivision from ZBrush?
CC5 supports adaptive subdivisions. You can send models back and forth at different levels (Lv0, Lv1, Lv2) and automatically generate optimized maps for each.
Can CC5 handle non-human characters sculpted in ZBrush?
Yes. CC5 includes tools like Adjust Bones and Pose Offset to fix skeleton alignment, making even stylized or alien proportions fully animatable.
What animation features can I use once the sculpt is in CC5?
You can apply motion capture, motion libraries, facial morphs, dynamic wrinkles, and voice-based lip sync to bring your ZBrush characters to life.
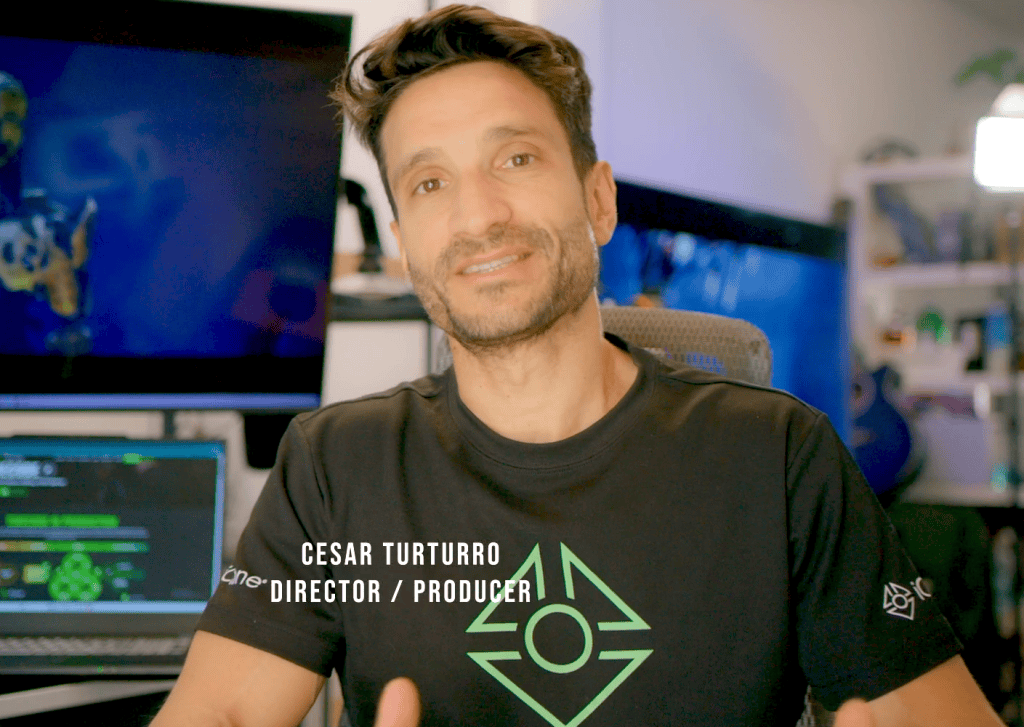
Cesar Turturro, award-winning film director and recipient of the 2022 Epic MegaGrant, is pushing the boundaries of hybrid filmmaking with his latest innovations. Known for blending live action with virtual production in projects like Nick 2040, Turturro masterfully combines Character Creator for realistic characters, iClone and ActorCore for dynamic fight choreography, and Unreal Live Link for instant visualization.
In his latest workflow, he harnesses the power of timecode to synchronize performances across DaVinci Resolve, Axis Studio, iClone, and Unreal Engine—bridging cinematic realism with digital worlds. This pioneering approach shows how Reallusion tools empower filmmakers to achieve seamless, iterative, and cinematic storytelling.
Bridging Live Action and Virtual Worlds
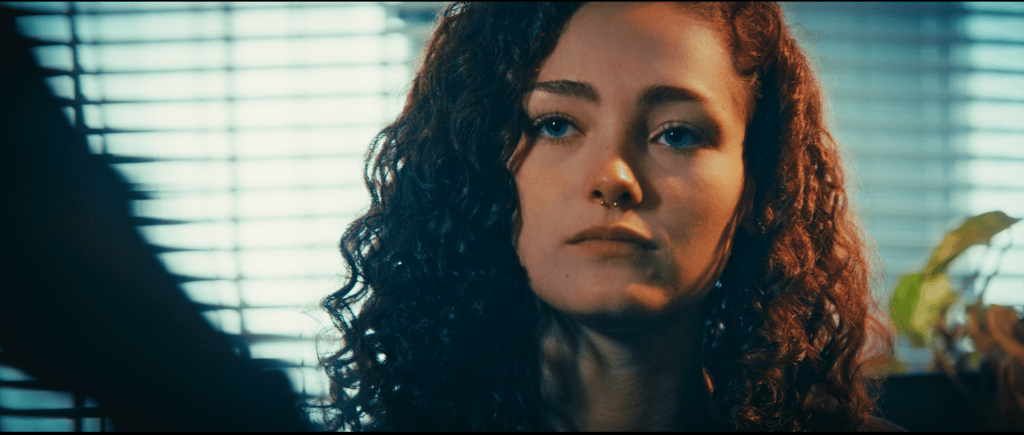
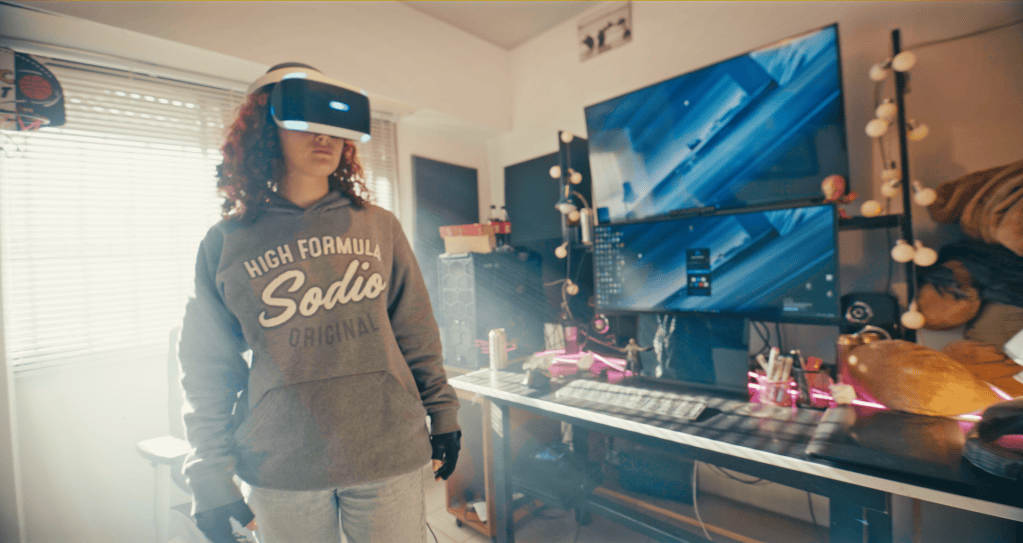
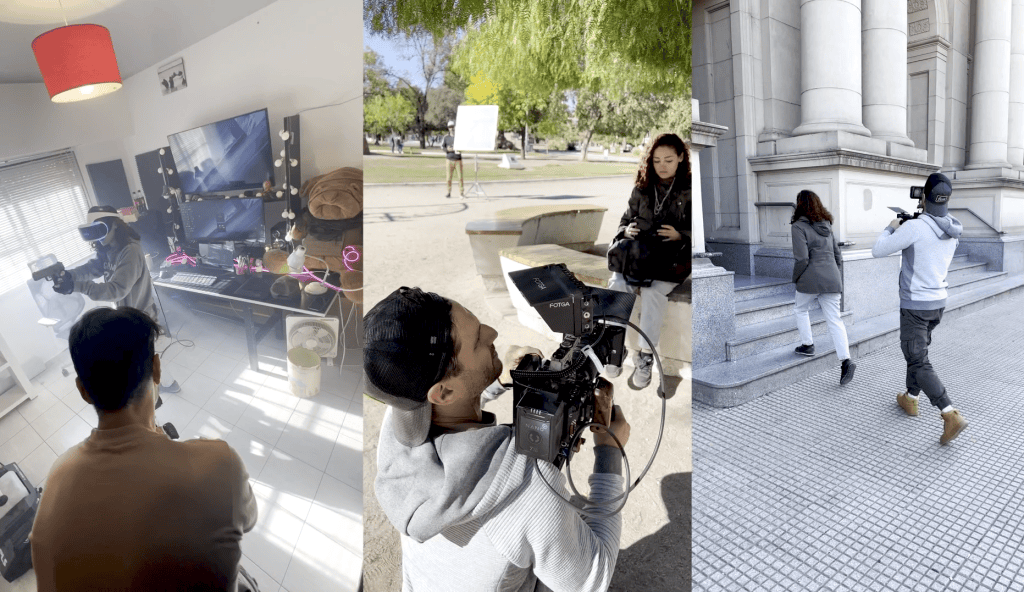
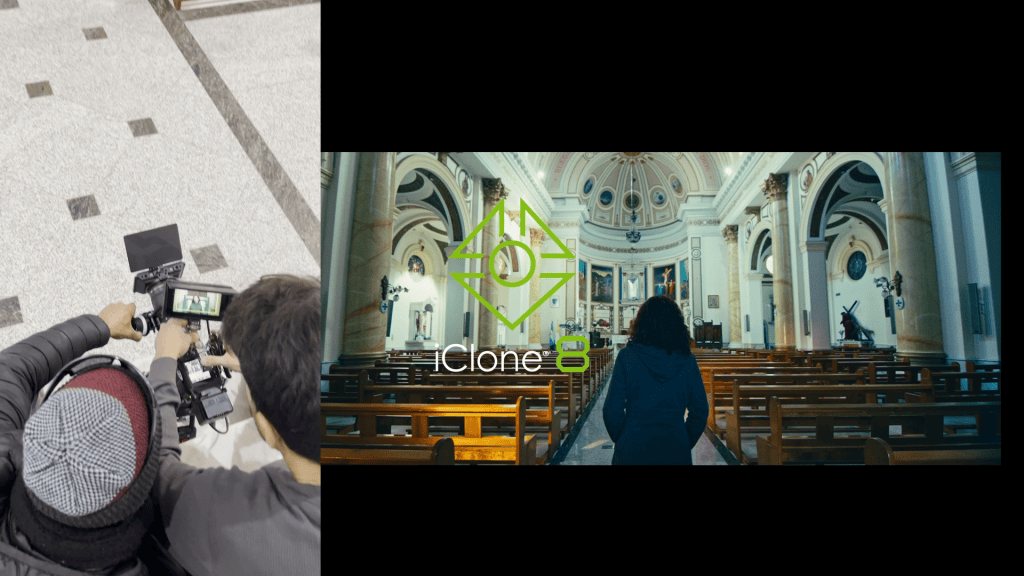
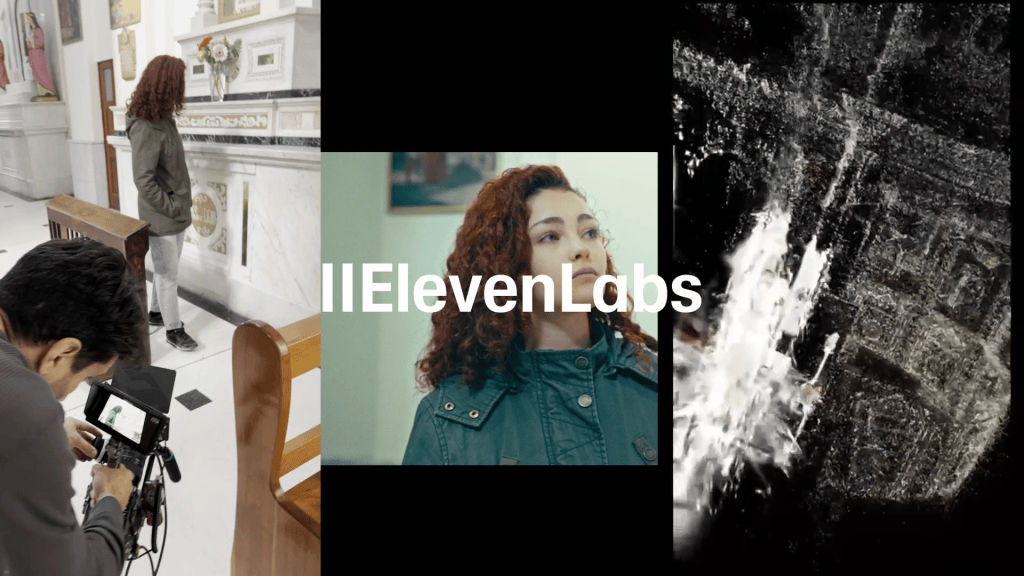
As always, it all started with the script. Once the story was ready, we shot in my hometown, Bahía Blanca, Argentina, with a live-action character who would later interact with a video game. The short film narrative alternates between the real world and the virtual world, where a key dialogue unfolds between two characters.
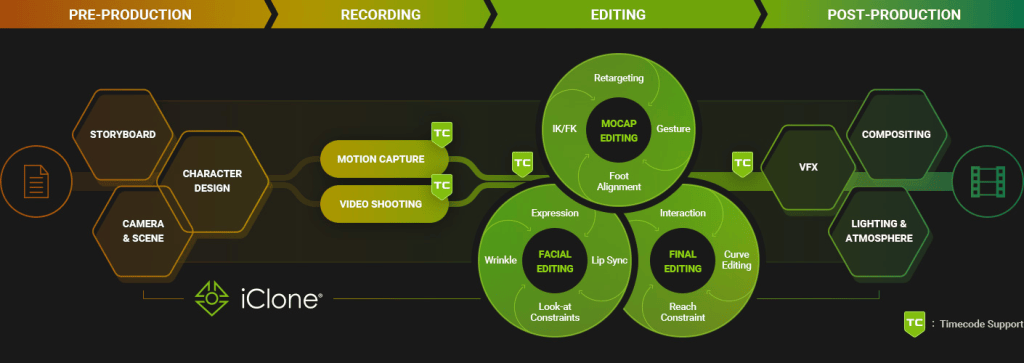
The main challenge was ensuring both worlds blended seamlessly. To achieve this, I designed a technical workflow based on timecode, which allowed me to maintain perfect synchronization from live-action footage to final animation in Unreal Engine using the new iClone Timecode plugin.
The iClone Timecode plugin allowed our studio to sync our content, providing character motion editing, along with frame-accurate alignment of motion, video, and audio in animation and VFX.
Audio and Timeline Preparation
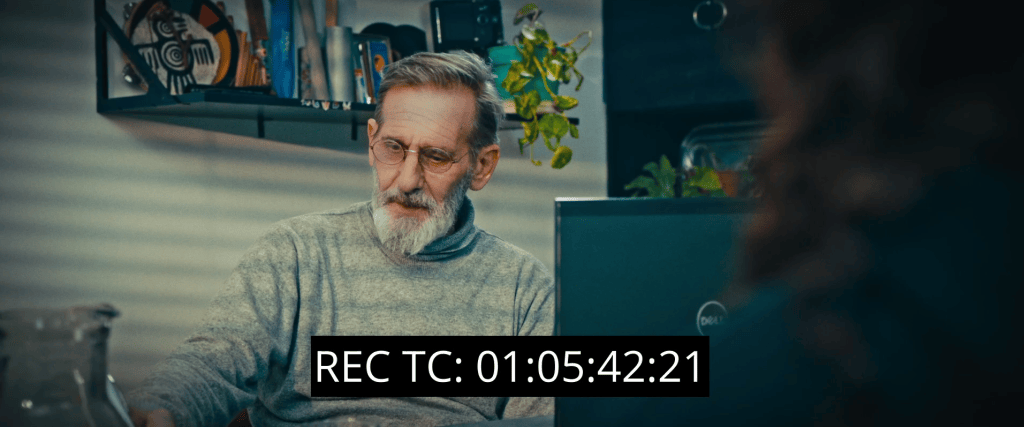
The first step was generating the character voices using Eleven Labs (AI). I imported them into DaVinci Resolve and built the master timeline with its embedded timecode. This became the backbone of the project: every subsequent step would align with this temporal reference.
Synchronized Motion Capture
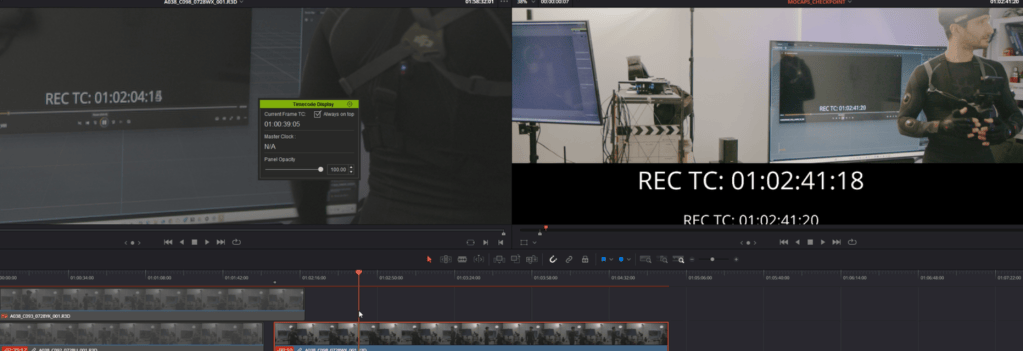
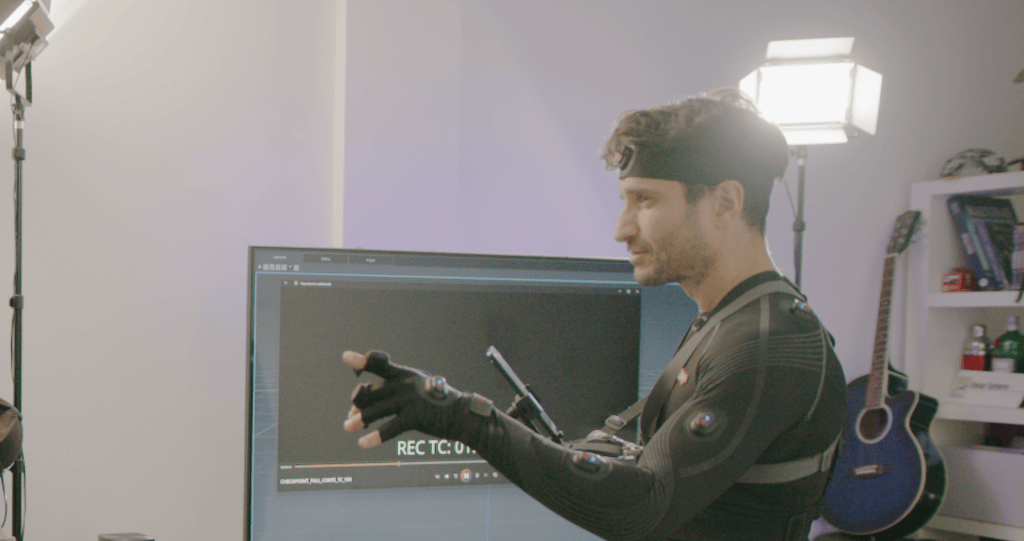
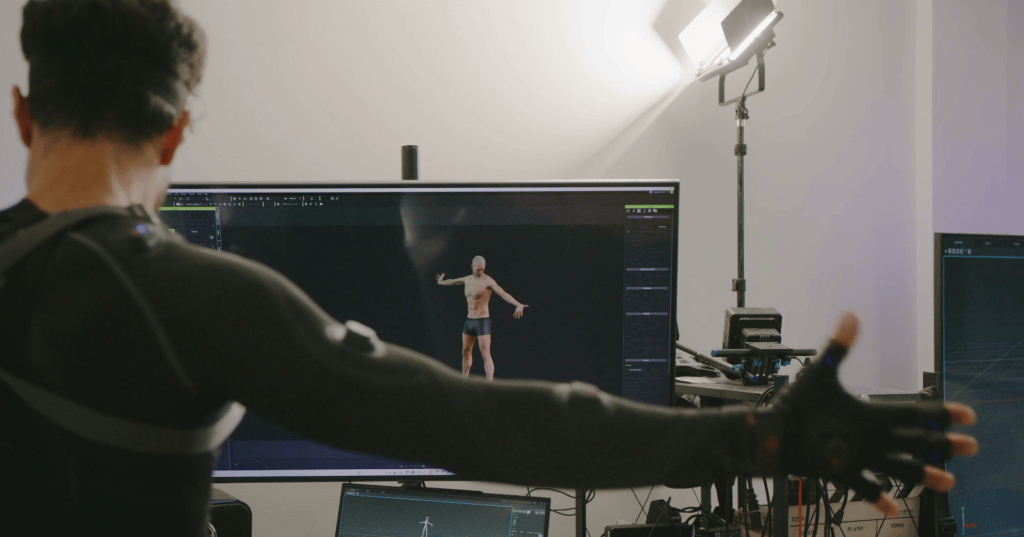
Next came motion capture. Using Axis Studio, I placed the short film video with its timecode on my screen while performing the actions of both characters.
This way, I followed the recorded voices in real time, ensuring every gesture matched the dialogue precisely. The result was clean motion data with no need for post-synchronization fixes.
Integration in iClone
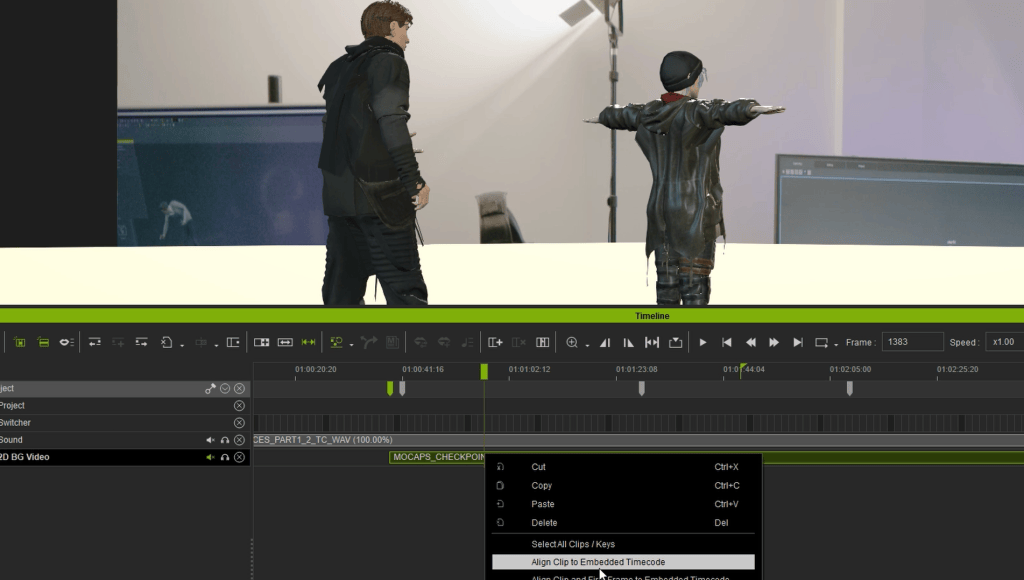
With the mocap data ready, I moved into iClone. There, I loaded the characters, animations, and the reference video—again using the same timecode from DaVinci.
Thanks to iClone’s timecode plug-in, I achieved frame-accurate synchronization. Once aligned, I exported the animations as FBX files with embedded timecode for the next stage.
Virtual Filming in Unreal Engine
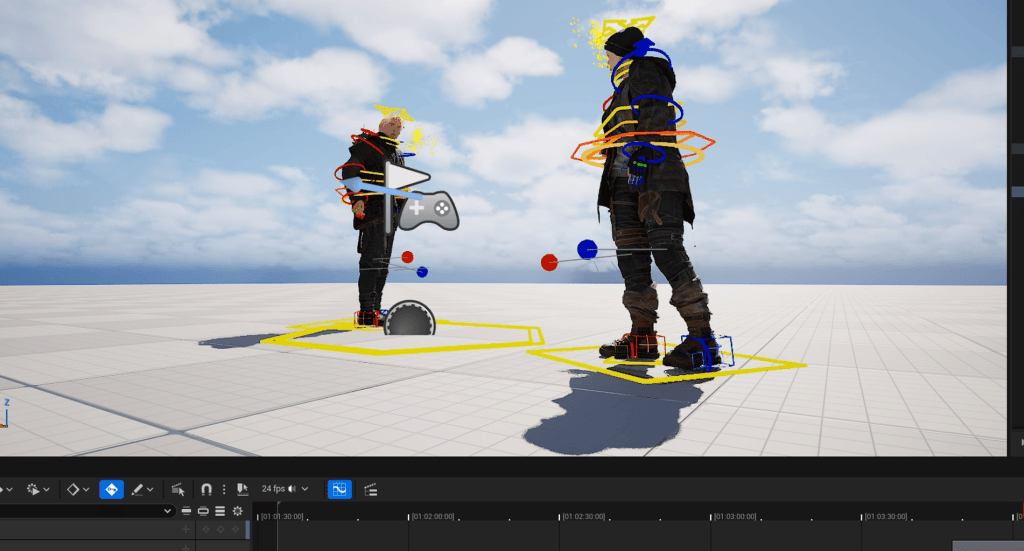
The assets were then brought into Unreal Engine (Sequencer), where I imported the FBX animations along with the original audio tracks. I generated the lip sync and began the process of virtual cinematography.
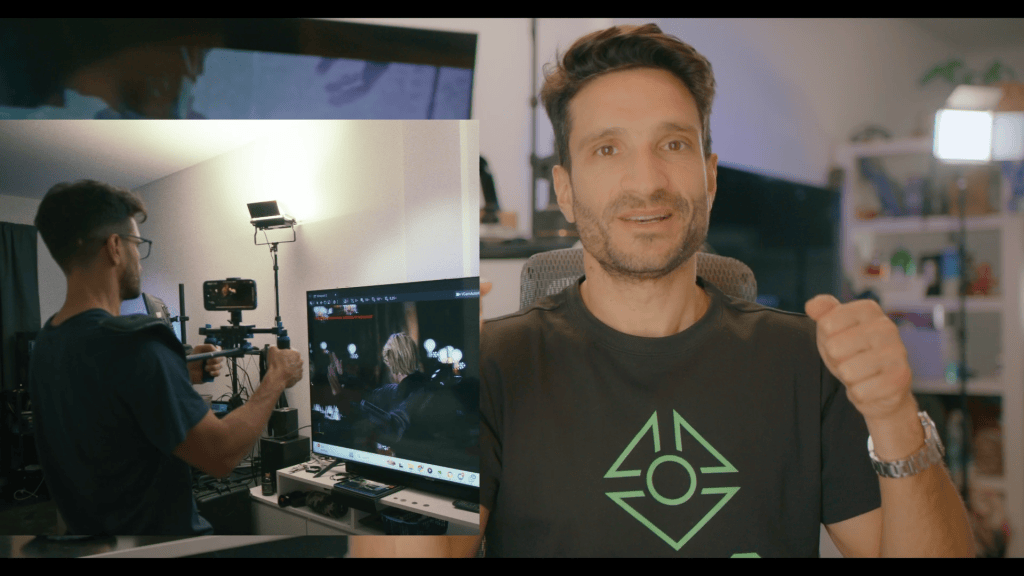
For the camera work, I used my phone as a virtual camera controller. This gave me the freedom to operate shots in a handheld style, producing a natural, cinematic look that closely resembles live-action camerawork.
Photogrammetry and Environment Accuracy
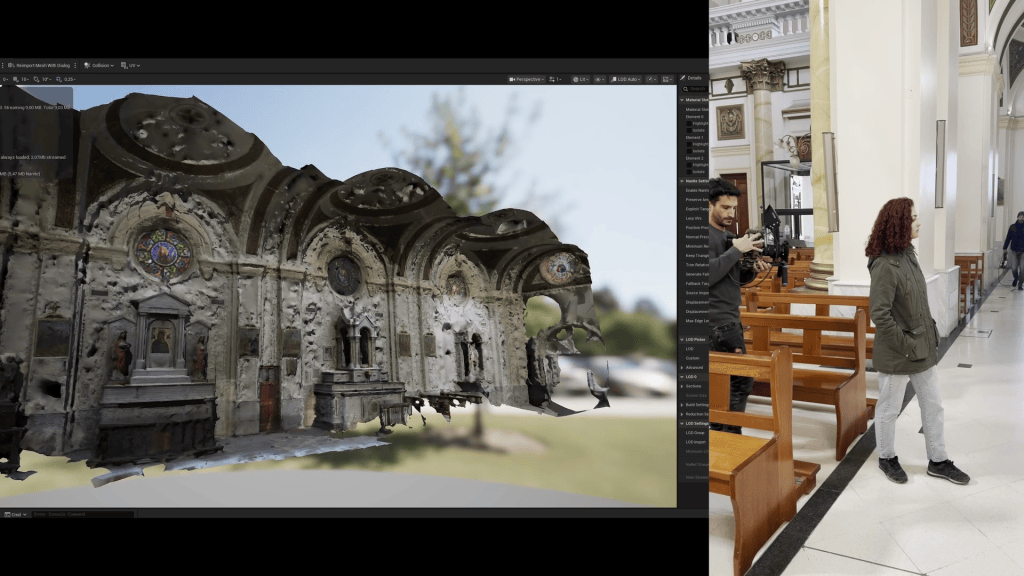
To further strengthen the connection between live action and the virtual world, I used RealityCapture to scan the architecture of the church featured in the story.
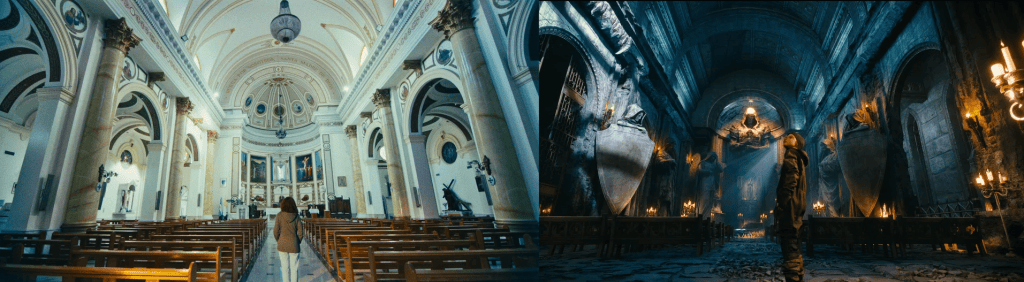
Since the narrative brings both realities together inside this location, recreating it exactly as it is in Unreal was essential. This process allowed me to ensure that the characters in the real footage and the ones inside the video game world shared a perfectly consistent environment, both visually and structurally.
Final Assembly in DaVinci Resolve
Finally, everything returned to DaVinci Resolve, where the live-action material and animated sequences were unified. One of the biggest advantages of this pipeline is its iterative flexibility: if I need to correct an animation, I simply adjust it in iClone, re-export with timecode, and it automatically aligns in Resolve without any manual re-synchronization.
Conclusion
This workflow—integrating DaVinci Resolve, Axis Studio, iClone, Unreal Engine, Blender, and RealityCapture—highlights the importance of using timecode as the central backbone of hybrid productions. It not only guarantees synchronization accuracy but also streamlines corrections and enables a smooth, iterative process.
For a director who is also both an animator and a technical artist, tools like Character Creator and iClone, combined with Unreal, provide an ideal ecosystem: flexible, efficient, and perfectly suited for projects where the real and the virtual must coexist without friction.