首頁 » Page 65

Winning Tips & Tricks: The Making of Petar Puljiz’s “Dear Rosie” Showcase

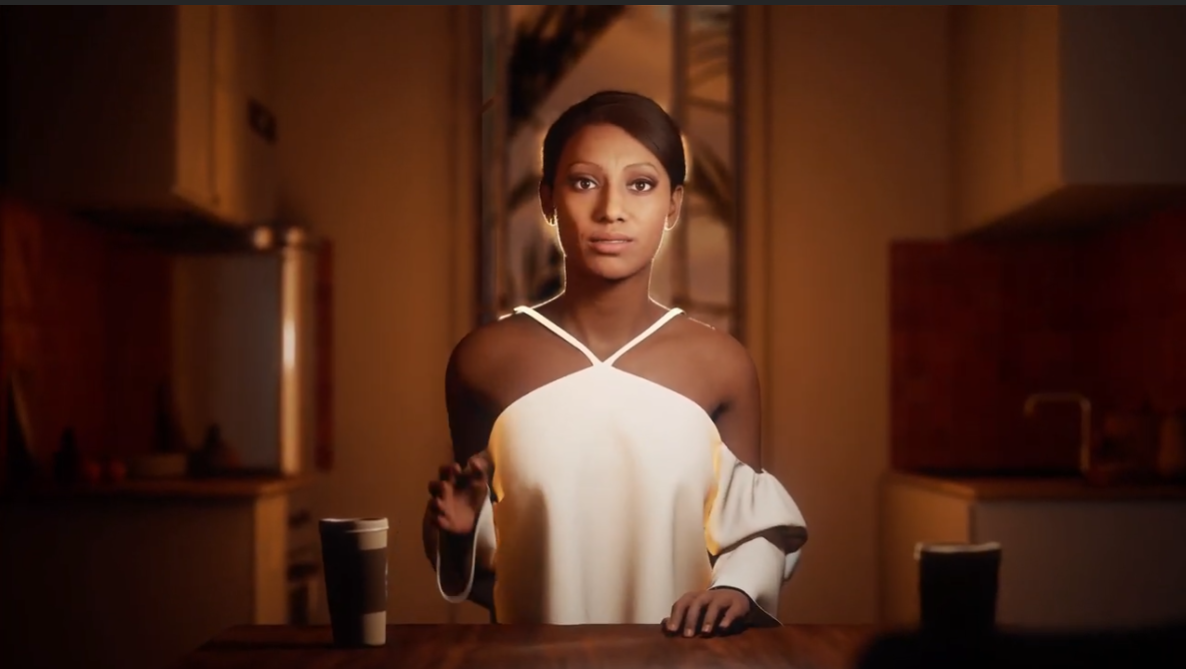
The “Winning Tips & Tricks” series covers practical workflows and techniques shared by winners from the “2021 iClone Lip Sync Animation Contest”. To let users see the full spectrum of the iClone facial pipeline, we are introducing projects that are rendered with different 3D engines including; Unreal, Unity, iClone, Blender, and Cinema4D.  Let’s now take a look at Petar Puljiz’s: “Dear Rosie”, combining workflow in Character Creator, iClone, Marvelous Designer, Blender, and Unreal Engine.

Petar Puljiz

Hello! I’m Petar(Peter) Puljiz, originally from Split, Croatia. I describe myself as a visual producer and artist, but I work in many roles. Currently, my main role is Visual Artist in Lowly from Trap Nation where I produce and publish experimental visual content for music. My current focus is based on virtual humans, and their implementation and representation on digital/virtual platforms. One of my virtual humans is mister visual, which I will write more about soon.

Why did I create this showcase? 

The goal of this project is to explore what’s the most fun and painless way to animate complex characters such as Metahuman with a variety of tools. I used to believe in a lie that I would be able to get character animation straight from motion capture. But then I found I was a bit naive, because it requires a lot of data-cleaning for the captured motion data, and that’s just the way it is. Since I’m getting into a new storytelling format – virtual influencers – I need a lot of tools in a one-stop-shop solution, and a more streamlined process to animate MetaHuman. The iClone Lip Sync Animation Contest was a great motivation to free up time and dive into their tools. So I set up some criteria, took a deep breath, and dove into iClone!

A quick summary of my workflow

  • After refining the Rokoko mo-cap data, I used iClone’s Motion Layer Editor to create several natural body movements emphasizing the character’s talking animation, including hand contact on the table, and grabbing and releasing the cup prop.
  • Like the other contestants, I used AccuLips to drive the main lip-sync animation and observed the Unreal render in real-time via the iClone to Unreal Live Link.
  • Instead of using a facial mo-cap, I chose to blend subtle emotional expressions using iClone’s Face Puppet and made final detailed tweaks via MetaHuman’s facial controller.

I relied on Marvelous Designer to create the character’s unique dress and gave it a dynamic animation within an environment built up in Blender. Now you know the outline, let me just break down the details of each production phase.

How I do it with Reallusion Tools

Preparation: Concepting my character

First, I step into the shoes of my female character, Rosie and describe her personality, situation and anatomy. I try to look at the world from her point of view. It helps me to know how she acts and behaves in certain situations, which will ultimately reflect in the 3D animation.

Step 1: Rokoko – mocap, gloves, and suit: preparation work and motion data capturing

I used a Rokoko Smartsuit and its Smartgloves for motion capturing. The first reminder for you would be: Please get used to the suit! Because the suit is very tight, it will restrict your movement when performing. Don’t be afraid to stretch the costume to extend your body movement — you need to feel comfortable first!
Mocap animation provided me with an awesome block-out for movement; it gave me great timing and canvas to animate. After the mocap session was over, we prepared the data to retarget from Rokoko to iClone via 3DXChange. It’s easier if you have a plugin, but this is a good way to do it too.

Step 2: iClone – clean up, additive layer for the body, Acculips for mouth animation editing, and Facial Puppet for the rest of the face

Here we are, the moment of truth! I start to click around, seeing all the tools, I take a brief look at official documentation to get a much clearer vision. I begin placing a Metahuman dummy and ExPlus face in the scene with additional props that my character will interact with and setting up an additive layer to manipulate the mocap animation data and fix root motion. All the while using IK controls to get bigger moves and polishing it with FK controls later on. I parent the cup of coffee to the hand bone, and when it leaves it on the table I deactivate it. I fell in love with Reach Targets — ain’t gonna lie! For hand placement, I used ReachTargets so the hands stay on the table, and then deactivate it when the arm needs to be raised.

For fingers, Gestures help me to create main keys and then I polish them manually. After the body, I started with the face, and the first item is the mouth, using AccuLips to create the main layer of animation editing. Then I used iPhone LIVE FACE to get a good foundation for the rest of the face.

After the mouth, I did the eyes, eyebrows and nose. For the whole time, I had a second monitor with Unreal Engine and Live-Link turned on to exactly see what I’m getting, not relying solely on the iClone viewport.

Step 3: UE4 – Record 3D animation and ControlRig clean up and additive layer.

Unreal Engine

Once I finished with character animation in iClone, I transferred the animation data to Unreal via Live Link and Take Recorder. Disable the Reduce Keys option because we want to preserve all of that “juicy” animation (raw data). Also, I set up all my keyframes in Linear, because every frame is keyframed and you wouldn’t want auto-smooth or curves as they can create errors.

In Unreal, I import animation on our character, bake data to Control Rig and play with it a little bit. I spent some time here, just to clean up stuff we don’t need and put some more fine-tuning, especially for the face.

Step 4: Import the baked animation sequence from Unreal Engine and convert it to Alembic with a fixed table prop

Once done and satisfied with the animation editing, I bake ControlRig Animation Sequence to get an animation asset from it. With that, I export animation in FBX format. From there we import to Blender to convert it to an Alembic file which will be imported to Marvelous Designer.

Now, bake an animation asset from the control rig animation in Unreal Engine 4, and export it as FBX to Blender. Convert the animation asset to Alembic cache and send it to Marvelous Designer for cloth simulation.

Step 5: Marvelous Designer garment and simulation

The goal here was to test the pipeline and create small interactive cloth details. After importing the Alembic file, apply the motion to simulate the cloth animation.

Step 6: Transferring from Unreal Engine 4 to Unreal Engine 5

Our simulation is done and ready to be imported to Unreal. Once every setting is completed in Unreal, I continue to finish our scene and lighting. And after a couple of hours of adjustment, voila! That’s how I complete it, and now I’m ready to send all the animated files for full render.

Hope you enjoyed reading my tips and tricks!
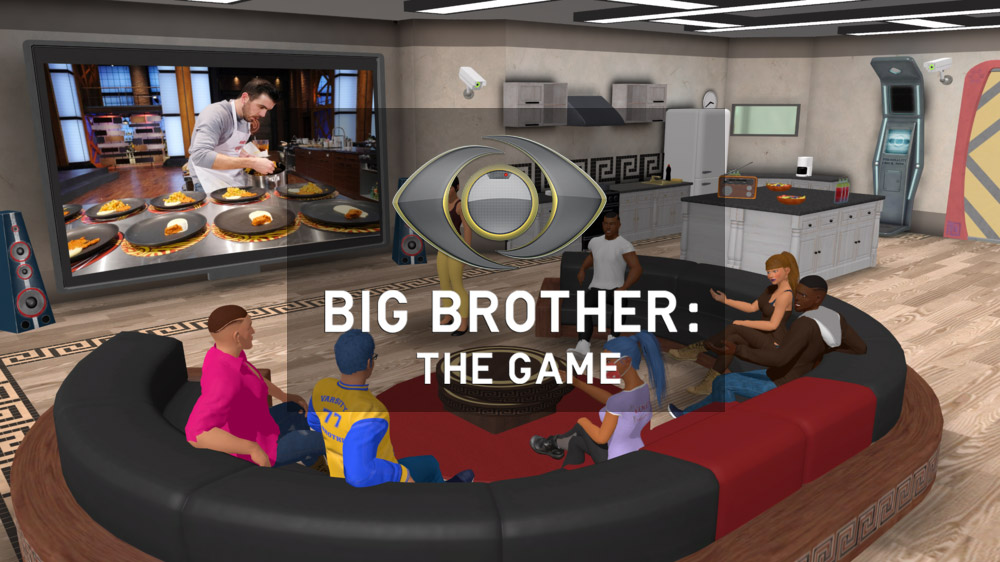
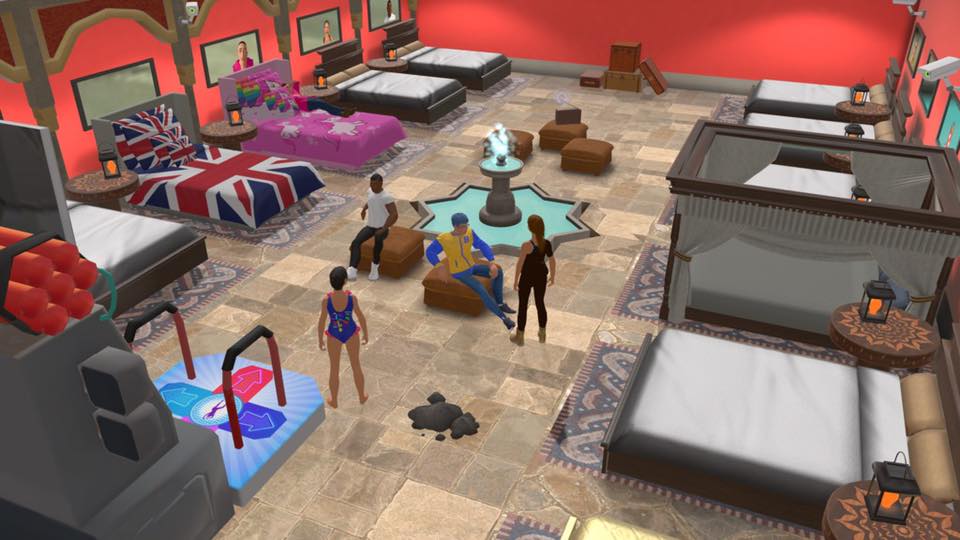
Development Studio creates game on hit Reality TV Show: BIG BROTHER

Dr. Finn Krewer | Head of Development, 9th Impact

Dr. Finn Krewer – Founder / Head of Dev at 9th Impact

Finn Krewer is a founder and head of development at 9th Impact with responsibility for the development of Big Brother: The Game. Finn has been developing games since he was 14 starting on Xbox 360 and has developed on consoles, desktops, web and mobile for over 15 years.

He has worked as technical lead on franchise projects including Biker Mice, Danger Mouse and now leads the multi-disciplinary team dedicated to Big Brother: The Game. Finn received his bachelor and doctorate of computer engineering from National University of Ireland, Galway for his work on FP7 funded AI project SI-Elegans and his work Neural Network FPGA design and ultra-wideband medical radar applications.

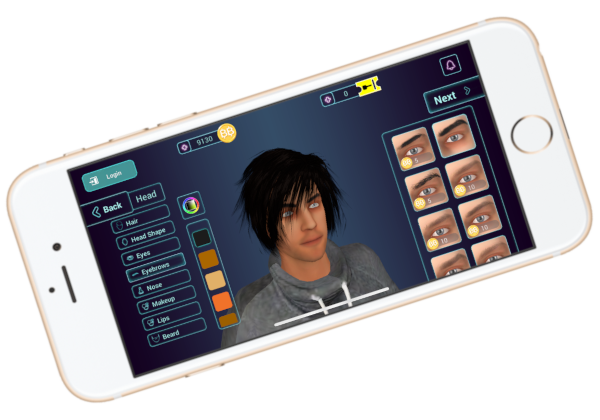
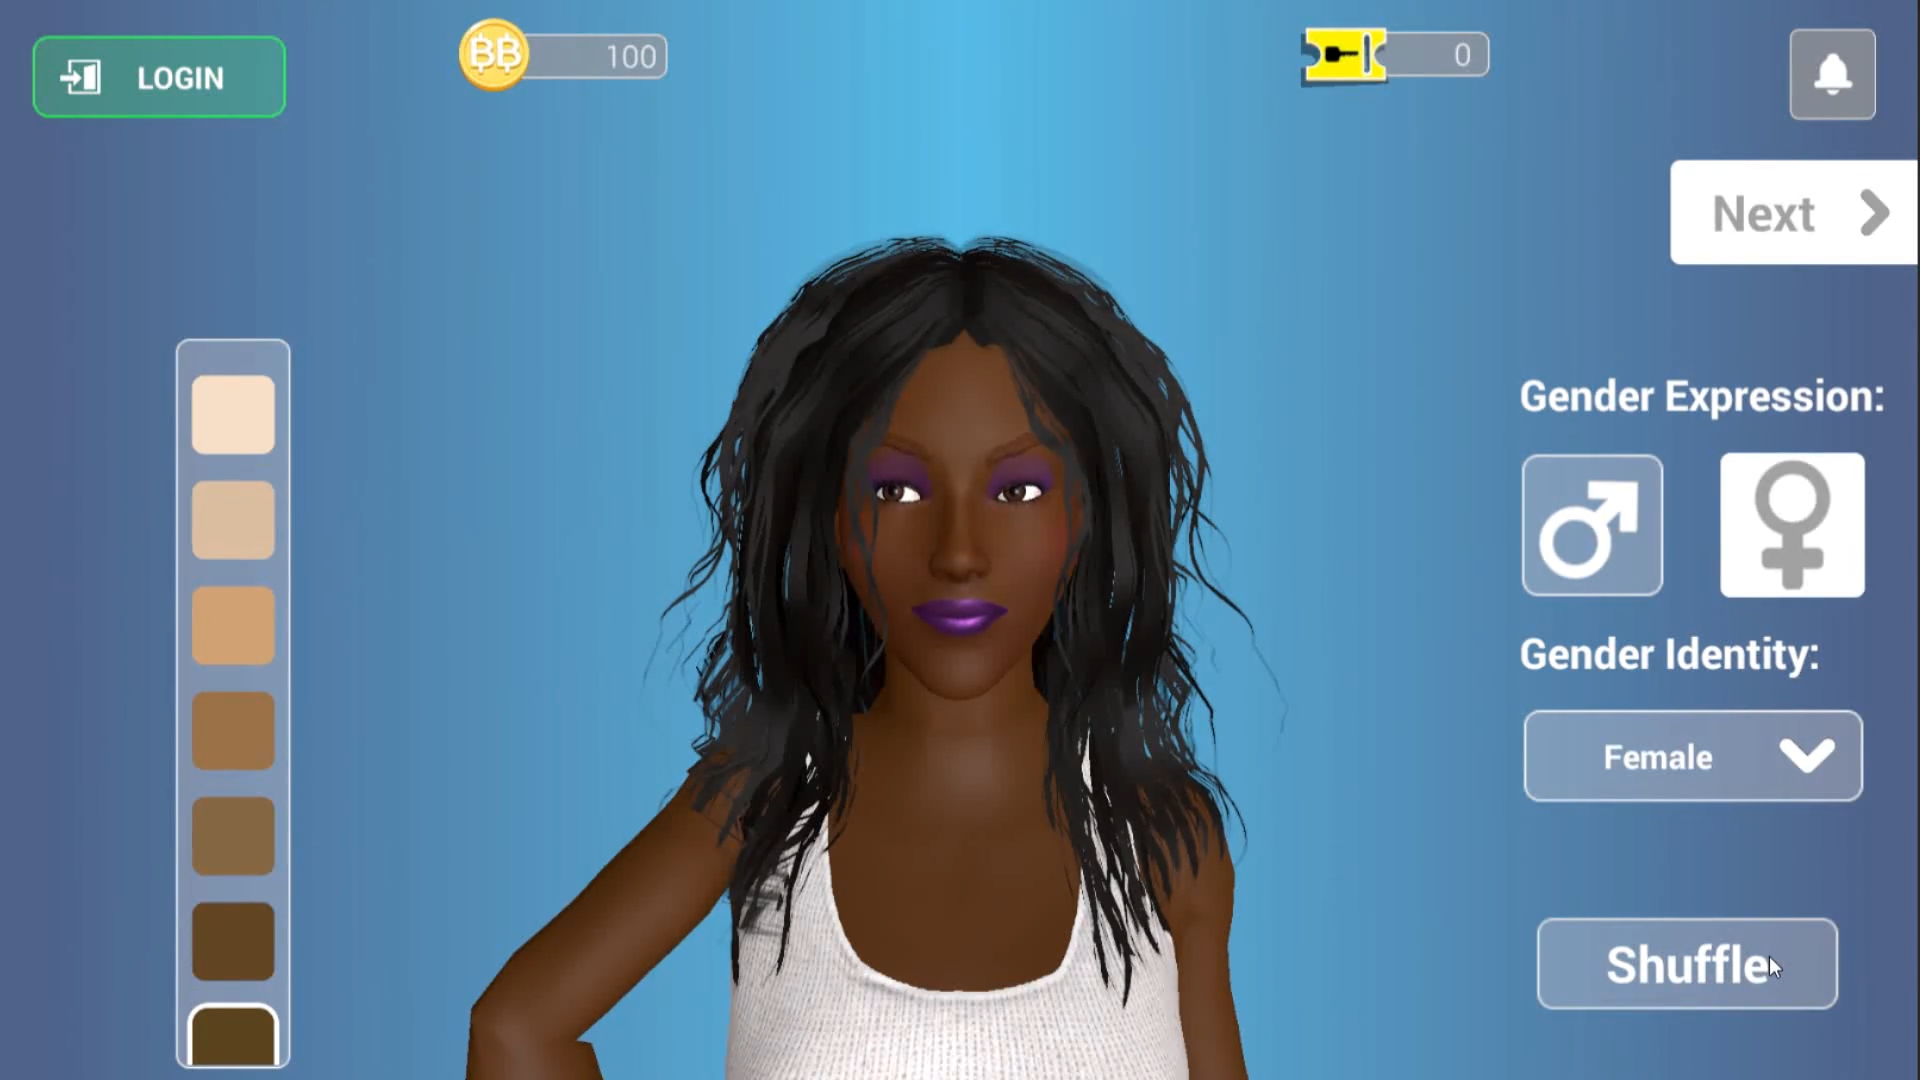
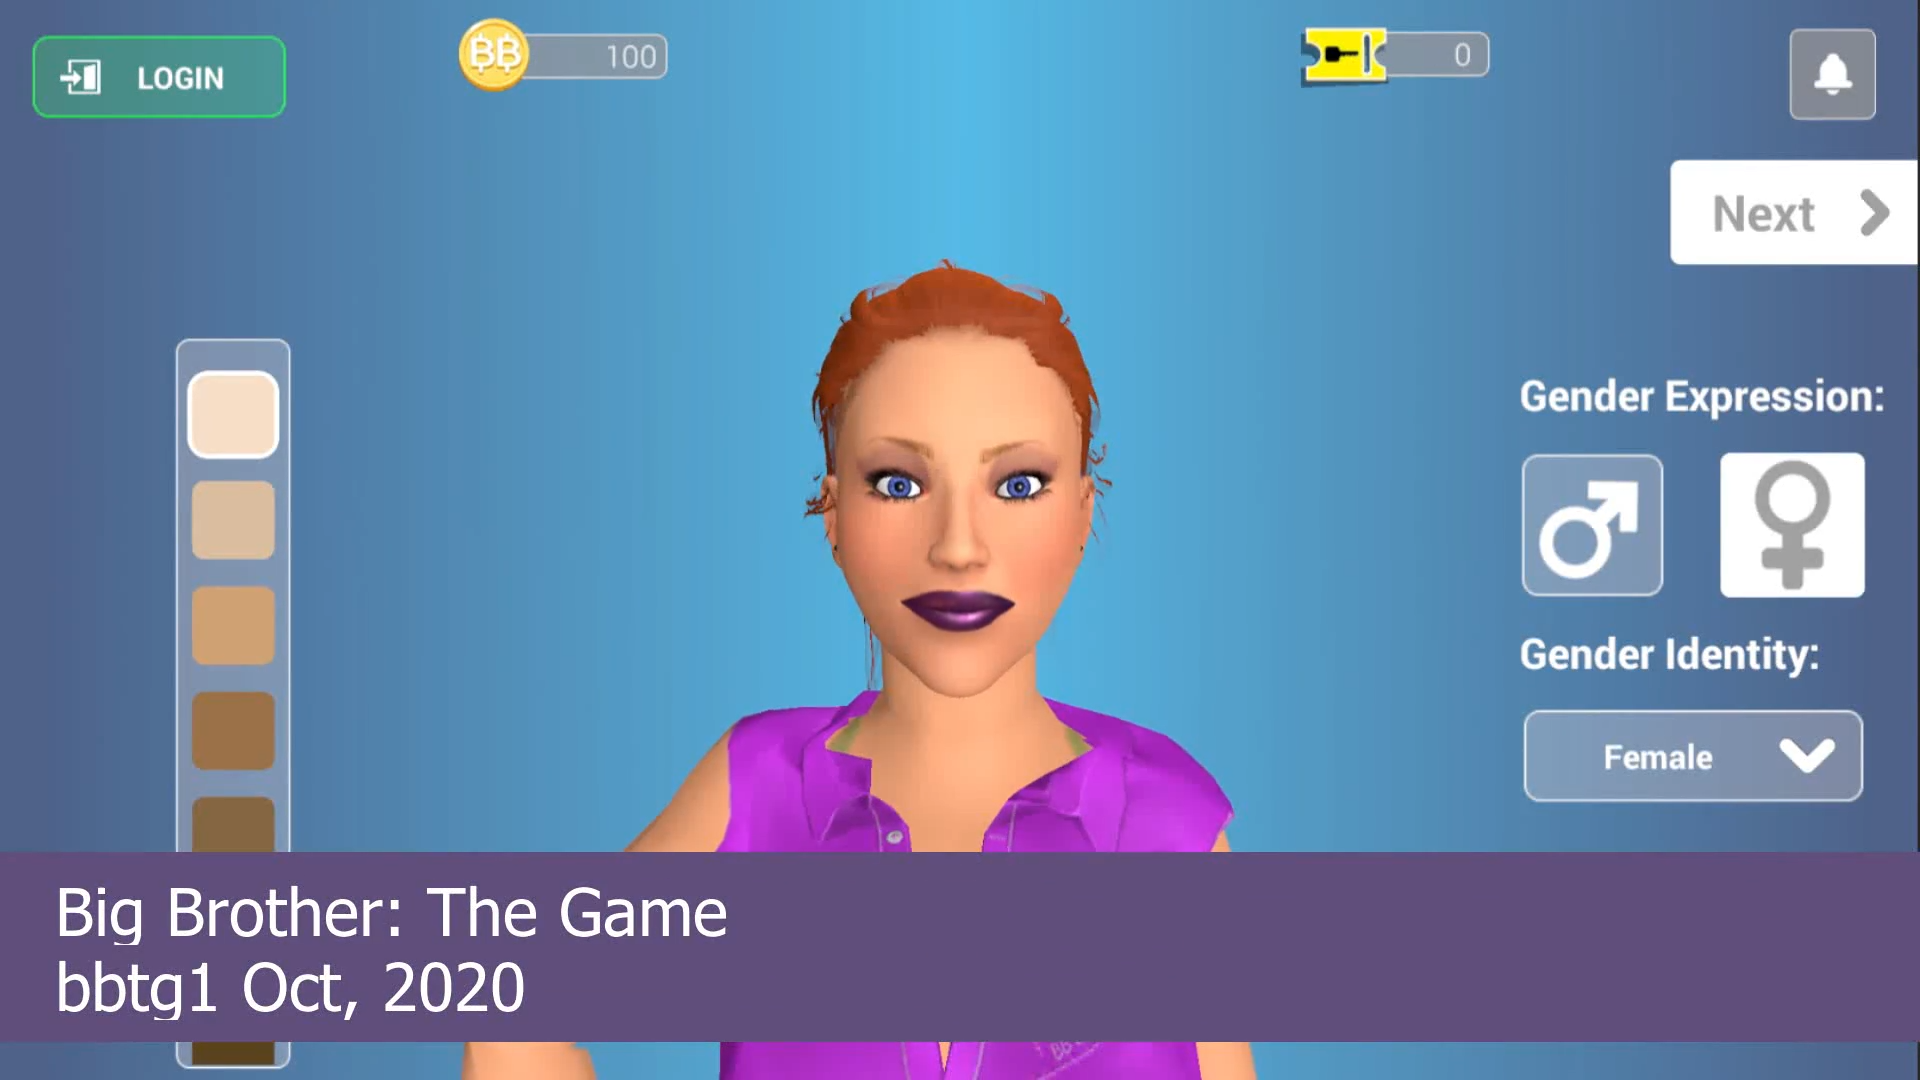
Game development studio 9th Impact uses Character Creator to generator over 1 million character variations for hit reality TV show game: Big Brother.

” Character Creator is a very fast workflow where conforming and skinning is immediate and without designer intervention except in some edge cases. The availability of a large clothing library for Character Creator also allows us to use and customize stock outfits.”

Dr. Finn Krewer | Head of Development, 9th Impact

Q: Hello Finn, and welcome to our Reallusion feature stories. Kindly introduce 9th Impact Studios, and the game development that your studios specializes.

9th Impact is a game development studio who partners with TV studios to make the official games of TV shows. We design games that fans of the TV show will love, so we don’t focus on any one particular genre of game. We are a small team but carry out game design, development, art production, testing and publishing in-house, which gives us tight co-ordination across disciplines and the ability to undertake complex and technically challenging projects.

Many of our games are cross-playable on different devices and we develop for mobile, PC, Facebook and Switch. Typically our games are localised into many languages. 9th Impact have created the official games of Biker Mice from Mars, Danger Mouse, Sunny Bunnies and Big Brother and have 2 new TV titles in development.

Q: Your team is currently working on Big Brother: The Game, based on the hit television series. Could you share with us the vision behind creating the game? How do the mechanics emulate what happens in the show, how do contestants participant in this experience?

Big Brother is the most watched TV show in history – 500 series have aired across 69 markets, producing over 28,000 episodes. So we knew that a large proportion of the global population would have watched Houseguests on TV competing in Big Brother.

The vision of the game was to create an official season of Big Brother where the TV audience could become the Big Brother Houseguests, using their mobile phone or PC as their portal into a virtual Big Brother House. The game is played in real-time, so the experience is slower than what you might expect from a mobile game, but becomes very immersive. A player is place in a House with 7 other real players. They get to know their Housemates and communicate via chat, voice messaging and private messaging. The latter is important for making secret alliances and plots!
Each day players compete in a mini-game to become Head of House. The Head of House chooses the nominees for eviction. There is Power of Veto competition that allows the winner to take one of the nominees “off the block” and force the Head of House to select another Housemate. At the end of the day, the Houseguests all vote on which nominee to evict.

The last remaining Houseguest is the winner of the House and continues to the next Tier. There are 7 Tiers in total and the winner of the Tier 7 House wins the grand prize. The prize fund increases with the number of players up to $1,000,000 with a guaranteed minimum of $50,000.

Q: With the Character Creator ecosystem, your team was able to create high quality avatars for the game. How were you characters originally made, and what made you decide to use Character Creator? What advantages does this application bring to game development studios?

Originally we would develop one base character that we would then create clothing for using tools like Marvellous Designer, Blender and Maya. The biggest effort in this path is the iterative conforming and skinning of clothing and accessories onto the base character.

In Reallusion Character Creator this is a very fast workflow where conforming and skinning is immediate and without designer intervention except in some edge cases. The ability to autohide elements of the base character which are hidden by clothing also decreases vert count and decreases clipping, in turn this decreases the need to conform and reskin multiple times.

The availability of a large clothing library for Character Creator also allows us to use and customize stock outfits to the Character Creator base character. Once conformed and skinned the clothing can then be directly used by the game engine.

Q: Season 2 of Big Brother will include over a million character variations. Typically what is your creation process like and how long does it take to create characters for the game?

The individual character variations are broken into slots which are available in the game such as Hair and Outfits. Each variation is prepared in Character Creator on a standard body which does not change. This allows the character to be built from multiple sections such as Hair, Outfit, Feet. Very basically the process includes selection of variation, application to the base character, conforming, skinning, skinning correction and pose testing in Character Creator.

The export pipeline then takes the required mesh and textures out to the engine. Finally, during engine import the Character Creator plugin is used to set up standard options and the UMA plugin is used to set up the options for the imported slot with all metadata and textures. Changing to Reallusion as our core character art toolset for season 2, reduced our production time by half and improved the quality of the output.

Q: When does Big Brother Season 2 begin, and how can the community join in on the fun?

Big Brother: The Game is available right now and players can join the competition by getting the game on App Store, Google Play, PC download and it is coming to Steam soon.

App Store:  http://bit.ly/bbtg-app

Google Play: http://bit.ly/bbtg-gp

PC (Windows): www.bigbrother.game/download

Steam:  https://store.steampowered.com/app/1388050/Big_Brother_The_Game/

Follow 9th Impact:

Website:
https://9thimpact.com/

Facebook:
https://www.facebook.com/9thimpact/

Twitter:
https://twitter.com/9thimpact

Videographer Makes Digital Walls, Virtual Homes Pop With NVIDIA Omniverse

This article was written by NVIDIA, and featured on NVIDIA Blog.

Helsinki-based Pekka Varis showcases browse-and-buy possibilities of digital art gallery, using NVIDIA Studio drivers, Reallusion and Lightmap software.

Pekka Varis’s artistry has come a long way from his early days as a self-styled “punk activist” who spray painted during the “old school days of hip hop in Finland”.

More than 30 years later, he’s embracing the future of graphics as a videographer who uses NVIDIA Omniverse, a physically accurate 3D design collaboration and simulation platform, to create vibrant virtual worlds.

His freelance video production company Catchline translates complex technology services into attention-snagging, easily digestible video messages or commercials.

A recent project was an animated ad for Artio, an app that brings a global digital art gallery to individual smart devices.

In the commercial, a digital family searches for the perfect piece of art to enliven their new home, visualizing options on the walls in real time. Plus, the parents unpack boxes filled with detailed items, a child plays with block toys, the dog shakes its head and wags its tail — all in a physically accurate way, thanks to Omniverse.

“NVIDIA Omniverse has given me more artistic power and a totally new level of freedom. It’s a trusty playground where I can bring in quality content and focus on creating designs, visuals, variations — all that fun stuff.”

Pekka Varis

Vivifying the Videography

The Helsinki-based videographer takes viewers through his creative process in a three-part tutorial that details his recent commercial project, in which Artio helps the digital family make their blank walls pop.

Watch the first installment of the tutorial series on demand and below:

In subsequent episodes, Varis covers his animation process with Reallusion Character Creator:

as well as his steps for lighting and color correction in Omniverse:

His multi-app workflow — bringing characters to life with Reallusion software and perfecting the lighting with Lightmap HDR Light Studio — is made possible by Omniverse Connectors, plugins that connect third-party design apps with Omniverse, and NVIDIA Studio drivers.

He estimates a 90 percent savings in time and cost using Omniverse. “With Omniverse Connectors to Reallusion software like Character Creator and iClone, I can make commercial-quality characters quickly and easily, which I wouldn’t have even dreamed about before,” he said.

“Natasha,” made by Varis using Reallusion Character Creator and Omniverse Create.

His favorite Omniverse apps, he added, are Omniverse Create — a toolkit built on Pixar’s Universal Scene Description format that accelerates advanced scene composition — and Omniverse Machinima, with which he animates and manipulates characters inside of virtual worlds.

“I see myself using Omniverse with every single work commission I get moving forward. And I hope my video tutorials inspire viewers to try using these superb tools to create their own artwork.”

Pekka Varis

When not creating videos, Varis makes music as a drummer who loves metal, rock and hip hop — and spends time with his six-year-old daughter, his source of inspiration.

Related Links:

NVIDIA Blog: https://blogs.nvidia.com/blog/2022/04/04/pekka-varis-omniverse-creator/

OrpheusVR | re:Naissance Opera brings live virtual performance with iClone

OrpheusVR is an indie VR game prototype that I have been working on in conjunction with Debi Wong of re:Naissance Opera, Brian Lee Topp, and Youhan Guan. The project was conceived as a way to engage new virtual reality platforms with the ancient art form of opera. Live From The Underworld is a series of interactive live-stream performances featuring mythological avatars brought to life by real-time motion capture technology and live opera singers.

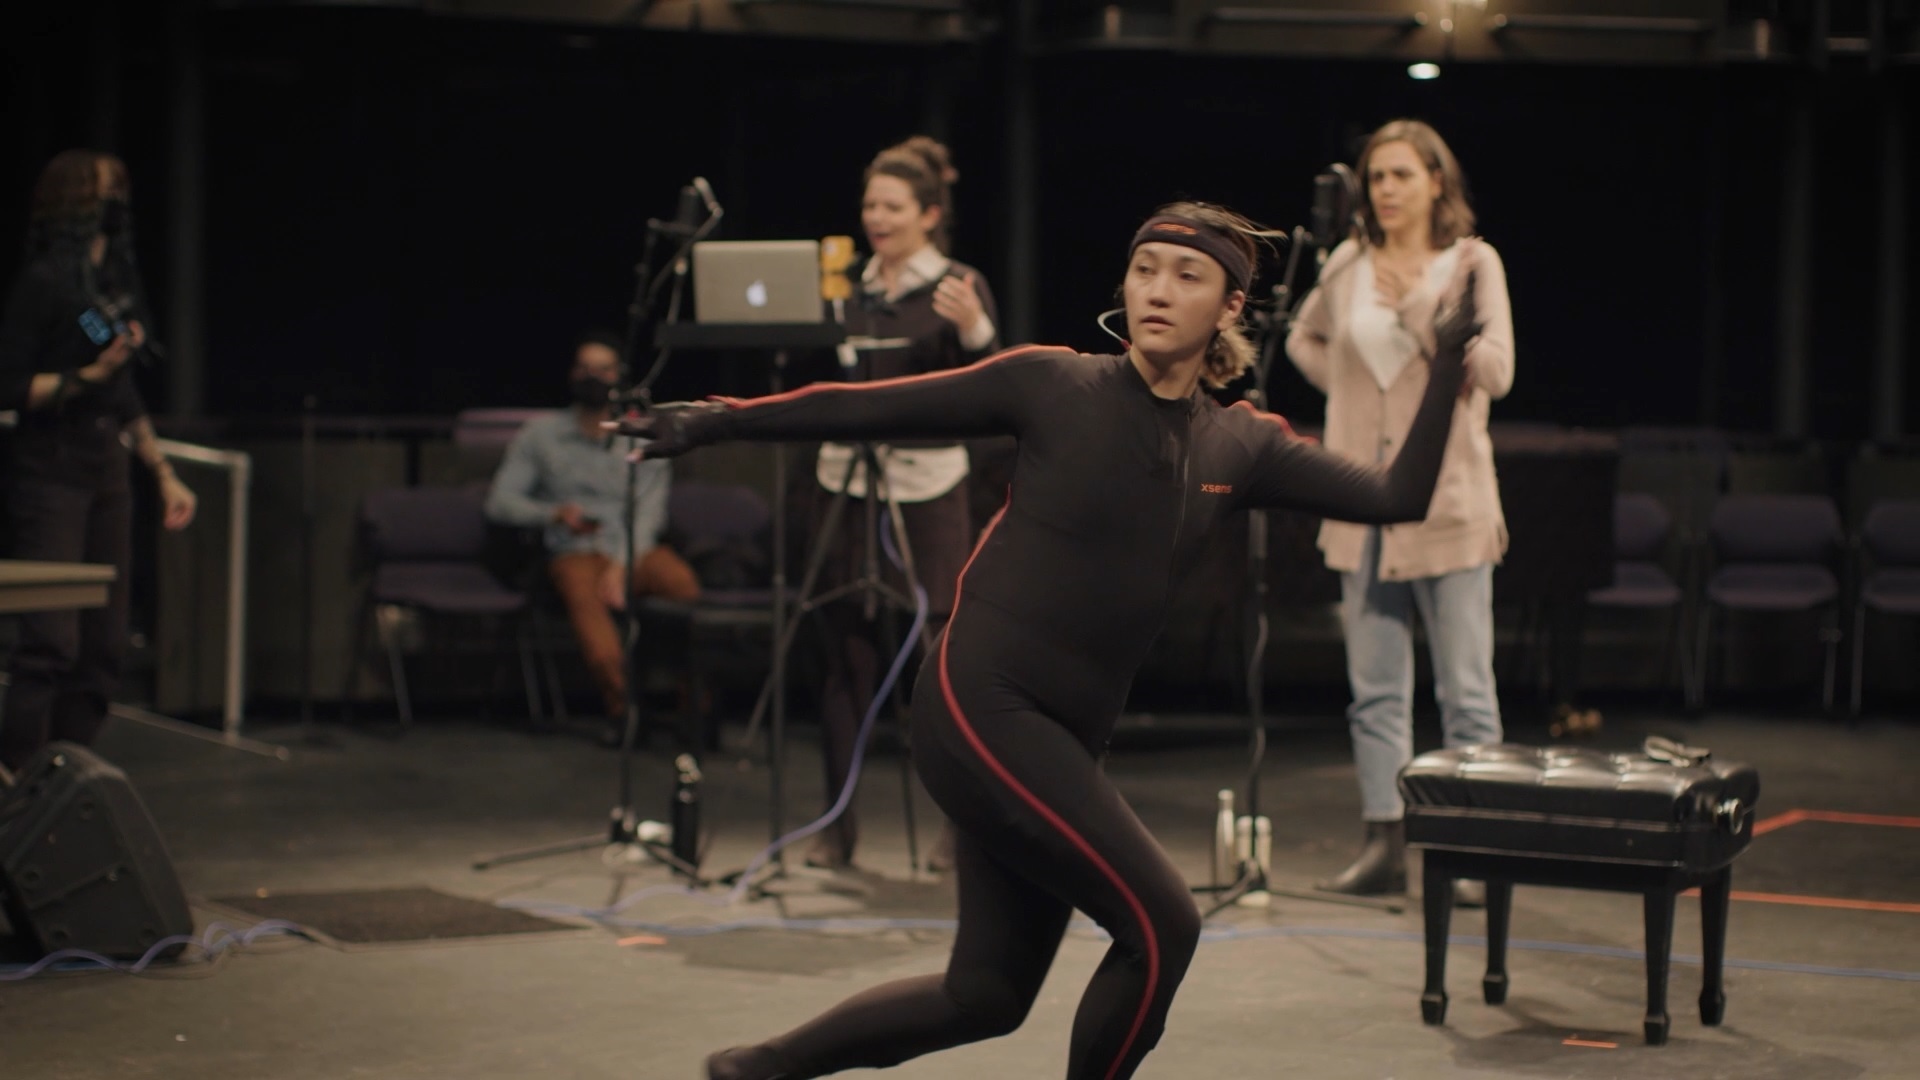
In 2018 a team of digital and opera artists came together to ask “what would opera look like if it were invented today?”. From that initial question OrpheusVR, an interactive, choose-your-own-adventure, virtual-reality opera was born. After completing the prototype in 2021, the OrpheusVR team started working in the digital live stream space, using iClone real-time animation software, iClone’s LIVE FACE mocap animation with Xsens body live motion capture technology and computer avatars from the OrpheusVR world to create live, interactive operatic performances that can be streamed from any device.

Debi Wong – Founding Artistic Director

Debi Wong

Debi Wong is an interdisciplinary performance artist that loves to weave together sound, text, movement, and technology to create contemporary stories. Her performances have been recognized as “unique and magical” (Rondo Classic) and “electric” (Schmopera).

As a soloist, Debi has performed with leading orchestras and ensembles across Europe and North America most notably with her lute and voice duo, White Sparrow at The Stockholm Early Music Festival, The Copenhagen Renaissance Music Festival, The BRQ Vantaa Festival (Helsinki), Garrick’s Temple To Shakespeare (UK) and the Venice Biennale. Debi is currently artistic director of re:Naissance Opera, a Vancouver-based indie opera company.

Debi is the founding artistic director of re:Naissance Opera in Vancouver, BC. With re:Naissance she has created #DidoAndAeneas (2014), an interactive, social-media opera; Acis & Galatea which was recognized by Vancouver Classical Music as one of the city’s best operas in 2017. In 2019, Debi spearheaded OrpheusVR, an interactive Virtual Reality Opera that was featured at the VIFF Immersed exhibit at the 2020 Vancouver International Film Festival and in 2020 she co-created the award-winning podcast The Apocrypha Chronicles (Finalist, New York Festivals Radio Awards).

Debi is a graduate of Yale University (M.Mus) and The Yale Institute of Sacred Music (Diploma in Sacred Music), where she studied vocal performance and was the recipient of the 2010 Margot Fassler Award for outstanding performances in sacred music. She is currently a Doctoral candidate at The University of the Arts Helsinki.

Conrad Sly

Conrad is a 3D Artist with a deep passion for the medium and its many platforms. He specializes in real-time graphics and has been producing architectural visualization for virtual reality projects for 4 years, and has worked on several iterations of the VR Theatre for SIGGRAPH in 2018 and 2019. He has a deep interest in the crossroads of experimentation with emergent technologies such as VR and AR, and traditional theatrical and art contexts.

Conrad and Debi began collaborating in 2018 when Debi took an interest in the digital art and virtual reality games Conrad was creating at the Centre for Digital Media. Their initial conversations led to the 2020 prototype of OrpheusVR, an interactive, VR opera for Oculus Quest, and Live From The Underworld (2021), a new interactive live stream that uses mythological CG avatars, motion capture, and dancers and singers to innovate live opera and online performance.

Conrad Sly – Art Director

“It is pretty complicated, but at the same time we’ve entered into these partnerships with, for example, Reallusion Software, and they’ve really created these user-friendly tools that have really helped us as indie producers.”

Debi Wong – Founding Artistic Director

Q: Greetings Debi and Conrad, welcome to our Reallusion Feature Stories! Kindly introduce OrpheusVR and what your team is trying to achieve with LIVE from the Underworld.

OrpheusVR is a mythological world we have been creating over the past three years. Inside this world, we’re trying to explore in what ways real-time gaming technologies and live motion capture technologies can bring something new to the table of traditional opera performance.

We’ve developed a prototype of a choose-your-own-adventure VR opera and we are now experimenting with live streaming our operatic avatars to mobile and personal devices. We’ve been having a lot of fun exploring what kind of design aesthetics we can create that you might not see in a traditional theatre and how livestreaming to personal devices allows for interactivity and new kinds of engagements from audiences. 

Q: Please share with us how you were able to combine different performances to bring your avatars to life for a live experience. What are the biggest challenges in doing this in real time?

One of the biggest challenges of real-time motion capture has to do with capturing high quality data from live performances. We use the Xsens, which produces excellent results, but still has responsiveness limitations — but because everything is live, we don’t have the luxury of going back and cleaning anything up or doing any detailed work. Coupled with an indie setup for the face using a iPhone with iClone‘s LIVE FACE app, it starts to get pretty complicated in terms of how to manage the intake of data in a performant way for real-time graphics. 

This meant we had to “rehearse” our avatars in very specific ways – we had to discover what kinds of movements read well with the suit and which movements do not produce great real-time results. We went through a similar process with facial capture and we also learned that mounting head rigs on opera singers is extremely cumbersome and limiting for their techniques. 

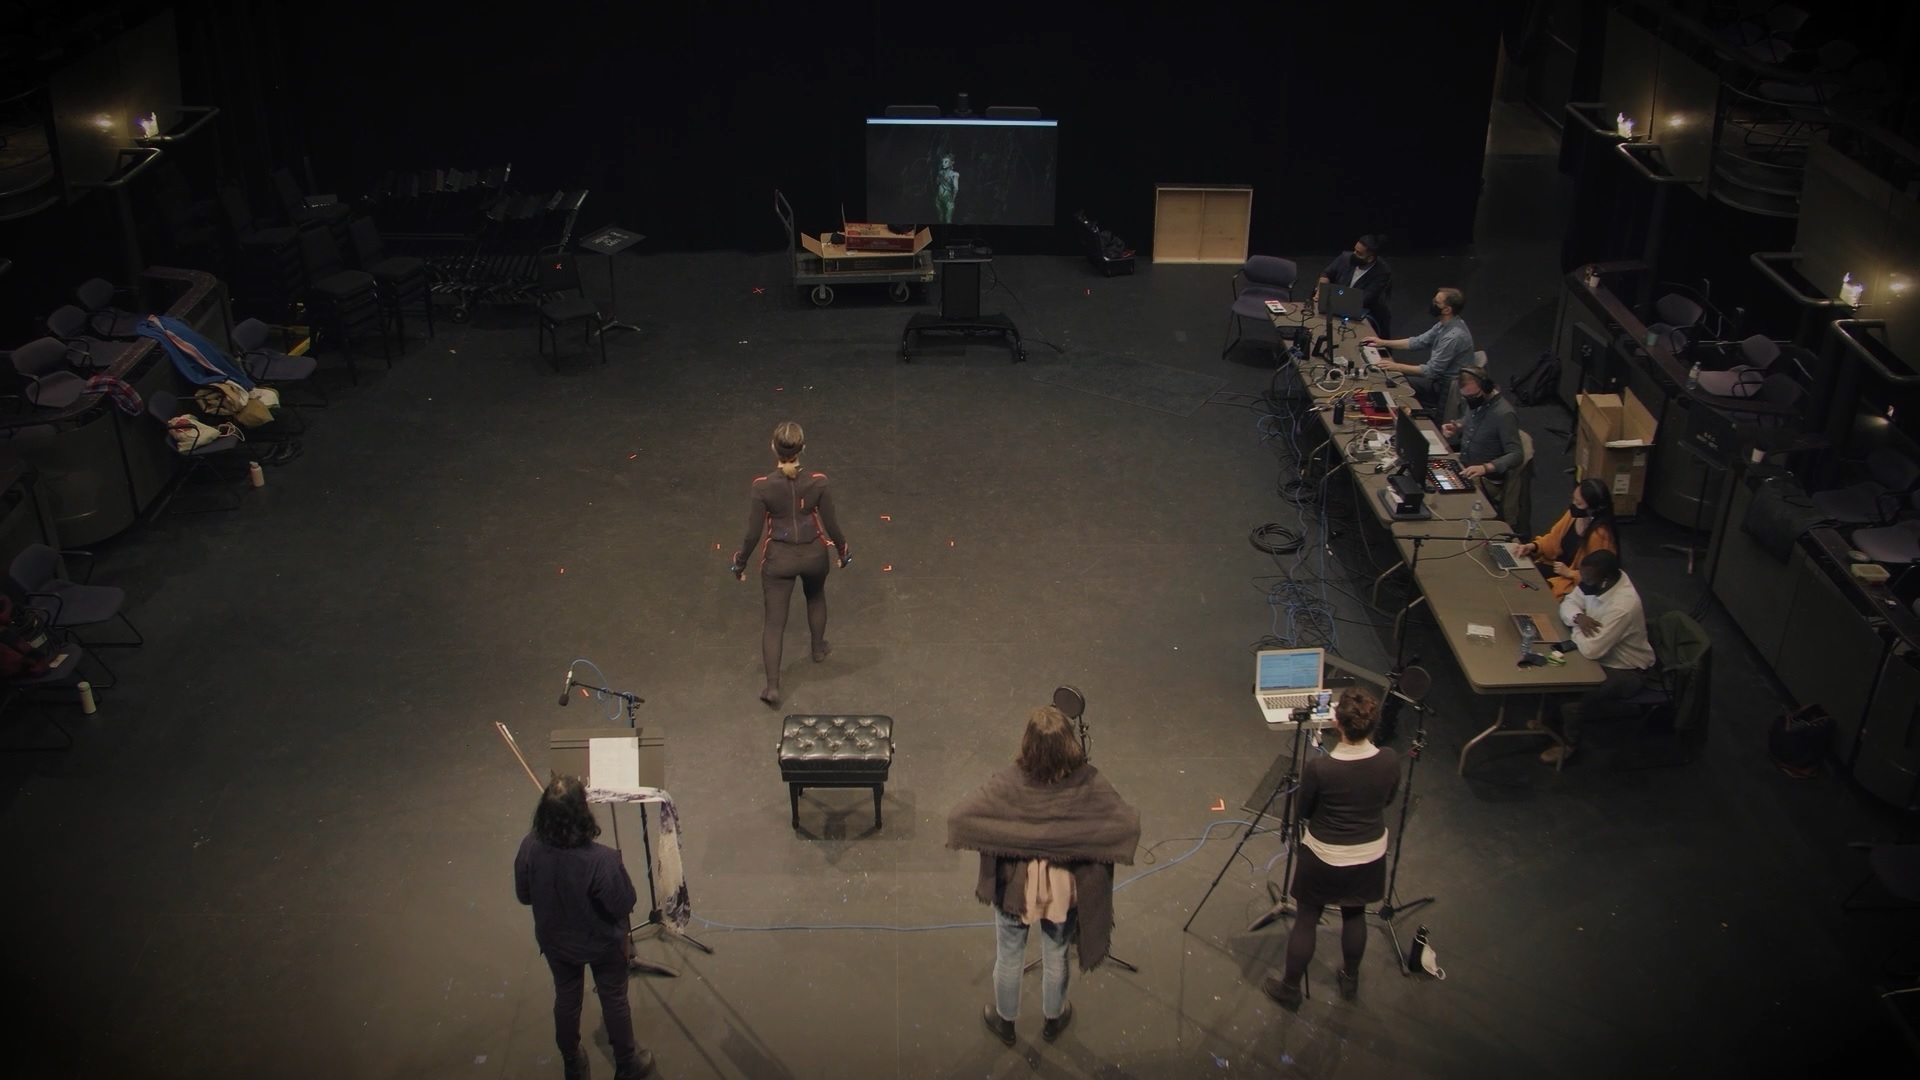
We decided to approach these challenges by compartmentalizing our motion capture and live performance art, dedicating certain workstations to specific tasks. We also started treating the avatars like puppets. We used dancer-choreographers to create vocabularies of movement for us and our singers did the same for facial gestures. In the end, we actually puppet our avatars with two performers: a dancer plays the body of character and an opera singer plays the face and voice. This lets us have a really diverse and expressive range of choreography and dynamic vocal acrobatics.

Q: As a producer, how has iClone and its LIVE FACE mocap animation helped your production ? What combination of tools and hardware did you use for the live actor performance?

We’re an indie studio working in real-time so the great thing about iClone is the ease of use for our team and its ability to bring in many different data streams (for our livestreams, we use an Xsens suit with Rokoko Smartgloves to capture the dancer’s body and finger data and the LIVE FACE app running on an iPhone 12 mini to capture facial expressions from our singer.). It produces great results with our custom Character Creator (CC3) avatars and we are able to produce really exciting live results.

LIVE FACE has also been a really powerful tool for us because it means any of our opera singers can take out their iPhones and capture data for us. We tested a few different options for facial capture because opera singers make pretty distinct facial animations when they sing and we discovered that calibrating facial movements and using LIVE FACE produced the most expressive real-time results for our singers. 

iClone’s LIVE FACE app for iPhone facial motion capture

Both iClone and LIVE FACE are an integral part of our livestream production pipeline and they have been second to none.  

Facial key editing inside of iClone animation software

 Q: After LIVE from the Underworld, what other projects can the community look forward to from re:Naissance Opera ?

We have a few dreams we are entertaining – we’re curious about streaming live in 360 and how our Reallusion tools can help us accomplish that in Unreal Engine. We are excited to go further with our live performances and audience interactions – we want our audiences to feel like they are participating in gameplay when they join our livestreams.

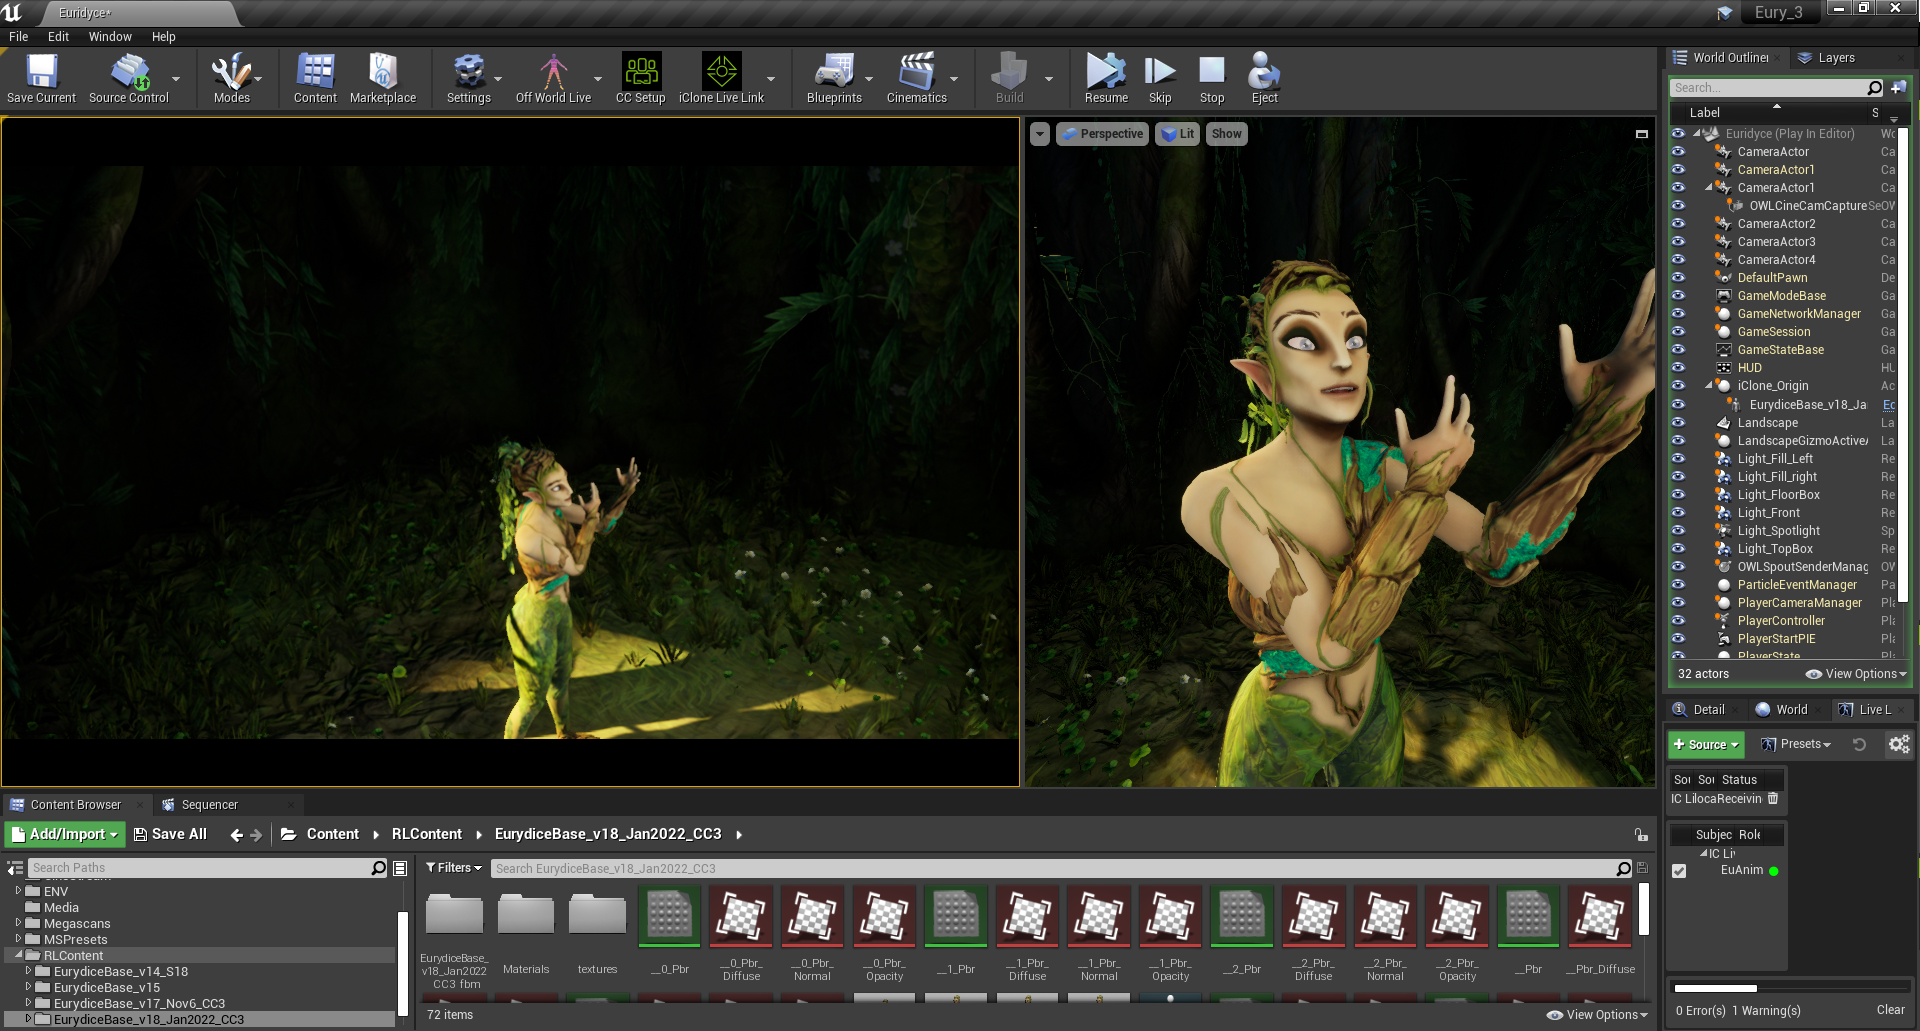
Live streaming performance from iClone to Unreal Engine via the LIVE LINK plugin

We are continuing to explore and discover in what ways these emerging and increasingly affordable technologies can infuse the world of opera with new life. 

Live streaming rendered inside of Unreal Engine
Orpheus VR live virtual performances with iClone and Unreal Engine

Follow OrpheusVR

Website:
https://reopera.ca/
https://orpheusvr.ca/

YouTube:
https://www.youtube.com/channel/UCCJ_d9ADrBdNfZsRtkwFvow

Reallusion Releases ActorCore Library for NVIDIA Omniverse

Integrating 3D Character and Mocap Animation Collection with NVIDIA’s Collaboration Platform and Asset Store to Simplify Crowd Generation for Business Visualization

Reallusion, the developer of Character Creator and iClone real-time animation software, has released new ActorCore Content for NVIDIA Omniverse™. ActorCore offers a large selection of AI-controllable 3D characters and mocap animations, significantly reducing workflow and increasing production efficiency for crowd rendering for use in AEC (architecture, engineering, construction) simulations and visualizations.

Already deployed in digital twin projects including NVIDIA drive simulations and BMW manufacturing visualizations, ActorCore’s 3D content has been quickly adopted by professional animators not only in archviz applications but in media entertainment, games, and films.

“As a leader in 3D character animation, Reallusion continues to provide the most intuitive tools and premium content for creators,” said Charles Chen, Reallusion CEO. “The iClone and Character Creator Connectors have added a complete character animation pipeline to Omniverse. In response to the huge demand for business visualization, particularly digital twin, the latest release of ActorCore Omniverse Content empowers business users with massive interactive assets for real-time crowd simulation on the virtual platform.”

Collaboration with Photorealistic Simulation

NVIDIA Omniverse™ is an easily extensible, open platform built for virtual collaboration and real-time physically accurate simulation. Creators, designers, researchers, and engineers can connect major design tools, assets, and projects to collaborate and iterate in a shared virtual space. Additionally, developers and software providers can also build and sell Extensions, Apps, Connectors, and Microservices on Omniverse’s modular platform to expand its functionality.

NVIDIA Omniverse open platform made for AEC simulations (Image credit: Reallusion and Bentley Systems)

Animated 3D Crowd for Industrial Visualization 

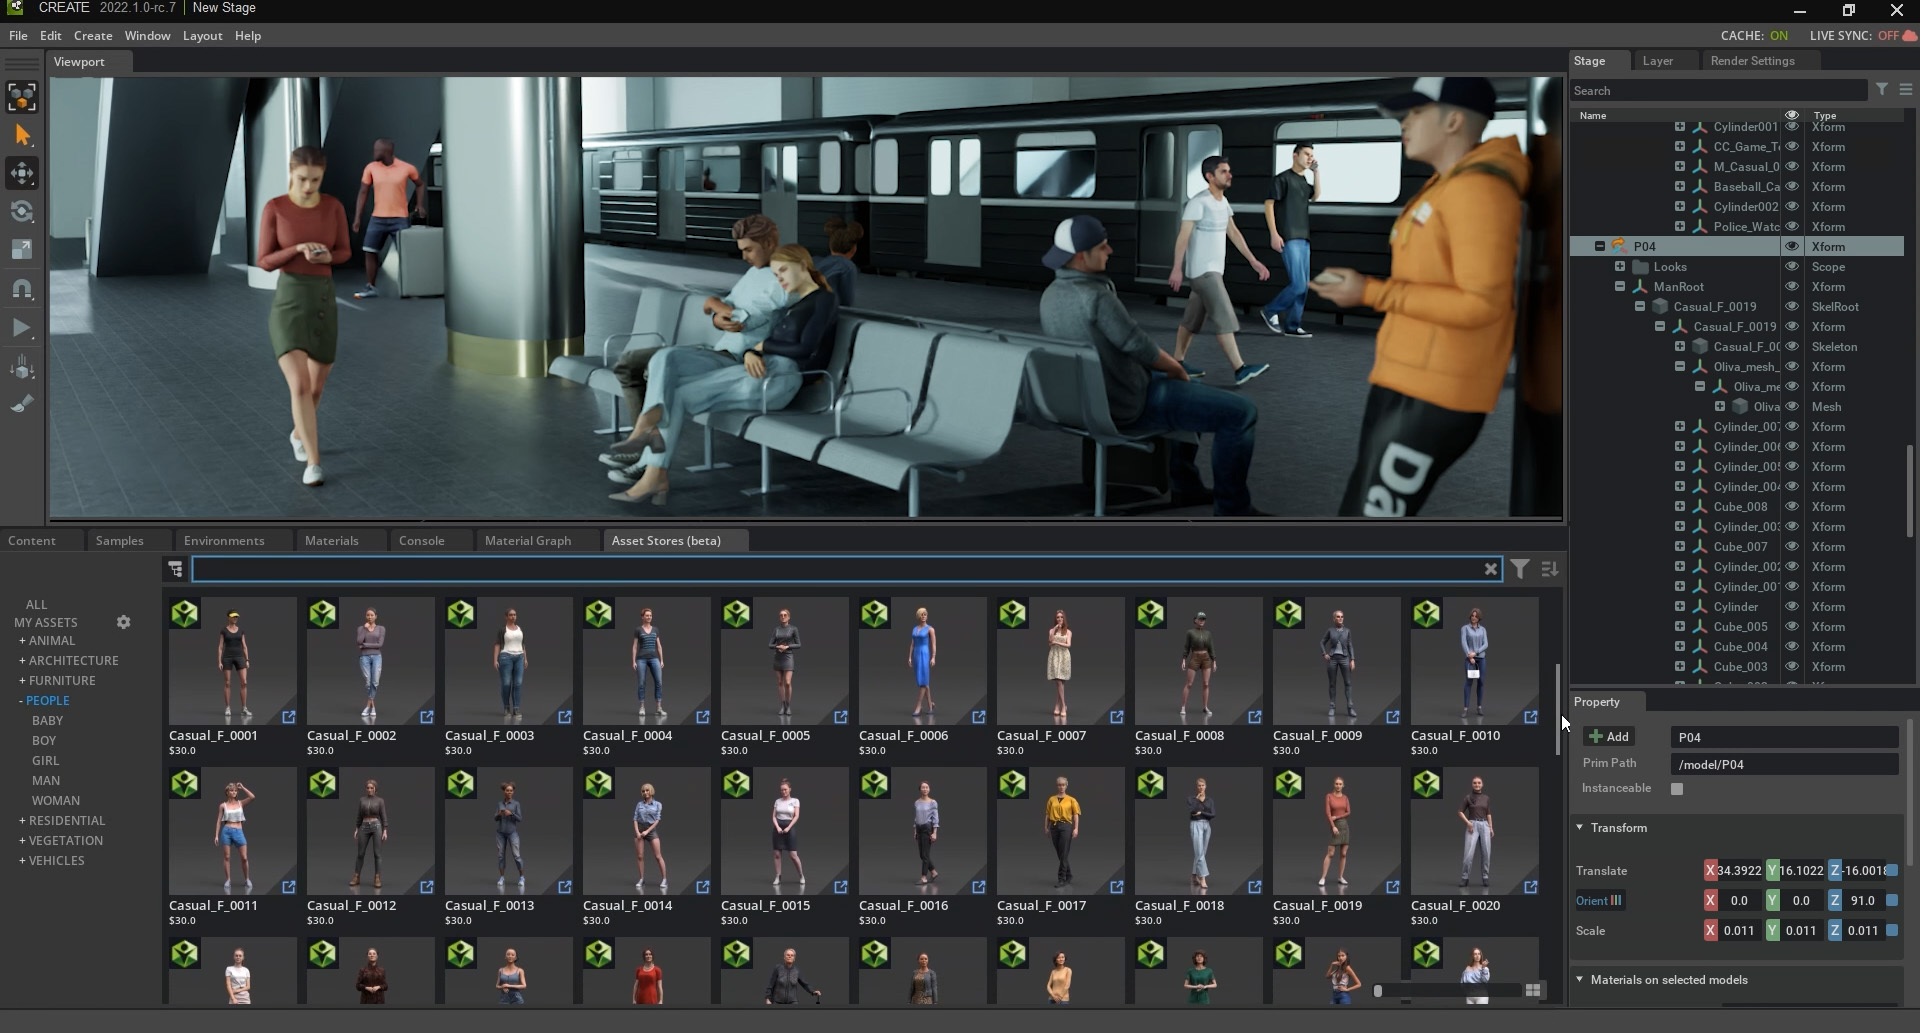
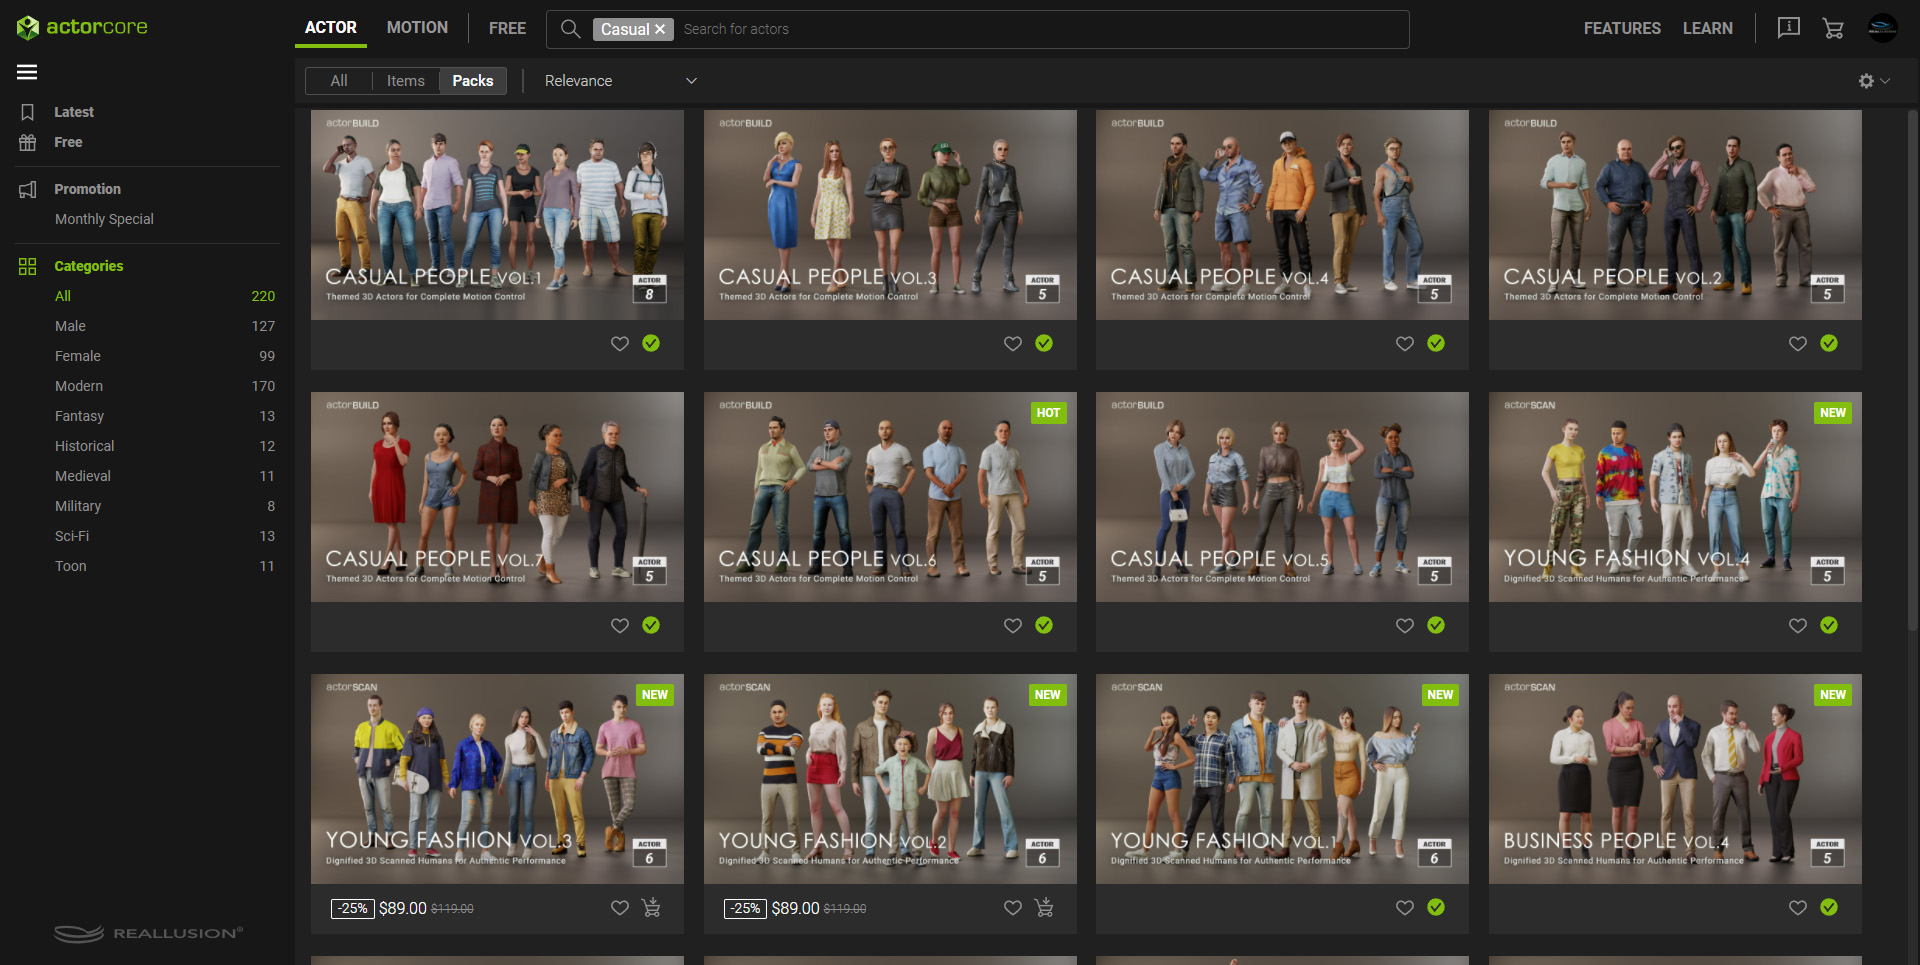
A cloud-based 3D character and mocap motion platform; ActorCore allows users to quickly search, view, and download photorealistic 3D people for crowd scene usage. ActorCore also provides thousands of AAA quality, well-themed mocap animations. Combining ActorCore and Omniverse, individuals or design teams can create a large group of 3D crowds to animate, and deploy for AEC simulations and visualizations.

Drag and drop ActorCore 3D characters and animations directly to Omniverse (Image credit: Reallusion and Bentley Systems)

Interactive Lightweight Actors for Real-Time Rendering

In contrast to commonly used 3D models with no natural movements and expressions, ActorCore’s fully-rigged characters can perform lifelike facial and talking animations suitable for different camera ranges. PBR materials are merged for the best crowd rendering performance in real-time, and the actors are fully compatible with thousands of mocap motions available in ActorCore expansive libraries.

Rigged lightweight characters for real-time rendering (Image credit: Reallusion)
A large collection of 3D people designed for business simulations (Image credit: Reallusion)

AAA Production with Seamless Motion Transitions

To meet demands from different industries, ActorCore offers professionally produced motions in well-planned themes. A specially designed motion system ensures smooth transitions between primary and secondary stance modes, offering high flexibility for professional animation production and interactive game character controls. Illustrated videos provide different usage scenarios to choose from, including individual, group, or paired motions for maximum compatibility.

Thousands of mocap animations organized with different themes.(Image credit: Reallusion)
AAA production motion capture animations in ActorCore (Image credit: Reallusion)

Simplified Workflow and Optimized Asset Management

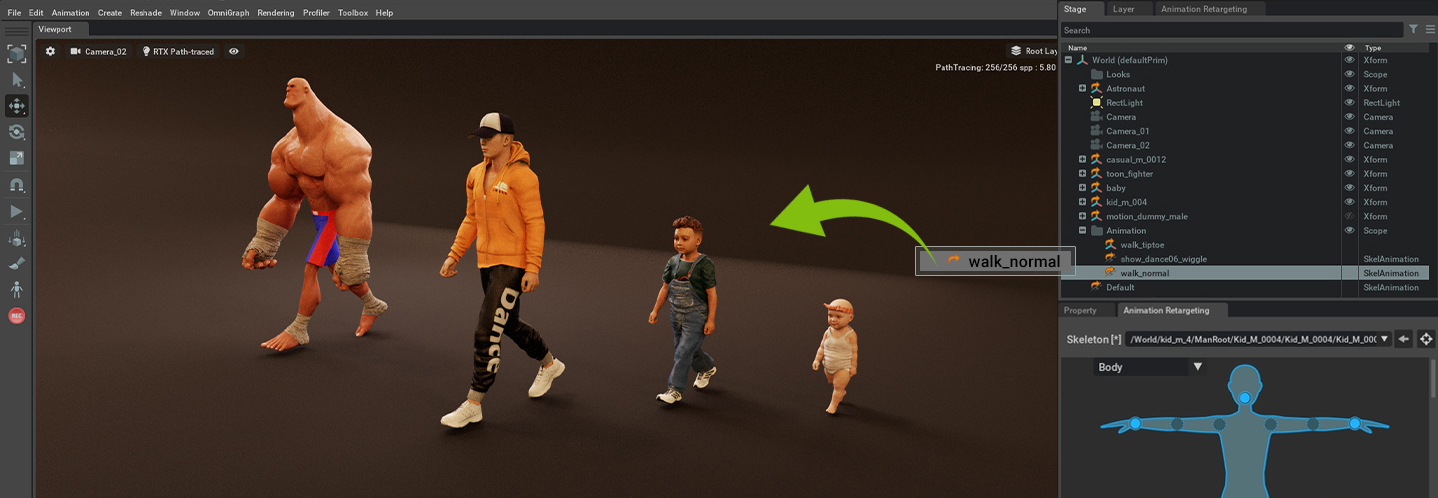
Users can directly export ActorCore’s rigged characters and motions to the USD (Universal Scene Description) format, and easily drag and drop the content to Omniverse apps to continue scene setup. With motion retargeting*, the same motion can be applied to characters with different body scales, optimizing ActorCore’s large content library and reducing effort for asset management.

*Motion retargeting will be supported by Omniverse Machinima version 2022.1.0 and after; it will also be supported by Omniverse Create. Please pay attention to NVIDIA’s official announcement.

Motion retargeting simplifies 3D animation workflow in Omniverse (Image credit: Reallusion)

Explore, Search, Interact – 3D Browser Experience

Exceptional performance on ActorCore gives users the best interactive 3D viewing experience on chosen characters and motions. Users can quickly search and explore thousands of contents through tags, categories, and keywords to find that ideal asset.

Quick search by keywords and interactive 3D preview on ActorCore (Image credit: Reallusion)

New Standard for 3D Crowd Simulation

ActorCore allows a variety of industries to access and deploy a large number of 3D people as task performers or citizens, defining the next generation of 3D character solutions for key industry simulation partners and technologies. For AEC, users can generate digital people to inhabit and interact with designs, buildings, and manufacturing sectors to simulate workforce and training.

Create industrial simulations with ActorCore in Omniverse (image credit: Reallusion, BMW Group, and NVIDIA)

Next-level Character Control with iClone

iClone’s easy facial and body controls allow full character performance with smooth bi-directional motion blending, FK/IK motion layer editing, and reach-target animation for advanced motion editing. Adjustable colors and materials allow for unlimited visual varieties while adding subtle facial performances and lifelike lip-sync animations for custom facial expressions. 

Advanced character control of ActorCore content with iClone (Image credit: Reallusion)

Free ActorCore USD Character and Motion Resource

Get a first-hand experience of ActorCore with free 3D character and motion assets. Visit

ActorCore website, or download Omniverse and access free USD sample content in Omniverse asset store.

Artificial Intelligence turns audio into realistic music performances with Character Creator

Using cutting-edge AI, Concert Creator analyzes audio recordings and turns them into hyper-realistic music performances and music lessons. The AI was trained on real professional musicians, to faithfully present accurate and human-like results.

Concert Creator uses AI and cutting-edge graphics to produce hyper-realistic music animations. Inside users find tools to customize all aspects of the AI-generated music; from camera angles, key colors, lighting effects, and more. 

The project is the brainchild of Fayez Salka; a medical doctor, software entrepreneur, 3D artist, and musician who is the co-founder of IMAGINE XR – a development studio that combines machine learning, computer vision, augmented reality, and real-time 3d graphics to deliver cutting edge experiences for handheld devices and XR headsets.

Concert Creator uses machine learning, with Character Creator avatars, to generate realistic musical performances using an audio input signal in the form of an MP3 or a MIDI.

Inside users can control different perspectives ranging from Top Camera, Chest Camera (mounted camera), Head Camera, Orbit Camera, and even a Director Camera for cinematic cuts that make it easy to use in high-quality productions.

This allows users to create everything from cinematic shorts, musical lessons, live concerts, and music animations straight from the downloadable software which you can currently use at no cost.

Follow more of Concert Creator Ai:
https://www.concertcreator.ai/

Quick & Easy Roundtrip Character Workflow with Blender & Character Creator

This article is featured on BlenderNation.

With these plugins, you can import both the texture and the mesh back to Character Creator with just one click!

INTRODUCTION

Russell Midfield is a freelance artist who enjoys making tutorials on YouTube around the 3D character development process, with a particular focus on Blender. With Reallusion’s commitment to developing their Blender Character Pipeline and the introduction of the Blender Auto Setup addon with CC3Python plugin, Russell decided to see how one may create their own character quickly using these very tools. Do the plugins work as advertised? Is it really that quick & easy? What would it be like to create your own character with this workflow? Well, there was only one way to find out. 

For this character, Russell makes use of a Character Creator / Blender “roundtrip” workflow, through the use of the Blender Auto Setup addon and CC3 Python plugin as touched upon above. The workflow would be as follows:

1. Start with a model generated in Character Creator 3 (CC3).

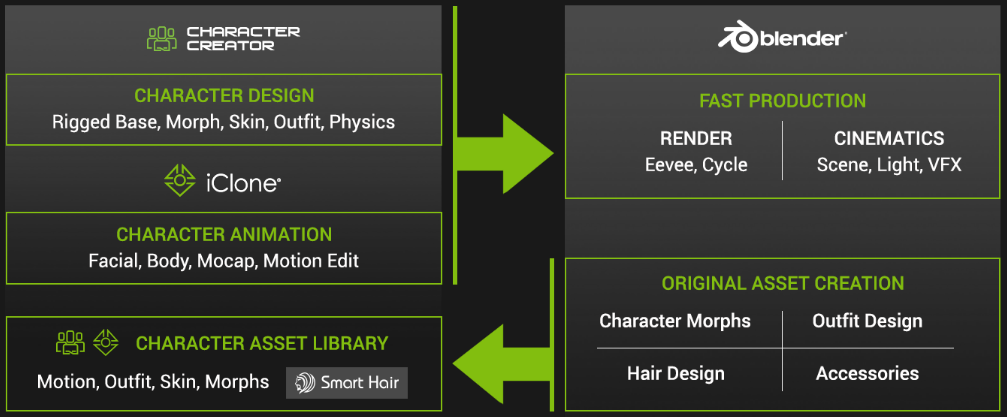
2. Import the CC3 model into Blender through the use of the Blender Auto Setup addon, to make some customization.

3. Import back into CC3 through the use of the CC3 Python plugin, for rigging and weighting. 

If one wished to add animation, a simple transfer to Character Creator’s companion software, iClone, is just one click away. 

Complementary Workflow between Blender, iClone and Character Creator

STEP #1: GENERATE A MODEL IN CHARACTER CREATOR 3

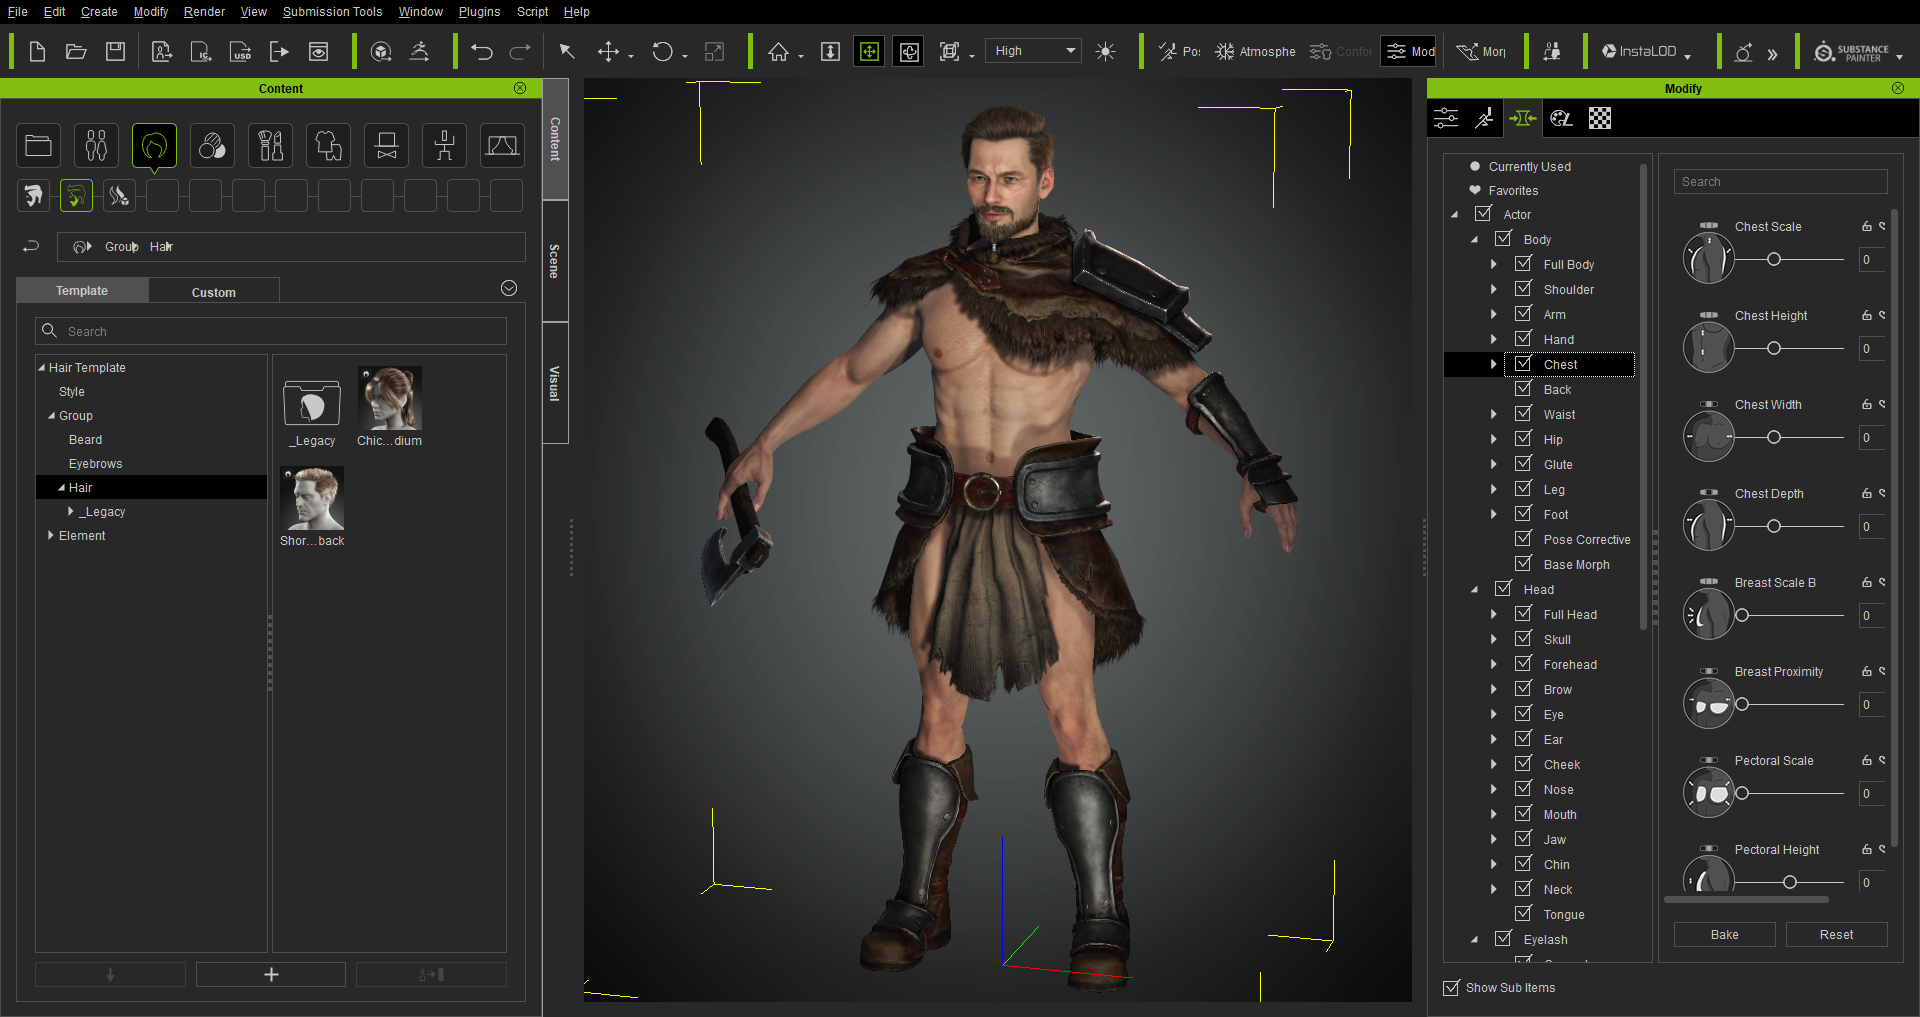
The first step of the process would be to generate a character model in Character Creator 3. There are a number of different options available in CC3 that make this task rather simple: 

• Morph sliders allow one to modify the size, shape, and rotation of every part of the body;

• Content galleries allow one to quickly add basic clothing, hair, armor, and accessories; and

• The SkinGen plugin allows one to easily add micro-details such as wrinkles, veins, moles, and pores. 

CC3 comes equipped with several tools to make Blender character creation quick and easy

Once the character model was complete, it was then time to export to FBX for further customization in Blender. CC3 has advanced FBX export options such as software presets, mesh and motion, texture embedding, and texture baking that make this transition easier. 

Important note! Ensure that you select the Mesh Only option at this stage of the process, and not the Mesh+Motion option. This ensures that the correct FBX key information is brought into Blender and is paramount to this roundtrip workflow working as intended!

Advanced FBX Export options available in CC3

STEP #2: CUSTOMIZE THE MODEL IN BLENDER

Blender comes fitted with a number of tools that allow the user to sculpt, model, and texture paint. It’s these tools that one can employ to further customize a model and add their own unique art style to a piece. 

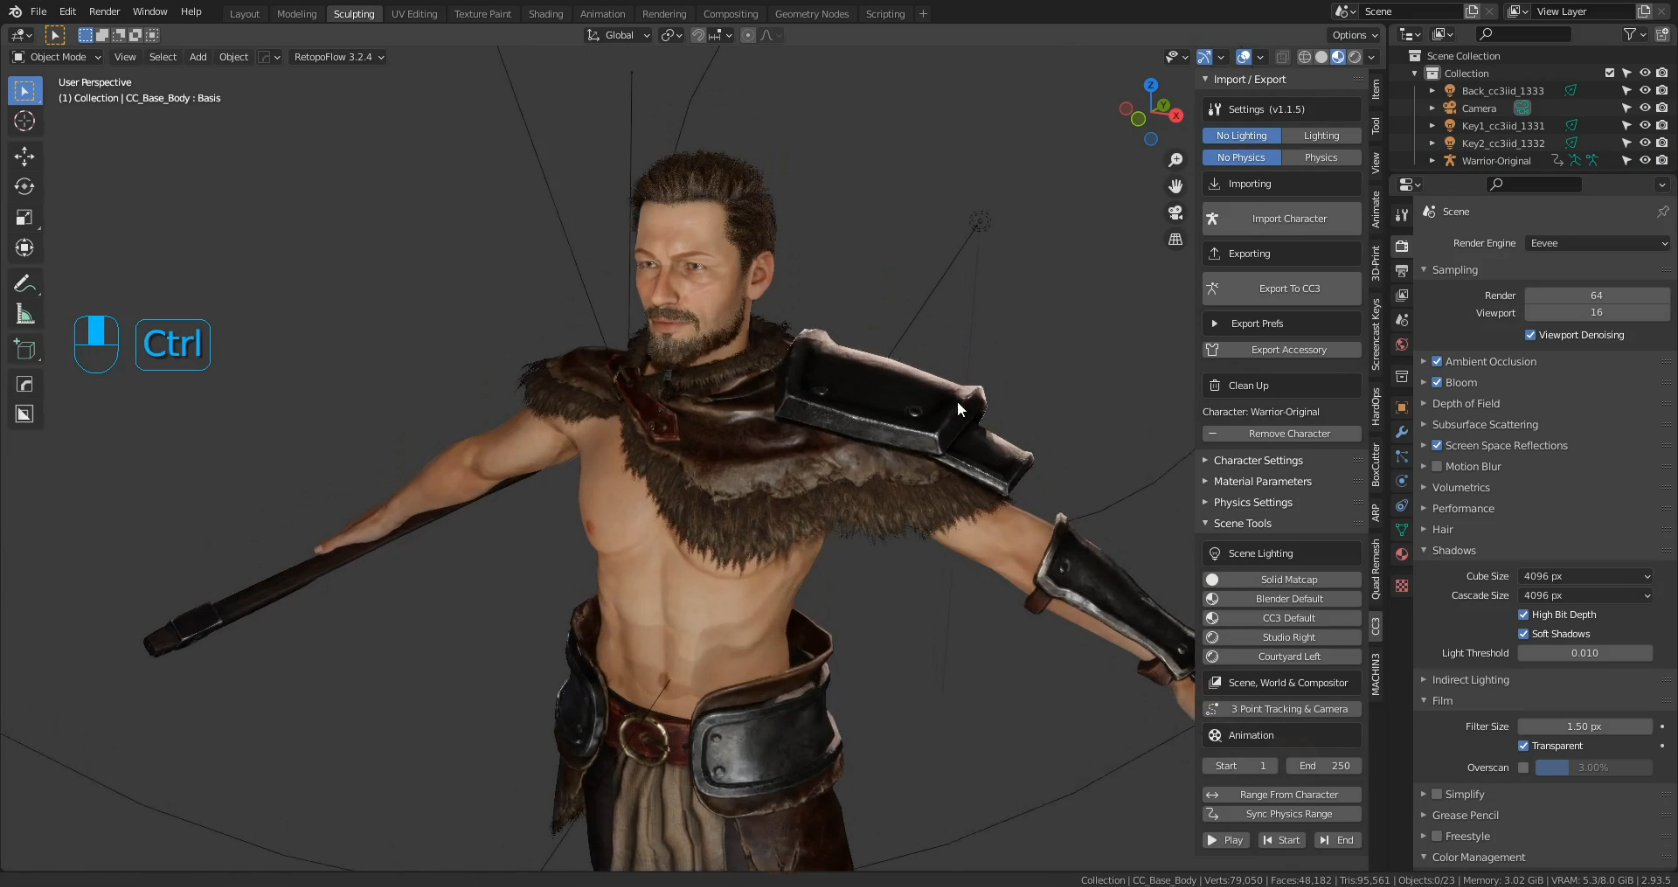
With the newly created FBX, the first plug-in of the round-trip workflow could be put to the test, the Blender Auto Setup addon. To use the addon it is quite easy, after you have installed the plugin, just press “N” on your keyboard for the Side Toolbar in the 3D viewport, and you will see a tab called “CC3”. Open it up and there will be a button labeled “Import Character”. Select your FBX file and the rest is taken care of. 

If you would like more information on the installation method you can check out the Reallusion Forum Thread (by Victor.Soupday) or my video at the 4:56 timestamp.

Blender Auto Setup Addon in Blender 3D Viewport

Below you can see the difference between making use of the Blender Auto Setup addon and the default FBX import option in Blender’s File menu. The materials compile perfectly with the addon whereas some adjustments would be required under the default method. Both models are under the same lighting conditions.

Comparison of Auto Setup addon and regular FBX import

With the model successfully imported into Blender, now it was time to add some customization. Russell sculpted in some more stylized shapes around the face, hands, and feet to make the character align more with his own art style.

Blender’s sculpting tools allow you to add your own unique art style

Once the sculpting was done, some adjustments to the clothing and armor were required. This was done through a mixture of modeling and sculpting tools in Blender.

Adjusting clothing through the use of Blender’s modeling and sculpting tools

Russell also made use of the existing topology of the clothing and armor to make his own, custom armor by duplicating select portions and moving them around. This is a quick and easy approach to making your own Blender character creation with the help of CC3. Using an approach like this could allow you to make several different iterations of a soldier very quickly for a large army scene for example.

Duplicating existing topology allows you to quickly build custom clothing and armor configurations

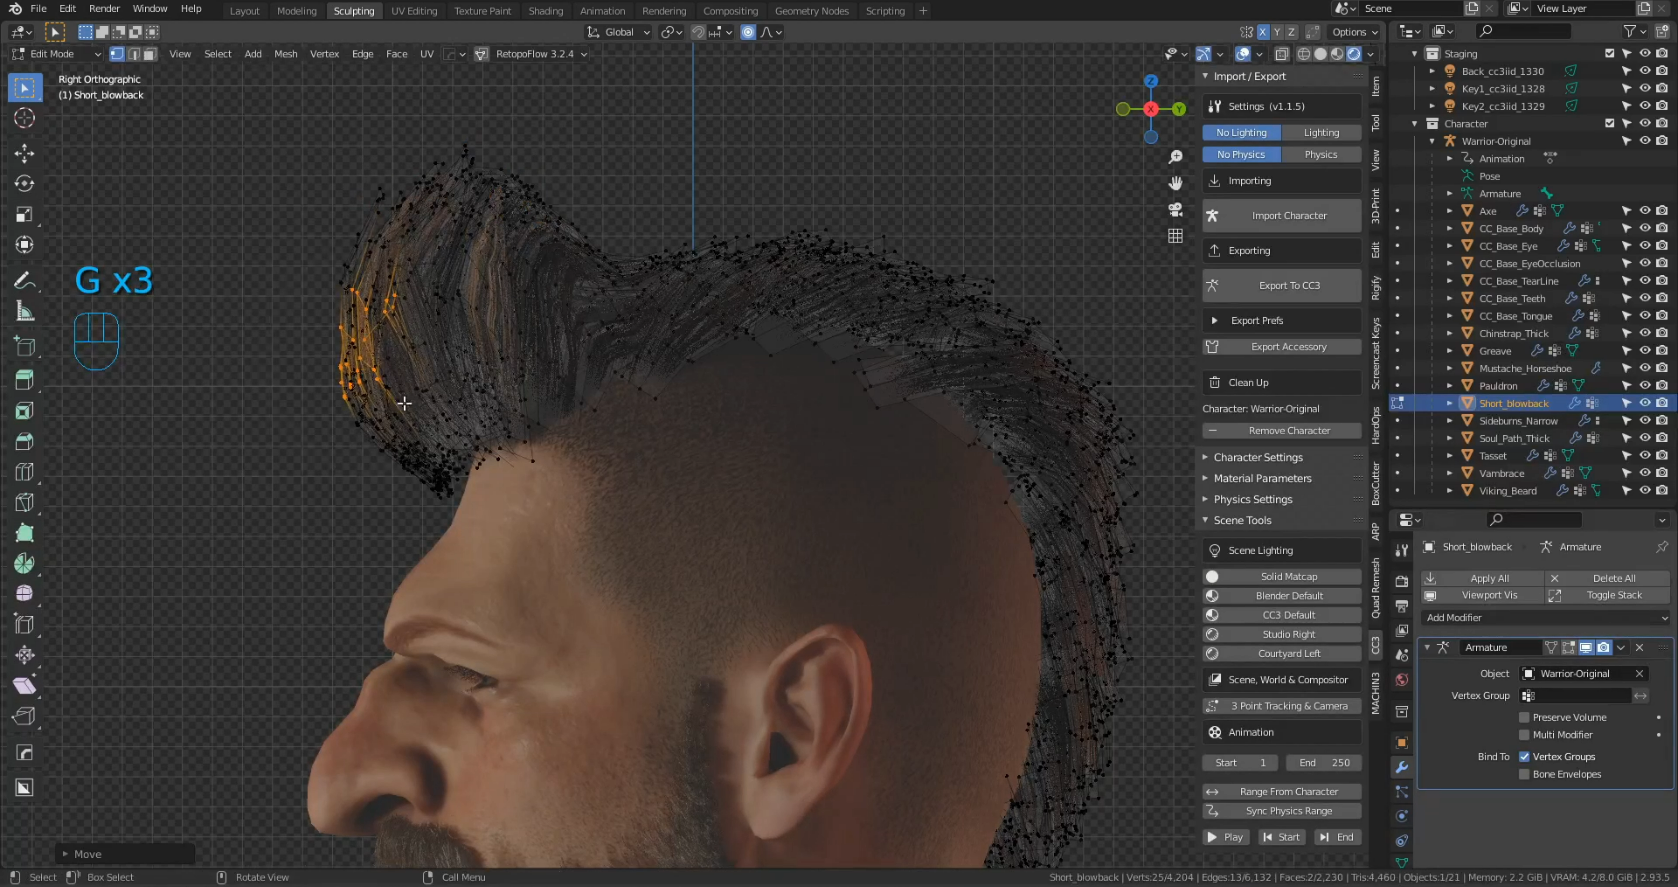
CC3 uses a hair card system, which means that in Blender, Russell was able to shape his own beard and hairstyles by duplicating and transforming the hair cards.

Create your own custom hair styles in Blender using CC3’s hair card system 

Utilizing Blender’s texture painting tools, Russell was able to add some custom skin textures and designs.

Create your own character hairstyles in Blender using CC3’s hair card system 

With all of the customizations complete, it was then time to export back out to FBX again. With the Blender Auto Setup addon it is incredibly easy, just select all the components of your model and go over to your Blender Auto Setup tab on the right, and click Export to CC3.

Easy one-click export to FBX with the Blender Auto Setup addon

STEP #3: RIG & WEIGHT PAINT IN CHARACTER CREATOR 3

And so to complete the roundtrip, we are back in CC3. It was now time to call into action the second plugin, the CC3 Python Plugin. Similar to the Blender Auto Setup addon, this one is incredibly easy to use, once installed just go up to your Plugins menu in CC3 and select Blender Auto Setup, Import from Blender, and select your FBX. The rest is taken care of automatically. All of the materials are automatically configured for you with no extra work required.

Easy one-click FBX import into CC3 from Blender with the CC3 Python Plugin

Below is a comparison between the CC3 Python Plugin and the default FBX import option through CC3’s File menu. The materials compile perfectly with the addon whereas none of the materials compile properly under the default method, manual adjustment is required. Again, both models are under the same lighting conditions.

Comparison between default FBX import and CC3 Python Plugin

Just a note, if you have changed the body of your character significantly, you can adjust the bones to match the body better by going up to the Modify menu here, Adjust Bones, and Auto-Position. This makes apply skin weights to your customized model more accurate, which in turn makes animation and posing much easier.

Adjust the bones of the CC3 armature quickly and easily with the Auto-Position feature 

Now if one wished, you could adjust skin weights for posing here in CC3. Or, you could also transfer to CC3’s companion software, iClone, for animation and rendering.

Pose your character in CC3 quickly using the poses included in the Content Gallery

Animate your character in CC3’s companion software, iClone

The verdict is in: the Blender Auto Setup addon and CC3 Python plugin work perfectly and make the integration of Blender and Character Creator quick and seamless!

Stay tuned because Reallusion will be releasing more Work-In-Progress videos for their new software, Character Creator 4 & iClone 8 from January. Check out Reallusion’s website, YouTube channel, and other social media for all the latest news! Expect much more to come this year in 2022 as well as Reallusion is really making strides to connect with the Blender community, joining the Blender Development Fund and becoming a Corporate Silver Partner in January! Some links below for more information :
• Blender Auto Setup Addon: https://bit.ly/3K6sORZ

• CC3 Python plugin: https://github.com/soupday/CC3-Blender-Tools-Plugin 

• Character Creator 4: https://bit.ly/344MWV5

• Reallusion: https://bit.ly/3C4iE1g

Character Creator 4 – Elevating Digital Humans

Work in Progress: Part Two 

In WIP I, we demonstrated the huge potential future of inclusive 3D character creation by unveiling Character Creator 4’s capability to enliven any character and animate any rig.

In WIP II, we’d like to emphasize the freedom of Scalable Expression Editing with the help of 60 to 140 morphs. One such feature is to offer 140 morphs to help create convincing details on digital humans in real time. Meanwhile, providing 60 morphs for users to easily adapt mo-cap data with optimal files, making Character Creator 4 a complete pipeline for major 3D platforms.

With the real-time Smart Skin Shader, the skin regions of characters can be identified automatically for quick color adjustment. Not only can skin color be adapted to avatars of any ethnicity with ease, but also high-fidelity digital humans can be efficiently created from scratch to make your own characters.

Scalable Expression Editing : 60 to 140 Morphs

In Character Creator 4, Standard level (60+) and Extended level (140+) are provided to help users edit expressions with adjustable morphs. The 60+ morphs in the Standard level are compatible with major 3D software supporting ARKit, while the 140+ morphs enable fine control over the nuances of the character’s expressions.

• Standard level: 60+ morphs

Covering 11 main facial features for the 3d head in the Standard level : Brow, Eye Blink, Eyelid, Eye Look, Nose, Cheek, Mouth Base, Mouth Blend, Jaw, Tongue, and Head.

• Extended level: 140+ morphs

Other than the additional sliders added to the 11 features of the Standard level, the Extended level has 4 extra features (Eye Lash, Eye Ball (pupil), Neck and Ear) for adding nuances.

• Flexibly upgrade to Extended level or downgrade to Standard level with a single click.

Smart Skin Shader: Fast Color Alteration 

The world comprises a variety of ethnic groups, and we believe that should be represented in the digital world as well. To faithfully reflect the diversity of human beings, Character Creator 4 provides four color bases: black, red, yellow, and white to speed up the process of creating different ethnicity at the beginning.

Users can quickly switch between different color bases to customize their own characters by adjusting luminosity, or blending with other colors of the skin. In addition, by directly choosing the desired colors, users can enjoy creating new skin colors for the characters they dream up – recreating the Hulk or The Mask, for example.

Non-skin areas will be automatically detected and excluded while adjusting the skin tone.

Smart Skin Shader: Solid Skin

By adjusting the Blend Strength slider, users can change skin colors while maintaining the original details of the characters. One can optimize the skin textures either by altering the Color Tones or importing different Blendmaps. Furthermore, thanks to the real-time skin shader design, users can instantly change the character’s skin tone across four hi-res skin materials (face, body, hands, and legs) all at once.

Smart Skin Shader: Skin Optimization

(for Headshot plugin)

For Headshot plugin users, the Solid Skin feature can easily de-noise the excessive details, and neutralize the deviation of the front and the side textures to derive the most life-like skin. In effect, helping to create more natural 3D heads with high fidelity and refined appearances that can be appreciated on close-up and from afar.

Bake shader color to texture

Once users finish their customized design, they can easily bake the shader color to the skin texture by clicking the Bake Skin Color to Diffuse Map button, which is exportable and ready for Live Link.

You can check the 3D Character Creation & Animation webpage for more information about the free upgrade offer, feature comparison, and FAQs. If you’re interested in the Character Creator 4 motto of “Enlivening any Character” and “Animating any Rig”, you can refer to the article ‘Working in Progress: Part One‘. For more technical details, please have a look at our latest New Features Introduction, which will be updated continuously in the coming months.

If you have further questions, please contact our Support Team, or join the discussion at Reallusion Forum.

New York Times bestselling author and Hugo Award winner Neal Stephenson becomes a Metaverse Avatar with Reallusion at Korea’s SBS D Forum

Discover how Reallusion brought the author of Snow Crash to the forum as a 3D character.

(Image credit: SBS / Reallusion)

The Seoul Broadcasting System’s SBS D Forum is one of South Korea’s most important annual forums for discussions on the future of tech. In 2021 it had a special guest speaker: Neal Stephenson, the bestselling author of speculative fiction such as Snow Crash and creator of the terms ‘metaverse,’ and ‘avatar’. Neal would be appearing remotely for his talk and video interview for the D forum from his hotel in San Francisco, but the team at SBS wanted to do something a little bit more special. 

Early in October, producer Jun Park contacted the 2D and 3D character creation and animation software developer Reallusion to discuss creating a special experience for the guest speaker. Park wanted to create a metaverse avatar of Neal to deliver the first segment of his appearance.  The D Forum was to take place barely a month after on November 18. Neal was put in touch with Reallusion and the work began.

The work to create the 3D avatar animation and voice began with Neal providing video of him making his introduction so that his voice and facial gestures could be used as a reference to create a stylized character and animation.  The performance was captured with Xsens Awinda, iPhone for Face with iCloneAccuLips lip-sync animation, and iClone Motion Live. With that material banked, Reallusion took care of the character design, teaming up with Actor Capture for the motion capture and character animation. 

Neal Stephenson’s novel Snow Crash first introduced the concept of Metaverse and 3D Avatar in 1992. (Image credit: Random House)

The metaverse avatars were made with Character Creator and the character animations were made with iClone. James Martin, Max Thomas, and Joel Mack from Actor Capture took the characters and generated the audio, lip-sync animation, and mo-cap for the final performance. Epic Games generated the environments and surrounded Neal’s 3D avatar and the stage with virtual world landscapes for a unique experience and a fitting tribute to Stephenson’s work and future scapes.

JuJun Park, Chong AE Lee and Neal Stephenson (Image credit: SBS / Reallusion)

“When Neal Stephenson’ took the stage as a digital human it was so incredible, obviously a big moment for the broadcasting industry and SBS D Forum.”

Jun Park | SBS News

John Martin, vice president at Reallusion, said: “Neal’s cooperation on the project brought a real-world literary hero into our work and we are honored and grateful to partner with SBS and with such a visionary like Mr. Stephenson.”

You can see a full recording of Stephenson’s appearance at the SBS D Forum on YouTube.