首頁

AI Studio Storytellers: Exploring Dimensions from iClone to Multi-Style AI Render

TL;DR:

  • iClone 8 and AI Studio combine for a powerful 3D-guided AI video generation pipeline, ensuring consistent characters and animations across diverse artistic styles.
  • Award-winning animator Benjamin Sokomba Dazhi (Benny Dee) demonstrates how to leverage iClone’s precise scene and camera control to prevent AI hallucinations and maintain IP.
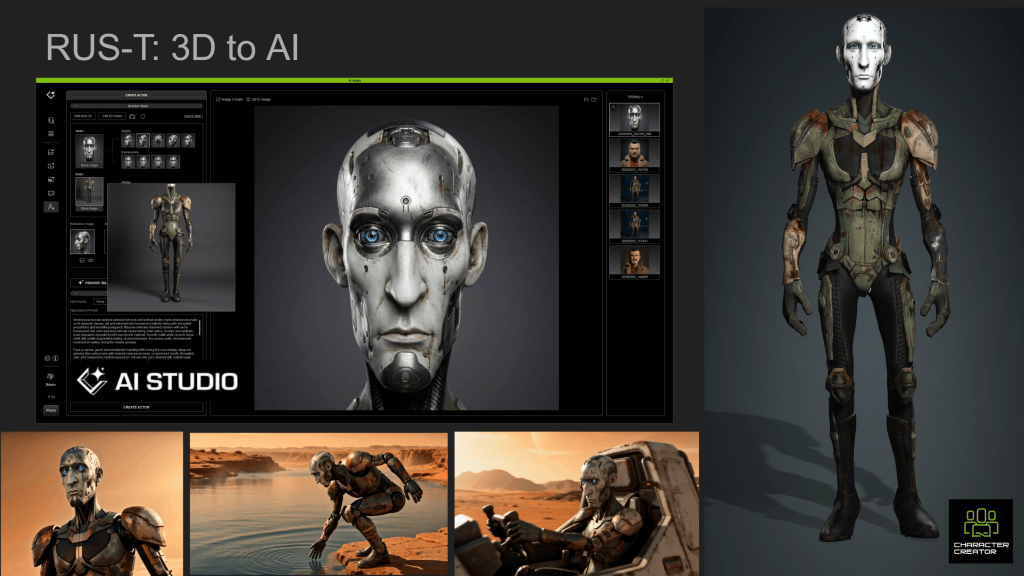
  • The workflow involves preparing characters in Character Creator 5, animating in iClone 8, then using AI Studio’s “3D To Image” and “3D To Video” functions for multi-style rendering.
  • Users gain full creative control and IP ownership over their AI-generated content, crucial for filmmakers, marketing agencies, and game developers.

This AI Studio Storytellers article by Benjamin Sokomba Dazhi (Benny Dee), an award-winning Nigerian animator, details a cutting-edge workflow using iClone 8 and AI Studio to generate diverse AI video render styles from precise 3D animation. It addresses the critical need for consistency, control, and IP ownership in AI-generated content, enabling 3D filmmakers, game developers, and marketing agencies to achieve stunning visual variety without sacrificing creative integrity.

“Reallusion’s AI Studio expands your creativity while preserving asset consistency and IP ownership. It combines iClone, Character Creator, and AI-generated video without sacrificing control over your 3D characters, scenes, animation, or lighting.”

BENJAMIN SOKOMBA DAZHIRenowned 3D Animator, Director, Musician, Cinematographer
AI Studio Storytellers: Exploring Dimensions from iClone to Multi-Style AI Render

What is 3D-Guided AI Video Generation?

3D-guided AI video generation represents a paradigm shift in digital content creation, offering artists unparalleled control over AI-driven outputs. This approach leverages established 3D animation software like Reallusion’s iClone 8, Reallusion’s flagship real-time animation suite, to serve as the foundational blueprint for AI models.

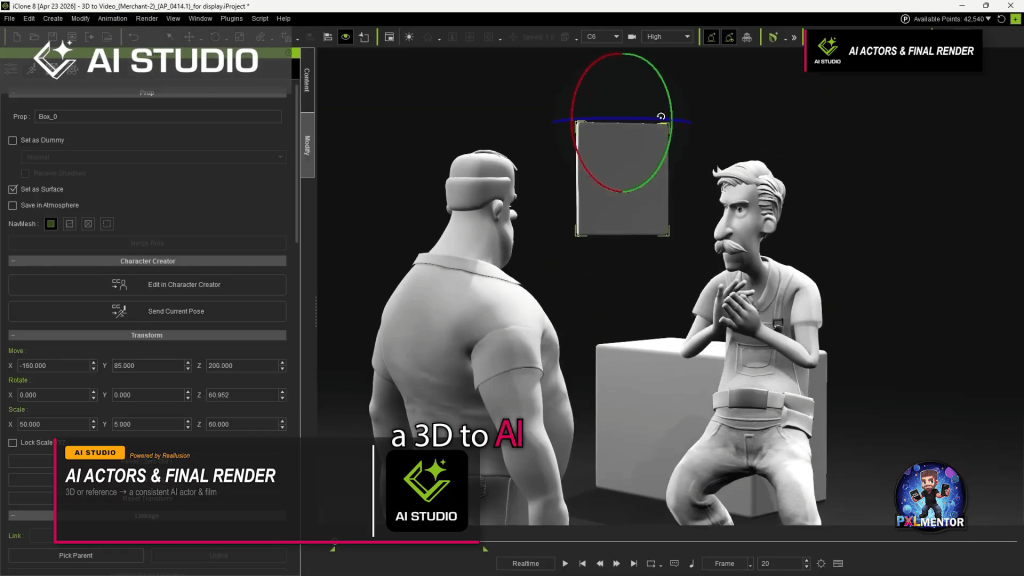
By providing a fully animated 3D scene – complete with characters, environments, lighting, and camera movements, users dictate the precise motion and composition, which AI Studio then interprets and renders in various artistic styles. This method fundamentally solves the common challenges of AI video generation, such as maintaining character consistency across frames and preventing visual hallucinations, by grounding the AI in accurate 3D data.

Bridging iClone 8 and AI Studio for Consistent Creativity

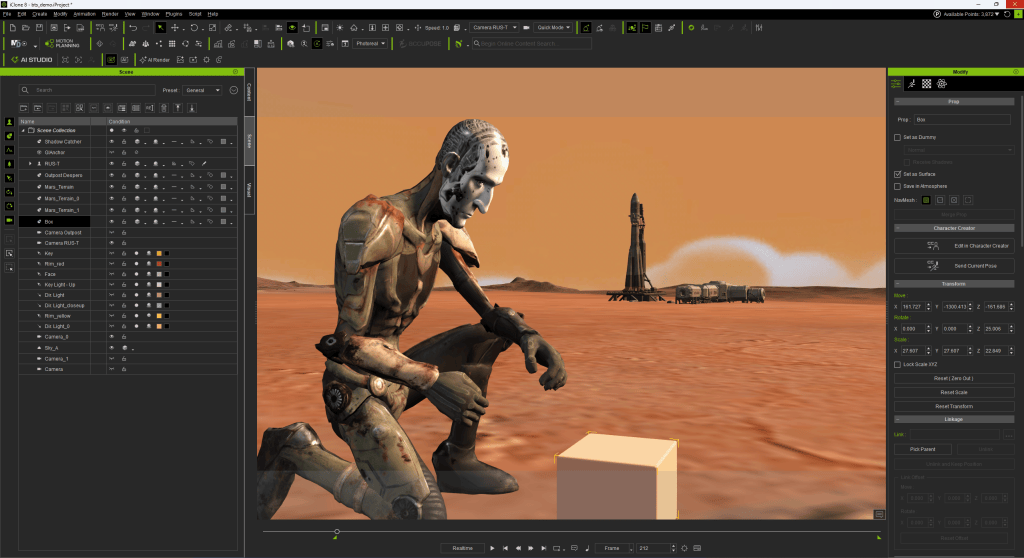
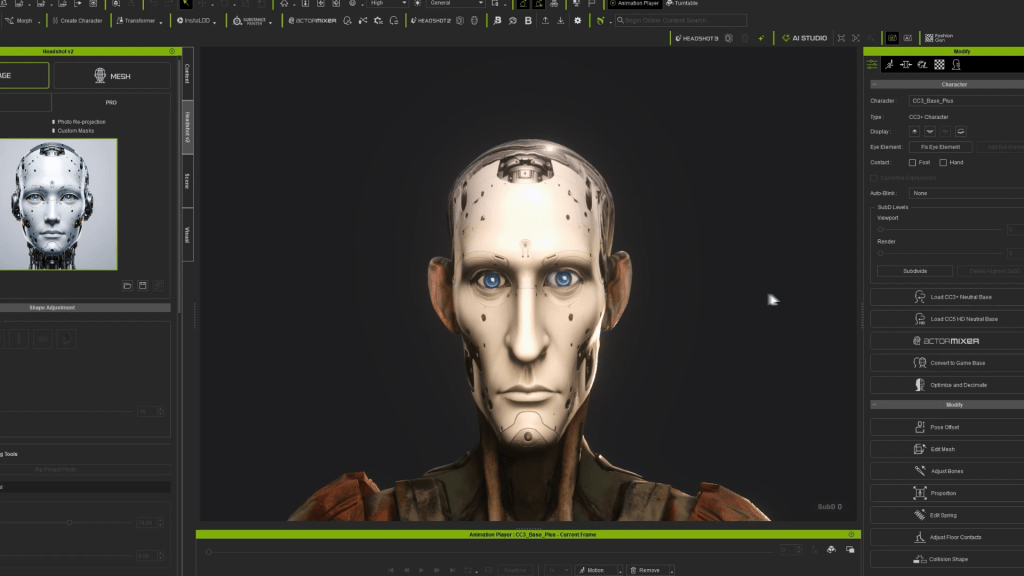
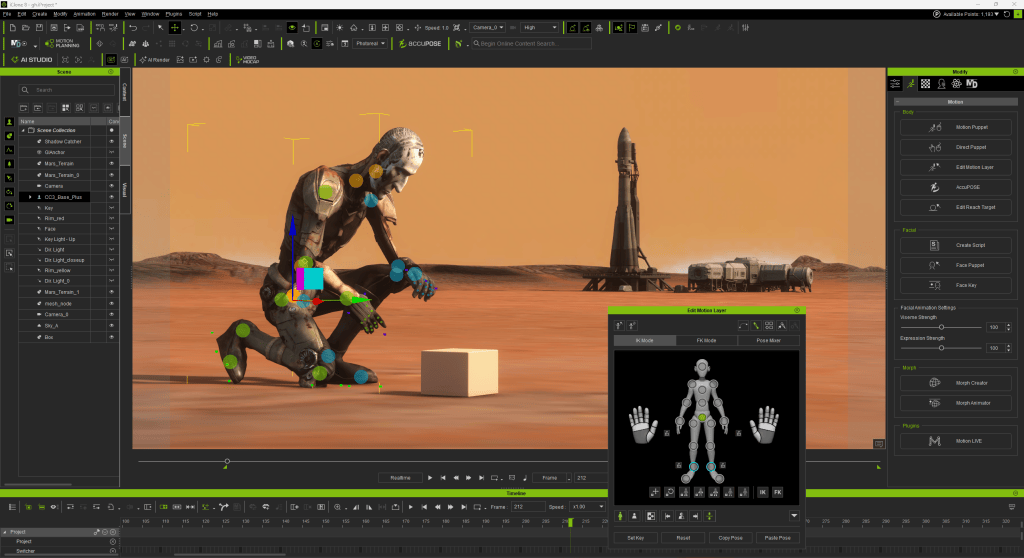
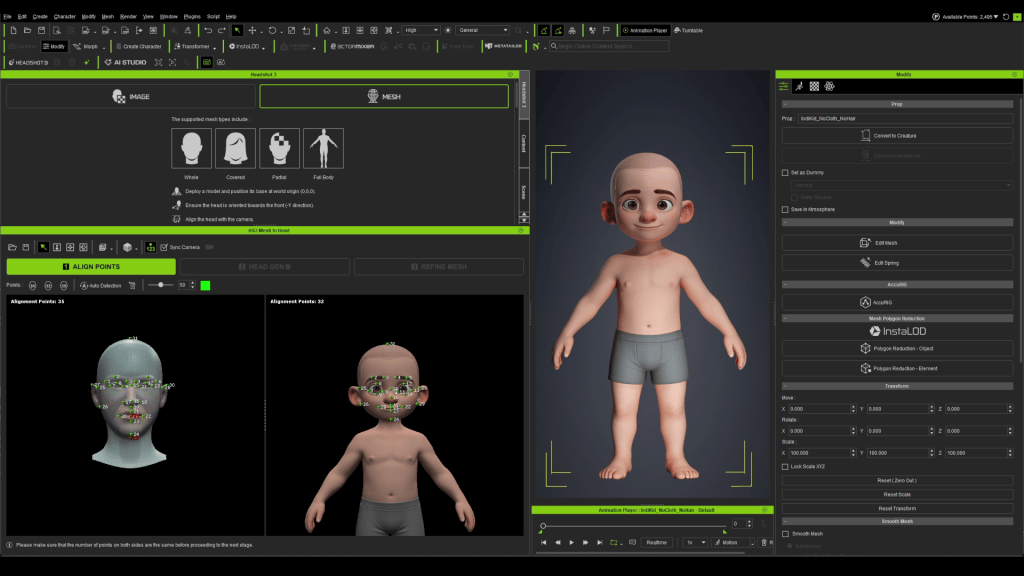
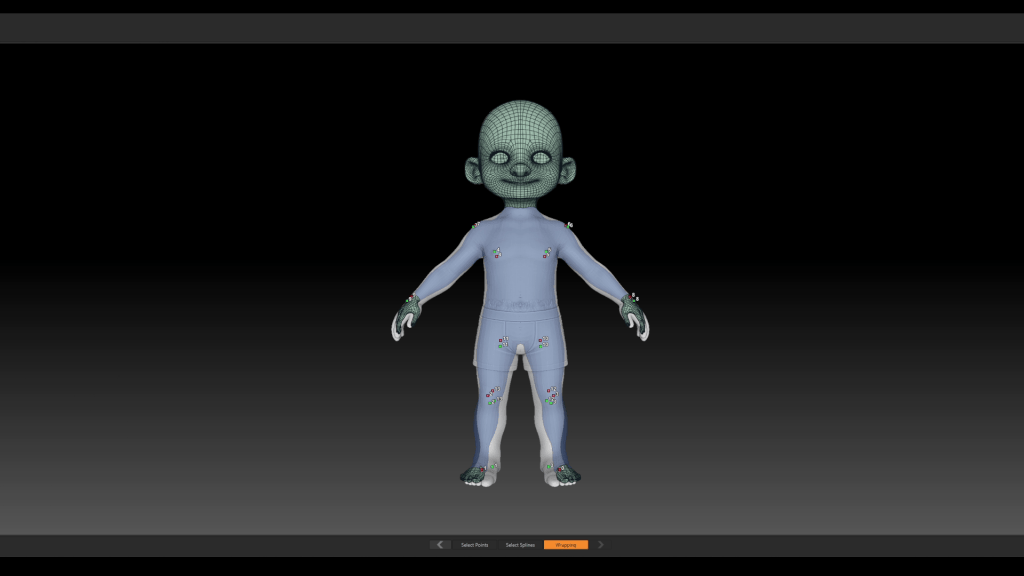
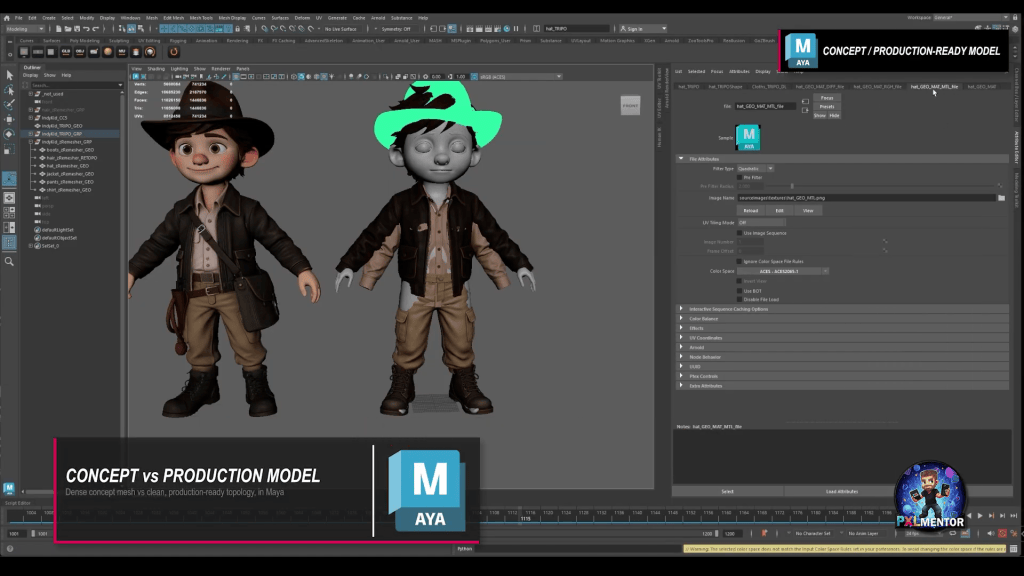
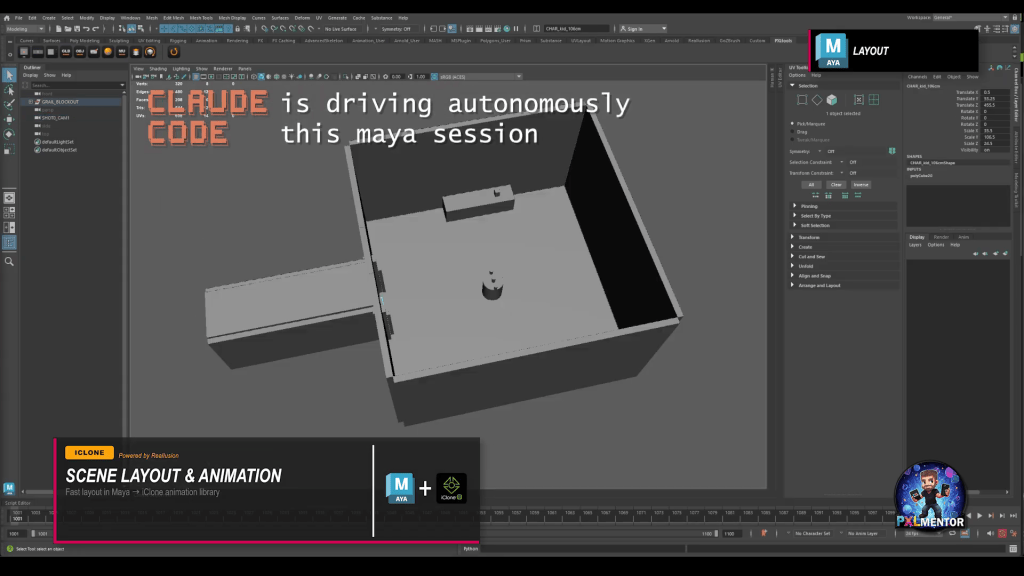
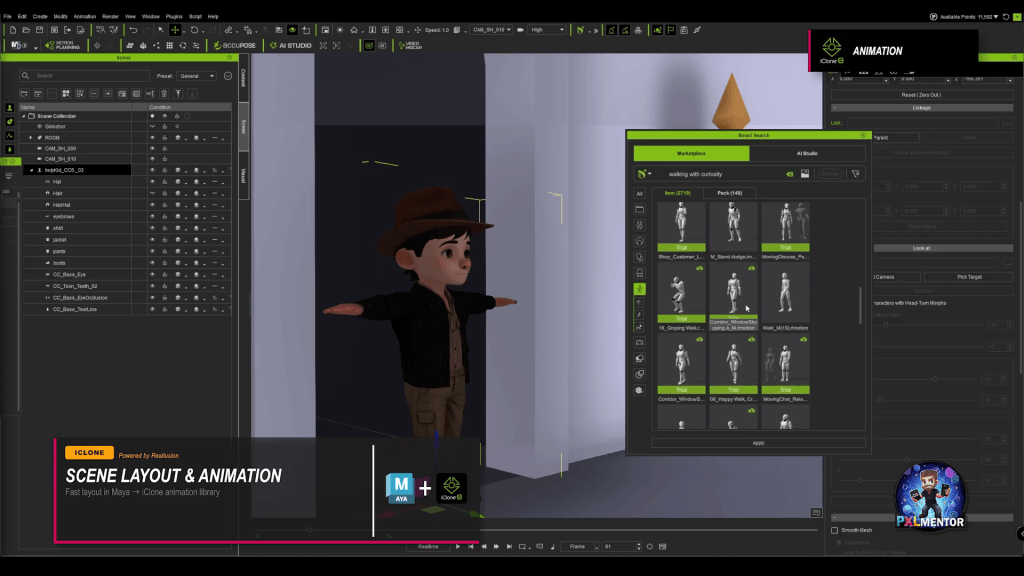
The workflow begins in the familiar environment of iClone 8 and Character Creator 5, Reallusion’s comprehensive character design tool. Artists first create or import their 3D characters, often leveraging tools like the Headshot 3 plugin for rapid, photorealistic head generation. The animated character and scene are meticulously prepared in iClone, with careful attention to lighting and camera work.

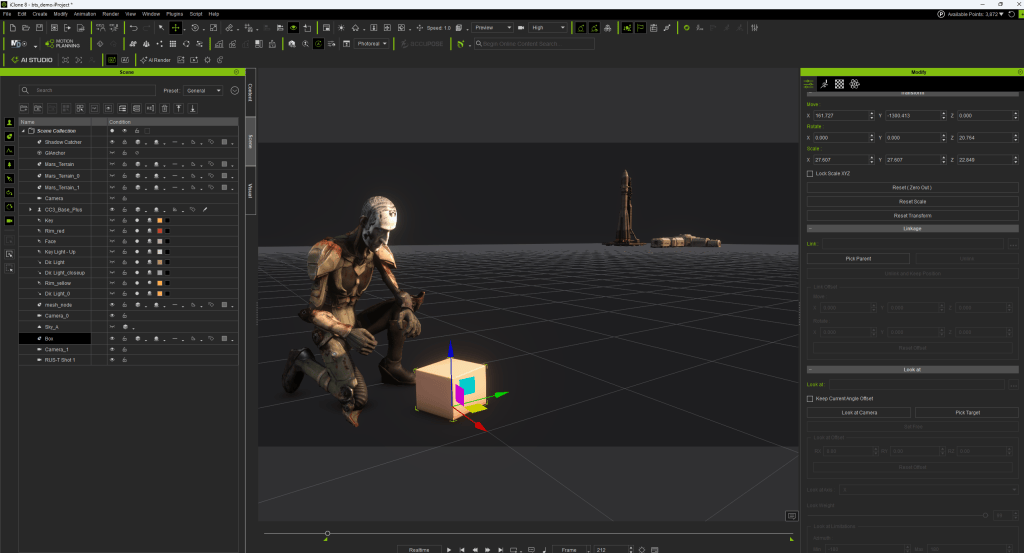
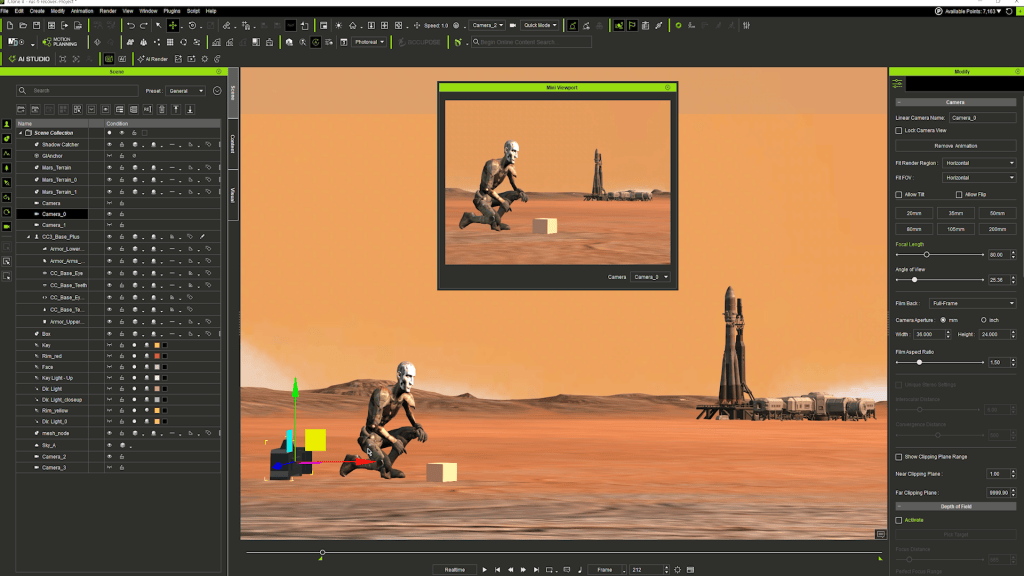
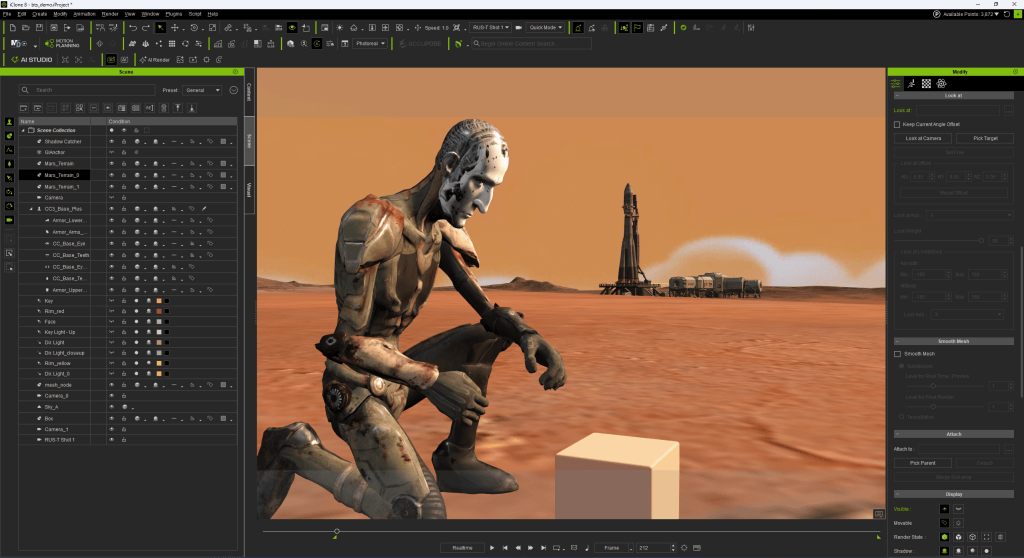
According to Benjamin Sokomba Dazhi, “The first thing I did was to animate my Character Creator generated avatar in iClone and prepare my scene in iClone.” This initial preparation includes setting up the scene, lights (Benny Dee often uses simple two-color lighting like red and blue for cinematic effect), and intricate camera movements. Crucially, the iClone PopCornFX plugin can be used for dynamic particle effects, adding another layer of visual complexity to the 3D guidance.

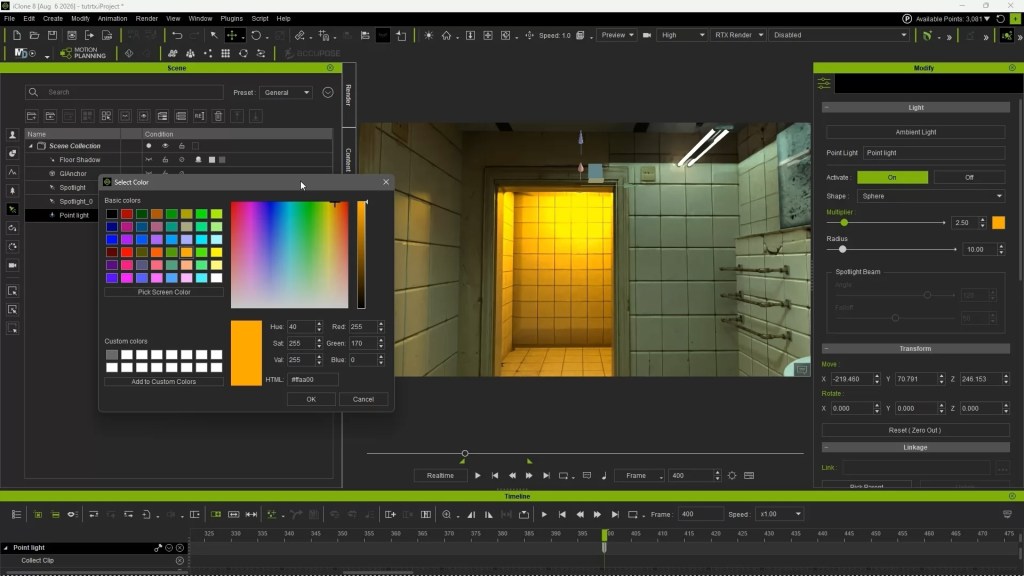
This initial iClone scene preparation includes setting up the scene, lights (Benny Dee often uses simple two-color lighting like red and blue for cinematic effect)

Voiceovers can be generated using iClone’s text-to-speech combined with external AI tools like ElevenLabs, then perfectly lip-synced to the character using iClone AccuLIPS, ensuring narrative cohesion. This comprehensive 3D data then becomes the robust input for AI Studio.

An AI-powered and automatically generated Lip-sync animation brings a smoother and more efficient way to animate and edit facial expressions. AccuLIPS detects and extracts text and viseme from audio, or imports a prepared script for precise lipsyncing. Create natural speak with the co-articulation design, and further fine-tune every word’s visemes and strength level. AccuLIPS contains an English dictionary with 200,000 default words, that are easily customized by adding new words, or changing others.
The iClone AccuLIPS system can automatically generate accurate text data, and correct viseme timing from an imported voice.

BENJAMIN SOKOMBA DAZHIRenowned 3D Animator, Director, Musician, Cinematographer

Benjamin Sokomba Dazhi, widely known as Benny Dee, is an award-winning Nigerian animator, film producer, and creative storyteller renowned for his distinctive visual style and technical prowess. Hailing from Niger State, Benny Dee’s career bridges animation, filmmaking, music, and emerging technologies, establishing him as one of Africa’s leading digital artists. His collaboration with Cartoon Network for the CN Dance Challenge showcased his ability to blend vibrant African culture with energetic animation on a global stage.

Benny Dee is an internationally respected expert in Reallusion’s iClone and Character Creator ecosystem, particularly noted for his mastery of real-time lighting, cinematic rendering, and virtual production techniques. He also leverages NVIDIA Omniverse for advanced rendering and collaborative workflows, pushing the boundaries of digital filmmaking. His methodology for integrating iClone’s precise 3D guidance with AI Studio exemplifies his innovative approach to animation and storytelling, ensuring consistent, high-quality results across diverse AI render styles.

Benny Dee’s Multi-Dimensional AI Workflow

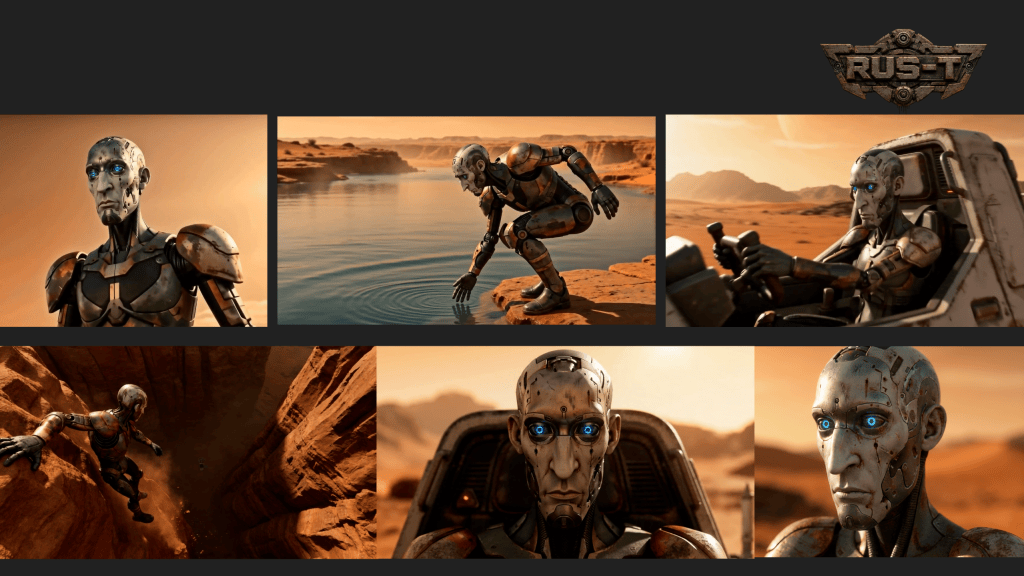
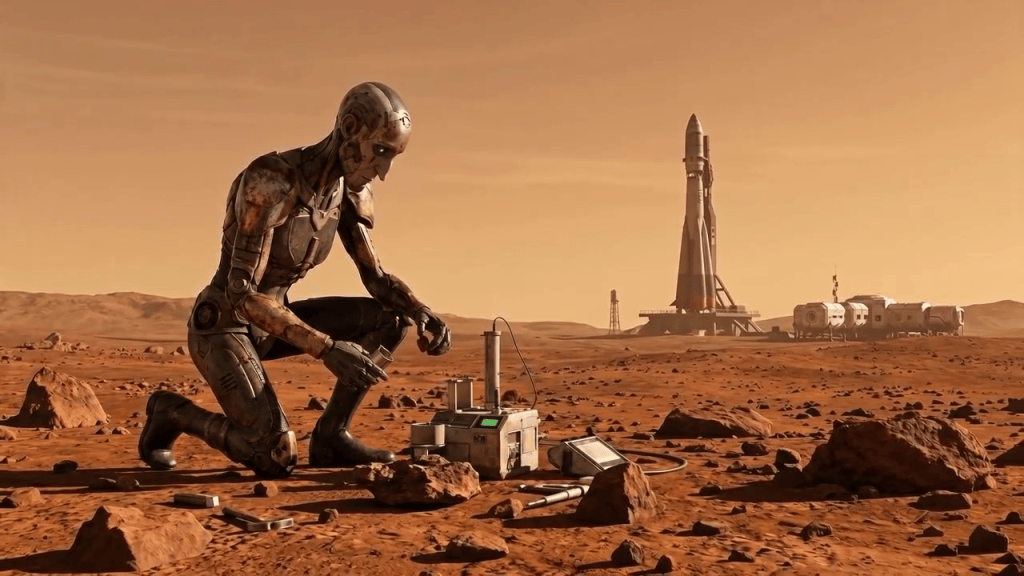
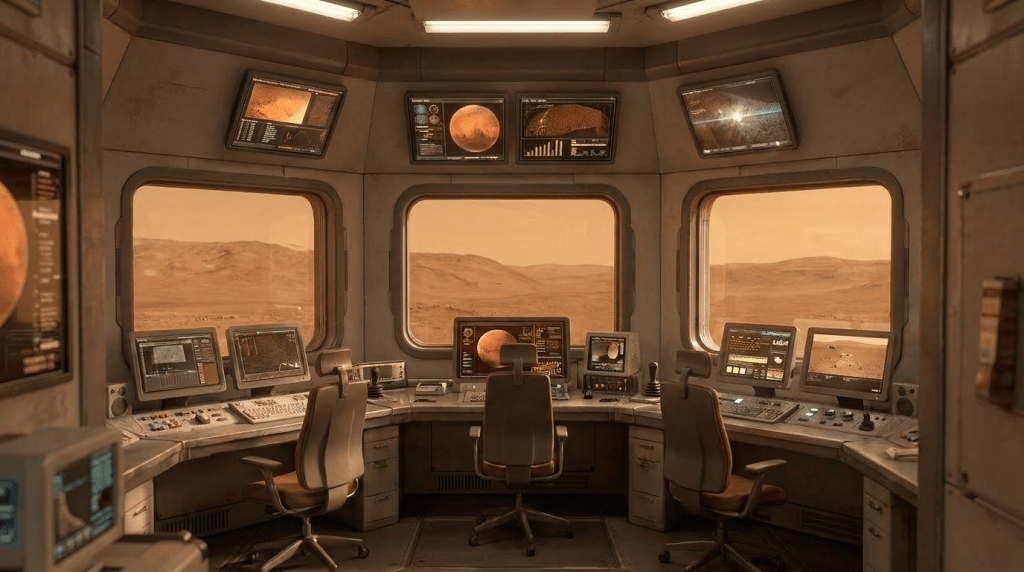
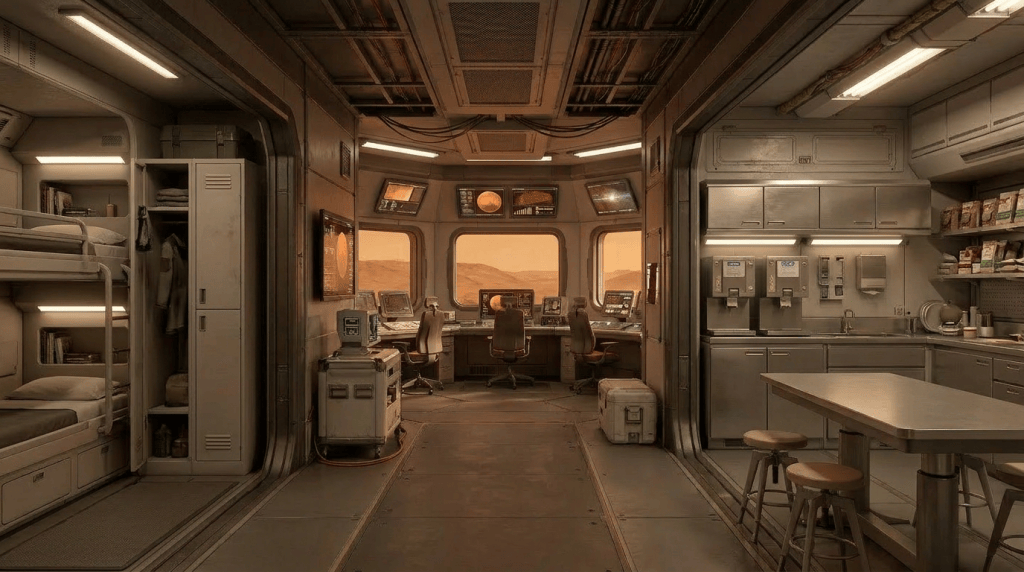
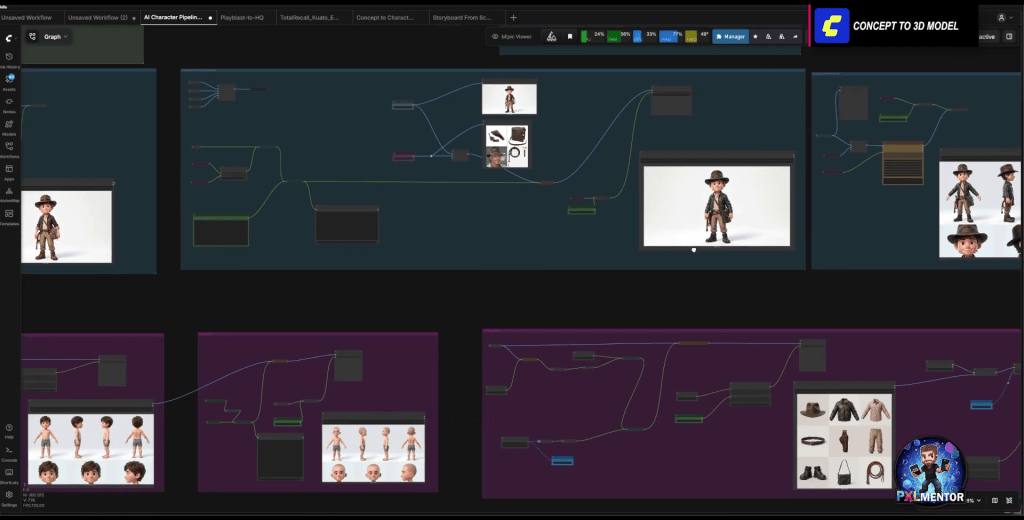
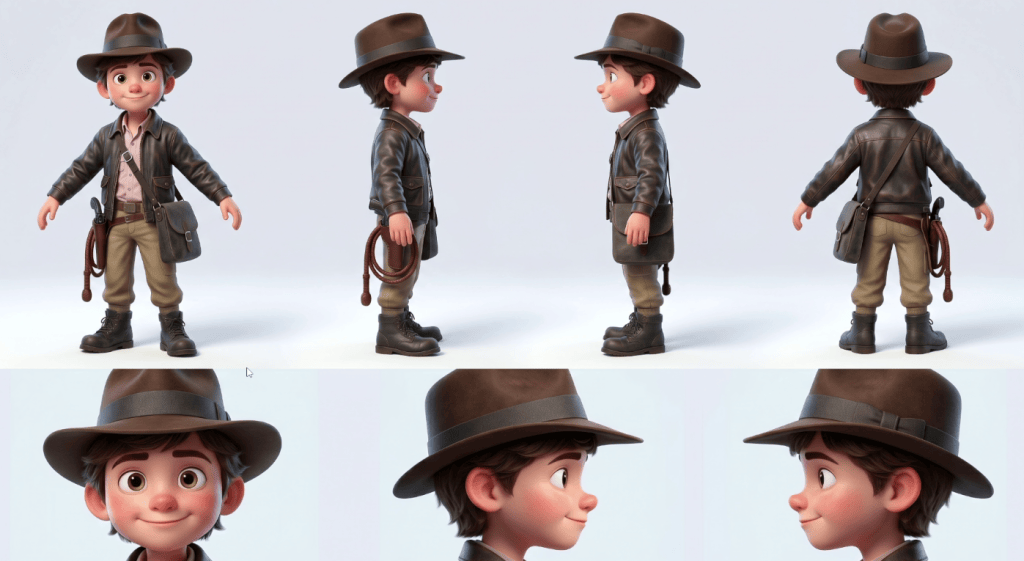
Benny Dee’s workflow for creating multi-style AI renders centers on a narrative concept where a character, Liam, travels through different “dimensions” or rendering styles. He meticulously prepares Liam’s character in Character Creator 5 using the Headshot 3 plugin, then imports Liam into iClone 8. Here, he animates Liam, designs the lab environment, and sets up dramatic lighting using just two colors, often blue and red, to achieve a cinematic look. Different camera angles and switches are choreographed in iClone to emphasize transitions between dimensions.

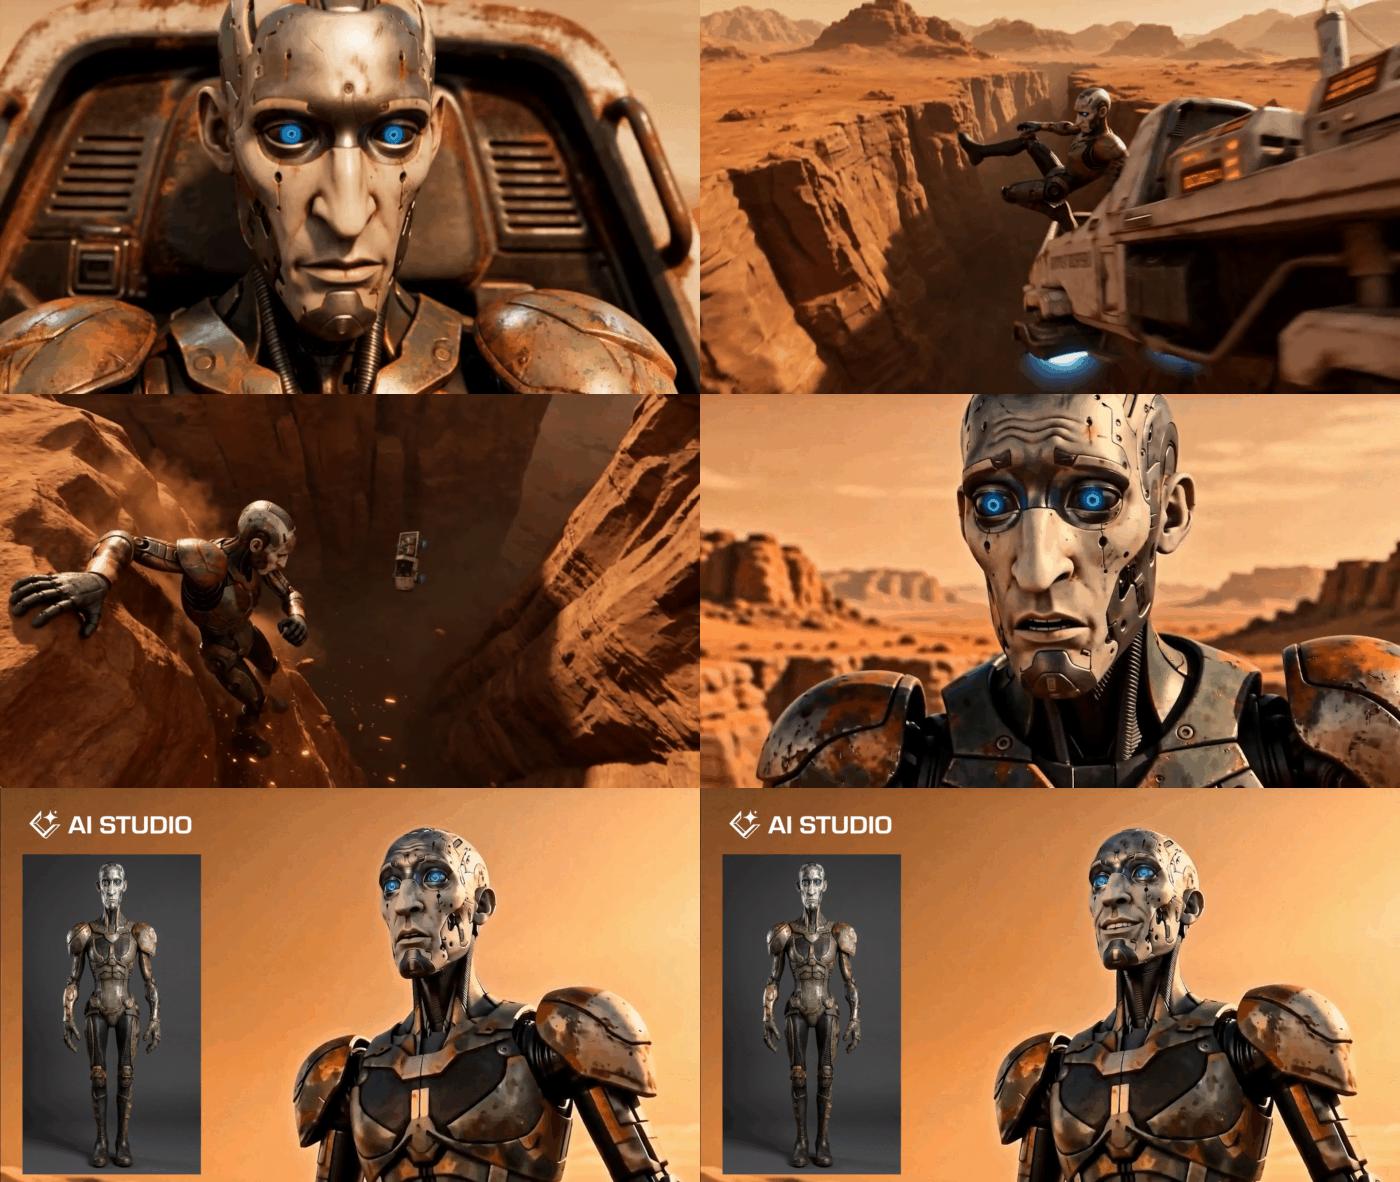
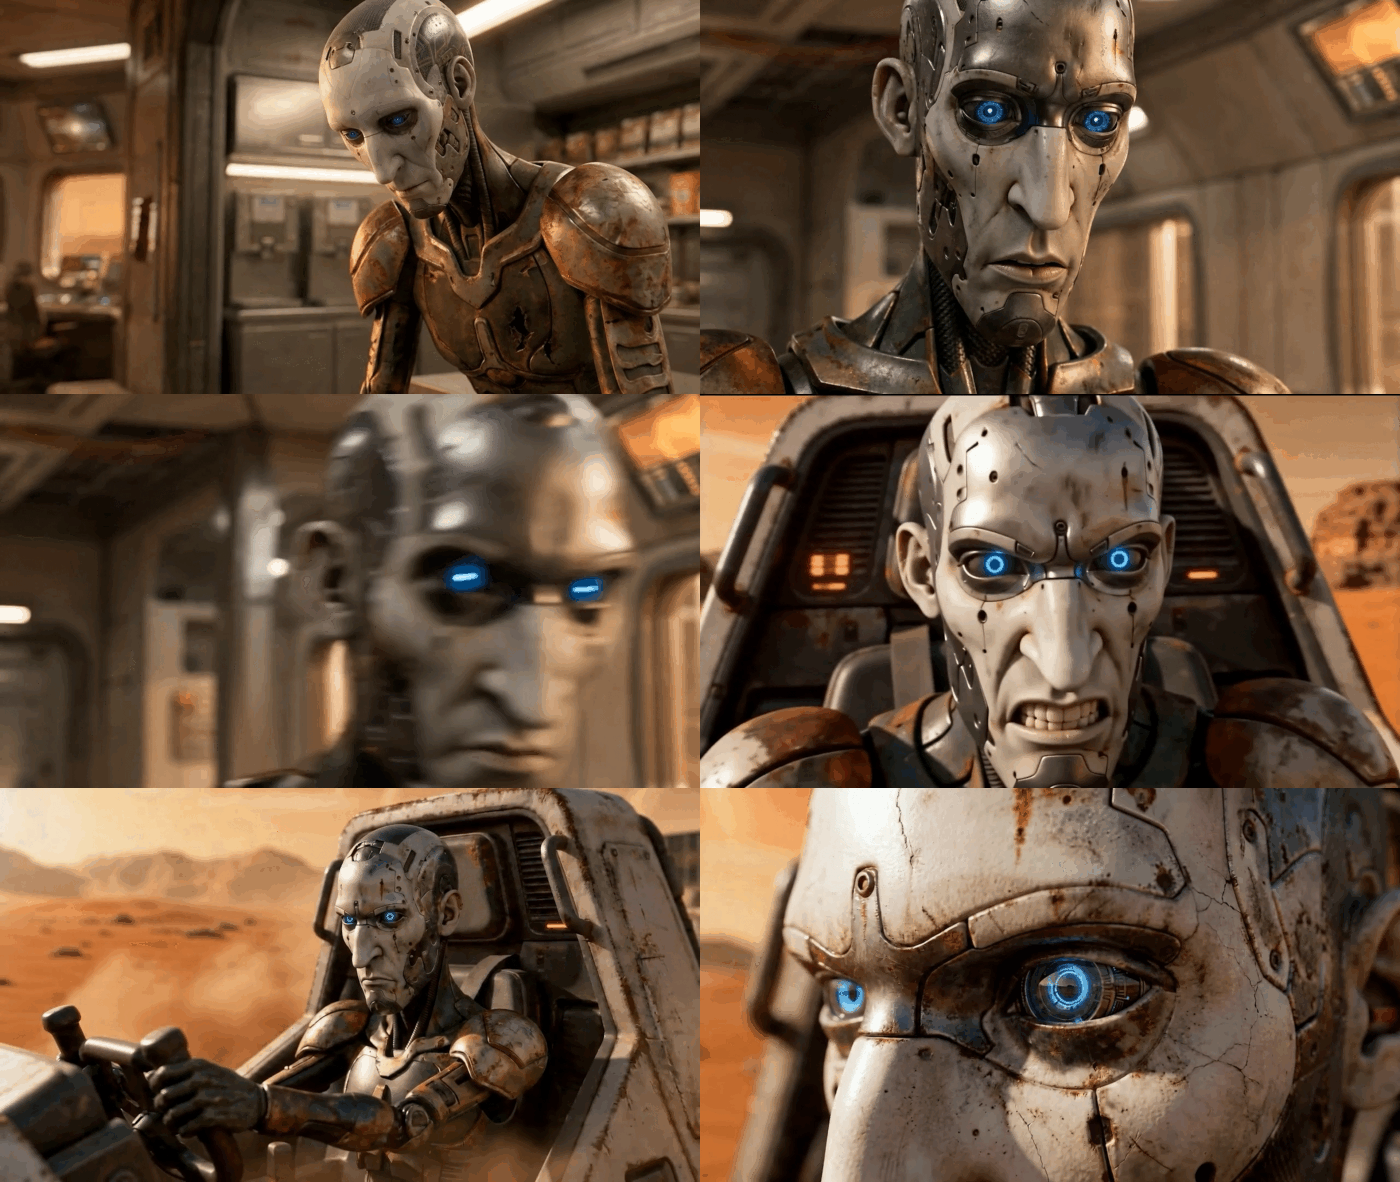
By capturing specific frames and video segments from iClone, Benny Dee guides AI Studio to render these segments in a multitude of artistic styles—from 2D Anime to Origami Art—while ensuring Liam’s appearance and actions remain consistent across all transformations. This control is paramount for storytelling where character identity must be preserved despite radical stylistic shifts.

Mastering Multi-Style AI Rendering with AI Studio

AI Studio empowers artists to transcend traditional rendering limitations by offering a robust platform for 3D-guided AI creation. It is powered by advanced models like Seedance 2.0, Veo 3, KlingAI, and Flux, providing 3D-guided scene layout and absolute motion control. This process transforms original 3D characters into consistent AI Actors (iModels), allowing for unprecedented creative versatility.

Step-by-Step AI Image Style Generation

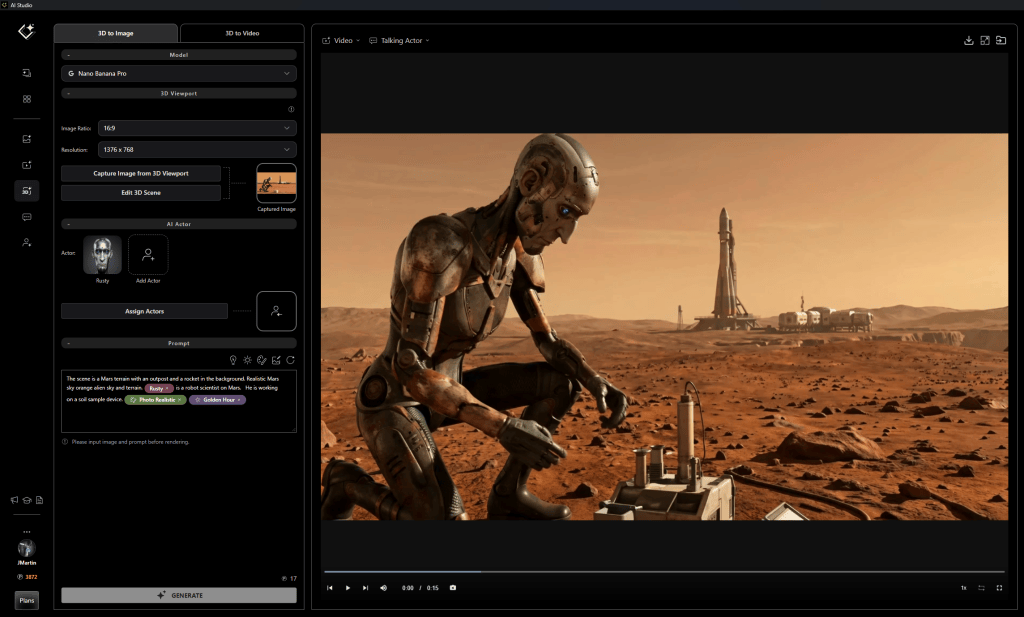
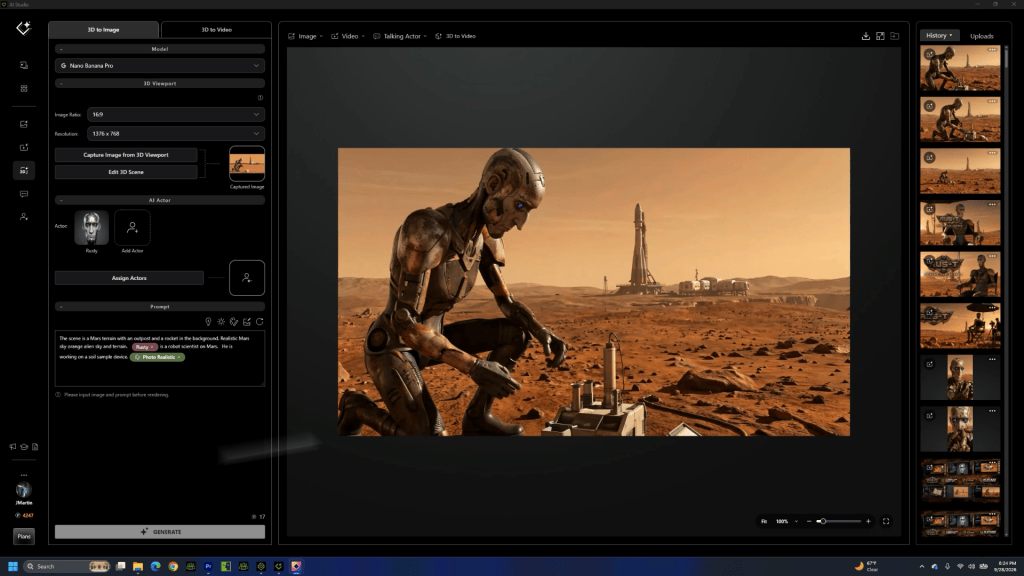
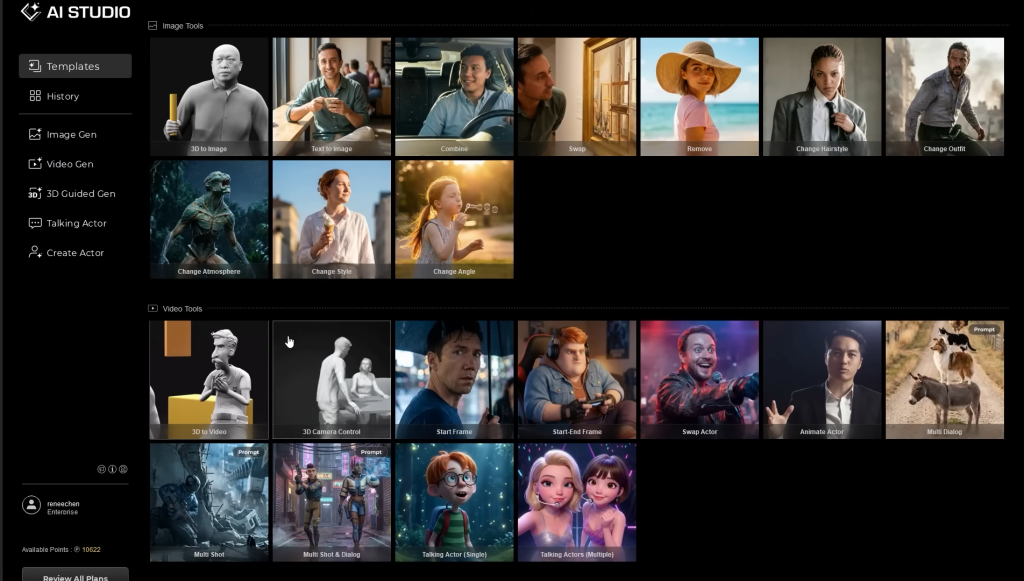
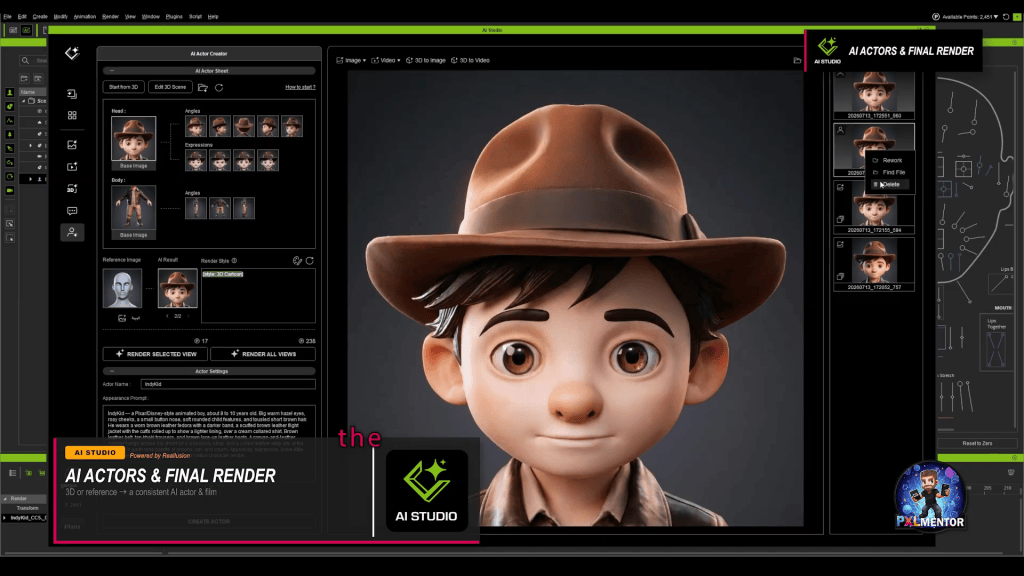
To begin, users switch to the AI Studio Workspace directly from the iClone dashboard. Within the “3D Guided Gen” tab, the “3D To Image” section is used to define the desired artistic style for a single frame.

  1. Capture Image: Click “Capture Image from 3D Viewport” to import the current iClone frame into AI Studio.
  2. Select Style: Navigate to the “Styles MENU” in the PROMPT area. Here, you can choose from over 33 render styles such as “2D Anime,” “Photorealistic,” or “Origami Art.” Each style comes with a preset prompt description.
  3. Refine Prompt: Users can expand the collapsed style prompt to view its full description and add their own specific details or modifications. This allows for fine-tuning the AI’s interpretation of the chosen style.
  4. Generate First Frame: Click “GENERATE” to send the image and prompt to the AI model servers. This typically takes a minute or two and consumes a small number of AI point credits (e.g., 17 AI point credits, approximately USD 0.15).

Converting Styled Images to AI Video

Once the initial styled image is generated, it loads into the “First Frame to Define Style” slot, acting as a crucial guide for the subsequent video generation.

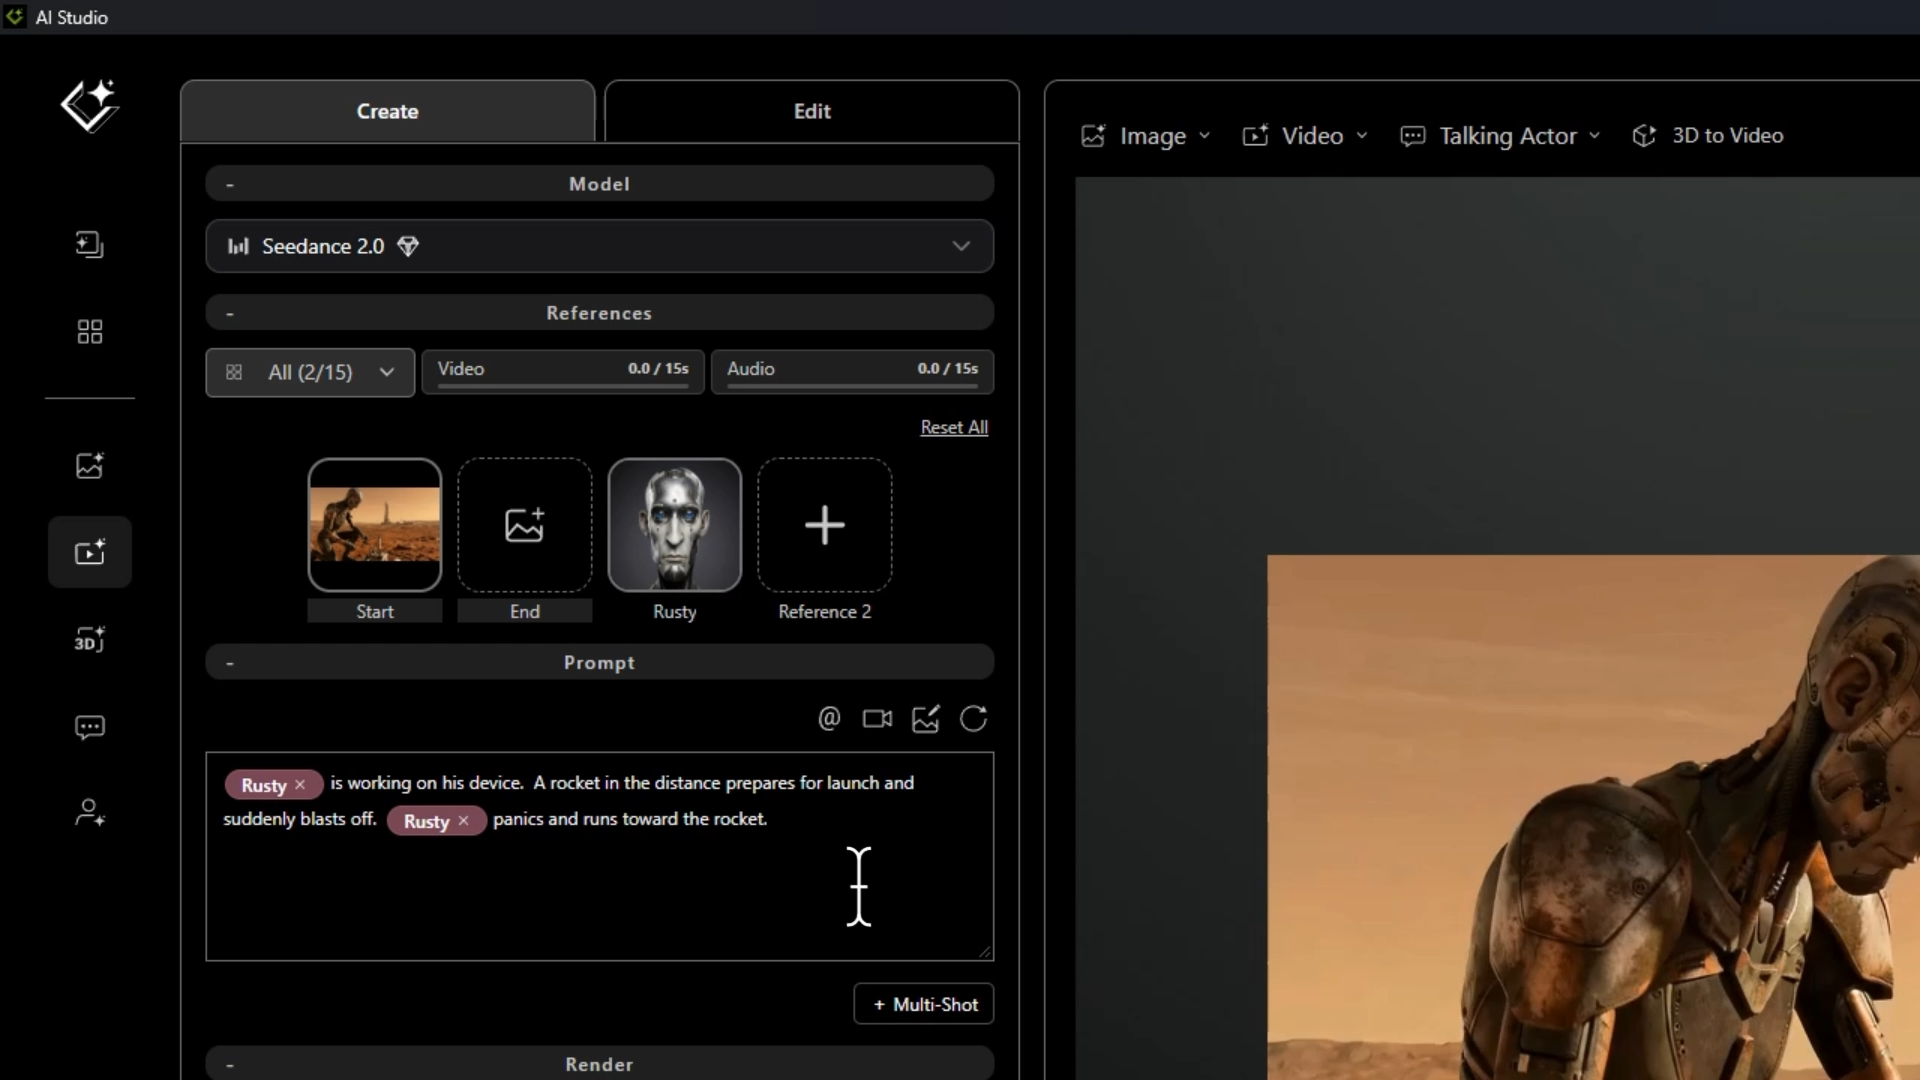
  1. Switch to “3D To Video”: Move to this section, where various AI video generation models like LTX, Wan, and Seedance 2.0 are available. Benny Dee opts for Seedance 2.0 for its capabilities.
  2. Capture iClone Video: Ensure the full animated sequence from the iClone 3D viewport has been captured and imported into AI Studio.
  3. Apply Camera Movement: It is critical to tick the “apply camera movement” box. This ensures the AI video generator respects the exact camera directions and movements orchestrated in iClone, preventing visual drift or inconsistencies.
  4. Manage Prompts: Copy the expanded style prompt from the “3D To Image” section and paste it into the “3D to Video” prompt panel. Always ensure previous style prompts are cleared or updated to avoid contradictions, as Benjamin Sokomba Dazhi emphasizes: “You can delete the previous Style text prompts to ensure no contradictions from the previous style descriptions.”
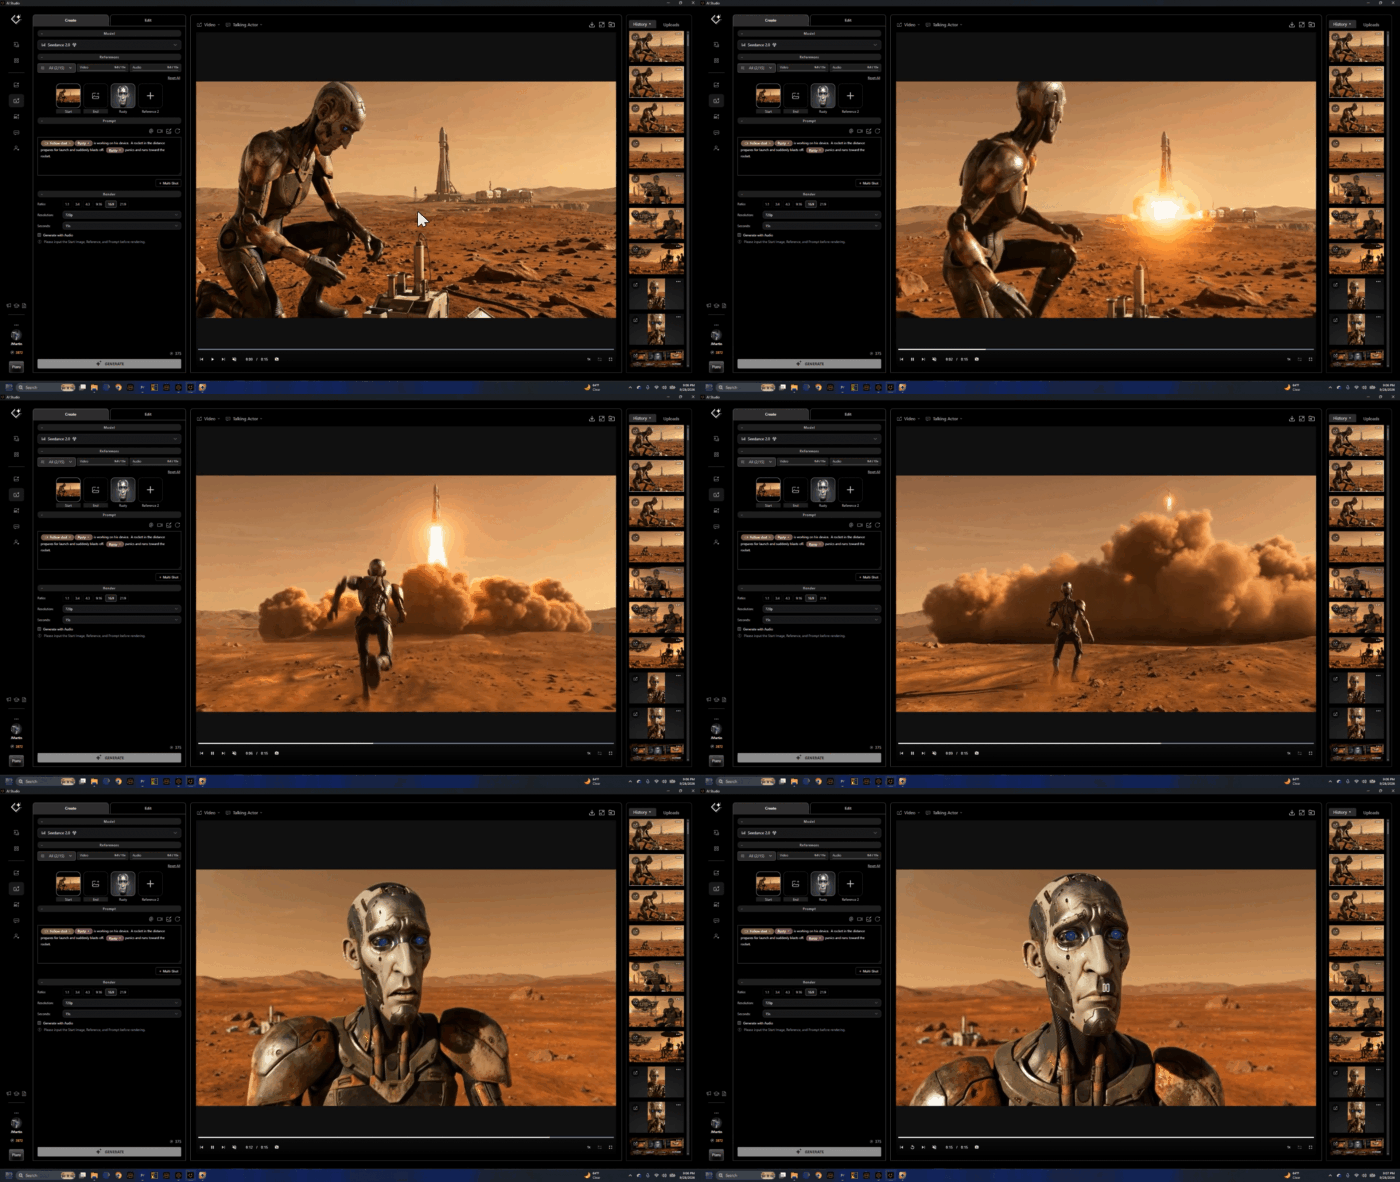
  5. Generate Video: Click “GENERATE.” This process integrates the selected style, the 3D-guided animation, and camera movements to produce a consistent AI-rendered video. The generated video appears in the History panel for review and playback. This iterative process is repeated for each “dimension” or style required for the animation.

AI Studio: Technical Capabilities

Feature CategoryDetailBenefit for Users
3D Guidance & ControlUses iClone 8 animation, lighting, camera moves as strict input for AI.Prevents AI hallucinations, ensures character/scene consistency, maintains artistic intent.
AI Models SupportedSeedance 2.0, Veo 3, KlingAI, Flux (for video); Nano Banana Pro (for image).Access to diverse generation capabilities, allowing varied stylistic outcomes.
Render Styles33+ preset styles (e.g., 2D Anime, Photorealistic, Origami Art, Minimal Cartoon).Rapid stylistic exploration, highly customizable through prompt expansion.
Resolution Support1080p, 720p, various aspect ratios.Professional output quality suitable for film, games, and marketing.
Cost EfficiencyAI point credit system (e.g., 17 credits for ~$0.15 per image).Pay-as-you-go model, cost-effective for experimentation and production compared to traditional rendering farms.
IP OwnershipGenerated from original user-owned 3D assets.Full ownership and control over content, crucial for commercial projects.

Why 3D-Guided AI Is the Future of Consistent Cinematic Production

While AI video generators unlock remarkable creative possibilities, they often struggle to maintain consistent character appearance, motion, and camera perspective across shots. These inconsistencies, commonly referred to as hallucinations or visual drift, can make it difficult to produce professional-quality animations or preserve a recognizable character throughout a project.

This is where the combination of Character Creator 5, iClone 8, and AI Studio provides a significant advantage. Benny Dee’s workflow begins with creating production-ready digital actors in Character Creator 5 before assembling the complete animation, camera work, lighting, and scene composition inside iClone 8. Instead of relying on AI to invent content from scratch, AI Studio uses this fully animated 3D scene as the foundation for rendering in virtually any artistic style.

This 3D-guided AI workflow allows creators to transform the same animation into dramatically different visual aesthetics—from 2D Anime and Minimal Cartoon to Origami Art—while preserving character identity, animation fidelity, camera movement, and storytelling continuity. The result is the creative freedom of generative AI without sacrificing production consistency or artistic intent.

Equally important, this approach gives artists complete ownership and control over their intellectual property. Because the original characters, animations, and environments are created within Character Creator and iClone, the underlying assets remain entirely yours. AI Studio functions as an alternative rendering engine rather than a content generator, enabling filmmakers, studios, and content creators to explore multiple visual styles while protecting their original work.

Whether producing proof-of-concepts, marketing content, animated shorts, or full cinematic productions, a 3D-guided AI pipeline offers the best of both worlds: the speed and stylistic flexibility of AI rendering combined with the precision, consistency, and creative control of a professional 3D animation workflow.

“AI Studio is a new rendering alternative to iClone’s real-time DirectX renderer. Using the same iClone animation, you can generate multiple visual styles, experiment with different camera angles, or even transform an entire animated scene into completely new creative looks.”

BENJAMIN SOKOMBA DAZHIRenowned 3D Animator, Director, Musician, Cinematographer
iClone 8's robust 3D guidance becomes indispensable by providing fully animated 3D characters, precise camera movements, and defined scene layouts. iClone acts as a strict blueprint for the AI.
iClone 8’s robust 3D guidance becomes indispensable by providing fully animated 3D characters, precise camera movements, and defined scene layouts. iClone acts as a strict blueprint for the AI.
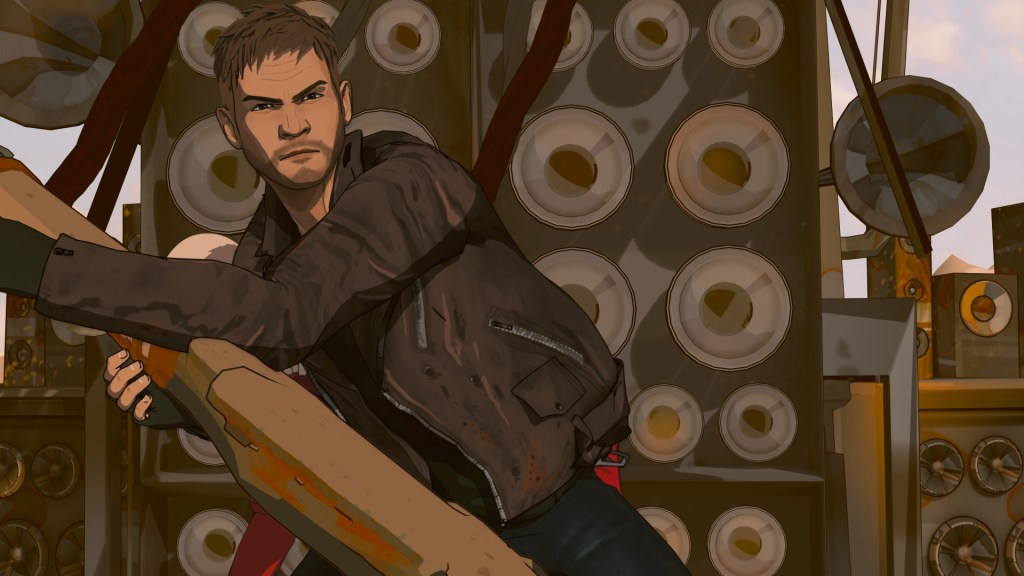
Render comparision between iClone real-time and AI Studio 2D Anime style

Conclusion: Unlock Infinite Render Styles with iClone and AI Studio

Integrating iClone 8’s robust real-time animation capabilities with AI Studio’s diverse AI rendering options empowers creators to explore a spectrum of visual styles with unprecedented control and efficiency. This workflow, expertly demonstrated by Benjamin Sokomba Dazhi, ensures consistent character presentation and strict adherence to creative direction, transforming the landscape of AI video generation. Artists can now achieve distinct artistic visions, maintain full IP ownership, and drastically accelerate their production pipelines, ushering in a new era of creative freedom in 3D filmmaking and animation.

iClone Personal is a permanently free, time-unlimited edition of Reallusion’s real-time 3D animation software. It provides full access to core animation tools and unlimited video rendering, but limits external 3D file exports to 30 lifetime uses.

iClone Personal is a permanently free, time-unlimited edition of Reallusion's real-time 3D animation software. It provides full access to core animation tools and unlimited video rendering, but limits external 3D file exports to 30 lifetime uses.

Claim your exclusive Reallusion AI Studio offer here

Frequently Asked Questions

Q: How do I ensure my AI-generated character looks consistent across different render styles?

A: Consistency is achieved by providing precise 3D guidance from iClone 8. By defining your character, animation, lighting, and camera movements exactly within iClone, AI Studio uses this accurate 3D data as its foundation. This structured input prevents AI “hallucinations” and ensures your character’s appearance and actions remain faithful to the original 3D model, regardless of the chosen render style.

Q: What is the difference between rendering in iClone 8 real-time and using AI Studio?

A: iClone 8 provides high-quality real-time DirectX rendering, ideal for interactive previews and quick outputs. AI Studio, conversely, acts as an alternative render engine that uses AI models to generate videos in diverse stylistic formats (e.g., 2D Anime, Photorealistic). While iClone handles the 3D animation and scene setup, AI Studio interprets that 3D guidance to produce entirely new aesthetic renderings, expanding creative possibilities beyond traditional real-time visuals.

Q: Can I use my own custom prompts in AI Studio, or am I limited to preset styles?

A: You have significant creative freedom within AI Studio’s prompt system. While it offers over 33 preset render styles, each with its own descriptive prompt, you can expand these presets to view their full details and then modify them. Additionally, you can input entirely custom prompts to guide the AI model towards a very specific stylistic vision, allowing for fine-tuned control over the final render.

Q: How does AI Studio ensure I retain ownership of my generated content?

A: AI Studio protects your content ownership by basing all AI video generation on your original 3D assets created in Character Creator 5 and iClone 8. Since the foundational characters, animations, and scene layouts are your proprietary creations, the AI-generated outputs, strictly guided by your 3D data, remain tied to your intellectual property. This model supports creators by giving them full control and ownership over their unique visual styles.

Read Next:

Reallusion AI Studio is built for 3D artists who want to streamline their workflow with authentic AI render, and for AI creators seeking stronger consistency and more precise control with less trial and error—unlocking greater productivity by blending the best of both worlds. Tutorial

Character Creator Digital Double: How PhiBix Sculpted a Photoreal Michael Jackson Without Leaving the Reallusion Pipeline

TL;DR: Solo 3D artist PhiBix built a photoreal Michael Jackson character creator digital double starting from a hand-drawn pencil sketch and finishing inside iClone, using nothing but Reallusion’s own tools: Character Creator 5 morph sliders, Mesh Editing, SkinGen, and Content Store hair and wardrobe. No ZBrush. No Blender. No Substance. The project, capped off by a Smooth Criminal-flavored musical that turns the sculpting process itself into lyrics, is a working argument that the King of Pop’s likeness can be achieved entirely inside one ecosystem.

When most digital double case studies say “all-in-one,” they still pass through ZBrush for sculpting and Substance for textures. PhiBix’s MJ tribute project does not. Working from a private studio under the handle phibix.com, the artist has been quietly building one of the most recognizable musician digital doubles on YouTube, a likeness used across multiple short films including a recreation of the demolished In the Closet set in Bombay Beach, California. The pipeline runs entirely on Character Creator 5 and iClone.

A King of Pop Built Without a Pipeline

The MJ digital double is the spine of PhiBix’s tribute work, a single character asset reused across multiple shorts, each one rebuilt around it. What makes the project notable isn’t just the likeness; it’s the route PhiBix took to get there. The entire character (head, skin, hair, wardrobe, performance) is built without ever leaving Reallusion’s own tools. No ZBrush. No Substance. No Blender. The “pipeline” most digital double artists assume is required simply isn’t part of his.

The work doesn’t start in 3D, though. Before opening Character Creator, PhiBix grounds each MJ build in a hand-drawn pencil sketch, a traditional portrait study that fixes the proportions, the bone structure, and the era-specific likeness he’s chasing before a single morph slider gets touched. The sketch becomes the brief he sculpts against. It’s an old-school move that anchors a very new-school pipeline.

The most recent release is a Smooth Criminal-flavored musical in which PhiBix writes the modeling process into the lyrics themselves. The song opens on “a whisper of bone, curves of a skull like the half-remembered home,” and walks the listener through jawline, eyes, lips, skin pores, and final lighting. Every verse is a stage of the build. By the chorus, the face has rendered into recognizability and the lyric drops the reveal: “From data to identity. I know that face.” A self-aware framing that doubles as a thesis: a digital double is an act of recognition, not just reconstruction.

The earlier In the Closet recreation short shows the same MJ asset in a fully rebuilt 1992 Herb Ritts environment, including the demolished Bombay Beach location, a working saqiya, and the sepia desert palette of the original music video. Same character, different scene. That asset reuse is only possible because the character was built inside a system designed for it.

The All-Reallusion Pipeline

The question PhiBix’s work answers: can a single artist hit musician-level likeness without leaving the Reallusion stack?

Stage 1, Pencil sketch for the brief

A traditional hand-drawn portrait of MJ fixes the proportions and era-specific likeness before any 3D work begins.

Stage 2, Character Creator 5 for the head, body, and likeness

Morph sliders and Mesh Editing shape the skull, jaw, brow, and facial structure to match MJ’s distinctive bone structure, no external sculpting required.

Stage 3, SkinGen for the skin

Layered material synthesis builds the pore detail, blemish maps, and subsurface depth that sell the close-up shots.

Stage 4, Content Store hair and wardrobe

Curls, jackets, and the In the Closet outfit are sourced from Reallusion’s own content ecosystem and conformed to the character.

Stage 5, iClone for performance and staging

The finished CC5 character is sent to iClone for facial animation, dance choreography, and multi-camera direction.

The core insight: when the character base, the skin system, and the wardrobe library all live inside the same topology, the “asset-handoff tax” disappears.

Character Creator 5: The Likeness Engine

PhiBix’s MJ proves that character creator digital double work no longer needs to escape to ZBrush for the hard sculpting calls. Two CC5 capabilities carry the weight.

Morph sliders and Mesh Editing as a sculpting language

The lyrics describe the process explicitly: “Curves of a skull like the half-remembered home. Jawline drifting into place.” That’s morph-slider work, not freeform polygon pushing. CC5’s Morph System gives PhiBix directional control over the skull, brow ridge, cheekbones, and jawline without entering a sculpt application. For the corrections that morphs can’t reach, Mesh Editing handles the targeted vertex-level work directly inside Character Creator. Together, the two tools cover the territory most workflows hand off to ZBrush, and the character stays on CC3+ topology throughout, so animation deformation never gets compromised.

For a face as scrutinized as Michael Jackson’s, that matters. The eyes have to read MJ. The jawline has to read MJ. PhiBix’s lyric, “Every angle, story untold. Every shadow rendered in gold. I’m watching hard in suspense, who are you behind that sense?”, captures the iterative recognition test. The artist watches the face accumulate identity slider by slider, vertex by vertex, against the pencil-sketch brief.

SkinGen for the texture layer that sells the close-up

Photoreal celebrity likeness fails most often in skin, not bone structure. SkinGen handles that layer natively inside Character Creator: pores, micro-detail, blemishes, subsurface tone, through stackable material layers rather than a separate texturing application. The lyric “Every pore, every glance, every subtle hue. Now the truth is undeniable. It’s you” is functionally a description of what SkinGen contributes to the build: the final 5% of photoreal recognition that lives in the skin.

The outcome: a character that holds up under iClone’s close-up camera rigs without round-tripping through Substance Painter.

Content Store: Find MJ’s clothes and hair

The MJ outfit and signature curls are sourced from the Content Store and the marketplace ecosystem, assets built natively against CC topology, so they conform without breakage. For a tribute project where wardrobe accuracy carries the period (this is 1992 MJ, not 1987 MJ), having a deep first-party library matters more than a generic universal-fit system.

Why an All-Reallusion Digital Double Matters

The dominant assumption in the digital double space is that getting from “good 3D character” to “convincing real person” requires a tool chain: ZBrush for the hard sculpting, Substance for the textures, Marvelous for the wardrobe, then somewhere downstream for animation. Each handoff costs time, file-format friction, and topology integrity.

PhiBix’s MJ project is a counter-example. The whole likeness (head, skin, hair, wardrobe, performance, camera) lives inside one ecosystem. For a solo artist or small studio chasing musician-grade likeness on a release cadence, that’s the difference between shipping a music video and shelving one.

It also reframes what Character Creator is for. Most marketing positions CC as a fast character base that you finish elsewhere. PhiBix’s work positions it as the finishing tool, the place the digital double becomes the digital double, not the place you start before going somewhere serious.

Key Takeaways for Solo Digital Double Artists

  • Start with a pencil sketch, not a Character Creator preset. A traditional portrait study fixes proportions and era-specific likeness before any 3D work begins, and gives the artist a brief to sculpt against.
  • Treat morph sliders and Mesh Editing as a primary sculpting pair. CC5’s Morph System plus vertex-level Mesh Editing can carry full musician-grade likeness work without an external sculpt application.
  • Let SkinGen own the texture pass. Native skin layering inside Character Creator hits the photoreal threshold that usually requires Substance Painter, and it stays in the same scene as the morphs.
  • Build the digital double to be reused. One MJ asset, many shorts. The investment pays back across a portfolio, not a single release.
  • Direct inside iClone, don’t just animate inside it. Multi-camera staging, lighting, and the virtual set should live in the same scene as the performance, that’s where the solo-director workflow becomes possible.

FAQ: Character Creator Digital Double

Q: Can I build a celebrity-likeness digital double using only Character Creator and iClone, with no third-party tools?
A: Yes. PhiBix’s Michael Jackson project demonstrates exactly that. CC5 morph sliders and Mesh Editing handle the structural likeness, SkinGen handles the photoreal skin pass, and Content Store hair and wardrobe finish the look. The character animates and performs in iClone. No ZBrush, no Substance, no Blender required.

Q: Do I need Headshot 3 to create a digital double in Character Creator 5?
A: Headshot 3 accelerates the process by generating a likeness base from photo reference and AI image-to-3D reconstruction, but it isn’t strictly required. Pure morph-slider and Mesh Editing sculpting can reach the same destination, as PhiBix’s work shows. Headshot 3 simply gets you there faster, especially for first-time digital-double artists.

Q: How do I get Character Creator 5 and iClone for digital double work?
A: Both are available from the Reallusion Software Store. Character Creator 5 also offers a 30-day free trial, which is enough time to test a full digital-double build end-to-end before committing.

Q: Does the digital double from Character Creator work with other 3D tools if I want to expand later?
A: Yes. CC5 characters export cleanly to Blender, Unreal, Unity, and Maya through Reallusion’s Auto Setup plugins. PhiBix’s project keeps everything inside CC5 + iClone by choice, but the same character asset is portable when a project needs it.

About the Artist

PhiBix is a 3D artist and animator producing musician tribute work centered on Michael Jackson, with shorts and music videos released on YouTube and full build documentation available to subscribers at phibix.com. His pipeline relies entirely on Reallusion’s Character Creator and iClone, including a fully recreated 1992 In the Closet set built around the demolished Bombay Beach location used in Herb Ritts’s original video. PhiBix grounds each build in a hand-drawn pencil sketch before any 3D work begins, and his recent Smooth Criminal-flavored musical weaves the modeling process into the song’s lyrics, a working statement that, for him, the craft and the homage are the same act.

Related Article

Download a free 30 day trial of Character Creator 5

Digital Double from Photos: PhiBix’s Photorealistic Workflow with CC5 and Headshot 3.1
TL;DR: This tutorial breaks down how Paris-based artist PhiBix builds a photorealistic digital double from photos using Character Creator 5 and Headshot 3.1. You will follow his full pipeline: standardizing reference images, aligning the mesh with Vector and morph tools, projecting texture from four camera angles with Stencil & Clone, repairing coverage gaps in Photoshop and AI Studio, and detailing skin, eyes, and expression until the likeness survives a full 360-degree rotation.

Step 1: Standardize the Reference Photos and Generate a Body Base

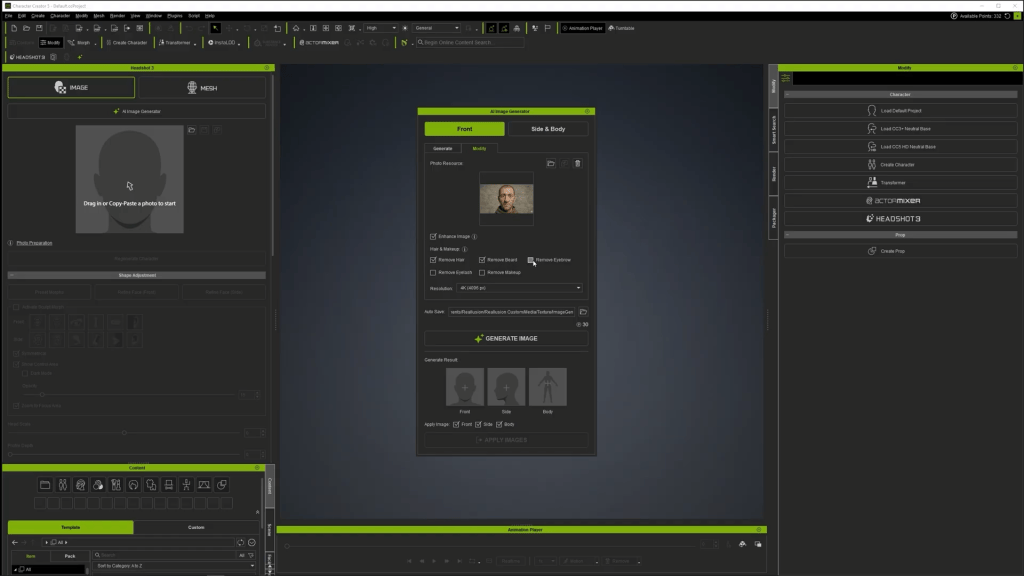
Before any geometry work, PhiBix removes hair, beard, and eyebrows from the source photograph. Headshot 3.1 then produces a 4K frontal reference: it moves the face to a frontal view, neutralizes the expression, replaces uneven light with diffuse light, and generates a matching profile reference from the cleaned result.

The generated profile is inspected as a usable secondary reference for the later profile alignment.

The first generated body comes back too muscular for the subject’s age, so PhiBix rejects it. In the Body tab he specifies an elderly, slender man, and the regenerated body matches the intended physique.

Pro Tip: Treat the first body as a proposal, not a final result. Normalize lighting, pose, and facial hair first, then confirm the body supports the subject’s age and silhouette before moving on.

Step 2: Align the Frontal Structure with the Vector Tool

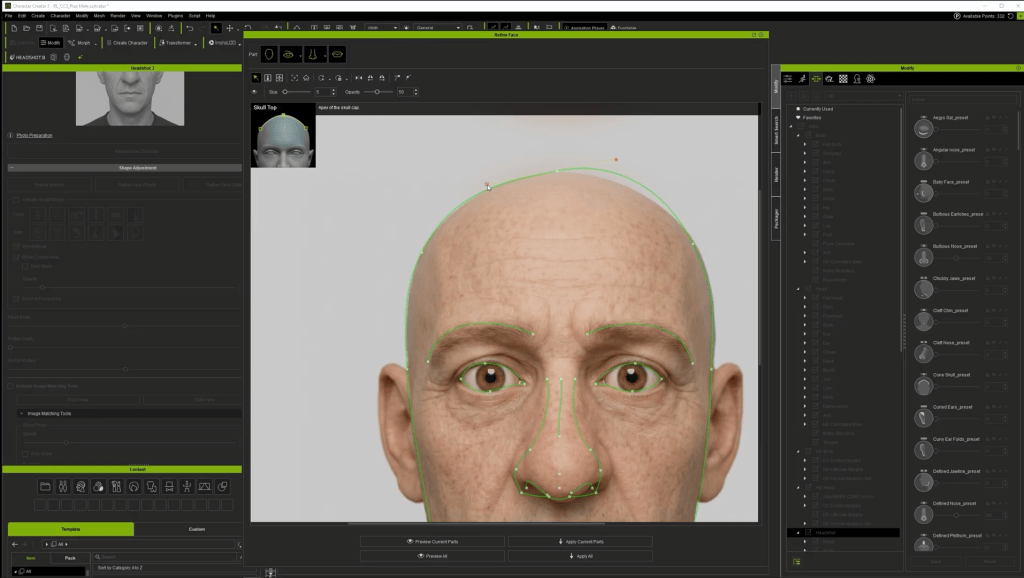
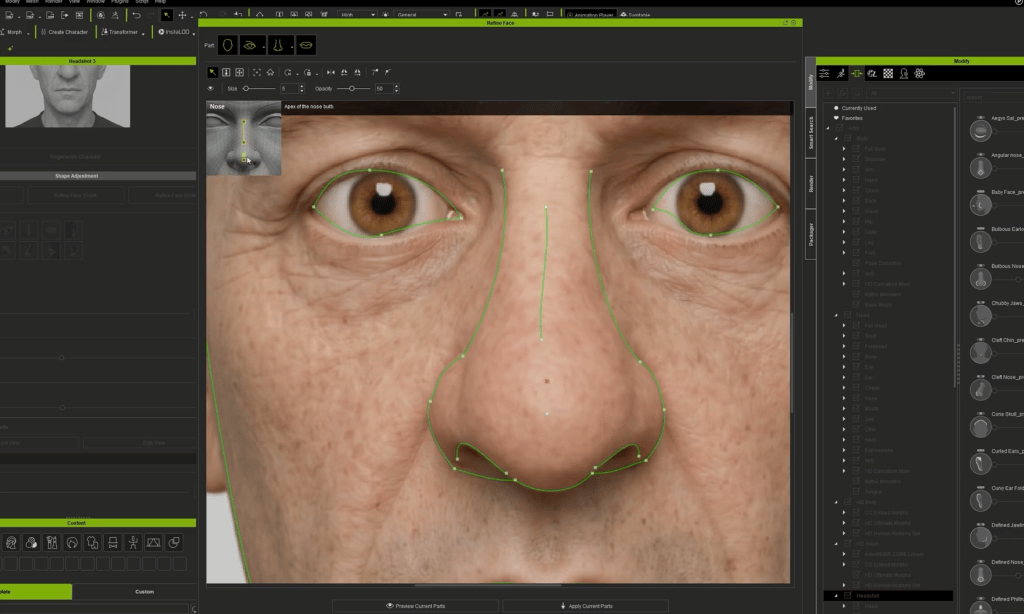
PhiBix uses vector-based Bezier curves to align facial landmarks point by point, guided by the small reference tutorial in the upper-left corner of the interface. The goal is structural alignment, not tracing visible makeup, hair, or shadow. He places the eye curve just below the eyebrow and adds a double eyelid because it is a distinctive structural feature of this face.

Once the curves and the side contour look right, a fast preview converts the vector corrections into a 3D result. This preview is a checkpoint: it shows whether the new landmarks improve the volume before the change is committed.

Note: Align the anatomical feature the guide points to. The eyelid curve follows the eyelid structure, not the eyebrow above it.

Step 3: Complete the Profile Alignment and Refine the Head

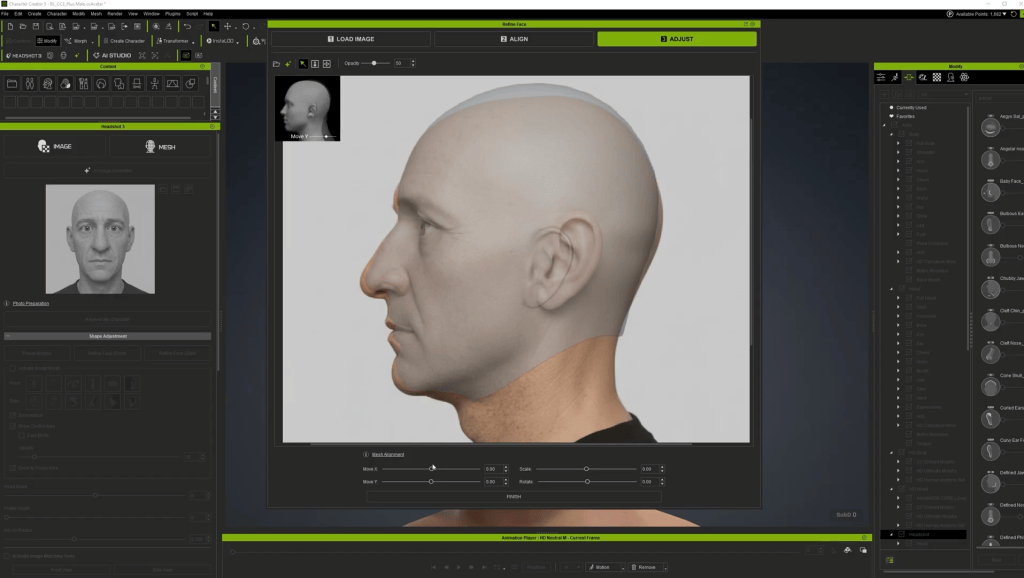
On the profile, PhiBix matches nose, lips, chin, forehead, ear, and skull depth to the side photograph. After applying the profile curves, he switches to Character Creator 5 morph controls and works exclusively on the head.

The reason is practical: every visible feature must sit under the corresponding region of the photograph before texture projection begins. He repeatedly toggles the reference opacity to compare the 3D head against the photo, aligning the mouth, nose, nostrils, eyes, chin, ears, forehead, brow ridges, eye shape, and skull silhouette. A correction that works in the front view but breaks the profile is not accepted. Once the alignment is close, he applies the projection, removes skin shine to get a matte working surface, and continues with local morph corrections.

Pro Tip: Keep the body unchanged while you solve the facial projection problem, and make the working skin matte so highlights do not hide proportion errors.

Step 4: Lock the Base Mesh and Generate the Multi-Angle Source Set

PhiBix narrows the left eye, adjusts the brow ridges, and changes the eyelid height, then applies the result. This is the last major geometry pass before texture work begins, and the likeness is already readable.

Headshot 3.1 generates five views, but PhiBix uses four: front, one profile, back, and the opposite profile. He deliberately keeps both profiles because faces are not symmetrical. Moles, wrinkles, and skin variation cannot be assumed to match from one side to the other.

Step 5: Project a Digital Double from Photos Using Stencil & Clone

This is where the digital double from photos really takes shape. In Stencil & Clone, PhiBix loads the frontal reference and matches the 3D camera angle, scale, and framing to the photograph rather than trusting the nominal lens value used when the image was generated. For this source, the match lands near a 69 to 70 mm focal length with a viewing angle of roughly 20 degrees.

He removes remaining shine, selects the Constant brush, sets Strength to 1, and begins the unifying pass only after the facial regions are positioned consistently.

Note: Geometry first, projection second. The brush cannot compensate for a nose, ear, mouth, or skull that is in the wrong place. Stop and realign whenever the projection stops landing on the correct anatomy.

Step 6: Project the Profile, Back, and Opposite Profile

On the first profile, PhiBix corrects skull depth, mouth, ear size, chin, forehead depth, and ear angle, with a 2-degree tilt and a scale of 189 percent producing a close match. The Constant brush stays at Strength 1, but he avoids the frontal face to protect the work already done there.

For the rear skull he uses full strength to unify coverage, then reduces strength behind the ears. A smaller brush handles narrow areas such as the nostril wing and the corner of the mouth. The second profile repeats the same logic, because the two sides carry different wrinkles and moles.

Pro Tip: Do not force the ears. When an ear outline is not aligned well enough, postpone its texture and repair it later in the diffuse map.

Step 7: Review the Projection and Map the Cleanup Zones

PhiBix does not treat the combined projection as finished. He moves around the head and inspects it for three categories of problems: incomplete coverage, visible overlaps, and lighting baked into the source photographs. His review loop is consistent: project, inspect the complete head, identify exactly what the projections could not solve, and choose a targeted repair for each remaining area.

The cleanup list here is specific: baked highlights on the chin, nose, cheekbones, forehead, and philtrum; imperfect seams around the ears; an incompletely covered scalp; and a gap directly under the chin.

Step 8: Clean and Consolidate the Diffuse Map in Photoshop

Starting from both the default Headshot projection and the Stencil & Clone projection, PhiBix transforms a generated right-profile photograph to fit the diffuse map, then adjusts it for matte finish, hue, tone, contrast, and brightness, blending precisely with the eraser. He repeats the approach around the eyes and mouth, and addresses the scalp with transformed material and a symmetry pass.

For the underside of the chin he demonstrates a manual route: use a frontal source, match proportions, switch between the source and the diffuse map, apply Warp and Puppet Warp, blend with the eraser, and correct color and brightness. The image is then flattened so the matte finish and the head-to-body transition stay coherent.

Note: Ear mirroring is not a universal rule. PhiBix mirrors the ear here only because this subject has no distinctive asymmetrical ear marks to preserve.

Step 9: Generate an Under-Chin Reference with AI Studio

For an integrated alternative that stays inside Character Creator 5, PhiBix opens AI Studio, chooses Image Gen and Edit, selects the Headshot front and profile images, and asks Nano Banana Pro to create an under-the-chin view from the two references. He sets the aspect ratio to 1:1 and the resolution to 2048 pixels, and generates the view with the chin tilted upward. When the first result casts a shadow below the jaw, he adds an even-tone lighting instruction and regenerates.

He then imports the generated image into Headshot 3.1 as a custom image, uses Edit Pose to put the 3D character into the same pose, aligns scale and proportions, and projects only the under-chin region. That projection also produces normal and roughness information for the repaired area.

Step 10: Extend Map Coverage and Refine Identity Detail

Because the character has a shaved head, scalp and neck detail cannot stay incomplete. PhiBix generates a normal map from the diffuse map in Photoshop and fills the areas that hair would normally hide, so skin relief continues across the scalp and neck.

He then darkens the overall skin tone and refines the eyes: a bluish iris rim, more bloodshot sclera, adjusted pupil and iris proportions, added iris depth, and the slightly bulbous eye shape. Makeup tools add a watery effect along the lower lash line, define the lips, harmonize the eye contours without erasing beauty marks, add subtle cheek veins, and restore localized sheen where moisture naturally appears. The same identity logic extends to the hands, where SkinGen adds age spots and vascular detail so the body matches the aged facial skin.

Step 11: Build the Expression, Style the Character, and Run Technical Checks

PhiBix shapes the characteristic expression first, then refines it with Edit Facial: the head tilts slightly sideways and down, the eyes look upward, the eyebrows raise, the forehead furrows, and a subtle half-smile appears. He adds tight curls, earrings, a dark suit, a tie, and a pocket square, and adjusts the default pose to preserve the intended head tilt and gaze.

Finally, he validates. Different light sources are tested so reflections and shadows do not hide texture problems. When the tie knot intersects the shirt collar, he corrects it with Edit Mesh. A full 360-degree turnaround confirms that geometry, seams, map coverage, and identity cues all hold together, not just in the hero angle.

Pro Tip: Clothing is part of the final validation, not an afterthought. Check that hair, accessories, shirt, tie, and jacket do not collide with the mesh before you call the model done.

Summary

PhiBix’s method comes down to a repeatable sequence: standardize the references, match the mesh, match the camera, project only aligned regions, repair coverage gaps, refine identity-specific detail, and validate under rotation, close-up framing, and varied light. Because of long experience with Character Creator, he completed this build in under four hours, and he estimates a newcomer who already knows the tools could reproduce it in roughly one to two days. You can watch the complete walkthrough in the full video tutorial.

Key Takeaways

  • Standardize the reference before touching geometry. Neutralize expression, remove hair and facial hair, and flatten lighting first, or the geometry and texture projection will inherit every flaw in the source photo.
  • Align the mesh to the photo before you project any texture. Toggle reference opacity constantly and confirm both front and profile, because the brush cannot fix a feature that sits in the wrong place.
  • Capture both profiles, not just one. Faces are asymmetrical, so moles, wrinkles, and skin variation on the left will not match the right, and a single profile leaves half the identity guessing.
  • Match the camera, not the nominal lens value. Dialing the 3D camera to roughly 69 to 70 mm and a 20-degree viewing angle for this source gave a far closer projection than trusting the generated metadata.
  • Treat coverage gaps as a repair list, not a failure. Behind the ears, the top of the scalp, and under the chin will almost always need targeted work in Photoshop or AI Studio after the main projection.

About Phibix

PhiBix is a digital-double specialist at RL-FRANCE, a multimedia production company on the Champs-Elysees in Paris that builds photorealistic doubles for trailers, commercials, music videos, and films, usually as a white-label partner for professional clients. He has created more than 250 commissioned hyperrealistic celebrity doubles and also works as a trainer and technical consultant for schools and companies developing character-production skills. He has used Character Creator since its earliest versions. You can follow his work on YouTube and Instagram.

FAQ: Building a Digital Double from Photos

Q: Can I use this digital-double-from-photos workflow on a subject I photograph myself?
A: Yes. The workflow starts from a standardized frontal image, so a well-lit, face-on photo with a neutral expression is the ideal input. Headshot 3.1 handles the frontal and profile reference generation, and the rest of the pipeline is the same whether the source is a commissioned shoot or your own camera.

Q: Why does PhiBix use four camera angles instead of a single front photo?
A: Because faces are not symmetrical. Keeping the front, both profiles, and the back lets the Stencil & Clone projection capture moles, wrinkles, and skin variation that differ from one side to the other, which a single-photo projection would flatten or mirror incorrectly.

Q: What versions do I need to follow this tutorial?
A: The workflow uses Character Creator 5 with the Headshot 3.1 plugin, plus SkinGen for skin detailing and Edit Mesh for the final collision cleanup. Photoshop is used for diffuse and normal-map repair, though AI Studio inside Character Creator 5 offers an integrated alternative for the under-chin region.

Q: Do I have to leave Character Creator for the texture repairs?
A: Not necessarily. PhiBix shows both routes. Photoshop gives the most manual control for diffuse cleanup, but the AI Studio Image Gen and Edit workflow with Nano Banana Pro can generate and project a missing view, such as the under-chin area, without leaving Character Creator 5.

Q: How long does building a digital double this way take?
A: PhiBix completed this build in under four hours thanks to years of practice. He estimates a beginner who already knows the tools could reproduce the same workflow in roughly one to two days.

Related Posts

Download a free 30 day trial of Character Creator 5
SIGGRAPH 2026: NVIDIA RTX Boosts AccuFACE2 & AI Studio at HP Booth

SIGGRAPH 2026: NVIDIA RTX Boosts AccuFACE2 & AI Studio at HP

SIGGRAPH 2026 in Los Angeles SIGGRAPH 2026 brought a week of incredible innovation to Los Angeles, gathering the world’s leading artists, developers, and technology pioneers in digital creation. This year, Reallusion was exclusively invited by NVIDIA to participate in the HP booth.

Positioned at the forefront of digital creation, this synergistic showcase combined Reallusion’s Character Creator and iClone software with NVIDIA’s advanced RTX GPU technology and HP’s top-tier hardware, specifically the Z4 Workstation and the HP ZGX Nano AI Station.

Reallusion’s Presence at SIGGRAPH 2026

From July 21st to July 23rd, the Reallusion team hosted active, high-traffic live demonstrations at the HP booth. Reallusion’s Director of Partnership Marketing – Enoc Burgos, and Senior Account Manager – Kai Deneve, engaged directly with fans, friends, clients, and industry partners to provide hands-on experiences. These daily interactions led to recorded testimonials from some of Reallusion’s closest allies and media systems integrators, demonstrating the industry-wide impact of the software.

Showcasing RTX Render, AccuFACE2, and AI Studio

Throughout the event, Reallusion featured hands-on showcases of AccuFACE 2 at the HP booth.

AccuFACE 2 features a newly trained AI model designed for accurate facial tracking and enhanced stability, specifically optimized for CC5 HD characters. With GPU acceleration support, AccuFACE 2 enables real-time, full-frame facial capture for faithfully reproducing nuanced lip movements and dynamic facial expressions.

Reallusion also had the chance to demo its latest RTX Render update for iClone, which leverages NVIDIA’s RTX GPU acceleration for real-time path tracing.

A major highlight was the new AI Studio intergration with iClone and Character Creator. Powered 3D assets exoprted from iClone to AI Studio, users can now strictly control consistency while retaining IP ownership when rendering with AI video generative models.

LIVE Demos on CenterGrid Virtual Machine

Beyond the HP showcase, Reallusion took center stage at the CenterGrid booth with daily, hands-on demonstrations of AI Studio. These presentations highlighted the sheer power of CenterGrid’s virtual studio services, demonstrating how users can scale their hardware by choosing from a flexible lineup of high-end GPUs designed to meet any project scope or budget.

At the CenterGrid booth, Reallusion Senior Account Manager – Kai Deneve led a captivating live demonstration of Reallusion’s AI Studio running entirely on a high-performance M4 Raptor cloud workstation with NVIDIA RTX A6000.

Kai walked attendees through the complete digital human pipeline, seamlessly linking Character Creator, iClone, AccuLIPS, Motion LIVE, and AI Studio, to showcase how artists can create, animate, and deploy production-ready characters without the constraints of local hardware.

By leveraging CenterGrid’s secure, cloud-based creative infrastructure, studios and independent creators alike can tap into powerful GPU resources for rapid, AI-assisted workflows and global collaboration, ultimately redefining the future of content creation for film, games, and virtual production.

Connecting with Friends, Fans and Long-time Allies

SIGGRAPH is always a fantastic opportunity to reconnect with the passionate creators who push our software to new heights. This year, the Reallusion team was thrilled to meet up with veteran power users and long-time champions of iClone and Character Creator.

We had great conversations with industry trailblazers like Jonathan Winbush, Solomon Jagwe, and E.J. Hassenfratz (School of Motion), sharing insights, workflows, and celebrating their continued success. It was also a special highlight to connect in person with our talented Reallusion content developer, Gregor Hoch, whose ongoing contributions remain a vital part of our vibrant creative community.

Looking Ahead: Event Wrap-Up & Key Takeaways

SIGGRAPH 2026 was a great success for Reallusion. The event solidified strong partnerships with NVIDIA, HP, CenterGrid, and Maxon, and allowed the team to demonstrate robust technological leadership through RTX GPU-Accelerated tools and AI Studio. Reallusion extends a heartfelt thank you to all the partners, academic leaders, and creators who visited our booths and participated in the live demonstrations.

FAQ

Q: Where was Reallusion located at SIGGRAPH 2026?
A: Reallusion was exclusively invited by NVIDIA to showcase inside the HP booth. Additionally, the team ran daily demonstrations of AI Studio at the Centergrid booth.

Q: What hardware powered the Reallusion demos?
A: The demonstrations were powered by NVIDIA’s advanced GPU technology running on HP’s Z4 Workstation and the HP ZGX Nano AI Station.

Q: How can users access AI Studio for free?
A: Users can access AI Studio for free through the latest iClone Personal Edition, giving creators a hands-on opportunity to explore AI-driven character creation and animation workflows directly.

Q: Which core technologies were highlighted at the event?
A: Reallusion provided hands-on showcases of RTX Render and AccuFACE2 at the HP booth, alongside daily demonstrations of AI Studio at the Centergrid booth.

READ NEXT:

Reallusion Unlocks Limitless Creation: iClone Personal Debuts Alongside AI Studio Official Launch

AccuFACE 2 Grand Launch: Professional-Grade Facial Mocap for CC5 HD Characters

RTX Render Open Beta Begins: Path-Traced Quality Inside Character Creator 5 and iClone 8

Daz to Character Creator 5 Workflow: Building Bu Ra En with CC5 and Blender

TL;DR: This tutorial walks through a complete Daz-to-Character Creator 5 workflow for creating original stylized characters. Multimedia designer CYING begins with a Daz Genesis 9 base, brings it into CC5 using the Transformer, then refines the character’s face and body with morph tools, adds tattoos and custom materials, and creates additional props in Blender before final integration. The finished result is an animation-ready original character, built far faster than sculpting from scratch.

Malaysia-based multimedia designer CYING creates original characters, stylized digital humans, and visual designs, and relies on a hybrid pipeline to do it. Rather than choose one tool, CYING combines three: Daz 3D for a fast base, Character Creator 5 as the central hub, and Blender for custom assets. This breakdown follows the Daz to Character Creator 5 workflow behind one character, Bu Ra En, then shows how the same process scales to an entire cast.

Step 1: Locking in the Character Concept

Before any 3D work begins, CYING defines the character’s personality, color palette, and overall visual direction. This front-loaded planning keeps the design consistent later and guides every asset choice.

For Bu Ra En, the brief was powerful, mysterious, dramatic, and slightly dangerous. The core design elements followed from that: red hair, dark clothing, strong contrast, sharp accessories, and full-body tattoos.

Pro Tip: A clear concept is not just a mood board. It becomes the filter for which Daz base, textures, and outfits are worth pulling in, which prevents the design from drifting once you are deep in the tools.

Step 2: Finding a Base Model in Daz 3D

With the direction set, Daz 3D provides the starting foundation. For Bu Ra En, CYING selected a Genesis 9 model and a full-body tattoo texture that matched her personality, then made first-pass adjustments to the face, body shape, skin, tattoo placement, and outfit direction.

The important mindset here: the Daz character is not the final result. It is a foundation to build on, chosen for speed and for the range of ready-made assets Daz offers.

Step 3: Importing the Character into Character Creator 5 with Transformer

This is the bridge that makes the Daz to Character Creator 5 workflow efficient. Once the Daz character is ready, CYING exports it and brings it into CC5 using the built-in Transformer.

Transformer converts the Daz character into the Character Creator system while preserving the important elements: body shape, face, textures, hair, and clothing. Because the conversion carries those pieces across, there is no need to rebuild the character from the ground up.

Note: CC5’s Transformer supports Genesis 3, 8, 8.1, and 9, converting them into CC3+ topology HD characters that support multiple subdivision levels. That topology is what unlocks the morph and material work in the next steps.

Step 4: Refining the Character in CC5 with Morph Tools

Inside CC5, the character stops being a standard base and starts becoming an original design. Using the morph tools, CYING reshaped Bu Ra En’s face, eyes, jawline, expression, and body proportions.

This is the stage where personality becomes recognizable. The goal is to move the character away from the generic base likeness and toward the concept locked in Step 1.

Step 5: Testing Tattoos, Materials, and Clothing

With the shape refined, CYING checks the tattoo texture, skin materials, clothing, and overall color balance together, because they interact.

Bu Ra En’s tattoos cover a large part of her body, so they have to read cleanly against her skin, outfit, lighting, and hairstyle rather than competing with them. CYING also tests the clothing from multiple angles to confirm the full silhouette stays clear and visually balanced from every view, not just the front.

Pro Tip: Judge tattoos and materials in context, not in isolation. A texture that looks sharp on a flat preview can flatten out or clash once hair, wardrobe, and lighting are in the scene.

Step 6: Creating Custom Assets in Blender

For design elements that do not exist in any content library, CYING turns to Blender. This is where accessories, ornaments, decorative shapes, and character-specific props get built or adjusted.

These custom pieces are what push a character past “assembled from existing content” and into something genuinely unique. Once the assets are ready, CYING exports them from Blender and brings them back into Character Creator 5.

Step 7: Final Integration and Animation Testing

Back in CC5, everything comes together: the character, materials, clothing, hair, tattoos, and the custom Blender assets are combined into one file.

CYING then tests poses, facial expressions, camera angles, and simple animations. This motion check catches problems a static render hides, such as accessories or clothing that intersect or behave badly once the character moves. In this pipeline, CC5 acts as the central hub where every part of the character is refined, organized, and prepared for presentation or future animation.

Applying the Workflow to Your Own Cast

The same process scales across an entire character lineup. CYING uses it for a full set of original characters, each with a distinct identity:

  • Xiao Lian has a softer, dreamy design inspired by lotus flowers.
  • Nakhari has a mysterious, elegant, snake-inspired appearance.
  • Xiao Fu has a gentle, natural identity drawn from plants and flowers.
  • Bu Ra En carries the darker, stronger, more dramatic personality featured throughout this breakdown.

The production steps stay the same, but morphs, materials, clothing, accessories, and styling produce very different results. That repeatability is the real payoff: one reliable pipeline, many original characters.

Summary

The Daz to Character Creator 5 workflow gives each tool a clear job. Daz 3D delivers a fast starting point and a deep asset pool. Blender adds the custom props and accessories that make a character feel one of a kind. Character Creator 5 sits at the center, where the character is refined, all the parts are combined, and poses and expressions are tested before animation. Worked this way, an original stylized character comes together efficiently without giving up a distinct personality or visual identity.

Want to learn more about the DAZ to Character Creator 5 workflow? Explore the DAZ Character Transformer Course for expert tips and techniques.


Key Takeaways

  • Design before you model. Locking personality, palette, and key elements first keeps asset choices consistent and stops the character from drifting once you are inside the tools.
  • Treat the Daz base as a foundation, not the finish. A Genesis 9 model plus a matching texture is a fast starting point, not the final look.
  • Let Transformer do the heavy lifting. Converting a Daz character into CC5 preserves body, face, textures, hair, and clothing, so you refine instead of rebuild.
  • Judge tattoos and materials in context. Skin, outfit, hair, and lighting all interact, so evaluate them together and from multiple angles.
  • Use Blender for what libraries can’t give you. Custom accessories and props are what separate an original character from an assembled one.

About the Creator

CYING is a multimedia designer and 3D character creator based in Malaysia, specializing in original characters, stylized digital humans, animation, and visual design. CYING’s approach favors a hybrid pipeline that borrows the strengths of Daz 3D, Character Creator 5, and Blender rather than committing to a single tool, using CC5 as the hub that ties the whole process together.

FAQ: Daz to Character Creator 5 Workflow
Q: Can I use this workflow for my own original characters?

A: Yes. The pipeline is built to be repeatable. As CYING’s cast shows, the same Daz to CC5 to Blender steps produce very different characters simply by changing morphs, materials, clothing, and custom assets.

Q: Which Daz characters can the Transformer convert into CC5?
A: Character Creator 5‘s Transformer supports Daz Genesis 3, 8, 8.1, and 9, converting them into CC3+ topology HD characters with multiple subdivision levels. Older legacy figures are only supported in Character Creator 4.

Q: Do I need Blender to follow this workflow?
A: Not for the core pipeline. Daz plus Character Creator 5 covers concept, conversion, refinement, materials, and animation testing. Blender is optional, used only when you want custom props and accessories that no existing content library provides.

Q: Why route Daz characters through Character Creator instead of animating them directly?
A: Converting into CC5 gives you a standardized, animation-ready rig plus the full CC toolset for morphs, materials, and pipeline export, while still keeping the Daz likeness you started from.

Related Posts

Download a free 30 day trial of Character Creator 5

AI Studio Storytellers: Building a Connected World with Consistent AI Characters

Consistency is one of the biggest challenges in AI filmmaking. Characters drift, environments change unexpectedly, and maintaining continuity across multiple scenes often becomes more difficult than creating the shots themselves.

In the latest AI Studio Storytellers, creator Max Thomas demonstrates a production workflow designed to solve those problems. Using AI Studio alongside traditional 3D production techniques, he created Sidewalk Syndicate, a neighborhood story that follows a recurring cast of characters through multiple locations, situations, and camera setups while maintaining visual continuity.

Rather than treating each prompt as an isolated image, Max approaches AI filmmaking much like a live-action production—developing actors, establishing locations, planning coverage, and using 3D when precise direction is required.


The Sidewalk Syndicate Experiment

At its core, Sidewalk Syndicate was never just about generating attractive images. It was an experiment in building a believable world populated by recognizable characters that audiences could follow from one scene to the next.

Instead of creating new characters for every sequence, Max developed a small recurring cast consisting of kids: Mason, Liam, Nolan, Oliver

Each character was given a distinct appearance, personality, wardrobe, and visual identity before production began. Once defined, these digital actors could appear throughout the story while maintaining consistency regardless of the scene, lighting, or camera angle.

The storyboard process can easily flow with shot ideas and characters. A good shot plan will keep production on schedule and allow for budgeting of points to achieve the goal.
This production-first mindset transforms AI generation from isolated shots into a cohesive narrative experience.

Building a Reusable Cast

One of the strengths of AI Studio is its AI Actor Library, allowing creators to establish reusable digital performers before building scenes. AI Studio has 200 ready to use actors that can be cast to your scenes or you can easily create custom AI Actors using images or Character Creator and iClone.

Once each character has been defined as an AI Actor, they become reusable assets that can be directed repeatedly throughout production. The AI Actors selected from the AI Studio library or AI Actors created by each user can be accessed and assigned to any scene, along with the included character prompts.

This mirrors traditional filmmaking, where actors remain consistent while the sets, camera positions, and story situations change around them. Because the characters remain stable, prompts become cleaner, direction becomes easier, and continuity improves dramatically over longer productions.


Creating Stable Environments

Just as important as character consistency is environmental consistency. Whether the environment is provided in images or as a concept, AI Studio image generation can build essential shots and alternate views of locations to get camera angles, and locations established before video generation.

Max begins by generating images that establishes the location’s architecture, lighting, mood, and visual language.

With a strong environmental reference established, AI Studio can produce different camera angles, compositions, and staging while preserving the identity of the location.

This allows scenes to feel like they all occur within the same physical space instead of unrelated AI generations. Whether following the boys through suburban streets, neighborhood hangouts, or new story moments, the world remains visually recognizable.


Directing Multiple Characters

As scenes become more complex, direction becomes increasingly important. Prompting scene elements, action and direction is essential to support the image input.

Max recommends treating AI actors much like performers on a film set by calling each character by name and assigning individual actions instead of describing the group as a whole. The character dialogue is capable inside prompts to allow the video model to generate the voices with text, audio or by using the Talking Actor feature inside AI Studio to create custom voices.

For example, instead of prompting: “Four boys stand together.” Each actor receives specific direction.

  • Mason reacts first. “Trust me. I definitely have a plan.”
  • Liam turns toward him.
  • Nolan laughs.
  • Oliver says: “That is what worries me.”

Follow some of these best practices for more believable staging while reducing confusion inside multi-character generations.

For dialogue scenes, Max also recommends:

  • Keeping spoken lines short and conversational.
  • Including dialogue directly inside prompts.
  • Building complete scene coverage using the AI Studio camera preset library:
    • Wide establishing shots
    • Medium shots
    • Close-ups
    • Reaction shots

Maintaining Continuity with AI Studio’s Edit Mode

Even with consistent characters, productions often require revisions. AI Studio’s Edit Mode provides a workflow for preserving continuity while refining individual shots. In this next shot, Max wanted another angle with closeup as the boys chatted at the hardware store.

Instead of regenerating an entire image, creators can adjust poses, expressions, compositions, or details while maintaining the established cast and environment. Max chose to edit the image and create a new camera angle for the interaction.

This iterative workflow allows filmmakers to improve performances without sacrificing continuity that has already been established earlier in production.
For longer-form storytelling, this becomes one of the most valuable tools in maintaining visual consistency from scene to scene.


Using 3D as a Production Foundation

While many scenes can be directed entirely inside AI Studio, some sequences require more precise control over camera placement, staging, and performance.

For these moments, Max incorporates a traditional iClone 3D workflow.

Characters and cameras are first blocked inside iClone, allowing complete control over Camera composition, Character placement, Silhouettes, Timing, Performance, Shot design.

The rendered frame then becomes the visual foundation for AI image generation. The frame can use the AI Studio tool to assign the AI Actors to the reference frame from iClone. The assignment allows Max to associate the intended actor’s performance, mood and gesture in the 3D reference to the AI Actors loaded into the AI Studio project.

Instead of asking AI to invent composition, the creator provides a carefully designed layout that preserves the original cinematic intent.

This hybrid workflow combines the precision of 3D filmmaking with the speed and visual quality of AI generation.
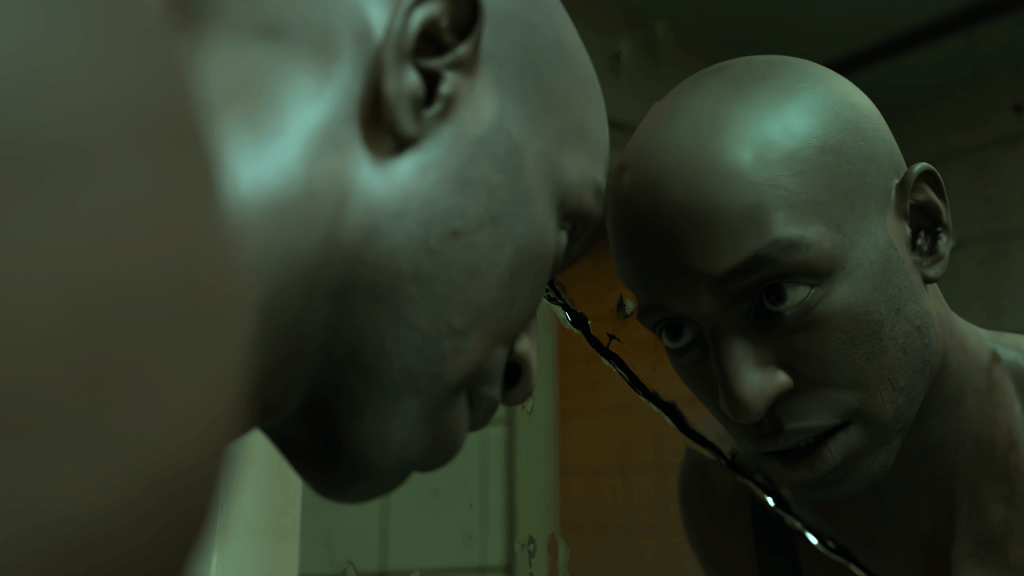


Production Mindset and Prompt Engineering

Perhaps the biggest lesson from Sidewalk Syndicate is that successful AI storytelling is less about discovering the perfect prompt and more about adopting a production workflow along with prompting.
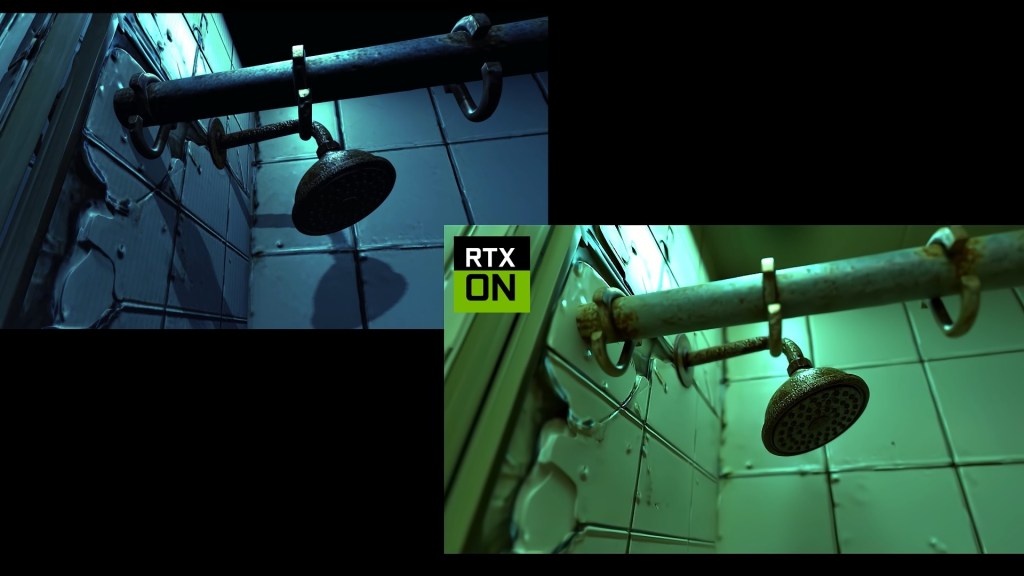
By treating AI actors as a recurring cast, establishing reusable environments, directing performers individually, planning editorial coverage, and incorporating 3D when precision is required, creators gain significantly greater control over the final story.

The result is a workflow that scales beyond single images into connected narratives with consistent characters, recognizable locations, and cinematic storytelling.

As AI filmmaking continues to evolve, production-minded workflows like the one demonstrated by Max Thomas offer a practical blueprint for creators who want to build believable worlds instead of isolated scenes.

AI Studio Storytellers

AI Studio Storytellers highlights creators who are pushing the boundaries of digital storytelling through Reallusion’s AI Studio workflow. Through behind-the-scenes breakdowns, production insights, and real-world projects like Max Thomas’s commercial lifestyle campaign, the series explores how artists combine Character Creator, iClone, AI Studio, and leading AI models to develop consistent digital actors, direct scenes in 3D, craft effective prompts, generate music and performances, and transform creative ideas into polished productions. Each episode reveals practical techniques and creative workflows that demonstrate how creators can direct AI with purpose while maintaining artistic control from concept to final delivery.
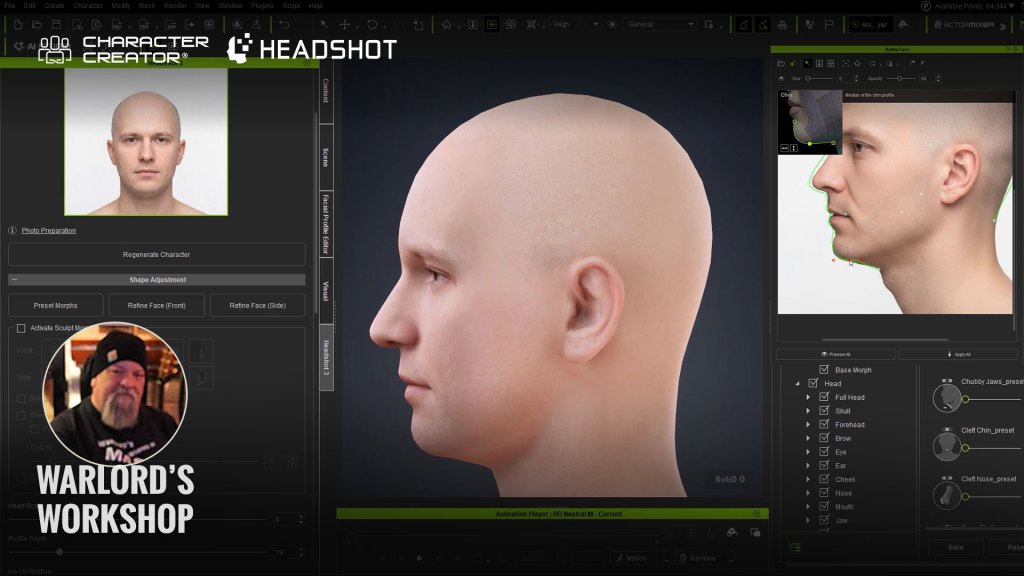
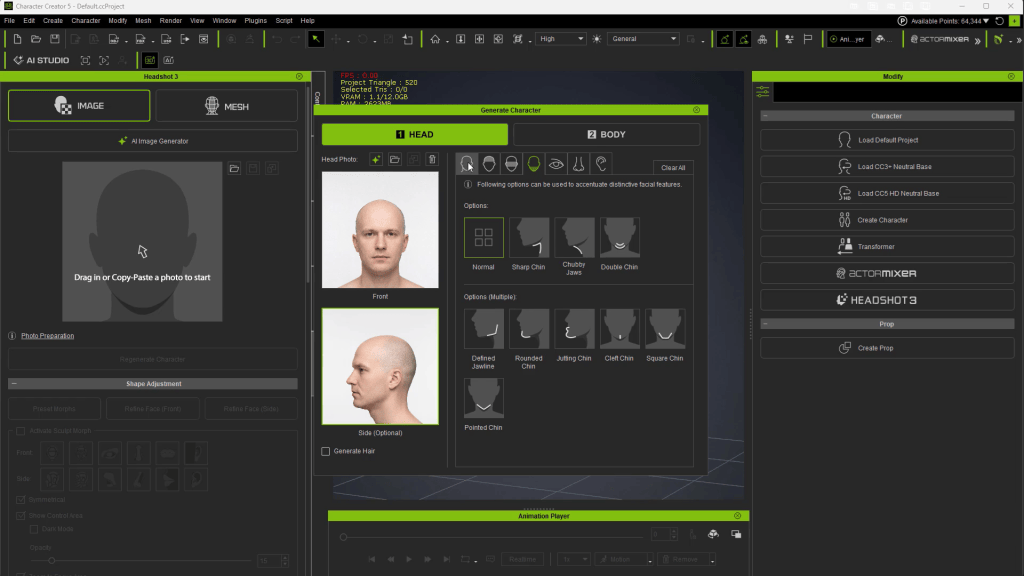
Max Thomas is a Professor of Practice at Georgia State University’s Creative Media Industries Institute (CMII) and Co-Founder & CTO of Actor Capture. His work focuses on virtual production, digital humans, motion capture, real-time animation, and AI-assisted content creation. As an educator and industry practitioner, Max specializes in helping creators combine traditional production techniques with emerging AI tools to accelerate storytelling and creative development. He regularly speaks on the future of production workflows and the growing role of AI in media, education, and entertainment.

Related Posts

Reallusion AI Studio is built for 3D artists who want to streamline their workflow with authentic AI render, and for AI creators seeking stronger consistency and more precise control with less trial and error—unlocking greater productivity by blending the best of both worlds. Tutorial

Headshot 3 AI Image Generation: From Prompt to 3D Head

This is another one of those tasks I look forward to… reviewing a product that was made for beginners and pros by a company that understands both markets. I never thought I’d make that statement, as 3D work can be difficult and time-consuming, which leads me to my favorite keyword “tedious,” of which a product like this eliminates or at the very least greatly reduces it.

There was a time when making characters was so complex that advanced skills were applied from blocking out a mesh, sculpting it, then rigging it for animation. Sure, it was fun the first time, maybe even the first one hundred times, but after a while it just gets to be a buzzkill and was a major reason I focused on props and scenes to avoid burnout. I loved making the character mesh, but the rigging was the deal killer, particularly in 3DS Max, creating and tuning envelopes for each finger and knuckle.

For those of you new to these products, they have been a long time in the making, based on collaboration with users, including pros, hobbyists, and beginners, to put a tool into our hands that follows the philosophy of using what you need while not overcomplicating basic features for beginners. In fact, there are so many features in Character Creator 5 and iClone 8 that I can’t even remember them all, and I, like other original users, have been along for the entire evolution of these products.

For the current users of CC5, I’ll stop the history lesson here, and we will focus on what Headshot 3 has brought to the table in terms of IMAGE-BASED facial creation. The mesh-based side of CC5 remains the same, but the image side of it has been refined and improved with more AI functionality while not stifling the creative nature of its users.

AI as a Tool

Not all of us can agree on the use of AI in digital art, but that also leaves out the fact that when used as a tool to enhance creativity by eliminating the tedious nature of things that kill the creative urge, this tool can empower the digital artist by spending more time being creative and less time being technical. I’m not sure myself where I stand on all things AI, but I know if we don’t learn, we could be left behind, and Reallusion is not here to create the artistry for you but to facilitate the tech needed to create and showcase that artistry.

Let AI do the Sculpting

Not all of us are able to sculpt 3d mesh into a character, and even those of us who can are finding ourselves under decreasing time constraints. If you are a pro, then time is money; if you are a hobbyist, then time should be fun. Frustration comes if you are not using applications that remain consistent and approachable by anyone.

For example, ZBrush is great, but it’s the most oddball interface new users might ever see. While Maxon is mainstreaming some features of ZBrush, the interface is so unique that it can take weeks to months just getting familiar with it. Even after all the years I’ve used it, I haven’t scratched the surface of what it can do. That is what I call AAA complexity for AAA results.

Reallusion products, on the other hand, can produce AAA results with little to no experience in 3D animation. In its simplest form, Headshot 3 allows us to load an image for reference, then let the AI create the head and put it on the body. No sculpting unless you want to tweak the mesh, but even in this simple straight-through run, you can get an amazing custom character. As you learn how to refine characters with experience, you can use more of the advanced sculpting tools, but you don’t have to use them.

Test Character One – 2K Generation

This is my first run to test it for myself. The goal was to get a young Mexican female in her late teens or early twenties. To do this, I used the AI-Generation feature in Headshot 3. I’m not sure at this point how the AI interprets a prompt, so I had a chatbot prepare a generic prompt for me, as I’m not that flowery with prompting, and it gave me the prompt below:

Young, beautiful Mexican American woman with smooth sun‑kissed skin, no hair, warm brown eyes, soft natural makeup, calm, confident expression. Even studio lighting, crisp focus, ultra‑realistic detail, 85mm portrait lens look, clean professional aesthetic.

I let Headshot 3 AI create the three views as shown, so I could see how it worked for the head and body. The process is covered in the video linked at the end of this article. This was strictly a straightforward run through the system without major tweaking, letting the tool do the work.

The face could use a little reshaping along with the nose, but for an unaided run using just AI, it went well and produced a character in minutes. The process is easy, like its predecessor, even though there are a lot more tools to fine-tune the mesh to better match the image. For a few minutes’ work, it’s a quick way to get filler characters, and depending on the quality resolution, they will work for main characters, as this first test was at 2k and went very smoothly.

Test Character 2 – 4K Generation

For the 4K generation, I chose a Persian male and once again let a chatbot create a more detailed prompt based on my basic requirements.

A handsome, striking young Persian man with a clean‑shaven head and smooth jawline, facing the camera with confident, magnetic charm. His dark, expressive eyes hold a calm intensity, and his features are sharp and sculpted. Soft, cinematic lighting highlights the warm undertones of his skin. The background is white to keep full focus on his commanding gaze and poised posture. High‑resolution, portrait, headshot photography style.

Some elements of the prompt might have been unnecessary, but it produced good results the first time, so I’ll didn’t edit anything out. I also didn’t specify a specific age as Reallusion did in the manual, but that can be a part of the prompt as well.

Just as I did with the first run, I let the plugin AI handle most of the work. I did a few sculpting tweaks with the new, more refined sculpting tools, and it worked fine. I was able to easily adjust what little needed to be adjusted, and I wasn’t looking for an exact copy anyway. I just wanted to verify that the first run wasn’t a fluke, and it produced another great character that would be at home close to the camera or as a scene filler. The great thing about using Headshot 3 is that the character is fully functional with all the bells and whistles we’ve become accustomed to.

The end result produces a very good, high-quality 4K character that looks good on screen, has all the functionality of an iClone character, and projects a very nice image or screen presence. Again, this was done with only a few minor sculpts, mainly to test the sculpting features, but it wasn’t necessary to produce a good character. I also lengthened the jaw and lowered the mouth a bit with sliders.

Why No Hair or Facial Hair in the Prompt?

I do this in the prompt so I can use the Beard tool and packs to add more realism, as photo beards are more like the late 1990s and can detract from the production, causing the audience to lose the story and focus on the funny-looking beard. Having no beard in the reference image makes the face a lot cleaner on the character than having to deal with a beard plastered on the face in the image.

Test Character 3 – U.S. Historical Figure

For this test, I dug out an old Abraham Lincoln character I made a long time ago when Character Creator was still new. I hadn’t updated it in years, and I created the clothes in Marvelous Designer to match the suit he wore at a famous speech. The mesh turned out to be too old to use in the process, as you’ll see in the video, but CC5 took care of it by substituting a new compatible male mesh without missing a beat. I added a beard, hair, and his famous top hat to round out the character.

I did edit the processing time in the video so you wouldn’t have to wait it out, but it was only a few minutes at most, so it wasn’t that long of a wait, and in under 5 minutes, I had a fully functional, updated Abe Lincoln character, not counting the clothing.

You can see from the video that it was simple to update my Abe Lincoln character to a cleaner face. This was an older CC mesh, so it was incompatible, but Headshot 3 let us use other body meshes without skipping a beat. I didn’t tweak this character as I wanted you to see what it looks like just going through the process. The chin could be longer, the mouth lower, and the top of the head shorter, which you can do with more time.

I was amazed at Headshot 3’s ability to enhance the photo I used, as it was far from optimal and broke most of the good practices rules for image to face, but as you can see, it turned out just fine. I only needed the one forward-facing headshot, so a side and body generation were not needed. As you can see in the video, all I had to do was load the image and click a few checkboxes, then start the process. Perfect for beginners that don’t want to fiddle with the sculpting or other edits, as this character was usable straight out of generation without refinement, as many are.

Summary

I spent over two weeks with Headshot 3 before I wrote this article, and I rarely looked at the manual. For me, this is one of the biggest selling points, and I’ve brought it up many times: the ease of use. You can refine and sculpt to your heart’s content or just run it through the process and let AI handle the technical aspects, with many options in between.

Is it worth the upgrade? In my opinion, yes, the mesh part is the same as before, but the AI generation is a real step forward in how I used Headshot 3, so it might be the same for many other people. I can’t find any reason not to upgrade unless you will not be using the AI, but you will miss out on learning the new refinement tools that anyone can use, and Pros can really take advantage of.

Headshot 3 is another tool that is as easy or as complicated as you want it to be. Use only what you need while learning the more advanced features at your leisure. Even beginners can be pros within 6 months to a year of experience using tools like Headshot 3, which really simplifies the process.

Manual

MD McCallum - WarLord

MD McCallum – WarLord

Digital Artist MD “Mike” McCallum, aka WarLord, is a longtime iClone user. Having authored free tutorials for iClone in its early years and selected to write the iClone Beginners Guide from Packt Publishing in 2011, he was fortunate enough to meet and exchange tricks and tips with users from all over the world, and loves to share this information with other users. He has authored hundreds of articles on iClone and digital art in general while reviewing some of the most popular software and hardware in the world. He has been published in many of the leading 3D online and print magazines while staying true to his biggest passion, 3D animation. For more information, click here.

Download a free 30 day trial of Character Creator 5

AccuFACE 2 Grand Launch: Professional-Grade Facial Mocap for CC5 HD Characters

When AccuFACE first launched, creators worldwide embraced its AI facial tracking capabilities in iClone. Thanks to invaluable feedback from the community, the development team continued refining and pushing the boundaries of performance capture.

Today, Reallusion is proud to announce AccuFACE 2, the new gold standard for facial mocap. Powered by GPU acceleration and specialized mouth-tracking optimizations, AccuFACE 2 enables real-time, full-frame tracking tailored specifically for Character Creator 5 (CC5) HD characters. It delivers reliable performance even under challenging conditions, ensuring smooth, precise tracking across dim lighting, diverse skin tones, aggressive head turns, and dynamic performer movement. 

GPU Power: The Engine Behind AccuFACE 2

At the core of AccuFACE 2 is a GPU-accelerated engine that drives the entire tracking process. By leveraging the power of your graphics card, AccuFACE 2 achieves ultra-low latency and full-frame tracking without overloading your CPU. This provides smooth viewport performance, instant real-time responsiveness, and maximum stability when tracking detailed characters under demanding conditions.

What’s really neat is in real time they’re able to leverage the RTX GPU, analyze the motion that’s there, figure out what the motion is, and then remap it and retune it.

Vincent Brisebois— Sr. Media and Entertainment Developer Relations Manager at NVIDIA

AccuFACE 2 x CC5 HD Characters: Next-Level Facial Mocap 

AccuFACE 2 introduces a newly trained AI facial tracking model engineered to unleash the full potential of Character Creator 5. By communicating directly with CC5’s native HD Expression Profile (262 blendshapes and 128 corrective morphs), the system captures intricate facial nuances with surgical precision, delivering full-frame tracking in real time. 

Capture Subtle Talking Performances: Driven by dedicated mouth-tracking optimization, AccuFACE 2 leverages CC5’s fine facial mesh to capture lip-puckers, micro-movements, and complex speech details for natural, precise lip sync across any language. 

Authentic Range of Emotions: From subtle eyebrow micro-twitches and eye-gaze shifts to extreme facial deformations, the enhanced AI model accurately translates the full emotional spectrum across both photorealistic and stylized characters.

You can see that we’re getting all the small minor details, a lot of times as a character creator artist, you get that uncanny valley and this is going to help you get past that.

Jonathan Winbush— Award Winning Artist & Influencer

Expression Curves for Highly Customized, Vivid Performances

Every project demands a unique artistic identity, and AccuFACE 2 gives artists total control over raw motion signals. While traditional facial capture tools lock users into linear tracking, AccuFACE 2 lets them sculpt how every tracking channel translates into motion directly inside the Expression Curves System to perfectly match any art style.

Non-Linear Signal & Timing: Break free from flat, linear mapping. Users can customize tracking sensitivity and non-linear response curves to add snappy physics and exaggeration for stylized characters.

Exaggeration & Follow-Through: Link a single tracking signal to drive secondary expressions automatically. This follow-through motion adds subtle anatomical fidelity to realistic characters, while unlocking dynamic exaggeration and unique personality traits.

Curve Presets: Instantly apply built-in curve presets tailored for specific facial zones and intensity levels. These presets allow animators to rapidly adjust animation rates and rhythm to suit different characters and scene moods without manual tuning.

You can go and adjust the strength of performance and really have a lot of control. So, as someone that really loves stylized characters, highly recommend this.

Edward Hassenfratz— Creative Director at School of Motion

Recording live video feeds is now available directly within AccuFACE 2, allowing animators to load reference footage side-by-side with 3D facial animation for precise editing. This live video recording feature has also been expanded to the LIVE FACE mobile app

Robust Capture Under Challenging Production Conditions

Real-world capture environments rarely provide ideal studio setups. AccuFACE 2 is engineered to maintain tracking stability across everyday webcams, mobile phones, and pre-recorded video feeds, eliminating the need for specialized head-mounted rigs or rigid neutral-pose calibrations. Built-in auto-gamma and adaptive vision algorithms handle severe real-world lighting, dynamic head movements, and performer variations:

Lighting Scenarios: The tracking engine automatically applies light compensation to handle underexposed, dimly lit environments as well as heavily overexposed studio lighting or severe directional shadows.

Extreme Head Movement & Rotation: Dynamic head rotation and pitch often lead to feature distortion or tracking lockup in traditional systems. AccuFACE 2 tracks reliably during aggressive head motion and side-profile turns, maintaining facial expression integrity without snapping or freezing.

Skin Tone Diversity: Adaptive recognition ensures stable facial feature detection across all skin tones and facial structures, preventing the tracking drift commonly caused by harsh contrast or low visual separation.

Unified Full Body Mocap with One Video Source 

AccuFACE 2 breaks distance constraints by maintaining exceptional tracking accuracy even when the performer is far from the camera. Engineered to withstand motion blur and reconstruct precise facial performances from head images as small as 120 × 120 pixels, the system eliminates the need for tight close-ups, enabling creators to use a single video source to simultaneously drive both facial expressions and iClone Video Mocap upper-body motion.

Long-Distance & Blur-Resilient Tracking: Advanced face detection reliably isolates and tracks facial features from wide or mid-shot footage, maintaining full performance fidelity despite low pixel counts or fast motion blur.

Single-Source Full Body Mocap: Process facial expressions and iClone Video Mocap body motion simultaneously from the exact same video feed. Solo creators can record a single shot on a smartphone or webcam and instantly generate synchronized face and body motion tracks in one streamlined step.

While AccuFACE 2 reconstructs performance from lower-resolution frames. For optimal tracking around subtle micro-expressions and intricate lip movements, closer camera framing is recommended. 

Seamless Cross-Platform Pipeline Versatility

Performers can capture and refine facial animation directly in iClone, then export clean motion data to Unreal Engine, Blender, Maya, or Cinema 4D. AccuFACE 2 offers direct compatibility with MetaHuman Animator (MHA) via Auto Setup. Facial performances captured on CC5 characters map directly onto MetaHuman rigs, and MHA sequences can be brought back into iClone for further editing. This makes iClone a powerful central hub for polishing and retargeting facial motion across any production toolset.

Get Started with AccuFACE 2 Today

AccuFACE 2 is available as an iClone plugin, offering tailored entry points whether users are upgrading an existing mocap setup or exploring the pipeline for the first time.

Existing AccuFACE Users: Take advantage of exclusive early-bird upgrade pricing to unlock next-generation CC5 HD tracking, full-frame GPU acceleration, non-linear curve controls, and dual-mocap capabilities.

New Creators & CC5 Users: Download iClone Personal, Reallusion’s permanently free, zero-cost edition with no time limits. Pair it with the AccuFACE 2 Free Trial to test the entire tracking and animation workflow on personal CC5 characters and discover what native facial mocap can achieve.

Free Bonus Included: Both trial and full users receive Ultra Head Scans – Meg ($79 value) as a free bonus, downloadable in the Content Manager via the Free Resource or Trial folder. Creators can use Meg as an ideal benchmark character to immediately test and see the best possible CC5 HD tracking results.

Related Links

AccuFACE 2 Product Page

Download AccuFACE 2 Free Trial

Buy AccuFACE 2

iClone 8 Product Page

Download iClone Personal

Online Manual

Forum

RTX Render Open Beta Begins: Path-Traced Quality Inside Character Creator 5 and iClone 8

Reallusion has launched the RTX Render open beta, bringing a new path-traced rendering mode to iClone and Character Creator based on NVIDIA RTX Path Tracing technology. The update introduces physically accurate lighting, a new RTX material system with Transmission, Coat, Sheen, and dedicated Hair controls, real camera depth of field, and a dynamic procedural sky, letting creators reach near-offline render quality directly inside their existing workflow. The open beta is free for iClone and Character Creator users: sign up through the beta form, and the official download link will be sent by email when the beta goes live.

What is RTX Render

RTX Render is a new path-traced rendering mode inside iClone 8 and Character Creator 5, built on NVIDIA RTX Path Tracing technology. Instead of approximating light the way a real-time rasterizer does, it simulates how light actually bounces through your scene, so skin, hair, eyes, and PBR materials reach a quality much closer to an offline renderer. The goal is simple: you get near offline visual quality without leaving your app and without exporting to an external renderer.

RTX Render is added as a separate render engine alongside the existing DX11 engine. It does not replace DX11. You can switch between the two at any time, and switching back to DX11 does not require you to reset your scene.

What’s New in RTX Render

Path-traced digital humans. Subsurface scattering lets light pass through skin the way it does in life: ears glow against backlight, faces carry real translucency. A dedicated hair shader lights strands physically, with absorption control for deep, rich dark hair and true rim-light wrap. Eyes refract like real eyes.

A new RTX material system.

  • Transmission: true glass and liquids, with Volume Attenuation so color deepens with the object’s real thickness, plus IOR and Thin Surface for effects like bubbles
  • Coat: a clearcoat layer for car paint, lacquered wood, and carbon fiber, with its own roughness, tint, IOR, and mask
  • Sheen: soft fiber highlights that make velvet, silk, and linen read as real cloth
  • Emissive: unified glow controls where emissive surfaces genuinely light the scene, neon that actually illuminates

Physically accurate lighting. Soft shadows driven by light size, a new Angle slider for directional light, Radius controls for point and spot lights, and image-based lighting that now casts true shadows.

Procedural sky. A dynamic sky with sun position, time of day, cloud speed and density, acting as a genuine light source under path tracing.

Cinematic camera and color. Real f-stop depth of field that behaves like a physical aperture, plus ACES and AgX view transforms, false color exposure view, gamma, and white balance controls.

Preview and Final quality, separated. Samples, bounce count, and noise controls can be set independently for preview and final render, so you iterate fast and output clean.

A ready-to-use RTX content library. No parameter tuning required to get results: the beta ships with 

  • 55 ready-made RTX materials across four categories (clearcoat surfaces, transmissive glass, subsurface scattering, and fabrics),
  •  18 studio-style light presets built on real portrait-lighting setups from three-point to Rembrandt, and complete demo projects with DX11 vs RTX comparisons. Apply, render, and reverse-engineer the settings to learn.

How to Join the Open Beta

  1. Fill out the beta signup form: FORM LINK
  2. Once submitted and approved, the official download link will be sent to your inbox.
  3. Install the beta build and switch to RTX Render from Project Settings or the toolbar in iClone or Character Creator. Your existing projects convert automatically.

Full documentation is on the Reallusion Forum:

Founding testers get direct access to the development feedback channel, and the best RTX renders from the community will be featured across Reallusion channels, including the 2026 3D Character Contest spotlight.

Download a free 30 day trial of Character Creator 5