Stylized motions that add zest to 3D cartoon productions
Anyone familiar with keyframe animation understands the immense skills involved, even for seemingly basic tasks like animating a walk cycle. While keyframe animation grants artists full control to meticulously craft animations to realize their original vision, the process of creating pose-to-pose animations and then refining the in-between poses with precise timing and pacing is undeniably laborious.
To circumvent this challenge, some animators opt for motion capture animation for stylized characters. While effective mocap animations can seamlessly animate a human model into a dynamic actor within the scene, this approach falls short with stylized characters. Translating human movements onto cartoonish characters dilutes their unique personalities, as their exaggerated actions and reactions lack authenticity, resulting in awkward visuals.
Image: Hundreds of cartoon motions available on ActorCore.
While desirable, toon motions can still be challenging to create. ActorCore, the asset store for 3D productions, offers hundreds of ready-made handkey animations. These animations save artists a significant amount of time and effort while ensuring high-quality, realistic cartoon movements.
ActorCore also provides dedicated categories, allowing users to easily find ideal moves for their stylized actors for a wide range of scenarios. All motions are crafted with seamless transitions between poses, enabling effortless switching of different sequences.
Handkey animations chock-full of personality
Image: ActorCore handkey motions are catered to match different toon personas.
Handkey animations on ActorCore are crafted to accommodate a diverse range of stylized characters, providing unique animation styles suited to various body scales and personalities. Whether it’s a male, female, child, or a character with a robust or slender physique, ActorCore offers specialized motions for all cartoonish performances.
Currently there are over 500 handkey motions available in the ActorCore motion store, from general movements such as walk, talk, run, to paired motions and interactions. Any motion that showcases unique cartoon personalities can be found, including playful, hefty, clumsy, cowardly, and more.
One example is “Clumsy Moves”, is a handkey motion pack designed to infuse uproarious fun and slapstick humor. When applied, the characters come alive and engage in a variety of negligent behaviors resulting in slips, falls, and tumbles.
The “Chubby Moves” packs offer a range of lively performance animations tailored specifically for plus-sized characters. By incorporating compatible animations (like “Sit Chair” and “Sit Sofa”) across both the “Chubby Moves – Playful” and “Chubby Moves – Bulky” packs, motions can transition from one theme to another, to transcend the performance. By extending this integration to include “Playful Stand” and “Bulky Stand”, different performances can be connected into one dynamically cohesive scene.
Easily find and export the best content to your favorite platforms
3D motions on ActorCore can be conveniently accessed via web browsers and mobile devices. Enhanced interactive 3D viewing experiences are available, accompanied by swift search functionalities and categorical exploration based on keywords and phrases.
All ActorCore 3D motions seamlessly integrate with leading 3D software such as Unreal Engine, Unity, Blender, Omniverse, iClone, 3ds Max, Maya, MotionBuilder, and Cinema 4D. Comprehensive step-by-step guides and tutorials tailored to each program are provided, alongside optimized Auto Setup plugins and import presets to streamline workflow processes. The use of ActorCore assets can benefit both newcomers to the 3D field and industry veterans with their established pipelines and arsenal of tools.
Image: Select “Handkey” to see cartoon motions designed for stylized characters.
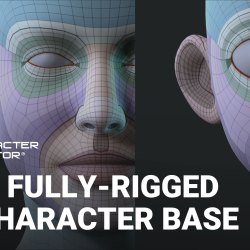
Reallusion, a trailblazer in simplifying character creation processes and breaking down animation barriers for 2D & 3D artists, is excited to announce the release of its highly praised Character Creator (CC) character bases, now accessible for free download. Recognized for their well-balanced and fully rigged topology, these animatable character bases facilitate effortless customization for a wide range of scenarios.
Five Character Bases for Free Download
Figure 1. Five bases including both cartoony and realistic male and female characters
To familiarize more individuals to the benefits of CC bases, Reallusion is generously offering five sets of CC characters for free. Interested parties can easily register on the official Reallusion website to access these valuable resources. The five bases encompass both cartoony and realistic male and female characters, as well as a neutral character. Each base is provided in three file formats — OBJ, FBX, and ZTL — accompanied by high-resolution textures. These bases can smoothly integrate into any 3D software, like Blender and ZBrush, thereby streamlining workflows.
The free CC character base is accessible for both personal and commercial purposes, encompassing applications like filmmaking, animation, gaming, 3D printing, and education.
Five Character Bases with high-res textures
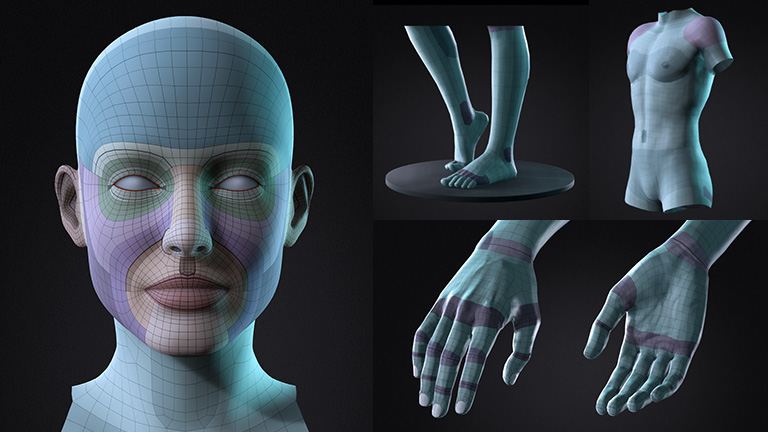
Well-balanced Topology for Morphing and Animation
Distinguishing itself from other bases on the market, CC character bases feature exceptionally balanced topology, making them not only ideal for animation but also for morph design and sub-divisional sculpting. Additionally, they come pre-loaded with 150 facial morphs meticulously crafted for expressive and accurate lip-sync animation.
Figure 3. Well balanced topology
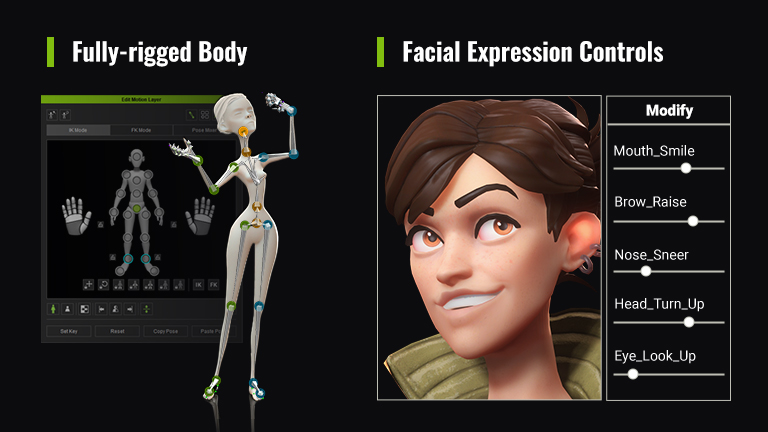
Full-facial and body Rigs for Posing and Motion Control
Furthermore, owing to their fully rigged nature, users can effortlessly transition from sculpting in other software to animating in Character Creator, utilizing its built-in skeleton for seamless motion creation.
Figure 4. Fully- rigged face and body
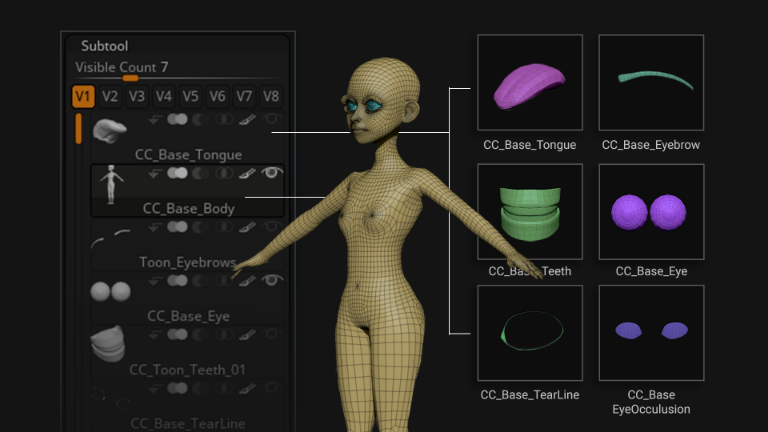
Custom Character Design for Game, Film and 3D Print
The download package includes a ZBrush ZTL file that includes subtools for eyes, brows, teeth, and tongue. This segmentation facilitates easier manipulation, adjustment, or hiding of individual elements within the ZBrush subtool list. The updated character can seamlessly GoZ to and from Character Creator while retaining its bone rig for animation and game production.
Reallusion has also dedicated significant effort to enable ZBrush designers to pose and animate their models effectively. Whether sculpting for animation, posing for 3D printing, or detailing expressions, a comprehensive character pipeline between ZBrush and Character Creator is provided.
Figure 5. Sub tool in ZBrush
For those eager to delve into an enhanced character creation experience, Reallusion warmly invites users to download Character Creator for free. Enthusiasts of all skill levels can unlock advanced functionalities and a wealth of content for a deeper engagement in the creative process.
To access further details and download Character Creator, please visit Reallusion’s website.
For more information regarding usage regulations and limitations, please refer to the end-user license agreement (Section 5: Character Creator Base Model License).
Reallusion’s Unreal Engine Live Link plugin has been a real boon to animators seeking to utilize the great rendering capabilities of the game engine. While iClone concentrates on providing animation tools, Unreal Engine is known for its cinematic rendering and life-like characters when combined with the proper lighting.
One-click transfer of assets from iClone to Unreal Engine saves time eliminating any rebuilding of the scene in Unreal. Combine this with the ability to easily send a prop or set piece from Unreal to iClone for reference and you have a more efficient means of going back and forth with assets.
Transversely you can build the scene in Unreal Engine, send over some landmark props, and use iClone for the character animation with only a bare-bones scene in iClone. It depends on your needs.
There is a new, streamlined process for transferring assets from iClone to Unreal Engine that eliminates the need for the popup Command window. Unreal Engine will provide popups showing the process along the way.
While a command window isn’t something we all use or even think about it had become a part of the process and I don’t miss it, but it did seem strange the first time I tested the new transfer method and didn’t see the command line interface popup. The new method just seems “cleaner” for lack of a better term.
UPDATE LIVE LINK & AUTO SETUP
Recently Reallusion released an update to this valuable plugin along with the equally important Auto Setup for Unreal Engine. It can be a little confusing because there is a difference between installing Live Link and Auto Setup for the first time versus updating an existing installation. The new updates are Live Link 1.3, Live Link Plugin 1.6 for Unreal Engine, and Auto Setup 1.33.
FIRST TIME INSTALLATION
If you have never installed Live Link, then the process is straightforward.
For first-time installation:
Download and Install Unreal Live Link Plug-in for iClone version 1.3 from the Reallusion HUB.
Download and Install the iClone Live Link Plug-in for Unreal Engine to version 1.6 from the Unreal Marketplace.
Download and Install Auto Setup to version 1.33. More on this later in the article under the Copy and Pasting Auto Setup Files section.
▌Reallusion HUB – from here you can install the Unreal Live Link controls in iClone, you can access it from the iClone PlugIn menu.
▌Unreal Marketplace – from here you can install the iClone Live Link plugin into Unreal engine, once the installation process is complete, the addon icon appears on Unreal engine’s top menu.
▌Auto Setup – download Auto Setup in a zip file from this page, and manually copy the “Plugins” and “Content” folders to your Unreal project folder. Once you reopen the project, the Auto Setup addon icon appears on Unreal engine’s top menu.
Icons of iClone Live Link & CC Auto Setup on the Unreal Engine’s toolbar.
UPDATING AN EXISTING INSTALLATION
THE OUTDATED PLUGINS
It is easy to identify the outdated plugins by going into Plugins from the EDIT menu in Unreal Engine. Select Reallusion on the left side panel or search for “iClone” in the search box. As you can see there are two plugins listed and any plugin with this date or earlier is outdated and will not work with the new features.
THE NEW PLUGINS
The new plugins are version 1.33 for Auto Setup and 1.60 for Live Link. As of this writing, this is the only version that works with the new features. Follow the information below on how to properly update your existing installation.
OPEN THE REALLUSION HUB: Update the Live Link plugin. Press the refresh symbol if you do not see an update to the plugin.
NOTE: The new Auto Setup 1.33 “ensures maximum compatibility with the Unreal Engine, and also takes into consideration the most efficient use of R&D resources; The Auto Setup plugin will only work with the latest 3 official release versions of the Unreal Engine.” More information at the website.
COPY AND PASTING AUTO SETUP FILES
This is the most difficult part of the process but by the time most of us reach this point we understand copy and paste, which is all this is. There is no installer-based installation of the Auto Setup files as they are project-dependent and must be copied to each project. This is not a big deal though.
Below is a quick look at transferring the files which is also covered, in more detail, in the Reallusion tutorial at the link towards the bottom of this section.
CLICK HERE to go directly to this section of the Reallusion tutorial.
ENABLE LIVE LINK PLUGIN & AUTO SETUP IN UNREAL
Now we need to go into the Unreal Engine editor and enable the Live Link and Auto Setup plugins. This requires checking the box on each plugin and restarting the Unreal Engine editor. Make sure to save any progress before restarting.
CLICK HERE to go directly to this section of the Reallusion tutorial.
OPEN THE LIVE LINK PANEL IN UNREAL ENGINE
The Live Link panel will not be open by default so you will need to open it to interact with the plugin.
CLICK HERE to go directly to this section of the Reallusion tutorial.
CONNECT & TRANSFER CONTENT
Connecting is a two-step process requiring Live Link to be activated in both iClone and Unreal Engine. After connecting you can then seamlessly transfer iClone content to Unreal Engine while Auto Setup takes care of the shaders and other aspects of the transfer.
Below is a quick look at the new transfer process:
Note that any accessory that is Hidden in iClone will be visible in Unreal Engine such as the earpiece/headset on the above character.
CLICK HERE to see the same installation process in the previous update. The tutorial below is still relevant even though the method of transfer has changed in Live Link 1.3v.
With the various plugin versions and depending on if you have a previous installation of Live Link, it can get a bit confusing for even the most advanced users. Just follow the info in this article and the Reallusion tutorials then you’ll be up and running with your first Live Link session.
Digital Artist MD “Mike” McCallum, aka WarLord, is a longtime iClone user. Having authored free tutorials for iClone in its early years and selected to write the iClone Beginners Guide from Packt Publishing in 2011, he was fortunate enough to meet and exchange tricks and tips with users from all over the world and loves to share this information with other users. He has authored hundreds of articles on iClone and digital art in general while reviewing some of the most popular software and hardware in the world. He has been published in many of the leading 3D online and print magazines while staying true to his biggest passion, 3D animation. For more information click here.
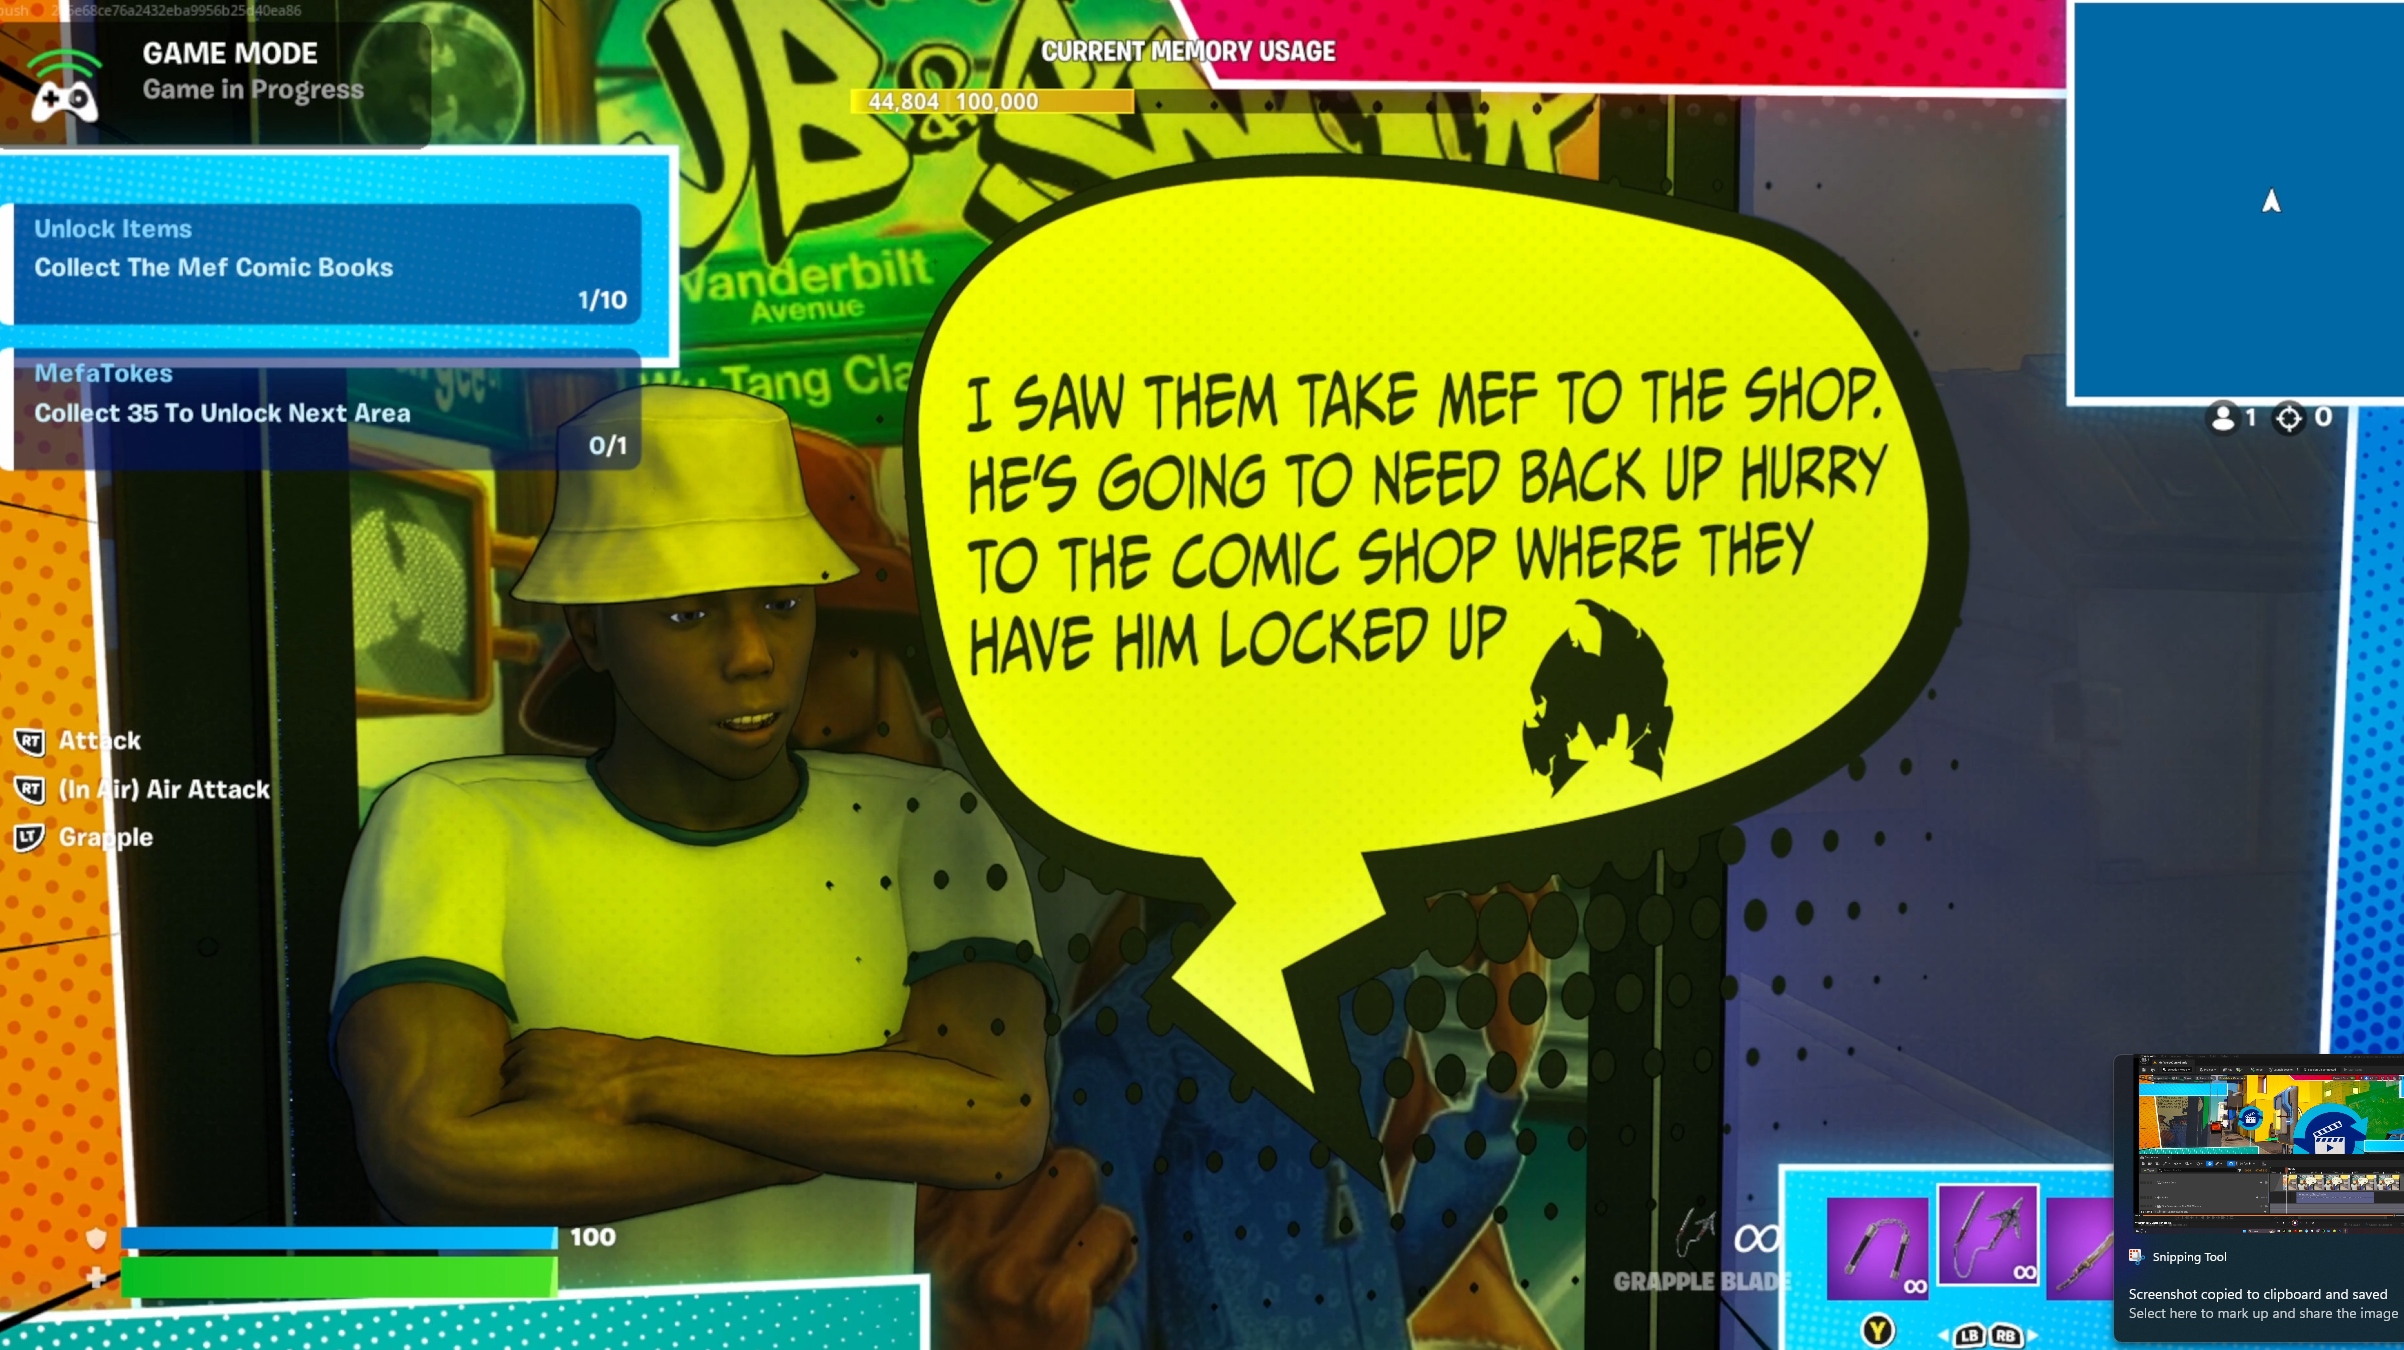
Jonathan Winbush details his workflow with Character Creator and iClone to create a custom character for Unreal Engine Fortnite
The Beginning of a Digital Transformation
The journey into the digital realm is both thrilling and intricate, especially when you’re crafting a character that will inhabit the vibrant world of Fortnite. Jonathan Winbush, a maestro in 3D creation with Reallusion iClone and Character Creator has embarked on an extraordinary venture to transform himself into a fully-fledged game character. The fascinating process, from the initial scanning of Jonathan’s head to the final steps of integrating his character into Fortnite is detailed in the video released on Jonathan’s YouTube channel where he shares his insights and tips into working with 3D tools.
Capturing the Essence with Creality Ferret Pro
Jonathan’s adventure began with the Creality Ferret Pro 3D scanner, a tool known for its precision in capturing high-resolution images. This initial phase was crucial as it laid the groundwork for creating a digital avatar that truly resembled him. The scanner meticulously recorded every contour and feature of his head, ensuring that the digital representation was as close as possible to Jonathan.
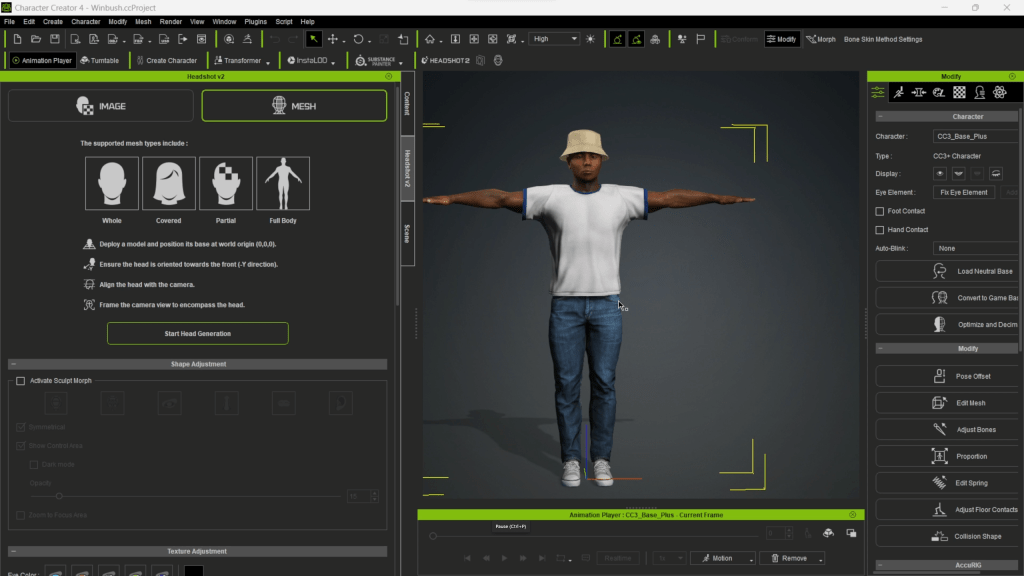
Crafting the Persona in Character Creator 4
With the head scan complete, Jonathan turned to Character Creator 4 to sculpt his avatar. In this phase, he designed every aspect of the character, from the facial expressions to the attire, making sure that each element was a reflection of his personal style and flair. The goal was clear: to create a unique character that would stand out in the Fortnite universe.
Bringing Emotions to Life with Rokoko HeadRig
To animate his character with facial expressions, Jonathan utilized the Rokoko Head Ring for facial motion capture. This technology allowed him to record his facial movements and expressions in real-time, ensuring that his digital counterpart would emote just like him. This step was vital in breathing life into the avatar, making it more than just a static figure.
Animating the Character in iClone
iClone was the next tool in Jonathan’s arsenal, where he finalized the motion capture process. Here, he animated his character, infusing it with dynamic movements that would translate well into the fast-paced action of Fortnite. The software’s robust capabilities allowed for seamless integration of the previously captured motions, resulting in a fluid and realistic animation.
Integrating into Fortnite with Unreal Engine (UEFN)
The culmination of Jonathan’s efforts was the integration of his character into Fortnite through Unreal Engine (UEFN). This powerful engine enabled him to blend his avatar seamlessly with the game’s environment. The character was now ready to partake in the epic “Battle for Wu-York City,” an original Fortnite experience crafted alongside Method Man from the legendary Wu-Tang Clan.
The Epic Battle for Wu-York City
“Battle for Wu-York City” is not just a game level; it’s a fusion of hip-hop culture and gaming, set in the heart of a fictional city. Players can expect intense battles, hidden easter eggs, and an immersive experience that Jonathan helped bring to life through his digital creation.
Conclusion: A Journey of Digital Creation
Jonathan Winbush’s journey from a real-world individual to a character in Fortnite exemplifies the power of modern technology and creative vision. Through his use of advanced tools like the Creality Ferret Pro, Character Creator 4, Rokoko HeadRig, and iClone, coupled with the capabilities of Unreal Engine, he has not only transformed himself into a digital avatar but also contributed to the rich tapestry of Fortnite’s universe. Stay tuned to witness the full process, discover tips and tricks, and see the birth of Jonathan’s digital alter ego. Join him in this creative odyssey and explore the boundaries of digital artistry and gaming.
The face is the first thing your audience looks at when watching or interacting with your character, so it is of the utmost importance that you make that experience a memorable one! And not just how your character looks standing there expressionless — your character’s face will move while it tells its story, and if all it can pull from is mediocre, default shapes, its performance will fall flat, and its story won’t be very interesting to your viewers. YOUR face and its movements are unique and interesting, so why wouldn’t your character’s face be as well. Beyond how your character’s face moves, there’s also supporting details that interact with facial movements that lend nuance and uniqueness to your character as well, adding a richness and believability that will make your characters stand out among a sea of boring characters, as well as being more effective telling their visual story. That’s why we are going to explore the powerful plugin – ZBrush Face Tools.
In this article we’re going to learn how Face Tools allow to you create all of these rich, unique shapes, wrinkles, and supporting detail, all while keeping the process fun. Creating expressive characters historically was a tedious and time consuming process, where you spent most of your time managing files and tweaking verts. With the Face Tools plugin, you’ll spend your time sculpting, painting, and exploring what makes your character unique, and letting Character Creator do the heavy lifting on the technical implementation!
Part 1. Face Tools Installation and The Concept of Expression Wrinkles in Character Creator (CC)
Installation
Before we get too far, we need to discuss what expression wrinkles are, and how they’re used and implemented in Character Creator. We’ll also go ahead and get Face Tools installed, so it’s ready to go when we need it. Installation is easy: go to the Reallusion Hub, click on Character Creator, and press the Install button for ZBrush Face Tools.
Installing Face Tools
Character Base Head
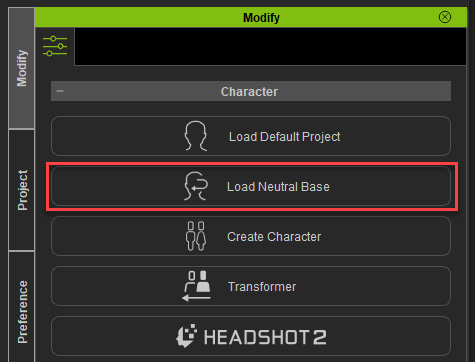
To illustrate some concepts, go to the Modify panel in Character Creator and press the Load Neutral Base button. Hit J on your keyboard to zoom in on the head, then go to the Morph tab > Head section to change the look of your character using the various sliders
Load Neutral Base
Morphs tab to change base head features
Base Head & Face Shapes
Yourbase geometry is the low-res topology of your neutral face and body. You can go into the Scene tab and change the shading mode to wireframe to see your low-res geometry.
Wireframe on Shaded mode to see topology
As you’re using morph sliders, this low-res geometry is moving, updating the look of your character. Next, go to the Motion tab and click the Edit Facial button; this will load up a dummy head where you can click and drag on the various muscles of your character to generate expressions.
Motion > Edit Facial to change face shapes
Expression Wrinkles
So we know our character’s face can emote with shapes, but you’ll notice when the face moves, it’s a little underwhelming. Look in a mirror and raise your brows; notice how your forehead wrinkles as your eyebrows go up, and in fact get deeper and more pronounced the higher your eyebrows go.Expression Wrinklesare driven by the facial shapes that help enhance the realism of our expressions, by behaving exactly how your face does in real life. When your character’s eyebrows go up, wrinkles will start to appear on the forehead.
Base head, base head creating an expression, and finally those expressions being supported by expression wrinkle textures to add realism!
Adding Neutral Expression Wrinkles
Let’s add some quick expression wrinkles to our morphed, neutral test character. Select the top group of your “CC3_Base_Plus” neutral character in the Scene tab, and you’ll see an Expression Wrinkles tab is available in the Modify panel — click on this tab. If you check on Activate Expression Wrinkles, Character Creator will apply default expression wrinkles to our character (these can actually be found in Actor > Expression Wrinkles > Neutral in the Content tab). Turn on Check with Expressions as well, and as you click on the different areas of the face in the dummy panel, the expression wrinkle system will activate a face shape, and blend in the appropriate wrinkles on your character where those shapes require it.
You can change the Strength, AO, Redness, and Rate of Appearance in the sliders below the dummy window. As your characters face animates, slight movements will cause less intense wrinkles to show up, but extreme or exaggerated facial expressions will bring in a texture map that will add wrinkle bumps (normal strength), shadows for those wrinkles (AO), and blood pooling between the wrinkles (Redness). All of these together create a much more nuanced, believable result as your character’s face moves.
Expression Wrinkles tab
Expression Wrinkles for Stylized Characters
These default wrinkles are fairly realistic — but, what if you had a stylized character, with chiseled, cartoony shapes? Realistic wrinkles would look out of place on these types of characters — but, don’t worry, with Face Tools we’ll be able to make custom shapes and expression wrinkles for both realistic characters as well as cartoony stylized ones! In fact, if you have the “Wrinkle Essentials” pack from the Reallusion Marketplace, you can apply different types of preset stylized wrinkles to your stylized characters.
Stylized character Eddy with Chisel type expression wrinkles applied
New Stylized base mesh with Groove type expression wrinkles applied
Part 2. Fast Prototyping Head & Body for ZBrush Sculpting
Kevin Base Head Setup
Let’s start a new character that we can take into ZBrush and make our own. To provide us with a good starting point, let’s load up the “CC4 Kevin” character from the Actor > Character folder.
Loading up the Kevin Character
Right now, Kevin isn’t symmetrical, and that’s ok — you don’t really want a perfectly symmetrical character. However, just starting out my new character, I want a symmetrical mesh to sculpt on in ZBrush to make things go a little faster, and later right before we call it done, we can dial in asymmetry using morphs. To fix this, select the “Kevin” group in the scene tab, and in the attributes tab, choose Edit Mesh, then choose a Mirror Copy option (left to right or right to left).
Attributes tab > Edit Mesh
Edit Mesh > Mirror Copy
Using Morphs in CC
Now that your eyelids are symmetrical, your eyeball placement is probably off a little. Luckily, all you have to do is go to the Morph tab and use the Morphs > Head > Eye > Eyeball > Eyeball Height sliders to fix eyeball placement in our newly symmetrical mesh. Also, while we’re in the morphs tab, go ahead and make overall adjustments to your character’s physique/head to get closer to the character you want to make (in our case, a gaunt, vampiric creature).
Eyeball Morphs to fine- tune placement
Remember you can use the Morph button in your toolbar to quickly and easily grab sections of your character’s face to move them around, and you can get more morph slider options by using the “Ultimate Morphs” pack from the Reallusion Marketplace.
Dialing in our character forms
Face Tools Locations in Character Creator
With a character loaded in Character Creator, you’ll find the button to send your character to ZBrush using Face Tools in these locations:
Plugins > Face Tools
Top menu bar
Modify tab > Face Tools (with a character selected)
Installing the Face Tools Plugin for ZBrush
Use any of the above methods to send your character to ZBrush. If you haven’t installed the plugin to ZBrush, it will prompt you to install. Select the version of ZBrush you want to install it for, and click OK.
Installing Face Tools ZBrush Plugin
Face Tools Output Settings
Before Character Creator sends over your character, it’s going to need a little more information about what we want to send over. In the ZBrush Face Tools dialog box, choose Create New for Action, since we’re not relinking an existing project. For Subdivision, we’ll do Level 6 – 2k Texture Resolution. This means when it sends our current head over to ZBrush, it will be subdivided up to level 6 (SDiv 6), and if we transfer the base color texture currently applied to our Character Creator head to our ZBrush polypaint, the millions of polygons that make up our SDiv 6 head will be enough to support a 2048 (2k) texture resolution on the transfer. Which is exactly what we’re going to do later.
Go ahead and check on Normal Details; this will put the skin pores and fine wrinkle detail currently applied to our character into an adjustable, sculptable layer in ZBrush. Then click All to turn on all the normals for every expression. All of our expressions in ZBrush will have Kevin’s own expression wrinkle detail baked into a sculptable layer for that expression.
Before we click GoZ, we’re going to uncheck Include normals in polypaint; This can be useful in some situations, but because we’ll be changing our base head polypaint, it’s not something we’ll need to do with our workflow. Finally, click the GoZ button to send all this over to ZBrush.
Part 3. Sculpting High-res Base Head with ZBrush Face Tools
ZBrush Sculpting
Now that we’re in ZBrush, open the Face Tools plugin by going to the ZPlugin menu, and clicking on the Face Tools submenu. While in ZBrush, we can modify the characters base Head, Eyes, Teeth, and Tongue geometry and polypaint, and any changes we make will be baked and sent back to CC.
Detail Layer, Diffuse, and Range
The Detail Layer button in the Face Tools plugin turns the “CC_DetailLayer” in your Layer pallet on and off. The Detail Layer contains pore detail and basic face detail wrinkles. We’ll toggle this off while sculpting our base. We want to ensure our base sculpting is done on the base model, NOT on a layer. However, if you want to add more pore or wrinkle detail to this layer, toggle it on, and press the record button on the layer. The Diffuse button loads up the head texture from CC, which we can transfer to polypaint later on. The Range button (with no expressions selected) will apply theFace Topology and UV Guide to your head.
Head Base Sculpt
Let’s start finetuning our character. Again, turn off your Detail Layer so we’re only sculpting on the base geometry that gets propagated to all of our other shapes. Drop down to subdivision level 1 under Tool > Geometry, and use your favorite ZBrush brushes to change your major volumes, increasing subdivisions as needed to dial in your custom primary and secondary forms.
SDiv 1 with Detail Layer off
Sculpting with guides in mind
Turn on your Range map so you get a better idea of what edgeloop the systems will be looking for when deforming into shapes later. When creating primary forms, make sure you move the geometry appropriately to keep the face guidelines where they need to be, instead of just sculpting through them.
You can also Ctrl+Shift click areas of your face to get easy visibility access while sculpting (press Shift+F on your keyboard to toggle polyframe mode on and off in ZBrush).
Hide and show major areas with polygroup visibility
Detail Sculpting
Once you get your primary and secondary forms done for your custom ZBrush character, you can turn on the Detail Layer in the Face Tools plugin to continue sculpting high frequency pore and fine wrinkle detail.
Original morph mesh vs final detailed ZBrush sculpt
Polypaint
Stop recording on your detail layer if you are. Go ahead and turn the detail layer off completely in the Face Tools plugin menu. Turn on Diffuse in the Face Tools plugin menu to load Kevin’s base color into our subtools texture, go to highest subdivision on your mesh, and in the Tool > Polypaint menu, click Polypaint from Texture to transfer Kevin’s diffuse texture to your head subtools polypaint. Once you’ve done that, go ahead and turn Diffuse OFF in FaceTools; that’ll turn the texture off, but your head should still be colored by the transferred polypaint. At this point, make any changes that you want in ZBrush to both the base head sculpt and its corresponding polypaint. Remember you can use the Polypaint > Adjust Colors menu, and utilize any ZBrush brush with RGB turned on in the toolbar to paint on your model, as well as sculpt.
Diff use on to turn your Kevin Texture Map on, then Polypaint > Polypaint From Texture to transfer your diff use texture to your polypaint
Eyes, Teeth & Tongue
Select a teeth or tongue subtool, subdivide the model up, and just like the head, turn the Diffuse texture on using the Face Tools plugin. Press Polypaint from Texture to transfer Kevin’s base color texture to your polypaint, unless you want to paint this subtool from scratch, which is fine too. Change the model and polypaint as you see fit for your character, it’ll all get sent back over to CC in the next step.
Original base teeth vs modifi ed teeth
Sending Base Head Changes Back to CC
Turn on your detail layer to make sure it’s still working well with your changes up to this point, and modify as needed. In the ZBrush Face Tools plugin menu, press the Update to Character Creator button. On the left side of the resulting dialog box, check on the Base Mesh, Polypaint > Diffuse, Details > Normal, and Cavity > Blend options, so all of our detailed sculpt and polypaint changes are baked back to the CC character. Keep the Texture Size at 2048, and under Facial Parts, check on anything that you updated in ZBrush – Head, Eyes, Tongue, and Teeth can all be updated. The options on the right side of this dialog box can be unchecked for now. Press the Update to Character Creator button.
Left side checked to send back only base head changes
CC GoZ options from the ZBrush Base Head
The ZBrush data is sent over to CC, so tab over to Character Creator, and in the resulting dialog box, keep the defaults checked, along with Apply Head Color to Body, so Character Creator will automatically adjust the body tone to match the head. We’ve successfully transferred the base details and polypaint from ZBrush back to Character Creator.
Results of the transferred texture polypaint and fi nal modifi ed polypaint in ZBrush, and sculptural detail and polypaint baked back into Character Creator using Face Tools
Part 4. Create Unique Expressions & Wrinkles with ZBrush Face Tools
Sculpting Expressions in ZBrush Using Face Tools
So we’ve got our base head, eyes, tongue, and teeth changes in ZBrush and in Character Creator, so now let’s work on those custom expressions. Tab back over to ZBrush and click on an expression in Face Tools to begin tweaking the wrinkles for that expression. Remember, the face tools button is turning on the corresponding expression layer in your layer pallet, and pressing the REC button so you can sculpt and polypaint on that expression. Any changes you make to your geometry or polypaint while the expression is in REC mode will eventually be sent back to Character Creator.
Before you sculpt on an expression, you can press the Apply Mask button in the Face Tools plugin menu; this will show the area that will bake out sculpted detail and polypaint information back to CC for the selected expression (in this example, “Brows Drop”). Go through each expression and sculpt/polypaint to create the perfect shapes and details for every expression for your unique character.
Mask region for Brows Drop expression wrinkles
Sending Expression Updates from ZBrush back to Character Creator
After you’ve fine-tuned your expressions in ZBrush, press the Update to Character Creator button in the Face Tools plugin menu again. This time we’ll use the right side menu.
If you updated shapes of the face (SDiv 1), check on Expression Morphs.
If you updated expression wrinkles (SDiv 2-6), check on Wrinkle > Normal to bake those details back to CC.
If you updated your polypaint for the expressions (redness, etc…) check on Wrinkle > Diffuse to ensure those changes get baked back to CC.
Back in CC, keep the defaults checked in the GoZ menu, then go to the animation player and choose Motion > Wrinkle Check for “Dramatic_Male”. As your face animates, your custom expression wrinkle changes will show up on the character.
Selecting expressions
Custom expressions and wrinkles
Part 5. Transfer Character’s Head and Complete the body in ZBrush
Full Body Head Data Transfer
Our head still looks a bit out of place on our CC body; let’s sculpt a custom body to match our head. First, select your character assets in CC, then hit the GoZ button in the toolbar, to send our body over to ZBrush this time. Keep all the defaults in the resulting dialog box, and make sure you have a-pose selected in the Pose section. Back in ZBrush, switch from the body tool we just sent over back to Face Tools that we were sculpting expressions on. Select the “CC_Base_SkinHead” subtool, then Ctrl+LMB the latest point in the history slider to store those vertex positions and colors into history.
Next, switch back to the body tool, select the “CC_Base_Body” subtool, and press the Tool > Geometry > Divide button until it reaches SDiv 6 to match the head resolution from the other Face Tools subtool.
Turn on Polyframe visibility with Shift+F, then Ctrl+Shift click the “red” polygroups on the body subtool to isolate their visibility (body and eyelash geometry). Then Ctrl+Shift+Drag in your document to invert visibility, so only the head geometry is showing (minus the body and eyelashes).
Storing history for the Face Tools head subtool
Isolating just the head geometry to match the Face Tools geometry visibility
Now that the vertex order matches between the Face Tools head geometry stored in history and the body geometry, select the Morph brush (you can hit the B, M, then G keys on your keyboard to select it), and “brush in” the details stored in history onto your body geometry! This will get our sculpted detail onto our “body” head, but not the polypaint. For that, go to the Tool > Subtool > Project menu, turn off “Geometry” so just Color is selected, and press the “Project History” button to transfer the color data from your Face Tools head to your body tool head!
Project History to transfer Color
Link and Sculpt
Ctrl+Shift click in your document to make all the geometry visible for your body subtool, then press the GoZ All button in the ZBrush Tool menu to send your updated body back to CC.
While you’re in CC, switch the pose from the standard a-pose to the relaxed a-pose using the Motion menu in the Animation Player, press the GoZ button in the Character Creator menu bar to send our relaxed a-pose to ZBrush.
Make sure you choose Current Pose in the dialog box.
Changing our pose to a relaxed A- Pose to sculpt on
Body Sculpt
Sculpt and polypaint the rest of the body, and follow the body Substance Painter workflow from the previous “Goblin” series to bake mesh maps and populate CC with your character textures.
Tip – the CC Body tool will have 7 subtools, the Face Tools tool will have 9 subtools
Sculpting the body to match the head
Conclusion
You now have a unique character with a custom body, custom facial expressions, and custom expression wrinkles, all tuned exactly how you want for your particular character. Feel free to apply accessories, clothing, animations, and poses to this character like we did in our previous “Goblin” article.
About The Author
Michael Pavlovich earned a Bachelor’s degree in Computer Animation from RSAD in 2005. Initially, he contributed to the development of environment and character art for popular video games such as Madden and NCAA Football. Later, he relocated to Austin to join Daybreak Games, where he worked on the creation of art assets for DC Universe Online.
Presently, Michael holds the position of Director of Character, Weapon, and Vehicle Art at Certain Affinity. His expertise lies in implementing iterative pipelines for Certain Affinity artists helping develop renowned video game franchises, including Halo, Call of Duty, and DOOM. To stay updated on his latest tutorial projects, you can visit Michael’s YouTube or ArtStation page.
Alejandro de Pasquale – Motion Graphic Artist / 3D Animator / Filmmaker / Content Creator
Alejandro de Pasquale
Since the age of 9, Alejandro de Pasquale embarked on a creative journey, crafting his first rudimentary comics and discovering his fervent passion for storytelling. With each passing year, Alejandro honed his creativity, delving into diverse tools and skills to encapsulate narratives across a spectrum of challenges.
From scripting movies to producing motion graphics for various enterprises, Alejandro explored the avenues of storytelling, eventually finding his true calling in breathing life into characters and immersive 3D worlds. It was through the transformative power of software like iClone and Character Creator (CC) that Alejandro delved into the world of 3D animation, discovering new dimensions to his storytelling prowess.
Embracing the entirety of the creative process, he channels his ardor for storytelling into his current roles at a motion capture company and an animation studio. Continually attuned to the latest advancements, Alejandro remains steadfast in his commitment to the craft, unwavering in the enthusiasm that ignited his creative spark at an early age.
“The significant advantage of iClone and Character Creator is that as one learns, one can also visualize the results. In other words, one can quickly breathe life into a character, and create a scene with animation, serving as an incentive to keep acquiring knowledge.”
Alejandro de Pasquale – Motion Graphic Artist / 3D Animator / Filmmaker / Content Creator
Q: Welcome Alejandro to our Reallusion Feature stories. Please share with us how you started creating animations with After Effects and what made you switch to tools like Character Creator and iClone.
Thank you! Well, it all started many years ago. I used to film and edit videos until I suddenly felt the need to embark on something more creative. That’s when I immersed myself in creating advertising animations in motion graphics, targeting small businesses, or presentations for a film director interview program, for which I handled the editing.
I believe this coincided with the rise of After Effects (AE) around the year 2015. During that period, I discovered my fondness for participating in forums and sharing my knowledge through my YouTube channel, where I started to teach everything about After Effects.
After Effects motion graphics
Later on, After Effects embraced the capability of working in 3D within its interface, first with a plugin for Cinema 4D, which, in my opinion, didn’t prove effective, and then with the contribution of one of the great masters of composition and VFX, Andrew Kramer. He created the Element 3D plugin, enabling the creation of 3D animations within After Effects or the addition of 3D elements in VFX compositions with filmed footage, while maintaining the layer structure characteristic of After Effects.
It was then that I realized my true passion lay in creating cinematic 3D compositions, not confining myself to a single area like animation or modeling but involving myself in crafting entirely 3D scenes, independent of filmed footage.
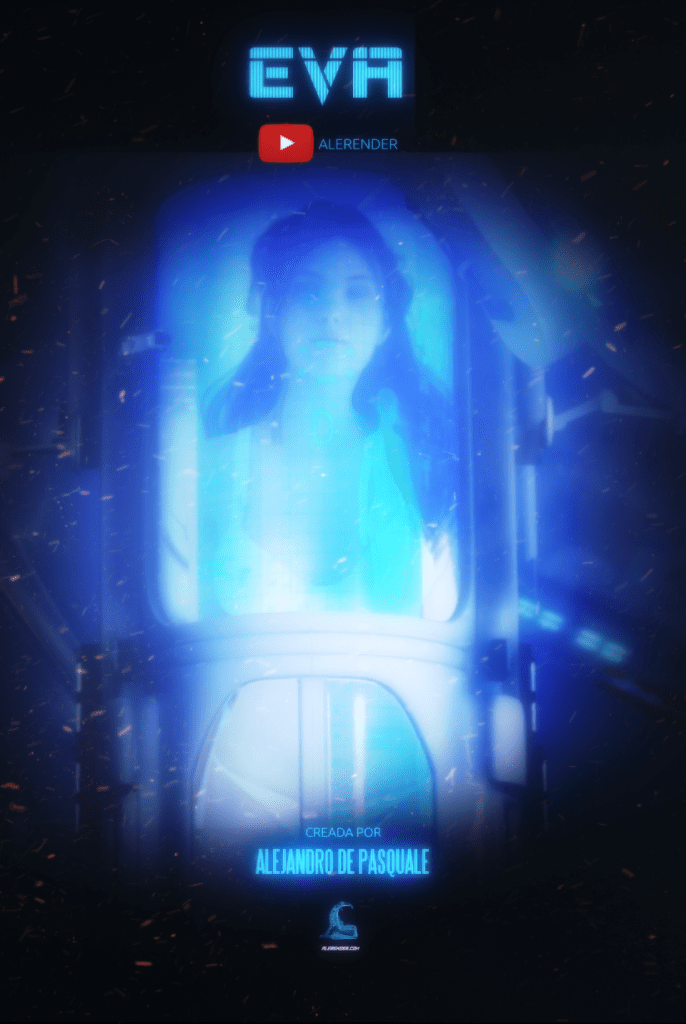
For unknown reasons, neither After Effects nor Andrew Kramer chose to advance the evolution of Element 3D. So, I decided to embark on what I thought would be my last project in AE: a personal scene where I could utilize Element 3D and After Effects to their full potential. This scene evolved into an approximately 10-minute episode called EVA 1.
EVA Episode 1 by Alejandro De PasqualeEVA Episode 1
Although I was pleased with the result, I realized that if I wanted to create 3D scenes or episodes of animation, I needed more than After Effects and Element 3D, where the character could only have a voiceover, for example. Hence, I began searching for tools that would allow me to create a workflow where I could create, direct, and produce everything. I had heard about iClone, so I decided to delve deeper.
Fortunately, for those looking to delve into this world in the Latin American sphere, there’s a wealth of tutorial videos in Spanish, which is an advantage, even though I’m always learning from YouTube in any language. FRANPEREZ3D’s channel was my first “lighthouse.” That’s how I dove into continuing with EVA, through multiple episodes that would help me learn all about Reallusion’s software. It also helped me solve various issues and immerse myself fully in this new world.
Q: Being first a Motion Graphics artist, please share with us how you were able to learn 3D animation with the Reallusion tools. How long did it take, and how easy was it?
Well, although learning is a constant process, especially in today’s dynamic environment where software evolves continuously at a pace not experienced a decade ago, the significant advantage of iClone and Character Creator is that as one learns, one can also visualize the results. In other words, one can quickly breathe life into a character, and create a scene with animation, serving as an incentive to keep acquiring knowledge.
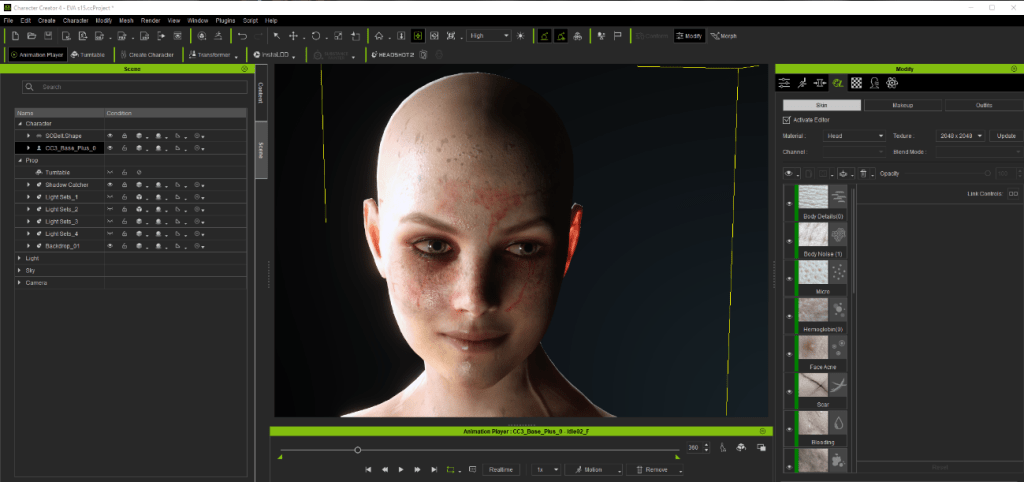
Realistic digital humans with Character CreatorCharacter Creator digital humans
On one hand, both programs are highly intuitive, as their interfaces allow users to quickly find the necessary tools. On the other hand, there is a wealth of learning material available on the Internet. The company consistently releases explanatory videos, enabling users to stay updated and continuously add new knowledge. This is positive as it motivates individuals to stay current. For instance, in my opinion, what led to the decline of After Effects back then was the lack of significant updates from Adobe. Despite new versions, none offered substantial changes, leading to redundancy in YouTube tutorials.
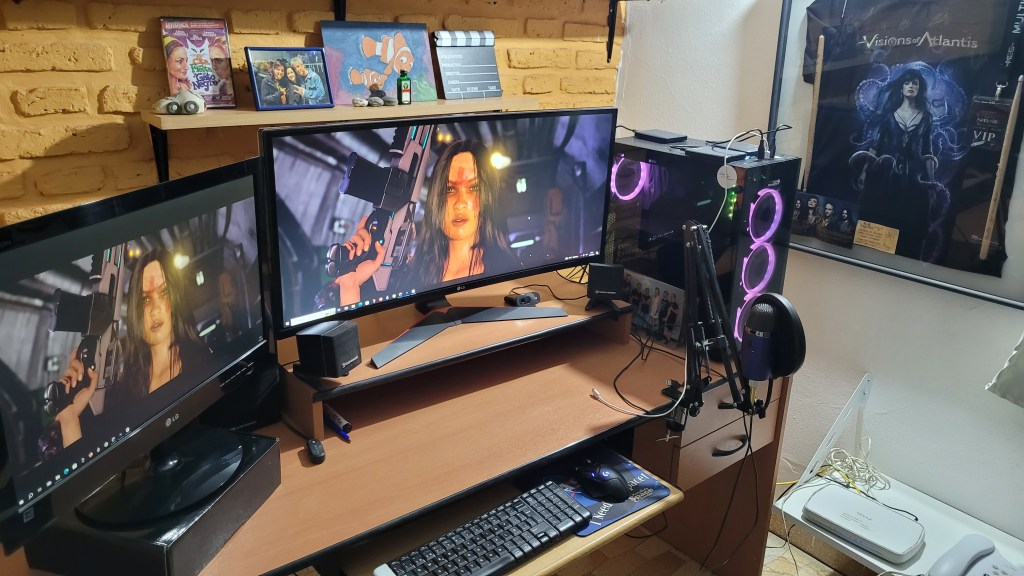
Alejandro De Pasquale’s workstation
Creating an animated short film typically requires a team of animators, modelers, lighting experts, and cameramen, among others. However, with Reallusion, one can venture out individually and start experimenting as a film director, having control over everything at a minimal cost.
Basically, I believe the main advantage lies in opening the program and starting to “play” with the options. Watching characters perform actions is something that motivates continuous learning and improvement. Additionally, it’s just a matter of searching for tutorials and references from great creators who use this software.
Q: Your first character was made using Daz3D. What was the workflow of updating it with Character Creator (CC) to later send it to Unreal Engine? What advantages does CC give you over Daz3D?
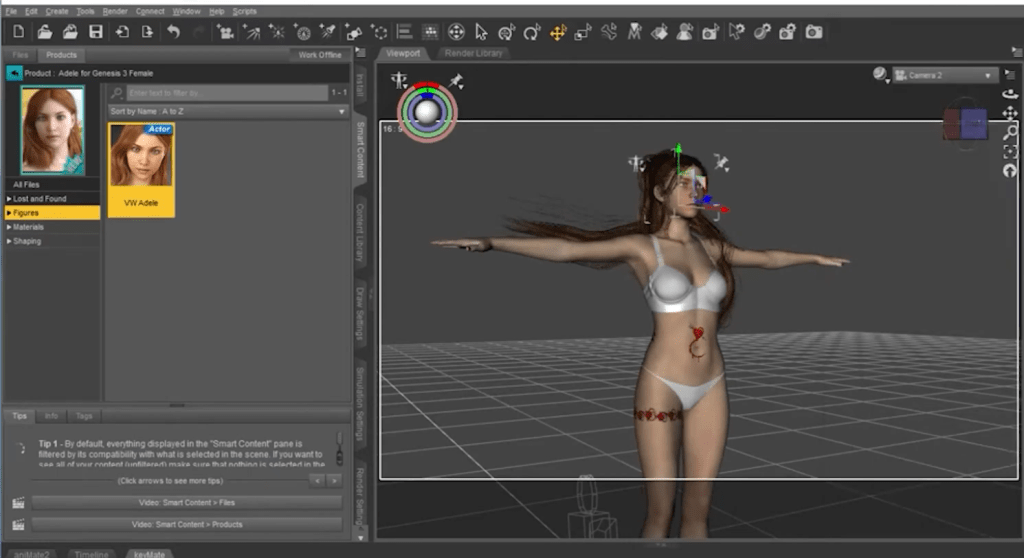
That’s correct. Initially, Eva was created in Daz 3D because it was one of the few models that could be integrated with Element 3D. I consider Daz 3D as software primarily designed for creating 3D characters intended to be rendered in images, not so much for animation. It doesn’t offer many options in that regard, or at least it hasn’t been developed in that direction. However, I believe it serves as a free entry point for those deciding to take their first steps into the world of 3D.
Version one characters made with Daz 3DVersion one characters made with Daz 3D
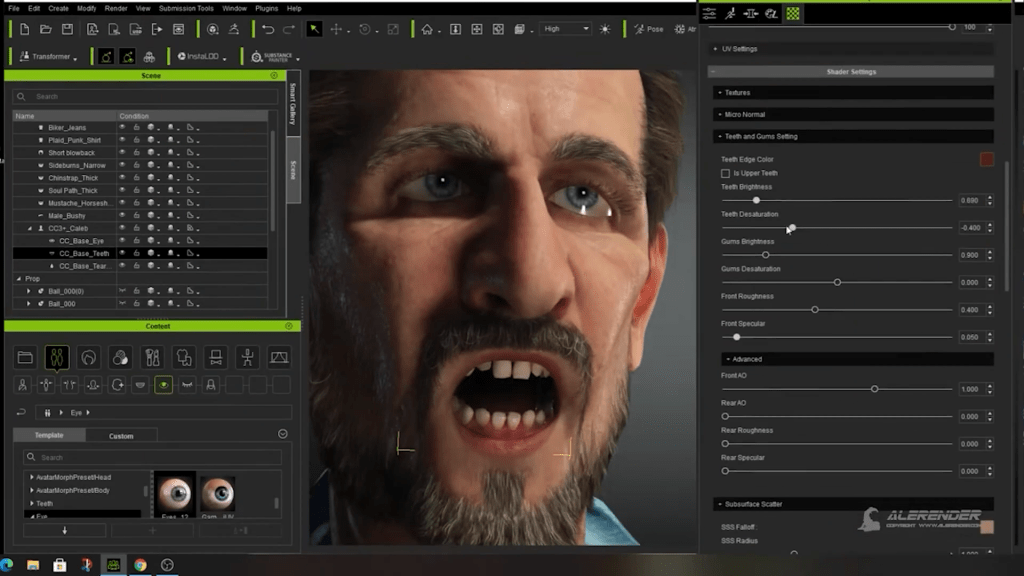
Starting from Eva 2, I began usingCharacter Creator. In this process, I only needed to retain Eva’s face created with Daz. Fortunately, Character Creator facilitates the import of FBX, converting its entire skeleton. This way, I could import Eva’s complete body (with rigging for facial expressions) and, separately, her clothing from Daz 3D. From that point, I enhanced everything using the various options provided by Character Creator: adjusting textures, eyes, and expressions. Then, when taking it to Unreal Engine, I only had to export the FBX (with the option for Unreal), and in that program, through a plugin designed by Reallusion, not only the model but also its textures are imported seamlessly. Without any further action required. Of course, one can fine-tune the textures there. But all the work done in Character Creator is imported perfectly.
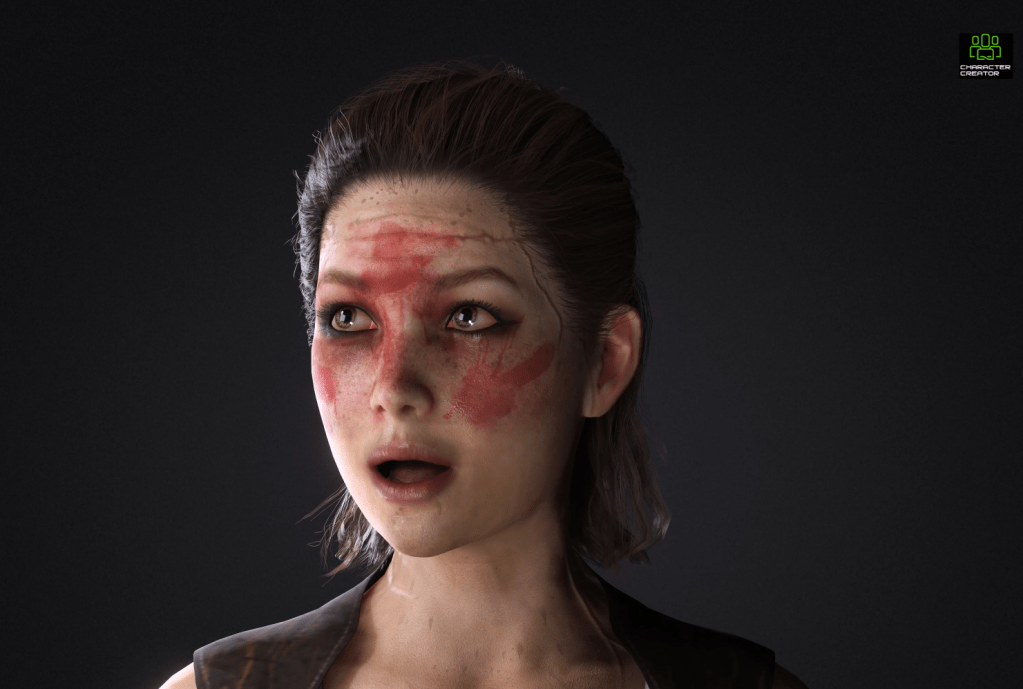
Digital Human skin textures with Character CreatorDigital Human made with Character Creator
Although there’s the option to send the character and animation through the iClone Unreal LIVE LINK plugin, I personally prefer exporting the FBX of the character in its T-pose and subsequently sending the FBX animation files in iClone. This working method aligns better with my workflow and how I have structured the animations, making it more practical for me.
Q: iClone played an important part in your character animation. How did you use iClone’s AccuLIPS feature to convert Spanish audio into English animated lipsyncs? Where did you find the motions to accelerate your creation time?
Well, iClone’s AccuLips feature, I believe, was one of Reallusion’s best moves! It was the feature that persuaded me to stay connected with Reallusion, even when Unreal’s Metahuman came out. Facial animation, in the world of 3D, is the most challenging to achieve without a specialized animator in this field.
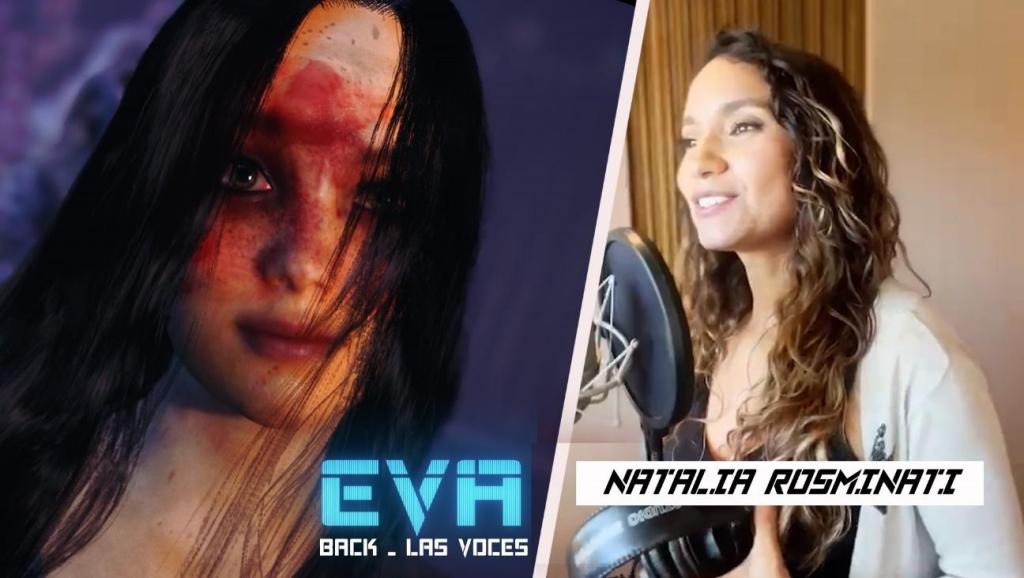
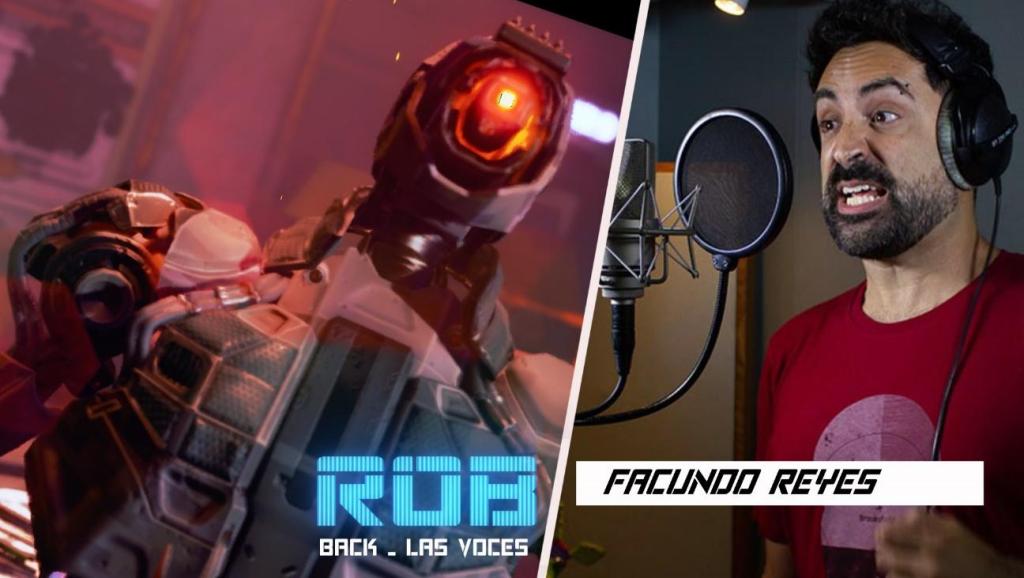
In my case, each episode begins with an audio recording. For Eva, this is done through Natalia Rosminati, one of the best voiceover artists in Latin America (having her work on each episode is truly a privilege). And for Rob, with the voice of another tremendous professional, Facundo Reyes. Initially, they were intrigued by the fact that all I needed were their voices, and then I used that to initiate the animation in iClone. It also gives them complete freedom when recording.
Audio recordings for Eva, done through Natalia RosminatiAudio recordings for Rob, done through Facundo Reyes
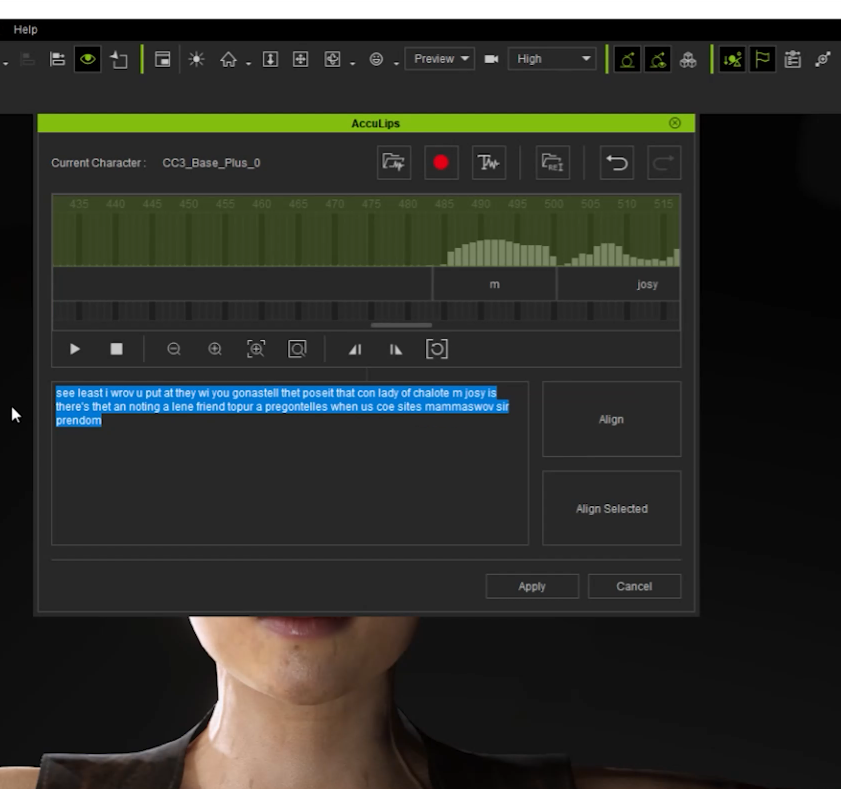
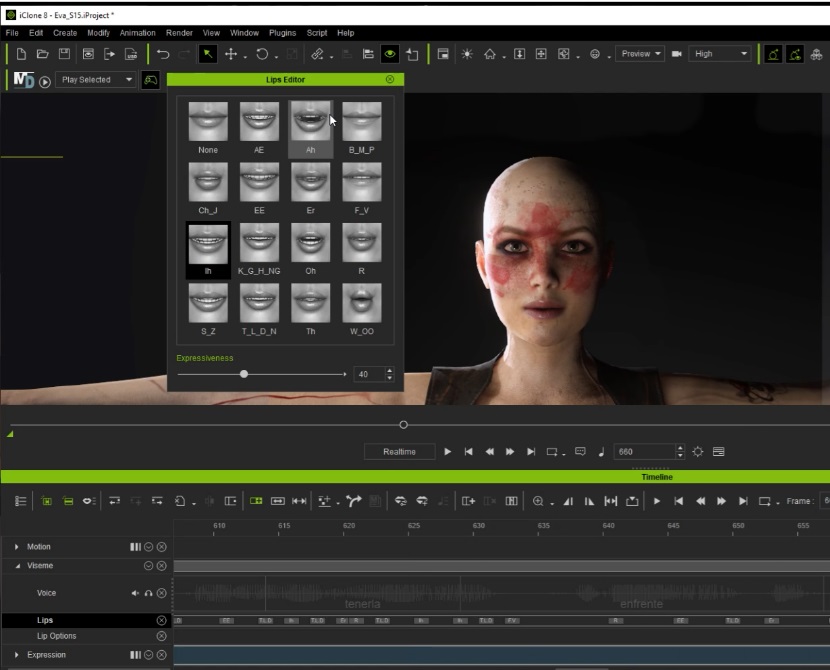
Once I have the audio, I divide it into paragraphs based on the animation. Then I import each of these “paragraphs” into iClone through AccuLips. The audio is in Spanish, of course. At first, I did this: imported the audio into AccuLips, instructed it to ignore words it didn’t understand, obviously, and then adjusted the phonemes in the iClone timeline. But later, while watching one of the many explanatory videos that Reallusion releases, I realized that after importing the audio, I could change the text created by AccuLips (with the misunderstood words) to the actual text. And then, only at that point, send it to the timeline. This way, there’s practically no need to correct anything in the phonemes. The synchronization and mouth movement are almost flawless without any extra effort.
Text to animation lip syc in iClone AccuLIPS.Lips Editor in iClone facial animation
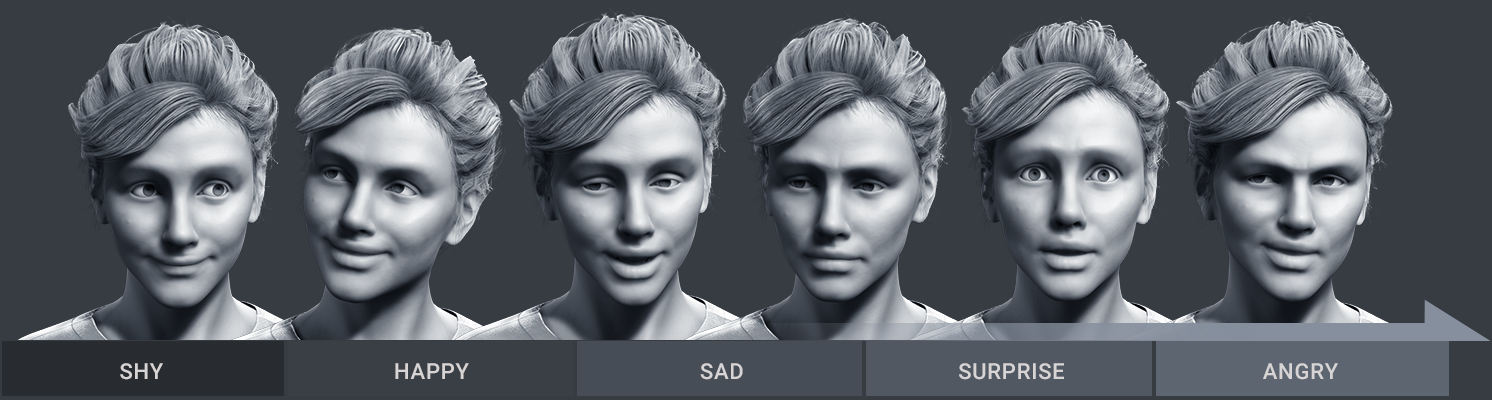
Then comes the part where we can start using the options, such as the intonation type and adding expressions. Here, I discovered a tremendously helpful package: Digital Soul. They come with predefined expressions that fit perfectly with any dialogue. If they continue adding expressions in the future, that would be fantastic.
iClone predefined facial expressions
In any case, there are options likeiClone Motion Puppet or Motion Key to enhance or adjust each of them further. And finally, the addition of wrinkles to emphasize each expression better. This added an even better touch to the facial animations.
Q: Both Unreal Engine and iClone work seamlessly. What advantages does using these real-time tools bring you? And what can the people who follow your free iClone-Unreal Course expect to learn?
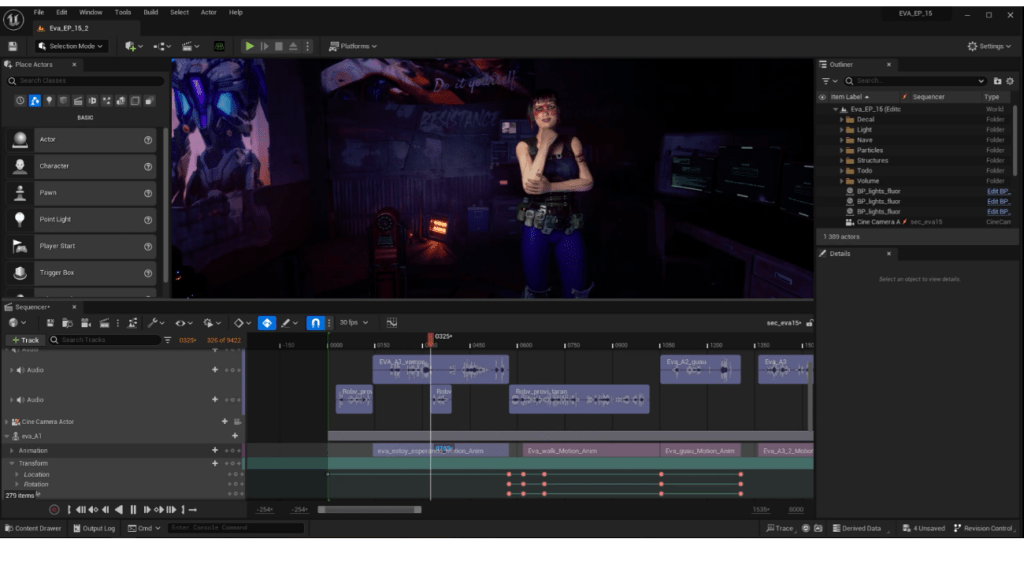
Complementing my workflow with iClone, Character Creator, and Unreal Engine turned out to be ideal for me. Reallusion’s programs seamlessly integrate with Unreal, as everything can be exported there with options prepared for it. Whether working with LIVE LINK or exporting as FBX, everything can be visualized with real-time rendering, which is the major advantage. Nowadays, traditional animation studios, I believe, are still amazed by this, as in the case of other software, they render a frame and decide what to change based on that.
Here, we see everything in real-time, providing another perspective even to rethink a scene, whether it be due to light or the setting. One truly “plays” the role of a director, making decisions on the set. In my case, I feel comfortable working on everything related to characters and animation in iClone, and then going to Unreal to compose everything.
Character motion keyframing in iCloneiClone character motions seamlessly transferred to Unreal Engine
Regarding those who follow my free course on both the channel and the website: my idea is to create a Latin community that holds more significance, even with our language in our productions. I want to reverse the situation for many people who practice this but then have to make a living in another way. In my case, learning these tools opened the door to a new work area related to what I do. That’s why I like to share everything I know so that other people can join this path. This, in turn, will contribute more talent and knowledge that will also benefit me.
For now, this is the aspect where I progress more slowly, but at least I’m making progress. I’ve met some users who have excellent works, but it’s challenging to see productions. I believe that selling more licenses is fundamental for this. It will bring more people to join professionally and more productions in Latin America. Therefore, sharing everything I’m learning through EVA, I believe, will help and inspire more creators. My idea is never to stop the free teaching on my channel for those who cannot access it in a paid form. And in that way, the cost of the license will be the only investment in this.
Rob in Alejandro de Pasquale’s EVA series
I would like to conclude with this anonymous quote, which was my first post when I started my free teaching platform: “Ignorance enslaves. Knowledge sets us free. Freedom makes us happy. Happiness (and only that) makes us succeed in life” (anonymous). Thanks for the support.
I would like to conclude with this anonymous quote, which was my first post when I started my free teaching platform: “Ignorance enslaves. Knowledge sets us free. Freedom makes us happy. Happiness (and only that) makes us succeed in life” (anonymous).
Thanks for the support.
Alejandro de Pasquale – Motion Graphic Artist / 3D Animator / Filmmaker / Content Creator
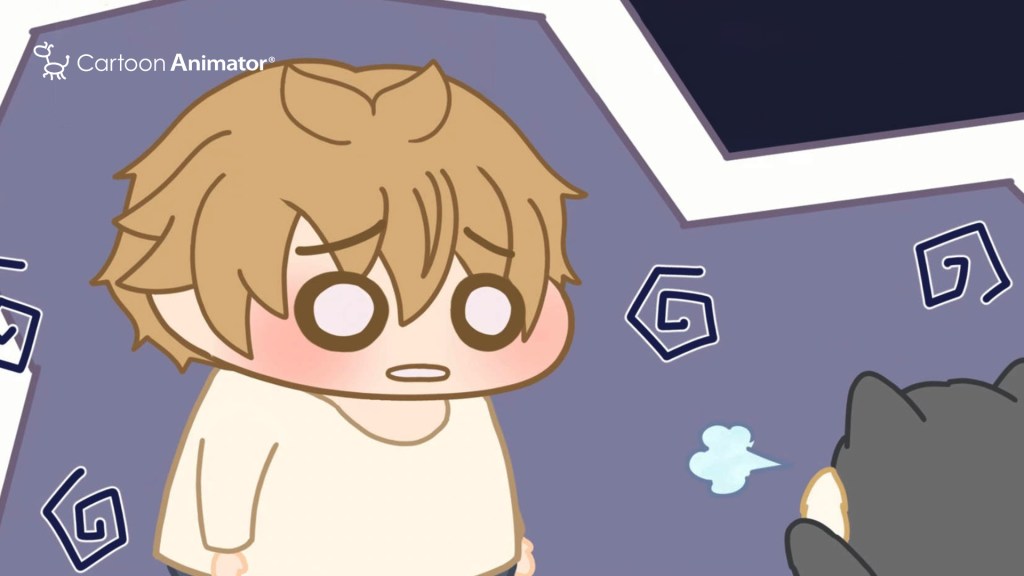
Greetings everyone, I’m Noel Yu, an illustrator hailing from Hong Kong. I’m passionate about bringing my original IP characters to life, often through Webtoon comics. For those reading this article, have you ever considered transforming your own characters into animated 2D wonders? If so, maybe I can provide my own experience to help guide your way into this exciting process.
Once a novice in 2D character animation, I never imagined I could single-handedly complete a 2D animation. That all changed when I discovered Cartoon Animator 5, an incredibly user-friendly software tailored for beginners. Within a week, I not only crafted successful animations but also seamlessly translated my Webtoon Comics into dynamic motion.
Gone are the days of requiring exceptional animation drawing skills or investing copious amounts of time. With Cartoon Animator 5, you have the freedom to realize your 2D animation dreams at your own pace. In its latest 5.2 iteration, Cartoon Animator has introduced Motion Pilot, a groundbreaking feature I extensively utilized in my recent collaborative projects.
How Motion Pilot Simplifies Animation Workflow
Introduced in CTA 5.2, Motion Pilot revolutionizes animation workflow by streamlining the Transform category’s keyframe management, simplifying the process significantly. Comprising four primary features – Transform, Wave, Motion, and Flock – Motion Pilot offers versatile tools that can be utilized individually or in combination to infuse dynamic variations into characters or objects.
In my Webtoon animations, I frequently leverage the Wave feature to inject scenes with dynamism and intrigue. When dealing with multiple similar characters or patterns, combining Wave with Flock enhances the scene coherence and completeness.
Consider the following case studies:
Initially, the character’s dialogue box remains static during speech. However, by applying Wave > Rotate Amplitude, the dialogue box maintains movement even when the character is silent, elevating the animation quality.
2) Without movement, the flowers at the scene’s conclusion appear static, resulting in a lackluster presentation. To address this, I adjust the Rotate Amplitude and Scale Amplitude parameters of the Wave feature for a primary flower and employ the Flock function for the background flowers. Consequently, all background flowers synchronize their movements with the main flower, eliminating the need for individual adjustments and greatly enhancing convenience in the animation process.
With Flock disabled.
With Flock enabled.
One of the functions I frequently rely on is Transform, enabling patterns or characters to move in all directions through mouse control. This feature not only facilitates rotational adjustments while in motion but also enables size modifications along the x- and y-axis.
Consider the following example:
1) With Move, Rotate, and Face Cursor activated within the Transform function, I effortlessly capture the ball movement and rotation as it bounces across the floor.
2) For the dog food scene, I utilized CTA’s default Motion Pilot effect, leveraging the move, rotate, and scale functions within Transform to create a striking entrance for the dog food. This deliberate emphasis on a specific object effectively captivates the audience’s attention right from the outset.
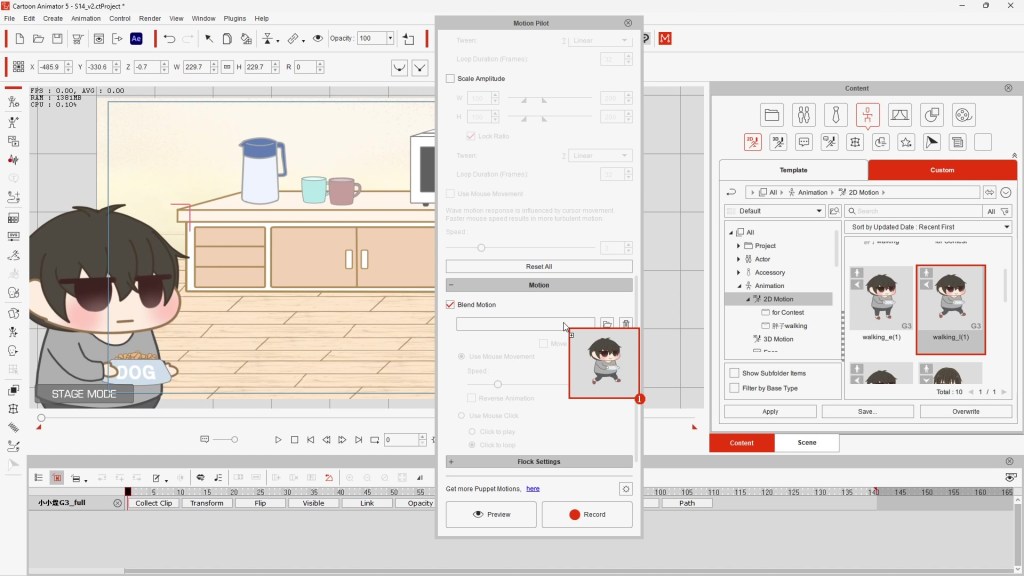
To synchronize the character movement with its walking motion, I combine Blend Motion from the Motion menu with Move from the Transform options. This allows me to seamlessly integrate the character’s walking animation with its trajectory, utilizing Move and Face Cursor within Transform to precisely control its path and animate it covering specific distances rapidly.
Let’s see some examples of this in action:
1) Using the CTA preset walking animation for quadrupeds, the white dog smoothly moves forward with the assistance of the Move function, illustrating a natural walking motion synchronized with the dog’s facing direction.
2) Motion Pilot offers the ability to incorporate custom motions into Blend Motion. For instance, in the case of Little Flame, I can seamlessly integrate a personally crafted walking animation. Furthermore, Motion Pilot enables fine-tuning of motion speed and tempo, ensuring the walking sequence aligns perfectly with the desired pace and my aesthetic standards.
In summary, Motion Pilot streamlines the motion setup process by simplifying tasks such as amplification, reduction, and rotation, thus saving considerable time and effort. For those who prefer efficiency and seek to avoid designing minor motions for scene elements, Motion Pilot serves as a valuable aid. Moreover, alongside Motion Pilot, CTA offers a plethora of other convenient features designed to expedite the animation process, ensuring a seamless and efficient workflow for us.
Understanding the significance of a creator’s character is akin to cherishing one’s own child, and the excitement that ensues when seeing this character come to life in animated 2D form is palpable. For those overwhelmed by the array of 2D animation software options available, or concerned about their lack of animation drawing skills, my foremost recommendation is to give CTA a try.
With its intuitive interface, CTA, provided by Reallusion, also offers an abundance of online tutorials to assist users in mastering the software from scratch. Its distinctive features negate the necessity for frame-by-frame 2D character animation and exceptional drawing skills, thereby significantly lowering the entry barrier and time investment for 2D character animation production. If embarking on crafting your own 2D animation series independently, opting for CTA is highly advisable. You’ll quickly discover how effortless and straightforward it is to bring your animations to life!
Reallusion is thrilled to announce the seamless integration between Character Creator, iClone, and Audio2Face. This robust connection, empowered by NVIDIA’s AI animation technology, revolutionizes multi-lingual facial lip-sync animation production. Not only does this integration bolster NVIDIA’s Audio2Face with a versatile cross-application character system, it also enhances facial editing capabilities, enabling users to export character animations to leading 3D engines like Blender, Unreal Engine, Unity, and Omniverse.
NON-LINEAR AI ANIMATION GENERATED BY AUDIO2FACE
Lip-Sync Animation and Expressions Straight from Audio
As an AI-powered application, Nvidia Audio2Face (A2F) produces expressive facial animations solely from audio input. In addition to generating natural lip-sync animations for multilingual dialogue, the latest standalone release of Audio2Face also supports facial expressions, featuring slider controls and a keyframe editor.
Multi-Language Lip-Sync and Singing Animation
Unlike the majority of English-centric lip-sync solutions, Audio2Face stands out with its exceptional ability to generate animation from any language, including songs and gibberish. Besides the standard AI model Mark, have access to Clair, a new deep-learning model tailored for female characters proficient in Asian languages. Clair’s friendly complexion is well-suited to customer interaction.
SEAMLESS CC – A2F – ICLONE INTEGRATION
Two complimentary plugins enable an automated workflow. With just a single click, configure a CC character in NVIDIA Audio2Face, animate it in real-time alongside an imported audio track, and seamlessly transfer the talking animation back to iClone for additional refinement before exporting it to 3D tools and game engines.
One-Click CC Character Setup in Audio2Face
The CC Character Auto Setup plugin for Audio2Face is the result of a collaboration between NVIDIA and Reallusion, condensing the manual 18-step process into a single step. By importing a CC character and choosing a training model — Mike or Clair — artists can instantly witness lifelike talking animations synchronized with audio files. Experiment with motion sliders, automatic expressions, and even set keyframes. The finalized animations can then be sent to iClone for additional refinement.
Full-Spectrum Animation Refinement using iClone
The free Nvidia Audio2Face plugin for iClone is tailored to receive animation data from Audio2Face. In addition to importing animations, it enhances the liveliness of facial features, resulting in a superior cut suitable for final production.
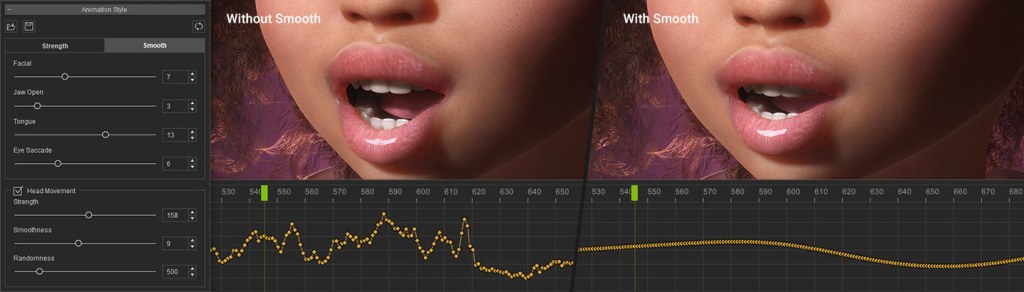
Facial Adjustment by Parts
Animations can be tweaked via a dynamic interface. Adjust various parameters such as expression strengths, head movements, or adding darting eyes to enliven the performance. Enlarge the jaw open range to enhance emotional tension and fine-tune the position of the tongue to mimic precise enunciation.
Smoothness Enhancement
Generative AI animation is susceptible to noise, particularly when audio files are captured by low-fidelity devices or within unfavorable environments. Reallusion Audio2Face integration circumvents these limitations by deploying a highly refined noise filter to eliminate jitters and achieve optimal results despite poor audio quality.
RAISING THE BAR
After obtaining a satisfactory animation from Audio2Face, a finishing touch becomes necessary, particularly when faced with emotional shifts or when emphasizing specific mouth shapes at varying levels of dialogue. iClone empowers facial editing, allowing for refined lip sync, the addition of natural expressions, and the incorporation of head movement sourced from mocap equipment.
The integration of Character Creator, iClone, and Audio2Face marks a significant milestone in AI-driven animation technology, offering creators unprecedented source audio flexibility and efficiency in their production workflows. The Character Creator Auto Setup plugin and iClone plugin are now available as free downloads from Reallusion, empowering creators to streamline their animation pipelines and unleash their creative potential.
To learn more about iClone Audio2Face Plug-in, please visit:
The Making of ‘Fetch’ – Leveling up your Cartoon Animator skills to PRO
Cartoonist and animator Garry Pye achieved a remarkable feat with Cartoon Animator(CTA), producing a full 2D animated film in just two weeks! His primary goal was not merely to use the tools of Cartoon Animator but to leverage them to craft professional-level animation.
Designing and rigging his characters for CTA, this solo animator wrote, animated, edited, and released his short film ‘Fetch’ within a swift 14 days. Join Garry as he shares his incredible journey from concept to the final film.
“I’ve been using Cartoon Animator (CTA) for 2D animation for over a decade now. I stick with CTA because it allows me to create animation quickly, enjoyably, and effortlessly, but still gives me a wealth of powerful tools to help me fine-tune my animations and get the results I want. Its user-friendly functionality means I’m not weighed down by technical details, allowing me to focus on the creative aspect of animation.”
Venturing beyond my usual 20 second animations, I aimed to create a fully animated short with a storyline – a challenge to myself. I’m drawn to characters who persist despite constant setbacks, and found that Klaang from my Alien Squad series was the perfect subject for this animation. In this short, Klaang innocently throws a stick for his pet, only to find it retrieving a stick of dynamite instead. Panic ensues, and Klaang has only seconds to solve the explosive situation.
I prefer writing plot points over storyboarding because it allows me the freedom to explore new directions spontaneously. The thrill of unexpected ideas fuel my creativity, and I like to remain open to the possibility of detouring from a set path. Storyboarding always feels limiting to me.
CHARACTER DESIGN
During my time with Cartoon Animator, I’ve designed and rigged over 500 characters. CTA’s user-friendly templates offer a solid foundation for character building while allowing complete design flexibility. Whether it’s shape or size, the possibilities are endless!
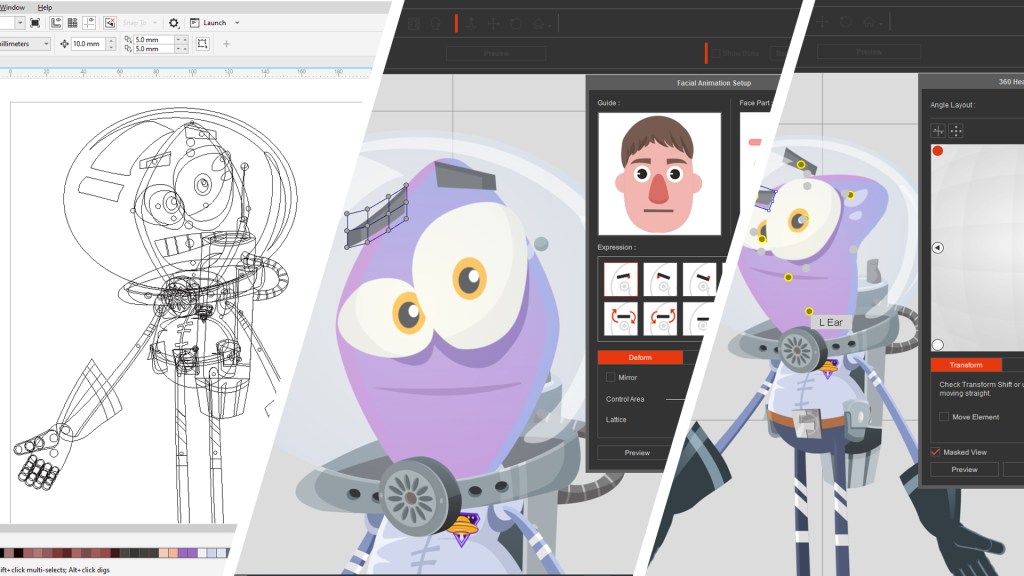
In this project, I was keen to feature one of my favourite characters, Klaang, from the Alien Squad series. Klaang, a G3 vector-based character with a 360 head, offers seamless face rotation for enhanced animation. With Cartoon Animator, I really focussed on customising mouth and eye sprites, designing over 55 mouth shapes and ensuring maximum expressiveness in his character animation.
Klaang’s energetic, dog-like pet was an adaptation of one of my Bonkers characters. By transforming him into a fuzzy ball of fur and removing the arms and legs, I not only achieved the look I wanted but also streamlined the animation process. Less keyframing, more bounce!
THE CONCEPT
When starting a new animation, I always seek challenges to elevate my skills. In ‘Fetch,’ I focussed on two specific targets to push my boundaries and grow as an animator.
For my first challenge in ‘Fetch,’ I aimed for detailed character interactions and prop handling in a single camera shot. The aim here was to show CTA users that by paying attention to small details, the final result will be of a much higher standard. Its easy to use the tools of Cartoon Animator, but they also give you the power to really bring your characters to life.
The story required having the dog retrieve the stick, drop it, and then watch Klaang pick it up seamlessly. The audience needs to believe the stick was genuinely in the dog’s mouth or Klaang’s hand, and not simply pasted on top.
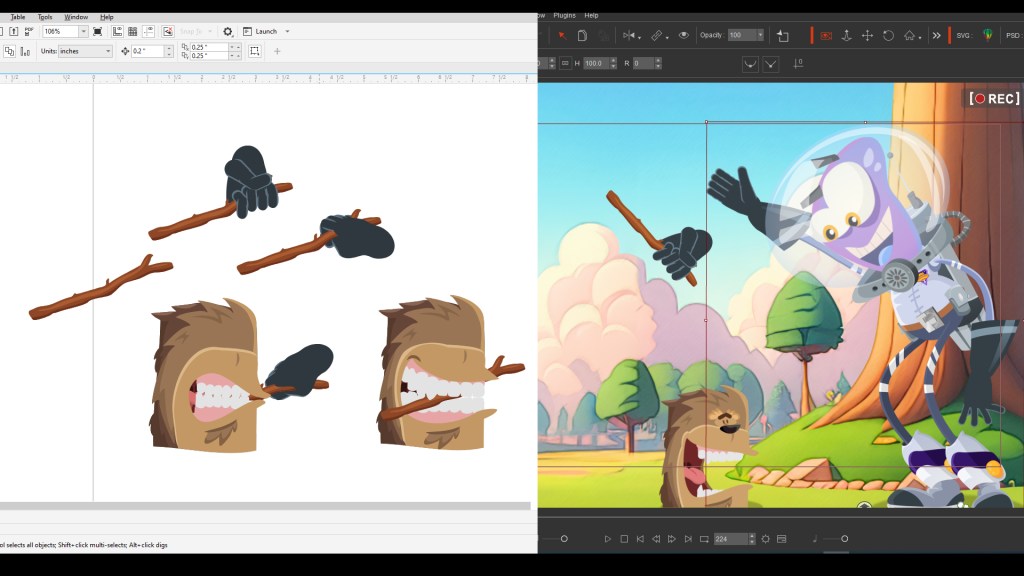
For this animation Klaang was going to have to believably hold the prop in his hand. To achieve this I created a series of individual props of the hand, and then replaced those for the original hand in Cartoon Animator, simply placing the new prop in position on his wrist, linking it to the character and then making the original character hand invisible. Then I was able to switch between hand sprites so Klaan could grab the prop in a convincing way.
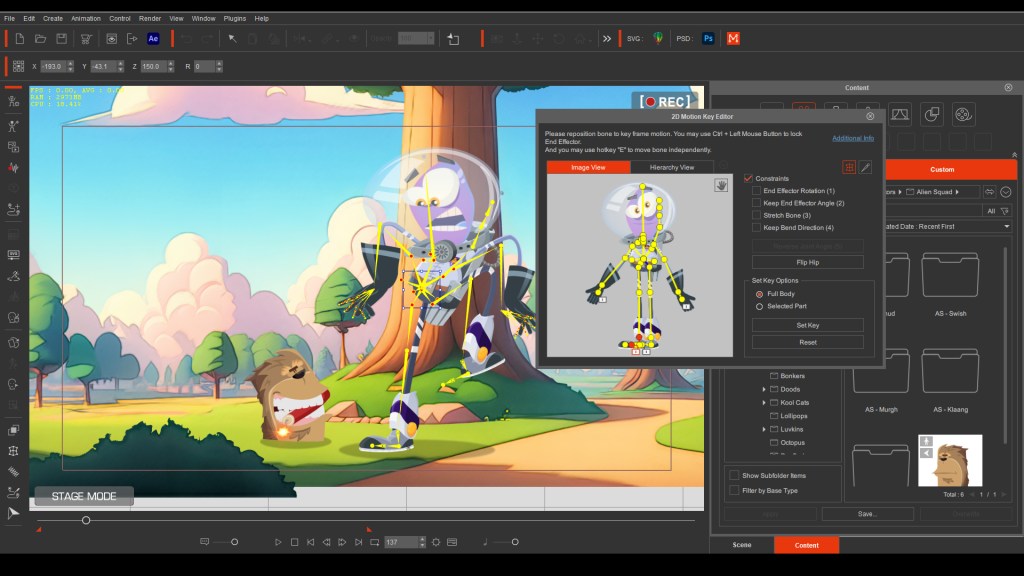
Another challenge in ‘Fetch’ focused on rapid character movements, creating a sense of urgency and panic in Klaang’s actions. This approach was a departure from my usual character animations. Also, rather than using premade motions, this animation required me to keyframe everything except the walk cycle. Swift transitions between full-body keyframes were crucial to maintain clarity in Klaang’s movements. But CTA gives me total control over every body part and keyframe, so that with attention to detail I can produce the results I want.
WHERE TO START?
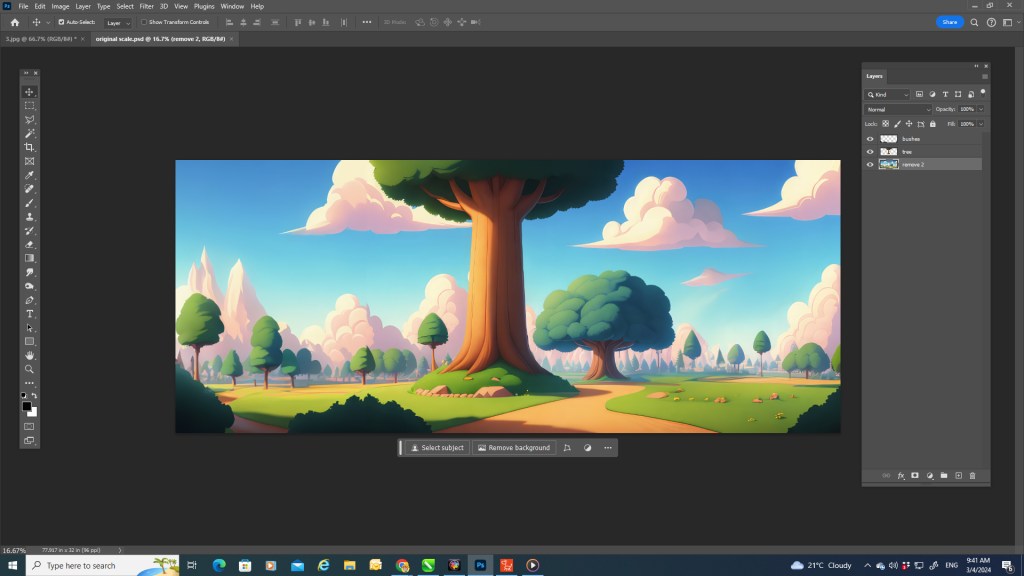
My first step is scene setup. I import fully layered PSD files as scenes, setting the depth of field for each layer to create a parallax effect during camera movement. Next, I position characters within the scene. Importantly, I save this setup as a separate file and then begin animating on a new save, providing a safety net to return to if needed. Another valuable tip is to create multiple versions of the project as you progress. After completing important or challenging animation sequences, I save that at that point and continue on a fresh file. This ensures the ability to backtrack a short distance in case of any issues without losing the entire project.
When starting any new animation, my initial focus is on blocking out basic character motion, with the priority on arms and leg movement, along with the character’s position on screen. What sets Cartoon Animator apart from other animation processes like traditional hand-drawn animation is its flexibility—you don’t need to tackle everything at once. I can lay out a character’s basic movement over 3,000 frames and then return to frame 1 to refine details like hand gestures, eye expressions, and head turns. With CTA, it’s a gradual process of building on a character’s performance, allowing fast and easy adjustments when required.
CHARACTER PERFORMANCE
After blocking out basic character motion, I dive into my favorite part of animating—character animation. The goal now is to meticulously refine every aspect of the character, bringing them to life in a way that gives them believability with the audience. With Cartoon Animator, I enjoy total control over every nuance of character animation, from the subtle turn of the head and focus of their eyes to shaping the mouth and eyebrows. It’s this level of control that allows for a truly immersive and realistic character performance. The more attention to detail, the more convincing the character becomes.
Cartoon Animator operates on a cut-out puppet system for 2D animation, where character parts move around pivot points. However Reallusion provides a wealth of tools and features designed to give these puppets the feeling of traditional hand-drawn cell animation. Tools like Free Form Deformation and Spring Bones play a crucial role in breathing life into characters, creating a smooth and realistic animation experience.
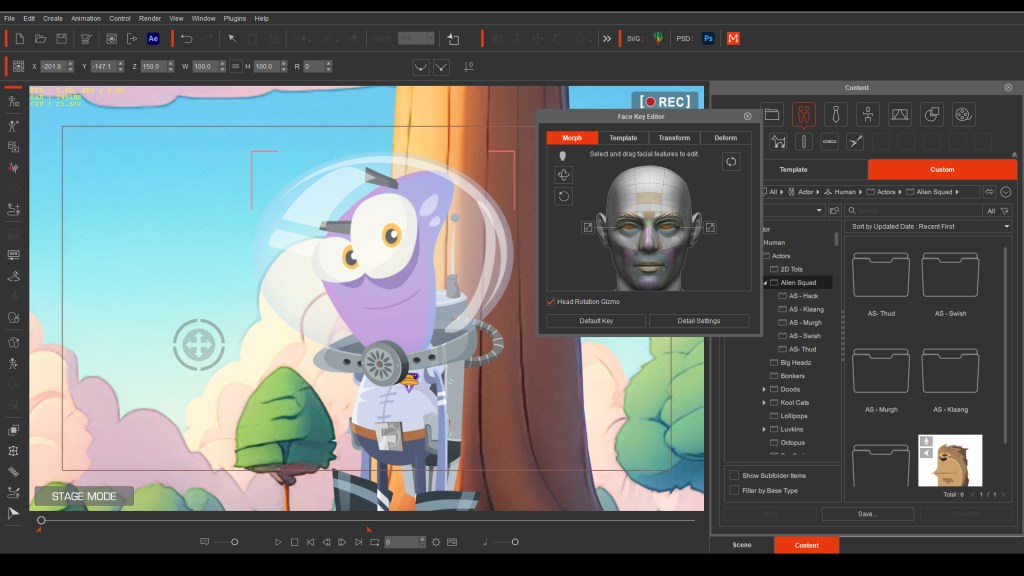
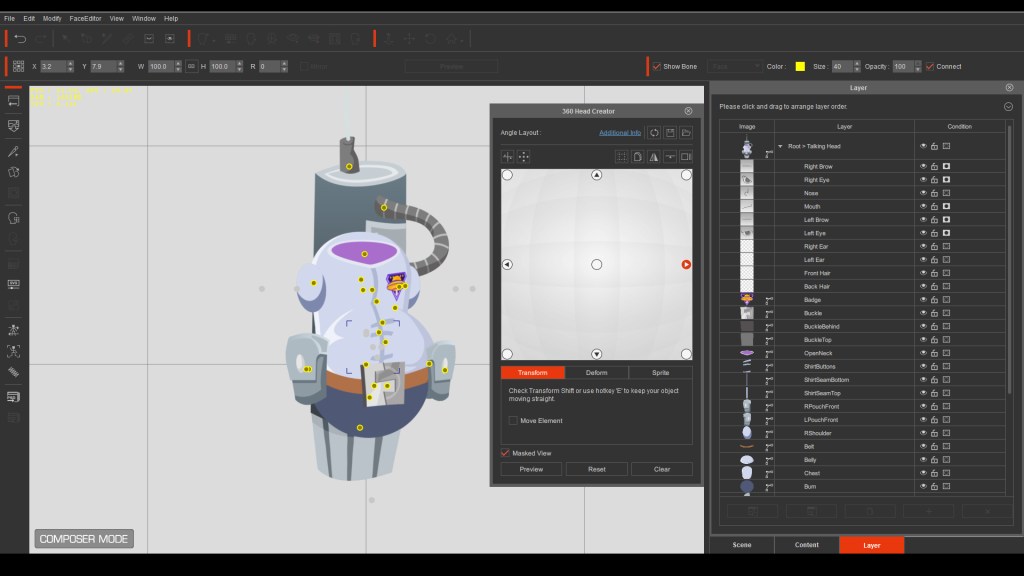
I start every character’s performance by focusing on the 360 Head motion. This feature gives animators the capability to smoothly turn and rotate a character’s head, creating a simulated 3D effect. Creating custom 360 Heads for characters is easy in CTA’s Composer Mode, offering complete control over the design and face animation. To me it feels like crafting a hand puppet.
After blocking out the head motion, I return to frame one to start layering my animation. I focus on individual face parts, employing tools like Transform and Deform to alter their shape and position. The Face Detail Settings come in handy, providing absolute control over nuances such as smooth eye squints for Klaang. Paying particular attention to the finer points of movement enhances the expressiveness of a character’s performance and makes your 2D animation more professional looking.
Directing your animated 2D character’s eyes towards specific points enhances believability in their performance, and Cartoon Animator’s Face Puppetry feature provides complete control over the movement of both eyes, whether together or individually. Keyframing eye movement ensures precision, allowing your character to focus exactly where you want. This method of working extends to various eye sprites, enabling quick and effortless expression changes during animation.
My goal is to always maximize the expressiveness of my animated 2D characters. So I aimed to make Klaang’s performance exaggerated and over-the-top. The challenge was to give him quick, smooth changes in his emotions, both with his body and face animation. This is where CTA’s Deform tool proves invaluable as it provided me with total control over shaping Klaang’s body parts like his mouth. The Deform Tool allows seamless blending from one mouth sprite to the next, ensuring fast and smooth transitions in expressions.
A valuable tip for achieving realistic character performance is to keep all parts of the character in motion. While modern animation often focuses on moving only essential body parts for efficiency, I love subtly tweaking every character part. This approach looks closer to traditional cell animation. For instance, when Klaang raises one arm, his shoulder lifts, the torso bends slightly for balance, and the opposing arm lowers to offset the shoulders. It’s about animating the entirety of the character. I even added a subtle wobble to Klaang’s helmet when his head moved quickly.
CHARACTER INTERACTION
One challenge I set for myself in this animation was to incorporate a lot of interaction between the character and prop. Cartoon Animator’s puppet system means that each character and prop are essentially a separate layer. The specific challenge here was figuring out how to convincingly make Klaang holding the stick or dynamite in his hand.
To do this, I created a number of separate images of the hand holding the prop and imported them into Cartoon Animator. Then I simply link the new image to the original hand and make the original hand invisible. This way, when the character moves his arm, the new prop moves with it.
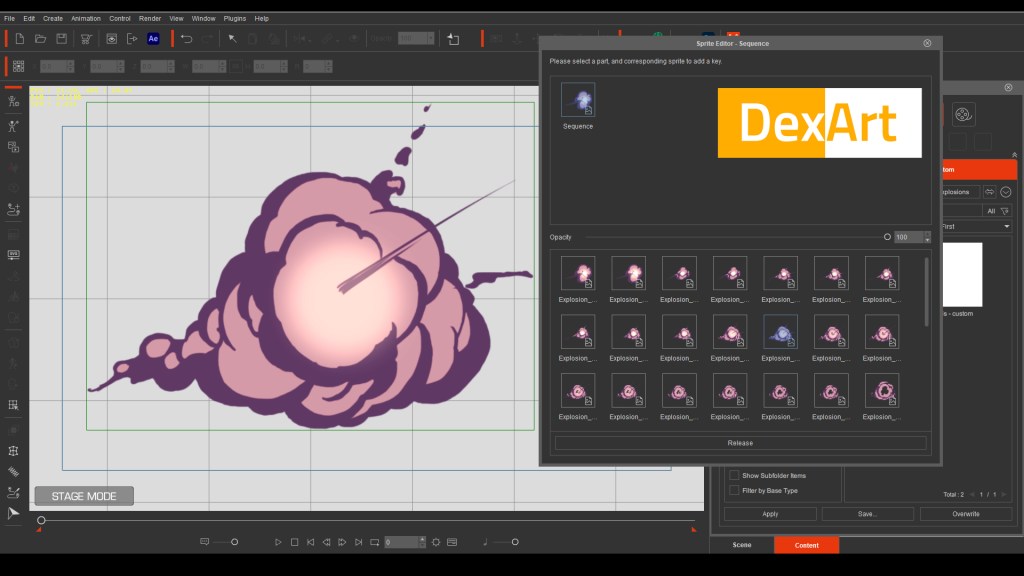
The process for having the dog character carry the stick and dynamite in his mouth followed a similar approach. I created an additional sprite for the character’s mouth and incorporated it into the character rig, enabling seamless switching between the new mouth sprite and the ones already built in to the character. Cartoon Animator allows animators to customise characters in every conceivable way.
I even took the extra step of adding a specific hand prop exclusively for when Klaang pats his dog and ruffles his hair. This custom prop allowed for a more realistic interaction, with Klaang’s fingers convincingly brushing through the dog’s fur. Attention to details like this enhance the overall realism and connection to the animation for an audience.
THE FINAL TOUCH
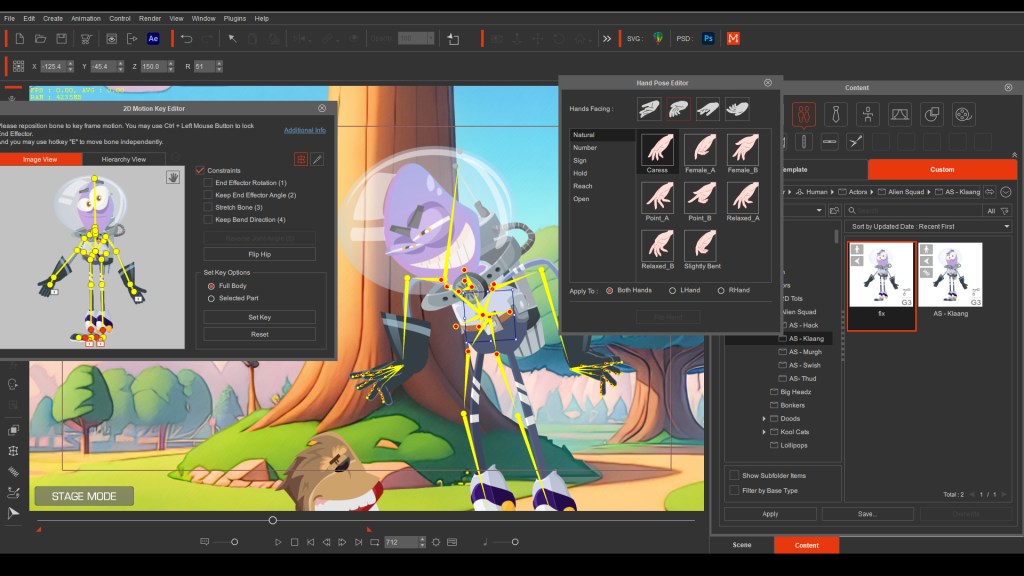
In the final stages of my animations, I set up my actors hand gestures. Cartoon Animator offers characters two hand options. First, sprite hands allow you to seamlessly swap between pre-drawn hand gestures built into your character.
For a more advanced approach to generating hand poses, Cartoon Animator offers Bone Hands. These are fully rigged hands with their own bone structure, allowing for articulation and the creation of hand gestures using preset templates or manual adjustments of each finger bone for precise control. The use of Bone Hands ensures seamless transitions between different hand gestures, providing a high level of smoothness in the animation.
An excellent tip for every Cartoon Animator user, after completing your animation and feeling 100% satisfied, step away and leave it for 24 hours. When you return with fresh eyes, you may spot minor errors or inconsistencies, or notice a part of a character’s motion that needs improving. Taking the time to correct these minor details is crucial—what you notice, your audience might as well. Correcting these details makes the difference between a good animation and a great one.
BREAKING UP THE SCENE
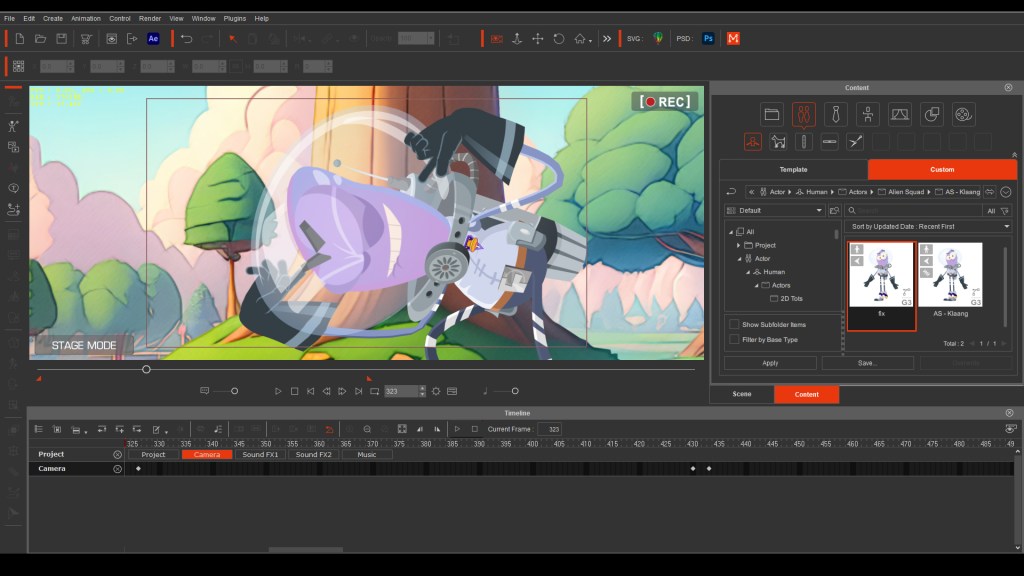
For longer animated films, relying on a single static camera shot may risk losing audience attention. Cartoon Animator provides full camera control, enabling dynamic movements such as panning, zooming, and rotating at any speed. Layering scene elements with varied Z-axis values adds depth to the scene, enhancing the overall viewing experience.
To maintain audience engagement and enhance storytelling, incorporate a variety of camera angles, ranging from wide shots to close-ups, and even use camera tracking in your animated film. The dynamic shifts in perspective will give you a more engaging and visually appealing film.
Camera cuts not only make a story more engaging but also serve as an effective strategy to break a longer animation into smaller files. This practice helps manage overall project size, making it more manageable and allowing for faster work. Keeping separate saves for each camera cut ensures smaller file sizes for efficient editing and reduces the risk of losing the entire project in case of a file error, as you only need to redo a small segment rather than the entire animation.
HELPFUL CARTOON ANIMATOR TOOLS
With the introduction of Cartoon Animator 5, a variety of new tools have elevated 2D animation, making the animating process much more professional. The capability to work with vector files in CTA 5 brings several advantages, such as the ability to zoom in much closer to characters without any loss of quality, blurring, or pixelation. Additionally, this update gives you control over color management, allowing animators to change colors as needed and create entirely new character looks from a single actor.
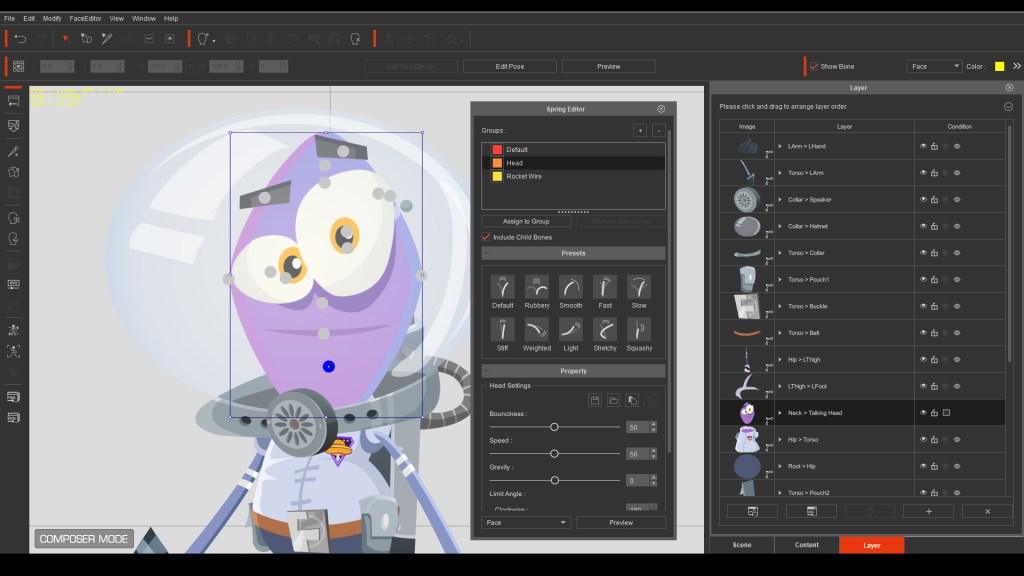
My Klaang character takes advantage of CTA5’s new Spring Bones feature, which gives automated motion to character parts and props. I applied Spring Bones to his head, giving him a jelly-like motion as he moves, and also added them to the antenna on his rocket pack, providing an extra touch of subtle movement. What makes Spring Bones fantastic is their automated motion once applied. Cartoon Animator controls their movement based on parameters you set, and you can effortlessly add Spring Bones to any character or prop yourself. The setup takes only seconds, eliminating the need for tedious keyframing of items like props, hair, and clothing—CTA handles it all for you.
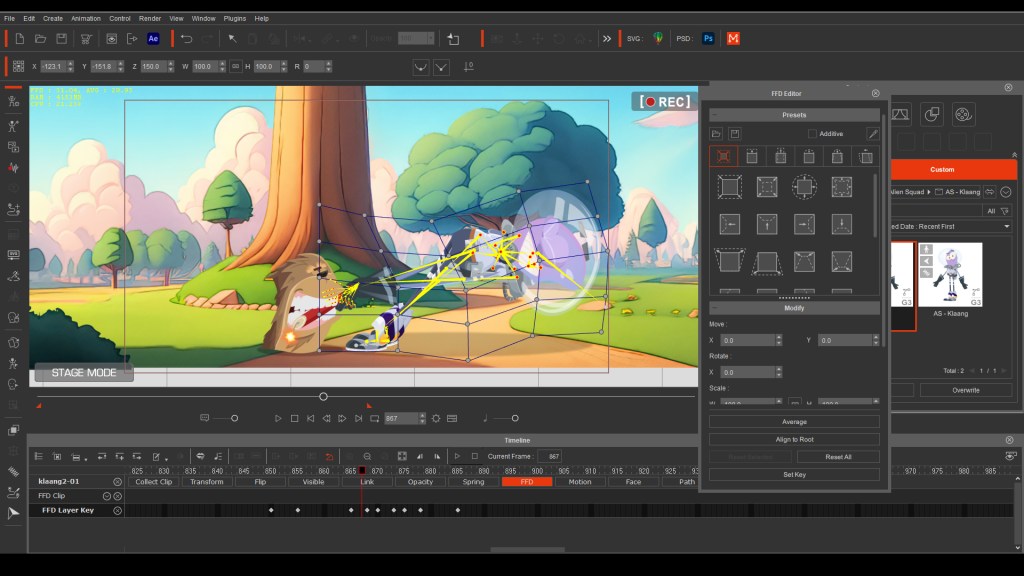
Cartoon Animator 5 introduces another powerful tool – Free Form Deformation. This tool is a game-changer, offering the ability to apply squash and stretch to your entire character. This feature enhances the final 2D animation, making it resemble traditional hand-drawn animation rather than a cut-out puppet. Whether you want subtle motion or wildly exaggerated moves, Free Form Deformation allows you to manually apply squash and stretch to characters and props. You can also leverage one of the many premade templates provided in CTA5. How you use it is up to you, but Free Form Deformation adds that perfect touch to your 2D animation.
THINKING OUTSIDE THE BOX
The key to making your 2D animations more professional is to think outside the box. Take what Cartoon Animator provides and then think about how it can be creatively used. For instance, I had the idea of capturing a quick shot of Klaang turning to the camera with his body following his head. However the character’s body is a flat cut-out puppet, meaning a body turn cannot be accomplished.
So to achieve a turning shot where Klaang’s body follows his head, I approached it by repurposing the 360 Head model. Instead of using it as a head, I transformed it into a body. Setting up the layers for the body, similar to creating a head, ensured that the parts would move into position correctly as the body turned and rotated. The process is very straightforward. I then added a copy of Klaang’s original head on top of the new 360 Body model and linked them together. This allowed me to animate his head turn and synchronize the body turn to match. When the footage was cut together, it seamlessly appeared as if it was the same character throughout the shot.
I applied this same process to create the UFO model. I really wanted the UFO to rock back and forth as the dynamite hit, so I knew I needed a more three-dimensional appearance in its movement. Employing the 360 Head model once again, I transformed it into the UFO. This allowed me to rotate and turn the UFO in any direction, creating the illusion of a 2D prop moving in three-dimensional space.
My advice to fellow CTA users is always, don’t ask, “Can CTA do this?” but rather, think, “How can I make CTA do this?” If you can imagine it, Cartoon Animator can make it happen. Sometimes, a touch of creativity is all you need.
HELP FROM DECLAN WALSH
One of my favorite Cartoon Animator developers and animators is Declan Walsh from Dex Art. With a background in traditional 2D animation as a Disney animator, Declan’s animated effects like smoke, water, and fire are unparalleled. For the final UFO explosion, I enlisted Declan’s expertise to achieve a traditional animated effect. Declan rose to the challenge and delivered an incredible frame-by-frame sequence of the UFO exploding. You can use a similar approach in Cartoon Animator by creating your own animated props. Simply import a sequence of frames and using Collect Clip you can animate them at the press of a button.
EDITING AND SOUND
After completing my animation, I exported each individual clip as a 4K MP4 file and then edited them together using my preferred editing software, Pinnacle. However, there are numerous editing software packages available, so you can choose the one that best suits your needs.
For music and sound effects I subscribe to a site called Audio Blocks which has everything I could ever wish for in the way of sound.
CONCLUSIONS
I’ve been using Cartoon Animator for 2D animation for over a decade. I stick with CTA because it allows me to create animation quickly, enjoyably, and effortlessly, but still gives me a wealth of powerful tools to help me fine tune my animation and get the results I want. Its user-friendly functionality means I’m not weighed down by technical details, allowing me to focus on the creative aspect of animation. As a creative individual, I simply want to animate and have fun, and CTA enables just that.
Reallusion consistently adds more tools and features to CTA, with many free updates in each software version. New tools in CT5, such as vector scaling, color management, spring bones, free form deformation, and motion pilot, provide me with greater control over every aspect of animation. In many cases, these tools automate parts of the animation process, speeding up production time and allowing me to concentrate on essential aspects like character animation.
With Cartoon Animator you can level up your 2D animations to a much higher standard.