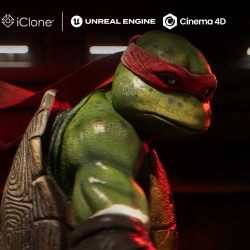
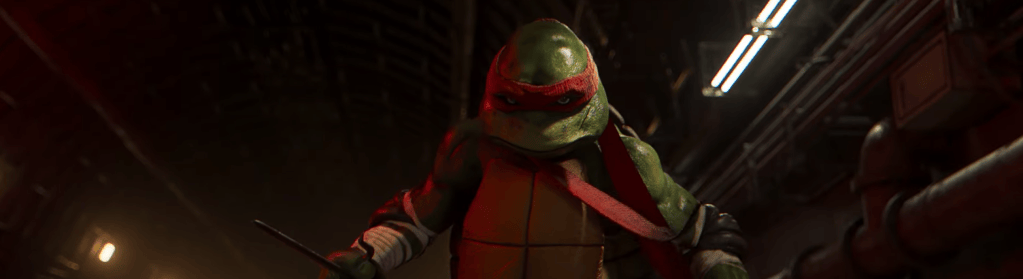
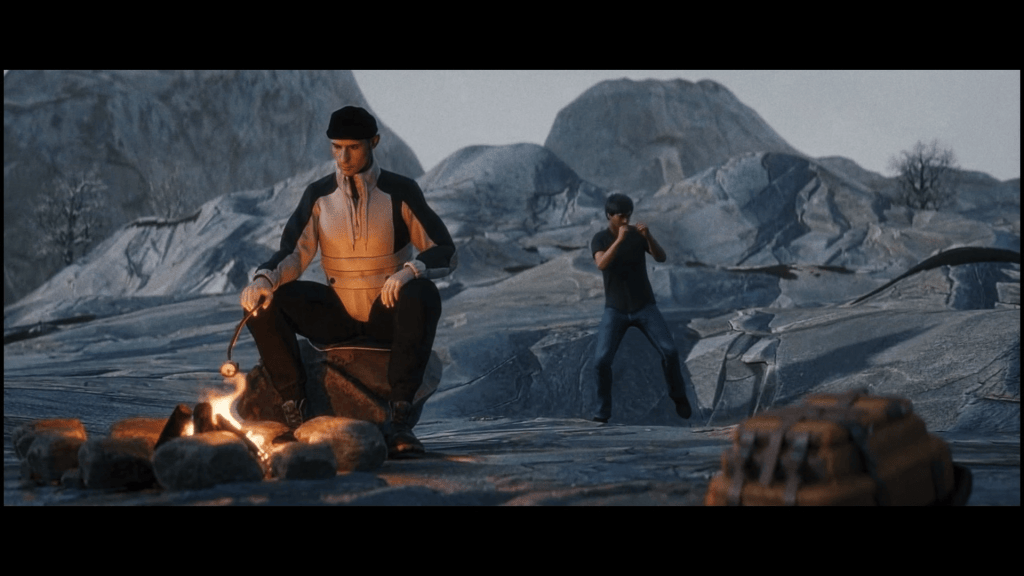
When director and creator John Likens set out to reimagine Raphael in a darker, grittier cinematic world, he wasn’t interested in nostalgia alone. He wanted intensity. Weight. Brutality. A version of the Teenage Mutant Ninja Turtles grounded in shadow, steel, and subway grit — something long-time fans have been hungry to see on the big screen.
The result? A high-impact action short centered on Raphael battling The Foot in a dimly lit underground station — a film that surpassed 2 million views on YouTube within its first few weeks.
At the heart of that realism: performance-driven motion capture from Actor Capture.
Building a Darker TMNT Universe
Likens had already built momentum with previous shorts spotlighting Donatello and Leonardo before embarking on his most visceral installment yet — Raphael. Known as the most volatile and physically dominant of the Turtles, Raphael demanded a fight sequence that felt raw, grounded, and punishing.
Likens collaborated with Oni Stunts and Fight Coordinator James Newman to design a brutal, tightly choreographed battle between Raphael and multiple Foot Soldiers. Every strike, counter, and environmental interaction was carefully mapped out before stepping into the volume.
With the fight language established, Likens turned to motion capture veterans Actor Capture to translate that choreography into digital performance.
From FBX to Fully Characterized Digital Fighter
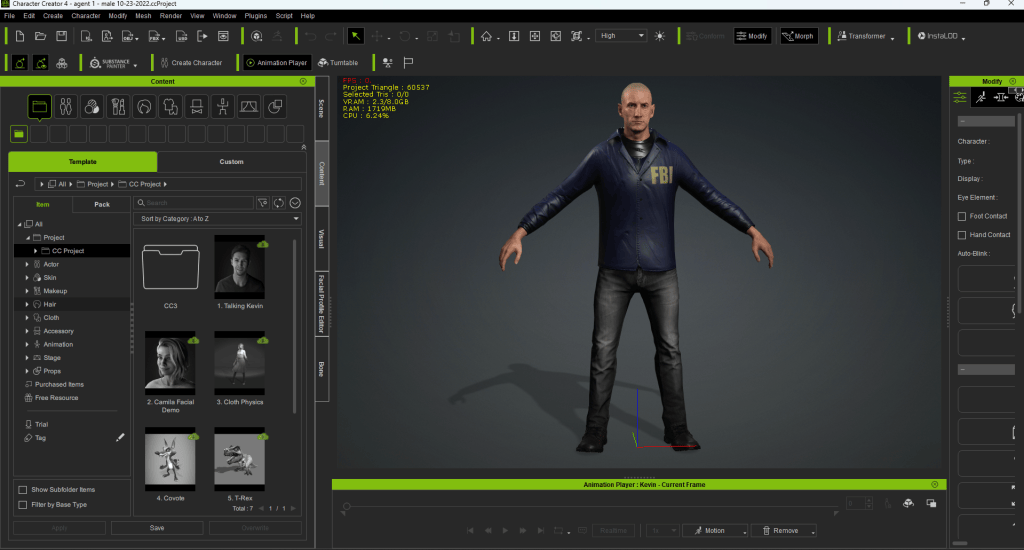
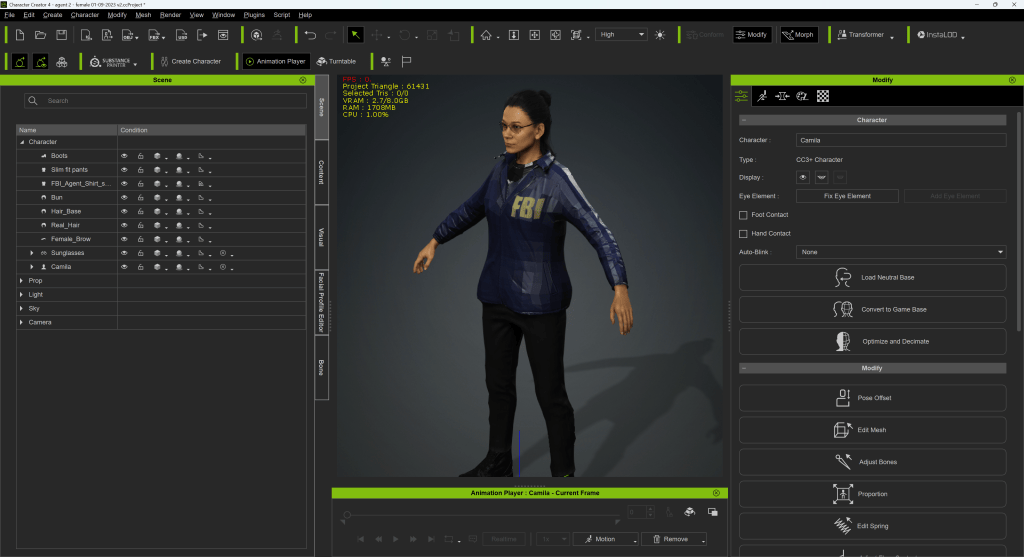
The pipeline began with Likens delivering his Raphael and Foot Soldier FBX models to Actor Capture. Using Reallusion Character Creator, the team characterized and prepared the models for animation, ensuring clean skeletal structures, proper retargeting setups, and compatibility with the capture system.
Quick motion tests were captured and sent back for creative approval — allowing Likens and Newman to evaluate performance timing, scale, and physicality before committing to the full shoot. Thanks to the efficiency of the Reallusion pipeline, turnaround was rapid. Once approved, Actor Capture moved into full production mode at its Atlanta studio.
Two Days Inside the Capture Volume
The action shoot brought together:
Director John Likens, Fight Coordinator James Newman, Stunt team from Oni Stunts, Performers including Alan Silva, Bee Xiong, Joshua Davidson, and Tony Sre, and the Actor Capture technical crew.
Inside a volume powered by 40 optical motion capture cameras and a 13×25 LED wall, the team recorded the entire fight sequence. The LED wall provided immersive lighting reference and spatial awareness, while the optical system ensured high-fidelity body tracking — crucial for preserving the nuance of stunt-driven choreography.
Performances weren’t just about combat — they were about character. Raphael’s aggression had to feel personal. The Foot Soldiers had to move with disciplined precision. Subtle weight shifts, pauses between blows, and grounded landings all contributed to the realism that fans responded to.
From Capture to Final Frame
After capture, the data was processed and cleaned in OptiTrack Motive, ensuring clean solves and accurate skeletal performance. The animation was then transferred into Maxon Cinema 4D for final animation refinement, lighting, and rendering.
For visualization during production, 3D models were also sent into Unreal Engine for mocap previs — allowing the creative team to see the action unfold in real time and make on-set decisions about pacing, framing, and choreography adjustments.
This hybrid workflow — optical capture, real-time visualization, and high-end 3D rendering — gave Likens cinematic control while preserving the authenticity of live performance.
Why It Resonated with Fans
The success of Raphael wasn’t just about nostalgia. It was about:
Performance authenticity driven by stunt professionals. High-end motion capture fidelity. Cinematic lighting and environment design. A grounded, mature tone many TMNT fans have long requested.
By blending live stunt choreography with advanced motion capture and digital animation tools, Actor Capture helped bridge the gap between indie fan film and theatrical-quality action.
A Glimpse of What Could Be
Likens’ trilogy of TMNT shorts demonstrates what’s possible when passionate storytelling meets production-grade performance capture. With over two million views and strong fan demand, Raphael proves there’s an audience ready for a darker take on the Turtles. And behind the digital shell and sais? Real performers. Real choreography. Real motion capture. Actor Capture didn’t just capture Raphael and The Foot. They brought them to life.
Building a Cinematic Survival Horror Game Without AAA Resources
Creating a cinematic survival horror game is demanding under any circumstances. For indie developers working nights and weekends, it can feel almost impossible.
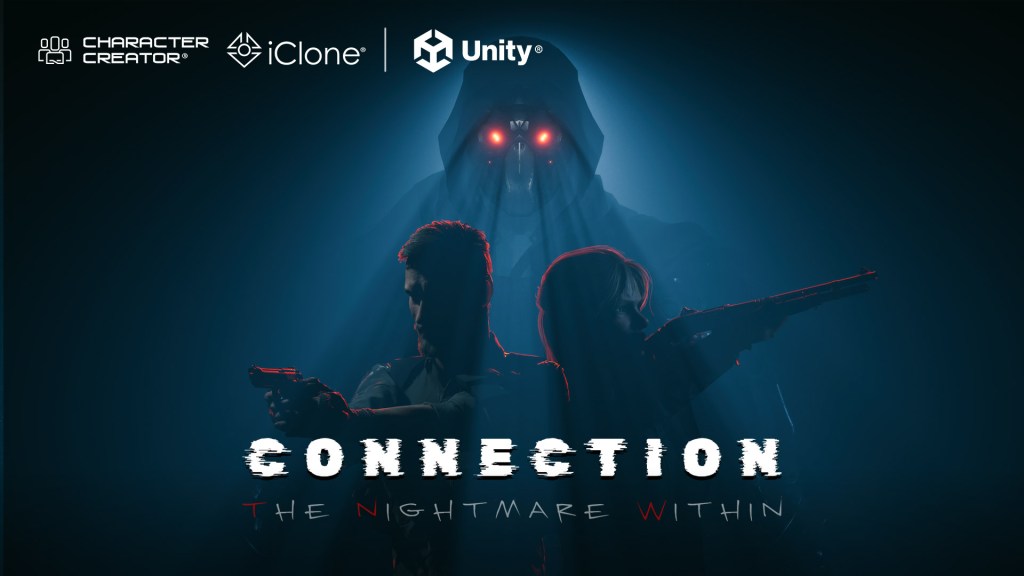
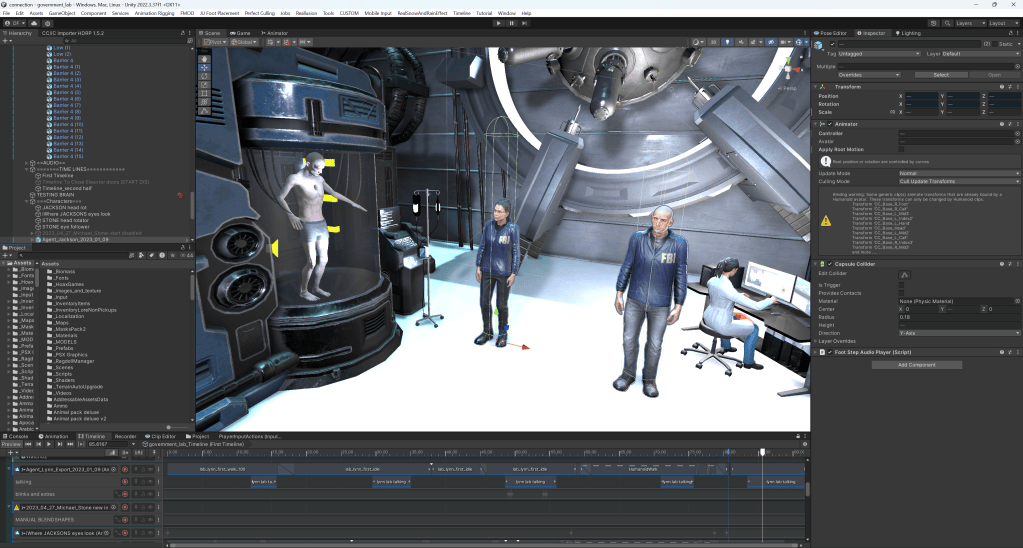
Dragon Level Studio — a three-brother team balancing full-time jobs — set out to build Connection: The Nightmare Within. Without a large animation team, without outsourced character artists, and without AAA budgets, they still delivered a game featuring fully voiced cutscenes, dynamic camera systems, and high-quality characters using Character Creator, iClone, and Unity Auto Setup.
The key question was not whether they could build the game. It was whether they could finish it.
The Team Behind Dragon Level
Dragon Level Studio is composed of three brothers based in LA, USA:
David – the eldest, with a cinematic background. He handles lighting, coding, and is also a music producer, shaping the game’s atmosphere both visually and sonically.
Armen – an engineer fluent in C#, which naturally led the team toward Unity as their engine of choice.
Paul – supporting across multiple areas and helping wherever production required. He also handled much of the playtesting, helping the team catch bugs earlier.
All three maintain full-time jobs while dedicating significant personal time to the game. Their motivation? A shared love of horror games, especially the classic era of survival horror.
That passion eventually turned into a serious production effort.
About the Game
Connection: The Nightmare Within
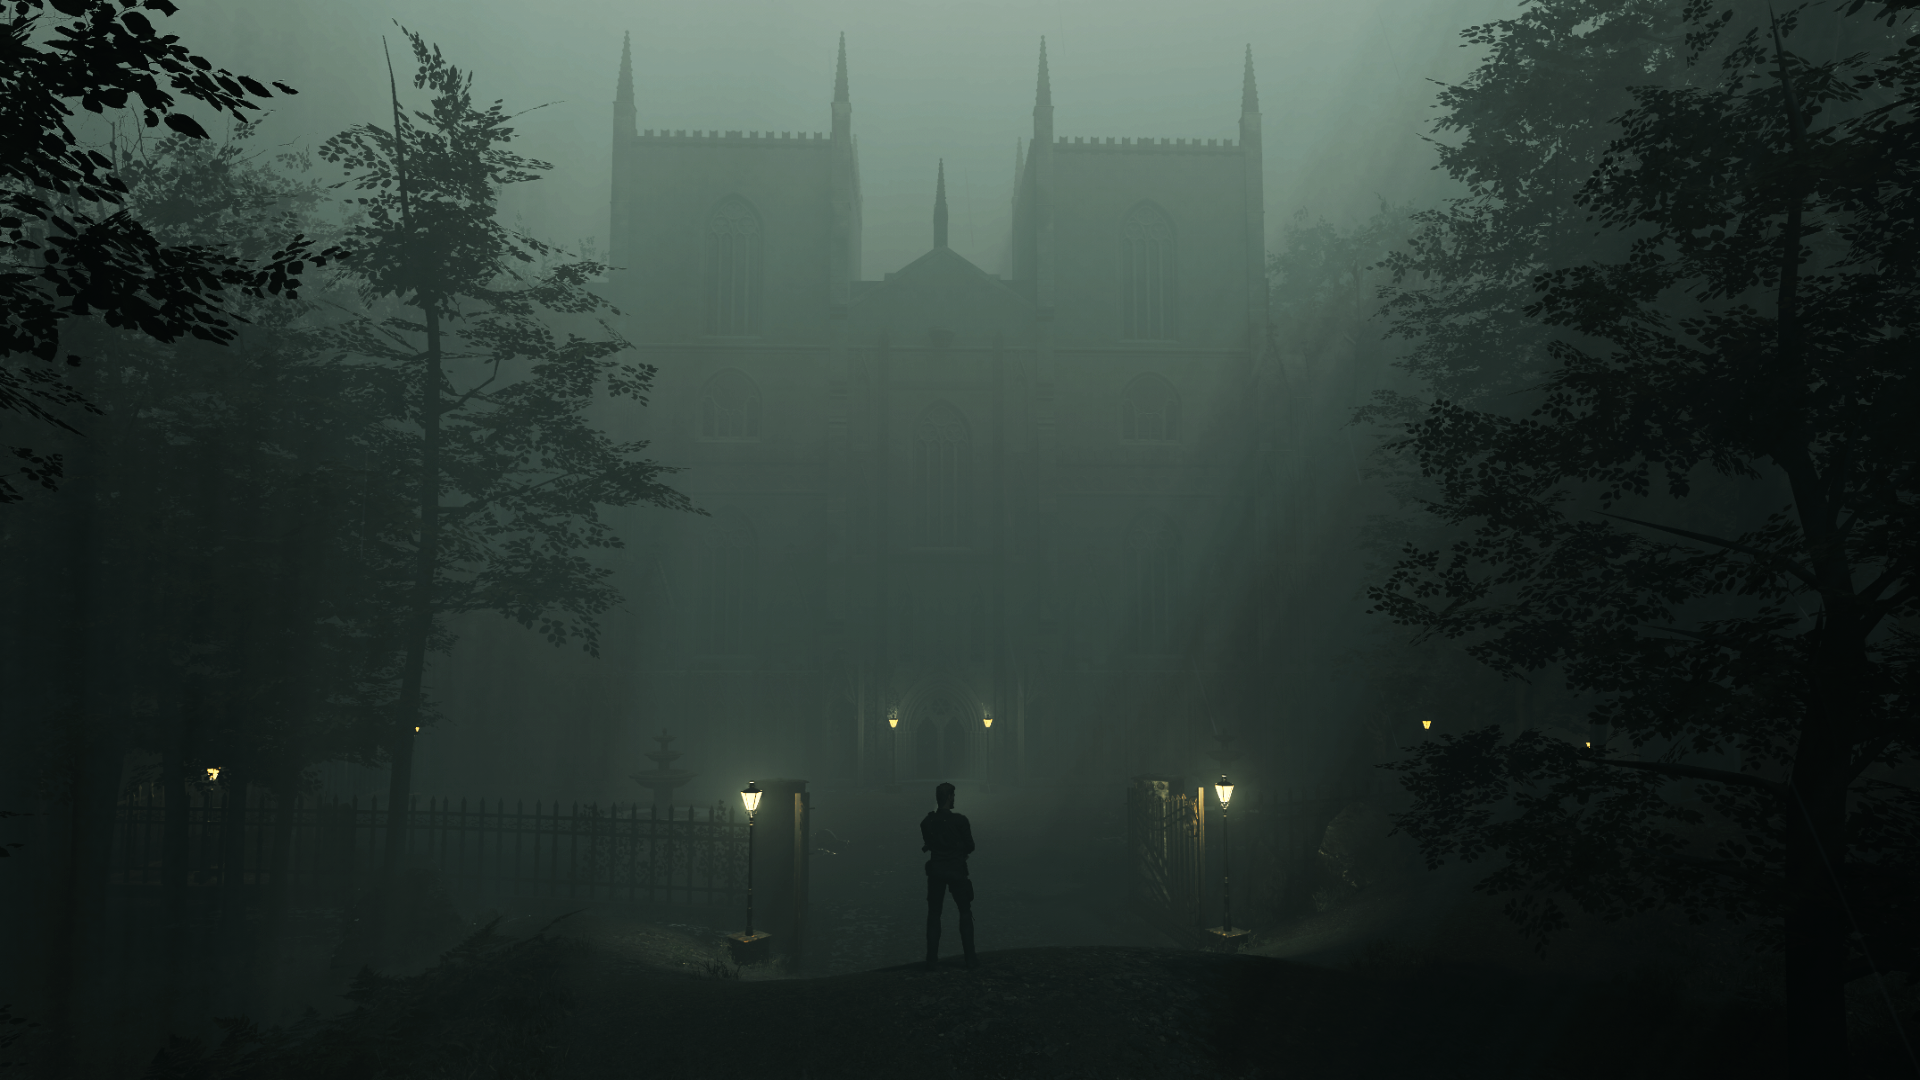
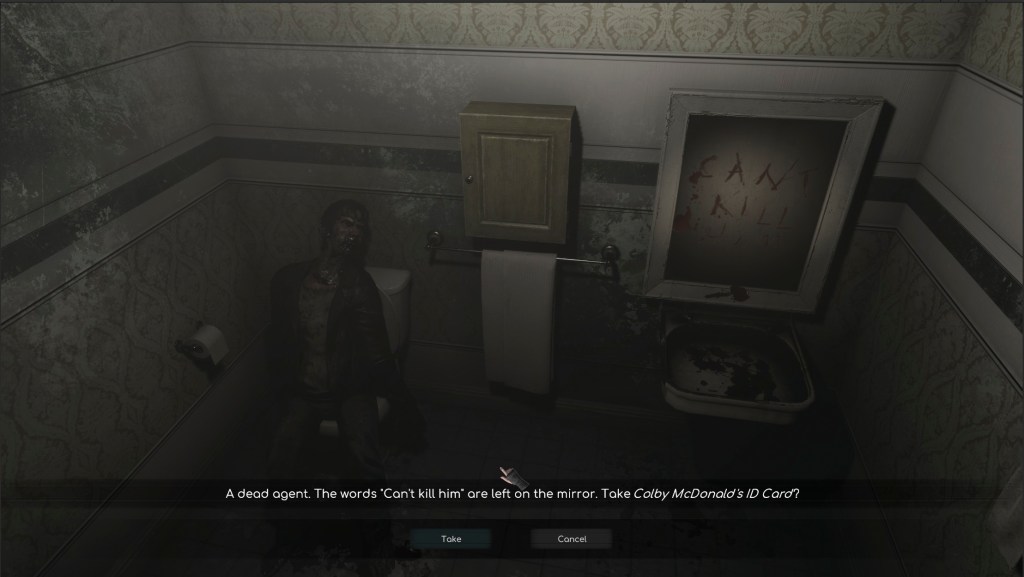
Connection: The Nightmare Within is a narrative-driven survival horror game inspired by classics such as Resident Evil, Silent Hill, and Alone in the Dark.
Players take on the role of Detective Stone, who becomes entangled in a shadow conspiracy while investigating a mysterious case. To uncover the truth, Stone uses experimental technology that allows investigators to enter the subconscious minds of criminals.
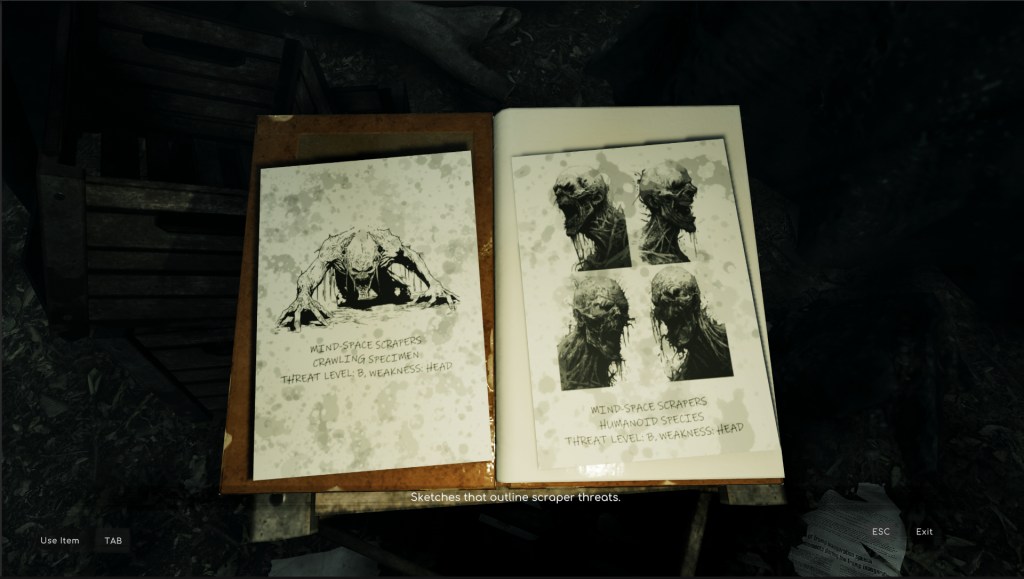
Inside these distorted mindscapes, players explore atmospheric environments, solve puzzles, and battle creatures that embody the fears and memories of the suspect. As the investigation progresses, fragments of the conspiracy begin to surface, gradually revealing a larger story hidden behind the crimes.
“Without a large animation team, without outsourced character artists, and without AAA budgets, they still delivered a game featuring fully voiced cutscenes, dynamic camera systems, and high-quality characters using Character Creator, iClone, and Unity Auto Setup.”
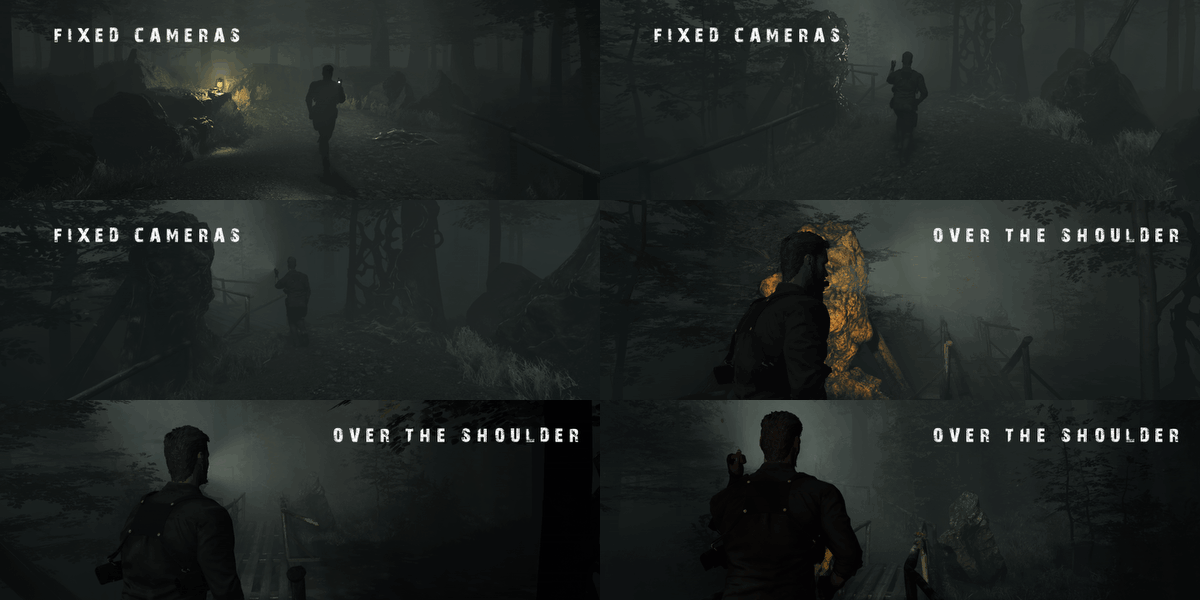
One of the game’s distinctive features is its camera system. Players can switch between a classic fixed-camera mode and a modern over-the-shoulder perspective. The idea actually originated from a creative disagreement between the brothers themselves.
David preferred the cinematic tension created by fixed camera angles, which allow scenes to be carefully framed to control pacing and atmosphere. Armen, who is nearly 12 years younger, grew up playing FPS and modern action games and strongly preferred an over-the-shoulder perspective that gave players more direct control.
Rather than forcing a compromise, the brothers decided to support both approaches and let players choose their preferred style. In the end, the hybrid system became one of the game’s distinctive features. As the team put it, “it turned out quite well.”
The Reality of Low-Budget Development
Building a cinematic horror game as a part-time team introduced two major constraints: time and budget.
Time
Since all three brothers maintained full-time jobs, development mostly happened at night and on weekends. This meant every part of the production pipeline had to remain efficient. Long iteration cycles, complex asset rebuilding, or repeated outsourcing revisions would quickly slow progress and threaten the completion of the project.
Cost
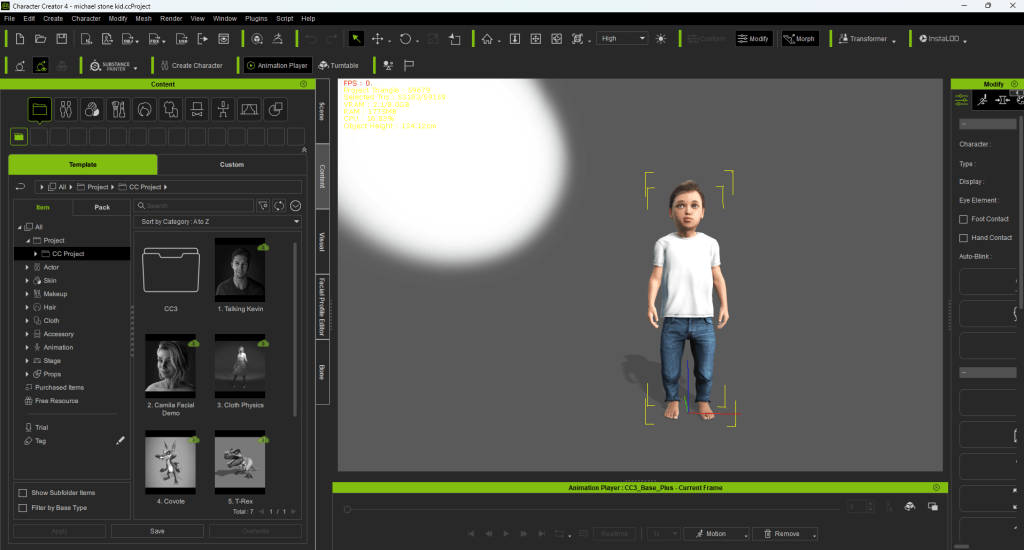
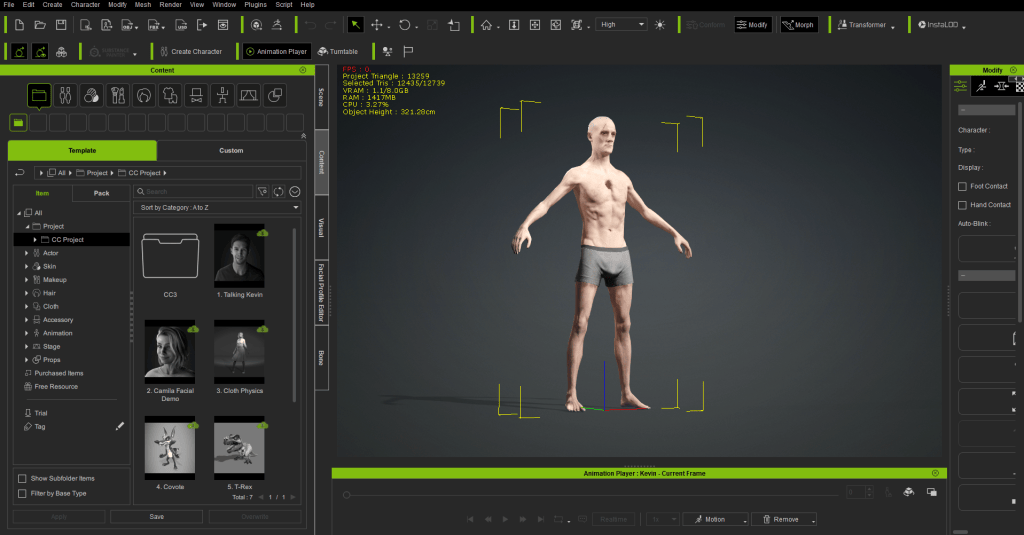
Character production quickly became one of the most expensive aspects of development. Initially, the team experimented with purchasing premade characters, but customization often required additional work, such as new shape keys, rig adjustments, and other modifications.
Outsourcing a base character might cost roughly $300, but once custom shape keys, full rigging, and additional adjustments are included, the total can easily rise by nearly $3,000 more.
For three protagonists, the cost could approach $10,000 USD — even before animation and revision cycles begin. For a small studio working part-time, that level of investment represented a significant financial risk.
That’s when they discovered Character Creator.
“Creating a cinematic survival horror game is demanding under any circumstances. For indie developers working nights and weekends, it can feel almost impossible.”
Integrating Character Creator & iClone into the Pipeline
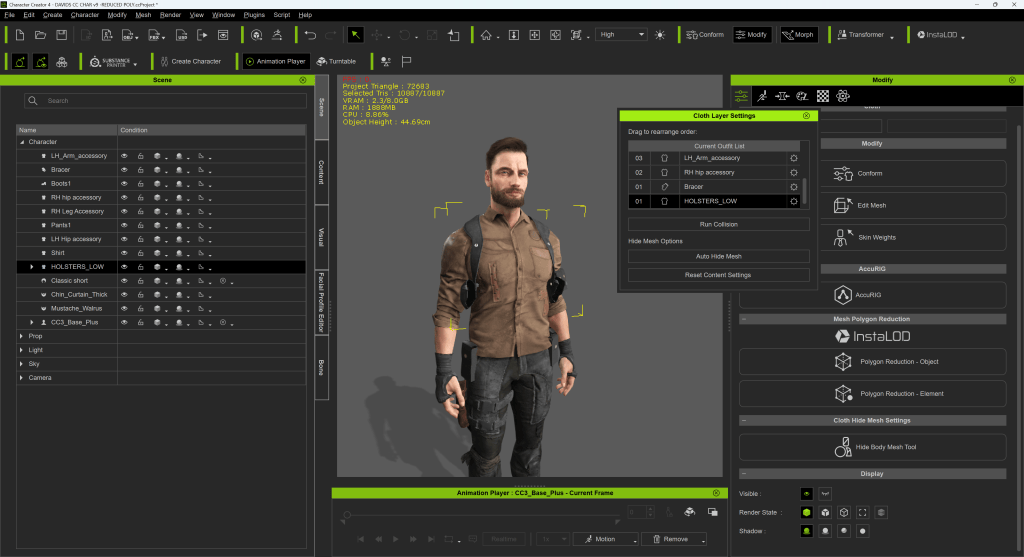
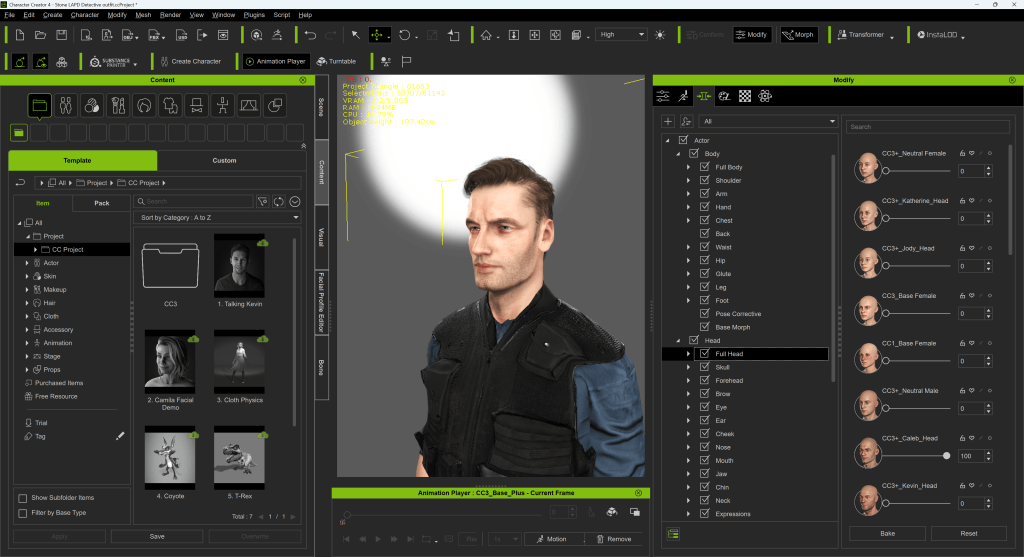
After discovering Character Creator, the team adopted it as the core of their character production pipeline. Characters were created and customized directly in Character Creator, with clothing assembled from assets in the Reallusion Content Store and Marketplace.
For animation, the team combined several sources. Body motion was captured using a Rokoko suit, while additional animations came from the Unity Asset Store and Mixamo.
Dialogue scenes were handled in iClone. After recording voice performances with actors, lip sync was generated in iClone before exporting the characters and animations to Unity using Auto Setup. This workflow allowed the small team to produce fully voiced cinematic cutscenes without relying on a large animation department.
Why Character Creator Worked for Them
1. Clothing & Rapid Styling
The Content Store allowed the team to quickly assemble believable outfits without starting from scratch.
For example, the detective’s clothing was built directly from store assets, drastically reducing design time. Using built-in styling features like the Conform to Body feature, garments automatically adjust to the character’s proportions, eliminating the need for time-consuming manual corrections.
For a small team with limited hours each week, this ability to style characters quickly made a significant difference.
2. Morph Precision
The protagonist was inspired by actor Josh Holloway. The team wanted a rugged facial structure with strong contours that conveyed experience and toughness.
Character Creator’s morph system allowed them to sculpt those features precisely within the same environment. Instead of exporting to a separate sculpting pipeline and iterating repeatedly, they could refine facial proportions directly until the character matched the vision they had in mind.
This greatly simplified the iteration process.
3. Mesh Editing Flexibility
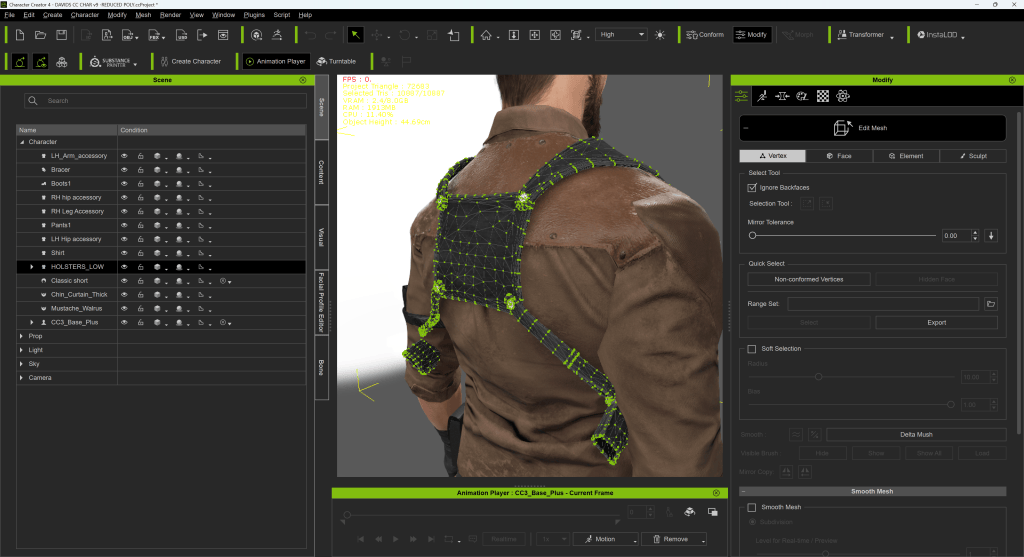
When importing accessories such as belts or small props, Character Creator’s automatic conforming handled most of the fitting.
However, when finer adjustments were needed, the Mesh Editing tools allowed the team to quickly reshape elements without breaking the character pipeline. A belt could be narrowed or repositioned in minutes, avoiding additional modeling steps in external software.
This level of flexibility kept the workflow efficient.
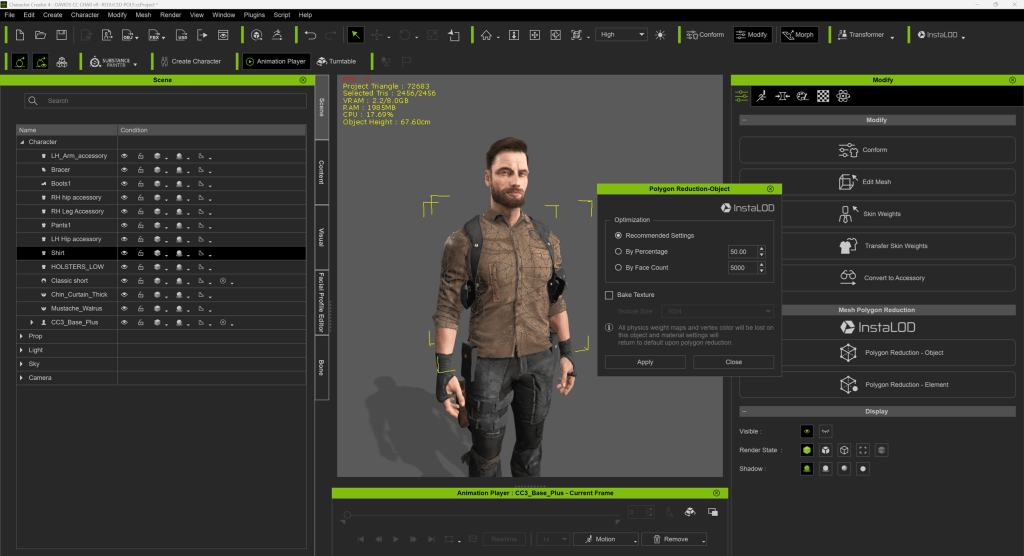
4. Polygon Optimization for Real-Time Performance
Another advantage came during the optimization phase. Because the characters were built with high detail, not every polygon was necessary for real-time gameplay.
Using Character Creator’s polygon reduction tools, the team was able to significantly lower triangle counts while maintaining visual quality. Hair assets in particular benefited from this process — large amounts of geometry could be removed without noticeably affecting the final appearance.
This allowed the characters to remain visually strong while running smoothly inside Unity.
Auto Setup for Unity: Removing Technical Friction
None of the brothers comes from a traditional artist background. Shader setup and hair rendering in Unity initially led to disappointing results.
Unity Auto Setup has been significantly simplified:
Shader configuration
Hair material setup
Character integration
What had previously resulted in broken visuals became predictable and production-ready.
Measurable Impact
Character Creator and iClone affected three core areas:
Quality
They achieved character quality that matched their horror vision, elevating immersion. Most critically: Without CC and iClone, fully voiced cinematic cutscenes would likely not have been feasible.
Time
The team estimates they saved approximately seven months of development time, primarily by eliminating outsourcing cycles and iterative rework.
Cost
Instead of spending nearly $10,000 on character outsourcing alone, they maintained control within a structured pipeline.
What’s Next for Dragon Level?
After completing such an ambitious title, the brothers are evaluating a more focused scope for their next project. The experience of building Connection: The Nightmare Within provided something even more valuable than the finished game itself — a validated pipeline.
They now understand exactly how to structure character production, animation, and Unity integration in a way that balances quality with limited time resources. The uncertainty that often paralyzes indie teams has been replaced with confidence.
Cinematic storytelling no longer feels like something reserved for AAA studios. With the right workflow and tools in place, it has become a practical reality — even for three brothers building horror games after work.
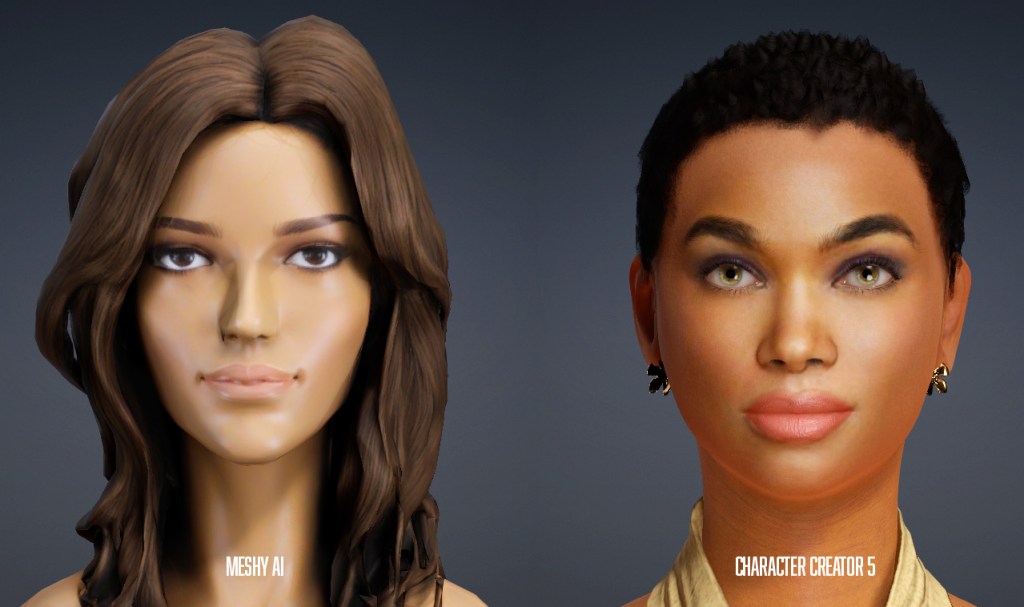
AI-generated character and prop meshes are improving, and some are operating on at least their fifth or sixth generation of AI models that drive the mesh creation. As a longtime character and prop creator I have relied heavily on my own creations for personal and professional projects but in the past year and half or so I have added Meshy AI to keep up with the current trend of AI mesh generation. While it has improved, AI-generated characters are not a full replacement for iClone or CC5 characters, but they do have their place.
Right now, that place is not in front of or close to the camera if you are wanting cinematic quality. Props may be a different story, but they too have flaws that need to be dealt with or hidden from camera view.
High Poly Count
As the AI models behind Meshy have evolved so has the poly count. It is not unusual for Meshy 6 to produce character meshes up into the millions of polys. I have seen many characters between three and four million.
This requires the extra step of remeshing and during this process we can convert the model to quads for a bit cleaner topology for animation performance but it’s not the perfect solution. The Meshy AI re-mesh offers general or fixed poly counts from 3K, 10K, 30K and 100K or a custom poly count. This does solve some of the problems but the meshes do lose a little quality after remeshing.
To get a decent character that looks good in front of the camera you still need at least 130K or more in most cases while Character Creator can provide a character with a working mouth, expressions, primed for easy lip-syncing and provide more advanced features like wrinkles and expressions for a lower poly count.
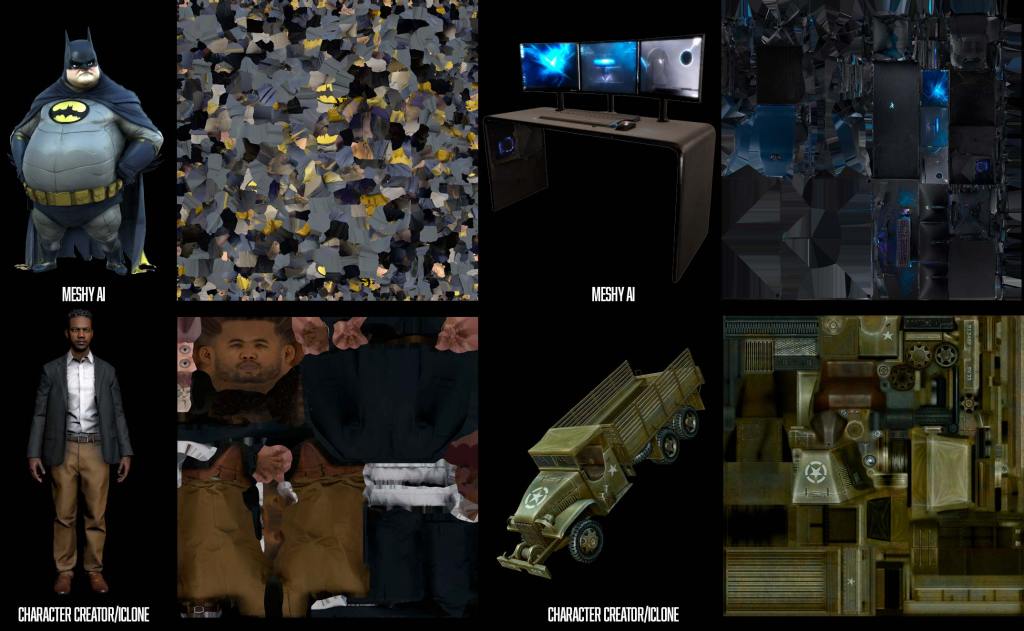
Atrocious UV Maps
In an iClone Facebook group, one user commented on a Meshy AI-generated UV Diffuse map that it looked like someone “ate the map and threw it up,” and I have no argument with that.
For beginners this is particularly problematic and maybe a showstopper and for pros it’s just a pain in the butt to deal with. It’s frustrating, confusing and so chopped up it looks like it came from an app tripping on mushrooms.
Also, for beginners, being able to use an app like Photoshop to alter or change the clothing and other aspects of a character is a defining moment and necessary milestone to get a unique character just by editing the diffuse map.
Sadly, choosing quads doesn’t solve the UV Map problem in Meshy but it does tame it a bit. The quad UV Map is bit more coherent in that we can more easily recognize certain features, but those features will still be chopped up into multiple pieces most times.
For example, the UV map can and usually does make it almost impossible to locate the face let alone all its scattered parts. With quads there is a better chance of the face being chopped up into far fewer pieces making some alterations possible but still frustratingly limited.
This image vividly demonstrates the difference in UV Mapping with Meshy AI versus iClone/ Character Creator
Mesh Binding and Collapsing
In a lot of cases, the generated mesh will be too poly-heavy for use in animation or even a game engine. This requires optimizing the mesh to a lower poly count while retaining as much of the original features as possible. This chops the mesh up into triangles even if it is a quad mesh to start with. This can lead to mesh binding and collapsing in tight joint areas like elbows and knees.
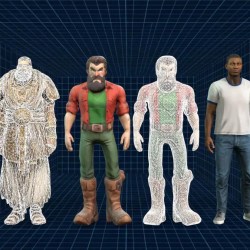
If needed for a crowd or army off in the distance you might get away with flat arms or pinched elbows, but this won’t work for anything closer to the camera. Stylized characters with thin arms and legs are more susceptible to this type of binding or collapse. With iClone and CC5 characters you can optimize character meshes down as low as 800 kb each with just the click of a button even if you don’t know anything about optimizing mesh. This same button can cause binding and collapse when used on some AI-generated meshes though.
Poor Quality Textures
Not only is the UV Mapping horrible so is the diffuse texture map which is the beauty shot of the maps. Just as I was writing this article Meshy announced Meshy 6 Texturing. Up to this point we could make a mesh in Mesh 4, 5 or 6 Preview but the texture was generated with Meshy 5.
Meshy 6 Preview texturing is an improvement but still not as good as Character Creator or most Content Store/Marketplace vendor items.
Quads Improve Mesh Quality Somewhat
In general, Quad meshes use four-sided polygons, while triangle meshes use three-sided. Quads are generally better because they deform more smoothly during animation, are easier to edit, and work best with subdivision tools. Triangles can cause messy deformations and are harder to manage for detailed modeling resulting in many 3D artists preferring quads for character creation in particular.
No Working Mouth
This is arguably one of the biggest drawbacks to using something like Meshy for characters. We can create characters with an open mouth then manually skin that area to the jawbone in CC, but this is an advanced skill generally not available to beginners.
Or we can simply use Character Creator to provide a unique character with all the bells and whistles including AI-assisted lip sync.
No Expressions or Emoting
Applications like Character Creator have spoiled us to great characters within low to reasonable poly counts with expressions. AI-generated characters have the expressions of a rock. Its expression will be whatever comes out of the mesh generation, and we are stuck with it.
On the other hand, iClone and CC5 have dedicated expression and wrinkle systems to improve realism. While it is possible for experienced 3D mesh modelers to create and rig a working jaw/mouth in CC5 even though it is an advanced skill, it is not possible to create a wrinkle system on AI-generated meshes with CC5 Advanced or ActorCore’s free AccuRIG, which leaves these characters rather lifeless compared to iClone/CC5 characters.
You’ll never get that superhero on the right to smile like Aaron does.
Mesh Editing/Clean up
This is annoying… AI-generated characters can be very messy with “blobs” and other detached parts floating around that must be dealt with either in Character Creator or another application. In CC5 we can usually isolate these blobs and hide them but that is not always possible. ZBrush and similar applications can handle the edits, but complicate them.
What You See is Not Always What You Get
If you have used a mesh generator then you have probably experienced some form of this problem. For those of you that haven’t been through this I will try to explain the problems in practical terms.
The untextured preview looks good. The final texture looks even better in the application interface. You download the character only to find a significant number of flaws not visible in the previous stages of generation.
These flaws can include both mesh and UV map problems. What looked like a great face on a character turned out to have another “ghost nose” or bump near the nose area or strange ears or misaligned texture requiring attention from a mesh editing app. This means the user needs to be up to speed on correcting character details like hands with too many fingers or multiple thumbs. Bumps where there shouldn’t be bumps… wrinkles where… well… where it’s just embarrassing and these must be dealt with, or the character is unusable.
Lifeless Eyes
This is a big one in terms of realism and there is no substitute for it. Back in the early days of gaming and animation it was not unusual for a character to be looking through you instead of at you. This defined the experience for the user. The mocap and acting were getting better, but those lifeless eyes would ruin the entire experience by taking focus from the scene. It might have been some great animation and storytelling, but the fixation on those lifeless eyes overshadowed the emotion of the scene.
iClone, in particular, Character Creator has gone to great lengths to solve this problem with eye tracking and textural realism. Using partially rigged AI-generated characters takes us back to the early day as they won’t have eyes in most cases… with them being part of the main mesh instead of separate meshes we can control.
What you see below on the left is all you will ever see with that character. The look of the eyes NEVER CHANGES versus the CC5 characters on the right that have layers such as occlusion and tearline for realism. Eyelashes and eyebrows add more realism too.
Left: Eyes are part of head mesh. Right: Eyes are separate items with reactive layers such as Eye Occlusion and Tearline.
Now let’s take a look at what AI-Generated characters can be used for.
Crowds
This is an obvious use, but you will have to decimate (optimize) them severely to get a crowd of any size. Depending on the distance from the camera, highly decimated characters will work just fine and should work well with the Crowd system in iClone.
Even with crowds, Character Creator still excels with high-quality optimization that starts with good, solid topography before decimation, which means a smoother character at the end of the process, which translates into smoother animation.
Storyboarding
This is another somewhat obvious use for AI-generated characters as storyboards are usually static and only require posing. Add in AccuPOSE and creating a storyboard is almost child’s play. From simple blocking shots to complicated scenes, iClone can punch out a storyboard very quickly and it can be animated if need be.
This is a great way to develop a shot list by recreating the scene in iClone to whatever level of realism is needed and moving the camera around to get a preview of how the camera shot list should be laid out.
Comic Books, Graphic Novels
Just like the storyboards above, iClone is a natural for comic books and graphic novels whether they are realistic, cartoony or somewhere in between. And just like the storyboards, AccuPOSE makes it so simple you will most likely have time left over to tinker with the project to refine it even more! If you don’t need dialog or expressions, then AI-generated characters can work in that situation.
A great example of this is Antareus Studio’s Operation Cobra: The Burma Incident, a WWII-era graphic novel produced entirely with iClone and Character Creator. Read the full story to see how they did it.
Scene Filler
This is a very important role for AI-generated characters just as I mentioned in the Crowd section and with those caveats. The meshes have to be optimized to lean and mean even if you are only going to use them in small Actor Groups but when these groups are deployed, they can add life to a scene.
A great ready-made solution for this is the Crowd Sim: Social Actions pack from the Content Store, which lets you drop pre-animated groups of characters into any scene with just a few clicks.
Content Store and Marketplace
These are still the best places to find quality characters, props, hair, accessories and other 3D assets for iClone and Character Creator 5 that will perform as expected. The Content Store is Reallusion’s curated, professional-grade market — every asset is held to a high standard, making it a reliable source for production-ready content. The Marketplace, on the other hand, is a more community-driven platform where independent creators share a wide and ever-growing variety of assets. Assets from both will look great in front of the camara, including close-up shots to intermediate crowds. The superior mesh topography, UV mapping and mesh density from these Reallusion and vendor products will work for most situations while making your production look as good as possible. With all the promotional events, sales and discounts available we can build a great library of 3D assets just from these two stores.
Summary
I did notice while writing this article that I use Meshy AI almost exclusively for non-standard, one-off characters and anthropomorphic creatures as I had a hard time finding a standard human Meshy AI character to use as a demo next to a standard CC5 character like Aaron.
The one thing that concerns me with AI-generated characters is the fact that they are not fully functional, and in some cases, the mesh is bad enough that the hands or fingers are not functional either. They have to be rigged as a 2-finger mitten to keep them from being stiff.
We sacrifice a lot of features with AI-generated characters that Character Creator has spoiled us to over the years. If you are an expert at sculpting and rigging you can do your own mods but it’s still a time-consuming and at times a tedious task.
AI-generated characters certainly have their place but at the present time they are rather limited in scope in terms of cinematic quality.
MD McCallum – WarLord
Digital Artist MD “Mike” McCallum, aka WarLord, is a longtime iClone user. Having authored free tutorials for iClone in its early years and selected to write the iClone Beginners Guide from Packt Publishing in 2011, he was fortunate enough to meet and exchange tricks and tips with users from all over the world and loves to share this information with other users. He has authored hundreds of articles on iClone and digital art in general while reviewing some of the most popular software and hardware in the world. He has been published in many of the leading 3D online and print magazines while staying true to his biggest passion, 3D animation. For more information click here.
Hi, I’m Melis Caner, a 3D Generalist and filmmaker with a Film degree from Dokuz Eylul University. After graduating with a focus on cinematography, editing, and sound design, I discovered 3D animation during the pandemic that followed. Amazed by its limitless creative possibilities, what began as a hobby quickly became my career and a new form of self-expression. My lifelong love for drawing, dancing, and acting now comes together in 3D animation, blending all my passions into one art form.
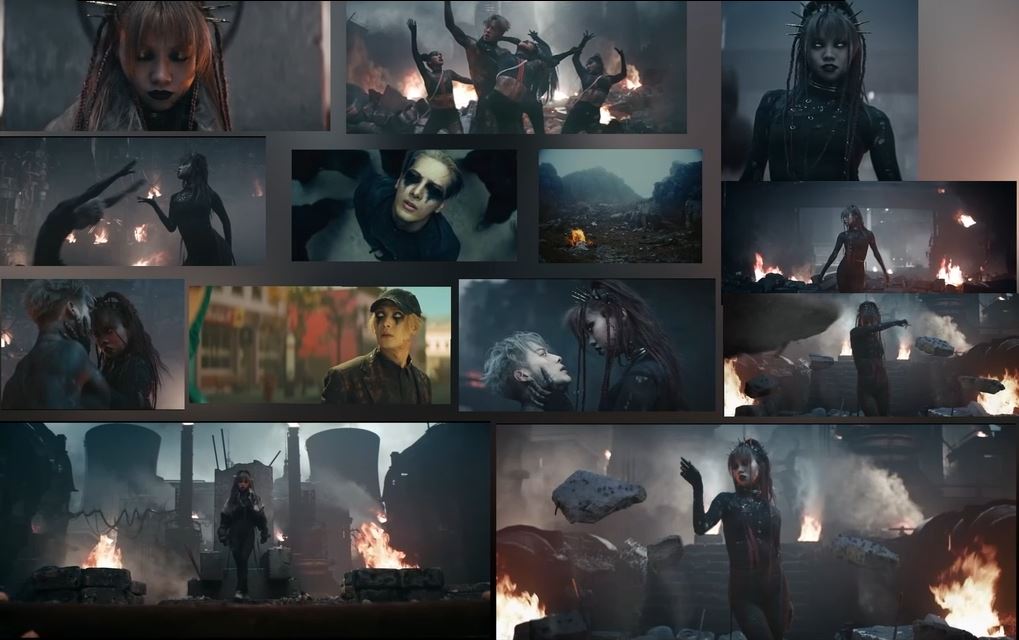
I’ve been obsessed with this music video. So I wanted to create a similar scene, but in my style. The character concept is a remake of Jackson Wang’s Music Video “Cruel.” Watch the full video side by side with my mood reference clippings.
I start by using the new HD stylized base model from Character Creator 5.
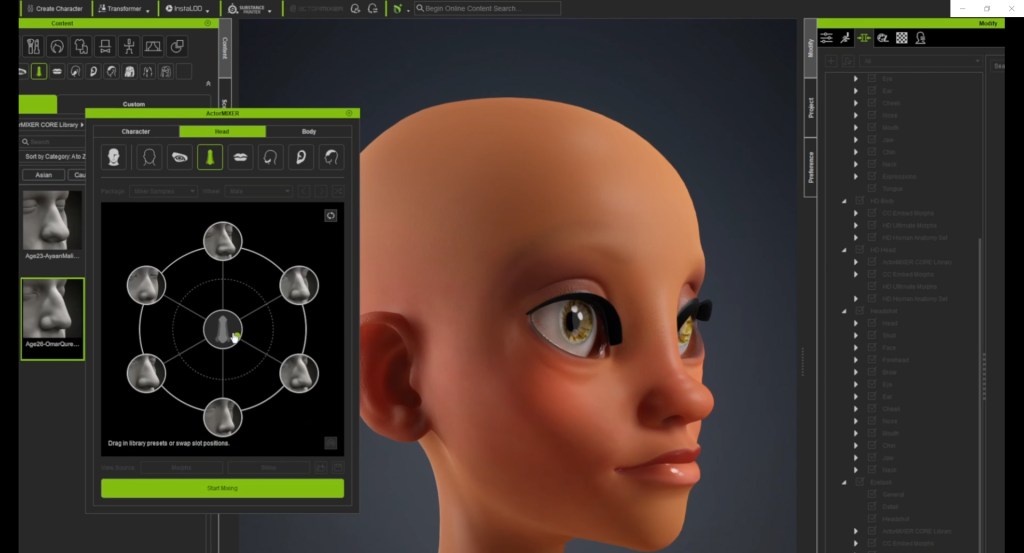
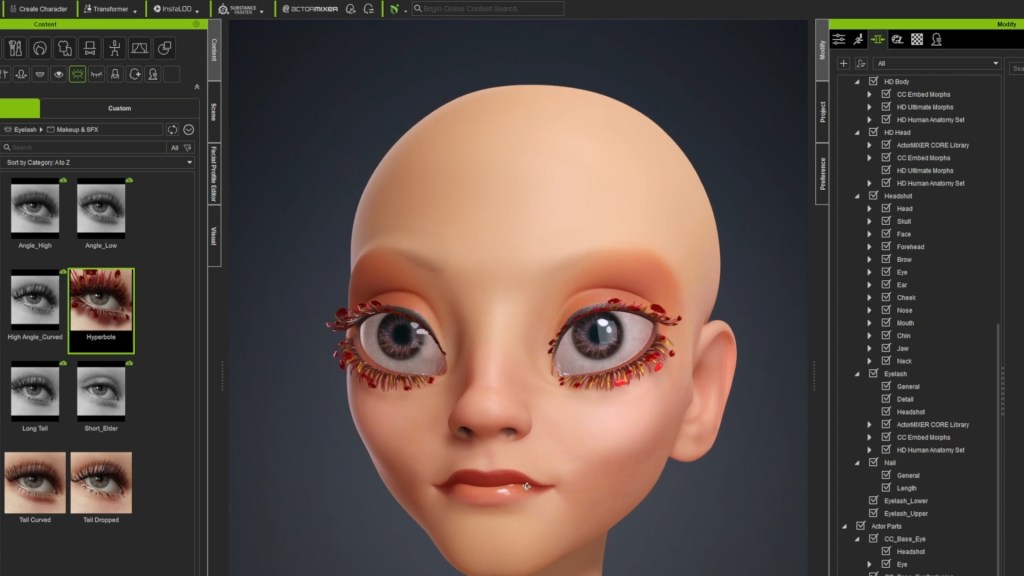
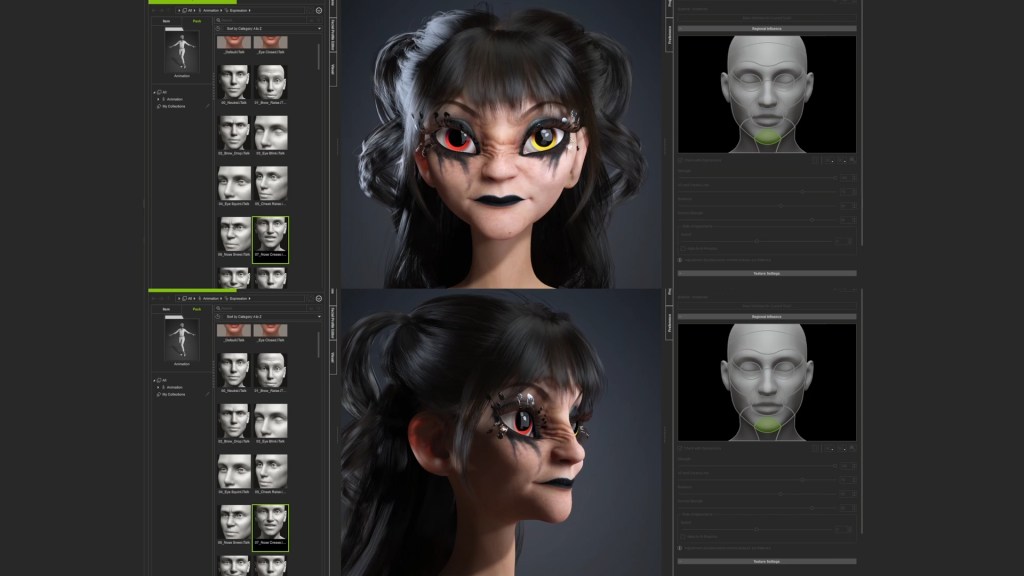
With ActorMIXER, you can combine different models and swap individual actor parts seamlessly. Just drag it onto your character, and the skin details will already look incredible. From there, I refined the makeup and ran a few expression tests, and the results turned out great as well.
ActorMIXER: a brand new way for character editing
If you are working on projects with unique character designs, using CC5 HD characters from the Reallusion Content Store will be more efficient. In the store, you will currently find several HD characters ready for use with ActorMIXER.
I would also recommend using the “Digital Soul 100+” pack for detailing the character expression. This saves my time tremendously in emoting the character.
Appplying the HD eyelash content on the characterDigital Soul 100+ pack helps with quick facial expression settings
Rokoko Body Capture and Character Animation in iClone
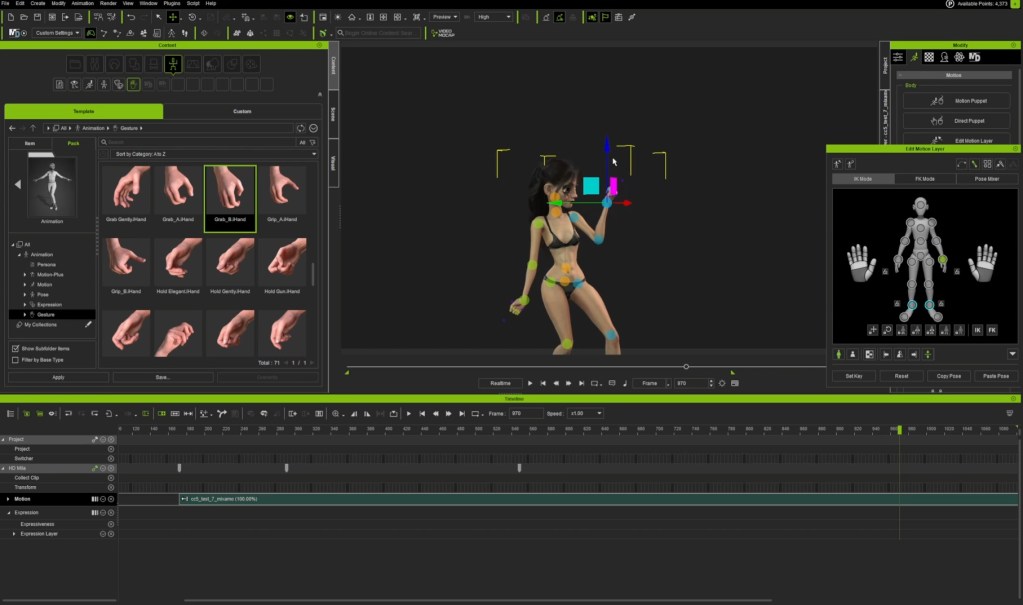
I captured my motion with the Rokoko suit and cleaned the motion up in iClone. I added facial animation with my favorite “Digital Soul” pack. This basically drags and drops the selected expression, then applies it to my character.
Mocap in Rokoko suits
3D Cloth Customization and Cloth Simulation
For the outfit, I purchased a 3d suit on CLO Connect. I designed the cropped sleeves of the clothing, and then simulated everything in Marvelous Designer.
Scene Composition in Blender
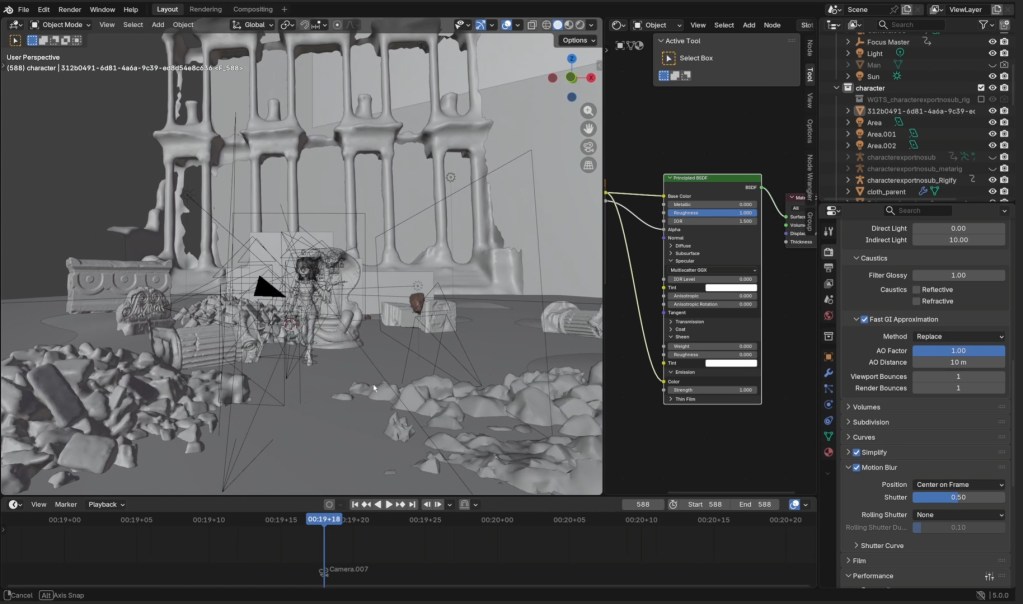
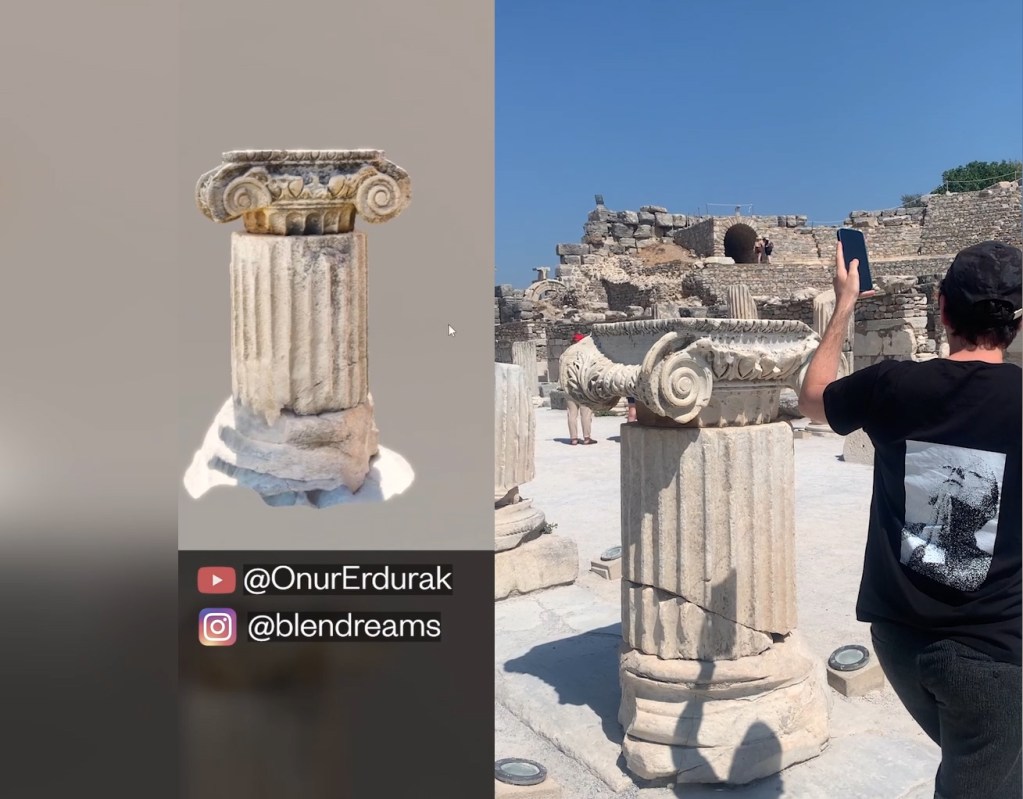
Finally, I built the scene in Blender using the 3D Scan tools that I scanned in the ancient city in Turkey, captured by Blendreams. Although I cannot move as coolly as the dancer queen, it is fun to see CC5 fit into my workflow. And Character Creator is truly a good companion with Blender.
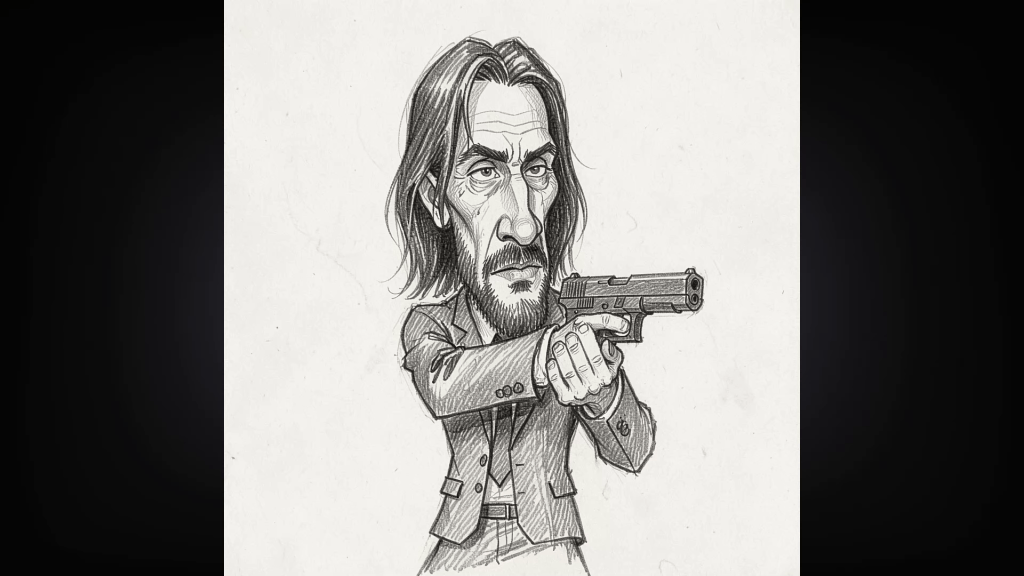
In this tutorial, we will quickly create a John Wick-inspired 3D caricature based on a sketch.
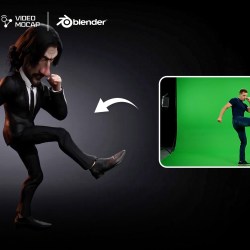
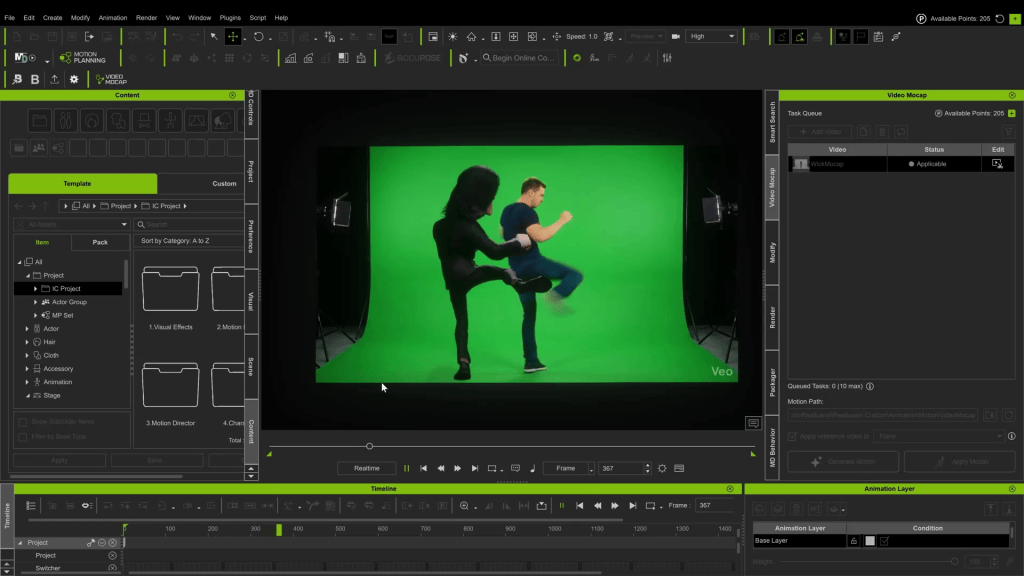
We will leverage the power of Character Creator’s ActorMIXER to create a strong base for an exaggerated character, use Blender for custom grooming and refining, and finally, bring the character to life in iClone. During this process, we’ll be using AI-generated animation and the Video Mocap plugin.
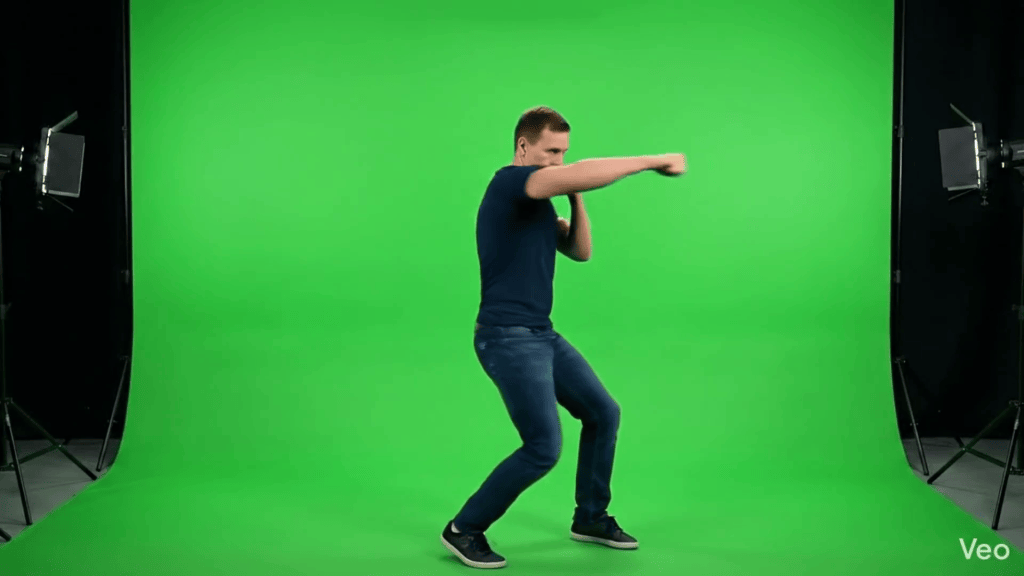
AI Video Generator (e.g., Google Flow/Veo) used for motion source.
Mythcons
Greetings, my name is Peter Alexander. In this demonstration, I’m going to walk you through how you can leverage Character Creator 5‘s new ActorMIXER as a powerful stepping stone to create unique, stylized characters. We’ll use the CC Base Mesh as our foundation, and ActorMixer will provide the next layer from which to build, making professional character creation that much easier. For this demo, I’ll be creating a stylized version of Arnold, using the Blender Autosetup pipeline, which is both cost-effective and efficient for creating characters and assets.
Step 1: Establishing the Foundation in Character Creator
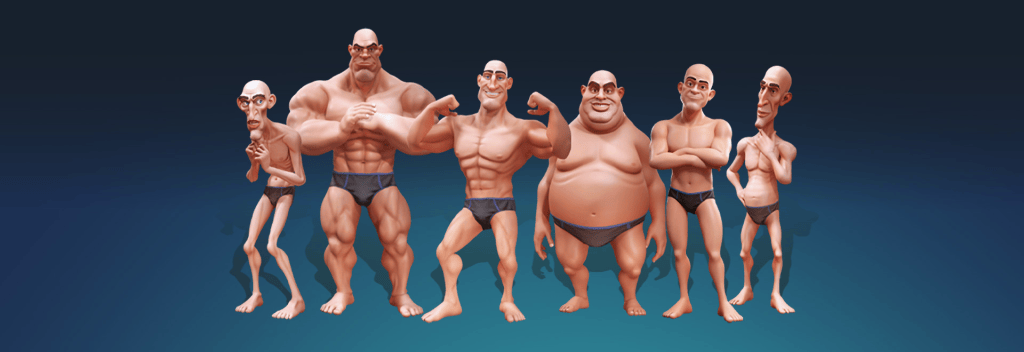
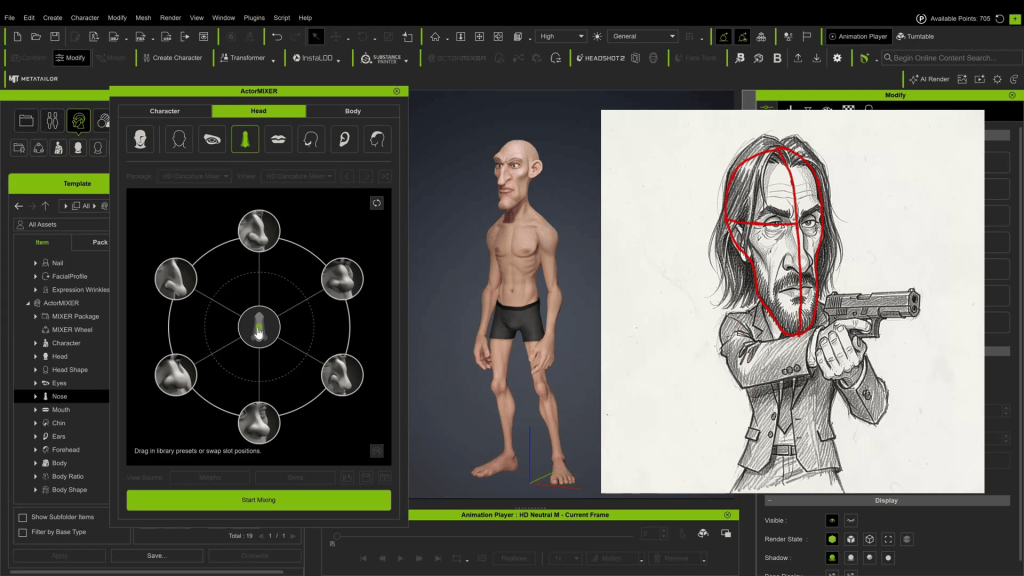
The hardest part of character design is often just getting started in a specific direction. ActorMIXER, combined with the CaricatureMIXER pack, makes this easy by providing useful directions for body types and character exaggeration.
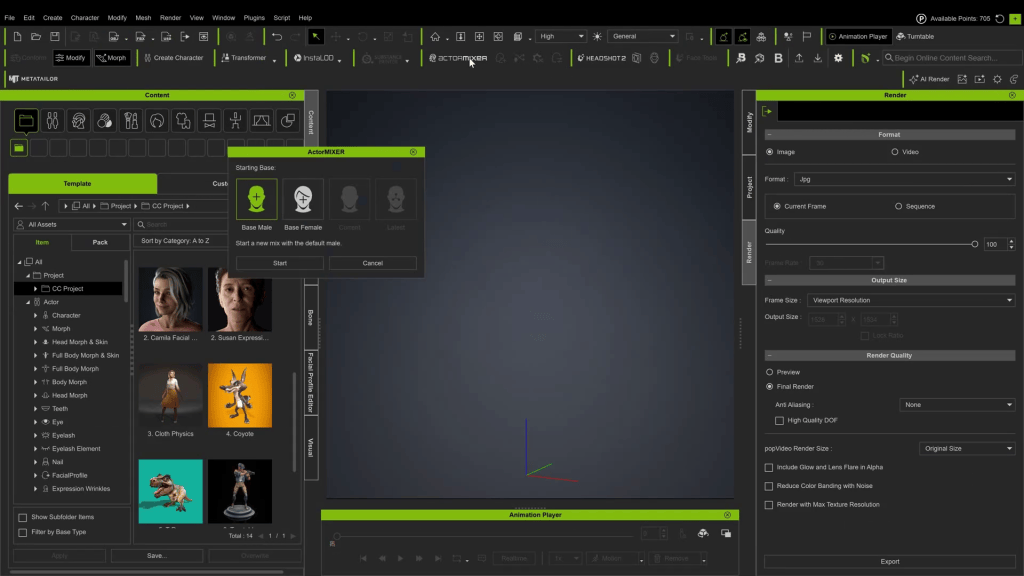
Initiate ActorMIXER: Start by loading up ActorMIXER within Character Creator. Select the standard “Male” option.
Define the Shape: Ensure the CaricatureMIXER pack is loaded. Begin defining the character’s shape by mixing the presets.
Target the Look: For a John Wick caricature, aim for a fairly slender body, a thin face, and a long, narrow nose. Leaning towards the “Thin” shape preset in the CaricatureMIXER pack is a good starting point to dial in the exaggeration.
Pro-Tip: While these packs provide a solid foundation, to really develop a strong caricature style, it is highly recommended that you study master artists like Tom Richmond.
Step 2: Refining Proportions and Initial Assets
Once the general direction is set in ActorMIXER, exit back to the main Character Creator interface for refinement.
Adjust Proportions: Use Character Creator’s tools, such as Morph Sliders, the Proportion Editor, and the Edit Mesh tool, to adjust the character further.
Exaggerate the Head: Caricatures are often defined by larger-than-normal heads. Scale the head up to achieve that distinct caricature look.
Add Base Assets: Give the character a basic prefab suit from your existing content library and add some initial facial hair.
Assess Needs: If you cannot find the exact hairstyle needed in your library, prepare to send the character to Blender for custom creation.
Step 3: Custom Grooming and Rigging in Blender
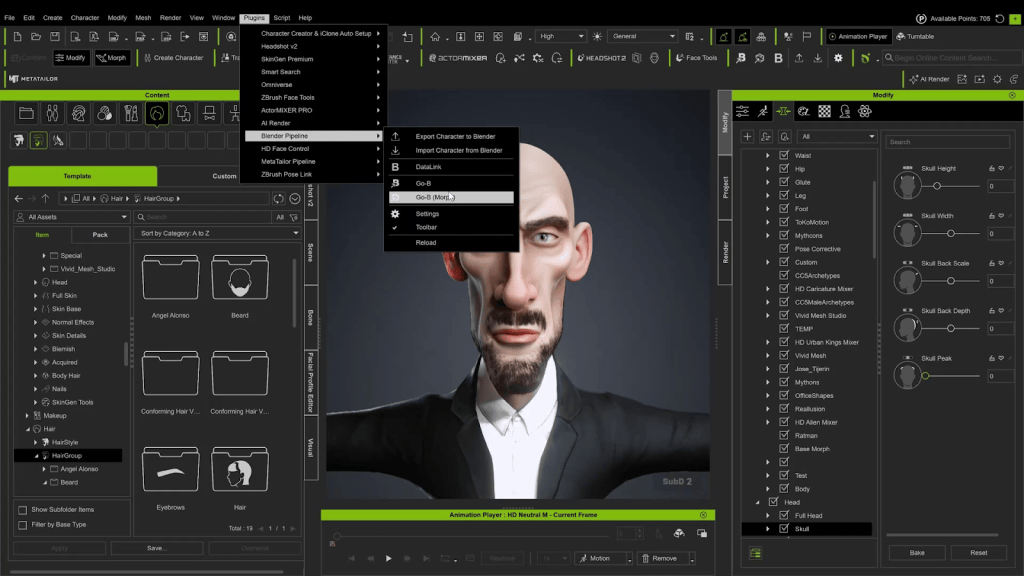
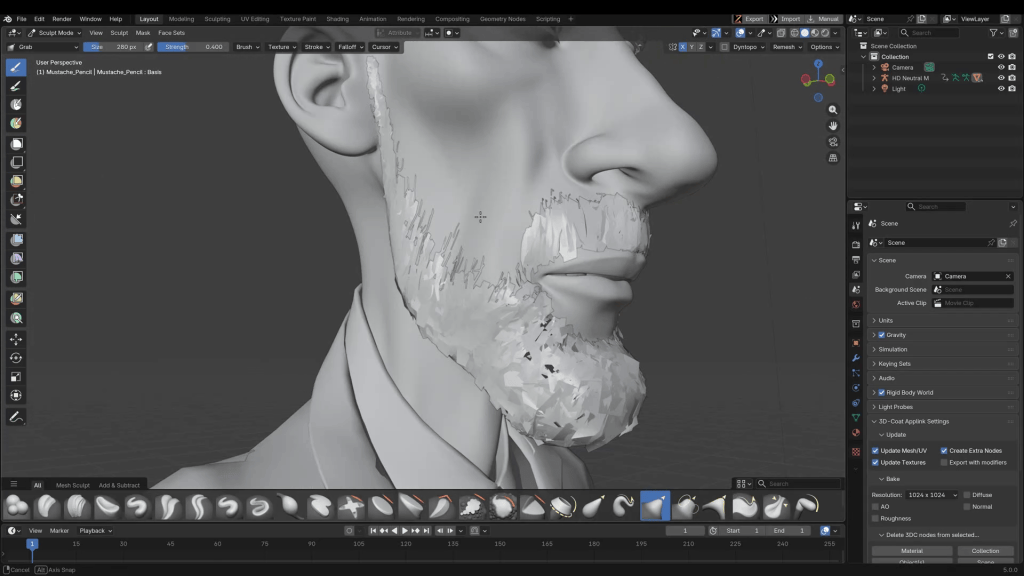
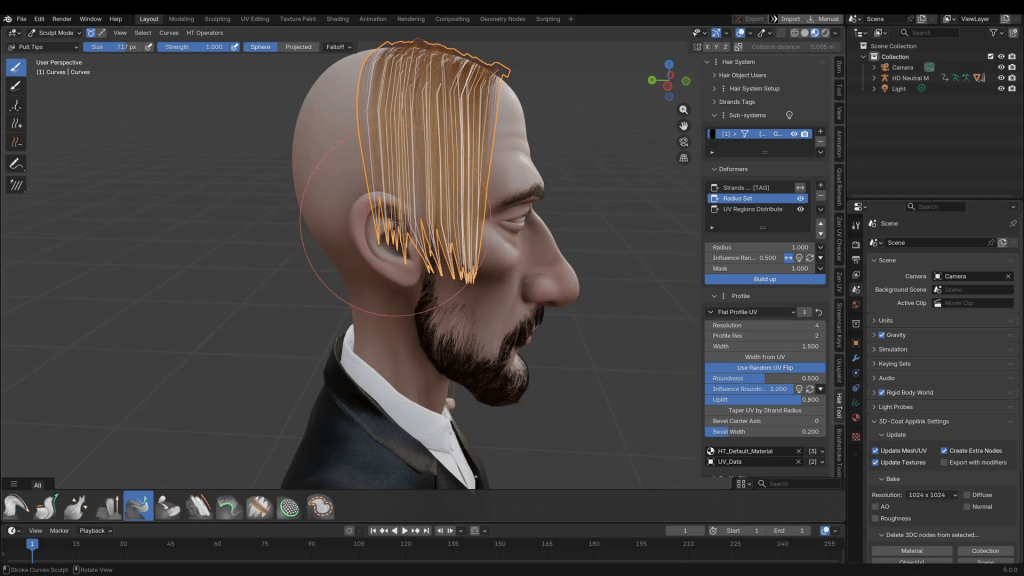
Send the character FBX to Blender to refine the sculpt, fit clothing better, and create custom hair.
Refine Sculpt and Clothes: In Blender, use sculpting tools to further refine facial features and adjust the fit of the clothing over the exaggerated body shape.
Create Hair: Create a custom hairstyle. The Blender “Hair Tool” add-on is highly recommended for assisting with basic hairstyles. (Optional: Add extra assets, such as a suitable tie, if available in your Blender assets).
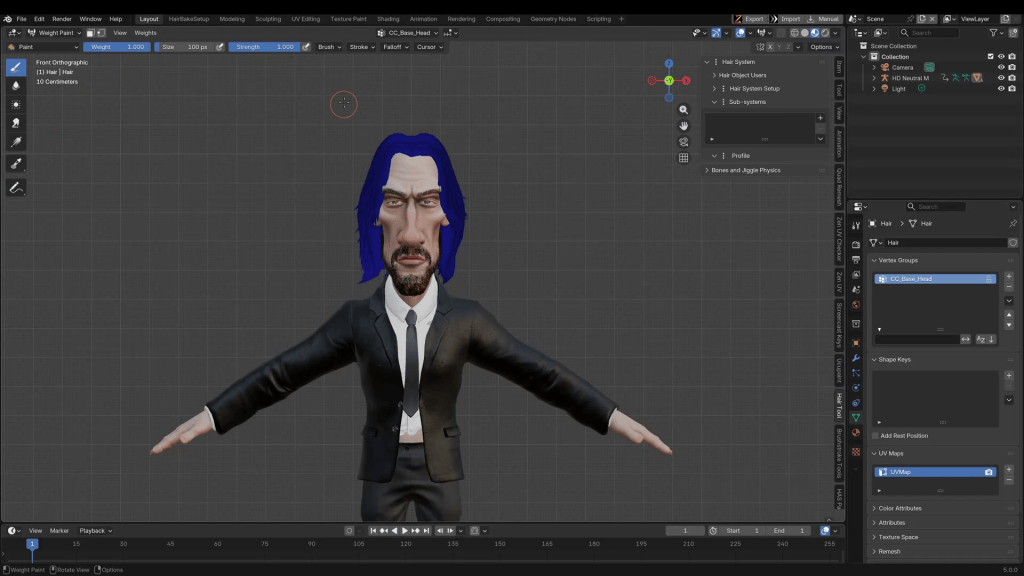
Rigging Assets: Once the hair and accessories are created, they must be rigged to the main character’s armature.
Select the item (e.g., the hair object).
Hold Shift and select the character armature.
Press Ctrl + P to parent them.
Choose “With Automatic Weights” (this is the most common selection for clothing).
Adjust Weight Skinning: Refine the rigging by adjusting weight painting. For short-to-medium hair like this, generally assign 100% of the weights to the “Head” vertex group. (For longer hair, you might also need to include neck groups).
Step 4: Preparing AI Motion Capture in iClone
With the character model finalized, send it back through Character Creator for any final checks, and then export it to iClone. Before applying motion to the character, you need a source video for the motion capture.
Generate AI Video: Use an AI video platform (such as Google’s Flow using Veo) to generate the desired motions. For this tutorial, three martial-arts style clips were generated and stitched together to create an 18-second fight sequence.
Motion Selection Advice: The Video Mocap plugin is a credit-based service. To maximize it, use input videos with very deliberate motions that are not too fast. Things like dance moves are perfect; super-fast combat motions or flips might yield mixed results.
Step 5: Applying Motion Capture
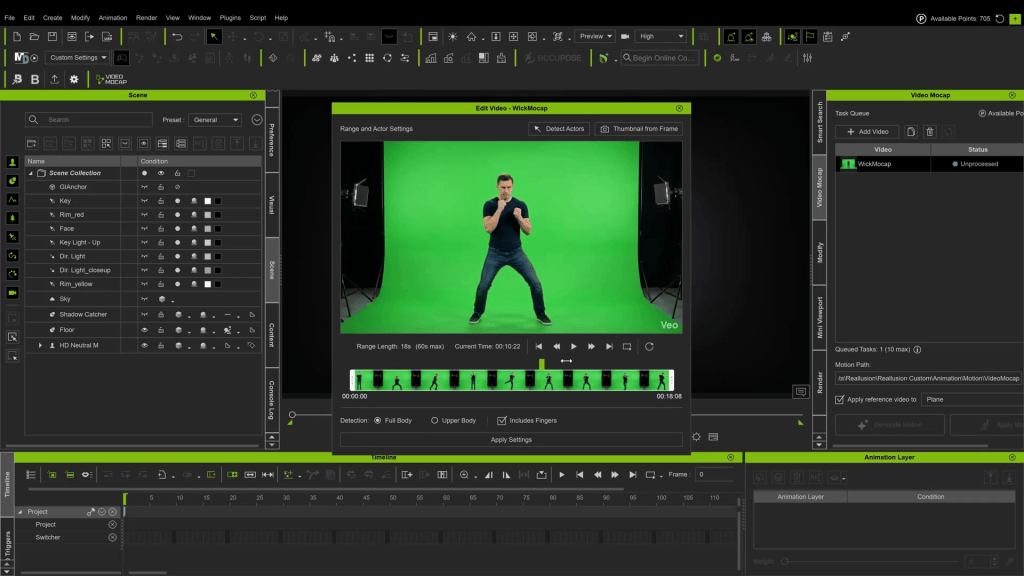
Load the Video Mocap Plugin: In iClone, open the new Video Mocapaddon.
Import Source Video: Load your AI-generated martial arts video.
Settings: If it is a solo animation, you do not need to select “Detect Actors”.
Sample the Motion: Analyze and sample the video movements. (Note: This 18-second video took approximately 10 minutes to sample. While this seems long, manually animating these moves would take significantly longer).
Conclusion
Once the motion is generated, apply it to your character. iClone will generate a plane showing the input video behind your character for comparison purposes.
By experimenting with clear video inputs, you can maximize your animation results. And there we have it: John Wick is animated and ready for revenge.
Cartoon Animator: A New Creative Era for 2D Animators
What happens when decades of traditional animation experience meet modern artificial intelligence? According to Australian illustrator and animator Garry Pye, it doesn’t replace creativity—it amplifies it. In a world where anyone can now press a button to generate an image, the real opportunity lies in combining AI with professional animation tools to gain speed and control.
This article explores Garry Pye’s evolving 2D-first workflow—blending Cartoon Animator (CTA), AI-powered image and video generation, and professional post-production tools—to show how 2D animators can create their own character, design compelling stories, and future-proof their creative careers without abandoning familiar pipelines.
From Pencil and Paper to AI-Assisted 2D Creativity
For most of his life, Garry learned animation “the hard way.” Reference books, hand-drawn sketches, frame-by-frame animation—every skill earned through repetition and persistence. Creating a simple cartoon scene once meant hours or days of preparation.
AI changed that overnight.
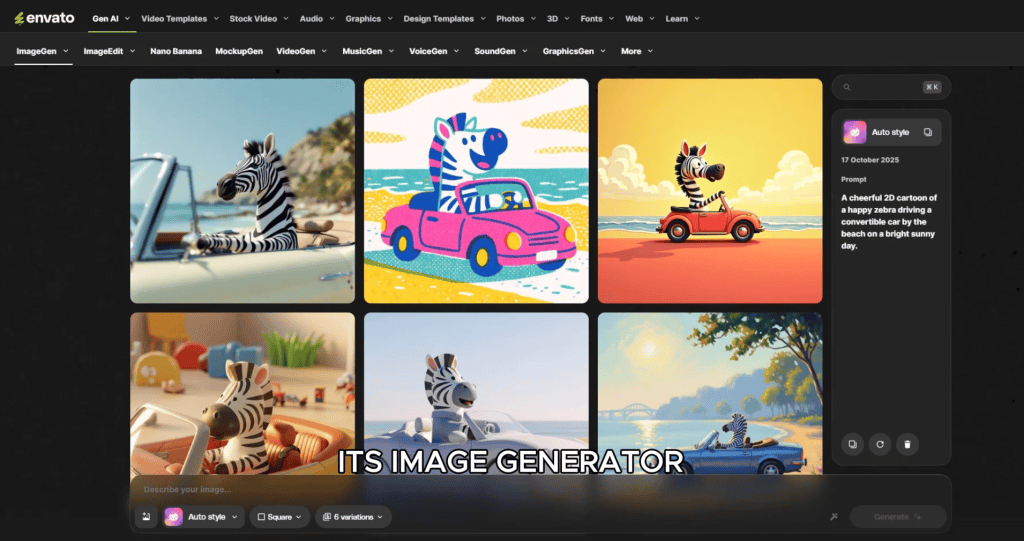
By describing an idea—like a zebra driving a convertible along the beach—Garry can now generate concept images in seconds. Even better, those images can be refined through iterative prompts: wardrobe changes, lighting adjustments, props, and camera angles.
But while AI accelerates ideation, Garry quickly learned an important lesson: AI alone is not a one-stop shop.
AI Is Not a Pipeline—It’s a Powerful Assistant
Despite its impressive results, AI still struggles with long-form storytelling, precise character acting, and consistent performance across scenes. Generating one good image often means discarding several unusable ones.
That’s why Garry approaches AI as a modular toolkit:
ChatGPT / Grok for ideation, scripts, and concept exploration
AI image generators for rapid visual development
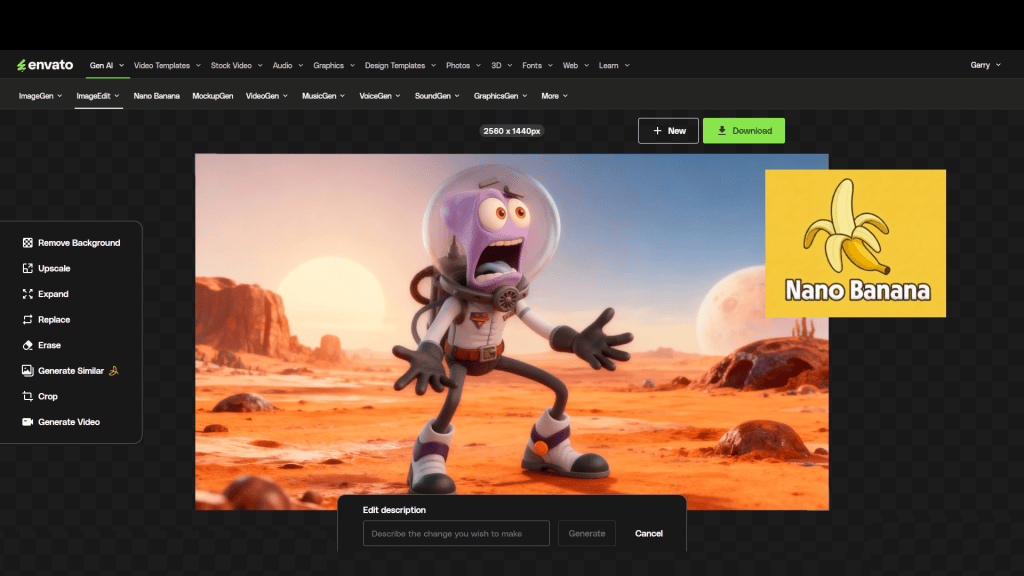
Nano Banana for controlled image editing and camera angle changes
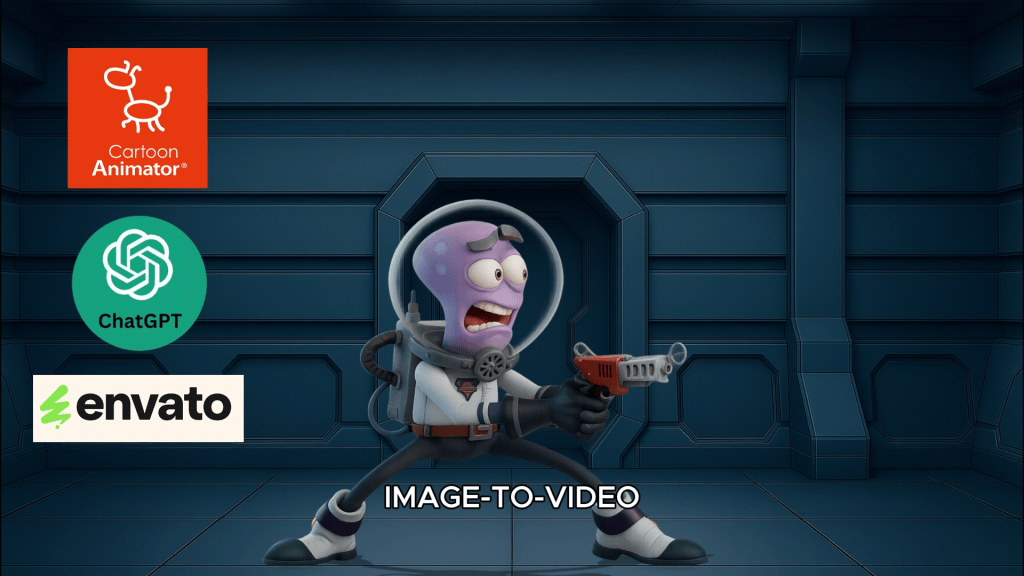
Envato Image to Video for short animated sequences
Photoshop for cleanup and compositing
CapCut for final edits
This modular approach allows one animator to achieve results that previously required a full production team.
Every day, Garry begins by opening ChatGPT and having a conversation. Rather than issuing commands, he treats it as a creative collaborator—sharing goals, ideas, and challenges.
ChatGPT and Grok are used for:
Producing reference images
Story concepts and scriptwriting
Visual descriptions for image generation
Exploring alternate narrative directions
The more specific the prompts, the better the results. Garry emphasizes that AI must be guided carefully—clear language and precise direction are essential.
Why 2D Artists Have an Advantage
Although AI excels with 3D figures, Garry’s expertise lies firmly in 2D animation—and that’s where Cartoon Animator truly shines as a professional 2D animation software.
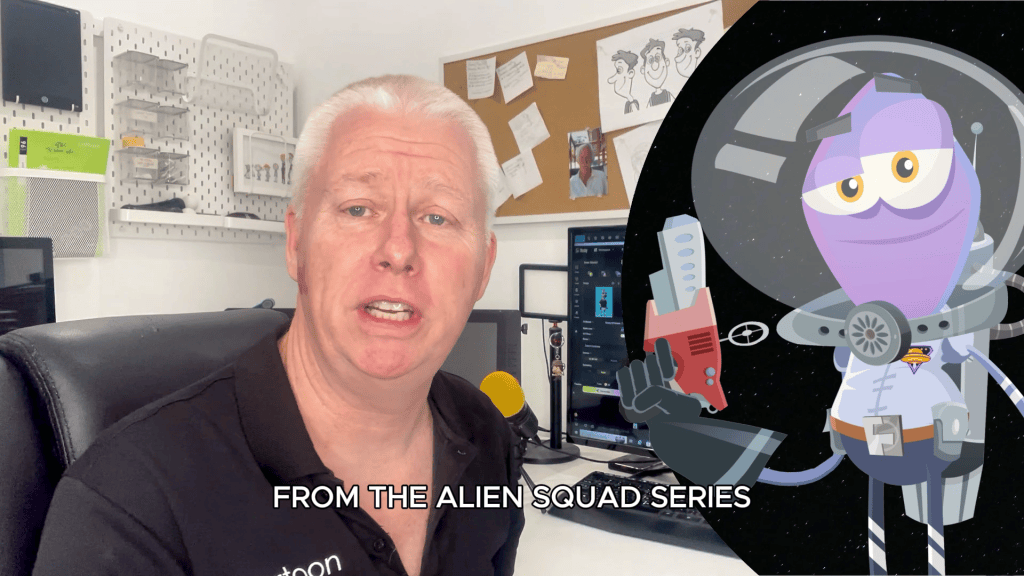
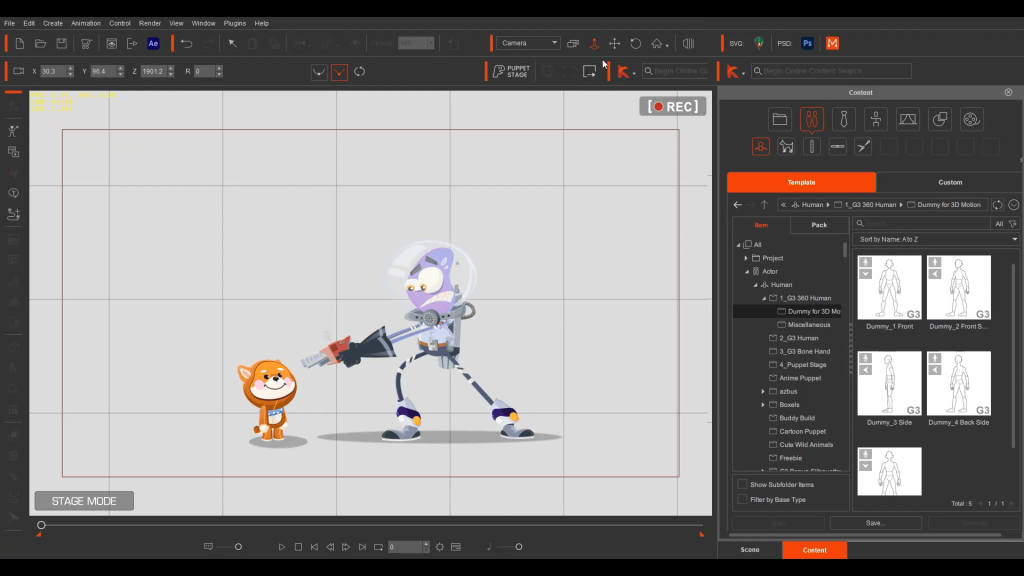
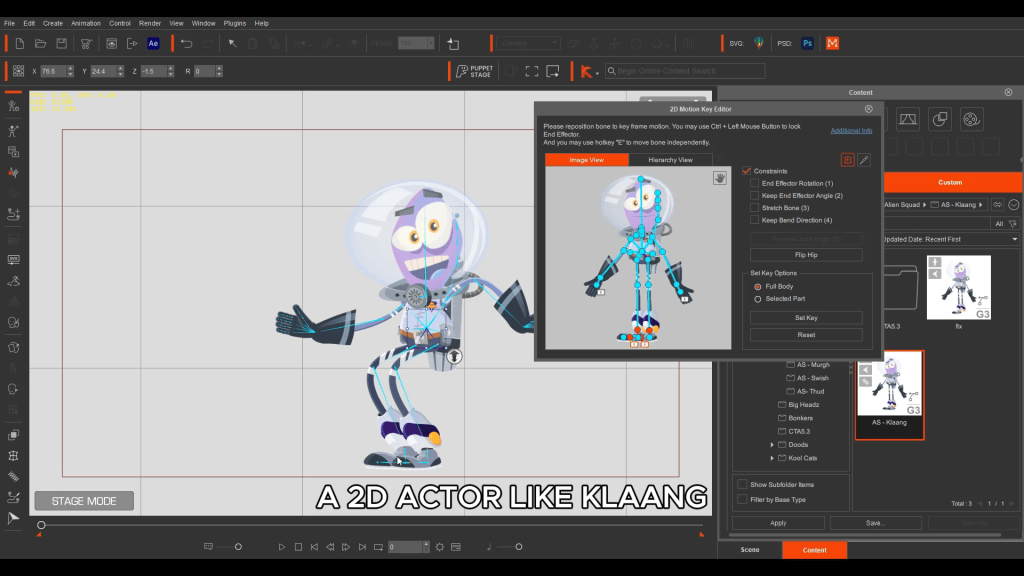
Using his original 2D character, Klaang from Alien Squad, Garry demonstrates a powerful 2D-centric hybrid workflow that keeps Cartoon Animator at the core:
Pose the character in Cartoon Animator
Export a still image
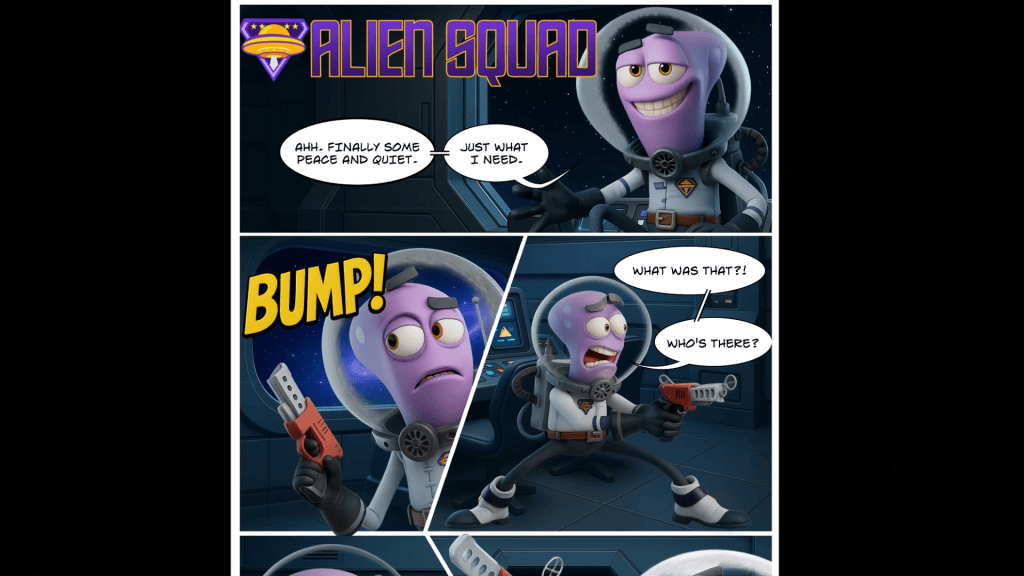
Ask AI to reimagine that pose as a 3D character
Refine results in Photoshop
The consistency across poses is impressive, and each pose becomes a standalone asset usable in print, comics, or animation.
This approach bridges 2D and 3D while keeping 2D animation, sprites, and performance control inside Cartoon Animator—without requiring deep modeling knowledge.
Envato: Image, Edit, Animate
Envato has become a cornerstone of Garry’s AI workflow. Its tools combine image generation, editing, and animation in one evolving platform.
Nano Banana: Controlled 2D Creativity
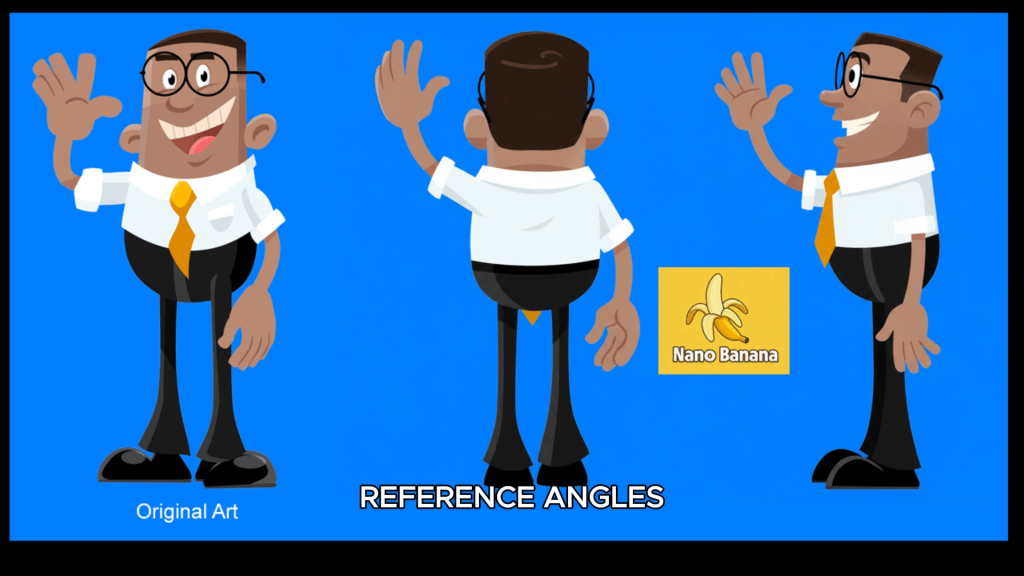
Nano Banana allows creators to edit only what they request—preserving character identity, lighting, and composition. Unlike many AI tools, it doesn’t randomly alter the entire image.
Key advantages include:
Camera angle changes from a single image
Selective edits
Lighting and color adjustments
For Cartoon Animator users, this is equivalent to gaining virtual 3D camera control inside a 2D pipeline.
Image to Video: Speed Meets Consistency for 2D Animation
Envato’s Image to Video generator has transformed Garry’s workflow. By defining a start and end frame—often created directly in Cartoon Animator’s Stage or Composer modes—he maintains visual consistency while AI fills in the motion.
In under an hour, Garry can:
Set up shots
Generate multiple animated clips
Assemble them into a coherent sequence
Even creators who struggle to draw can now produce polished animations—while experienced animators gain unprecedented speed.
Expanding What’s Possible with 2D + AI
Beyond character animation, AI excels at tasks that are traditionally time-consuming:
2D Animated Props
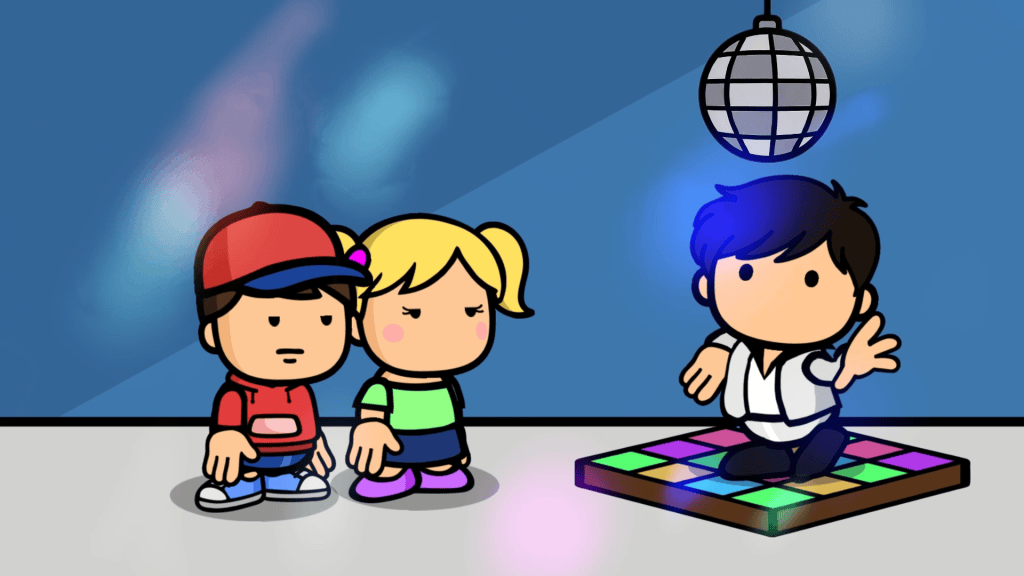
Static objects like disco balls or fire can be animated via Image to Video tools. Individual frames can then be imported into Cartoon Animator as animated props.
2D Living Backgrounds
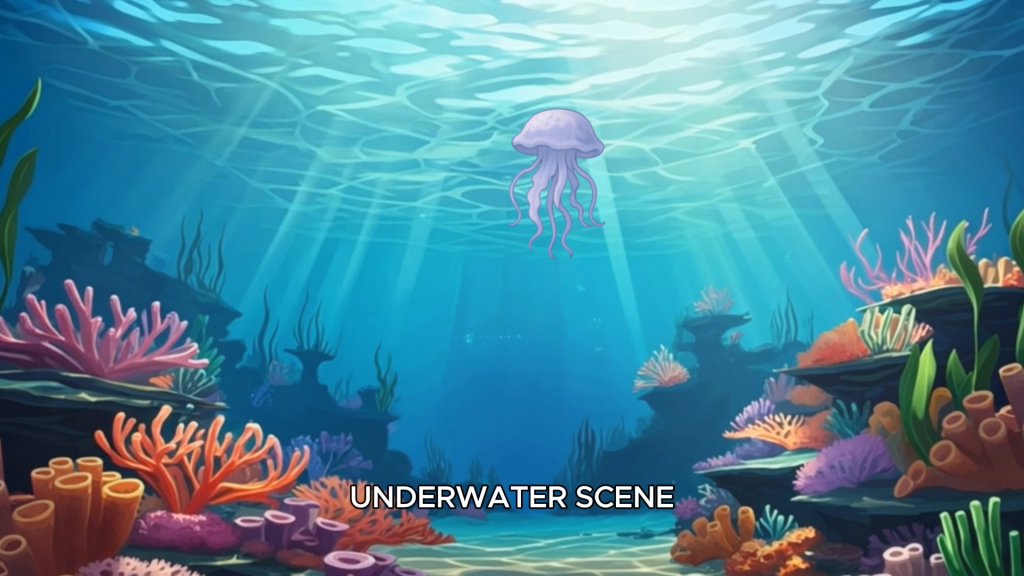
AI-generated environments—such as underwater scenes—can be cleaned in Photoshop and animated to create dynamic backdrops. These animated backgrounds drop directly into CTA’s Stage Mode.
Cartoon Character Turnarounds and Sprites
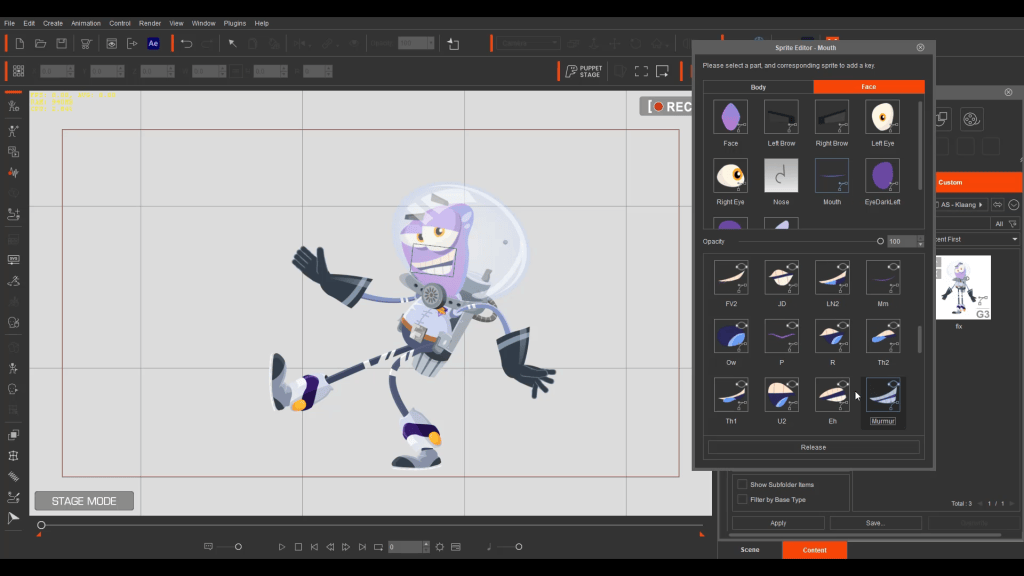
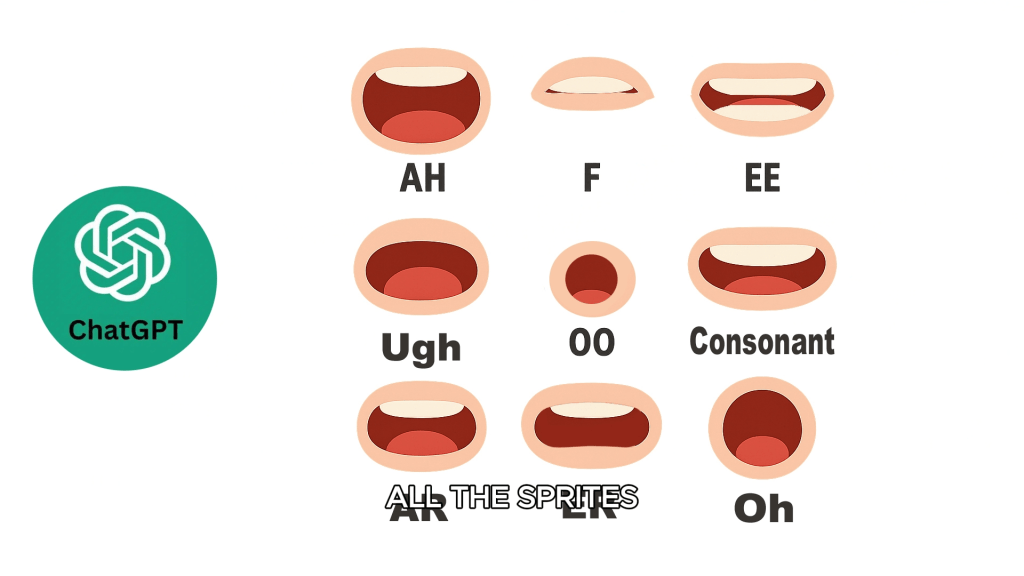
AI can generate side and back views of characters, mouth sprites, and eye sets—ideal for creating custom rigs or preparing assets for 360-degree heads.
Additionally From AI Images to 3D Characters
One of the most exciting developments in AI is the ability to convert images into 3D models. Tools like Meshy can generate a Blender-ready character base from a single image.
While current results may include dense topology and imperfect meshes, the speed is undeniable. Garry notes that what once took months of modeling can now be achieved in minutes—and the technology is improving rapidly.
For creators working in Blender or other 3D animation software, this opens new doors:
Rapid exploration of styles and proportions
Faster prototyping
AI-assisted character designer workflows
Cartoon Animator: The 2D Control Layer AI Can’t Replace
Despite AI’s rapid growth, Garry is clear: AI is not a replacement for professional animation software.
2D rigging, bone systems, and sprite-based character control
Precise motion editing
2D camera control, staging, and shot continuity
Performance-driven storytelling
AI speeds up the process, but Cartoon Animator delivers the polish, timing, and performance control that 2D animation requires and AI cannot provide on its own.
Pros of Combining Cartoon Animator and AI for 2D Production
Speed: AI handles repetitive and experimental tasks while CTA focuses on performance
Creative Freedom: Explore more 2D ideas, poses, and shots without increased production time
Solo Production Power: Small teams can produce studio-level results
Future-Proof Skills: 2D artists who master Cartoon Animator are perfectly positioned to leverage AI
Quality Control: Human direction ensures consistency and storytelling integrity
Key Lessons Garry Has Learned
Garry summarizes his AI experience with three guiding principles:
Free plans limit results; professional output requires investment
Think outside the box—anything is possible
Be extremely specific with prompts
Above all, AI needs a creative boss.
Conclusion: AI Has Supercharged Creativity for 2D
AI hasn’t taken creativity away from animators—it has expanded what’s possible. By combining AI tools with Cartoon Animator, iClone, and traditional skills, creators can work smarter, not harder.
For 2D animators, content creators, and production studios, the message is clear: use AI to accelerate production—but rely on Cartoon Animator for performance, storytelling, and control.
Explore Cartoon Animator, iClone, and Character Creator to build an animation pipeline where AI accelerates your ideas—and your skills remain the driving force.
FAQ
Can AI replace Cartoon Animator or iClone?
No. AI enhances speed and ideation, but Cartoon Animator and iClone provide essential animation control and polish.
Is this workflow suitable for beginners?
Yes. AI lowers entry barriers, while Cartoon Animator helps beginners learn professional animation fundamentals.
Can I use AI-generated characters in Blender?
Yes. Tools like Meshy can convert images into Blender-ready models, though cleanup may be required.
How does Character Creator fit into this pipeline?
Character Creator 5 provides a professional character base for consistent, production-ready assets.
What’s the biggest advantage of combining AI and Cartoon Animator?
Garry Pye is an Australian illustrator, animator, and Cartoon Animator instructor with over a decade of industry experience. Known for his approachable teaching style, sharp humor, and deep technical knowledge, Garry has built a reputation for making animation accessible to beginners while still inspiring seasoned professionals.
His work spans animated shorts, educational content, and live presentations where he demystifies complex workflows. At the core of Garry’s philosophy is a belief that storytelling always comes first—and tools should serve creativity, not limit it.
Today, Garry is exploring how AI can become a creative assistant inside professional animation pipelines rather than a replacement for skilled artists.
Luis Duarte is a 3D digital artist specializing in character creation for animation and video games. His work is distinguished by a strong focus on stylized aesthetics, crafting characters that are highly expressive and full of charisma. Clearly inspired by the visual language of cartoons translated into 3D, Luis excels at simplifying realism with keen artistic judgment, resulting in clean, well-structured, and visually striking designs.
As many of you already know, Character Creator 5 (CC5) arrived with a very important update that we did not explore in depth in the previous article, as it truly deserved its own dedicated space. We are referring to ActorMIXER Pro, a powerful tool that allows me to significantly streamline the creation of infinite character variations by blending components together, starting from unique designs created entirely on our own.
My name is Luis Duarte, and in this tutorial I will show you how to create CC5 assets converted into ActorMIXER sliders, which can then be stored inside your own custom content library.
1. Our Character Lineup
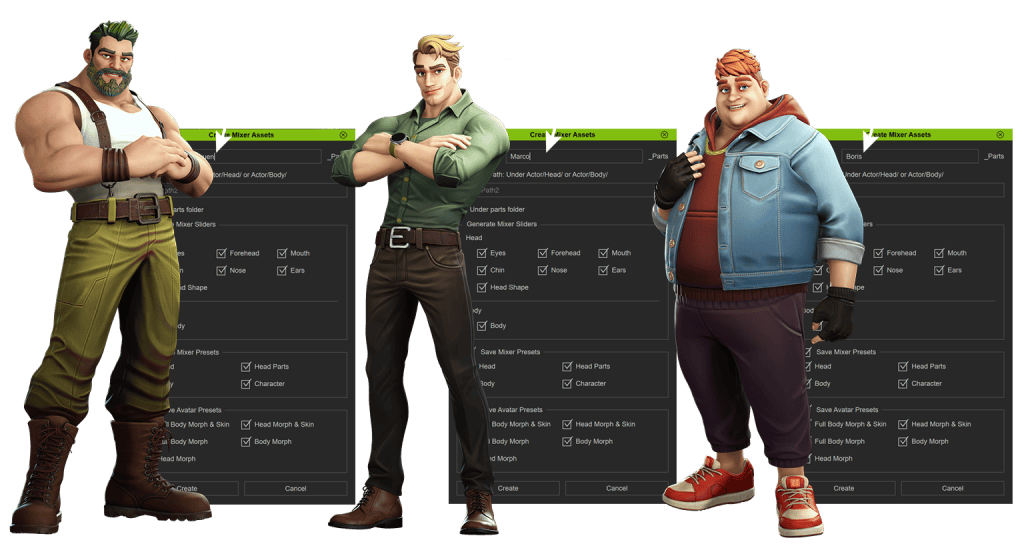
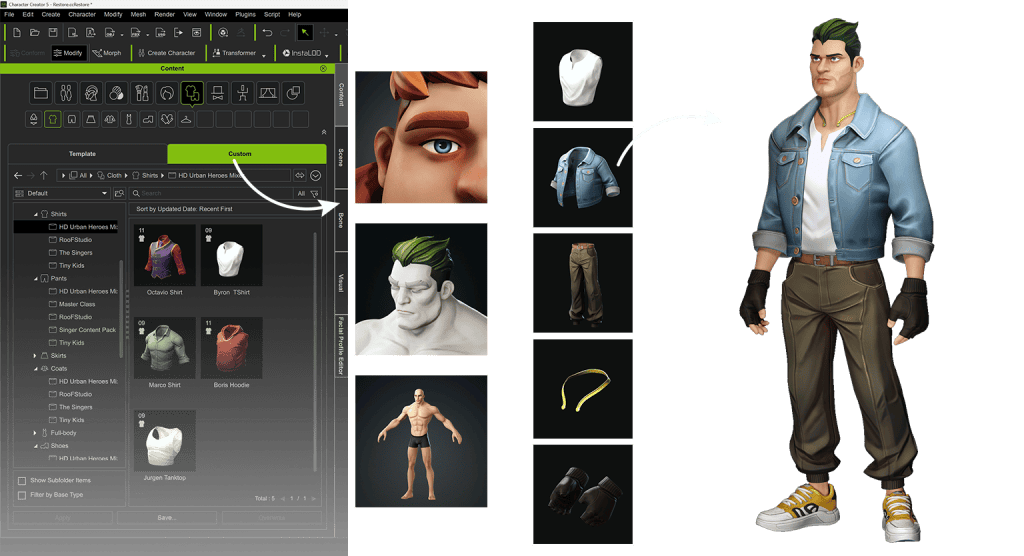
For this section of the tutorial, I am using the main assets from our latest content pack, HD Urban Kings, developed exclusively for use within Reallusion’s 3D ecosystem.
This content pack features five stylized characters designed with a Fortnite-style, battle royale aesthetic, each with different clothing styles and body shapes. These body shapes can range from slimmer silhouettes to more robust builds. Using ActorMIXER, these variations can be combined to create new characters, following the same workflow we used for designing action heroes like Byron. For a deeper look at the full design process, I recommend checking out the previous article on Byron.
As an additional note, it is not strictly necessary to have five different character assets for this process, since the focus is placed solely on body structure. In fact, this tutorial can be replicated using only three characters. The only essential requirement is havingActorMIXER Pro installed, as it enables the necessary combinations efficiently.
2. Creating Mixer Assets
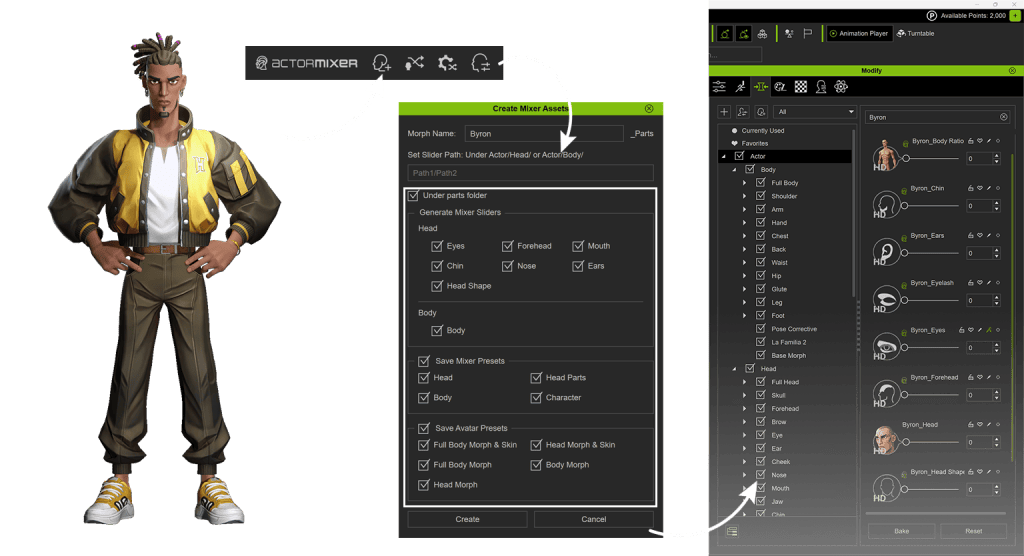
To build a small Mixer asset library, I work with each character individually. As a first step, I start with the character Byron. From the Actor Mixer toolbar, I click on the “Create Mixer Assets” icon. During this process, I assign a name to the resource using the character’s name (Byron). Next, I enable the “Under Parts Folder” option and, in my case, leave all options enabled to generate a complete set of components.
I also enable the avatar preset sets, which allow the sliders to appear inside the morph library. Finally, I press the “Create” button to complete the process.
Tip: I recommend repeating this same procedure for every character you want to include in the Mixer wheel.
This process generates several assets that are organized into different sections within CC5. Most of them are controlled through sliders, enabling fast and precise adjustments in an intuitive way. Additionally, the gallery includes various skin materials that help clearly define the character’s final appearance.
3. Creating Thumbnails for Your Assets
If you want to build a personalized content library with a wide variety of assets, organization is key. One of the most effective ways to achieve this is by making each asset easily recognizable, and thumbnails play a crucial role in that process.
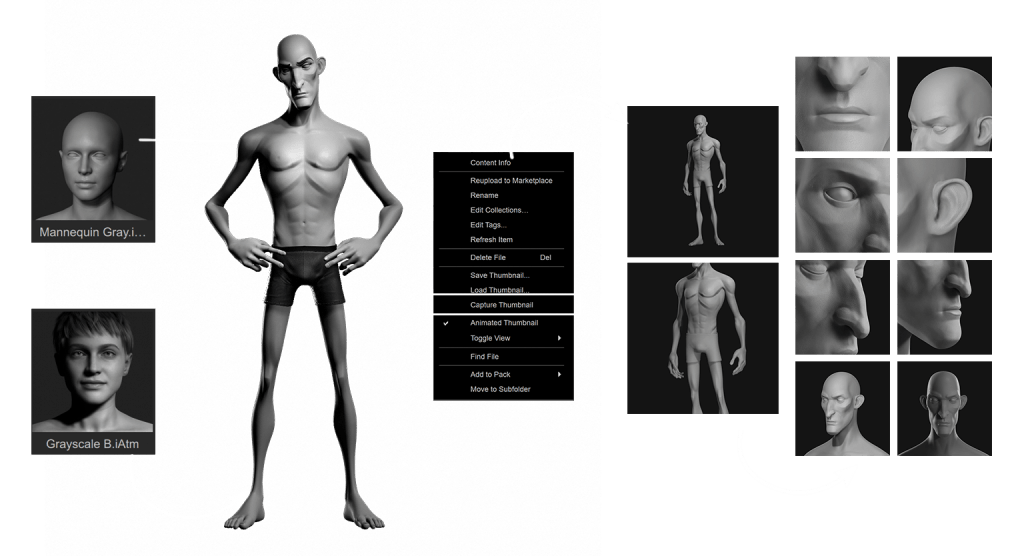
Reallusion makes it very easy to create custom thumbnails for each asset. The key is to apply a general gray material to the character and add a basic backdrop; No further adjustments are required. The “Mannequin Gray” material is available from the free content included with Character Creator, as is the grayscale atmosphere.
After that, I take close-up camera shots and click “Capture Thumbnail” in the content library. I repeat this process for each part provided by the Asset Mixer. The goal is to clearly identify each segment, making it much easier to manage and locate them within the Mixer wheel, optimizing both workflow and control over the character elements.
4. Managing and Editing Mixer Wheels
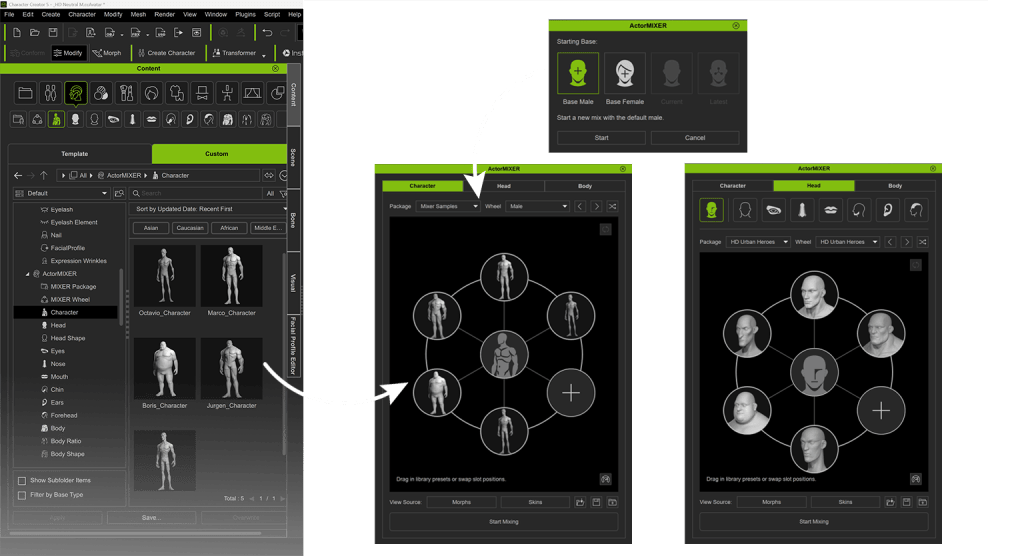
I open Actor Mixer from the toolbar and, in this case, use a male base mesh as a template. Upon launching, the system takes me directly into edit mode, where I can customize the wheel I want to use for morphing.
The process is straightforward: I navigate to the content library and switch between the different categories offered by the Mixer, which are already synchronized. From there, I simply drag and drop the elements directly onto the editing wheel.
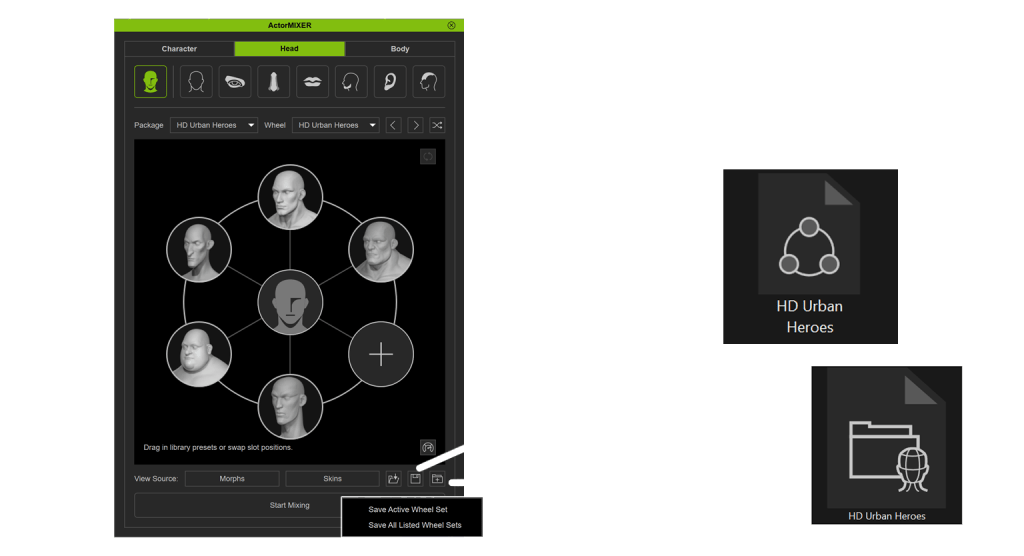
Tip: You can save your wheels for future projects using “Save Active Wheel Set”, which stores only the current wheel, or “Save All Sets”, which is ideal for preserving all wheels across categories and reusing them in other projects.
One of the most powerful aspects of this workflow is that everything can be edited in real time. You can remove, replace, and reorganize elements as needed, while maintaining full control over the final result at all times.
5. Mixing Characters with ActorMIXER
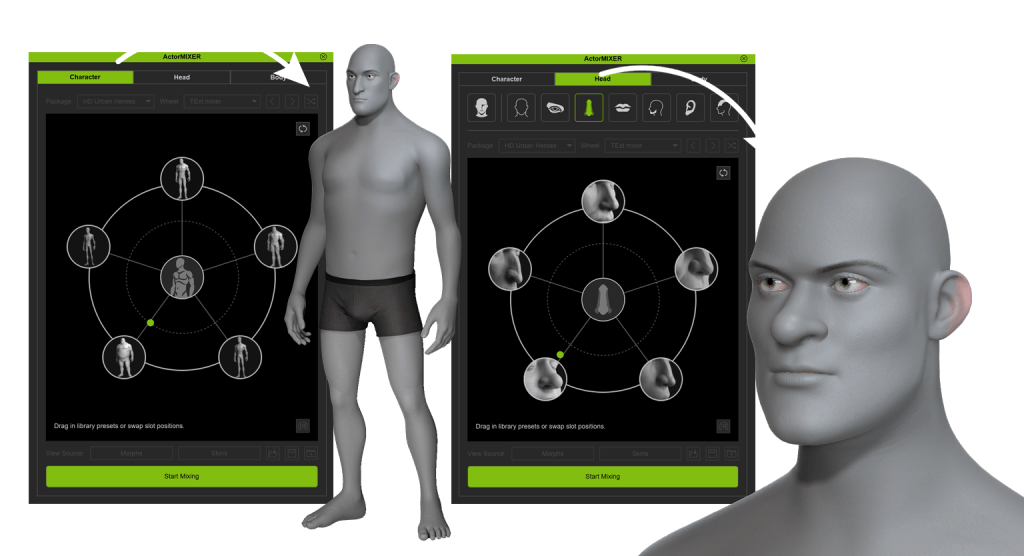
When everything is ready, I click “Start Mixing” (the green horizontal button). Intuitively, I move the green point located at the center of the wheel toward each of the outer circles that I previously configured. As I do this, I can see in real time how the body structure changes as the point moves.
The shapes blend together as the cursor passes through the intersections, creating unique and dynamic combinations. The experience is genuinely fun and closely resembles a video game avatar editor, making the creative process highly interactive and enjoyable.
Actor Mixer is organized into three main categories: Character, Head, and Body. Within the Head section, we find individual segments that allow us to modify specific elements such as eyes, nose, mouth, ears, and the overall head shape. This means the mixing possibilities are extremely broad. Taking advantage of this flexibility, I apply different combinations and merge the results to create a new character that maintains the same artistic style characteristic of HD Urban Kings.
6. Character Ready for Animation
Once the character’s shape is fully defined, I close Actor Mixer and make sure to include all the assets from my gallery that define the character’s final look. I start by dragging in the skin asset, followed by eyes, eyebrows, and hair, and finally add the clothing assets. With this approach, the character is fully prepared and ready for animation, with all visual elements integrated in a cohesive and consistent manner.
7. Random Face Function
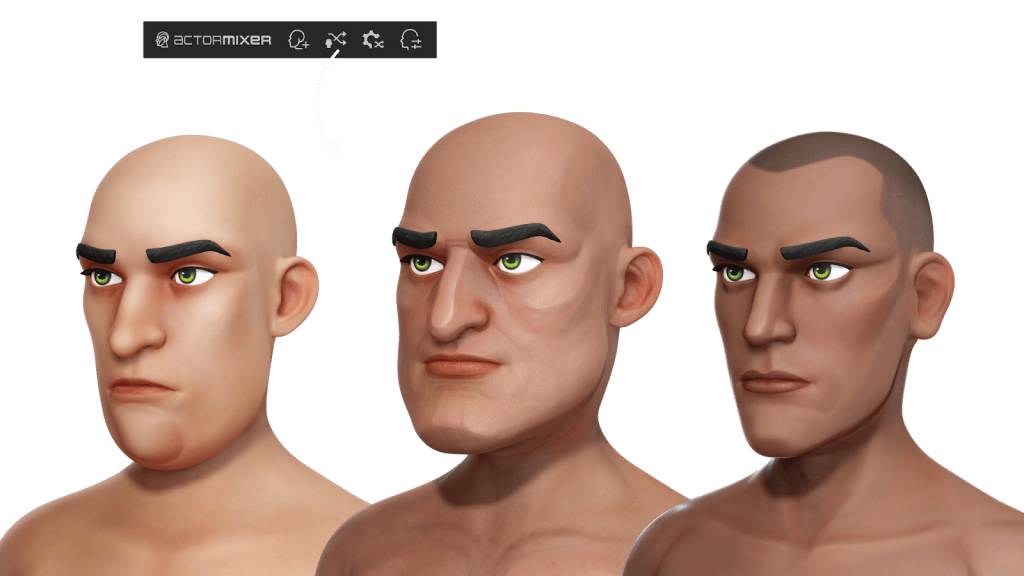
To take full advantage of the nearly infinite possibilities of character generation, I use the Random Face function, which can be found in the compact Actor Mixer menu. This tool allows me to quickly and efficiently explore a wide range of facial variations.
If I want to take advantage of custom shapes, I simply open the Random Face settings window and set the generation path to my own customized files. Once this is configured, I can use the Random Face generation button to create faces randomly, repeating the process until I achieve the result that best fits the character I am developing.
FAQ
Can I create my own assets inside Actor Mixer?
Yes. To create your own assets in Actor Mixer, you will need the ActorMIXER Pro version. This version allows you to take character creation to the next level, offering greater freedom and control. You will be able to combine your own assets with most of those available in the gallery, opening up nearly unlimited design possibilities.
Is the entire content gallery compatible with Mixer-generated characters?
Yes. In fact, by acquiring the Pro version of ActorMixer, you gain access to a variety of HD assets that enrich your gallery and allow you to start experimenting even if you do not yet have your own custom resources.
Can morph sliders be used while mixing?
Yes, but it is recommended to use only the sliders that display the ActorMIXER icon. These are the only ones that remain functional if you decide to resume character mixing later, ensuring consistency and control throughout the process.
For Blender artists looking to create their own characters without sacrificing realism, flexibility, or production speed, character creation has long been a complex, fragmented process. From sculpting and retopology to texturing, rigging, and animation prep, building a usable character base often takes weeks—sometimes months.
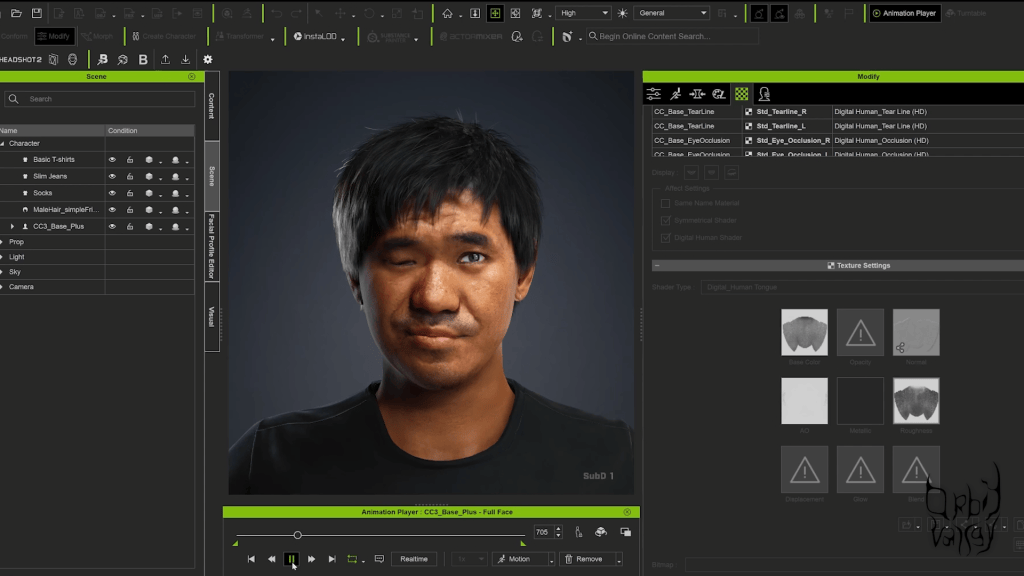
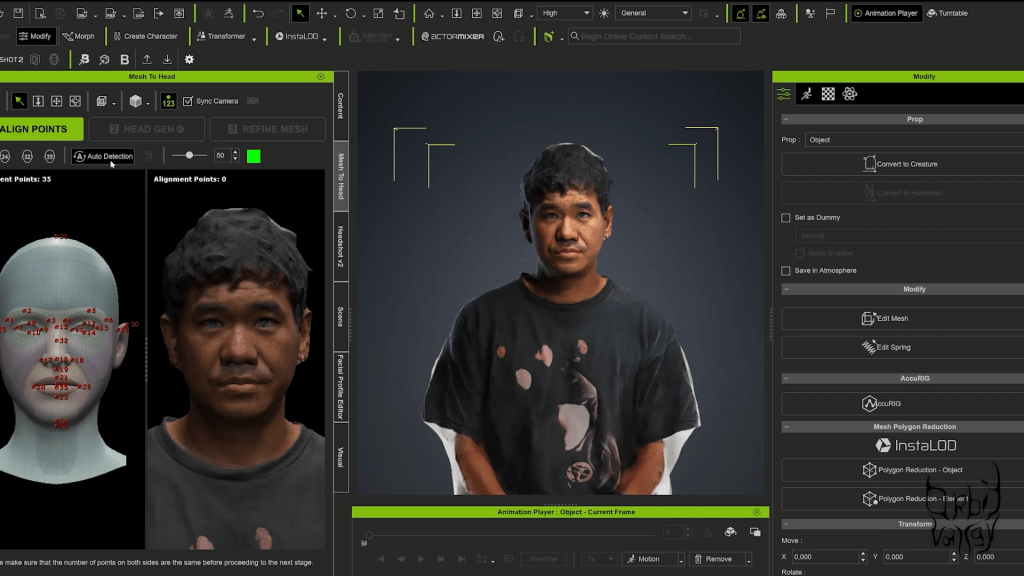
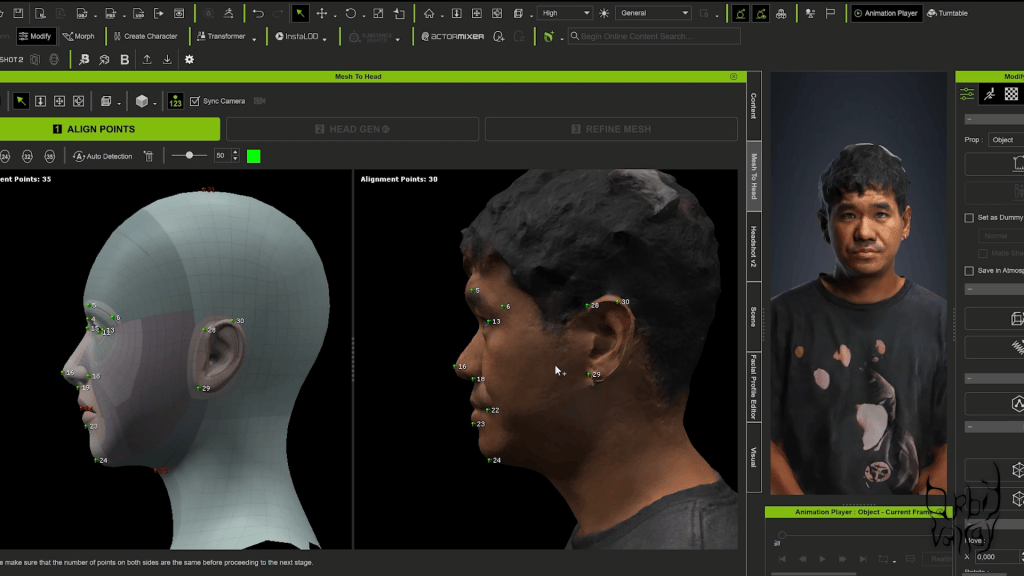
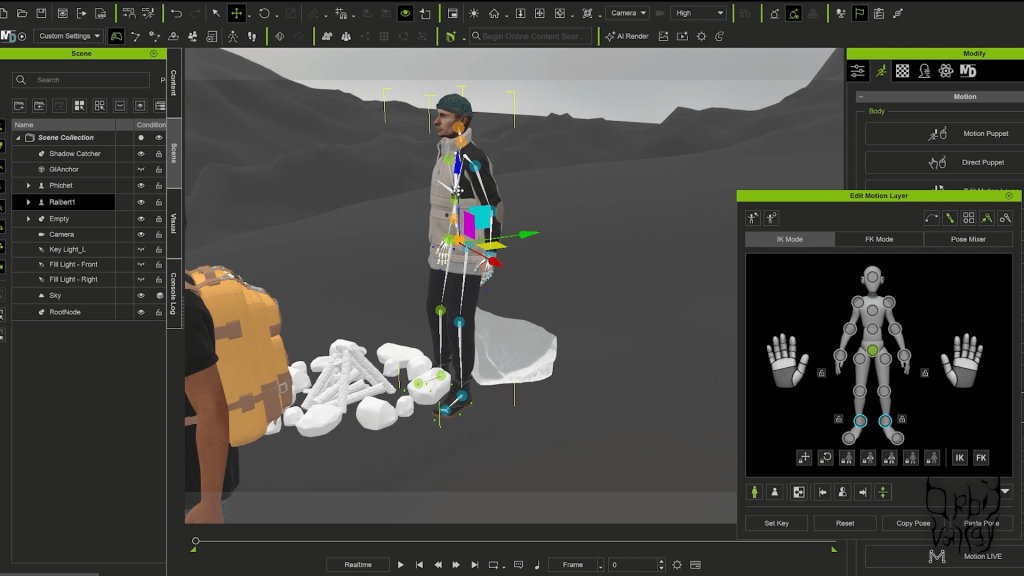
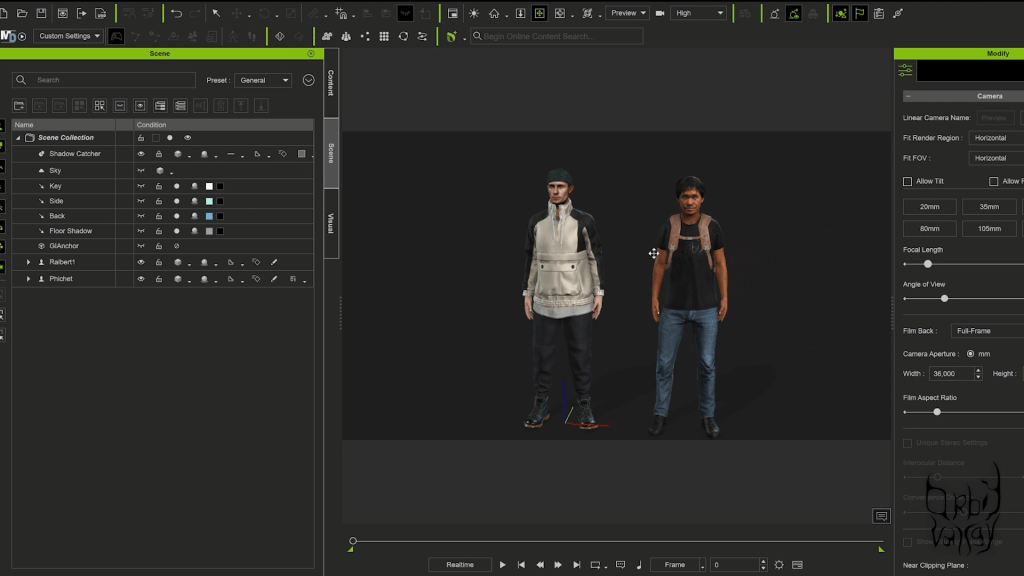
That workflow is changing. In their in-depth review of Character Creator 5, the team at Orbit Valley explores how Reallusion’s latest tools integrate seamlessly with Blender to deliver a streamlined, high-quality character designer pipeline for modern 3D animation software users.
This article breaks down Orbit Valley’s experience, insights, and production philosophy—showing how Character Creator 5, iClone, Blender, and real-world 3D character scans work together to empower artists, studios, and content creators.
Rasmus Rørbæk | Phichet S.B
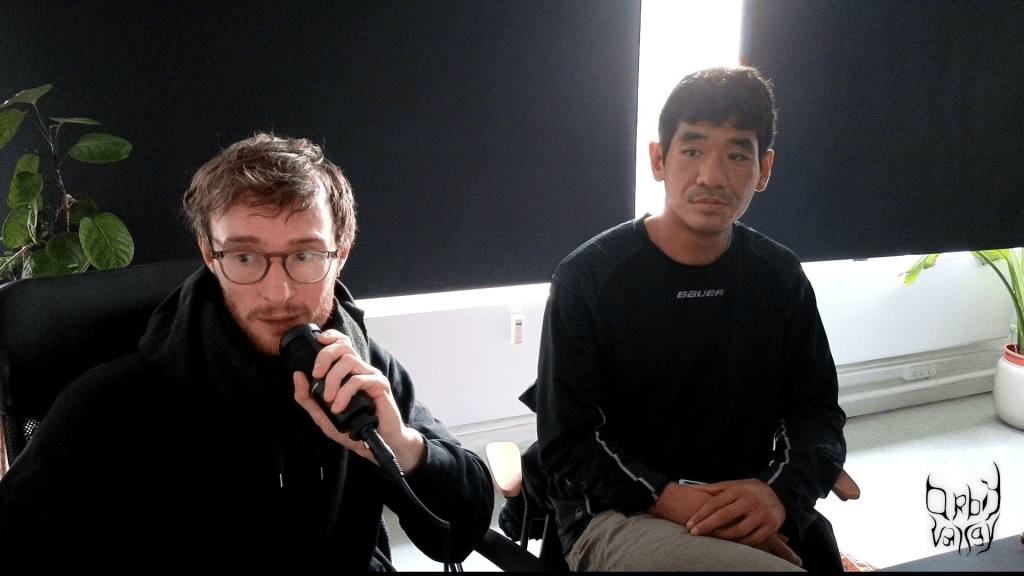
Founded in March 2023, Orbit Valley was established with the goal of operating as an end-to-end production company capable of blending disciplines, formats, and creative philosophies.
The studio’s founders—Rasmus Rørbæk and Phichet S.B.—originally connected through a shared passion for music. While their peers focused on sound creation, Rasmus and Phichet naturally gravitated toward the visual dimension, shaping identities, atmospheres, and moving imagery that complemented musical expression.
Phichet brings an extensive background as a freelancer, specializing as a VJ, 3D animator, and editor, with deep experience in commercial production environments. Rasmus, a graduate of The National Danish Film School, trained as a cinematographer after years working independently as a director and filmmaker.
Both founders were shaped by a strong DIY ethos, valuing adaptability, experimentation, and cross-disciplinary workflows. Orbit Valley’s creative philosophy embraces the idea that there are no fixed rules—only tools and intentions. Their inspiration draws heavily from meditation and mindfulness, influencing their desire to create from a grounded, conscious state rather than rigid technical frameworks.
This mindset made them an ideal team to evaluate Character Creator 5 as a flexible Blender human creator rather than a closed or prescriptive system.
Why Character Creation Is a Bottleneck for Blender Artists
For many Blender users, character creation represents the most time-consuming and technically demanding part of the pipeline.
Common pain points include:
Sculpting anatomically accurate human forms
Achieving production-ready topology
Generating realistic skin materials
Building facial rigs suitable for animation
Preparing characters for motion capture or performance animation
While Blender excels as a general-purpose 3D animation software, it is not purpose-built as a character designer. Orbit Valley recognized that the challenge wasn’t Blender itself—but the lack of an efficient, standardized character base to build from.
This is where Character Creator 5 (CC5) enters the workflow.
Character Creator 5: A Production-Ready Character Base
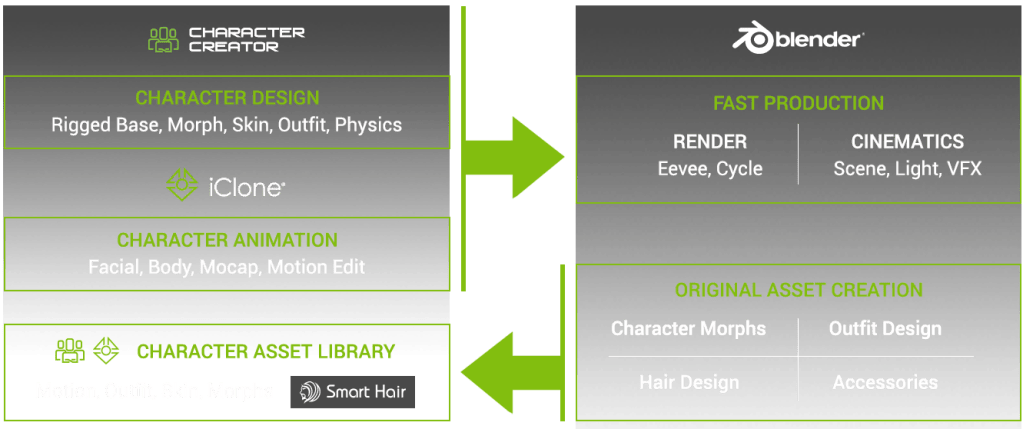
Character Creator 5 is designed to give artists a high-quality, animation-ready human character from the start. Rather than replacing Blender, CC5 acts as a powerful front-end system that feeds clean, consistent assets directly into Blender’s ecosystem.
Orbit Valley highlights that CC5 excels in three core areas:
Speed – Characters can be created, customized, and exported in a fraction of the time
Consistency – Topology, UVs, and rigs remain stable across characters
Interoperability – Assets move cleanly between CC5, iClone, and Blender
For artists who want to create your own character without reinventing foundational work each time, CC5 provides a dependable starting point.
Integrating Character Creator 5 with Blender
One of the most important aspects of Orbit Valley’s review is the non-destructive relationship between Character Creator 5 and Blender.
Rather than locking artists into a proprietary environment, Reallusion supports Blender as a first-class destination.
Blender-Ready Assets from Day One
Characters exported from CC5 arrive in Blender with:
Clean, animation-friendly topology
Fully functional facial and body rigs
PBR materials compatible with Blender’s shading system
Consistent scale and orientation
This allows Blender artists to immediately begin refining, shading, lighting, and animating—without technical cleanup.
A True Blender Human Creator Workflow
Orbit Valley emphasizes that CC5 functions as a Blender human creator, not a replacement for Blender’s creative control. Artists remain free to sculpt, stylize, or push realism further inside Blender while benefiting from CC5’s robust foundation.
Leveraging Real-World Data with 3D Character Scans
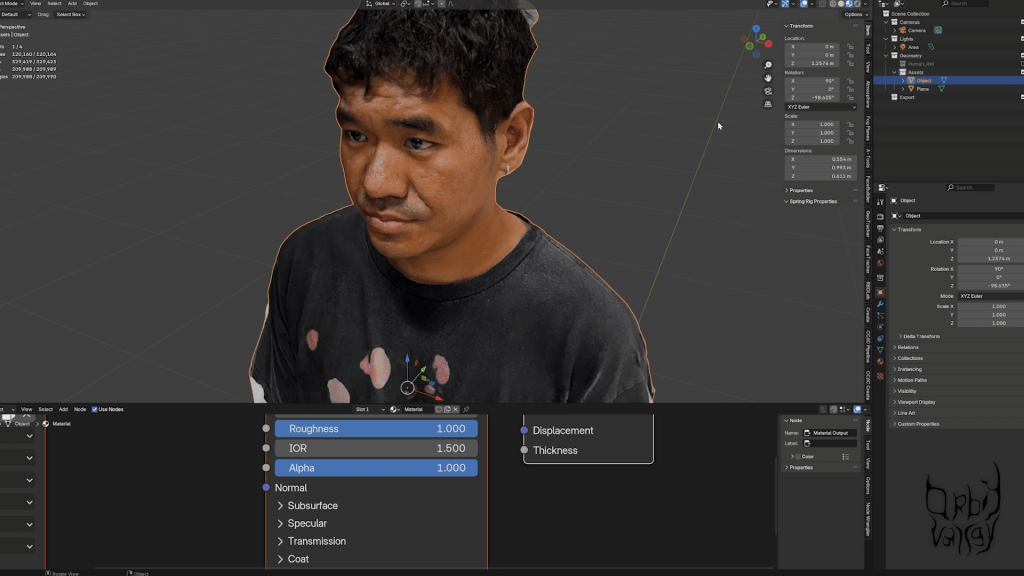
A standout feature in Orbit Valley’s workflow is the integration of 3D character scans.
By capturing real human data and feeding it into Character Creator 5, artists can achieve an exceptional level of realism while maintaining full editability.
From Scan to Animation-Ready Character
Orbit Valley describes a streamlined process:
Capture real-world facial or body data using scanning tools
Import scan data into Character Creator 5
Align and refine scans using CC5’s morph system
Generate clean topology and textures
Export directly to Blender or iClone
This approach bridges the gap between reality and digital performance—making CC5 a powerful hub for scan-based workflows.
Headshot 2: Turning Photos into Production Characters
Another key component highlighted in the review is Character Creator Headshot 2.
Headshot 2 allows artists to generate detailed, realistic human heads from photographic reference—dramatically reducing setup time.
Why Headshot 2 Matters for Blender Artists
For Blender users, Headshot 2 offers:
Rapid generation of realistic facial proportions
Seamless integration with CC5’s morph system
Full compatibility with Blender export pipelines
Orbit Valley notes that Headshot 2 is especially valuable for commercial projects, music visuals, and narrative content where likeness and emotional connection are essential.
iClone: Real-Time Animation and Performance Control
While Character Creator 5 handles character generation, iClone plays a critical role in animation.
Orbit Valley highlights iClone as a real-time animation hub that complements Blender rather than competing with it.
Why Use iClone with Blender?
The combined workflow offers several advantages:
Real-time preview of motion and performance
Facial animation and lip-sync tools
Motion capture integration
Rapid iteration before final Blender rendering
Once animation is finalized in iClone, characters can be sent back to Blender for lighting, shading, and final output—preserving creative flexibility while saving time.
The Advantages of the Reallusion + Blender Pipeline
Orbit Valley’s review makes it clear that the real strength lies in using these tools together.
Key Benefits at a Glance
Faster character creation without sacrificing quality
Reliable character base for multiple projects
Scalable workflows for studios and freelancers
Easy onboarding for new team members
Compatibility with modern production pipelines
For studios, this means predictable results. For solo creators, it means focusing on storytelling instead of technical hurdles.
Designed for Modern Content Creators and Studios
Orbit Valley emphasizes that Character Creator 5 isn’t limited to one type of user.
It benefits:
Blender animators building narrative projects
Content creators producing short-form media
Production houses needing scalable character pipelines
Indie filmmakers working with limited resources
By reducing friction, CC5 allows creators to iterate faster and explore more ideas.
Conclusion: A Smarter Way to Create Your Own Character
Orbit Valley’s review of Character Creator 5 reveals a powerful truth: modern character creation doesn’t have to be slow, fragmented, or overly technical.
By combining Character Creator 5, iClone, Blender, and real-world scanning tools, artists gain a flexible, professional pipeline that respects creative freedom while delivering production-ready results.
For anyone looking to create your own character, streamline their Blender human creator workflow, and elevate their 3D animation software pipeline, Reallusion’s ecosystem offers a compelling solution.
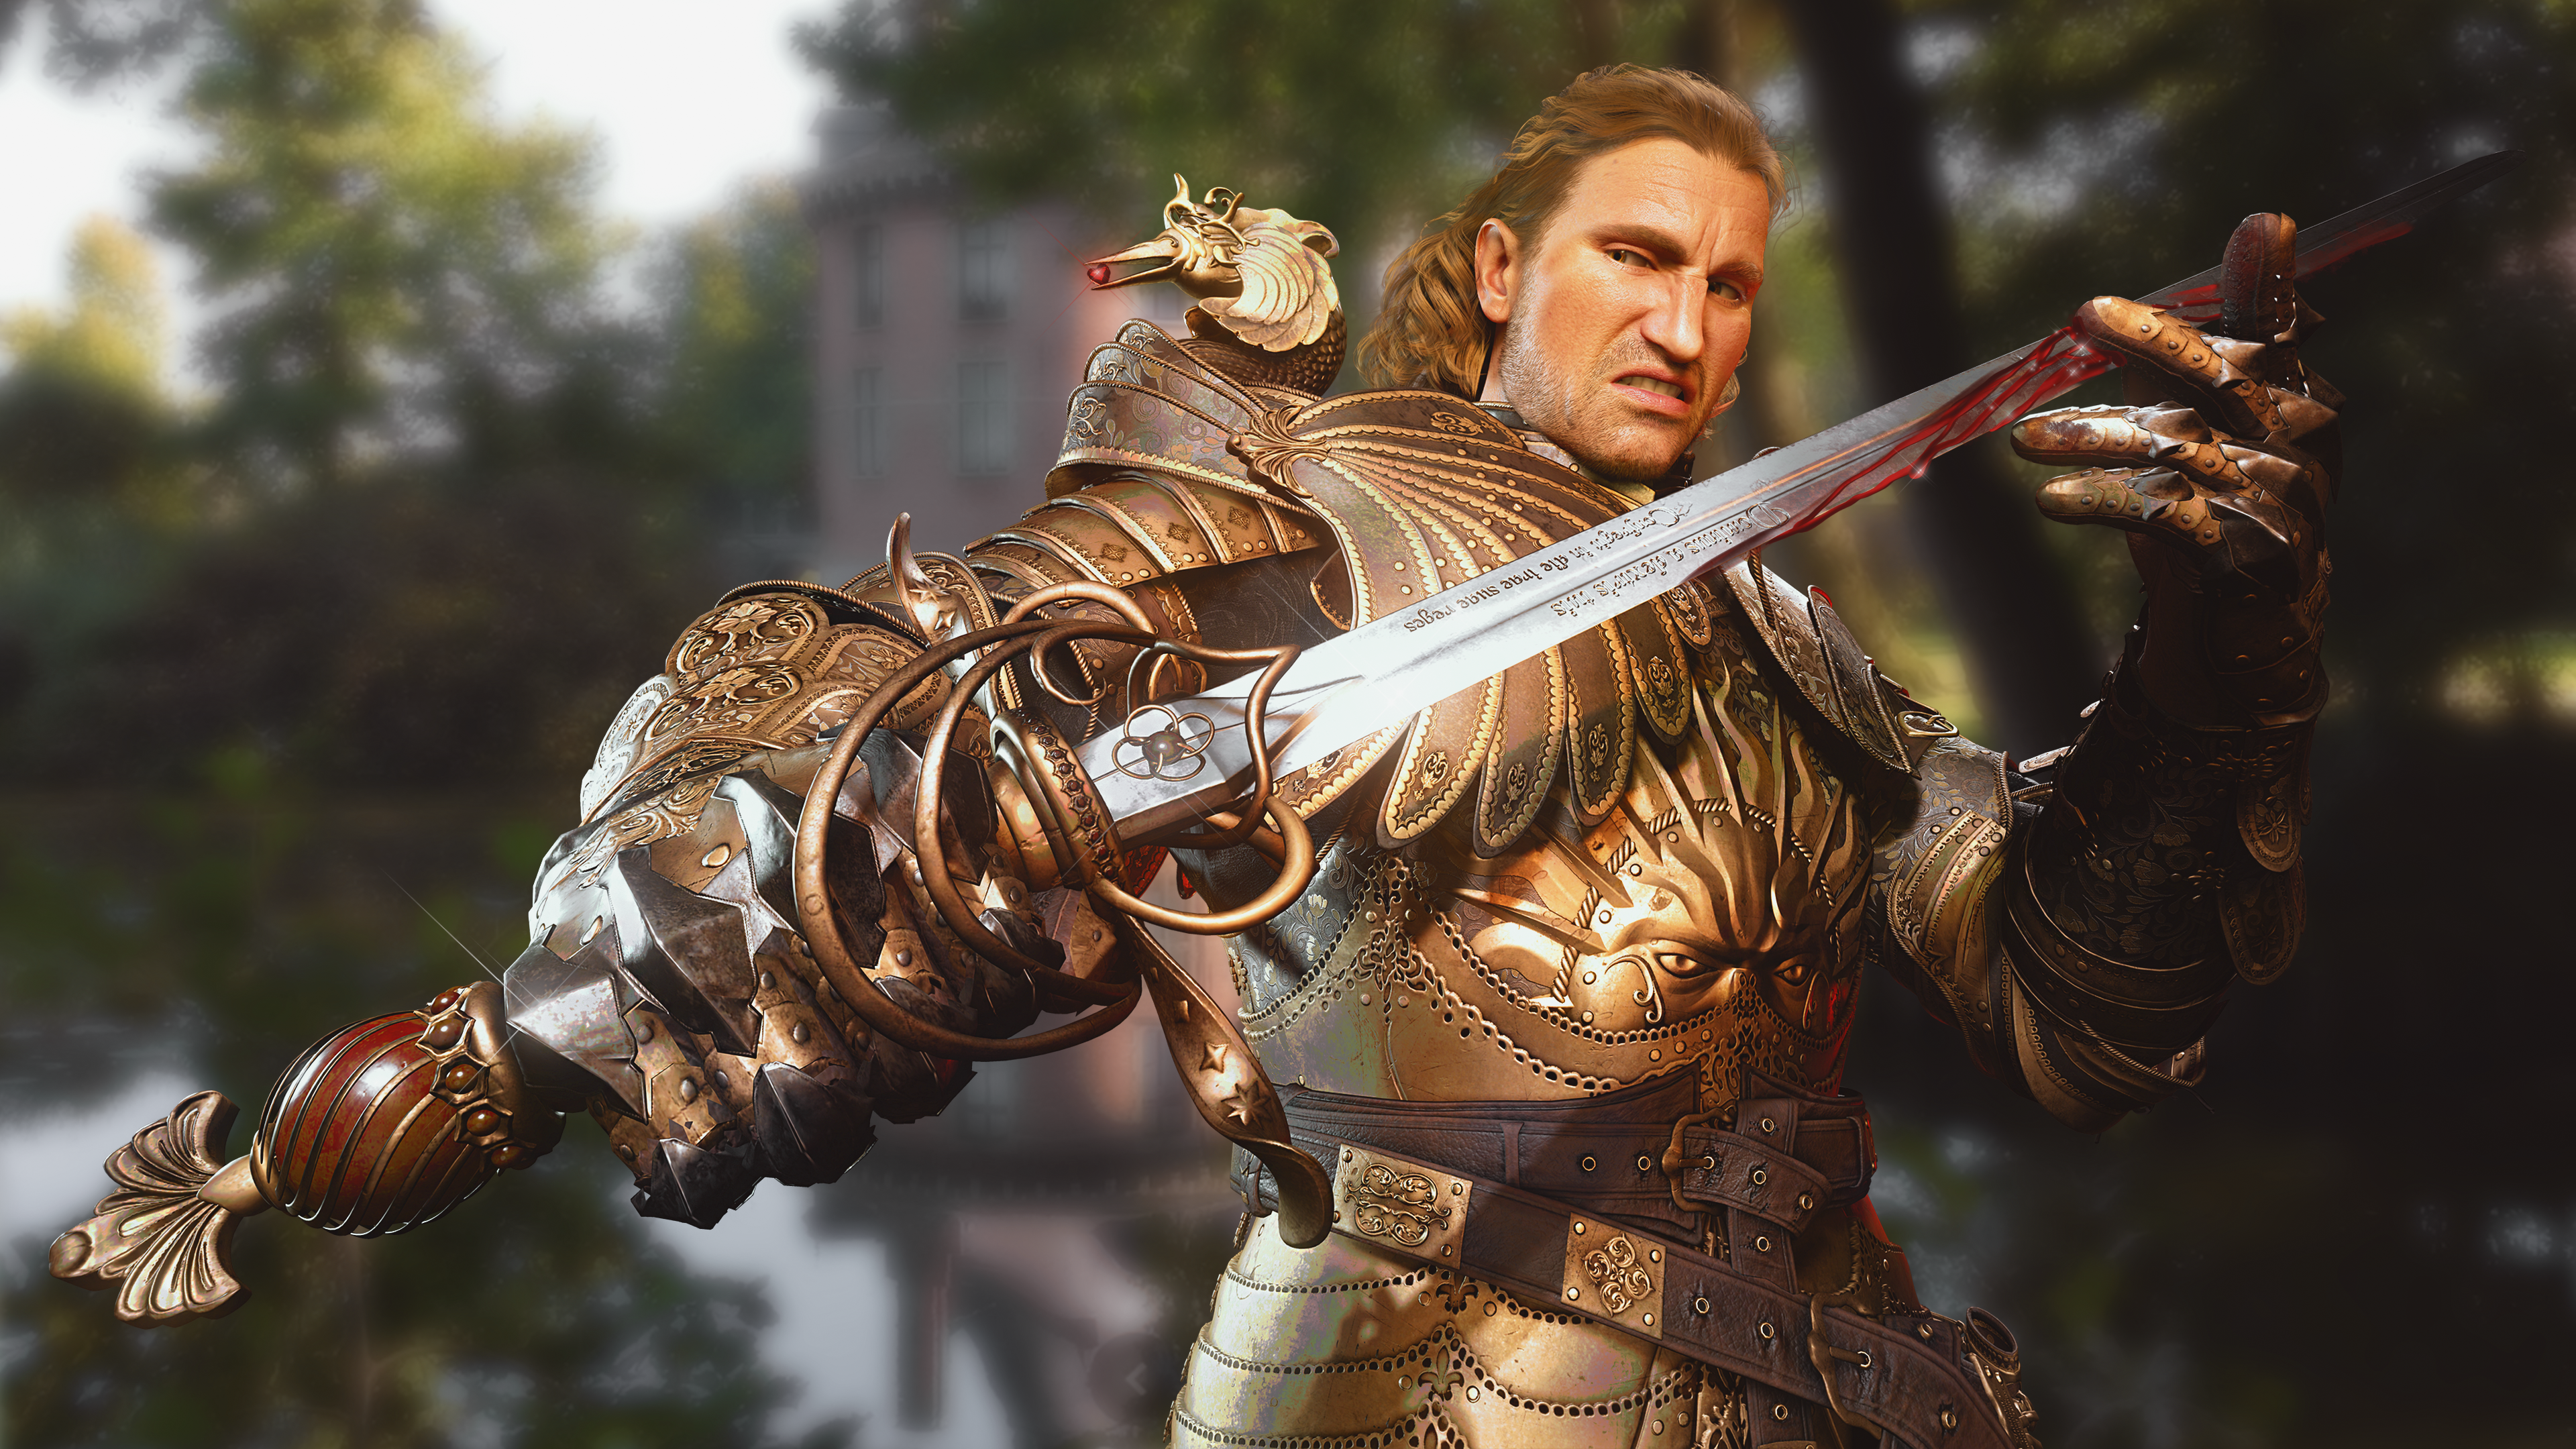
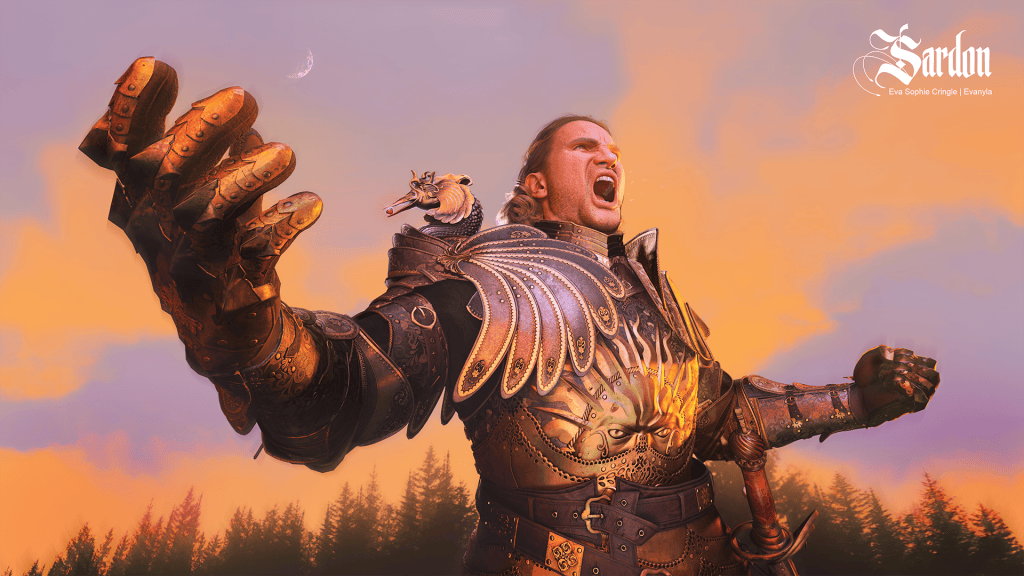
Hi, my name is Eva Sophie Cringle, also known as Evanyla. I am a 3D Character Artist with five years of professional experience, currently working as a freelancer and lecturing at universities. In this article, I will guide you through my complete Character Creator 5 pipeline, from start to finish, using my character Sardon as an example. Along the way, I will share some practical tips and small insights that helped me achieve this outcome.
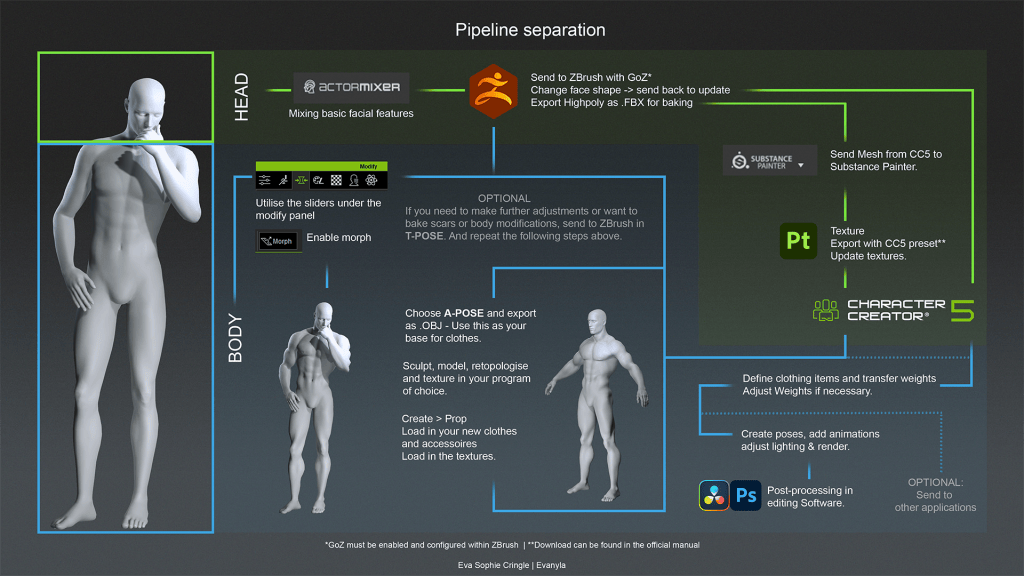
This is the diagram of my own pipeline, utilizing CC5 and 3rd-party software:
Outline for my personal pipeline utilising CC5 and adjacent software
1. HD base, morphs, & ActorMIXER
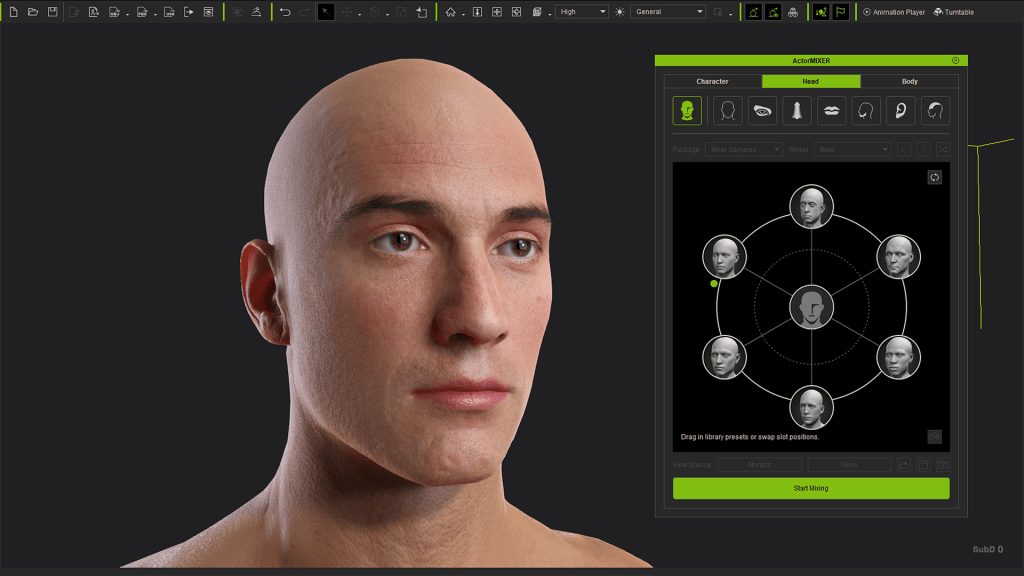
HD Basemesh Aaron with Actormixer.
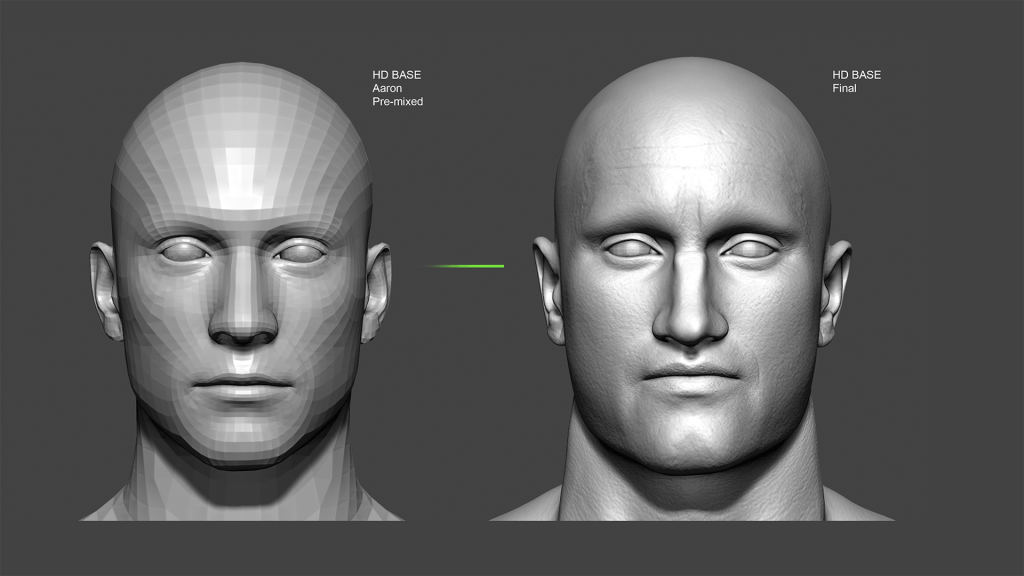
Character Creator 5 provides two HD base bodies: Aaron (male) and Ariana (female). Since Sardon is a male character, I chose Aaron as my starting point. The HD base allows for the mesh to be subdivided back and forth depending on usage.
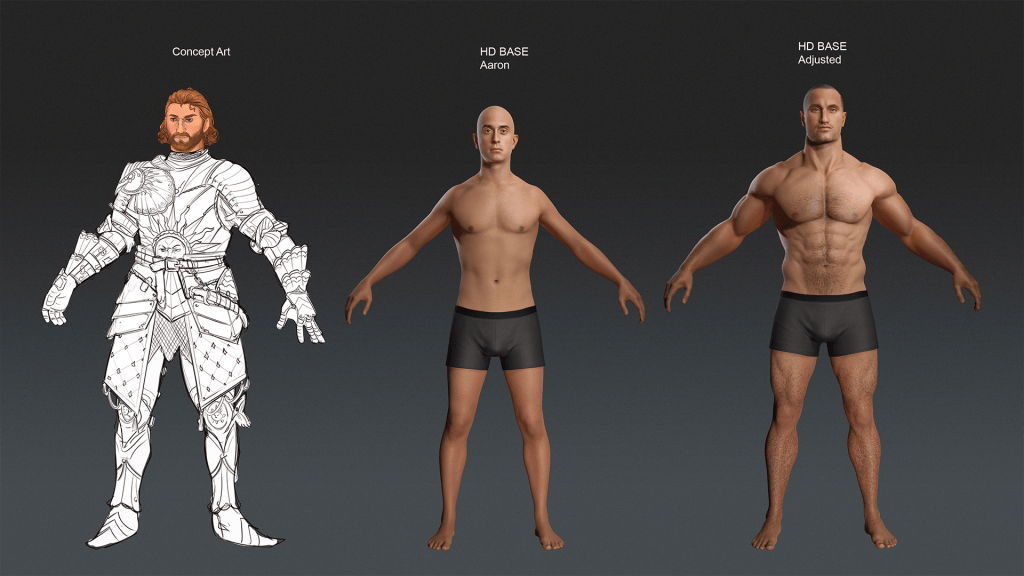
I began with a concept sketch, which served as my primary reference throughout the process. As this was a solo project, I allowed myself to iterate freely and adjust the design organically.
Starting from the base body, I adjusted the height to 194 cm (6’3″) and added muscles using the HD Body morphs(Modify > Morphs > HD Body).
I did not replace the base skin textures (except for an added hairline). Instead, I added body hair, stubble and eyebrows from the Content Browser. I also slightly adjusted the skin hue towards red and olive tones (Modify > Textures > Select Body > Activate Skin Colour > Adjust).
ActorMixer for face morphs.
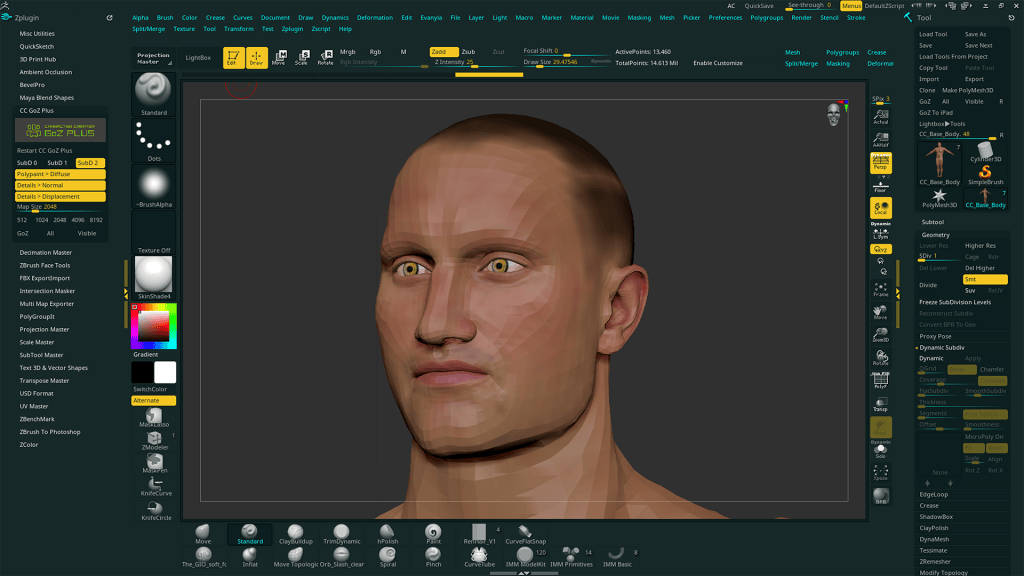
For the face, I used ActorMIXER to establish a rough foundation for head shape, ears and eye placement. I intentionally left finer facial details for later. Once satisfied, I ensured the model was set to SubD0, selected it, and sent it to ZBrush via GoZ using the default options.
(Before and after) Concept art (Evanyla) and basemesh adjustments
2. Reshaping the face in ZBrush with GoZ
If you are not planning to make significant changes to the body, you can safely send the character in an A-Pose. If you intend to modify body proportions, sending a character with a T-Pose via GoZ Plus is required.
In ZBrush, I reshape the facial structure primarily using the Move brush, although other brushes can be used as needed. I recommend hiding the eyelashes during this process, as they tend to be visually distracting. Even if the eye area is altered, CC5 provides tools to correct this later.
For characters that require heavier detail, such as deep wrinkles, scars or damage, I separate the workflow as follows.
2.1 Reshaping only
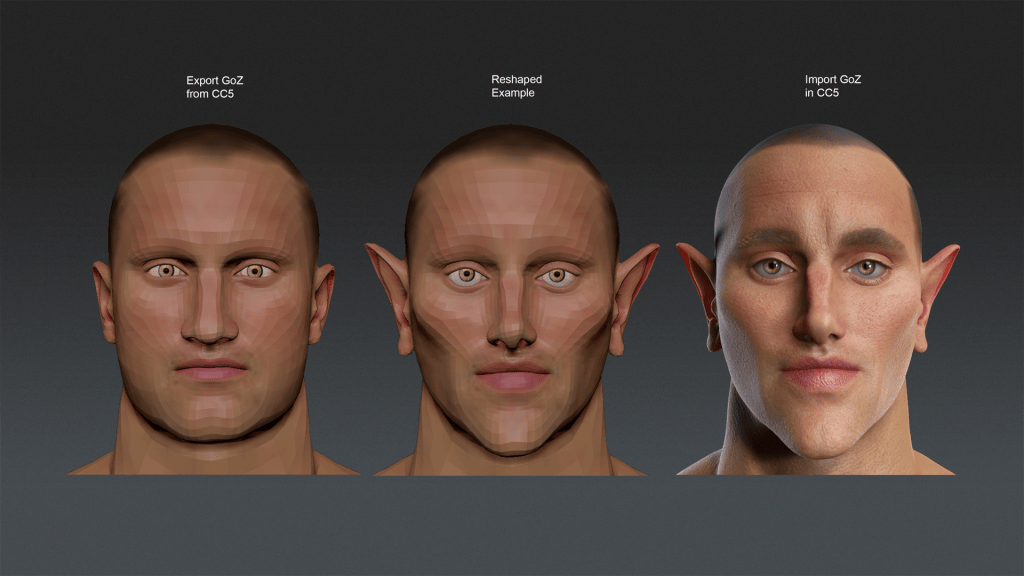
I keep the subdivision level relatively low, as only the lowest subdivision is sent back to update the base mesh. The main tools I use are the Move brush and lasso masking to establish the overall form. Once satisfied, I select GoZ All (Tool > GoZ All) to send the mesh back to Character Creator. When CC5 reopens, I check the dialogue window.
Good outcome: the window displays “Update” at the top. Proceed as normal.
Bad outcome: the window displays “Create Cloth” at the top. This indicates a mismatch. Possible fixes include:
Ensure the character in CC5 is still in SubD0 and unchanged in pose
Make sure no additional SubTools were added in ZBrush
Confirm that no meshes were renamed in ZBrush
Try GoZ on the active subtool only
Try GoZ+ (ZPlugin > CC GoZ Plus), disable all texture maps, set SubD0 and press All
If none of these resolve the issue, this step may need to be redone, as some mismatches cannot be corrected.
2.2 Skin sculpting
(Before and after) Facial reshaping and surface details
For characters with more surface detail, I first complete the reshaping step above and confirm the base mesh updates correctly in CC5. I then return to the ZBrush file, delete unnecessary SubTools, usually keeping only the head unless body sculpting is required.
I subdivide the mesh to a higher resolution and sculpt wrinkles, scars, pores and other details. I strongly recommend working with layers for flexibility. Once sculpting is complete, I export the high-poly mesh (ZPlugin > FBX Import Export).
From CC5, I export the character again in the same pose as an OBJ, including textures. This is used as the low-poly base for baking and texturing.
In Substance Painter, I import the low-poly OBJ and load the existing head and body textures as resources. I then bake using the high-poly FBX, adjusting the cage until there are no visible errors. I typically bake at 4K resolution and downscale later if required.
In the texturing stage, I reapply the diffuse textures using fill layers and make adjustments. This is also where I define the hairline. Make sure to use the official Character Creator export preset for Substance Painter, available in the documentation:
I often replace the eye texture entirely. You can either use existing eye assets or create your own based on the CC5 eye shader. I export the diffuse texture and open it in Photoshop.
(Modify > Textures > Eyes). I photograph my own eye using flash, cut out the iris and pupil, remove reflections, and adjust the shape. Since the texture is mirrored, this cleanup is essential. I then adjust the colour as needed. For Sardon, I used a hazel tone.
4. Creating clothes, hair, and armour
Before creating clothing, I strongly recommend setting up a modified A-Pose.
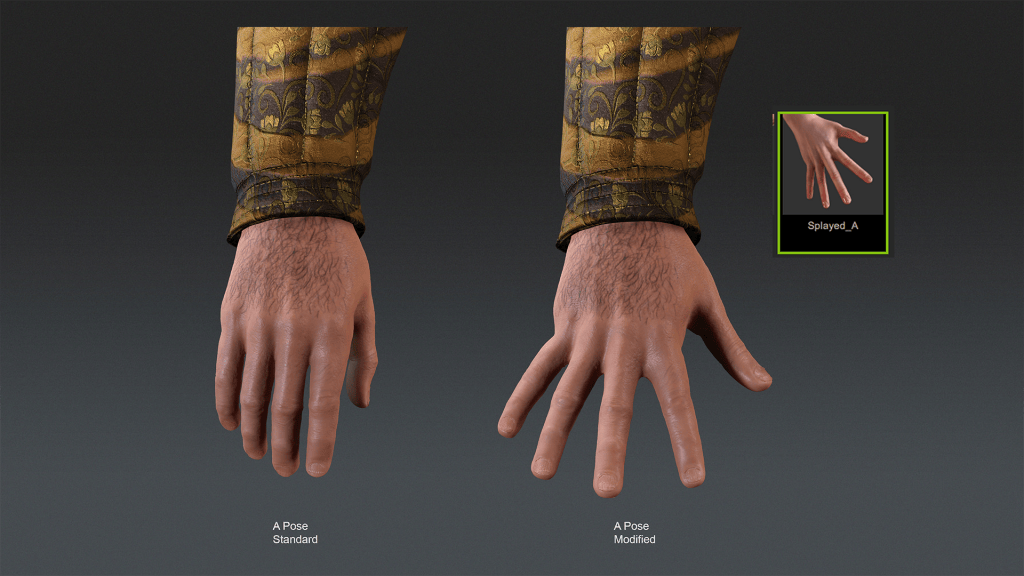
The main improvement over the default A-Pose is using splayed hands. These can be found here (Content > Animation > Gestures). Sculpting gloves becomes significantly easier, and texture baking produces fewer errors due to better cage wrapping between fingers.
I also mirror the pose (Modify > Motion Pose > Edit Pose > Mirror), as the default A-Pose is slightly asymmetrical.
(Before and after) Modified A-Pose
Once complete, I save the pose to my custom library for later use. (Content > Custom > Animation > Pose > Save).
I then export the full character as an OBJ using the current pose.
Tip1: For very muscular characters, export both SubD0 and SubD2 versions. Muscle definition can differ between subdivision levels, which may cause mismatches later.
Tip2: I first import the model into Maya to remove unnecessary geometry such as hair, underwear, and other unused elements, keeping only what I need. I then export a cleaned OBJ for further work.
4.1 Marvellous Designer
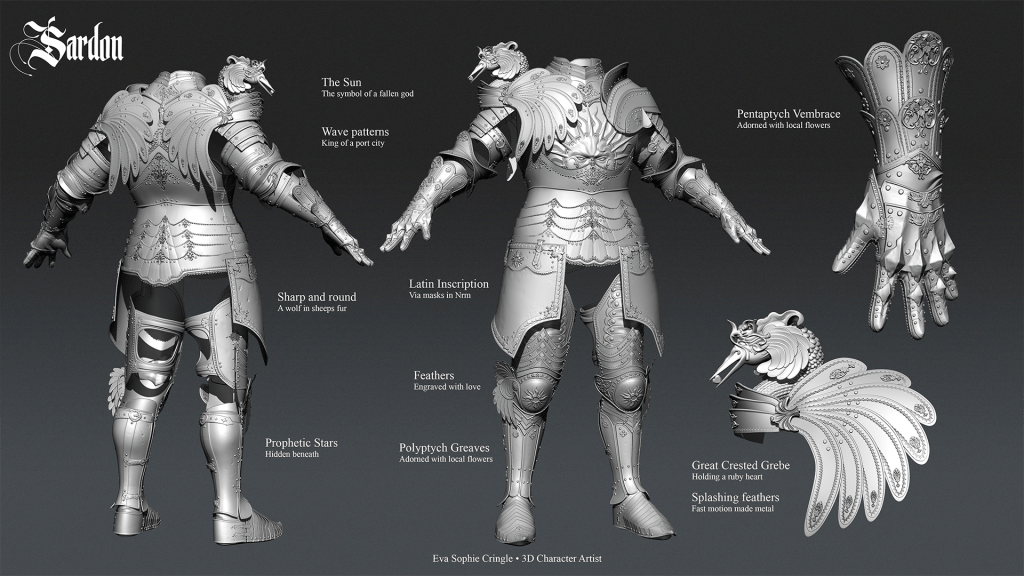
Clothes made in Marvelous Designer, sculpted details in ZBrush
I usually start clothing in Marvelous Designer as it allows me to create patterns and folds. I import the OBJ and recreate patterns either from reference or from scratch. I keep complexity in check and decide early whether details are better handled in MD or sculpted later in ZBrush.
Often, I bring garments directly into ZBrush as high-poly meshes for further sculpting, then later retopologize in Maya or TopoGun. This requires more welding but can still be efficient depending on the garment type.
Tip: Technically speaking, you could export your CC5 Character with motion to simulate a catwalk with realistic cloth movement.
4.2 ZBrush
Armour sculpted within ZBrush. Hands utilise the splayed hands for reduced baking errors.
In ZBrush, I import both the SubD0 and SubD2 body meshes as sculpting references. For armour, my workflow typically follows this sequence:
(Mask with lasso > Extrude zero thickness > Unmask > Mask by border > Invert mask > Soften mask > Polygroup > ZRemesher (half or same, with polygroups) > Extrude > Bevel or further edits using ZModeler.)
Some pieces benefit from quick retopology in Maya before refining further in ZBrush, especially armour that requires clean edge flow. For ornaments, I strongly recommend using IMM brushes instead of alphas. IMM brushes create real geometry rather than projected detail, resulting in cleaner bakes. They also do not require extremely high subdivision levels.
Tip1: After placing IMM ornament meshes, decimate them to reduce polycount without visible quality loss (ZPlugin > Decimation Master).
Tip2: If the sculpt becomes too heavy, split the mesh into multiple files to keep ZBrush responsive. For Sardon, I had it split between Clothes, Armour, and Scabbard + weaponry.
4.3 Maya
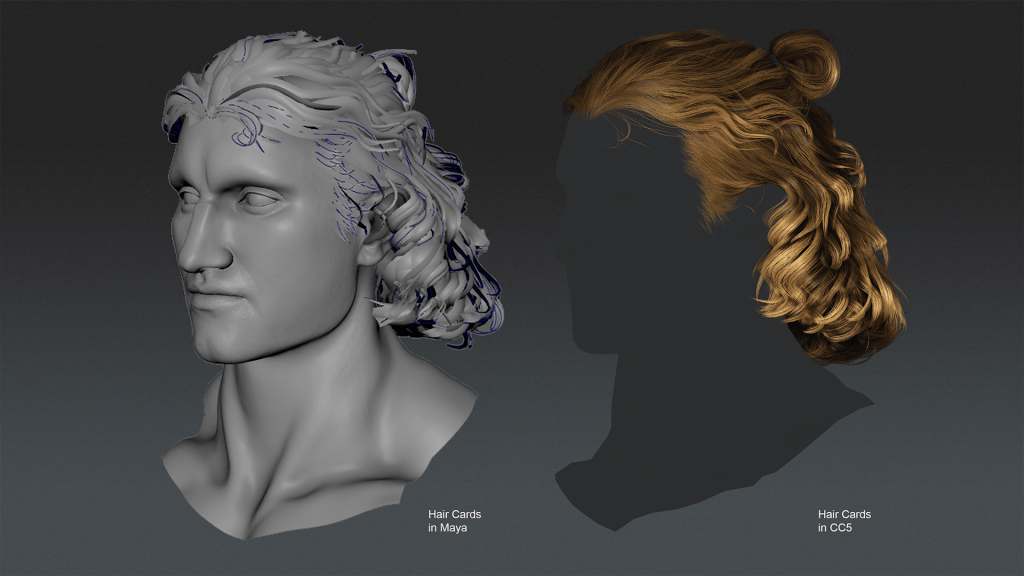
In Maya, I create hair cards using GS CurveTools (Paid Plugin for Maya). After importing the character, I delete unnecessary geometry, such as the body and teeth, and begin setting up materials.
I mark the hairline in Photoshop or Substance Painter to guide placement and darken the scalp where hair emerges. Since I was satisfied with CC5’s hair shader, I reused its textures instead of switching to XGen or Fibershop. I add a temporary hairstyle in CC5, export the diffuse and opacity textures, and reuse them in Maya.
For hair materials, I assign a Lambert shader, load the textures, and enable Alpha Is Luminance on the opacity map. In Viewport 2.0, I enable depth peeling at the highest quality.
Tip1: For debugging hair layers, duplicate the material and apply high contrast rainbow colours to the diffuse texture inside Photoshop.
Hair shader using the Bucket tool:
Hair cards made in Maya with GS Curvetools vs Final render in CC5.
Tip: To test hair, export it as an OBJ file, open a clean Maya scene, combine and smooth it if needed, and then export it again. In CC5, adjust the transform if necessary and apply the hair shader using the Bucket tool.
5. Import back into CC5
Once clothing, hair, and armour are retopologized, UVed, and textured, I import them into CC5 as props (Create > Prop).
Tip: Import related items in batches rather than combining everything into one object.
If an offset occurs on import, you can either correct it via (Modify > Attribute > Transform) or adjust the character pose to match (Modify > Motion Pose > Edit Pose). If the meshes appear blocky, ensure that you smooth the edges before exporting from Maya.
6. Setting up textures and materials
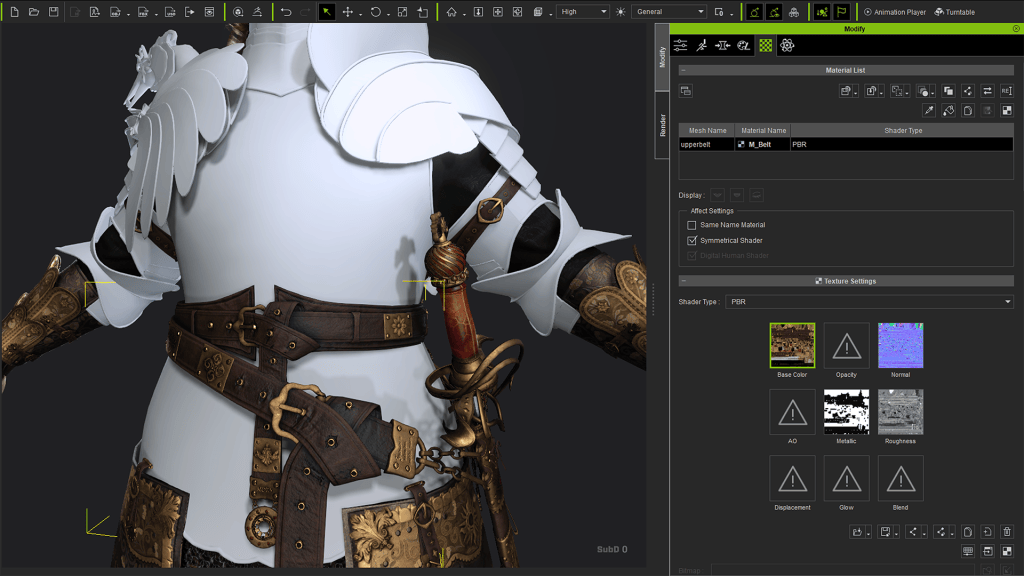
Assigning textures to the meshes, Weight painting adjustment on the poleyn (knee armour)
With all meshes in place, I assign materials (Modify > Textures) by dragging and dropping from the file browser. I leave normal and displacement maps until last, as they prompt additional options.
To elevate the flat faulds (layered plating around the waist), I created a custom mask for the displacement. With tessellation level on max, multiplier at 0.5 and grey scale value at 0 (Black = noelevation).
Tip: If physics are planned, ensure simulations are enabled (At the top row > “Rigid body simulation” and “Soft cloth simulation”).
7. Technical art
To ensure custom meshes conform to the character correctly, they must be bound to the skeleton and weighted properly. Select the mesh and assign a parent bone (Modify > Attribute > Attach). If the bone is difficult to select, click on any body part. Then use the dots inside the panel to choose from the list.
Once parented, the object will move along but not deform. Select it again and use “Transfer Skin Weights”. Choose the appropriate clothing type. Defaults work for most items, but shoes and gloves should not use the default setting. For the Sabatons, I had to combine them with the actual leather shoe beforehand, as your character can only wear one pair of shoes.
Weight painting adjustment on the poleyn (knee armour)
After binding all items, test deformation using the debug animations in the playbar. These include full-body and more limb-focused movements (Animation player > motion > Body rig).
Tip: You can pause the animation or even pose to get your mesh where you need it to be for testing. You can return into A or T pose at any time.
Weight painting adjustments are usually necessary, especially for armour. This mode can be performance-heavy, so save the scene frequently. Armour often needs rigid behaviour, but to save time, I often focus on parts close to joints like the pauldron and couter armor pieces. I then check to which bone I can assign 100% of the weights to, to make sure I get the least deformation and most natural movement.
Here is what I changed:
Pauldron: 100% clavicle bone
Couter: 100% elbow share bone
Tassets: 100% waist bone
Poleyn: 100% knee share bone
If you have imported any clothing items or armour that covers any body part, you can select it and enable the option to “hide body mesh” (Modify > Attribute >). Then click on the body parts which you want to make invisible.
Tip: Do not delete the mesh where that information is stored. I recommend creating a “Dummy mesh”, which you can rename to “Do not delete”. I gave my character piercings on his chest, which I named “disappiercing” so I always know which mesh I can select to change the hidden body parts.
8. Setting up a render
8.1 Pose and Express
Posing Sardon to scream dramatically.
With everything prepared, I begin posing. This is where character personality really comes through. Choose a well-lit atmosphere and start posing (Content > Stage > Atmosphere).
Tip: If performance drops, switch from High to Quick mode temporarily. (Top bar)
Save poses to the Custom tab for iteration. I usually refine each pose three to four times, checking from all angles to make sure the pose is readable and has no clipping. In the Expressions tab, I experiment with facial expressions to match the character’s personality and save those as well. For Sardon, I chose a proud sneer.
8.2 Lighting
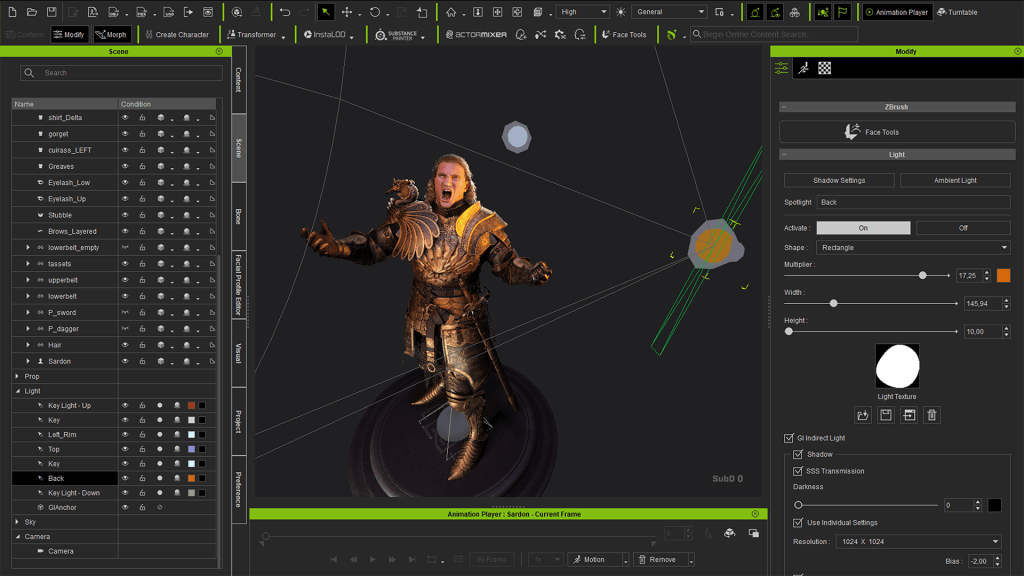
Adding and adjusting lights within the scene
I prefer full control over lighting, so I create custom light sets based on existing HD presets (Content > Stage > Atmosphere > CC5 HD).
A strong fill light, clean rim lights, and controlled shadows are key. Good lighting can elevate a model, while poor lighting can undermine even strong work. You can add custom lights to your scene via (Create > Light >). In the modify panel, you can change the attributes to fit your needs.
Tip: Introduce subtle temperature variation between lights, such as a warm fill and cooler rim light for greater contrast.
8.3 Turntable
For my portfolio, I always include turntables. Both digital and physical turntables can be used. CC5 allows you to rotate the scene, character or lights independently. I usually render one light turn and one character turn and combine them in DaVinci Resolve .
9. Rendering
Lighting adjustment, slight camera adjustment.
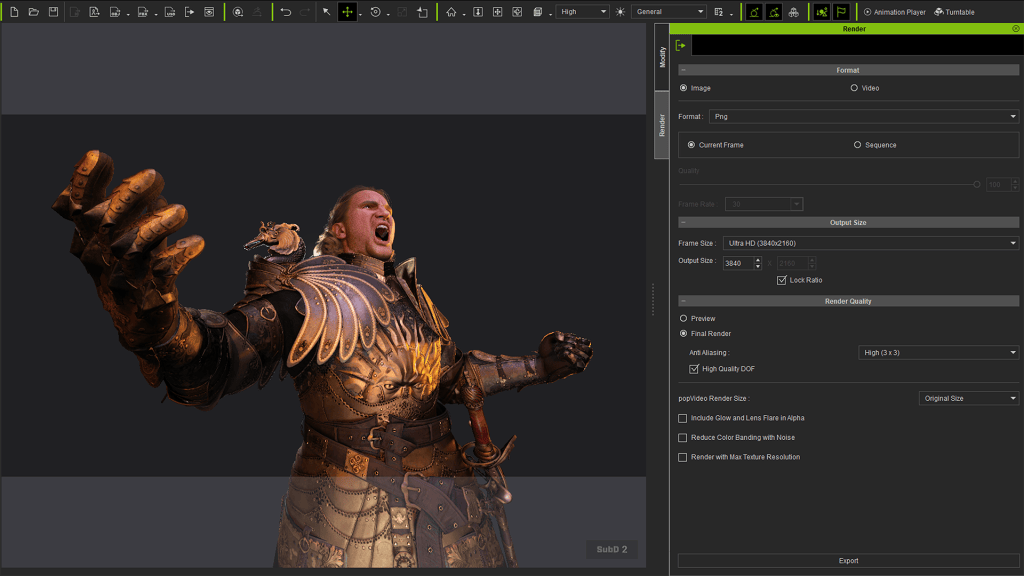
In the render settings (Ctrl + 3), I disable the background to allow transparent output. Open the render layout (Ctrl + 5) to access all of the controls for exporting. You can always add other windows like the playbar via (Window > ).
9.1 Images
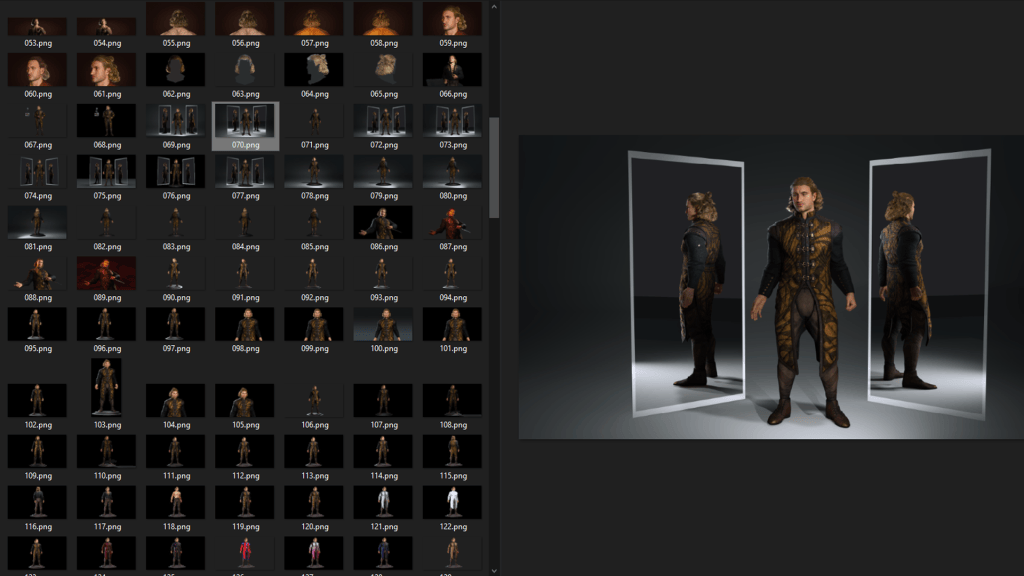
One of many renders, many just differ slightly in pose, angle or lighting
I render my shots in Ultra HD as PNG files with maximum anti-aliasing. Post-processing is handled in Photoshop. Camera focal lengths usually sit between 80 and 105 mm, with depth of field disabled. You can find the camera settings by selecting them in the Scene tab. For action shots, I use a lower focal length for added dynamism.
Tip: Very high focal lengths can cause viewport artefacts. Reduce the value until they disappear.
9.2 Videos
Turntable renders within DaVinci Resolve
I render videos in standard HD MP4 format: one light-only turntable and one character turntable. Speed and direction can be adjusted in the turntable settings. If you want to add a turntable to your scene, click on the icon in the playbar.
10. Post-processing in Photoshop
Before and after-post processing.
I organise renders using Artboards for clarity. The size is the same as the renders (3840 x 2160). Once everything is placed, I begin final adjustments.
I selectively sharpen high contrast areas using the sharpen brush rather than applying a global filter. Dodge and burn to enhance depth, emphasising rim lights and toning down overly bright areas to fake additional shadow.
I rarely colour correct, unless necessary or to boost certain areas of interest.
10.1 Secret metal trick
A neat little trick to make the metalness richer in post-production.
For metal-heavy assets, duplicate the layer and apply a Curves adjustment. Push the curves up and down until a strong colour variation appears, then merge and reduce opacity. Mask the layer and paint the effect selectively. This adds subtle richness and variation to metal surfaces.
11. Summary
Final render of Sardon
This concludes my complete Character Creator 5 workflow and how I integrate it into my broader character pipeline. I am very happy with how Sardon turned out, and I look forward to my next character project, where I want to go deeper into the advanced tools. If you want to see more breakdown shots and renders, you can view my portfolio here: