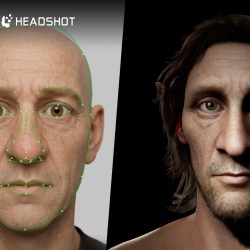
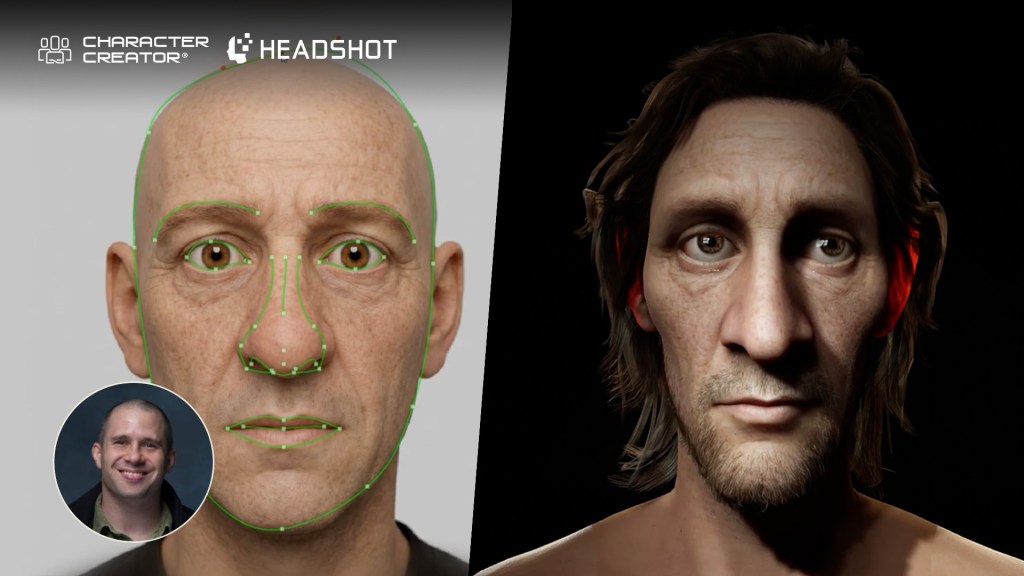
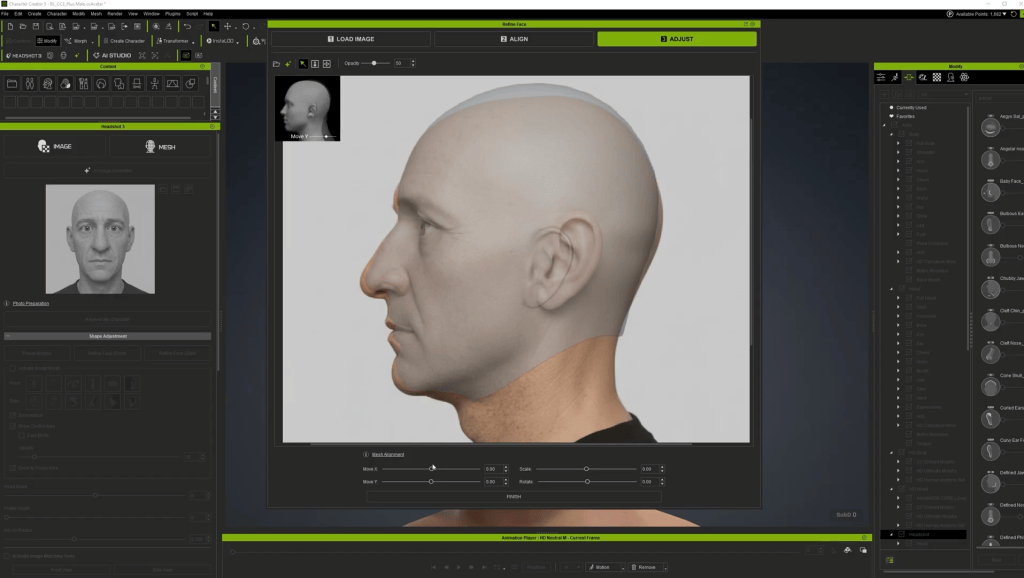
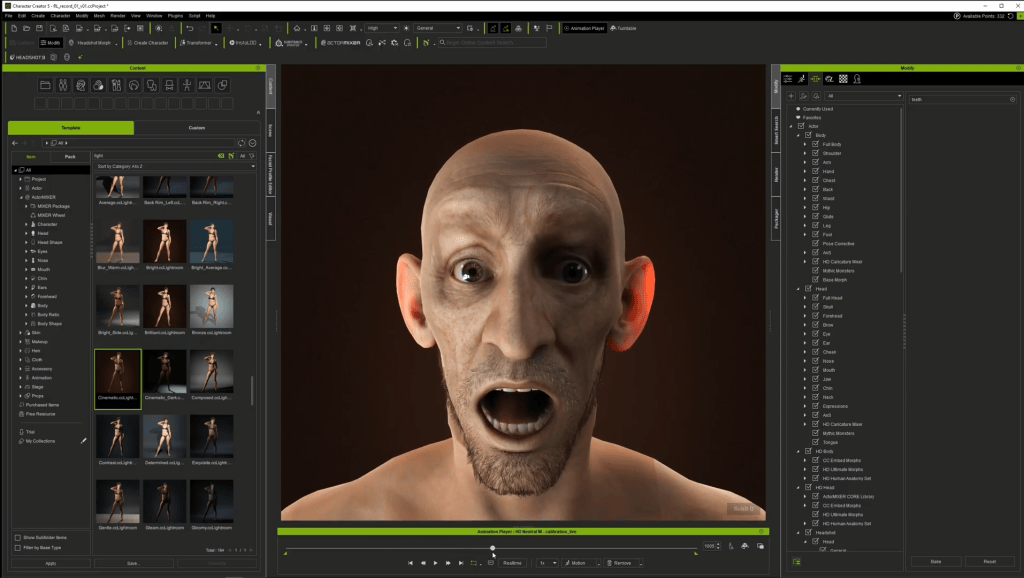
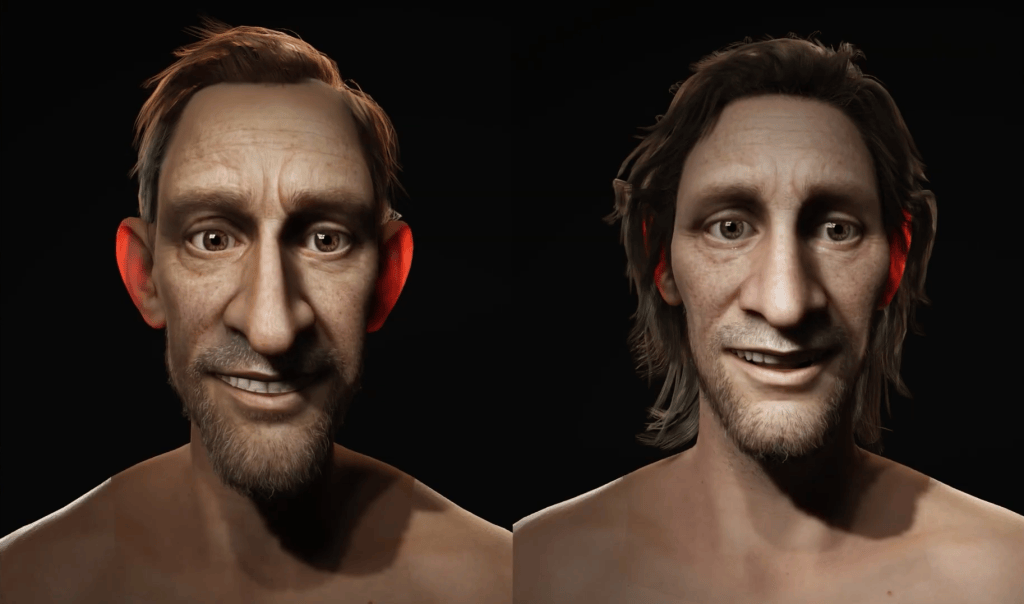
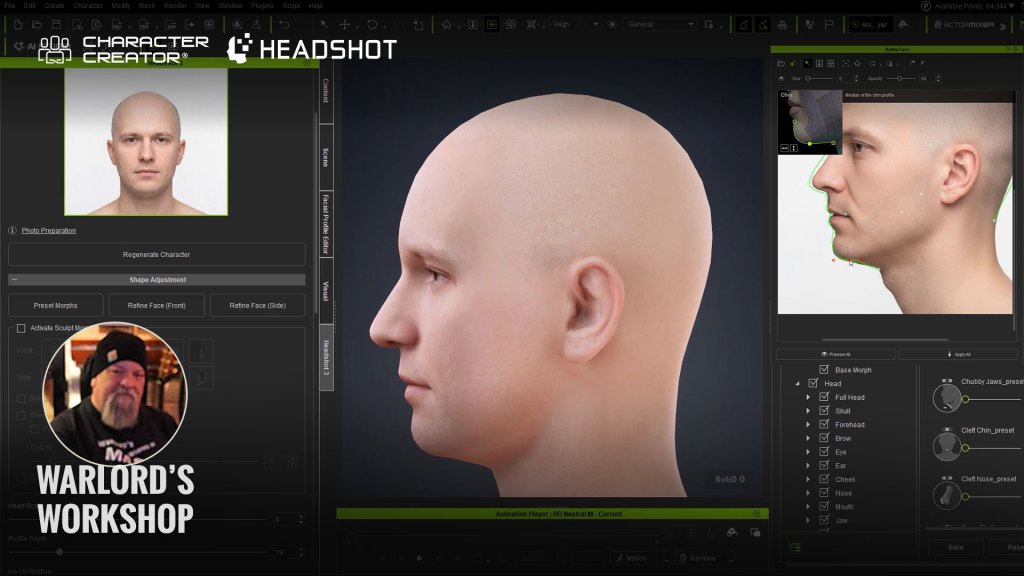
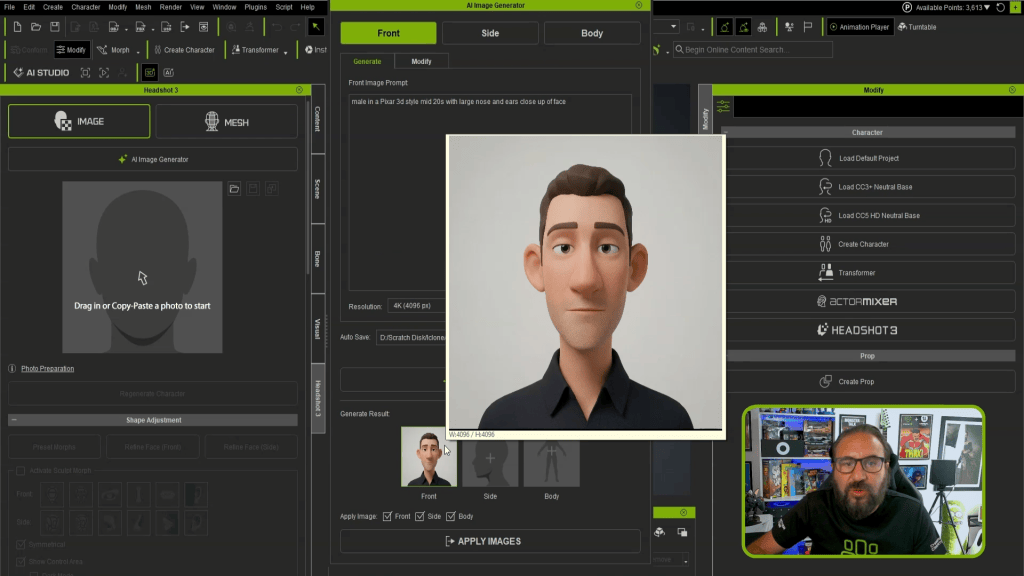
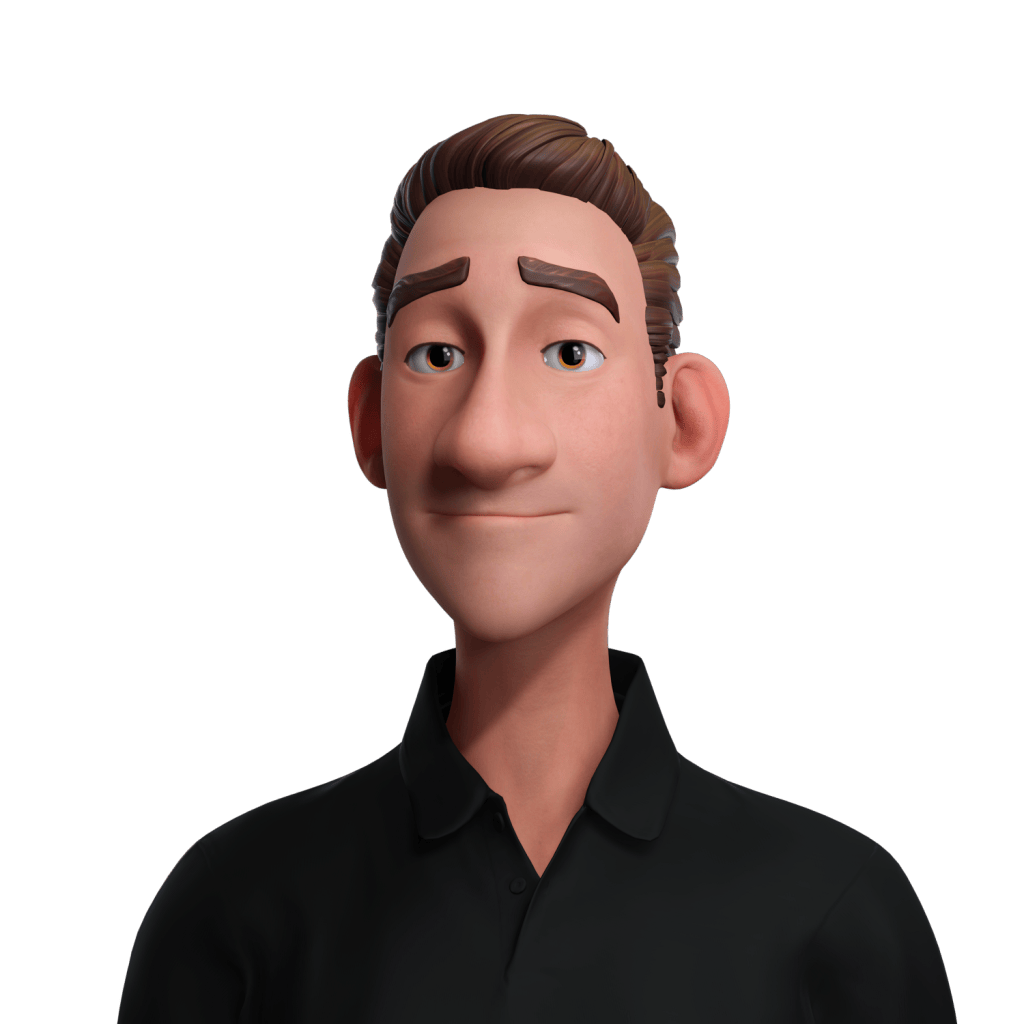
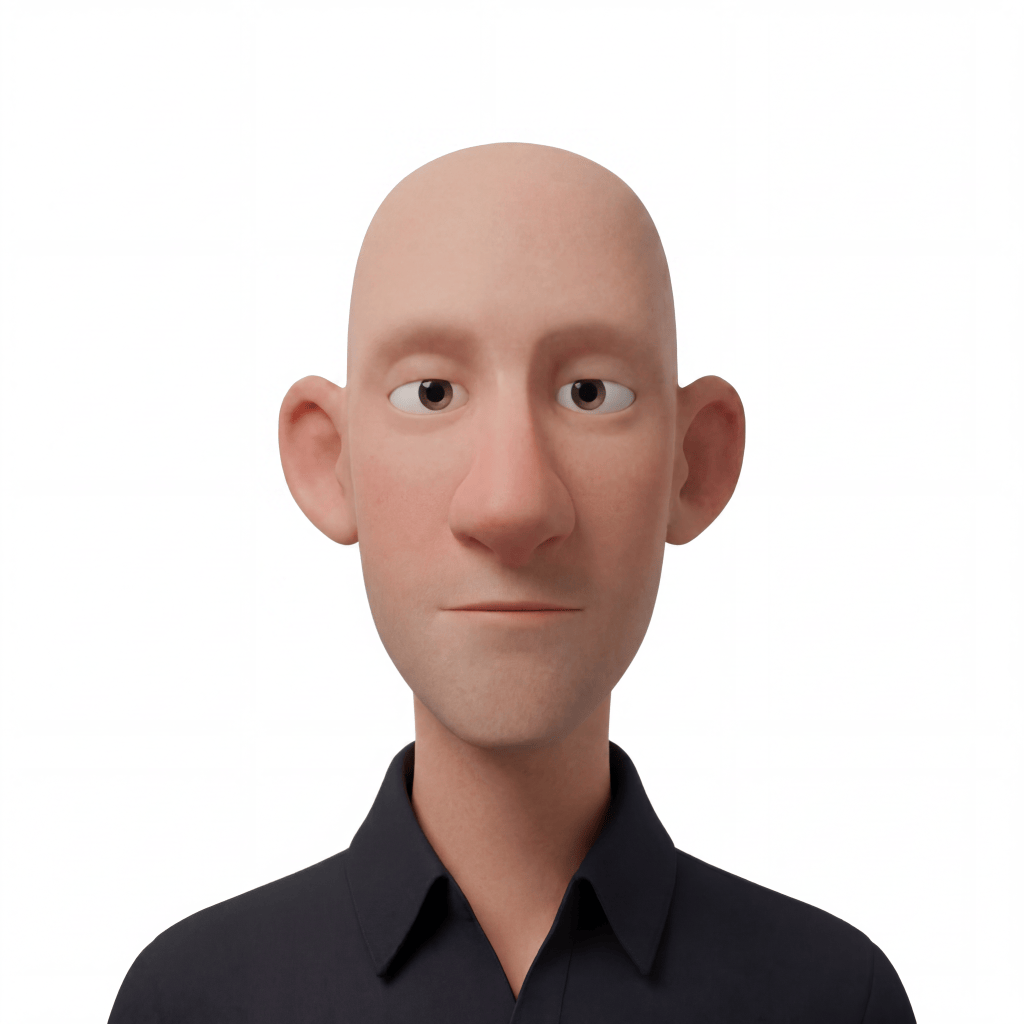
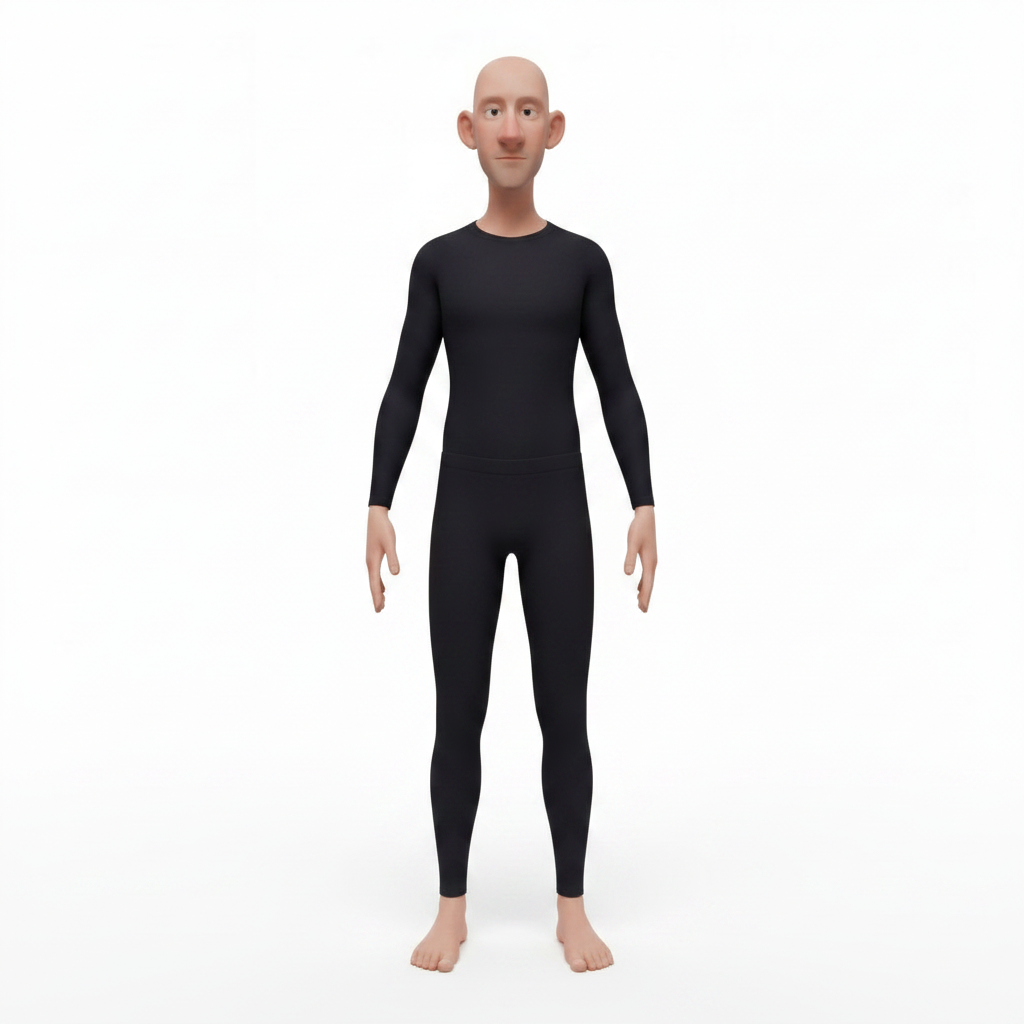
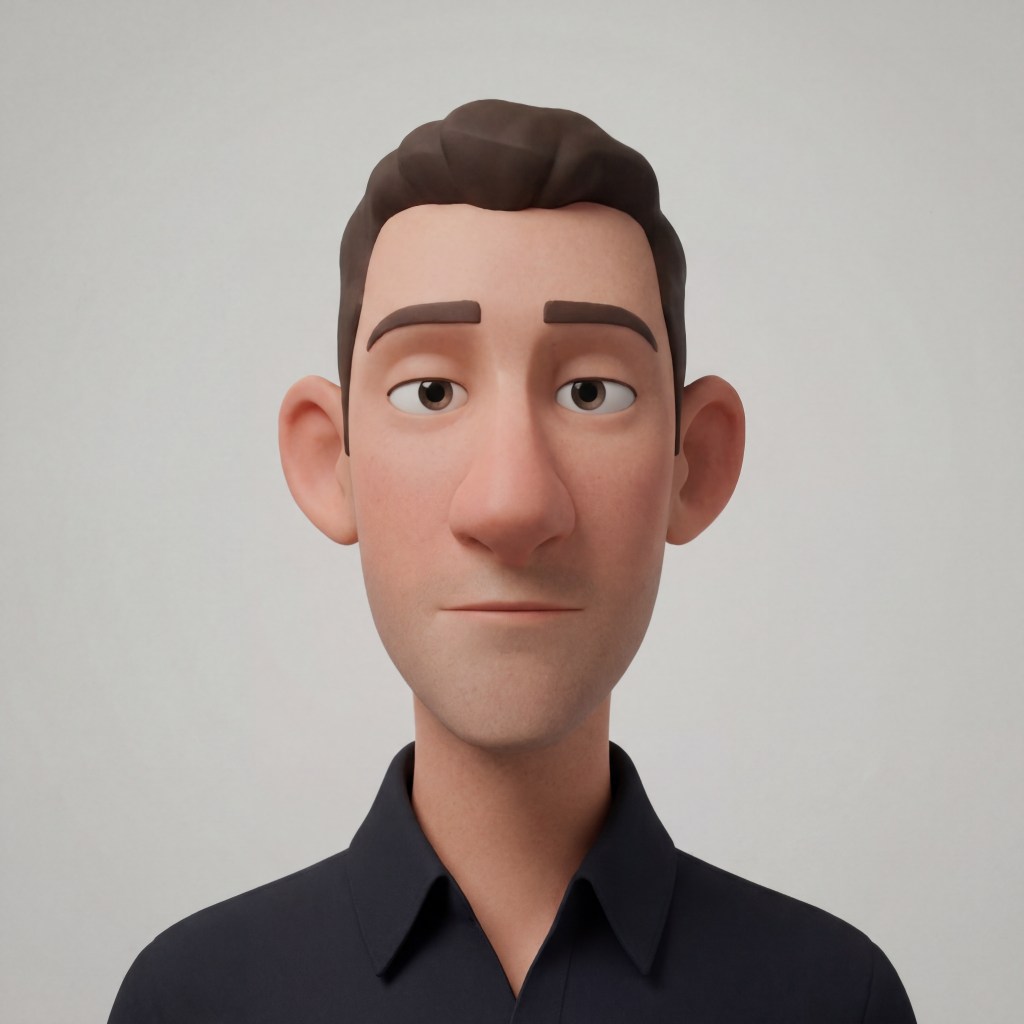
3D artist Jon Blalock demonstrates how to match 2D portraits to 3D meshes using Character Creator 5 with Headshot 3. The workflow, combined with built-in texture modification tools, ActorMIXER morphing, and automatic facial rigging, lets you rapidly build animation-ready realistic heads or caricatures from scratch.
Headshot 3 Plugin Overview
The Headshot 3Plugin brings game-changing upgrades and powerful new features to Character Creator 5, building on the solid foundation of Headshot 2. Whether you are generating 3D heads from scratch or refining intricate facial details, Headshot 3 streamlines the AI-to-3D pipeline with unprecedented precision and flexibility.
Getting Started with the Headshot 3 Plugin
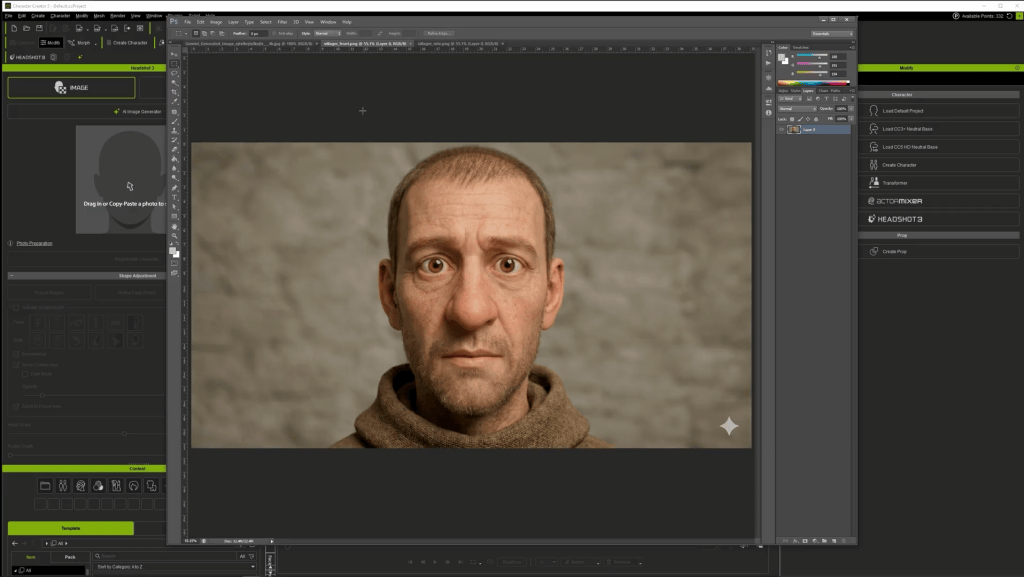
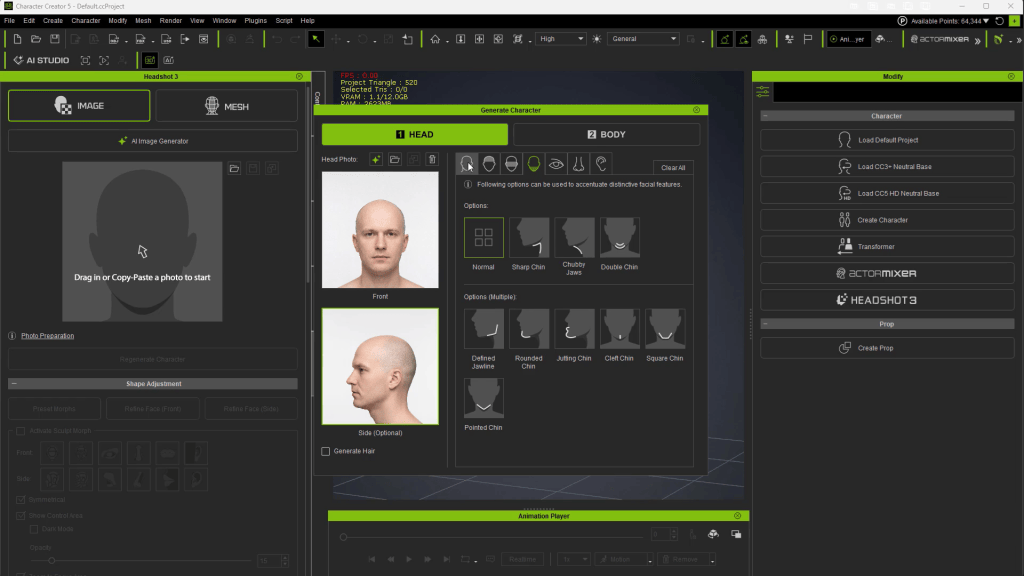
To kick off your character creation workflow, launch the plugin via Plugins > Headshot 3 > Headshot 3 Plugin. The intuitive interface immediately prompts you to load a front-facing image. You can craft custom source photos directly within Character Creator 5 using the integrated AI image generator. Simply enter a descriptive text prompt detailing the character face you envision (for example, a stylized medieval villager with exaggerated features).
Image generation costs vary by resolution (15 credits for 2K, 30 credits for 4K). Powered by Reallusion’s cloud servers, the generator yields flat-lit source photos. This flat lighting is essential because minimal baked-in shadows ensure dynamic in-engine lighting reacts realistically across your final 3D character mesh.
Using External Images & Image Preparation
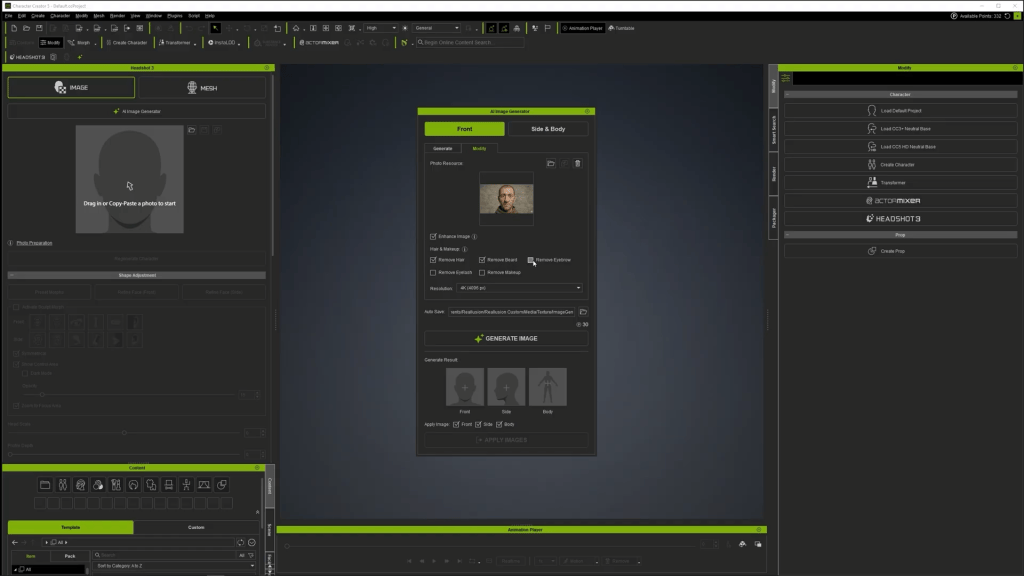
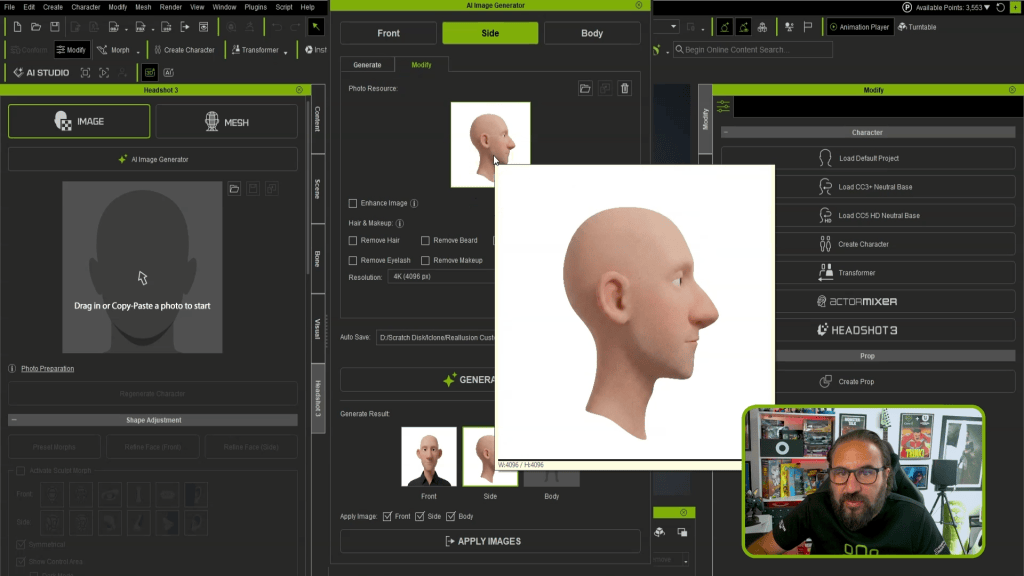
You are not limited to generating photos within the Headshot 3 Plugin. The images created using external AI tools like Gemini Pro or ChatGPT work seamlessly as well. If an external photo contains heavy shadows, stray hair, or facial hair, you can easily clean and prepare it using Headshot 3’s built-in modify tab.
Simply drag your front-view image into the Modify panel and apply automated cleanup parameters to eliminate hair, beards, mustaches, or eyelashes. Generating a clean 4K base texture delivers a smooth surface foundation, giving you complete freedom to add modular mesh hair and 3D facial hair elements back onto your character later.
Initial Mesh Generation & Feature Matching
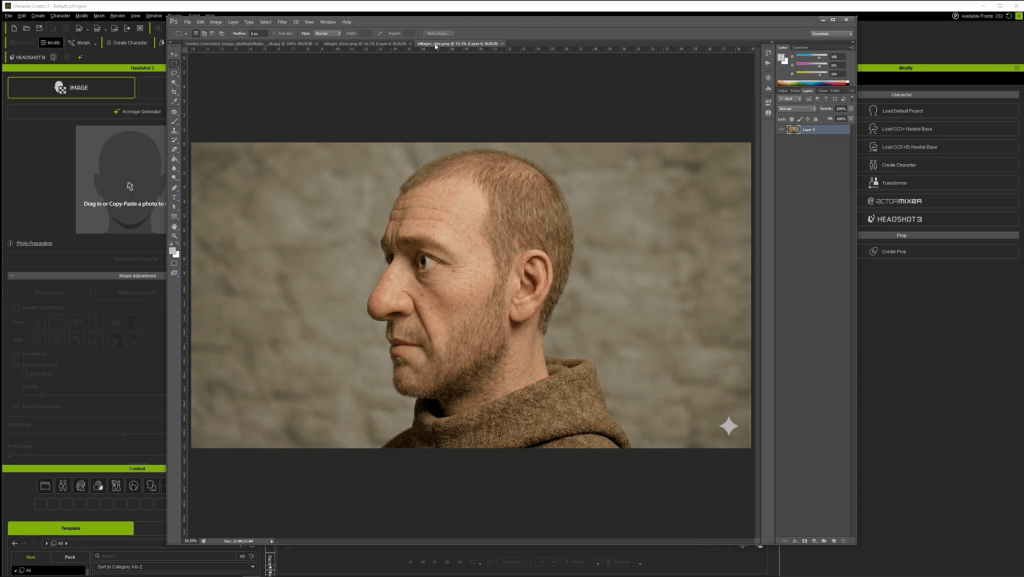
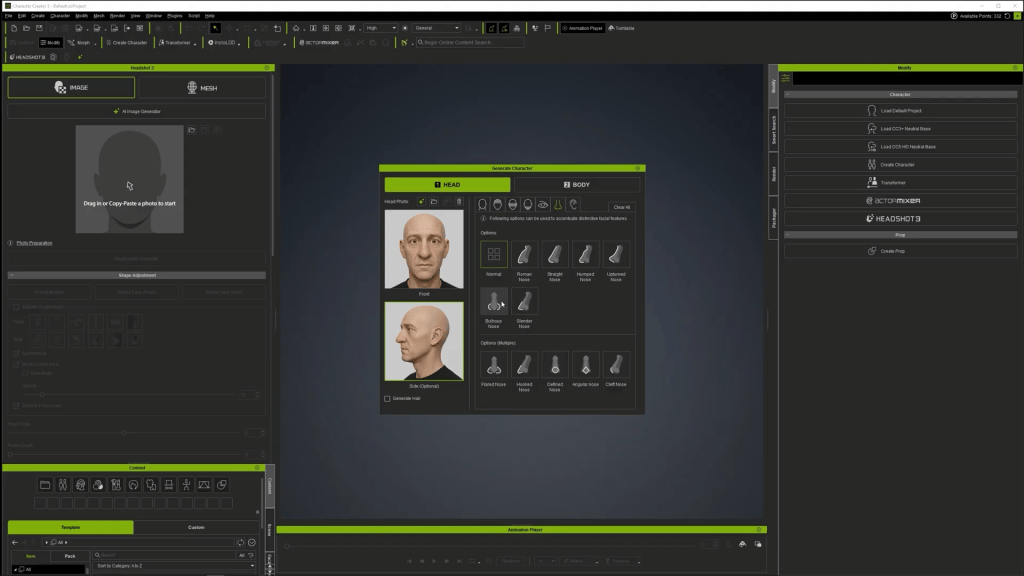
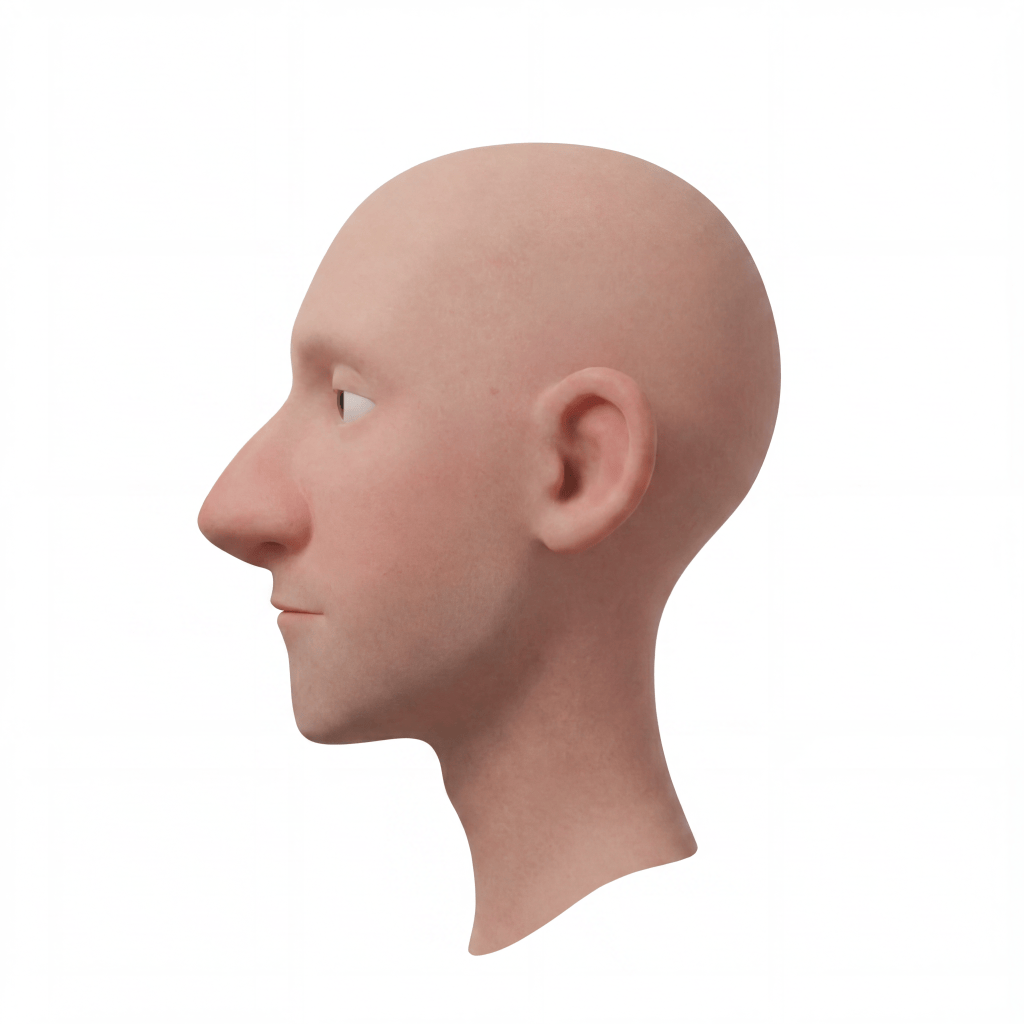
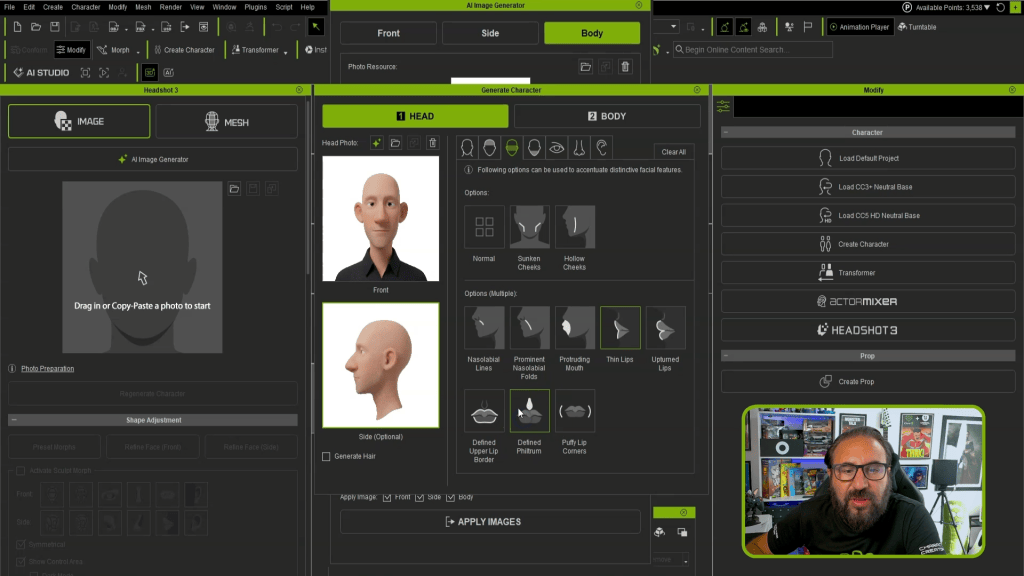
Once your front and profile (side) images are loaded into Headshot 3, guide the mesh generator by specifying key facial attributes.
Face Shape: Oval, strong jawline, defined nose line, sharp or rounded chin.
Facial Features: Eye bags, bulbous nose, defined front nose.
Body Type: Male/Female, Adult, Normal physique.
After clickingthe generate button, leverage the Image Matching tools to overlay and compare the generated 3D mesh against your reference photo using the opacity slider. For characters with distinct ocular proportions, adjust the Iris UV Radius slider to perfectly match the 3D iris scale to the photo.
Refining the Front Face Mesh
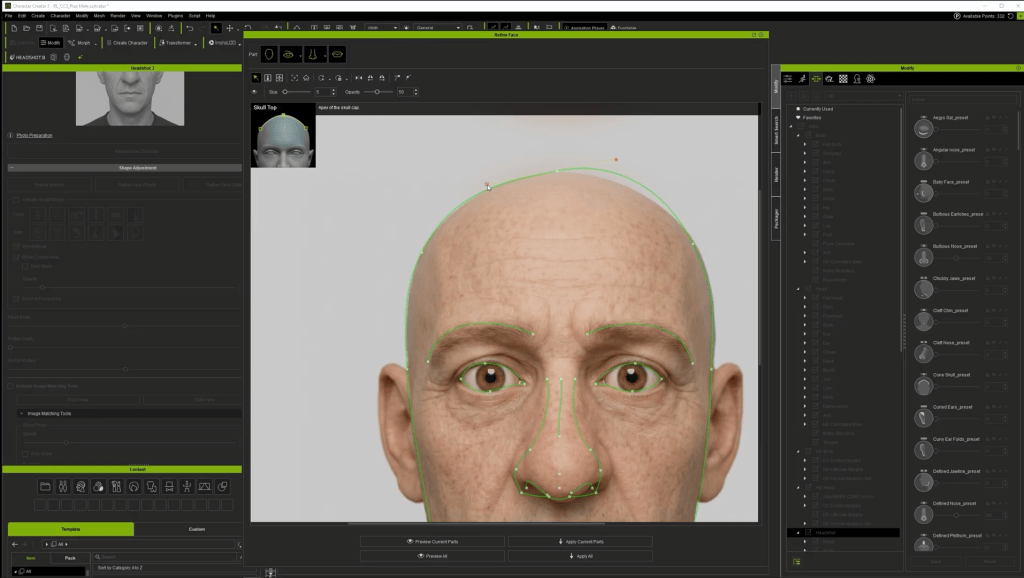
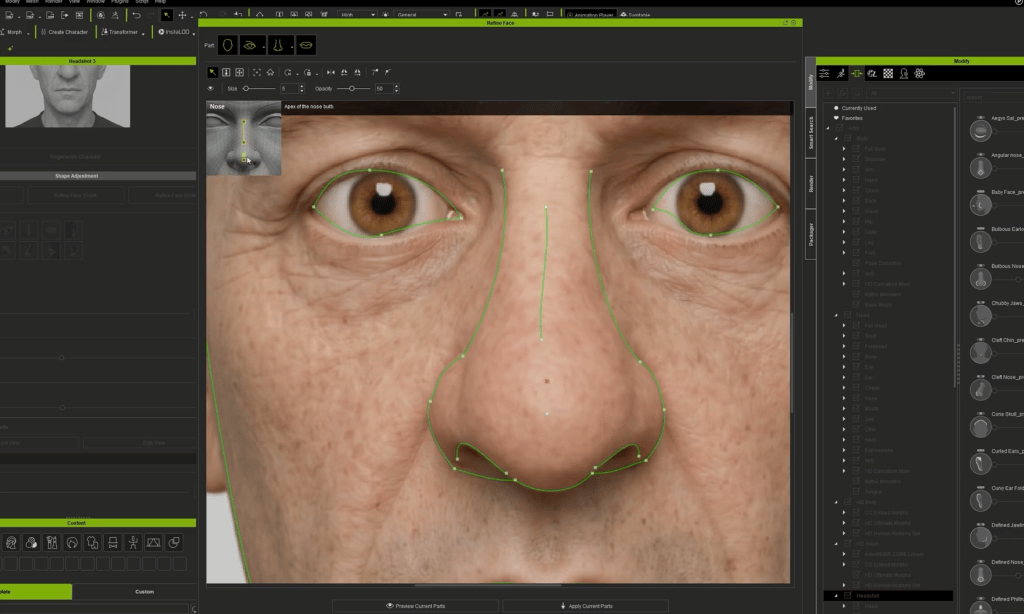
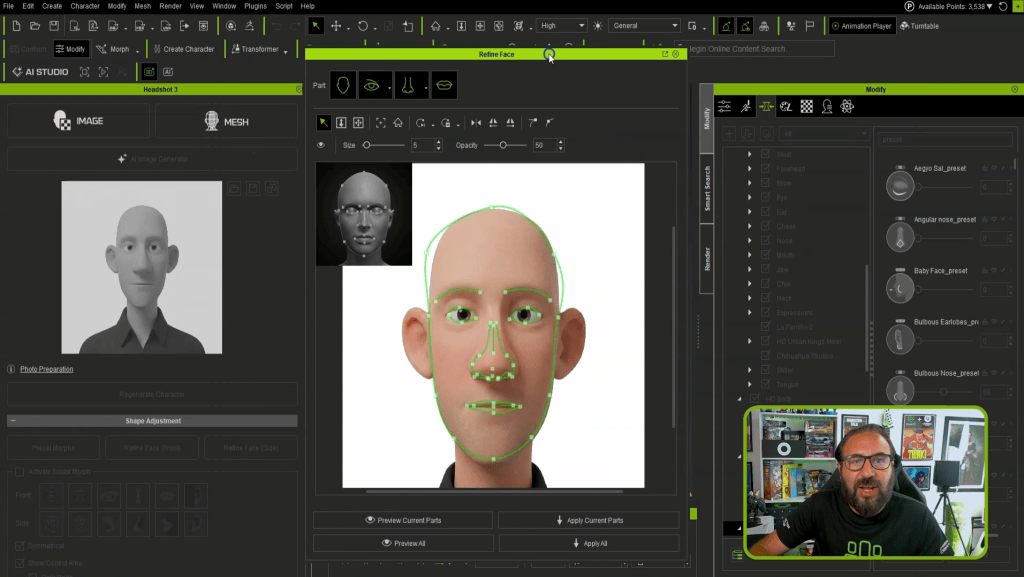
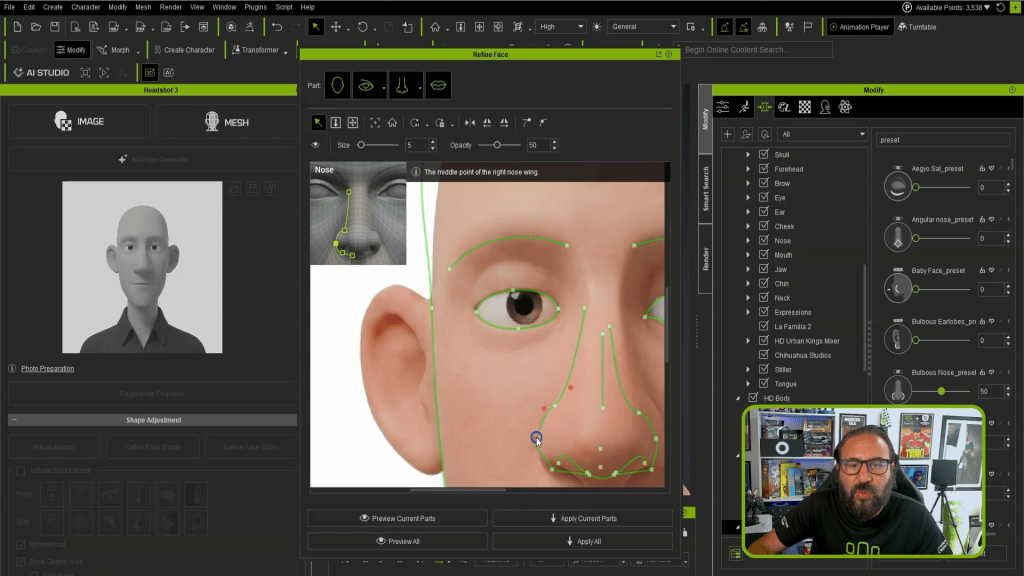
Click the refine face button to enter the fine-tuning workspace. This tool provides interactive landmark guides and Bézier control points to align geometric contours precisely with facial feature boundaries:
Position main landmark points around the ear, jaw, skull base, nose, mouth, and eyes.
Adjust the Bezier curves to match the facial curvature. Unlink curve handles if you need individual tangent control.
Click Preview Current Parts to review the geometric overlay. Once satisfied, click Apply Current Parts.
Refining the Profile View & Best Practices
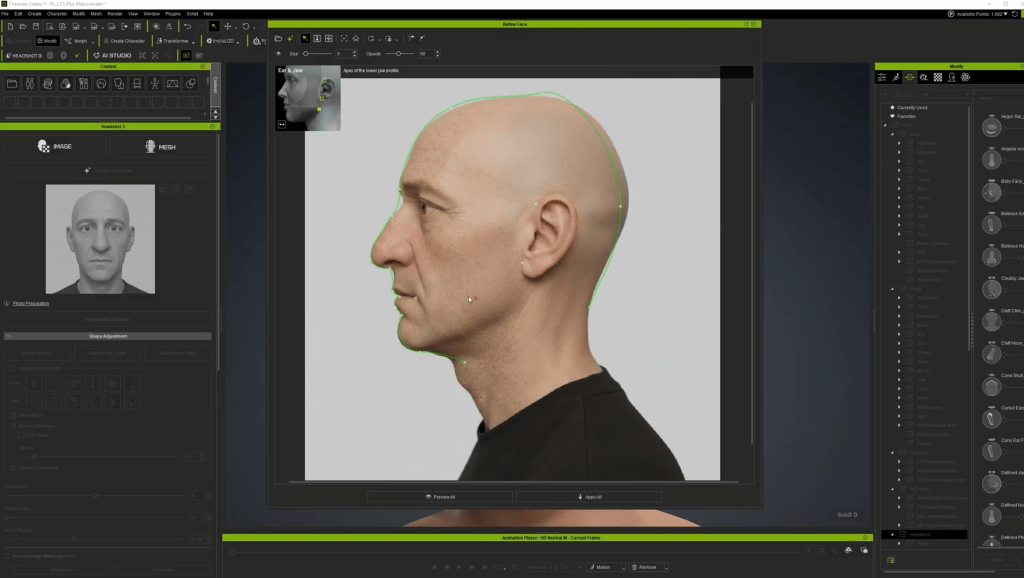
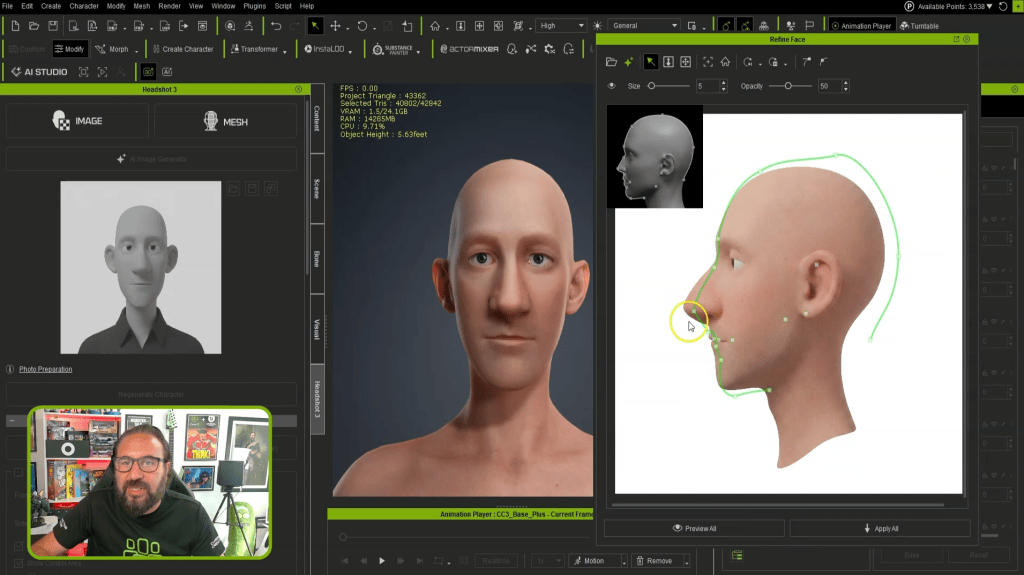
When setting up profile reference images, always use a true 100% profile image where the opposite eye is completely hidden. If your side photo shows even a hint of the far eye, re-generate a precise profile image using the AI generator rather than fitting against an angled photo.
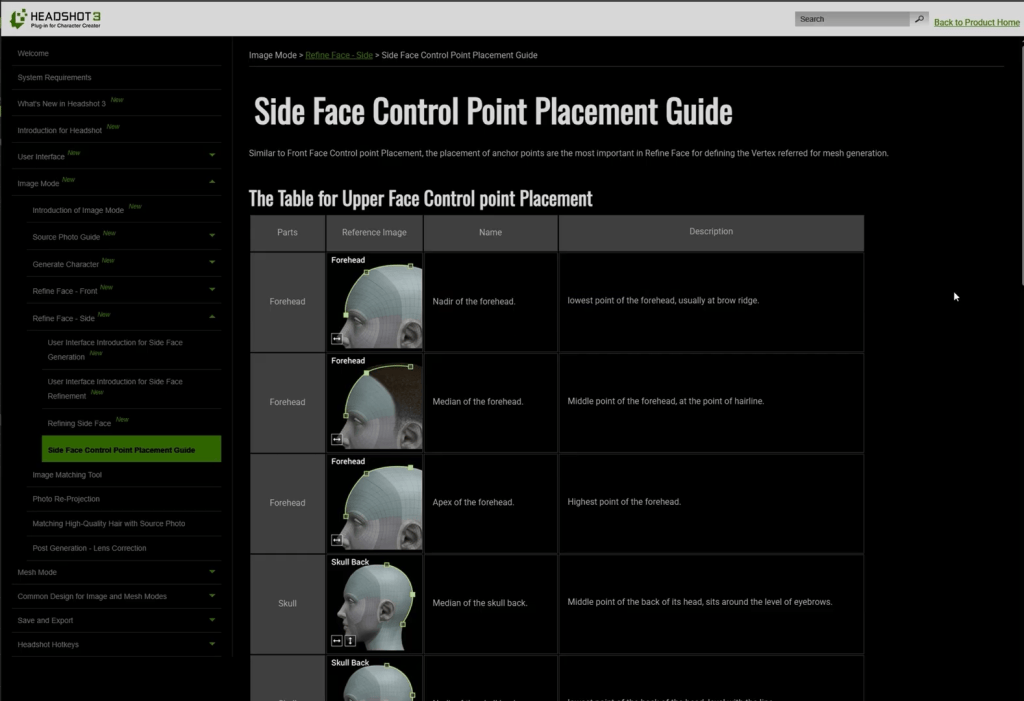
According to Reallusion best practices and my own testing, placing landmark points at exact anatomical positions takes priority over adjusting Bézier curves. Consult the online Headshot 3manual for precise point definitions (such as aligning the “median of the skull back” point horizontally with the eyebrows). Once completing the pointing for the eye corners, mouth corners, ear boundaries, and jawline, adjust position and scale. Then, use the preview to see the mesh, and click Apply All. This will ensure the best result for getting the head shape correct.
Stylizing Characters with ActorMIXER
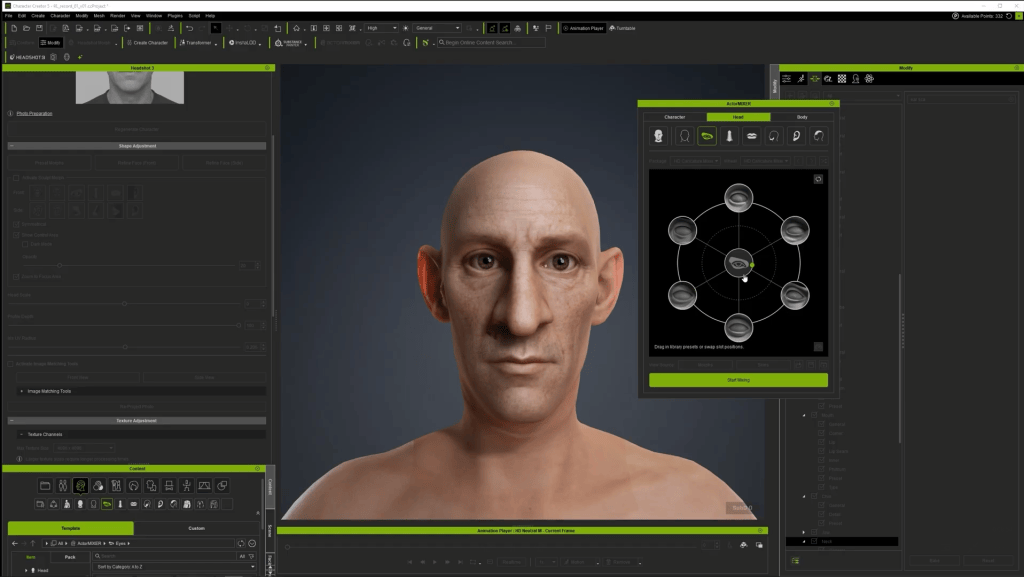
To turn a realistic mesh into a stylized caricature, open the ActorMIXER plugin and load in the HD Caricature Mixer Pack. For my stylized 3D character, I found it quite helpful to use the existing content pack!
Blend build proportions across head, eye, nose, and jaw sections to add caricature elements without over-distorting the head.
Adjust body proportions to match the stylized head.
If mixing causes a distorted neck, select the actor morphs and adjust the Neck Length slider.
“HD Caricature Mixer is a pack that I like a lot, because it almost applies to any stylized characters. It is really flexible, and gives you the proportions of all kinds of different body build.”
For facial hair, I use theBeard & Brows Builder pack to apply modular sideburns, mustache, and sparse beard layers.
Eyeball Alignment: Adjust Eyeball Depth, Eyeball Width, and Eyeball Height morph sliders so the eyes look directly forward without clipping through the eyelids.
Eye Blink Correction: Test eye closure using the blink tool. If the eyelids do not meet completely, go to Character > Correct Eye Blink.
Lighting: Apply cinematic lighting presets (Content > Item > Light > Cinematic Light) to evaluate dynamic shadows and material highlights on your finished character.
As for the facial animation & teeth depth, I tested the performance by using Motion > Facial Rig > Dramatic Male. If upper or lower teeth poke through the lips during facial expressions, adjust the Teeth Upper Depth morph to pull them back.
Conclusion
The Headshot 3 Plugin equips digital artists with an unrivaled toolkit for turning 2D portraits into fully animation-ready 3D avatars. By combining AI image generation, robust mesh-fitting controls, and seamless integration with ActorMIXER and Character Creator 5, you can dramatically accelerate your character production pipeline while maintaining full artistic control.
John Blalock
John’s background and education are in the traditional visual effects pipeline, mainly as a Compositor. Over the years, he has worked at visual effects studios such as Rhythm & Hues, and game company Sony PlayStation.
While he enjoyed those studio experiences, he found a greater love in passing along what he had learned. He has taught in the college education sector in Southern California for over 12 years, including the Academy of Art University.”
He has been entranced by their possibilities and integration with other tools, such as iClone and Character Creator, ever since. John is also co-founder of the YouTube channel AsArt and also runs a tutorial-based channel, JohnnyHowTo. He would love for you to stop by and join him on his adventures!
Frequently Asked Questions (FAQ)
Q: Can I use photos created with third-party AI generators like Midjourney, ChatGPT, or Gemini?
A: Yes! Headshot 3 accepts external images. If your source image contains baked-in shadows or unwanted hair, try to regenerate it with an AI prompt, and always mention that the character’s face should be fully lit for best results. This will give you a good start in achieving a reliable image for the later AI 3D head.
Q: Why is flat-lit lighting so important for source photos?
A: Flat lighting eliminates directional shadows on the base diffuse texture, allowing Character Creator‘s dynamic lights and shaders to render realistic highlights and shadows in real-time without visual artifacts.
Q: How do I fix teeth or eye clipping during facial animation testing?
A: You can adjust the eyeball depth, width, and height morph sliders to ensure proper eyelid contact. For teeth clipping, use the “Teeth Upper/Lower Depth morphs”, or run the correct eye blink tool under the Character menu.
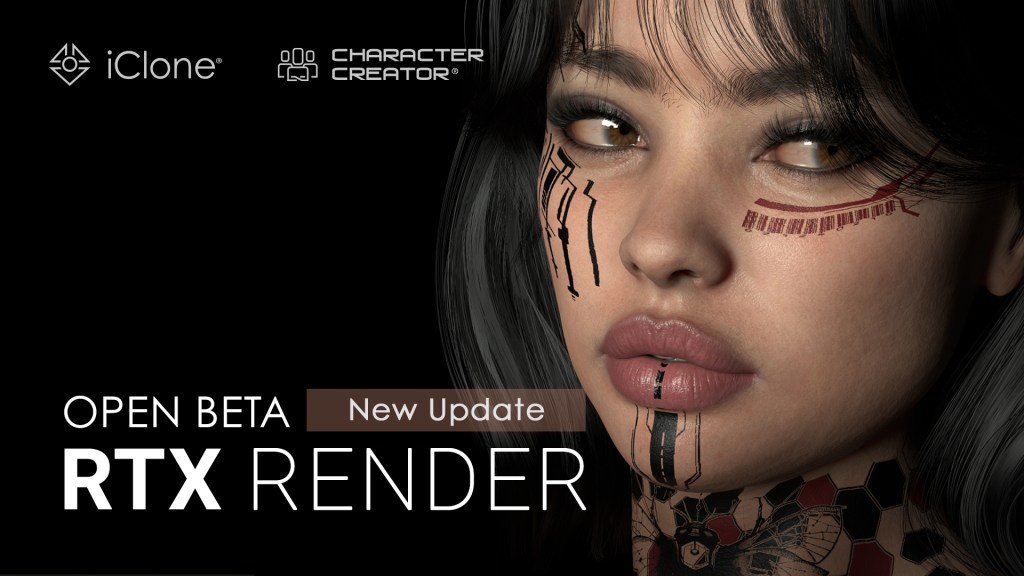
Reallusion has officially launched RTX Render Open Beta 3 for iClone 8 and Character Creator 5. Building on earlier path-tracing releases, Open Beta 3 delivers key production upgrades to help creators produce film-grade visuals through advanced camera controls, expanded color management, dedicated post-processing channels, and live procedural material workflows.
Camera mechanics receive physical-world upgrades with real-world lens profiles and shift controls. Artists can select fixed prime focal lengths (like 12mm f/2.8 or 50mm f/1.8) or standard zoom setups (like 24-70mm f/2.8) that automatically bound focal lengths and maximum apertures. A Universal Zoom mode remains available for unrestricted adjustments. Additionally, new Sensor Shift controls simulate tilt-shift lenses by shifting the internal sensor plane horizontally or vertically, keeping parallel vertical lines perfectly straight during high- or low-angle shots without moving the camera body.
Native Volumetric Lighting
Open Beta 3 natively integrates real-time ray-traced volume scattering for physical Spot Lights and Point Lights, enabling atmospheric light shafts, sunbeams, and spotlight cones directly inside the viewport.
Refined Lens Flare Controls
Lens Flare effects receive major visual enhancements in Open Beta 3. Artists can now take advantage of refined flare controls and directional settings, offering greater precision and improved optical quality when tuning lens artifacts in the scene.
Physical Optics, Bokeh, and Smart Focus Tracking
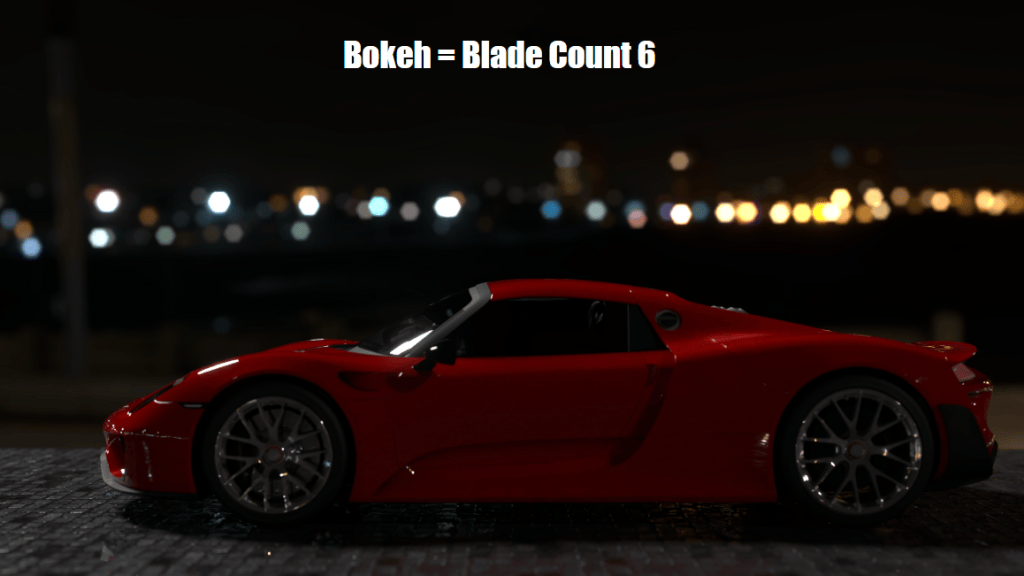
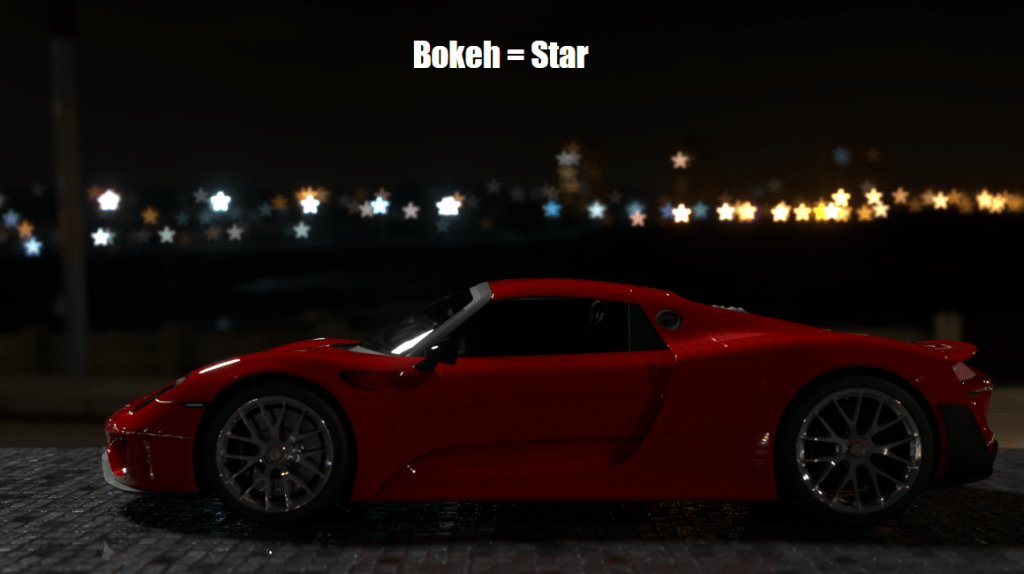
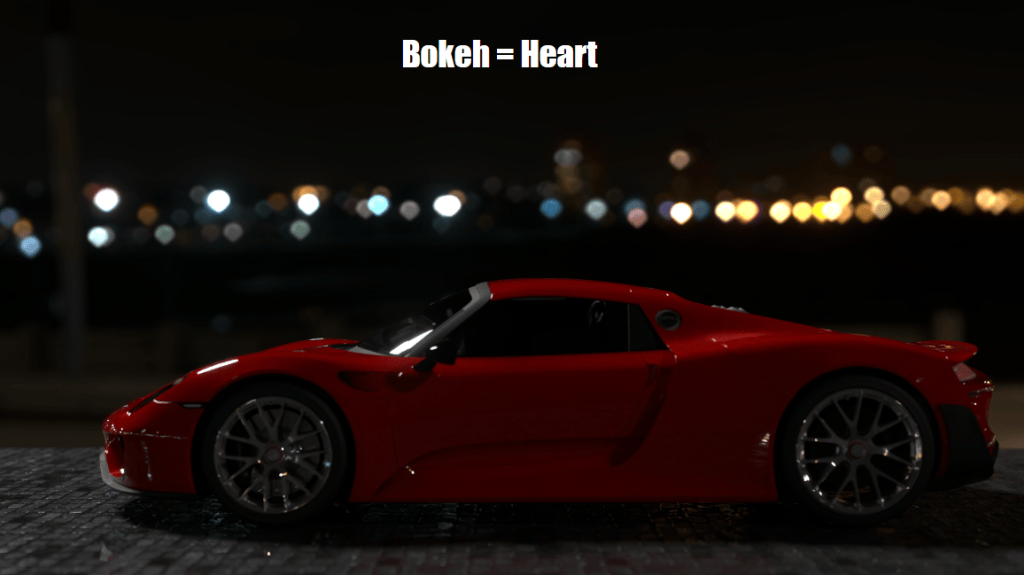
Depth of field is now driven by physical F-stop values, with options to style background highlights using geometric aperture shapes, physical blade counts, or Anamorphic Squeeze Factors for realistic oval bokeh. Smart Focus Tracking keeps camera focus automatically locked onto moving actors, bone structures, or mesh vertices during dynamic motion.
Multi-Scatter Bloom & Custom Glare Kernels
Highlight diffusion algorithms receive a massive upgrade with Multi-Scatter Bloom, which calculates light scattering across 6 layered passes to preserve surface details. Furthermore, artists can load custom EXR or DDS HDR images as optical kernels to render realistic glare starbursts.
Decoupled World Lighting & World Background
The previous IBL framework is now split into independent World Lighting and World Background channels. Scene lighting can be driven via Ambient Light (solid color), IBL, or the new Dynamic Sky system. Ambient Light colors blend smoothly into both IBL and Dynamic Sky setups, while dedicated Horizon Height and Horizon Blur parameters enable precise blending along the ground line. 2D background imagery is also integrated directly into the World Background panel, allowing backdrop tweaks without shifting scene lighting intensity.
AgX Color Management
AgX Color Management replaces standard sRGB tone mapping with the AgX View Transform and specialized Look presets (AgX-Punchy, AgX-High Contrast) to eliminate highlight clipping and smooth out HDR roll-offs.
Advanced Denoising Mechanics & Diagnostics
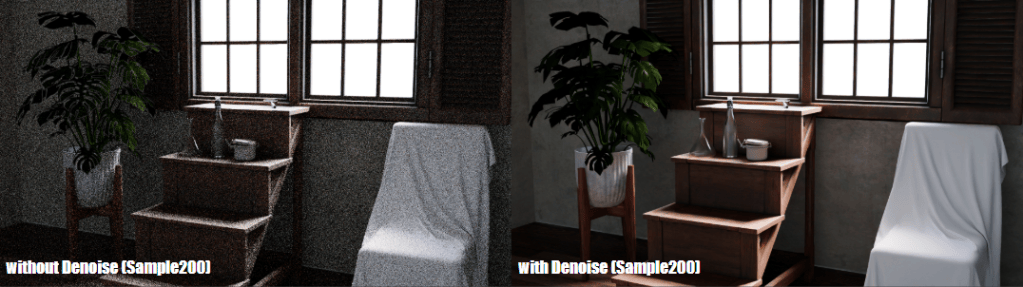
Rendering controls now offer independent sampling profiles for viewport previewing versus final renders. Viewport denoising can be set to engage only after reaching a specified sample threshold to maintain interactivity, while final renders leverage auxiliary Albedo and Normal passes for cleaner noise reduction in dark environments.
Material Render Pass Isolation
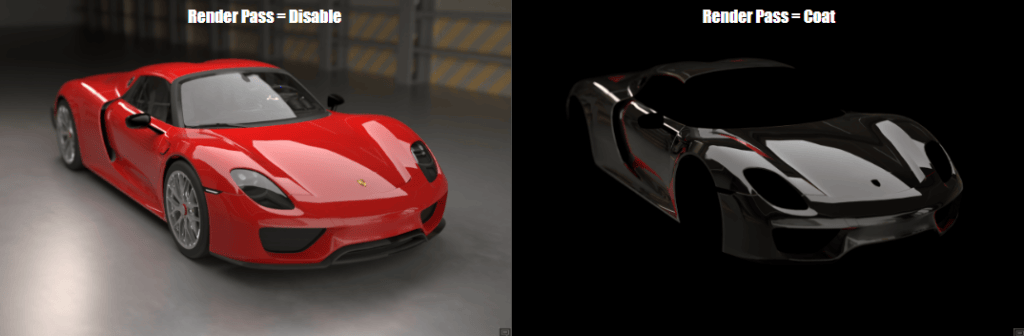
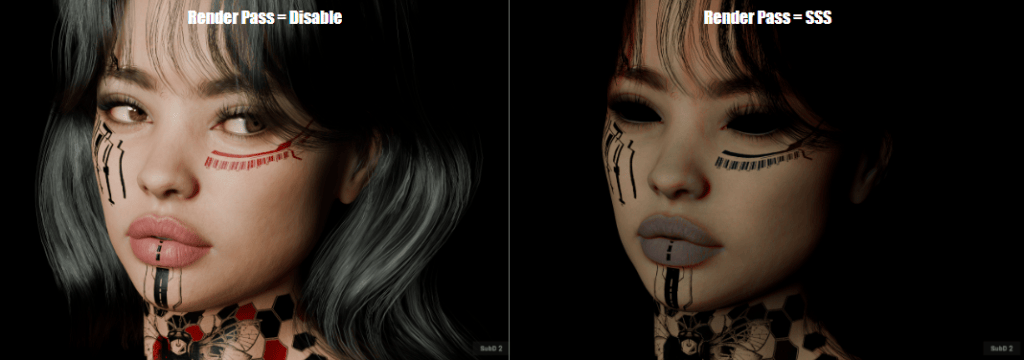
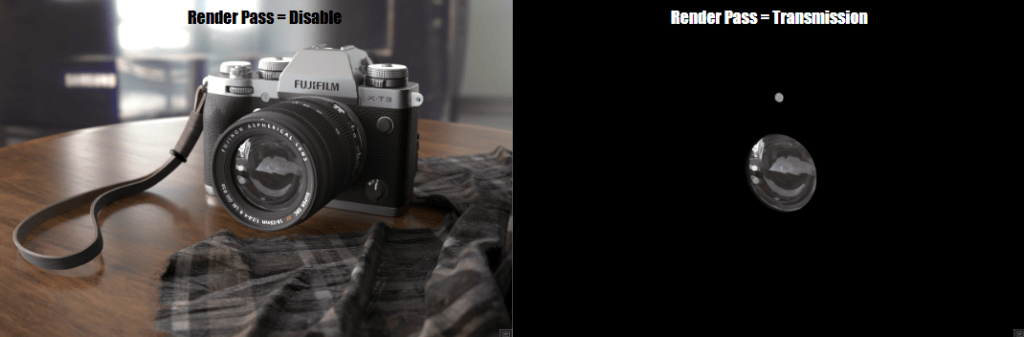
For precise compositing and surface material debugging, Open Beta 3 introduces dedicated render passes. Artists can directly isolate and inspect individual lighting components, including Transmission, Clearcoat, Sheen, Emissive, Specular, and Subsurface Scattering (SSS).
Live Dynamic Substance Parameters & Timeline Keyframing
Substance materials now stay completely live within the RTX path-tracing engine without baking down into static textures. Procedural material attributes—such as pattern variations, roughness offsets, and color channels—can be tweaked in real-time. Artists can also keyframe Substance parameters directly along the Timeline to create dynamic, time-based material transformations during RTX playback.
Availability
RTX Render Open Beta 3 is available now for registered users of Character Creator 5 and iClone 8. Download the update today and share your renders and feedback on the official Reallusion Forum.
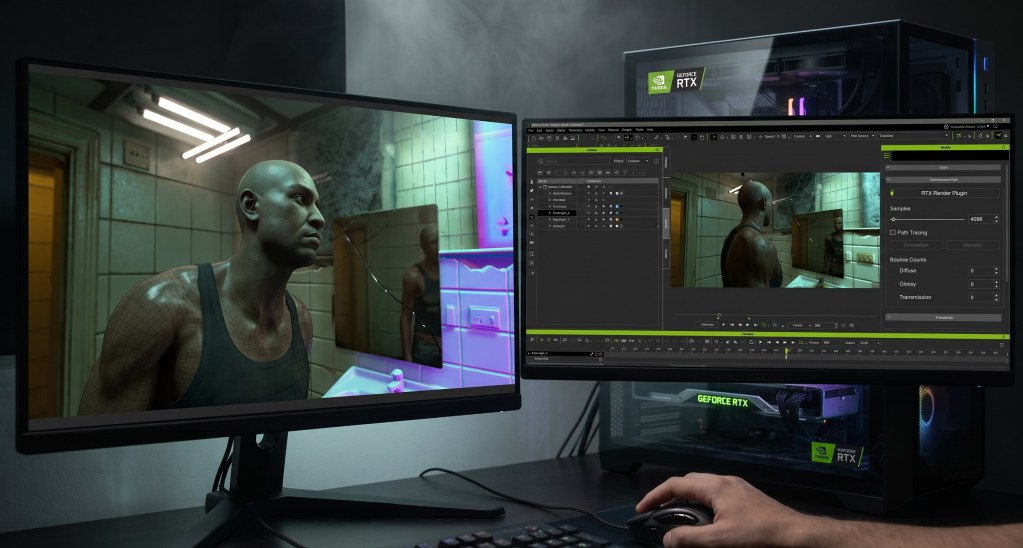
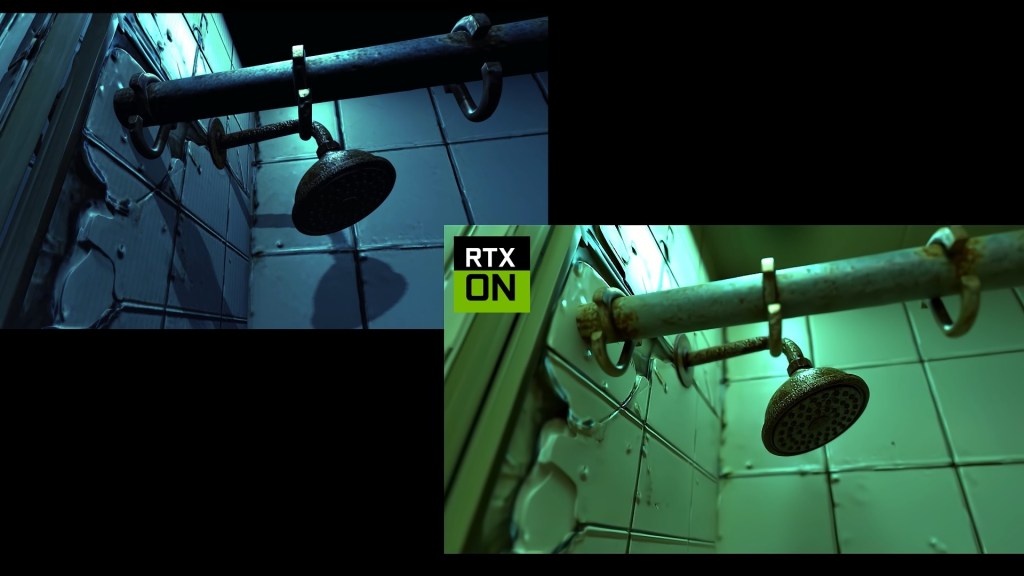
The RTX Render plugin for iClone 8 and Character Creator 5 brings physically accurate path-traced rendering directly into your real-time workflow.
Artists can achieve near offline rendering quality with features like subsurface skin scattering, multi-layer RTX materials, and f-stop camera depth of field.
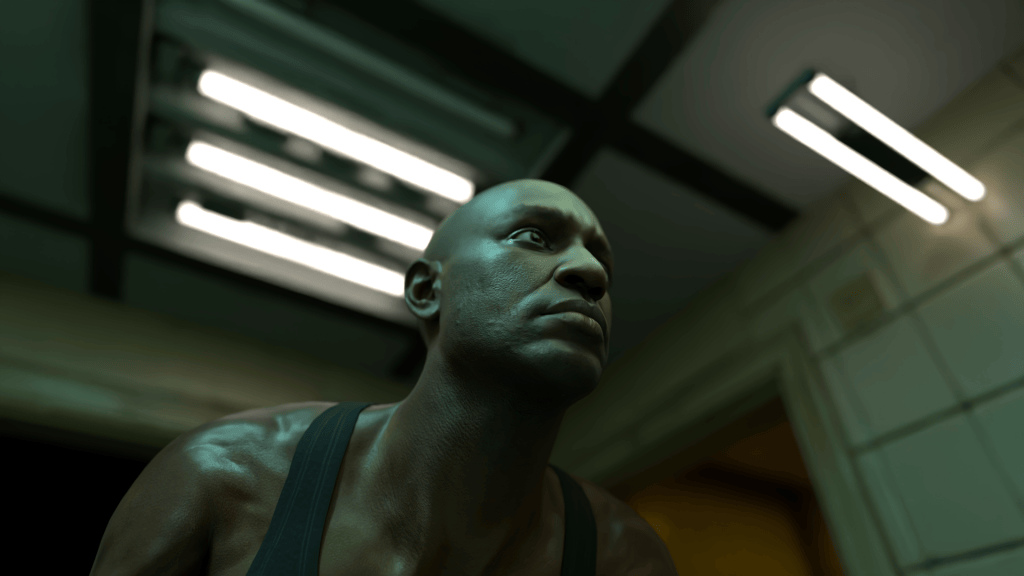
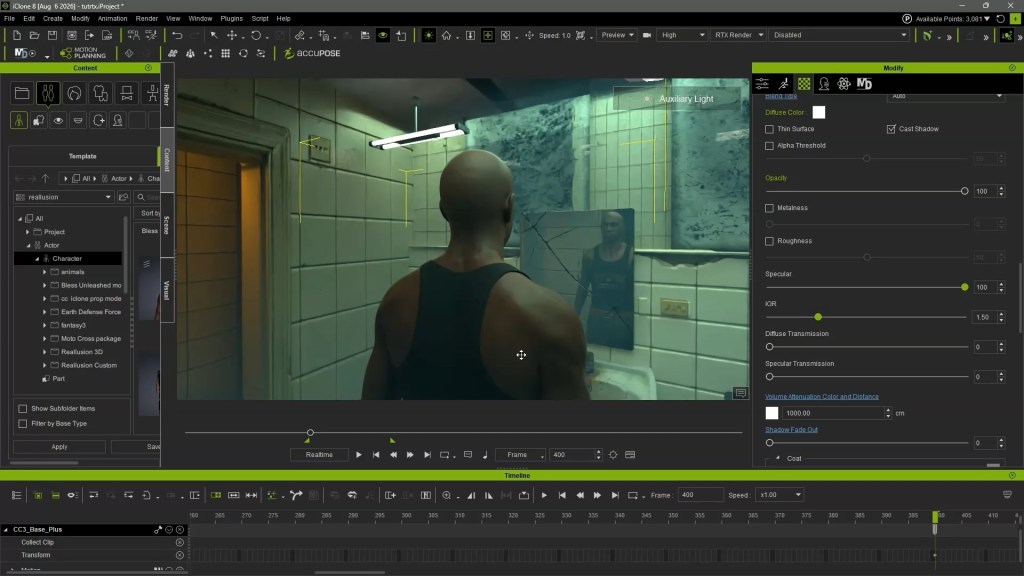
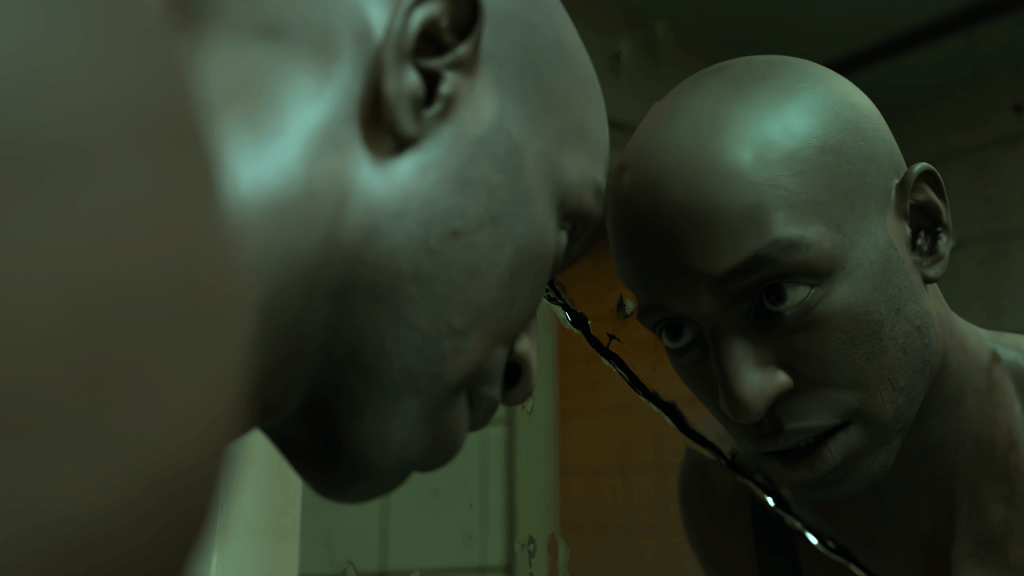
Award-winning animator Benjamin Sokomba Dazhi (Benny Dee) leverages RTX Render to create highly realistic scenes, optimizing lighting and mirror reflections in real time.
The plugin offers free access during its open beta, enabling users to re-render old projects with stunning new visual fidelity.
The new RTX Render plugin for iClone 8, Reallusion’s flagship real-time animation suite, transforms digital human creation and virtual production by integrating physically accurate path-traced rendering. This article details an advanced workflow, demonstrating how artists can achieve near offline rendering quality directly within the software, solving the challenge of bridging real-time production with cinematic visual fidelity. The process leverages NVIDIA RTX Path Tracing technology for stunning realism without external exports.
“Reallusion’s iClone RTX Render delivers real-time, realistic results, while AccuFACE 2 makes it easy to drive facial animation using a webcam or prerecorded video.”
BENJAMIN SOKOMBA DAZHI — Renowned 3D Animator, Director, Musician, Cinematographer
How to Achieve Near Offline Render Quality with RTX Render in iClone 8?
The RTX Render plugin fundamentally changes how artists approach rendering in iClone 8 by bringing advanced path tracing capabilities directly into the viewport. This integration means features like physically accurate light bounces, subsurface skin scattering, multi-layer RTX materials (Transmission, Coat, Sheen), and real f-stop camera depth of field are no longer exclusive to traditional offline renderers. Users can now visualize complex lighting interactions and material properties in real time, significantly streamlining the creative process. This on-the-fly feedback loop enables rapid iteration and precise artistic control, especially crucial for detailed 3D character creation and cinematic real-time animation pipelines.
The journey to high-quality renders begins with meticulous scene and character preparation. For 3D character artists and digital human creators, this means starting with a high-fidelity base. According to Benny Dee, preparing characters in Character Creator 5 is a critical first step due to its robust tools for generating HD quality characters with realistic skin textures. He emphasizes that the characters are already “very realistic enough” even before applying RTX, thanks to the HD skin options available in Character Creator 5. Props and environments must also match this level of detail to fully leverage RTX Render’s capabilities, with “ultra realistic props” enhancing the final output.
Optimizing Scene Setup for Path-Traced Environments
Effective lighting and material setup are paramount when utilizing a path-traced renderer like RTX Render. After assembling high-quality props and characters, the next step involves converting the scene to the RTX rendering mode. This instantly transforms the lighting and material behavior, requiring a fresh approach to illumination.
Crafting Realistic Lighting with RTX Render
In RTX Render, lighting shifts from approximation to physical accuracy. Users position spotlights and point lights strategically at every light source within the scene to simulate realistic light emission and shadow casting. The real-time preview in RTX Render immediately showcases amazing shadows that are “very soft and realistic,” as highlighted by Benny Dee.
This immediate feedback is invaluable for virtual production professionals and cinematic visual storytellers, allowing them to precisely sculpt light and shadow. Adjusting light color, intensity, and even the light shape (e.g., from Sphere to Rectangle for softer, more evenly spread illumination) allows for highly nuanced moods and atmospheric effects.
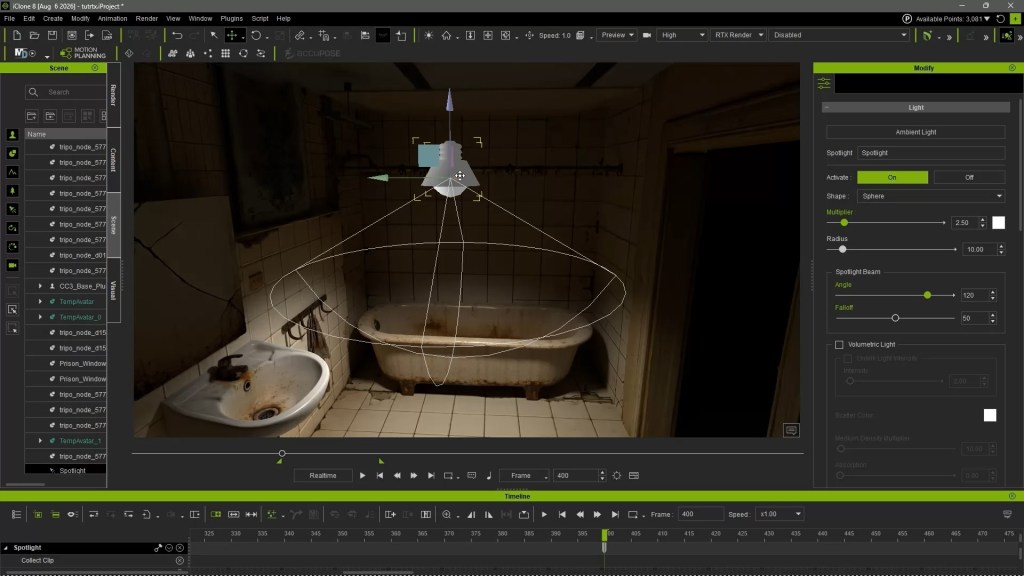
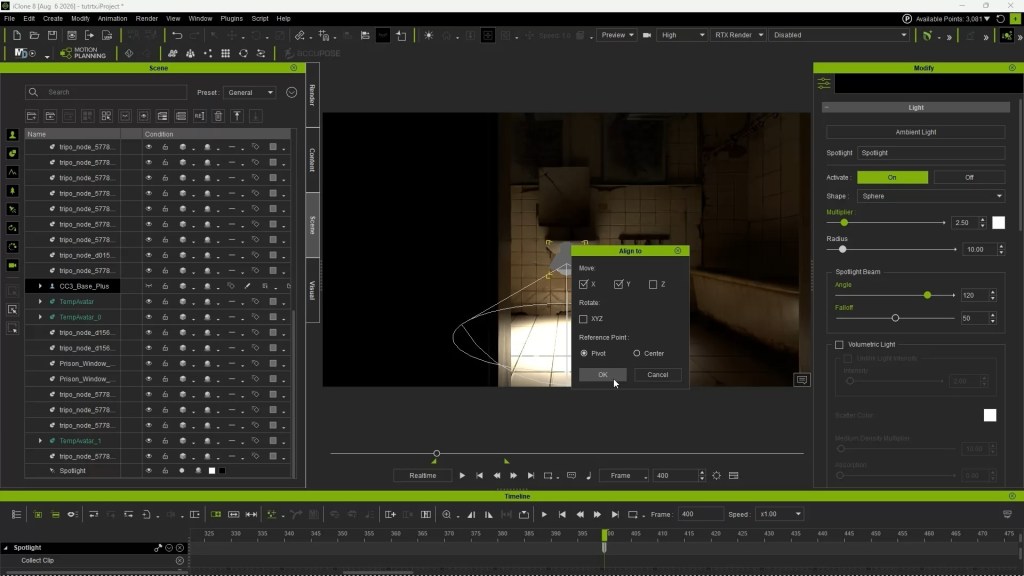
Q: How do I set up a spotlight in iClone 8 for RTX Render?
A: To set up a spotlight, navigate to the top menu, select CREATE > LIGHT > SPOT LIGHT. Once placed, the light will appear in the Scene Manager. You can then align it to the scene center using the ALIGN function for easy positioning. Adjust its properties in the Modify panel, including color and intensity, to achieve your desired illumination. The real-time RTX preview immediately reflects these changes, allowing for precise control over the scene’s mood and shadows.
Enhancing Realism with Emissive Materials and Reflections
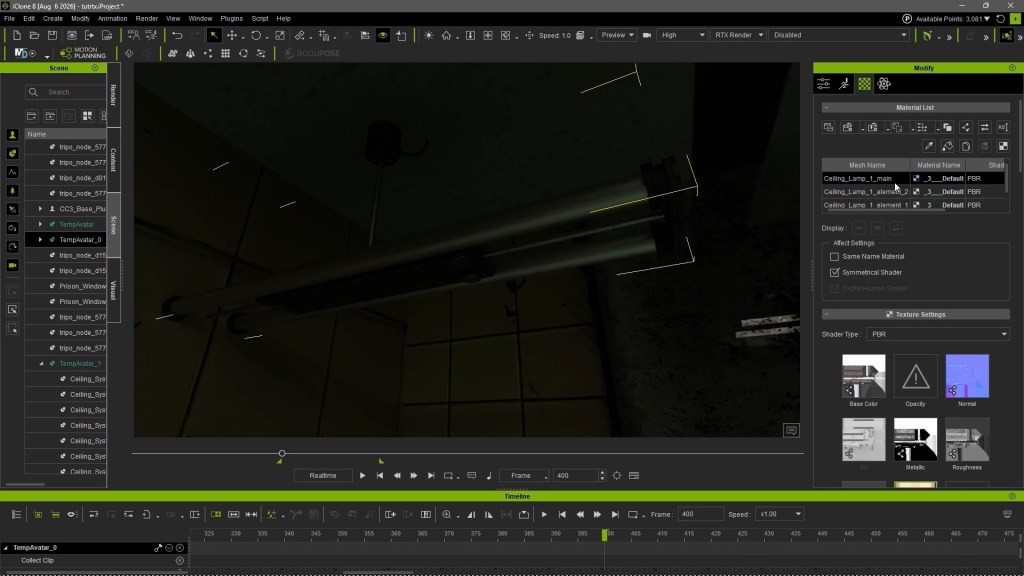
Beyond direct light sources, incorporating emissive materials significantly boosts scene realism. For instance, Benny Dee describes setting up lamps with emissive material by increasing their GLOW channel strength. This not only makes the light fixtures appear to be actually emitting light but also contributes to the scene’s ambient illumination and global illumination. A clever detail, like intentionally making one incandescent tube lamp appear “old and burnt out” by disabling its glow, adds authenticity.
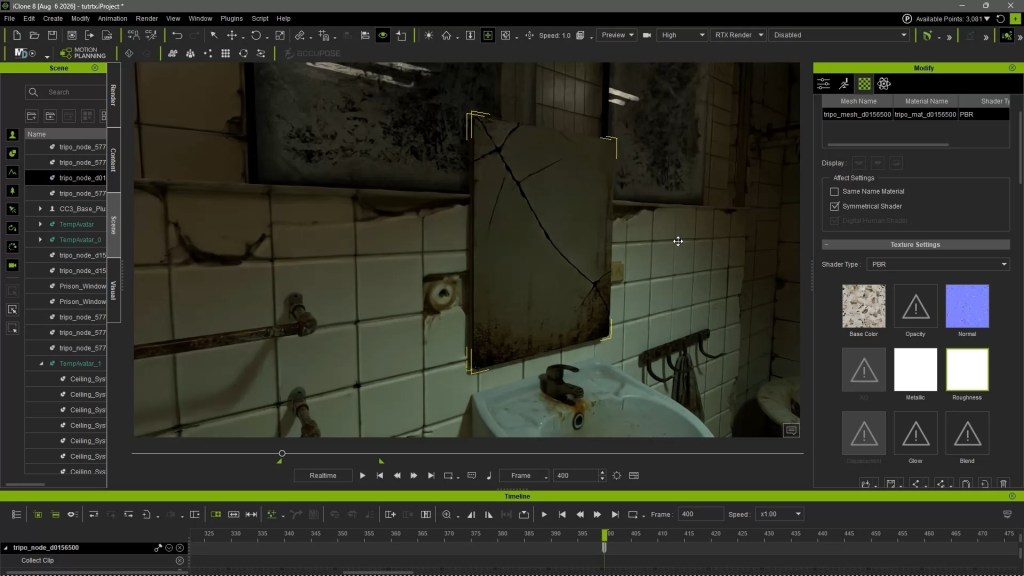
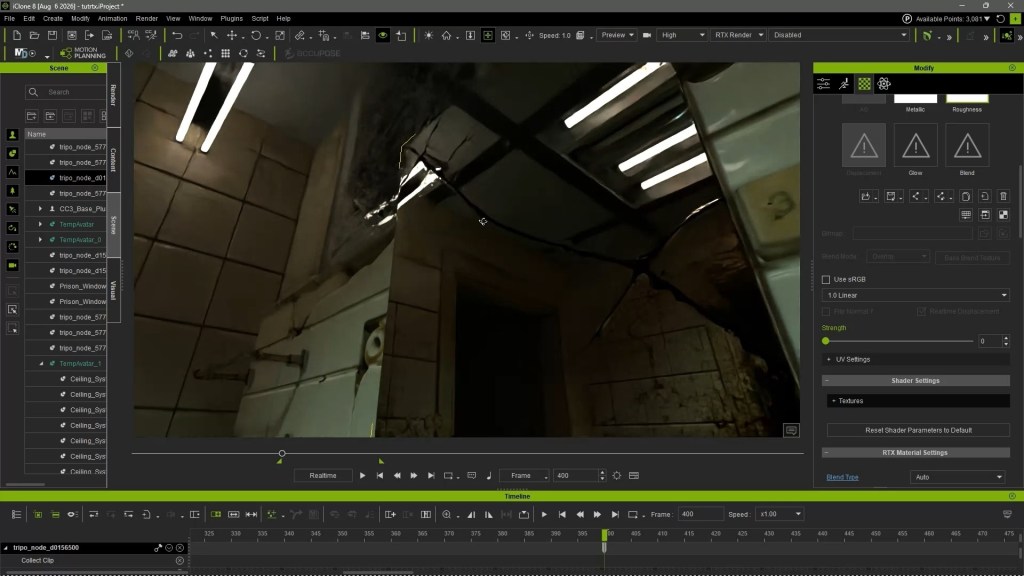
Another powerful feature is the creation of highly reflective surfaces. By simply adjusting the ROUGHNESS material channel of a plane prop to a value near zero in the Modify panel, it transforms into a highly reflective mirror. This capability showcases RTX Render’s capacity for accurately reflecting the environment and lights in real time, providing immediate visual confirmation for portrait and lighting artists seeking perfect reflections. The system can even account for complex phenomena like subsurface scattering, providing depth and realism to materials like skin.
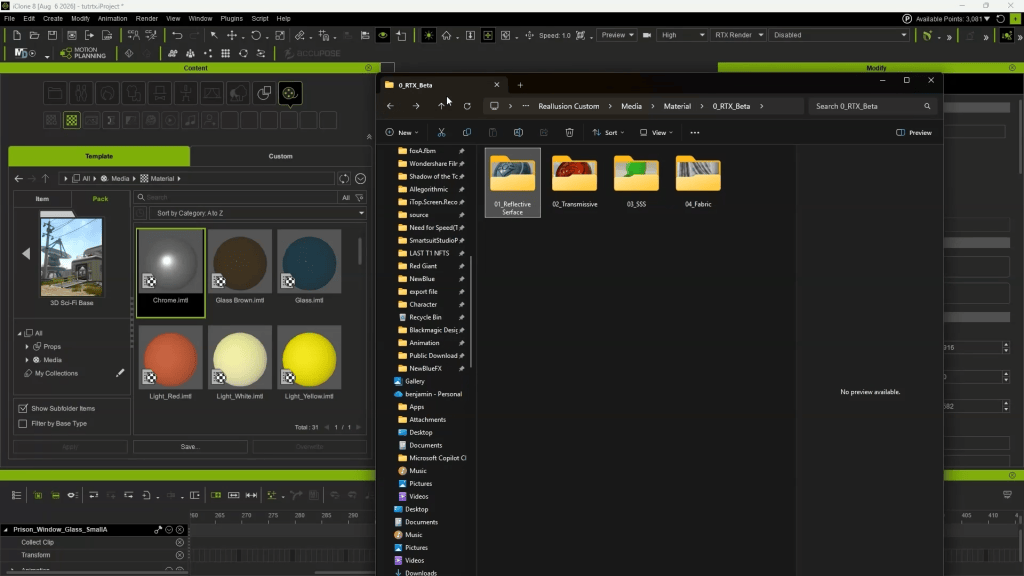
Without having to manually customize the Material Channel settings of each props, users can also take full advantage of the RTX Render BETA, by accesing the specialized material pack located within the MEDIA folder under Reallusion’s custom directory. Navigating into the RTX BETA materials folder reveals dedicated subfolders for reflective surface, transmissive, subsurface scattering, and fabric presets.
These materials are engineered for effortless workflow integration, allowing artists to simply drag and drop any material directly onto an object surface in the scene. This instantly converts prop textures into optimized RTX-ready surfaces—such as rapidly transforming a flat plane into a realistic, highly reflective mirror—enabling quick visual experimentation without tedious manual map setup.
Volumetric Lighting in iClone
In an iClone scene, volumetric lighting can be added to existing light sources to make light shafts visible and enhance the overall environmental atmosphere. Users can enable this feature by selecting the volumetric light settings and fine-tuning parameters such as the medium density multiplier to control the exact intensity and spread of the effect.
Playing with these settings allows creators to tailor the visual impact to their specific needs, giving the scene added depth and a cinematic quality based on how the light interacts with the surrounding space.
Featured Artist Spotlight: Benjamin Sokomba Dazhi (Benny Dee)
BENJAMIN SOKOMBA DAZHI — Renowned 3D Animator, Director, Musician, Cinematographer
Benjamin Sokomba Dazhi, globally recognized as Benny Dee, is an award-winning Nigerian animator, film producer, and creative storyteller. Hailing from Niger State, Benny Dee has carved a niche as one of Africa’s leading digital artists, skillfully blending animation, filmmaking, music, and cutting-edge technologies. His acclaimed work includes a collaboration with Cartoon Network for the CN Dance Challenge, demonstrating his unique ability to infuse vibrant African culture into dynamic animation for international audiences.
Benny Dee is a respected authority in the Reallusion ecosystem, particularly lauded for his expertise in real-time lighting, cinematic rendering, and virtual production with iClone 8 and Character Creator. He also integrates NVIDIA Omniverse into his workflows for advanced rendering and collaborative pipelines, consistently pushing the boundaries of digital filmmaking. His innovative approach extends to guiding AI Studio with iClone’s precise 3D guidance, ensuring consistent, high-quality results across diverse AI render styles.
“I was honestly impressed by the visual quality and the speed of the RTX Render inside iClone 8.”
BENJAMIN SOKOMBA DAZHI — Renowned 3D Animator, Director, Musician, Cinematographer
Benny Dee’s RTX Render Workflow Highlights:
Character Preparation: Starts with Character Creator 5 to generate HD quality characters with realistic skin, providing a strong foundation for RTX Render.
Prop & Environment Detailing: Ensures all scene props are “ultra realistic” and meticulously arranged, often using reference pictures for guidance.
Real-time Lighting: Utilizes RTX Render’s real-time capabilities to position spotlights and point lights accurately, leveraging physical light bounces and soft shadows.
Material Enhancement: Increases emissive material strength for light-emitting props and adjusts ROUGHNESS material channel to create highly reflective surfaces like mirrors.
Camera & Animation Blocking: Prioritizes camera setup and animation blocking, often setting the camera first to frame the scene or using AccuFACE 2 plugin for facial performance capture.
Rendering Optimization: Adjusts RTX Render quality options like samples and bounce counts for efficient final renders based on GPU capacity.
Incorporating Animation and Camera Work for Cinematic Shots
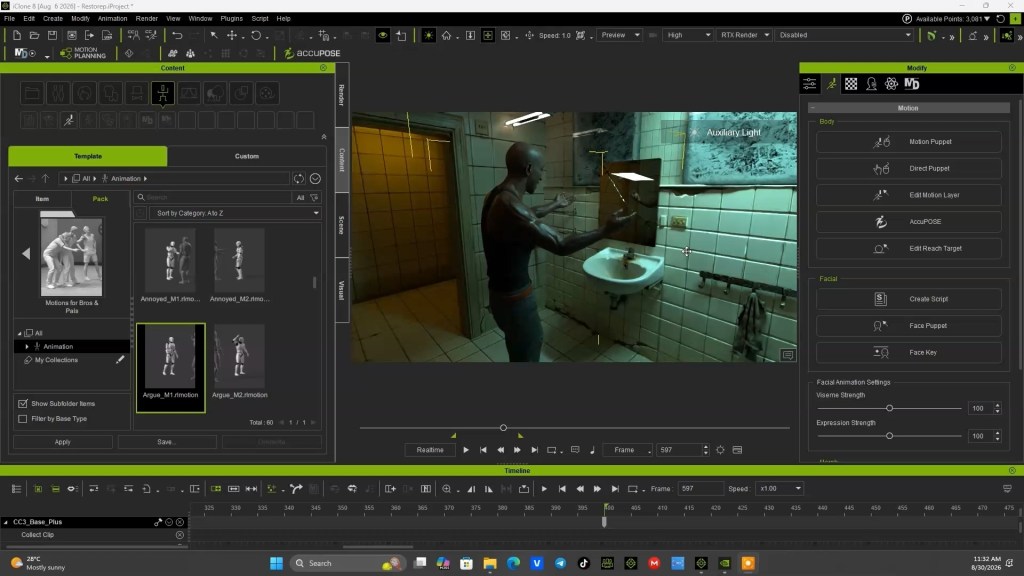
Once the scene is meticulously lit and materials are set, integrating character animation and dynamic camera work completes the cinematic vision. Users can drag and drop pre-existing animation clips from the Content Library onto their characters. Benny Dee often prioritizes camera setup before animation, establishing desired angles and framing. This workflow is crucial for concept artists and game developers aiming for specific in-game cutscenes or marketing visuals.
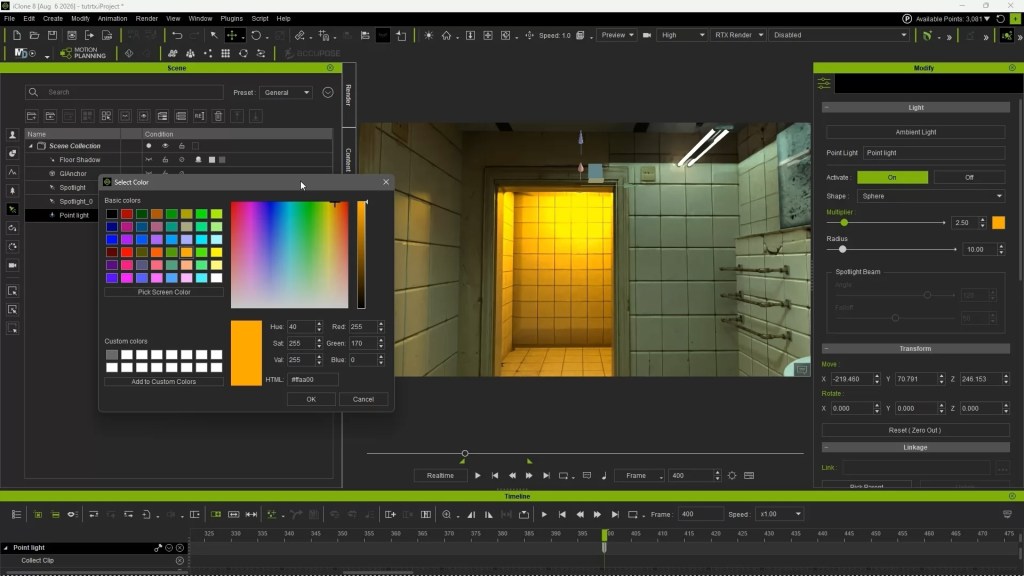
During the lighting setup, a point light can be added to a far backroom to emit a warm orange color that acts as a rim light. This warm hue provides depth and contrast to the scene. Once the scene is meticulously lit and materials are set, integrating character animation and dynamic camera work completes the cinematic vision.
A key element for cinematic results is the proper use of depth of field. In iClone 8, users can easily add depth of field to their cameras, allowing them to blur backgrounds and foregrounds, thereby directing the viewer’s focus to the primary subject. By using the PICK target function, artists can precisely select the character, ensuring it remains sharp while the surroundings gently fall out of focus. This real f-stop camera depth of field is rendered accurately by RTX Render, contributing significantly to the photorealistic aesthetic.
Advanced Facial Animation with AccuFACE 2
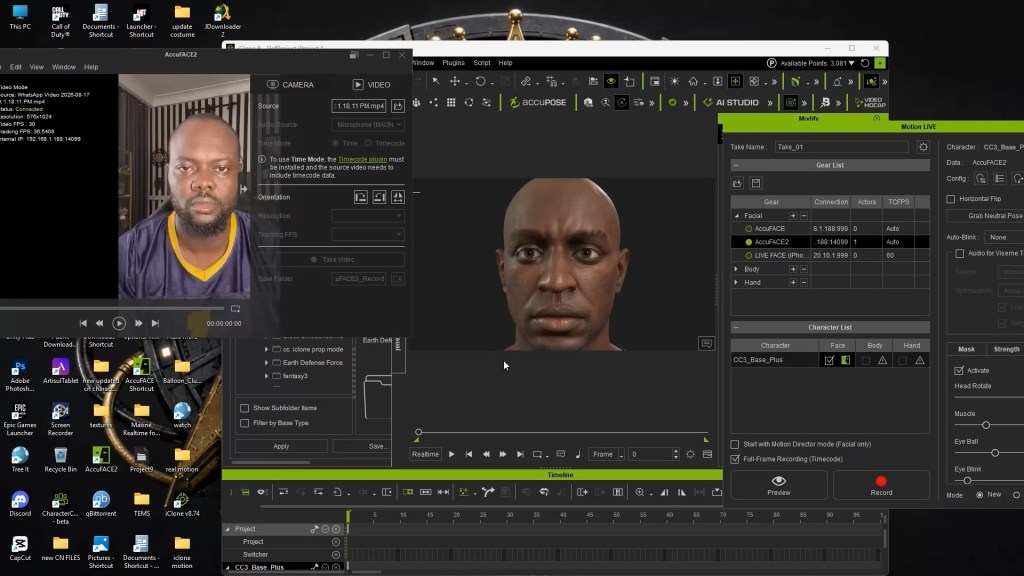
To truly bring characters to life, high-fidelity facial animation is essential. The AccuFACE 2 plugin for iClone 8 offers a powerful solution for facial motion capture, allowing artists to drive character expressions using either a live webcam or a prerecorded video file. This tool is invaluable for 3D animators seeking nuanced and expressive performances.
After launching the Motion Live panel, users connect AccuFACE 2, disable head movement if only facial expressions are desired, and adjust global strength and denoise functions to refine the capture. This seamless motion capture pipeline integrates directly into iClone, recording performances into motion clips on the timeline.
“For facial motion capture in iClone, you can easily download and integrate Reallusion’s new AccuFACE 2 plugin into your workflow.”
BENJAMIN SOKOMBA DAZHI — Renowned 3D Animator, Director, Musician, Cinematographer
Technical Workflow for RTX Render Settings
Finalizing a render involves fine-tuning the RTX Render quality options. These parameters, found under the RENDER toolbar, include samples for bounce counts and bright pixel noise threshold. Reallusion provides extensive documentation to understand how these settings affect the final image, impacting both quality and render time. For efficient rendering, Benny Dee suggests adjusting the samples value; while the default is 1000, he often reduces it to 64 samples to optimize rendering speed based on his graphic card’s capacity, ensuring a decent quality within a reasonable timeframe.
Pro Tip: To significantly reduce final render times without drastically compromising quality, adjust the RTX Render’s samples parameter from the default 1000 to 64. This method saves roughly 50-70% of render time for typical animation sequences, making it ideal for rapid prototyping or studios with tight deadlines.
The RTX Render plugin for iClone 8 and Character Creator brings a new level of visual fidelity and speed to character animation and virtual production. Its ability to perform path-traced rendering directly within software, without requiring external exports, accelerates workflows for everyone from indie developers to AAA studios. The current open beta status and free access mean there’s no better time to experiment with its capabilities.
RTX Render Key Features
Feature
Description
Benefit
Path-Traced Rendering
Simulates physically accurate light bounces and global illumination.
Achieves near offline render quality in real-time.
In-Software Integration
Renders directly within iClone 8 and Character Creator 5.
Provides authentic camera depth of field for cinematic effects.
Enhances visual storytelling and artistic focus.
Real-Time Preview
Updates visuals instantly as settings or scene elements are adjusted.
Accelerates iteration and artistic decision-making.
Conclusion
The RTX Render plugin fundamentally reshapes the real-time animation and 3D character creation landscape by merging the speed of iClone with the visual fidelity of path tracing. By integrating directly into existing workflows and leveraging NVIDIA RTX technology, it empowers artists to produce cinematic-quality renders with unprecedented efficiency. Its features, combined with the detailed setup and optimization techniques demonstrated by experts like Benny Dee, make it an indispensable tool for achieving stunning, realistic visuals.
Best of all, this free plugin expands iClone’s capabilities, providing users with three distinct rendering options: the classic DX11 render, AI render with AI Studio, and the new RTX Render. This open beta offers an unparalleled opportunity to experience these capabilities firsthand.
Q: How do I export a rigged character from Character Creator 5 to iClone 8 for RTX Render?
A: Characters created in Character Creator 5 can be directly sent to iClone 8 using the Send to iClone function within Character Creator 5. This maintains the rigging, materials, and any applied animations, ensuring a seamless transfer. Once in iClone 8, you can then activate the RTX Render plugin to immediately view your character within a path-traced environment and begin fine-tuning materials and lighting for your final cinematic render.
Q: What is the difference between DX11 render and RTX Render in iClone 8?
A: DX11 render uses traditional rasterization for real-time display, providing fast performance suitable for general scene setup and animation previews, though with less physical accuracy in lighting. RTX Render, conversely, employs path tracing, which simulates light behavior physically, resulting in highly realistic shadows, reflections, and global illumination. While more computationally intensive, RTX Render delivers near offline quality directly in iClone 8, ideal for final cinematic output.
Q: Can I use RTX Render to improve the quality of my older iClone projects?
A: Yes, one of the significant benefits of the new RTX Render plugin is its ability to re-render old iClone projects with dramatically enhanced visual quality. By simply opening an existing project in iClone 8 and activating RTX Render, all lighting, materials, and reflections will be recalculated using path tracing. This allows you to bring new life and cinematic realism to your legacy animations and scenes without extensive re-work.
Q: Why does my real-time RTX Render preview run slowly, and how can I optimize it?
A: Real-time RTX Render performance depends heavily on your GPU’s power and VRAM. To optimize, ensure your NVIDIA graphics drivers are updated. You can also temporarily switch back to DX11 mode while arranging props and blocking animations, then reactivate RTX Render for final lighting and material adjustments. Additionally, reducing the number of complex light sources, disabling subsurface scattering on less critical elements, and lowering samples in the preview settings can improve responsiveness.
The Headshot 3 plugin was another evolutionary leap in character creation with the addition of improved Image facial mapping capabilities. For those of you that haven’t had the pleasure of using Headshot 3 yet the mapping is not complex at all so don’t let the terminology scare you off.
We will cover in this article how to use the control points and the curve handles that come with those points to shape the head mesh to fine tune the image to mesh process. We can use up three images: Front Face, Side Face and Body including custom body images or the standard male and female bodies we use on a regular basis. The AI image generator in the plugin is ready to create just such images based on your prompt at the press of a button for unique characters.
Two is Better Than One
When it comes to the image to face feature the front and side image is the preferred method instead of just a front image. Keep in mind that the FRONT IMAGE controls items like head height while the side image controls head depth or more precisely the item you are working with like the eyes, nose, head outline and so on.
The side refinement tool has more control by giving us control points to place in strategic areas like Character Creator has used in the past and curve handles on those points to control the surface curve between the control points.
NOTE: Reallusion points out that the control points are more important and should receive more attention than the curves as the control points form the mesh while the green curves form the surface between the control points.
To be honest I was focusing more on the curves and not paying enough attention to the proper placement of the points. They don’t have to be perfect, but they do need to be as close as you can get them to the head shape. Some quick experimentation will show you what works best.
Front View Only
Using just a front view will work just fine, but if you want more control use the Front and Side view with separate images for both as this will activate the side view control points for proper placement. If you are creating background or crowd characters, then this is not that important but if you are trying to recreate a concept or historical character this will give you more control points to shape the characters’ head.
Front and Side View
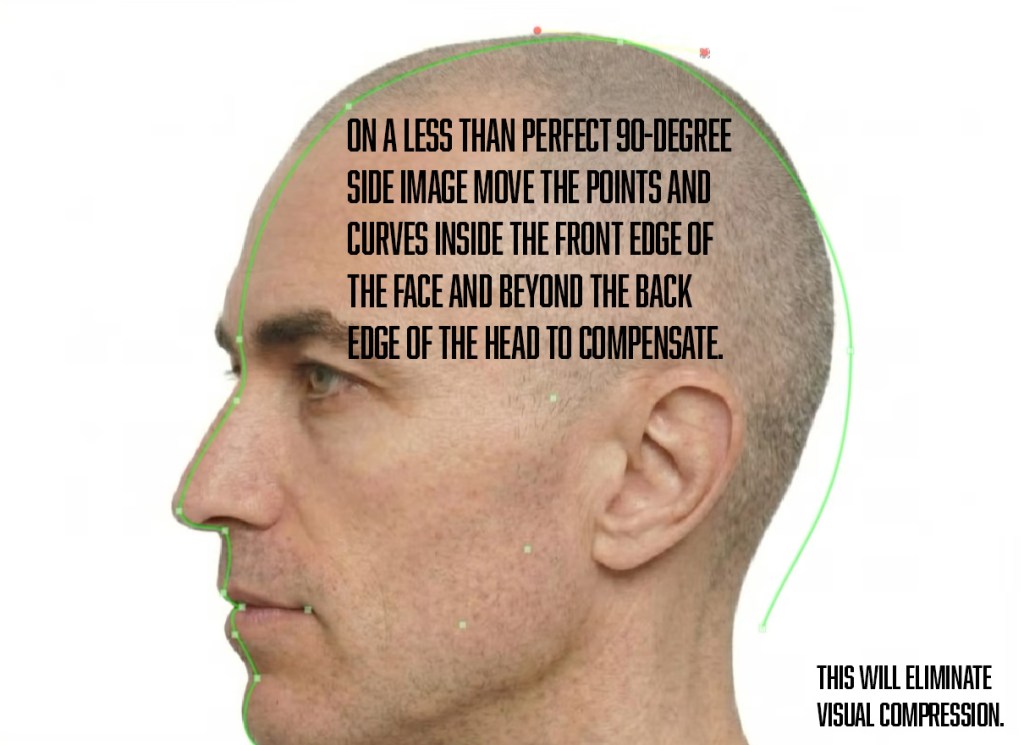
This is the preferred method if you have a side view available. It needs to be 90-degree side view or as close as possible otherwise we have to make up for it by moving the controls relative to the mesh outline on front and back as discussed later in this article. This is also demonstrated in the recent Reallusion tutorial embedded in this article.
Again, the new AI image generation feature can generate images for us, and we can regenerate if needed or adapt the control points. This added bonus allows us to stay within the application instead of going to an outside generation service for headshots. As with most Character Creator tools, this simplifies the process and keeps us in app negating the necessity of running multiple apps.
The Side View
Now we have control over the sides of the head, it provides us with more flexibility in matching the character.
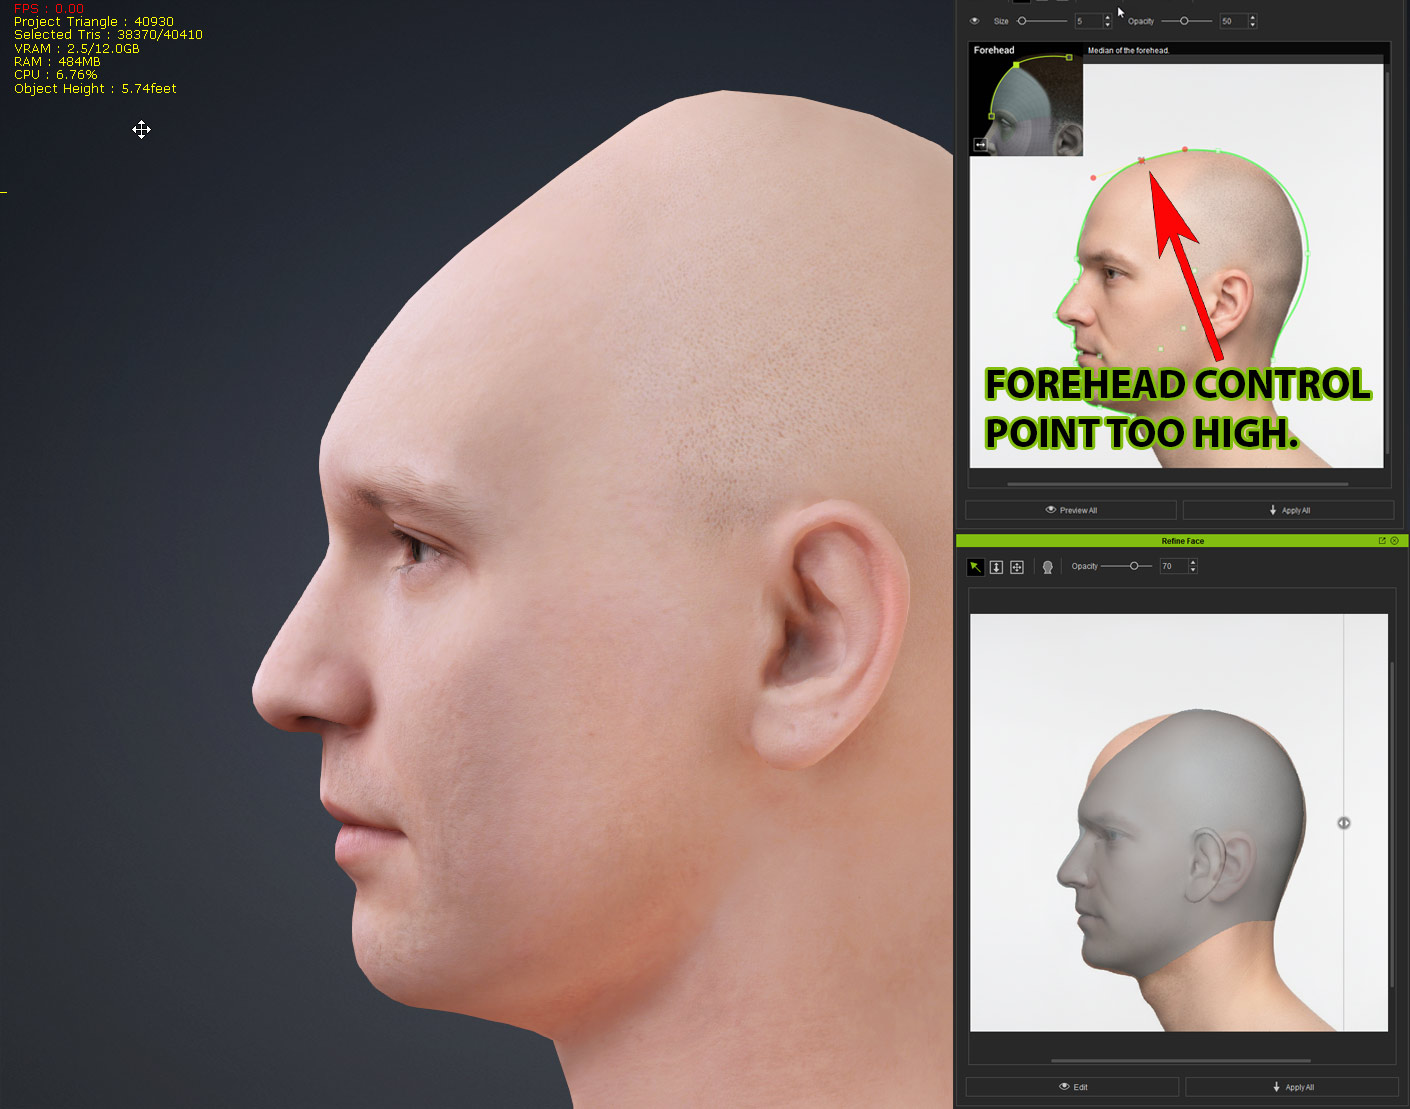
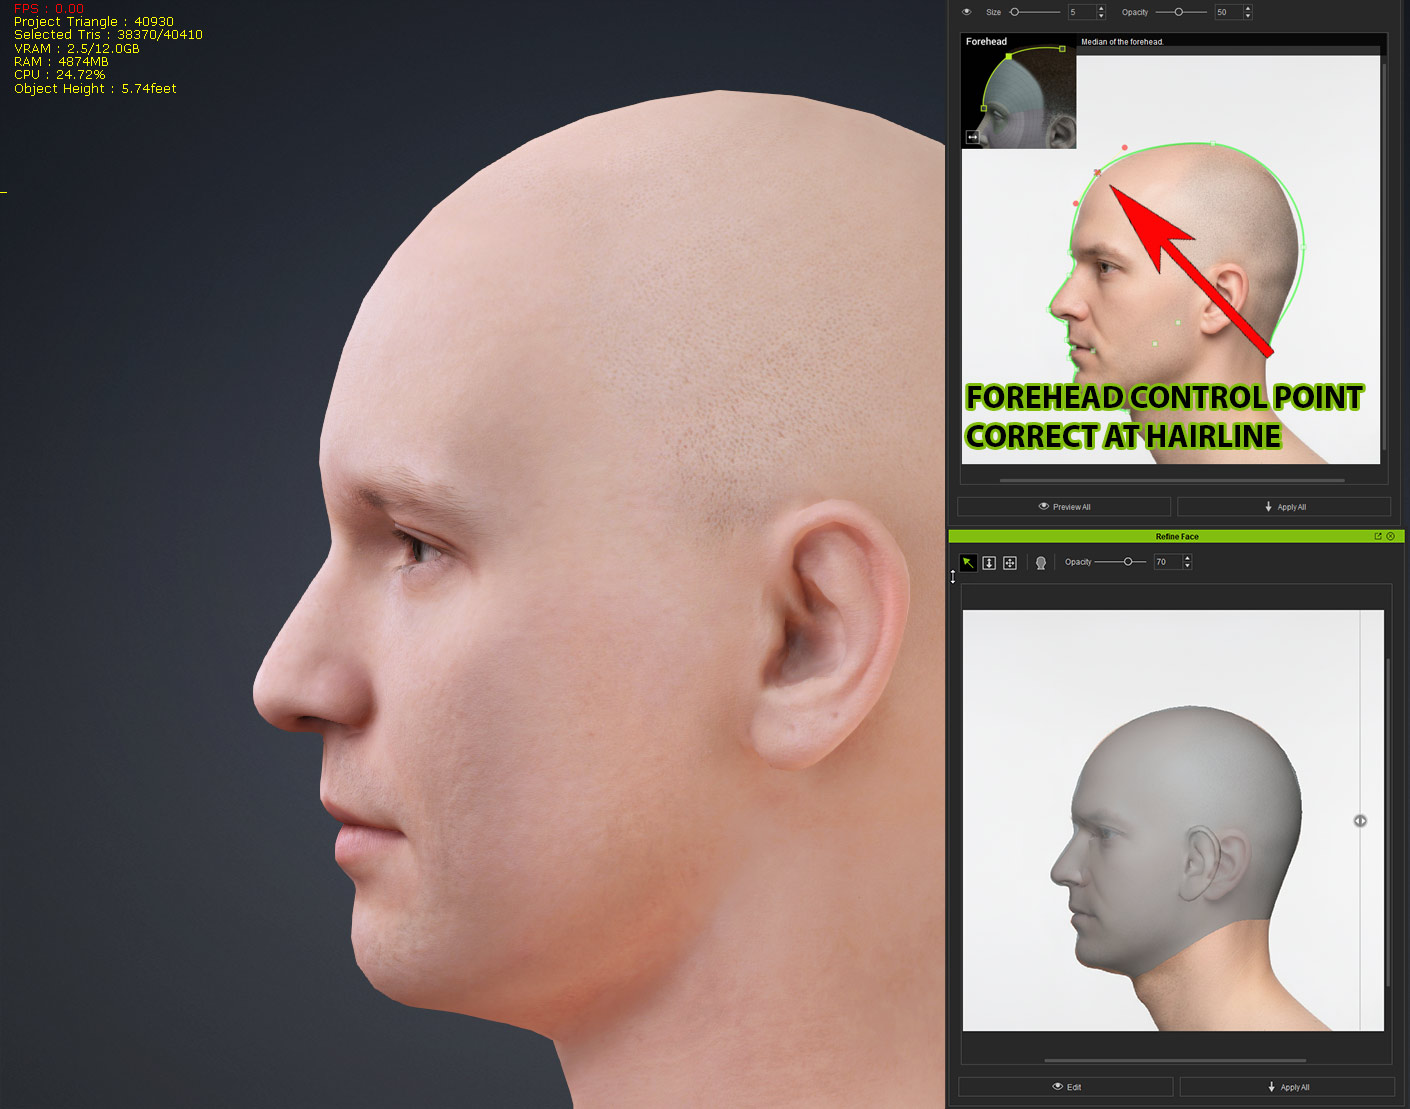
While using the Side image gives us more control points it can collapse the forehead if used improperly as the side view sets the forehead (and head) depth in general. If you place one particular control point too high on the head the forehead depth or volume will collapse and curve awkwardly inward, then back out.
To avoid this the top front control point needs to be placed at the hairline or where the hairline should be. This will ensure enough volume to keep the forehead from distorting when shaped from the side. After this we can then fine tune the forehead volume if needed.
The video below demonstrates this and how to correct it and the Reallusion Tutorial further down in this article goes into more detail.
The Profile Depth Slider
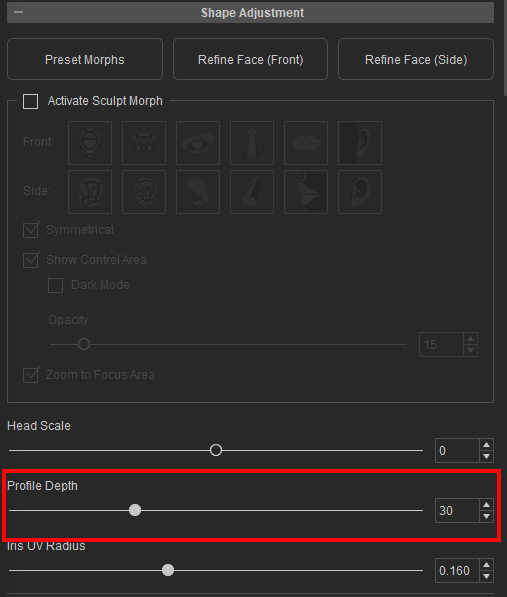
To get a character all we need at minimum is a forward headshot. This sets the face features and other landmarks. Due to it being a forward view the face can be a bit flatter than normal so we can use the Profile Depth slider to project face outward more or draw it inward. If the nose seems a bit flat, then the slider will extend the nose along with all the other facial features adding more depth.
The same thing can happen with using both front and side as the front image still determines the height just like using a single front image with no side image.
Control Point Placement
This bears going over again as the control points are the most important part of the refinement process. The control points set the boundaries of the mesh while the curves fill in the mesh between boundaries so to make substantial changes you must move the control points not the curve control handle.
It might also be necessary to move the points outside of the current mesh boundary to get a finer adjustment. This is why the preview option is so important before committing to the process. What you see on the preview is the actual outcome regardless of what the spline curves show on the adjustment panel. All of this is covered in the tutorial below from Reallusion, my tutorial earlier, as well as in the manual sections for Control Point Placement Guide – Front Face and Side Face.
A Less-Than-Optimal Side View
If you are using a side view that is not exactly 90 degrees, then it can lead to distortion of the head mesh. The Reallusion tutorial below addresses this issue at the 4:50 mark. This explains how to use the refinement tool to solve this problem by forcing a better alignment with the placement of the control points.
If we try to use a less than 90-degree side view the depth of the head will appear narrower and if we do not adjust for it as shown in the video, then skull compression can happen reducing the distance between the front and back of the head creating a less than desirable skull shape.
The video tutorial below from Reallusion explains all of this and demonstrates how to compensate for a less-than-optimal side view image ensuring your characters look like YOUR characters not just a close semblance of them.
Aligning the Ears and Setting Eye Depth
We are not confined to using the refinement tools as we can also use the morph sliders to deal with issues like aligning the ears and eye depth. AI can have difficulty in determining the eye depth from a frontal image, so slider adjustment is necessary. Same with lining up the ears from front to back of the head as this can be done with a slider also.
Don’t Forget the Sculpting Tools Too!
Not only does Headshot 3 retain the original sculpting tools if needed there are also additional improvements to the visual sculpting areas for more fine control. In Headshot 3 I suspect the sculpting tools will be used less and less as Character Creator is taking on more of the load with the AI Image to Head tool than ever before. Learn more from the tutorial below, as well as the manual sections for Sculpt Morph Design – Front and Side.
Summary
The main thing to remember if you get a distorted forehead mesh is to go back and place the affected control point closer to the proper position like the area of the hairline in this example. Since the side view only works with depth and not height you must use the front view refinement window to change things like the top of the head height demonstrated in this article and tutorials.
Once again Reallusion provides a tool that can be as simple or as complex as you need it to be. Generate or load a front headshot and you can get a good character but if you use front and side images you will have a lot more controls points to work with and achieve a much more desirable character that can withstand the scrutiny of closes-ups and near camera work.
Digital Artist MD “Mike” McCallum, aka WarLord, is a longtime iClone user. Having authored free tutorials for iClone in its early years and selected to write the iClone Beginners Guide from Packt Publishing in 2011, he was fortunate enough to meet and exchange tricks and tips with users from all over the world and loves to share this information with other users. He has authored hundreds of articles on iClone and digital art in general while reviewing some of the most popular software and hardware in the world. He has been published in many of the leading 3D online and print magazines while staying true to his biggest passion, 3D animation. For more information click here.
Solo artists can achieve remarkable consistency and ownership over generative AI models by integrating 3D assets from tools like Character Creator 5 and iClone 8.
The workflow, championed by Cristian Spagnuolo (PXLmentor), leverages Headshot 3 for rapid 3D head generation and AI Studio for training consistent AI actors.
Combining tools like ComfyUI, Tripo 3D, ZBrush, MetaTailor, and iClone’s AccuFACE with Reallusion’s ecosystem dramatically streamlines character creation and animation.
Strategic pre-production and a connected toolchain transform weeks of studio work into a solo artist’s achievable pipeline.
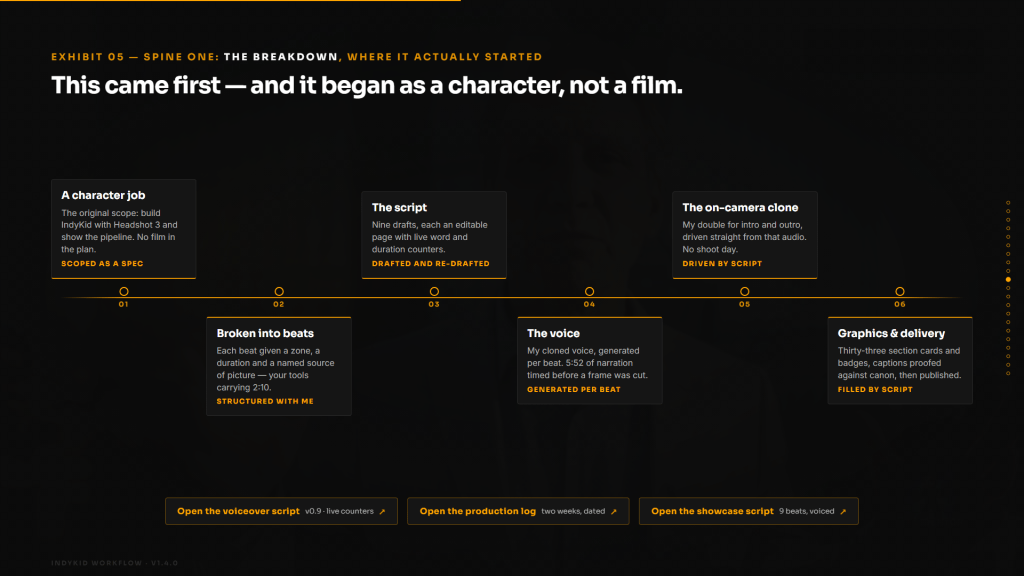
The pursuit of consistent, production-ready characters from initial AI-generated concepts has long been a challenge for solo artists working with generative AI. This article details an innovative workflow centered around Reallusion’s Character Creator 5 and iClone 8, demonstrating how to maintain visual fidelity and creative control over your assets. By leveraging specialized plugins and an integrated pipeline, artists can transform rough AI concepts into fully rigged 3D characters, ready for animation and consistent AI output.
AI Holy Grail: Mastering Generative AI with 3D Assets and AI Studio
How Can a Solo Artist Use Real 3D Assets to Achieve Consistency and Ownership with Generative AI Models?
Achieving consistency and ownership in generative AI projects as a solo artist requires a strategic bridge between initial AI concept art and production-ready 3D assets. The core of this workflow involves using dedicated 3D character creation software to establish a stable, controllable base. This means moving beyond fleeting AI generations to a tangible 3D model that serves as the “source of truth” for all subsequent AI iterations.
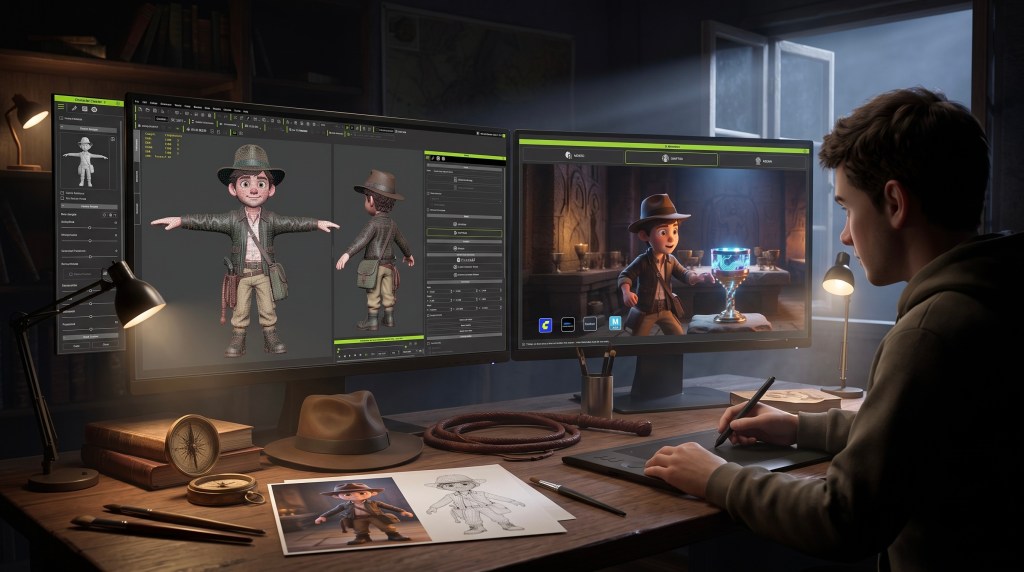
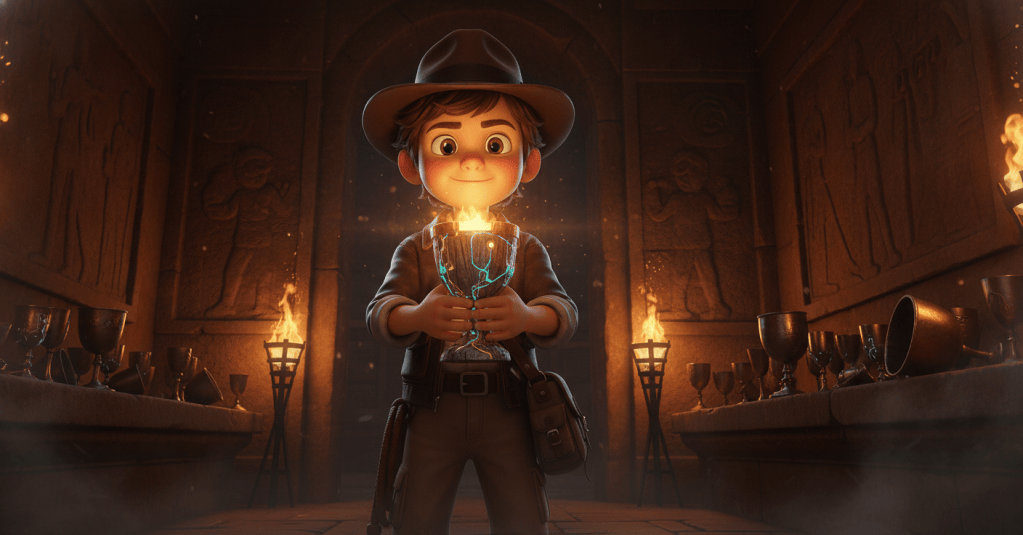
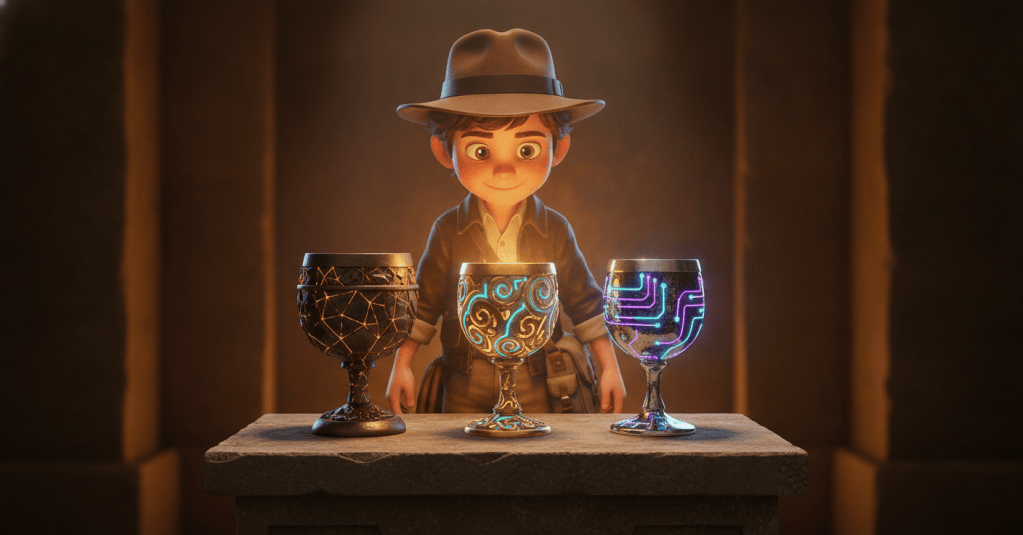
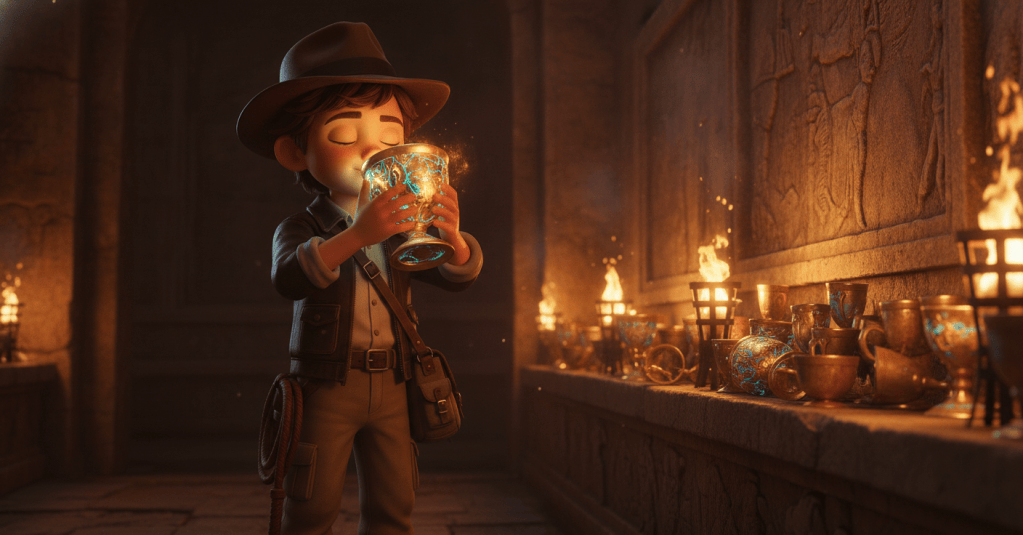
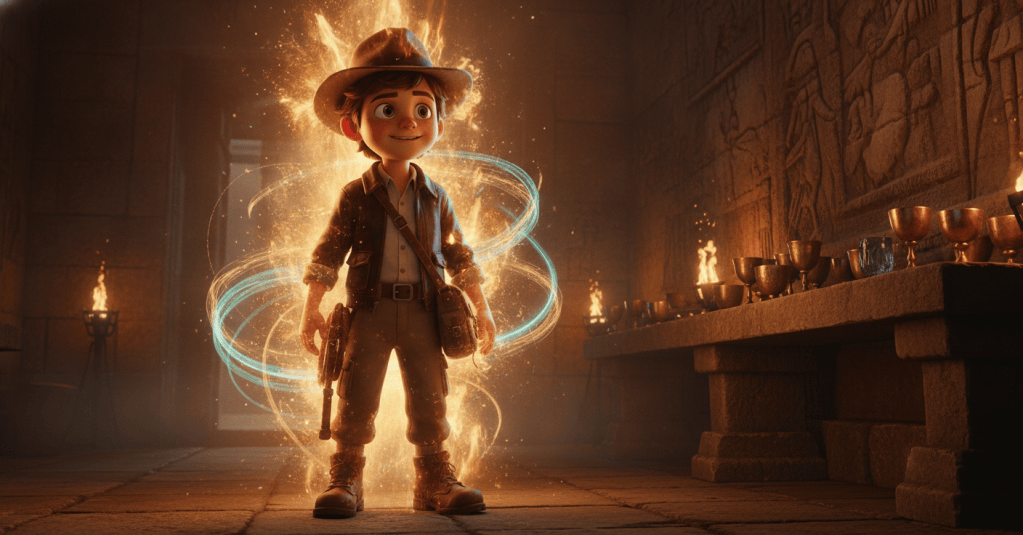
Cristian Spagnuolo’s Indie Kid AI Actor from Character Creator 5 & iClone 8 holds a glowing chalice in an ancient tomb.
Creating the Initial Concept Art and Rough 3D Models
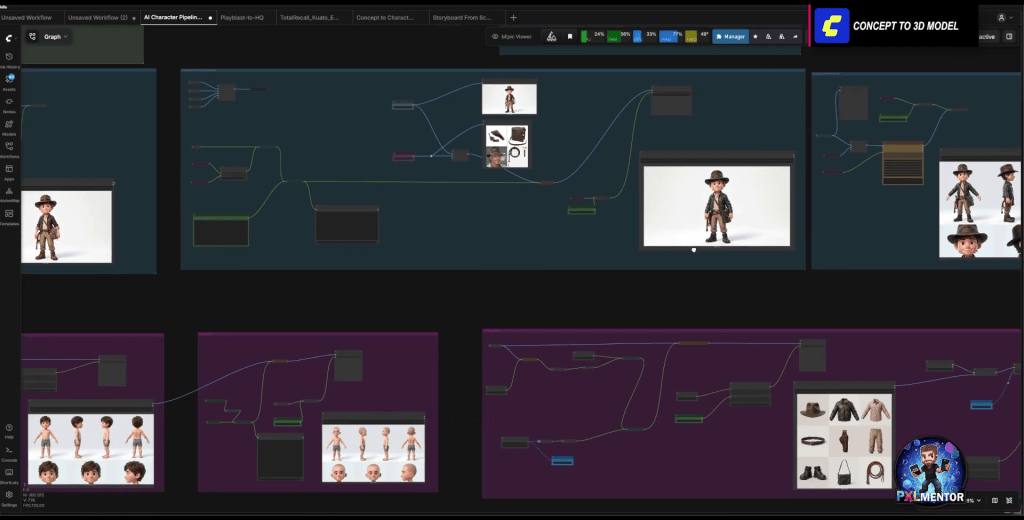
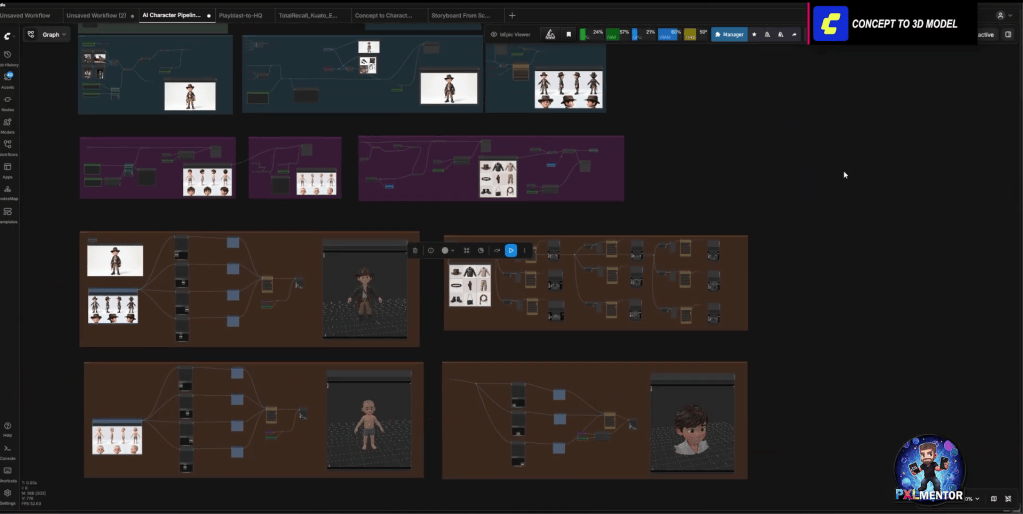
The foundation of this generative AI workflow begins with a core idea and rapid concept iteration. Starting with inspirational pictures, artists can utilize curated workflows inside ComfyUI to generate and develop their initial concepts. Through a series of refinement steps within ComfyUI, these initial ideas are carefully expanded to build a comprehensive, full character sheet.
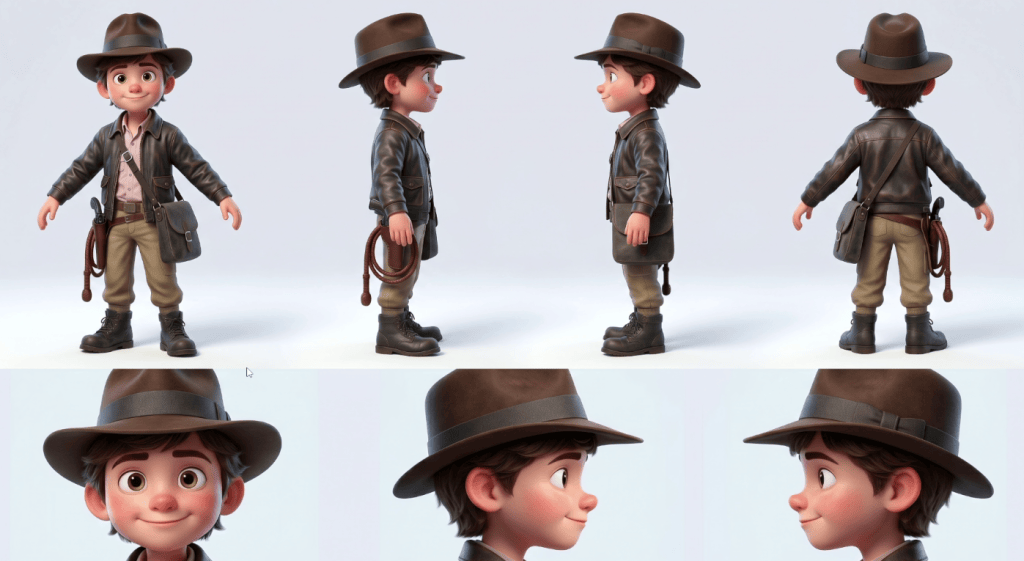
Indy Kid character sheet
To ensure a smoother transition into the 3D workspace, it is recommended to design the character’s base body without hair, which allows for easier 3D reconstruction. Additionally, every garment and accessory should be generated as a separate piece.
Once the 2D character sheets and component images are finalized, they are brought into Tripo 3D. This AI-powered tool efficiently turns those flat images into your very first rough 3D models. While these initial Tripo 3D meshes are rough and not yet ready for production or animation, they provide a vital, controllable 3D base that serves as the starting point for the rest of the pipeline.
Once the 2D character sheets and component images are finalized, they are brought into Tripo 3D
“Getting from that rough base mesh to a clean rigged production ready character, that’s usually the longest, hardest stretch of the whole pipeline. But a few tools shrink that road dramatically.”
Streamlining 3D Character Creation with Character Creator 5 and Headshot 3
The most critical phase for a solo artist is transforming a raw 3D concept into a fully rigged, production-ready character without needing extensive rigging expertise or a large team. This is where Character Creator 5 becomes indispensable. As Reallusion’s comprehensive 3D character creation tool, CC5 simplifies the complex tasks of modeling, rigging, and texturing.
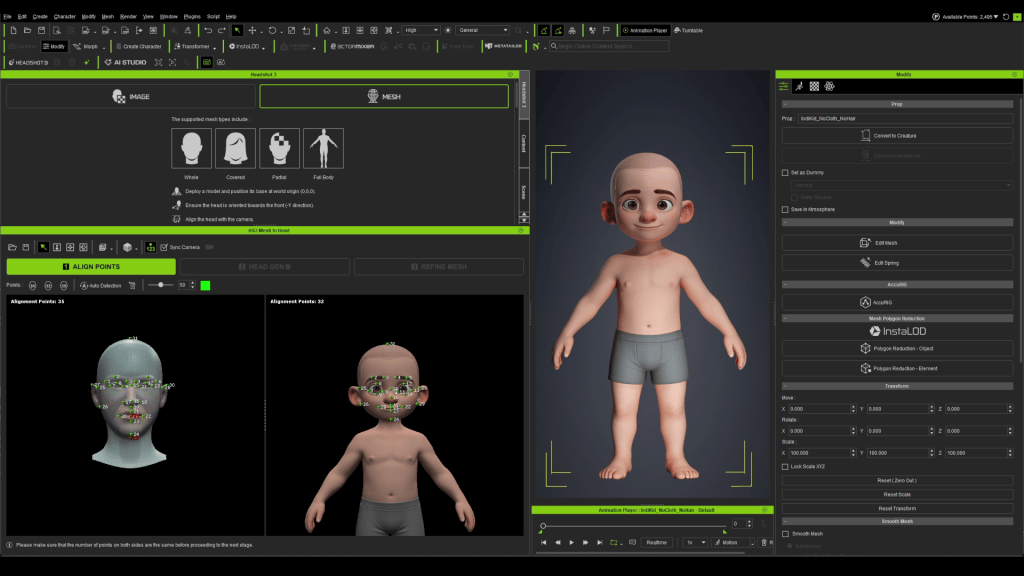
A key component in this stage is the Headshot 3 plugin for Character Creator. This powerful plugin leverages proprietary AI to automatically generate highly accurate, fully rigged 3D heads from a single image. What makes Headshot 3 particularly impactful is its ability to take a rough AI-generated head from Tripo 3D and rebuild it onto clean, production-ready topology. This means the facial mesh is optimized for animation, complete with blend shapes, without any manual rigging.
“What used to take weeks, if not months, can now be done with Character Creator and Headshot 3. One person, with zero rigging knowledge, can end up with a high-end, fully rigged hero character. It doesn’t replace a studio, but it puts that starting line within reach of anyone with a brilliant idea and a story to tell.”
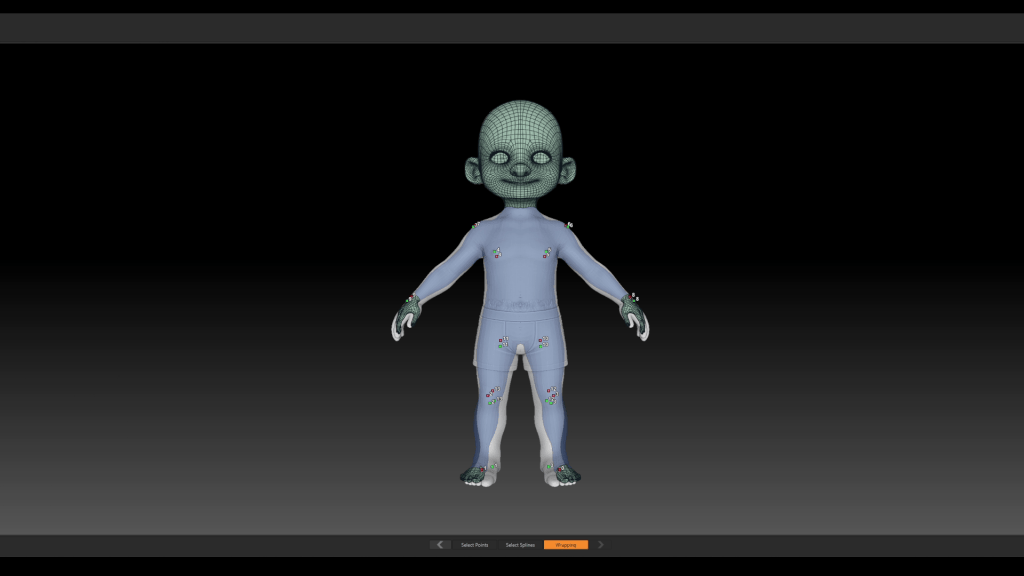
For the character’s body, the workflow integrates with sculpting tools like ZBrush. Artists can use ZWrap to transfer the clean topology of a CC5 base mesh onto the rough Tripo model, ensuring the refined mesh perfectly matches the original design intent. Iterative refinement between CC5 and ZBrush, facilitated by the GoZ plugin, allows for customization of expressions and the finalization of the body rig directly within Character Creator 5. This integrated approach reduces weeks, if not months, of work typically performed by multiple specialists in a studio setting, into a single-person operation.
Q: How does Headshot 3 maintain facial detail from AI concepts?
A: Headshot 3 employs advanced AI features that push the fidelity and detail of AI-generated faces further than traditional methods. Its topology transfer mode is crucial; it rebuilds rough Tripo 3D heads onto clean, production-ready facial topology while preserving critical likeness and detail. This ensures the character’s unique features, derived from the initial AI concept, are accurately translated into a fully rigged 3D model, ready for animation without manual setup.
Pro-Tip: Leverage the “topology transfer mode” in Headshot 3 within Character Creator 5. Instead of manually re-topologizing rough AI-generated heads, point Headshot 3 at your base mesh, and it will automatically rebuild the face on clean, production-ready topology, complete with a full rig. This method saves roughly 2 hours of manual weight painting and rigging per character head, making a complex task accessible to artists without specialized rigging knowledge.
Refining Garments and Props for Optimal Performance
Beyond the main character, garments and props also require careful optimization to ensure they behave correctly downstream in the animation pipeline. Initial AI-generated models, like those from Tripo 3D, often come with dense, heavy meshes that are unsuitable for real-time animation or efficient rendering.
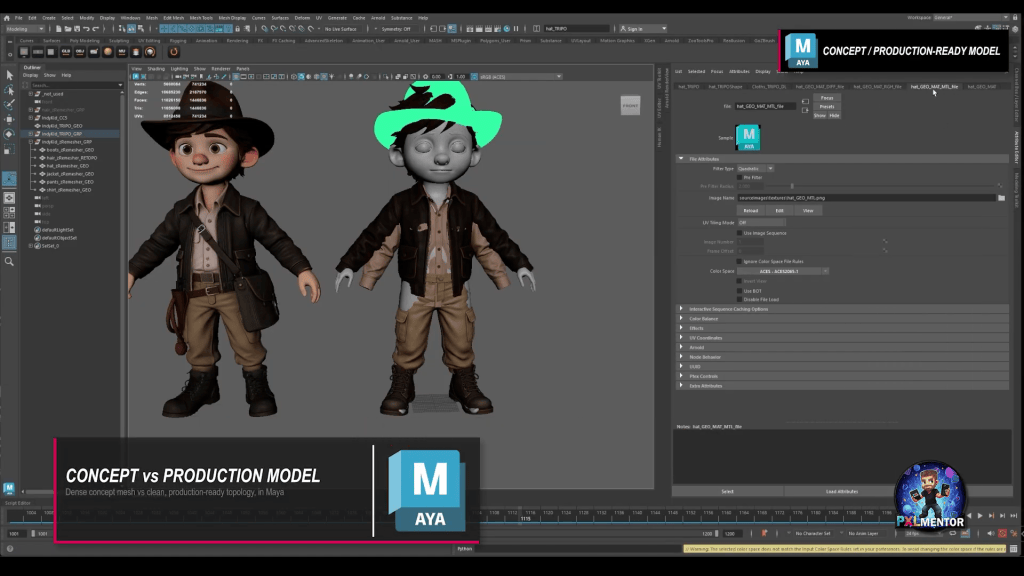
Using the GoZ plugin, artists can seamlessly move models from Maya, their primary DCC, to ZBrush. There, ZRemesher quickly re-topologizes each garment and accessory, converting dense meshes into clean, production-friendly topology in minutes. Once the topology is clean, proper UVs are laid out using tools like UV Master in ZBrush or Maya’s UV editor. This foundational work ensures that all subsequent texturing and animation steps proceed smoothly, as Cristian Spagnuolo emphasizes, “Foundations matter.”
Using the GoZ plugin, artists can seamlessly move models from Character Creator, to Maya, their primary DCC, to ZBrush.
After re-topologizing, textures and high-resolution details are transferred. PBR textures and fine surface details (wear, stitching, grain) from the initial AI-generated meshes are baked onto the new, clean low-resolution models using Substance Designer for PBR textures and Substance Painter for high-res details. This preserves all the rich, AI-generated surface detail without sacrificing performance. Finally, MetaTailor provides a direct connection to Character Creator 5, enabling precise layering and fitting of garments onto the character, making them sit like real cloth.
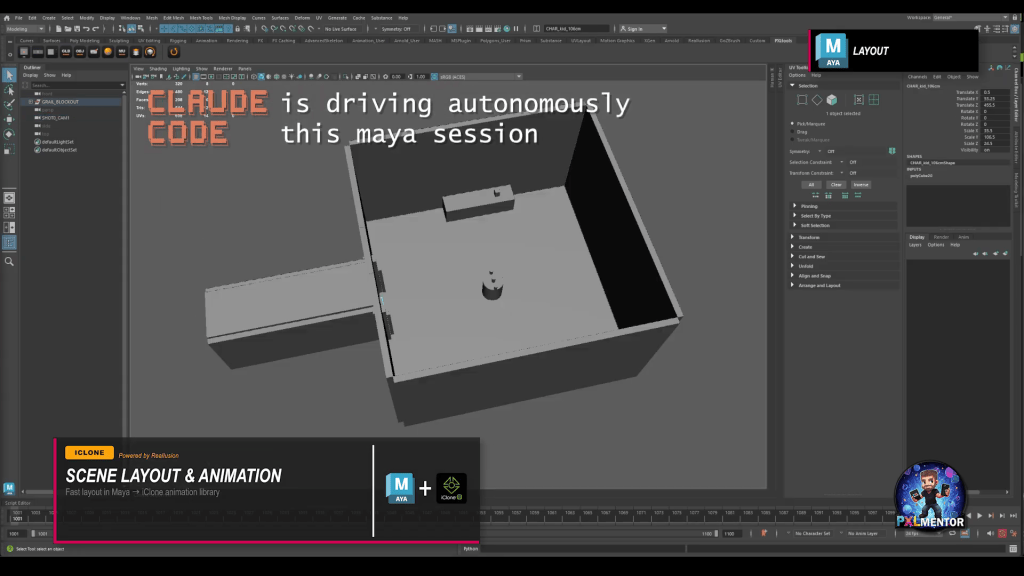
Maya workspace setup with Indy Kid garments and props
Workflow Stage
Primary Tools Used
Key Benefit for Solo Artists
Concept & Initial 3D
ComfyUI, Claude Code, Tripo 3D
Rapid concept iteration, rough 3D generation
Head Creation & Rigging
Character Creator 5, Headshot 3
AI-powered production-ready heads, auto-rigging
Body & Garment Retopo
ZBrush (ZWrap, ZRemesher, GoZ), Maya
Clean, animate-able topology from dense meshes
Texturing & Detail Bake
Substance Designer, Substance Painter
Transfer AI-generated details to optimized assets
Garment Fitting
MetaTailor
Realistic clothing drape and fit
Facial Animation
iClone 8, AccuFACE
Camera-based performance capture
AI Actor Generation
iClone 8, AI Studio
Consistent AI characters, IP ownership, advanced AI models
Elevating Facial Animation with Character Creator FaceTools
While optimizing garments and laying out props is efficiently handled in a primary DCC like Maya (Maya workspace setup with Indy Kid garments and props), breathing life into a character’s face requires dedicated attention. To push the character’s performance beyond a standard rig, the workflow utilizes the power of Character Creator FaceTools to bridge Character Creator 5 and ZBrush.
Instead of manually building complex facial blendshapes from scratch, an artist can use FaceTools to transfer the CC5 production-ready mesh and its core expression set directly into ZBrush. Inside ZBrush, these core expressions become editable layers. This allows creators to easily customize the bundled expressions, sculpt high-fidelity dynamic wrinkles, and apply detailed polypaint to the character’s skin to ensure their unique personality shines through.
Once the nuanced sculpting is complete, everything is synchronized back into Character Creator with a single click. This pipeline effectively eliminates the weeks of technical setup typically required by a dedicated facial rigger in a traditional studio. The result is a highly expressive, production-ready hero character equipped with bespoke facial morphs, fully prepared for performance capture and animation.
This video provides a basic walkthrough of the various ways you can utilize the Face Tools plugin, including creating custom expressions and dynamic wrinkles.
Bringing Characters to Life with AccuFACE and iClone 8
With a high-quality, fully rigged character, the next step is animation. For solo artists, traditional animation can be incredibly time-consuming. Reallusion’s iClone 8 is designed to accelerate this process, particularly for real-time animation.
A groundbreaking tool for performance capture on a solo creator’s budget is the AccuFACE 2 plugin for iClone. This plugin captures any facial performance using just a camera, eliminating the need for expensive motion capture suits or complex head rigs.
The artist can simply act out the desired facial movements, and AccuFACE 2 facial mocap plugin for iClone, translates them directly onto the 3D character in real-time. This includes every subtle blink, smirk, and eyebrow raise, making high-fidelity facial animation accessible to independent creators. This democratizes Motion Capture for facial performances, drastically cutting down animation time.
The artist can simply act out the desired facial movements, and AccuFACE 2 facial mocap plugin for iClone, translates them directly onto the 3D character in real-time.
Leveraging AI Studio for Consistent Generative AI Output
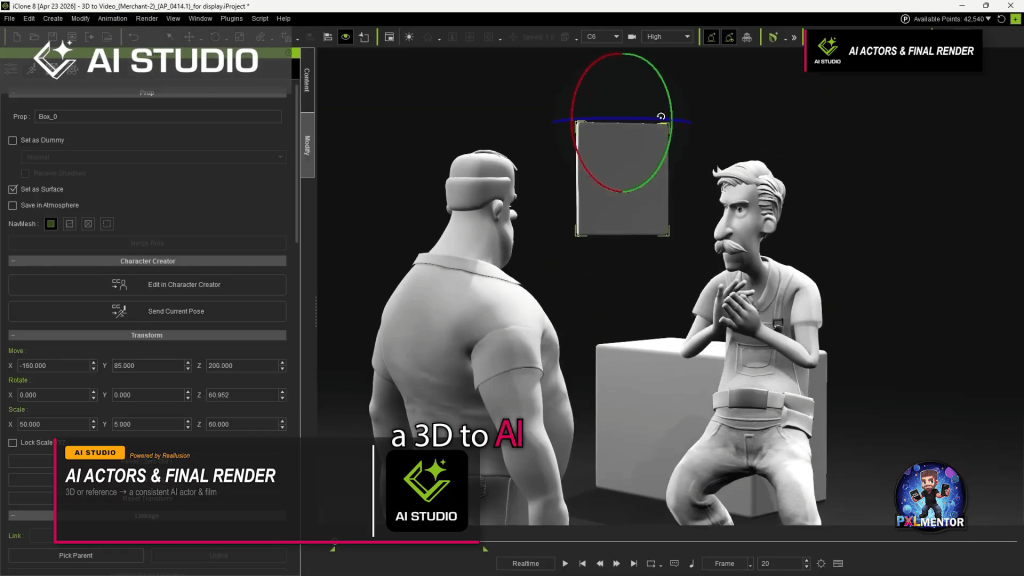
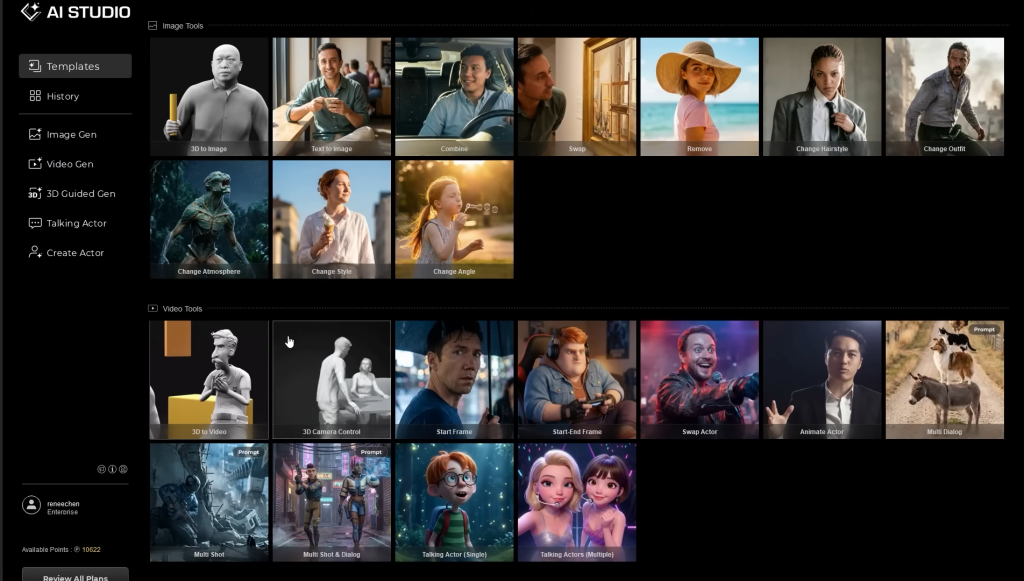
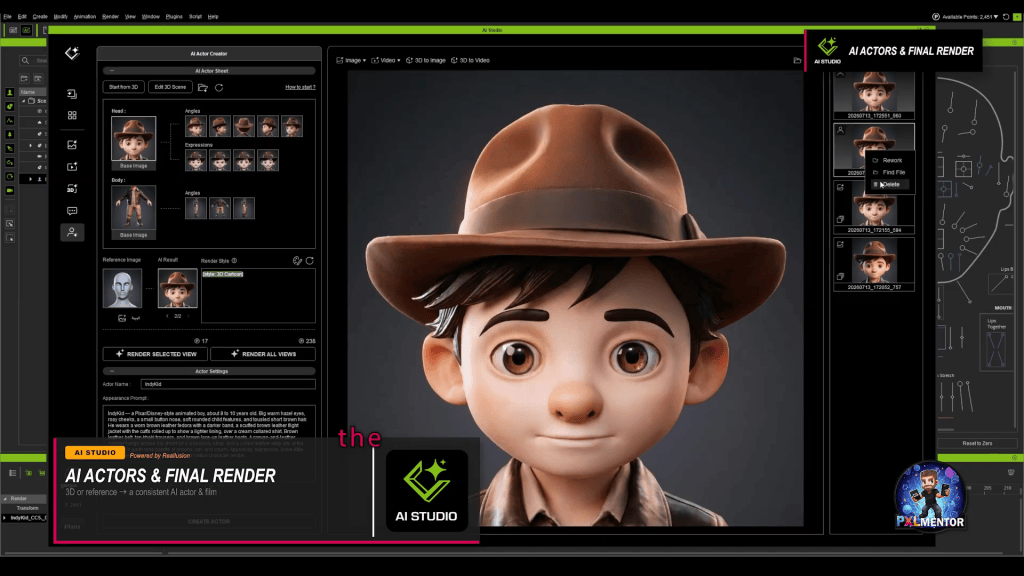
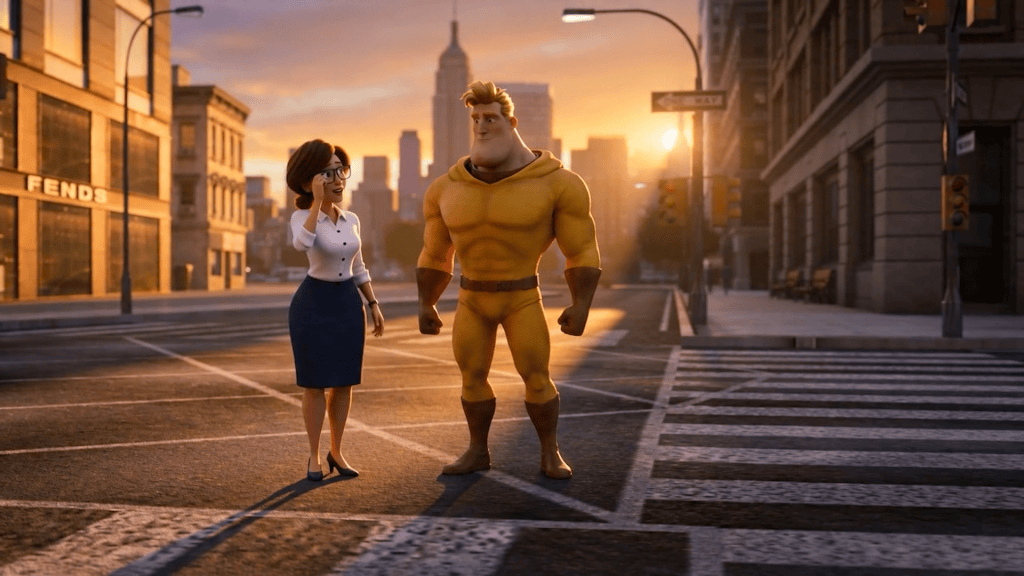
The culmination of this workflow lies in achieving consistent AI-generated visuals, preventing the common “identity drift” seen with purely AI-driven projects. Reallusion’s AI Studio, built directly inside iClone 8, is a revolutionary 3D-to-AI workflow that addresses this head-on. Launched recently, AI Studio transforms your 3D characters into consistent AI Actors.
AI Studio operates by training a dedicated AI model based on your Character Creator 5 character. This ensures that across multiple shots and prompts, the AI-generated output maintains the exact likeness and characteristics of your original 3D asset. This is vital for maintaining creative ownership and visual continuity throughout a project.
Reallusion’s AI Studio, built directly inside iClone 8, is a revolutionary 3D-to-AI workflow that addresses this head-on. Launched recently, AI Studio transforms your 3D characters into consistent AI Actors.
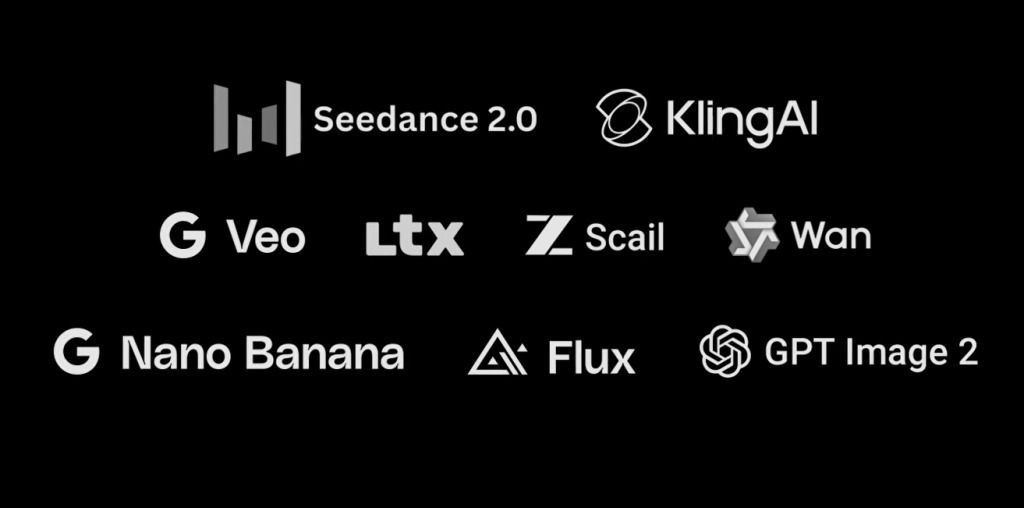
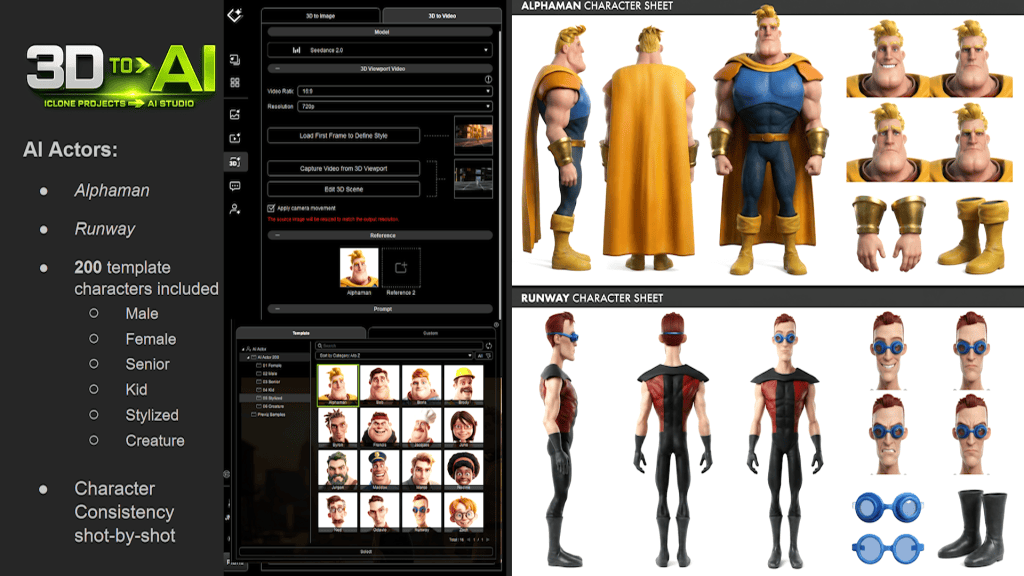
Under the hood, AI Studio integrates leading AI models such as Seedance 2.0, Veo 3, KlingAI, and Flux, giving artists access to cutting-edge generative capabilities. It allows for precise 3D scene layout, camera control, and motion influence, ensuring that your AI generations are guided by your detailed 3D previs. The platform also offers access to over 5,000+ 3D previz assets and 200 production-ready AI Actors, further empowering solo creators.
AI Studio integrates leading AI models such as Seedance 2.0, Veo 3, KlingAI, and Flux, giving artists access to cutting-edge generative capabilities.
Featured Artist Spotlight: Cristian Spagnuolo (PXLmentor)
Cristian Spagnuolo, known as PXLmentor, is a highly respected CG and VFX Supervisor with nearly two decades of experience across commercials, movies, TV series, and animation. His journey has refined both his artistic and technical skills, making him a dedicated beta tester for cutting-edge software and a proponent of innovative, optimized workflows. Cristian’s primary focus is enhancing VFX efficiency and elevating final product quality, making his “Indie Kid and the AI Crusade” project a perfect demonstration of his expertise.
Cristian’s workflow exemplifies how solo artists can achieve AAA-level results. He starts with concept art refined in ComfyUI and Claude Code, then uses Tripo 3D for initial 3D meshes. The core of his character creation relies on Character Creator 5 and Headshot 3 for rapid, production-ready head and body rigging. He then employs ZBrush with ZWrap and ZRemesher for clean topology on garments and props, leveraging GoZ for seamless integration. Texturing is handled in Substance Designer and Substance Painter, and garment fitting with MetaTailor. For animation, he utilizes iClone 8 and AccuFACE for accessible facial performance capture. Finally, AI Studio becomes his engine for consistent AI actor generation and scene control, with Maya (using Maya MCP) for initial scene layout and Adobe Premiere for final editing, including AI-generated sound effects with Claude Code.
PXLmentor by Cristian Spagnuolo – A VFX community built by someone who’s lived it for 20+ years. Real knowledge, honest industry talk. Professional Training and Coaching.
The Pre-Production Advantage: A Pro Tip for Solo Artists
Pro Tip: According to Cristian Spagnuolo, robust pre-production is the “real secret” to a smooth AI workflow. By utilizing tools like Claude Code to develop the story, write every prompt, and craft action descriptions upfront, and then using the Maya MCP to lay out basic 3D scenes and cameras, you establish a solid foundation before entering AI Studio. This methodical preparation can make your AI generation process roughly 50% faster, saving days of iterative prompt engineering and scene adjustments.
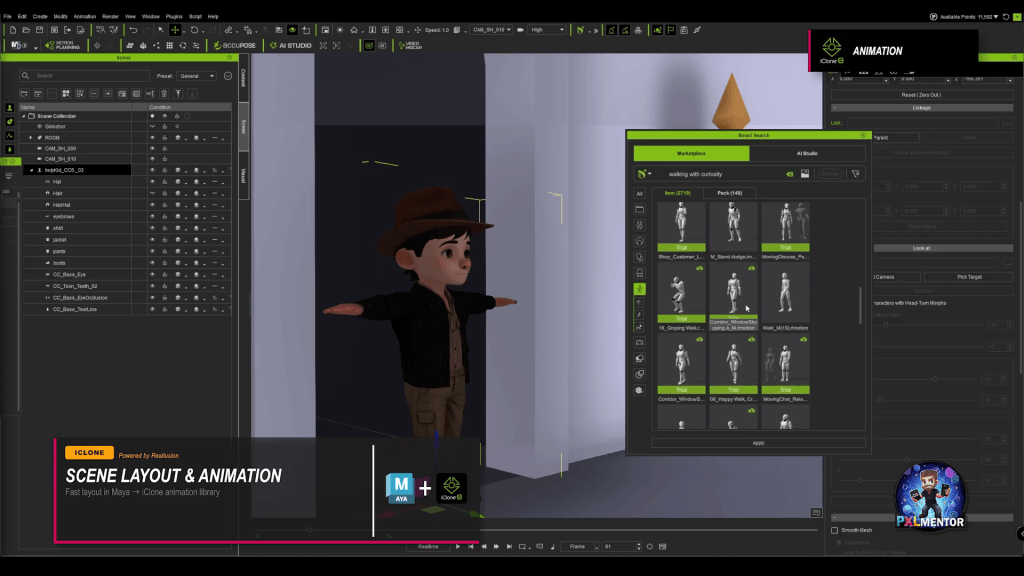
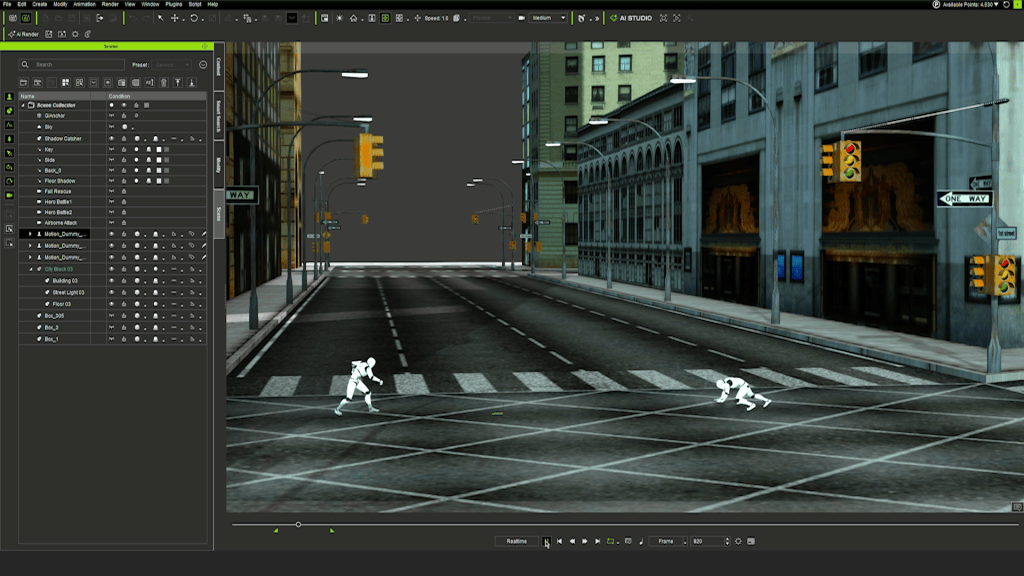
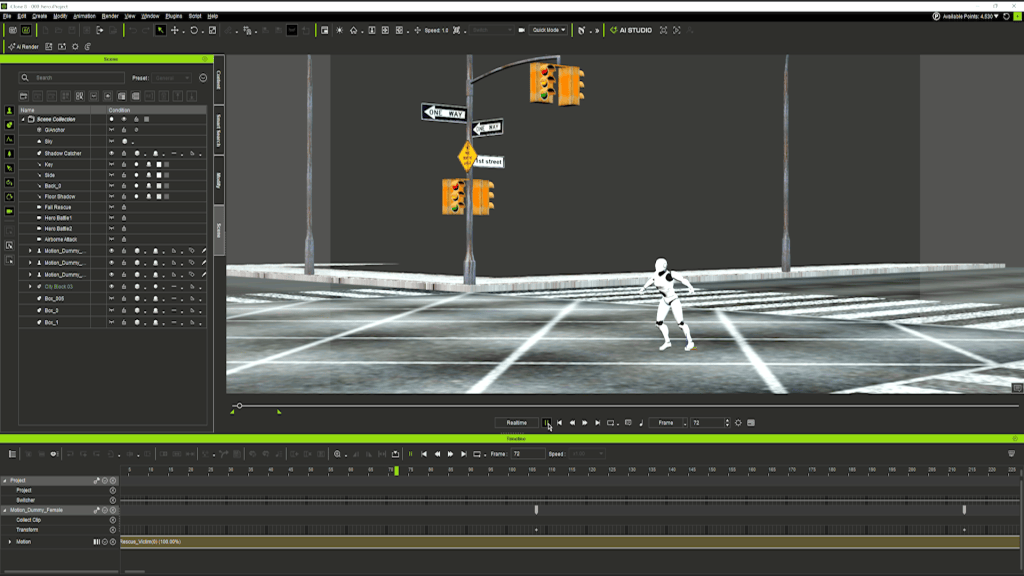
For scene layout and camera work, initial plans can be developed in Maya using the Maya MCP (Maya Camera Planning) to define basic 3D scenes and camera movements. This layout is then brought into iClone 8, where its extensive animation library can be leveraged, combined with custom touches and driven by the prepared cameras. This approach ensures real animation and camera work is quickly established, serving as a powerful guide for subsequent AI generations.
This layout is then brought into iClone 8, where its extensive animation library can be leveraged, combined with custom touches and driven by the prepared cameras.
AI Studio offers two primary methods for creating AI actors: directly from your iClone 3D character (using a simple button press to create a character sheet) or from reference images. The ability to generate AI actors from your custom 3D models guarantees that your unique character design is consistently represented across all AI outputs, avoiding “identity drift.” This integrated approach ensures that even purely prompted shots within AI Studio benefit from the underlying 3D structure and character consistency.
AI Studio offers two primary methods for creating AI actors: directly from your iClone 3D character (using a simple button press to create a character sheet) or from reference images.
“AI did not replace the creative job here… It is a multiplier. It takes your craft, your fundamentals, and amplifies them.”
Conclusion: Amplify Your Creative Vision with Reallusion and AI
By strategically combining Character Creator 5, Headshot 3, iClone 8, and AI Studio, solo artists can overcome the traditional hurdles of consistency and technical overhead in generative AI projects. This integrated workflow empowers creators to maintain ownership of their intellectual property, transform rough concepts into polished 3D assets, and generate consistent AI-driven content with unprecedented efficiency. It’s a pipeline that amplifies your existing creative skills, putting high-end production capabilities within reach of independent developers and freelance artists alike.
MADE WITH: Reallusion Headshot 3, Face Tools, AccuFACE, Character Creator, iClone, AI Studio, Faceform Wrap, ZBrush, Tripo, Substance Designer and Painter, MetaTailor, Maya, ComfyUI (WAN and Qwen), HeyGen, ElevenLabs, and Adobe Premiere Pro. Orchestrated with Claude Code.
Frequently Asked Questions
Q: How do I ensure my AI-generated characters look consistent across different shots?
A: Consistency is achieved by building a high-quality 3D character in Character Creator 5, using plugins like Headshot 3 for realistic heads, and then transforming that 3D character into an “AI Actor” within iClone 8’s AI Studio. This process trains AI Studio on your specific 3D model, allowing subsequent AI generations to maintain the character’s exact likeness and details across various scenes and prompts, preventing visual identity drift.
Q: What is the difference between Headshot 3 and AI Studio?
A: Headshot 3 is a Character Creator 5 plugin that focuses on generating fully rigged 3D heads from images, often taking a rough 3D scan or AI-generated model and rebuilding it with clean production topology. AI Studio, integrated into iClone 8, is a broader 3D-to-AI platform that takes your fully rigged 3D characters (often created with CC5 and Headshot 3) and converts them into “AI Actors” to generate consistent AI images and videos while maintaining 3D control.
Q: Can I use my existing 3D models with Reallusion’s AI tools?
A: Yes, Reallusion’s ecosystem is designed for flexibility. While Character Creator 5 provides a powerful base, you can import and refine existing 3D models. Tools like ZWrap and GoZ facilitate transferring detailed meshes and topology. Your refined 3D models can then be brought into iClone 8 and AI Studio to serve as the consistent “source of truth” for generating new AI-driven images and videos, ensuring visual continuity.
Q: Why is pre-production so important when combining 3D and AI?
A: Pre-production is crucial because it establishes a solid foundation for your entire project, minimizing costly rework downstream. As highlighted by Cristian Spagnuolo, thoroughly planning your story, prompts, and camera layouts using tools like Claude Code and Maya MCP before engaging AI Studio significantly streamlines the creative process. This upfront effort ensures your AI generations are guided by clear intent, accelerating iteration and improving final output quality.
Reallusion announced the official release of AI Studio 1.1, a major architectural and feature update designed to transform how digital creators integrate generative AI into 3D-guided workflows. Moving beyond its original embedded execution within iClone andCharacter Creator, version 1.1 debuts as a fully standalone application featuring an independent workflow, an expanded AI model suite, and an upgraded dataset engine built for enhanced character consistency.
Unbound from iClone & CC: Experience a Faster Standalone Workflow
Version 1.1 delivers complete operational flexibility across the production pipeline. Digital artists can now execute AI generation tasks independently without launching iClone or Character Creator, while preserving on-demand access to 3D guidance whenever advanced control is required. In addition, the update streamlines system administration with a centralized Account Settings interface, automated web preset deployment, and customizable asset download modes tailored to specific production archiving workflows.
Dedicated Standalone Application: Accelerates production by executing independently of iClone and Character Creator, drastically reducing operational complexity.
User Data Cloud Synchronization: Provides seamless cross-device access to personal presets, custom user data, and generation histories.
Automated Version & Preset Deployment: Ensures continuous access to the latest application builds, AI models and presets without requiring manual patch installations.
New Models: 30-Sec Video with Seedance 2.5 & Budget-Friendly 2.0 Mini
AI Studio 1.1 expands creative control through extended video durations, higher rendering resolutions, and cost-efficient generation options. Beyond core video generation upgrades, this release introduces full 4K output support across Image Create, Image Edit, Video Create, and 3D to Video. Furthermore, moderated policy guidelines grant creators greater narrative freedom when productions involve certain NSFW contents, such as gunfights and intense verbal exchanges, without encountering generation blocks.
Seedance 2.5 (30-Second Cinematic Video): Generates up to 30-second video sequences across multiple resolutions while preserving strict character and scene consistency across up to 50 reference inputs.
Seedance 2.0 Mini: Introduces a cost-effective model tier priced at 50% of the standard Seedance 2.0 rate, optimized for rapid iteration and generation without unnecessary credit expenditure.
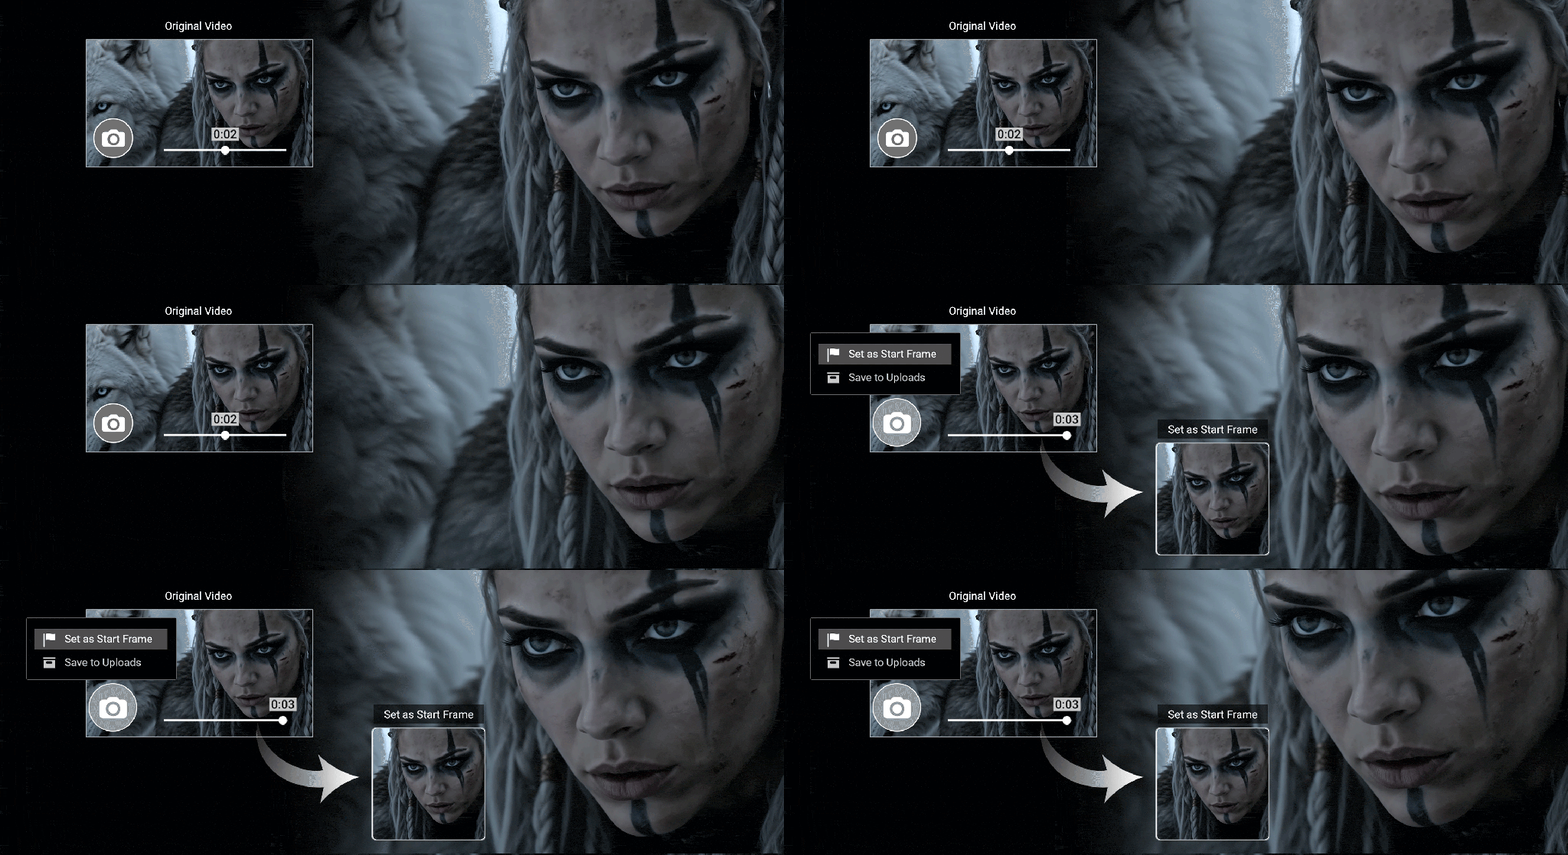
Capture Any Frame: Allows creators to extract any video frame as a starting point or visual reference—ideal for modifying mid-video segments, editing specific scenes, or extending shot continuity.
Upgraded AI Actor Creator: Simplified Workflows & Higher-Quality Datasets
Achieving multi-scene character consistency is now faster and yields significantly higher visual fidelity. AI Studio 1.1 reorganizes character creation into streamlined operational tiers while upgrading core rendering capabilities under the hood. The character module also benefits from an optimized UI, a redesigned AI Actor Library browser, and improved multi-view rendering accuracy.
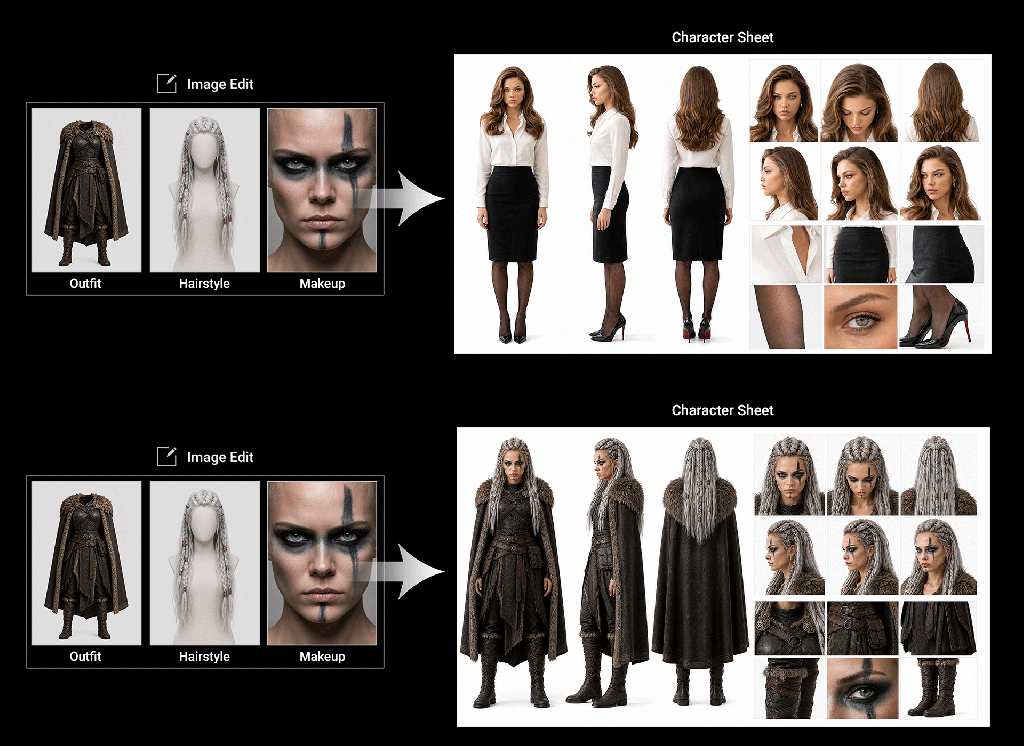
AI Actor Creator – Basic Mode: Offers the most direct path to creating AI Actors. Users simply upload reference images to auto-generate structured character sheets that maintain consistent visual identity across scenes, with full support for style adjustments or external sheet imports.
Auto-generated character sheet created from reference photos to build a consistent AI Actor.Customizing outfit, hairstyle, and makeup using Image EditImporting an external character sheet from another AI tool to create an AI Actor.
Powered by GPT Image 2 Engine: Integrates the updated GPT Image 2 model to significantly enhance rendering accuracy and structural fidelity, producing cleaner reference datasets for downstream AI image and video generation pipelines.
Availability and Access
AI Studio 1.1 provides the speed, flexibility, and control required to optimize professional production pipelines or explore 3D-to-AI workflows for the first time.
Existing Users: Can update directly via the Reallusion Hub to launch the standalone application immediately.
New Creators: Can download AI Studio 1.1 directly from the Reallusion website. Users can also pair the application with iClone Personal(available as a free download) to leverage full 3D-guided control alongside AI generation workflows.
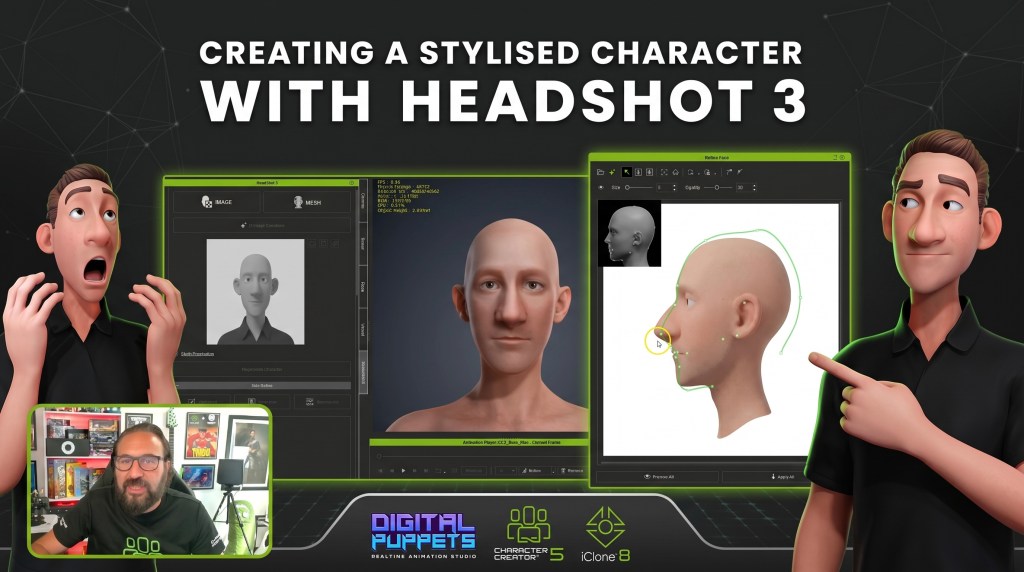
Antony Evans of Digital Puppets streamlines stylized 3D character creation using Character Creator 5 with Headshot 3.
The workflow integrates AI image generation for concept art and precise Headshot 3 refinement tools for non-realistic proportions.
Characters are automatically rigged with advanced HD Facial Profiles, ready for animation in iClone 8.
Leverage AccuFACE 2 and iClone Video Mocap for efficient facial and full-body motion capture directly from video input.
This article details a professional workflow for generating animation-ready, stylized 3D characters using Headshot 3, an AI plugin for Reallusion’s Character Creator 5 (CC5). It explores how Antony Evans of Digital Puppets transforms AI-generated concepts into fully rigged models, ready for real-time animation with iClone 8, demonstrating a complete, efficient pipeline for indie developers, freelancers, and studios.
“Even though Headshot 3 was trained on realistic human features, it can still work with stylized characters. You can push out bigger eyes, bigger features, and those kinds of proportions.”
ANTONY EVANS — Co-Founder of Digital Puppets / 3D Animator
Introduction
My name is Antony Evans, Co-founder of Digital Puppets, a UK-based animation studio specialising in character design, animation, and virtual avatars. We work across a variety of projects, from games and real-time experiences to television and virtual production, so having a flexible character creation workflow is really important for us.
Over the years, Character Creator has become the foundation of our character pipeline. I’ve used a lot of different tools and workflows during my career, but what keeps bringing me back to Character Creator is the balance between speed and creative control. It allows me to get a character up and running quickly, but still gives me the flexibility to push the design further when I need to.
For this project, I wanted to explore the latest updates to Headshot 3, Character Creator 5, and AccuFACE 2, and see how they could fit into the type of work we do at Digital Puppets. Rather than creating a realistic digital human, I wanted to focus on a stylised character. This is much closer to the kind of work we normally produce, but it also presents a different challenge. Stylised characters often don’t follow realistic anatomy—they have exaggerated proportions, unique shapes, and a lot more personality built into their design.
“That’s probably one of the things I like most about Reallusion tools and ecosystem—you can adapt the tools around the project rather than having to adapt the project around the tools.”
ANTONY EVANS — Co-Founder of Digital Puppets / 3D Animator
The question I wanted to answer was: How well can Headshot 3 workflow handle that type of stylized character?
The results were really interesting. The new AI tools helped me quickly generate reference images and explore ideas, the updated refinement tools gave me much more control over the final shape, and once the character was complete, the new HD facial profile meant it was ready for animation almost immediately.
Character Creator 5’s Headshot 3 AI tools helps quickly generate reference images and explore ideas, to build fully-rigged 3D character creations that are ready for animation almost immediately.
Combined with iCloneVideo Mocap, and the new AccuFACE 2 update, I was able to take the character from an initial concept idea through to a fully animated performance while staying almost entirely within the Reallusion ecosystem.
AI-Assisted Character Generation
AI-generated concept designs have become a regular part of my workflow, but probably not in the way people often think.I don’t use AI as a one-click character creation solution. For me, it’s much more of a creative tool that helps me explore ideas quickly. If I have a character in my head, being able to generate different variations in minutes is incredibly useful. I can test different styles, proportions, clothing ideas, and personalities before committing time to the modelling process. The biggest advantage is speed.
Previously, if I had an idea for a character, I might spend a lot of time sketching variations or trying to explain the idea to someone else. Now I can create several visual references very quickly and use those as a starting point.Of course, the generated image is only the beginning. The important part is what happens afterwards—taking that idea and turning it into a properly designed, rigged, and animated character.
For Headshot 3, having good reference images is really important. The better the input, the better the result. Front and side profile images give Headshot much more information to work with, which helps create a more accurate base model. One of the things I really like about the new AI generation tools is that they are designed with this workflow in mind. They don’t just create an image; they also help optimise it for character creation. Removing elements such as hair, eyebrows, and eyelashes prevents unwanted information being transferred into the generated textures.
This might seem like a small detail, but these are exactly the types of things that can slow down a production later. Spending less time cleaning up textures means more time can be spent on the creative side.
I also found the ability to generate multiple reference variations really useful. Character design is often about exploring possibilities, and being able to quickly compare different directions helped me make better decisions before moving into 3D. For me, that’s where AI fits into the workflow. It doesn’t replace the artist’s decisions, it simply removes some of the slower early stages and allows you to get to the creative problem-solving much faster.
Character Refinement and Customization
This was the area I was most interested in testing because, while Headshot has always been very impressive for realistic characters, most of the work we do at Digital Puppets is stylised. Stylised characters are always a little more challenging because they don’t necessarily follow realistic human proportions. A larger head, exaggerated eyes, unusual facial shapes, or a more cartoon-like design can all make the character more difficult to recreate from a single image.
The Headshot 3 Side profile is especially important. A character might have the perfect silhouette from the front, but if the nose, jaw, or back of the head doesn’t match the concept, it can quickly lose that original design.
I wasn’t expecting Headshot 3 to create a perfect stylised character immediately, and that’s not really what the workflow is about. The strength comes from the combination of the generated base character and the tools you have available to refine it. The new Refine Face tools are probably one of the biggest improvements for this type of workflow. Being able to adjust the face from both the Front and Side views gives you much more control over the overall structure.
The Headshot 3 Refine Face tools are probably one of the biggest improvements for this type of workflow. Being able to adjust the face from both the Front and Side views gives you much more control over the overall structure.
From my experience in character design, getting the proportions right from different angles is one of the most important parts of creating a convincing character. It’s easy to make something look right from one view, but the challenge is making sure the design holds up from every angle. The Side profile is especially important. A character might have the perfect silhouette from the front, but if the nose, jaw, or back of the head doesn’t match the concept, it can quickly lose that original design.
The refinement tools help solve that problem by allowing you to guide Headshot towards the shape you actually want rather than simply accepting the first generated result.
“The new Headshot 3, Refine Face tools are probably one of the biggest improvements for this type of workflow. Being able to adjust the face from both the front and side views gives you much more control over the overall structure.”
ANTONY EVANS — Co-Founder of Digital Puppets / 3D Animator
The refinement tools help solve that problem by allowing you to guide Headshot 3 towards the shape you actually want rather than simply accepting the first generated result.
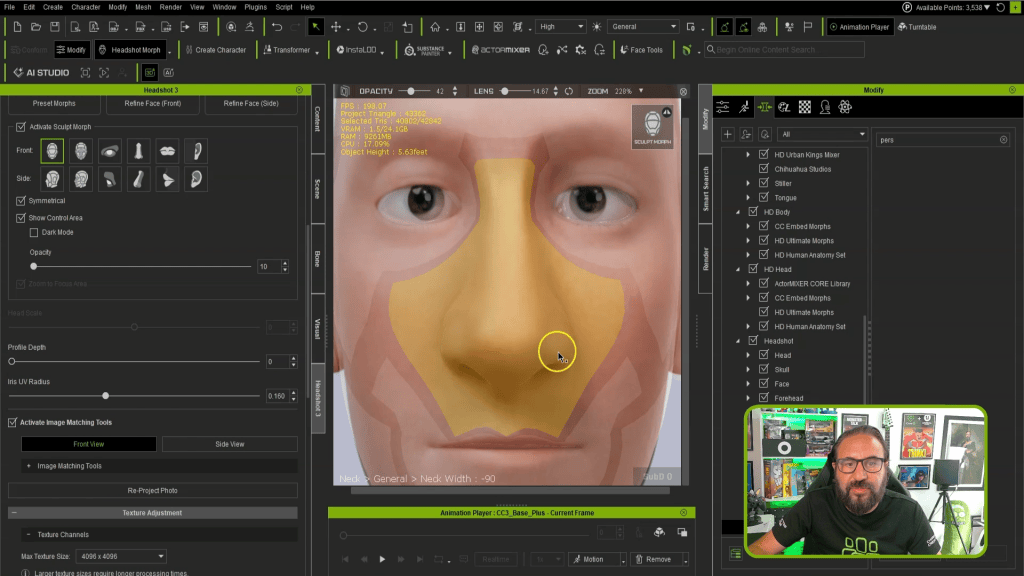
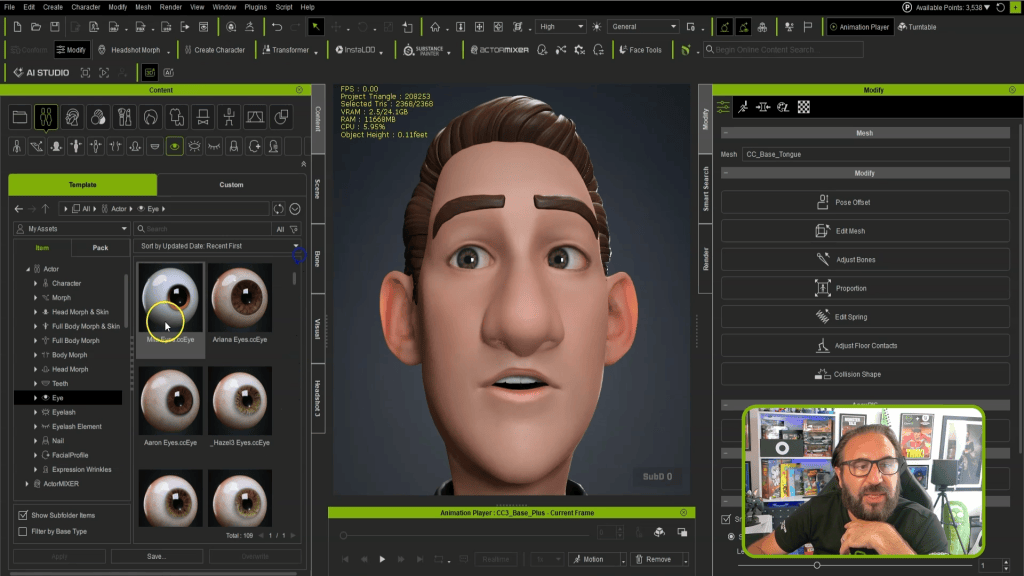
Once I had the basic head shape, I moved into the Sculpt Morphs. This is where the character really started to come together. I could push and pull features, adjust proportions, and exaggerate certain areas until the character started matching the original concept. For stylised characters, these small adjustments make a huge difference. A slight change to the eyes or mouth can completely change the personality of the character.
The Headshot 3 Sculpt Morphs. This is where the character really started to come together.
I also found the image matching tools really useful during this stage. Being able to keep my original AI-generated reference visible while refining the model helped make sure I didn’t lose the design direction I started with. Normally, this is the stage where I would probably move into another application such as ZBrush for additional sculpting. However, I found myself staying inside Character Creator much longer because the new tools gave me enough control to make most of the changes directly within CC5.
Once the head and face shape were complete, the next step was improving the textures. Headshot 3 can generate a high-quality facial texture from your reference image with a single click, which is a huge time saver. But what really stood out to me was the ability to continue editing those textures directly on the character.
In previous versions of Headshot, one issue I occasionally found—especially with stylised characters—was that certain areas of the texture could overlap or contain unwanted information. Hair, eyebrows, eyelashes, and exaggerated facial features could sometimes create areas that needed additional cleanup.
The new brush and masking tools make this much easier to fix. Instead of exporting the texture, editing it externally, and then bringing it back into Character Creator, I can now paint directly onto the mesh and make adjustments exactly where I need them. This is something we would normally do in ZBrush or Photoshop, so having those tools available directly inside CC5 makes the workflow much more efficient.
Another small feature that I really appreciated was the Delight tool. When using photographs as references, lighting information from the original image can sometimes be baked into the texture. Normally I would remove this in Photoshop before applying it to the character. Being able to do this directly inside Character Creator saves another step and keeps the whole process moving.
Once the character was complete, one of the biggest benefits of the Headshot workflow became clear, the character was ready for animation.
With Character Creator 5’s new HD Facial Profile, the character automatically receives the updated facial blendshapes and corrective morphs needed for expressive animation.
In my experience, the default setup works extremely well. Most of the time I don’t need to make any changes, but if a specific character requires extra control, the Facial Profile Editor is still available for further adjustments. This is a big advantage because the technical setup that normally takes time before animation can begin is already done. The character is ready to animate in iClone, and it can also be used with Unreal Engine workflows, including MetaHuman Animator pipelines.
“AccuFACE 2 allows you to use the CC5 HD profiles giving really good results just from a webcam or a prerecorded HD video. So, instead of going out to Metahuman Animator, we are able to do all our facial capture directly here in the iClone and Reallusion ecosystem.”
ANTONY EVANS — Co-Founder of Digital Puppets / 3D Animator
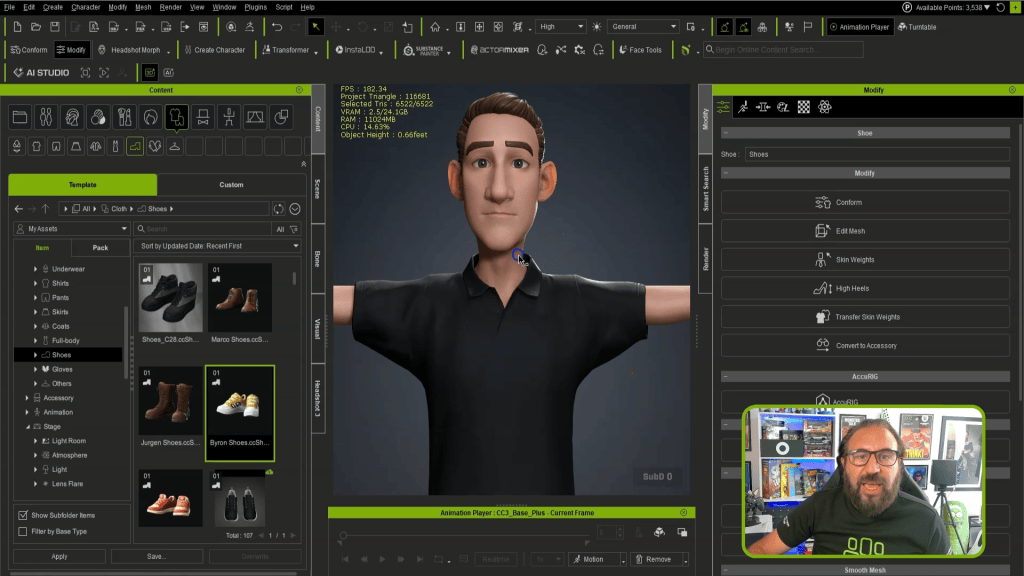
After finishing the face, the final stage was completing the overall character design body. I could easily expand the body using the same AI generator tools, which allowed me to create a fully-rigged 3D body from a reference image in minutes.
After finishing the face, the final stage was completing the overall character design body. I could easily expand the body using the same AI generator tools, which allowed me to create a fully-rigged 3D body from a reference image in minutes.
This streamlined approach ensured that the body proportions, pose, and initial clothing layout matched the facial style perfectly. By having the AI handle the complex task of mesh generation and initial skin weighting, I was able to bypass hours of manual modelling, allowing me to move directly into final adjustments and wardrobe customization.
It bridged the gap between a standalone head sculpt and a complete, production-ready character, ensuring the entire design language remained cohesive from head to toe.
One of the things I like about working with Character Creator is that you are not limited to the base character. The Reallusion Marketplace provides a huge range of clothing, hair, accessories, and additional assets, making it easy to finish a design quickly.
For this character, I went back to the original AI-generated concept images and used them as a guide when choosing hairstyles, clothing, and other details. Of course, there are times when you need something completely custom. In those cases, we create clothing and accessories in applications such as Blender or Maya and then bring them into Character Creator using the Weight Transfer tools.
That combination of custom assets and Character Creator’s built-in systems gives us the flexibility we need for different projects.
Feature
Description
Benefit for Stylized Characters
AI Image Generator
Generates concept art from text prompts, with optimization for 3D import.
Removes lighting information baked into reference photos.
Ensures neutral, clean base textures for consistent lighting.
HD Facial Profile
Automatic generation of advanced blendshapes and corrective morphs.
Animation-ready characters with expressive facial performances.
Animation Integration
Once the character was complete, the next challenge was bringing it to life. This is where iClone really becomes the next part of the workflow. One of the reasons I enjoy using Reallusion tools is that there are so many different ways to animate a character depending on the needs of the project. You can use traditional keyframe animation, motion libraries from ActorCore, professional motion capture systems, mocap suits, or video-based capture. There isn’t one correct workflow; the best option depends on the project, the budget, and the type of performance you need.
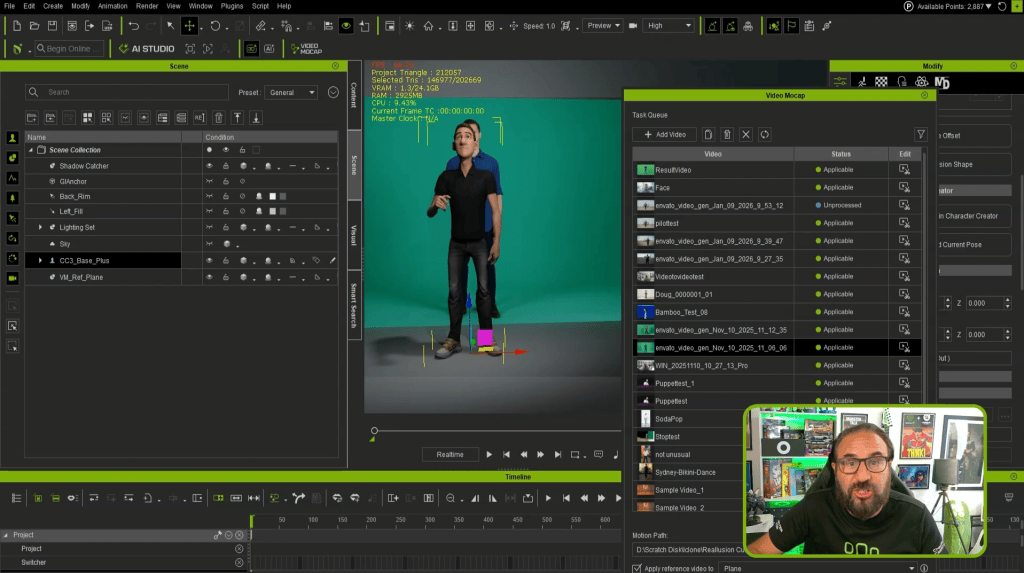
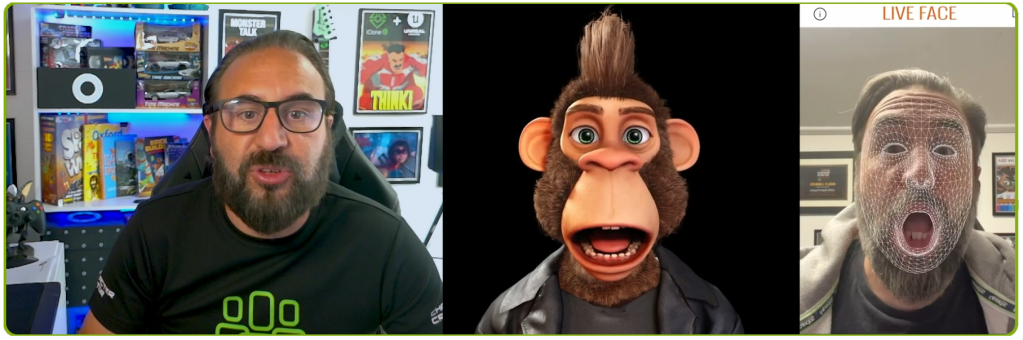
For this character, I wanted to demonstrate iClone Video Mocap because I think it’s one of the most accessible ways to create custom animation. For smaller teams, freelancers, or creators working without expensive motion capture equipment, being able to record a performance using a simple video is extremely useful. It works particularly well for characters that need to talk directly to the audience, such as virtual presenters, educational characters, or digital hosts. I wanted to test how quickly I could take a simple performance and transfer it onto the character.
“I wanted to demonstrate ICLONE VIDEO MOCAP because I think it’s one of the most accessible ways to create custom animation. For smaller teams, freelancers, or creators working without expensive motion capture equipment, being able to record a performance using a simple video is extremely useful.”
ANTONY EVANS — Co-Founder of Digital Puppets / 3D Animator
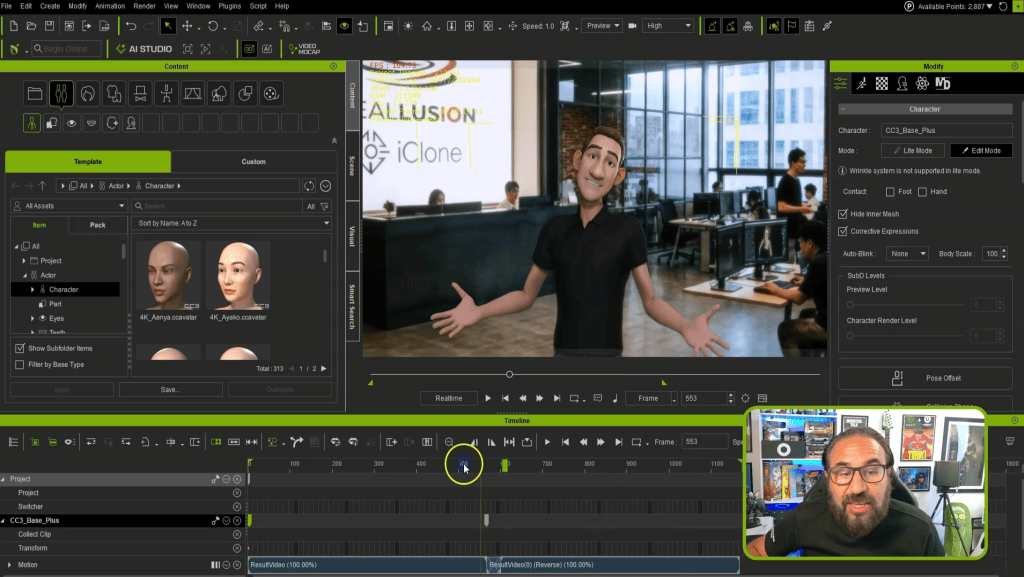
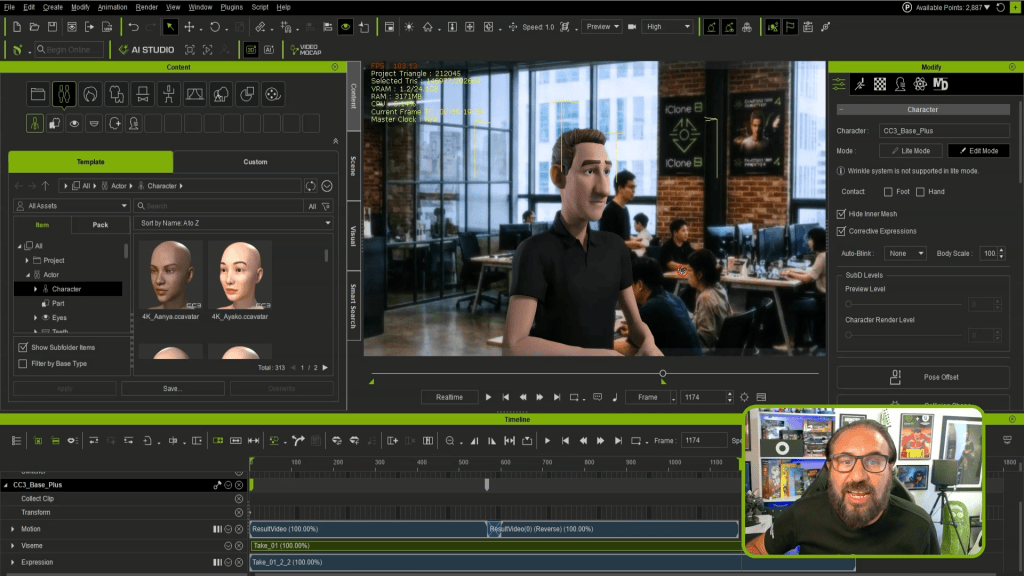
Because I didn’t have enough space in my office to record myself properly, I decided to experiment with an AI-generated video clip instead. I created a short video using an AI actor Kevin, prompting him to perform some simple talking gestures and natural movements. I then imported this video into iClone’s Video Mocap system, selected my character, and within minutes the character had a full-body performance.
The result was surprisingly good straight away. Like any motion capture workflow, there was some cleanup needed, but that’s completely normal. Even professional motion capture usually requires some adjustment afterwards. The difference is that iClone makes this cleanup process very straightforward. Using tools such as Motion Modifier, I could quickly adjust areas that needed refinement and polish the final animation.
For me, this is where the workflow becomes really powerful. The technical barriers are reduced, allowing you to spend more time focusing on the performance and storytelling. I was especially looking forward to testing AccuFACE 2 because facial capture is something we use regularly in our projects, and we are always looking for ways to improve both quality and efficiency.
Facial animation is often one of the most challenging parts of character production. A character can have a great design and a good body performance, but if the facial animation doesn’t feel natural, the audience will notice immediately.
Before testing AccuFACE 2, our preferred workflow for high-quality facial capture involved using MetaHuman Animator and then transferring that animation onto our Character Creator characters. This works very well, especially when working inside Unreal Engine, but it does mean adding extra steps and moving between different systems.
What impressed me about AccuFACE 2 is that it allows us to keep more of that process inside the Reallusion workflow. Combined with Character Creator 5’s new HD Facial Profile, the level of detail captured in the facial performance is really impressive. The updated facial system makes a big difference because the capture is not just moving simple expressions, it is working with a much more detailed facial rig with corrective morphs already built in.
“What impressed me about AccuFACE 2 is that it allows us to keep more of that process inside the Reallusion workflow. Combined with Character Creator 5’s new HD Facial Profile, the level of detail captured in the facial performance is really impressive.”
ANTONY EVANS — Co-Founder of Digital Puppets / 3D Animator
I was able to import the character, capture the performance, and then transfer the animation between characters using the existing tools. The process was straightforward and showed how practical this workflow could be when working with multiple characters or different versions of a project—all within the same tools.
I also noticed some nice improvements in the AccuFACE 2 update, including the ability to reset different areas of the face independently and adjust the resting face pose.These might seem like small additions, but anyone who has worked with facial capture knows that these types of controls can make a big difference. Every character is slightly different, and having the ability to fine-tune the starting point helps create a better final performance.
The workflow I have shown here with iClone Video Mocap and AccuFACE 2 is only one possible approach. That’s probably one of the things I like most about the Reallusion ecosystem—you can adapt the tools around the project rather than having to adapt the project around the tools.
Every production has different requirements. Sometimes you need speed, sometimes you need maximum control, and sometimes you need a balance between the two. Having multiple options means you can build a workflow that suits the project, the team, and the budget.
Benefits for Creators
For me, the biggest benefit of this workflow is simple: it allows creators to spend more time being creative and less time dealing with technical setup. The combination of AI-assisted concept creation, Character Creator 5’s Headshot 3, and iClone 8’s AccuFACE 2 creates a much faster path from an idea to a finished animated character.
The concept stage is quicker because I can generate and explore ideas faster. The modelling stage is quicker because I already have a strong starting point. The rigging and facial setup are quicker because so much of the technical work is already handled automatically. That doesn’t mean the creative decisions disappear. In fact, I think the opposite is true. By removing some of the repetitive tasks, you have more time to focus on the things that actually make a character interesting—the design, personality, storytelling, and performance.
One of the main reasons I recommend iClone and Character Creator to other artists is because they are very approachable. There are a lot of powerful tools available, but the workflow remains intuitive. Features like preset animations, automatic rigging, lighting tools, weight mapping, facial setup, and the huge library of available assets all help speed up production without making the process feel complicated.
For smaller studios and independent creators, this is especially important. A lot of artists are working with limited time and resources, so being able to create professional-quality characters without needing a huge pipeline can make a massive difference. Another big advantage is how well these characters fit into different production environments. The same character can be used for a game project, a cinematic animation, a virtual presenter, or a real-time experience. You aren’t locked into one format or one platform.
At Digital Puppets, we’ve been fortunate to work across many different types of projects, and having a flexible character creation workflow is essential. Character Creator continues to be the foundation of our process because it allows us to create characters quickly while still fitting into professional pipelines.
Conclusion
After testing Headshot 3, Character Creator 5, and AccuFACE 2, I think this is a really exciting direction for character creation. For me, the biggest improvement with Headshot 3 is how much more practical it has become for stylised characters. Previous versions were already very good for realistic faces, but stylised designs often required more manual work afterwards.
The new refinement tools make a big difference because they give artists more control over the final result. Instead of accepting the generated character as the finished product, you can use it as a starting point and shape it into exactly what you need. The AI generation tools also fit naturally into this workflow. They don’t replace the creative process—they simply make it faster. Being able to move from an idea to a useful reference image quickly means more time can be spent developing the actual character.
The biggest takeaway for me is the complete image-to-animation pipeline. A concept image can now become a fully rigged, textured, and animated character in a fraction of the time it used to take. The technical foundations are already there, allowing artists to focus on the creative side.
With Character Creator 5, Headshot 3, iClone, and AccuFACE 2, you have a workflow that can adapt to almost any project. Whether you’re creating characters for games, animation, virtual production, education, or real-time experiences, the tools are flexible enough to fit different needs.
For the type of work we do at Digital Puppets, that flexibility is probably the biggest advantage. The goal has always been to create better characters, tell better stories, and spend less time fighting technical limitations. These updates help move that process forward, giving artists more freedom to focus on what matters most—the creativity behind the character.
Featured Artist Spotlight: Antony Evans – Digital Puppets UK
ANTONY EVANS — Co-Founder of Digital Puppets / 3D Animator
Antony Evans is a highly respected UK-based 3D animator, character designer, and virtual production specialist, co-founding Digital Puppets alongside his brother, Scott Evans. Based in Torquay, Devon, their studio is renowned for its expertise in real-time motion capture, innovative 2D/3D character design, and custom VTuber avatar creation. Digital Puppets excels in delivering turnkey virtual production solutions, crafting rapid character designs and digital puppetry workflows for a diverse client base that includes educators, streamers, and commercial agencies for full-scale animated shows and marketing content.
Antony’s workflow with Reallusion tools is a testament to their flexibility and power, forming the foundation of his studio’s character pipeline. He continuously explores the latest updates, integrating tools like Character Creator 5, Headshot 3, iClone, and AccuFACE 2 to push creative boundaries while maintaining high efficiency. His recent work on stylized characters showcases how Headshot 3‘s AI-assisted generation and refinement tools streamline concept to animation, allowing for unprecedented speed and creative control in crafting unique IP. This blend of technical mastery and artistic vision positions him at the forefront of real-time animation production.
Q: How do I create stylized characters with exaggerated features using Headshot 3 in Character Creator 5?
A: Headshot 3 utilizes AI to generate an initial 3D head from reference images, which you can then extensively refine using its dedicated Refine Face tools for front and side views. These tools, coupled with Sculpt Morphs, allow artists to push and pull facial features, adjust proportions, and exaggerate elements to match any stylized design. This process ensures the character maintains its unique personality and cartoon-like aesthetics across all angles, offering precise control over the final shape.
Q: What are the key benefits of using Character Creator 5’s HD Facial Profile for animation?
A: The Character Creator 5 HD Facial Profile automatically equips characters with an advanced facial rig, including updated blendshapes and corrective morphs. This means the character is immediately animation-ready upon creation, significantly reducing technical setup time. The profile enables highly expressive facial performances in iClone 8 and ensures compatibility with professional facial capture solutions like AccuFACE 2 and even external pipelines such as Unreal Engine’s MetaHuman Animator, offering unparalleled flexibility.
Q: Can I use AI-generated videos for full-body motion capture in iClone 8?
A: Yes, iClone 8’s Video Mocap system supports using AI-generated video clips for full-body motion capture. As demonstrated by Antony Evans, a video of an AI actor performing gestures can be imported and applied to your 3D character, generating animation quickly and efficiently. This method is incredibly useful for freelancers or studios without dedicated motion capture equipment, providing an accessible way to create custom body animations with straightforward cleanup tools.
Q: How does AccuFACE 2 compare to MetaHuman Animator for facial capture of custom characters?
A:AccuFACE 2, an iClone 8 plugin, offers real-time facial capture directly from a webcam or HD video, leveraging the advanced Character Creator 5 HD Facial Profile. A key distinction noted by Antony Evans is AccuFACE 2‘s Expression Curve editor, which provides superior granular control over micro facial expressions crucial for custom IP and stylized characters. While MetaHuman Animator (MHA) also offers high-quality capture, AccuFACE 2 allows users to remain within the Reallusion ecosystem for a more integrated and efficient workflow, especially for non-realistic designs.
Generative AI can create extraordinary images and video, but filmmaking requires more than generating something that looks good. A director needs control over characters, performance, motion, cameras, composition, environments, and continuity from one shot to the next.
John Martin explores a production workflow that combines the directability of iClone with the generative capabilities of AI Studio. Using a superhero sequence featuring Alphaman and Runway, Martin demonstrates how an iClone project can become the foundation for both AI image and video generation.
Instead of beginning with a blank prompt and asking AI to invent the shot, the process starts in 3D. Characters are positioned. Motions and poses are established. Cameras are chosen. Environments are assembled. The action can be viewed and adjusted before generation begins. That 3D information is then sent into AI Studio, where AI Actors, image generation with Flux2 Max, video generation with Seedance, and enhanced prompting transform the previs into a more cinematic result.
The central idea is simple: Use 3D to direct the shot. Use AI to transform it.
The Motion Dummy is important because its purpose is not to define the final appearance of the superhero. It provides something equally important: performance. Motions, poses, and keyframe edits created in iClone can establish what the character is doing before the shot reaches AI Studio. The director can refine the pose, adjust an existing animation, change timing, reposition the character, or modify the camera while still working inside a controllable 3D environment.
The city props perform a similar role. Using City Block 03 and other city assets, Martin can establish the geography and scale of the scene. Buildings, streets, characters, and cameras have actual spatial relationships instead of being independently interpreted from a text prompt. The result does not need to be a final render. It needs to communicate the shot.
3D as Visual Direction for AI
Once the project has been constructed, iClone contains much of the information necessary to communicate Martin’s intention to AI Studio. The project can provide motion, pose, props, character position, environment, camera framing, and camera changes.
This changes the role of prompting. Consider a traditional text-to-video instruction such as: A superhero flies through a city. That sentence leaves almost everything open to interpretation. Where is the camera? How does the superhero move? What direction does he fly? What is his starting pose? Where is he in relation to the buildings? How quickly does the action happen?
An iClone scene can answer those questions visually. The 3D project becomes another form of prompt—one constructed with characters, animation, cameras, and environments rather than words. AI Studio can then use that visual information as the foundation for generation.
The Motion Dummy Becomes an AI Actor
One of the key transitions happens when the relatively simple 3D character is replaced by an AI Actor in AI Studio. Martin’s project uses the superhero Alphaman changed to be in full yellow suit and no cape, also a text prompted female actor, and later his opponent Runway, as AI Actors. For sequences involving both Alphaman and Runway, both AI Actors can be included as references, helping maintain their identities across the sequence.
AI Studio includes a library of approximately 200 template characters, including male, female, senior, kid, stylized, and creature characters. For this project, the AI Actor system provides something especially important for filmmaking: character consistency from shot to shot.
The Motion Dummy can therefore concentrate on directing the performance in iClone while the AI Actor establishes the character’s identity during generation. This creates a useful separation between two jobs: iClone defines what the character does. The AI Actor defines who the character is.
Once Alphaman is added to the project, his AI Actor can be invoked by name in the prompt. This gives AI Studio a specific character likeness to reference when generating the shot rather than asking the model to reinvent the superhero every time.
3D to Image with Flux2 Max
The first workflow demonstrated is 3D to Image. Martin positions the iClone playhead on the exact moment he wants to develop into a finished image. That frame is captured directly from the iClone 3D project and becomes an image reference for AI Studio. For the demonstration, image generation uses Flux2 Max at 1280 × 720. The captured iClone frame provides the basic composition, pose, camera, and spatial arrangement. Alphaman and Runway are then selected from the Character Library as an AI Actor reference.
The generation therefore has multiple layers of information working together. The iClone capture communicates the shot. The AI Actor communicates the character. The text prompt communicates additional visual and cinematic intention.
AI Studio’sLighting and Style presets can then be incorporated to further develop the final appearance.
What begins as a relatively simple 3D viewport image can consequently become a much more developed cinematic frame while retaining the directional decisions made in iClone.
From 3D to Video
The workflow becomes even more powerful with 3D to Video. For video generation, Martin uses Seedance in a 16:9, 720p format. Here, AI Studio can receive two forms of guidance from iClone.
An image reference can be captured from a specific playhead position, establishing the visual starting point.
A video reference can also be captured from the iClone project, allowing the animation itself to guide the generated motion. The desired animation range can be selected using the iClone timeline or In and Out markers.
Now the AI model is not simply being told what movement should occur. It can see the movement. The 3D animation communicates the character’s motion, trajectory, timing, and overall performance, while the captured frame establishes the composition and the AI Actor reference maintains identity. This provides a much stronger starting point for directed AI video than text alone.
Prompting Between the Key Actions
The rescue sequence demonstrates an even more interesting variation. Martin begins with a 3D motion that establishes the important start and end states. The generated sequence, however, needs more storytelling between those points. The basic idea is straightforward: Alphaman takes flight over the city, rescues a falling woman, brings her safely to the ground, and receives her appreciative reaction.
Instead of trying to animate every detail of that interaction in 3D, Martin keeps the important motion structure while using the prompt to describe the action that should occur between those established moments.
This creates a hybrid approach to animation. The director can lock down the essential action with 3D while giving the generative model room to interpret secondary movement and connective performance. It is a different way of thinking about AI video. The choice is no longer simply between animate everything and generate everything. A filmmaker can decide which parts need explicit 3D direction and which parts can be interpreted by AI.
Using ChatGPT to Enhance the Prompt
Prompt development becomes another stage of production. Martin begins with a basic written description of the rescue and takes it into ChatGPT with the instruction to improve it for generative AI video. The objective isn’t to replace the direction already supplied by iClone. It is to make the intention surrounding that direction clearer.
The enhanced prompt can add information about cinematic presentation, emotional reactions, physical interaction, environmental response, pacing, and other nuances that aren’t easily communicated by the 3D motion itself. The refined prompt is then pasted back into AI Studio.
This creates a three-part directing system:
3D communicates physical direction. The prompt communicates cinematic and narrative intention. The AI model interprets both.
In the rescue example, the beginning and ending motion can remain anchored to the iClone reference while the prompt encourages Seedance to develop the rescue action between them.
That is an important distinction. Prompt enhancement isn’t being used simply to make the language more elaborate. It is being used to tell the model where it has creative room and what should happen inside that space.
Directing AI Instead of Simply Prompting It
The larger lesson from 3D to AI is not that prompting becomes less important. It becomes more focused. Text is very good at describing intention, atmosphere, emotion, style, and additional action. It is less precise when asked to communicate every spatial and physical decision required by a complicated cinematic shot. 3D excels at those decisions. By combining the two, Martin’s workflow allows each tool to contribute what it does best.
AI Actors provide recurring character identity and shot-by-shot consistency.
Flux2 Max transforms directed 3D frames into generated imagery.
Seedance transforms directed 3D motion into generated video.
ChatGPT helps develop the prompt beyond a basic description, adding clarity, cinematic nuance, and additional action.
And AI Studio brings those elements together into a single generative workflow.
3D to AI: A Director’s Approach
For Martin, the significance of the workflow is not simply that a 3D render can be made to look better with AI.
It is that existing 3D filmmaking skills can become a method for directing generative AI.
A pose is direction.
A motion edit is direction.
A camera choice is direction.
Moving a character within the scene is direction.
Choosing the exact playhead position is direction.
Setting In and Out points is direction.
Selecting the right AI Actor is direction.
And writing the prompt is another layer of direction.
Together, those decisions create a production process where the filmmaker doesn’t have to surrender the shot to a text prompt. The filmmaker can build the shot first and then decide where AI should contribute. That is the promise behind 3D to AI: Direct it in 3D. Define it with references. Enhance it with prompting. Generate it with AI Studio.
For storytellers accustomed to thinking in terms of actors, motion, sets, cameras, shots, and performances, it offers a familiar way into an unfamiliar technology. AI becomes another filmmaking tool and the director still directs.
John Martin
John Martin is a producer, digital storyteller, and Vice President of Marketing at Reallusion, where he has spent more than two decades helping shape the future of real-time animation, digital humans, and AI-powered content creation. With a background spanning filmmaking, performance capture, animation, and emerging technologies, John has been instrumental in the development and testing of AI Studio, helping refine workflows that connect traditional CG production with generative AI. His passion is empowering storytellers with innovative tools that transform imagination into cinematic experiences.
TL;DR: Digital sculptor Óscar Fernández built Veyra, a horned demon with digitigrade legs and full bat wings, using a Character Creator to ZBrush workflow in which CC5 supplies the rigged base, handles skinning, texturing, posing, and final render, while ZBrush carries the sculpting and hard-surface work. The same file ends up both animation-ready and print-ready.
Across a 20-chapter series, Fernández documents the full build on Character Creator 5 and ZBrush, connected by GoZ Plus. What makes the series worth studying is not any single technique, but where he draws the line between the two applications: everything structural and repetitive goes to CC5, everything artistic stays in ZBrush.
Resource Pack Free Download
Fernández bundles everything reusable into a single Resource Pack, including his custom ZBrush interface, the Geo and Slash2 brushes, the free Orb brush set, the CC face region texture that maps expression deformation zones, and the scale alphas used on the shoulders and forearms. The brushes need to be copied manually into ZBrush’s ZStartup/BrushPresets folder before they appear in the palette.
A Demon With No Human Skeleton to Borrow
Veyra is a deliberately awkward test case. She has reversed digitigrade legs ending in hooves, oversized clawed hands, a horned helmet fused to the skull, layered armor, and a wingspan wider than she is tall. Every one of those choices breaks something in a conventional rig.
Fernández, who specializes in figures for 3D printing, does not treat that as a sculpting problem. He treats it as a proportion problem, and solves it with sliders before a single brush stroke lands. The CC5 neutral HD base gets an athletic female preset, longer legs, a stretched torso, wider hips, scaled-up hands and feet, elf ears, and extended nails, all through the Morph System before the mesh ever reaches ZBrush.
His summary of what that buys him is blunt: the base alone, he says, has “already saved us a ton of work hours that would have gone into sculpting the body from scratch.” His normal process would be blockout, then DynaMesh, then hours of refinement. Here it takes two clicks.
The Six-Stage Character Creator to ZBrush Workflow
The series follows one loop, repeated at increasing resolution.
Stage 1
Base in CC5
Load the neutral HD base, set proportions with body modifiers and detail sliders, clear the pose, then GoZ to ZBrush with diffuse and normal maps switched off.
Stage 2
Sculpt the body via GoZ
Sculpt facial structure, anatomy, and the digitigrade leg break at subdivision level one, sending the mesh back at level zero whenever topology or proportion changes need to be verified against animation.
Stage 3
Build accessories
Duplicate the body subtool as a conforming base, then cut helmet, armor, clothing, and ornament pieces from it using slice curves, polygroups, and dynamic subdivision thickness.
Stage 4
Detail
Add anatomy passes, claws, horn erosion, surface noise, alphas, and scale texture, pushing to 57 million polygons where needed.
Stage 5
Texture
Skin, makeup, eyes, and nails from CC5 content; accessories polypainted in ZBrush with cavity and ambient occlusion masks; tattoos composited over CC5 skin maps in Photoshop.
Stage 6
Render or print
Pose, light, and render in CC5, or decimate a base prop, pose against it, and send the posed mesh back to ZBrush as a layer for print prep.
The loop only works because Fernández tests early. After every major proportion change he loads a walk cycle in CC5 to confirm the deformation still holds.
Character Creator 5: The Base That Removes the Blockout
Sliders Instead of Sculpting
The most repeated lesson in the series is that CC5 should absorb anything parametric. Knuckle thickness, finger length, nail shape, ear type, thigh-to-calf ratio: all of it moves faster on a slider than under a brush, and all of it stays symmetrical and topologically clean. When Fernández wants the shins longer and the thighs shorter, he says he could do it in ZBrush, “but as you can see, it’s just a matter of moving two sliders.”
Bones That Follow the Morph
The digitigrade legs are the real test. Fernández splits the ankle joint upward in ZBrush so the hoof can behave as a foot, then sends the mesh back. The first walk cycle looks wrong, and the cause is skeletal, not geometric. Auto Position rebuilds the bone placement against the new silhouette, and the character walks correctly on the tips of the hooves. That single step is what keeps a non-human body plan animatable.
Test at Every Stage
He returns to CC5 constantly, at subdivision level zero, purely to check behavior. It costs seconds and catches problems that would be expensive to unwind later.
ZBrush: Where the Character Actually Gets Made
Sculpt Low, Detail Late
Fernández sculpts the face at subdivision level one, using the CC face-region texture map as a guide so that his edits respect the deformation zones the expression system depends on. He is emphatic about resolution discipline: work high too early and “that plastic effect will start to appear, which looks really, really bad.” Volume first, detail last.
Polygroups as a Hard-Surface Engine
Nearly every accessory in the series follows the same recipe: cut the shape, define polygroups at every intended edge, then alternate Polish by Groups and ZRemesher until the surface is clean and the edges survive. Thickness comes from dynamic subdivision rather than manual extrusion. It is a low-poly, high-control approach that produces armor, helmet panels, and belt hardware without ever leaving sculpting mode.
Physics for the Things Sculpting Does Badly
The wing membranes start as ZSpheres, then get a flat plane draped over the finger bones and simulated with ZBrush dynamics against a calculated collision volume. Fernández drops the firmness almost to zero so the cloth sags naturally. The resulting folds, he notes, would be “pretty hard to sculpt.” The same technique settles the skirt against the legs.
Detail With Restraint
Scales go on the shoulders and forearms via surface noise driven by custom alphas, then get individually lifted with Move and Inflate so the tiling does not read. Everything else stays smooth on purpose. His reasoning applies to any character: “It’s also important when designing a character that not everything has a ton of texture. You need to let it rest.”
Texturing and Getting Everything Back Into CC5
Split the Texturing Job
Skin, makeup, eyes, and nails come from CC5 content, which handles subsurface behavior and the eye shader better than a hand-painted approach would. The accessories get polypainted in ZBrush using cavity and ambient occlusion masks to drive gradients, plus a consistent top-down light pass that reads as form. Color direction came from concept artist KithKart, whose palette proposals Fernández mixes rather than adopts wholesale.
The tattoos take a third route entirely: masked and painted in ZBrush, exported as high-contrast 2K maps, then composited over the CC5 skin textures in Photoshop as a multiply layer at 50% opacity. It gives full control and takes minutes.
Accessory or Clothing, Not Both
Bringing the pieces back is where the series is most useful. Rigid parts, horns, helmet, shoulder pad, forearm guard, come in as accessories and get bound with Pick Parent to the correct bone. Deforming parts, hooves and the lower garment, come in as clothing with Transfer Skin Weights using the shoes preset, then Conform to calculate collision. Anything left intersecting gets fixed with Mesh Editing sculpt tools directly in CC5.
Displacement and normal maps transfer separately per subdivision level, so level one and level two each need their own bake.
Rendering Without Leaving CC5
Fernández builds the final image entirely inside Character Creator: a preset stage, a tuned five-light setup, a rescaled and recolored backdrop, then a pose assembled from a preset, hand-adjusted joints, hand presets for the claw gesture, and a facial expression tuned through both muscle mode and sliders. He renders at 4000 x 4000 at subdivision level one, with depth of field. His verdict on the output: “we don’t need any other program.”
From Render to Resin: Preparing Veyra for 3D Printing
The final chapter is the one that separates this series from a standard character pipeline. Fernández merges his sculpted base prop, runs Decimation Master down to roughly 700,000 triangles, and brings it into CC5 as a prop. He unlocks the foot IK, poses Veyra against the base, then sends the mesh back to ZBrush with GoZ set to deliver only the new position, loaded into a layer.
That layer is the payoff. Pose Tools reads the layer names, so multiple poses live inside one file and can be toggled on and off without duplicating subtools or losing subdivision levels. The final figure gets a Marvelous Designer cloth pass to close the composition, and it is ready to print.
Why This Matters for Solo Character Artists
The interesting number in this series is not polygon count, it is time allocation. By the fourth chapter Fernández observes that he is spending most of his time on accessories and very little on the character itself, “because that’s already done for us by Character Creator.”
For a solo artist selling print files or building animated characters alone, that reallocation is the entire value proposition. Rigging, skinning, weight painting, bone placement, and skin shading are the tasks that historically forced specialization or outsourcing. Handing them to CC5 does not make the artist faster at sculpting. It removes the technical work that was never the artistic contribution in the first place, and it does so without locking the result into a single output. The same file renders, animates, and prints.
Looking Ahead
Fernández closes the series by pointing at the range rather than the result: the same character can go to animation, to render, or to a collectible figure, without a separate build for each. For anyone already sculpting in ZBrush, that is the argument for adding CC5 to the pipeline rather than replacing anything in it.
Key Takeaways for a Character Creator to ZBrush Workflow
Push every parametric change to CC5 first. Proportions, hand scale, ear type, and nail shape are faster and cleaner on sliders than under a brush.
Sculpt at subdivision level one for as long as possible. Big shapes at low resolution avoid the plastic look and keep the mesh easy to reshape.
Run Auto Position after any major proportion change. Non-human silhouettes only stay animatable if the skeleton follows the morph.
Decide accessory versus clothing before you send anything. Rigid pieces get Pick Parent, deforming pieces get Transfer Skin Weights, and mixing them up costs a full round trip.
Send the posed mesh back as a layer, not a new file. Pose Tools reads layer names, so several poses can live in one project with subtools and subdivision levels intact.
FAQ: ZBrush to Character Creator 5 Workflow
Q: Can I sculpt non-human proportions in ZBrush and still animate them in Character Creator 5? A: Yes. Sculpt the proportions at a low subdivision level, send the mesh back through GoZ Plus at level zero, then run Auto Position so the skeleton relocates to match the new silhouette. Veyra’s reversed digitigrade legs and hooves animate correctly using exactly this method.
Q: Should armor come into CC5 as an accessory or as clothing? A: Rigid pieces that should not deform, such as shoulder pads, horns, and forearm guards, come in as accessories and get linked to the right bone with Pick Parent. Pieces that need to follow the body, such as boots or fabric, come in as clothing and get skinned with Transfer Skin Weights.
Q: Do I need to bake displacement maps separately for each subdivision level? A: Yes. Normal and displacement maps in CC5 are independent per subdivision level, so a character viewed at level two needs its own bake in addition to the level one bake.
Q: Do I need to buy anything extra to use ZBrush with Character Creator? A: GoZ Plus is included free with Character Creator and works with recent ZBrush versions. A Character Creator trial is available from the Reallusion Software Store if you want to test the round trip before committing.
ÓSCAR FERNÁNDEZ / DIGITAL SCULPTOR
Óscar Fernández is a freelance digital sculptor from Spain, specializing in creating figures for 3D printing. With deep expertise in ZBrush, he is known for crafting highly expressive characters that capture both personality and motion. His work stands out through the meticulous attention to facial expression, muscle definition, and dynamic posing, giving each sculpt a strong sense of tension and storytelling power.