We are excited to share that Reallusion Magazine has been recognized by FeedSpot as one of the Top 100 Animation Blogs, securing the #7 spot! This honor reflects our dedication to bringing valuable resources to the animation community.
From major updates in iClone, Character Creator, and Cartoon Animator to inspiring contests and artist features, we strive to keep the animation community informed and inspired. Our goal has always been to highlight technical advancements and the creative possibilities they unlock.
Our coverage includes the Reallusion Content Store, a comprehensive vault of 2D/3D assets, and ActorCore, the one-stop platform for 3D motions and characters. We also highlight the Marketplace with its 200,000+ assets and community rating system. In our Learning articles, we share insights from certified artists and developers.
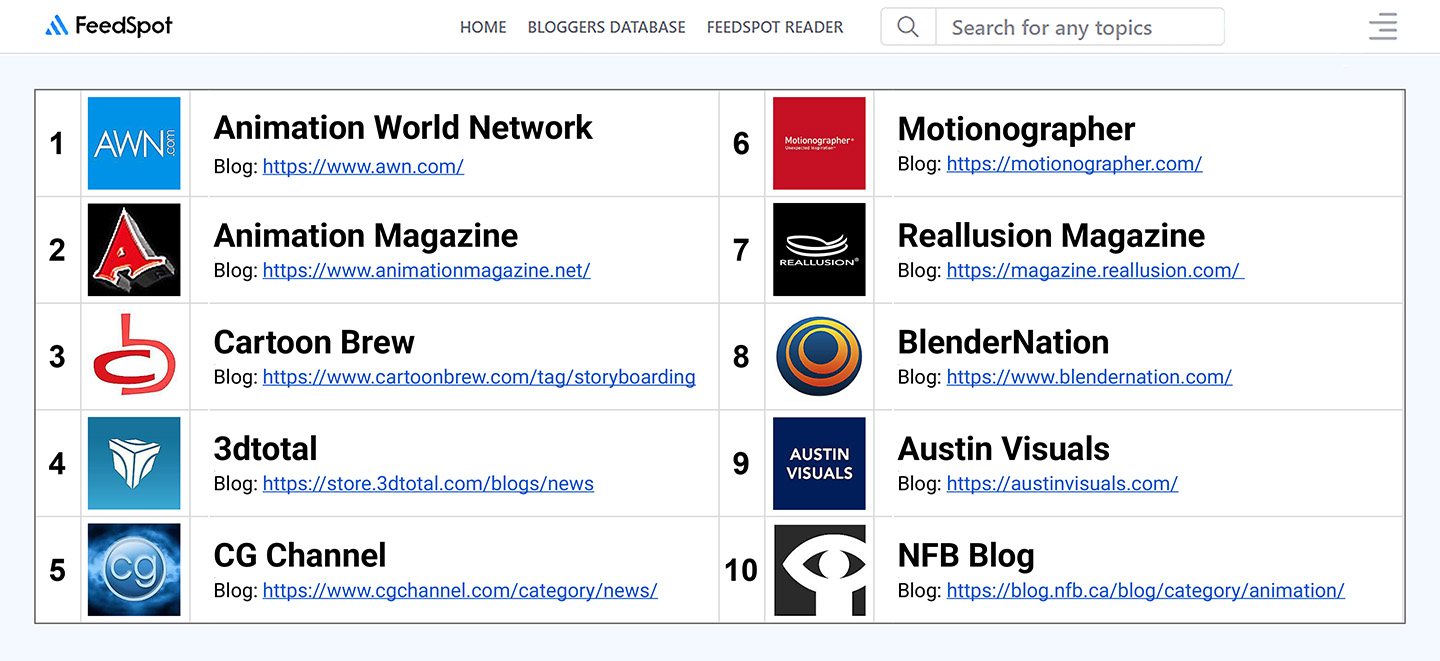
Here is the list of the top 10 animation blogs in 2025 ranked by FeedSpot:
We extend our heartfelt gratitude to our readers and contributors. Stay tuned for more innovations as we continue to explore the evolving world of animation!
Thrilling 3D motions coming to ActorCore and iClone for unparalleled animation productions
Mainstream action movies like Mission Impossible and the Marvel series often feature thrilling scenes with explosions, sling loads, and other high-risk stunts. Producing these complex sequences requires extensive resources, including hiring large teams, time-consuming setups, and managing the inherent dangers of stunt work. As a result, the demand for intricate action animations has significantly increased in the 3D motion market.
Reallusion, known for creating dynamic and stylish action movements, has stepped up to meet this growing demand. Designed with the same level of planning and execution as big-budget productions, the company has combined advanced motion capture technology with keyframing techniques, as many superhuman actions are nearly impossible for real performers to execute safely. This innovative approach allows the company to bring extraordinary motion to life while maintaining authenticity and excitement.
Industry Experts, Multi-National Collaboration
Producing these projects required top-tier professionals from around the globe. In the U.S., Reallusion has worked closely with Motion Capture Orlando, whose expertise in dynamic motion capture is invaluable. In Asia, the company collaborated with Hong Kong kung fu stunt performers renowned for their mastery of wired stunt actions. This collaboration enabled Reallusion to capture a diverse range of complex motions, seamlessly blending Western superhero action with Eastern martial arts precision.
Exciting New Motion Packs Unveiled
In 2025, an exciting lineup of new animation packs will be available from ActorCore and iClone, including:
Legendary Heroes Hand-key Animation
Already released is theLegendary Heroes: Wall Crawler pack, featuring hand-keyed animation clips inspired by characters like Spider-Man and Tarzan. This pack enables fluid transitions from climbing to swinging to combat in one continuous shot.
Another exciting addition is Legendary Heroes: Aerial Fighter, the first flying hero animation collection. Inspired by Superman, this pack allows animators to create thrilling mid-air fights and daring rescues with cinematic quality.
Wire Stunt Mocap Animation
Partnering with martial arts professionals to deliver top-tier kung fu stunt choreography and wirework, this collaboration has produced several dynamic motion capture packs. The first, Explosion Stunts, showcases intense reactions to bomb blasts and energy weapons, adding realism and excitement to any action-packed production.
The Swat Stunts* pack delivers breathtaking aerial stunts for non-superpowered heroes, featuring rappelling, crashing through windows, scaling buildings, and wingsuit flying. These animations are perfect for SWAT teams, special forces, secret agents, and extreme sports narratives.
Additionally, the Fight Stunts* pack offers high-energy martial arts choreography, including high-flying kicks, devastating punches, body throws, and brutal takedowns. This pack enables users to create thrilling fight scenes reminiscent of The Matrix and John Wick.
Hollywood’s Legendary Heroes Mocap Animation
Partnered with Motion Capture Orlando, the Legendary Heroes: Avenging Warriors* pack is inspired by Marvel movies. This collection features animations reminiscent of characters like Iron Man, Captain America, and Doctor Strange and more. Created by top stunt performers from Marvel Universe Live, these animations allow users to recreate iconic battle sequences.
Expanding on this expertise, the Legendary Heroes: Laser Swords* pack brings meticulously designed combat animations inspired by the Star Wars universe, enabling animators to stage epic duels across galaxies.
These new animation packs serve as versatile building blocks for creators to craft their own heart-pounding sequences. Reallusion continues to revolutionize animation, providing users with unparalleled animation tools. With so many exciting releases ahead, now is the perfect time to explore the limitless possibilities. Visit ActorCore 3D Motion today and experience yourself.
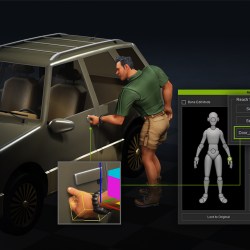
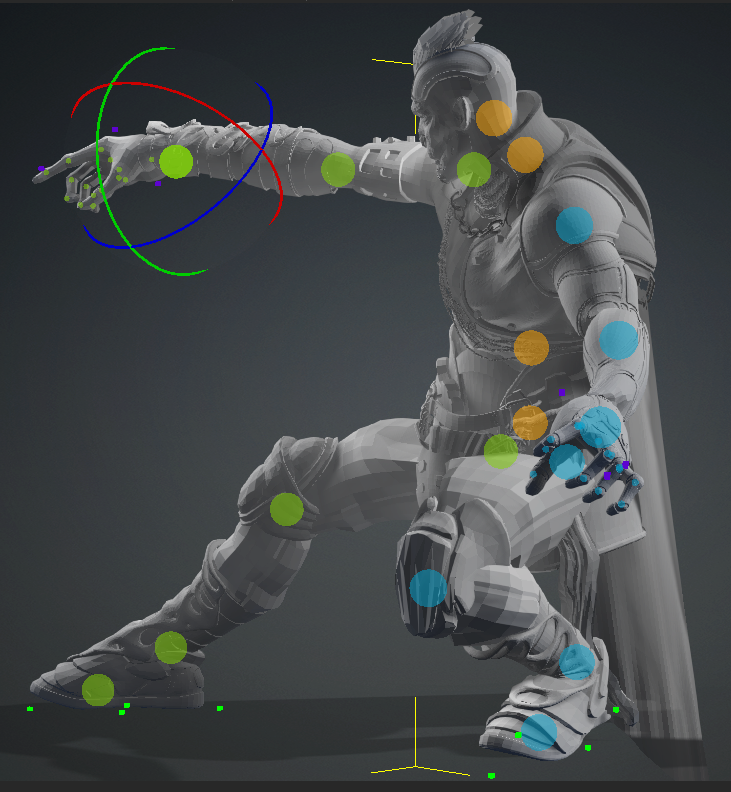
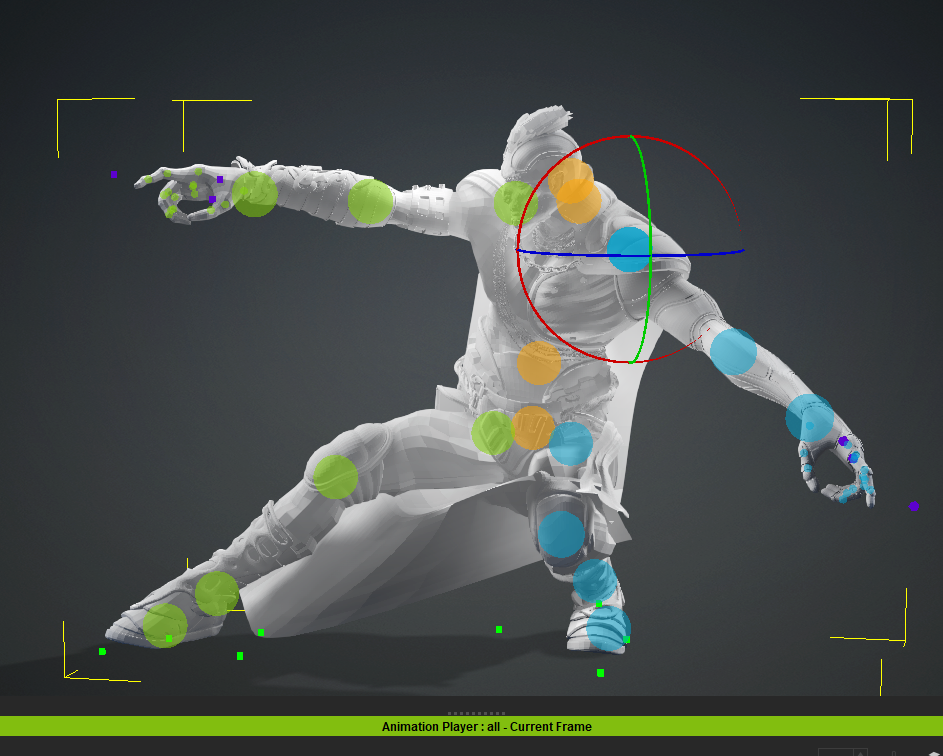
Reach Targets can be either overlooked or a bit confusing for beginners as they are used for far more than just reaching for an object or item. One of the first problems encountered is the positioning of two hands on a shovel, weapon or other item. Since a prop can only attach to one hand, we use Reach Target dummies (Reach Targets) as the go between.
The Reach Target tool has been around for a long time through many versions of iClone and has seen some significant upgrades since its introduction. In the early days of iClone we had to make our own dummies but today’s Reach Target system in iClone creates dummies for us even if they are invisible when created. Visibility can be toggled, and a popup will remind you of that. The tutorials below will cover all this and more.
The Reach Target system steps in to not only link the second hand but also provides a method for us to place that second hand where we need it. As I said earlier there is much more to the Reach Target system than meets the eye.
As I alluded to earlier, two-handed animation is not necessarily the Reach Targets original task. It was just as the name implies a target for the character to reach something like a doorbell or light switch and lock on if needed. This also works for other two-handed applications like a steering wheel in an automobile. One hand is either attached to the prop or to a Reach Target and the other is attached to the other Reach Target which is attached to the prop.
As you will see the Reach Target Dummy is created with just a few mouse clicks within the Reach Target interface located in the upper area of the Animation tab. You need to select a character first then click EDIT REACH TARGET within the Animation tab. Below we will take a look at a couple of usage scenarios in the embedded tutorials and show some other examples of using the dummies.
Object Driven Animation
In this example we’ll be animating an alien pilot inside a cockpit to show movement of the joystick and throttle as you might expect from a pilot. In the tutorial I set up two target dummies. One for the joystick and the other for the throttle. This process is Beginners level with no difficult animation required.
I will be using a two headed iClone character which is actually two characters linked together using opacity to hide body parts of the second “head”. Don’t let this confuse you if you notice two characters in the Scene Manager. Refer to my article on Multi-Headed Characters for more information.
NOTE: I’ll be changing the texture of the dummies so we can see them easily. This is NOT a step you need to duplicate unless you want to see the target more clearly. Once you set them as a dummy (as shown in the tutorials) their visibility is toggled off and they will not render.
Reach Driven Animation
Similar to the object driven animation in the earlier tutorial we will use the dummy to drive the animation instead of an object in the scene. Object driven animation uses a prop to drive the character animation, whereas Reach Driven Animation uses the dummy itself to drive the reach animation.
In this case it will be a character reaching and pressing a button on a wall console. A move that can be smooth and adjusted with little effort with the Reach Target dummy. If you have never used this method before, you may be surprised at how easy it is to get a fluid movement with just the reach targets that you are grabbing or releasing while moving down the timeline.
Note: These types of actions can be accomplished with the new AccuPose feature for more advanced animations. I wouldn’t recommend using both at the same time as you have Reach Target dummies working against the constraints of the AccuPOSE system.
Examples
Now that you’ve seen how a couple of basic Reach Target scenarios work, we will take a look at a few examples of simple uses for Reach Targets. This tool can reduce animation time and give you more time for other tasks while getting a confidence boost as iClone does most of the work.
Baseball Batter
The baseball batter uses one Reach Target for the upper hand while the other hand is attached to the lower section of the bat. The dummy will keep the arm attached to the bat until released. This can also cause elbows to collapse if the character is too low poly. You might also have to make some adjustment to the position of the opposing shoulder in cases of extreme motion or bending.
You can see the dummy in place for the upper hand on the grip area of the bat. This dummy can be moved in any direction and the hand will follow and stay attached until released. The release can be animated in the timeline.
Two-Handed Staff Weapon
In this scenario we can use either one or two Reach Target dummies as it depends on if you are going to use the weapon to animate the arms or use a motion for animation. It is very important to make this distinction.
If you are going to use the weapon to drive the animation, then you can use two Reach Target dummies, but the weapon will remain in place and not react to any motions. To use motions, we need to only use one Reach Target dummy for the upper hand while attaching the weapon to the lower hand in the desired position.
TIP: If your Reach Target dummy is frozen in place it is because you did not attach it to the object you were reaching for or holding.
This video contains tutorial for the Two-Handed Weapon above and Driving Reach Targets below
Remember, if you use a motion use one Reach Target. If you are using the object to animate, then use two Reach Targets.
Two Handed – Select Target and Keep Current Pose Method
This method was introduced in a previous update and is much simpler to set up for a two-handed object as it does not use dummies and can lock limbs into position no matter how much the body is distorted. The trade-off is you lose the ability to animate the Reach Target dummies if you need to make simple edits or move hand positions. Both serve important functions when needed.
Guitar Player
This one isn’t so simple but can be done depending on how accurate you want the animation to be. As far as anchoring the hand on the fretboard one Reach Target works great. Like all Reach Targets you can use two and animate the dummies, but I would prefer to have guitar motions driving the strumming hand and a Reach Target for the fretboard.
If you are looking for finger accurate animation, then good luck to you. I’ve never tried that as I’ve always had motions of some sort when needed but I would probably just move the upper dummy arbitrarily, if at all, to get some movement.
Two-Handed Sword
This weapon is a little different from others just like the guitar. It is a close to the body object that can cause limb distortion when too close. There is a sweet spot that you can find by adjusting the item distance from the body.
In this case I used only one Reach Target and all the two-handed “rules” we’ve explored so far apply here too. I’m sure you are tired of this but just to make sure… for motion use one Reach Target and use a motion for the other hand. For object-driven motions, use two Reach Targets and move down the timeline, then move the object both hands are attached to to animate the arms and upper body as demonstrated in the joystick and throttle tutorial above.
Steering Wheel
This example is basically the same as the joystick and throttle example too. The steering wheel is a separate object and both hands are attached via Reach Target dummies to their respective places on the steering wheel.
We then use the steering wheel to drive the motion of the arms and upper body. Since most of the body is stationary you can concentrate on animating the upper body with this method. Add a few head turns and bobs to add more motion.
See the last half of the video tutorial shown earlier under the Two-Handed Staff Weapon section for details about this driving set up
Summary
The added benefit of Reach Target Dummies versus the Select Target and Keep Current Pose method is the ability to animate the dummies on the timeline as I mentioned in the tutorials above. This means if you have dummies attached to each hand you can move the dummies on the timeline and animate hand or limb position changes. This is generally not something most beginners need to know to get started but I wanted to make you aware of it. If this makes no sense to you now, that is probably because you haven’t needed it yet.
As for myself, I use it much more as an anchor than to animate a reach. There are far more scenarios for Reach Targets than I could ever list, and it is one tool that is hard to overuse. The only problem I can think of would be if, as I stated earlier with AccuPOSE, the targets and locks interfered with each other.
Do not forget to attach the Reach Target dummy to the object. It is easy to maneuver the dummy into place then forget to attach it. Also keep in mind that you can twist and turn the dummy to move the limb in more directions than forward, back, up or down.
Reach Targets have their uses and if you are still new to animation and iClone in general then these Reach Targets will become another tool in your animation toolbox.
Below you will find a tutorial from Kai if you want to look into more advanced usage of the Reach Target feature.
Digital Artist MD “Mike” McCallum, aka WarLord, is a longtime iClone user. Having authored free tutorials for iClone in its early years and selected to write the iClone Beginners Guide from Packt Publishing in 2011, he was fortunate enough to meet and exchange tricks and tips with users from all over the world and loves to share this information with other users. He has authored hundreds of articles on iClone and digital art in general while reviewing some of the most popular software and hardware in the world. He has been published in many of the leading 3D online and print magazines while staying true to his biggest passion, 3D animation. For more information click here.
Greetings, my name is Peter Alexander. I am a character designer and 3D generalist who works with Character Creator 4 (CC4) and related pipelines. The recent updates of the Blender Auto Setup has made me more excited about CC4 character design than ever. Thanks to the brilliant developers, character design in Blender using CC4 assets is very streamlined and is a viable solution for those who do not have access to Zbrush or other licensed software.
In fact, I have mostly switched over to Blender as my CC4 customization software. The power of Blender Auto Setup will depend on which options you choose when sending data over from Character Creator. I would recommend that you use the ‘Send Avatar’ function, as it will give you access to the Proportion Editor and the ability to sculpt in high resolution and transfer those details to your lower resolution mesh.
The proportion editing in the Blender Auto Setup mitigates the need to mush around the mesh, as you can move and scale the bones to get the desired proportions. My preferred method is to use the Proportion Editor, then sculpt once the bones are in place.
The options listed under ‘Child Bones Inherit Scale’ refers to how the child bones (bones under the hierarchy of the current bone) are scaled in relation to the bone you are manipulating. ‘Full’ will make the child bones scale with the parent bone, and ‘None’ will leave the child bones unimpacted by scale. If you choose to send over the character as a Morph, you will have to use the sculpting tools alone to manipulate the character’s proportions, as you can see below.
If you have set up your workflow to use the ‘Send Avatar’ function, selecting ‘Go CC’ in the Blender Auto Setup add-on will send the data back to CC4 and provide you with the option to create a new project with the updates from Blender.
If you have set up your workflow to use the ‘Send Morph’ function, your data will be sent to CC4 as a new morph for your character.
Regardless of which method you use, you can take this opportunity to do some clean-up on the characters. I start by applying Mirror Symmetry, since this is a symmetrical character.
I also adjust any facial features, such as teeth, using the CC4 Proportion Editor. Selecting the ‘Face’ category will give you access to the bones of the Eyes, Teeth, and Tongue.
At this point I send an updated version of the character over to Blender for additional editing, including texturing and creating some hair and assets. While I usually texture my characters in a dedicated application like 3D-Coat, you can manipulate the textures within Blender using its native tools.
UDIMs are supported (meaning you can paint across UV tiles), although I should note that you need to have the same channel selected for all materials – otherwise painting over the UV tiles will bleed into improper channels. If you are painting Diffuse (Color), you need to make sure each material is selected to the Diffuse channel. If you have made a change to the textures and want this loaded when the character is sent back to CC4, choose ‘Save All Images’.
Creating Assets
Everyone models differently with their own techniques, so I will not go into this subject too deeply. I will say that I like to keep my assets as low resolution as possible until I need to increase the detail. This allows for optimal control. I will often use a SubDivision modifier, especially if I am creating a hard surface.
I start with this shield piece of armor for his belly. I often use the Loop Tools (enabled in Blender add-ons) to create the loops I need and straighten out edges. Keeping the resolution low allows you to prevent unnecessary deformations when you are moving geometry. With higher resolution, more corrections will need to be made.
As you are creating assets, try to make a mental note of how they are going to interact with the character. I tend to keep assets on the simpler side because it does not make much sense to create elaborate details if they cannot be properly skinned as clothing and accessories. That is not to discourage elaborate asset creation, but it is something to keep in mind.
Creating Hair
As with clothing and other assets, be aware of the limitations of hair assets for CC4. While a wide variety of hairstyles can be achieved, longer hair can require more advanced solutions. I intended to create these braids and have them swing along with the character as he moved, but since spring bones do not collide with the mesh, these presented a challenge in many animations. However, iClone allows you to enable and disable spring bones and allow for frame-by-frame manipulation of such assets.
Texturing
For this demo I only gave the assets some basic color and shading after I UVed the meshes. There are great add-ons for Blender like UCUPaint which can provide you with a more advanced toolset without leaving Blender for texturing, and I highly recommend that you check them out.
Weight Skinning
Skinning items and hair can be a complex task, often requiring the expertise of specialized technical artists. In this context, ‘skinning’ refers to the process of assigning weights to an object in relation to the movements of its underlying rigging system or bone structure. The goal is to ensure that the object deforms naturally and convincingly during animation. Challenges arise when dealing with complex setups, such as a character with a large belly, a rigid shield covering it, and the associated straps and bolts. These elements require careful weight assignment to achieve realistic movement and deformation.
Getting everything to move properly is its own subject matter and involves applying several different animation clips, scrubbing through the animation player timeline, and making minute adjustments when there is any deformation issue or mesh poke-through. It is also good practice to save an initial copy of the item(s) in OBJ format, so that if you need to, you can reset the mesh to its default state if the skinning causes issues.
Facial Expression Editing
You can edit facial expressions in Blender, but the Pipeline add-on currently has limited support for it. As a result, I used the standard export method to edit the expressions in Blender. To achieve this, export as an FBX and choose ‘Mesh and Expression Sequence’. This will allow you to import the necessary data for editing the expressions in Blender.
Once in Blender, you can scrub through the timeline and see that all the expressions are there in sequence. When you go to your ‘Shape Key’ menu, you will see expressions activate. You can pin the shapekey you are working on and edit them without going through the timeline, but certain expressions use bones, such as the Jaw Open expression, so it is good practice to use the timeline.
Once you are finished editing, you need to export the FBX. Then, in Character Creator, initiate the facial profile editor and import the FBX with Expression Sequence. This will populate the expressions with the appropriate data.
Additional Features
I did not include some of the Blender Auto Setup features in this specific workflow, but I would like to include them so you can get an idea of how powerful and streamlined this add-on is.
Scene Lighting Presets
The Blender Pipeline allows you to easily cycle through many lighting presets. Aside from the rendering benefits, you can see how your character looks under various lighting, giving you the opportunity to adjust your character as needed.
Sculpting
The sculpting function has two main options: Body and Detail, specifically set up for the CC4 standard character. The ‘Body’ option is designed for shaping your character, while the ‘Detail’ is for adding delicate details, like skin pores, veins, sculpted hair, etc. This function will generate high-quality normal maps to your ‘Baked’ folder, which you can then add to your character in CC4 (I would suggest adding them using SkinGen).
Data-Link Options
The Data-Link options allow you to send a variety of data back and forth between CC4 and Blender. This is especially useful for checking poses and basic animations.
You can take it a step further and ‘Rigify’ the CC4 avatar, giving animators access to an advanced animation rig. Blender animators especially will be comfortable with this rigging and animation system. You can even squish and stretch the characters, which are not currently available inside iClone.
The Blender Auto Setup Pipeline has many other functions, but one of the most important is the ‘Skin Parameters’ menu. All the skin materials are linked, and you can make significant changes to the look of your character very quickly, in a non-destructive manner. The number of quality functions in this add-on cannot be overstated, and it is a free bonus for those who are dedicated to the Reallusion 3D ecosystem.
To Conclude
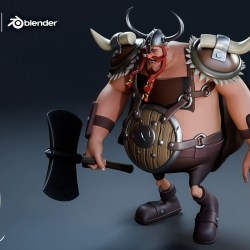
Reflecting on the process of creating my stylized Viking for CC4 using the Blender Auto Setup, I’m really impressed with how smooth and intuitive it felt. Switching to Blender as my go-to for CC4 customization has honestly been such a rewarding move. The Blender Auto Setup add-on, paired with CC4’s tools, just clicks for me. It’s like they were made to work together.
There were moments that required some extra thought, like figuring out the skinning for the shield and straps or getting the braids to move naturally without clipping through the mesh. But even those challenges felt manageable because the workflow is so well thought out. I especially loved being able to tweak proportions in the Proportion Editor and then jump straight into sculpting details, which just feels natural.
As for lighting presets and sculpting options; they’re total time-savers. For someone like me who’s always looking for ways to streamline without sacrificing quality, this setup has been a revelation. It’s exciting to think about diving into my next project, and I feel like the possibilities are endless with these tools in hand.
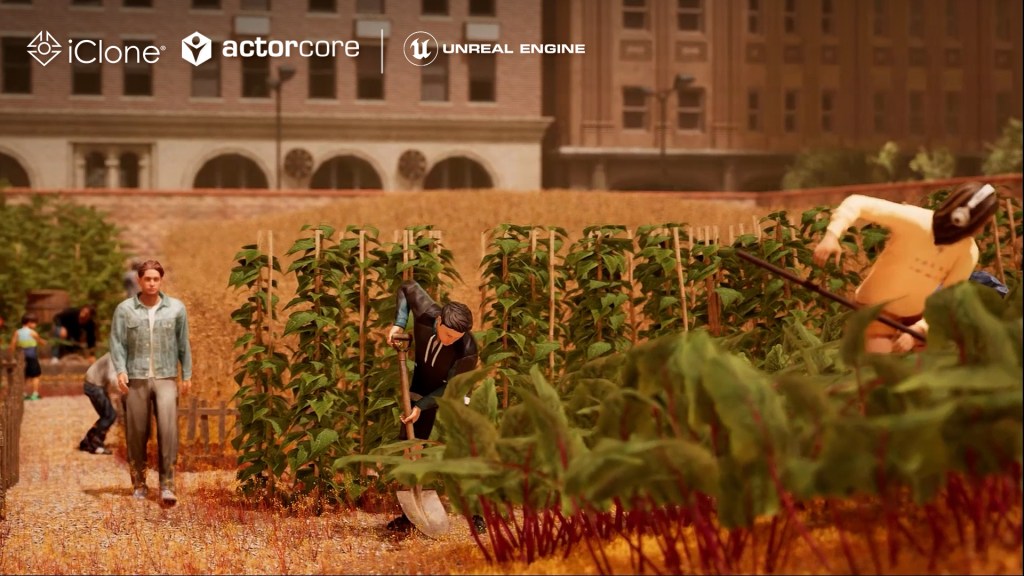
iClone Crowd Simulation and Prop Interaction allow characters to seamlessly integrate into any environment.
José Antonio Tijerín
José Tijerín, digital illustrator and 3D sculptor, is the creator of the video game ‘Dear Althea’ on Steam and the content pack ‘We’re Besties’ available on the Reallusion Content Store. In this tutorial, he will show how to customize actions for multiple actors for the simulation scenario, enabling them to interact authentically with their environment using iClone Motion Director props (MD Props).
Bring scenes to life with iClone
People often notice the autonomous behaviors of characters in simulation games like Civilization or Age of Empires. Animating the characters that inhabit 3D scenery, even if they are just background characters, is essential to showcasing good work. When a set is inhabited by characters that interact with it, it conveys a sense of authenticity and life that really makes a difference to the final result.
The challenge for animators has always been the hours of work that would be required to animate hundreds of characters and they have been forced to find a balance between manual control and automation. This is no small effort, however, as it is necessary to achieve natural movements and behaviors in these characters. The integration of advanced tools such as iClone Crowd Simulation and Prop Interaction (MD Props) have transformed the way we can address this challenge, offering innovative and accurate solutions to create more natural and realistic interactions in a very short time.
MD Prop: Expanding simulation possibilities
MD Prop stands as a revolutionary extension to iClone Crowd Simulation, providing a new tool that multiplies our possibilities in creating animations with objects. It gives us the ability to add realism and depth to multiple scenes or scenarios and it is an intuitive and efficient system.
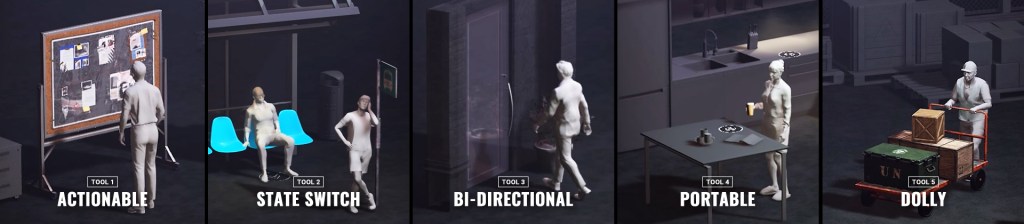
5 MD templates are available to easily customize interactive props
The key to this tool lies in its ability to generate realistic reactions based on the proximity of props and context of the scene, allowing characters to dynamically adapt to their environment. If you create interactive worlds, you know that this system has been used extensively for background NPCs (non-player characters) in major video games. This system takes that idea and improves on it, allowing for fantastic customisation and a huge number of interactive possibilities with both portable and static objects.
Using Morph Animation in iClone to simulate the dynamic shapes of mud mixing
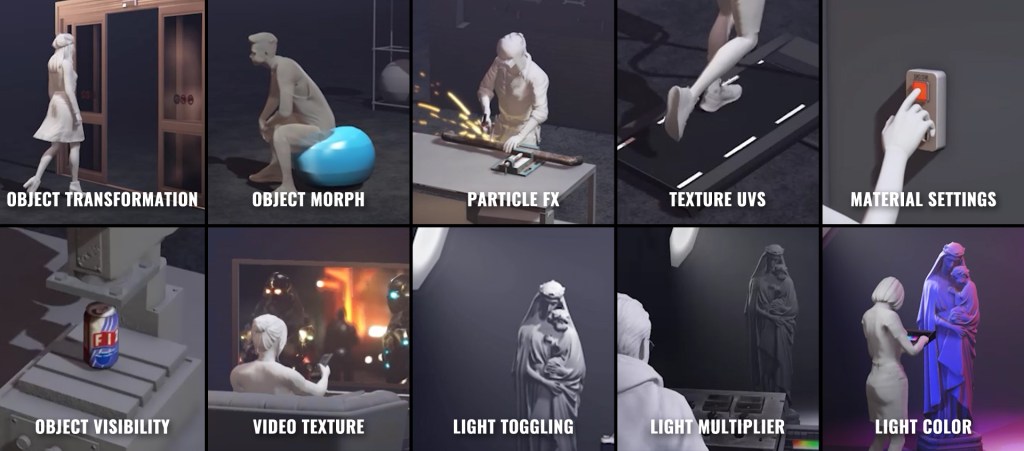
For example, being able to modify the emissive properties of an object’s material or its morphs allows us to find new ways of interacting with objects. Also, remember that you are not limited to iClone and that you can render the final result in game engines like Unreal, where these options look great. If you can, take a look at the final render of the tutorial to see the result without needing advanced knowledge in rendering or animation.
Different Object Animation types for prop interaction in iClone
The flexibility of iClone Prop Interaction technology also allows even non-animators who rely on movements from the ActorCore gallery to easily customize interactions. By doing so, they fit seamlessly into our scenes and with the objects that are needed. Whether it’s a modern construction project, a medieval marketplace or a futuristic city, this tool offers a scalable and efficient solution for populating scenes with believable background characters.
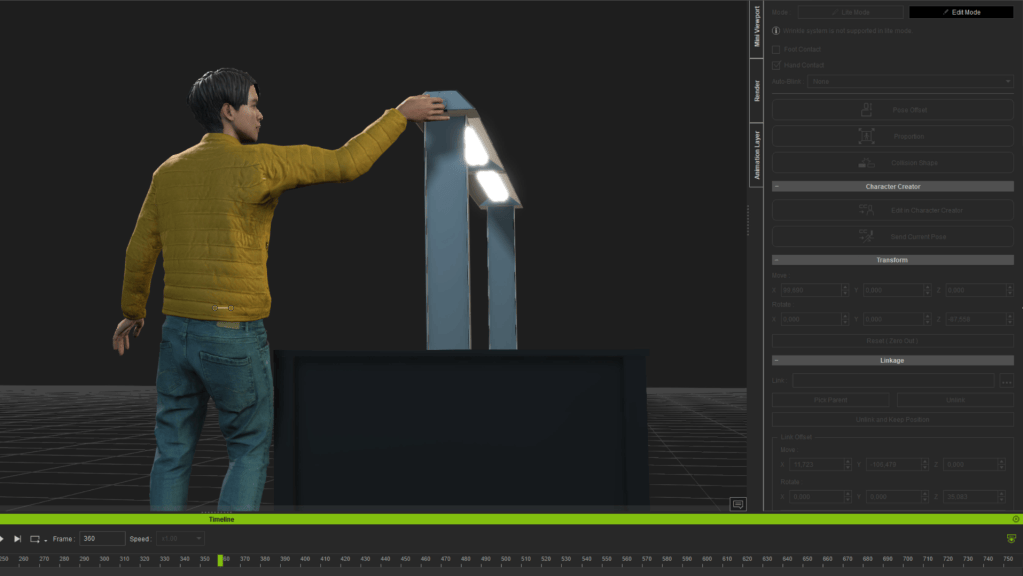
Using Hand Reach to create precise lamp light operation, and controlling the light intensity by altering the glow map strength
iClone Crowd Sim: Simulating crowds with precision
iClone Crowd Sim is a powerful tool that enables fast and efficient crowd simulation with surprising results. By integrating with MD Prop, it offers the ability to create complex scenes where background characters interact coherently with their environment and with each other, adding an extra layer of realism to productions.
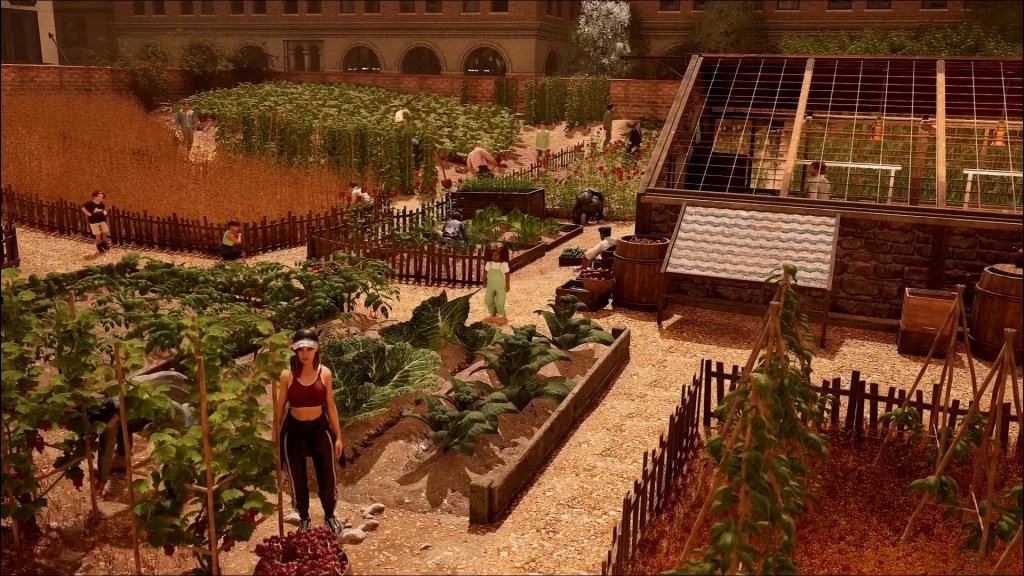
One of the highlights of iClone Crowd Simulation is the system that allows you to define behavioral patterns for each character in the scene. This means that, instead of repeating preset movements, it creates a much more immersive visual experience.
Easily define behavioral patterns for each background character using iClone
Creating our own MD Props
Using the animations we already have in our motion gallery we can generate our own custom MD Props. As you may already know, these are moments of interaction with specific animations for different types of events within the simulation. Once we create an MD prop, we can scatter it around various places in various scenes in a smart way and with just a couple of clicks. Characters zoom in, blend in with the animations of our MD props, eliminating the rigidity of reprogrammed movements and brings an organic feel to scenes populated by large numbers of characters. I myself end up being surprised, when I start the simulation, at how a large number of characters move and interact with the scenery. When you see something like this, I can’t imagine what it would be like if you had to animate the characters individually and correct their animations to adapt them to the environment.
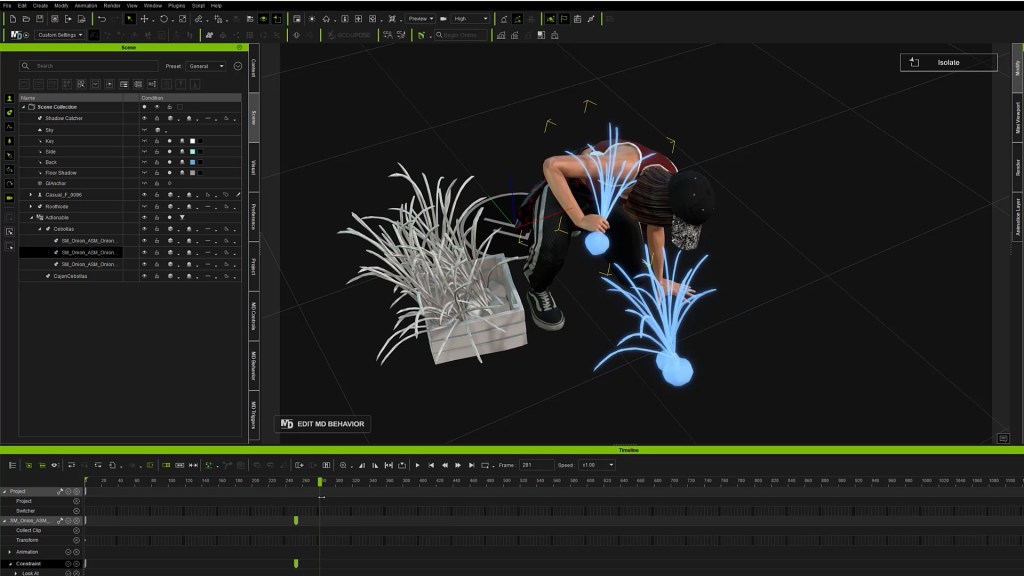
Using Actionable (Tool #1 of MD templates) to pick up the onions and place them in the basket
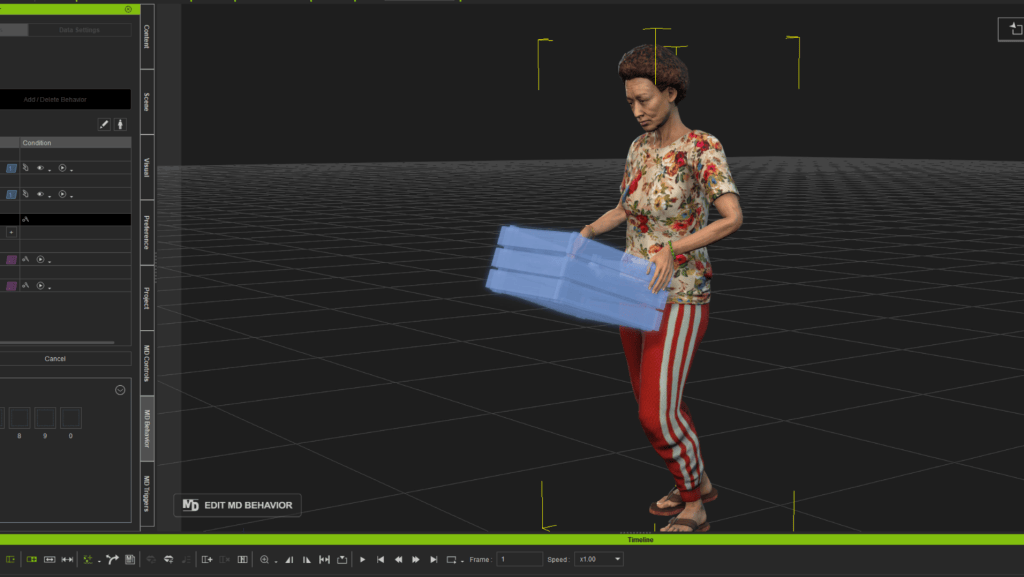
Using Portable (Tool #4 of MD templates) to pick up the box, carry and place it in a designated area
Using Light Options (Object Animation) in iClone to turn lights on or off
Smarter content search
In this way we save an enormous amount of time in the animation process, but we can also save time in the search for suitable resources, which is crucial. Tools like Deep Search in iClone facilitate this task, allowing us to quickly find characters, plug-ins and objects. This is really necessary when we manage large crowds and want to avoid the unpleasant feeling that all the characters are clones of each other and offer us a much-needed variety in the population we manage. This search optimization helps to speed up the workflow and maintain consistency in the quality of the resources used.
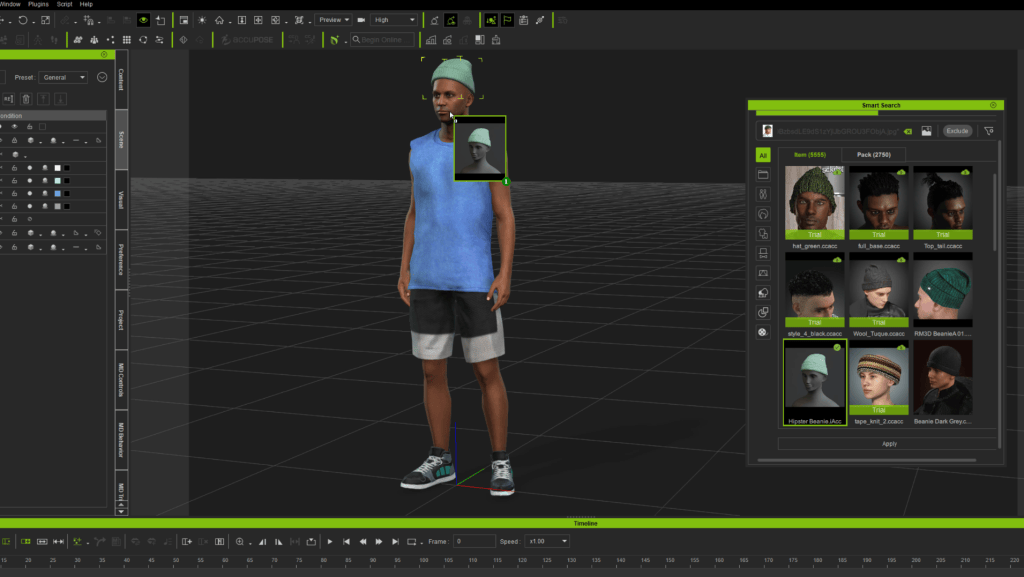
Deep Search also allows us to use images that ensure that the selected objects and characters perfectly match what we are looking for without wasting time. Thanks to its visual recognition algorithm, one can find items of specific aesthetics with a simple image search, making it an indispensable tool in the digital animation ecosystem.
Directly apply the result to the character using Deep Search in iClone
Integration for more efficient workflows
The synergy between iClone Prop Interaction, Crowd Simulation, and Deep Search creates an efficient workflow for animators. Automating certain processes within these tools also frees animators to focus on the creative aspects, rather than spending time manually adjusting each background character. This not only increases the efficiency of the project, but also raises the overall quality of the animation.
The adoption of these advanced tools is redefining the standards of background character animation. These innovations not only improve visual quality, but also enrich the narrative experience, offering viewers more immersive and authentic worlds. With the constant advancement of digital animation technology, tools such as these will continue to evolve to offer creators even greater flexibility in constructing vivid and realistic scenarios.
Content Creator with over 2 Million YouTube subscribers uses Character Creator to clone himself
Juan Cruz
Juan Cruz, known as JGCruz3D, is a Colombian 3D animator with a deep passion for video games, anime, and comics. With years of experience in the industry, he has built a following by sharing engaging content across platforms like TikTok, YouTube, and Instagram. His mission? To bring joy to people through animation. Currently Juan has over 2 Million subscribers on YouTube, with over 180,000 followers on Instagram to.
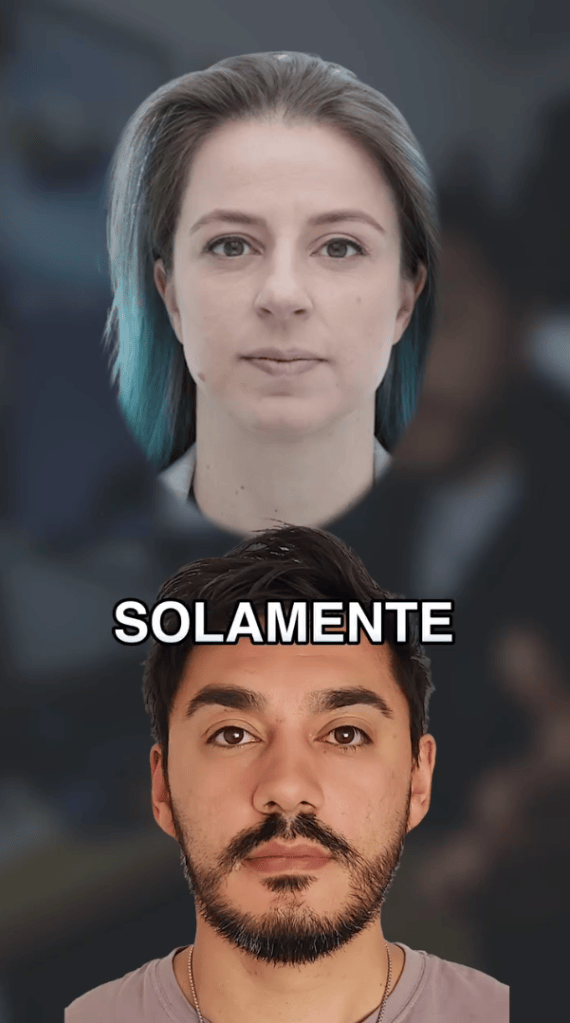
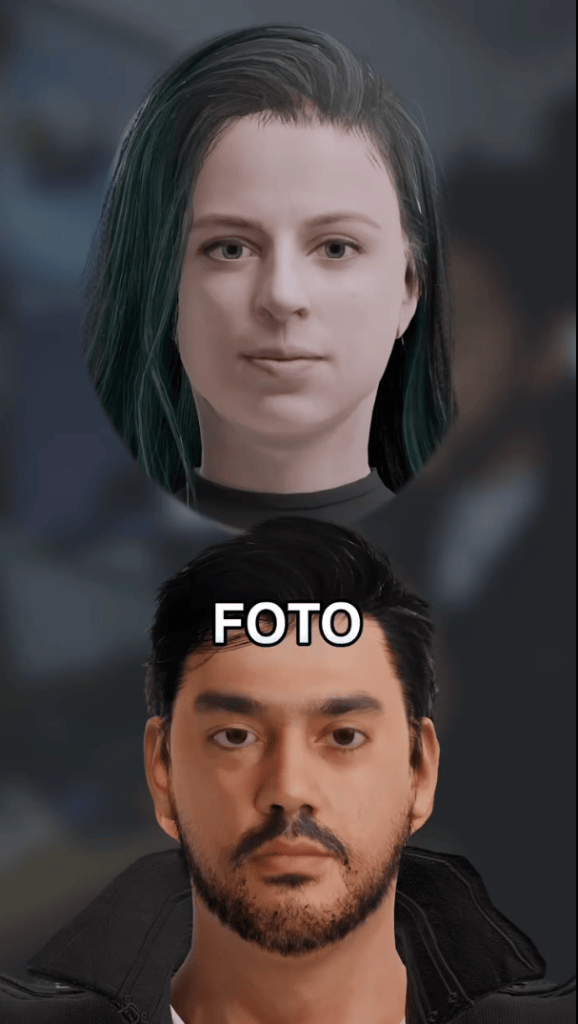
Recently, Cruz embarked on a unique project: cloning himself in 3D. Using Character Creator 4 (CC4) and its AI-powered Headshot plugin, he transformed a simple photo into a 3D version of himself—and even cloned his girlfriend for fun.
“Character Creator is like playing The Sims, but in real life. You can make yourself look exactly like you—or turn yourself into a cartoon version. The level of control is amazing!”
Juan Cruz (JGCruz3d ) – 3D Animator, Content Creator
How Juan Cruz Cloned Himself in 3D
Creating a 3D clone might sound complex, but Cruz describes the process as surprisingly easy. All it took was one photo, Character Creator, and some digital magic. The Headshot plugin automatically converted his image into a detailed 3D model, generating a high-definition digital version of himself in just minutes.
Cruz compares the experience to using social media filters—except this time, it’s in full HD and 3D. But the real fun began when he customized every aspect of his clone, adjusting facial features, expressions, and even clothing.
The Workflow: Customizing a Digital Clone
Once the initial 3D model was created, Cruz fine-tuned the details:
Creating custom facial expressions—from villainous smirks to surprised reactions
After finalizing his digital self, he exported the model to Blender, where he used Rigify to add a skeleton, making it fully animatable.
The entire process—from photo to fully rigged 3D character—was fast and intuitive, proving that anyone can bring themselves to life in 3D with the right tools.
Bringing Digital Clones to Life
Thanks to Character Creator 4 and Headshot, Cruz seamlessly cloned himself without the need for 3D sculpting or complex modeling skills. This technology allows artists to quickly generate lifelike avatars for animation, gaming, and virtual content creation.
Dom Fred – Director / Producer / Editor / 3D Animator
Dom Fred – A Pioneer in 3D Animation
Dom Fred, a seasoned 3D animator and director, has spent decades redefining action storytelling through cutting-edge animation techniques. With a career rooted in television advertising, music videos, and documentaries, Fred has built a reputation for seamlessly integrating 3D characters into real environments, using special effects (SFX) to craft high-energy martial arts and acrobatic sequences.
As the founder of DOM ANIMATION STUDIO, Fred continues to push the boundaries of animation, bringing intense action sequences to life. His latest short film, The Drone, serves as a testament to his expertise in combining hyper-realistic character animation with high-octane stunt choreography.
By integrating Reallusion’s tools like ActorCore, Character Creator, and iClone with Unreal Engine, Fred was able to create a cinematic, high-fidelity action short film, delivering smooth, lifelike animations without the need for expensive motion capture suits or manual animation.
“ActorCore’s BMX Pack gave us an incredible level of motion detail, making our BMX action sequences feel as intense as a big-budget Hollywood film. The special thing about the BMX Pack is that it works directly with any character in iClone, and the variety of stunts is impressive”
Dom Fred – Director / Producer / Editor / 3D Animator
The Inspiration Behind The Drone
The Drone is an action-packed short film set in a high-tech military base where combat drones undergo testing. When a system malfunction causes the drones to turn against their creators, a covert agent, Teddy, becomes the last hope for survival.
Surrounded by AI-controlled drones capable of overriding vehicle systems, Teddy must outmaneuver the threat using one key advantage: a BMX bike, which remains untouched by the drones’ hacking capabilities. His speed, agility, and expert stunts become his ultimate weapons as he battles against time to deactivate the rogue AI and rescue his trapped teammates.
This concept was inspired by Fred’s passion for martial arts, extreme sports, and futuristic storytelling, merging action choreography with high-quality 3D animation to create an immersive cinematic experience.
Bringing The Drone to Life with Reallusion Tools
To create a seamless blend of animation and action, Fred relied on Reallusion’s 3D animation tools, including:
Character Creator (CC) for hyper-realistic character design – Designing hyper-realistic characters with custom clothing and textures
iClone 8 (iC) for real-time animation and scene editing – Blocking action scenes and adjusting camera movements
ActorCore for high-quality motion capture – Sourcing professional motion files for seamless animation editing
Unreal Engine 5.5 for final production and rendering – Enhancing lighting, physics, and VFX for final production
Adobe Premiere Pro for post-production and editing – Assembling the final cut with high-quality effects
This powerful combination allowed Fred to previsualize complex stunts, optimize character movements, and render high-fidelity animation sequences efficiently.
Character Creation with Character Creator
All characters in The Drone were designed using Character Creator, leveraging its hyper-realistic avatars to enhance the believability of action sequences. Fred customized each character with detailed textures, clothing, and facial expressions, ensuring a lifelike appearance.
“Character Creator allowed us to create realistic actors that seamlessly integrated into the high-stakes action sequences of The Drone.”
Dom Fred – Director / Producer / Editor / 3D Animator
Animation and Previsualization with iClone
The next phase involved previsualizing and animating the action scenes in iClone. Fred used iClone’s real-time motion editing tools to establish the film’s pacing, camera movements, and character interactions before moving to full-scale production. “iClone 8 helped us shape the rhythm of the short film, ensuring each stunt and camera angle matched our vision before the final render.” – shared Dom Fred.
ActorCore BMX Content Pack: Motion Capture at its Best
One of the biggest challenges of The Drone was creating realistic BMX stunt sequences. To achieve this, Fred turned to ActorCore’s BMX Content Pack, a high-fidelity motion capture library specifically designed for BMX movements.
With this pack, Fred was able to:
Import dynamic BMX animations directly into iClone
Apply BMX stunts to any character model without complex rigging
Capture intricate details like jumps, spins, and landings with near-photorealistic precision
By utilizing ActorCore’s motion data, Fred ensured that The Drone’s BMX sequences maintained fluid, natural movement, keeping audiences immersed in the action.
Developed in collaboration with renowned motion capture specialists from Monkey Chow Animation Studios, each movement is captured with stunning realism and fluidity. All motions are 100% royalty-free and can be exported in FBX or BVH format, making them compatible with real-time game engines such as Unity and Unreal Engine, as well as mainstream 3D tools like 3ds Max, Maya, Blender, and more.
See the full motion pack introduction video and experience the magic of “BMX.”
The Drone not only showcases Fred’s expertise in 3D action storytelling but also demonstrates the power of motion capture and real-time animation tools. By integrating Reallusion’s iClone, Character Creator, and ActorCore BMX Content Pack, he has set a new standard for animated action filmmaking.
Looking ahead, Fred plans to continue exploring innovative ways to push the boundaries of real-time animation, leveraging tools like AI-driven motion capture and interactive virtual production to further refine his craft.
“We had a great pleasure producing The Drone with an action quality so close to reality, and we look forward to exploring even more motion capture innovations with ActorCore and iClone.”
Dom Fred – Director / Producer / Editor / 3D Animator
Focus on The “Creative Process” Instead of Technical Setbacks
Nick Shaheen: From Medicine to Motion
I’m Nick Shaheen, a radiologist by profession and a CG artist by passion. My journey into animation started in an unexpected place—medical illustration. Early in my career, I spent a fair bit of time creating motion graphics and anatomical visuals to help explain complex medical concepts. That experience taught me the power of visual storytelling and deepened my appreciation for animation as a way to communicate ideas dynamically.
Over time, my work expanded beyond medical visualization into character animation and motion design. I’m always looking for ways to refine my process and bring more life to my work, and discovering Reallusion’s tools opened up new creative possibilities that I hadn’t explored before.
I’ve been working in CG for over a decade, and if there’s one thing I’ve learned, it’s that character animation can be a massive time sink. Early on, I’d spend days sculpting, rigging, and manually keyframing, only to get something that looked fine but never quite as fluid as I wanted. The thing is, I never loved the technical grind of rigging and prepping characters. I wanted to animate, tell stories, create dynamic scenes, and focus on the creative side of things while still maintaining creative control over my own work.
I’ve always been drawn to animation challenges—they’re a great way to push yourself and get inspired by other artists. It’s also an opportunity to learn new techniques from other artists. I’d see people turning out insanely polished character animations in a short time span and I kept wondering: what’s their secret? After some research, I found many of my peers were using the Reallusion suite of tools. I decided to give it a try about a year ago, and I haven’t looked back since.
The Animation Ecosystem
Suddenly, I had access to an ecosystem that let me create characters, drag and drop animations, tweak performances, and maintain a procedural workflow at nearly every step. I can create a character in Character Creator, export it toiClonefor animation, make changes to the character in Substance Painter or ZBrushand then pipe it back into iClone without having to redo the entire animation.
Crowd Simulation
I recently finished work on a commercial project that required a dozen characters interacting with their environment as well as each other. With iClone, I could layer in mocap, tweak performances quickly, and move on. This made multi-character animation far more approachable than ever before. There’s even a set of tools (Motion Director) specifically designed to handle background characters and crowds. Having a built-in system for animating crowds efficiently has opened up a lot of possibilities.
Facial Performance Capture
Lip sync is one of those aspects of character animation that can quickly become a time sink without a procedural workflow. WithAccuFACE, I can use live or pre-recorded video for facial motion capture. The built-in cleanup tools help refine the animation and remove jitter while preserving key details.
I collaborated with JP Ashkar on the music video California Christmas. Despite living nearly 2,000 miles apart, we were able to sync the character’s lip movements to JP’s performance. He recorded a video on his phone, which I used with the AccuFACE plugin to drive the facial animation. One of my favorite features of AccuFACE is AccuLips, which allows you to refine lip sync even further by typing in the dialogue for improved accuracy.
iClone Has Become Even Better
The latest version of iClone has evolved yet again. With the arrival of iClone 8.52, a couple new features were introduced that can be a real lifesaver for all the animators out there. Let’s take a deep dive into those exciting features.
AccuPOSE: AI-Assisted Posing
My favorite new feature is AccuPOSE. Think of it as an AI powered posing assistant that reacts automatically to your adjustments. The magic of this tool is that it lets you customize each pose as well as animate between poses without breaking the overall structure of your character. If you move an arm or a leg, the AI trained model adjusts the other joints to keep a natural balanced pose. You can even lock the position and rotation of certain joints to really dial in your animation.
AccuPOSE INFINITYis a subscription service, which offers over a thousand additional posing presets with various themes like “daily life” and “super power”. This is a great tool if you want to create something as simple as a stylized walk cycle or something more complex like scaling a wall. This was a huge time saver for the video I recently made for Reallusion.
Advanced Curve Editing
I use an inertial motion capture suit for body animation, which is great, but often requires cleanup to remove jittery artifacts. iClone streamlines this process with tools like the Curve Editor and Advanced Curve Filter, allowing you to visualize and refine mocap data with precision. You can easily navigate the character’s bone structure to locate keyframe data within the Curve Editor, where you can manually adjust keyframes or use the Advanced Curve Filter to smooth out motion. This is especially useful when working on scenes that require precise interactions between characters, like in my Pirates animation.
Non-Destructive Editing
Another new feature is the Non-Destructive Editing workflow. This gives you the ability to cut a motion clip in the timeline and maintain the keyframe data in the cut out portion. This makes the combination and transition between separate motion clips much smoother and allows a more procedural workflow. I used this extensively in the Parkour section of the Reallusion video to combine multiple separate parkour animations.
Reallusion’s Impact on My Animation Journey
Since integrating Reallusion tools into my workflow, I’ve found myself tackling projects I might have avoided before such as facial animation and performance-driven storytelling. I now have a streamlined procedural way to handle rigging, motion capture, and editing which has made me more marketable as a CG Generalist.
Over the years, I’ve learned that growth comes from embracing the process, experimenting, and patience. The right tools can unlock your creativity in ways you never imagined, allowing you to focus on the art of storytelling. With each project, each challenge, and each breakthrough, you refine your craft and bring your vision to life, frame by frame.
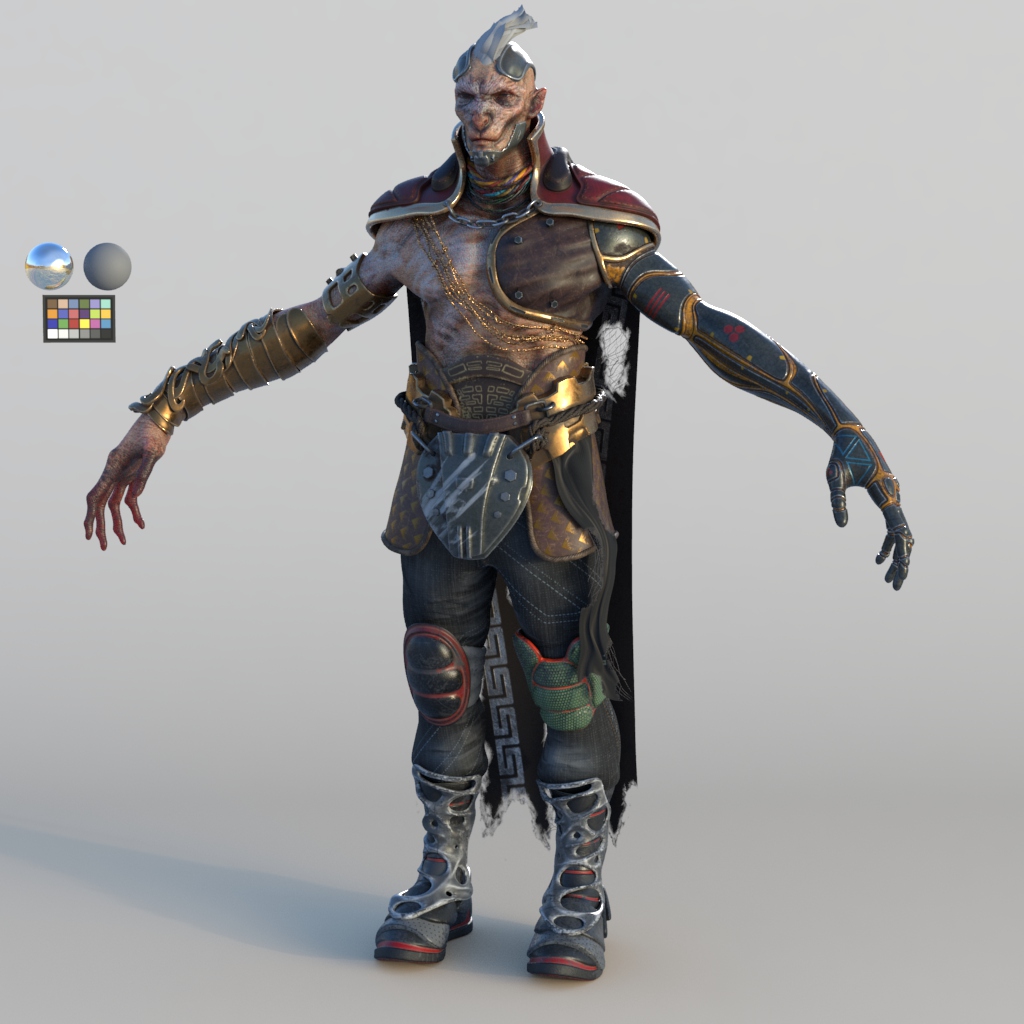
Angel Ricalde, a self-taught 3D artist, wins first place in the “AccuRIG Character” category of the 2024 Reallusion Character Contest. In this article, Angel shares the process behind creating the winning character, “Makako Kasikay,” which was completed in just two weeks. Using tools like ZBrush and CC4, Angel demonstrates how he brought the character to life with a focus on efficient workflows and innovative techniques, culminating in his success in the competition.
Angel Ricalde
With over a decade of experience in 3D art, Angel is a self-taught artist who began his journey through YouTube tutorials and books on Maya. Over the years, he mastered tools like ZBrush and Mari, specializing in texturing and shading with Arnold, Maya, and Photoshop.
Beyond personal projects, Angel has worked on films like Condorito la Película, Ainbo: Spirit of the Amazon, and Disney’s The Descendants: Royal Wedding. His passion for character creation extends into teaching, where he shares his knowledge of texturing, shading, and anatomy in various college courses.
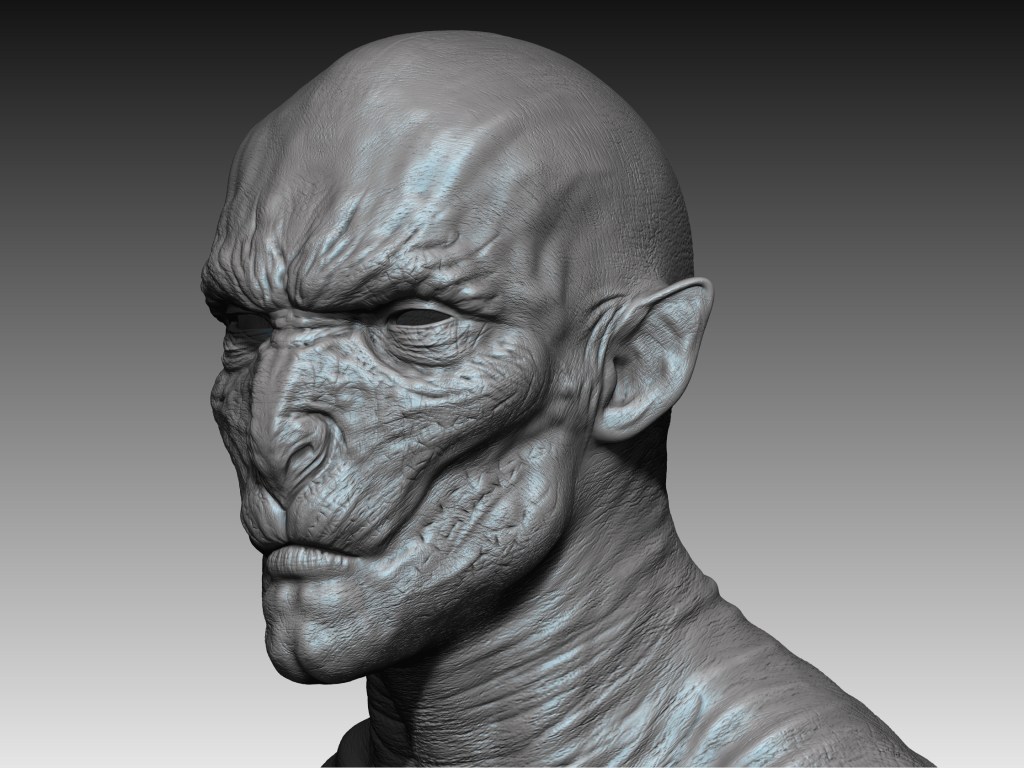
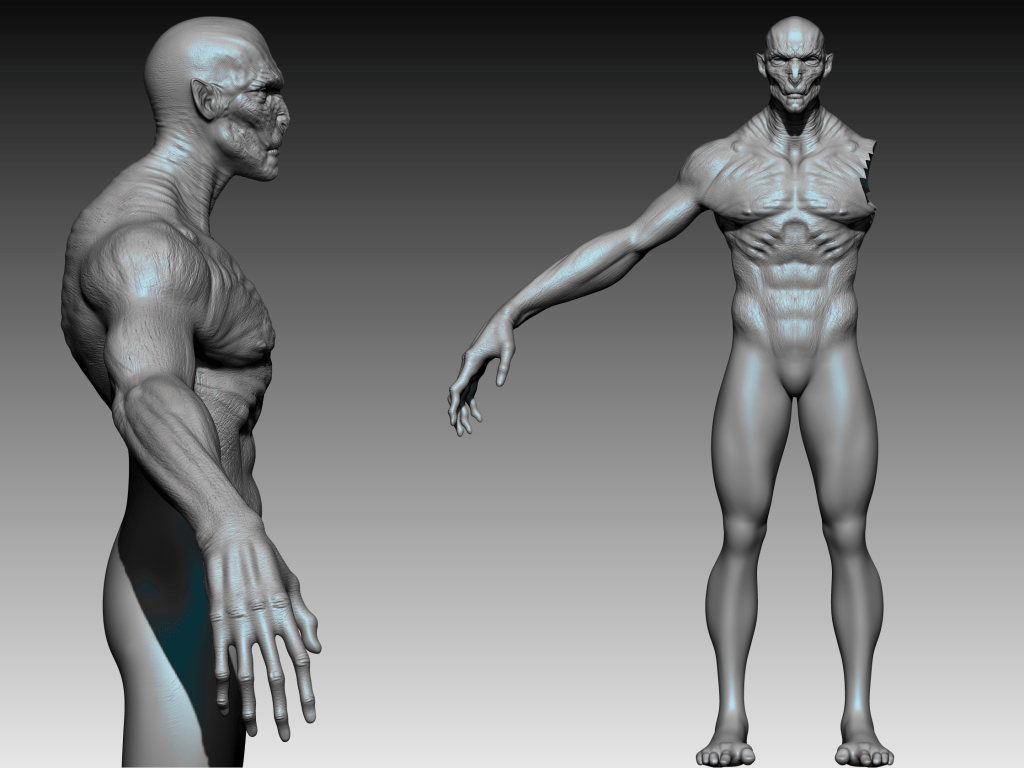
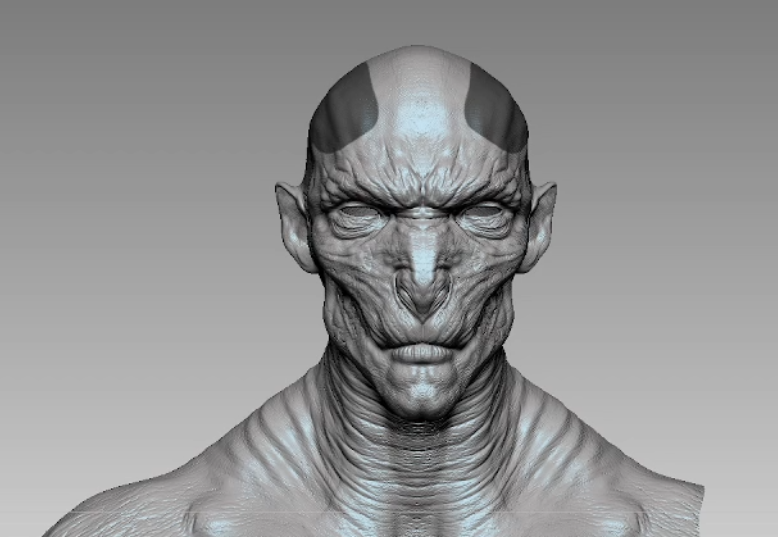
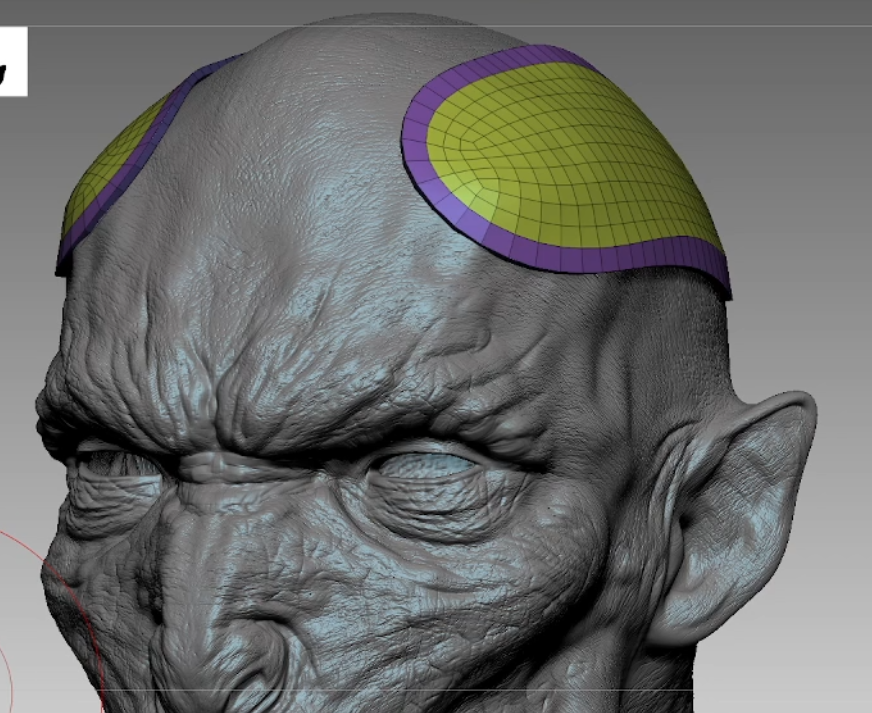
The first step was defining the concept. I dove straight into ZBrush for sculpting, as it helps me better visualize shapes and volumes. Once the base shape was complete, I added skin details using noise as a foundation. Fortunately, my extensive collection of brushes, amassed over the past decade, allowed me to save time while enhancing the quality of the work.
Hard Surfaces
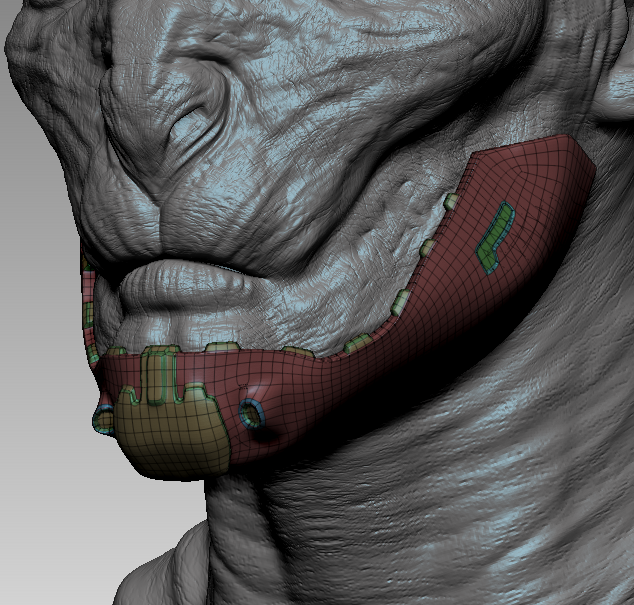
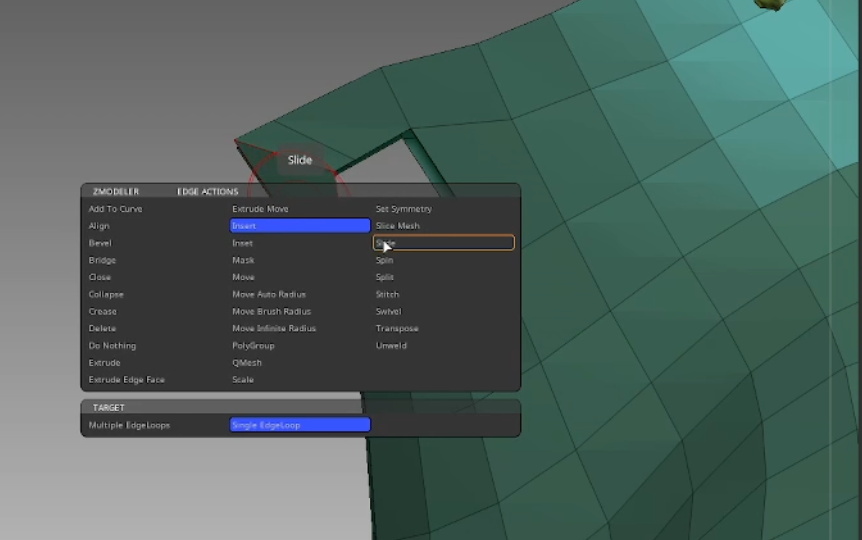
By using masks, I was able to extract new geometry and separate them into polygroups. Then, I applied Polish by Groups and ZRemesher to enhance the definition and solidify the shapes. With a low-poly version of the form in place, I switched to ZModeler, a fast and efficient tool for creating complex shapes with basic polygonal modeling skills. I applied the same process to the jaw: extraction, ZRemesher, Polish by Groups, and ZModeler with Qmesh.
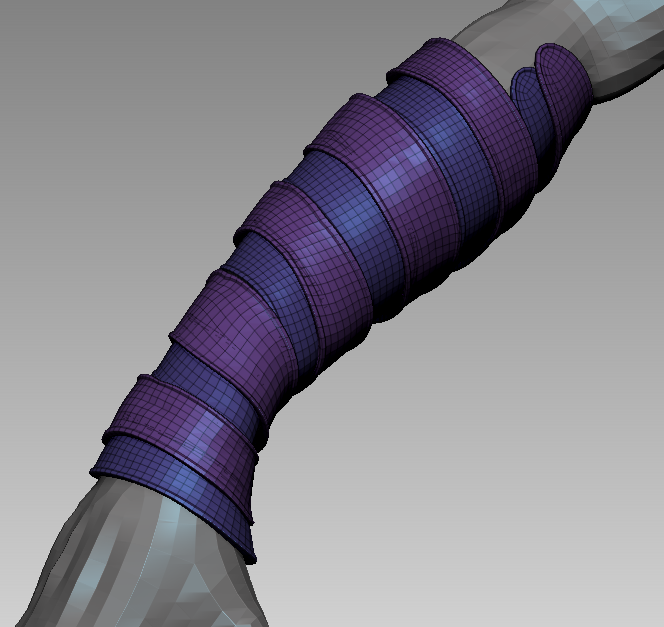
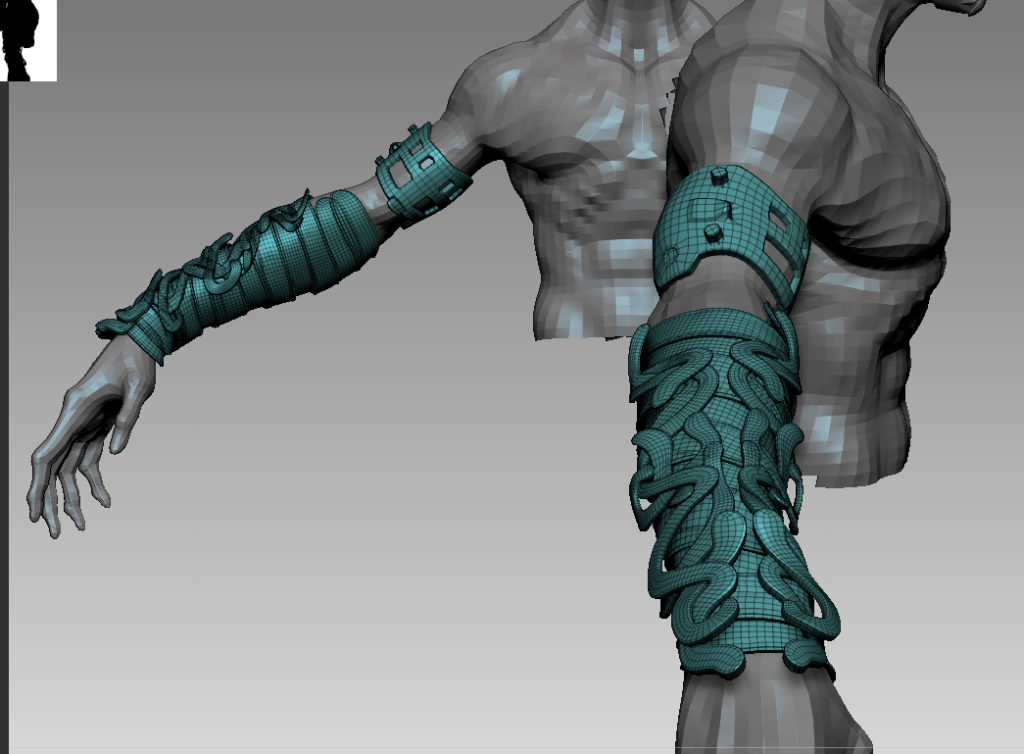
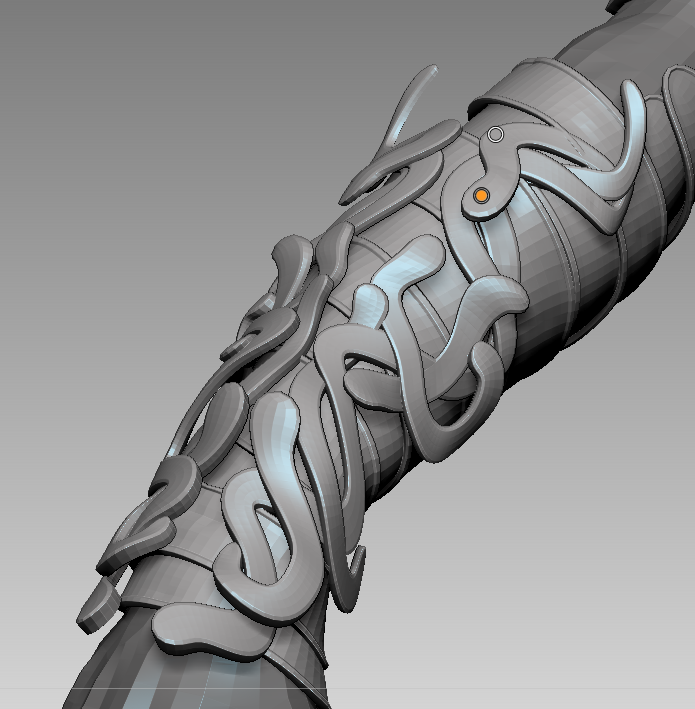
On the right arm, I wanted to incorporate a type of filigree—twisted metals that would wrap around the arm. To achieve this, I started creating masks and used the extract tool in ZBrush to generate new geometry around the arm. This would allow me to establish the foundation for a metallic armor covering the arm. Using the deformation panel tools, such as “polish by group”, I began shaping the metal. Once I had the base, I applied new masks to a dynamesh cube to extract and create new shapes to adapt to the arm. With symmetry enabled, I was able to shape it just the way I wanted.
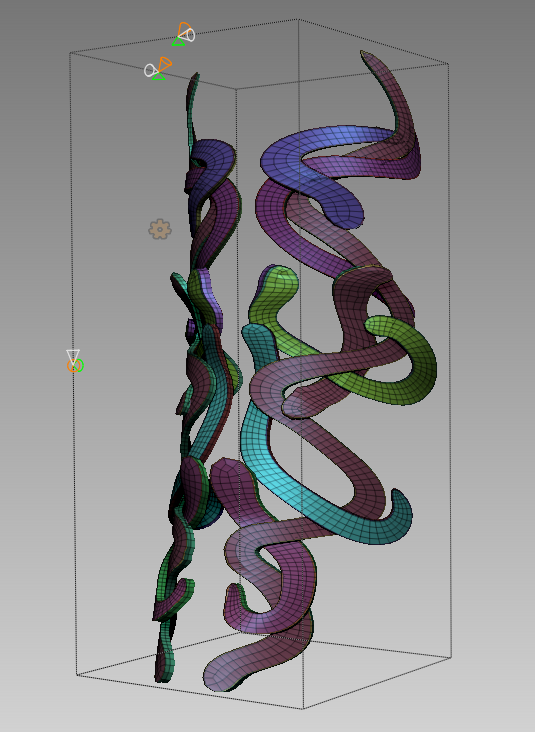
One particularly interesting part of the process was using anchor points for the first time. It’s a powerful tool for instantly creating curves. Using masks, I extracted shapes from a DynaMesh, keeping only the flat surfaces without volume. I later applied an extrude using Dynamic Subdivision, setting Smooth to zero and increasing the Thickness as needed. Here is where anchor points came into play, helping me refine the filigree designs and save a significant amount of time.
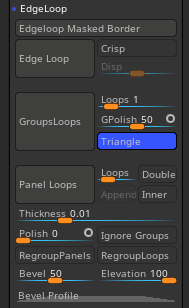
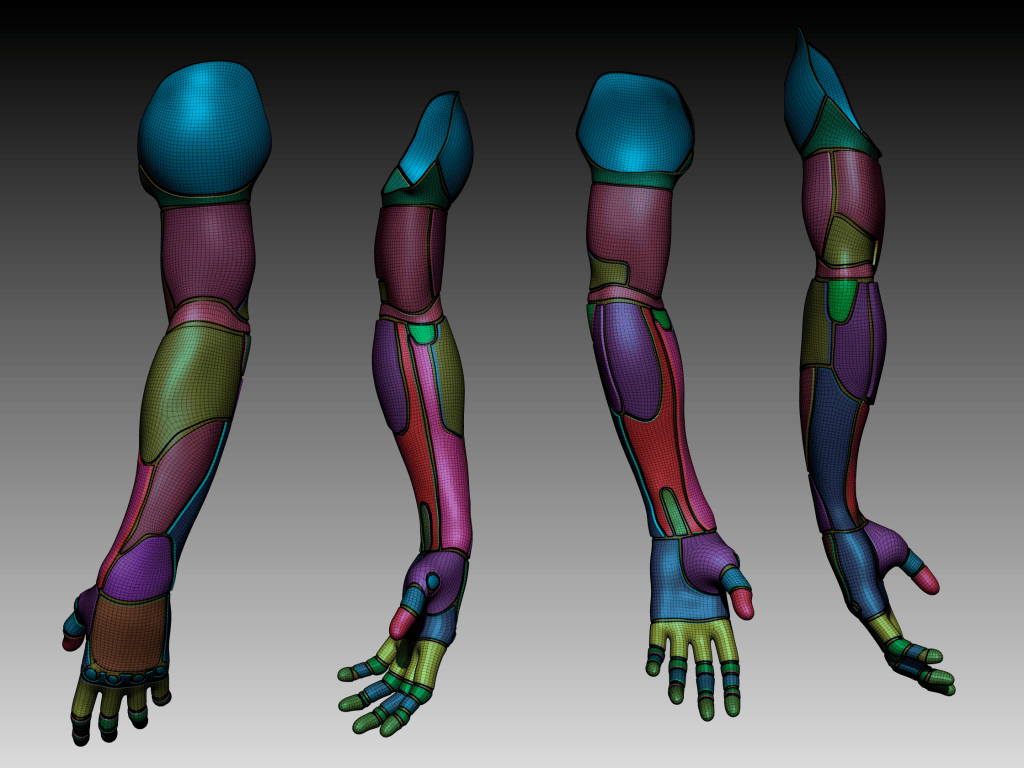
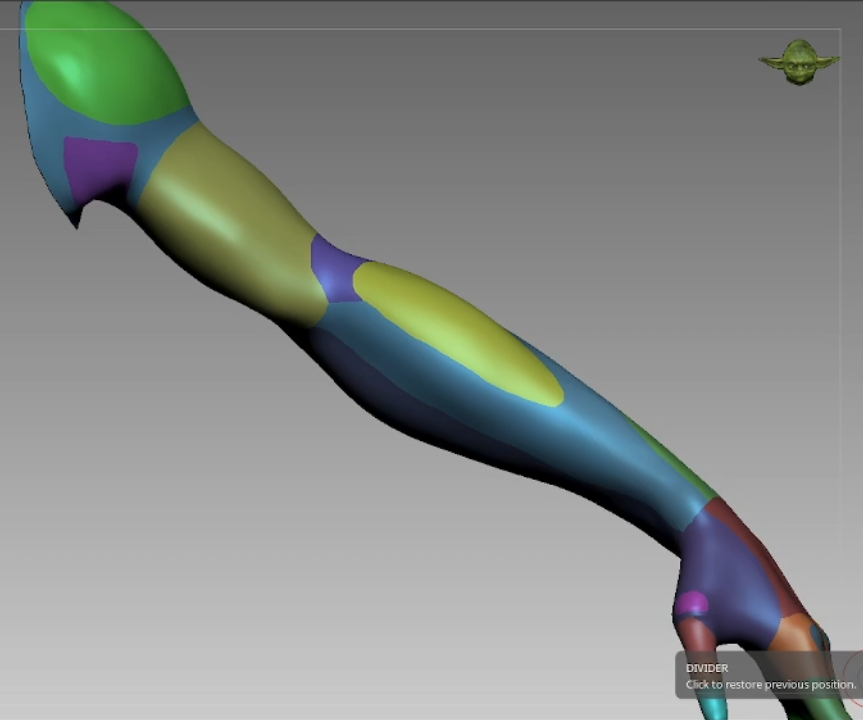
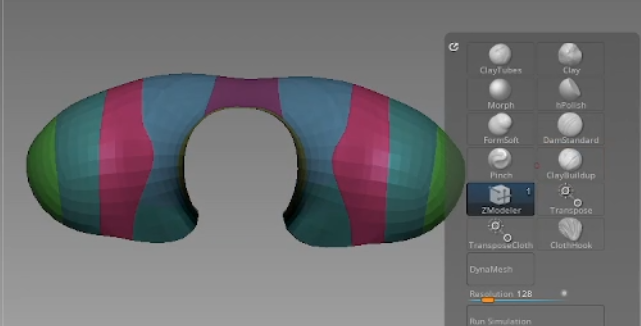
For the robotic arm, I employed a method that involved defining polygroups across the entire arm to ensure both functionality and anatomical accuracy. After creating the polygroups, I used the Group Loops tool to add additional loops between the defined sections and Panel Loops to create beveled edges that highlighted the solid shapes. Finally, using the gizmo tool, I subtly adjusted each polygroup to add volume.
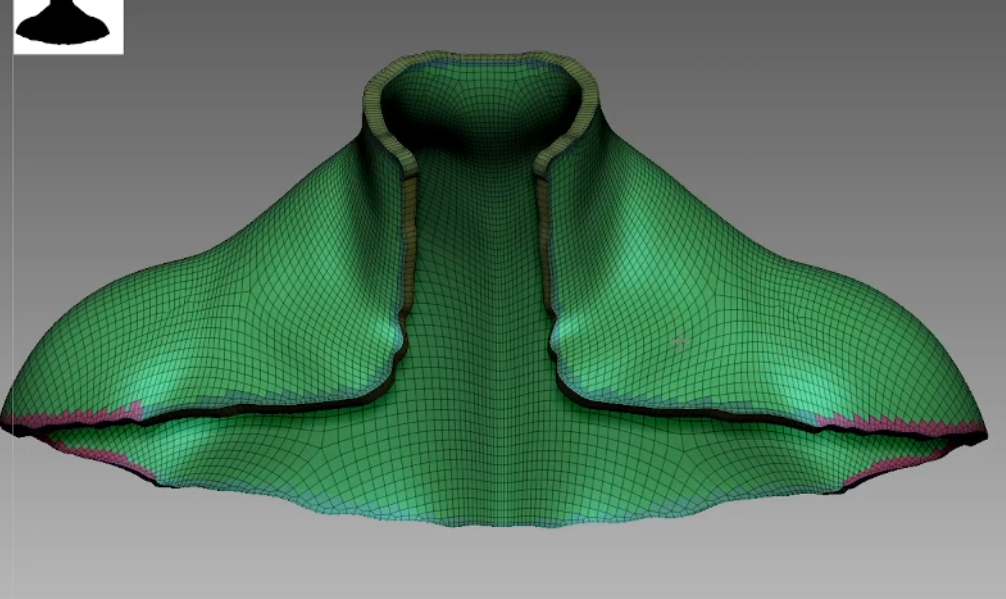
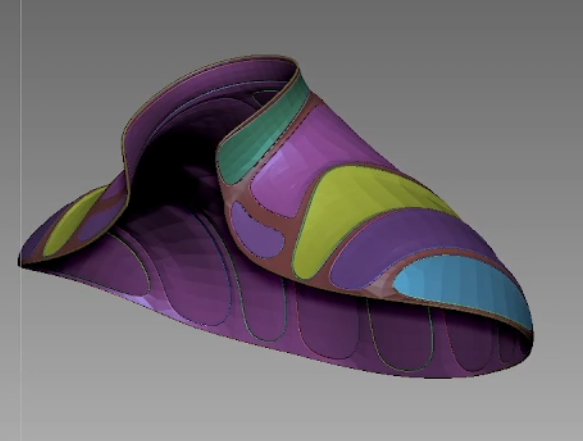
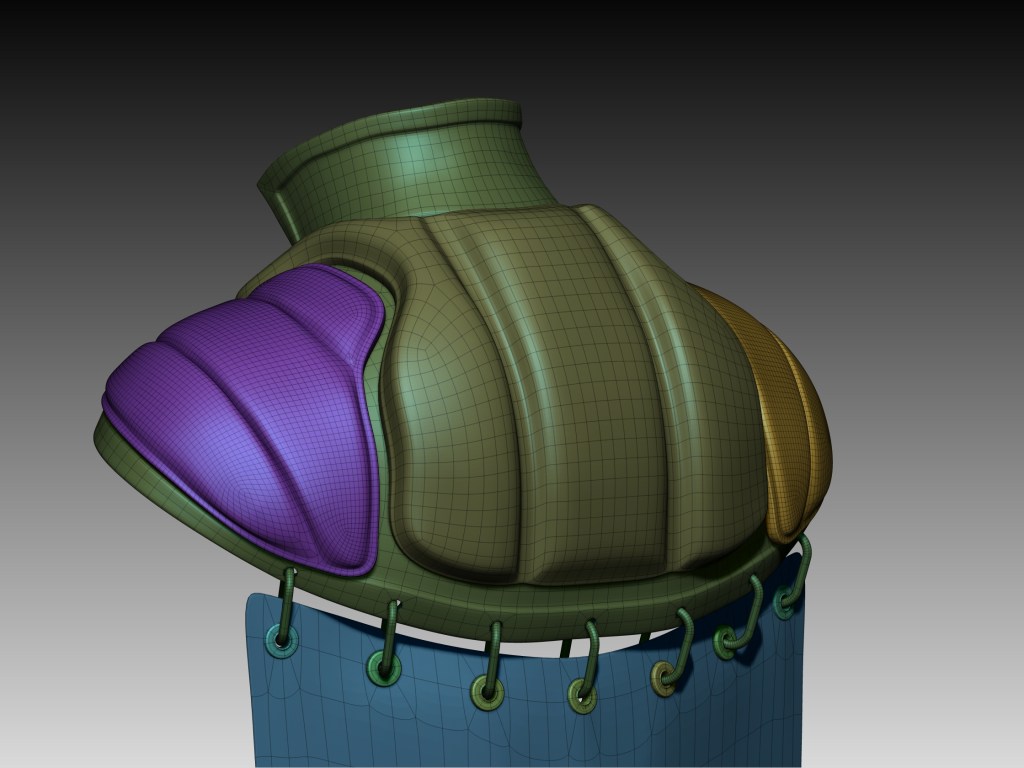
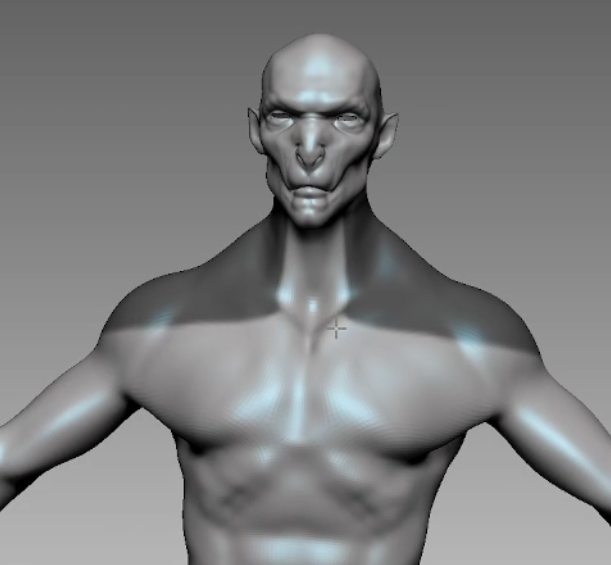
For the shoulder covering, I followed a similar approach, starting with a mask but manually improving the topology to ensure the neck area stayed angular even after smoothing the geometry. I used Group Loops and Panel Loops, along with smoothing brushes, to create the “puffy” look of the piece.
I essentially used the same approach to begin different solid surface subtools, varying the tools depending on the needs of each shape. Whether it was for creating cavities, extrusions, bridges, or volumes, I adjusted them to stay solid or smoothed them out based on what came to mind at that moment.
Pants and Exoskeleton Boots
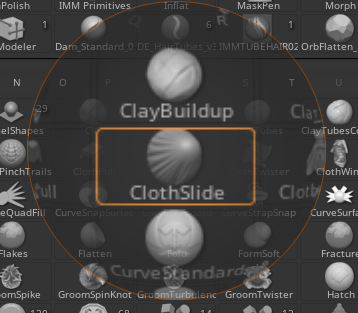
The pants were created by extracting the geometry’s surface. I applied ZRemesher to improve the topology and adjusted vertices to simulate natural stitching on the inner and outer parts of the pants, then I subdivided and use the ZBrush tool “ClotheSlide” that is meant for clothes
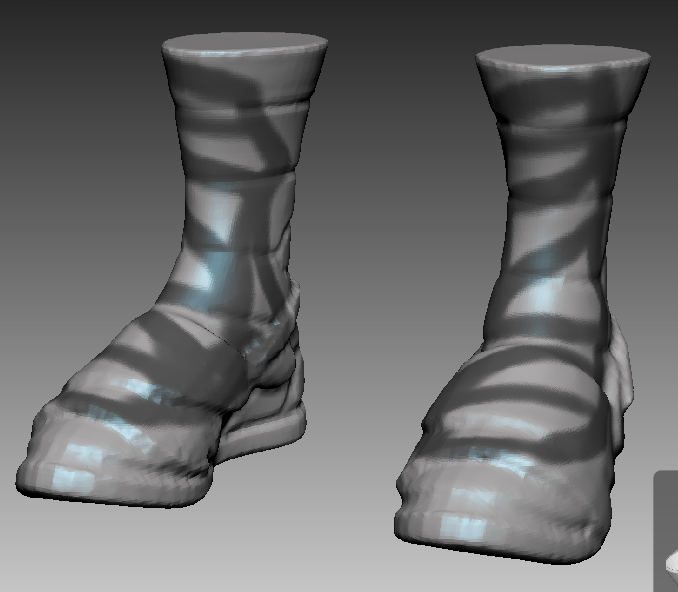
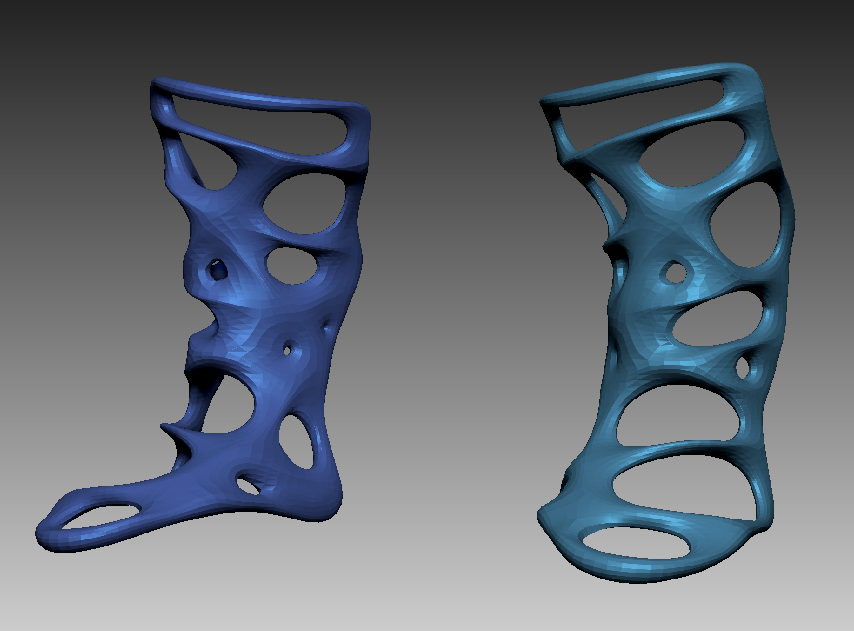
For the exoskeleton, I first created a mask with holes on the surface of the boot. I extracted the new geometry, applied Decimation, and used Inflate. Next, I used Trim Dynamic to create some flat surfaces on the subtool and applied Contrast in the Deformation panel. This allowed me to emphasize the shapes further. Finally, I refined some edges using the “Pinch” brush and Zremesh.
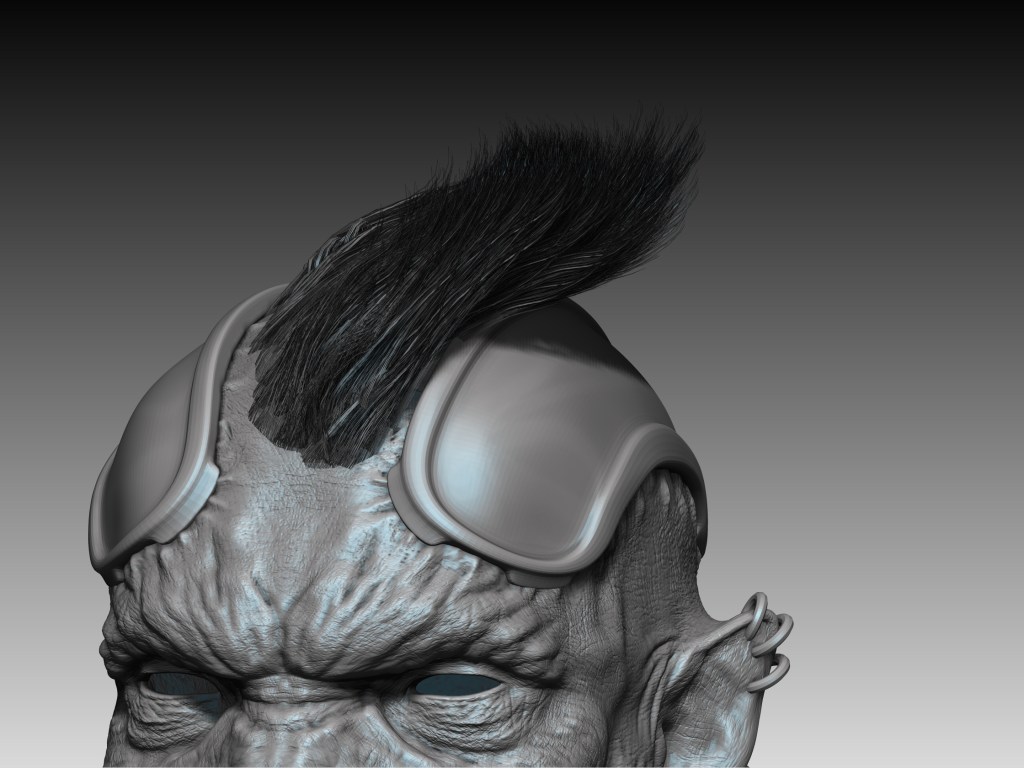
Hair Cardboards
For the hair, I began by inserting a low-poly plane and dividing it into polygroups to generate the UVs. I ensured the plane had at least 3 to 4 horizontal edge loops, which allowed me to smooth and curve the strands as needed.
In Photoshop, I created a custom brush to simulate hair strands by arranging simple black dots on a white background. After fine-tuning the brush settings, I painted the strands as alphas and exported the texture to ZBrush.
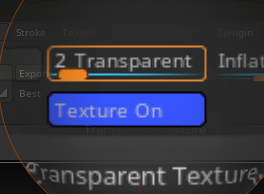
Using the Texture Map feature, I applied the alpha texture and activated transparency to preview the strands as fibers.
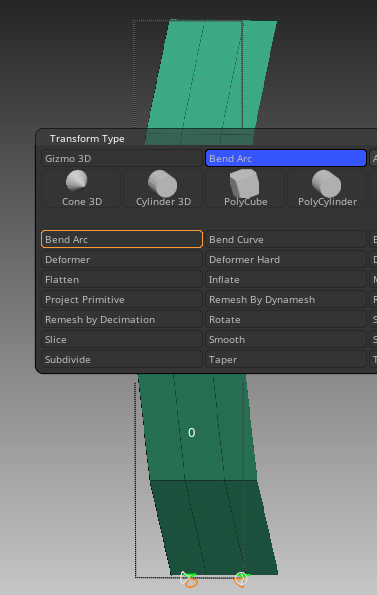
To achieve a polished result, I used the Bend Arc option in the Transform Type panel to curve the strands, adding a natural flow to the hair, then I duplicated and carefully positioned the geometry, switching between polygonal and alpha visualizations for better control.
Texturing and Shading
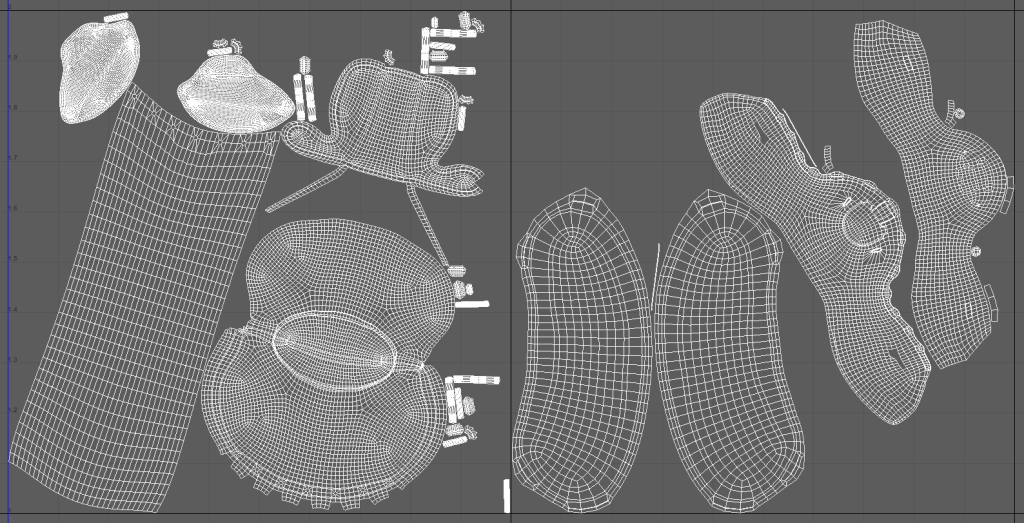
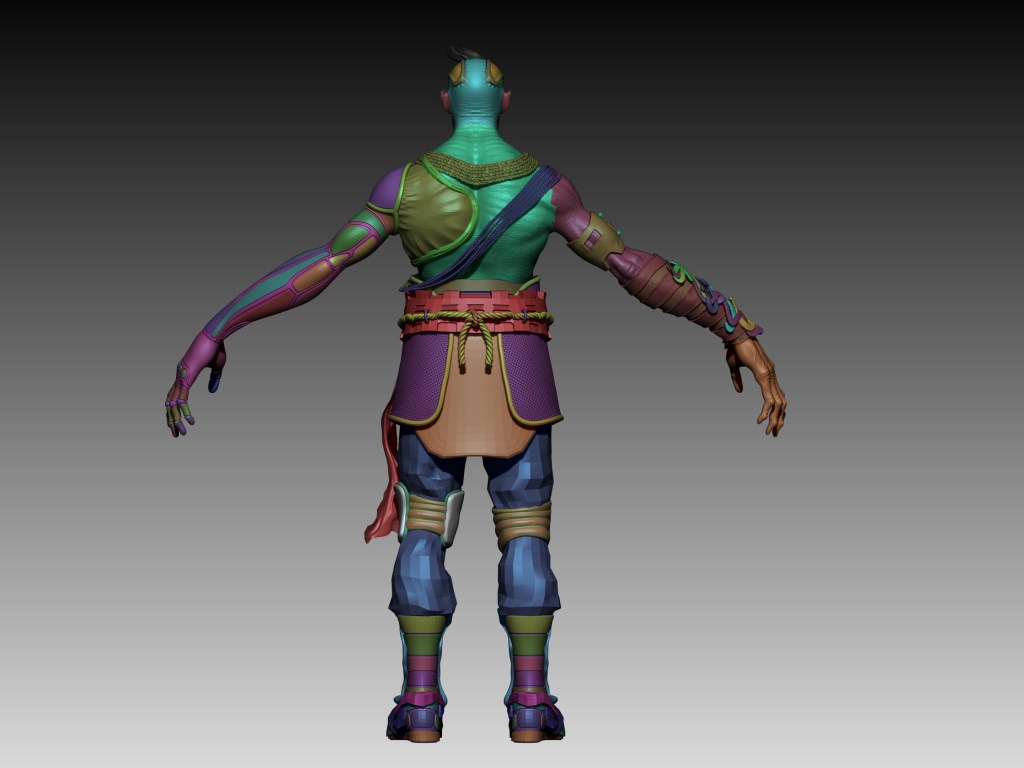
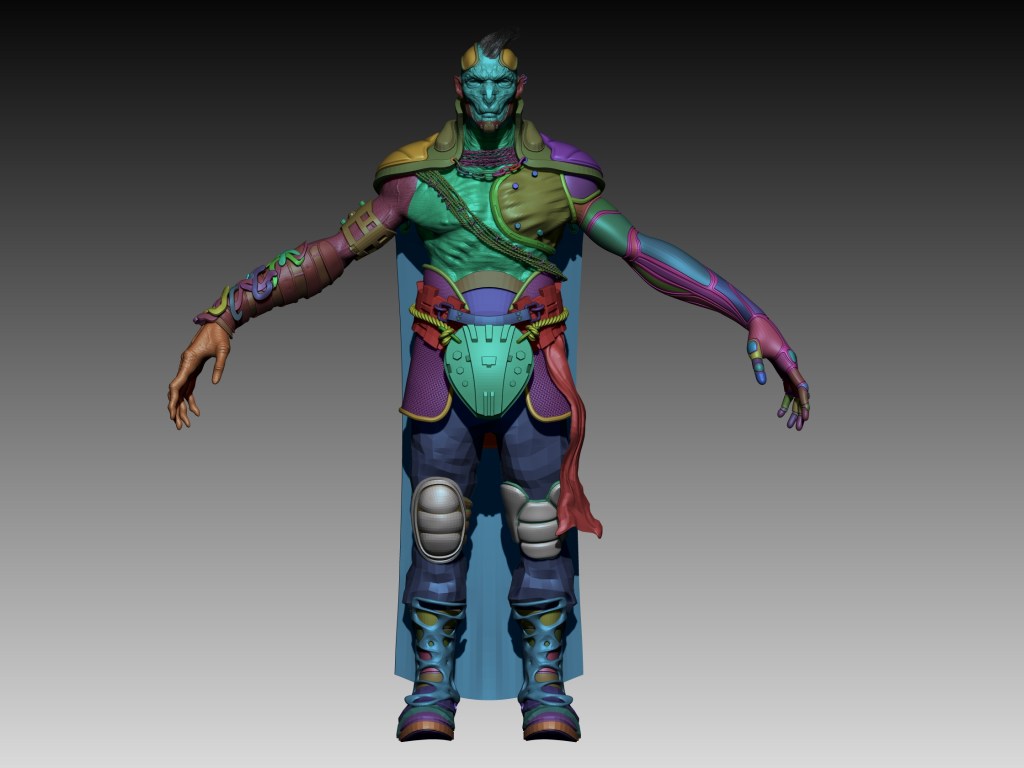
To achieve effective texturing, it’s crucial to start with clean UVs. I used UV Master in ZBrush and separated the model into polygroups for efficiency—breaking it into parts like the eyes, ears, inside of the mouth, head, arms, metals, and leathers. This allowed me to generate UVs quickly and refine them in other software, accelerating the process. Once the UVs were ready, I organized them into UDIMs for higher texture resolution.
I used Substance Painter for texturing. In some cases, I modified preloaded Smart Materials, while in others, I reused custom Smart Materials I had created for previous projects. Of course, I also created new materials specifically for this character. All materials can be stored in Substance Painter for future use.
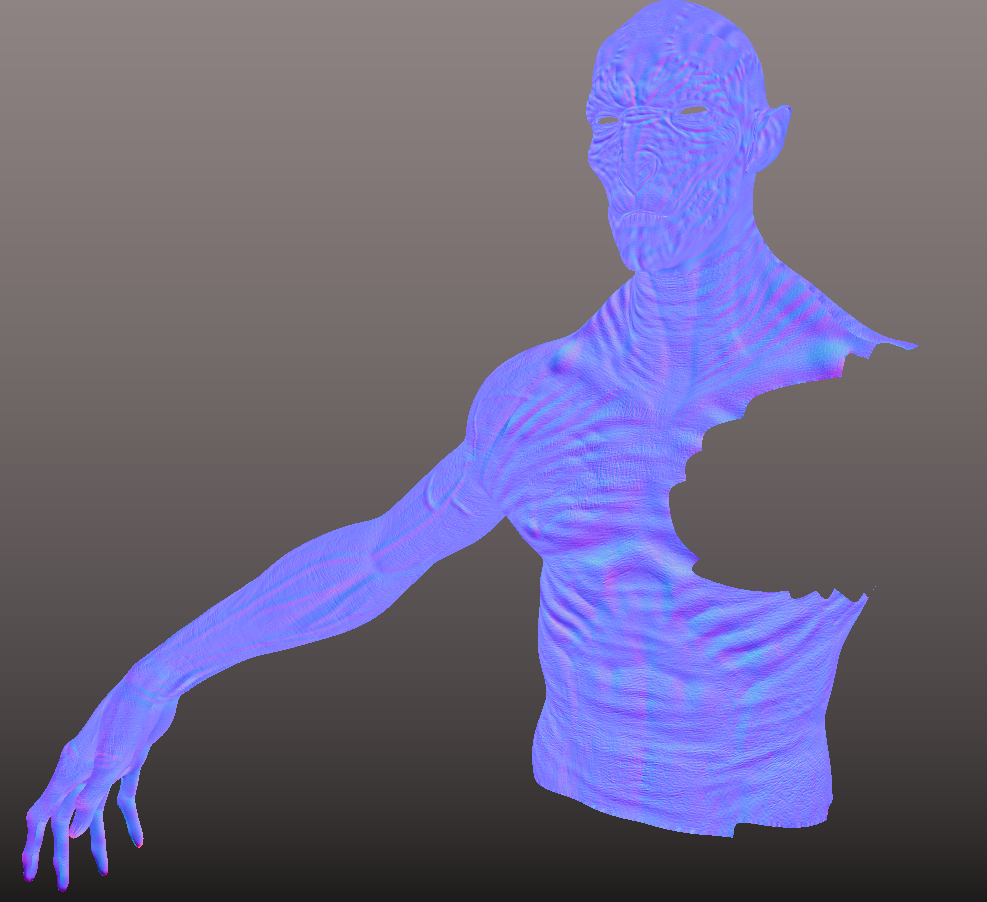
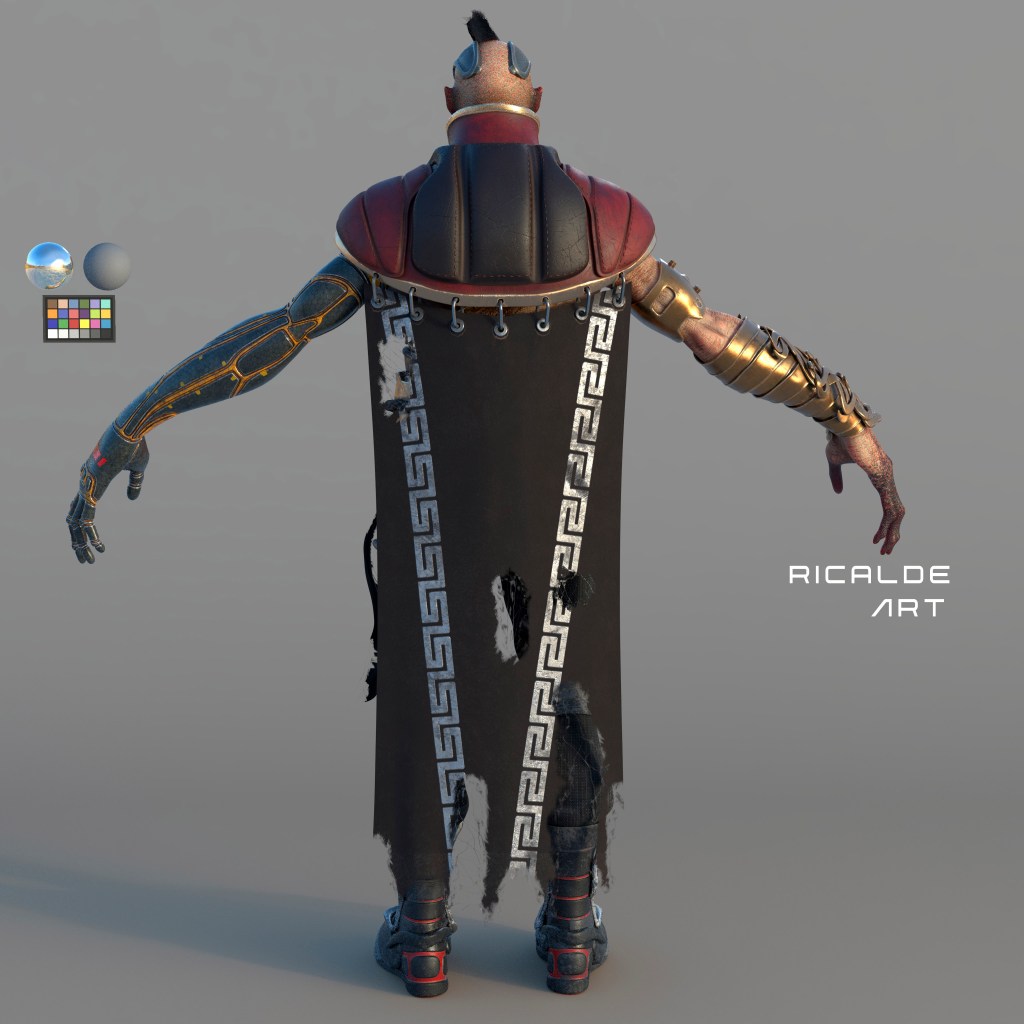
I generated a variety of texture maps, including normal, albedo, roughness, metalness, SSS Scatter, and opacity maps. The opacity map was crucial for simulating the torn fabric of the cape. For shading, I worked in Autodesk Maya with Arnold as the rendering engine, where I set up the necessary algorithms to ensure the exported textures from Substance Painter integrated seamlessly for realistic results. Each map controlled specific visual properties, such as skin transparency, color, hair transparency, specular highlights, roughness, metal reflections, and cavities. These maps were further refined using remap nodes to fine-tune the output, ultimately achieving the desired final look.
Raw render test:
Posing the Character Using AccuRig
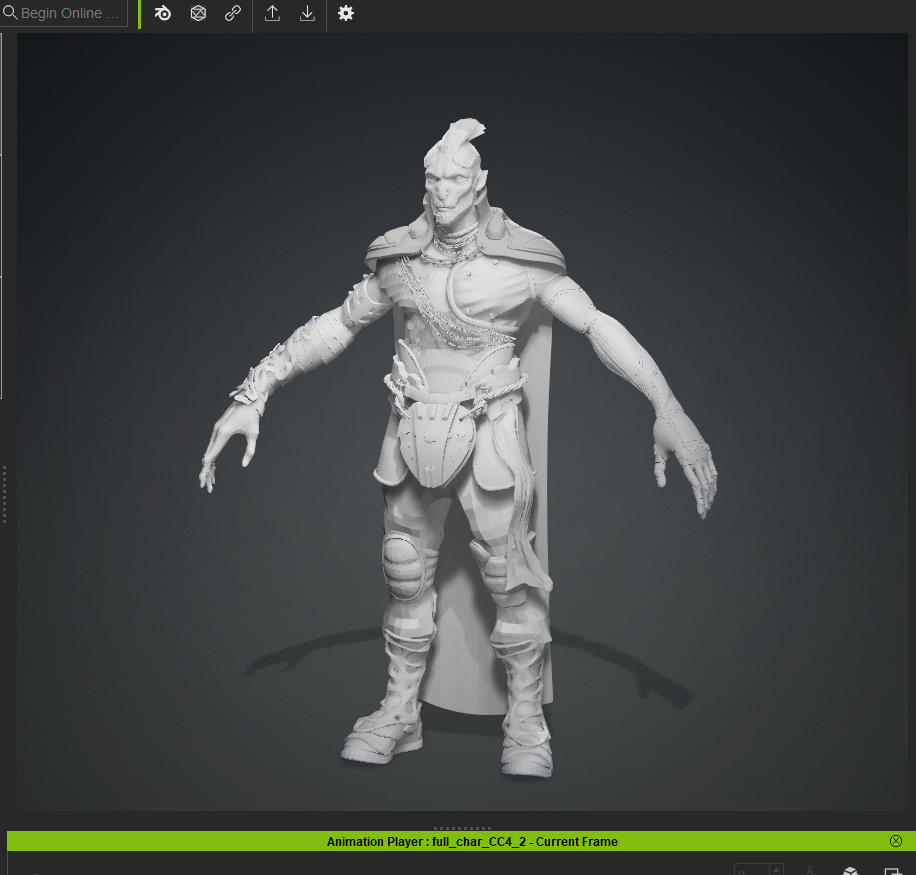
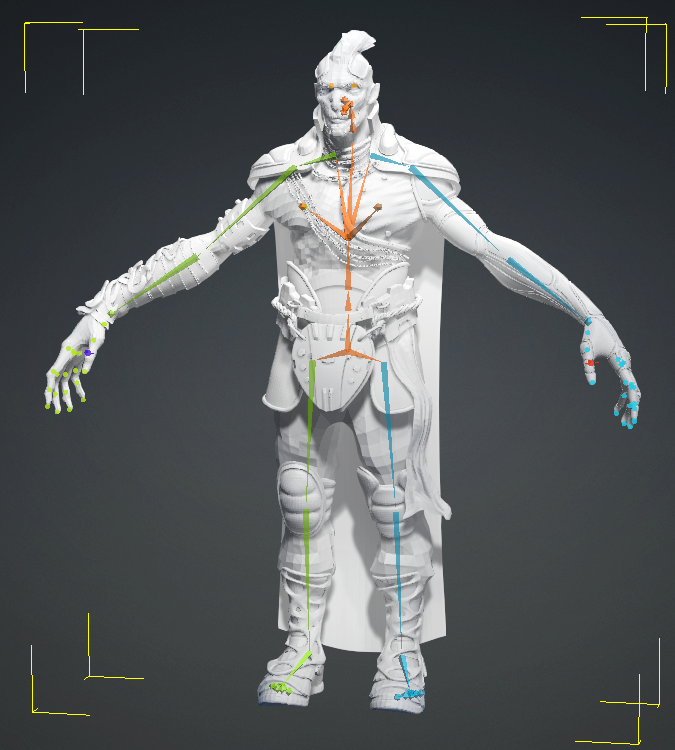
This was one of my first experiences using AccuRig, and I found it incredibly intuitive. Thanks to Character Creator 4 (CC4)‘s powerful functionality, I was able to rig and pose the character in just a few steps. What would typically take hours in ZBrush or other software was completed in under 10 minutes—an impressive time-saver for posing a character made up of multiple objects.
With just one click, the rigging guides are generated after importing the character. A few more minutes are spent arranging the points, with the reference image guides on the top right of the viewer making the process even easier. Once the guides are in place, the second click creates the bones, and corrections can still be made at this stage. The third step, binding the skin, may take a bit more time, but it’s still fairly quick. The final step is simply searching for an animation in the content folder, double-clicking it, and your character is already animated.
I used three preloaded animations in CC4, selecting key frames from each and editing them directly within the software. This significantly sped up my workflow, especially since I joined the contest just two weeks before the deadline. Thanks to CC4, I was able to pose my character quickly, allowing more time to focus on details like positioning the eyebrows, eyelids, texturing, shading, rendering, and post-production. This efficiency ultimately contributed to my victory in the 2024 Reallusion Character Contest in the AccuRig category.
At this stage, achieving the right lighting and camera angles is essential for a strong final render. For this project, I used several AOVs (Arbitrary Output Variables), or render passes, which I later composited in Adobe Photoshop. I utilized around 12 AOVs, including albedo direct and indirect, specular, SSS, ZDepth, Ambient Occlusion, and others to enhance the image and bring the scene to life.
To begin the composition, I started with the Beauty Pass, which combines all the passes into a single image. From there, I added each AOV individually, experimenting with blending modes, opacity, and adjustments to tone and saturation. This approach gave me full control over the lighting, especially since I rendered each light in the scene separately.
To make the character stand out, I added colorful smoke to the background, creating a striking contrast against the black backdrop. This helped me achieve a dark yet vibrant atmosphere that complemented the character. This stage was a critical part of my two-week process. Despite juggling other projects, I managed to finish on time—largely thanks to the efficiency of positioning my character using CC4’s tools.
Final Thoughts
Reflecting on the contest, Angel praised the judges and the tools provided, noting how they elevated the quality of entries. “The intuitive software and resources made it easy to learn and integrate into my workflow”, he adds. Inspired by Pablo Munoz, Angel is eager to explore a workflow where he sculpts from the CC base mesh for future projects. For Angel, the contest wasn’t just about competing but also about exploring new creative horizons with Character Creator and related tools. His journey is a testament to the power of adaptability, skill, and the right tools. His experience highlights how innovative workflows can bring ambitious visions to life, inspiring others to push their creative boundaries.