首頁 » Page 70

Cartoon Animator Offers a World of Creative Opportunities for Video Editing Community

Reallusion Cartoon Animator 4.5 update exports transparent footage for video compositing

Reallusion, the software developer of Cartoon Animator 4 (CTA4) – a 2D animation software that turns images into animated characters with intuitive animation tools and content libraries; expands its horizons to the video editing community by supporting transparent footage to all video making tools.

Combine 2D Animation with Live-Action Video Footage

Cartoon Animator combines animation with real-life footage, helping creatives revisit once difficult projects like Disney’s acclaimed “Who Framed Roger Rabbit?”, or Looney Tunes and Michael Jordan’s Space Jam. This latest CTA 4.5  update allows video editors to employ a repertoire of powerful animation tools including facial expressions, smooth body motions and 360 head, along with animated characters, backgrounds and motions that can be exported as transparent MOV videos for fast video compositing. 

Through Cartoon Animator, video editors can also access an extensive library of fully-rigged characters and motions that can be easily customized, making animation editing a fun experience.

Two typical user cases frequently seen on professional video projects:

  • Composite 2D characters with live action footage with post lighting and shadow effects

  • Immerse real-life actors inside virtual 2D scenes

Supports Transparent MOV and PNG Sequences

Cartoon Animator supports both transparent video (MOV) and image sequence (PNG) export. CTA 4.5 Users can freely group animated elements into transparent footage to easily add visual effects to animated items, and composite 2D animations with video through all major video editors while employing useful features such as exporting selected items for fast video compositing, Fit-to-Object-Size output for optimized video editing, and much more.

  • Export Transparent Footage (MOV Video, Image Sequence)

Easily add visual effects to animated items

  • Flexible Export

Users can use Isolate Selection to exclude unwanted elements, and export only selected ones. Selected items will be automatically merged into one transparent element for fast video compositing.

  • Smart Export

Exported items will automatically be placed into their corresponding folders in accordance to their types.

  • Fit-to-Object-Size Export

Creators can export animated items with their effective animation range instead of the entire project. They can also easily rearrange object positions in editing tools, and optimize performance for smaller data sizes. 

Update for After Effects

In CTA version 4.5, Reallusion also enhances the functionality of Export to After Effects, including exporting audio clip by object (.wav), camera settings, project sounds, background image, and transparent Video (.mov). Users can download the free AE script from the webpage.

Free Update for CTA Pipeline / Pro Purchase Users

This CTA 4.5 free update allows Cartoon Animator users to use any preferable video editing tools to add powerful post production effects to their videos, elevating their end products faster and at low costs, in ways that would normally take big budget studios several weeks of work with a large team. 

“I’m so excited with this update. If you are an animator, I assure you that this is going to change your work life. You will no longer be restricted in any way. All new exciting possibilities will open up for you. If you can dream it, you can create it.” said GarryPye, Reallusion’s 2D Community Manager and Certified Content Developer.

Learn more on animation solution for video compositing: https://www.reallusion.com/cartoon-animator/video-makers.html

For the launch special offer and more price information, visit Reallusion Store.

TV Creative Agency ZDF Digital adopts Real-time Animation Tools for Network Production

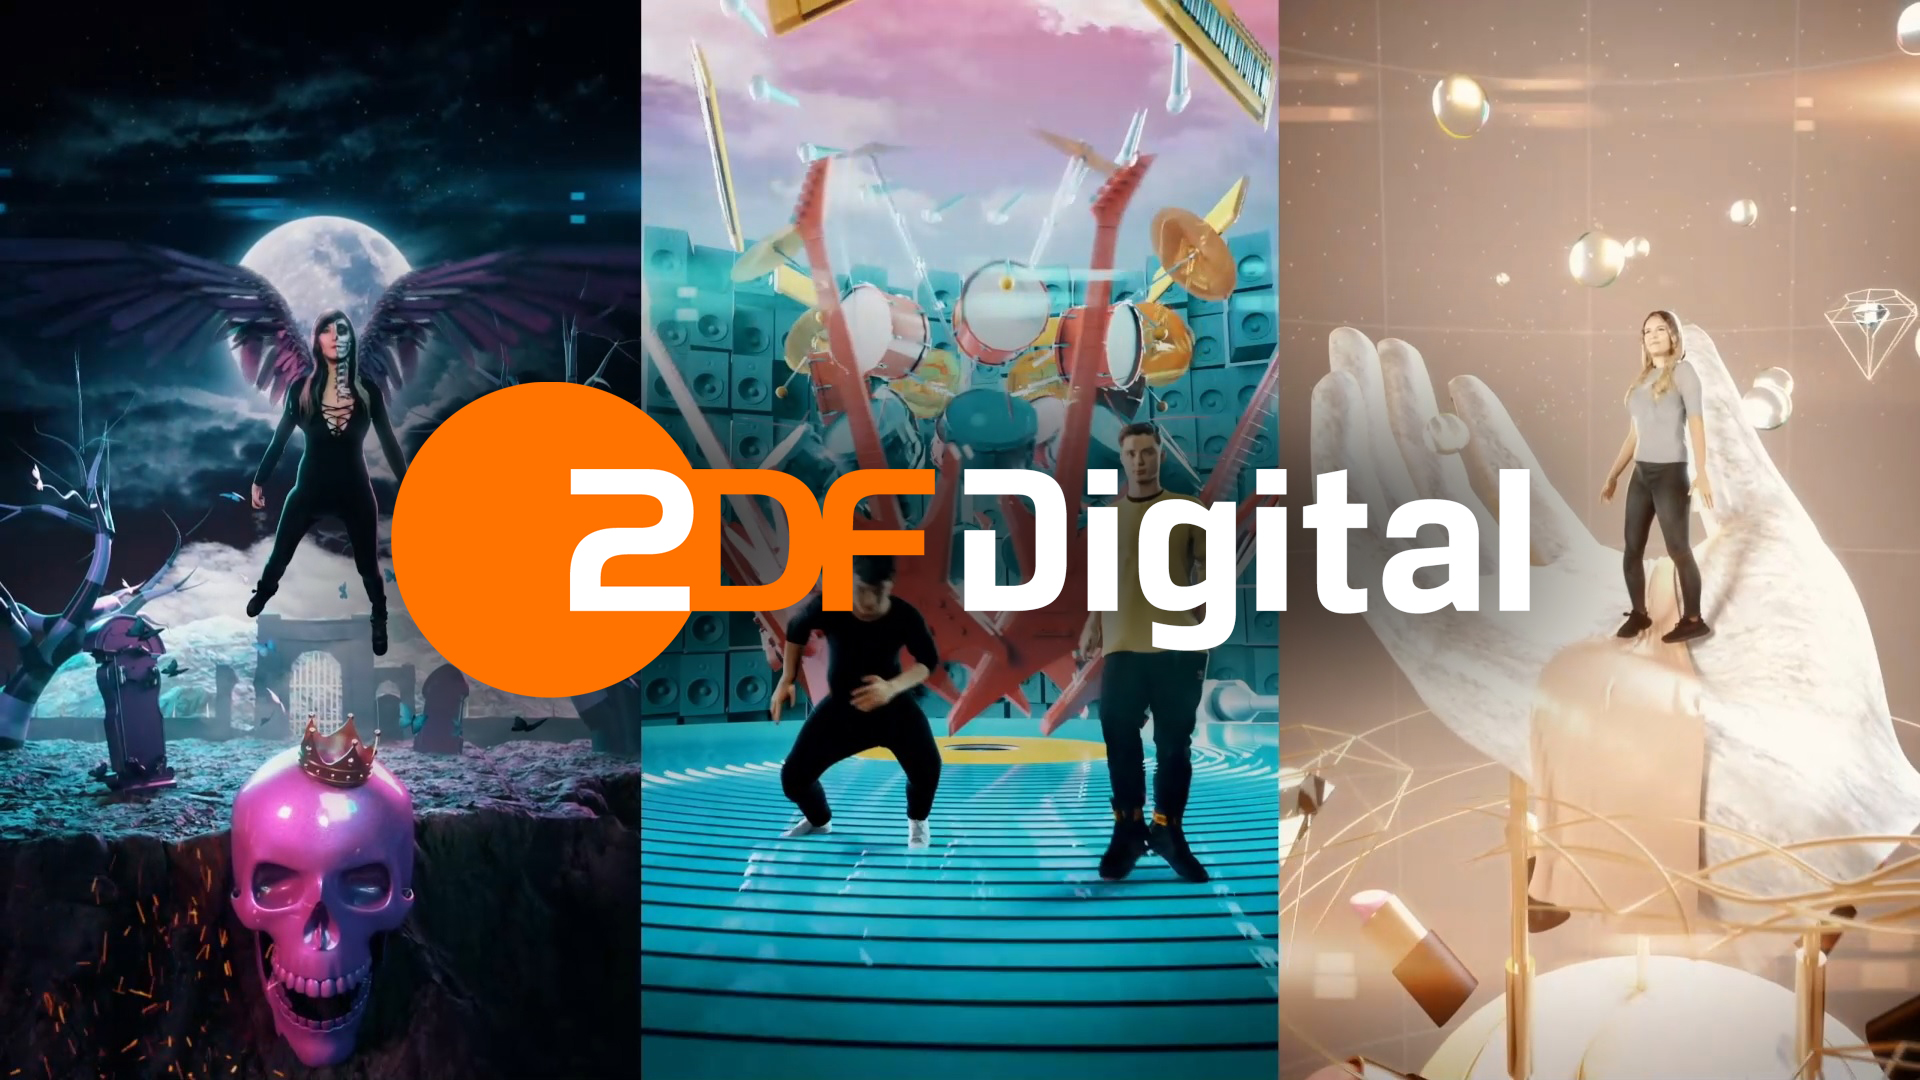
ZDF Digital

ZDF Digital develops advanced television and design products for national and international clients. They create immersive and interactive experiences and products for TV, web and social media for national and international customers.

At their offices in Mainz and Berlin, they bring documentary reports, TV magazines, TV shows, corporate and advertorial films, transmedia productions, apps, e-books, interactive and broadcast designs, animation and visual effects to life.

With have over 70 experts – developers, editors, concept designers, 3D, VR, motion, corporate and sound designers, performance managers, editors / cutters and subtitlers working together on projects, they have recently delved into adopting real-time creation and animation tools, like Character Creator and iClone, in their network pipelines to speed up production while maintaining quality.

“Now we use the Reallusion software on a daily basis, for all kinds of high-end projects to create much more, and better output at the same time.”

Mario Hill – Motion Designer | ZDF Digital – Germany

How to bring 3D skills to 2D animation

Explore innovative ways to create animations with iClone for Cartoon Animator.

The world of animation traditionally has sets of tools devoted to 2D or 3D. In recent years, with the advancement of technology, the barriers between 3D and 2D have been broken down. More and more 3D animators have found ways to create 2D animations on the basis of 3D skills. Here, I’ll explore how to create animations with both 3D and 2D tools. 

Where 3D meets 2D

I’m Tom Jantol, a filmmaker and animator who graduated from Film Academy as a film and TV director a long time ago – I’ve been a professional animator for more than 15 years. I first started with game engines as part of the Machinima movement, then further delved into software such as iCloneCartoon Animator for 3D and 2D animation, Unreal and Unity game engines, and After Effects for post-production. 

As 3D animators, we have always been in a race with photorealism; however, there are times when we need different creative approaches for storytelling. I will never forget the time a viewer watched a realistic animated character I had made and said: “sorry, but hand-drawn cartoons are far more convincing”. Our brains automatically compare 3D with the real world and the tiniest discrepancy shatters that illusion. On the other hand, 2D animation has the flexibility to create its own world of exaggerations and illusions. 

(Image credit: Tom Jantol)

3D and 2D both have something to offer, then – they can both create distinctive and incredible worlds. Traditionally, the learning curve of mastering 2D or 3D animation was too high to acquire both skillsets. However, new software has made it easier than before. For example, you can now directly apply your 3D animations to a 2D character, despite the dimension difference in iClone and Cartoon Animator. This is where both worlds cannot just coexist but supplement each other. My dream is to merge these two worlds in a way that celebrates both, showcasing the best of each. After all, the viewer doesn’t care about dimensions, they care about the emotion that the art brings. 

An easy workflow from 3D to 2D

Cartoon Animator, iClone, and After Effects are the backbones for any idea willing to emerge from my crowded animator’s brain. They cover everything from creating 3D animations, making a 2D character move, to post-production, which makes the final result enticing. The best thing is that I don’t have to think in dimensions; whatever comes to mind can be realised using these three programmes.

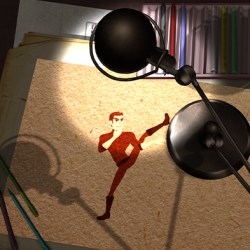
Take one of my recent animations – Lamp Fight – as an example (see video above), there are a few key steps to completing it:

01. Animate 3D characters in iClone 

(Image credit: Tom Jantol)

For the initial animation of the character, I prefer using iClone to make the character animation I want. As there are advanced features in iClone to help me easily animate the details.

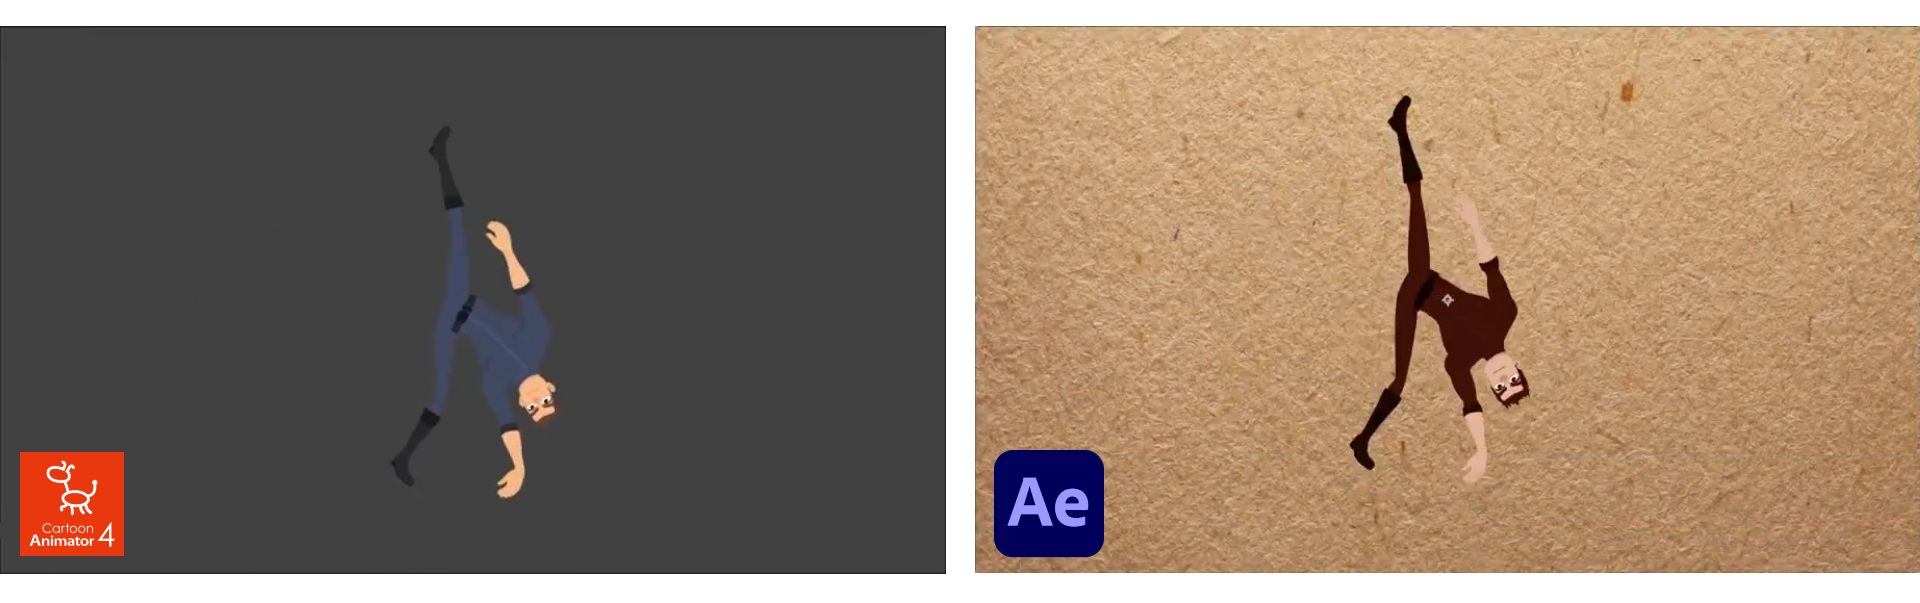
02. Apply 3D animation to 2D characters in Cartoon Animator 

(Image credit: Tom Jantol)

I know many animators who would like to try 2D character animation, but they are afraid of the complex work they think is involved. With iClone’s Motion Link plugin for Cartoon Animator and iClone, this fear is obsolete. Animators can literally animate 3D characters and in real-time watch that animation applied to 2D characters. It may sound almost impossible, but it is not just possible – it’s easy to do. Let’s put it this way: what was once a nightmare, is now a pleasant multi-dimensional dream.

03. Polish the animation with VFX in After Effects

(Image credit: Tom Jantol)

Then, I send the entire animation clip as sequence images to After Effects with just a few clicks by using the AE scripts for Cartoon Animator. I further arrange the compositing and add lighting, texture effects to give the animation a finished look.

04. Create scenes in iClone

(Image credit: Tom Jantol)

iClone is perfect for making a quick 3D scene of the table with a lamp and a bunch of papers. I used After Effects to give the video the ‘paper look’, and then I send the video back to iClone to close a circle with animations of a 3D lamp, synchronised with the moves of a 2D character.

05. Animate lamp according to character animation

(Image credit: Tom Jantol)

With all the materials gathered, the last key step for me to work on is to arrange the camera movement and animate the object (the lamp) to interact with my character.

Combine 2D and 3D in incredible ways

Thanks to the recent capabilities of the Motion Link connection of iClone and Cartoon Animator, and the AE script that links Cartoon Animator to After Effects, Reallusion plugins make the realisation of any idea possible. Jumping from one software to a second, or third has never been easier. Sometimes I feel like I am working in one big, merged software.

The iClone Motion Link plugin is a game-changer for animators. It solves the biggest problem of 2D animators and brings 3D functionality right into a 2D world. Those two dimensions are now closer than ever. It is modern puppetry with modern wizardry. We can now animate our characters in an easy-to-use 3D environment and then ‘glue’ that animation onto a 2D character in Cartoon Animator in real-time.
Pitch & Produce | PROJECT W: Sandfall Interactive Studios Develops Ambitious RPG Game with Real-time Tools

Guillaume Broche – CEO / Creative Director

Guillaume Broche – CEO / Creative Director

Founded in 2020 in France, Sandfall Interactive is an independent video game studio focusing on PC and next gen console development of high quality premium games. With a focus on single player experiences, they are looking to deliver incredible stories with fascinating characters in gorgeous worlds for all players to immerse into.

Their first game currently in development – Project W is an RPG experience aimed at next gen consoles and PCs. Set to release on Unreal Engine 5, the game will immerse the player in a beautiful post apocalyptic fantasy world through an epic single-player narrative-driven adventure.

Guillaume worked in game production at Ubisoft for 4 years before founding Sandfall Interactive. They won support from Reallusion’s Pitch & Produce program, where they received the help of real-time creative tools like Character Creator, SkinGen plugin for Character Creator (CC), iClone, the Rokoko Smartsuit profile for iClone, and AAA mocap motions from the ActorCore online platform, to be used in the Unreal Engine.

“The promise to get realistic characters, fully customizable, automatically rigged to the UE4 skeleton, and with blendshapes seemed too good to be true — but Character Creator actually delivers in all these areas.”

Guillaume Broche – CEO / Creative Director

Q: Bonjour Guillame, and welcome to the Reallusion Feature Stories. Kindly introduce yourself, Sandfall Interactive and Project W.

Bonjour everyone! My name is Guillaume Broche and I am the CEO and Creative Director of Sandfall Interactive – a new video game studio based in Montpellier, a sunny city in the south of France. I have worked at Ubisoft for over 4 years and recently decided to start my own studio together with another Ubisoft dev, and we are now a team of 8 planning to grow up to 15 people.

Our first game currently in development is Project W, which is a fascinating and ambitious RPG experience aimed at next gen consoles and PCs. Set to release on Unreal Engine 5, the game will immerse the player in a beautiful post-apocalyptic fantasy world through an epic, single-player, narrative-driven adventure.

Q: You applied to the Pitch & Produce program where you used Character Creator and the SkinGen plugin to create your characters. What are the typical challenges that game developers face when making characters? And what originally caught your attention when using Character Creator and SkinGen?

When creating 3D characters, especially in a realistic style, there are a lot of things to worry about: do they look good? are they well optimized? How am I going to do the facial animation? How am I going to rig them? How can I make my textures realistic enough? All these questions and many more make creating high-quality characters expensive and time-consuming, especially when you want to create many.

As a small team we have to find ways to optimize that, which is why Character Creator and the SkinGen plugin for Character Creator, caught our attention. Character Creator has great tools to setup cloths and paint weights.

Not only that, but we are using it to rig all the creatures in our game.

Q: For your game animations you utilized a combination of mocap from the Rokoko Smartsuit, key-framed animations and Reallusion’s ActorCore mocap library. As a game developer, what kind of motions do you need to mocap yourself, versus using pre-made animations from a collection?

Pre-made animations are a fantastic way to gain time. We always modify them a bit to make them more unique, but having access to a polished library of mocap animation, like the Reallusion ActorCore platform, is awesome.

Though of course it doesn’t fit all our needs, especially when we have complex cutscenes and such. In which case we turn to the Rokoko Smartsuit Pro to get exactly the animations we need.

Finally for the character’s skills, we use a combination of mocap and keyframes to make them more dynamic.

Q: Yourself and some of your team members have previously worked in big AAA studios like Ubisoft. What would you say are the biggest hurdles in coming from a large studio, to an indie studio?

Time and people of course! When switching to an indie studio you lose the comfort of having ultra-specialized people in every field, so you have to learn a ton of stuff that wasn’t originally your specialty, including character art. So far, I was the one making the character, but we are hiring a character artist to push they quality ever further with custom hair, beards and skin textures. We also need quite a few monsters to kill!

The indie adventure is fascinating, you learn a ton every day, you meet so many incredible people along the way, you face so many technical and creative challenges… but overcoming them feels so incredible. We are also able to go much faster than big teams on many points, as we are much more agile and communication goes a lot faster when the team is human-sized.

Q: Project W is currently in development; when is the game to be completed and what can the community look forward to from Sandfall Interactive?

Project W should release in about 3 years. It is quite an ambitious project so we want to take our time to deliver something incredible and unique. Note: that this is an estimate that is totally subject to change don’t take it as a hard date.

The community can expect us to always deliver games that we are proud of. We love single player narrative games with well written characters, an engaging story, a unique Art Direction and deep yet fun gameplay.

We really hope that our first project will be loved and played by as many gamers as possible, because we are really pouring all our hear into it. Stay tuned for more news!

Follow Sandfall Interactive

Website : https://www.sandfall.co/

Facebook: https://www.facebook.com/SandfallGames

Twitter: https://twitter.com/SandfallGames

LinkedIn: https://www.linkedin.com/company/sandfall-interactive

Related Posts

Reallusion Simulates Digital Humans Inside NVIDIA and BMW Group’s Factories of the Future Showcase

Digital human simulations are key to adapting factory planning to human worker ergonomics

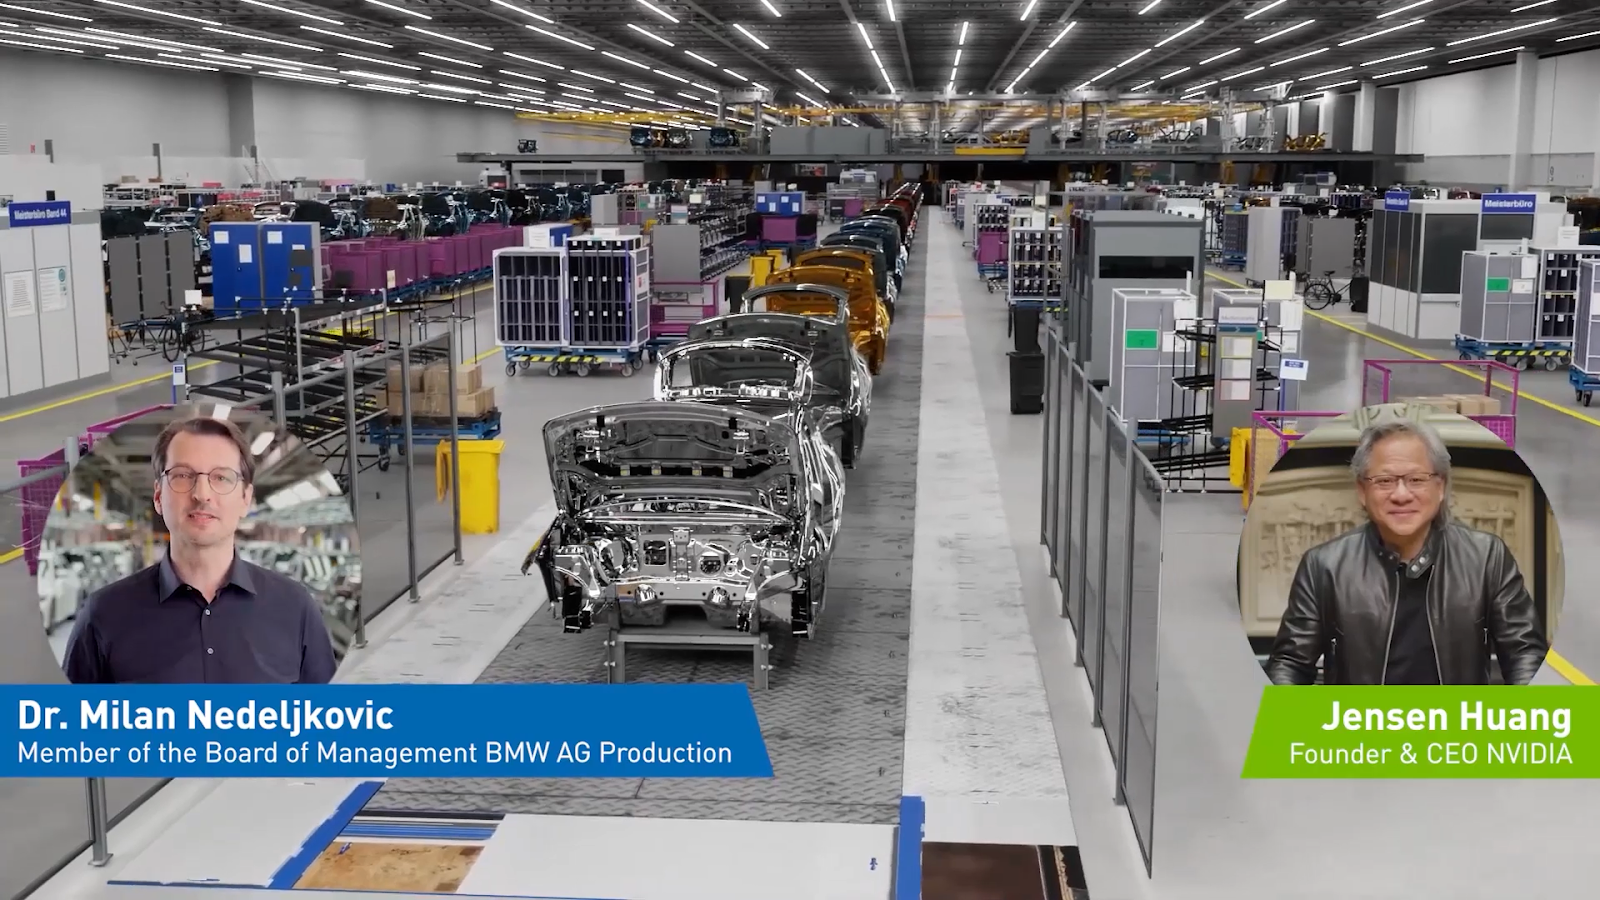
The next era of simulation for manufacturing Is showcased inside BMW Group’s factory of the future project – designed, simulated, operated, and maintained entirely in NVIDIA Omniverse, a 3D real-time simulation and collaboration platform. 

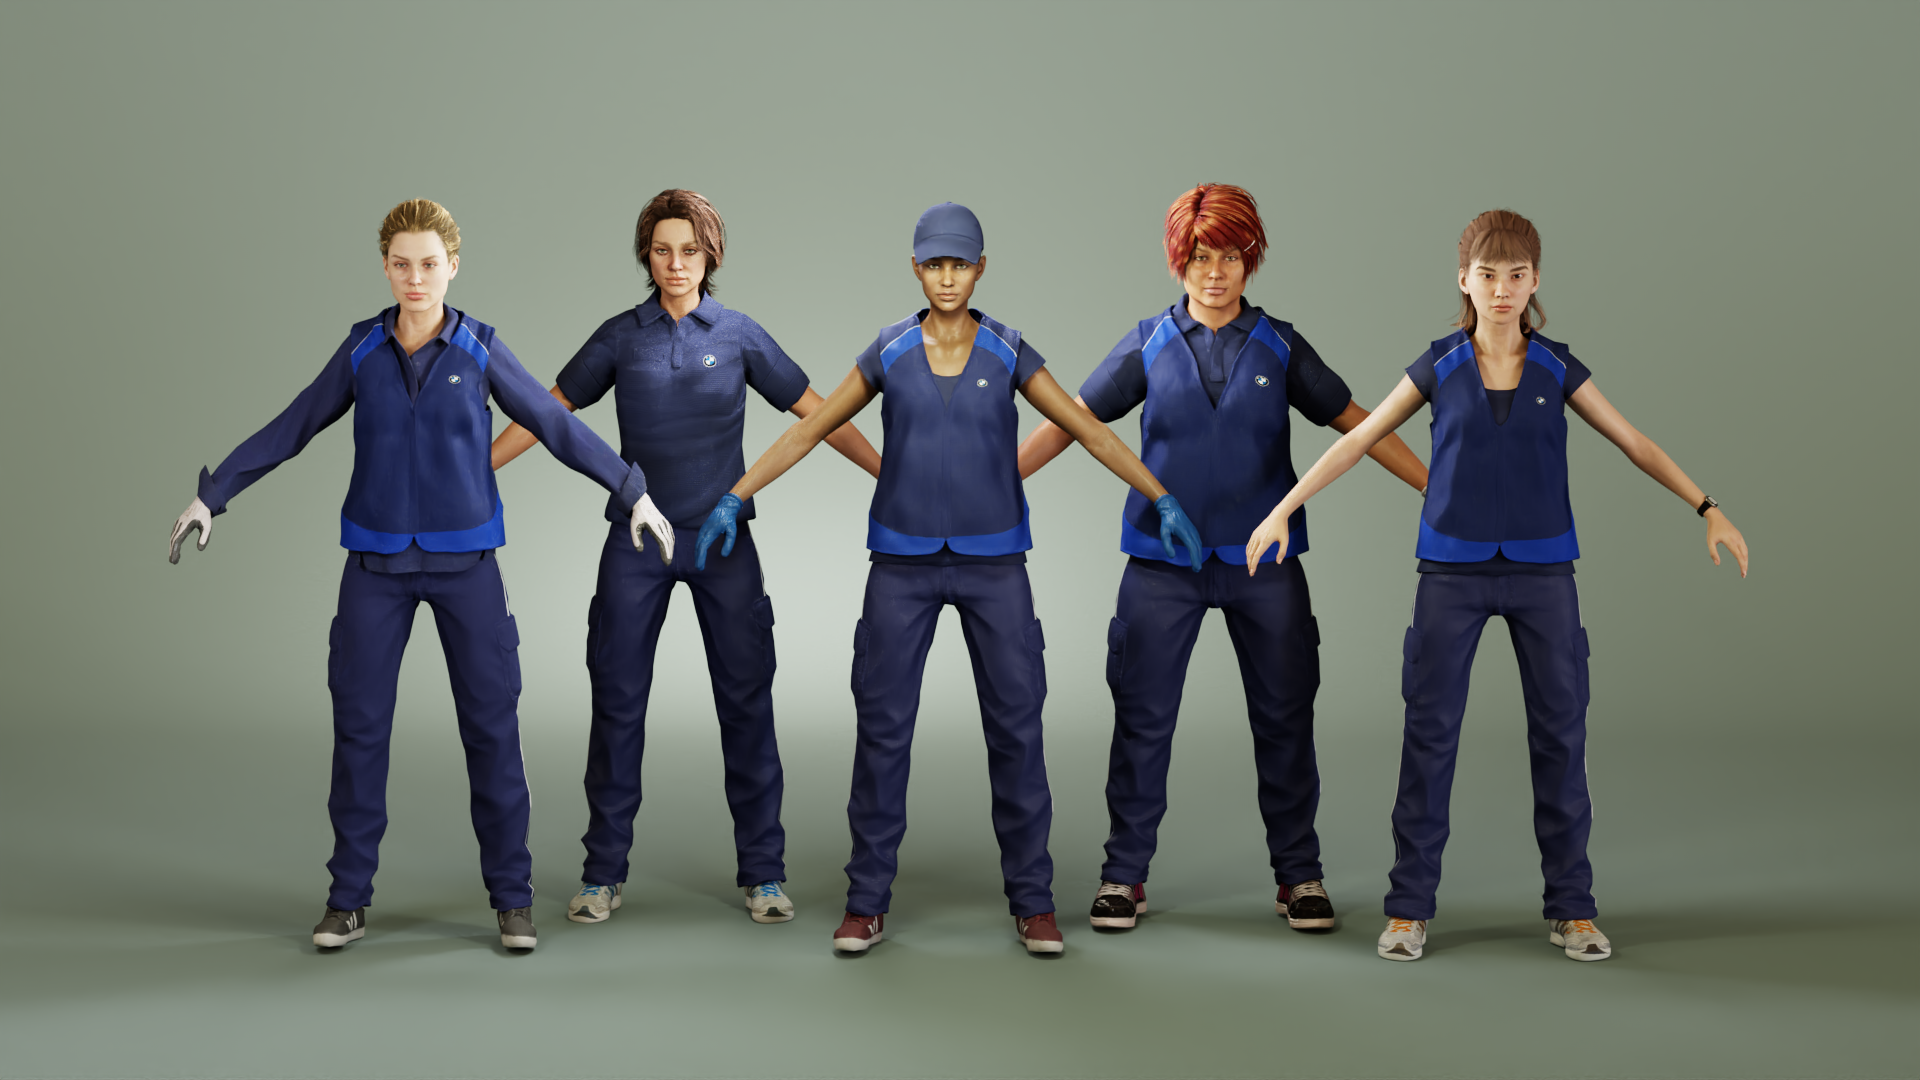
Reallusion collaborated with NVIDIA and BMW Group to generate a diverse workforce of digital humans for the digital twin of a factory. Utilizing Character Creator and headshot photos from Generated.Photos AI, a range of characters were designed to simulate ergonomics for the real-world workers. The digital twin workers can be assigned tasks with core Omniverse and NVIDIA AI technologies, allowing BMW to fully simulate complex factory workflows involving humans, robots, and vehicles – all working in sync.

“BMW regularly reconfigures its factories to accommodate new vehicle launches,” said Dr. Milan Nedeljkovic, member of the board of management BMW AG Production, who unveiled the demo with Jensen Huang, NVIDIA founder and CEO at GTC21. 

“We would like to be able to do this at scale in simulation. Digital humans are trained with data from real associates. You could then use digital humans and simulation to test new workflows for worker ergonomics and efficiency,” Nedeljkovic said.

NVIDIA Omniverse is an open platform built for virtual collaboration and real-time physically accurate simulation. The platform enables real-time collaboration between design tools, assets, and projects for collaborative iteration in a virtual world. With Omniverse, BMW Group can collaboratively design, plan, and simulate their factory in real time.

“There is a huge demand for digital humans and character motions across industries, but they have been challenging to create due to the complex process and costs involved,” says John Martin, VP of Product Marketing, Reallusion. “With the Omniverse Character Creator Connector, artists, designers, and developers can create digital humans for projects with ease, eliminating the need to outsource or incur associated costs.”

Automated virtual workers are able to move to designated locations and perform required tasks, which helps factory designers and planners understand design impacts on real-world workers’ ergonomics and comfort.

Why Reallusion is the Digital Twin Workforce of the Future

The Character Creator Omniverse Connector adds the power of a full character generation system with motions and unlimited human variations to Omniverse. Professionals of any skill level can leverage the tools to create digital humans for projects with efficiency and without the need to outsource or forego digital humans due to cost or human resource challenges. Enable rapid character creation, choose animations from a vast library of motion capture, or add and edit custom motion with iClone. Transfer characters and motions from Character Creator with the Omniverse Exporter for a solution that is easy to learn and deploy digital humans for Omniverse Create and Omniverse Machinima.

The Character Creator Connector is the complete solution to design and deploy digital humans in Omniverse. Designers can create, morph, edit, skin, clothe, animate and transfer characters with tools designed to develop and bring to life real-time, photorealistic digital humans in Omniverse. With the Universal Scene Description (USD) file framework, the user can senda model and motion from Character Creator to Omniverse, allowing full characters and performances to be transferred directly. Omniverse Connectors, plugins to leading industry software applications, enable users to work across other tools such as Epic Games Unreal Engine, Autodesk Maya or 3ds Max, and more in a simultaneous scene building effort. 

The Character Creator Connector aims to populate digital humans anywhere and by anyone who desires to utilize 3D characters in their Omniverse projects. The USD format is the common way all DCC tools connected to Omniverse can load, edit and manage content collaboratively, in real time.

The factory’s workforce is animated with intelligent motion design from Reallusion’s Motion Matching mocap data, Actor Core motion library, and assembly line movement for factory motions from performance motion capture sessions.

“120 AI-driven animated digital workers are inside the digital twin of BMW’s assembly system powered by Omniverse. For the first time we are able to have our entire factory in simulation. Global teams can collaborate using different software packages like Revit, CATIA or point clouds to design and plan the factory in real-time 3D. The capability to operate in a perfect simulation revolutionizes BMW’s planning processes,” says Dr. Nedeljkovic

Omniverse and the Character Creator Connector provide a creation workflow that is adaptable to any individual or corporation. Plus, with the ability to integrate NVIDIA AI technologies into the Omniverse platform,  the Character Creator digital humans become intelligent animated workers within virtual factories to simulate real-world operations.

Create Digital Humans for Omniverse with Reallusion Character Creator: https://www.reallusion.com/character-creator/nvidia-omniverse/

Get the tools to create Omniverse-ready digital humans. Download a full evaluation trial of Character Creator 3 Pipeline to design custom characters with ease: https://www.reallusion.com/character-creator/download.html

Get started with NVIDIA Omniverse by downloading the Launcher and Character Creator Omniverse Connector. Use the Omniverse Exporter from Character Creator 3 to export and transfer any CC3 character and motion as USD to Omniverse: https://www.nvidia.com/en-us/omniverse/

About Generated Photos

Generated Photos is an AI company creating diverse model headshots. The images are stunningly realistic, however, these people are not real. This makes them worry-free in terms of copyrights and royalties and a good fit for character development, visualizations, demos, and marketing materials. 

Concept Art MasterClass #7: Comping Renders, Paint, and Finish

Gnomon Instructor and Senior Concept Artist Kyle Brown shares a groundbreaking workflow

Kyle Brown, a veteran of the CG world, Kyle has worked within the field since 2015 and has had his hand in a number of projects throughout the film and television industry. He also currently is an instructor at the Gnomon School of Visual Effects where he is able to share his expertise with others.

This Master Class comes in 7 parts, each carries its own tutorial video to guide you through the entire process of how Kyle incorporates Character Creator, Photoshop, ZBrush and other tools to create the concept art. You can find links to the other 6 tutorials below.

Part #7: Comping Renders, Paint, and Finish

With the renders complete, I bring them into Photoshop to put on the final touches. The amount of painting varies from piece to piece but as so much of these pieces were figured out early in the process, it doesn’t take much to get them looking the way I want them to.

The first thing I do is play around with some color LUTs to get a unified color grading, very similar to the post effects available in CC3.

On the two other versions that weren’t based on my initial sketches I want to push some of the stock elements a little bit further to match the Cyberpunk look. As mentioned earlier in the tutorial, I not only wanted the costume to be different between the versions but also the artificial skin as well. I opted to tweak some of the cut lines and QR code on the cheek a bit, opting on the third to remove it completely for more of a natural aesthetic.

With the more ‘mechanical’ bits on the second version, I wanted to paint in some extra cut lines and material reads, including some additional texture and sheen. As well, this version showcases the alternate glow texture created earlier in the tutorial.

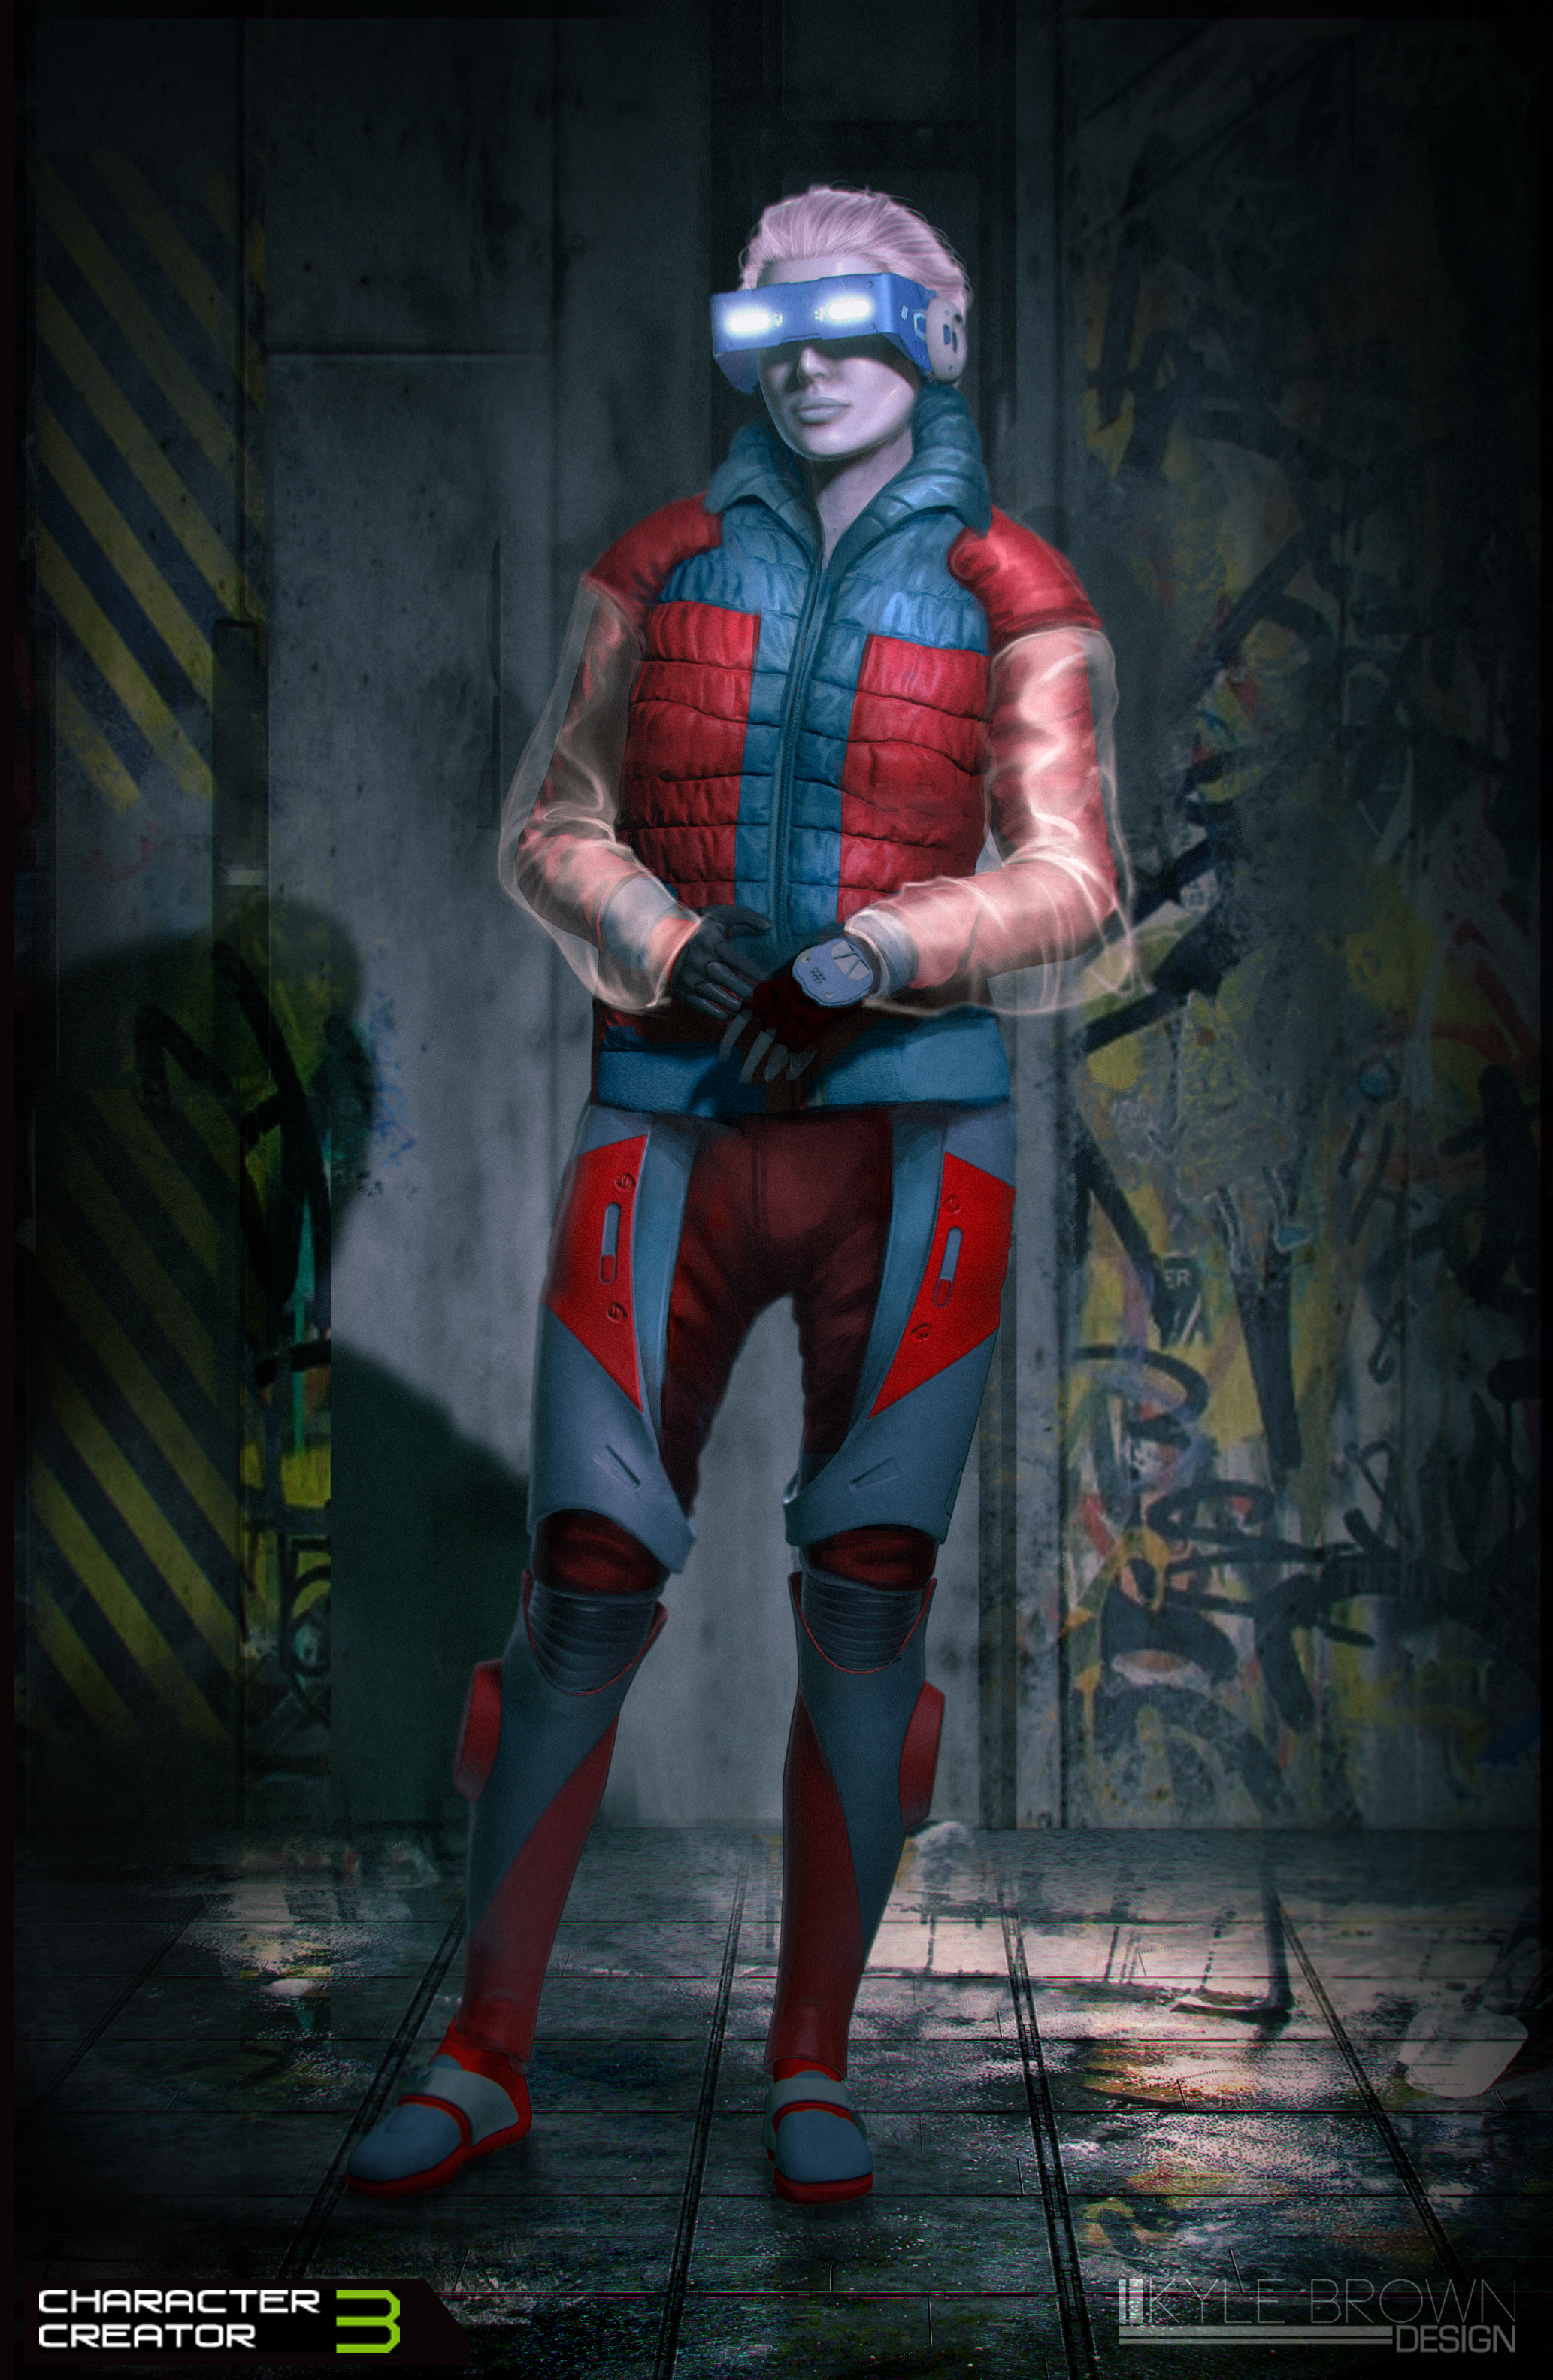
I used some really cool streetwear for the third variation that looked great right out of the box but felt it needed some more break ups in the pattern and something futuristic in the read to push it over so I opted for some plastic or some sort of transparent material.

And here we are! The three final design iterations for our futuristic Cyberpunk android!

And that about does it! There are plenty of resources out there to cover the digital sculpting and digital painting processes, but I was happy to put together a tutorial that tied all of these elements together and showcased an alternate way of utilizing Character Creator 3 for concept design! As I experimented with this new workflow, I found feature after feature that I am excited to implement going forward. I only scratched the surface of all of the new features available in Character Creator 3, whether it’s the brand new SkinGen or the awesome Headshot plugin that allows you to easily capture likeness, something I feel will be extremely valuable on upcoming projects! 

Thank you so much for taking the time to check out this tutorial! It was fantastic getting to explore a new workflow, one that feels like a missing component my workflow was missing and one I am excited to push forward. Once again, thank you to the Reallusion team for inviting me to participate and helping so much along the way! Can’t wait to get into the next piece!

Follow the other 6 tutorials in this series:

Part #1: Getting Started and Sketches

Part #2: Costume & Asset Creation in ZBrush

Part #3: Refining and Adding Details in ZBrush

Part #4: Generating Textures and Importing into Character Creator 3

Part #5: Lighting and Posing a Character in Character Creator 3

Part #6: Costume Variation and Texture Modification

Concept Art MasterClass #6: Costume Variation and Texture Modification

Gnomon Instructor and Senior Concept Artist Kyle Brown shares a groundbreaking workflow

Kyle Brown, a veteran of the CG world, Kyle has worked within the field since 2015 and has had his hand in a number of projects throughout the film and television industry. He also currently is an instructor at the Gnomon School of Visual Effects where he is able to share his expertise with others.

This Master Class comes in 7 parts, each carries its own tutorial video to guide you through the entire process of how Kyle incorporates Character Creator, Photoshop, ZBrush and other tools to create the concept art. You can find links to the other 6 tutorials below.

Part #6: Costume Variation and Texture Modification

When you spend all the upfront time getting your avatar set up, posed, lit and positioned in frame the way you want, you’ve done all of the heavy lifting. With Character Creator 3’s incredible library of assets that can be applied to nearly any character, you can mix and match these incredible assets to get all new looks for your design. With concept it is all about exploring a variation and possibility so being able to change bits and bobs to get new looks is crucial which makes CC3 such an exciting and efficient new tool to be added to the toolbox.

With custom clothing and accessories, it might require some tweaks to make sure pieces don’t interpenetrate and overlap incorrectly. Luckily, we can tackle these issues right inside of the CC3 Modify tab. Hitting conform will give you options to adjust the clothing as a whole where the Vertex modifiers will allow you to use different tools, including options like sculpting to select and move specific vertices, a really handy tool to keep the whole process simple and efficient.

This is a preview of the conform options which will place your model back in T pose allowing you to see the fit as a whole. Like most 3D packages of your choosing, you can use soft selections to make gradual adjustments to areas without distorting the mesh too much.

My first version had the visor up as it did in the initial sketches, but on each iteration I like to change up as much as possible so I easily move the visor down to see it in action.

You can generate a whole library of clothing and accessories that fit within a genre so you can pick and choose elements to get brand new looks with a few clicks and quick adjustments.

I decided that I want some options on the character herself. I elected to remove the cut lines that I had created earlier and opted to create something else that will still evoke the cyber punk feeling while hopefully feeling fresh and interesting. 

I grabbed the same texture from the cut lines that were directing the glow effect and once again took advantage of the Texture editor that sent it over to Photoshop. I used the texture reference in tandem with the original cutline glow to figure out where I wanted the new glow to be, I really enjoy hand painting these maps, giving me a very fluid workflow that can help create options on the fly. 

With mixing and matching, I am able to set up three unique renders that I can now take into photoshop to finish off with some paint and photo texture to get that last little bit of the way to the finish line!

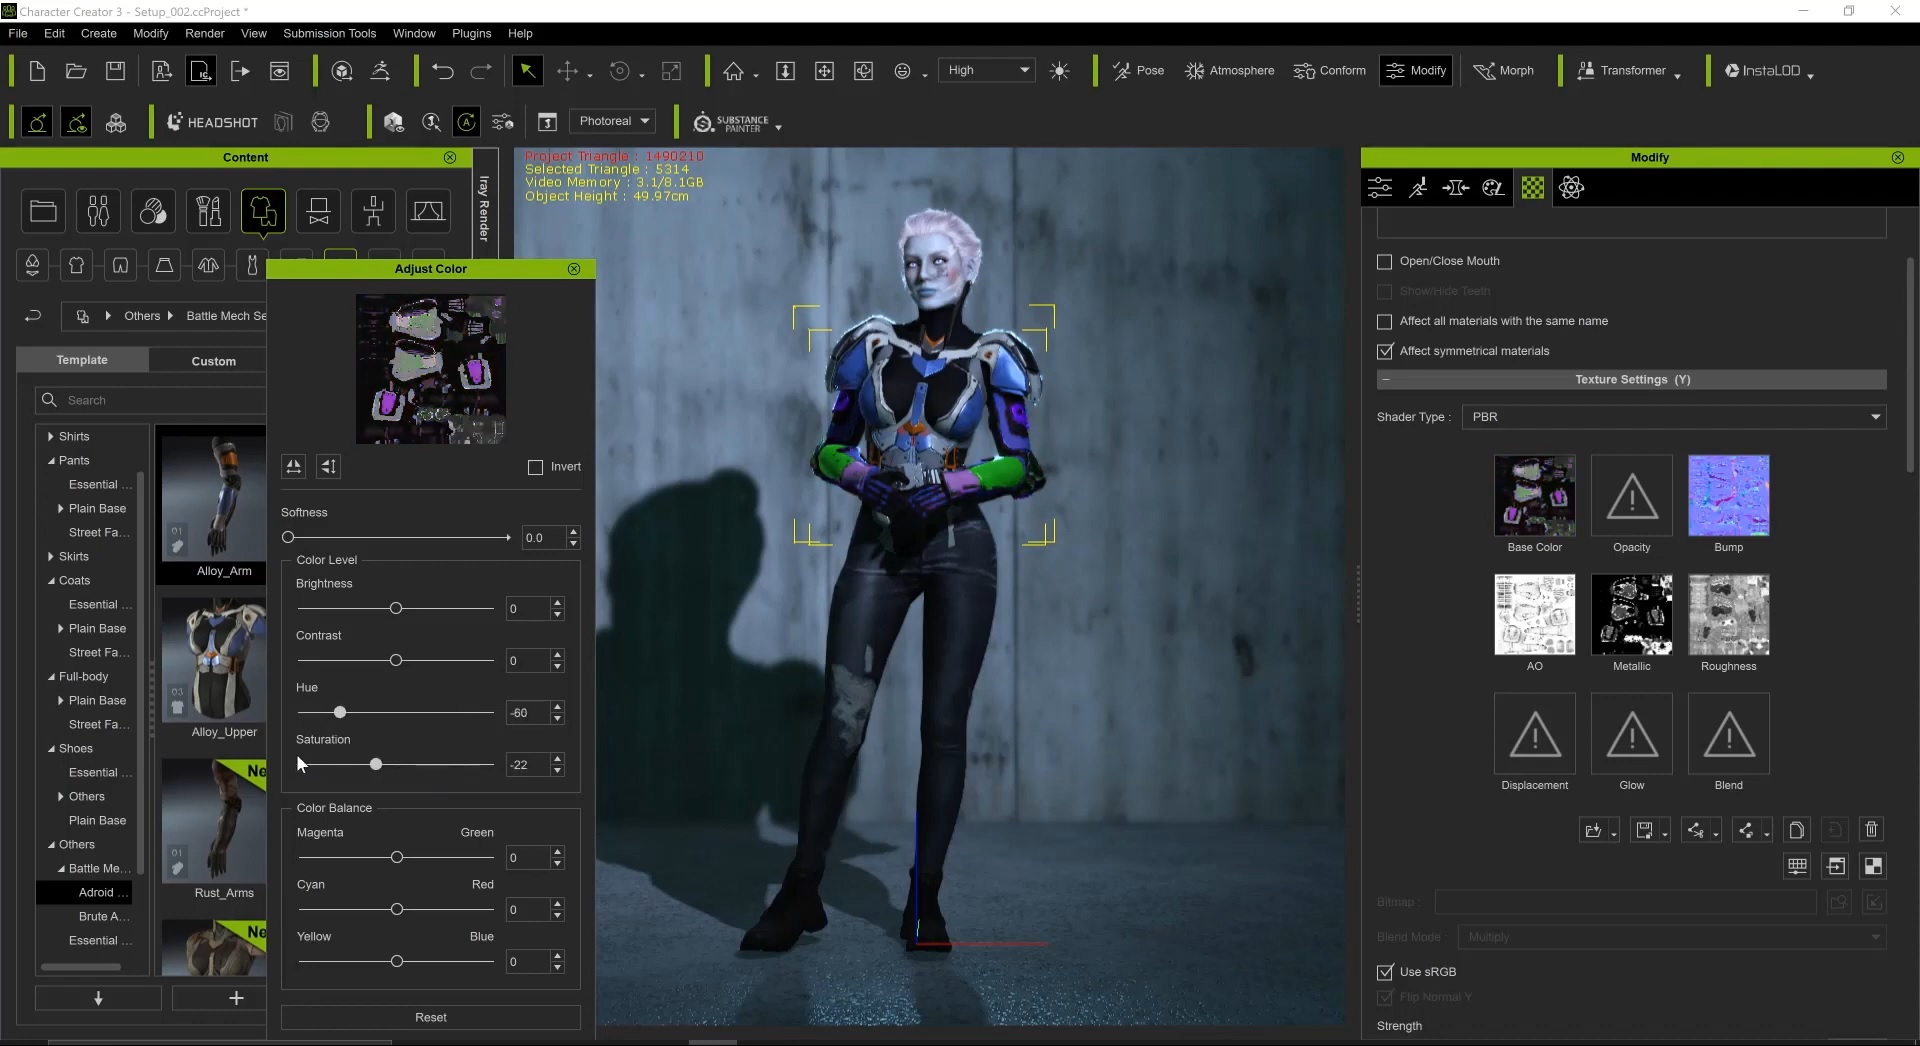
*Note: You can Right click on your color map in the modify tab to pull up the option to Adjust color. This allowed me to desaturate the texture of some clothing I had that didn’t quite work with what I had established. This gives me a great base to work with in Photoshop.

Follow the other 6 tutorials in this series:

Part #1: Getting Started and Sketches

Part #2: Costume & Asset Creation in ZBrush

Part #3: Refining and Adding Details in ZBrush

Part #4: Generating Textures and Importing into Character Creator 3

Part #5: Lighting and Posing a Character in Character Creator 3


Part #7: Comping Renders, Paint, and Finish

Concept Art MasterClass #5: Lighting and Posing a Character in Character Creator 3

Gnomon Instructor and Senior Concept Artist Kyle Brown shares a groundbreaking workflow

Kyle Brown, a veteran of the CG world, Kyle has worked within the field since 2015 and has had his hand in a number of projects throughout the film and television industry. He also currently is an instructor at the Gnomon School of Visual Effects where he is able to share his expertise with others.

This Master Class comes in 7 parts, each carries its own tutorial video to guide you through the entire process of how Kyle incorporates Character Creator, Photoshop, ZBrush and other tools to create the concept art. You can find links to the other 6 tutorials below.

Part #5: Lighting and Posing a Character in Character Creator 3

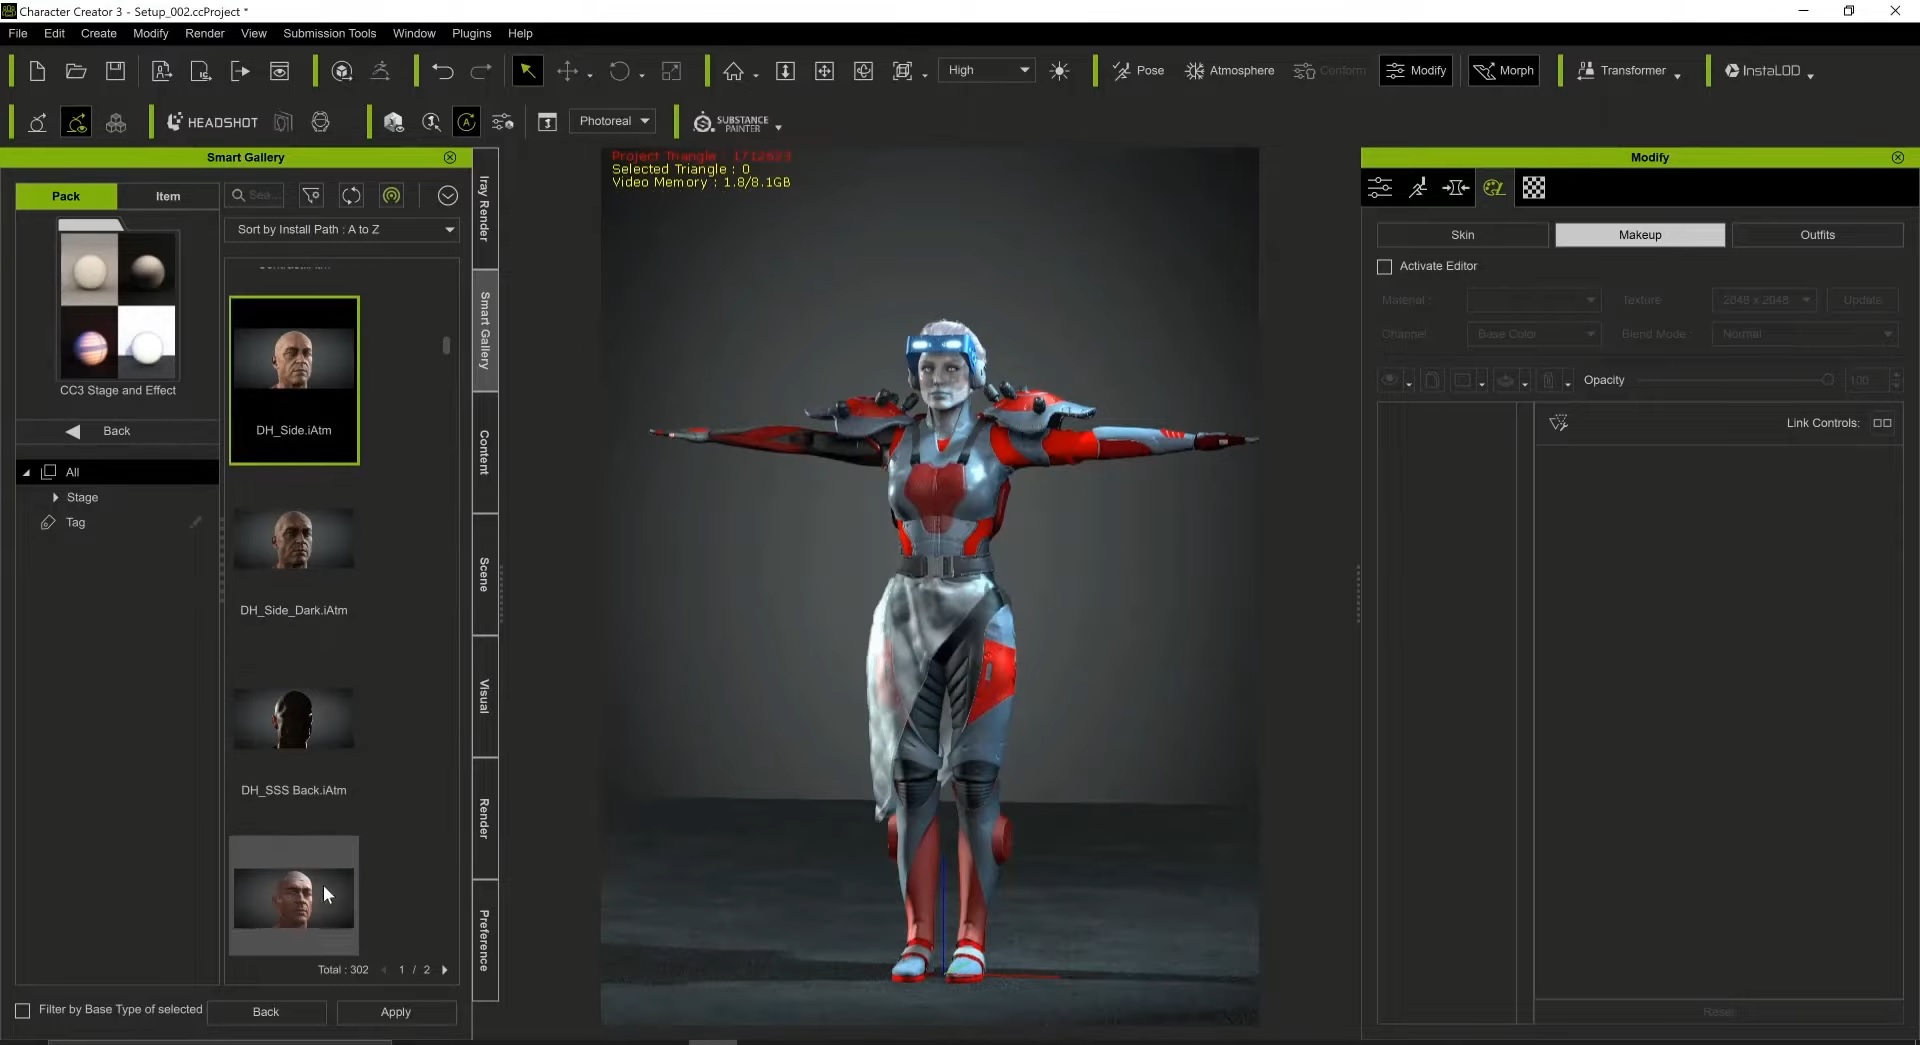
With all of the textures in place and material properties assigned, I start to work with some of the other properties within the content library, including the Stage elements. I enjoy looking through the Smart Gallery as well so see how options are bundled for a more cultivated look. 

Not only can you set up the lights but you can also further adjust the image window with a number of post effects including blurs, color adjusts and LUT color grading effects.

This is great for artists who want to streamline the process as much as possible and limit their time in their post processor of choice.

I flipped through a number of studio lighting scenarios that had some really strong dramatic lighting. I wanted a nice blend between studio lighting and something that would feel a little more natural or environmental as though some of the lighting was coming from some neon street signage.

Once you pick a studio lighting preset you will see that it generates lights in your scene tree that you can move and manipulate for further customization. 

With lights arranged I went digging through the library of content to see what I could tackle inside of CC3 rather than generating elsewhere or photobashing later. I was thrilled to find the Floor_Asphalt and Floor_Tarmacked available in the Content > Stage Elements > Props > floors. 

There is also a really great concrete wall that fit perfectly for the vibe I was trying to achieve in the piece and did a great job of framing the scene.

I experimented with some posing earlier in the process, when checking to make sure all of the costume and prop elements were parented to the right body part and conforming properly. After setting up the lighting with the figure in T-Pose, and locking in a little bit of the environment, I deep dive into getting my character into her final pose.

The final Pose is similar to the initial pose used for the sketch phase, still maintaining the same attitude that the sketch had. I wanted a pose that showed off a bit of character without it being too extreme, blocking parts of the costume. As this is for concepts, it’s important to communicate as much information as possible to the viewer. 

I had to tweak a few elements of the costume, including the shoulder pauldron that after moving was interpentrating the upper torso and arm.

Everything is looking the way I want, the pose and position are where I want them, the camera angle is where I want so I start adjusting some of the camera effects.

These adjustments can be made in the Visual tab, where you can make adjustments to your Light, Shadow, Ambient Occlusion and much more. You have the option to edit your post effects that were added from your content library as well. 

Here is the piece rounding the final adjustment to get our primary scene set up. I make some adjustments to the Bloom to get a little bit more ‘oomph’ out of the visors and play up that cyberpunk aesthetic.

CC3 can render out a static image from the real time window, It’s is important to know that there is also the option to render with the Iray renderer that can be installed with CC3. To take advantage of the real time benefits of the SkinGen set of tools and their appearance, it would be best to render with the real time render in CC3. This will be one set image when I render out, with no additional passes which means I want to handle as much in one pass as possible and handle the rest in paint within photoshop.

I want to get some depth of field in the shot, so I select the Camera in my scene tree and jump over to the Modify menu where you find some additional options you can tweak.

If you want to see the effect of the depth of field, you can check or uncheck the Activate box in the Modify menu to turn it on and off. I will do this as I apply different costume pieces to the other iterations in the coming steps.

*Tip: To save the Camera by navigating to the Content tab, selecting the Stage Elements > Camera and selecting Custom. Hit the + at the bottom of the menu to add your custom camera in case you accidentally move out of that view while modifying your character.

Follow the other 6 tutorials in this series:

Part #1: Getting Started and Sketches

Part #2: Costume & Asset Creation in ZBrush

Part #3: Refining and Adding Details in ZBrush

Part #4: Generating Textures and Importing into Character Creator 3

Part #6: Costume Variation and Texture Modification


Part #7: Comping Renders, Paint, and Finish

Pitch & Produce | INVASION 2040: Director harnesses Character Creator iClone and Unreal Engine for Web Series

César Turturro – Director / FX Producer

Creavision is a small studio located in the city of Bahia Blanca, Argentina. We mainly focus on the realization of 2D and 3D animation projects, although we also do filmic works, such as advertisements, corporate videos and documentaries.

Invasion 2040 is a project that started in 2017. Post-production started immediately, as I wrote the script. At the beginning, almost 70% of the project was carried out on my own, without involving other artists or studios. This was due to the fact that it was a search and learning process, and we did not have financial support.

During that time I used different types of programs and render engines until August 2020, while working remotely in the middle of the Covid-19 pandemic that we won the support of Reallusion’s Pitch & Produce program. It was then when we also began work with Unreal Engine, and when I involved two more artists from the studio.

“With the help of all these real-time tools — in just a few months we accomplished more than half of all the animation and rendering work, which had personally taken me almost 3 years before.”

César Turturro – Director / FX Producer

In summary, I can say that there is a before and after both in my career and in the way we work. Today Invasion 2040 is being released on several networks and has won various awards at festivals around the world. With all the shots and animations that I imagined 4 years ago, I can say that we have realized not only a movie… but a dream.