首頁 » 2026 » Page 8

CC5 x ZBrush: Create a HD Sci-Fi Vanguard (2/7)- Sculpting the Body and Simulate the Nano Suit

This article is the second chapter in our seven-part Character Creator 5 (CC5) HD GoZ Pipeline Series on the complete workflow from CC5 base creation to ZBrush sculpting, Substance 3D Painter texturing, and finally Marmoset Toolbag rendering.
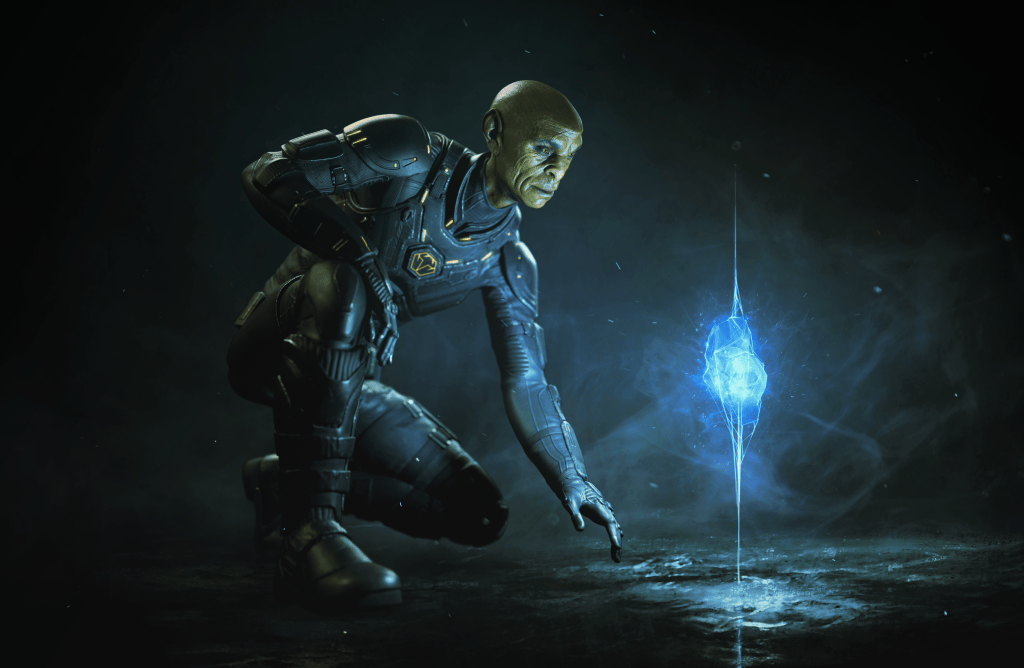
In Part 1, we shaped the character’s foundation using Actor Mixer, click-and-drag morphing, facial tests, and skin editing. For part 2, we move into ZBrush with GoZ / GoZ Plus, sculpting workflows, anatomy adjustments, building the sci-fi suit, and preparing subdivision-ready meshes for Character Creator 5.

Pablo Munoz Gomez

Hello, my name is Pablo Munoz Gomez, and I’m an enthusiastic 3D concept and character artist who is deeply committed to the spread of knowledge. My expertise lies in 3D sculpting, visual development, and engaging in mixed-media projects. I take immense pride in being the creator of Pablander Academy, serving as an outlet for showcasing my work, sharing my workflows, and assisting fellow artists in honing their skills across a wide range of subjects.

Sculpt the Body and Nano Suit

After importing the CC5 mesh into ZBrush, we store a morph target and bake our sculpting layers. This lets us selectively bring back the transferred normal details only where needed, which is typically around the face. Using the morph brush, we can paint the original microdetails back in while keeping broader changes intact on the rest of the body.

Our goal is to take advantage of the CC5 normal details just for the face, since the body will be covered by the sci-fi suit and doesn’t require any skin detail.
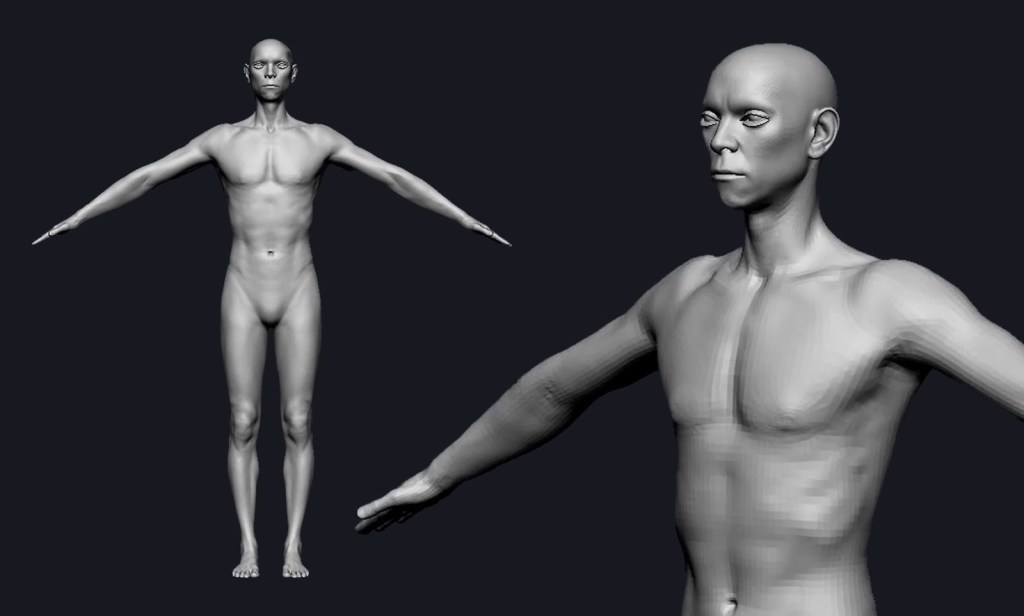
Blocking out the suit: Softening anatomy without losing structure

The suit should feel like a material layer over the body, rather than just painted-on muscle. We began by reducing anatomical definition: smoothing transitions, softening muscle separations, and suggesting seams, like a neck trim, using a few clay buildup strokes. Then, with a standard brush, we indicated the primary wrinkles and the general compression of the suit.
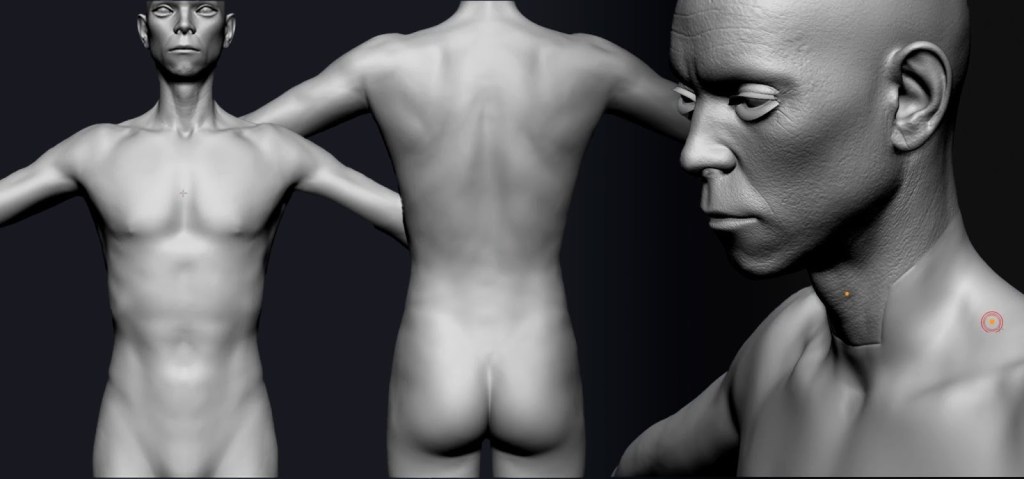
With a 14+ million poly mesh, switch to tools like Smooth Strong for effective smoothing.

Use references and targeted masking

References are essential. For this project, we collected images of wetsuits, surf suits, and dive gear to study where fabric naturally compresses and folds. Later, we can refine the wrinkles based on the character’s pose and how the material stretches or compresses around joints.

Masking is a quick way to simulate local compression. For example, we masked and inflated the calf areas to suggest the effect of boots. Keep in mind: this stage is just a blockout as precision comes later.
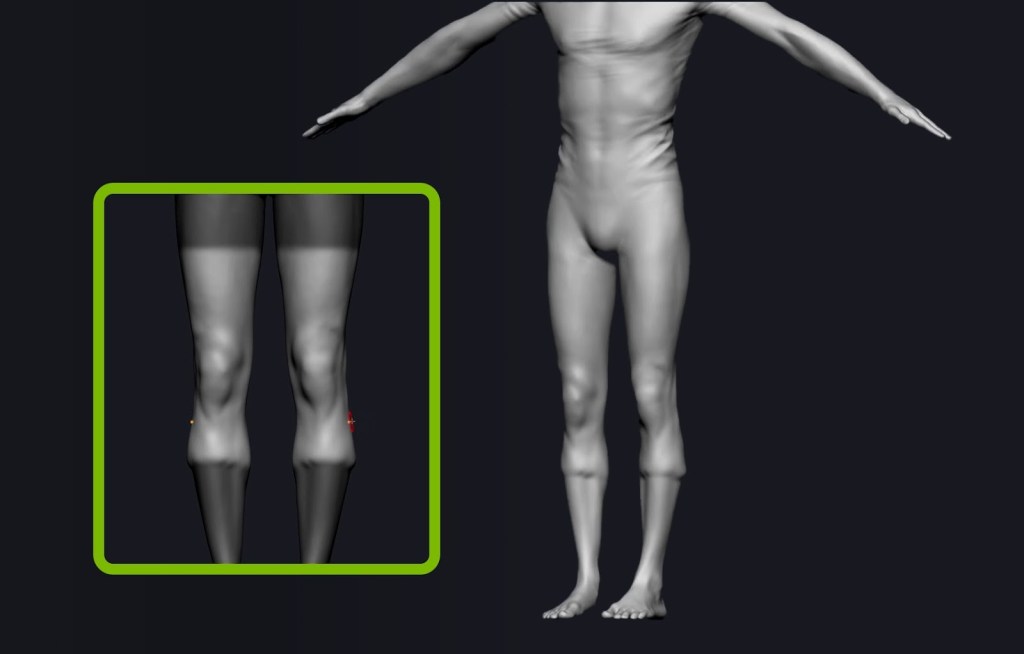
Brushes and tools that speed up believable fabric details

Beyond native ZBrush tools, these brushes accelerate believable material creation:

  • Gio Brush – A cleaner, more controlled Dam Standard for seams & micro creases
  • Compression Falls – Ideal for quick small wrinkles and fabric compression
  • Clean Builder Brush – Adds volume cleanly without clay stacking artifacts
  • FormSoft – Vital for shifting mass at high subdivisions without destroying detail

Alternate strokes with Alt to create ridges and fall lines for more organic suit behavior.
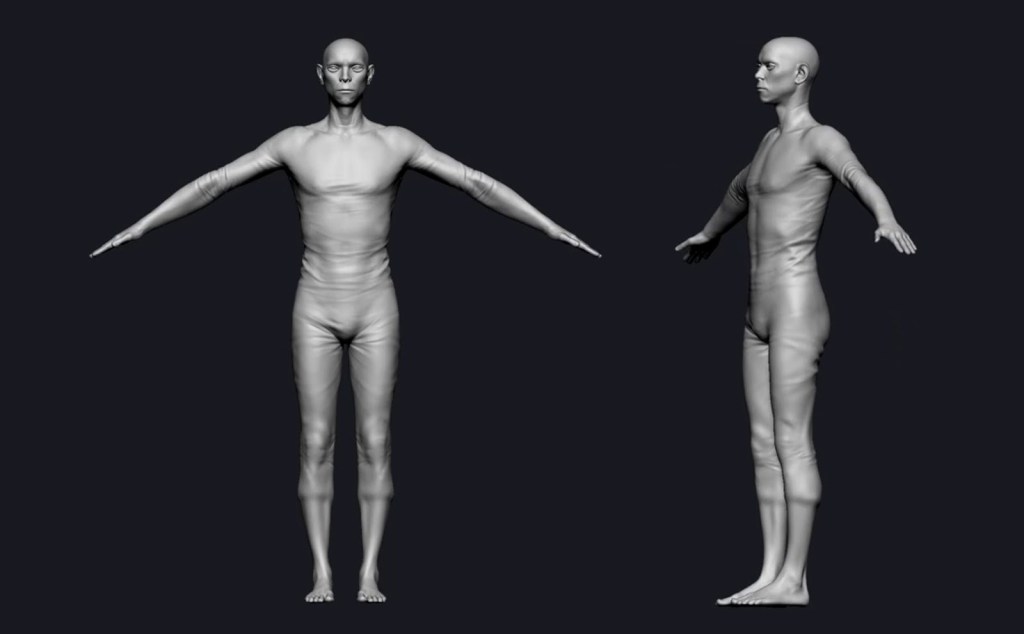
When to use Marvelous Designer and how to bring the simulation back

Simulating the suit in Marvelous Designer is a lot of fun and produces a more physically accurate set of folds and material behavior. 

Workflow overview:

  1. Duplicate the base mesh.
  2. Isolate the suit region.
  3. ZRemesh to reduce mesh density.
  4. Export avatar with the suit to Marvelous Designer.
  5. Use existing UVs as 2D patterns when applicable.
  6. Adjust shrinkage (warp / weft) to control wrinkle density.
  7. Export back to ZBrush for cleanup.
  8. ZRemesh → Project from History → Polish the surface into clean quads.
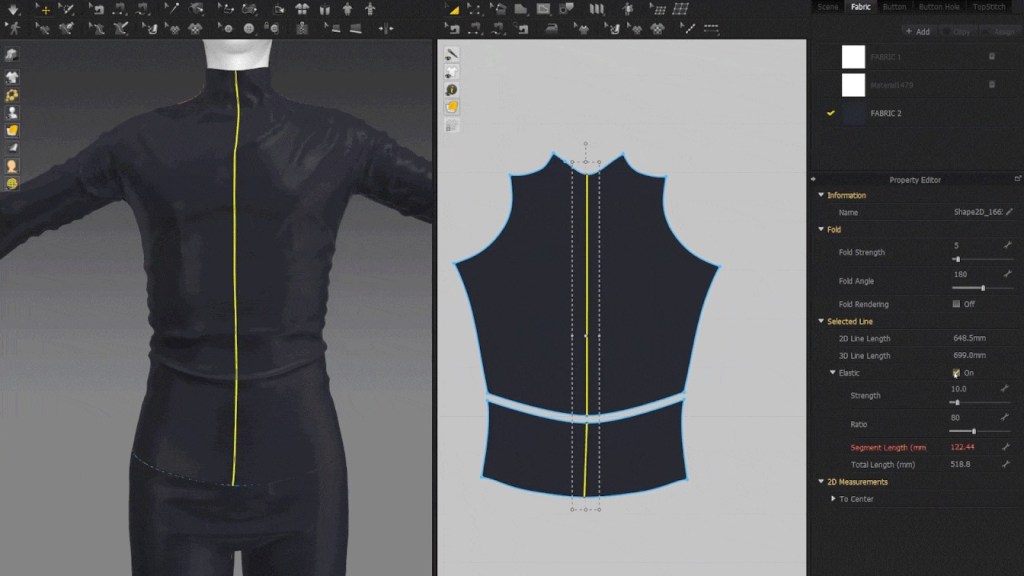
That simulation gives more realistic falls and tension, especially in complicated areas like knees, elbows, and the torso. But here’s the important distinction that unlocks the best results in Character Creator 5 and one of my new favourite features: subdivision levels.

Project the simulated suit onto the base mesh

Character Creator 5 now supports subdivision levels up to 2 on the visible geometry. To fully leverage that and showcase the capability, we can have the suit as part of the main base mesh, not a separate object:

  1. Project its detail onto the subdivided CC5 base mesh.
  2. Hide/delete the temporary suit mesh.
  3. Continue refining directly on the base.
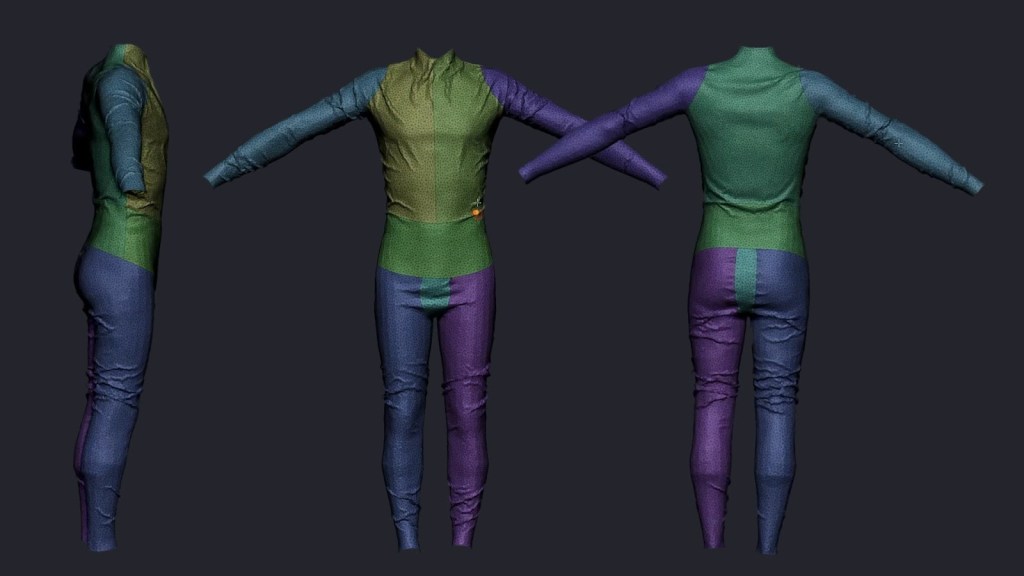
This approach preserves the original CC5 topology and ensures that subdivision data moves cleanly between ZBrush and CC5.

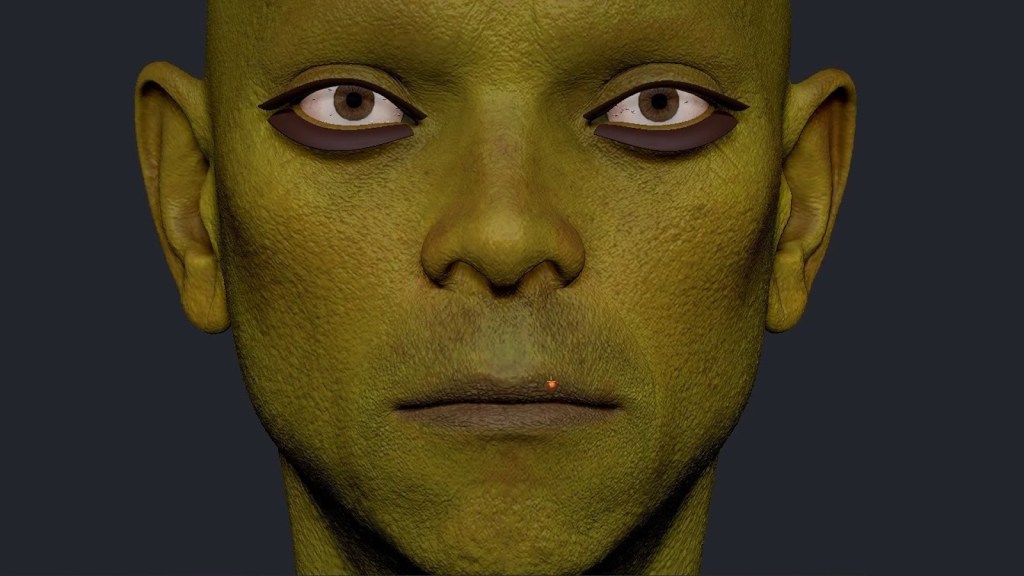
Sculpting the face and pushing toward a slightly alien look

The goal here is to maintain a humanoid silhouette and subtly push proportions to achieve an otherworldly vibe. The CC5 base typically includes clean polygroups, which makes isolating and masking facial features quick and accurate.
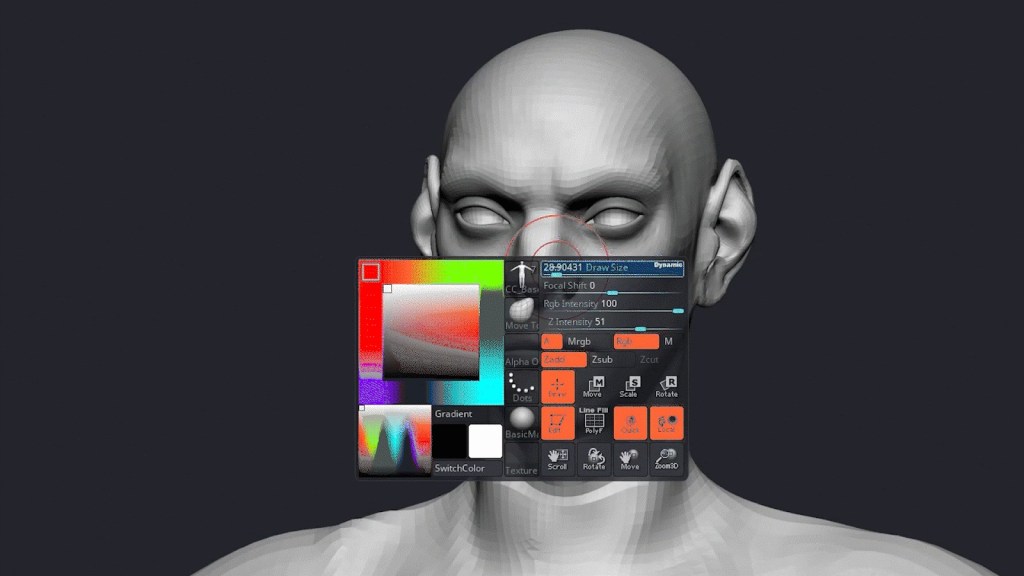
Recommended workflow:

  • Start at a low subdivision to define main volumes.
  • Move to Clean Build Brush for form shaping.
  • Use Dam Standard / Gio Brush for sharper cuts.
  • Finish with FormSoft at high subdivisions for proportional adjustments.

This approach preserves CC5’s microdetail layer while introducing an alienesque flair.
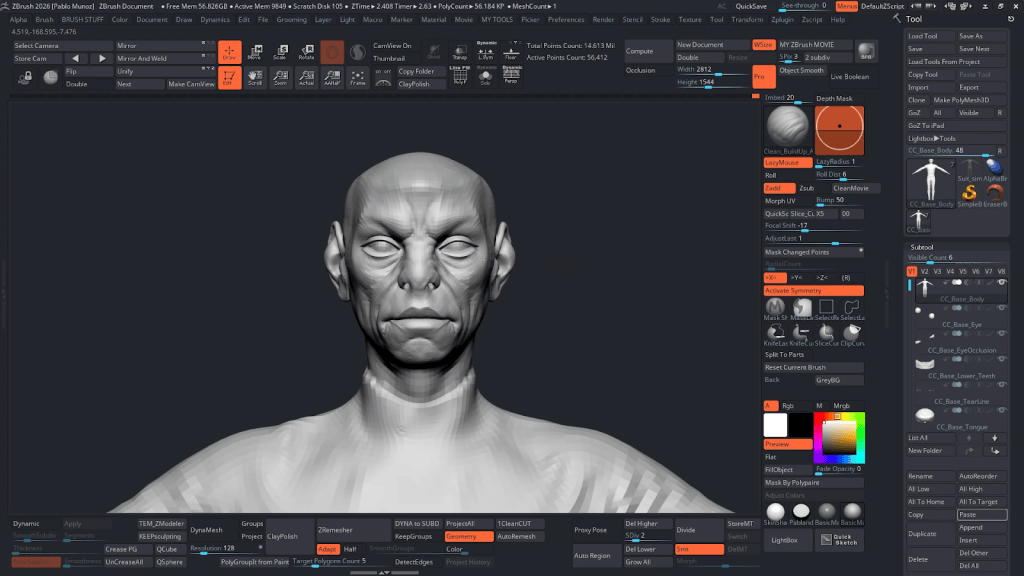
Send it back to Character Creator 5: GoZ Plus and subdivision control

The GoZ Plus plugin is essential for automating exports back to CC5 with a single click, provided you configure a few key settings correctly. Since CC5 is now capable of handling higher resolution geometry, I recommend: 

  • Setting subdivision Level to 2.
  • Disabling Polypaint to Diffuse (unless texturing is done).
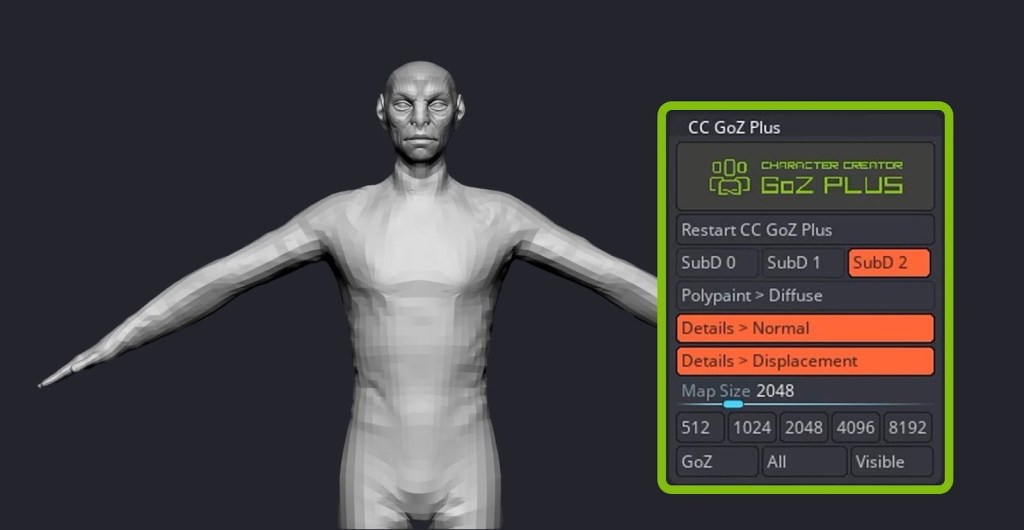
Enable Adjust Bones to Fit Morph if you changed proportions

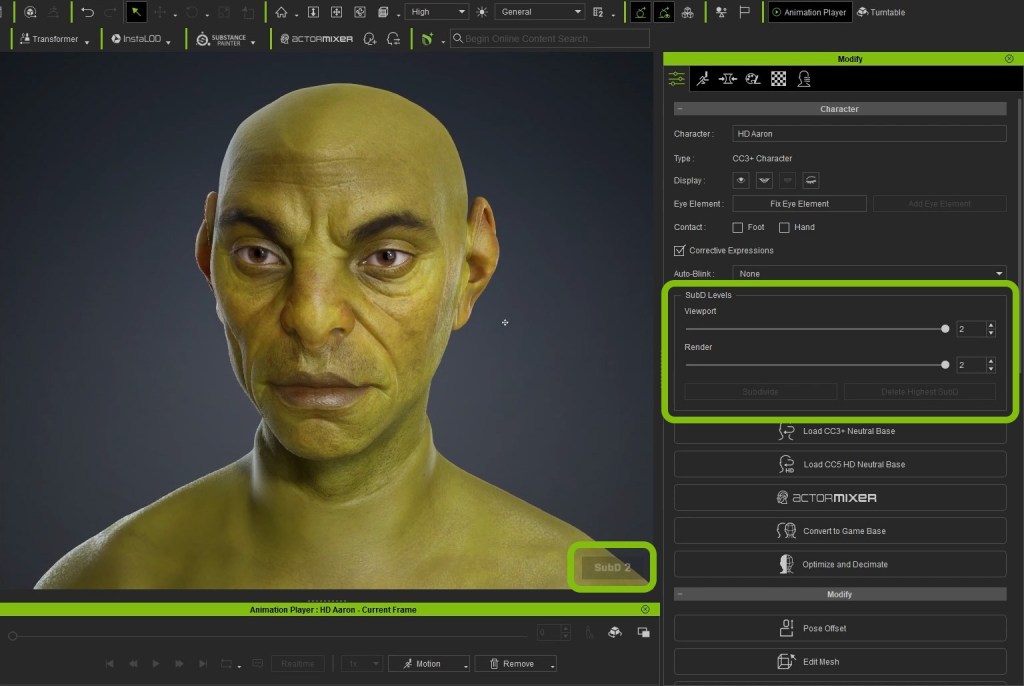
Once updated, the Modify panel in CC5 includes sub‑D level controls for viewport and render. When set to Subdiv 2, you view real geometry at that level, producing much cleaner silhouettes and deformations compared with the old workflow.
Efficiency Tips for This Stage of the Pipeline

To maximize efficiency in this pipeline, I leverage several key features of Character Creator 5. The native subdivision level support is a game-changer, allowing me to view and render real subdivided geometry for superior silhouette fidelity without relying on displacement maps or things like that. The GoZ Plus automation is equally critical, streamlining the round-trip process between ZBrush and CC5. 

I also rely on Adjust Bones to Fit Morph to ensure the rig remains functional after significant shape changes. The ability to preserve polygroups and morph targets grants me precise control over facial and accessory isolation during localized edits.

Coming Up in Part 3

In the next chapter, we’ll move deeper into hard-surface creation inside ZBrush. That includes building the chest plate, extracting armor panels, adding thickness, and sculpting modular components like boots. We’ll also explore rapid blockout techniques using Dynamesh, manual retopology with ZSpheres, and how to organize clean polygroups for extrusion workflows. Once the armor set is complete, we’ll prepare all pieces for re-import into Character Creator 5 for rigging, material setup, and texturing preparation.

Related Posts

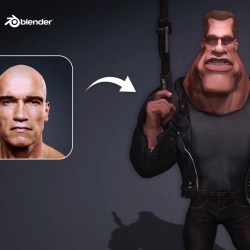
Creating a Stylized Arnold Schwarzenegger 3D Caricature with CC5, ActorMIXER & Blender

Mythcons

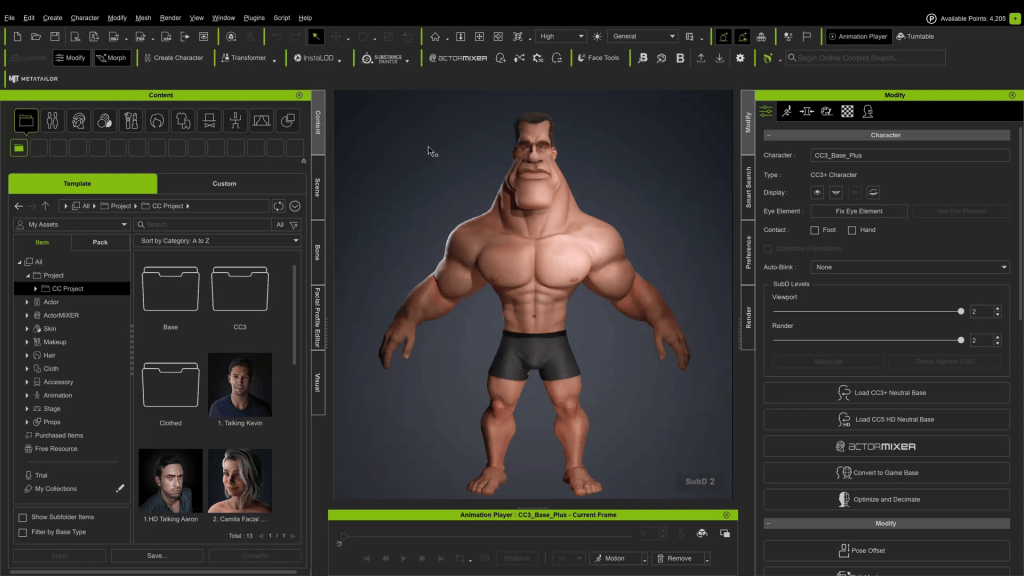
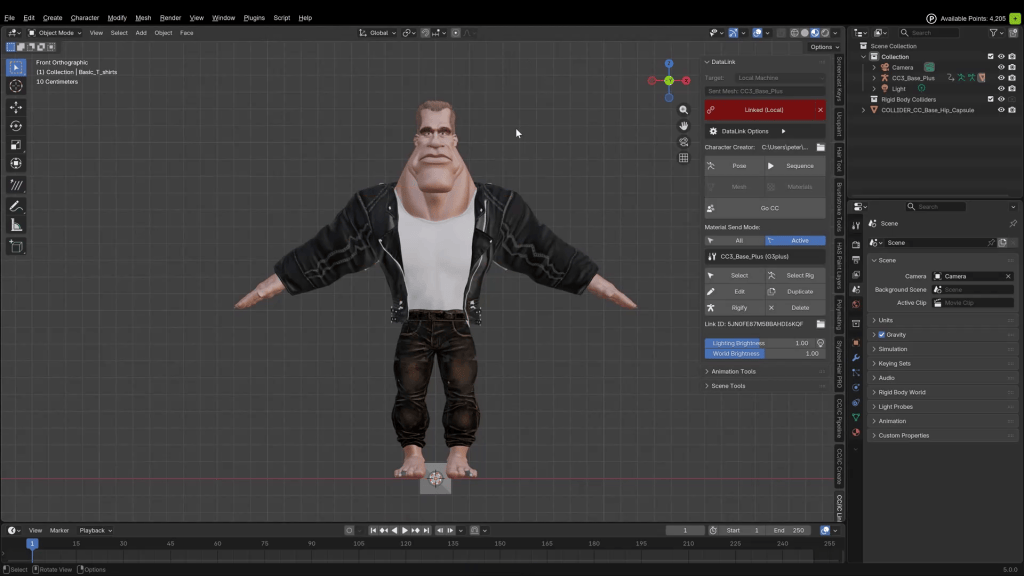
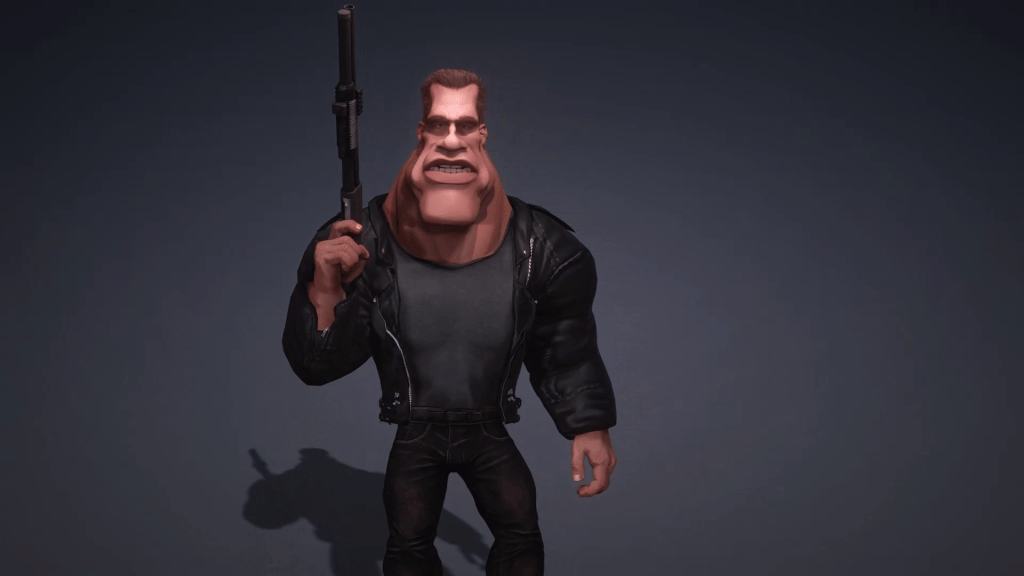
Greetings, my name is Peter Alexander. In this demonstration, I’m going to walk you through how you can leverage Character Creator 5‘s new ActorMIXER as a powerful stepping stone to create unique, stylized characters. We’ll use the CC Base Mesh as our foundation, and ActorMixer will provide the next layer from which to build, making professional character creation that much easier. For this demo, I’ll be creating a stylized version of Arnold, using the Blender Autosetup pipeline, which is both cost-effective and efficient for creating characters and assets.

Visit Mythcons’ ArtStation

In this tutorial, I will walk you through the steps to create a celebrity-style 3D caricature—specifically a stylized Terminator—using Character Creator 5, ActorMIXER, and the Caricature MIXER pack. We will move between AI generation, Reallusion tools, and Blender to refine the look.

Tools Used:

  • Character Creator 5 (CC5)
  • Headshot 2.0
  • ActorMIXER & Caricature MIXER Pack
  • Hyper3D (AI)
  • Blender (with CC Auto Setup Addon)
  • Krita (or any raster editor)

Step 1: Generating 3D Reference with AI

While you can sculpt manually from photos, creating a 3D reference mesh gives us a faster starting foundation.

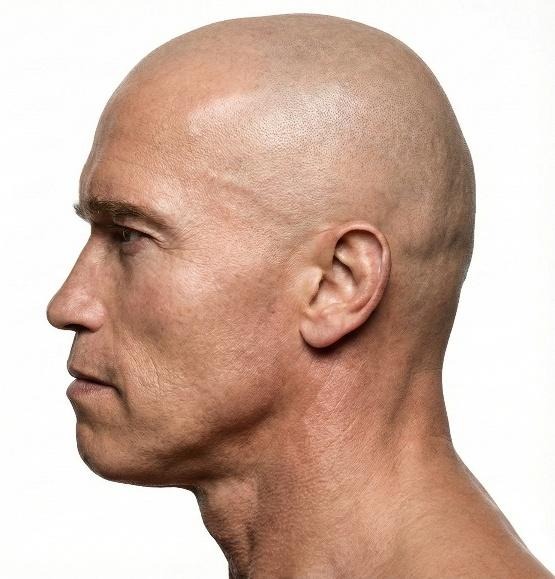
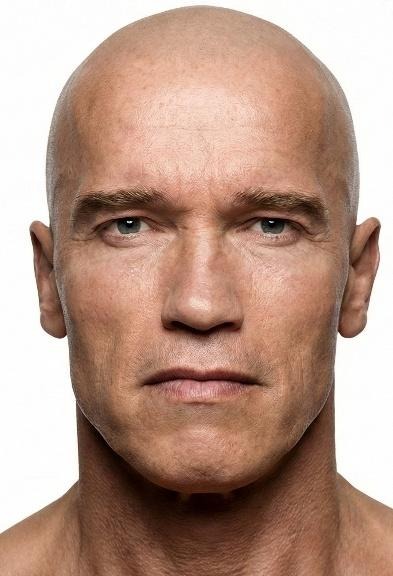
  1. Generate Image References: Ask an AI image generator for front and side views of your subject (Arnold), ensuring you request to remove hair for a cleaner mesh.
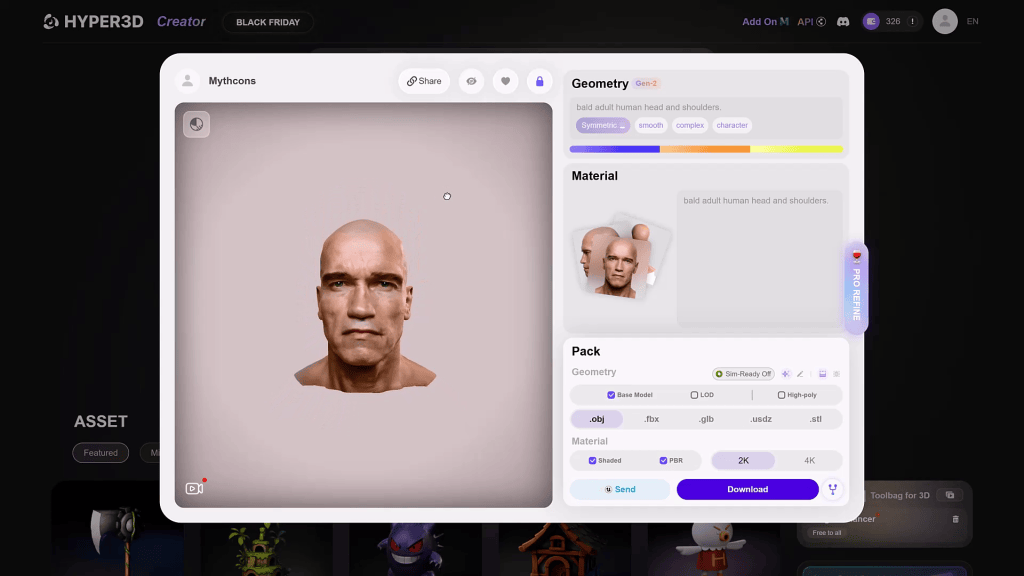
  2. Generate the 3D Reference: I used Hyper3D for this workflow.

Note: I chose Hyper3D because other platforms (like Hunyuan) produced results that were already too stylized. I wanted a more neutral base to apply my own stylization to. 

Step 2: The Foundation (Headshot 2.0)

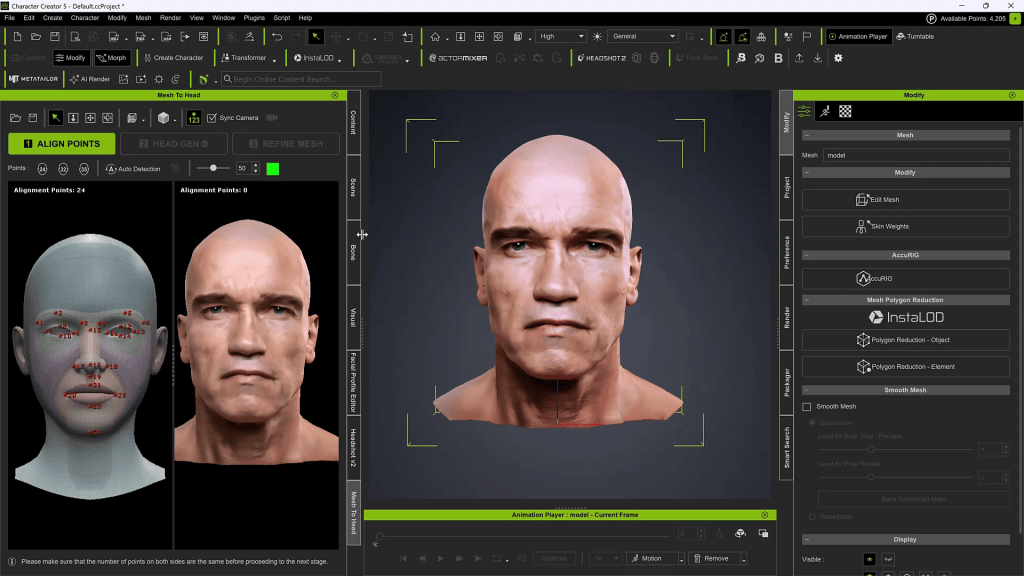
Once you have the .OBJ or mesh from Hyper3D, load it into Headshot 2.0 inside Character Creator.

  1. Select the Mesh option. 
  2. Alignment: Align the corresponding points on the reference mesh to the CC base mesh.

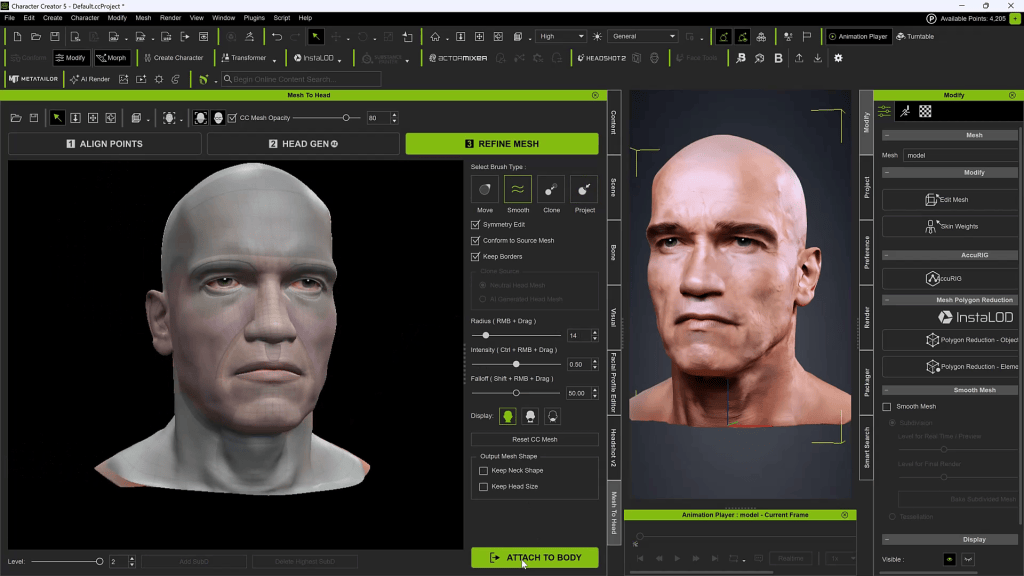
  1. Refine: Use the included brushes to add, delete, or switch between subdivisions to ensure details align correctly.
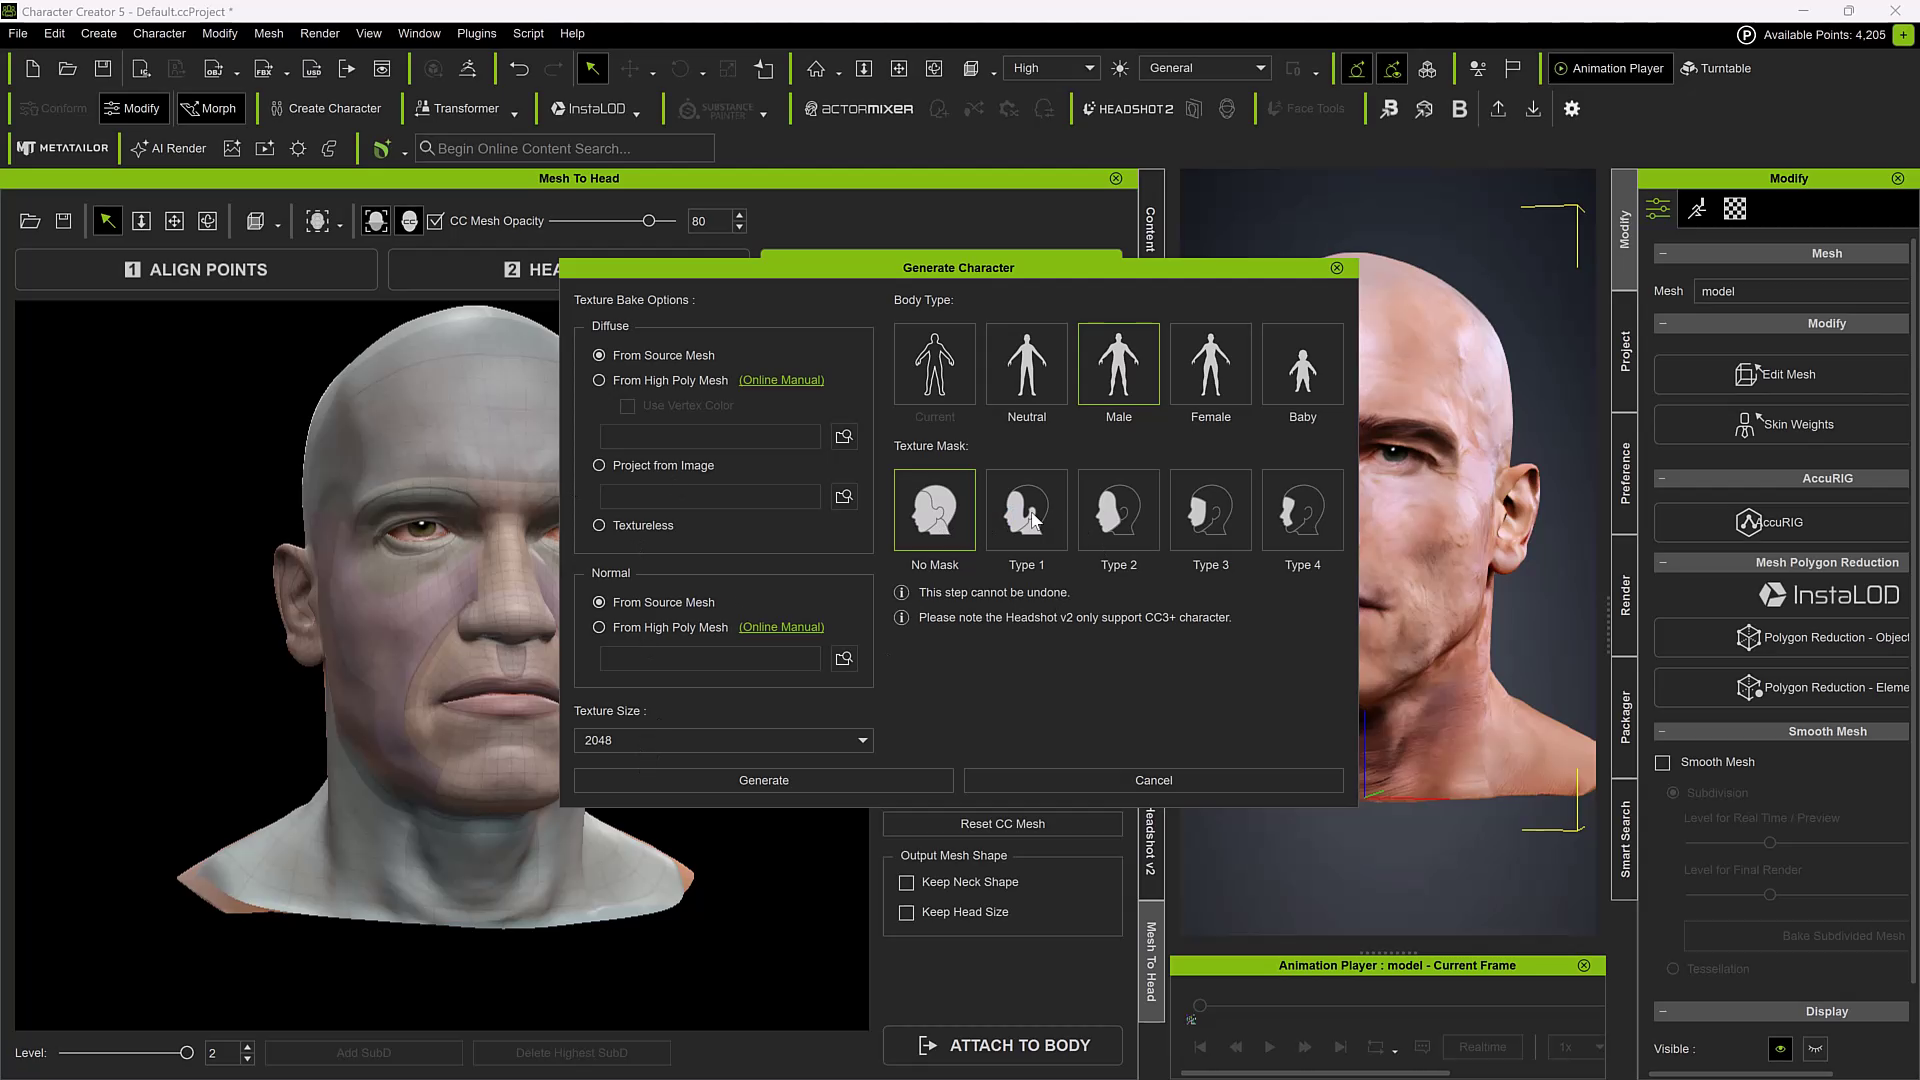
  2. Generation Settings: Set the generation type to Male and select a Masking Style (this helps blend the reference details into the CC base smoothly).

Step 3: Body Shaping & Exaggeration

He isn’t a Terminator without an imposing physique. This is where we start pushing the style.

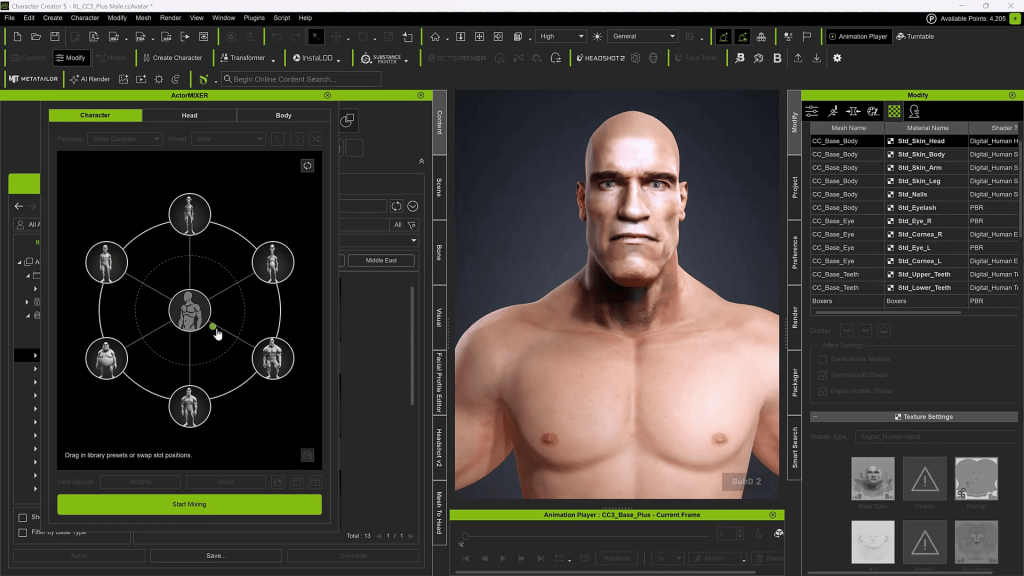
  1. Open ActorMIXER

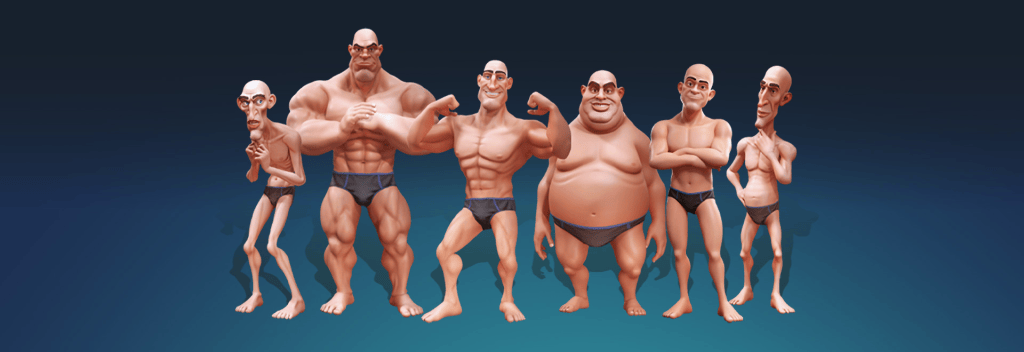
2. Blend elements from the Caricature MIXER pack with standard muscle morphs.

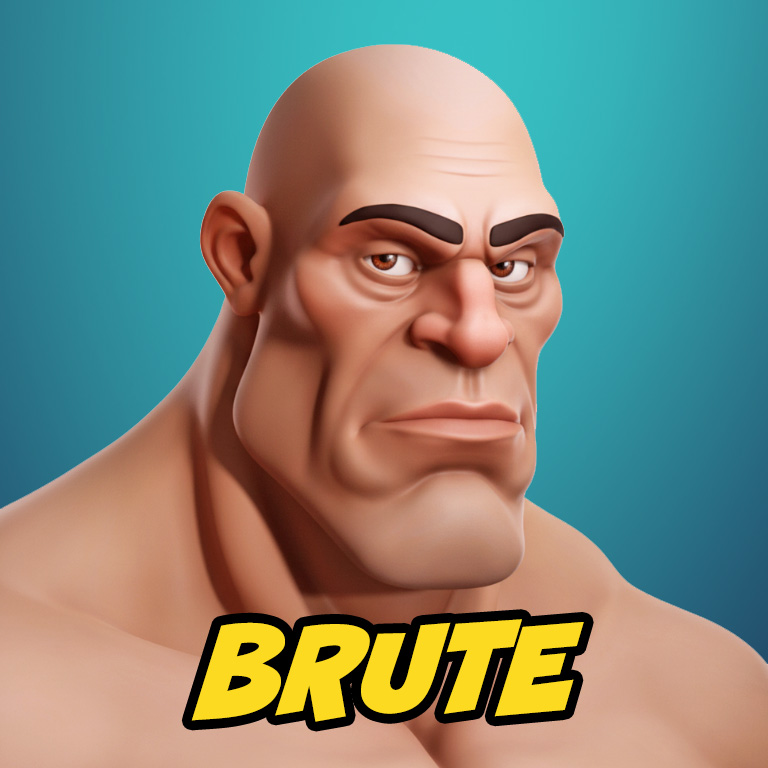
3. Cycle through combinations to find the right balance of “Brute” and “Caricature.”

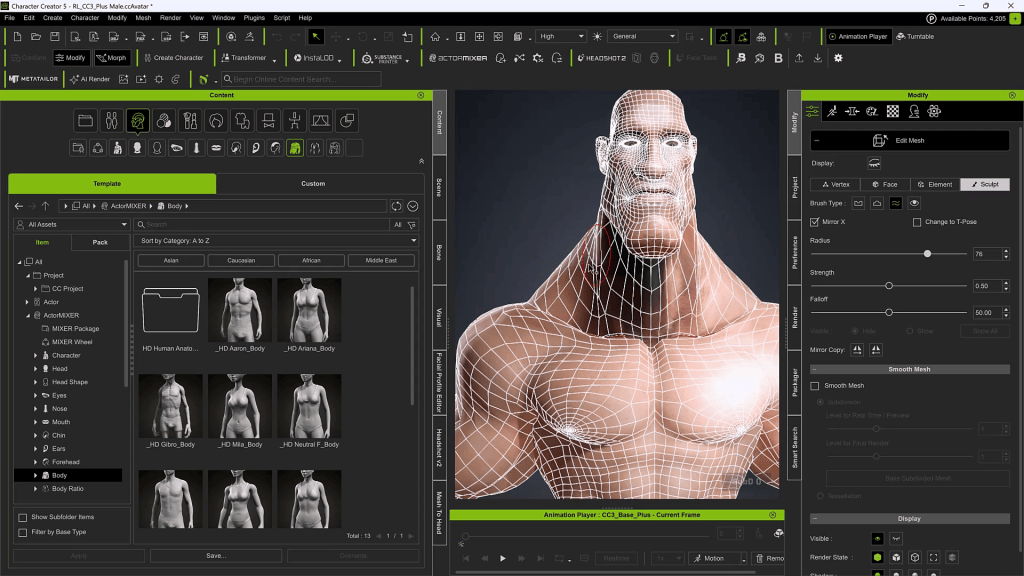
4. Mesh Correction: If areas don’t blend well, use the Edit Mesh brushes.

Technique: Reduce the mesh to low resolution, smooth out the artifacts, and then mirror the changes to the other side.

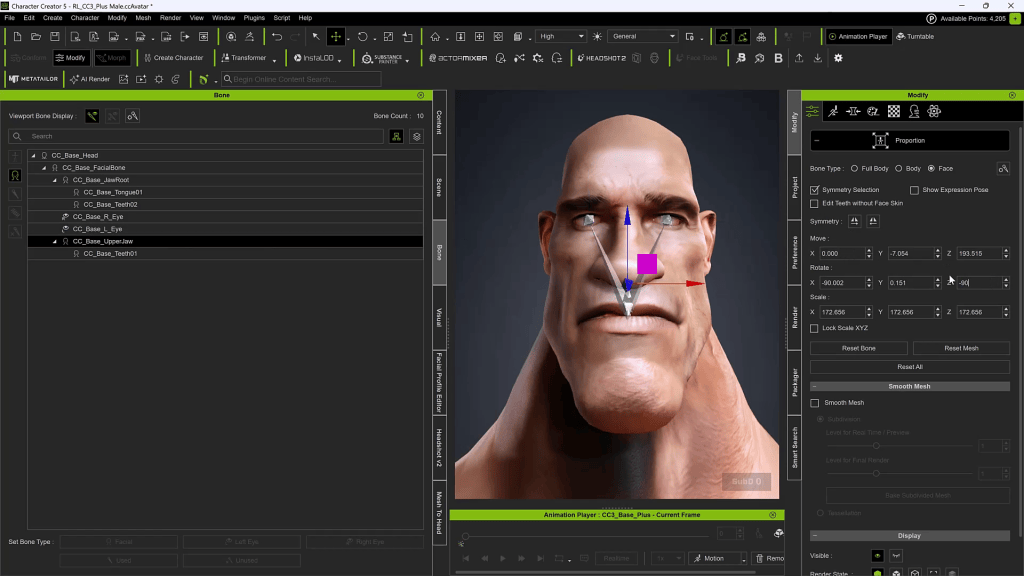
Troubleshooting Tip: Fixing Symmetry & Bone Alignment If you find that your mesh edits aren’t mirroring correctly, the bone coordinates might be off.

  1. Select the bone (e.g., Head, Jaw Root, or Upper Jaw).
  2. Check the Move and Rotation values.
  3. Move X should generally be 0
  4. Rotation is often not zero. If you see a value like -89 degrees, change it to -90 or 90 degrees. Correcting these values usually solves mirror symmetry issues.

Step 4: Texture Cleanup

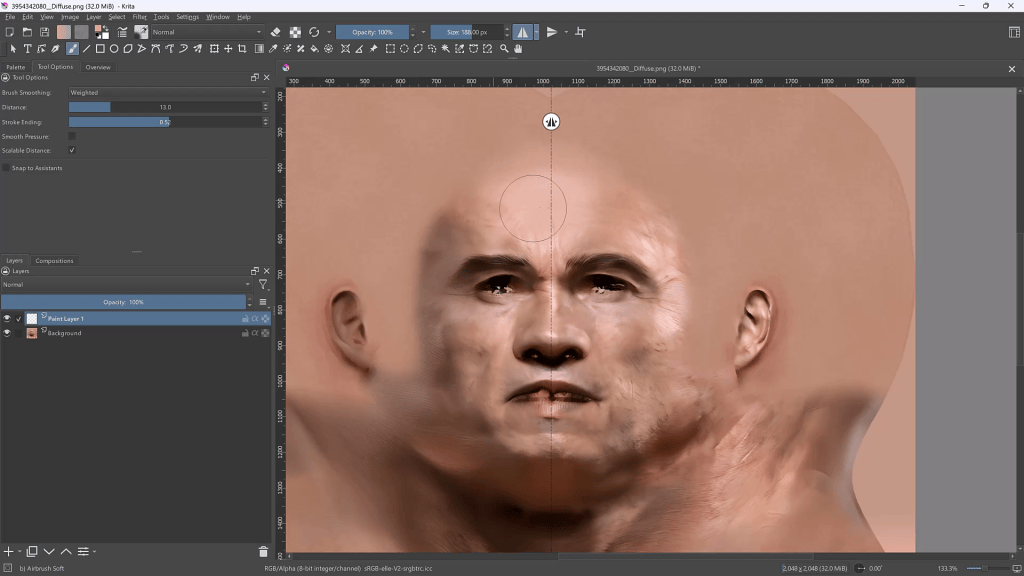
The AI projection will likely leave unwanted shadows on the face texture.

  1. Export the texture to a raster editor (I use Krita). 
  2. Paint out the heavy baked-in shadows.
  3. Note: You will lose some likeness, but for a caricature, clean textures are often better than noisy photo-real ones.

Step 5: Sculpting in Blender (Round 1)

Now we need to push the shapes beyond what sliders can do.

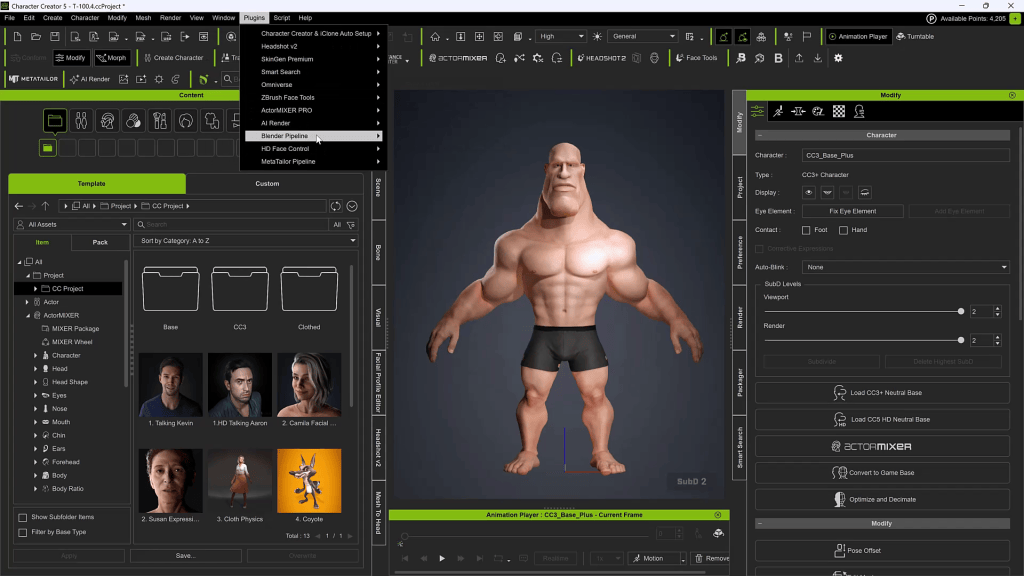
  • Use the Blender Auto Setup Addon.
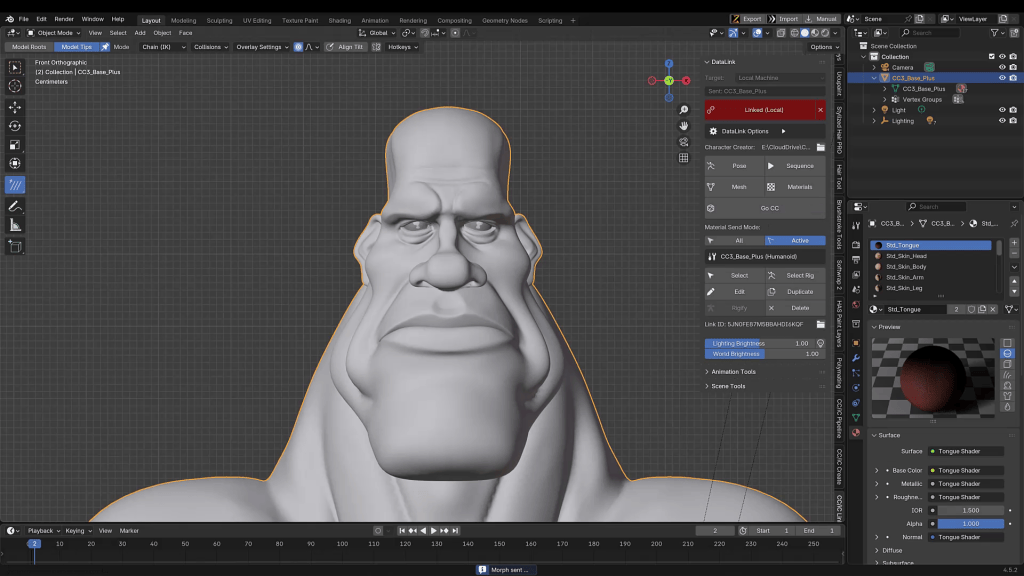
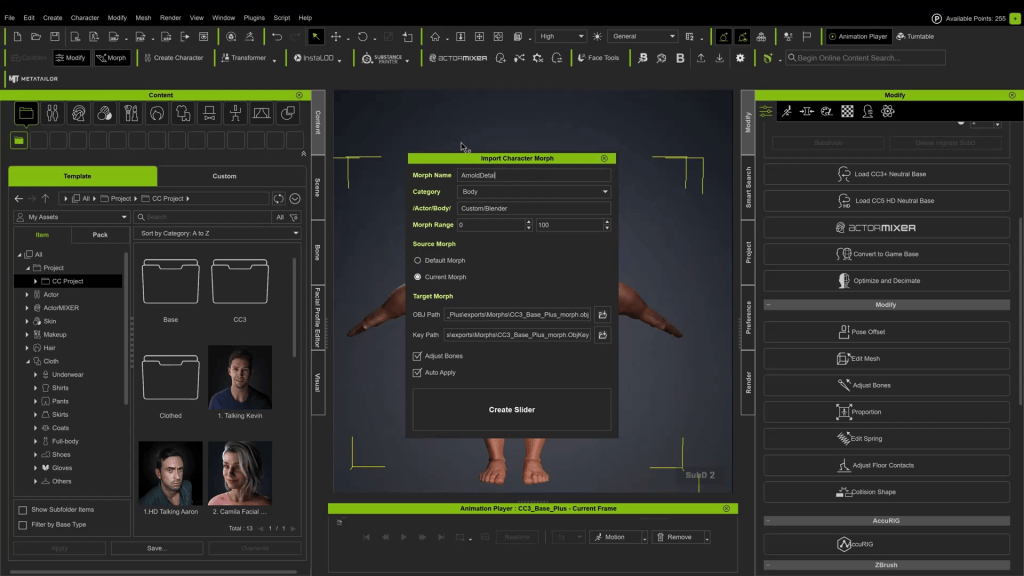
  • Send the character using Morph Edit at SubD 2 (we don’t need a low-res pass for this).
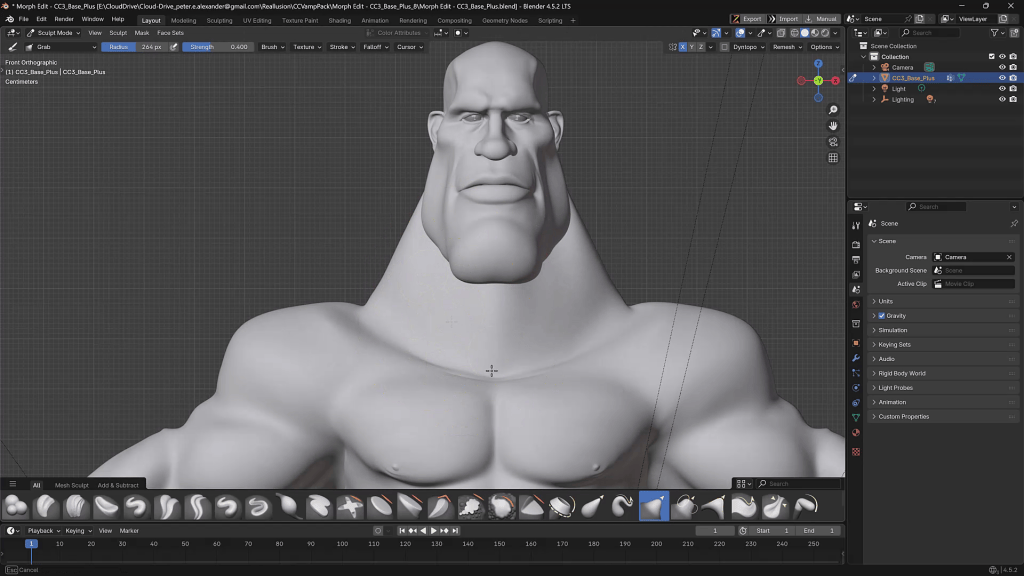
  • Sculpting: Use the Grab/Move brush to push the stylization. Since CaricatureMIXER gave us a good foundation, we are just refining shapes here.
  • Send back to CC5: Once updated, check the silhouette.

Iteration Note: After applying hair in CC5, I realized the forehead was too low. I simply sent the character back to Blender, adjusted the forehead height, and updated the mesh again.

Step 6: Clothing & Smart Search

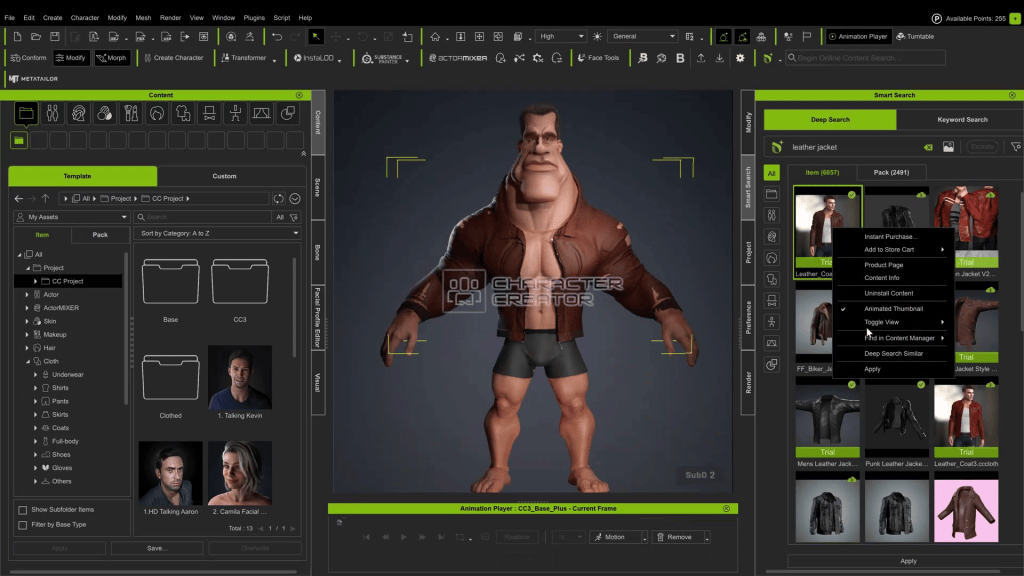
To dress the character, we can use the Smart Search feature in the Content Panel.

  • Trial Function: You can download a watermarked version of clothing to test the fit.
  • Deep Search: Use “Deep Search Similar” to find assets that match the vibe of the items you are looking at.
  • Licensing Explained:
    • i-Content: For use strictly within iClone/CC.
    • Standard: Required if you plan to export the mesh to Blender or ZBrush (which we are doing).

Layering Tip: Check your Clothing Layer Settings. Ensure the Leather Jacket is layered above the shirt and jeans to prevent mesh collision.

Step 7: Fitting Clothes to Extreme Shapes

Because this caricature has exaggerated proportions, standard clothing won’t fit perfectly out of the box. We need to fix the stretching.

  • Establish DataLink: Make sure your CC5 character and Blender are connected via the Pipeline addon.
  • Bind Pose: Ensure the character is in the default Bind Pose in CC5.
  • Send to Blender: Send the character (mesh) to Blender.
  • Sculpt the Fit:
    • Use the Grab brush to pull clothing over the muscles.
    • Caution: The Smooth brush in Blender is very strong. Lower the strength significantly before using it on clothing.
  • Update CC5: In the Blender Pipeline addon, under DataLink, select Mesh. This updates the vertex positions inside Character Creator. 

Step 8: Final Polish

Once the clothing fits:

  1. Adjust facial expressions to verify that the rig handles the new shapes correctly.
  2. A lot of the likeness comes through in the expression (the squint, the stoic mouth).
  3. Set up your lights and render!

Summary

This workflow is designed specifically for caricaturizing characters efficiently, without sacrificing control or pipeline flexibility.

At the core of this process is ActorMIXER, combined with the CaricatureMIXER Pack, which dramatically lowers the barrier to stylized character design.

Reallusion’s rich content ecosystem further accelerates the workflow. With a wide range of ready-to-use clothing and assets, plus the Smart Search and Deep Search Similar features, finding outfits that match a specific character archetype or visual vibe becomes frictionless

When custom refinement is needed, the full Blender pipeline ties everything together. Thanks to CC Auto Setup and DataLink, both character shapes and clothing adjustments can be sculpted directly in Blender and seamlessly synced back to Character Creator.

Related Posts

CC5 x ZBrush: Create a HD Sci-Fi Vanguard (1/7)- Character Base Creation with ActorMIXER

Character Creator 5 dramatically improves the workflow for fast character iteration, stylization, and asset customization. It’s now paired with an even smoother HD GoZ pipeline all the way to Marmoset Toolbag rendering.

This article is the first in a seven-part series, where we break down a complete CC5 → ZBrush → Substance Painter → Marmoset Toolbag 5 workflow for creating high-quality sci-fi characters. Each chapter focuses on a different stage of the pipeline, and together they form a full production-ready guide for artists.

In this first part, we’ll walk through choosing your base mesh, prototyping with the ActorMIXER, refining morphs, previewing facial rigging, and preparing clean skin edits to set the foundation before sculpting begins.

Pablo Munoz Gomez

Hello, my name is Pablo Munoz Gomez, and I’m an enthusiastic 3D concept and character artist who is deeply committed to the spread of knowledge. My expertise lies in 3D sculpting, visual development, and engaging in mixed-media projects. I take immense pride in being the creator of Pablander Academy, serving as an outlet for showcasing my work, sharing my workflows, and assisting fellow artists in honing their skills across a wide range of subjects.

Pick a Mixer-Ready Base

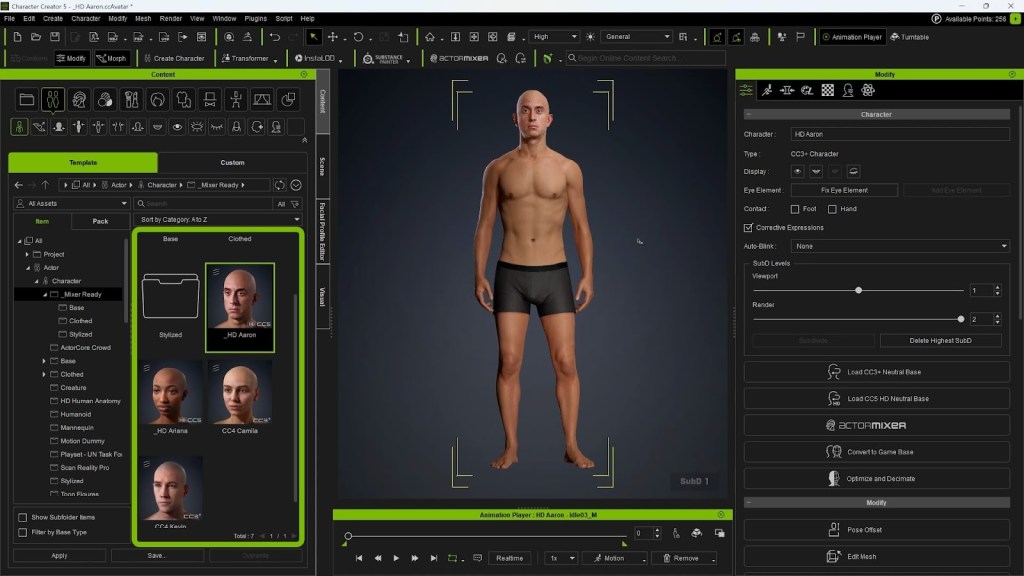
Start inside Actors → Content → Character → Mixer Ready. These assets are specifically optimized for CC5’s new ActorMIXER workflow, making them ideal starting points for rapid character prototyping.

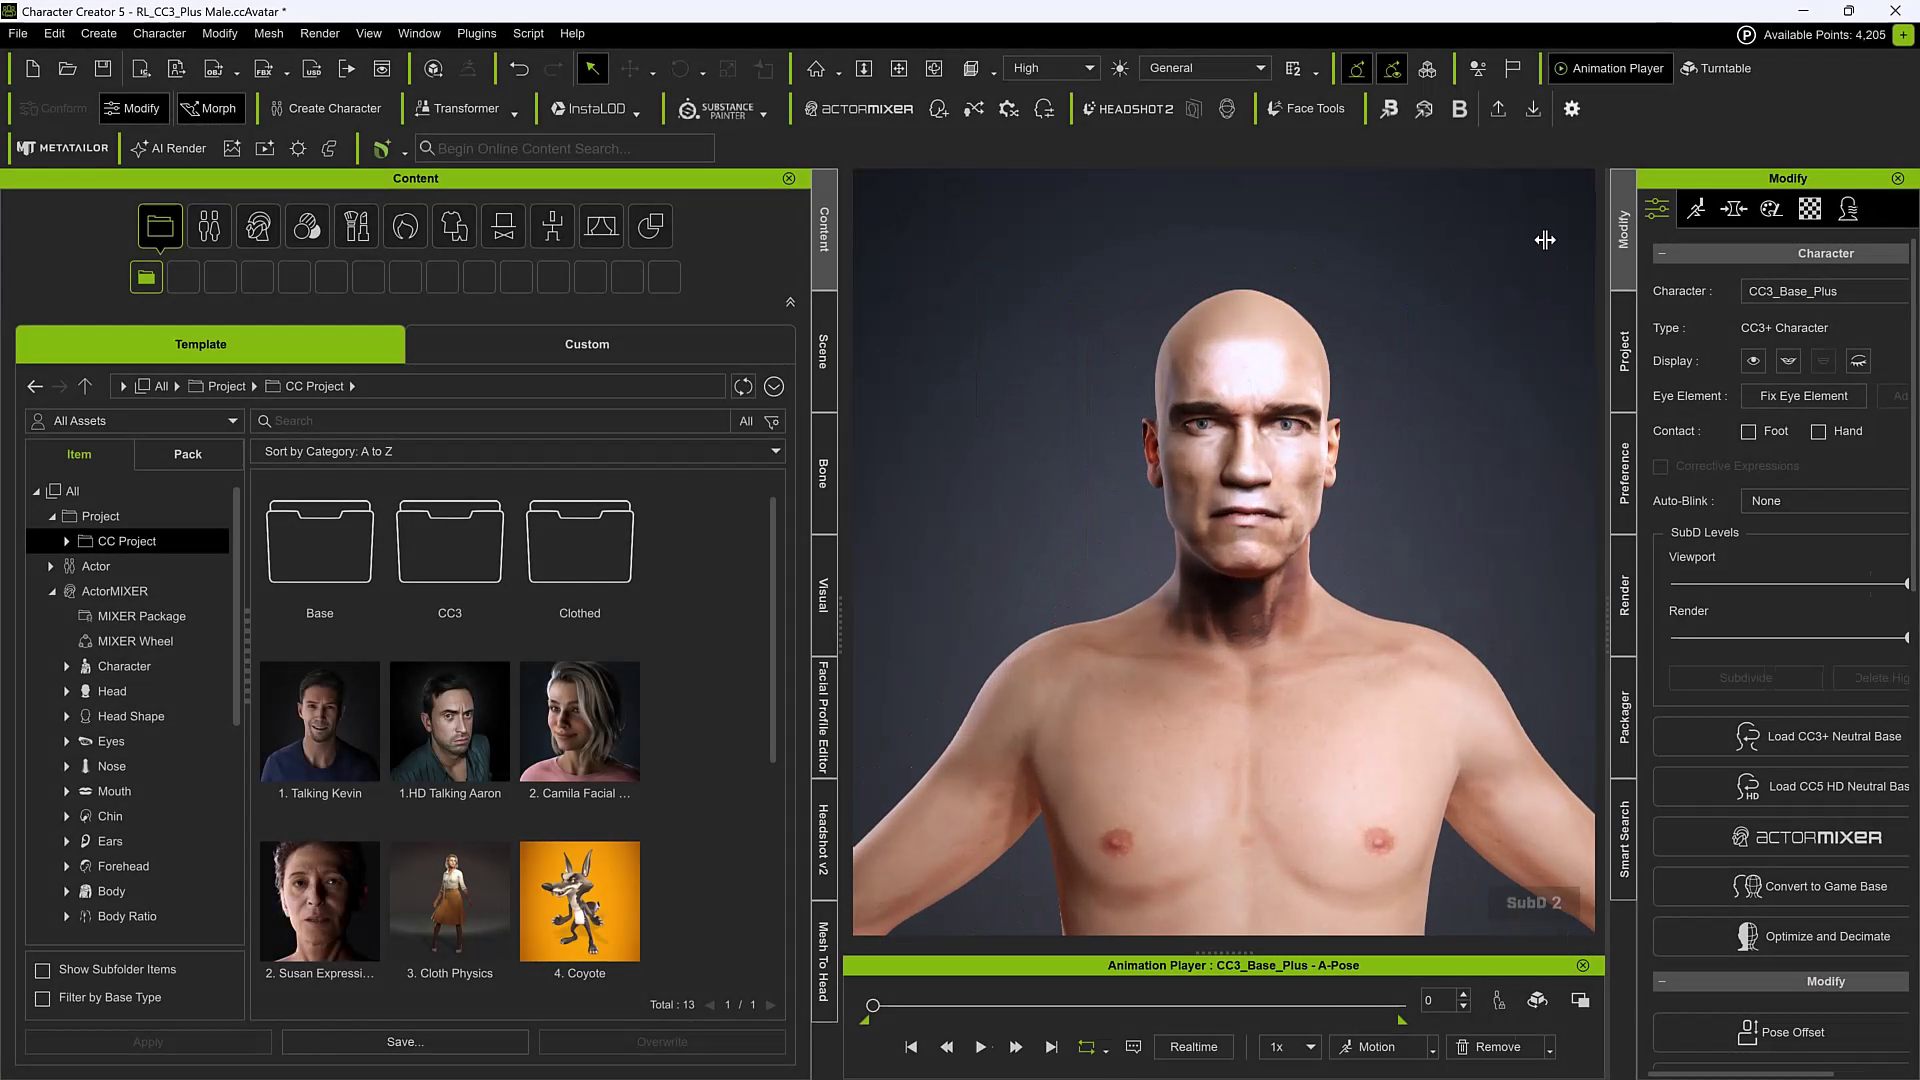
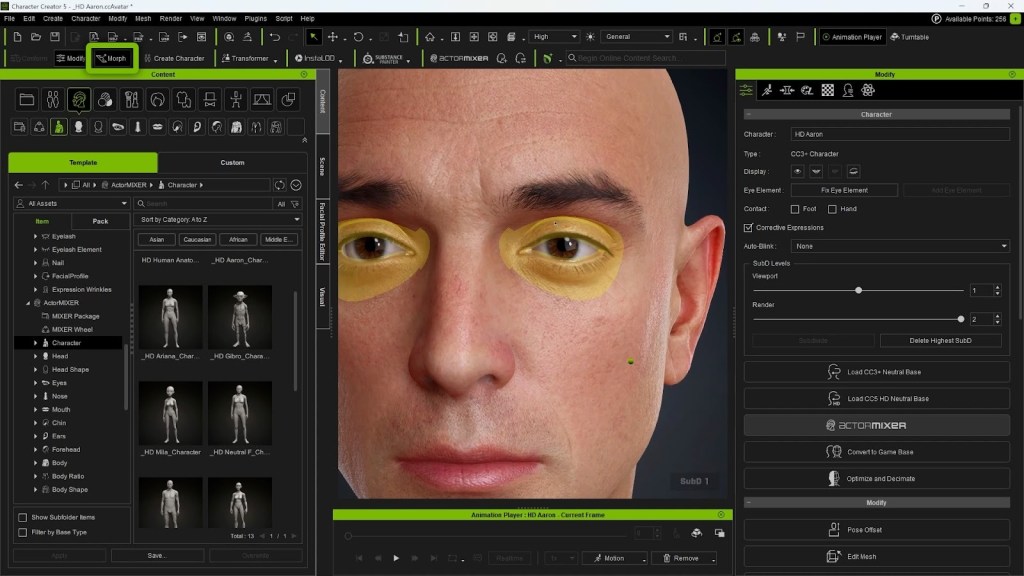
For a male creature, select an HD base such as the HD Aaron asset. Drag and drop it into the viewport. Once loaded, remove any geometry you won’t use so you are working with a clean base mesh.

Fast Morphing with Viewport Click-and-Drag

While CC5 still provides a huge library of sliders, a faster and more intuitive approach is to morph directly in the viewport. Enable the viewport morph switch, hover over the model, and simply click-drag to push or pull shapes. You can quickly adjust neck thickness, jaw length, eye spacing, and so on.

This direct manipulation is ideal for exploring exaggerated or stylized proportions quickly. Small adjustments give immediate personality without fiddling through long slider lists.

ActorMIXER: The Big New Feature

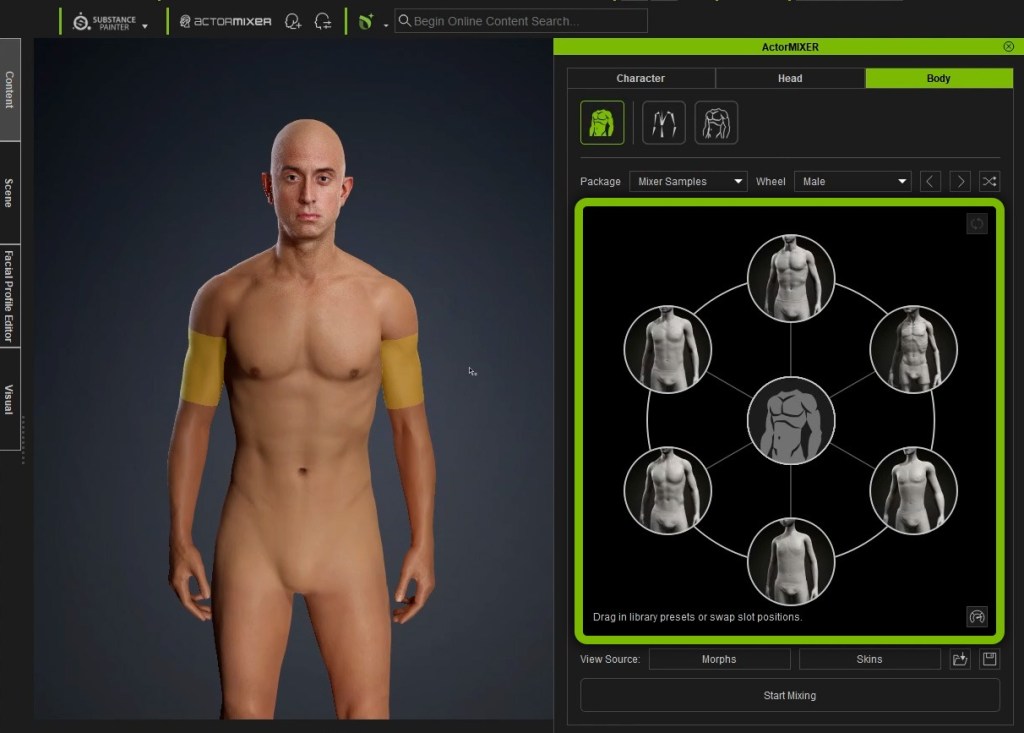
ActorMIXER is the new standout feature in CC5. It provides a radial visual controller that lets you mix multiple body or head presets and refine the results quickly. Available under Modify → Settings → Mixer (Current), it works with the full character, head only, or body only. 

Open it via Modify → Settings → Mixer (Current).

You can work with:

  • Full character
  • Head only
  • Body only

Drag the central control point toward different zones to blend presets, stylized, muscular, aged, or softer forms.

Why ActorMIXER is a Game Changer

  • Visual blending helps you pick the perfect in-between looks without guessing slider values.
  • Independent head/body mixing allows character hybridization, like realistic bodies with stylized alien heads.
  • Rig-aware ratios ensure bones automatically follow mesh changes, keeping animation deformation natural.
  • Optional proportion editing gives full artistic freedom when stylizing creatures or non-human silhouettes.

This tool allows you to generate a unique character identity extremely early in the process — before sculpting or outfit modeling even begins.

Refining Expression and Facial Rigging

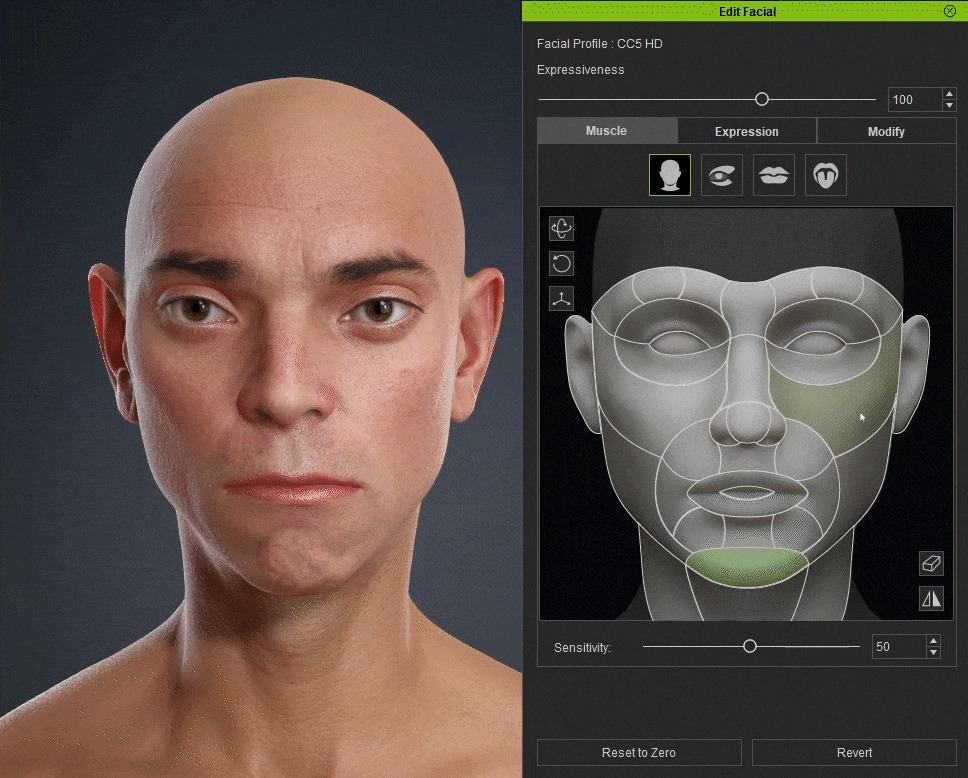
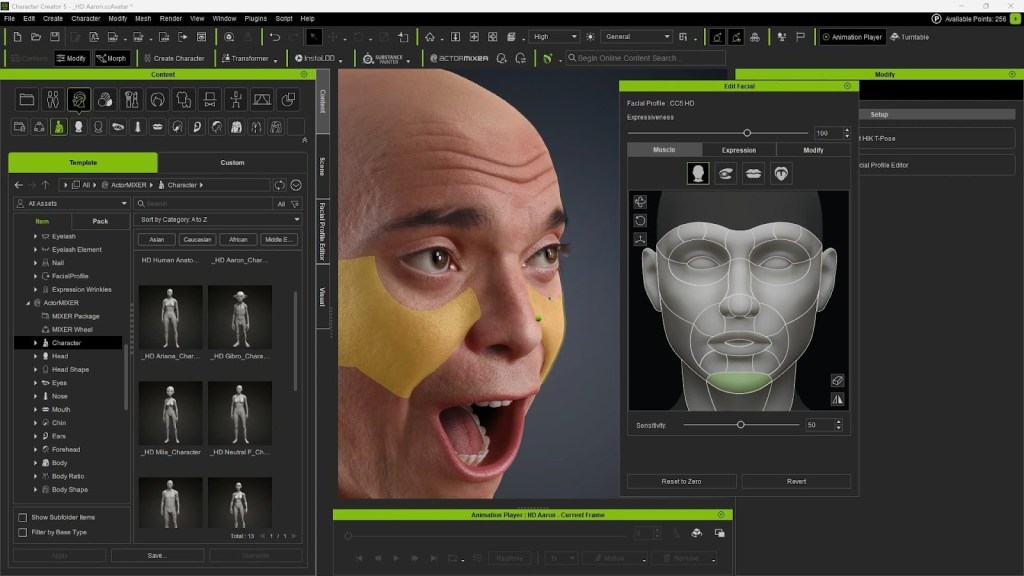
Before committing to sculpting or clothing, test the character’s facial movement. Go to Modify → Motion → Edit Facial and use the controllers to preview the range of motion for the jaw, brows, eyes, and more. Use the middle mouse button to drag controllers and watch how parts move.

CC5 retains the powerful dynamic wrinkle system first introduced in CC4. These wrinkles auto-activate based on expression intensity, giving instant feedback on how the face behaves in animation.

Why This is Important before Sculpting

  • You can identify where folds should be emphasized or softened in ZBrush.
  • Lets you avoid sculpting wrinkles that will later conflict with the dynamic system.
  • You get a roadmap of natural compression zones — directing the sculpt rather than guessing.

If you want to go deeper, CC5 also supports custom dynamic wrinkle profiles, letting you design completely unique expression maps. I have another in-depth series on the YouTube channel covering this process specifically, in case you are interested.

Skin Editing with the Activate Editor

The skin editor is also very powerful and flexible. Open the paint palette section and click Activate Editor to access base textures, IDs, and material resources.

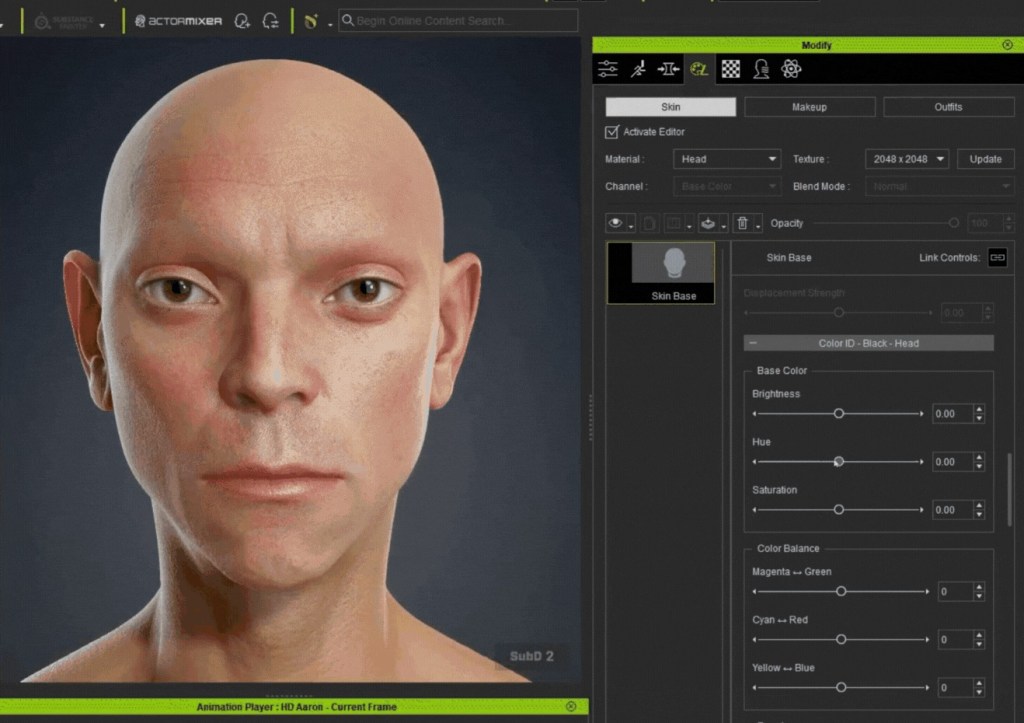
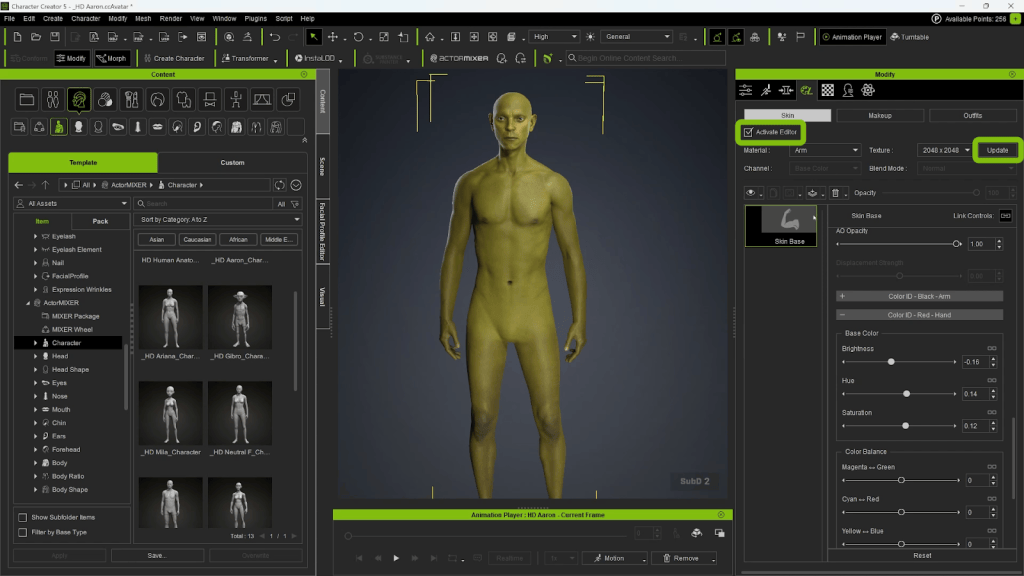
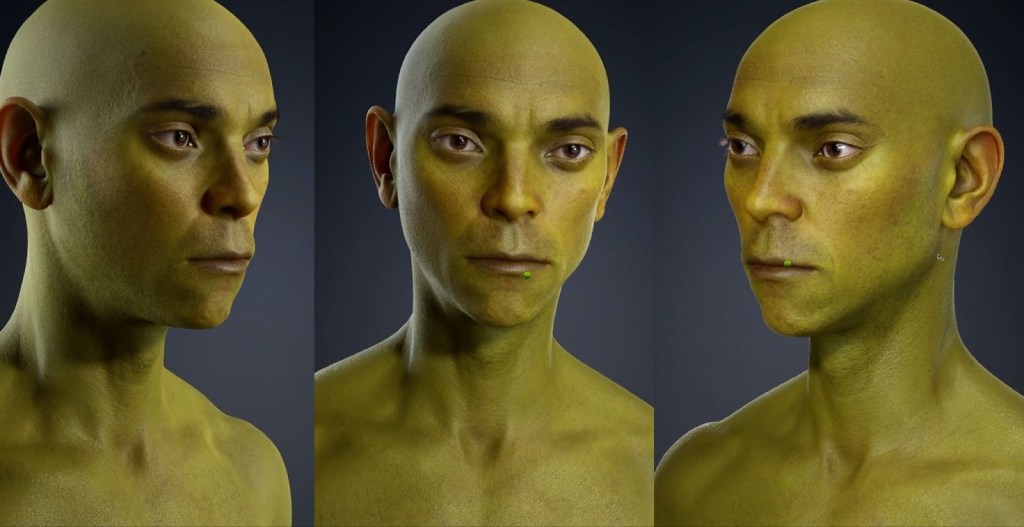
I like to work on the face first, especially since in this project the body will be covered by a suit or armour. Use brightness, hue, and saturation to push toward a stylized tone. Remember that different regions, like lips or specialized body parts, might use separate material IDs and therefore require individual editing. After adjusting the face, click Update to propagate changes across the body. Deactivate the editor to bake the textures.

It’s best to check specific areas like the lips, eyes, teeth, and accessories immediately upon import, as these often come with separate IDs that require manual adjustment to function correctly. Of course, none of this is necessary for the project but I wanted to share with you because the options are in there and are quite useful to know. 

Exporting the Base Mesh to ZBrush with GoZ

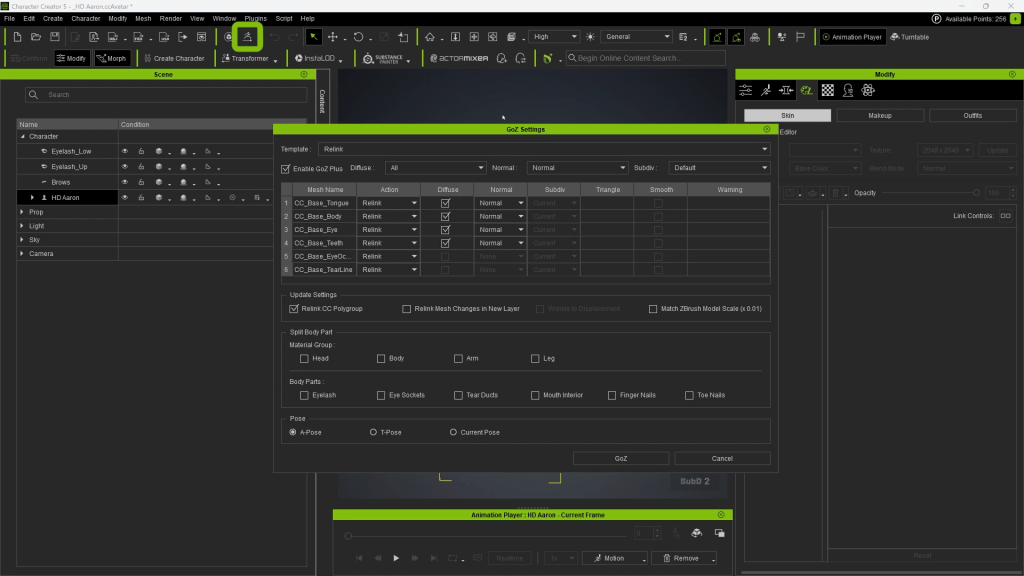
Once the CC5 base is established, send the mesh into ZBrush using the GoZ button in the Scene tab. Choose Create Template > A-Pose (recommended for sculpting).

Character Creator transfers normal map details into a ZBrush sculpting layer as high-fidelity detail. That means pores and micro-skin texture are preserved and editable as a layer, very useful for toggling intensity or removing detail during broad-form sculpting.

Fixing Brush Scale in ZBrush for CC5 Meshes

Due to CC5’s real-world scale, ZBrush brushes may feel too small, even at maximum diameter. Go to Preferences > Draw and choose 5000 for Max Brush Size and 50 for Dynamic Brush Scale.

This dramatically improves the usability of brushes when working on full-body meshes with millions of polygons.

Coming Up in Part 2

In the next chapter of the series, we’ll take the CC5 base mesh into ZBrush using GoZ, begin sculpting primary and secondary forms, and block out the sci-fi suit. We’ll also explore how to manage CC5’s transferred microdetail layers, fix brush scale issues, and prepare a clean sculpt for subdivision workflows before sending everything back into Character Creator 5.

Related Posts

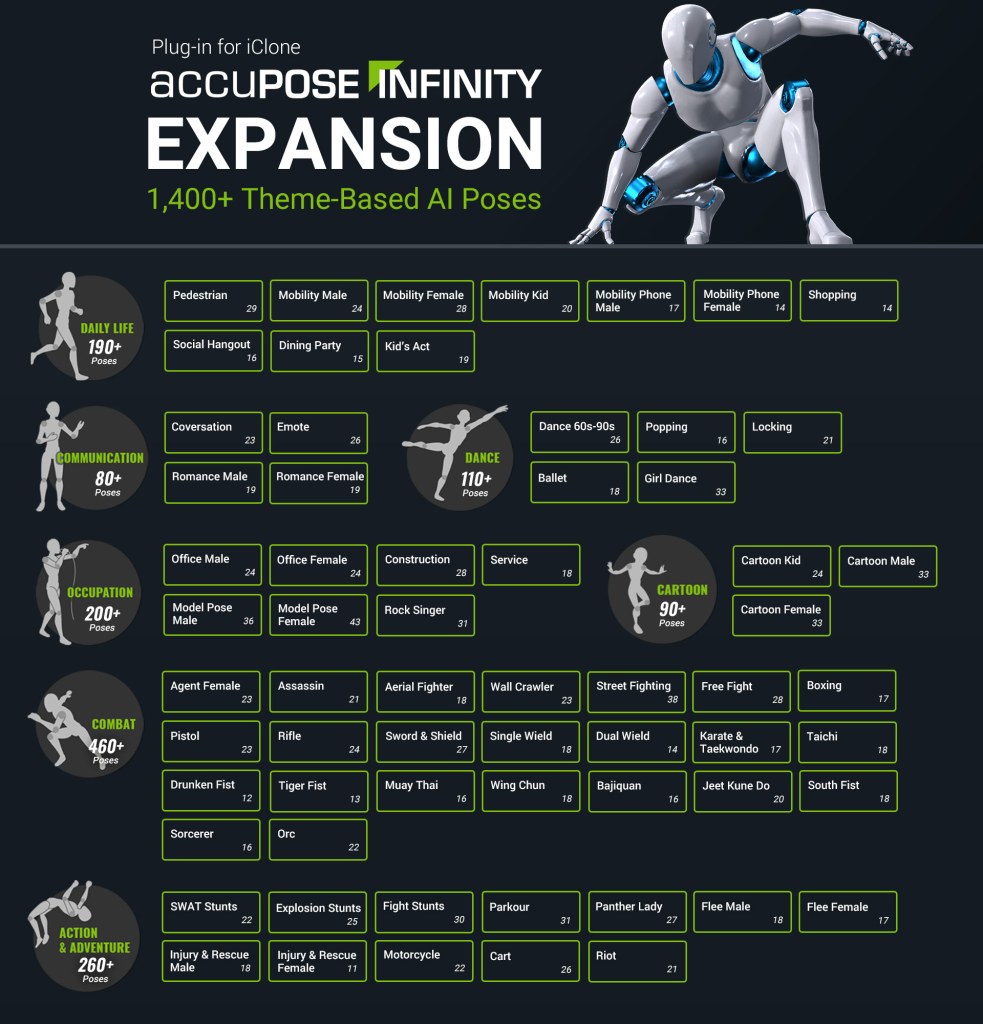
AccuPOSE INFINITY: One-Time Purchase Unlocks 1,400+ AI-Trained Poses

Thank you for supporting AccuPOSE and helping us shape this new generation of motion editing. Based on user feedback—and now that we’ve released more than 1,400 AI-trained poses—we are transitioning AccuPOSE INFINITY from a subscription model to a one-time purchase ($149 USD), effective January 6.

AccuPOSE INFINITY was originally offered as a subscription to support multiple content drops and to deliver this technology to users as quickly as possible. Over the past few months, all content planned for this year has been released. With the full library now available, we believe creators can fully benefit from the breadth and diversity of AccuPOSE INFINITY without an ongoing subscription, which is why we are transitioning to a perpetual license.

While we will continue adding new models and improvements over time, these updates will not follow a fixed schedule.

Cartoon Category Added to AccuPOSE INFINITY

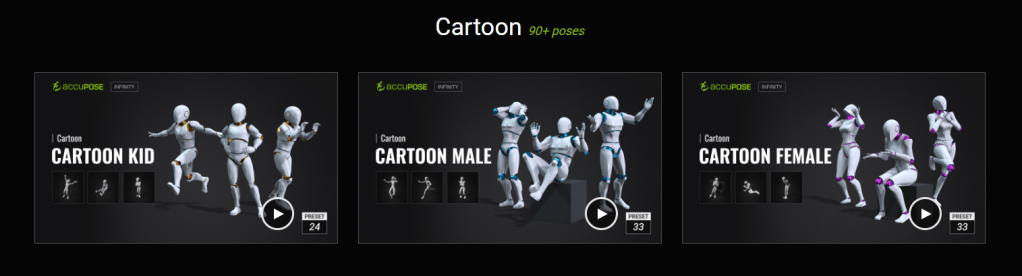
This update also includes AccuPOSE INFINITY Expansion 6, introducing a brand-new Cartoon category designed for exaggerated, expressive animation styles.

  • Cartoon category
    • Stylized, highly flexible poses for cartoon-like animation
    • Includes Male, Female, and Kid poses
    • Ideal for expressive storytelling

In addition to the Cartoon category, this update also adds the following pose themes:

  • Free Fight
  • Panther Lady
  • Aerial Fighter

With these new additions, AccuPOSE INFINITY now offers over 1,400 poses in total, all available through a single purchase.

Check out the full library of poses

Our Thanks to AccuPOSE INFINITY Early Supporters

To ensure fairness and to thank our early adopters:

All users who have ever subscribed to AccuPOSE INFINITY — whether the subscription is currently active, expired, or renewed — will automatically receive the full perpetual license

✅ Perpetual License Delivery

The perpetual license redeem link is provided below for your convenience.

>> Redeem HERE

To ensure all eligible users receive their copy, notification emails will also be sent on December 29 and January 6.

Please check your inbox (including spam or promotions folders) on or after these dates for confirmation.

✅ For Users Who Renewed Their Subscription

If you have renewed your AccuPOSE INFINITY subscription:

  • The renewal fee will be refunded in the form of Reallusion Bonus Points (BP)
  • BP notification emails are scheduled to be sent before January 12

✅ Workgroup Subscribers

Workgroup subscribers will receive separate emails with instructions tailored to their specific subscription status.

One Purchase. Long-Term Ownership

This change allows creators to invest once and own AccuPOSE INFINITY permanently, making it easier to integrate into long-term workflows without recurring costs.

Thank you again for your trust and continued support. We look forward to growing AccuPOSE with more enhancements in the future.

Garry Pye: Using AI and HeadShot in Character Creator

Building Lulu’s Head: AI, HeadShot, and Hope

In the first Lulu entry, Garry Pye set out with a clear goal: to apply everything learned from building Carl and approach 3D character creation with more confidence and intention. Now, in this second chapter of Lulu’s journey, that mindset is put to the test where it matters most—the face. This post dives into the creative and technical process of turning a 2D illustration into a living 3D head, blending AI tools with Character Creator and its Headshot plugin to shape Lulu’s identity from the ground up.

When it comes to creating 3D characters, the part that still makes my brain hurt a little is the face. As I start thinking about facial rigging, lip synching, and all those tiny muscle movements in sculpting software, my brain goes on holiday. So for now, I’m sticking with what I know works, using Headshot 2.0 for my character’s head and Character Creator for everything else.

The process starts with a bit of AI magic. I take one of my 2D illustrations, in this case, my design for Lulu, and feed it into an AI program (for Lulu, I used Krea) to create a 3D stylised version of her. 

The goal here isn’t to copy the AI result exactly. It’s just a visual guide or inspiration. To get a better sense of her form, I use AI again to generate images of her from different angles, making sure I can clearly see her head shape and hair from every side. Once I’ve got those angles, I take them into another AI tool, Rodin, which converts the reference into an actual 3D model of Lulu’s head. It’s like jumping ten steps ahead in the creative process. I then export that head as an FBX file and import it into Character Creator as a prop, ready to bring it into Headshot, where the real fun begins.

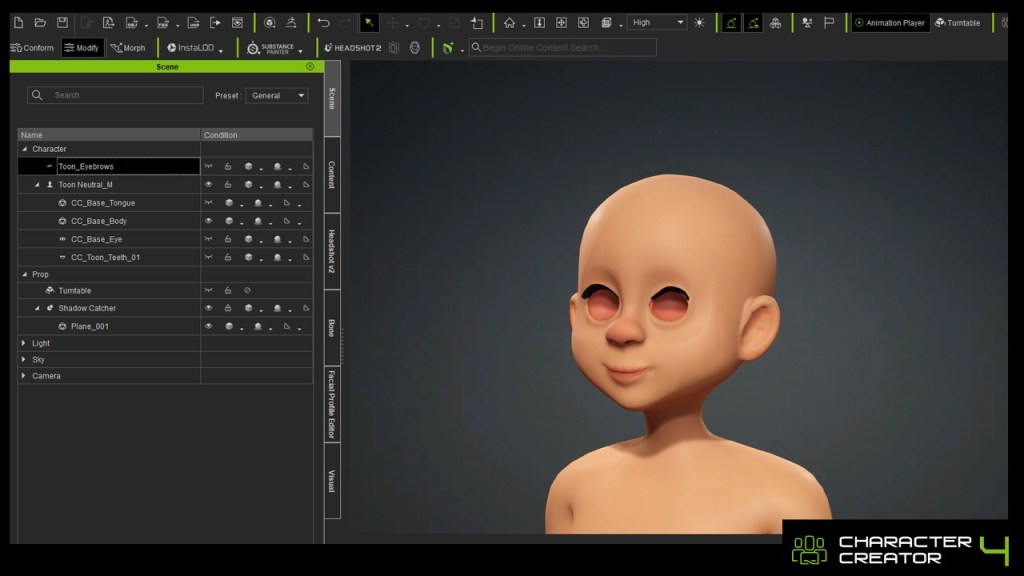
Inside Headshot, I start plotting face markers, little dots that tell the program where all the important facial landmarks are. Because Lulu’s head is more stylised than a realistic human face, I place extra markers wherever I need them, making sure to define everything from the top of her head right down to the base of her neck. The more time you spend here, the better the results later on, and the best part is that Character Creator lets you make changes in real time. You can shift a marker, hit generate, and see the update instantly. It’s a process that feels creative rather than technical, which is the way I work best.

A handy little trick I’ve picked up is to temporarily replace the skin texture with a grid pattern. It might sound odd, but it gives you perfect symmetry guides while you’re placing points, a lifesaver when you’re still learning to eyeball things accurately.

Once all the markers are where they should be, I generate the new skin. If something looks off, I can simply go back, nudge a few points, and regenerate. There’s no pressure. The freedom to keep redoing this process makes this whole step surprisingly enjoyable.

Then comes Refine Mesh, the digital equivalent of smoothing out a clay sculpture. Using the Project tool, I can make sure the new face sits snugly against the base mesh, pressing all those surfaces together. It’s like watching a mask slowly become a face.

And just like that, Lulu’s head is born.

For me, this was one of those quiet “wow” moments. The point where you suddenly realise how far you’ve come. I couldn’t help but notice how much faster I’d reached this stage compared to my first character build. Credit for that has to go to Character Creator, which makes it incredibly easy to make adjustments on the fly. Everything happens right there in front of you, updating in real time, so instead of guessing and waiting, you’re sculpting and seeing instant results. 

Already, I could see the beginnings of Lulu’s personality emerging. The face wasn’t perfect, not yet at least, but it had that unmistakable spark of life. And for anyone who’s ever built a 3D character from scratch, that’s the moment that hooks you. That’s the moment you fall in love with the process.

This image has an empty alt attribute; its file name is Garry-Pyes-profile-image-edited.jpg
Garry Pye – 2D/3D Animator, Cartoonist, Content Developer

Garry Pye – 2D/3D Animator | Content Developer

Garry Pye is an Australian illustrator, animator, and Cartoon Animator instructor with over a decade of experience in the animation industry. Known for his unique blend of creativity and humor, Garry’s work spans from teaching animation techniques to creating innovative content that helps both novice and experienced animators improve their skills.

Garry’s enthusiasm for storytelling and animation shines through in all his projects, whether it’s creating animated shorts, preparing educational tutorials, or sharing his expertise by teaching. With a passion for making animation accessible and fun, Garry has built a community of learners who not only appreciate his knowledge but also his infectious sense of humor and dedication to his craft.

Follow Garry Pye’s iClone Page2D Animation Page2D Marketplace

Related Posts

2026 Reallusion Software Subscription Options: Expanding Your Creative Freedom

Starting January 6, 2026, Reallusion will introduce new subscription-based licensing options, giving you greater flexibility to choose the plan that best fits your needs. Alongside the existing perpetual licenses, these subscription plans significantly expand creative possibilities across Reallusion ecosystems for Character Creator, iClone, and Cartoon Animator. All subscription plans provide the same rights and privileges as perpetual licenses under the Reallusion Software EULA, ensuring a fair and consistent experience for all customers.

Subscription Model Benefits

Available with monthly or annual renewal options, subscription licensing offers a flexible and budget-friendly solution for short-term projects and creators new to the Reallusion family of products.

  • Same EULA Rights
    Enjoy the same commercial-use rights and features as perpetual license holders, fully covered under the Reallusion EULA.
  • Stay on the Cutting Edge
    Always access the latest software versions—including major upgrades (e.g., iClone 8 to iClone 9)—at no additional cost during your active subscription.
  • Full Ecosystem Access
    Get unrestricted access to plugins and content purchases that integrate seamlessly with your existing pipelines and third-party tools, including Blender, Unreal Engine, Unity, Maya, ZBrush, and more.
  • Upgrade Perks
    Receive an exclusive member discount when upgrading your subscription or switching to a perpetual license. Transitions are seamless, with no service interruption, and discounts are automatically applied at checkout.

Reallusion offers seven subscription plans, available with both monthly and annual billing options. Get started with Character Creator for as little as $8.30 per month, or iClone for just $16.90 per month. For detailed plan information and comparisons, please visit our official website.

Perpetual Model Benefits

Reallusion continues to support perpetual licensing for creators and studios that value the reliability and long-term stability of permanent software ownership.

  • Pay Once, Own Forever
    Make a one-time purchase with no recurring fees to secure a lasting production tool for your pipeline.
  • Stable Production Environment
    Ideal for long-term projects that benefit from consistent version control and a predictable, uninterrupted production environment.
  • Collaborative Synergies
    Perpetual licenses remain essential for teams requiring advanced software management and allocation, including floating license control, shared content and project purchases, and seamless collaboration with external clients and partners.

License Recommendation

Perpetual Licenses are ideal for users who prefer permanent ownership, and for companies, studios, or educational institutions that need multi-seat licenses, team-based content sharing, floating license, and seamless external collaboration via Workgroups. We recommend purchasing our two most popular bundles to get started and save over 35%, or you may visit our Software Store to mix and match your own custom bundle.

Subscription Licenses are best for personal use, short-term projects, or budget-conscious creators. The Reallusion 3D Suite 365 plan is the premier option for a complete CC & IC toolkit. Choosing the Annual Plan provides the most cost-effective value to get started.

License TypesPerpetual LicenseSubscription License (365)
Best For 1. Permanent use
2. Content sharing, team collaboration
3. Studios and businesses 
1. Personal use
2. Short-term projects
3. Budget-conscious creators
User Rights1. Commercial use rights (EULA)
2. Access to full content and add-on platforms
3. Pipeline support for 3rd-party integrations
Unique Benefit1. No recurring fees
2. Multi-seat licensing and workgroup management
1. Access to most up-to-date versions
2. Flexible upgrade options
PaymentOne-time Purchase (No recurring fees)Recurring Payment (Billed monthly or annually)
Refund Policy14-day money-back guaranteeNo refund, Cancel anytime (next billing)
LimitationPersonal license only
(Not suitable for workgroups or educational licensing)

Learn More

Explore the software subscription store

Software EULA

Reallusion Store FAQ