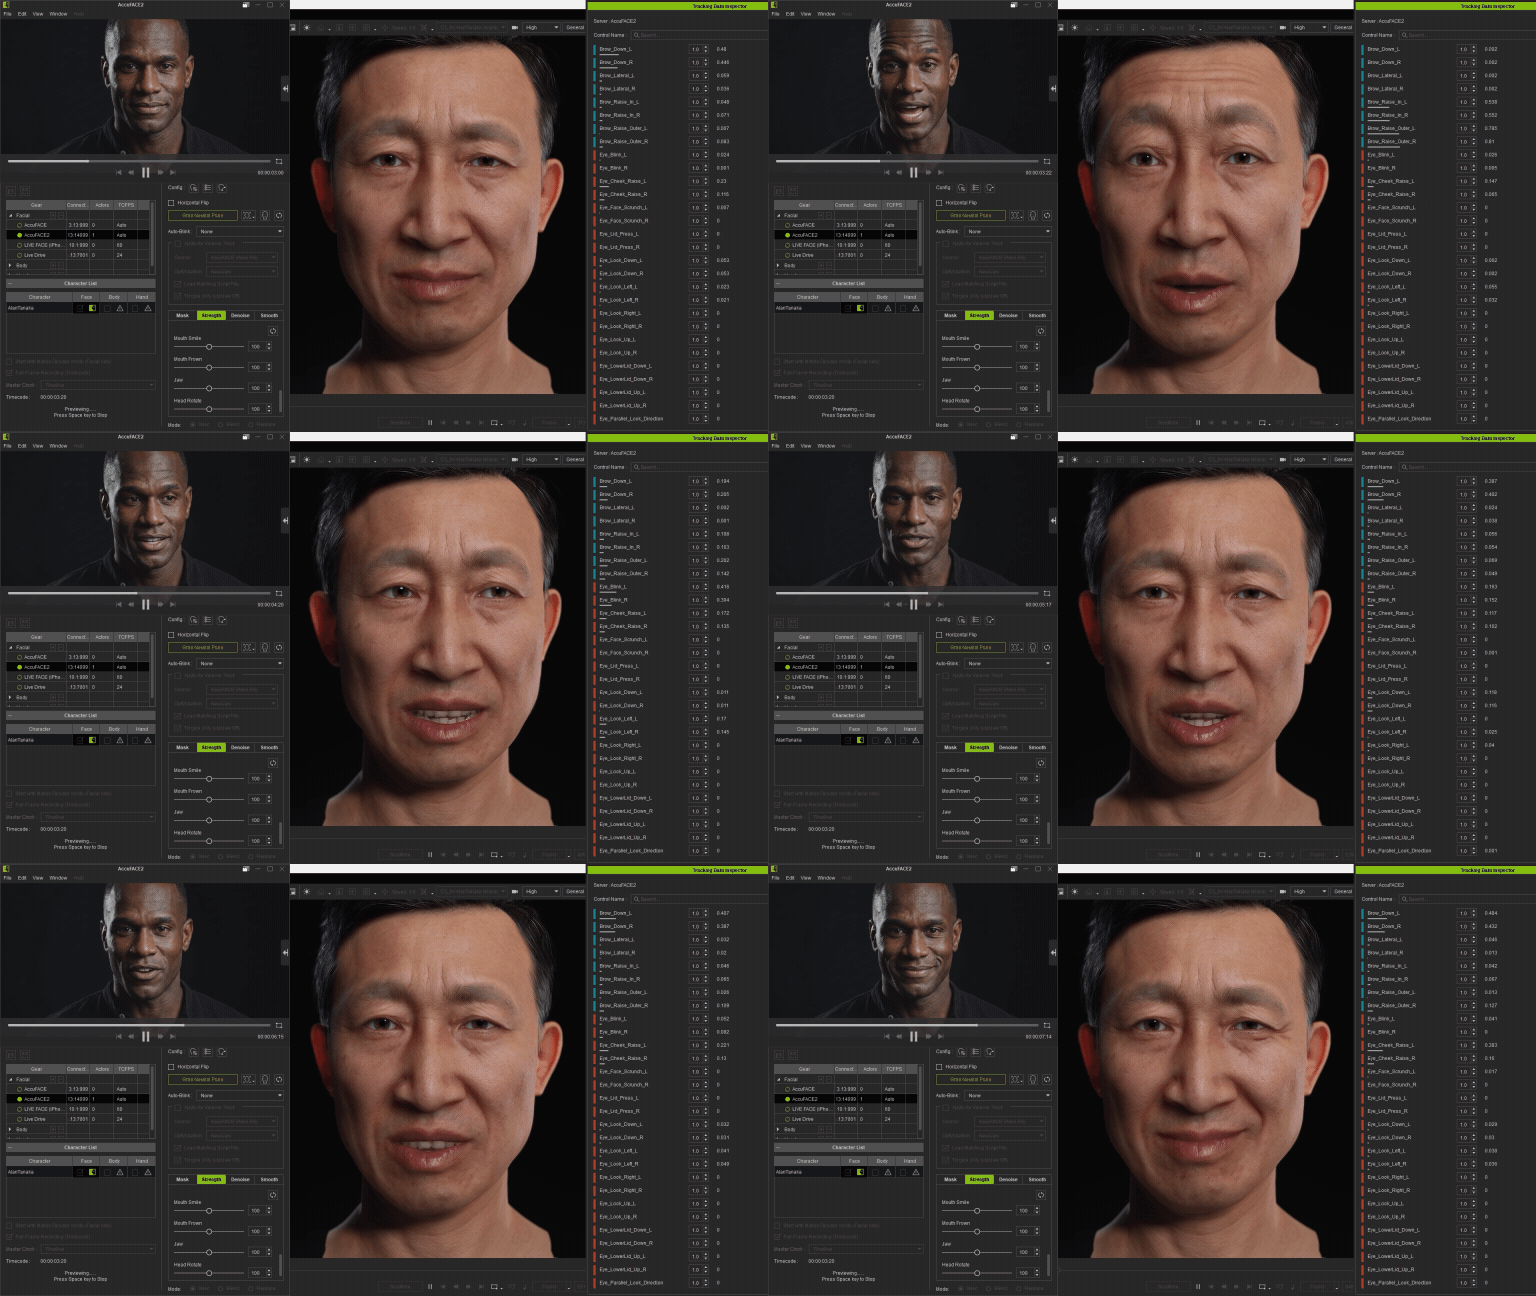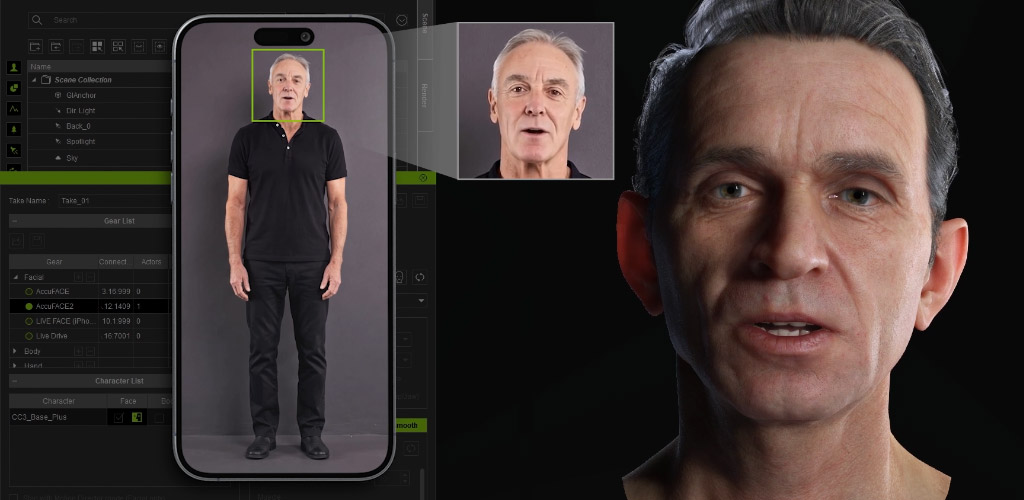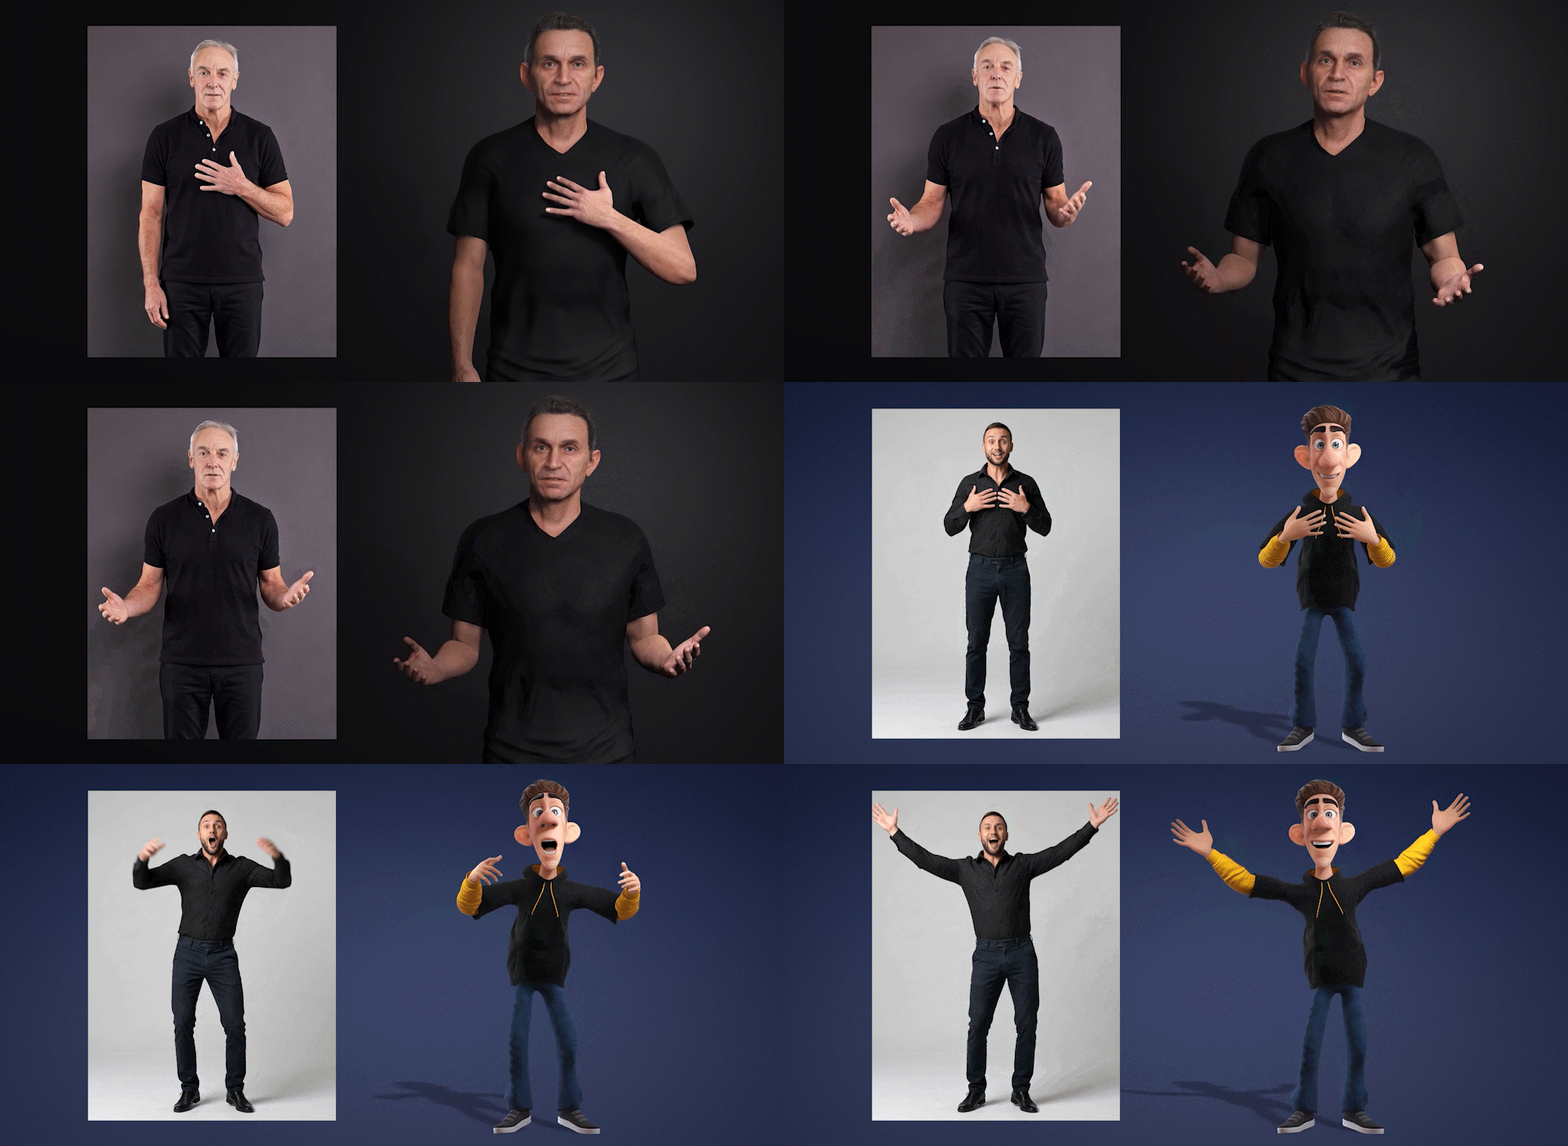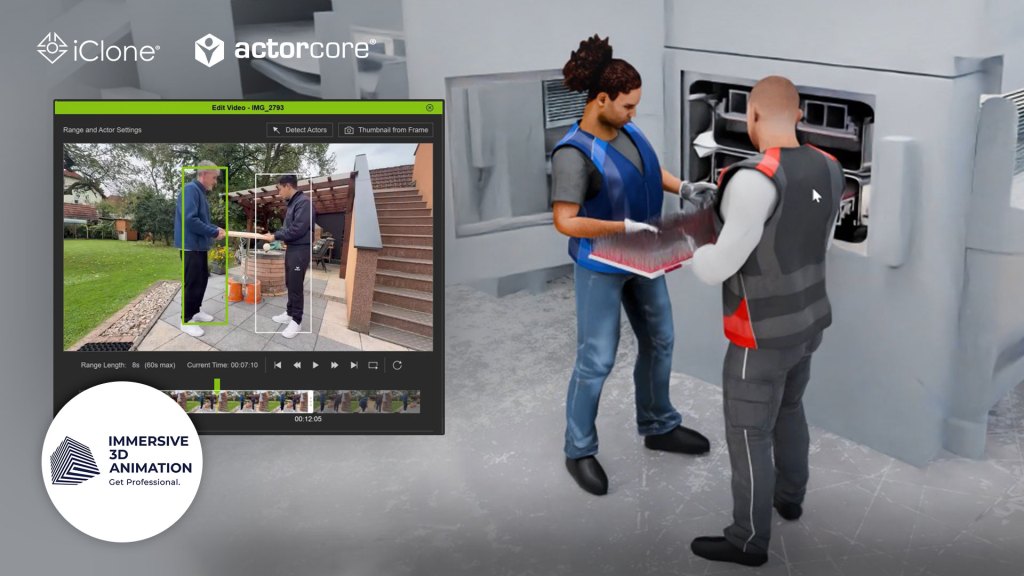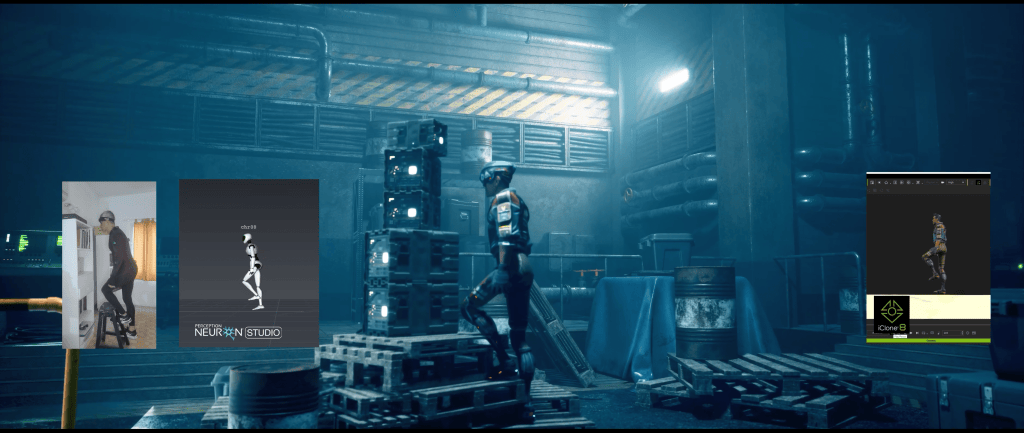
Achieve convincing industrial character animations rapidly and cost-effectively using iClone 8.
Leverage ActorCore for diverse character assets and iClone Video Mocap for AI-powered motion capture from standard phone video.
Streamline your pipeline with direct export to Blender using the Reallusion Blender Auto Setup add-on.
This workflow significantly reduces animation production time and costs for industrial simulations and explainer videos.
This article details the most cost-effective approach to creating and animating industrial characters for simulation and explainer videos. It outlines a proven workflow that leverages iClone 8, Reallusion’s flagship real-time animation suite, and its powerful Video Mocap plugin, alongside the extensive ActorCore asset library, to deliver highly convincing yet efficient 3D character animations for AEC enterprises and industrial applications.
What is the most cost-effective way to create and animate industrial characters for simulation?

For AEC enterprises and industrial studios requiring compelling characters for simulations or explainer videos, balancing quality with cost and speed is paramount. The primary challenge lies in producing animations that are convincing enough to convey complex actions without over-investing in character development when characters aren’t the central focus. The solution involves a streamlined pipeline leveraging advanced real-time animation tools that minimize manual effort and specialized hardware.
“In this field, we usually have to visualize something really complex in a really simple way. And often, characters are needed to show specific actions. However, the characters are not in the focus of the video. Therefore, we need a fast and simple way to achieve character animations that still look convincing.”
Mensur Bukvarevic — CEO of Immersive 3D Animation
Product presentation is usually the main focus for industrial simulation, not character animation.
Leveraging ActorCore for Rapid Character Acquisition
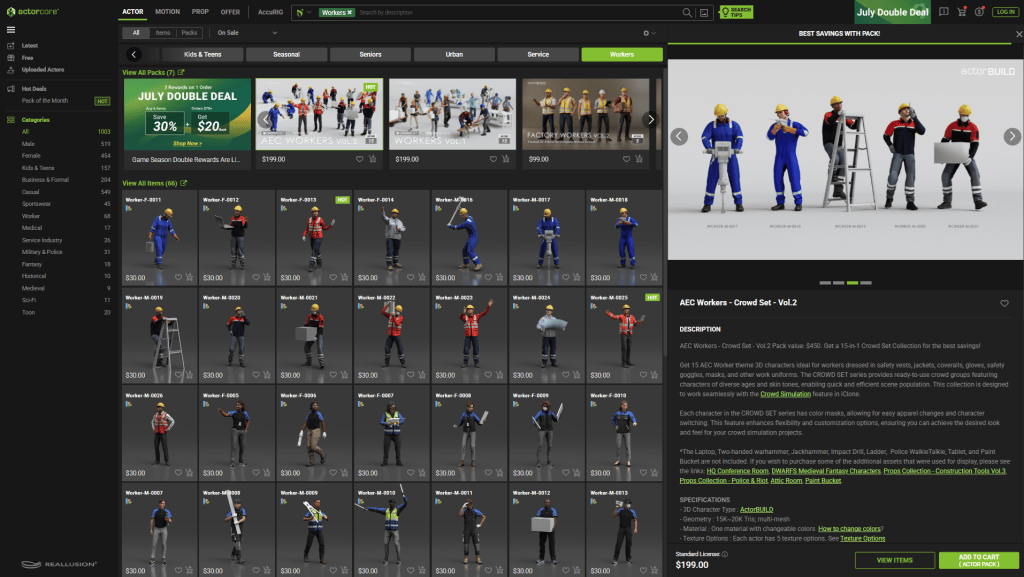
The initial step in this efficient workflow is sourcing appropriate 3D characters. ActorCore, a massive 3D character animation library, offers a diverse range of production-ready assets, including specialized packs like AEC Workers. These collections provide a variety of different characters tailored for specific industrial fields, significantly reducing the time and cost associated with custom character modeling. Users can easily retarget motions online to selected characters, and the library boasts thousands of high-quality mocap animations suitable for simulation, game, film, and interactive projects.
ActorCore offers hundreds of ready-made industry-specific 3D characters.
How can AI-powered Video Mocap revolutionize animation production?
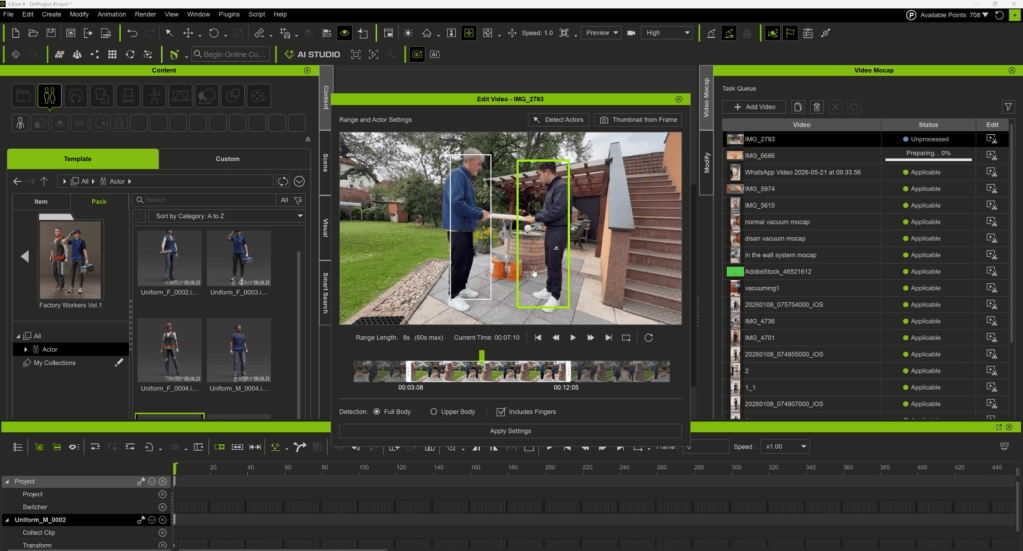
Traditional motion capture systems demand expensive hardware, sensors, and specialized suits, placing them out of reach for many studios focused on efficiency. iClone 8, paired with its groundbreaking Video Mocap plugin, eliminates these barriers. This AI-powered service transforms ordinary video footage—captured even with a smartphone—directly into precise, editable 3D animation data. This significantly democratizes high-quality motion capture, making it accessible and extremely cost-effective.
“This is the workflow I can recommend to anyone that needs fast and good-looking results.”
Mensur Bukvarevic — CEO of Immersive 3D Animation
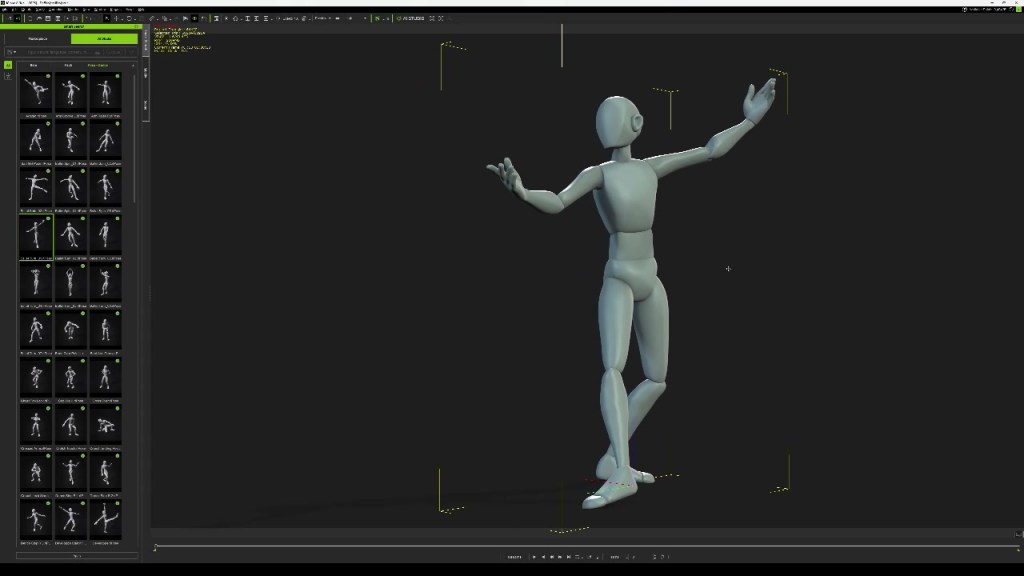
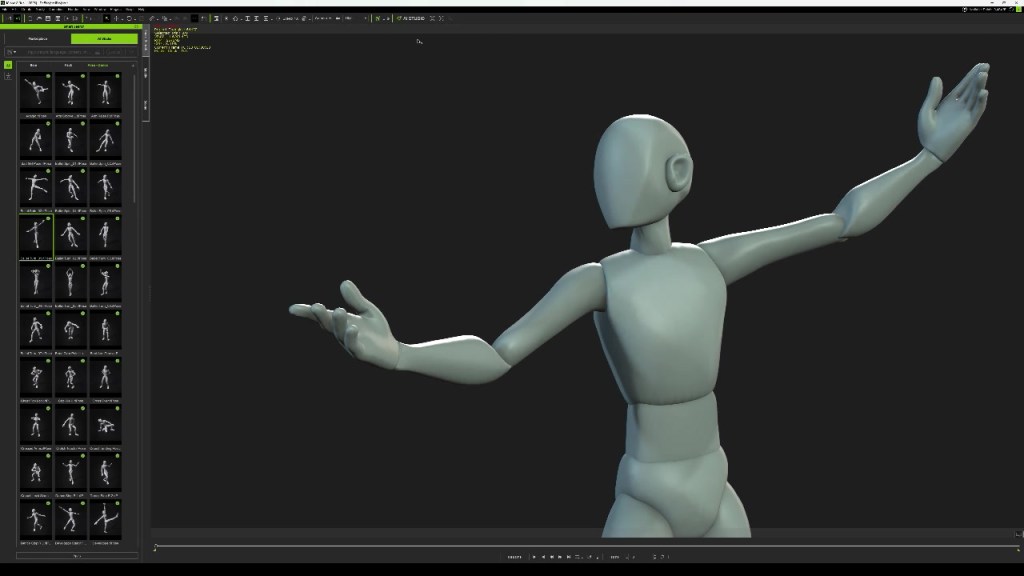
Video Mocap can accurately generate 3D motion data from any source video.
Streamlining your animation pipeline with Blender integration
Once the initial character animation is refined in iClone 8, seamless integration with other leading 3D software like Blender is crucial for final scene assembly and rendering. Reallusion provides specialized pipeline tools, such as the Blender Auto Setup, to simplify this transition.
Exporting and Refining in Blender
After achieving a solid basic result in iClone, characters can be exported to Blender using the Blender Auto Setup. This tool optimizes the import process, ensuring characters retain their rigging and materials correctly. Further cleanup and interaction adjustments are often necessary in Blender, especially if characters need to interact with complex objects or environments. Animators can then render the final scene within Blender, capitalizing on its robust rendering capabilities.
Efficient Industrial Character Animation Workflow
Stage
Tools Used
Key Actions
Benefits
Character Sourcing
ActorCore
Select rigged characters (e.g., AEC Workers).
Fast asset acquisition, field-specific variety, production-ready models.
Motion Capture
iClone 8, Video Mocap, Smartphone
Record video, import, trim, generate 3D motion.
Cost-effective mocap, no special hardware, precise editable data.
Animation Refinement
iClone 8
Apply motion to character, perform initial cleanup and adjustments.
Real-time feedback, quick iteration on motion.
Platform Integration
Blender Auto Setup add-on, Blender
Export character/motion from iClone, import into Blender.
Seamless data transfer, preserves rigging/materials.
Final Scene Assembly
Blender, Animation Layers add-on
Further cleanup, object interaction, animation layers for non-destructive edits, render.
Featured Company Spotlight: Immersive 3D Animation
Immersive 3D Animation, founded by Mensur Bukvarevic, is an animation studio based in Austria specializing in creating impactful 3D product and explainer videos for industrial companies and specific use cases. With a growing team and a customer base exceeding 100 companies worldwide, Immersive 3D Animation excels at simplifying complex industrial processes through engaging visual storytelling. They continuously seek efficient workflows to deliver high-quality results under tight deadlines.
Immersive 3D Animation’s workflow for industrial character animation leveraging Reallusion tools involves:
Character Selection: Utilizing ActorCore packs to quickly find suitable, production-ready industrial characters.
Rapid Motion Capture: Recording custom motions with a smartphone and processing them into 3D animation data using iCloneVideo Mocap plugin. This bypasses traditional mocap costs and complexity.
Refinement in iClone: Applying and refining the captured motions directly onto the ActorCore characters within iClone 8.
Blender Integration: Exporting the animated characters to Blender using the Blender Auto Setup add-on for final scene integration, object interaction, and rendering.
Layered Animation: Employing animation layers in Blender to add non-destructive corrections and fine-tune character-object interactions.
By integrating iClone 8, ActorCore, and iClone Video Mocap with Blender, animation studios can significantly reduce the time, cost, and complexity traditionally associated with 3D character animation. This workflow empowers creators to produce fast, convincing character animations essential for visualizing complex industrial processes, ultimately enhancing explainer videos and simulations.
How do I create convincing industrial characters cost-effectively for simulations?
The most cost-effective method involves leveraging pre-made character libraries like ActorCore for asset acquisition and utilizing AI-powered motion capture from video, such as iClone Video Mocap plugin. This workflow bypasses expensive custom modeling and traditional motion capture hardware, allowing studios to quickly generate high-quality, relevant character animations without a significant investment in time or resources.
What is iClone Video Mocap plugin and how does it work?
The iClone Video Mocap plugin is an AI-powered tool that converts standard 2D video footage (like smartphone recordings) into precise 3D animation data. Users simply record their desired motion, import the video into iClone, and the plugin analyzes and applies the motion to any 3D character. This eliminates the need for expensive motion capture suits or dedicated studios, making professional animation accessible and highly efficient.
Can I integrate iClone 8 characters and animations into Blender for my final renders?
Yes, iClone 8 characters and their animations can be seamlessly integrated into Blender. Reallusion provides tools like the Blender Auto Setup add-on that streamline the export-import process, ensuring that character rigs, textures, and animations are transferred correctly. This allows artists to leverage Blender’s powerful rendering capabilities for final scene assembly, lighting, and advanced visual effects, building upon the efficient animation created in iClone.
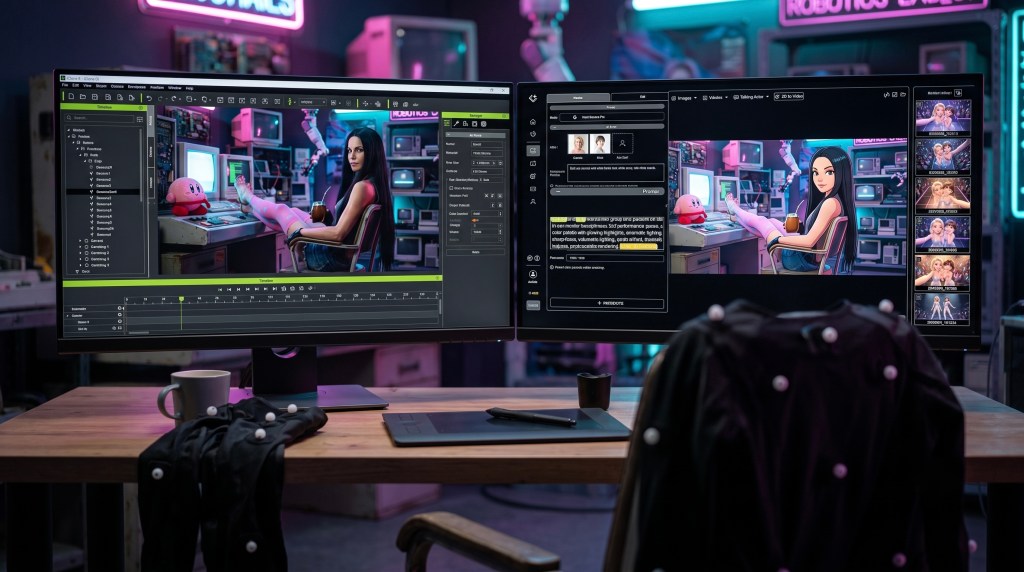
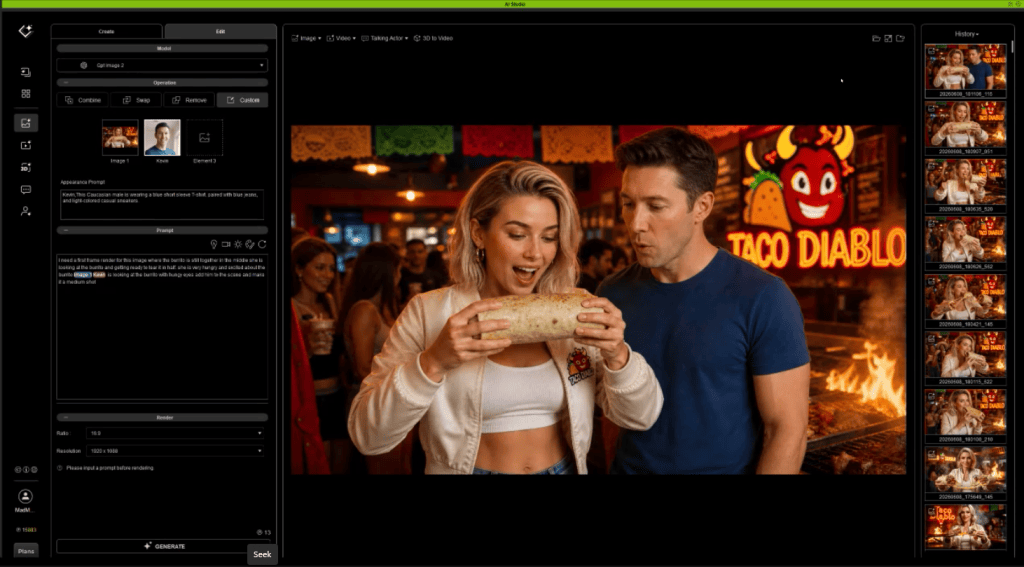
Alejandro De Pasquale integrates iClone 8 and Character Creator 5 with AI Studio to precisely guide AI video generation.
The workflow leverages Perception Neuron MOCAP data for realistic character animation, ensuring consistent character identity across AI productions.
Users can choose between full texture transfer, gray model, or dummy character modes for varying degrees of AI creative freedom.
iClone PERSONAL is now free, removing barriers for new users to explore AI-guided animation workflows.
Welcome to AI Storytellers, a new series from Reallusion that explores the creative possibilities of AI Studio through the eyes of storytellers. In each episode, we’ll go behind the scenes with creators, filmmakers, artists, and innovators to discover how they’re using AI Studio to develop characters, build worlds, and bring their stories to life.
This article outlines a precise workflow using Reallusion’s iClone 8 and Character Creator 5 (CC) to guide AI-generated videos. It solves challenges of AI hallucination and character inconsistency. By integrating custom motion capture and CC characters with AI Studio, creators like Alejandro De Pasquale maintain complete control over character identity and movements, ensuring consistent, IP-safe digital actors for any production. This method ensures vision accuracy and intellectual property integrity, leveraging AI’s speed.
AI Studio Storytellers: Motion Capture to AI Video Generation
Why Traditional AI Video Generation Fails Filmmakers?
Traditional AI video generation relies heavily on text prompts, which inherently lack compositional and frame-by-frame structural control. Consequently, these systems often struggle with maintaining consistent character appearances, spatial coherence, and the artist’s original vision. These visual “hallucinations” stem from the probabilistic nature of generative video models. Because artists cannot predictably direct the outcome, they are frequently forced into frustrating cycles of trial and error, constantly regenerating clips, rapidly burning through platform credits, and facing significant cost overruns.
To eliminate this costly guesswork, filmmakers require a reliable method to exert precise, directable control over the generative process. Using a 3D environment as a precision control layer to prevent arbitrary AI interpretations is exactly what the iClone-guided AI Studio workflow is designed to address.
“Generating videos with artificial intelligence has never really caught my attention until now. This is differentbecause what it does is connect all the 3D tools like Character Creator and iClone with AI Studio platform so we can generate videos and images precisely to what we need. Its a different approach to what we could previusly create.”
Alejandro De Pasquale — Unreal Artist, Filmmaker, Animator
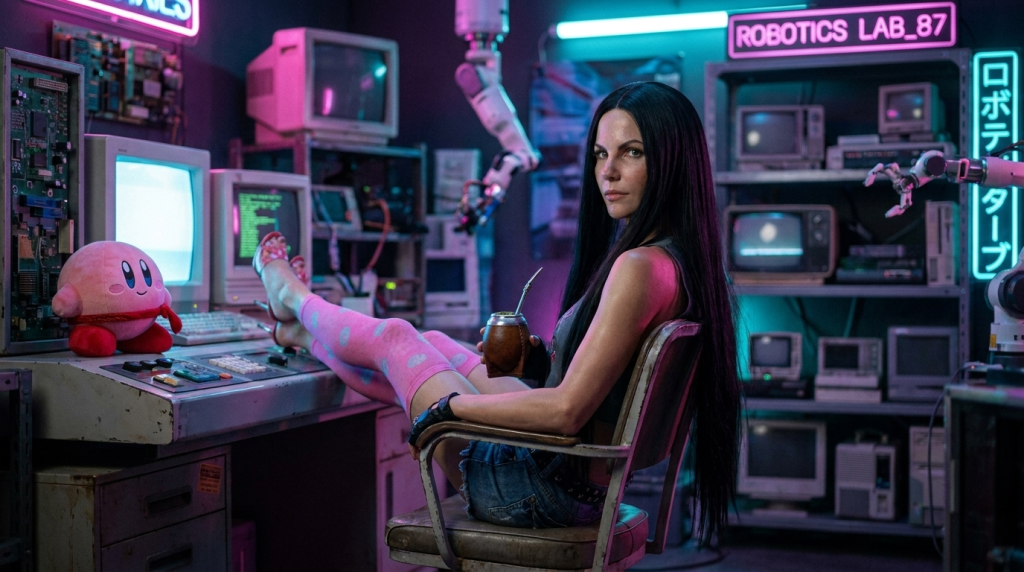
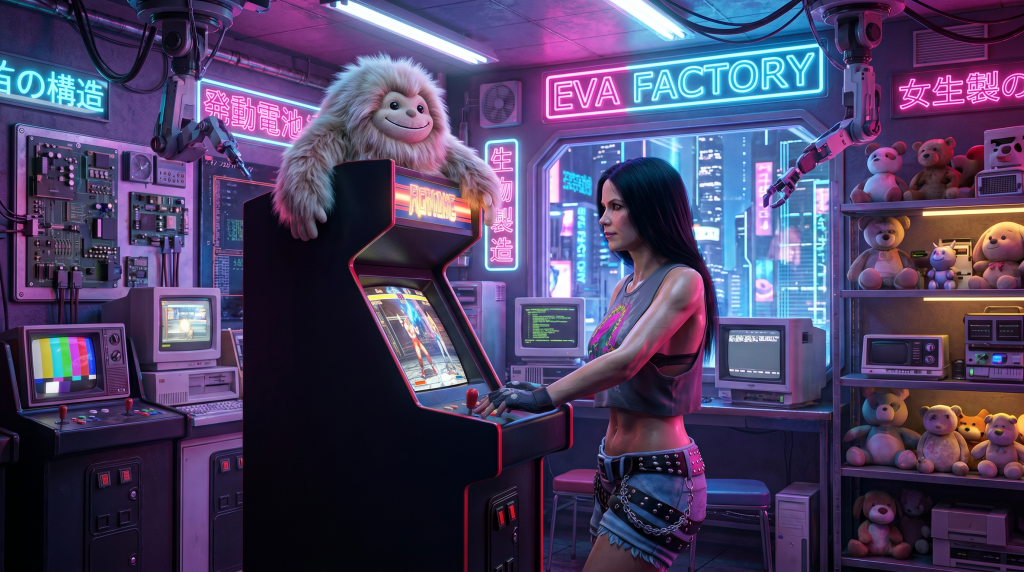
iClone 8 AI Studio workflow: Alerender’s AI Actor (EVA) in a cyberpunk robotics lab, surrounded by retro tech & MOCAP guides.
How to Guide AI-Generated Videos with Your Own Motion Capture and Character
Creating compelling animated content often involves precise control over character performance and visual style. The challenge with modern AI video generation platforms is maintaining consistency and preventing unwanted AI “hallucinations” that can compromise character identity or narrative integrity.
This workflow demonstrates how to achieve highly orchestrated AI-generated videos by using iClone 8 and custom Character Creator 5 avatars, driven by Motion Capture data, as a foundational guide for AI Studio.
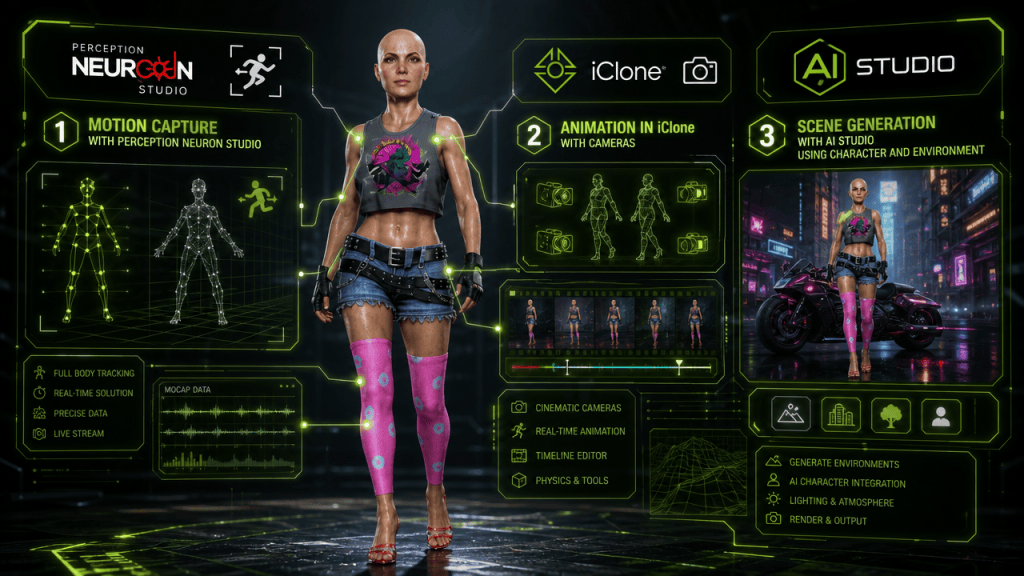
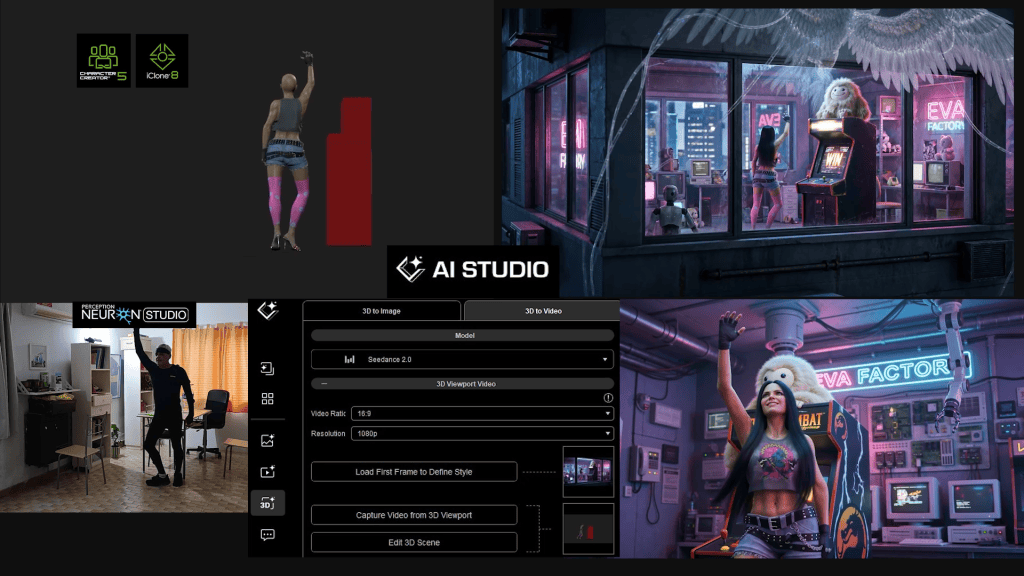
Alerender’s iClone 8, CC5, Perception Neuron mocap workflow for AI Studio: real-time animation, AI character integration, scene generation.
Animating Characters for AI Guidance in iClone
The first step in this pipeline involves bringing your custom 3D character to life within iClone 8. For artists like Alejandro De Pasquale, the preference is often for robust motion capture integration to achieve natural, fluid movements.
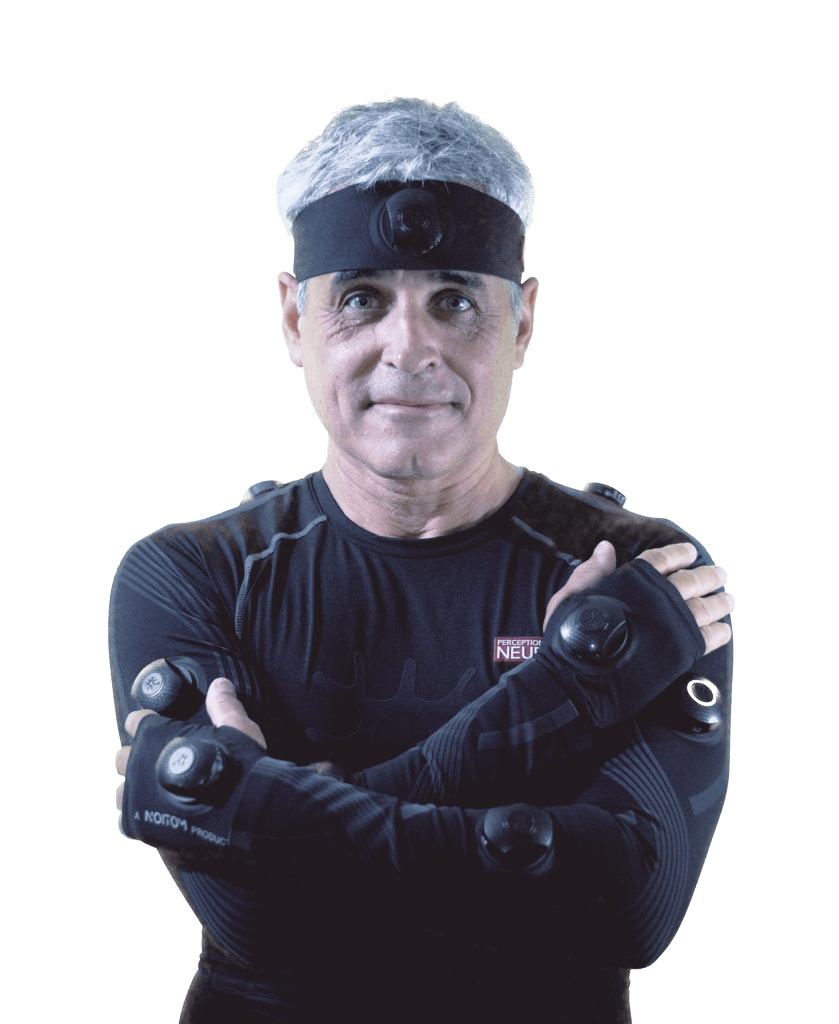
Alejandro utilizes his Perception Neuron MOCAP suit to capture animation data, which is then directly transferred to his Character Creator 5 characters within iClone. This real-time data transfer is facilitated by the iClone Motion LIVE plugin, specifically using the Perception Neuron Profile, which bypasses the need for extensive retargeting.
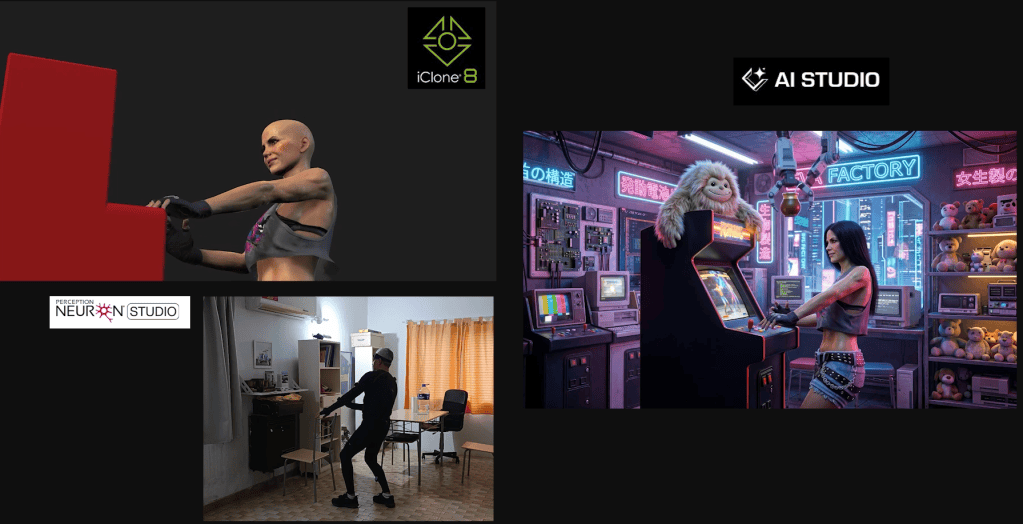
iClone 8 Motion LIVE: Perception Neuron mocap drives a CC5 character in iClone.Perception Neuron mocap, iClone 8 3D character, and AI Studio AI actor for guided AI video generation.Alerender’s iClone 8 mocap for AI Studio. Shows Perception Neuron suit-wearing human, controlling the CG robot, and a custom AI Actor in the iClone UI and 3D environment.
Once the motion capture data is applied, the animation is further refined in iClone 8. Multiple camera angles can be set up to capture different perspectives, establishing the visual guide that will later inform the AI. This detailed 3D animation, complete with intricate character movements and camera work, forms the core input for AI Studio.
Bridging iClone to AI Studio: Consistent AI Actor Creation
The crucial step for maintaining character consistency across AI productions is integrating your Character Creator 5 avatars into AI Studio as “AI Models” or “iModels.” This involves generating various angles and expression images of your iClone character to train and save them as an AI Model within AI Studio. This process allows the platform to recognize and consistently render your specific character, preserving multi-actor identity and IP across all AI productions.
Transferring Animation to AI Studio with Control
AI Studio offers three distinct methods for transferring the animated look of your iClone 8 character, providing varying degrees of creative freedom for the generative AI models:
Full Texture Transfer: The character is transferred exactly as it appears in iClone, including all textures, clothes, skin, and accessories. This is ideal when maintaining a precise 3D feeling and realistic style, as Alejandro chose for his EVA character.
Gray Model Transfer: All textures and material maps are removed, presenting the character as a simple gray model. This option provides generative AI models like Seedance 2.0 more freedom to interpret and generate new textures, clothing physics, and even stylistic elements.
iClone Dummy Character: An iClone dummy character is used as a placeholder, allowing AI Studio to specify an entirely different AI Model Actor later. This offers the most creative freedom, enabling the AI to generate characters with new hair, clothing physics, and even subtle expressive variations, ensuring the output is more fluid and less constrained by the original 3D guide.
iClone 8, Character Creator 5: Full texture, gray model, and dummy character modes to be transferred to AI Studio for consistent AI Actors.
Pro-Tip: When you desire the AI to generate dynamic hair or clothing physics with greater creative freedom, intentionally omit these elements from your original iClone character. Instead, describe them directly in your AI Studio prompt. This approach signals to models like Seedance 2.0 that they have more latitude, allowing for fluid, AI-generated styles that would otherwise require complex simulations in 3D software, potentially saving roughly 4-6 hours of manual setup and simulation per character.
Generating the Initial AI Image from iClone
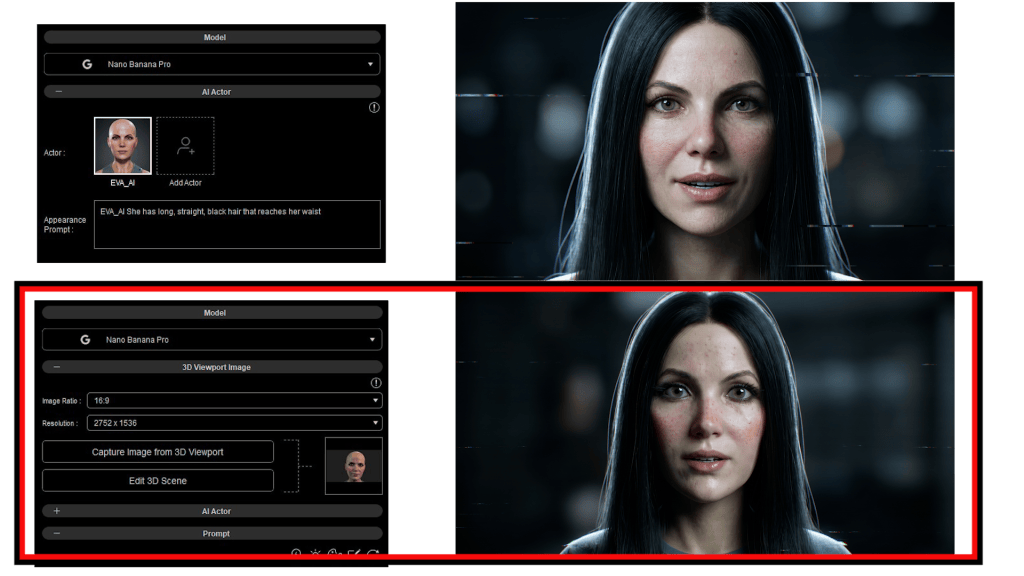
The first step in AI Studio is to generate a foundational image. Alejandro initiates this by capturing the first Start Frame directly from iClone’s 3D viewport using the ‘Capture Image From 3D viewport‘ feature, ensuring precise composition.
Within AI Studio, he selects an image generation model like Nano Banana PRO and then assigns his pre-trained AI Actor (Eva). For multi-character scenes, the ‘Assign Actors’ feature becomes crucial, allowing users to bind box-specific characters and map them to their corresponding AI Models.
Alejandro meticulously crafts his text prompts, often utilizing external tools like ChatGPT for detailed descriptions, to define elements such as lighting (e.g., Rim Light), render style (photorealistic), and even details like Eva’s hair, which was intentionally omitted from the iClone guide for AI interpretation.
AI Studio UI: AI Actor EVA guides AI image generation from iClone/CC5 3D Viewport; ‘Capture Image’ button highlighted. Cyberpunk arcade scene.Alerender’s EVA AI Actor (Character Creator 5) plays arcade, guided by iClone 8 mocap, in AI Studio render.
From Static Image to Dynamic AI-Guided Video
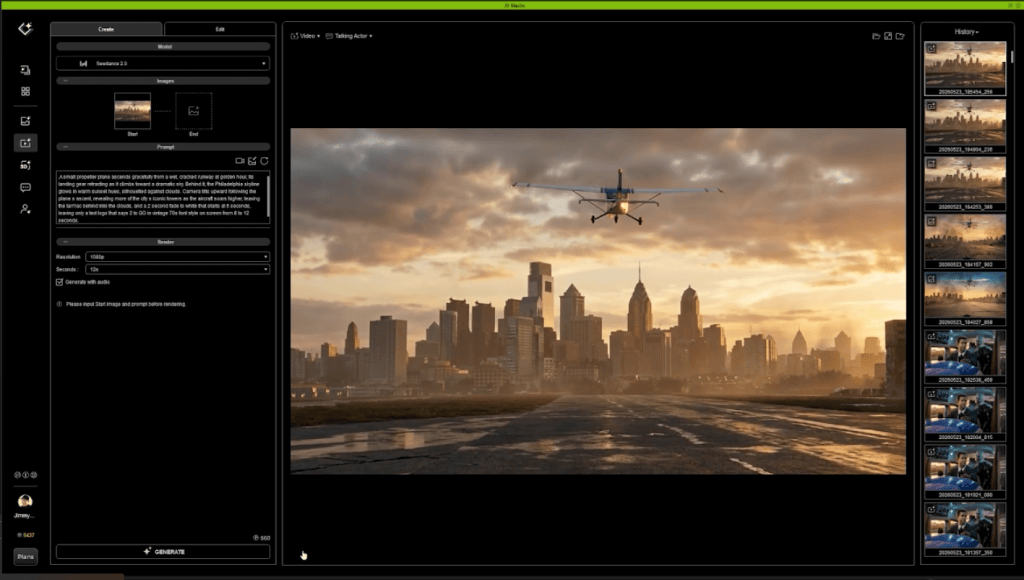
With the initial image established, the workflow transitions to video generation within AI Studio’s 3D-to-video section. The previously generated image is automatically assigned as the starting point. Alejandro selects Seedance 2.0 as his AI video generation model, noting its current superiority for photorealistic renders.
Reallusion AI Studio 3D to Video UI, Seedance 2.0 generation model selected for rendering AI Actors.
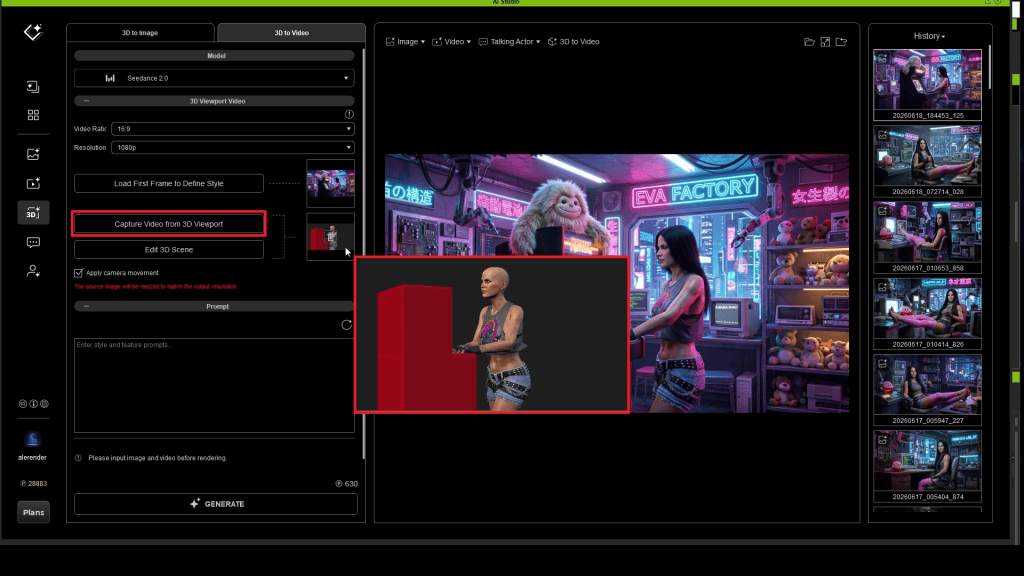
The core of the video guide is then imported by `capturing the video from iClone’s 3D viewport`, complete with the meticulously designed 3D camera movements, which are enabled via the ‘apply the camera movements’ checkbox in AI Studio.
AI Studio 3D to Video UI with “Capture Video from 3D Viewport” selected, showing an imported iClone character guiding a cyberpunk scene.
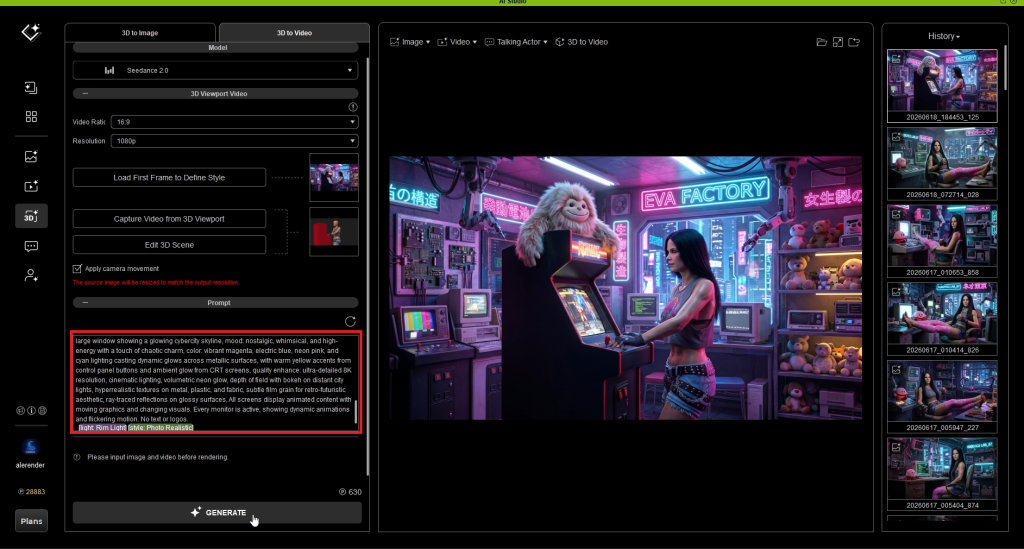
Detailed action descriptions are added to the text prompt, guiding the AI to animate specific events, such as Eva raising her arm to take a mate tea from a robotic arm, ensuring precise execution of the narrative.
AI Studio 3D to Video UI: EVA AI Actor playing arcade using iClone Mocap guide & prompt.
Incorporating Dialogue and Lip Sync
For scenes requiring character dialogue, Alejandro explores various approaches to maintain both visual consistency and expressive performance. He often tests different initial image generation methods, comparing fully realistic renders (using Nano Banana PRO directly in AI Studio) against those derived from iClone screenshots, opting for the latter to maintain a cohesive 3D aesthetic when blending with his other AI-generated content.
AI Studio UI for AI Actor EVA_AI from CC5/iClone 8. Appearance prompt, ‘Capture Image from 3D Viewport’ & generated AI character.
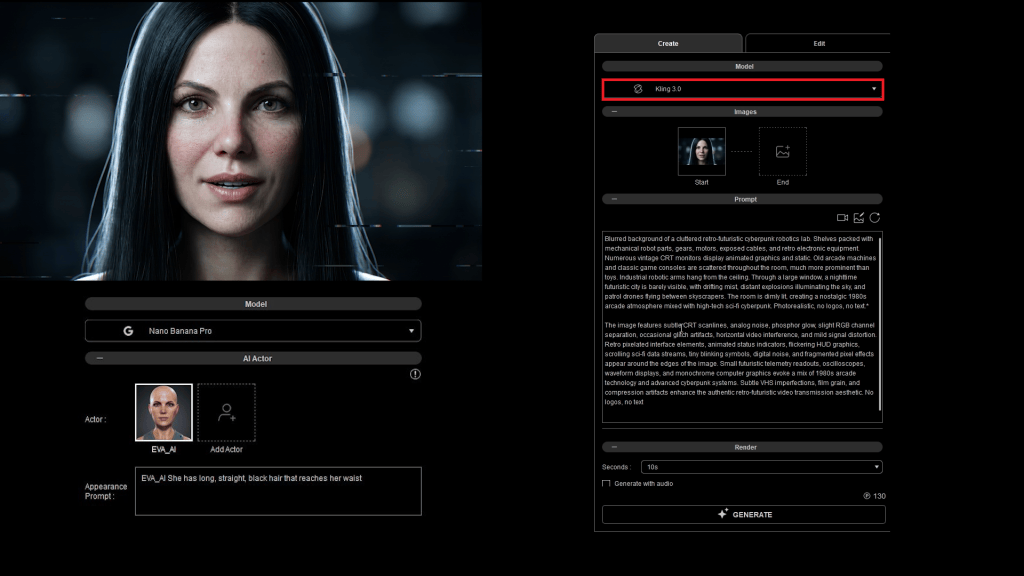
For video generation, he leverages the Kling 3.0 AI model.
Reallusion AI Studio UI guiding AI video: EVA AI Actor, Nano Banana Pro & Kling 3.0 models, detailed prompt.
Critically, AI Studio’s ‘Single Talking Actor’ section allows for direct audio input, automatically generating precise lip sync animations that align perfectly with the provided voiceover.
This ensures that character lipsync performances are not only visually guided by iClone data but also acoustically synchronized.
“What the AI video generation model does is directly add the same inputted audio and perform the lip sync in accordance.”
Alejandro De Pasquale — Unreal Artist, Filmmaker, Animator
AI Studio’s ‘Single Talking Actor’ UI displaying the iClone-generated EVA character thumbnail, audio input, for lipsync AI output.
AI Model Selection Criteria
Criteria
Seedance 2.0
Kling 3.0
Google Veo 3.1
LTX 2.3
Overall Quality (Motion smoothness, camera control, visual effects, character animation, etc.)
★★★★★
★★★★
★★★
★★
Character Consistency (e.g., facial features or outfit appearance)
★★★★★
★★★★
★★★
★★
Style Consistency
★★★★★
★★★★
★★★
★★
Multi-Shot (Generates multiple scenes in sequence for storyboard creation)
★★★★★
★★★★
★★★
★
Multi-Dialogue (Generates audio for conversations between multiple characters)
★★★★★
★★★★
★★★
★★
Output Speed
★★★★
★★★★★
—
—
Celebrity Generation Support
—
V
V
V
Reference Support in AI Studio (v1.01) (AI Actor, Image, Video, and Audio Inputs)
V
—
—
—
Seedance 2.0: Highest overall quality but does not support celebrity generation.
LTX 2.3: Fastest model but lowest quality.
Higher-performance AI video models typically cost more, but they often require fewer attempts to achieve the ideal result.
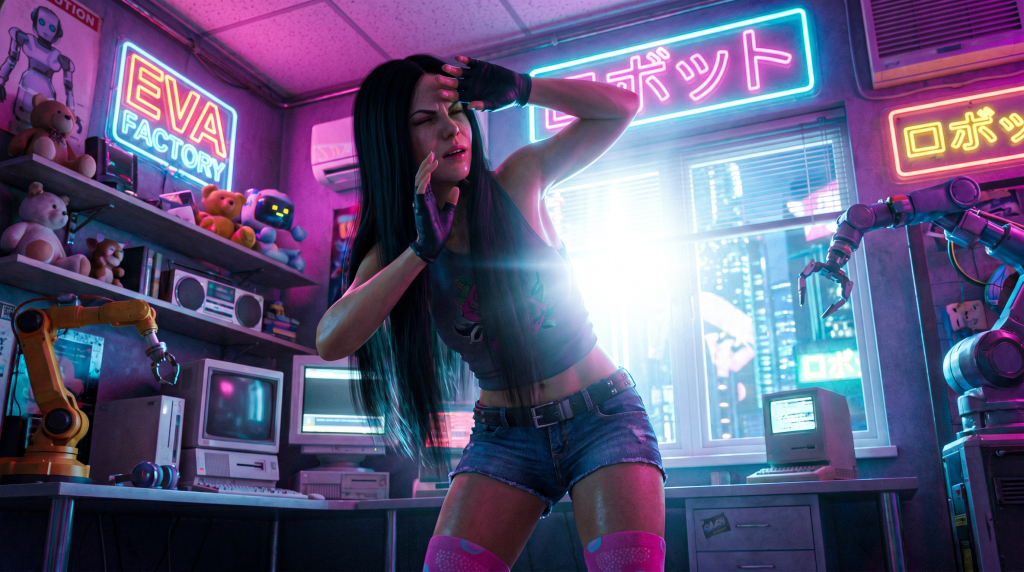
Alerender’s EVA AI Actor (iClone/CC5) rendered with AI Studio, recoils in a neon AI Studio lab with retro tech & robotic arms, guiding AI video.
Alejandro De Pasquale
Alejandro De Pasquale, known by his online moniker Alerender, is a storyteller whose creative journey began at the age of nine with rudimentary comics. Over the years, he has mastered diverse tools and skills, evolving from scripting movies and producing motion graphics to specializing in bringing characters and immersive 3D worlds to life. Alejandro’s current focus is the “EVA Project,” an animated series developed using Unreal Engine and Reallusion tools such as ActorCore, iClone 8, and Character Creator 5. The EVA Project chronicles a character’s awakening in a high-security complex with fragmented memories, driven by a quest for answers about a destroyed Earth.
Alejandro’s workflow involves meticulously crafting his EVA character in Character Creator 5 and animating her with his Perception Neuron MOCAP suit via iClone Motion LIVE. He then utilizes these high-fidelity 3D animations as guides within Reallusion’s AI Studio. This methodical approach ensures that the AI-generated visuals for the EVA Project maintain the exact character identity and motion fidelity he envisions, preventing the common pitfalls of AI hallucination and enabling him to produce consistent, high-quality animated content independently.
“Honestly, with this is AI Studio workflow I can do everything by myself in my mini studio. I can create precise iClone animations to strictly guide AI in a pretty independent way with all these resources.”
Alejandro De Pasquale — Unreal Artist, Filmmaker, Animator
Conclusion
The integration of iClone 8 and Character Creator 5 with AI Studio, particularly when leveraging precision motion capture data, offers an unparalleled workflow for filmmakers and directors seeking to create high-quality, consistent AI-generated videos without compromising on character identity or artistic vision. This approach empowers creators like Alejandro De Pasquale to master AI production, ensuring their stories are told exactly as intended.
Reallusion’s iClone 8, CC5, & Perception Neuron MOCAP workflow for AI Studio: 3D guide, live mocap, UI, AI-generated EVA character.
FAQs
How do I export a rigged character from Character Creator 5 to AI Studio?
You first create your character in Character Creator 5, then transfer it to iClone 8 for animation and scene setup. From iClone, you capture either an image of the first frame or the full animation sequence using specific viewport capture features, which then feed directly into AI Studio as a 3D guide. This process trains the character as an AI Model (iModel) within AI Studio, ensuring its consistent appearance across generative video projects.
What is the difference between generating an AI video with a full texture transfer versus a gray model in AI Studio?
When generating an AI video, full texture transfer ensures the AI strictly adheres to your iClone character’s exact appearance, maintaining its original look, clothing, and skin. Conversely, transferring a gray model gives the AI significantly more creative freedom to generate textures, clothing physics, and even new stylistic elements, resulting in a less constrained and potentially more unique AI-generated aesthetic.
Can I use iClone PERSONAL to guide AI Studio videos without any time limitations?
Yes, iClone PERSONAL is a completely free version of iClone that offers all core animation tools and numerous character and motion assets. Unlike previous time-limited trials, you can use iClone PERSONAL indefinitely to create animations and seamlessly connect them with AI Studio for your AI-guided video generation projects, eliminating previous pricing barriers for new users.
* AI point credits required for 3rd-party AI video generation.
Why does Alejandro De Pasquale emphasize assigning specific AI Actors in AI Studio, even with a single character?
Alejandro De Pasquale emphasizes assigning specific AI Actors in AI Studio, even for a single character, because it ensures the generative AI model precisely uses the pre-trained character model. While AI Studio might automatically select the only character present, explicit assignment with the ‘Assign Actors’ feature removes any ambiguity, guaranteeing consistent character identity and appearance, especially crucial when dealing with intellectual property.
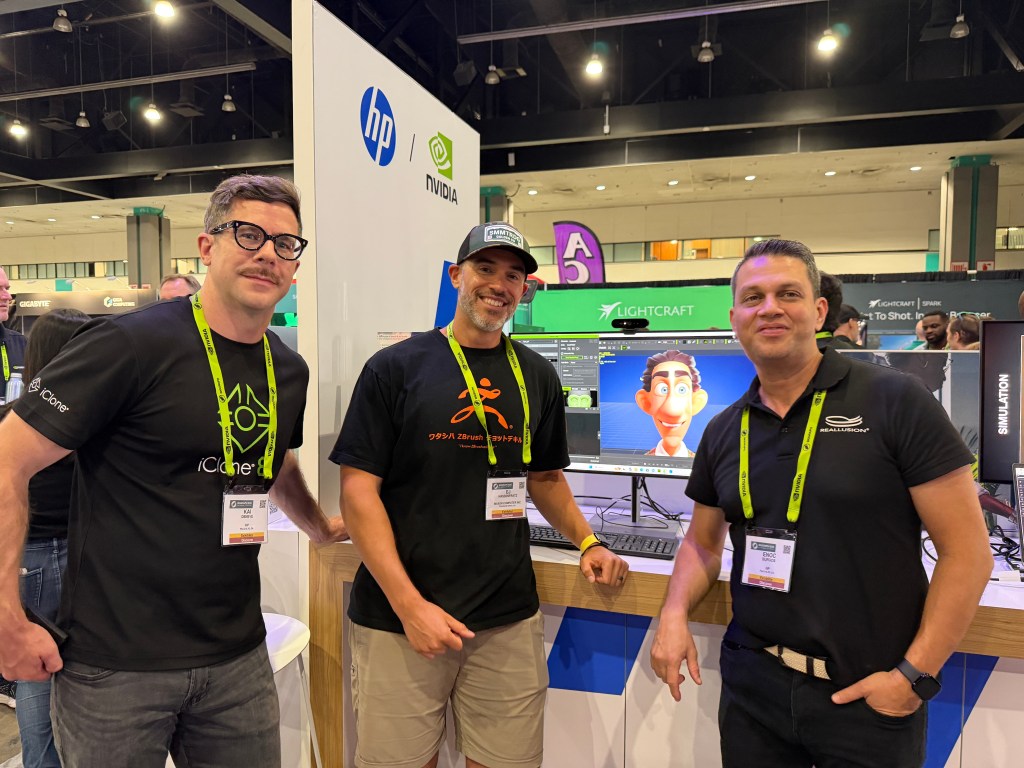
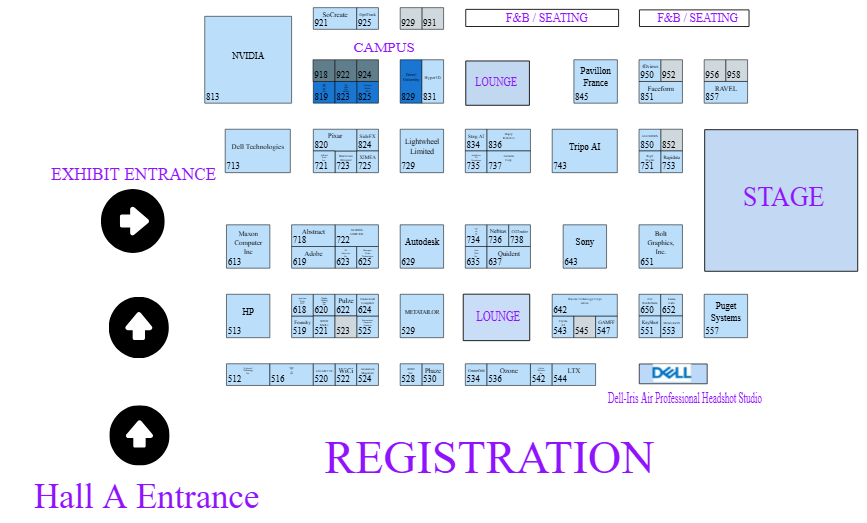
SIGGRAPH has always been the ultimate breeding ground for cutting-edge graphics tech, and this year’s show in Los Angeles is shaping up to be one for the books. We are thrilled to announce that Reallusion is heading to SIGGRAPH 2026, partnering with HP at Booth #513 from July 21st to 23rd!
Reallusion will be showcasing how we are pushing the limits of real-time 3D animation and digital human creation using state-of-the-art NVIDIA RTX technology. Whether you are an indie creator, a seasoned studio animator, or a student just starting your 3D journey, we have some massive updates that will change the way you work.
The Main Event: Cutting-Edge Tech Showcases
We’re packing some serious horsepower at the HP booth this year. Visitors will get a front-row seat to three of our most advanced, GPU-driven technologies:
Experience the official rollout of our 3D-guided AI rendering toolset. Integrated directly into the Reallusion ecosystem, AI Studio bridges traditional 3D artistry with next-gen AI workflows. Generate stunning, character-consistent visuals using AI models guided directly by your own 3D scene data.
2. RTX Render
Get a sneak peek at our highly anticipated, GPU-accelerated photorealistic render engine. Built specifically for iClone and Character Creator, RTX Render (entering open beta in late July 2026) lets you produce movie-quality, path-traced visuals directly inside the software. Say goodbye to lengthy external exports just to see your final look.
3. AccuFACE 2
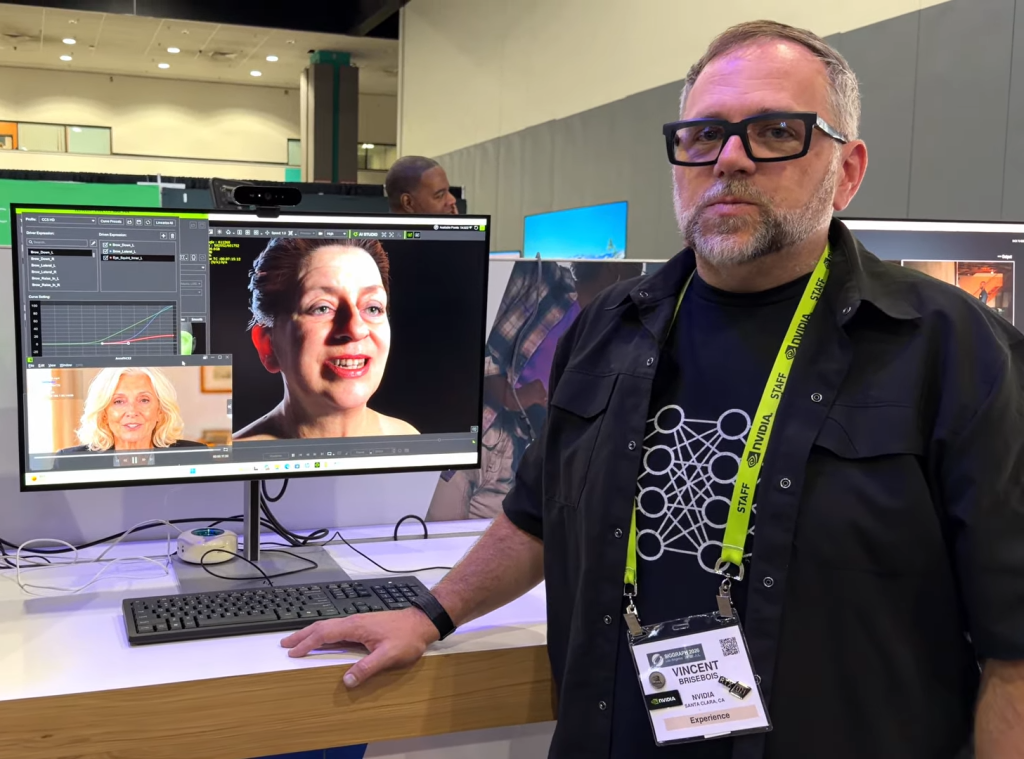
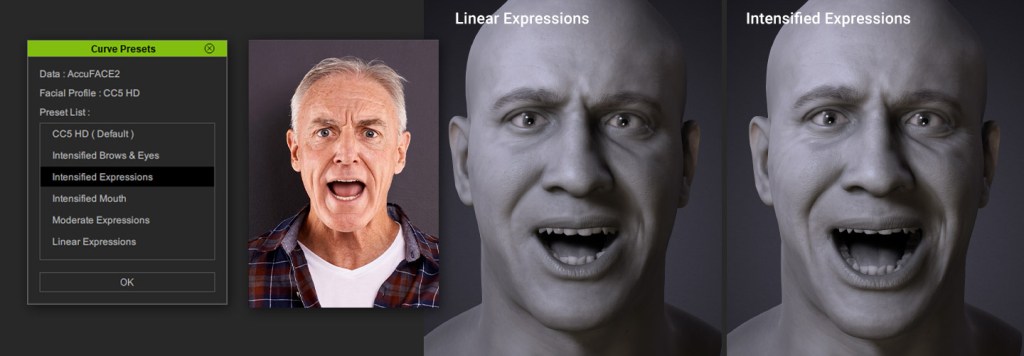
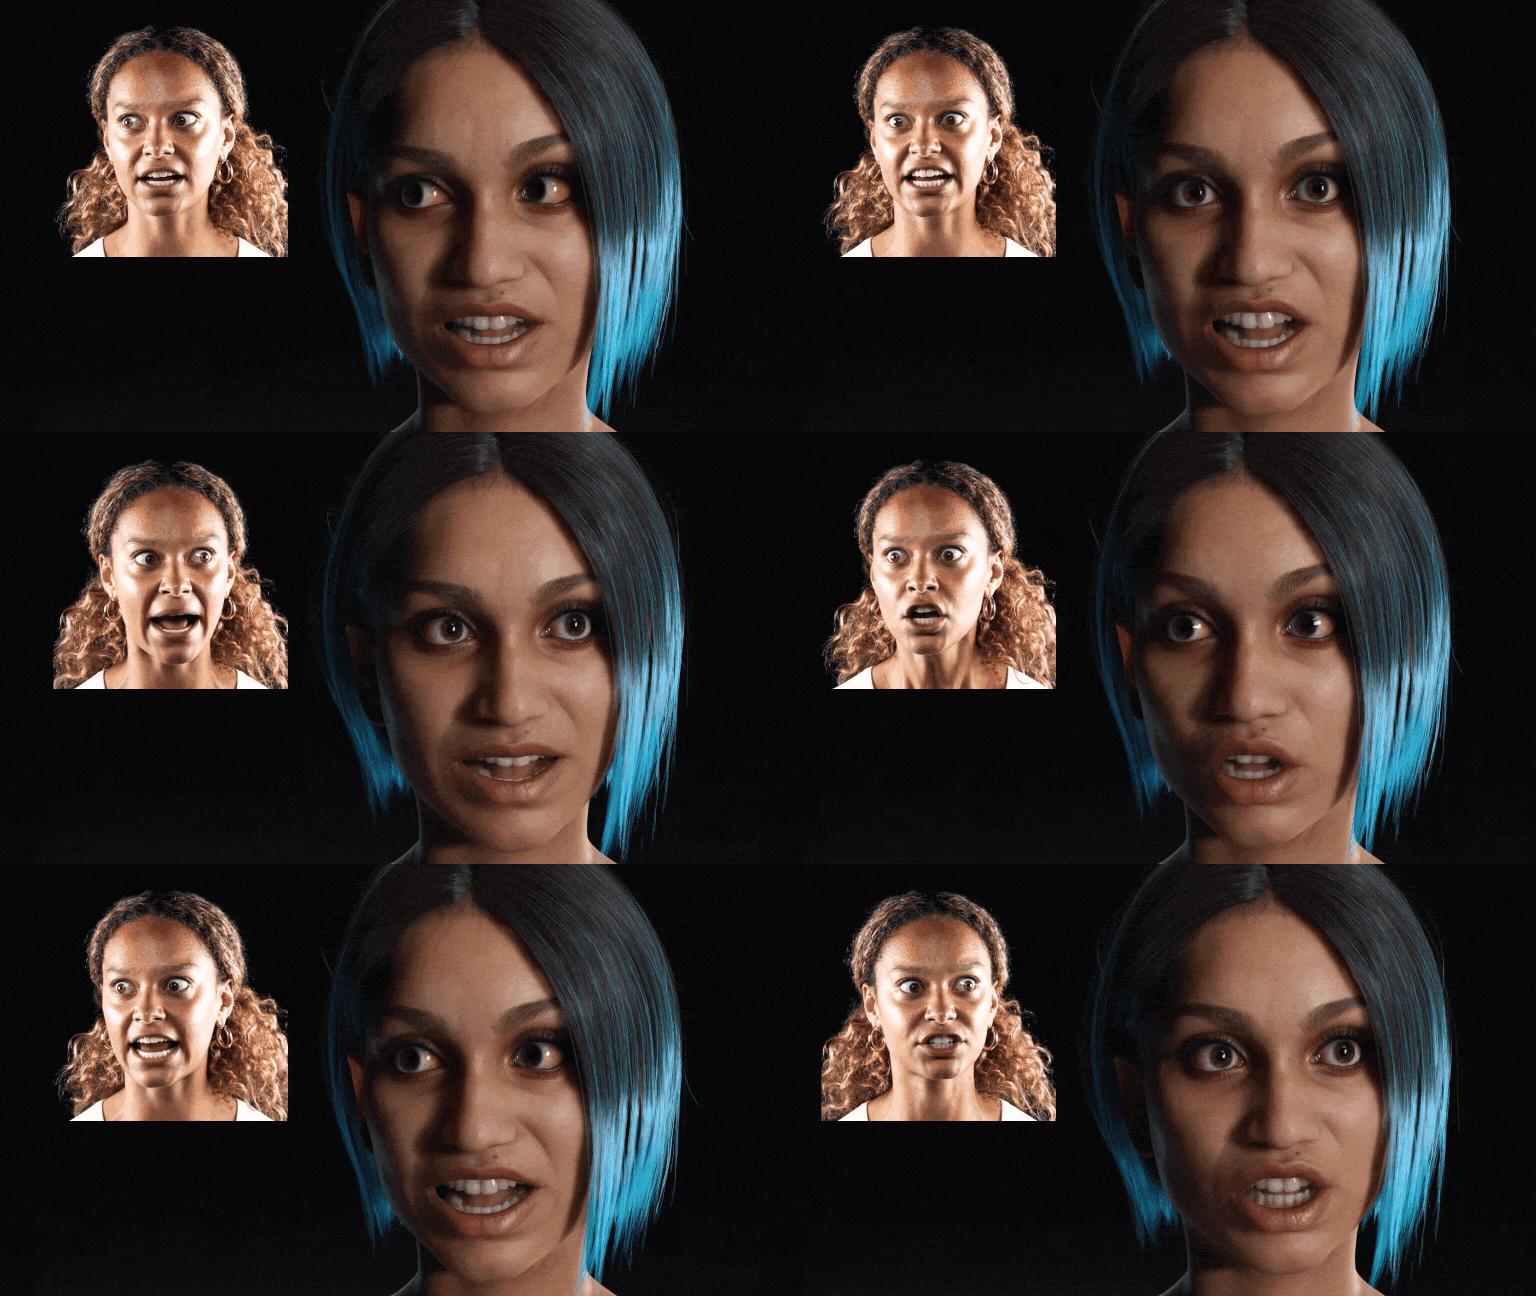
Witness the next evolution of facial performance capture. AccuFACE 2 delivers ultra-precise, real-time facial tracking and expression capture. Animators can translate complex human emotion onto digital characters instantly using only a standard camera feed or pre-recorded video.
We believe that the future of 3D storytelling should be accessible to everyone. That’s why at SIGGRAPH 2026, we are officially shining the spotlight on iClone Personal—our permanently free edition of iClone.
What does “permanently free” mean?
We have completely retired the traditional 30-day trial. With iClone Personal, you get unlimited, unrestricted access to the full iClone animation, production, and rendering toolset. You can learn, build scenes, direct virtual movies, and render your creations indefinitely—entirely for free.
For creators looking to integrate assets into external pipelines like Unreal Engine or Unity, the free tier includes 30 lifetime 3D project exports. Once you are ready to scale up to professional production, you can easily transition to a subscription or perpetual license without ever losing access to your project files.
Beyond local hardware, Reallusion is also redefining cloud-based pipelines. Stop by the CenterGrid Booth #534 to see how CenterGrid’s advanced virtual machine technology powers Reallusion’s flagship tools—including AI Studio, iClone, and Character Creator.
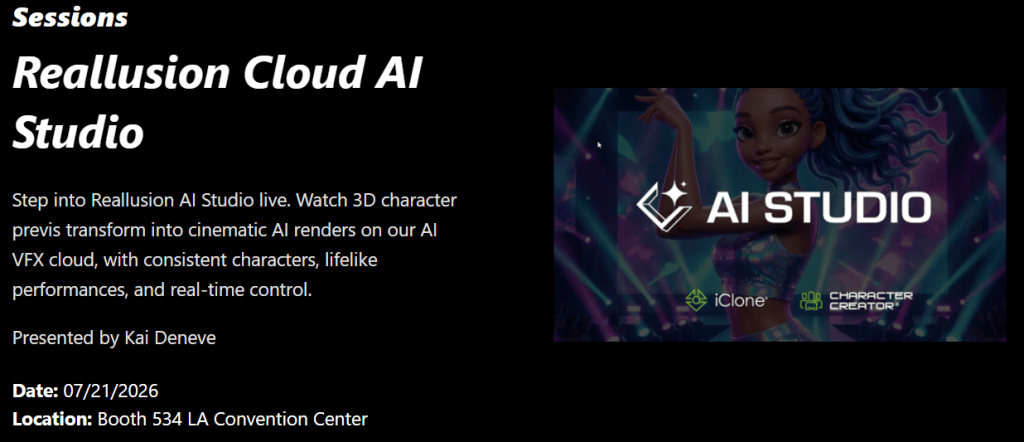
Mark your calendar for July 21st, 2026, for an exclusive live demonstration hosted by Kai Deneve:
From Prompt to Production: Building Commercial Content
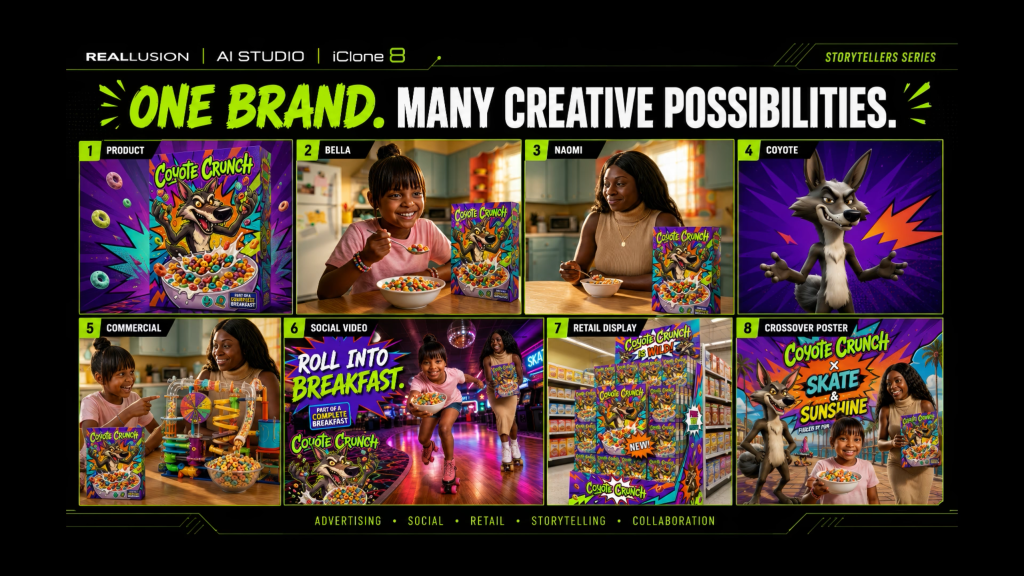
Storytelling isn’t limited to films and animation. Every successful advertisement, social campaign, and brand experience tells a story. The challenge for modern creators is producing that content quickly while maintaining quality, consistency, and creative control.
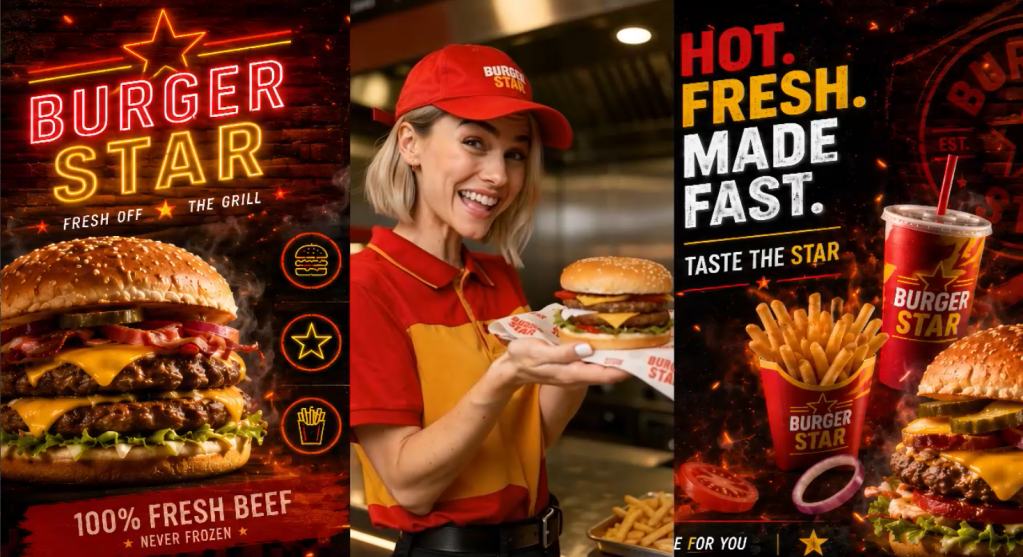
In this episode of AI Studio Storytellers, Max Thomas takes a behind-the-scenes look at the creation of a commercial lifestyle campaign produced using Reallusion’s Character Creator, iClone, and AI Studio. More than a showcase of AI-generated imagery, the project demonstrates how professional production techniques can be combined with AI workflows to create marketing content that is both visually compelling and production-ready.
The Challenge of Commercial AI Content
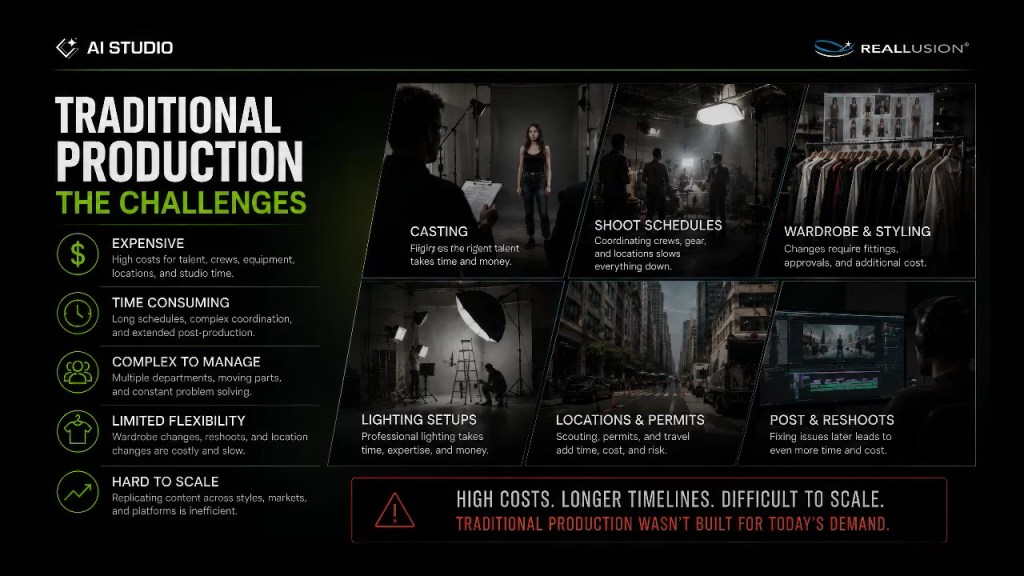
Creating a single AI-generated image is easy. Creating an entire campaign with consistent characters, environments, and visual storytelling is much more difficult. Commercial projects require continuity. A character must look like the same person from image to image. Wardrobe choices must remain consistent. Visual style, composition, and branding need to feel intentional across every deliverable. Without a structured workflow, these elements often break down. This is where Reallusion’s production-first approach provides a significant advantage.
Creating the Foundation with Character Creator
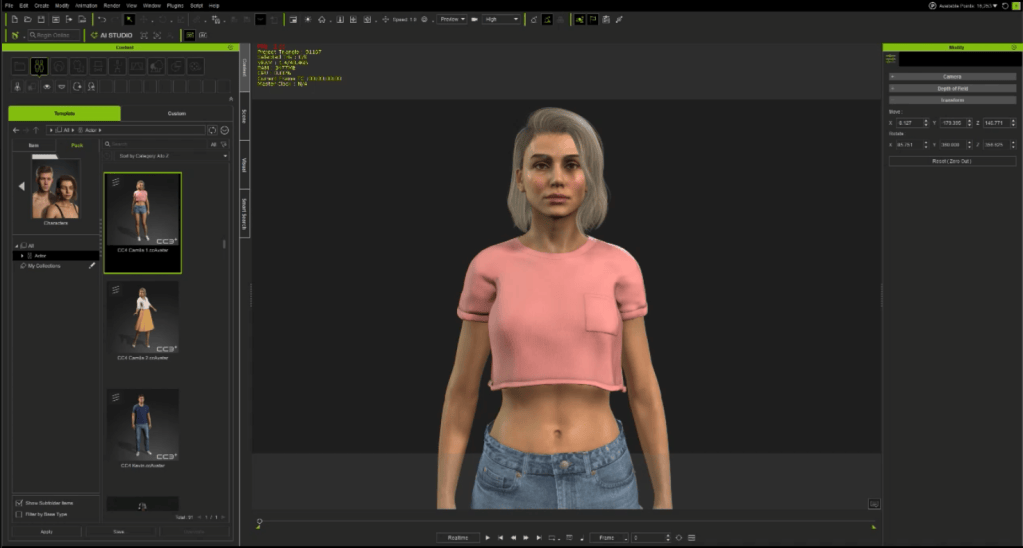
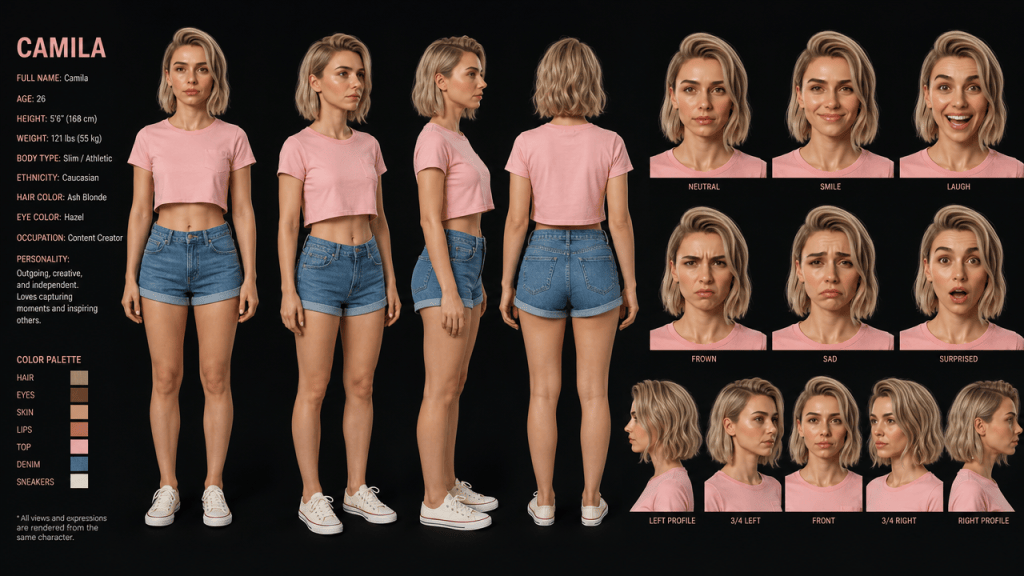
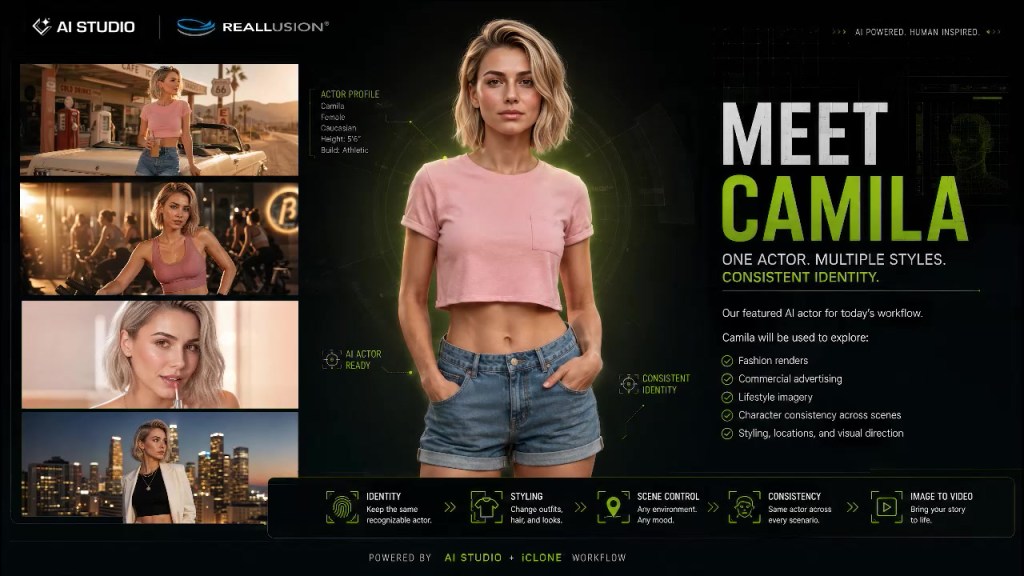
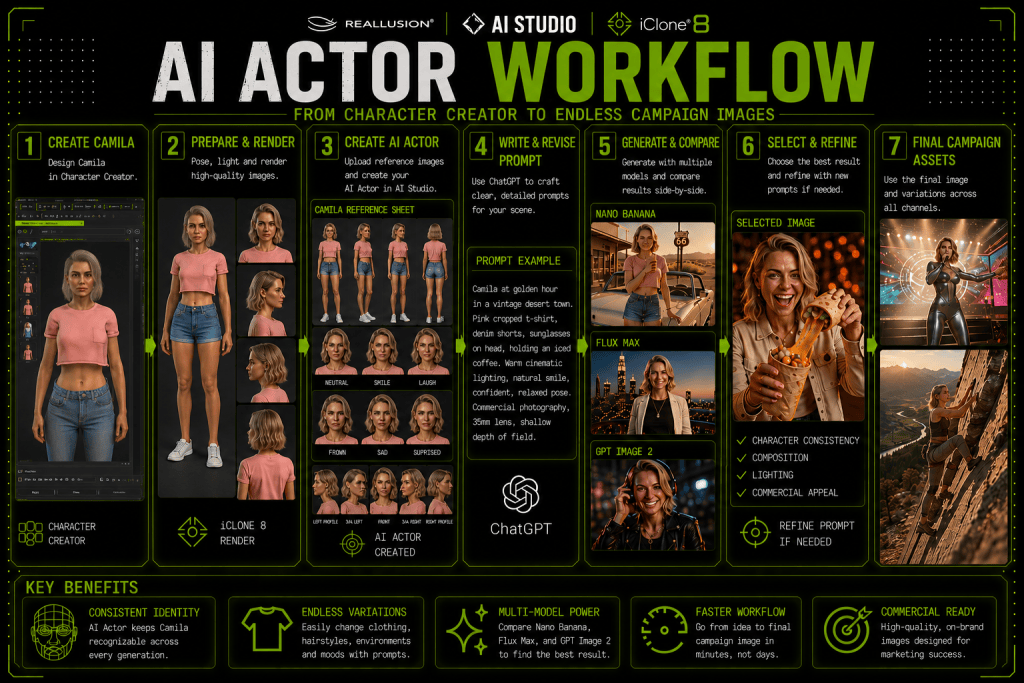
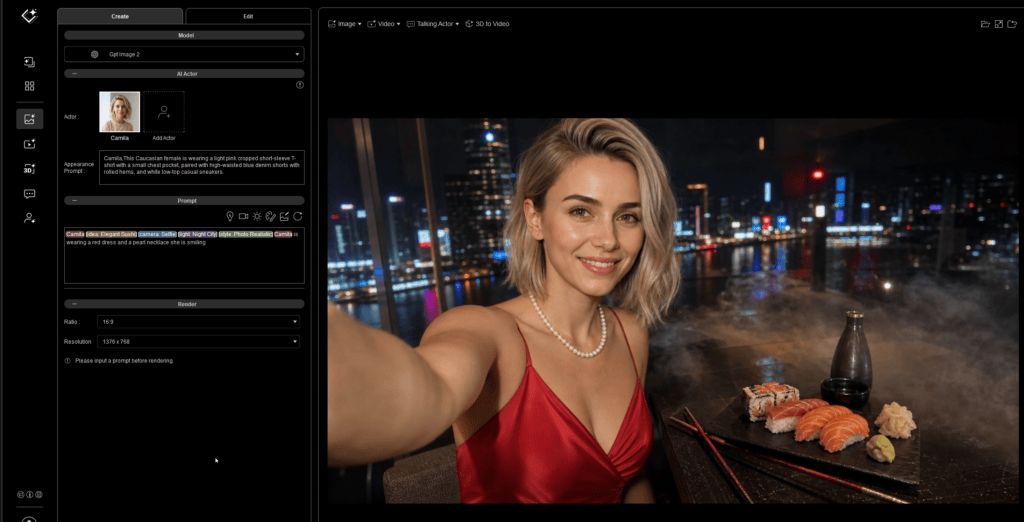
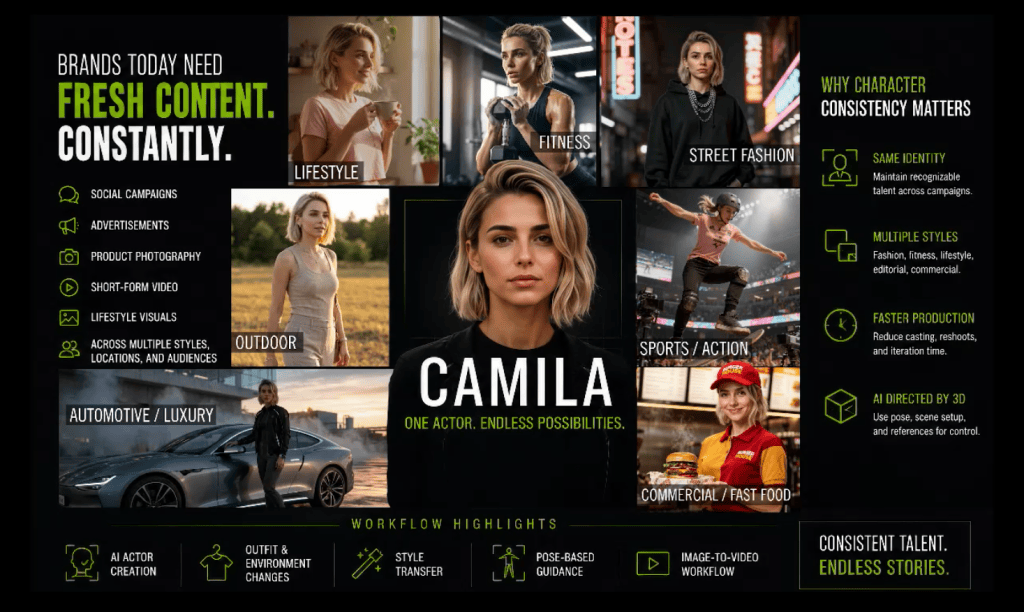
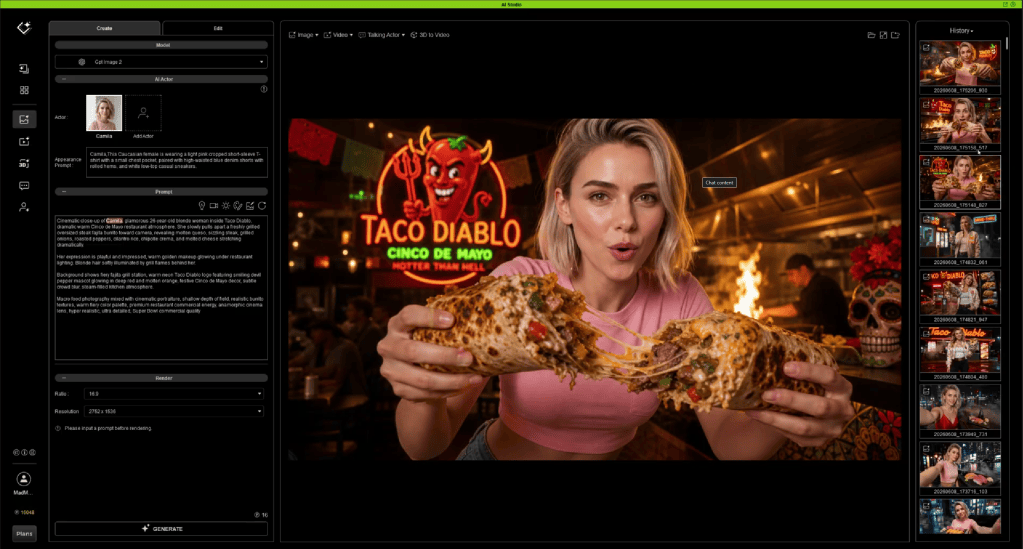
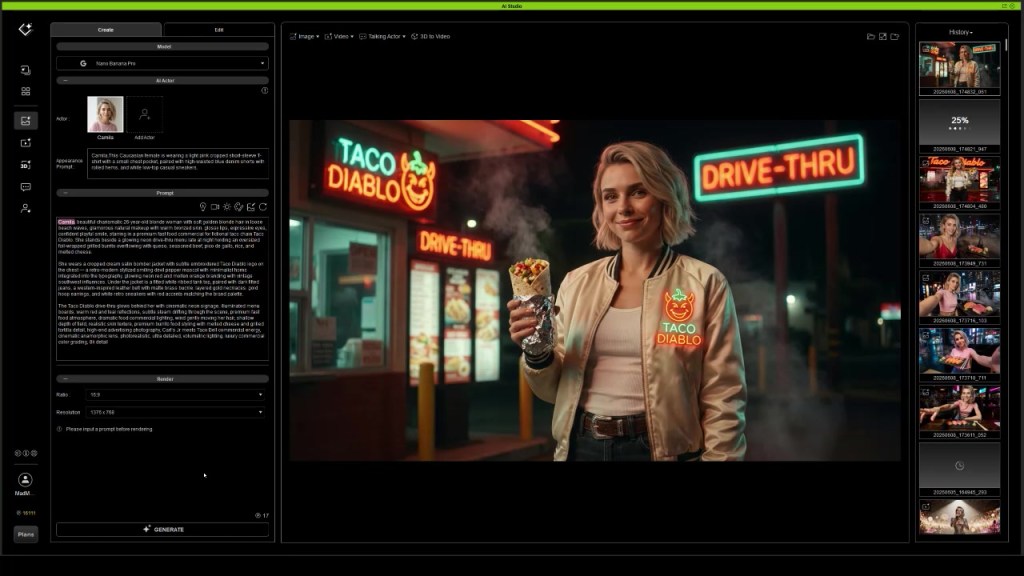
At the center of the project is Camila, a custom AI Actor created using Reallusion’s Character Creator, iClone, and AI Studio workflow. Max began by developing the character in Character Creator before preparing her for AI Studio through iClone. This same process can be used with Character Creator characters, other 3D characters, or image references to create consistent AI Actors for AI-powered productions.
Once established in AI Studio, Camila became the foundation for the entire campaign. From restaurant scenes and marketing imagery to musical performances, the AI Actor maintained a consistent appearance across every generation. By combining Character Creator, iClone, and AI Studio, Max was able to create a reusable digital performer that preserved character continuity while providing the flexibility to rapidly iterate on creative ideas.
This foundation becomes the basis for maintaining continuity throughout the entire campaign.
For commercial content, that consistency is critical. Whether creating a single social media post or an entire advertising series, recognizable characters help strengthen visual storytelling and brand identity.
The Art of Prompting Like a Filmmaker
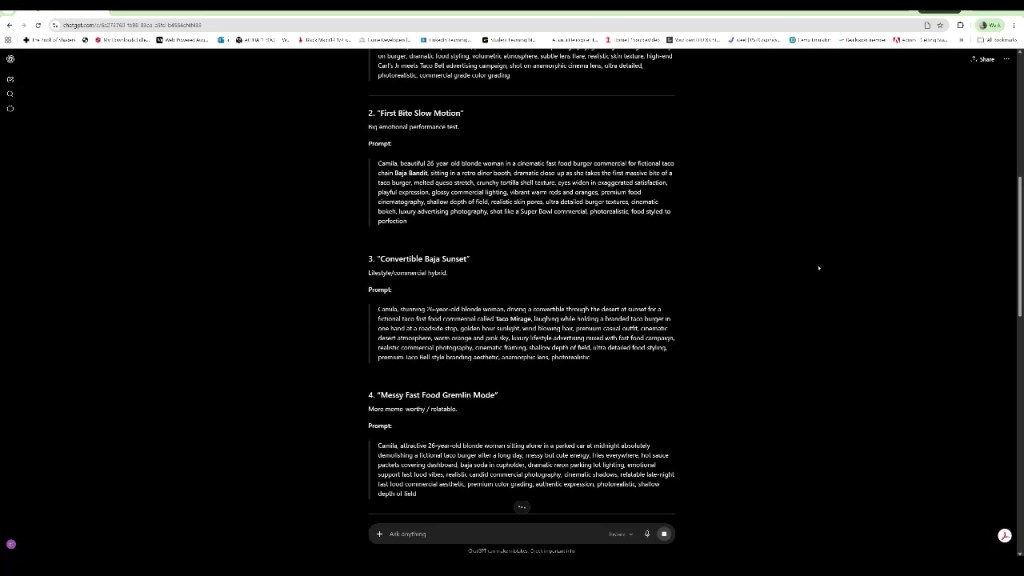
One of the key educational takeaways from this project is the importance of prompt construction. Thomas used ChatGPT to refine prompts and increase the details of the original prompts.
Many creators approach prompting as a simple description of what they want to see. Professional results often require a more structured approach.
The prompts used throughout this project were built using the same language found in commercial photography and filmmaking, including:
Subject and character descriptions
Environment and location details
Wardrobe styling
Camera framing and shot design
Lens choices
Lighting direction
Mood and emotional tone
Marketing and brand objectives
By combining these elements into layered prompts, creators can guide AI toward a specific creative vision rather than leaving results to chance.
The process mirrors the collaboration between a photographer, cinematographer, creative director, and marketing team.
AI Studio: Turning Direction into Content
Changing Looks Without Changing the Character
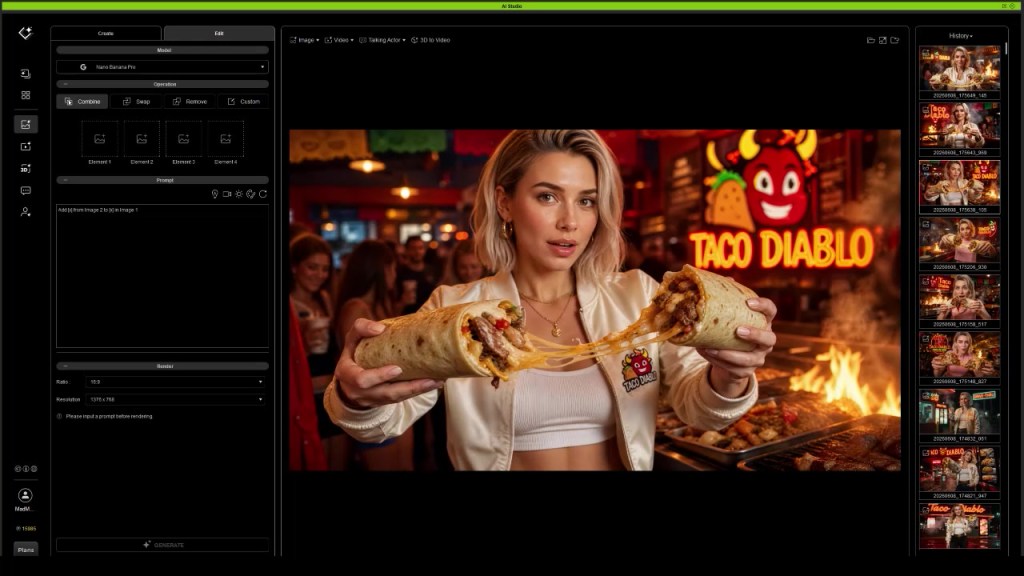
One of the advantages of AI Actors is the ability to explore new wardrobe and hairstyle options without losing character identity. Rather than creating a new character for every scene, Max used Camila’s AI Actor as a consistent foundation and then described clothing, hair, and styling changes through prompting. This allowed him to quickly test different commercial looks while maintaining the facial features and overall likeness established in Character Creator. By combining AI Actors with detailed styling prompts, creators can generate a wide range of appearances while preserving continuity across an entire campaign.
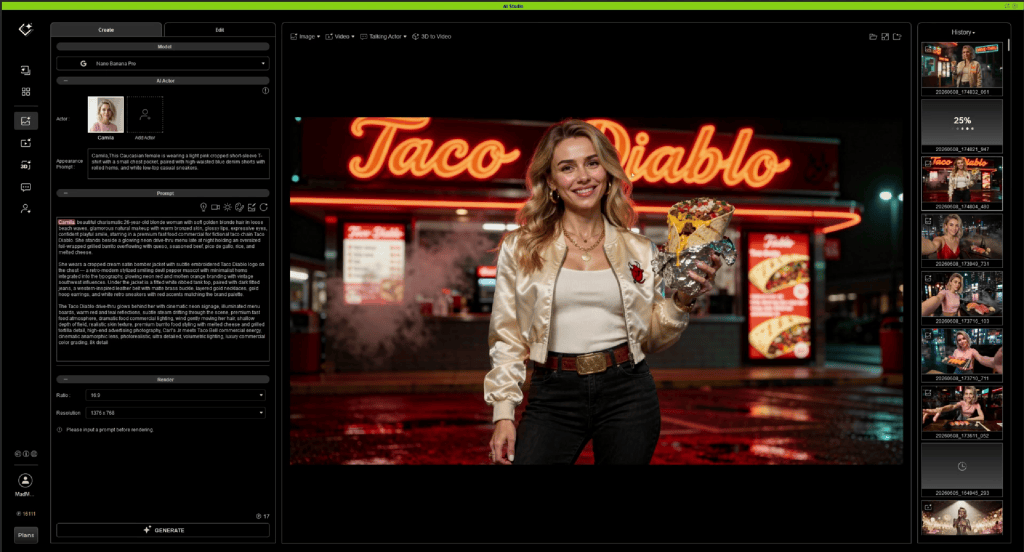
With the visual foundation established and prompting strategy defined, AI Studio becomes the engine that transforms creative direction into finished content.AI Studio allows creators to generate, evaluate, and refine images while preserving the visual consistency established through Character Creator and iClone.This ability to iterate rapidly is one of the most valuable advantages of AI-assisted production.
Different wardrobe options can be explored, as in the image above, where Camila AI Actor was used, and a simple prompt to change the clothing to a red dress makes a quick wardrobe change. Camera angles can be adjusted. New marketing concepts can be tested. Entire visual directions can be evaluated within minutes instead of days.
What once required multiple photoshoots and extensive production resources can now be accomplished through a streamlined creative workflow.
Comparing AI Studio Image Models: Nano Banana, Flux Max, and GPT Image 2
One of the strengths of AI Studio is access to multiple image generation models within a single workflow. Rather than searching for the “best” model overall, Max demonstrated how different models excel at different creative tasks and how comparing results can help creators choose the right tool for a specific project. Using the same AI Actor and creative direction, Max generated variations with Nano Banana, Flux Max, and GPT Image 2 to evaluate how each model interpreted character consistency, styling, composition, and realism.
Nano Banana delivered some of the strongest results for character fidelity and reference adherence. When maintaining Camila’s identity was the priority, Nano Banana consistently preserved facial features, wardrobe details, and overall likeness, making it particularly useful for AI Actor workflows where continuity is critical.
Flux Max produced highly polished and visually striking imagery with strong photographic qualities. Its interpretation often emphasized cinematic lighting, commercial photography aesthetics, and refined image detail, making it well-suited for advertising and marketing visuals.
GPT Image 2 demonstrated impressive versatility, balancing prompt interpretation with image quality. The model responded well to creative direction and provided another option for exploring visual variations while maintaining the overall intent of the scene.
Rather than relying on a single model, Max used AI Studio’s ability to compare outputs side by side. This allowed him to evaluate strengths, identify the best result for a given shot, and iterate quickly without leaving the platform. The process highlights an important advantage of AI Studio: creators can focus on creative direction while leveraging multiple leading image models to achieve the desired outcome.
From Song to Performance: Using iClone, Suno, and AI Studio
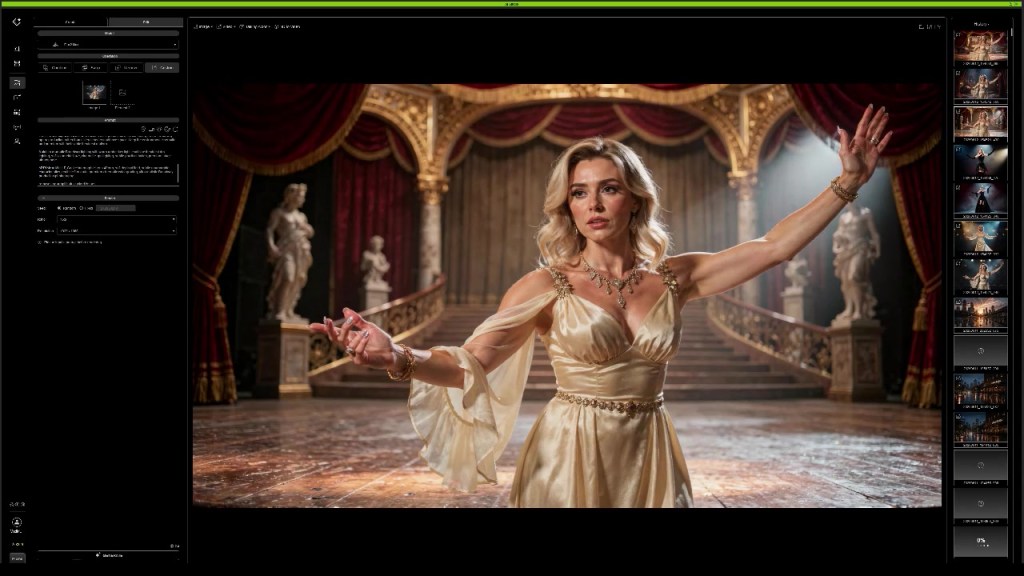
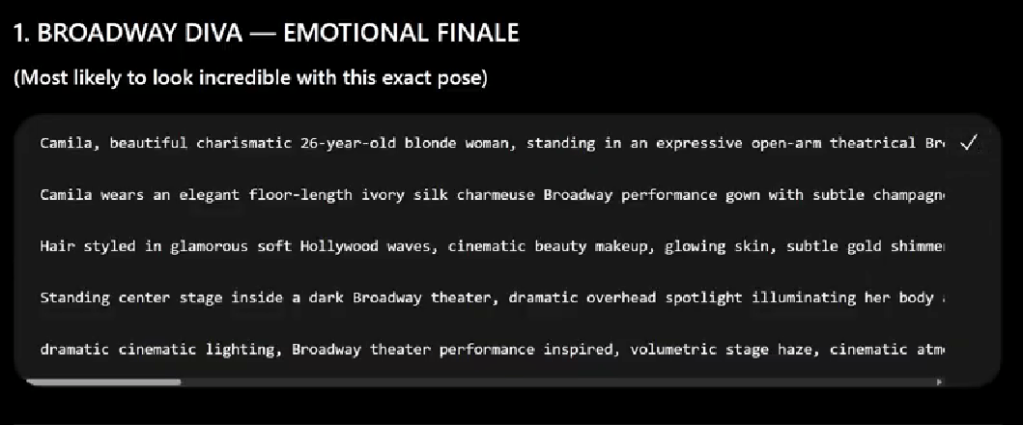
Before generating the performance, Max used iClone to pose Camila exactly as he envisioned for the opening shot. By establishing the character’s stance, body language, camera angle, and stage presence in 3D, he was able to create a clear visual foundation before moving into AI generation. This step ensured that the performance started with intentional direction rather than relying on chance.
One of the most interesting aspects of the project was how Max approached music generation as part of the storytelling process rather than as a standalone audio exercise.
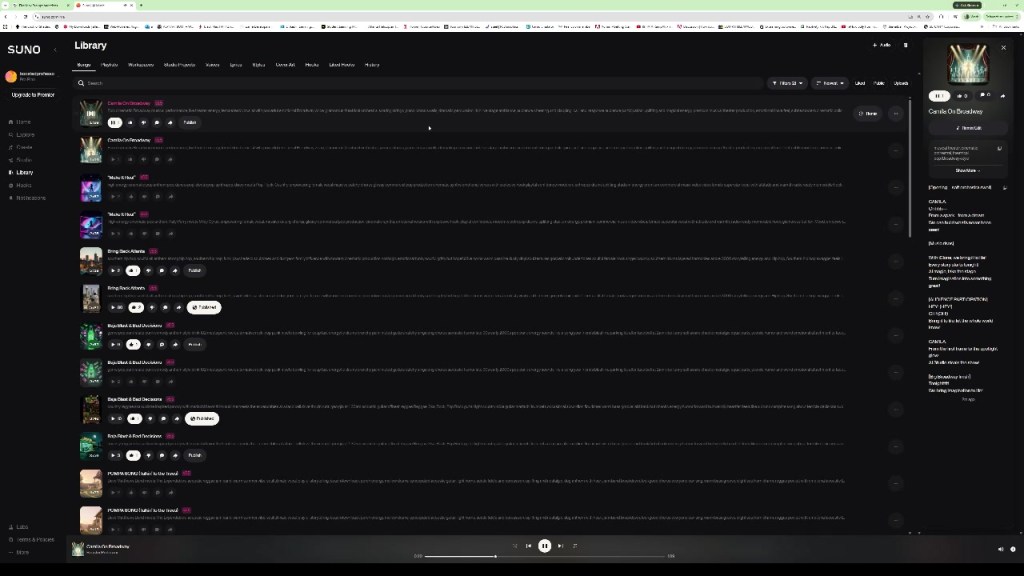
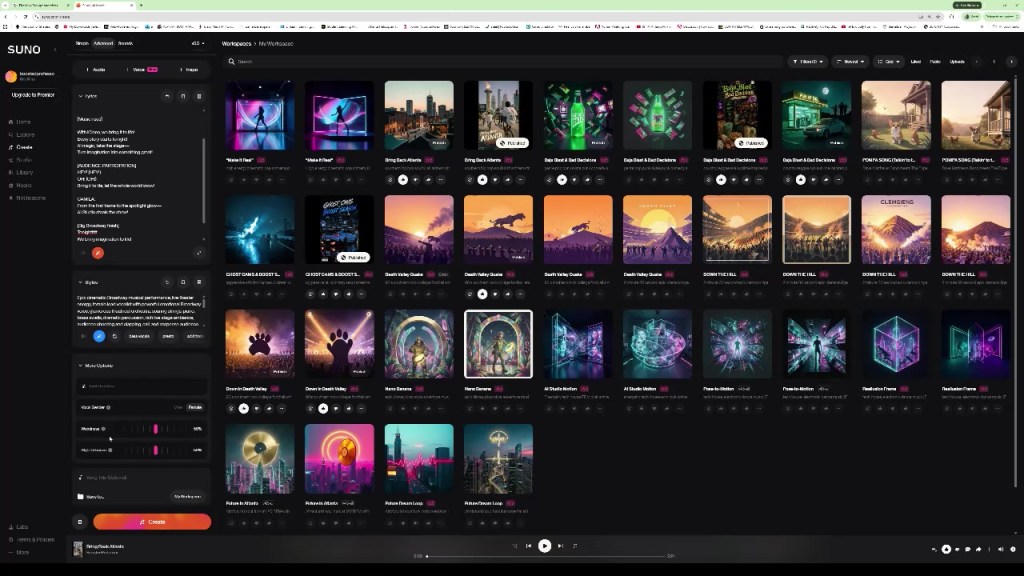
After developing the character of Camila and establishing her visual identity, Max used Suno to create an original Broadway-inspired musical performance designed specifically for the character.
The goal wasn’t simply to generate a song, but to create a performance piece that would feel authentic to the world and personality of the campaign.
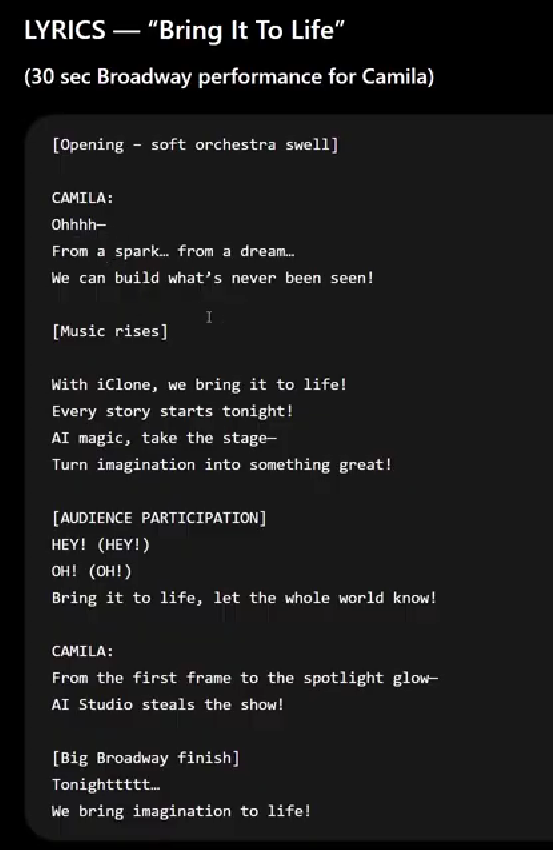
The workflow began with lyrics written for the project, including references to storytelling, iClone, and AI Studio. Rather than relying on generic music prompts, Max structured the request around a specific musical format: a short Broadway-style performance with a clear opening, build, audience engagement, and finale. By defining the musical structure, emotional tone, and performance style upfront, he was able to guide Suno toward results that felt intentional and production-ready.
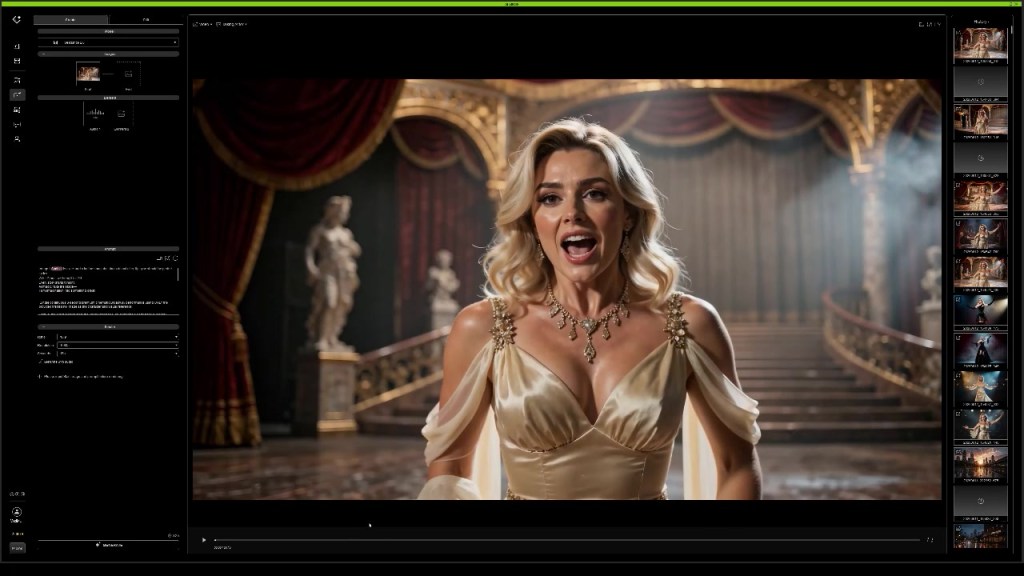
Once the song was generated, the audio became the foundation for the next stage of the pipeline. Using AI Studio, the vocal performance was paired with Camila’s visual identity and passed into video generation. In the example shown, the prompt emphasizes that the uploaded audio should remain unchanged while the character delivers the song with perfect lip synchronization, emotional singing, and theatrical stage presence.
This approach highlights an important creative principle demonstrated throughout the project: AI performs best when each stage of production has a clear role. Suno generated the music and vocals, while AI Studio transformed that audio performance into a fully realized visual experience. The result is a workflow where creators can develop original songs, generate vocal performances, and animate digital characters from a single creative concept.
A New Workflow for Storytellers and Marketers
The commercial lifestyle project featured in this episode demonstrates how AI is evolving from a creative experiment into a practical production tool.
By combining Character Creator, iClone, and AI Studio, creators gain the ability to:
Develop consistent digital talent
Direct scenes before generation
Apply professional prompting techniques
Generate campaign-ready imagery
Iterate rapidly
Scale content production
Maintain visual continuity across multiple deliverables
Most importantly, they gain creative control.
AI Studio Storytellers
AI Studio Storytellers highlights creators who are pushing the boundaries of digital storytelling through Reallusion’s AI Studio workflow. Through behind-the-scenes breakdowns, production insights, and real-world projects like Max Thomas’s commercial lifestyle campaign, the series explores how artists combine Character Creator, iClone, AI Studio, and leading AI models to develop consistent digital actors, direct scenes in 3D, craft effective prompts, generate music and performances, and transform creative ideas into polished productions. Each episode reveals practical techniques and creative workflows that demonstrate how creators can direct AI with purpose while maintaining artistic control from concept to final delivery.
Max Thomas is a Professor of Practice at Georgia State University’s Creative Media Industries Institute (CMII) and Co-Founder & CTO of Actor Capture. His work focuses on virtual production, digital humans, motion capture, real-time animation, and AI-assisted content creation. As an educator and industry practitioner, Max specializes in helping creators combine traditional production techniques with emerging AI tools to accelerate storytelling and creative development. He regularly speaks on the future of production workflows and the growing role of AI in media, education, and entertainment.
Reallusion released Headshot 3.1, a major update that brings comprehensive texture editing and painting directly inside Headshot. You can now paint, refine, and perfect your character textures without ever leaving the application, making your 3D character workflow in Character Creator faster and more seamless than ever before.
Paint Your Textures Directly Inside Headshot 3
Say goodbye to tedious round-trips to external image editors! Headshot 3.1 introduces a comprehensive, brush-based painting system explicitly designed for high-end facial texturing, keeping your focus entirely within the 3D viewport:
Diffuse Map Editing: Enjoy full brush capabilities to sketch, blend, and paint directly onto your 3D mesh.
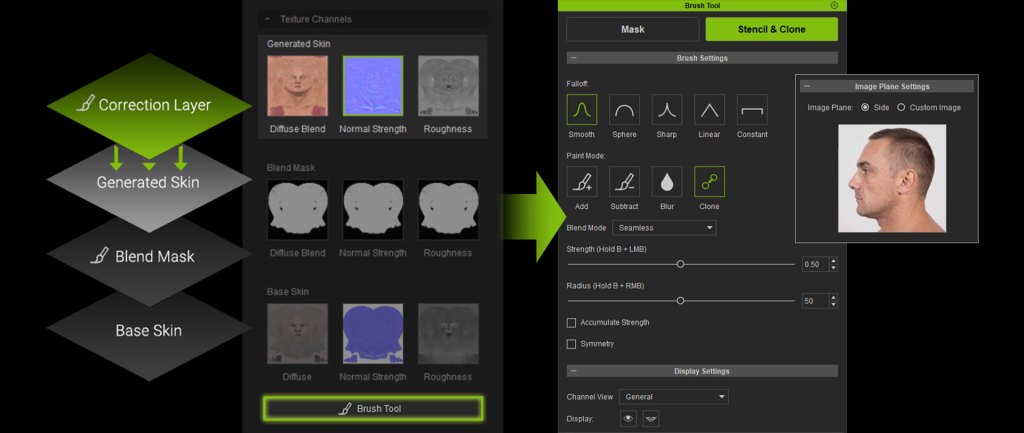
Stencil Brush Mode: Project and paint textures directly onto the 3D view using profile images or any custom photo for instant, real-world detailing.
Clone Brush: Sample a specific source area and clone visible textures to precisely eliminate blemishes or blend complex skin patterns.
Correction Layers: A brand-new, non-destructive layer system that allows you to experiment and iterate without damaging your base texture.
Industry-Standard Blend Modes: Fully supports classic modes like Normal, Darken, and Multiply to seamlessly fit your painting habits.
Dedicated Seamless Brush: Masterfully tailored to eliminate harsh facial texture seams and blend edges flawlessly with a single stroke.
Flexible Texture Workflow Management: Users can choose to keep the source front and side images for further editing, or merge them into diffuse channels to save space.
4K Profile AI Image Gen for Stencil Painting
While front-face generation is already highly optimized, Headshot 3.1 brings massive upgrades specifically to profile (side-face) AI image generation, ensuring your side-view inputs deliver the same high-fidelity quality:
4K Ultra-HD AI Generation for Profiles: AI image generation for profile views now officially supports crisp 4K resolution, capturing pore-level skin details from the side.
Smart Hair-Removal for Profile Images: New dedicated options for side-face images efficiently remove obstructing hair strands, ensuring an uninterrupted view of the skin and facial contours for a much cleaner texture bake.
Faster, More Accurate Model Matching
We’ve overhauled the alignment process to make it faster and foolproof for both beginners and industry pros. Achieving a perfect fit is now easier than ever:
New Flip Function: Instantly mirror overlays during the profile alignment step for faster, more intuitive point matching.
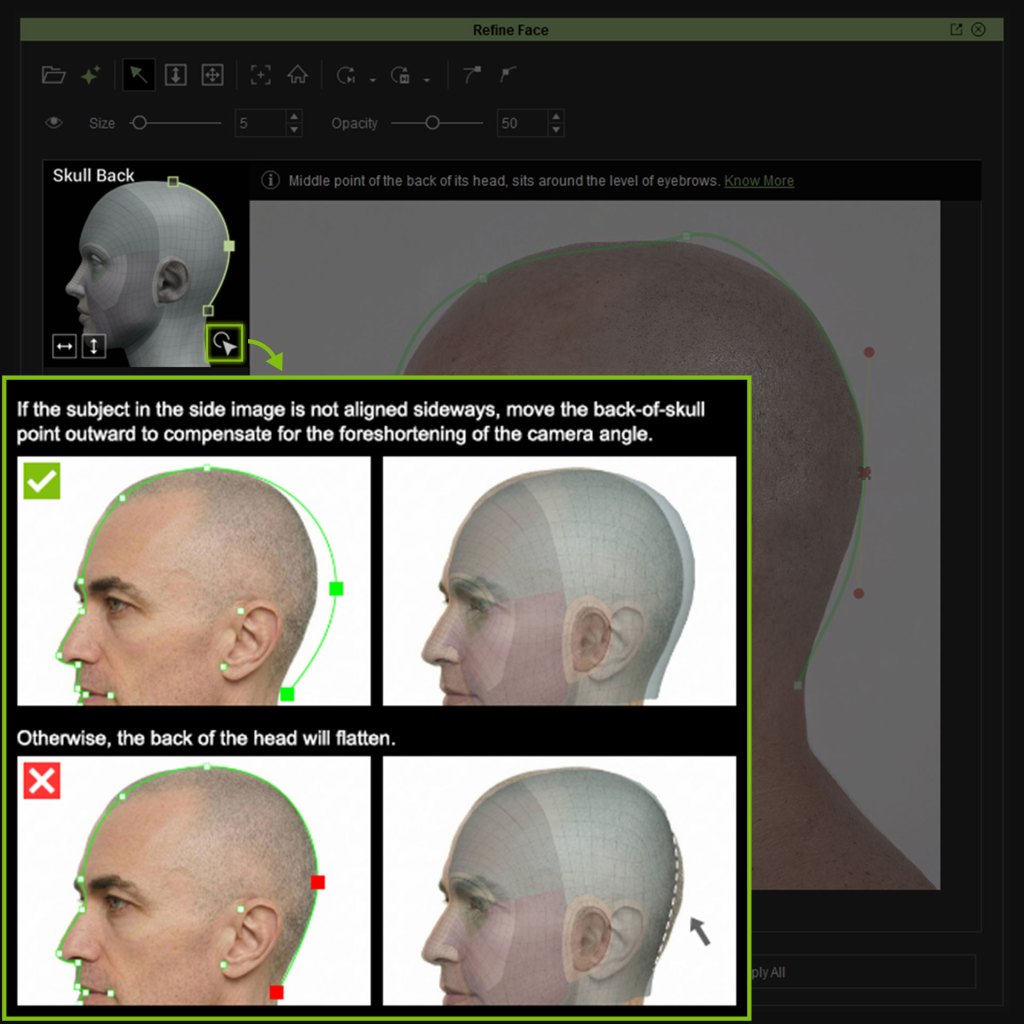
New Point Placement Guidance: High-quality visual legends highlight critical tracking points, complete with clear “good vs. bad” reference diagrams to eliminate guesswork.
Rock-Solid Core Fixes & Optimizations
We’ve also resolved several critical pipeline bugs to ensure a perfectly stable environment. Headshot 3.1 successfully maintains full fidelity for LOD 1 and 2 after ZBrush edits, prevents mesh distortion when using Refine Face after changing head scales, ensures body color consistency during texture replacement, and fully supports Windows usernames containing non-English characters.
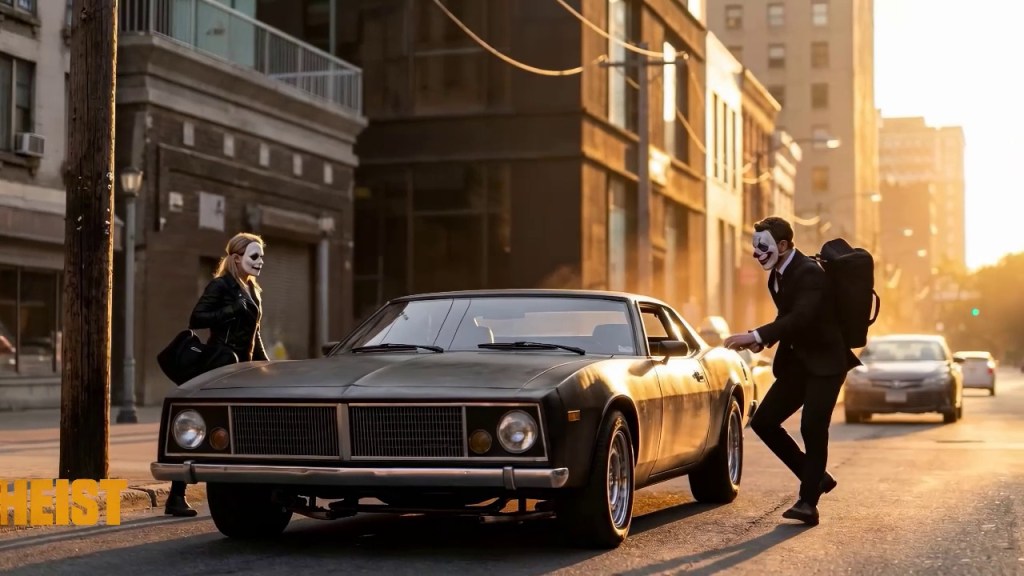
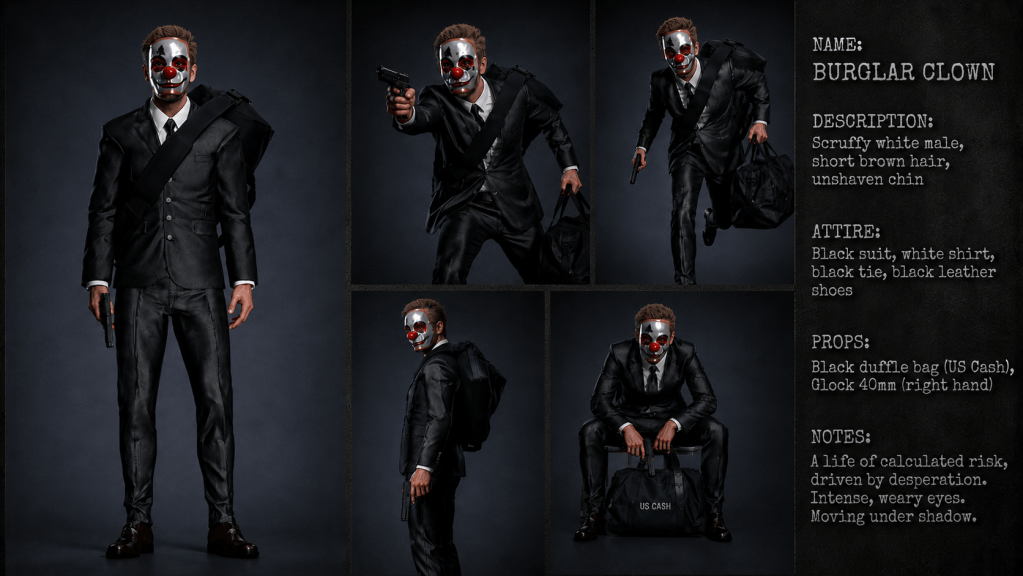
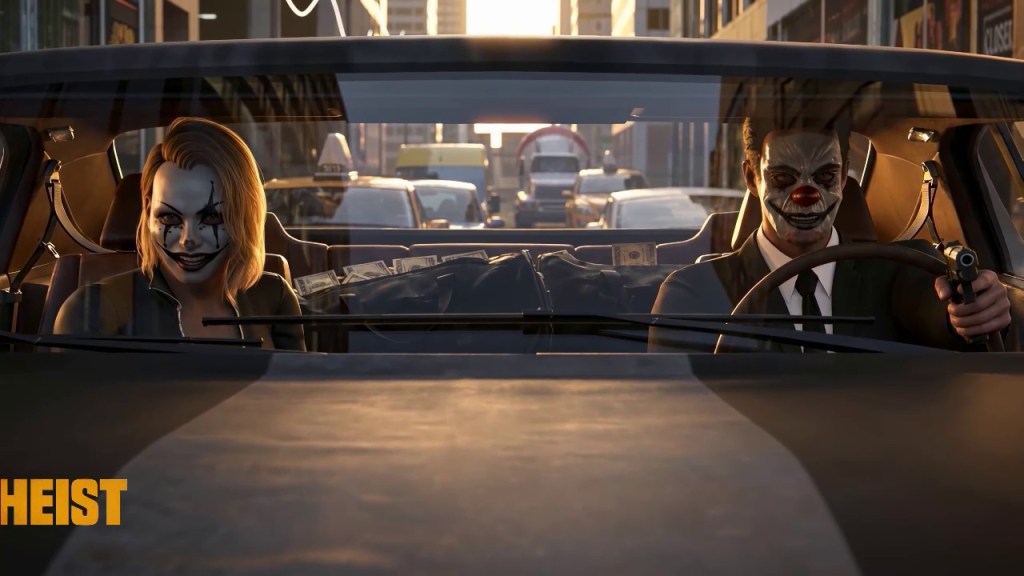
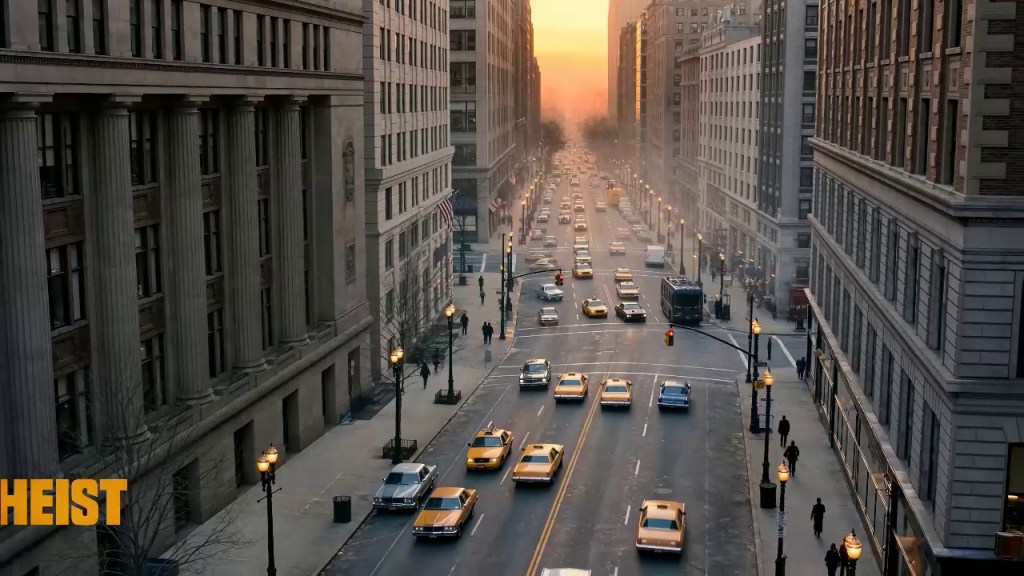
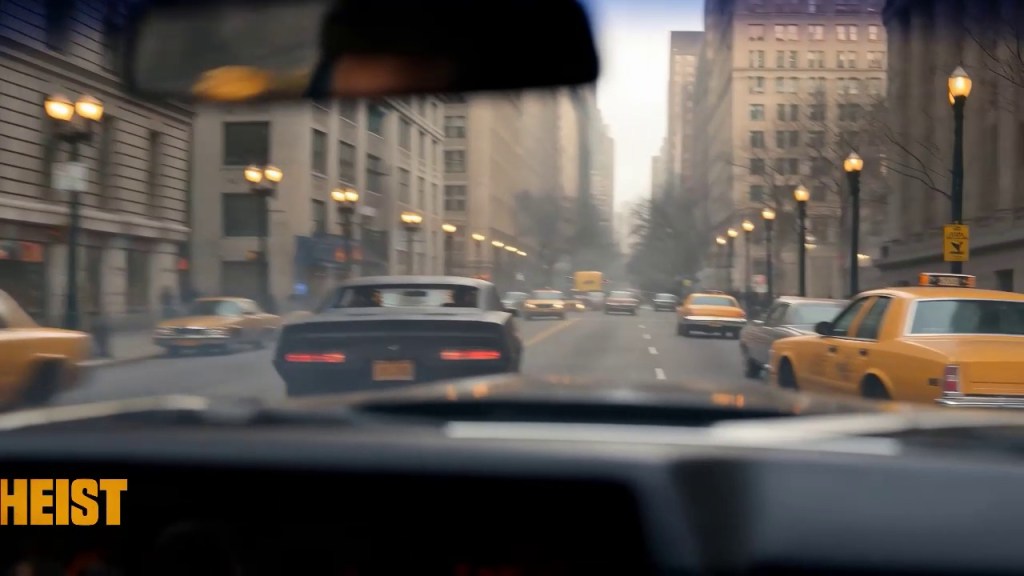
HEIST demonstrates how Character Creator, iClone, and AI Studio transform traditional previs into a production-ready AI filmmaking pipeline, giving creators the power to direct AI with the same cinematic techniques used in film and television.
The rise of generative AI has made it possible for anyone to create cinematic imagery, but creating a compelling sequence of shots requires a combination of principles and execution. Storytelling depends on deliberate choices—camera placement, composition, character performance, continuity, pacing, and visual language. These are the same principles filmmakers have relied on for decades, and they remain essential in the age of AI.
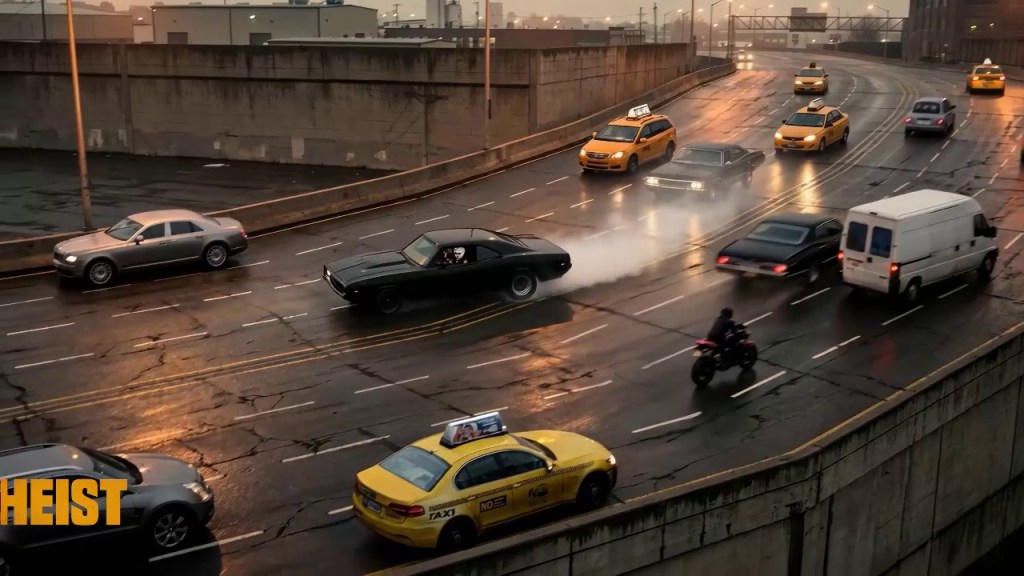
HEIST, from James Martin, was created as an exploration of how traditional filmmaking techniques can be combined with AI-powered production. Rather than relying solely on prompts, the project demonstrates how Reallusion’s Character Creator, iClone, and AI Studio enable filmmakers to use 3D as a directing layer, transforming established production workflows into a powerful AI filmmaking pipeline.
Building the Film Before the Film
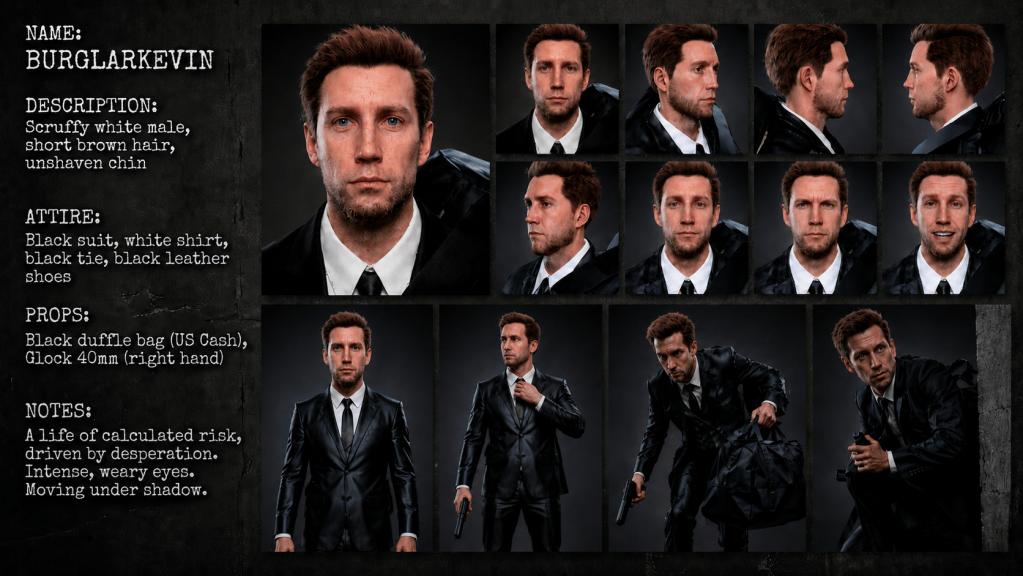
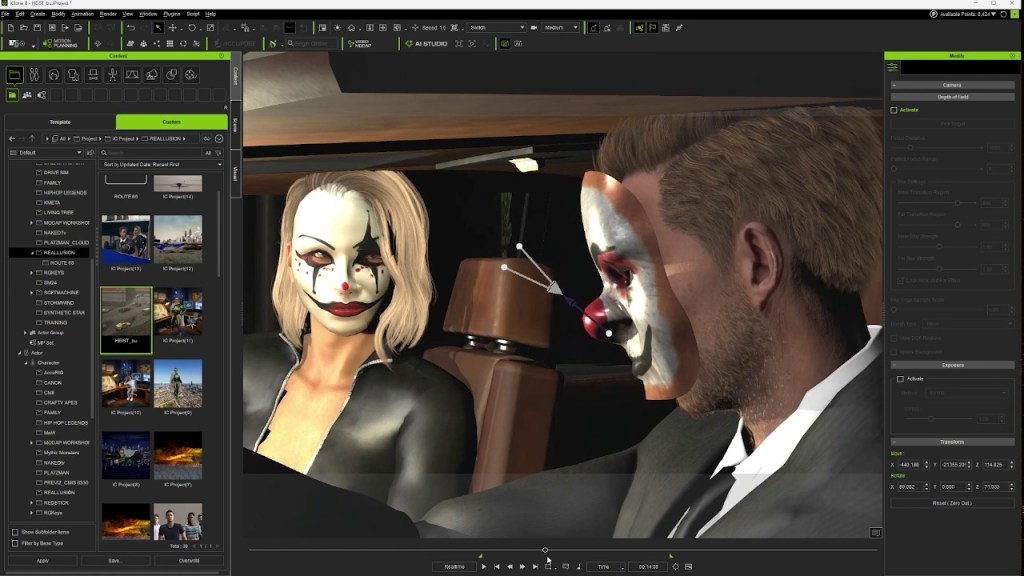
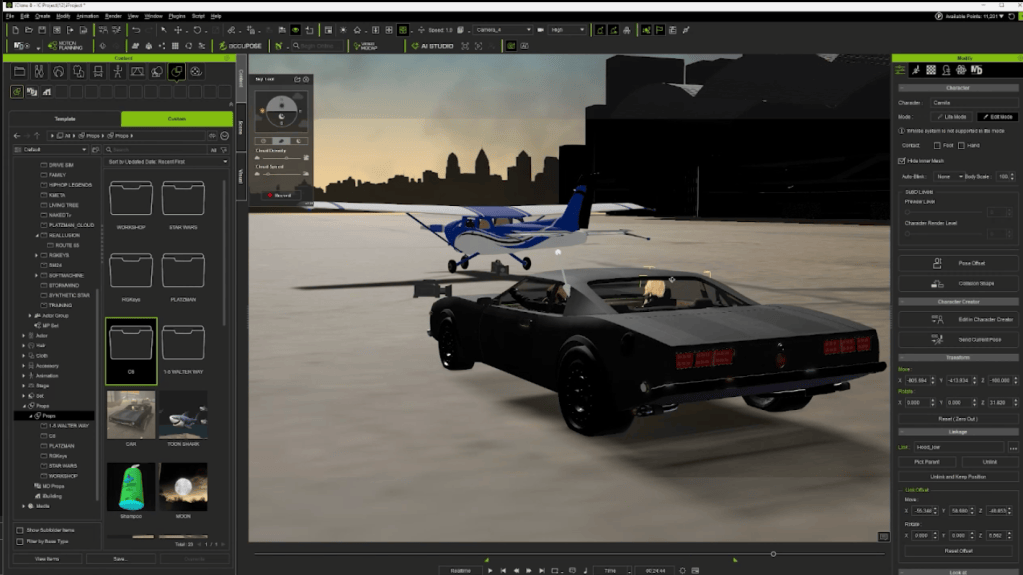
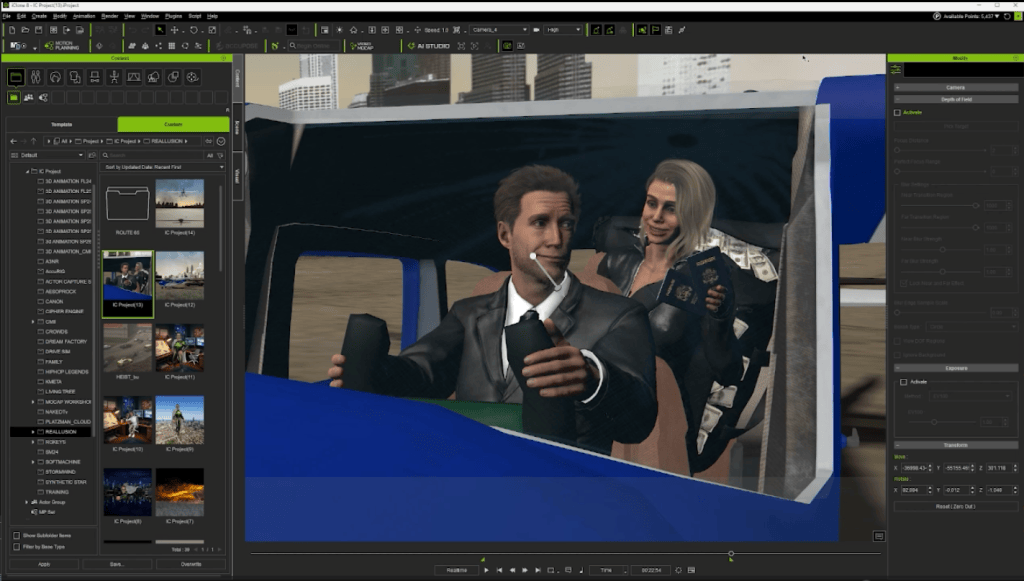
Like many feature films, HEIST began in previs that originates in the storyboards, guiding the character design in Character Creator and 3D layout in iClone to prepare the scene.
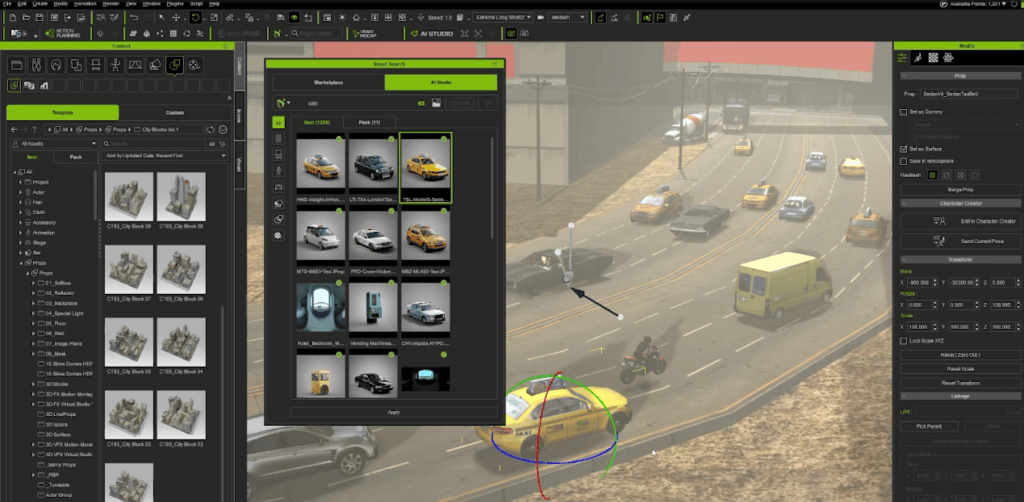
Using Character Creator and iClone, scenes were staged using content from the included AI Studio content library and the creator’s custom content library, cameras were placed, and shots were planned before AI generation ever began. This virtual production process allowed creative decisions to be made early, including framing, camera movement, character blocking, and shot progression. The 3D pipeline to AI Studio is crucial to directing the AI with anticipated results.
By working in 3D first, the production gained something often missing from prompt-driven workflows: intentional direction. Every shot existed for a reason. Every camera angle supported the story. Every sequence could be reviewed, refined, and approved before moving into AI production.
From Character Creator to AI Actor
One of the greatest challenges in AI filmmaking is maintaining character consistency across dozens or even hundreds of shots.
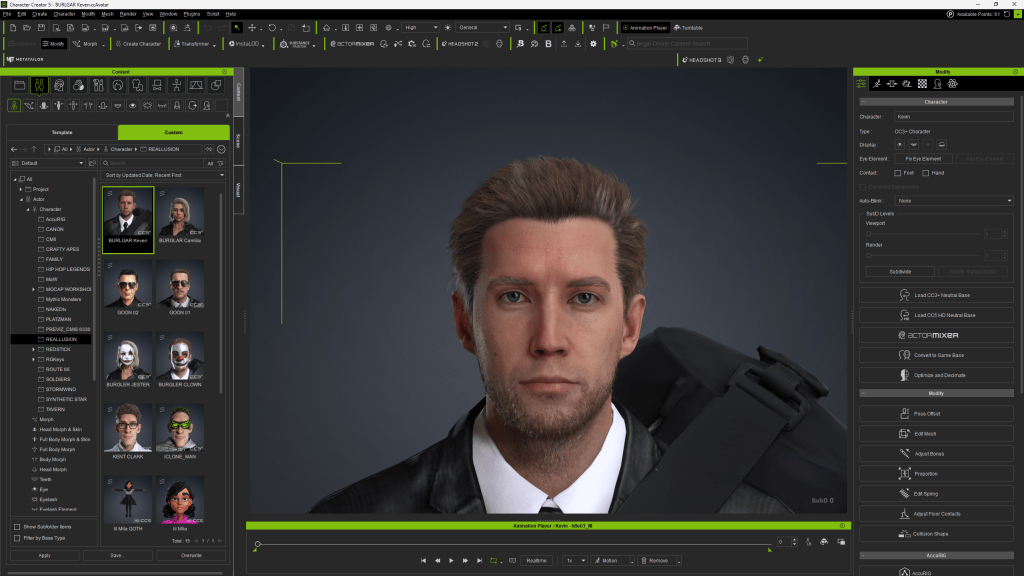
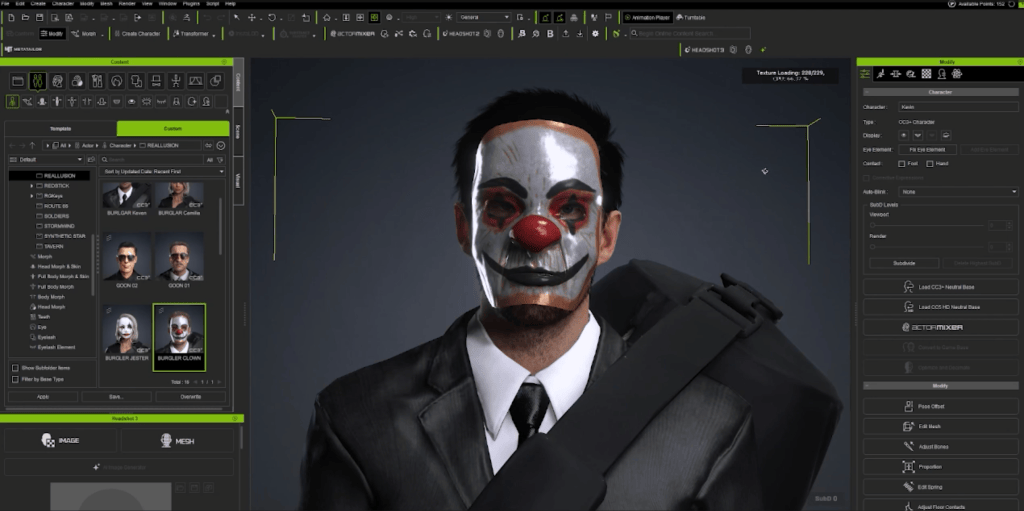
For HEIST, custom characters were established using Character Creator and prepared within the Reallusion ecosystem for AI production. Through AI Studio, those characters became AI Actors, preserving their identity, appearance, and visual continuity throughout the project.
Instead of generating a new interpretation of a character with every prompt, the production relied on a consistent digital performer that could appear reliably from scene to scene.
This approach allows filmmakers to think less about recreating characters and more about directing performances.
Using 3D to Direct AI
The real innovation behind the workflow is not replacing filmmaking with AI. It is using AI to extend filmmaking.
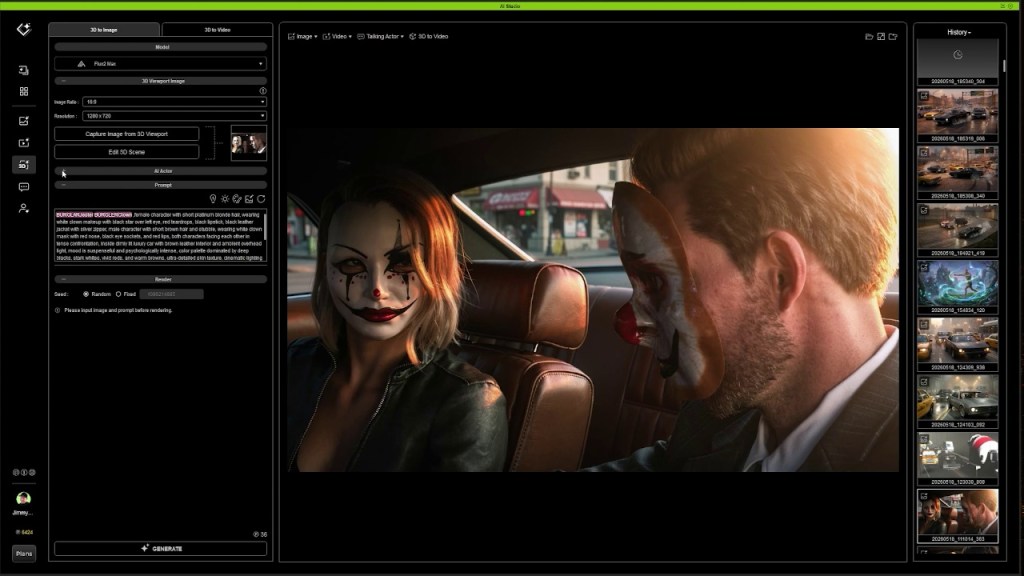
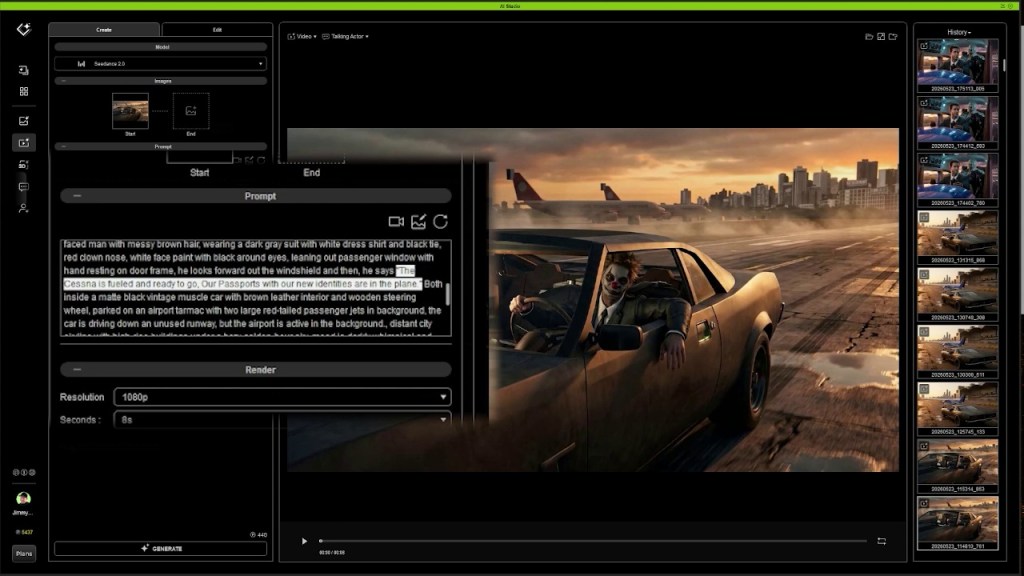
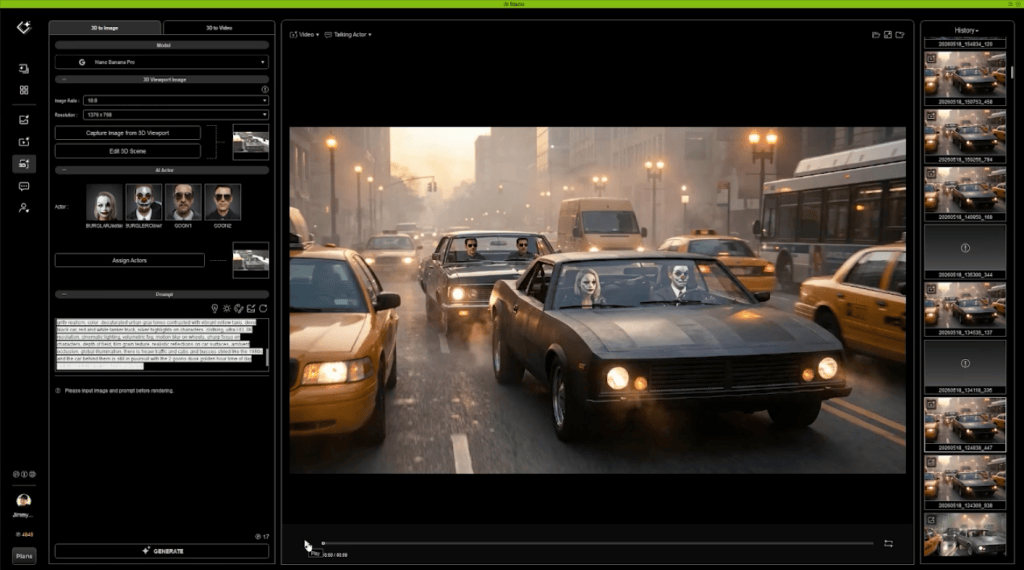
The process starts with storyboards, and then previs created in iClone serves as a blueprint for the final production. Camera intent, composition, staging, and narrative structure established in 3D carry forward into AI generation. Martin used Nano Banana for image generation and SeeDance for video generation.
In this way, AI becomes the visual execution layer rather than the creative decision maker.
The 3D to AI Studio workflow with prompt enhancement gives control over:
Shot composition
Camera placement
Lens language
Character positioning
Scene continuity
Story pacing
Visual storytelling
The result is a workflow that combines the speed and flexibility of generative AI with the precision and predictability of professional production techniques.
The Prompt Strategy
James Martin approached prompting as a directing tool rather than a creative shortcut. Instead of asking AI to invent scenes, prompts were used to communicate specific cinematic intent, including camera angles, character actions, lighting, mood, and environment.
Once a visual direction was established, prompts evolved through small refinements to maintain consistency across shots. By defining characters and story context before generation, prompts could focus on the scene itself, resulting in stronger continuity and a more cohesive visual narrative. For HEIST, successful prompting was not about writing longer prompts. It was about providing clear direction and using AI to execute a filmmaker’s vision.
Why It Matters
As AI filmmaking evolves, the most successful productions will not simply generate images. They will apply the same storytelling principles that have guided cinema for generations.
HEIST demonstrates that the future of AI filmmaking is not prompt versus production. It is a production enhanced by AI.
By leveraging Character Creator, iClone, and AI Studio, filmmakers can build stories with the structure of traditional filmmaking while taking advantage of the creative possibilities offered by generative AI.
The result is a new production model where 3D becomes the director’s language, AI becomes the camera, and storytellers maintain creative control from the first shot to the final frame.
AI Studio Storytellers
AI Studio Storytellers highlights creators who are pushing the boundaries of modern filmmaking through Reallusion’s AI Studio workflow. Through behind-the-scenes breakdowns, production insights, and real-world projects like HEIST, the series explores how filmmakers are using 3D, AI, and virtual production techniques to create the next generation of cinematic storytelling.
Professor James C. Martin is a motion capture specialist, AI Storyteller, and Technical Director at Actor Capture, as well as Professor of Practice at Georgia State University’s Creative Media Industries Institute (CMII). With over 20 years of experience, he has contributed to projects including The Suicide Squad, Lyle, Lyle, Crocodile, Creed III, and The Electric State. A Reallusion Certified Trainer, Martin specializes in motion capture, virtual production, digital humans, real-time animation, and generative AI workflows. In 2026, he was a featured presenter at the CMII AI Symposium and a panelist at the Alt Era AI Summit and Film Festival, discussing AI in education and storytelling.
TL;DR: This tutorial walks through a complete Headshot 3 stylized image to 3D pipeline, turning a single piece of front-facing bodybuilder caricature art into a fully rigged, sculpt-ready CC5 character. You will generate a side-profile reference with AI, reshape the fitting splines to capture exaggerated proportions, sculpt the muscle groups in Blender as a non-destructive morph, then realign textures in Krita before finishing back in Character Creator.
Caricature and stylized concept work live or die on their silhouette, which is exactly where standard photo-to-3D tools tend to struggle. The trick is to let Headshot 3 and Character Creator 5 handle the tedious base-mesh and alignment work, so your energy goes into the parts that actually define the character: the anatomy, the exaggeration, and the texture styling. The workflow below uses an extreme bodybuilder caricature as the test case, but it applies to almost any stylized 2D concept you want to bring into 3D.
Step 1: Generating the Side Profile for Your Stylized Image to 3D Conversion
Load your single, front-facing caricature concept into Headshot 3’s Image workflow. Stylized and caricature work demands a sharp silhouette, but a front view alone gives the AI no depth information for the profile. Use the AI Image Generator to produce a matching side-profile reference image: it analyzes the facial features in your front art and generates a complementary profile view that feeds the image-to-3D reconstruction, so you get profile depth without drawing a second angle by hand.
Pro Tip: AI Image Generation in Headshot 3 is powered by Google Nano Banana and consumes credits per generation, so generate your profile reference once and reuse it rather than regenerating on every iteration.
Step 2: Reshaping the Splines to Fit Exaggerated Proportions
Headshot 3’s automated fitting is trained on standard human anatomy, so on a caricature it will initially pull in toward “normal” proportions and clip exaggerated features like the bodybuilder’s oversized jaw and chin. Move into the spline-based head shaping stage and manually drag the guide-curve nodes outward until they fully encompass the true structural borders of your concept art. You are telling the fitting system where the real edges of this face are, rather than letting it default to anatomical averages.
Note: Push the splines all the way to the outer silhouette of the concept, even if it looks extreme on screen. Under-fitting an exaggerated feature here is much harder to recover later in the sculpt.
Step 3: Refining Forms in Character Creator Edit Mode
Switch into Edit Mode inside Character Creator and use the sculpt morph tools with a wide soft-selection falloff to pull and mold the primary facial forms directly over the background image plates. Mirror your adjustments across the axis to keep both sides consistent, and blend them with the built-in sculpt morph sliders to cement the underlying depth before you ever leave Character Creator.
The cardinal rule: Never change or scale the character’s overall head size using standard viewport transform tools at this stage. Headshot locks the mesh to the photo layer based on the analyzed camera lens, so scaling the head breaks that camera projection alignment and ruins your texture matching. If head size genuinely needs to change, handle it inside the Headshot 3 dialog so the projection stays intact.
Step 4: Sculpting the Muscle Groups in Blender as a Morph
Send the character to Blender through Blender Auto Setup, exporting as a morph rather than a full avatar replacement. This keeps the pipeline non-destructive: you alter only the physical shapes while the rigging and bone weights stay perfectly intact, and the result comes back into CC5 as an editable Character Morph.
Focus your sculpting at Subdivision Level 2 (SubD2). That resolution gives you enough clean geometric density to carve out the heavy muscle groups of a bodybuilder without wrecking viewport performance or creating messy topology. Ignore micro-detail like pores for now; you are blocking anatomy, not skin.
Step 5: Realigning the Warped Textures in Krita
Because the mesh was heavily distorted during fitting and sculpting, the originally projected textures will be pulled out of place. Export the diffuse map to Krita at 2K resolution. Then export the model’s 3D UV layout, invert its color, and lock it on an overhead layer set to Multiply so it acts as a positional roadmap over your texture.
Using Krita’s warp and push tools, slide the texture details (lips, eyes, nostrils) back onto their correct 3D coordinates, guided by the UV roadmap. Finish with soft airbrushes to erase any seams left behind by the warping.
Step 6: Resetting Normal Map Artifacts with Neutral Blue
If your texture bakes leave messy artifacts or unwanted structural wrinkles, you cannot paint over them with skin-tone color, because a normal map encodes surface direction, not appearance. Sample the exact neutral value of the normal map (RGB 128, 128, 255) and paint over the problem areas with that single hue. This flattens the surface vectors in those spots and resets them to a clean, smooth baseline without disturbing the rest of the map.
Summary
The full Headshot 3 stylized image to 3D pipeline runs front art to AI side profile, spline fitting, Edit Mode refinement, a Blender morph sculpt, and finally texture realignment in Krita. Bring the refined textures and Blender morphs back into Character Creator, then add hair with Smart Hair, build a high-contrast studio lighting rig, and drop the character into dramatic poses to stress-test the deformation. By offloading base-mesh modeling and profile setup to Headshot 3, you skip the most tedious phase entirely and spend your time on anatomy, styling, and performance.
Key Takeaways
Generate the missing profile with AI before fitting. A side-profile reference from the AI Image Generator gives Headshot 3 the depth cues a single front view cannot, which matters most on exaggerated stylized concepts.
Push the fitting splines past “normal” anatomy. Automated fitting averages toward standard faces, so manually drag the guide curves out to the true silhouette of your caricature.
Never scale head size with viewport transforms. Doing so breaks Headshot’s camera projection lock and destroys texture alignment; resize only inside the Headshot 3 dialog.
Round-trip to Blender as a morph, not a replacement. Exporting as a morph keeps rigging and weights intact and returns your sculpt as an editable CC5 Character Morph.
Reset normal-map artifacts with neutral blue (128, 128, 255). Painting the neutral normal value flattens surface vectors and clears baked artifacts without touching the diffuse.
Mythcons
Greetings, my name is Peter Alexander. In this demonstration, I’m going to walk you through how you can leverage Character Creator 5‘s new ActorMIXER as a powerful stepping stone to create unique, stylized characters. We’ll use the CC Base Mesh as our foundation, and ActorMixer will provide the next layer from which to build, making professional character creation that much easier. For this demo, I’ll be creating a stylized version of Arnold, using the Blender Auto Setup pipeline, which is both cost-effective and efficient for creating characters and assets.
Can I use this stylized image-to-3D workflow for any concept art, not just caricatures?
Yes. The bodybuilder caricature is just an extreme test case. The same pipeline (AI profile generation, spline reshaping, Blender morph sculpting, texture realignment) works for any stylized 2D concept, and the more exaggerated the proportions, the more the manual spline and sculpt steps matter.
Does the AI Image Generator in Headshot 3 cost credits?
The core 3D head generation in Headshot 3 is free, but the AI Image Generator, which produces the side-profile and reference images, is powered by Google Nano Banana and consumes credits per generation. Generate your profile reference once and reuse it.
Do I need Blender and Krita, or can I stay inside Character Creator?
You can take a stylized character a long way using only Headshot 3 and Character Creator’s sculpt morph tools. Blender is used here for heavy anatomical muscle sculpting at SubD2, and Krita for precise texture realignment after large mesh distortion. Both are optional refinements layered on top of the core Reallusion workflow.
What is the difference between Headshot 3’s Image and Mesh workflows?
The Image workflow generates a rigged 3D head from a 2D photo or concept, which is what this tutorial uses. The Mesh workflow converts an existing static 3D model into a fully rigged CC character. For 2D caricature art, the Image workflow is the right entry point.
Reallusion announced a massive double release: the groundbreaking debut ofiClone Personal(free for all users) alongside the official public launch of AI Studio. Together, they establish a seamless, zero-barrier pipeline that bridges traditional 3D artistry with next-generation AI workflows.
Having garnered strong community interest during its Early Access phase, AI Studio is now fully available to all creators. The platform comes equipped with advanced multi-reference capabilities that preserve actor likeness with unprecedented accuracy and consistency.
Alongside this launch, Reallusion is introducing iClone Personal Edition, replacing the legacy 30-day trial with a perpetual experience that removes time restrictions entirely. Creators gain unrestricted access to iClone‘s complete 3D toolset and AI Studio, enabling them to explore, learn, and master the entire 3D-to-AI workflow at their own pace.
iClone Personal: No Time Limits, No Creating Barriers
To give artists the ultimate freedom to integrate Reallusion tools into their workflows, iClone Personalofficially replaces the traditional 30-day trial. The time restriction is completely gone, allowing creators to learn and master the software indefinitely. Because it seamlessly integrates with the Reallusion ecosystem, allowing users to animate Character Creator actors and utilize ActorCore motion packs, while supporting full imports from other industry 3D tools, it serves as the perfect permanent environment for education and long-term pipeline compatibility testing.
A Flexible, Uninterrupted Pipeline
This update ensures creators never lose access to their work. iClone Personal provides the ideal space to build, block out, direct, and animate scenes indefinitely. While 3D project exports to external software are limited to 30 times in the Free tier, this restriction is instantly removed via a subscription plan or permanently lifted with a perpetual license.
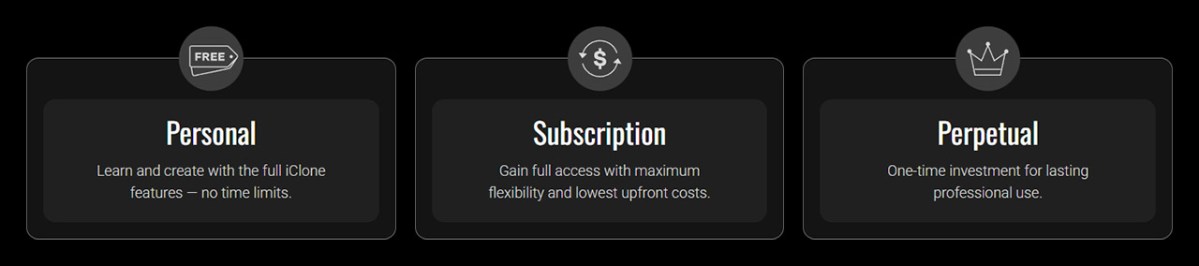
iClone Personal: A permanent, zero-cost tier for indefinite learning, scene blocking, and animation with full project access and entirely free rendering. While creation is unrestricted, it includes a limit of 30 exports for external 3D pipelines.
Subscription Plans: A flexible, project-based option that completely lifts the 3D export limit. Ideal for creators who need to temporarily scale their pipeline and seamlessly export assets to game engines and external teams. If an active subscription ends, the software simply reverts to this free version, keeping your work fully accessible.
Perpetual License: The premier upgrade path for professional studios wanting full, permanent ownership of the software and completely unrestricted 3D asset export capabilities.
Standalone Production Power with RTX Render
Creators can also take advantage of unlimited rendering via the upcoming, highly optimized RTX Render engine. Launching in Open Beta in late July as a future free update for iClone and Character Creator, this engine delivers high-fidelity visuals directly within the software. This allows creators to complete entire animation and rendering processes natively without needing to export to external tools, making the core production experience completely free.
iClone Personal Licensing Guidelines:
Render Output: Renders created with RTX or the real-time renderer are licensed for personal and social use only, requiring an upgrade to subscription plans or a perpetual license for commercial rights.
AI Studio Exports: Commercial rights are determined by your AI Cloud plan; Standard and Pro tiers include commercial use, while the Starter tier and Free tier are limited to personal and social use.
AI Studio Official Launch: Enhanced Character Consistency & Next-Level Multi-Reference Control
With iClone Personal opening up a permanent environment for unrestricted 3D creation, creators now have the perfect foundation to fuel Reallusion’s next major release. AI Studio officially moves out of Early Access and into full public availability, introducing a powerful suite of new multi-reference features designed to deliver unmatched cinematic fidelity and an upgraded solution to character consistency.
Re-engineered AI Actor Support: Uncompromising Identity Precision
While the Early Access introduced AI Actors (iModels) for character consistency, the official launch takes character preservation significantly further. We have re-engineered the workflow to capture and lock down absolute identity precision, virtually eliminating identity drift even during drastic style or angle changes. This enhanced precision is also incredibly useful when characters do not clearly appear in the start frame, ensuring the model accurately anchors and maintains the correct identity the moment they step into view.
Enhanced Video Integration: AI Actors can now be combined as a reference layer directly inside the Seedance 2.0 video pipeline to ensure your character’s likeness remains flawlessly stable from the first frame to the last.
With AI actors in Seedance 2 workflow, characters remain perfectly consistent across camera cuts even if they were not in the original frame.
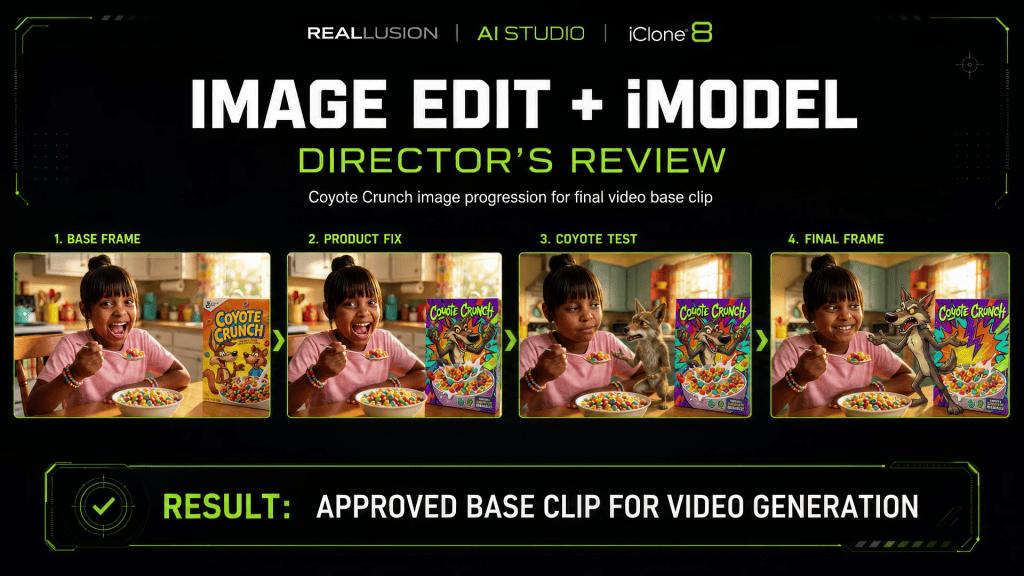
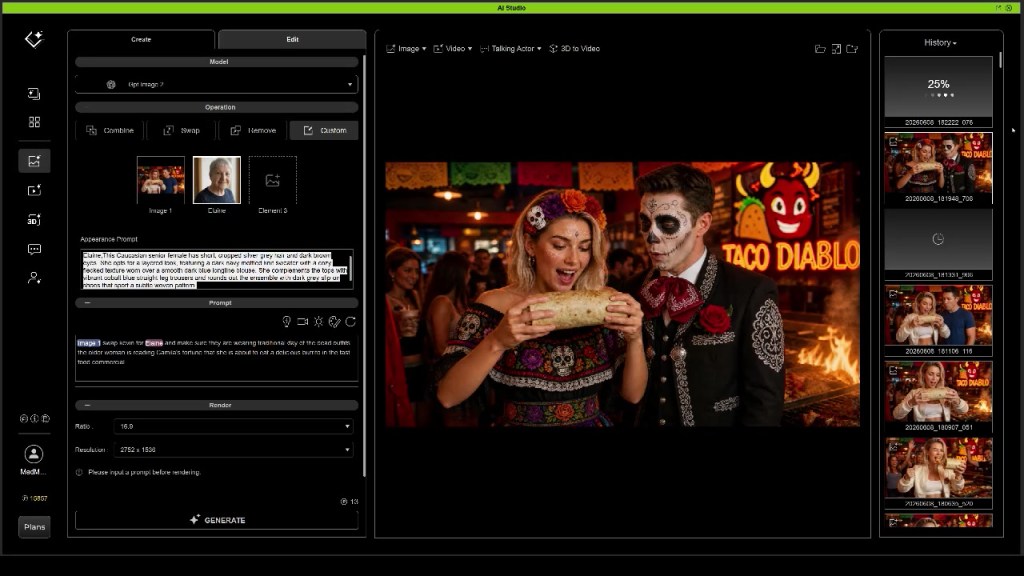
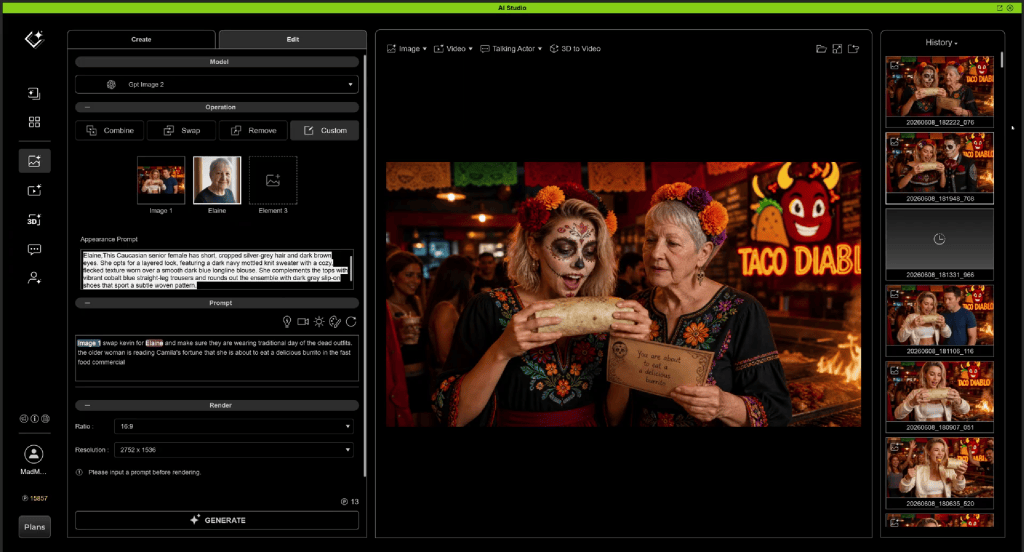
Image Edit Deployment: AI Actors can be deployed directly in image editing workflows. Effortlessly swap assets, change outfits, or coordinate multiple characters across various angles. This unlocks complex, derivative storytelling pipelines while keeping your characters perfectly locked in, every single frame.
With AI actors, characters remain perfectly consistent during complex edits like coordinated outfit changes for multiple people.
Advanced Multi-Reference Support for Seedance 2.0
As a platform that integrates multiple premier generative models, including Kling 3.0, Veo 3, Nano banana, Flux, and others, we are constantly pushing the boundaries to let users harness the full creative power of these technologies.
While Seedance 2.0 was already established in AI Studio as the most advanced video generation model for interpreting 3D spatial data, this official launch delivers a major update that allows creators to experience it to its absolute fullest. By introducing native support for what the industry knows as Elements in Seedance, the platform unlocks unprecedented artistic control.
Using only AI actors, images, and audio references, Seedance 2 can generate complete videos without requiring an initial start frame.
Users can now seamlessly mix, match, and combine multiple reference inputs, including Image, Video, Audio, and AI Actors, alongside native 3D scene data. Instead of guessing with unpredictable text prompts, creators can orchestrate complex camera movements and character choreography in 3D, allowing the AI to flawlessly execute the final cinematic look with complete structural precision.
Combine 3D camera controls and motion dummy characters with AI Actors for flawless consistency in Seedance 2.
Reallusion AI Cloud Plans Now Fully Available
Coinciding with the public launch, Reallusion’s AI Cloud Plans are now officially open to everyone. Designed to scale with your production needs, these plans unlock the true capacity of the integrated 3D & AI workflow.
Subscribing to an AI Cloud Plan (Starter, Standard, or Pro) gives you full access to premier generation models like Seedance 2.0, Kling 3.0, and Veo 3, alongside a massive premium creative library:
5,000+ 3D Previz Assets: Fully unlocked for subscribers. Easily populate, compose, and block out your scene layout with poses, posed people, interior furnishings, buildings, animals, trees, plants, and vehicles.
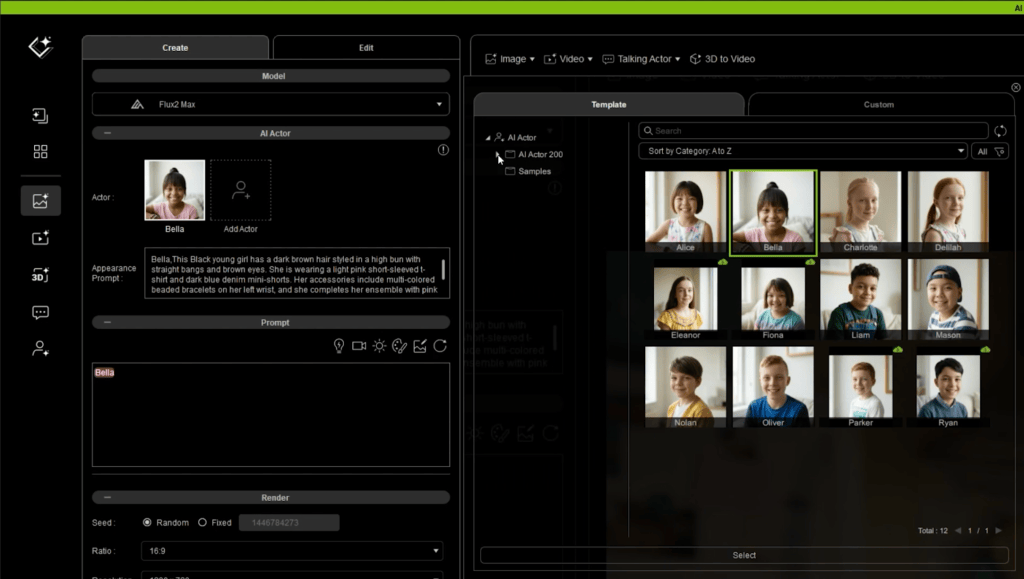
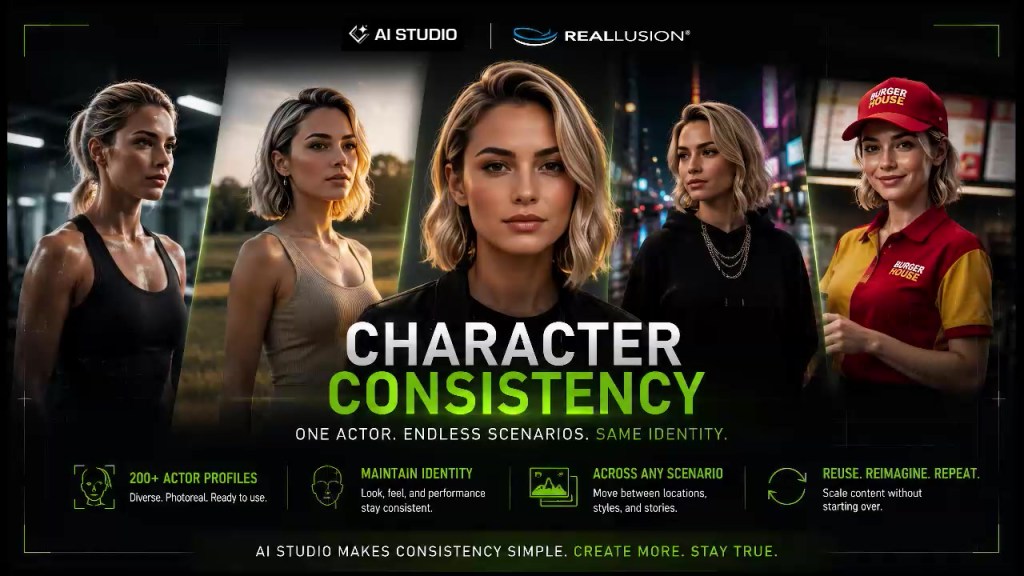
200+ Production-Ready AI Actors (iModels): Skip the setup and jump straight into production with a massive roster of consistent digital humans, stylized characters, and creatures ready to perform under your direction.
(Free-tier users retain access to a curated sample set of 200 assets and 12 starter AI actors.)
In addition, AI Points included in these plans can now be used across Reallusion’s broader AI cloud ecosystem, including the Headshot 3 image workflow and cloud-based Video Mocap, enabling a unified end-to-end character and animation pipeline.
Start Your Limitless Creation Today
The future of 3D-to-AI production is live. Download iClone Personal to access unrestricted 3D creation and unlimited RTX rendering with no 30-day limits, and seamlessly step into the public launch of AI Studio for next-generation character consistency and workflow integration.
Get iClone Personal: New users can download the software permanently from the official iClone Product Page to begin building, directing, and animating 3D scenes without any time constraints.
Unlock Full Pipeline Export (Subscription or Perpetual): Upgrade to a flexible subscription plan or a perpetual license to permanently remove the 30-time export limit. This fully unlocks iClone’s pipeline connectivity, enabling seamless 3D project and asset exports directly to game engines and other external 3D applications.
Access AI Studio: Now fully open to the public, existing users can update their software via the Reallusion Hub to access the fully integrated AI Studio toolkit. Free-tier users and trial explorers can begin testing the pipeline instantly with 500 free AI Points provided automatically upon installation.
Explore AI Cloud Plans: To tap into premier generative models like Seedance 2.0, Kling 3.0, and Veo 3 alongside the expanded premium asset library, creators can review options and subscribe directly on the AI Cloud Plans Page.
Emmy Award-winner Mark Cheng details his efficient Character Creator 5 pipeline for Unreal Engine cinematic series.
Learn how to sculpt, texture, and fine-tune game-ready characters with 4K PBR textures rapidly.
Discover seamless animation workflows using iClone and Unreal Live Link for real-time production.
Optimize character creation and animation cleanup, focusing on visual fidelity for camera-specific shots.
This article details an efficient pipeline for creating cinematic-quality, game-ready characters for Unreal Engine animated series using Character Creator 5, Reallusion’s advanced 3D character design platform. It explains the practical steps and creative decisions behind crafting complex characters with 4K PBR textures and integrating them into a real-time animation iClone 8 workflow, enabling indie filmmakers to accelerate their production timelines.
Close-up of EXTRACTED’s Powell, a Character Creator 5 3D character, with weathered skin, beard, and cap, for Unreal Engine series.
How Character Creator 5 Accelerates Unreal Engine Series Production
Creating compelling characters quickly is critical for indie filmmakers producing animated series in Unreal Engine. Character Creator 5, Reallusion’s flagship character design software, offers a robust solution for generating highly detailed, production-ready assets. According to Emmy Award-winning producer Mark Cheng, the key to rapid character development lies in strategic starting points and iterative refinement. He emphasizes that rather than building from scratch, starting with an existing base model and systematically altering its appearance significantly streamlines the design process.
Starting with Existing Models for Rapid Design Iteration
Mark Cheng, founder of Creative Studios and producer of the Unreal Engine series EXTRACTED, prefers to begin with a pre-existing Character Creator 5 model rather than building a character entirely from scratch.
Reallusion Character Creator 5 UI: Mark Cheng’s Powell character (Aaron base) with facial morphs, Modify panel, and content library.Mark Cheng customizes male 3D character in Character Creator 5, adjusting body morphs via Modify panel; underwear content visible.
For Powell, one of the central characters in EXTRACTED, I started with Reallusion’s Aaron character as a foundation. Some artists like to start from a blank slate, but I prefer beginning with an existing model and gradually shaping it into the character I have in mind. Starting from a proven base gives me a design direction and lets me focus on creative decisions instead of technical setup.
As I work, I’m constantly reacting to what I see on screen.
“Powell is dirtier than Aaron.”
“He needs a stronger build.”
“His hair shouldn’t be so well groomed.”
Those reactions become the roadmap for the character design process. Each adjustment helps me move closer to the personality and story role I want the character to communicate.
“Some artists like to start from scratch but I prefer to start with an existing model and proceed to change and alter their appearance to get to my character.”
MARK CHENG — Founder of Mark Cheng Creative Studios
Character Creator 5 UI: 3D character ‘Powell’, ‘Apply Beard Options’ dialog, and content library.Character Creator 5 UI: 3D character ‘Powell’ in camo top, ‘Apply Cloth Options’ dialog, content library with tactical pants.Character Creator 5 UI: 3D character ‘Powell’ in camo uniform, ‘Apply Cloth Options’ dialog, content library with tactical pants.
Crafting a Rugged Look: Skin, Hair, and Build
Powell is a lieutenant in a joint human/android military unit fighting in a future civil war. By the time audiences meet him, he’s already spent years on the front lines. I wanted him to look like someone who has been living in combat zones for far too long.
To achieve that look, I leaned heavily on Character Creator 5’s skin and hair tools. I layered pores, dirt, sweat, sunburn, blemishes, capillaries, and weathering effects to create a face that felt lived-in and authentic. I tend to push skin details further than many artists because it’s a personal pet peeve of mine when combat characters look overly polished or unrealistically clean.
CC5 UI showing Aaron, a 3D character with PBR skin, dirt, and sweat textures, and the content panel for skin effects.
The Realistic Human Skin packenabled the addition of nuanced pores, dirt, sweat, sunburn, and capillaries, intentionally pushing boundaries to avoid an overly “clean” combat appearance.
For his hair, I experimented with several different styles before settling on a baseball cap and a nearly bald appearance. Character Creator 5 includes some of the best beard assets I’ve worked with. I was tempted to give Powell an elaborate braided Viking beard, but ultimately chose the largest, most unkempt beard in my library because it better reflected the character’s lifestyle and military background.
CC5 UI: Mark Cheng’s ‘Powell’ in military uniform, showing beard customization via hair options & head morphs in the Modify panel.
For his physique, I wanted Powell to feel physically dominant and imposing. As a leader, he needed an immediate visual presence, but I also wanted that physical strength to create a contrast with moments later in the story when he reveals emotional vulnerability. That’s something I often consider during character creation, how physical design choices can reinforce dramatic themes.
I ended up giving Powell so much muscle definition that his battle dress uniform initially couldn’t contain him. Parts of the body mesh pushed through the clothing in several places. Fortunately, Character Creator 5’s polygon-level mesh editing tools made it easy to reshape and expand portions of the uniform until everything fit correctly.
Character Creator 5 UI with muscular, bearded 3D character Powell in camo pants, displaying save progress for iClone.
Fine-Tuning Character Realism and Expression
Achieving cinematic quality in animated series requires meticulous attention to character realism, extending beyond initial sculpting to include nuanced expressions and effective posing. Character Creator 5 provides versatile tools that cater to diverse artist preferences, allowing for both precise numerical adjustments and intuitive sculptural modifications. This flexibility is crucial for translating creative visions into tangible 3D assets ready for the rigors of real-time animation.
Sculpting vs. Numerical Adjustments in Character Creator 5
One of the things I enjoy most about Character Creator 5 is that it provides multiple ways to achieve similar results. Different artists have different preferences, and the software gives you the flexibility to work the way that feels most natural.
For Powell’s facial structure, I relied heavily on sculpting tools, pushing and pulling specific areas of the face until I arrived at the shape I envisioned. The process feels intuitive and allows me to make artistic decisions visually rather than numerically.
Reallusion Character Creator 5 UI: 3D military character (Powell) backside with CC menu for eye selection & sculpt tools visible.Reallusion CC5 UI: ‘Powell’ 3D character (Aaron base) with beard. Modify Panel active, numerically adjusting eye parameters.Reallusion Character Creator 5: Powell character with blue eyes, beard, yellow morph overlays, ‘Eye’ library, and ‘Eyeball’ modify panel.
For other features, such as his chest, shoulders, and arms, I found it faster to use the Modify Panel and adjust muscle groups through numerical controls. Being able to switch between sculpting and parameter-based editing helped me move quickly while still maintaining precise control over the final result.
“One thing I really like about Character Creator 5 is that there are often multiple ways to achieve the same result.”
MARK CHENG — Emmy Award-winning producer
Pro-Tip: When facing clothing mesh bleed-through due to extreme character morphs, utilize Character Creator 5’s polygon-level mesh alteration tools directly. This allows you to specifically “grow” or reshape areas of the garment to conform to the underlying body, eliminating clipping without requiring external software. This method saves roughly 2 hours of manual weight painting per character.
Testing Emotions for Cinematic Impact
Throughout the design process, I frequently stop sculpting and test my characters using a wide range of facial expressions and emotional states.
I’ve always believed that a character’s emotional range is just as important as their physical appearance. Have you ever watched an actor and thought, “I love that performer, but I don’t like how they look when they smile?” That’s exactly the kind of thing I’m looking for during character creation.
Character Creator 5 makes this process easy through the Edit Facial panel, which provides access to a large library of expressions and emotions. I often reference key moments from my script and recreate the emotions the character will need to perform on screen.
Character Creator 5’s Edit Facial panel provides access to a large library of expressions and emotions.
For Powell, one of my goals was to make sure he maintained kind eyes, even during moments of anger or intensity. As a result, I would intentionally soften eyebrow movement, nose curls, and cheek raises to preserve that aspect of his personality. These subtle adjustments may seem small, but they contribute significantly to how audiences perceive a character.
Character Creator 5’s Edit Facial panel used to fine-tune Powell’s intense expression for cinematic Unreal Engine.Character Creator 5 UI: 3D character Powell (Aaron base) with weathered skin, beard, open mouth for realism & expression tuning.Reallusion Character Creator 5 UI: ‘Modify’ panel & ‘Content > facial HairGroup’ with Mark Cheng’s ‘Powell’ character in intense expression.
Seamless Animation Pipeline: Character Creator 5 to Unreal Engine
The transition from character design to real-time animation is a critical juncture for any animated series production. Reallusion’s integrated pipeline streamlines this process, enabling artists to bring Character Creator 5 assets into environments like Unreal Engine with remarkable efficiency. This robust connection facilitates rapid iteration and high-fidelity animation, essential for cinematic storytelling.
Leveraging iClone and Live Link for Real-Time Animation
Once I’m satisfied with the character in Character Creator 5, I move the model into iClone 8 for final testing and animation preparation.
I prefer using the Unreal LIVE LINK Transfer process because it automates much of the technical work involved in moving assets between applications. The workflow sacrifices some export customization options, but for my production pipeline, the efficiency is worth it. I’ll often start a transfer right before taking a coffee break, and by the time I return, the character and materials are already waiting for me inside Unreal Engine.
EXTRACTED originally began as an Unreal Engine 5.1 project and has since been upgraded to Unreal Engine 5.7, and the Reallusion pipeline has remained a reliable part of that production process.
iClone also serves as my primary hub for animation preparation. Whether I’m working with motion capture data from my Rokoko suit or AI-processed video performance data, everything flows through iClone before reaching Unreal Engine.
Reallusion Character Creator 5 and iClone 8 UI with 3D character Powell, bald with long beard & camo BDU, testing facial expressions & skin detail.
“I prefer using the Live Link Transfer process which automatically migrates the model and its materials into Unreal. I’ll hit transfer right before a coffee break and it’s all ready to go when I come back!”
MARK CHENG — Founder of Mark Cheng Creative Studios
iClone’s role extends beyond mere transfer. It serves as Mark’s primary platform for ingesting and refining motion capture (mocap) data, whether from an inertia suit or AI-processed video. For detailed guidance on this, see the official Reallusion Character Creator help documentation on setting up the Auto Setup pipeline.
Powell in iClone animated in real-time inside Unreal Engine UIs, demonstrating Unreal LIVE LINK pipeline for EXTRACTED real-time character animation.
Optimizing Animation for Camera Layout
I’m a solo creator. I handle motion capture, animation, cinematic staging, and directing responsibilities myself, so efficiency is critical throughout production.
After establishing camera layouts, I use iClone’s Unreal Live Link to essentially puppeteer Powell’s character directly inside Unreal Engine while controlling a mirrored version of the character in iClone. This workflow allows me to focus my time and attention only on what the audience will actually see.
If Powell’s feet aren’t visible in the frame, I don’t spend time refining foot animation.
If one hand is hidden behind his body, I may not need to perfect every finger pose.
My goal is to focus my effort where it matters most for the final shot.
The real-time connection between iClone and Unreal Engine helps me quickly identify animation issues, evaluate cinematic framing, and make creative decisions in context. Once I’m satisfied with the result, sending the finalized animation back to Unreal is only a few clicks away.
There are many ways to build an animation pipeline, but this workflow has become mine because it lets me spend less time wrestling with technical processes and more time focusing on storytelling.
Unreal Engine UI: Powell & Cyberpunk Samurai 3D characters. Animating game-ready models using Character Creator/iClone Live Link.Unreal Engine UI showing Mark Cheng animating EXTRACTED’s Powell character and a robot using iClone Live Link. Take Recorder panel visible lights.
Workflow Stage
Reallusion Tool
Key Benefit
Output/Integration
Character Design
Character Creator 5
Rapid iteration, detailed morphs & textures
Game-ready CC Project for iClone, Unreal Engine
Skin & Hair Enhancement
CC5 + Realistic Human Skin, Beard & Brow Builder
High-fidelity realism, weathered looks
Custom Character Mesh
Rigging & Initial Pose
Character Creator 5
Auto-rigging, expressive facial tools
Fully Rigged CC Project for Unreal Engine
Animation Pre-Production
iClone 8
Mocap import, real-time posing & emotion tests
iClone Animation Projects and Unreal Engine
Real-Time Engine Integration
iClone Live Link Plugin, Unreal Engine
Seamless transfer, live character puppeteering
Unreal Engine Assets
Conclusion
The synergy between Character Creator 5,iClone 8, and Unreal Engine provides an unparalleled pipeline for indie developers and animation studios seeking to produce high-quality animated series efficiently. By leveraging tools that support rapid iteration, detailed customization, and real-time integration, creators like Mark Cheng can transform ambitious narrative concepts into visually stunning productions without compromising on artistic vision or technical fidelity. This integrated workflow empowers artists to achieve cinematic realism and streamline their animation process, proving that powerful tools are accessible for projects of any scale.
Character Creator 5’s Powell character, a bearded soldier in tactical gear, passes pistol magazines in an Unreal Engine cinematic series shot.Character Creator 5’s Powell character, a bearded soldier in military fatigues with a rifle, surveys a burning vehicle in an Unreal Engine cinematic.Powerll character made in Character Creator 5, a rugged, bearded soldier from EXTRACTED for Unreal Engine, in tactical gear, holding a rifle.
Mark Cheng
Mark Cheng is an Emmy Award-winning producer, creative executive, and the visionary founder of Mark Cheng Creative Studios. With a distinguished career spanning over three decades in media, entertainment, and technology, including 13 years at Nickelodeon and Paramount, Mark has made significant contributions to AAA video games, live-action productions, and animated films. A film alumnus of Cornell University with an MBA focused on High-Tech Growth, his expertise lies in crafting compelling narratives through innovative content and emerging technologies. He is currently in production on EXTRACTED, an animated series produced entirely in Unreal Engine.
Mark’s workflow with Reallusion tools for EXTRACTED is a testament to their efficiency for indie studios. He initiates his characters, such as the protagonist Powell, in Character Creator 5, preferring to start from existing models for speed. He meticulously sculpts and textures, utilizing tools for polygon-level mesh adjustments when fitting custom attire like BDUs. After fine-tuning expressions in CC5, he transfers the character to iClone 8 for animation preparation, including mocap data import. Finally, the Unreal LIVE LINK plugin facilitates real-time puppeteering of the character directly within Unreal Engine, allowing Mark to streamline cinematic shot production by focusing on camera-visible animation details.
How do I export a rigged character from Character Creator 5 to Unreal Engine?
Exporting a rigged character from Character Creator 5 to Unreal Engine is highly streamlined. You typically design and finalize your character in CC5, then send it to iClone 8. From iClone, the Unreal LIVE LINK plugin facilitates a direct, automated transfer of your character, its materials, and rigging into Unreal Engine. We highly recommend that you also install the free Unreal Auto Setup from Reallusion to seamlessly transfer all character materials and shaders to Unreal. This ensures the character is game-ready, maintaining its PBR textures and bone structure for immediate use in your animated series or game project.
What is the difference between Character Creator 5 and iClone for character animation?
Character Creator 5 (CC5) is primarily a powerful 3D character design platform, focusing on creating detailed, rigged characters with extensive customization options for appearance, clothing, and textures. iClone, on the other hand, is a real-time 3D animation software suite. While CC5 builds the character, iClone brings it to life through animation, motion capture integration, and scene setup, then facilitates the export or live-link to game engines like Unreal.
Can Character Creator 5 characters use custom morphs and textures in Unreal Engine?
Yes, Character Creator 5 characters maintain their custom morphs and 4K PBR textures when exported to Unreal Engine. The pipeline ensures that all the detailed facial and body morphs, along with the high-resolution texture maps you’ve applied in CC5, are fully preserved. This allows for continued facial expression and body shape adjustments within Unreal, ensuring cinematic fidelity and creative control over your animated characters.
Why does Emmy Award-winner prefer to start with existing models in Character Creator 5?
Emmy Award-winning Mark Cheng prefers starting with existing models in Character Creator 5 because it significantly accelerates the initial design phase. Instead of building from a blank slate, a pre-existing model provides an immediate reference point and design direction. This iterative approach allows for faster visual feedback on modifications, ensuring that changes to the character’s build, hair, or features directly serve the narrative and aesthetic requirements of his animated series, EXTRACTED.
CC5 3D character Powell, rugged bearded soldier in digital camo BDU with assault rifle, amid burning homes in Reallusion AI Studio render.