首頁 » Page 12
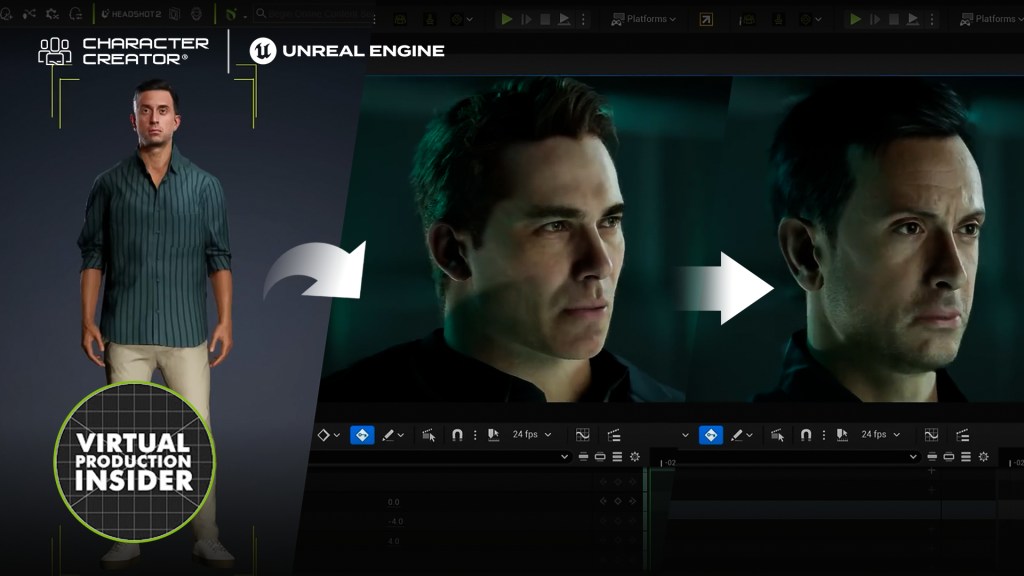
In David Stapp's review, he disclosed that Character Creator 5 is truly compatible with his Unreal MetaHuman workflow. The softwrae is aimed at professionals who need an easy, intuitive workflow for creating custom characters from scratch.

Influencer Spotlight: Character Creator 5 Review by Virtual Production Insider

In David Stapp's review, he disclosed that Character Creator 5 is truly compatible with his Unreal MetaHuman workflow. The softwrae is aimed at professionals who need an easy, intuitive workflow for creating custom characters from scratch.
In David Stapp’s review, he disclosed that Character Creator 5 is truly compatible with his Unreal MetaHuman workflow. The softwrae is aimed at professionals who need an easy, intuitive workflow for creating custom characters from scratch.

David Stapp / Virtual Production Insider

Hi everyone, I’m David Stapp. With over a decade of experience in the film industry, I’ve had many opportunities to hone my craft in post-production, VFX, and even cinematography. And over the past few years, I’ve been able to leverage the skills and insights I’ve gained from my experiences by channeling them into virtual production, which is a major passion of mine.

I now specialize in Unreal Engine environment creation and cinematics, along with ICVFX stage operation and supervision, blending creative vision with technical expertise. I’ve also launched a YouTube channel called “Virtual Production Insider” where the goal is to make virtual production as approachable as possible for people from all walks of life.

Virtual Production Insider YouTube

My Journey with Character Creation Tools

For the past few years, Metahumans have been the easiest way to create high-quality, realistic 3D characters. But now, Character Creator 5 is here, and it’s coming for the crown. And I’m not going to lie, it’s got me second-guessing my entire character workflow. I’m the director of virtual production at Form Studios. I use Metahumans a lot—like a whole lot. They really have been an integral part of my journey in Unreal Engine 5 and using it as a filmmaking tool.

We finally got some pretty big updates to MetaHumans in the recent release of Unreal Engine 5.6. I made a whole video that explores all of those upgrades and all those new features, so definitely go check that out. But there are still some areas where MetaHumans are lacking. I wanted to try out Character Creator 5 to see how it stacks up. Luckily, Reallusion hooked me up with a copy of Character Creator 5 and a lot of its plugins so that I could try it out. But I promise you that everything you’re about to read is my opinion. We’re going to dive deep into what this program can do, how it stacks up against the MetaHuman workflow, and honestly, who this program is for.

The Evolution: Major Upgrades from CC4

Before opening the program, I researched the upgrades from Character Creator 4. I’ve used CC4, but the quality wasn’t competitive with MetaHumans, and the transfer workflow to Unreal Engine wasn’t great. With Character Creator 5, they’ve heavily upgraded their character models. The new features include:

  • More subdivision options.
  • Skin textures that go up to 8K
  • Way more blend shapes for way more accurate facial animation.

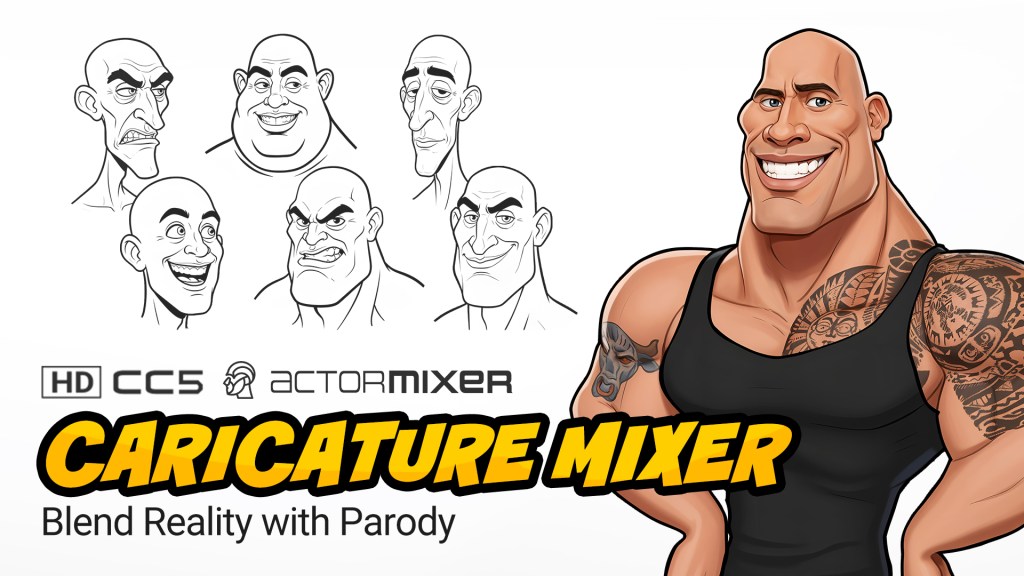
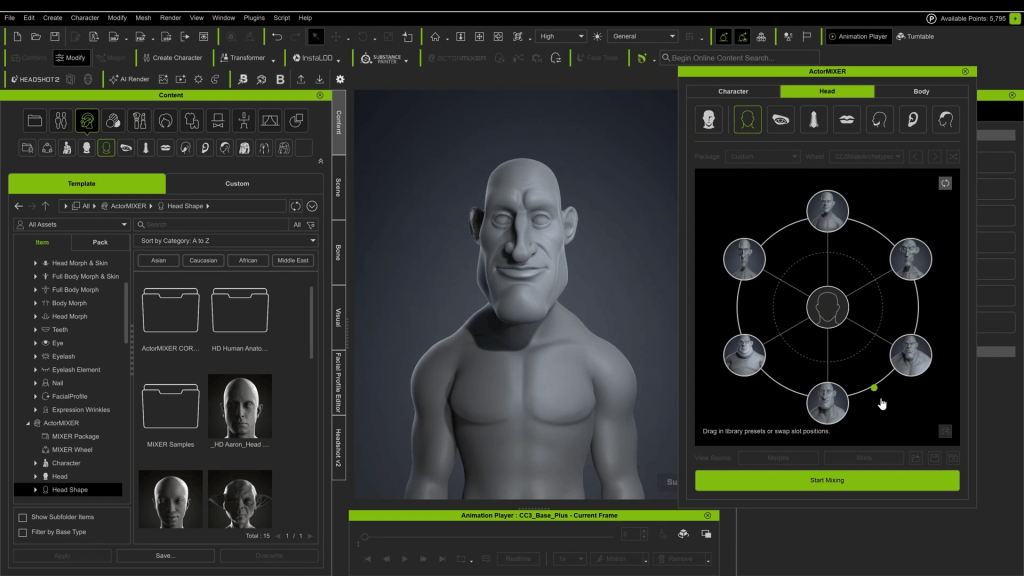
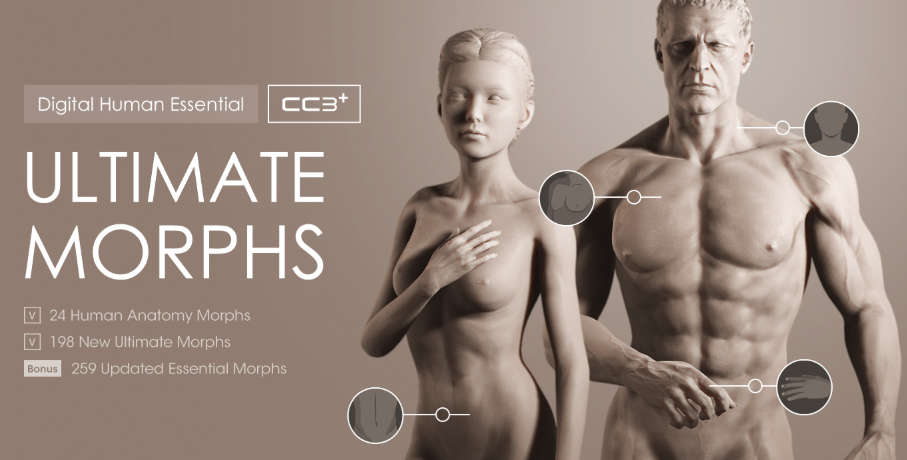
They also offer a wide variety of plugins for customization. For example, the HD ultimate morphs pack adds quick definition and facial features. The new ActorMixer Core Library lets you mix and match features from different presets. This is similar to the MetaHuman Creator mixer, but CC5 definitely offers more customization beyond the starting point.

Character Creation in CC5: A Quick Demo

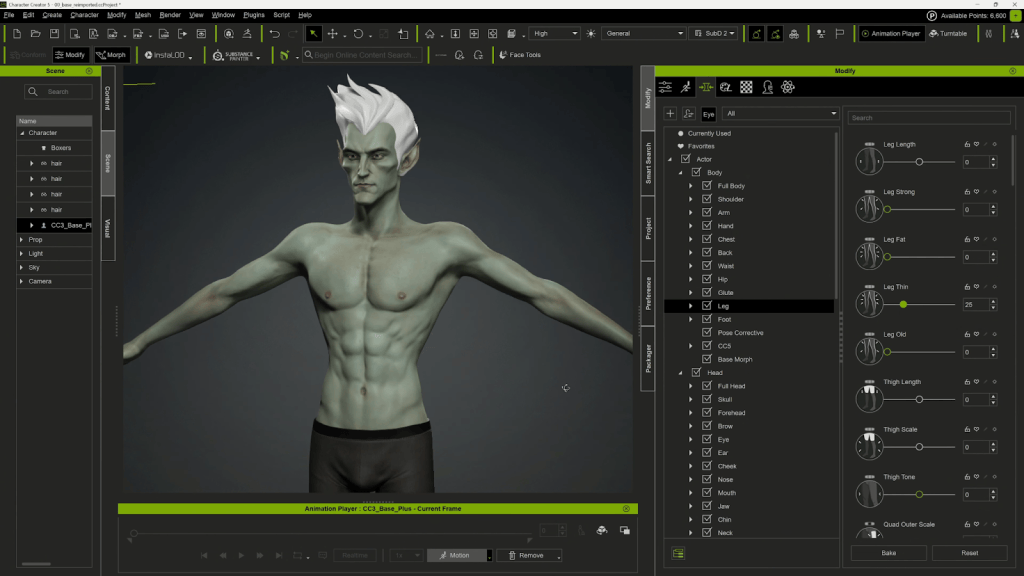
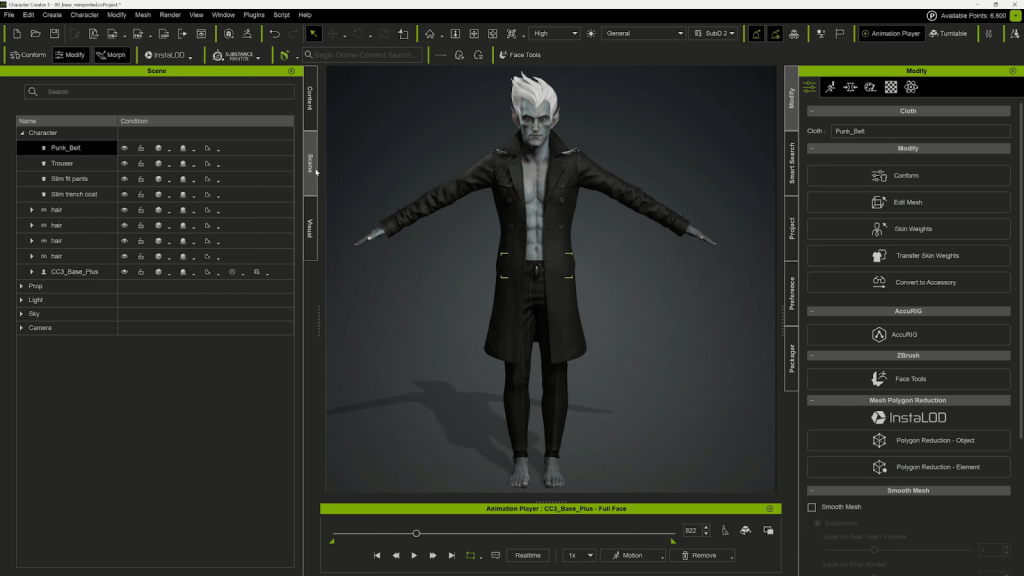
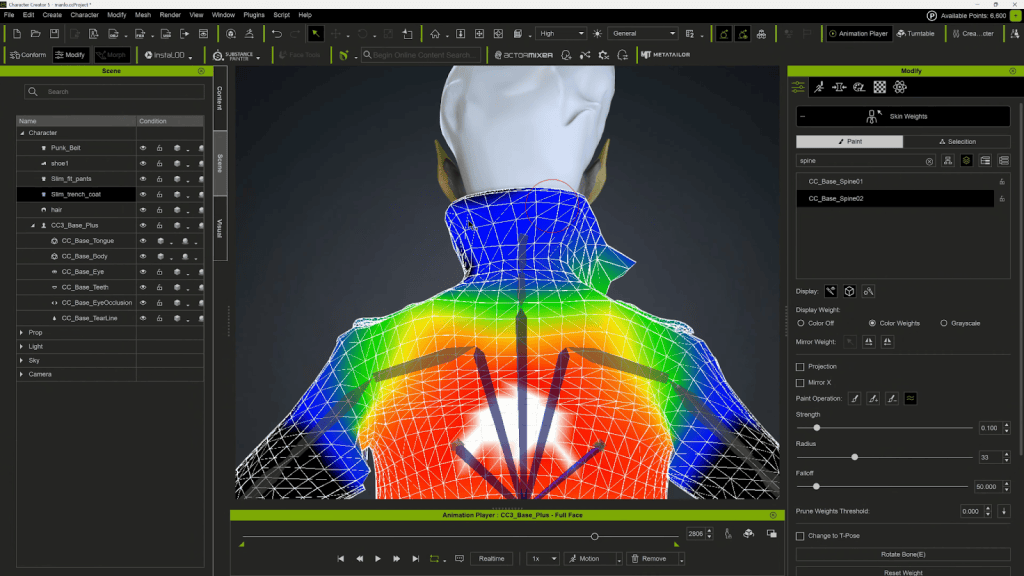
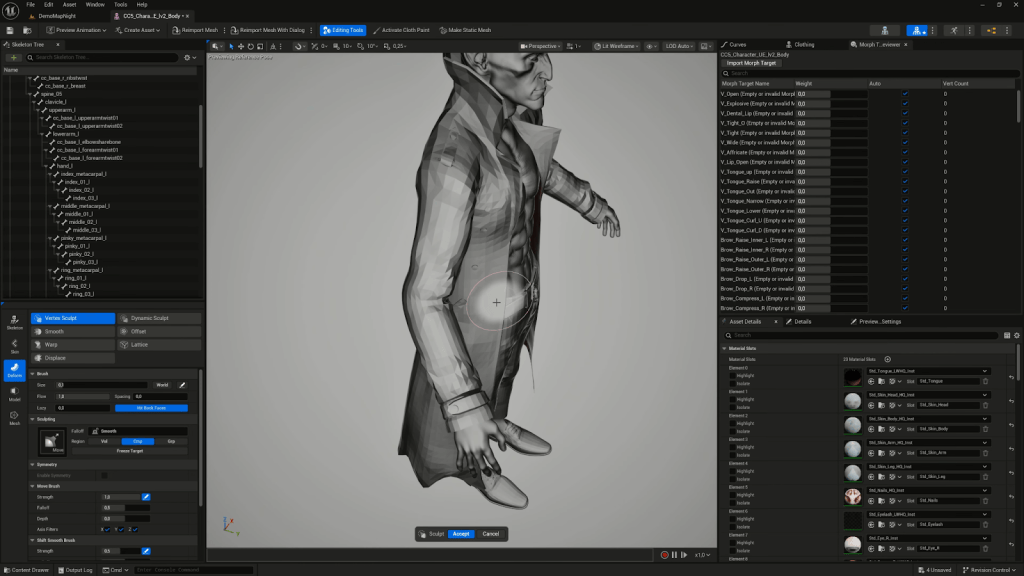
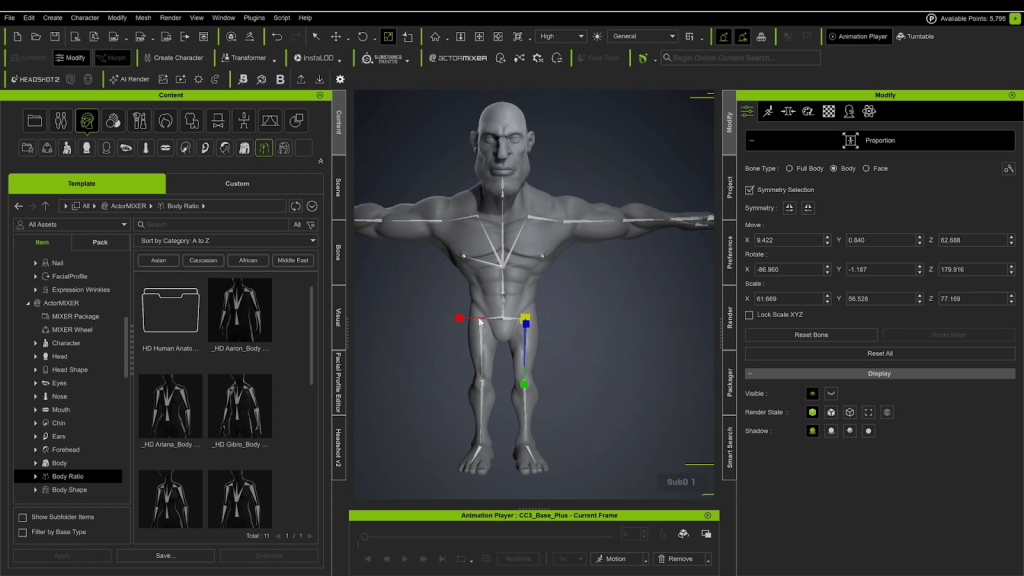
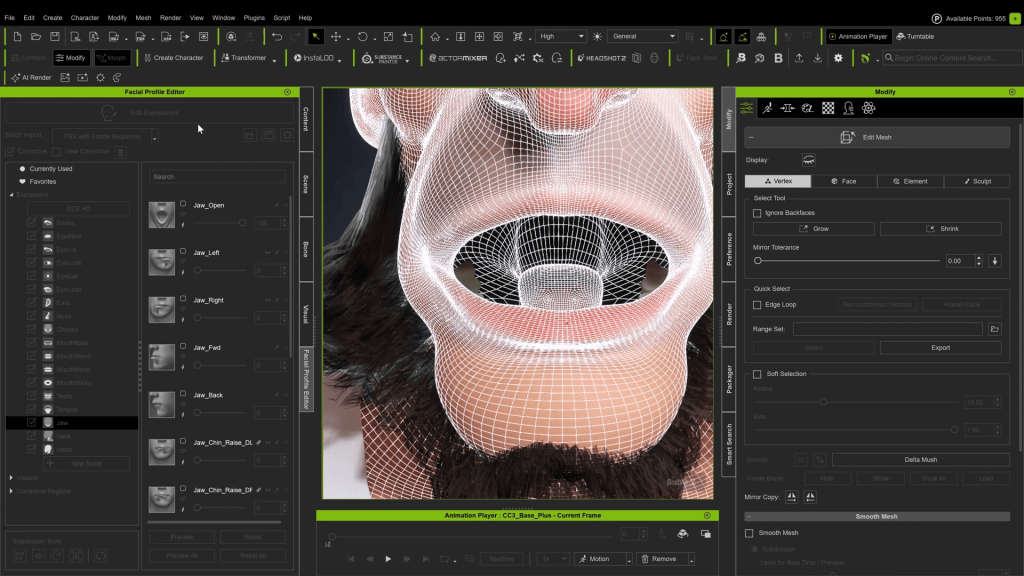
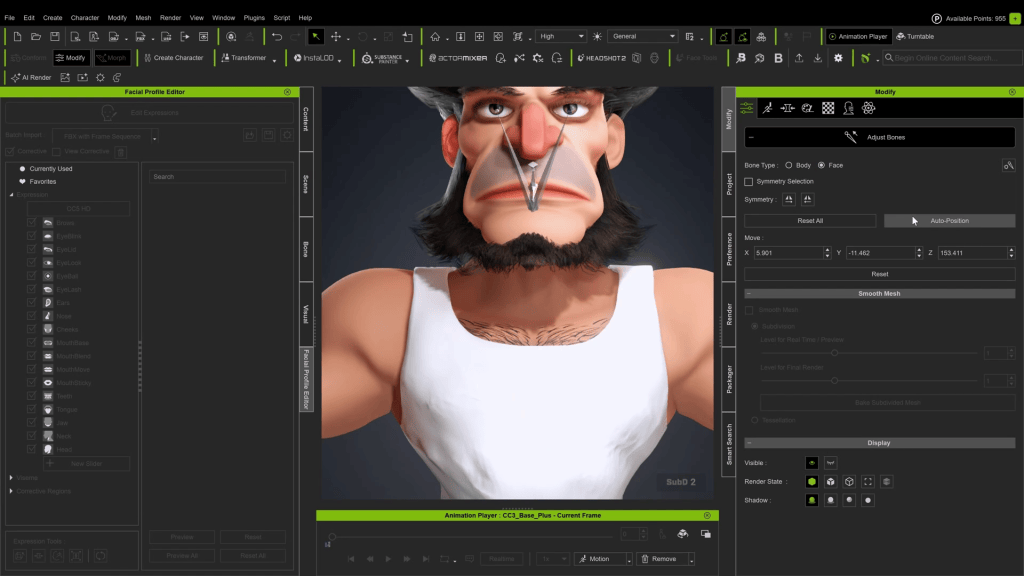
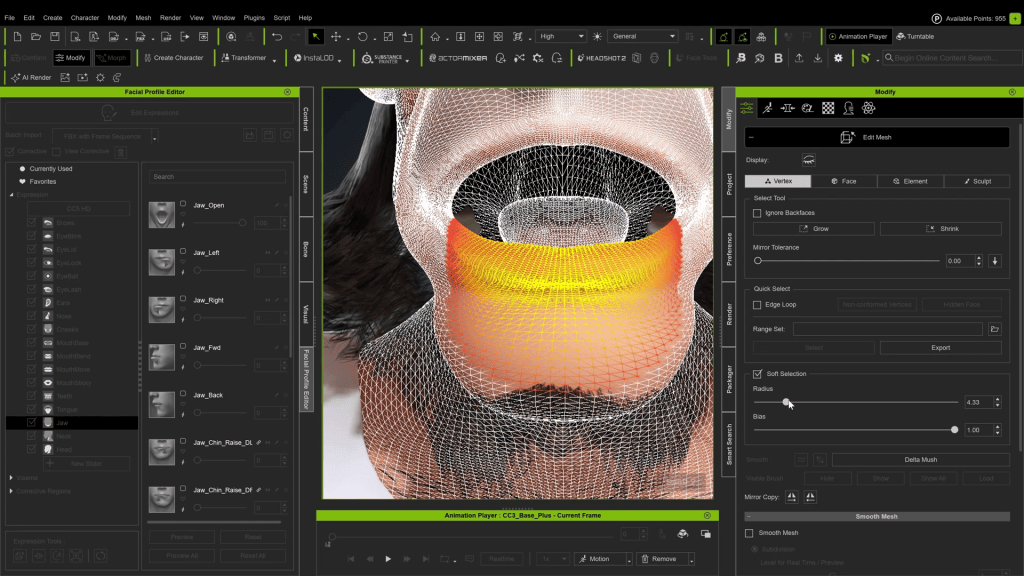
I want to give you a quick demo of how easy it is to get up and running. I loaded the HD-based Aaron clothed avatar, which is a full character with hair, clothing, and high-quality skin textures applied. If you click the morph button, you can start adjusting features. And with the morph button enabled, you can highlight over different body parts and drag them to adjust things like cheekbones, the tip of the nose, ears, and eye size. The “Edit Mesh” feature can modify the character, showing the wireframe and allowing you to grow, shrink, or use other tools to really dial in the mesh. This applies to the body as well.

While Unreal Engine 5.6 has the parametric body system, CC5 is the winner when it comes to manipulating the body and adding imperfections or tweaks to the skin. For example, the realistic human skin pack gives you tons of options for adding wrinkles, acne, moles, scars, and even tattoos. Between the plugins and the marketplace, there are thousands of objects to customize your character. This variety is an area where Metahumans have been lacking, as the built-in options in the Metahuman Creator are pretty limited. CC5 wins on the sheer amount of assets, but with the caveat that many are paid options.

“I think this was super smart by Reallusion. They’re not looking at Metahumans as a competitor, but an extension of Character Creator 5. The updated bone structure can match with MetaHumans when using their new export preset, and the Auto Setup tool makes it super easy to take your character to other DCC platforms like Unreal Engine, Unity, Maya, and even Blender.”

David Stapp / Virtual Production Insider and Lead Virtual Production Artist at Forms Studio

CC5’s Greatest Strength: The Metahuman Workflow

It is now so easy to take your character out of Character Creator 5, import it into Unreal Engine, and swap it out with your existing Metahuman. Here’s how:

Creating the Control Rig Assets

Once imported, find the skeletal mesh asset. Right-click on the skeletal mesh and select Create CC control rig. This creates a new rigs folder with the essential body and face control rig assets.

Export & Import Summary

  1. In CC5, go to File > Export > FBX > clothed character. (Note: If the export button is hidden, check your Windows display settings to ensure scaling is at 100%.)
  2. In the export dialogue, select the Unreal Engine UE5 skeleton preset. Uncheck embed textures. Choose a higher subdivision level (like 2) for a more detailed mesh. Hit export.
  3. In Unreal Engine, ensure the Reallusion Auto Setup tool is installed.
  4. Install the Character Creator UE control rig plugin from Fab and activate it in your project’s Plugins menu.
  5. Drag the exported FBX file into a content folder. The Auto Setup window will pop up—select high-quality shader and hit okay.
  6. In the traditional FBX import box, make sure use T0 as ref pos is unchecked and import morph targets is checked, then click import.

Final Swap

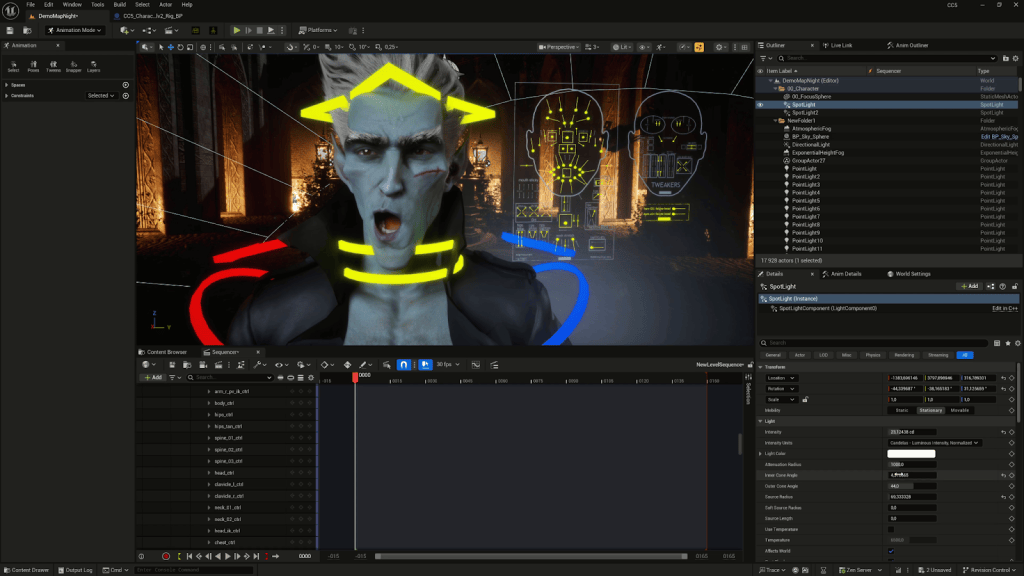
In Sequencer, I have a Metahuman talking to the camera. Now we replace it.

  1. Click the Metahuman, and hit edit in the blueprint.
  2. Delete all hair from the face component (a Reallusion recommendation). (Tip: Duplicate your Metahuman blueprint first!).
  3. Replace the Metahuman body mesh with the imported Aaron body mesh asset.
  4. Replace the face mesh with the imported Aaron face mesh asset.
  5. Hit compile and save.

Just like that, the Character Creator 5 avatar is in our Sequencer, with the body and face animation applied. This truly opens up the possibilities for creating custom characters and using them seamlessly in Unreal Engine.

My Conclusion: Metahuman Companion

Character Creator 5 is pretty amazing. It has so much customization and so much at your disposal—something that I feel has been missing from the MetaHuman creator. Who is this for? If you are a casual user who creates Metahumans occasionally, CC5 may not be right for you. This is aimed more at professionals who need an easy, intuitive workflow for creating custom characters from scratch. If you constantly create characters for your cinematics, I highly recommend checking it out with a Free Trial of Character Creator.

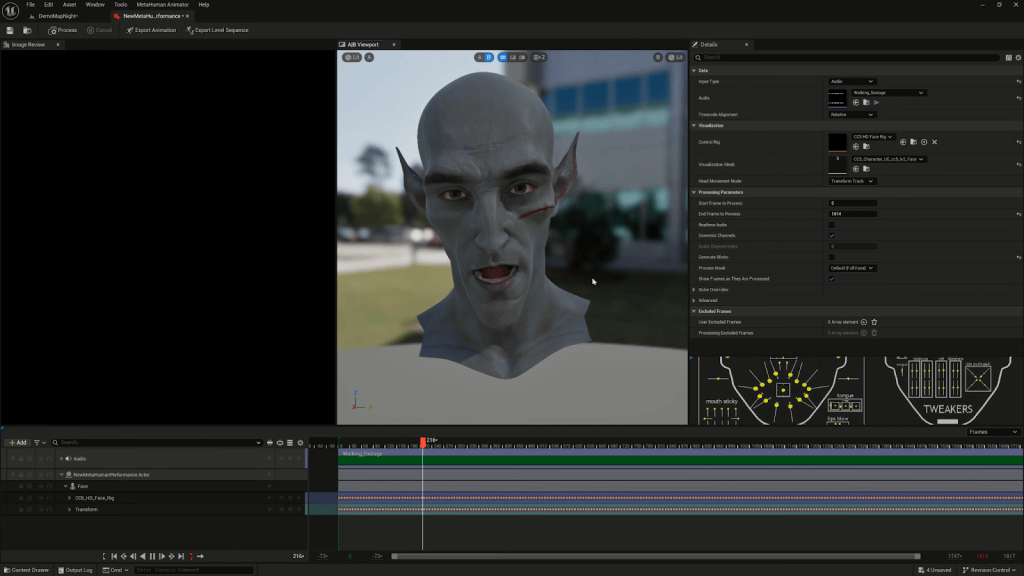
I don’t view this as a Metahuman killer; I think this is a Metahuman companion. It works really well in tandem with it. I’m excited to integrate this into my workflow because it will give me so many more options for customizing the face and body, and it’s amazing that I can easily bring them into the Metahuman blueprint with very little effort. But if you want to upgrade your workflow and easily customize characters, I recommend checking it out—it’s very low risk with the free trial.

Related Posts

Riding the Digital Grid: David Sujono’s CC5 + Cinema 4D Workflow

David Sujono

Freelance 3D Motion Designer David Sujono has built a reputation for cinematic, motion-driven visuals that fuse technical precision with artistic flair. Based in Sydney, Australia, David collaborates with agencies and studios worldwide — formerly serving as 3D Lead at Collider Studio, and earning top honors such as 1st place in Rokoko’s Perfect Loop Challenge and 2nd place in Pwnisher’s Chasm’s Call Challenge.

Today, he’s pushing his creative boundaries even further with Character Creator 5, iClone, and the CC4D Tools, crafting high-fidelity digital humans and dynamic animation workflows directly inside Cinema 4D + Redshift.

Building the Hero: From CC5 Base to Tron’s Digital Realm

David’s latest short film project revisits the visual language of Tron, with a reimagined protagonist inspired by actor Bruce Boxleitner. Using the new CC5 base character, he explored different head and body variations in the Character Creator 5 and its ActorMIXER feature, blending multiple morph sources to fine-tune ethnicity, facial structure, and overall proportions — all in a non-destructive, real-time workflow.

“It was awesome seeing how close I could get — CC5 has so many specific morphs that let me tweak every aspect I wanted,”

David Sujono, Freelance 3D Motion Designer

Armed with a side-by-side reference board, he focused on sculpting subtle details like the nose bridge, eye depth, and head silhouette, leveraging CC5’s new HD morphs and corrective systems. The improved eyelash system and HD eye shaders provided an extra layer of realism, while the new aging morphs opened creative possibilities for his next film — featuring a father-and-son narrative.

CC4D Integration: Seamless from iClone to Cinema 4D

The technical backbone of David’s project lies in the CC4D Tools 1.0.5, which now fully supports CC5’s HD facial rig and Redshift materials.

Using the Import Character feature within CC4D, David brought the entire rigged character into Cinema 4D — automatically linking the control rig, materials, and shaders in one go.

“The CC4D plugin is amazing — it automatically sets up Redshift materials and the control rig, saving me hours,” he said.
“The iClone HD face control rig transfers 1:1, and the new facial rig gives me insane control over nuance and expression.”

This seamless bridge allowed him to iterate on animation in iClone, export facial and body motion separately, and swap takes without breaking rigs — a huge efficiency gain for solo creators managing full CG productions.

Animating the Light Cycle: Rokoko Meets iClone

To bring the iconic Light Cycle sequence to life, David used his Rokoko Smartsuit Pro II with a custom saddle setup — simulating motorcycle posture for realistic performance capture.

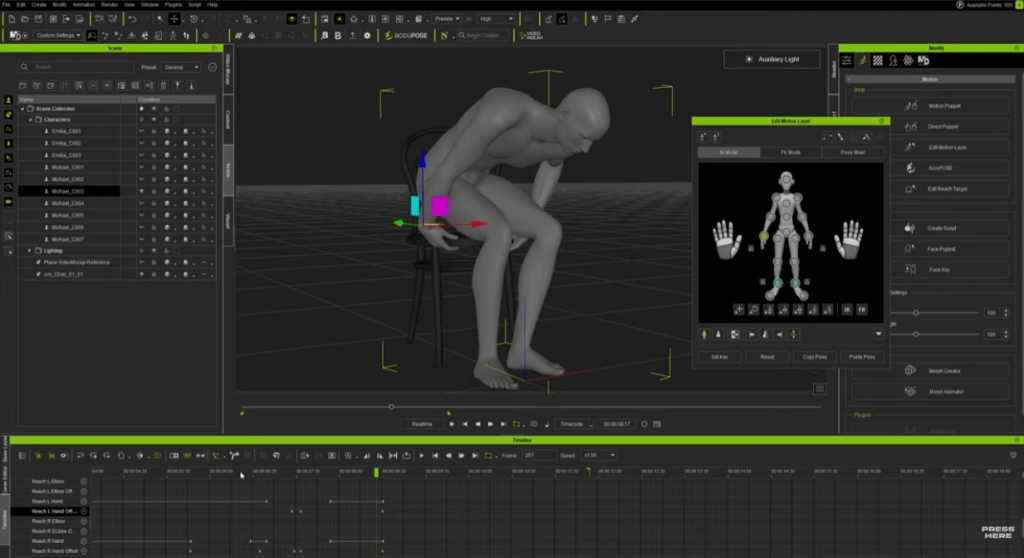
He captured multiple takes while referencing a previz timeline to sync motion with camera beats, then brought the mocap data into iClone, where he refined movement using reach targets for the hands and feet.

“Capturing movement was crucial. Doing this all by hand would’ve taken weeks,” David explained.

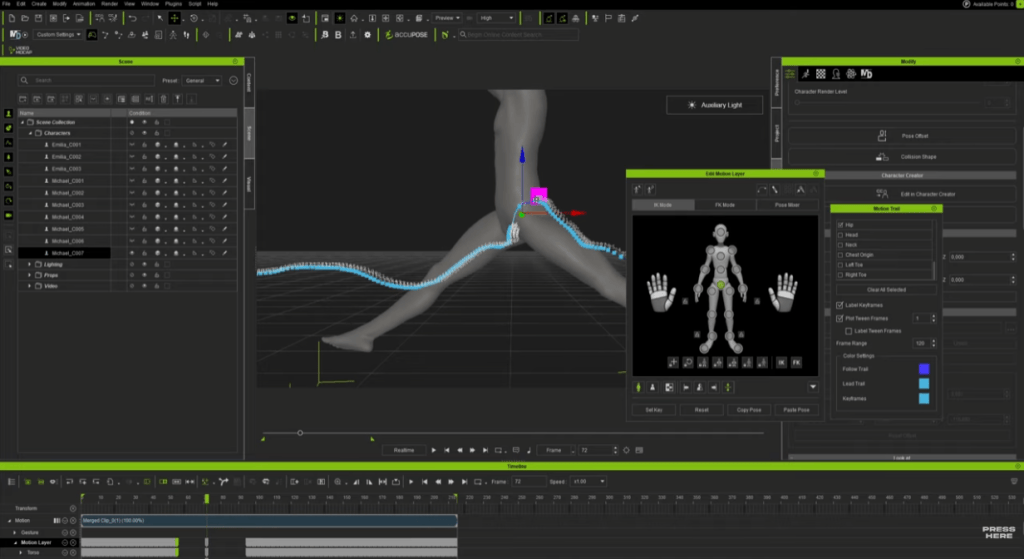
The Motion Layer system helped fine-tune subtle movements — adjusting neck rotations, torso lean, and timing for cinematic emphasis. After smoothing and baking, the results delivered an authentic, weighty performance for the Tron rider.

Facial Motion & Lip Sync: Precision with Dollars Link and AccuLips

Facial performance was handled via Dollars Link, pairing David’s iPhone Live Link app directly with iClone to capture real-time facial mocap. He carefully tuned brow, cheek, and eye movements to keep the performance expressive yet natural.

For speech, David relied on AccuLips to manually refine visemes and enhance lip-sync precision.

“AccuLips is a lifesaver. Facial mocap alone never nails dialogue perfectly — being able to hand-adjust visemes brings the realism up a notch.”

The final animation pass was polished using iClone’s new HD Face Controls, then imported seamlessly back into Cinema 4D via CC4D Tools, maintaining perfect alignment and material fidelity.

Designing the Tron Universe: Procedural Worlds in Cinema 4D

David’s film unfolds across two primary environments: a mountainous tunnel and a vast digital landscape.


He built the terrain using Cinema 4D splines and procedural noises, shaping the tunnel path and animating the Light Cycle along it. For the open-world shots, he combined spline extrusions, displacements, and greeble generators to create depth and complexity with minimal manual modeling.

Textures generated in JSplacement added a futuristic edge through emission maps and digital noise patterns. He layered volumetric lighting, VDB clouds, and soft atmospheric gradients to achieve the film’s signature neon glow.

Final compositing in After Effects involved film grain, glow effects, lens dirt, and cinematic color grading, delivering a look that feels both nostalgic and modern.

Reflections on Workflow & What’s Next

“The fidelity I can achieve with CC5 is incredible — and CC4D makes it effortless to move between tools,” David noted.
“Having materials auto-convert to Redshift saves so much time, and iClone gives me the flexibility to iterate animation faster than ever.”

Looking ahead, David is developing a new short film slated for next year — a heartfelt father-and-son story. He plans to push realism even further using ZBrush detailing, CC5 HD morphs, and iClone’s performance capture tools to create his most photorealistic characters yet.

Related Posts

CC4D Tools 1.0.5 is Now Released — Bringing CC5 Characters to Life in Cinema 4D

A Smarter Bridge Between Character Creator and Cinema 4D

The wait is over — CC4D Tools 1.0.5 is now released, delivering the most powerful bridge yet between Character Creator 5 (CC5) and Cinema 4D.

Developed by Reallusion partner Benjamin Broschinski, the CC4D plugin has become the go-to solution for Cinema 4D artists who want to import, rig, and animate Reallusion characters with professional precision.

What was once a tedious import and rigging process has evolved into a seamless, production-ready workflow, allowing artists to transfer, rig, and animate characters faster than ever.

This new update introduces full support for CC5 characters and the advanced CC5 HD facial profile, bringing next-generation facial detail and animation control right into Cinema 4D.

Face Rig HD — Next-Level Facial Animation

The headline feature in this update is the CC4D Face Rig HD, bringing Metahuman-style facial control straight into Cinema 4D.

Built for CC5’s HD facial profile, the rig lets you drive micro-expressions, corrective morphs, and constraint-based deformations using predefined Xpresso setups.

In practice, this means you can now animate complex facial movements in Cinema 4D with the same fine-tuned precision you’d expect directly inside Character Creator 5. It’s a game-changer for anyone focusing on cinematic storytelling or realistic character performances.

Sharper, More Realistic Eye Shader

Visual realism takes a noticeable leap forward with two new shader templates: EyeTearline Plus and EyeOcclusion Plus.

These subtle but crucial additions smooth out the transition between the eyeball and eye socket, creating a soft fade that eliminates harsh edges and prevents visible mesh intersections.

The result: a more natural, polished look, especially in close-up shots where every pixel counts.

Complete Character Pipeline for Cinema 4D Artists

Beyond the new headline features, CC4D Tools 1.0.5 continues to deliver a comprehensive, artist-friendly pipeline that connects your Reallusion characters with Cinema 4D in just a few clicks.

  • Import Character – Automatically imports FBX files with optimized joints, cleaned morph targets, and optional rig and material setups.
  • Control & Face Rigs – Attach fully-featured FK/IK control rigs or facial systems directly to your character—no manual rigging required.
  • Auto Material Setup – Convert imported textures into Redshift materials in seconds, complete with wrinkle maps and properly configured parameters.
  • Motion Import Tools – Bring in body and facial animation seamlessly from Character Creator, iClone, ActorCore, Mixamo, Rokoko, or Moves by Maxon.

A Refined Workflow for Artists

With version 1.0.5, the CC4D Tools not only keep pace with Character Creator 5—they fully embrace its next-gen capabilities.

Whether you’re an independent creator refining cinematic performances or part of a studio pipeline, CC4D Tools 1.0.5 ensures a consistent, efficient workflow from Character Creator to Cinema 4D—ready for animation, lighting, and rendering in minutes.

FAQ

What’s new in CC4D Tools 1.0.5?

The update introduces full support for CC5 characters, HD facial rigging, and new eye shaders for enhanced realism in Cinema 4D.

Can I import animations from iClone or ActorCore?

Yes. Motion import is supported from iClone, ActorCore, Mixamo, Rokoko, and Moves by Maxon.

Which render engine does it support?

The Auto Material Setup creates materials for Redshift, ensuring instant compatibility and realistic renders.

Do I still need to rig manually?

No. CC4D Tools automatically apply full FK/IK and facial rigs — no manual setup required.

Are CC4 characters still compatible?

Absolutely. CC4D 1.0.5 supports CC4, CC5, and AccuRig characters for a unified workflow.

Related Posts

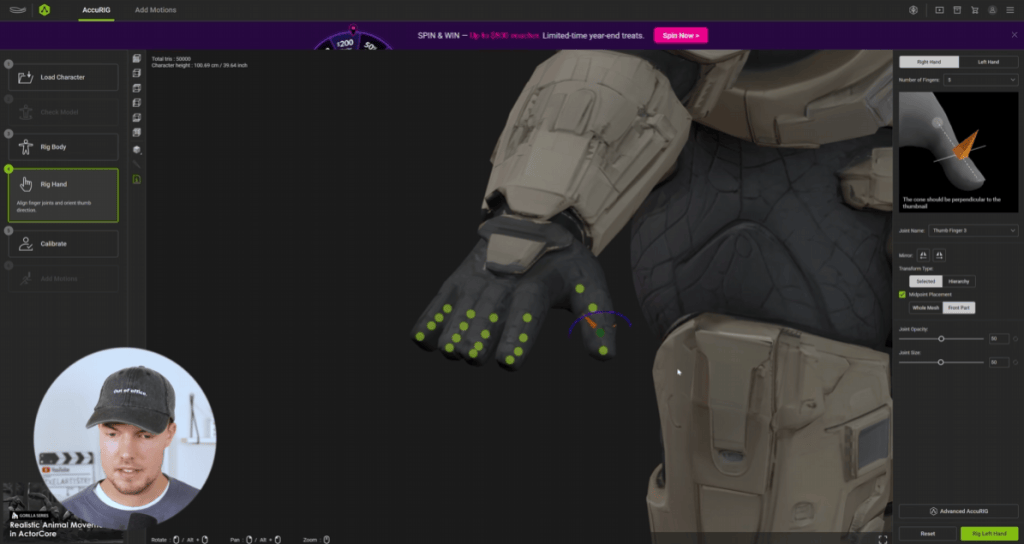
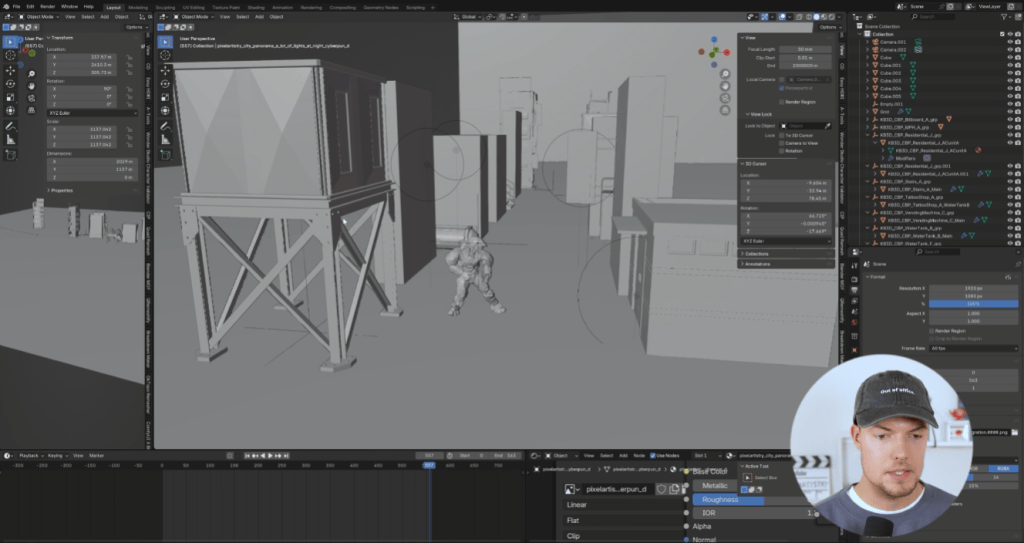
The Making of 3D Gorilla Animations: Capturing the Beast in Motion

Over 130 lifelike gorilla movements, professionally performed and motion-captured.

About ActorCore

Reallusion ActorCore is a premium motion capture library designed for professional 3D production, offering over 4,700 high-quality animations spanning a wide range of themes, from everyday actions and conversations to combat, stunts, and paired performances. Constantly pushing creative boundaries, ActorCore holds a reputation for delivering mocap animations that are often difficult, time-consuming, or costly for studios to produce on their own, while making them accessible and affordable to everyone.

Gorilla Series

Following the acclaimed success of the Wire Stunts and Legendary Heroes series, Reallusion is now venturing beyond standard human motion with a new collection that explores primeval behaviors. Inspired by films such as Planet of the Apes, Tarzan, King Kong, and Warcraft, and supported by industry expertise and the production-scale resources of a major studio, this ambitious project captures authentic gorilla movements. While primate themes often appear on the big screen, this kind of motion data has been largely out of reach for 3D creators… until now.

In collaboration with Quantum Stage, a professional motion capture studio in Switzerland renowned for its directing expertise and stunt performers capable of simulating realistic primal behaviors, Reallusion creates the Gorilla Series—a distinctive collection of high-quality 3D animations available on the ActorCore 3D asset store. These animations authentically capture the strength, movement, and personality of hulking gorillas, making them perfect for wildlife documentaries, zoo simulations, or cinematic storytelling.

See how the Quantum Stage process and professional mocap acting replicate lifelike gorilla movement:

Research and Planning

To achieve natural movement, Reallusion and Quantum Stage conducted extensive research on gorilla behavior. The study organized actions into key categories: daily routines such as walking, running, crawling, and jumping; alert behaviors like scanning the environment and responding to threats; terrain navigation across different levels; and social interactions, including attacking, taunting, defending, and escaping. Together, the study has captured the full range of gorilla motion for use as a production reference.

Imitation of Gorilla Motion

Creating realistic gorilla animation involved two key steps. First, the mocap studio captured the human performer’s body and skeletal motion, much like a traditional motion capture session. The second step focused on accurately adapting these movements to a gorilla’s anatomy. Although gorillas share a similar skeletal structure with humans, their body proportions differ significantly: their hips, chest, and shoulders are much broader, their upper arms and forearms are considerably longer, and their legs are noticeably shorter. By carefully adjusting these proportions, the final animation preserves both anatomical accuracy and authentic primate movement.

“When we shot this animation we specifically observed gorilla motion and behavior from movies such as the King Kong series and Planet of the Apes, and also nature documentaries about how the primates behave with other animals and with each other. It is a very big part of the whole makeup of a gorilla and that shows in the performance. We tried to replicate these as closely as possible,”

Tobias Baumann, Founder, Quantum Stage

Preparing for Action

The most crucial element in capturing authentic gorilla motion is the performer. The actor must combine physical prowess with the creative ability to understand, visualize, and embody gorilla behavior and movement. With high-quality motion capture, every subtle emotion and intention of the performer is recorded, translating directly into the animated character’s movements and expressions.

For this project, the studio collaborated with Ophir Raray, a stunt actor and motion capture artist specializing in creature performances, wire stunts, and movement-based roles. With a background in gymnastics, capoeira, and military training, he brought both life and realism to the gorilla performance. The capture process was physically demanding and technically challenging, requiring the actor to maintain consistent energy, posture, and motion, so that all movements flowed naturally from a precise starting point.

“The preparation involves a lot of research, including researches of animals, apes, and gorillas, their movements, also their psychology, sounds and breath, which are some of the most important things for the performance, to give a life-like performance that the audience can really feel,”

Ophir Raray, creature performer and movement expert

The Right Tool for the Job

To ensure accurate kinesthetics, the team used arm extensions, allowing Raray to mimic the true skeletal proportions of a gorilla. This tool enabled him to move with the correct weight, rhythm, and balance, fully transforming his performance into that of a believable primate. These techniques and tools were essential in bridging human expression and performance with animal motion and behavior, ensuring that the animation captured not only anatomical accuracy but also conveyed personality and emotion.

“Using arm extensions is a very specialized skill, and it requires the body parts, muscles and movements that you normally don’t use. It’s a behavior that you as a human never really experience but the tools allow you to actually move like a gorilla and you can really feel that you are becoming a gorilla,”

Ophir Raray, creature performer and movement expert

Available Now on ActorCore

A product of hours of dedication and passion, the Gorilla Series is now available on ActorCore. The pack includes four motion categories: Routines, LocomotionAggressionand Evasion. The full collection features 131 mocap motions designed for jungle scenes, wildlife simulations, educational content, or any project that requires realistic gorilla movement and behavior.

Whether you’re creating games, cinematic animations, or storytelling sequences, this motion set provides the versatility needed to bring your scenes to life. The collection also includes core poses, instinctual reactions, expressive gestures, combat responses, and terrain-based movements. The Gorilla Series offers the perfect mocap content to bring wildlife adventures into your productions. 

Related Posts

The Ultimate CC5 3D Lighting Guide: Create Cinematic Realism with Free Presets

Lighting is one of the most powerful tools for defining mood, realism, and style in Character Creator 5 (CC5). The free 3D lighting presets give you an excellent foundation to start with — but to truly make your character shine, you’ll want to move beyond simply applying a preset. Fine-tune the lighting to match your character, theme, and camera angle for the best visual results.

This guide walks you through how to make the most of CC5’s Lightrooms and how to adjust presets so they perfectly complement your scene.

Corresponding Lightrooms to CC5 Key Visuals

Reallusion’s Lightrooms are designed to reflect the aesthetics of CC5’s promotional visuals, making them ideal reference points for achieving professional-quality lighting. Each Lightroom offers a ready-made setup that you can adapt to your own scene instead of starting from scratch.

Before making adjustments, take a moment to study the Lightroom you’re using — observe the direction of the key light, how the fill balances the shadows, and whether rim lights are adding separation and depth to your character.

Refer to the Content Resource Page for related examples and presets.

Drag and Drop to Switch Light Presets

Switching between lighting setups in Character Creator 5 is as simple as dragging and dropping. Each preset instantly updates your lighting, letting you preview different moods and angles without manual tweaking.

Apply the Same Light Preset to Different Characters

Apply one light preset to multiple characters to keep a consistent visual tone. Subtle differences in skin tone, facial shape, and materials will still stand out—keeping your renders unified yet distinctive.

Using Lightrooms Effectively

1. Break Down the Lighting Setup

Understanding the default lighting setup is essential. Open the Scene Manager and toggle each light on or off to observe how it shapes the scene. Notice which light defines the face, which adds depth to the shoulders, and how they interact to create balance. Once you understand each light’s role, refining the look becomes much easier.

2. Troubleshoot with On/Off Toggles

If your character appears too bright, flat, or lacks shadow definition, toggle off one light at a time to identify the cause. This method helps isolate problem lights quickly and prevents overcorrecting with unnecessary adjustments.

3. Adjust Light to Match Character Height

Lighting presets are designed for average proportions. If your character is taller, shorter, or posed differently, the light may hit at the wrong angle. Raise or lower the lights so they illuminate the character’s face naturally.

4. Rotate Lights Around the Character

Pivot your lights around the subject to refine highlight and shadow balance. Even a subtle 15–30° rotation can dramatically shift the mood and emphasize your character’s best features.

5. Extend Portrait Lighting to Full Body

Most presets are tuned for upper-body shots. For full-body renders, extend the light range downward so the legs, feet, and shadows are properly illuminated. This ensures the character doesn’t appear to be floating under inconsistent lighting.

5-1. Duplicate Existing Lights with Dummies

If one light works well but doesn’t cover enough area, duplicate it and link the copy to a light dummy. This extends coverage while keeping the original lighting balance intact.

5-2. Add a Shadow Catcher

Ground shadows add realism. Use a shadow catcher plane to anchor your character in the scene—without it, even good lighting can look artificial.

5-3. Adjust Shadow Darkness and Range

Avoid setting shadow darkness to zero or your scene will appear flat. Increase intensity for more weight, and extend the range so shadows fade naturally to the ground.

5-4. Duplicate the Full-Body Light to Add a Fill Light

Duplicate the main light to create a soft fill. This secondary light reduces harsh shadows and adds surface detail while keeping the key light dominant.

5-5. Reduce Fill-Light Shadow and Adjust Intensity

Lower the fill light’s shadow strength to prevent double shadows, then fine-tune brightness until it complements the key light smoothly.

5-6. Use PCSS as an Optional Choice

PSCC (Percentage-Closer Soft Shadows) softens shadows farther from the object for a more natural falloff. It may, however, cause visual artifacts—use selectively and check results from different angles before final rendering.

6. Enhance Eye Reflections

Eyes bring characters to life. Slightly adjust the light position to create strong catchlights in the eyes. This subtle touch adds realism and enhances the emotional depth of your character.

7. Post Effects

Lightrooms and iAtmosphere include built-in post effects for instant visual enhancement. Free LUT resources can be added, removed, or adjusted to refine color tone and elevate the overall mood and atmosphere.

8. Use Depth of Field (DOF) for Focus

DOF not only adds a photographic touch but also draws attention to your character’s face. A subtle background blur enhances the mood and helps separate your subject from the scene.

9. Don’t Forget Shader Adjustments

Lighting alone won’t achieve realism if shaders aren’t properly set. Adjust skin, hair, and clothing shaders to respond correctly to your light setup. For example, fine-tuning roughness or specular levels helps prevent skin from looking plastic or overly shiny.

GreaseMicro Roughness Scale: -0.4

MatteMicro Roughness Scale: 0.2

NaturalMicro Roughness Scale: -0.2

Final Thoughts

The free lighting presets in Character Creator 5 are more than quick solutions—they’re powerful starting points for creative customization. By breaking them down, adjusting for character proportions, extending their range, and fine-tuning shadows, reflections, and shaders, you can achieve cinematic, expressive lighting that feels uniquely yours.

Related Posts

CC5 – Big Step Up for Beginners & Pros

Character Creator 5 has been released, and it was well worth the wait, and a welcome release to beginners and pros with its usual ease of use we have come to expect from Reallusion products. Over the past five releases, Reallusion has brought some of the most time-consuming and difficult animation tasks, character creation and rigging, to anyone that wants to make a character.

No technical experience necessary.

This release brings characters to a new level from gaming to cinematic needs as it includes High-Definition Characters, High-Definition morphs, and High-Definition facial animation by including Subdivision levels from 0 (lowest to 2 (highest), providing three levels of mesh density to suit a wide range of needs.

With three levels, this also brings up another interesting and much-needed new feature: baking normal maps to transfer features from a high-poly character to a low-poly character (projecting) using maps, not mesh. I’ll get more into this later on in the article, but I can say they have made it a simple process as usual.

CC5 Launch Bundle

For those not familiar with all this the CC5 Launch Bundle consists of CC5 Deluxe, the new ActorMIXER Pro plugin with the core library.

ActorMIXER Core Library includes 44 HD scanned head shapes and textures across four ethnicities: Asian, Caucasian, African, and Middle Eastern. (It will cost you hundreds if you purchase 3D-scanned heads in the market)

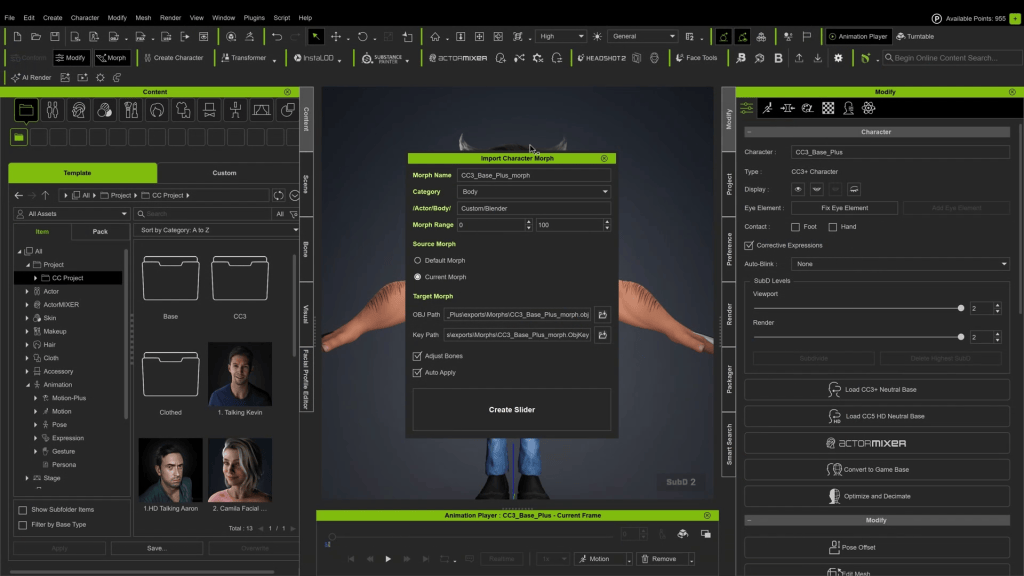
HD Ultimate Morphs is different from the Ultimate Morphs Pack currently available for CC3+, it includes fine-tuned, realistic body parts and facial features. Users can refine facial details to full-body shape with built-in sliders, even baking the details into normal maps on lower base meshes.

HD Human Anatomy Set includes 12 avatars across diverse anatomy features that are animation-ready and customizable with ActorMIXER.

HD Characters & Morphs

Character Creator 5 introduces a major advancement with its new HD Character Base that supports up to 16 times more mesh detail through subdivision for cinematic-quality visuals and real-time performance. The system bridges game-ready characters with film-quality rendering by combining enhanced shaders, high-resolution eyes with a new eyelash system, and full support for displacement maps to achieve real geometric depth even in close-ups.

The upgraded HD morph system allows detailed anatomical adjustments without changing the character’s bone structure, enabling variations like muscular builds, feminine curves, or aging effects.

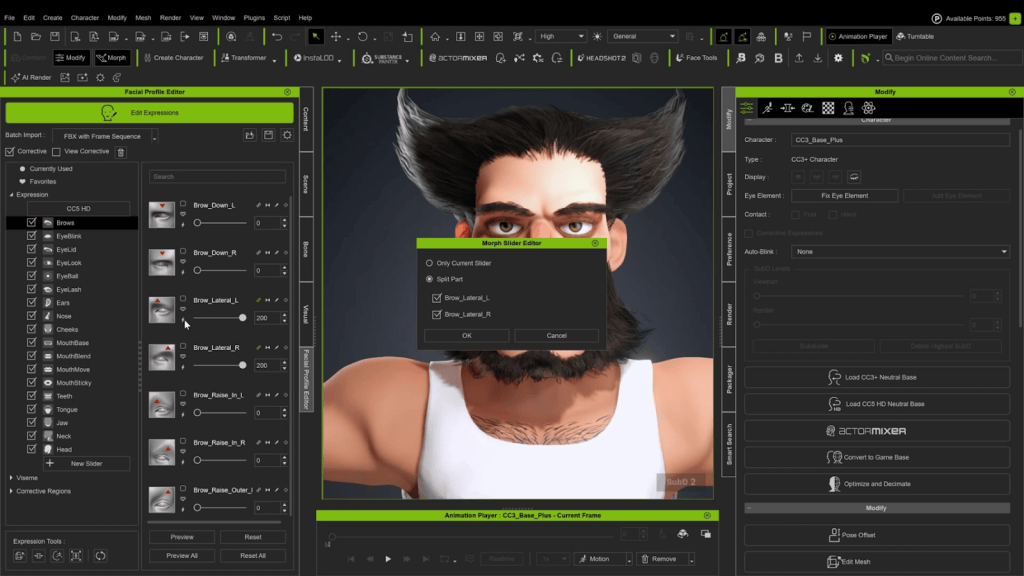
Character Creator 5 also features a next-generation facial animation system with an expanded HD Expression Profile that drives more blend shapes for subtle micro-expressions. A corrective constraint system ensures all facial movements remain anatomically accurate, preventing distortion and providing more lifelike emotional detail.

Overall, Character Creator 5 sets a new standard for real-time HD character creation, combining flexibility and fidelity for games, film, and VFX production.

HD Facial Animation

Reallusion’s Character Creator 5 introduces a next-generation HD Facial Animation system designed to deliver cinematic realism. Built on 262 blendshapes and 128 corrective morphs, the new rig captures everything from subtle micro-expressions to complex lip-sync with film-quality precision. The result is more lifelike characters that move beyond the uncanny valley and bring digital performances to a new level of believability.

Seamless integration with iClone tools like Face Puppet, Face Key Editor, and Motion LIVE ensures intuitive control and flexibility. The system also supports mocap pipelines such as iPhone and AccuFACE, and aligns with Epic’s MetaHuman Animator for high-fidelity performance capture. Even legacy CC3+ models benefit from the Extended-Plus Profile, which adds corrective morphs and mocap compatibility, making Character Creator 5 a powerful hub for animators seeking both realism and efficiency.

  • Next-gen HD Facial Animation with 262 blendshapes + 128 corrective morphs capturing detailed micro-expressions and lip-sync
  • Seamless iClone Face Puppet, Face Key, and Motion LIVE mocap support
  • Compatibility with iPhone mocap, AccuFACE, and MetaHuman Animator
  • Extended-Plus Profile upgrades legacy CC3+ models, boosting corrective morphs and mocap compatibility
  • Enhanced mesh detail, HD morphs, and displacement maps for cinematic realism

Baking and Projecting High Poly Maps

Baking maps refers to the process of pre-calculating and storing complex information about an object’s surface into texture maps. These maps can include details like lighting, shadows, and other surface characteristics. By embedding this information into the maps, the rendering process becomes more efficient, as the computer doesn’t have to calculate these details in real-time. This technique helps achieve high-quality visuals while optimizing performance, significantly reducing the computational load when scenes are rendered.

Projecting was at one time an advanced skill. I use it in ZBrush, and the process was already simplified a lot by then. Now Reallusion has made it even easier by giving us a simple, straightforward method of projecting details from, for example, a 500K mesh to a 50K mesh with little to no loss of detail. Let that sink in. Less polys, same look.

The general idea behind projecting is taking at least two versions of the same mesh—one very high poly and the other very low poly. We do the work on the high poly mesh with the detailed character, then use the High-Definition maps to create detail instead of mesh for use on the low poly character. This allows us to dramatically alter and lower the mesh density (poly count).

In simpler terms, imagine you have a very detailed 3D model (high poly) with lots of tiny details. This model can be quite complex and heavy for computers to handle in real-time. To make it easier to work with, we create a simpler version (low poly) with fewer mesh details and more map details. The projection process transfers the detailed information from the high poly model onto the low poly model by creating texture maps that capture intricate details like bumps, shadows, and textures. These maps are then applied to the low-poly model, making it look as detailed as the high-poly model but with much less computational load.

By using these techniques, artists can create highly detailed and realistic 3D models without the need for complex and resource-intensive calculations during rendering. Character Creator now has a simple process to create up to three levels of mesh density. If you can click a button or check a box, you can bake. Overall, baking and projecting maps are crucial techniques in 3D animation and computer graphics that enhance both the visual quality and performance of rendered scenes.

ActorMIXER Plugin

ActorMIXER is a valuable tool in itself and worth the upgrade for a lot of creators who need unique characters, particularly if they can make those new characters from existing assets. It is beginner-friendly with ease of use. We can even drag in custom morphs for all sorts of possibilities.

Reallusion released a free and a Pro version of the plugin. This opens up new possibilities of combining our current characters to create even more characters with the mixer wheel. It is a very simple and intuitive way to mix existing character parts including heads for more unique characters.

We can mix the body or facial parts, including the Head, Head Shape, Eyes, Nose, Mouth, Forehead, Ears, and Chin. With this enhanced morphing via the ActorMIXER wheel, we can easily and quickly produce unique characters from our existing character base. ActorMIXER Pro comes with random face generation too.

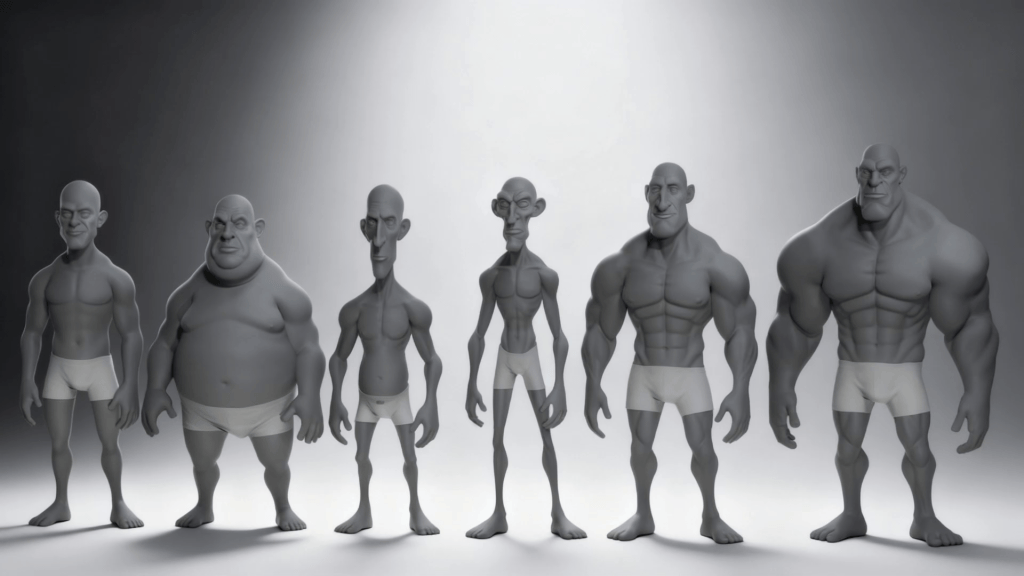
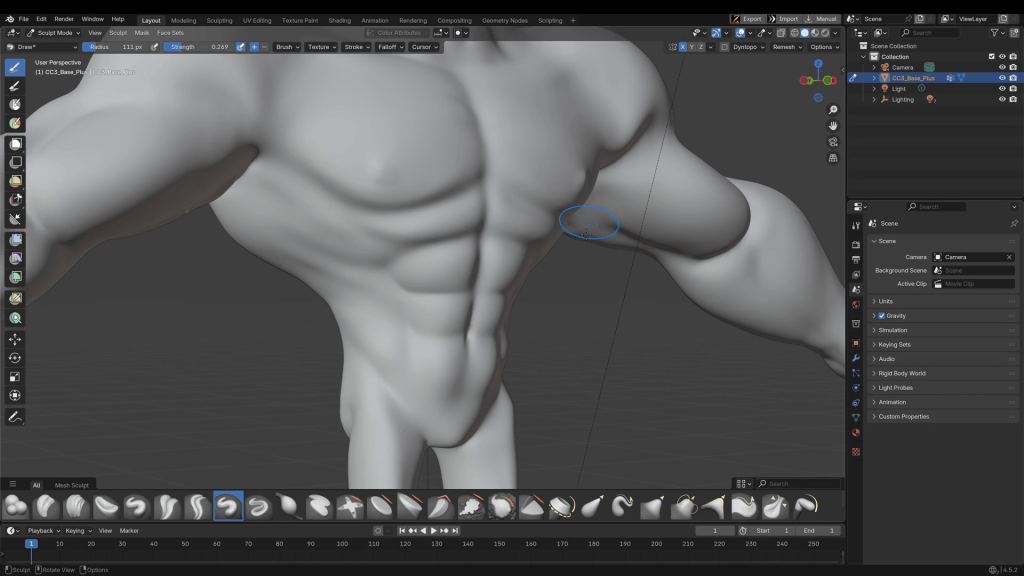
Not only can we use the ActorMIXER wheel to create unique heads, but we can also apply the same principles to the body morph. This includes adjustments to the Body, Bone Scale, and Body Shape. By manipulating these parameters, we can achieve a wide range of body types and proportions, allowing for the creation of truly unique and diverse characters.

Whether you’re aiming for a more muscular build, a slender frame, or anything in between, the body morph options provide the flexibility needed to bring your vision to life. This level of customization ensures that each character can be tailored to fit specific artistic or narrative requirements, enhancing the overall creative process.

Auto Setup for Marmoset, Maya, and Blender

Maya – Auto Setup for Maya is a free plugin designed to streamline the import and rendering of high-definition characters and animations from Character Creator, iClone, and ActorCore directly into Autodesk Maya. The tool automates rigging, facial animation controls, material assignments, and offers integrated lighting presets, helping artists create cinematic-quality renders with minimal manual setup.

Blender – Auto Setup for Blender is a free plugin that connects Blender with Character Creator, iClone, and ActorCore to enable a smooth workflow for 3D character and animation development. The tool eliminates the need for manual FBX imports by providing real-time, two-way data synchronization called Data Link, allowing artists to transfer character models, morphs, poses, animations, lights, and cameras between platforms with a single click.

Marmoset Toolbag – Auto Setup for Marmoset Toolbag is a free plugin that simplifies the process of importing and rendering high-definition characters and animations from Character Creator, iClone, and ActorCore into Marmoset Toolbag 5.0 and above. This tool automates the assignment and baking of Reallusion’s Digital Human Shaders, enabling photorealistic ray-traced rendering with full control over skin, wrinkles, hair, eyes, and teeth materials.

MetaHuman Support

Reallusion offers a comprehensive MetaHuman integration pipeline that connects its Character Creator and iClone software with Unreal Engine’s MetaHuman Creator and animation system.

This pipeline enables seamless transfer of customized head shapes, skin textures, high-resolution body textures, and dynamic wrinkles from Character Creator to MetaHuman, ensuring ultra-realistic character representation in Unreal Engine.

iClone 8.6 Update

The iClone 8.6 update is packed with features and improvements for character realism, animation control, and export flexibility, especially when paired with Character Creator 5 (CC5). Now, you can import MetaHuman facial animations and use CC5’s HD and Extended-Plus profiles for more detailed corrective shapes and better subdivision control. The eye shaders got an upgrade too, with new occlusion and tearline systems that get rid of mesh intersections and make tear ducts look super realistic.

On the animation side, there’s a new facial parts strength option and expanded Motion LIVE functionality, which lets you do non-linear curve editing for characters with corrective facial profiles. Exporting is smoother now with new FBX presets for Marmoset Toolbag, Unreal Engine 5 skeletons, and UEFN. Other updates include better eye modeling, optimized file compression, and bug fixes for crash scenarios and Unreal control rig mappings.

Summary

There is far too much to cover with the CC5 release and subsequent articles will look at some of these tools in more detail. CC5 is so feature-packed that it just can’t be adequately described in one article.

It doesn’t matter if you are a beginner or seasoned professional, CC5 can help you achieve even more unique characters than previous versions, and is a next-level step above CC4, which was a character powerhouse in its own right.

If you have never tried Character Creator, then version 5 is a perfect time to start. You will be creating characters almost as soon as you download and install it.  Then you will be wondering why you wasted so much time on other methods.

Don’t wait… try the free trial and explore a new world of 3D character possibilities all with full facial and lip sync features!

MD McCallum - WarLord

MD McCallum – WarLord

Digital Artist MD “Mike” McCallum, aka WarLord, is a longtime iClone user. Having authored free tutorials for iClone in its early years and selected to write the iClone Beginners Guide from Packt Publishing in 2011, he was fortunate enough to meet and exchange tricks and tips with users from all over the world and loves to share this information with other users. He has authored hundreds of articles on iClone and digital art in general while reviewing some of the most popular software and hardware in the world. He has been published in many of the leading 3D online and print magazines while staying true to his biggest passion, 3D animation. For more information click here.

From CC5 to Marmoset Viewer: Bring Characters to Life on the Web

ÓSCAR FERNÁNDEZ / DIGITAL SCULPTOR

Óscar Fernández is a freelance digital sculptor from Spain, specializing in creating figures for 3D printing. With deep expertise in ZBrush, he is known for crafting highly expressive characters that capture both personality and motion. His work stands out through the meticulous attention to facial expression, muscle definition, and dynamic posing, giving each sculpt a strong sense of tension and storytelling power.
Check Oscar’s ArtStation

Oscar Fernandez’s HD Alien MIXER pack is available now!

Overview

Character Creator 5 (CC5) continues to expand its creative ecosystem with the addition of new free plugins that streamline workflows with leading industry tools. One of the latest integrations, Auto Setup for Marmoset, makes it easier than ever to render and showcase your characters with professional quality.

In this article, we’ll take a closer look at how Marmoset Toolbag—and specifically Marmoset Viewer—can enhance your CC5 projects. From real-time rendering to interactive presentation, we’ll explore how these tools work together to bring your creations to life with both speed and style.

Setting Up Our Scene

We’ll start by setting up the scene: importing the mesh using Auto Setup for Marmoset, applying its materials, and adjusting the lighting, camera, and post-processing effects, just as we did in the previous video. 

It’s important to keep in mind that Marmoset Viewer is designed to run smoothly on a wide variety of devices, so there are some limitations. For example, shadow-casting lights are limited to three (you can use more lights, but only the first three will cast shadows), omni lights don’t cast shadows, and certain shading models, post-processing effects, and rendering features are not yet supported.

We’ll make sure the camera is centered to make navigation and scene rotation easier. Usually, to do this, we select the main mesh and go to View → Frame Selected (Ctrl+F).

Export the .mview File

To export the .mview file, go to File → Export → Viewer, or simply press Shift + Ctrl + V.

You can also add artist credits and a link to your portfolio by filling out the Title, Author, and Link fields.

As you’d expect, the texture quality setting has a significant impact on the file size. Here you can choose between Low, High, or Unreasonable quality — a very fitting name for this viewer’s purpose, corresponding to 4K textures.

Once everything is ready, just click the Export button to generate the file.

After exporting, you can view the file locally using Marmoset Viewer, which is installed for free  alongside Marmoset Toolbag, but can also be downloaded separately from the Marmoset  website.

Once opened, you can switch to full-screen mode and also isolate different layers such as normal  maps, color information, roughness, metalness, and mesh topology independently — all with the advantage of being able to view your model in real-time 3D.

Upload to Artstation 

This same file can be shared directly on several 3D communities, such as ArtStation, just as easily as adding an image to a new project, and with the same viewing advantages we saw earlier.

Embedding On Our Website 

When exporting, you can also choose the HTML option. Once you’ve defined the size and a few additional parameters, you can hit Export. However, if you’re going to embed the viewer inside an iframe, it’s important to select Full Frame. This way, Marmoset Viewer will ignore the  height and width values and automatically fit the iframe size. 

This will generate a simple HTML file that displays your scene. It’s very handy if you want to embed or showcase the scene on your personal website. You’ll just need some basic HTML  knowledge, but it’s very straightforward. 

I’ve created this super simple HTML file, and we’re going to embed the code by simply copying  and pasting it where we want: 

<iframe src="yourscene1.html" allowfullscreen="true" height="467" width="830"></iframe>

We replace the example HTML with our own file, adjust the iframe dimensions, and that’s it! 

Keep in mind that for this to work, the file must be uploaded to a server, since it won’t display correctly when viewed locally.  Another very interesting option is to create a gallery on your own website. 

We’ll create a pose for each character in Character Creator to give them a bit more personality,  export each one as FBX files (as we already know how to do), and then load them into Marmoset using the Auto Setup plugin, on a previously configured but empty scene — just like we did in the previous video. Finally, we’ll export a Marmoset Viewer (.mview) for each character using the HTML export option we just saw. We’ll also render some images of each character to use as thumbnails for  our gallery. 

Using the same template as before, we’ll copy the following base code:

<iframe src="yourscene1.html" name="viewerframe" allowfullscreen="true" height="467"  width="830"></iframe>

Here, we can assign any name we like — in this case, “viewerframe”.

We replace the example HTML with the scene we want to display by default, make sure  allowfullscreen is set to “true”, and define the viewer size. To create clickable thumbnails, we’ll copy the following code: 

<a href="yourscene1.html" target="viewerframe"><img src=" yourscene1.jpg"  alt=" yourscene1"></a> 
<a href=" yourscene2.html" target="viewerframe"><img src=" yourscene2.jpg"  alt=" yourscene2"></a> 
<a href=" yourscene3.html" target="viewerframe"><img src=" yourscene3.jpg"  alt=" yourscene3"></a>

Replacing each HTML reference with one of our own. Make sure that the target matches the name we defined earlier (viewerframe) and replace the images with our custom thumbnails.

I’ve also added a stylesheet to the gallery to make it look a bit more modern and appealing — and this is what the final result looks like once uploaded to our website. 

<style> 
.gallery-section { 
display: flex; 
flex-direction: column; 
align-items: center; /* aling iframe horizontally*/ 
gap: 10px; /* space between the iframe and the thumbnails */ 
margin-top: 20px; 
.thumbnail-bar { 
display: flex; 
justify-content: center; /* center the thumbnails */ 
flex-wrap: wrap; /* allows them to go down the line if there are many */  gap: 10px; /* space between images */ 
.thumbnail-bar a img { 
width: 295px; /* thumbnail size */ 
height: auto; 
border-radius: 8px; 
cursor: pointer; 
transition: transform 0.2s, box-shadow 0.2s; 
.thumbnail-bar a img:hover { 
transform: scale(1.05); 
box-shadow: 0 0 10px rgba(0,0,0,0.3); 
iframe { 
border: none; 
border-radius: 12px; 
box-shadow: 0 0 20px rgba(0,0,0,0.3); 
</style>

And finally, this is the part of the code connected to the style sheet:

<div class="gallery-section"> 
<iframe src=" yourscene1.html" name="viewerframe" allowfullscreen height="600"  width="900"></iframe> 
<div class="thumbnail-bar"> 
<a href=" yourscene1.html" target="viewerframe"><img src=" yourscene1.jpg" alt="  yourscene1"></a> 
<a href=" yourscene2.html" target="viewerframe"><img src=" yourscene2.jpg" alt="  yourscene2"></a> 
<a href=" yourscene3.html" target="viewerframe"><img src=" yourscene3.jpg" alt="  yourscene3"></a> 
</div> 
</div>

I hope this tutorial has helped you enhance your project presentations using the new tools in Character Creator 5.

Related Posts

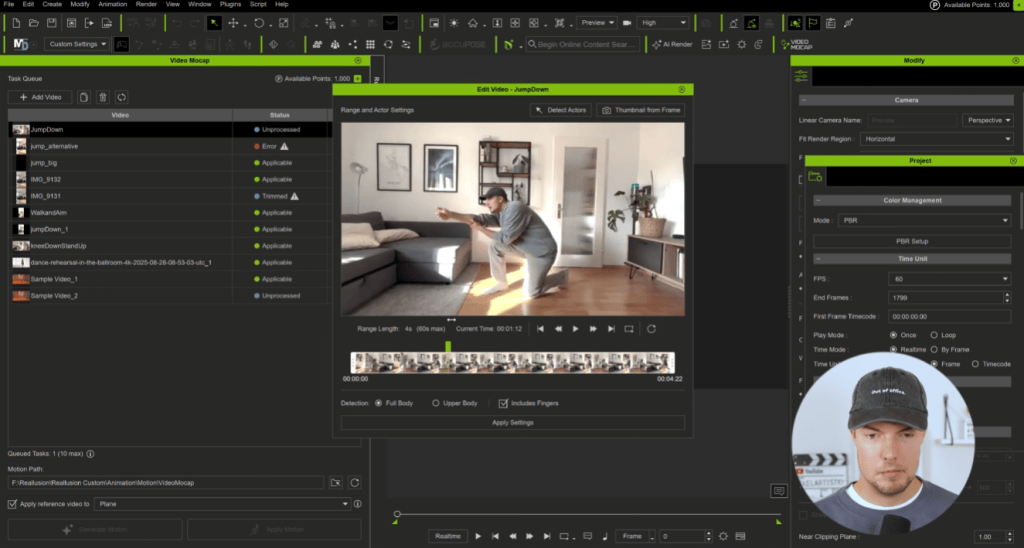
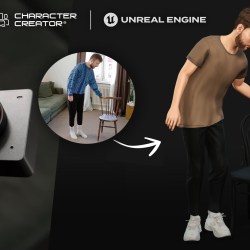
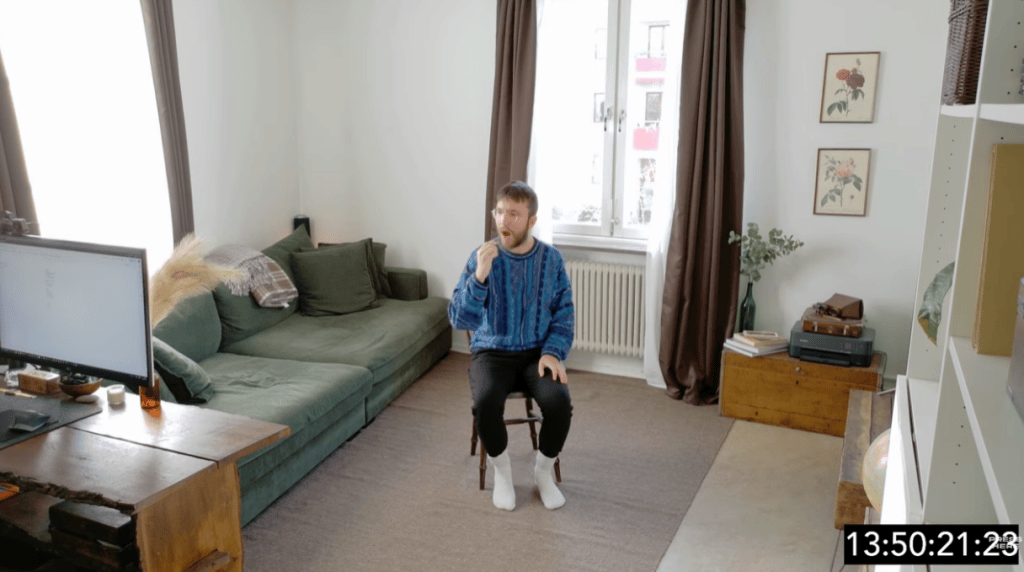
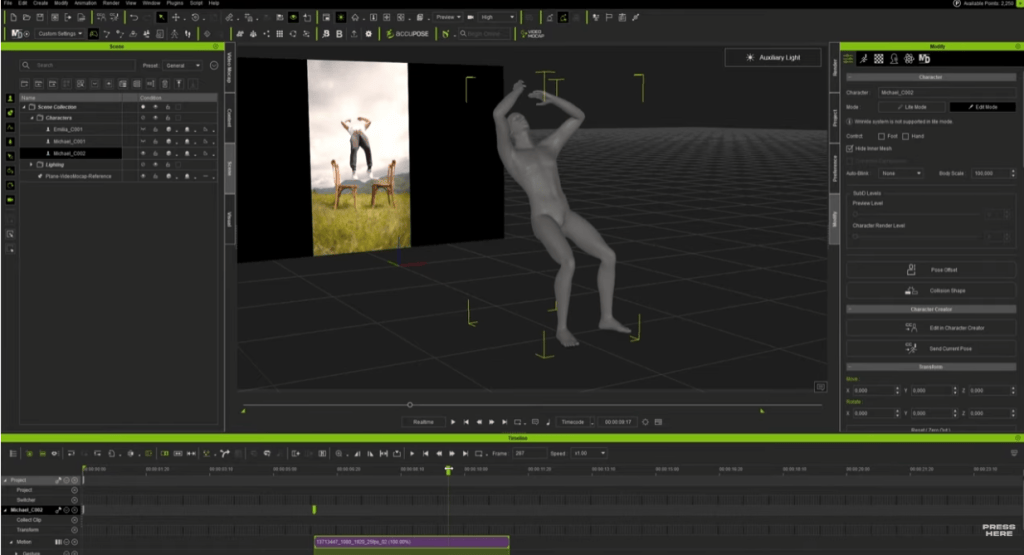
iClone Video Mocap Converts Videos into Editable 3D Motion

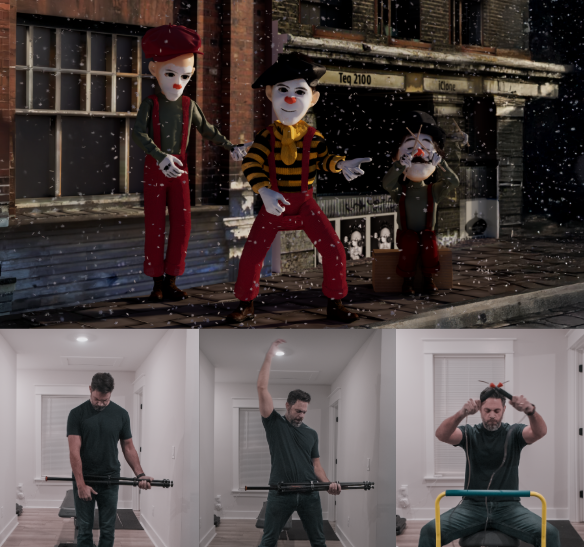
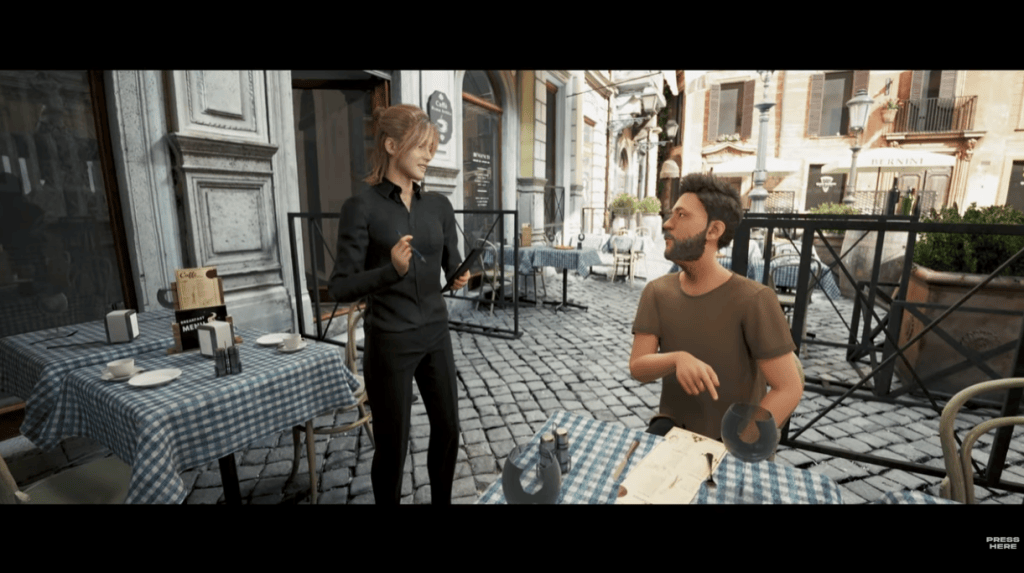
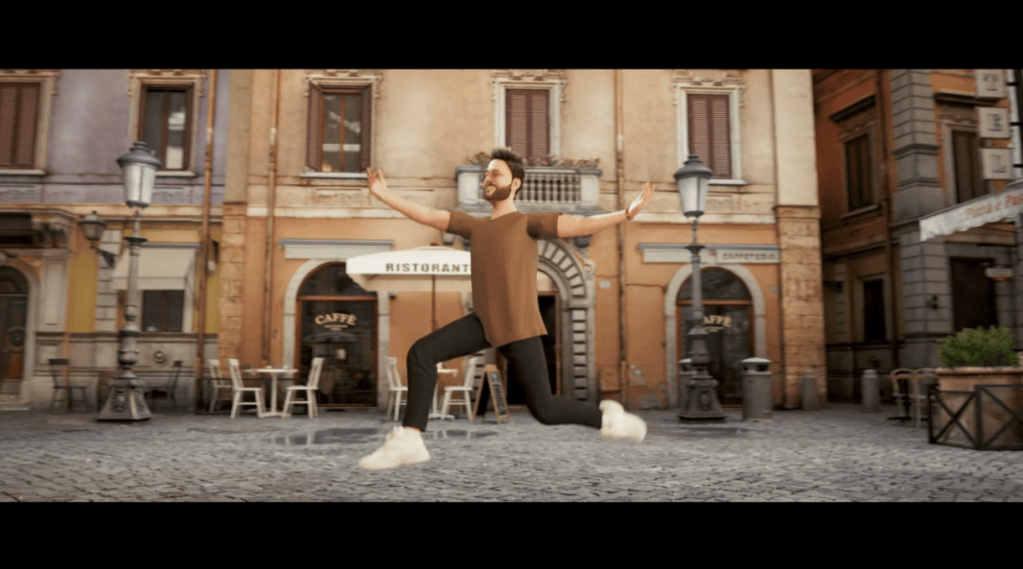
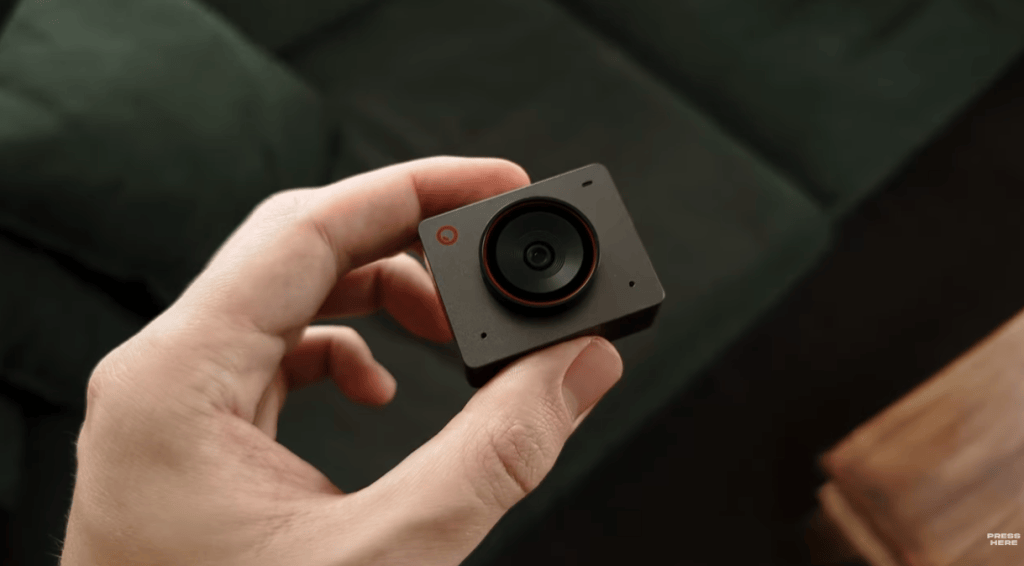
Reallusion introduces iClone Video Mocap, an AI motion capture service that turns ordinary videos into precise, editable 3D motions, right inside iClone. This new solution streamlines motion creation for filmmakers, game developers, and creators seeking natural, production-ready animation without the need for mocap hardware or costly subscriptions.

Precise AI Mocap from Any Video

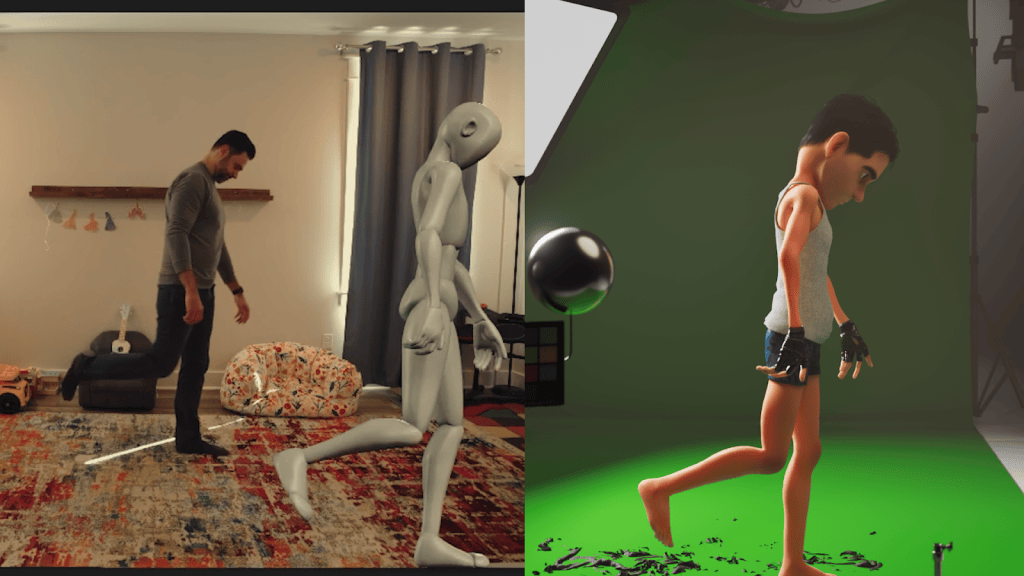
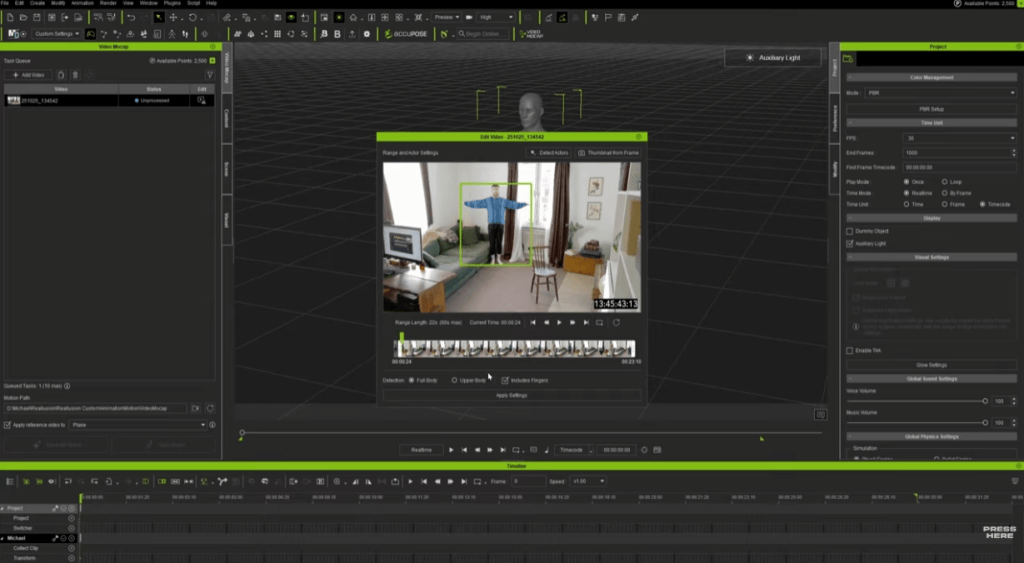
By partnering with QuickMagic, Reallusion brings one of the most accurate and widely adopted AI mocap solutions on the market. With iClone Video Mocap, creators can instantly convert any video — whether it’s a YouTube clip, a movie scene, or even a quick phone recording — into precise, editable 3D motion data that is ready to apply to any 3D character. This is all made possible with Quickmagic’s advanced AI engine, which analyzes 2D footage, reconstructs 3D motion to deliver stable, lifelike animations.

Recreate Group Actions to Talking Scenes

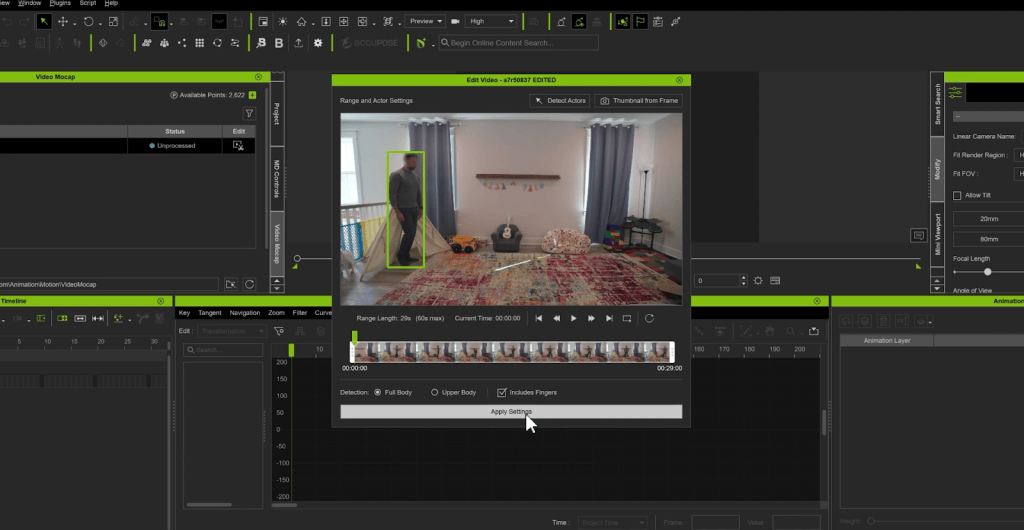
From high-energy choreography to intimate conversations, iClone Video Mocap gives users precise control over every capture. Visually trim clips and define the detection range to match the performance you need. For multi-actor footage, simply duplicate the task for each performer and separate the detections to ensure clean, accurate motion for every single character.

The system adapts to a variety of performance, from full-body movement to upper-body gestures with detailed finger tracking. Paired with iClone’s AccuFACE and LIVE FACE, it transforms any talking clip into a fully synchronized facial-and-body performance with lifelike realism.

Motion Editing Adds Core Support

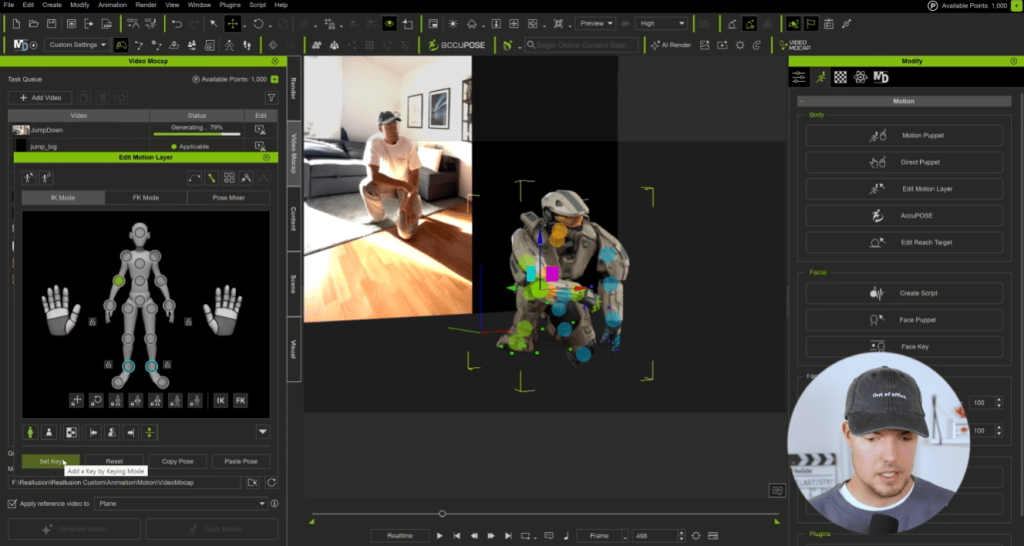
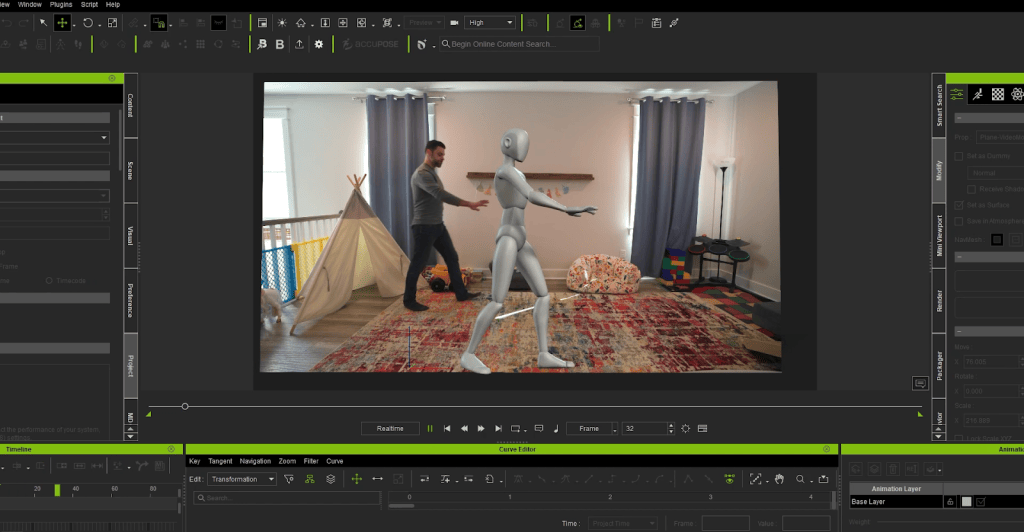
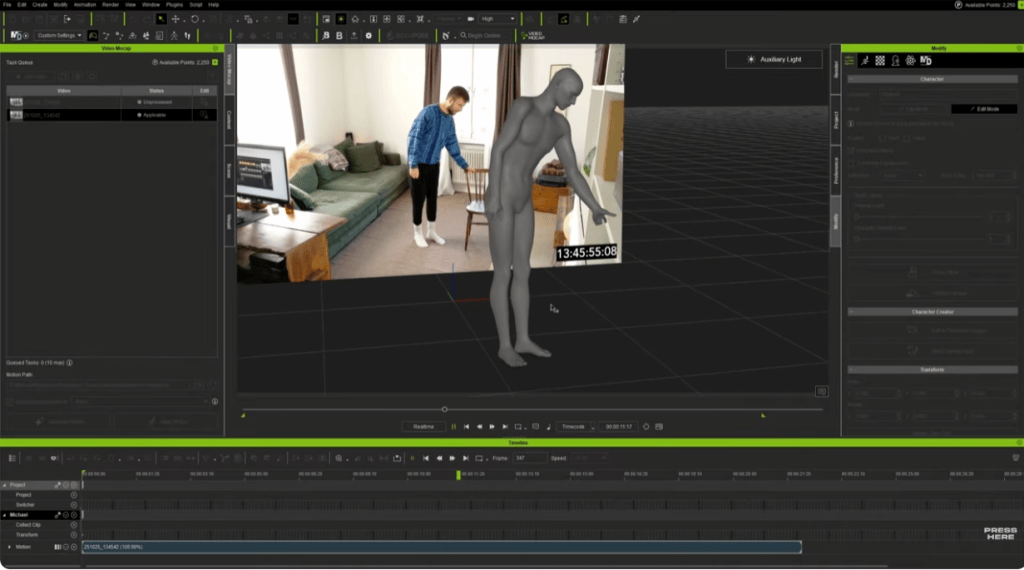
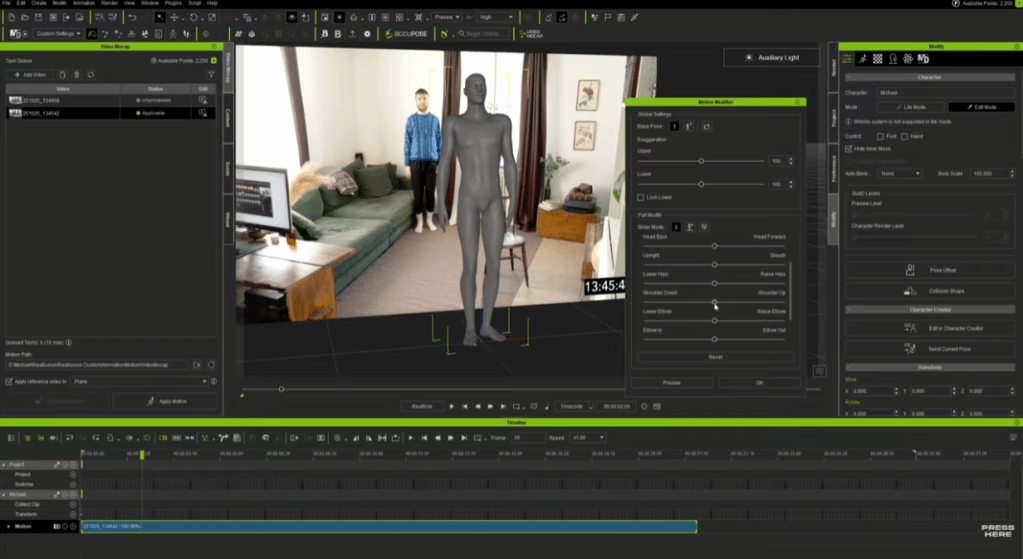
While AI mocap can capture realistic movement, it also introduces common issues like foot sliding, depth misalignment, or unnatural twists. Most tools require exporting the data to another 3D editor for cleanup, adding extra steps to the process. With iClone Video Mocap, all fixes can be done directly inside iClone. Animators can correct motion offsets, smooth out jitters, and fine-tune details right in the timeline using tools like Foot Contact, Auto Motion Alignment, Curve Editor, and Reach Target.

Once a motion is generated, the reference video automatically loads in the viewport as a 2D background, letting you compare their animation with the original footage in real time.

Reallusion also provides over 35 professional mocap tutorials, helping users quickly master motion refinement and achieve production-quality results — all without leaving iClone.

Custom Motion for Any Character

iClone Video Mocap expands the creative reach of Reallusion’s character ecosystem. For AccuRIG, it offers a quick way to animate freshly rigged characters with personalized motions. For ActorCore users, it’s the perfect add-on, enabling unique performances that complement existing motion packs.

With Auto Retargeting, generated motions can be instantly adapted to characters of different body types with precise fitting, ensuring consistency and accuracy across diverse models.

Production-Level Mocap for Everyone

iClone Video Mocap is built to fit the needs of both indie creators and professional studios, offering a flexible, cost-efficient, and production-level approach to motion capture. For indie creators, it removes the need for expensive mocap suits or studio rentals — just record with your phone and start animating right away. For production houses, it supports a hybrid workflow for quick shots or background actions while reserving traditional mocap for large, complex scenes. The precise motion data makes it easy to integrate with existing pipelines, boosting efficiency without sacrificing quality. From solo artists to full teams, iClone Video Mocap adapts to any workflow with ease.

Pay-Per-Use for Maximum Flexibility

Unlike most AI mocap services that lock users into monthly subscriptions, iClone Video Mocap adopts a pay-per-use model. This gives creators full control over their costs. Spend just 250 DA Points (~$2.50) per motion generation, with no ongoing fees or usage limits.

Each upload can be up to 60 seconds long, and you can process up to 10 videos simultaneously, making it a fast, scalable solution for both individual artists and production teams. This on-demand model is both affordable and flexible.

Top up DA Points to start

Convert Footage to Finished Animation in iClone

iClone Video Mocap marks a new chapter in Reallusion’s AI production ecosystem that combines intuitive AI automation with iClone’s precision motion tools. Creators can now generate, refine, and apply realistic motion entirely within one platform, redefining how animation is made.

Up to 100 free AI mocap generations — Limited-Time Video Mocap Access. Learn more

Copresence 3D Scans into Character Creator 5 Workflow

Copresence, a Switzerland-based deep tech company, is transforming how we interact in digital spaces. By combining AI-driven deep learning models with robust capture technology, Copresence enables anyone to generate photorealistic 3D avatars in just minutes. Their platform supports industries spanning gaming, VR/AR, telepresence, and digital communication, giving creators and businesses tools to build hyper-realistic avatars at scale.

In this article, we’ll walk through a step-by-step workflow shared by Anderson Rohr, a 3D artist from Brazil, who demonstrates how to bring a Copresence face scan into Character Creator 5 (CC5). Whether you’re a 3D animator, content creator, or production studio, this guide shows how to unlock the full potential of Copresence + Reallusion for lifelike character creation.

Why Use Copresence for 3D Face Scans?

The value of Copresence lies in its accessibility and accuracy. Unlike traditional 3D scanning setups that require expensive hardware and studio environments, Copresence only requires your smartphone. Within minutes, you can create:

  • High-fidelity 3D geometry of your face
  • 4K texture maps for photorealistic detail
  • Strand-based hair in Alembic format (currently in CC5 support)

This means creators no longer need to rely solely on manual modeling or limited avatar generators. Instead, they start from a true-to-life digital double, ready to be customized in Character Creator 5.

Step 1: Scanning with the Copresence App

Anderson begins the tutorial by introducing the Copresence mobile app, available in app stores. The process is straightforward:

From there, download the CC5-compatible export package.

Download the app and follow the built-in tutorial.

Capture your face scan using your smartphone camera.

Once complete, upload the scan to the Copresence web app.

This package includes:

  • avatar.fbx → the 3D mesh of your face
  • Texture maps (diffuse, normal, roughness, etc.)
  • Hair in Alembic format (not currently supported in CC5)

At this point, you’re ready to bring your scan into Character Creator 5.

Step 2: Importing into Character Creator 5

Once the scan is downloaded, the workflow moves into Character Creator 5, Reallusion’s powerful tool for designing customizable characters. Anderson breaks it down:

  1. Unzip the Copresence download folder.
  2. Open Character Creator 5.
  3. Go to File → Import → Import.
  4. Select your avatar.fbx file.
  5. When prompted, choose:
    • Prop
    • Keep Original
    • Convert All

This imports the 3D scan as a base mesh.

Step 3: Using CC Headshot plugin for Head Generation

With the Copresence model imported, the next step is refinement using Character Creator’s Headshot 2 plugin.

  • Navigate to the Scene Tab.
  • Select the root node of your imported mesh.
  • Open Headshot 2.
  • Select Mesh as input and click Start Head Generation.

Headshot 2 analyzes the Copresence scan and regenerates it as a fully rigged CC5-compatible head, with improved topology optimized for animation and morphing.

This is where the scan truly comes alive—transitioning from a static 3D model into a character that can be animated.

Step 4: Refining Textures and Hair

Since CC4 previously didn’t support Alembic-based hair imports, Anderson chooses a preset hairstyle directly within Character Creator.

For textures, Copresence provides 4K maps that can be re-applied:

  • Base Color → for skin tone accuracy
  • Normal Map → for fine detail like pores and wrinkles
  • Roughness Map → for realistic lighting and skin reflection

The result is a character that looks remarkably close to the scanned subject—while retaining full CC5 editability.

Step 5: Full Customization in Character Creator 5

One of the advantages of CC5 is that the imported scan isn’t locked. Anderson demonstrates how you can still modify:

  • Facial features (nose, eyes, jawline, lips, etc.)
  • Skin tones and makeup
  • Clothing, accessories, and hairstyles
  • Expression profiles for animation

This flexibility makes CC5 a powerful extension of Copresence’s scan. The workflow combines realism from AI-driven capture with creative control in CC5.

Importing CC5 Characters into MetaHuman Animator

One of the most powerful aspects of Character Creator 5 is its flexibility to integrate with pipelines beyond iClone and Unreal Engine. For creators who want to leverage MetaHuman Animator (MHA) for advanced facial performance capture, CC5 provides a streamlined way to bridge assets into the workflow.

By exporting characters from CC5 in Unreal-ready formats (FBX or USD), users can bring their fully rigged and textured avatars directly into Unreal Engine. Once inside, these characters can be linked with the MetaHuman Animator system, enabling detailed facial animation through Epic Games’ powerful capture pipeline.

The benefits of this integration are significant:

  • Freedom in character design – While MetaHuman focuses on ultra-realistic humans, CC5 lets you design stylized, fantasy, or hybrid characters, which can still benefit from MHA’s facial fidelity.
  • Faster production workflow – You don’t need to build characters from scratch in Unreal. Instead, you can take advantage of CC5’s extensive morph sliders, clothing systems, and asset libraries before plugging into MHA.
  • Cross-pipeline compatibility – This means you can combine the best of both worlds: CC5 for creative freedom, MetaHuman Animator for performance capture realism, and Unreal Engine as the final rendering hub.

For filmmakers, indie studios, and animators, this compatibility opens doors to creating highly expressive performances without being locked into a single ecosystem.

Applications for Creators and Studios

The combination of Copresence and Reallusion tools opens new possibilities for:

  • Game Developers → Build lifelike avatars for NPCs or player characters.
  • Animation Studios → Reduce time spent on modeling and rigging digital doubles.
  • Content Creators → Clone yourself in 3D for YouTube, TikTok, or VR content.
  • Production Houses → Use real faces in pre-visualization and cinematic pipelines.

By eliminating the need for expensive 3D scanners or mocap setups, this workflow lowers the barrier for high-quality avatar creation.

Unlock Flawless 3D Scans

Copresence just released a next-gen pipeline using new deep learning models to eliminate shadows and artifacts. Dive into the update now → https://www.copresence.tech/blog/platform-release/

Conclusion: The Future of Avatar Creation

Copresence and Reallusion’s Character Creator 5 together represent a new standard for digital human creation. With Copresence, anyone can create a realistic 3D scan in minutes. With CC5, that scan becomes a fully editable, animatable avatar ready for games, films, and immersive experiences.

For animators, studios, and creators, this workflow means less time modeling, more time creating. As Anderson Roar shows, the future of avatars is here—and it’s accessible to everyone.

FAQ

Do I need professional equipment for Copresence scans?

No. Copresence works with your smartphone camera and processes everything in the app.

Can I use Copresence hair in Character Creator 5?

Currently, CC5 doesn’t support Alembic hair files. You’ll need to use built-in hairstyles.

Is Headshot 2 required for this workflow?

Yes. Headshot 2 is necessary to convert the Copresence mesh into a fully rigged CC5-compatible head.

Can I animate the imported Copresence avatar in iClone?

Yes. Once processed in CC5, the character can be exported to iClone for full animation.

What industries benefit most from Copresence + CC5?

Gaming, film, VR/AR, and digital content creation all gain from faster, more realistic avatar production.

Related Posts