首頁 » Page 31

Photo or Image to 3D Face

When I first discovered iClone in version one it had a powerful image to 3D face tool that was unmatched in the industry as far as I could find. What impressed me was using a photo of the long-running James Bond actor Roger Moore. The character mesh looked nothing like Moore. Having already been disappointed by the early photo-to-face tool in Poser, which did everything but look like the reference photo, I wasn’t expecting much.

The default mesh had a thin face and head along with an equally thin body that did anything but match Roger Moore’s appearance at the time. After a short wait, I couldn’t believe what I was looking at. It WAS Roger Moore in the face and head despite the body being thin.
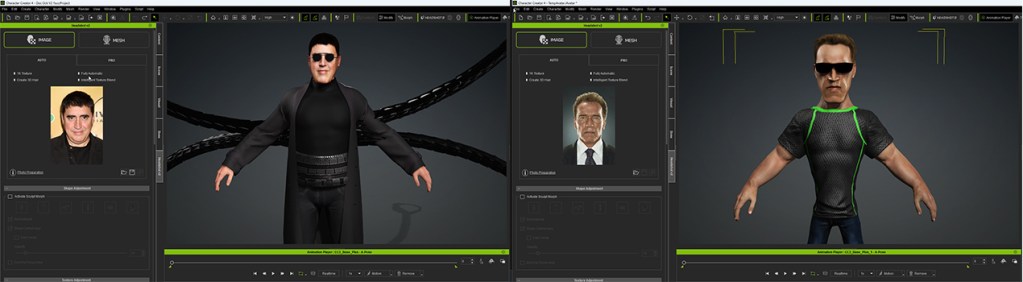
Both use Auto Mode. The Left has no shaping while the right has stylized shaping.

After this, I rounded up several more pictures of former Bond actors like Sean Connery, Timothy Dalton, and Pierce Brosnan. All were very good copies of the original actor as the tool seemed to shape the head according to the image. Maybe it was just my imagination but that thin mesh head suddenly filled out with different images and became the basis of a test clip called “The Faces of Bond” which helped to sell me on iClone as a viable tool.

Even being new to iClone I was able to put the clip together in one day. Something unheard of at the time, particularly when animation could cost thousands of dollars per minute to produce. My project cost was the cost of iClone and my time.

Both images use Auto Mode with no shaping. Anyone can reproduce reasonable copies of famous actors, people or characters.

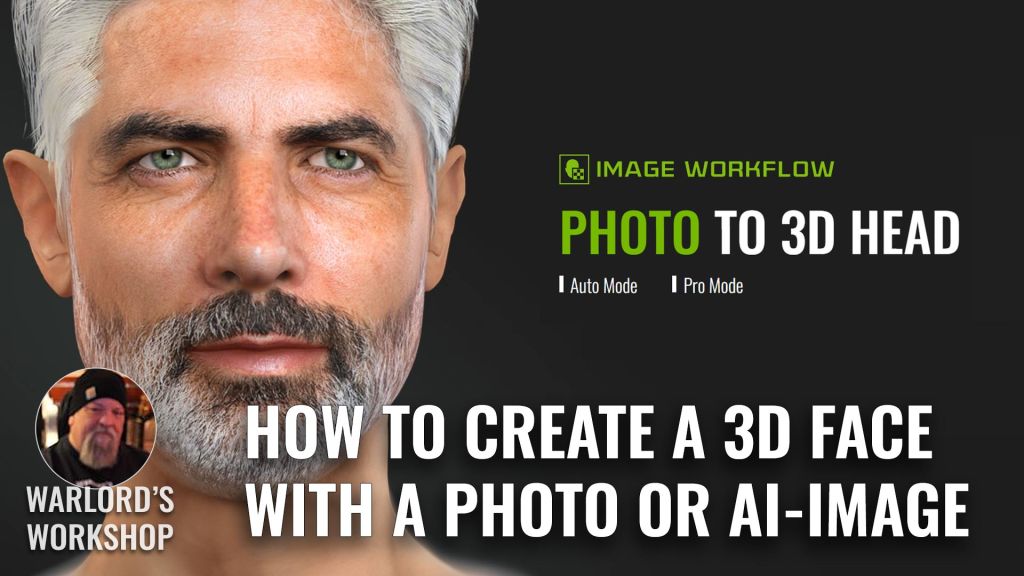
Today Reallusion’s photograph to 3D face tool is known as Headshot and resides in iClone’s close cousin, Character Creator and it is easy to use with a minimal learning curve like other Reallusion products. Whether it be a photograph or an AI-generated image, Headshot can use that image to make a very close copy with minimal work.

As of yet, I haven’t found an easier-to-use photograph to 3D face product that turns out such stunning characters with so little time and effort.

AI-Enhanced Headshot 2 Plugin

Headshot, like Character Creator, was a major boost in creativity and productivity when it was released. This is particularly true for those of us who might be lacking in a skill or two when it comes to creating characters with unique faces or reproducing well-known faces of celebrities or newsmakers. Character Creator is loaded with tools including integration with ZBrush for quick and easy round trips between the apps. However, not all of us are master sculptors of facial features but this photograph to 3D face tool makes us look like pros.

Headshot gives digital artists or character devs a quality photo-to-face tool that can bring more detail to your characters. Headshot gives us the ability to take an image (photo or ai-generated) and create a high-quality character with great facial features and expressions. It can be done with little to no intervention in the Auto mode or more detailed shaping and guidance with the Pro mode. Both modes are included in the plugin. 

If you are new to creating 3D characters, you’ll soon learn there is no easy way to do so without applications like Character Creator. Not only does creating a character involve making the basic character mesh, but there is also UV mapping, rigging, and skinning down to knuckles and toes. You have to learn about binding and poly collapse along with poly count and many other 3D nuances.

Or… you can use Character Creator and the Headshot plugin.

Why Use Character Creator and Headshot?
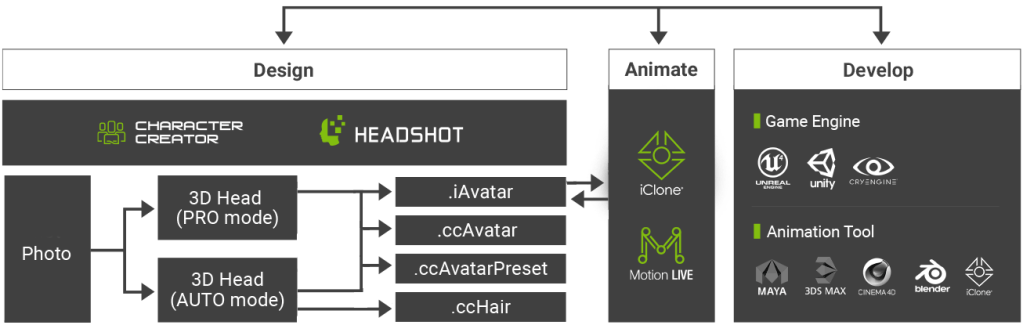
To save time and frustration while getting great results. Being able to tweak those results right up to rendering time is another bonus. Character Creator and Headshot handles all of the character creation tasks for us while we concentrate on making the best character we can.

It wasn’t that long ago that a 3D artist had to have several applications like Maya, 3DS Max, or Cinema 4D for the majority of the work. A painting program like 3D Coat for UV texturing. Sculpting programs like ZBrush or Mudbox for more organic shapes and the list was long. None of those tools are cheap and back in the early days they were prohibitively expensive for the average freelancer while shutting out the home animator completely.

Character Creator and Headshot’s pricing make the tool more readily available to a wider group of animators and character devs for fast turnaround which saves time and money. Smaller studios can benefit from getting more of out their existing talent pool without increasing anyone’s workload. It may decrease the workload while improving character output.

With Character Creator and the Headshot plugin, we can dump the expensive apps and the long, difficult learning curves to concentrate on creativity instead of the tedious technical work required to create a great character with full function and a massive expression library.  

Character Creator characters also work in pipelines for Unreal Engine and Nvidia Omniverse with plugins and USD file support. You can control the action from iClone while using the game and render engines for a more cinematic look and feel.

Auto Mode

Auto mode excels at making groups of unique characters in a ridiculously easy way. In this tutorial, I wasn’t looking to exactly duplicate the head in the image, which is possible, but I was more interested in quickly turning out unique characters. This was a quantity-over-quality endeavor (1024×1024 texture resolution) looking to turn out as many characters as possible, so I did not do any reshaping to tweak the head to match the image.

Pro Mode

Don’t let the title fool you. While it is Pro mode, you don’t have to be a pro to use it. In fact, it gives us more tools like the image matching tool and sculpting tools to get results of 4 times higher resolution (4096×4096) compared to Auto Mode. When used in combination with each other, Headshot can create even more professional and delicate close-up views of virtual humans without tweaking any sliders or other morphs.

However, if we use the morph sliders to help shape the head we can more closely match our source image with overall head shaping and individual feature shaping.

The second part of the tutorial below shows how easy it is to use the pro mode with the sculpting features to more closely match the source image. I’ve purposely kept the tutorials short as we can always go to Kai’s tutorials for more details.

TIP: If necessary, you can run your character through both modes using the Auto mode for hair generation and the Pro mode with the Image Matching tool for more detailed sculpting. Go through the Auto mode first then save the hair it generates before going on to the Pro mode for more shaping after which you can load the generated hair onto the character as the hair will conform to the head shapes.

Common Features for Both Modes

Facial Ethnicity Detection

The Headshot AI Engine detects the human face and creates 3D heads with naturally matching face types. Typical profiles for Caucasian, Asian and African are provided, and each with subtle variations based on the nature of your source images.

As you can see, behind the scenes, Character Creator does a lot of work that we don’t have to even think about. As I stated earlier it was the powerful “image to head” technology that brought users like me to iClone back in version one long before AI and since then, with AI, Reallusion has improved on that tech.

Match Skin and Body Types for Generated Heads

Character Creator gives us several body types to choose from whether it be for “Image to Face” or Mesh. These body types range from a currently loaded character to male, female, baby, and neutral. It also gives us some initial tools on skin type like Clean Soft, Clean Rough, Scalp, Beard and Scalp. These help to tell Character Creator how to handle the final output and deserve some time spent here with experimentation. It is recommended that you try all of these types at least once to get an idea of what they can do.

Hair Generation

One of the unique features of Auto mode is Hair generation. Character Creator takes care of this process with no intervention on our part as it relies on the original image for input. According to the website it also adds an additional mesh layer with an alpha mask to soften the edges. The generated 3D hair is also conformable to other character head shapes.
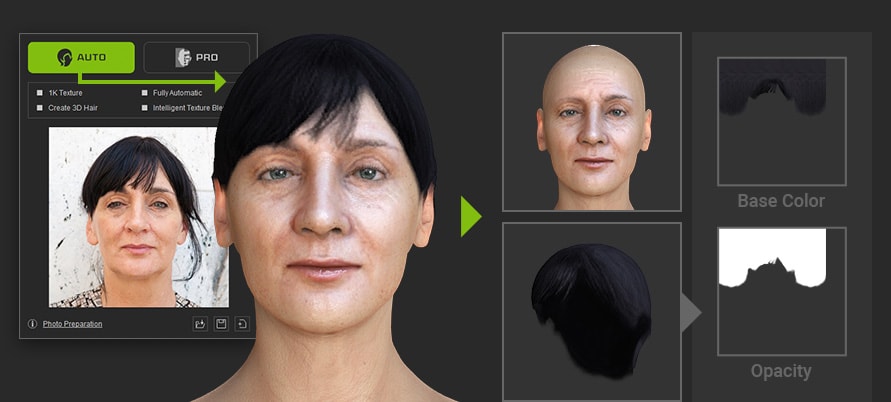
Build a 3D Hair Library

Auto Mode Hair generation can help you build a library of Character Creator hair. Start a habit of saving generated hair and before long you will have a library of hairstyles for your characters. Since the process is handled by the software we just have to wait for the magic to happen, save the hair, and watch our library grow.

One thing we find out, as animators and digital artists, is the fact that you can never have too many hair assets in your inventory. Not only does Auto Mode do all the work but you get the hair as a bonus.
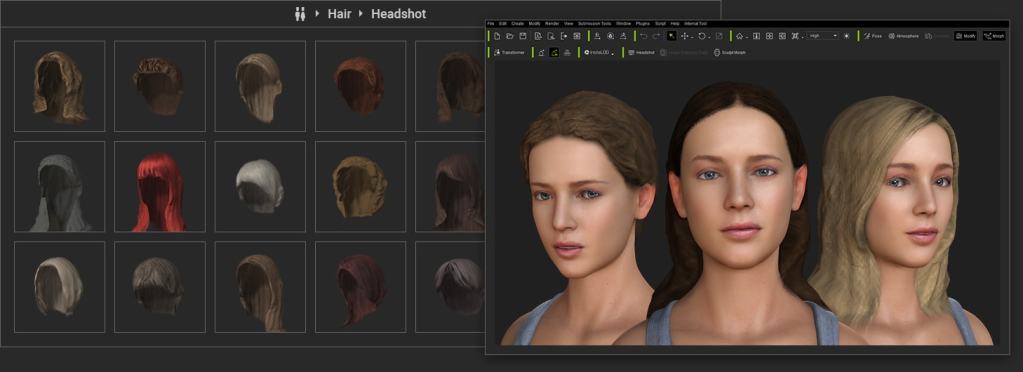
The AI-enhanced plugin does a great job of initial shaping so for a large number of characters, auto mode is a click-and-forget procedure for each character.

Headshot Morphs 1000+ Detailed Shape Refinement

Another feature that makes Headshot so powerful is the Headshot Morph 1000+. From full head and face sculpting to individual features – head contour, face, eyes, nose, mouth, and ears, the six levels of morph detail enable users to hover over different control areas, and use directional mouse drags to refine the corresponding mesh shape intuitively. You can quickly achieve the professional and detailed look of 3D scan models.

Even more, the search function in Headshot Morph 1000+ helps to locate the targeted morph out of 1,125 facial morphs categorized by unique visual icons and naming within a second, users are given control over all possible facial shapes for the most accurate source images to recreate all possible human facial varieties regardless of race.

Source Photograph or Image Prep

There are some things to keep in mind when searching for or creating source images. Foremost is a good image with soft, diffused lighting. We don’t want any harsh shadows on any area of the face as it may come out as a dark spot on the character’s face. A main offender is a side shadow which makes one side of the face too dark and one side of the face light resulting in a less than desired result that looks more like a dirty face.

From the Source Photo Guide in the Headshot Manual:

  • A good image/photo is the key to great result of Headshot 3D head generating process. There are five crucial factors to kind in mind when it comes to choosing a good image or taking a good photo.
  • The image used for realistic 3D head generation should be a clear, well lit picture of a full head facing front, with nothing obscuring the facial features. The film format of the image can be .bmp, .jpg, .jpeg, .png, .tif or .tiff.
  • Depending on the mode you use for generating the head, the concept of an ideal image are basically the same yet differ in terms of resolution and cropping.

Mesh Head Option (New in Headshot 2.0 Update)

There is also a mesh option with Headshot 2 that allows us to replace the head of a character with a different head mesh such as creating an anthropomorphic cat or dog with human, bipedal characteristics with a working animal mesh head. While this article focuses on the Photo to Face options I also wanted to point out the mesh feature for those that may not be aware of it. This powerful, but simple method involves mapping points on the mesh head to match up with Character Creator’s mesh and controls. You can have as few as 24 points or more if needed to define areas like the back of the head or odd shaped ears. There is also an auto-map feature that, in my experience, matches anywhere from 80 to 100 percent of the points needed leaving only minor adjustments and maybe a few additional points.

Overview of using Mesh feature for bipedal Cat character. “Imagine cat” (https://skfb.ly/6R6Qv) by nonlly is licensed under Creative Commons Attribution (http://creativecommons.org/licenses/by/4.0/).

As usual, Character Creator does the hard work for us. You can get more information from my review on the Mesh option when it was released providing an overview of the process.

Summary

It doesn’t matter what size operation you have, from a one-person studio to a major motion picture studio, Headshot can save a lot of time which saves a lot of money that can be budgeted elsewhere or possibly even go into that ever-elusive concept called “Profit” to make your life better.

Using AI-generated images, stock photography, or our images, Character Creator and Headshot provides us with a consistent and feasible method of creating highly detailed characters for close-ups, crowds or actor groups. We don’t need a supercharged set of skills to produce a great character. Just a good source image, Character Creator, and the Headshot 2 plugin.

Click here for an overview of the 7 steps to create an AI-generated character.

MD McCallum - WarLord

MD McCallum – WarLord

Digital Artist MD “Mike” McCallum, aka WarLord, is a longtime iClone user. Having authored free tutorials for iClone in its early years and selected to write the iClone Beginners Guide from Packt Publishing in 2011, he was fortunate enough to meet and exchange tricks and tips with users from all over the world and loves to share this information with other users. He has authored hundreds of articles on iClone and digital art in general while reviewing some of the most popular software and hardware in the world. He has been published in many of the leading 3D online and print magazines while staying true to his biggest passion, 3D animation. For more information click here.

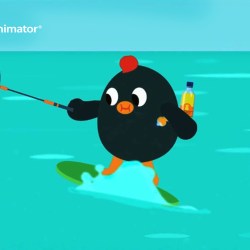
How to Create Kid-Friendly Educational Animation Step by Step

Prosenjit Biswas

Hi, my name is Prosenjit Biswas, and I am a freelancer from India. Since childhood, I have been captivated by animation, superheroes, and anime characters. This passion inspired me to pursue a career as a freelance 2D animator. Additionally, I teach digital graphic design at my local school, where I enjoy sharing my knowledge with aspiring animators and educators who want to create educational animations for children or personal YouTube channels. I am here to guide you through every step of the animation process, making it easy and enjoyable. Let’s get started!

1. Finding Your Idea

  1. Identify Your Target Age Group: Determine the specific age group you’re targeting.
  2. Incorporate Educational Elements: Consider teaching numbers, letters, moral values, or social skills.
  3. Draw Inspiration: Use classic fairy tales, children’s books, and fables for timeless story ideas.
  4. Ask “What If” Questions: Generate unique scenarios, such as “What if animals could talk and had their own adventures?”
  5. Develop a Simple Plot: Create an engaging story with elements of adventure, mystery, or problem-solving.

2. Writing Your Script

Turn your idea into a story. The script needs to be easy and understandable for kids. Include funny and engaging lines to attract them. If you don’t know how to write a script, use AI software like ChatGPT to generate one quickly.

3. Voice Recording

I usually use Adobe Audition for recording, but you can use any software you like. Audacity is a great free option. If you don’t want to record your voice, you can hire someone or use AI voices, which are now very human-like. Some AI voice tools include ElevenLabs, Play.ht, Speechify, and Murf, with various free and paid plans.

4. Collecting References

Collect references for your ideal character and scene. This helps in defining the character style and personality. Develop a unique art style that distinguishes your educational animations, whether it’s whimsical, cartoonish, or realistic. Use sites like Behance, Google Images, Pinterest, and ArtStation to gather references for your project.

5. Storyboarding

Storyboarding is crucial for complex projects. It helps plan camera angles and character interactions with props and other actions. For simpler animations, a storyboard may not be necessary. I use Clip Studio Paint for storyboarding and composite in Filmora. You can use any drawing software or even simple pen and paper.

6. Character design

This is a kid’s video, so I focus on creating happy and energetic characters that evoke joy and have cute reactions. Chubby characters are also adorable. Kids typically enjoy videos featuring colorful, engaging characters with vibrant personalities. Popular types of characters include:

  • Cartoon Animals
  • Fairytale Figures
  • Friendly Robots

I draw all my characters in Clip Studio Paint. I start with simple, easy lines and then add some details. I focus on the hand and leg joints because these parts need to be movable. I always create easy-to-animate characters. 

For coloring, I use the Adobe Color website to choose my palette, then apply the colors to the characters one by one. Character color is very important as it represents various moods and situations. After coloring, I place the character on a premade template, putting all layers into the premade character folder. Then, I adjust the bones, especially the hip joint, which is essential for cartoon animation because it changes the character’s body weight. Finally, I recheck the bone names and export the character as a PSD file

7. Head Turn

Cartoon Animator has a very useful feature called the 360 Head Turn. This allows you to take a character and make the head turn easily, as demonstrated in my tutorial video. The 360 Head Turn transforms 2D art into 3D-styled characters with up to 360 degrees of motion for deeply rich performances. Additionally, it offers Photoshop round-trip integration for editing multi-angle characters in and out of the 360 Head Creator.

8. Animation

For some scenes, I use premade walk motions, but mostly I create custom motions. Using the IK (Inverse Kinematics) and FK (Forward Kinematics) features, along with the End Effector, I place keyframes to pose the character, then apply easy ease to the character and adjust the timing.

Motion Pilot

Motion Pilot is a great tool that adds a new dimension to your animation. With the help of your mouse, you can animate anything in a minute. Simply select the object, open Motion Pilot, adjust the slider, click preview, then press the spacebar. Now you’re ready to animate.

Motion Path

Motion Path is a line that helps you animate anything along your preferred trajectory. Just create a line, select the object, then select the path and adjust the path progression bar. It’s that simple.

9. Export

You can export images in BMP, JPG, TGA, PNG, and GIF formats. For videos, you can export in WMV, AVI, MP4, popVideo, MOV, and WAV formats. I use After Effects, so I export as a JSON file with all PNG sequences.

10. After Effects Script

The After Effects script is a game-changing step for Reallusion. Many users rely on After Effects, and now they can edit in After Effects with ease. Simply import the JSON file into the Cartoon Animator AE script. Once the file is fully imported, you can begin editing the scene. I added some blur effects, motion blur, glow, and layer styles before rendering the file in MP4 format.

11. Compositing

When all scenes are ready, I bring them into After Effects. Here, I add various effects, transitions, masking, and time remapping. After applying these enhancements, I export the final render.

12. Sound Design

The final video is then imported into Filmora, where I add all the necessary sound effects and voiceovers. I also include an intro and end credits before exporting the final ready file. There are many websites where you can collect sounds, such as YouTube Studio and FreeSound.com.

Conclusion

If you’re an individual animator or a teacher with limited animation experience, Cartoon Animator is the perfect tool for you. I hope you now understand how I created that video, so you can start making your own as well. For more information, visit the Reallusion website and check out their social media channels.

Facebook – Cartoon Animator Users Group

This group comprises many professional animators who are always willing to assist beginners. You can ask any questions you may have and also view our animations on the page. Feel free to join our community and become a part of our growing family.

Learn More

Official product page:

2D Animation Software for Cartoon Maker | Cartoon Animator

FREE for 30 days & get 1,700+ ready-made assets:

2D Animation Software Download | Cartoon Animator

Related Posts

————————————————————————————————————————————————————————————

The original article was written by Prosenjit Biswas and also featured on Cartoon Brew.

“3 Body Problem” Concept Artist: 5 Reasons Character Creator Reigns in Previz

This article is featured on befores and afters

Jakub Kaźmierczak

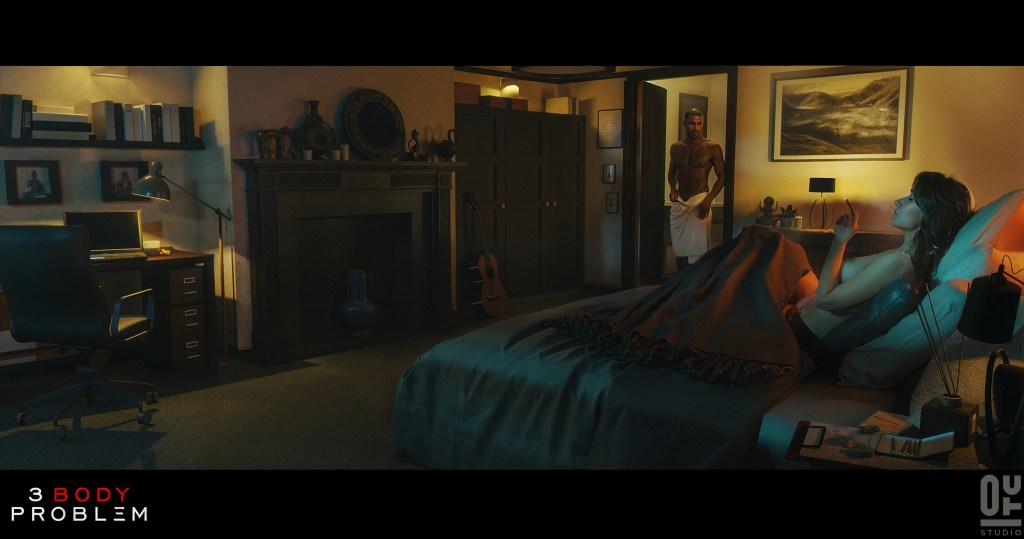
Hi, I’m Jakub Kaźmierczak, a concept artist specializing in environments and keyframes. I’d like to show you how we at OUT Studio designed sets for “Three Body Problem” previz and how I used Character Creator to save time during production.

Check on Jakub’s ArtStation

About OUT Studio

OUT-Studio is a concept art studio that brings talented artists and agile management together to efficiently visualize our clients’ storytelling. We are based in the UK and Poland, although we collaborate with artists from around the world. We build highly effective teams tailored to the client’s individual requirements to achieve innovative and cost-effective solutions.

Interview with Jakub

Today, we are fortunate to interview the experienced 3D concept artist Jakub, who recently collaborated with Out Studio on the popular Netflix series “3 Body Problem.” Jakub was responsible for some of the previz scenes and used Reallusion products such as Character Creator, Headshot, and ActorCore in the process. We invited him to share why he chose Reallusion products for previz and the benefits they brought to the production.

Q: Please share why filmmakers need concept art and the challenges you have encountered.

Why do filmmakers need concept art in the first place? Short answer is to save money. If you sweat more in preproduction you will bleed less when shooting. The sets are being physically built so the team has to know what they are building, how the material samples will look on the elements and if the camera crew can squeeze in there with all the equipment. Even if the design won’t be used at the end or it will be on the screen for 3 seconds it will definitely help with making the right choice.

Q: Could you please describe what it looks like in practice?

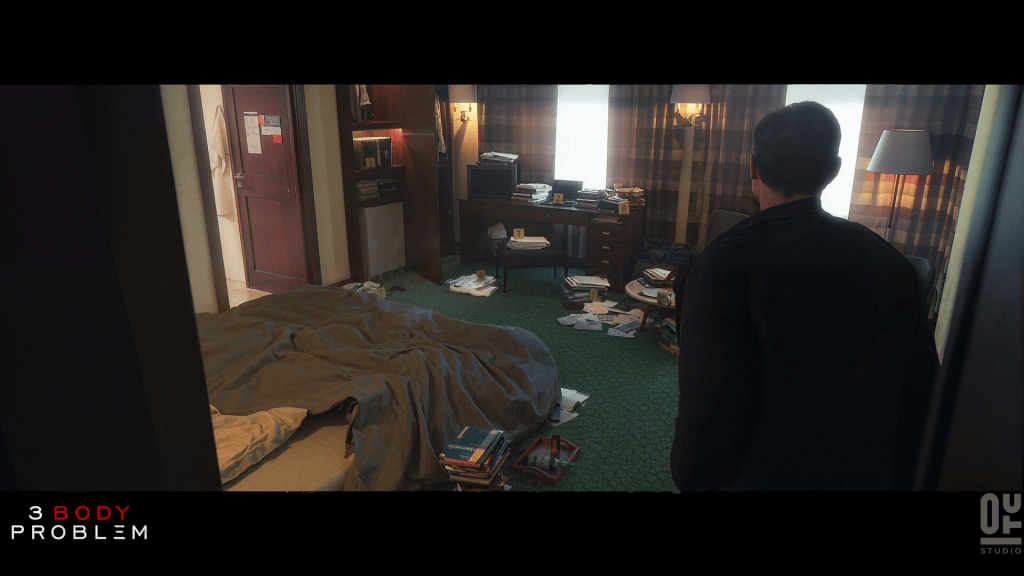
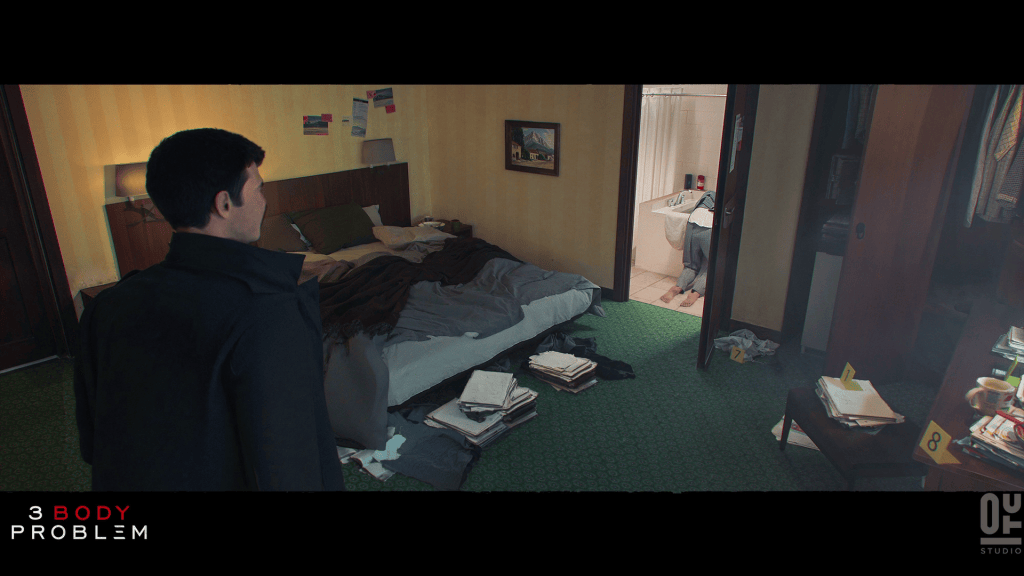
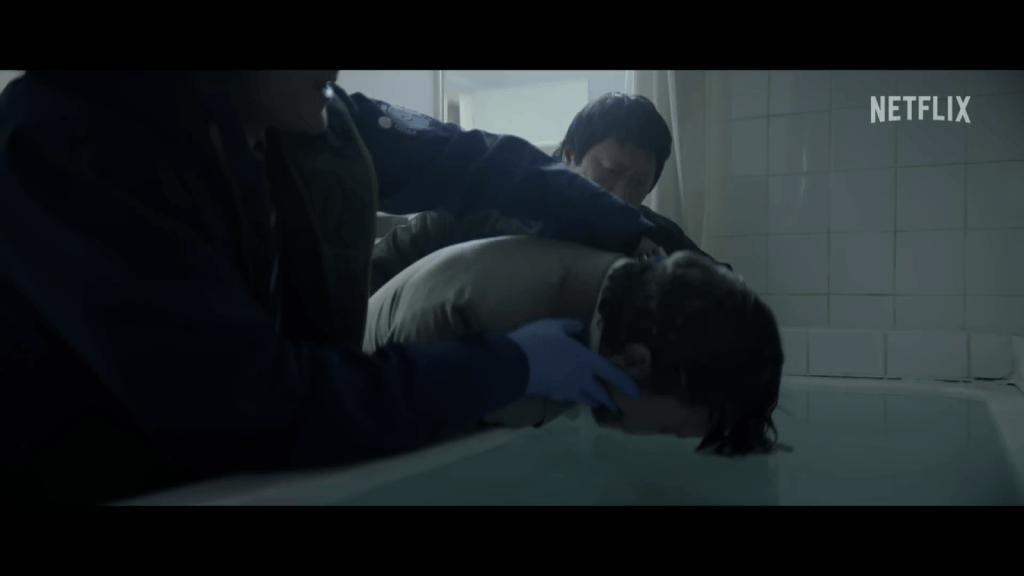
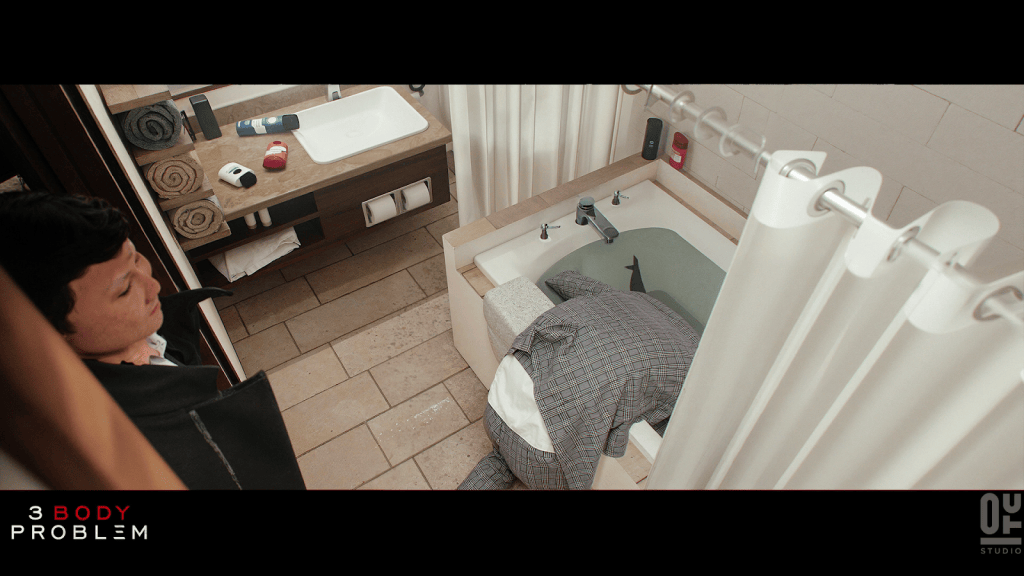
For instance, on one set I worked on, I was provided with a simple 3D model of the room with all the real-life measurements. They wanted to see three specific shots: the main shot of the room, the view from the room into the bathroom, and the dead body in the bathtub. I had to use specific materials provided by the client for the curtains, walls, and floor. For the smaller elements, I used scans of the books and papers I had in my room.

Q: Is there a reason why characters are included in concepts for set environments?

Besides the design of the environment, I have to show the story moments that are happening in the script. Like the dead body in the bathroom. Unfortunately I don’t have a lot of time to do everything from scratch and model every face and outfit. That’s where the Character Creator comes into play and saves my time allowing me to focus on the task and iterate on the idea with ease.

Q: Please talk about your technique of mixing scans with characters.

Back in the day I used to use posed scans with kitbashed heads from the character creator. It’s a fast workflow but it gets tricky when I have to change the pose of the character. In the past years the workflow got a bit of an overhaul that I’m going to show you.

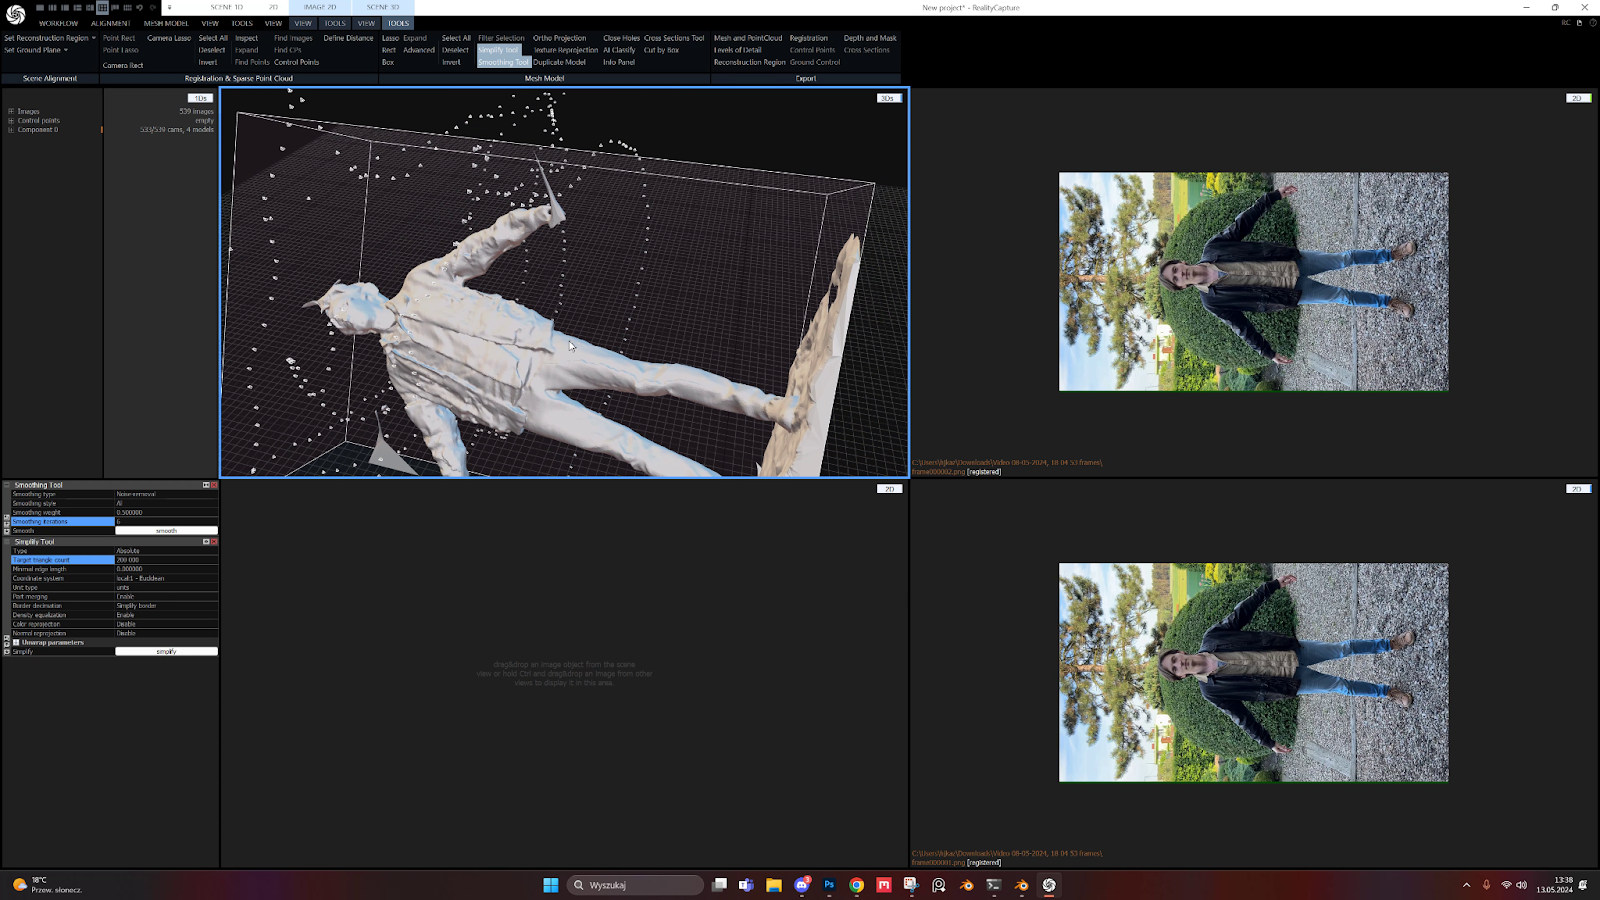
When I can, I scan the elements that could be helpful with the project, books, papers, clothes or full characters. So I get dressed in an outfit that resembles the character in the scene. I record myself or take pictures for reconstruction. 

I use reality capture or reality scan for processing. Both tools are free.

The best practice involves capturing RAW photos and adjusting shadows and highlights in Lightroom to achieve low contrast. Recording is also an option, but it may impact the quality of the 3D model. In Reality Capture, I follow the standard procedure: aligning images, reconstructing the model, decimating, smoothing, and applying textures. With the model prepared, I’m set to create the character.

Q: Please reveal your five reasons for choosing Character Creator for previsualization!

There are five aspects where I believe Reallusion products are particularly suitable for previz:

  1. Headshot
  2. Comprehensive content
  3. Fast posing
  4. Fast material editing
  5. AccuRIG for the crowd posing

Let’s talk about those in detail…

Headshot

Sometimes I know the actor who will play the role, and I use their face for the 3D double. When I don’t have that information, I create a face that closely resembles the script’s description. Headshot is a valuable tool for this, producing results that reach the benchmark of professional concept work.

Comprehensive content

To enhance my work further, I utilize my scan for clothing and refine the remaining elements using the program’s extensive content, including hair elements and skin decals.

Fast posing

At the beginning of my work, I always place a T-posed character in my scene as a reference for scale. As mentioned earlier, I need to show the scene from multiple angles, and my characters must perform various actions according to the script and director’s requirements.

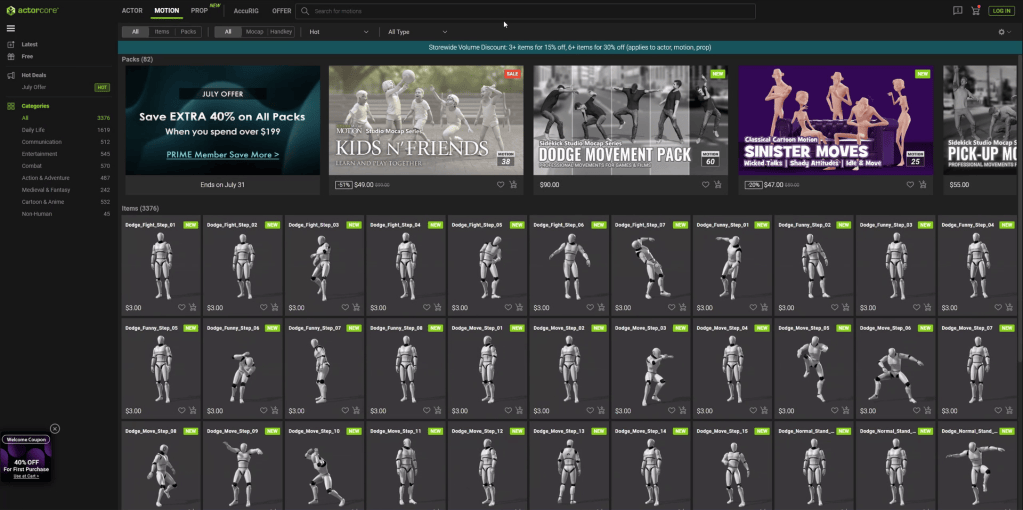
Reallusion offers a vast library of motion captures Actorcore that assist me in this task. Typically, I duplicate the folder containing my characters to create copies for each required shot. This allows me to easily apply motion capture data to the characters, find suitable poses, and create realistic interactions between them.

Fast material editing

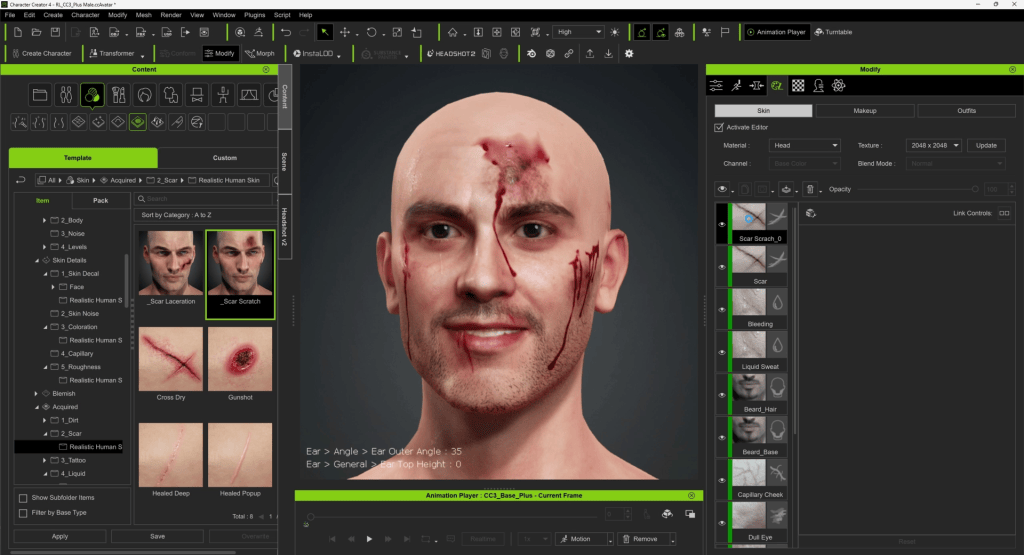
If I receive feedback from production requiring changes to the character, such as adding bruising from a fight, I can incorporate these adjustments using Character Creator and seamlessly re-import them into Blender. Fortunately, I don’t need to reposition or pose the character again. With just two clicks, I can update the materials using SkinGen on the main model and continue working on the scene.

AccuRIG for crowd posing 

To fill the scene with background characters that don’t require anything specific, I usually rely on scans, either purchased or captured by myself. Thanks to the intuitive interface of AccuRIG, I can get them rigged with just a few clicks. It also works seamlessly with mocap packs, allowing me to easily pose the characters without having to do everything manually.

Conclusion

After completing the initial setup, I overpaint and color grade the image before delivery. Sometimes the concept is approved instantly, while other times it requires iterations. Using Blender and Character Creator, I can efficiently apply even the most challenging and time-consuming changes without any issues. This streamlined workflow helps the team produce their best work for the show.

Related Posts

————————————————————————————————————————————————————————————

The original article was written by Jakub Kaźmierczak and is also featured on befores and afters.

Completing University Thesis with Character Creator and Blender

This article is featured on Creative Boom
Alberto Méndez Rojas – Film Director / Cinematic Artist

Alberto Méndez Rojas

My name is Alberto Méndez Rojas. I am 25 years old. I am a professional cinematic artist based in Costa Rica. I graduated as a 3D Artist from Véritas University with a short film called Rebus. This opened opportunities for me due to my precious skills. I participated in the production of Sausage Party: Foodtopia for Amazon Prime.

Since a young age, I developed a love for cinematics. I am especially fond of fantasy ones where there is a whole world to explore. These worlds have their own mechanics and story. They are often shrouded by a social or political problem that escalates. These stories teach us about the human condition. They show how subjective and abstract the values and morals of civilizations are. They also show how history shapes the environment.

Rebus is a short film centered around world building as the main focus of the project. It tells a story about a dystopian civilization. This civilization is trying to endure the harsh world they live in, surrounded by magical creatures and unexplainable natural disasters.

For this project we had the opportunity to use Character Creator to make many characters. They represent the civilians, like merchants, slaves, commoners, and much more. We also implemented ActorCore motion library to animate our characters. We made good use of the library of motion capture provided for us.
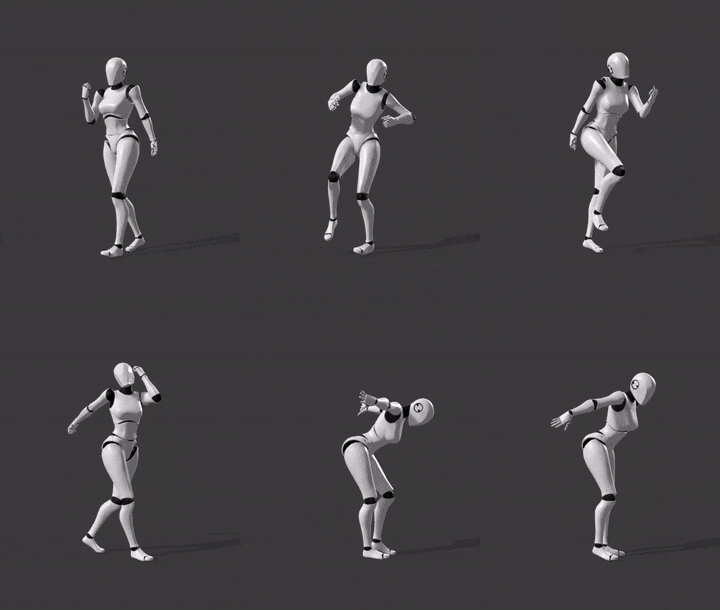
Additionally, the store of Reallusion was of great help. There were many assets for the characters like hair, skin, clothing, and full fledged characters.

“If you want to create a movie or short film, you shouldn’t waste resources by creating each character individually. Using tools like those provided by Reallusion is crucial. They represent, for me, the future of digital cinema for small and large teams.”

Alberto Méndez Rojas – Film Director / Cinematic Artist

University project REBUS: 8 month challenge

The animation career of Véritas University has a length of 4 years plus the final project. One option is another short film. We had the chance to develop the skills and tools learnt through this film. From the very beginning, I wanted my final project to be the culmination of my vision. I had a vision for my story. This vision began to be written 7 years prior to this point in my life.
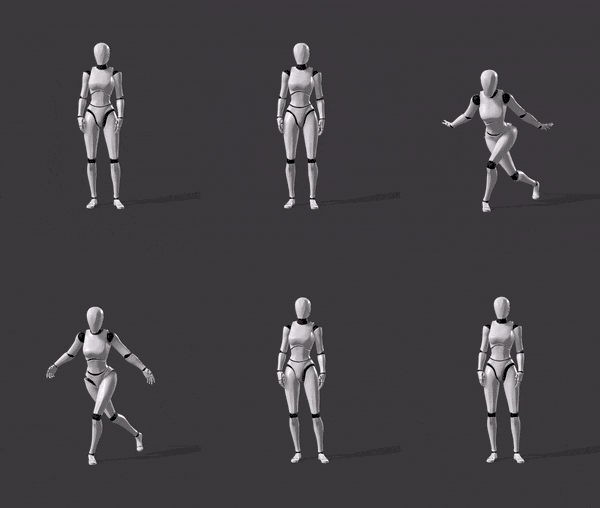
With this vision in mind, I had a foundation. My friend, Adrián Sánchez Albán, and I decided to create this project from that foundation. We envisioned a new world from the ground up. Thus, Rebus came into existence. In these 8 months, the main challenges were at a conceptual level. We already had the necessary skills to create anything we saw in our minds. But it is useless to create things that look cool but lack meaning and deep value.
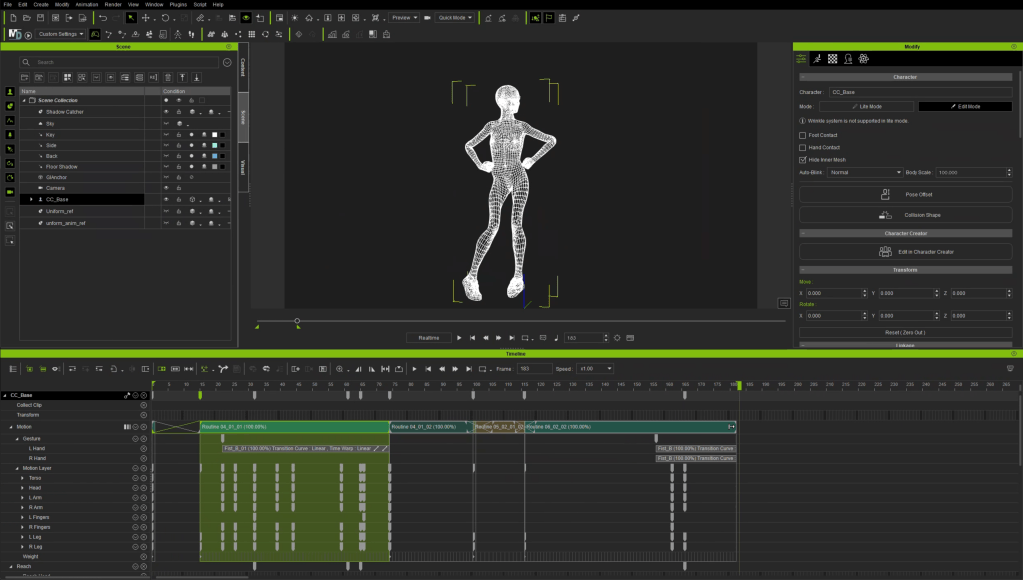
Once this section was completed, we now had to deal with another challenge but on a more technical level. We had to learn new tools. We tried to manage a team of 6 people as best we could. This was challenging because we were students.

The most important part of Rebus was trying to make the viewer feel that this world was real. We wanted to show that people lived there and had their own stories. Due to the lack of a large team, we couldn’t afford to create people and animations from scratch. This is why we decided to use Reallusion tools. They helped us complete this crucial segment in our project in a quick and effective way.

“Due to the lack of a large team, we couldn’t afford to create people and animations from scratch. This is why we decided to use Reallusion tools. They helped us complete this crucial segment in our project in a quick and effective way”

Alberto Méndez Rojas – Film Director / Cinematic Artist

Vision, Pre-production, Production

The preproduction phase was very hard and tiring, because we created a world with its own rules and mechanics. From religion and economy, to fantasy aspects such as magic and rituals, education system and more. A lot of research had to be done about civilizations and some philosophical points of war. Along with the human condition, in order to give more realism to our world.

We thought that the best way to complete this project was to create all the environments of high value/demand. And then fill them with the help of Reallusion assets. On some occasions, we did not have time to create our environments. That is why we also incorporated Kitbash3D assets. These assets are highly optimized just like the ones from Character Creator. This is because the focus of both Kitbash3D and Reallusion is to develop tools. They can be used in a large production setting. And these tools come at a low cost for the user. An example of this is shown in a market with a high number of civilians.

Creating a World of Characters

We used something around 20+ characters created just with the tools of Reallusion. Then we arranged that scene with only Kitbash3D assets. This created a full shot fairly easily. It helped us further push this idea of a rich world with people and a social structure. These assets were taken from the Kitbash3D Dark Fantasy library. These assets fit perfectly with the aesthetics we were looking for. We also used the character pack from the Medieval Reallusion library.

Full Compatibility with Blender

We succeeded wonderfully thanks to how flexible Blender is. All of these different factors and sources could be compiled into one file. They could be played with each other without much problem. One very important thing to note is that the assets from Character Creator and Kitbash3D can be used. They come with high quality textures. However, if it is too much for your hardware, there is a setting inside of Blender. It can take all of the textures used and reduce them to a certain texture size, like 1k or 2k. This helps a lot to save ram memory and keep building a larger scene.

Obviously certain problems had to be resolved on the fly, but it wasn’t a big deal

Advantages of Character Creator

The advantages of using Character Creator are the ability to create a character very quickly, something around 10-20 minutes. This is due to the different types of packages available in the store, such as hair, skin or even clothing. The optimization processes such as texturing and adding assets to the characters is very good and stable. This makes everything else easier.

“The advantages of using Character Creator are the ability to create a character very quickly, something around 10-20 minutes. This is due to the different types of packages available in the store, such as hair, skin or even clothing.”

Alberto Méndez Rojas – Film Director / Cinematic Artist

For Character Creator’s Ai plugin Headshot, we used a photograph of a person. We added the photograph into the program. Then we made the Character Creator tool use the reference image. This created facial proportions in the 3D model similar to that of the photograph. In addition to this, the same photograph could be used as a texture in the model. This makes the similarity even greater.

Key factors: iClone, ActorCore, Blender

The core difference between live action movies and animated movies is movement. In digital film, we have to make sure to make it as it seems to be alive. Examples of this are like subtle details like the wind moving a flag or some flowers. A flag or flowers are easy to animate. However, characters are a completely different challenge.

To animate characters, we first need a good topology. We also need a functional rig, and good, clean motion capture animations. These are available with the iClone and ActorCore tools.

After working on our character in Character Creator, we can send it directly to iClone and ActorCore. There, we work on the character’s movements in a procedural way. This involves moving a certain number of keys.

If we do not want to use the animations provided by the Reallusion library, we can export the characters. Once exported, we can work on their animations in Blender. This process also works the other way around. We can export the animation from the library. With a tool called Auto Rig Pro, we can select the Rig chain brought from Reallusion. We can then retarget the animation to the bones of a native Blender character. This allows us to use that same animation on different characters if necessary.

Advice to other directors

There is no need to reinvent the wheel. Nowadays we can’t afford to have our egos affected by using tools that make production processes simpler. These tools make production processes faster, which for AAA companies are a daily occurrence. The important thing should be to express these ideas and concepts. We want to expose them to the world. We can bring this to reality.

“Nowadays we can’t afford to have our egos affected by using tools that make production processes simpler. These tools make production processes faster, which for AAA companies are a daily occurrence. The important thing should be to express these ideas and concepts.”

Alberto Méndez Rojas – Film Director / Cinematic Artist

If you want to create a movie or short film, you shouldn’t waste resources by creating each character individually. We can’t use our resources of money and time to create/animate the characters one by one. Using tools like those provided by Reallusion is crucial. They represent, for me, the future of digital cinema for small and large teams.

“In the end, these tools and the company gave us crucial help. Without them, we would not have been able to finish the graduation project. We left the university with a strong portfolio piece to start a professional career on the right foot.”

Alberto Méndez Rojas – Film Director / Cinematic Artist

Follow Alberto

http://www.instagram.com/betomzr

Related Posts

————————————————————————————————————————————————————————————

The original article was written by Alberto Rojas and is also featured on Creative Boom.

Reallusion enhances Character Creator to ZBrush pipeline with free GoZ Plus plugin upgrade

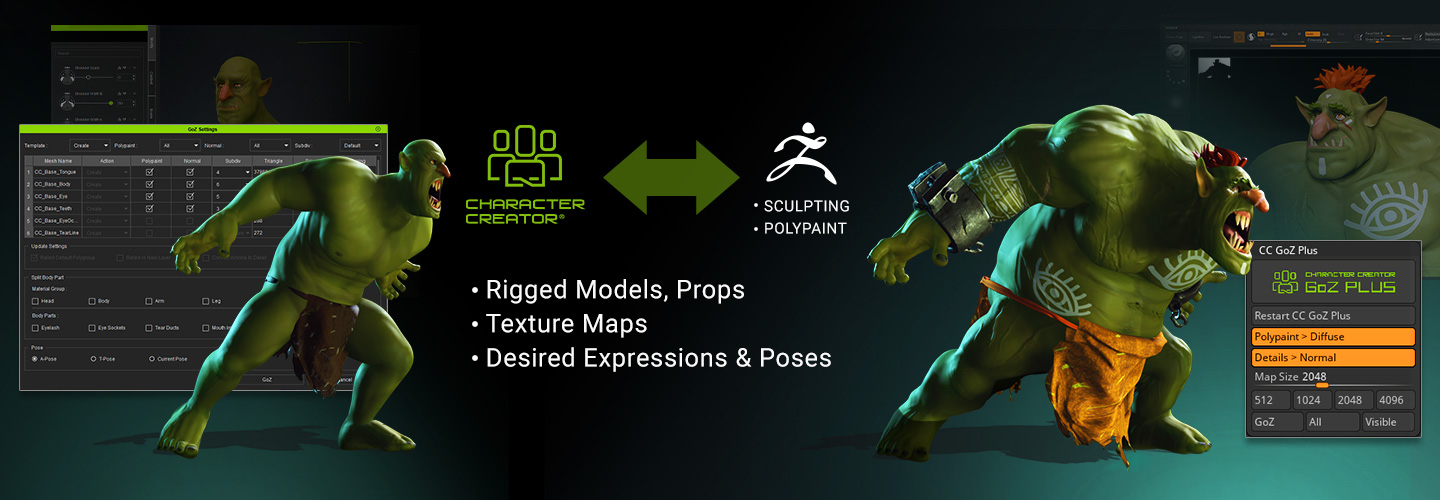
Reallusion is consistently working to improve the integration between Character Creator (CC) and ZBrush, aiming to streamline the workflow for 3D artists and simplify character animation. Over the past year, Reallusion introduced Pose Tools for managing character poses and Face Tools for customizing expressions between CC and ZBrush. Now, Reallusion announces the launch of the enhanced and free GoZ Plus plugin, which significantly enhances the CC and ZBrush pipeline. It will be automatically available when you update CC to the latest version.

One-click transfer of CC character poses, expressions, and wrinkles to ZBrush

Previously, artists relied on ZBrush GoZ to transfer assets between Character Creator and ZBrush. This method had limitations, such as only being able to transfer character meshes while textures had to be imported separately. With the new GoZ Plus plugin, 3D objects and texture maps can be directly transferred. GoZ Plus also includes subdivision and smoothing options to supplement more essentials of the ZBrush workflow.

Streamlined Texture-to-Mesh Baking and UDIMs Conversion

Previously, artists faced the tedious process of manually hiding and showing meshes to export material maps one by one, followed by sequential importing into Character Creator (CC). With the introduction of CC GoZ Plus, this process has been revolutionized, artists can import characters from CC into ZBrush for sculpting and polypainting. It will automatically convert CC diffuse textures to ZBrush polypaint and normal maps to ZBrush displacement. Once you complete the detailed sculpting and painting, textures can now be baked and applied to CC3+ UDIMs with just a single click, streamlining and accelerating the workflow.

Seamless high-poly mesh sculpting and smoothness options

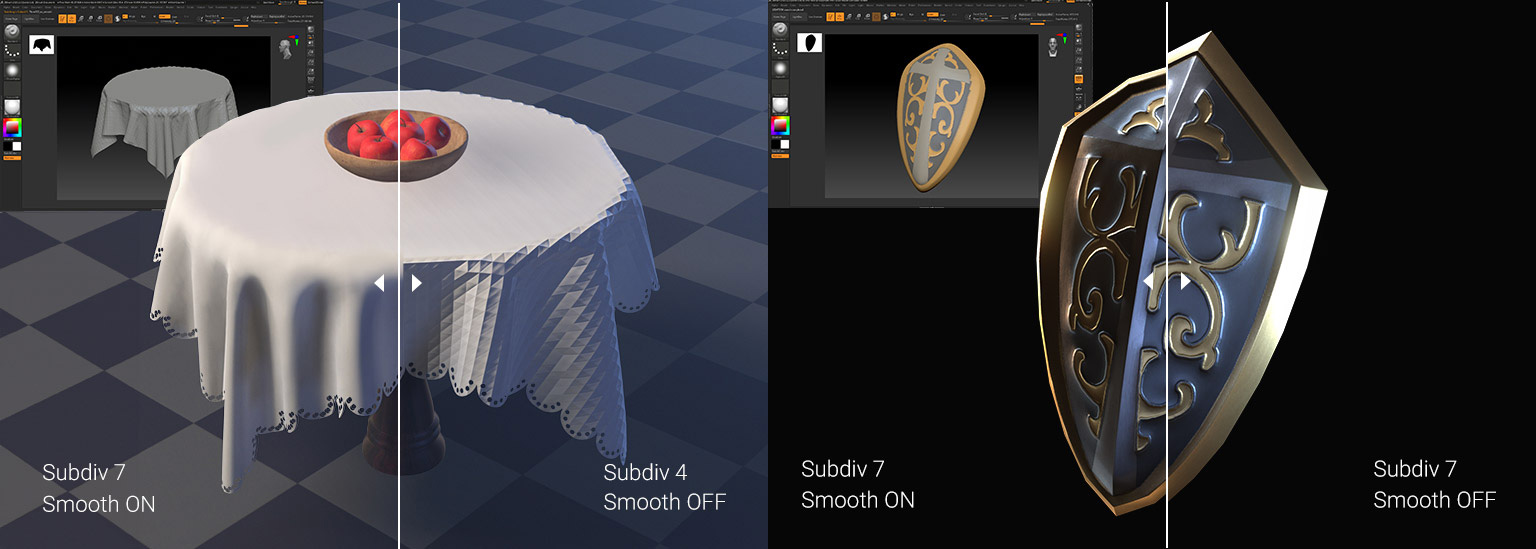
Unlike prior versions of GoZ which could only transfer characters, GoZ Plus allows for the direct transfer of props. Additionally, the smooth mesh option allows users to choose between maintaining the sharp edges of a hard surface model or smoothing out soft surface models.

Recognizing the importance of detail sculpting for ZBrush artists, Reallusion has also added a subdivision option to the GoZ Plus. This enables the transfer of props from CC to ZBrush at high subdivision levels, providing high-resolution meshes for sculpting and polypainting to achieve intricate details. 

Transform CC assets into 3D printing-ready models

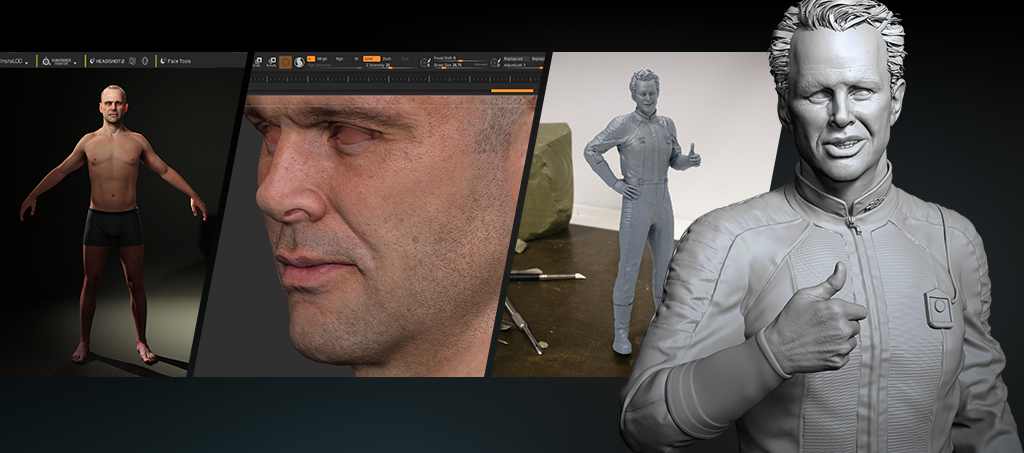
As a major benefit for character artists, the new GoZ Plus plugin makes it easy to transform low-poly CC models to high-poly sculpts. Custom poses and expressions can be applied to million-polygon meshes, enabling ZBrush artists to sculpt micro-details, make intricate tweaks, and create multiple characters with different poses. Artists can create new layers in ZBrush to manage poses using Pose Tools and switch between different poses with ease. Due to its versatility, Pose Tools is quickly becoming an essential tool for 3D print artists.

Image courtesy of from Michael Pavlovich

GoZ Plus is completely free and will be automatically accessible with ZBrush 2022 or later when you update to the latest version of Character Creator 4.42. Besides, ZBrush Artist Michael Pavlovich has created a series of tutorial for CC GoZ Plus. For more information and to experience the enhanced capabilities of GoZ Plus, update your versions of Character Creator and ZBrush right now!

Resource Links

Character Creator 

CC GoZ Plus official page

Character Creator ZBrush Pipeline

Tutorials for CC GoZ Plus

Michael Pavlovich Tutorial part 1

Michael Pavlovich Tutorial part 2

Michael Pavlovich Tutorial part 3

External Link

Best Laptops For Graphic Design For Artists

Simplifying Cartoon Animation for 3D Artists

This article is featured on BlenderNation

Catur Indra Sukmana

Hello everyone, I am Catur Indra Sukmana, a freelance 3D artist based in Yogyakarta, Indonesia. My journey into 3D modeling began when a relative of mine asked me to design a house they were planning to build. At that time, I was an Ocean Engineer, but this request sparked my interest in 3D design. In 2012, I started teaching myself how to draw houses using YouTube tutorials. Although my initial attempts weren’t very satisfactory, I found joy in the process. Since then, I’ve honed my modeling techniques, progressing from low-poly to high-poly models.

My professional career began when I joined one of the largest online marketplaces for freelancers. At that time, I was still offering services for architectural visual design, and over time, the clients that came to me became more diverse with various orders. 

Fast & Accurate Auto-rigging with AccuRIG

For years, I manually rigged characters in Blender. Recently I discovered auto-rigging using AccuRIG from Reallusion. AccuRIG is a free software equipped with user-friendly automation features that allow you to focus on model design while achieving superior rigging in just 5 simple steps. Compatible with low to high density and multiple meshes in any A and T poses, this software also supports direct export to all major 3D platforms.

Auto-rig body and hands with AccuRIG.

We can download the free software from ActorCore. The first step in using AccuRIG is to import a 3D file (.obj / .fbx) into the software. Your model doesn’t have to be in an A or T pose, but the results will be more optimal if it is. Then, we define the positions of the joints on our model, starting from the arms, knees, fingers, neck, and so on. The rigging results can be checked immediately and corrected if any movements are not quite right. The next step is to export our rigging results to ActorCore.

Retargeting 3500+ 3D Motions in ActorCore

ActorCore is a web-based online store from Reallusion that contains hundreds of characters with thousands of motions in a wide variety of styles. These motions are neatly organized into categories such as “Daily Life”, “Combat”, “Cartoon & Anime”, and more. ActorCore motions come in two styles: mocap or handkey animations. With just one click, we can make our character move smoothly, as these motions were created by professionals.

Uploading rigged 3D characters from AccuRIG to ActoreCore 3D store.

We can preview these motions directly in the 3D viewer window and create a list of the motions we choose. This time, my character will use handkey motions such as “Long Hug”, “Stand Happy Chat”, “Stand Anxious Talk”, and others. All the motions we have downloaded will be stored in the inventory of our account.

Motion preview with over 3500 animations.

Advanced Motion Editing with iClone

iClone is a 3D animation software used by professionals to create and edit animations quickly and easily. iClone simplifies the process of bringing our characters to life by enabling facial animation, motion capture, scene design, and cinematic storytelling.

The motions we have downloaded from ActorCore will automatically synchronize with iClone. We can combine several motions and edit them to create smooth animations. Additionally, we can offset certain parts of the character’s body to make the movements align more closely with our preferences. We then export these characters, with the animations we have created, for texturing and rendering.

Combining motions in iClone.

Accurate Interaction Made Easy with iClone

Pairing animations between two digital actors can be a challenge.  iClone’s Reach Target lets you adjust the character’s grip and apply offsets to perfectly align interactions.  With its ingenious technology, it has never been easier to create interpersonal interactions that are not only naturalistic but also completely convincing.

Reallusion offers a series of mocap animation training materials that can really help users to master their skill on accurate interaction between characters and characters with props.  

35+ training videos on mocap animation available online.

Texturing and Rendering inside Blender

We import the combined motion results of our characters from iClone into Blender for texturing and rendering. I often use Blender because it is an open-source software that is regularly updated and, of course, free.

Having perfected my character animations, I usually apply a Subdivision Modifier to smooth them out. In addition, I provide attractive textures that match the theme of the animation I’m creating.

Finalizing process inside Blender

Finally, it’s a Game Changer!

I am very impressed with the innovations that Reallusion has made. The rigging and animation process that used to take days can now be completed in a matter of hours. I highly recommend these tools. Thank you, Reallusion!

Download AccuRIG and iClone, and see for yourself!

Related Posts

————————————————————————————————————————————————————————————

The original article was written by Catur and is also featured on BlenderNation.

Festive Character Animation with iClone BuildingGen, Character Creator and Houdini

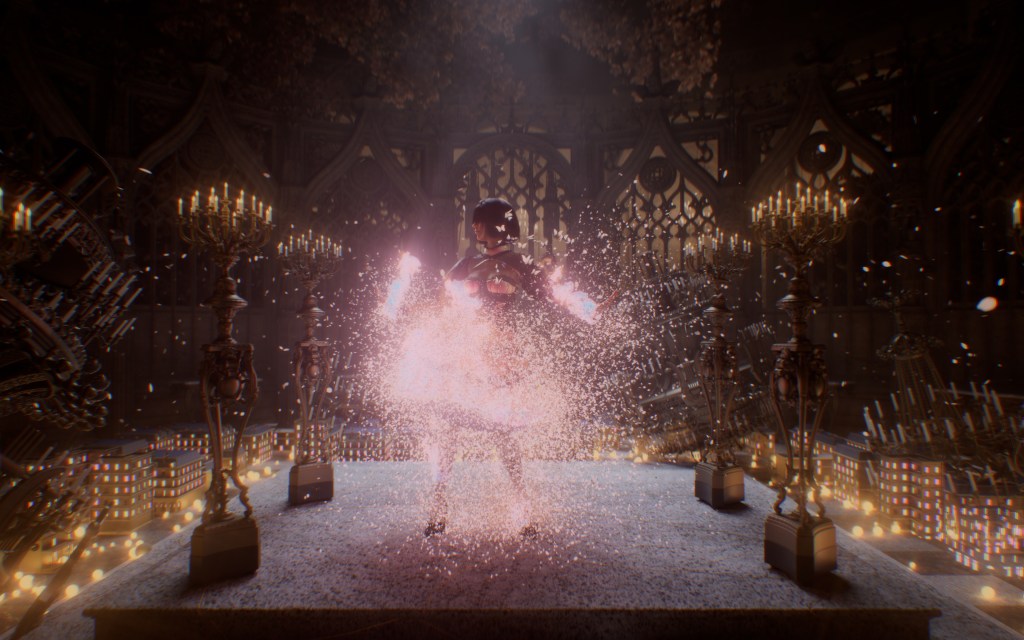
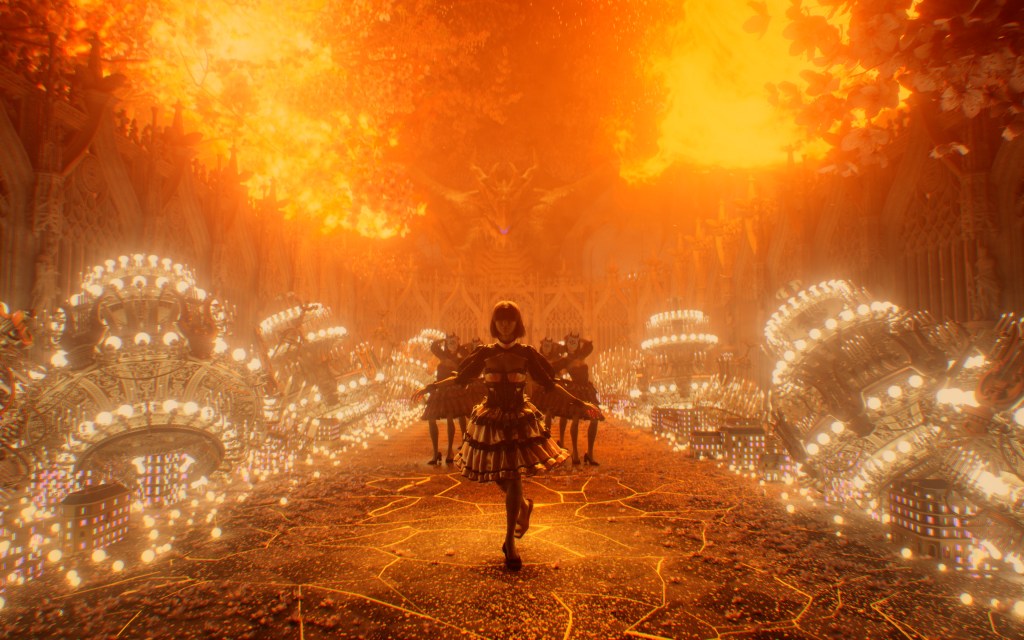
Project “Henshin!” (変身!) is a one-minute full CG animation, showing a uniform-dressed crowd celebrating during a festive time. Made with Character Creator, animated in iClone and environment decorated with the latest BuildingGen Plugin. This is also John’s artistic and metaphorical transformation, representing his exciting leap from Cinema 4D to the captivating world of Houdini.

John Yim

Kay John Yim is a Chartered Architect at Spink Partners based in London. He has worked on a wide range of projects across the UK, Hong Kong, Saudi Arabia, and Qatar, including property development and landscape design. His work has been featured on Maxon, Artstation, CG Record and 80.LV.

Yim’s growing passion for crafting unbuilt architecture with technology has gradually driven himself to taking on the role of a CGI artist, delivering visuals that not only serve as client presentations but also as means of communication among the design and construction team. Since the 2021 COVID lockdown, he challenged himself to take courses in CG disciplines beyond architecture, and has since won more than a dozen CG competitions. 

“Henshin,” a beloved term in Japanese Anime for initiating electrifying transformation scenes, fittingly translates to “transformation.” In this project, I blend the pulse of modern dance with the grandeur of Gothic fashion and architecture. Inspired by the vibrant and whimsical dance scenes in Anime, I sought to capture that same energy and playfulness in “Henshin!.” As a former Cinema 4D enthusiast, this project marks my first deep dive into Houdini’s procedural magic—a transformative experience for me as both an Architect and a CG Artist. Houdini’s unique node-based interface was intimidating at first, diverging significantly from what I was used to. To navigate this new terrain, I balanced experimentation with thorough research on relevant use cases. In this article, I will outline my workflow, highlighting the key takeaways and challenges I faced during this project. I will also share valuable resources, including articles and tutorial links, that helped me troubleshoot and ultimately achieve my desired outcome.

Intro – why I switched to Houdini

Rhino has always been my go-to tool for 3D modeling as an Architect. Its accuracy and intuitive user interface, reminiscent of hand drawing, made it my favorite for over a decade. My muscle memory in Rhino modeling was so ingrained that I became very accustomed to a ‘manual’ or ‘destructive’ workflow. In the early days of exploring CG rendering, I turned to Cinema 4D as my gateway to third-party renderers like V-Ray, Redshift, and Octane. My process involved exporting models from Rhino into MOI3D and then into Cinema 4D. This repetitive workflow, especially with frequent design iterations and client brief changes, was grueling. Yet, I brute-forced my way through, never considering an alternative.

A turning point came a few years ago while working on an Unreal Engine project, ‘An Unreal Diorama‘, which required baking hundreds of texture maps in Substance Painter. The sheer volume of repetitive tasks quickly overwhelmed my excitement and physical stamina. Desperate for a more automated solution, I discovered Houdini. Houdini’s fully procedural nature was a revelation, easily handling repetitive tasks. At first, I used Houdini as a Cinema 4D ‘plug-in,’ exporting models into Houdini for poly-reduction, quad-meshing, or UV-mapping before re-importing them into Cinema 4D for rendering. Over a year and a half of intermittent use, I gradually transitioned most of my modeling, texturing, and rendering tasks into Houdini. This shift unlocked new possibilities for my professional and personal projects, particularly in iterative FX like pyro and flip simulations, cloth simulations using Vellum, and procedural modeling.

Character (iClone + Marvelous Designer + Houdini)

My character workflow began in Character Creator, where I primarily used the body morph sliders and Skingen to create my two characters. I then brought the characters into iClone and explored the Actorcore library for mocap animations. I chose 5 sets of Actorcore Motions and blended them into 3 sets of character animations:

The ‘Edit Motion Layer‘ and ‘Motion Correction‘ functions were the ones I used most frequently.

Edit Motion Layer’ allows me to manually keyframe character movements with IK joints
‘Motion Correction’ helps me fix foot sliding.

I always set the first frame as a T-pose or A-pose, with at least 15 frames of buffer before the character animation starts. A-pose is recommended for cloth creation in Marvelous Designer and cloth simulation in Houdini Vellum.

Tips: 15 frames of buffer is set before the animation!

Once I was happy with the character animation, I exported it from iClone as both Alembic and FBX files for use in Houdini and Marvelous Designer. The Alembic file was my primary working file throughout the project.  Note that at the time of writing Houdini has a known bug that does not import iClone FBX characters’ accessories properly (hair, clothes, shoes etc.), so I recommend using Alembic to avoid issues down the line.

Cloth Preparation

The character clothes are prepared separately in Marvelous Designer using the first frame of the exported Alembic file from iClone. Cloth creation is a complex topic beyond the scope of this article, but I generally look for sewing patterns on Etsy or start with the clothing templates that come with Marvelous Designer by default.

There are two essential points I always keep in mind during this process:

1_Avoid adding garment details with overlapping cloth (e.g., the hem of a dress), as this can cause issues during cloth simulations with Houdini Vellum.

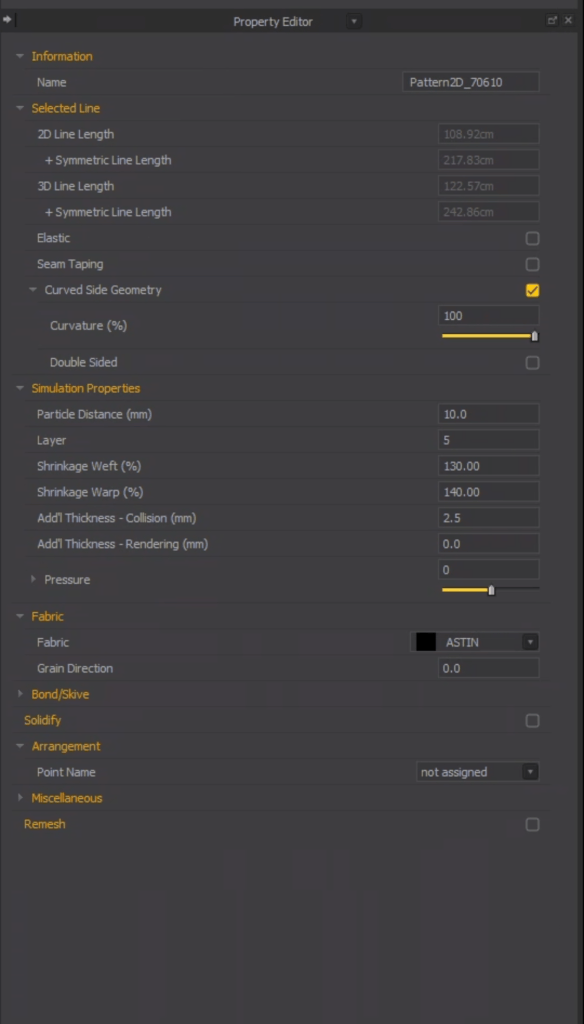
2_Maintain a particle distance above 10mm for the garment. Lower particle distance increases the simulation time in Vellum.

Marvelous Designer’s cloth simulation is extremely user-friendly, but its lack of control over partial simulation and collision masking makes it unreliable for art direction or design iteration.

Once I have the garments fitted to the character’s A-pose, I re-topologized them as quad mesh (right click on garment ‘Quadrangulate’) and then export them as OBJ files into Houdini (as welded). Note that Alembic files exported from Marvelous Designer do not include any material data, so unless I am exporting animations from Marvelous Designer I always default to exporting in OBJ.

Vellum Simulation in Houdini

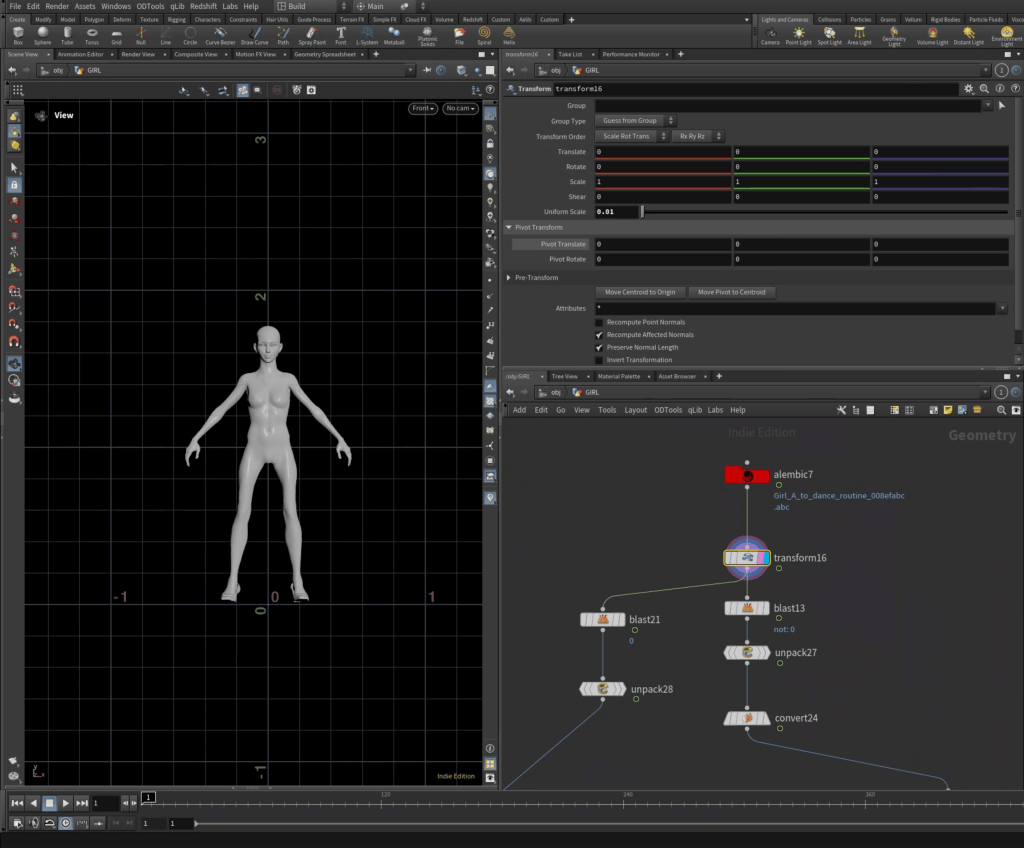
With both the character animation and garment A-pose imported into Houdini, I first use the ‘Transform’ node to scale them down to the correct units. Houdini’s native unit is meters while Marvelous Designer and iClone works in centimeters, so I always have to scale imported files down by 0.01.

My overall cloth simulation workflow in Houdini can be categorized into four main stages:

i: Character pre-Vellum setup

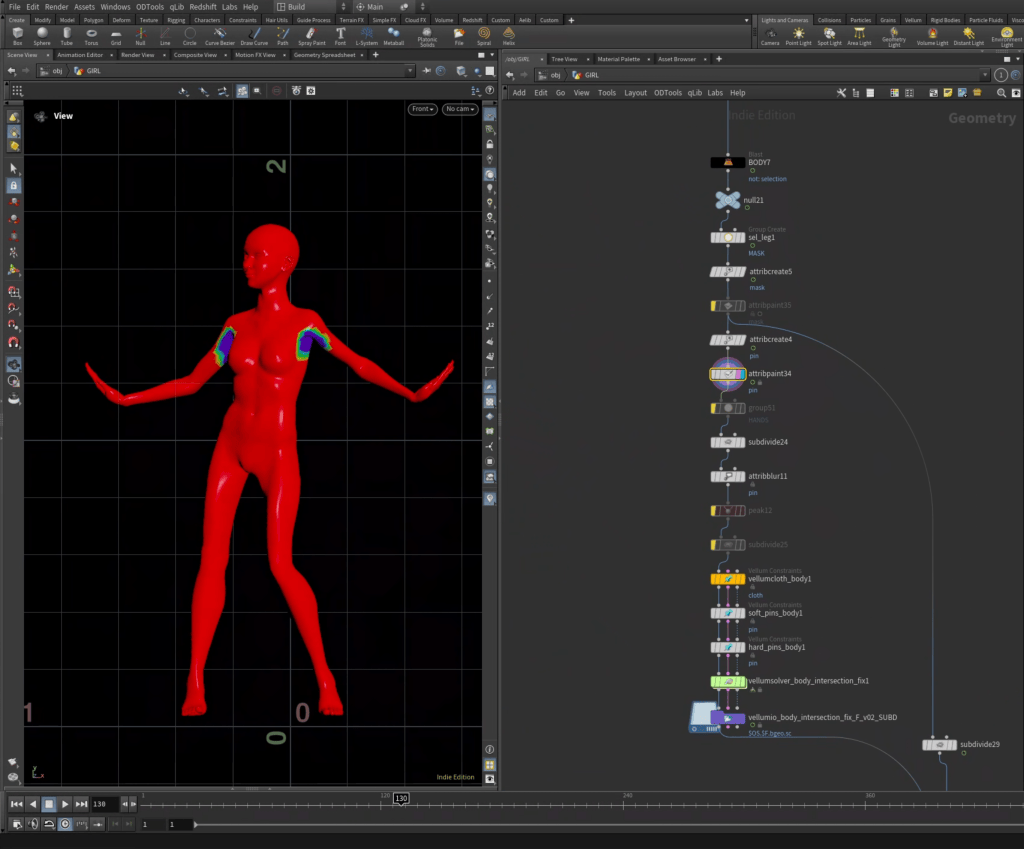
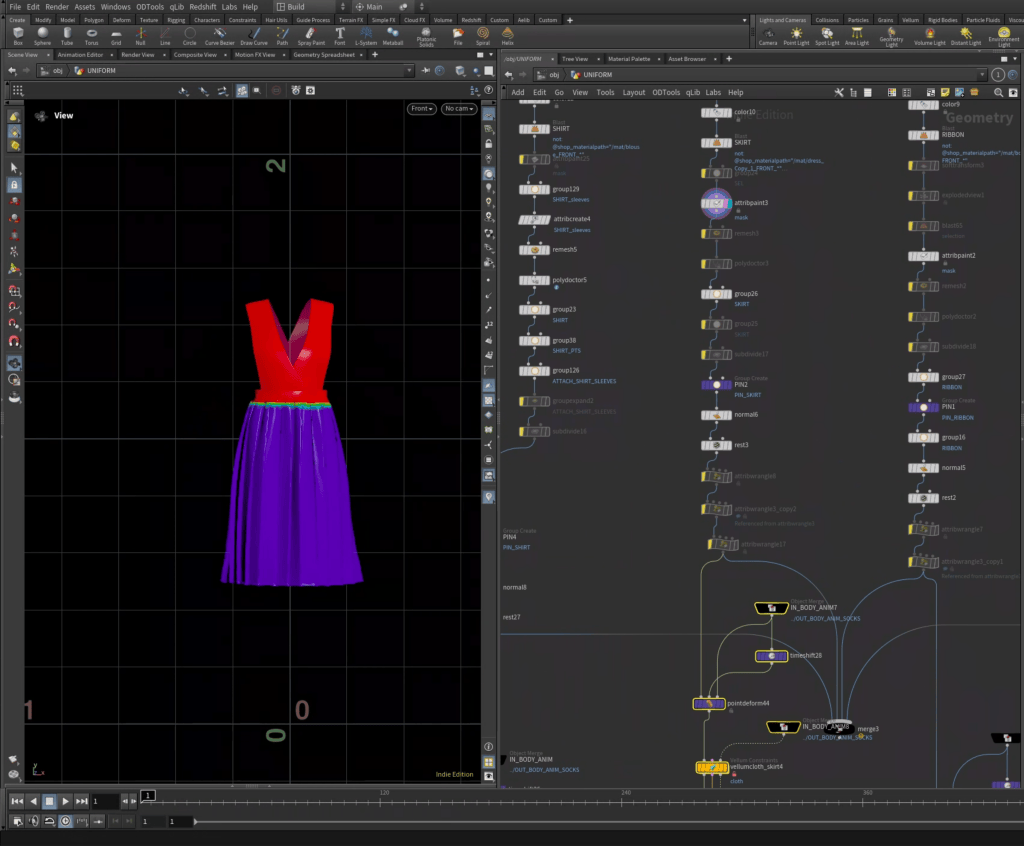
I separated the main body from the rest of the body parts, including the eyes, shoes, and nails. From the hundreds of Vellum tests I did, I found that armpits are the most problematic areas during cloth simulation due to the minimal space for the cloth mesh to fit into. To address this without delving into muscle simulation, I perform a Vellum simulation solely on the main character body, with the armpits masked out to solve intersecting frames. This simulation resolves skin intersections and prevents future issues down the line.

This workflow is also outlined in detail on SideFX’s site: ‘Vellum Cloth: Tips & Tricks.’

ii: Garment pre-Vellum setup

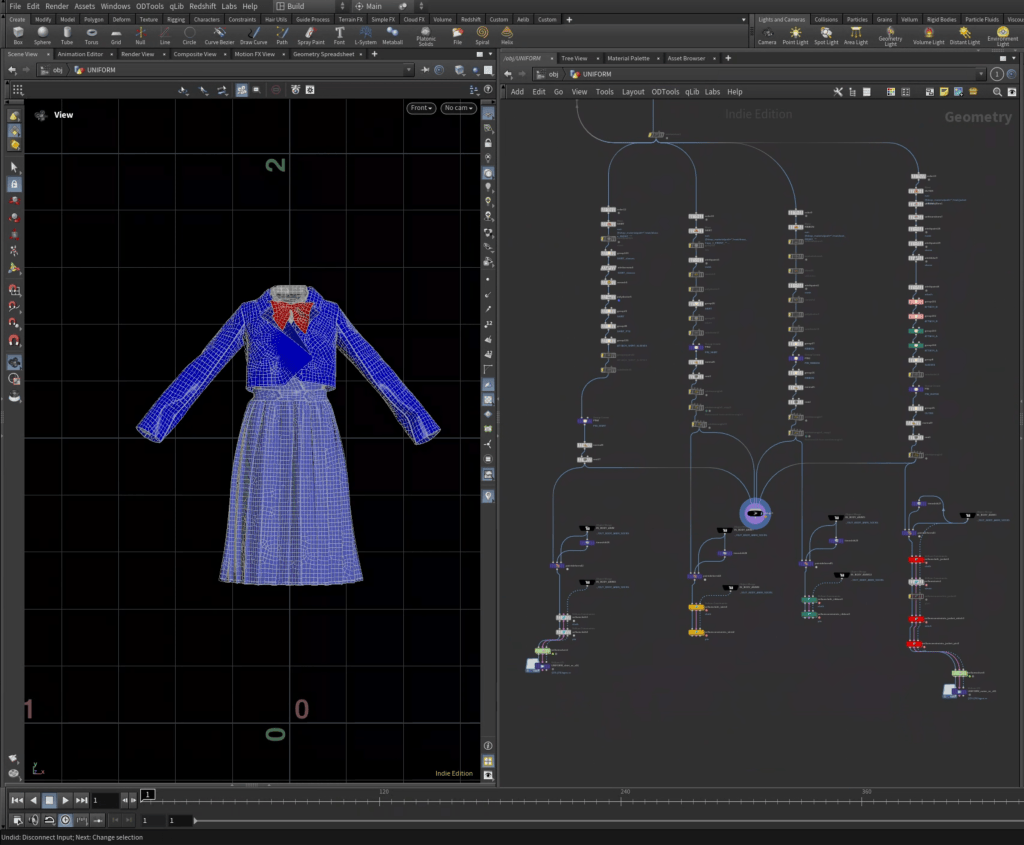
I first separated the imported OBJ file by materials. I used a handy free plugin ‘MASSEParmUtilities‘ to do this, but one can just use ‘Blast’ nodes to do the same. My principle is to always perform Vellum simulations on each separate clothing item before combining multiple items in one simulation, making iteration and fine-tuning more efficient.

I manually painted masks on the cloth to define which parts of the clothing should ‘stick’ to the animated character at all times. Buttonings of jackets were also defined with paint masks. The paint mask attribute is then promoted to point groups with a simple expression: @mask_name > 0.5.  I then used a ‘Point Deform’ to deform the static clothing to the animated character.

This process involves a lot of trial and error, as Vellum properties vary by mesh density and do not adhere to real-life metrics. I usually begin with the Fabric Samples found in the SideFX Content Library. SideFX documentation recommends using a ‘Remesh’ node to triangulate clothing into uniformly distributed triangular meshes before Vellum simulation, as triangular meshes use fewer points than quad meshes (renderable mesh) to capture more details (e.g., wrinkles). However, I find that quad meshes can produce more realistic simulations for thicker fabrics like leather. I always run test simulations with different mesh densities on both quad and triangular meshes whenever time allows. One of the best tutorials I found online on Vellum setup is ‘Houdini Vellum Creature Setup’ on CGCircuit, which explains how to set up multi-layered clothing for Vellum simulation in great detail.

iii: Vellum simulation

Once I had all the separate simulations dialed in, I brought all the clothing together using either a ‘Vellum pack-unpack’ workflow or by combining them into a single stream.

I personally prefer setting up multilayered cloth simulations within a single stream, as I find it much clearer to read and easier to attach different cloth parts together when necessary. For instance, I attached the jacket sleeves to the shirt sleeves to ensure that the jacket does not slide down the character’s arm when her arm is lifted.

iv: Post-Vellum clean-up

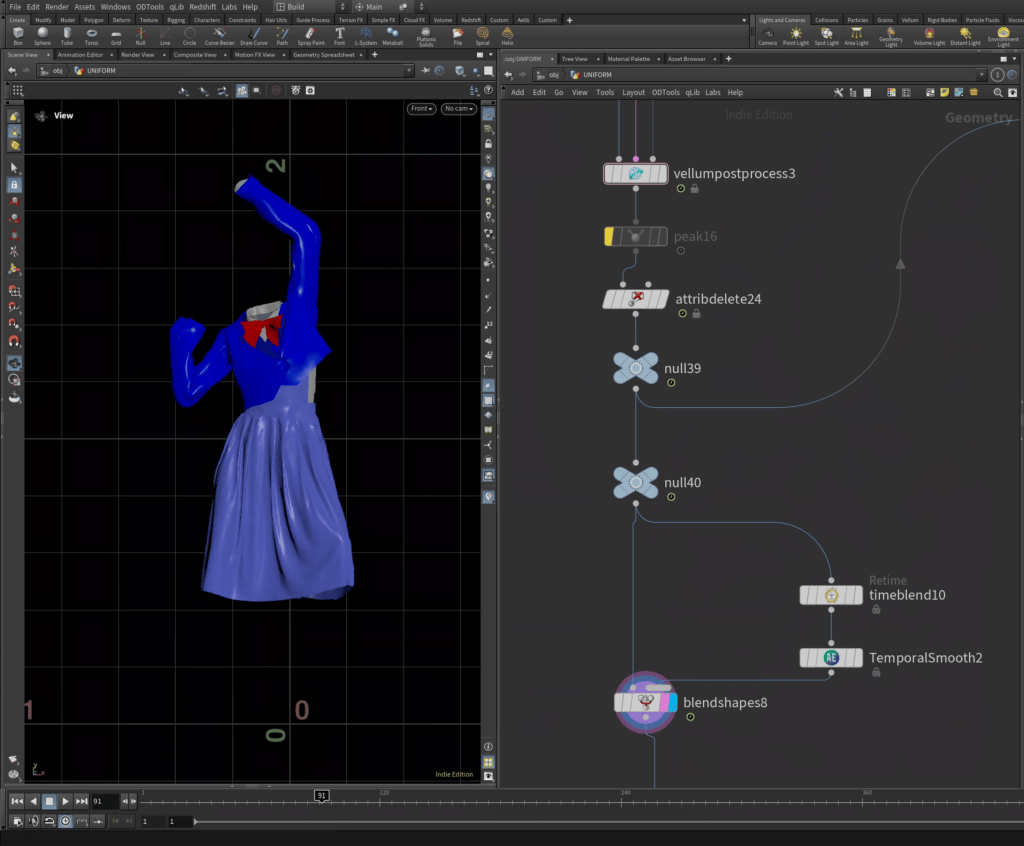
On average, it took me about 40 iterations to achieve the final Vellum simulations that I am happy with. I usually add a ‘Post vellum’ node after the simulation to smooth out some of the spiky or rough surfaces. Vellum sometimes produces jittery results during minimal animation (e.g., idle character animation with very little movement), for which I use the ‘AE temporal smooth’ node from Aelib to eliminate unnecessary movements.

With all the simulations cached, I use a ‘Point Deform’ node to transfer the simulation from a low-res/triangular mesh to a renderable/quad mesh.

Cloth Transformation

The cloth transformation is composed of three parts:

i: Disintegration with Sop Solver

Disintegration is essentially achieved with a Sop Solver that spreads and accumulates grouped points, using a Blast node to delete points with values above a certain threshold. I first learned about the Sop Solver from Applied Houdini’s tutorials—Particle IV covers the theory of the Sop Solver and how to spawn particles (such as petals) along the disintegration effect.

Applied Houdini – Particle IV / Another great intro to SOP Solver from Far Out Studio:

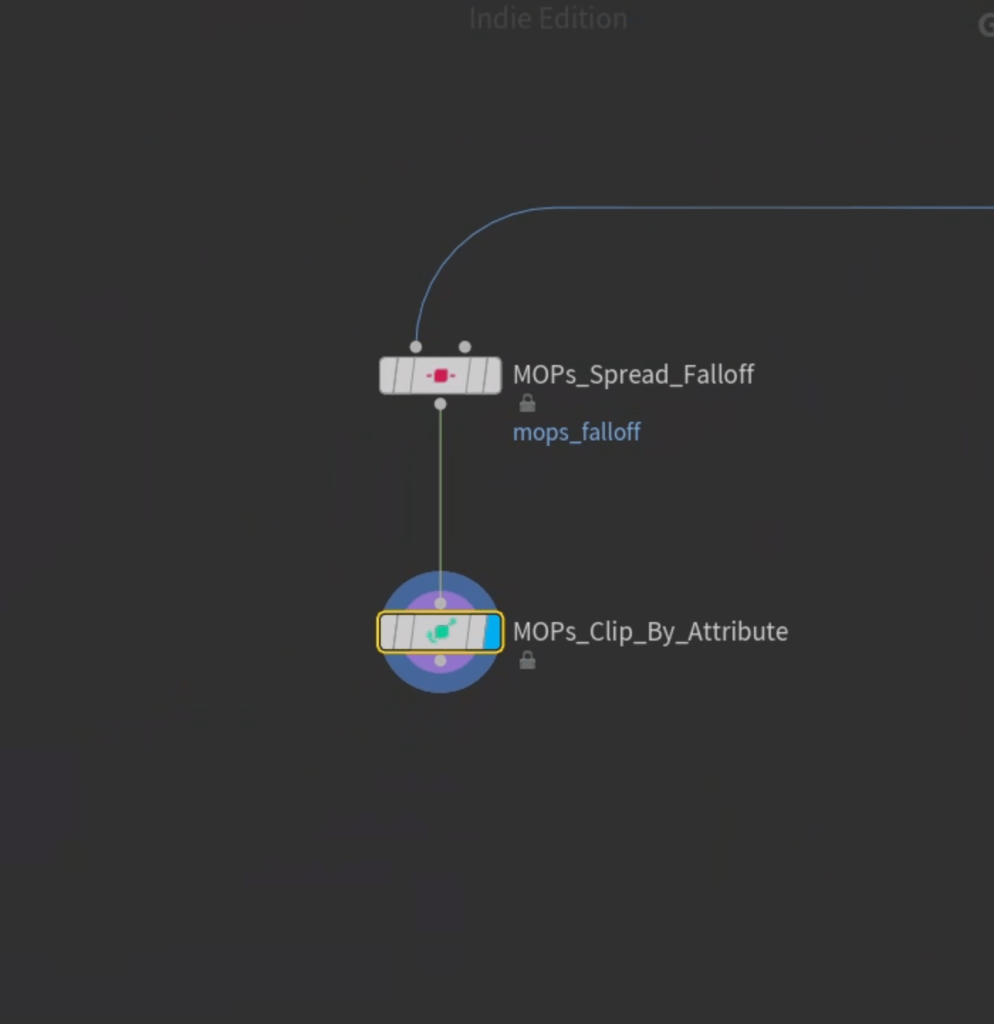
In retrospect I could have used a combination of ‘MOPs Spread Falloff’ & ‘MOPs Clip by Attribute’ to completely replace my aforementioned setup, both nodes could be found within the free MOPS houdini toolkit and simplifies a lot of what I did for this project.

ii: Pyro simulation with Axiom Solver

With the SOP ‘Solver’ cached, I blasted out the disintegration edge and fed it into the Axiom Solver for the pyro simulation (the same result could also be achieved by Houdini’s Pyro Solver, Axiom Solver is speedier on GPUs) . The resulting pyro simulation is then fed into a Pop simulation to generate swarming particles onto which I instanced butterflies. The butterfly swarm consists of nine time-shifted variations of the same butterfly animation.
https://www.youtube.com/watch?v=nJa5RbQK9zU&t=2s

See the cloth transformation result!
Pyro sim result.

iii: Butterfly spawning with Pop simulation

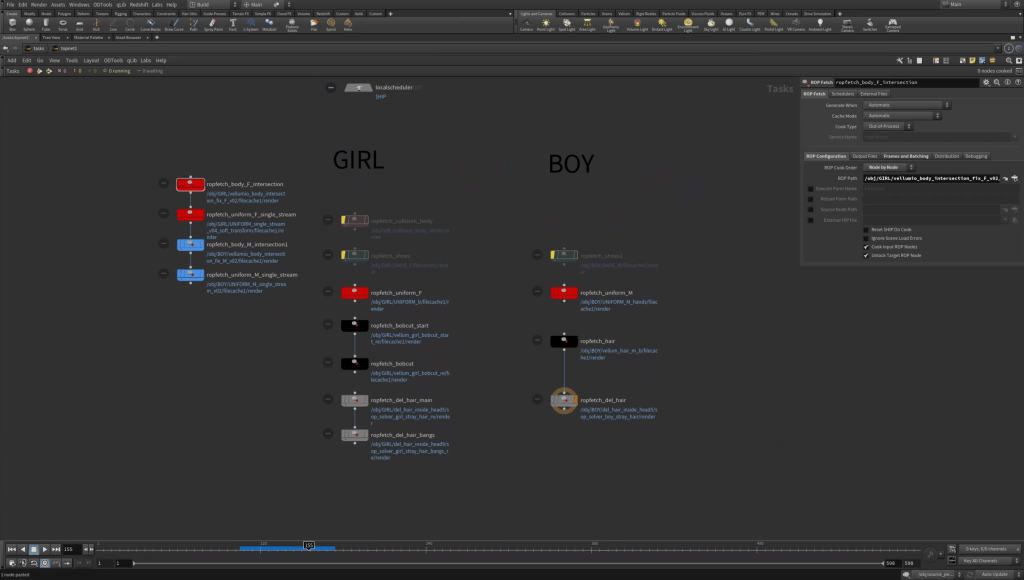
I setup a TOPnet for all my simulations, such that in case when I have to tweak my character animation and re-import into Houdini from iClone, I could just press a button and let Houdini re-run the Vellum simulation and cloth transformation automatically overnight, rather than checking manually.

Environment

What’s the point of Procedural Modeling

Coming from Rhino NURBs modeling, procedural modeling has been one of the most challenging aspects of learning Houdini for me. As the only DCC tool that enables a fully procedural workflow, many online Houdini tutorials advocate for a completely non-destructive approach to modeling. However, this can be technically overwhelming and time-consuming. To determine the complexity of the procedural setup needed, I ask myself two questions:

Is there a possibility that I will need to model something very similar later on, or is this a one-off project?

For most architectural or geometric objects loosely modeled from photos, I prefer to keep my setup as procedural as possible. However, for one-off projects where I’m recreating an existing product, such as a chair or sofa, I may model it in Rhino and then bring it into Houdini, knowing that it’s less likely to be modified later on.

How strictly do I need to adhere to the reference, and how much freedom do I have to tweak the design of the environment?

For architectural modeling, if I’m tasked with modeling a house based on a loose sketch, I’ll set up everything to be procedural, anticipating that every dimension and proportion may change. However, if I’m provided with a CAD drawing, I might model everything in Rhino and then export it into Houdini with material attributes.

My procedural modeling workflow

Throughout the project, I typically adopt a hybrid procedural setup (10% destructive, 90% procedural) for efficiency. For instance, the altar arch-shaped screen begins with curves drawn in Rhino by tracing a reference image. Since Houdini’s curve drawing utilities are relatively primitive compared to Rhino, I prefer to do any line or curve drawings in Rhino first. This included the backbone curves of the altar screens as well as the profile/section curves.

Later, I bring them into Houdini either as FBX (planar mesh) or IGES (NURBs curves).

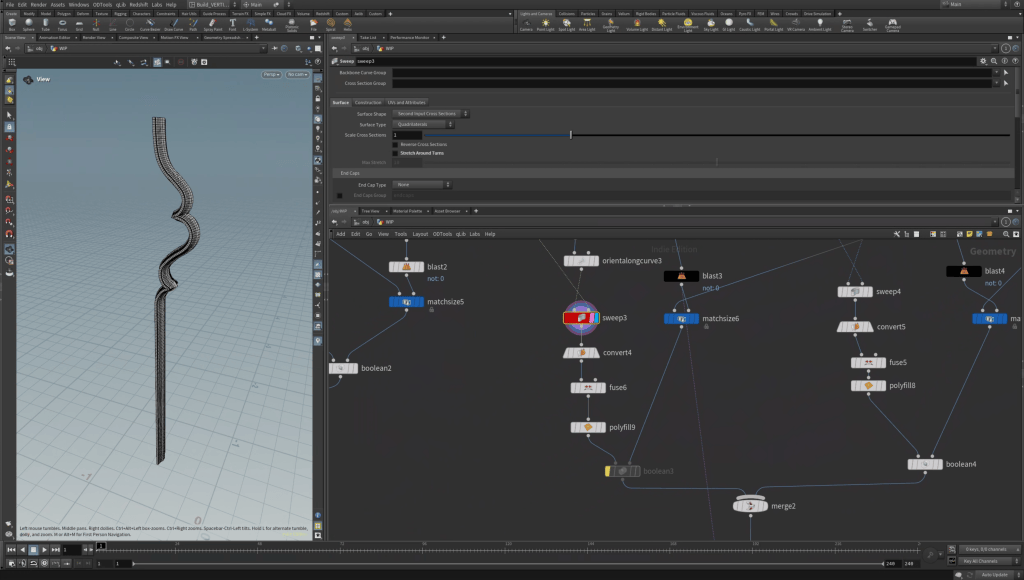
In Houdini, I utilized a ‘Sweep’ node with imported backbone curves and profile curves to create the main arch. Subsequently, I added more intricacies by manipulating the same backbone curves with ‘Soft Transform’ and ‘Transform’ nodes. Then, I used ‘Copy to Points’ to duplicate them geometrically, using the arch shape as the foundation.

Frequently used nodes

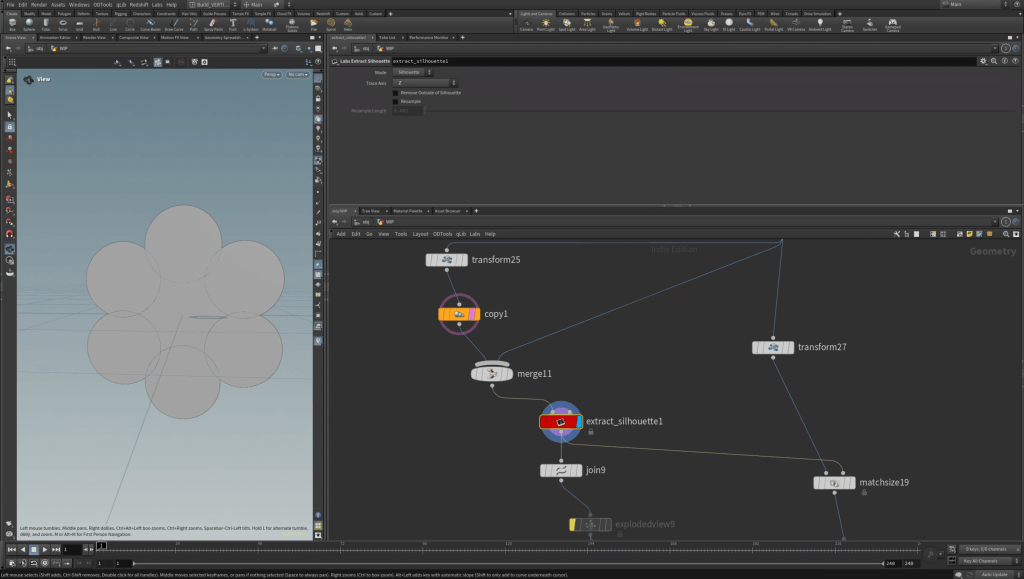
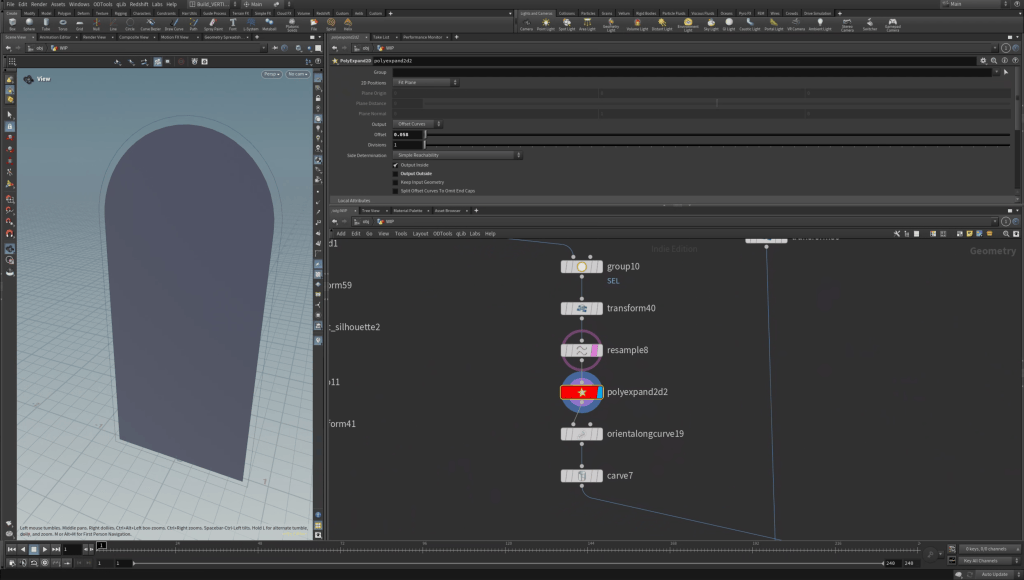
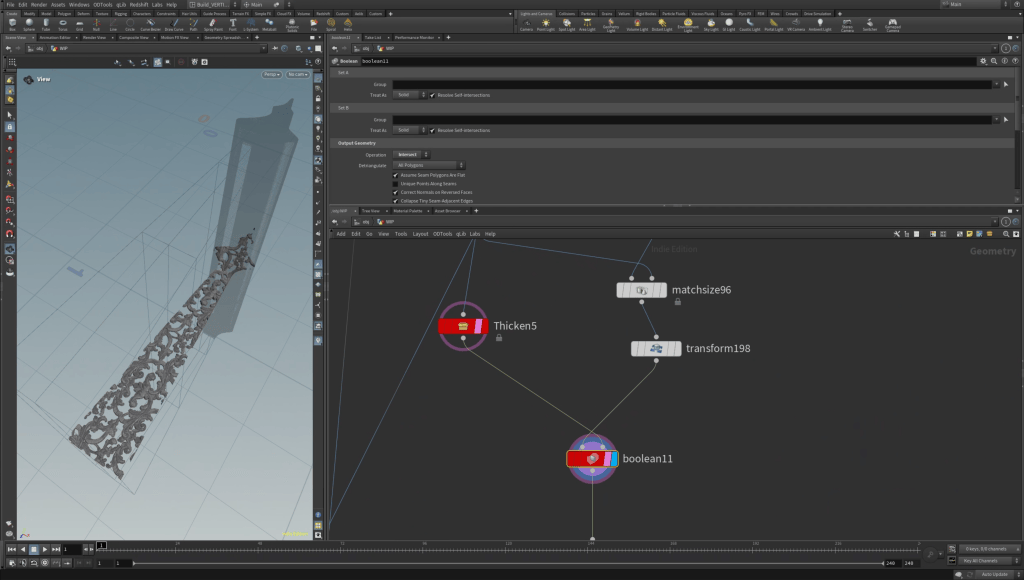
Here are a couple of nodes that I constantly utilized for a procedural modeling setup. The name of the nodes are “Match Size”, “Labs Extract Silhouette”, “Labs ExtPolyExpand2D”, “Sweep” and “Boolean & Thicken (AELib)”. Pleas see the illustration below for detailed info.

Assembly, Look-dev & Shot-framing

Assembly, look-dev, and shot framing were not linear processes; they required extensive back-and-forth testing to achieve the final result. I parent objects to ‘Null’s when moving them around in the scene. This way I can easily replace the object in the same position by re-parenting the ‘Null’. I used ‘Instance’ objects as much as possible to populate my scene in order to reduce RAM usage, this included the altar screens, the characters, chandeliers and the floating petals. When working on materials or shaders, I always prefer to work in context—viewing through the final animation’s camera, with appropriate lighting and environment settings—rather than isolating different objects. This approach ensures that I focus my efforts on objects and materials most visible on camera. To maintain a relatively mysterious atmosphere throughout the animation, I emphasize bottom-up artificial lighting. A major part of the look-dev process involved testing the placement of bottom-up light sources to enrich the scene. Here, Reallusion’s French Style BuildingGen Content Pack proved invaluable. This pack includes nine variations of detailed houses, optimized with minimal point counts and baked textures.

BuildingGen & French Style House Content Pack

Assembly, look-dev, and shot framing were not linear processes; they required extensive back-and-forth testing to achieve the final result. I parent objects to ‘Null’s when moving them around in the scene. This way I can easily replace the object in the same position by re-parenting the ‘Null’.

I used ‘Instance’ objects as much as possible to populate my scene in order to reduce RAM usage, this included the altar screens, the characters, chandeliers and the floating petals.

When working on materials or shaders, I always prefer to work in context—viewing through the final animation’s camera, with appropriate lighting and environment settings—rather than isolating different objects. This approach ensures that I focus my efforts on objects and materials most visible on camera.

To maintain a relatively mysterious atmosphere throughout the animation, I emphasize bottom-up artificial lighting. A major part of the look-dev process involved testing the placement of bottom-up light sources to enrich the scene. Here, Reallusion’s French Style BuildingGen Content Pack proved invaluable. This pack includes nine variations of detailed houses, optimized with minimal point counts and baked textures.

BuildingGen & French Style House Content Pack

Using iClone’s BuildingGen plugin, I exported all the French Style BuildingGen presets into FBX format. I then imported them into Houdini using a simple drag-and-drop method, facilitated by the Houdini plugin ODTools. ODTools automatically created a Material network with all the materials exported from BuildingGen, allowing me to easily drag and drop the building textures into the network.

I separated randomly selected windows as Redshift Mesh Lights and scaled the buildings down to knee-size models, effectively turning them into miniature floor lanterns. I scattered points on the ground and placed the nine variations of the French Style buildings onto these points using an ‘Instance’ object. This method added significant visual detail and provided fantastical direct light to the scene without overwhelming global illumination.

Additionally, I scattered two variations of chandeliers and spheres across the scene as light sources to diversify the “floor lantern landscape”.

Adding Camera Shake

I introduced a subtle random camera shake to the camera’s parent ‘Null’ and added an extra layer of noise, keyframed to sync with the dragon’s fire breathing. I personally find intense shakes disorienting and indicative of a haphazard, handheld filming style, so I keep camera shakes minimal to mimic the steadiness of heavy cinema cameras.

Rendering

As SideFX’s native GPU render engine Karma exits beta in Houdini 20, there is a lot of push from official tutorial and Film industry veterans promoting the migration of rendering into Solaris (LOPs) from OBJ context.  Having done extensive experiments with Redshift in both OBJ and LOPs, LOPs is too time-consuming to set up for a one-man team and slower to render with Redshift in general, so I kept the entire project in OBJ context.  

As John’s long-term partner and also his favorite render farm, Fox Renderfarm stands out in the CG industry since 2011, offering fast & secure cloud rendering services to 3D artists, VFX companies, and animation studios.

Managing objects in the OBJ context can quickly get messy – unlike LOPs where everything is node based and has to be interconnected, everything in OBJ is loosely positioned.  I used ‘Bundles’ to manage my OBJ render sets in Houdini OBJ Redshift; this allows me to render and debug objects separately whenever necessary.

Motion Blur

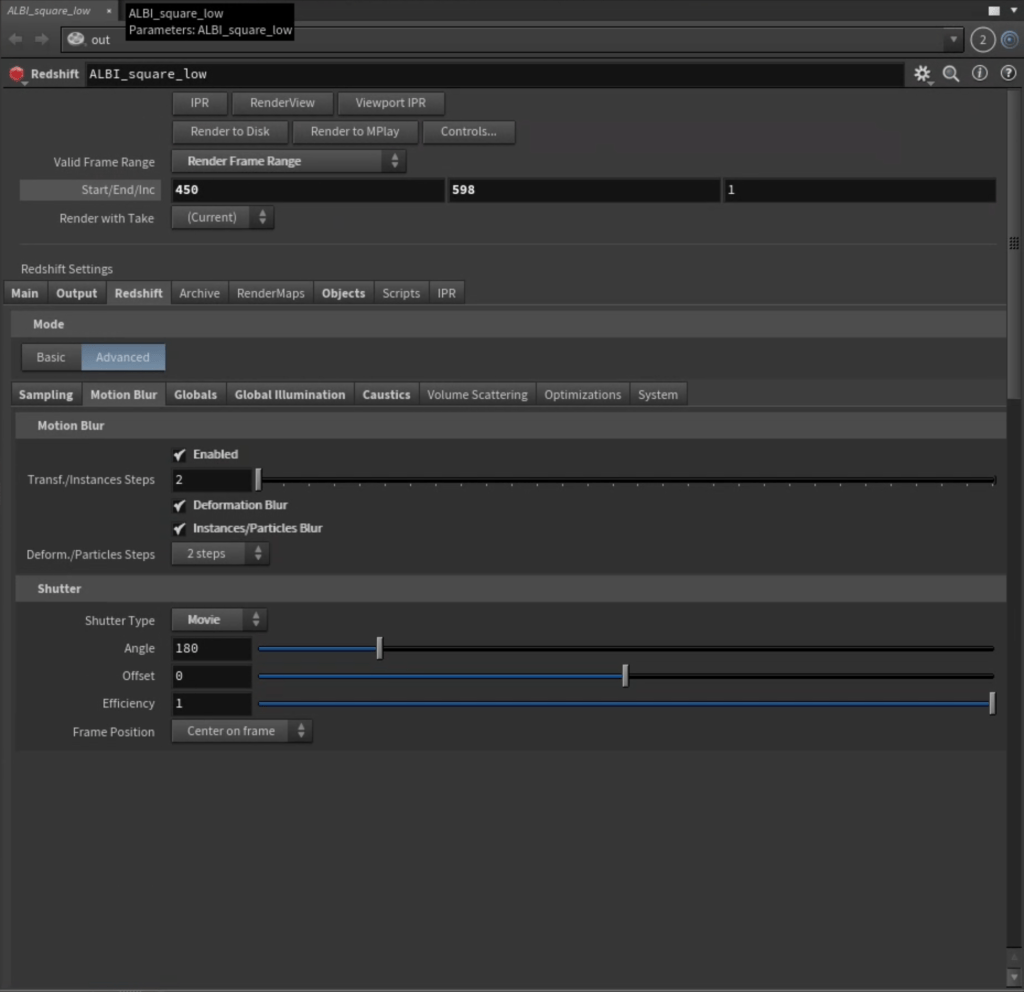
To render characters with correct motion blur, I enabled the ‘Deformation Blur’ option under Redshift ROP. Using a ‘Trail’ SOP, I calculated the characters’ velocity and transferred this velocity to all the clothing using “Attribute Transfer’. Without this step, I noticed that at higher ‘Deformation Blur’ settings, the characters’ skin would pierce through the clothing.

Irradiance Caching Trick

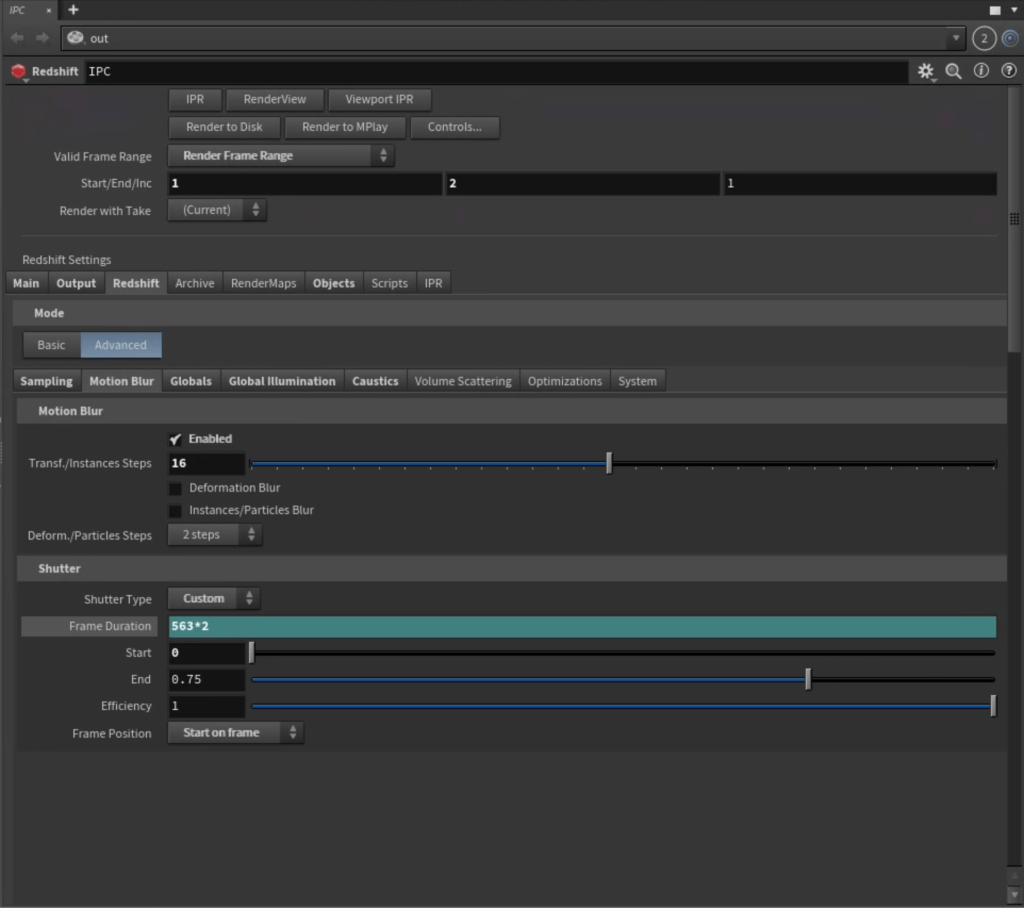
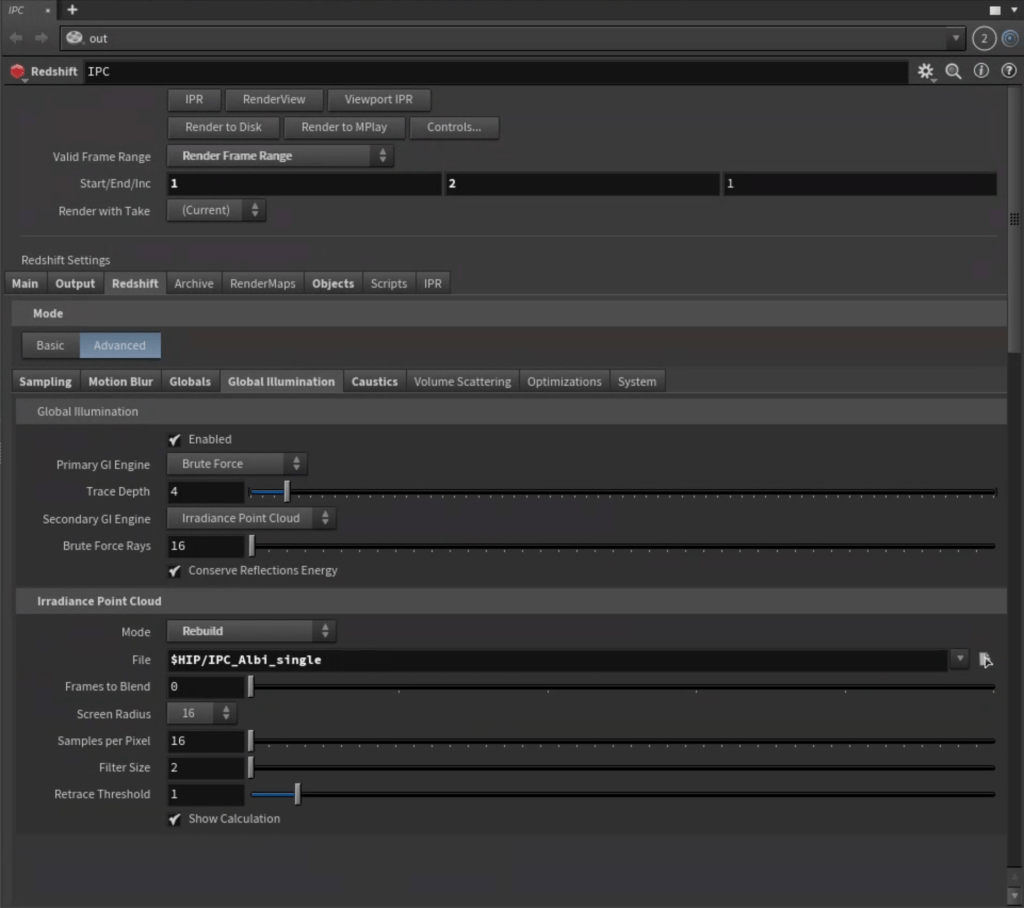
To reduce rendering time, I rendered a single irradiance cache from the first frame, setting the motion blur frame count to twice the total number of frames in the final animation. Although this is not the officially recommended method for rendering sequences with significant motion, I found that it mitigates the ‘light patches’ issue often caused by small light sources and can save up to 10-20% of total rendering time.

Post

With the whole sequence rendered, I used Red Giant looks for slight color correction, adding lens artifacts like halation and chromatic aberration to soften the final render to a more “filmic” look. As John’s long-term partner and also his favorite render farm, Fox Renderfarm stands out in the CG industry since 2011, offering fast & secure cloud rendering services to 3D artists, VFX companies, and animation studios. To celebrate its success in cloud rendering service, Fox Renderfarm offers a special welcome offer with exclusive $50 USD render points. (Link: https://bit.ly/4f9VQQN)

Afterthoughts

Transitioning to Houdini has opened up numerous possibilities for both my personal and professional work. The number of iterations this project required to reach the final result would have been impossible without a procedural setup. Houdini fully procedural nature enables me to very quickly update files exported from iClone, Marvelous Designer or Rhino; its capability to handle heavy scenes is also superb compared to other DCCs; for instance, Cinema 4D would have struggled with more than two high-res characters and constantly crashed the viewport. However, as much as I love Houdini, I cannot wholeheartedly recommend it to everyone. It has notable shortcomings in areas such as sculpting, curve drawing, modeling from CAD data, and freehand drawing or painting.

Additionally, I do not recommend Houdini for projects that need to be completed within a very short time frame, such as an artistic brainstorming session within a couple of hours or a day. In my early days of using Houdini, its procedural nature could quickly turn a fun artistic project into a technical nightmare, diverting my focus from achieving the render to getting lost in optimization rabbit holes.

Despite all the technical hurdles, “Henshin!” represents a significant personal milestone, a thematic and technical “transformation” that has profoundly shaped my approach to future projects.

Related Posts

create toon-shaded character with Character Creator and Cinema 4D

Design Toon-Shaded, Sci-Fi 3D Characters Using CC & Cinema 4D

This article is featured on 80 Level

Calder Moore

Hey Everyone! My name is Calder Moore and I’m a digital artist that focuses on both 2D and 3D illustrative work. I’ve been in the industry for over 12 years doing everything from preschool tv shows, numismatic coins, video games, board games, and even trading card games. I’ve worked for companies like Disney, Nickelodeon, Google, Royal Canadian Mint, Magic: The Gathering, and Dungeons and Dragons.

My passion though, has been creating art for my personal project, In Search Of, a sci-fi anthology project where I explore creating and developing 3D stylized scenes that take place within a gritty dark universe. For the first few years of making art for this project, I had only really created landscape and location art, never really diving into creating characters for it.

I had all these vast landscapes and cities, but the world I was creating still felt lived-in but very vacant at the same time. Last year I wanted to change that and start to bring some life into the universe inside In Search Of and figure out how to create animated characters without any knowledge of rigging and very little for animation.

Calder Moore’s Artstation

So with that drive to make characters, I reached out to a few friends, one of which had recommended checking out Character Creator 4. Once I checked it out and saw what it had to offer for character bases that are fully rigged, UVed, and completely customizable to top it off. After a couple of weeks of tinkering around I finally found a sweet spot that blended CC4s realistic characters with my stylized rendering. After creating about 10 of these stylized characters I have established a solid workflow that I would love to break down for you today!

Throughout this breakdown I will cover my workflow for creating these stylized animated characters using Character Creator 4, Zbrush, Marvelous Designer, Substance Painter, Cinema 4D and finally rendering using Arnold Render.

Reference Images for Stylized Character

I’ll start every character and scene the same way, with collecting reference images and inspiration to build up the overall idea and direction. To do this, I like to explore through Pinterest and Artstation, collecting everything together with PureRef, a great mood board tool for collecting images together and creating collages to refer to as I create the character. When I’m looking for reference images, I wont search for a similar character to what I’m wanting to create but rather bits and pieces to help create what I have in mind. Stuff like jackets, sci-fi gadgets, color scheme inspiration, fabric inspiration, face sketches, and other photography or sketched characters that help to inspire the general direction.

Sketching the Design

Once I get all my reference inspiration and idea of where I want to take the next character, I will sketch out the design and further flesh out the idea. To do this I’ll use either Photoshop or pen and paper. When I’m sketching the character I’m not really trying to create a finished piece, but more of a solid direction to guide the 3D workflow with. I feel like it’s important to figure out the direction with even just a quick sketch as it makes the 3D process much more efficient as you have a direction to go into, without a sketch or direction, you’ll find a lot of time is wasted as you don’t really have any direction and aimlessly creating in 3D which tends to take much longer than a quick sketch would.

Character Creator 4 and ZBrush

When I dive into creating the character in 3D, I start by building the base model using Character Creator 4. This amazing tool provides great character bases that are already rigged, UV-mapped, and fully customizable in a non-destructive way.

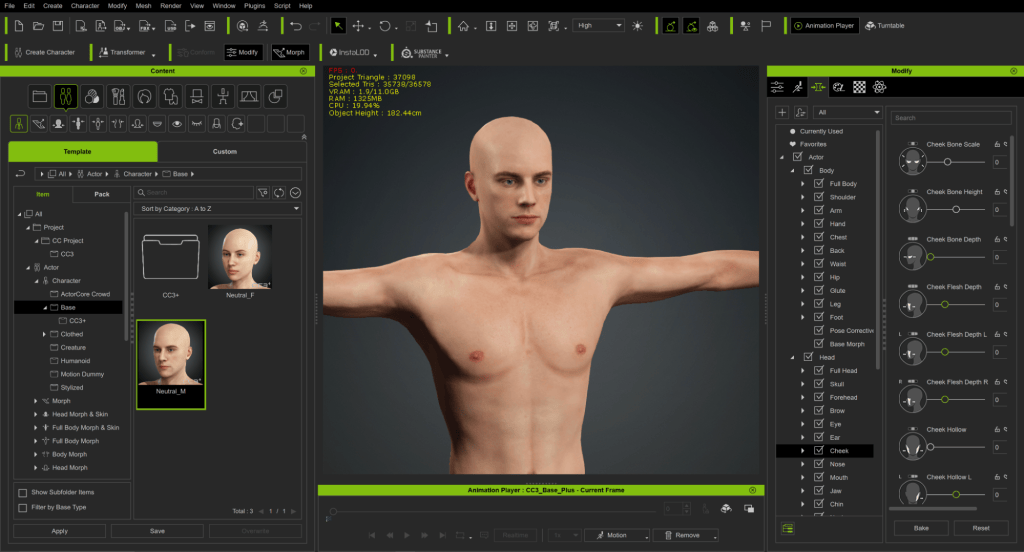
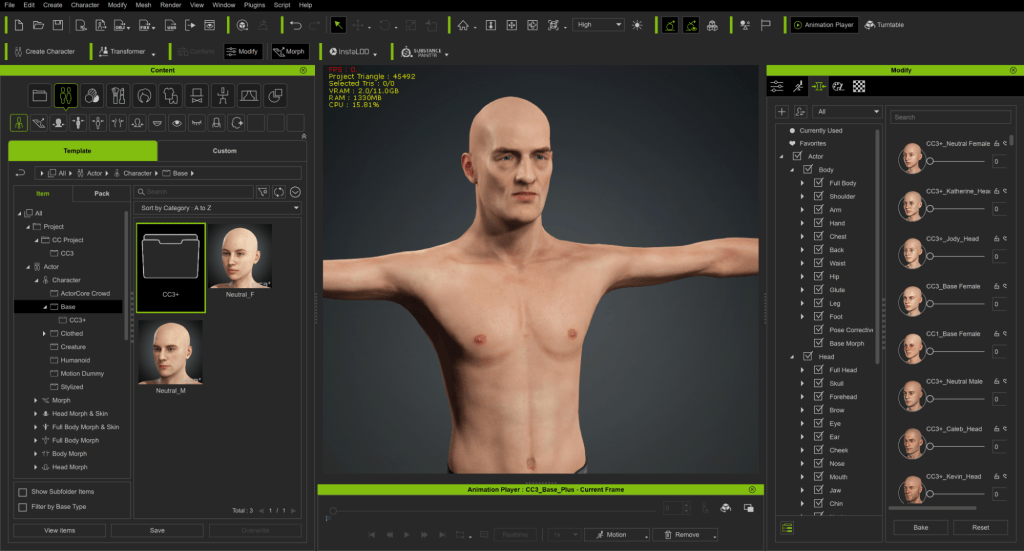
I’ll load up the CC4 Neutral male or female base model and then go into the morphs tab and play with the sliders to adjust the face to what I want to have for the character. With these characters being a bit stylized, I’ll push some of the features more extreme then they would normally be to help give them more of that character I’m looking for. Things like a bigger nose, sunken eyes, prominent cheekbones. Stuff where the shader can interact with as well as push the silhouette.

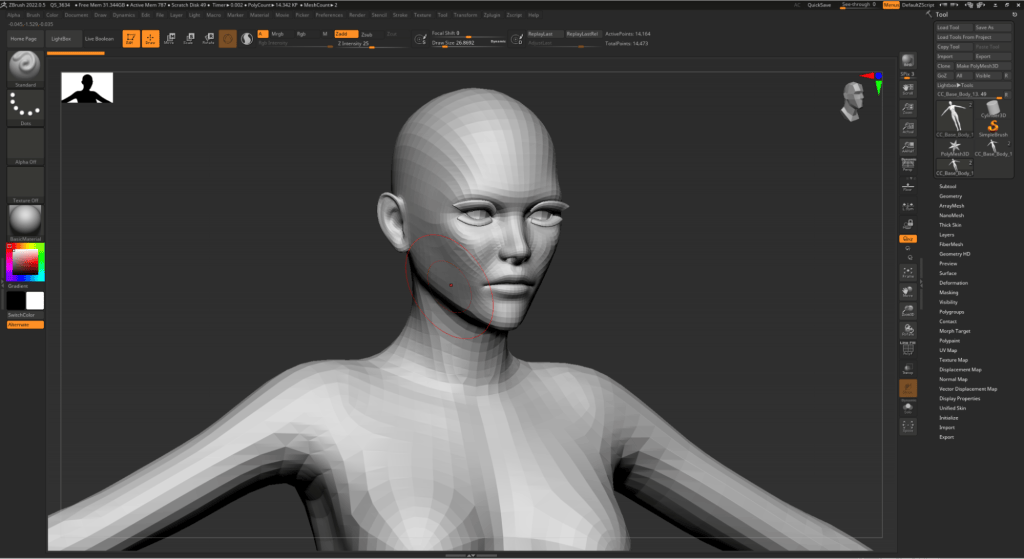
Sometimes though I’m not able to push the forms into where I wanna take them, and that’s where the ‘GoZ’ function comes in handy. I’ll send the character over into ZBrush where I can sculpt the forms a bit more into exactly how I want them and then click the GoZ button in Zbrush to send the adjusted model back into CC4 where it updates to reflect those changes. This workflow is so good for not having to worry about reweighting the geometry as everything still works perfectly.

Once I’m done adjusting the model, I’ll then export it as an FBX checking on ‘current pose’ and ‘first frame in bind pose’ to have a nice default state to attach assets onto with.

Marvelous Designer

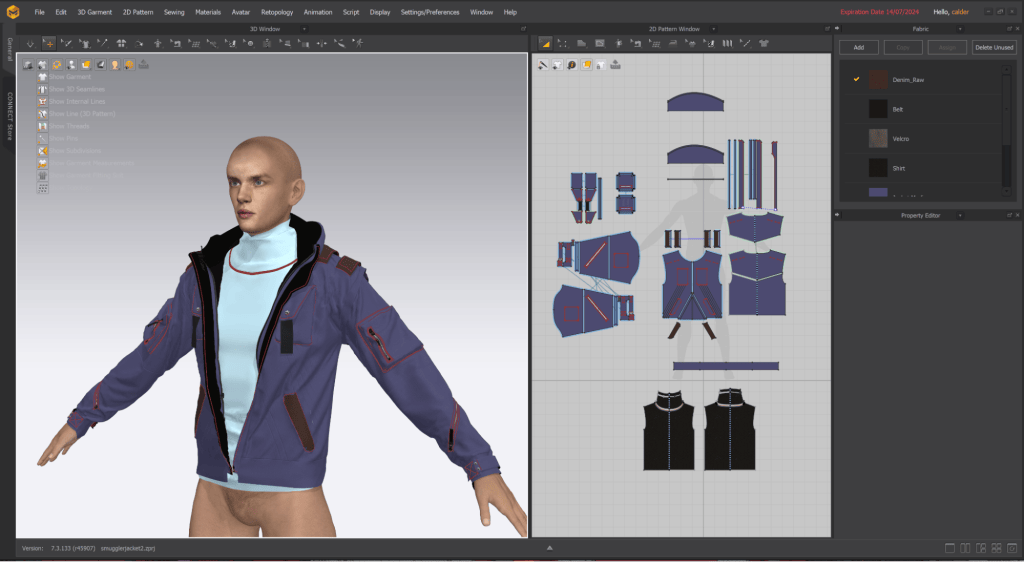
Next I like to bring the exported model into Marvelous designer, which is an amazing tool for creating the clothing for characters. It’s a physics-based software where you can create clothing for your characters with accurate folds/wrinkles and everything you need to create realistic looking clothes. Depending on the character concept I’ll either start from scratch or find a template to build off of that you can find in all the 3D marketplaces and one their website.

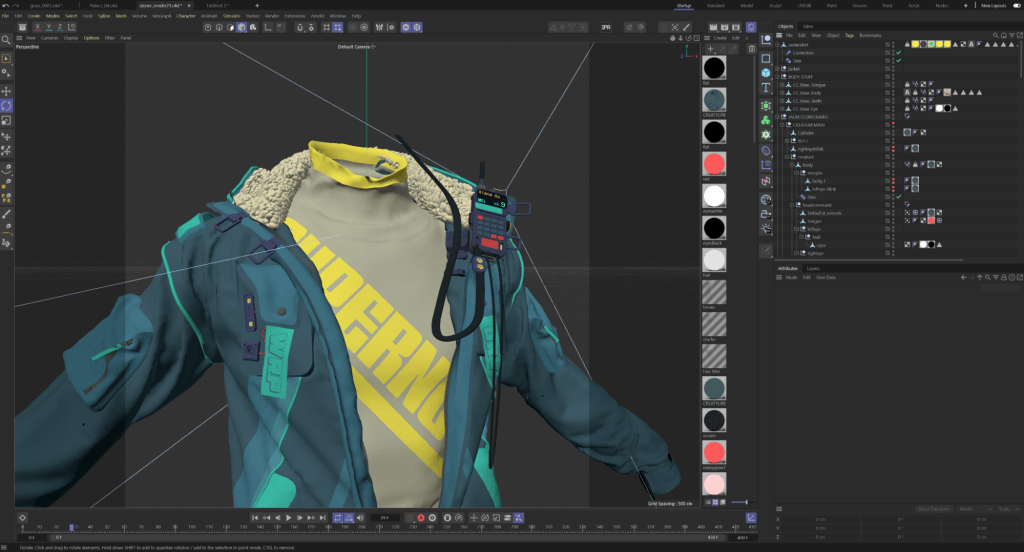
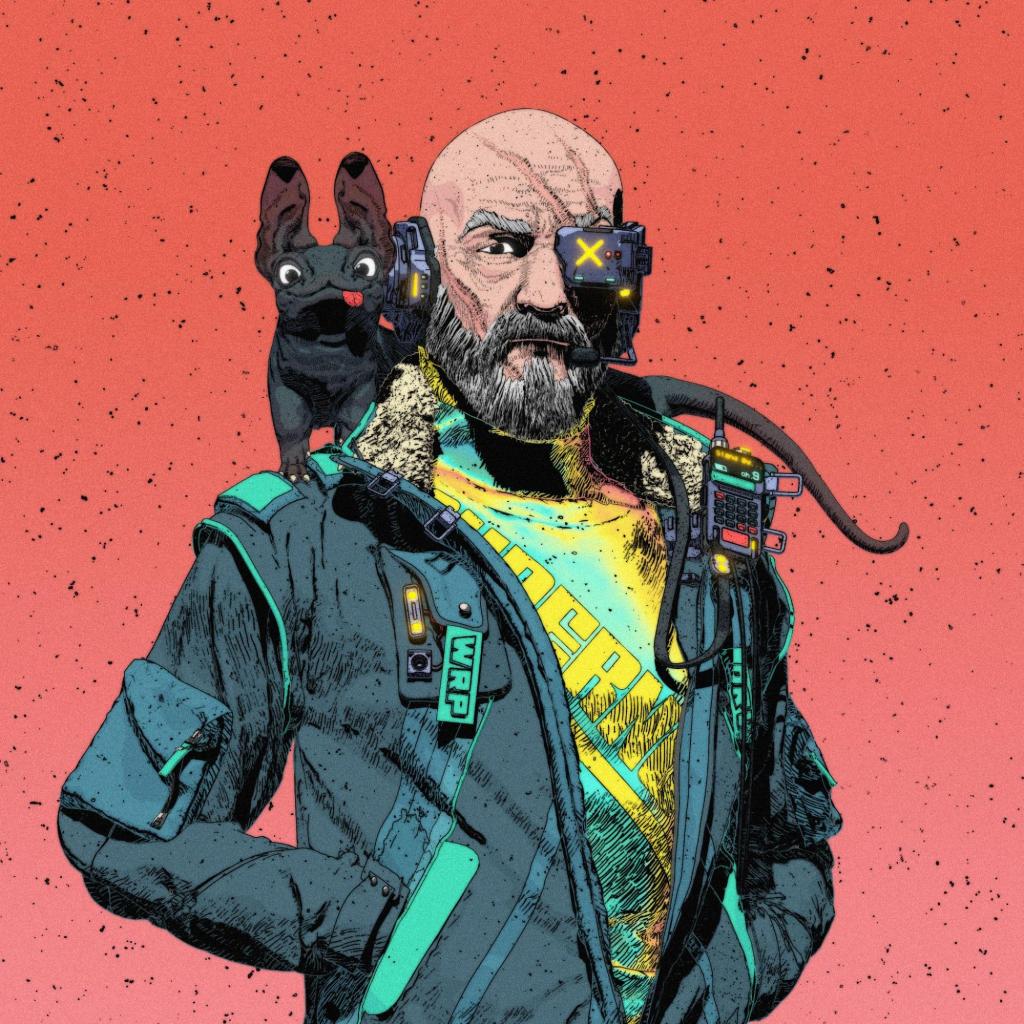
Because I had the sketch for this character, I had a great direction to go into for creating his clothing. I created a simple turtle neck shirt as I knew I wanted to play with the branding logo and the sheen of the fabric and not have it be too noisy in the end. For the jacket I wanted to build this mix of a ski jacket and a classic pilots jacket with the wool collar. With that direction in mind I had found an ok base jacket as a starting point, then tweaked the base shape into a spot I was happy with. After that I added details and cutlines to help guide the viewer’s eye up toward the face, which is the end focal point for the character. I knew I could create the wool collar better in Cinema 4D so I left that for later as well as any of the hardware on the jacket and all the lettering on both the jacket and the shirt. I then exported everything as FBX.

Substance Painter

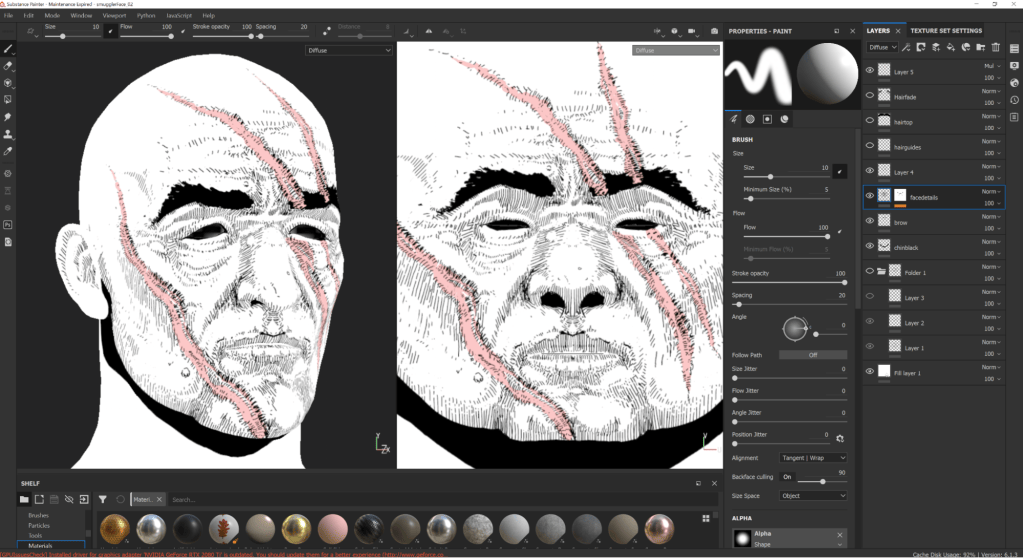
With the stylized nature of this character and how I built the toon shaders, neither blend well for creating an interesting face so I like to bring the head portion of the model into Substance Painter to hand paint all the face details. This is another great reason why I like the CC4 models so much — as I don’t have to UV the face!

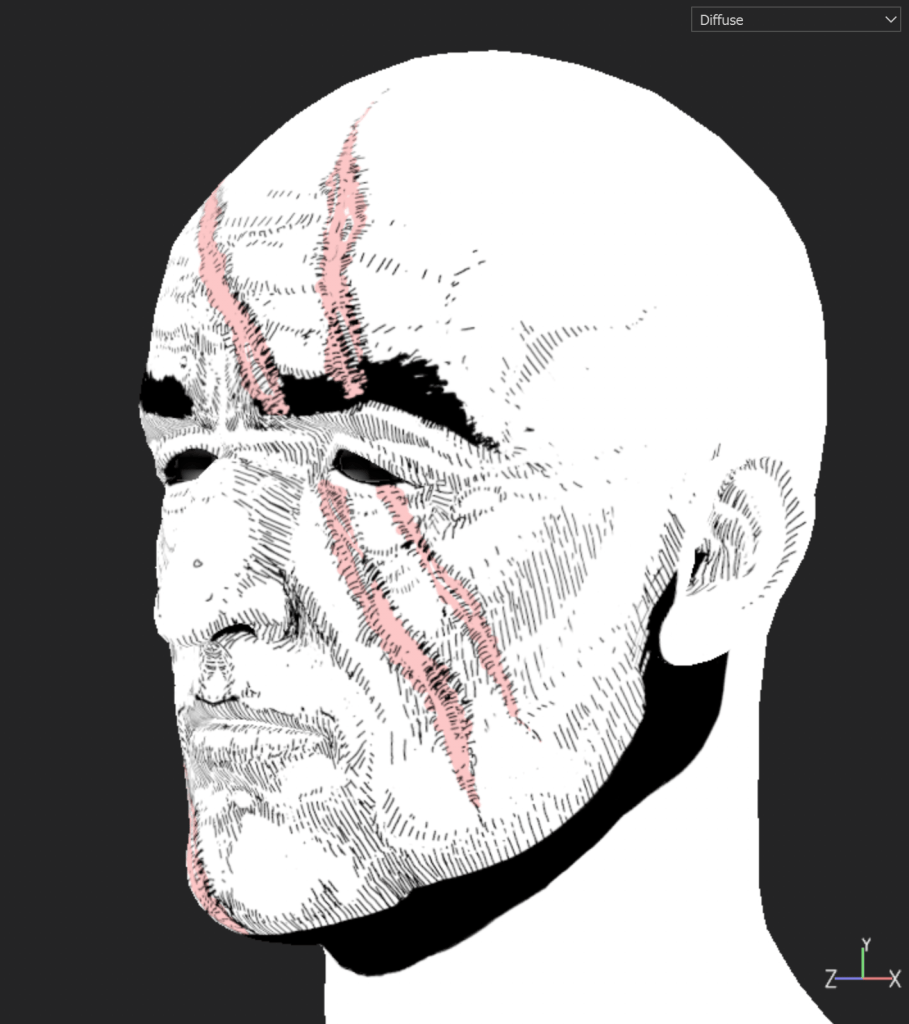
In Painter, my scene is very basic, I’ll usually turn on the wireframe and lower the opacity for that just to get an idea of where I’m painting on the face and get a sense of the contours as I’ll work in diffuse mode . Then I’ll start to block out the general shadow areas, as well as the areas that help define features like around the eyes or wrinkles on the forehead. You’ll notice that all the face details are done through hatching and not just a solid line drawing out the detail, this was something I found works much better for this style, as the solid lines pushed it too far towards that borderlands look.

Because this guy is older and battle worn, I had then pushed the bags under his eyes a bit more, added moles, dings, small deformations to push the face in a more asymmetric way and lastly the giant scars that reach across his face, I added the pinkish color in them so they are more pronounced compared to the skin color.

Lastly, I export out the texture to apply to the character in the Arnold shader.

Cinema 4D

Now that I have all my externally created assets done, I can import everything into Cinema 4D, My main software of choice for all my modeling, scene creation, and rendering. I import the CC4 character, Marvelous Designer clothes, and will import the face texture later when I have the material ready for it.

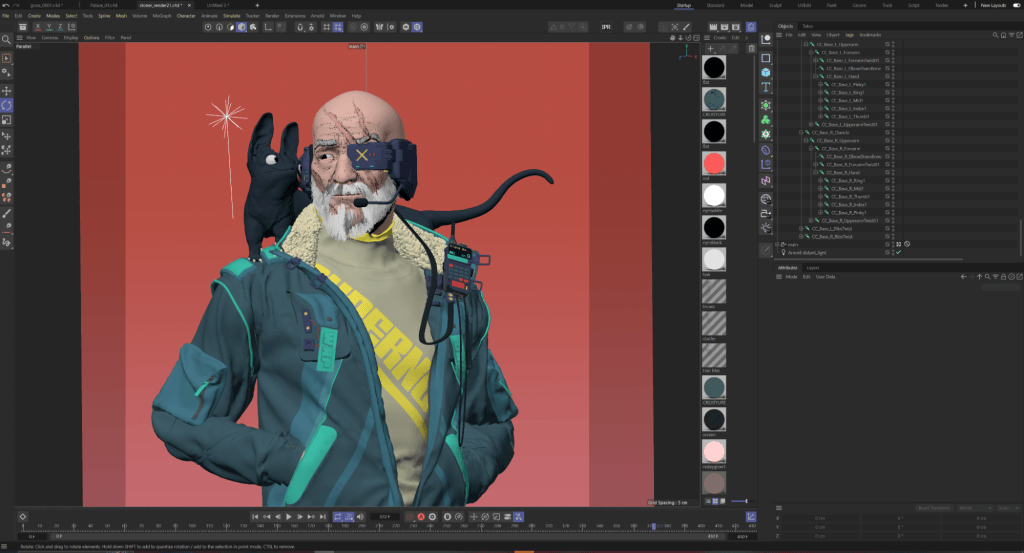
With the jacket imported I’ll then work on the finishing details for that, adding the hardware bits and pieces, the comms unit, the text on both the shirt and the jacket, and the wool collar using C4D hair generating thick and short strands of hair that look like wool once rendered with the shaders. Next, I added the face hardware, modeling the face piece that wraps around the head and acted as a bit of a cybernetically repaired eye and the receiver side of the comms unit.

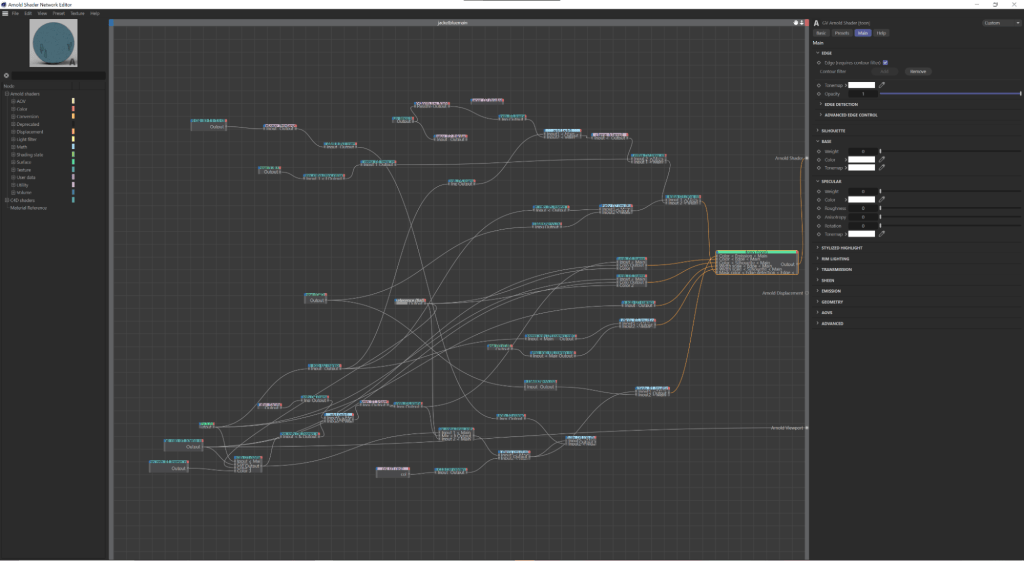
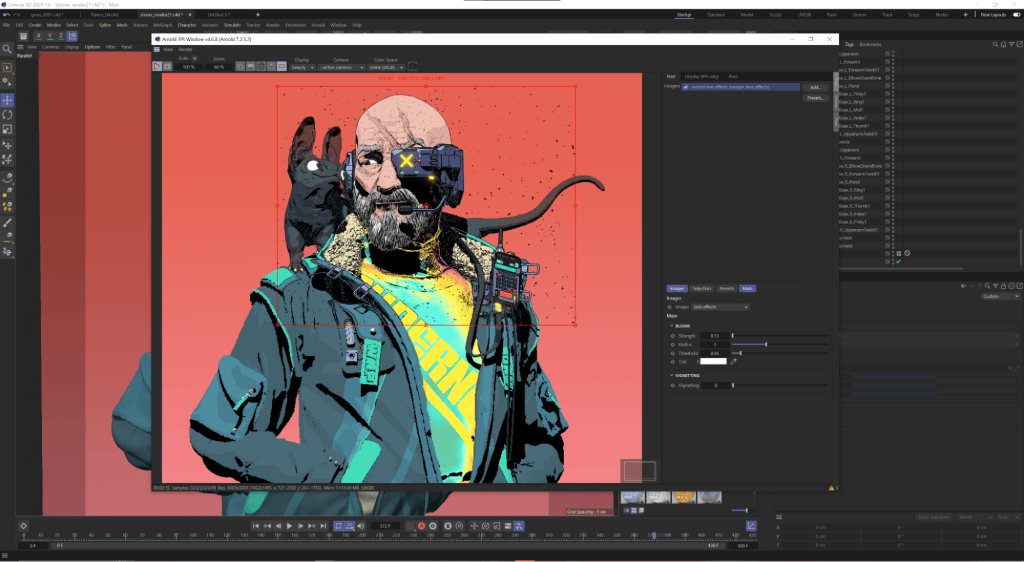
Next, I tackled more of the face with importing the face texturing and applying it to the face using my Arnold toon shader setup. This also acts as a guide for me to shape the beard around that I created using C4D hair. After molding it into the shape and form I wanted I turned off all instances of gravity or any forces in the scene as I have to keep the hair ‘live’ so it reacts to the CC4 Pose Morphs on the face.

With all the pieces modeled and set up, I then attach all of it to the CC4 rig that gets imported. The jacket and shirt I skinned and weighted as well as some of the smaller hardware pieces on the jacket. For the headwear and comms unit stuff, I created constraint nulls that reference the bones where I wanted the pieces to be attached to. Like a head constraint for all the head assets and added those assets as a child to that null. Rinse and repeat until all the accessories are attached to the character and everything is ready to be animated. I had also created his pet that I sculpted in ZBrush and imported into C4D and rigged for animation.

After that, I created the animation loop using the CC4 rig and pose morphs that come with the character model. I’ll start by creating his base pose then keyframing everything at the beginning and end of the timeline, and then block out all the middle poses I want him to have throughout the animation. After that, I refined all the in-between areas, added the extra details with pose morphs like blinking and reacting to the pet as well as adding the eye movements.

Arnold Render

Throughout the creation and assembly of the character within C4D, I’ll work in tandem with Arnold, rendering out WIPs and checking on how the shader is reacting to the geometry, or how the face texture looks when rendered out.

To render the scene, I’ll usually have just a direct light casting down on the scene to mimic the sun, and for these characters, I render them using a parallel or isometric camera. The shader itself is a toon shader where I’ve gone and customized the entire setup with a series of nodes to create this stylized look that I can then adjust all aspects of where I can tune it to each surface it’s applied to. The shader is built into a few main sections. Creating the inner line details like hatching lines, speckles and bigger stains. Then, the light and color area where I can play with all the colors that make up the lit and unlit areas. And lastly, all the masks that tell the previous sections where to show up on the model based on stuff like the scene lighting, Facing ratio, procedural noises. The shader itself can look quite intimidating, but it’s mostly just layers of blending things together by multiplying or adding, like in Photoshop, or mixing together based on those masks.

I’ll find a good camera position and light angle for the character and lock it in place fairly early into the workflow, as I find it helps to have a good direction to tune the shaders too and be able to refine them throughout the workflow.

I’ll create a bunch of duplicates of the main shader where I’ll then change the colors for them, or in some cases, add the face texture or adjust how much of the lit area shows up to change the material from looking like fabric to metal. I’ll then apply these shaders to the character and refine them until I’m happy with the result.

When rendering using Arnold, you can add a bloom effect onto the render which I love to do. I’ll adjust it so the light on the character gives off a nice glow, adding that little bit of extra detail onto him.

Lastly, I render out all the frames and composite it together using After Effects.

Conclusion

Even though the character is complete visually, they are still not quite fully finished. I’ll send these over to my buddy Duskosound to create the SFX as well as a backing track for all of the characters to just push them that much further and bring them to life that much more. After he works his magic, they are fully done!

So with creating over 10 of these characters now with a bunch of very different concepts, some not even having any human to them at all, I find myself still using that CC4 rig and this workflow to create them. For the fully cyborg characters I will use the rig, but then use the body geo as a guide on where to add the metal details so they still have the sense of being human.

After creating over 10 characters with a variety of concepts, some of which aren’t even human, I still find myself using the CC4 rig and this workflow. For fully cyborg characters, I use the rig and the body geometry as a guide for adding metal details, ensuring they maintain a sense of humanity.

My process and style is always evolving, and with every character I make, I tend to explore something I haven’t tried doing yet. What I’ve loved with using CC4 is that with this very stylized look and even when I replace everything but the rig, I still find it such a useful tool as it speeds up my process so much and it’s super easy to use and get great results out of.

Learn More

Related Posts

————————————————————————————————————————————————————————————

The original article was written by Calder Moore and is also featured on 80 Level.

The submission deadline for the 2024 Reallusion 3D Character Contest on September 1st . Work from a CC base to vie for top prizes in character design and animation, or use other software and tools to create original characters and use AccuRIG to pose and animate your characters to perfection.

Last Call and New Sponsor Prize: 2024 Reallusion 3D Character Contest

It’s now or never

The countdown is on. With the submission deadline for the 2024 Reallusion 3D Character Contest on September 1st (PST), there are only 30 days left for 3D enthusiasts worldwide to join the fun! Work from a CC base to vie for top prizes in character design and animation, or use other software and tools to create original characters and use AccuRIG to pose and animate your characters to perfection.

This is your chance to shine! Winners will be showcased in magazines, promotional videos, and marketing materials seen by millions online. Don’t miss out on this golden opportunity to showcase your skills around the world!

$2,700 boost to the prize pool

Fox Renderfarm has joined our esteemed roster of sponsors, raising the stakes by offering $2,700 worth of render points to the top 18 winners. Additionally, Fox Renderfarm is providing an exclusive $50 USD coupon for newly registered members using this link. If you’re looking for top-tier cloud rendering services, now is the perfect time to register.

The expanded prize pool for 2024 Reallusion 3D Character Contest, now includes:

  • NVIDIA ASUS ProArt laptops with NVIDIA RTX 4070 GPU
  • Maxon One License (includes Cinema 4D, Forger, Red Giant, Redshift, Universe, ZBrush)
  • Rokoko Coil Pro, Rokoko Smartsuit Pro II, Rokoko Smartgloves, Rokoko Headrig for iOS
  • Noitom Perception Neuron 3 Body Kit
  • Kitbash Cargo Pro
  • 3DConnexion SpaceMouse® Enterprise
  • KeenTools FaceBuilder Studio License
  • TexturingXYZ VFACE Commercial License
  • Fox Renderfarm Render Coupon (ranging from $100 to $300)

Freestyle your way to a $500 cash reward

Are you eager to showcase your unique style and brand through your own characters? The AccuRIG contest category is perfect for you. Simply rig an existing 3D character with AccuRIG, then repose and customize it to your liking. Make sure your character stands out to secure $500 cash.

The opportunity is still available for 3D artists ready to explore the advantages of AccuRIG. Don’t miss the chance to bring your incredible models to life before the September 1st deadline!