首頁

AccuFACE 2: Professional Facial Capture For Beginners

As I have said many times, there are many things a new user needs to grasp, and iClone has always excelled at reducing the learning curve of professional-level techniques. This includes Facial Tracking that utilizes a camera of your choice (in my case, a webcam) and the new AccuFACE 2 standalone application to bring superior facial reactions and animations to iClone without the fuss. And… no messy calibration either in the new version!

To top that off, Reallusion introduces Expression Curves to smooth things out if you are ready to tackle curves, but you do not have to use it as it’s just an enhancement of an already powerful tool. So, if the word “curves” means nothing to you right now in terms of animation, then don’t worry about it. When you get more experience under your belt, you’ll learn to use curves then.

And if that isn’t enough… AccuFACE 2 also works with video clips in addition to live camera capture, which opens up a new library of resources for facial animation and puts it right at our fingertips! We don’t have to be a pro to animate like a pro with AccuFACE 2.

New AI Model

AccuFACE 2 comes with new powerful AI to guide and manage the tracking and capture of expressions for use with any Character Creator (CC) actor, but it is specifically trained for CC5 HD characters to get optimal results.

From the Reallusion website:

  • AccuFACE 2 features a newly trained AI model designed for accurate facial tracking and enhanced stability, specifically optimized for CC5 HD characters. With GPU acceleration support, AccuFACE 2 enables real-time, full-frame facial capture for faithfully reproducing nuanced lip movements and dynamic facial expressions.
  • Realistic speech animation depends on high-fidelity lip tracking and comprehensive lip morphs. Powered by an optimized mouth tracker, AccuFACE 2 captures every subtle lip movement to deliver accurate, natural-looking speech animation across languages and a wide range of performance styles.
  • Master facial motion capture to translate everything from powerful outbursts to subtle micro-expressions. Whether crafting realistic or stylized assets, achieve exceptional realism and believable performances without compromise.

Expression Curves: Fine-Tuning Acting Styles & Follow-Through

The brand-new Expression Curves system in AccuFACE 2 gives animators granular creative control over every performance without requiring tedious manual keyframing. Starting with a variety of built-in curve presets, you can adjust curve intensities across different facial regions to enhance speech articulation, amplify emotional drama, or tailor movement to specific stylized acting styles. Furthermore, custom curves allow you to link driver and driven morphs—connecting multiple facial expressions together with realistic timing, secondary motion, and follow-through that go far beyond standard 1:1 facial tracking.

Full Body Capture with a Single Video Source

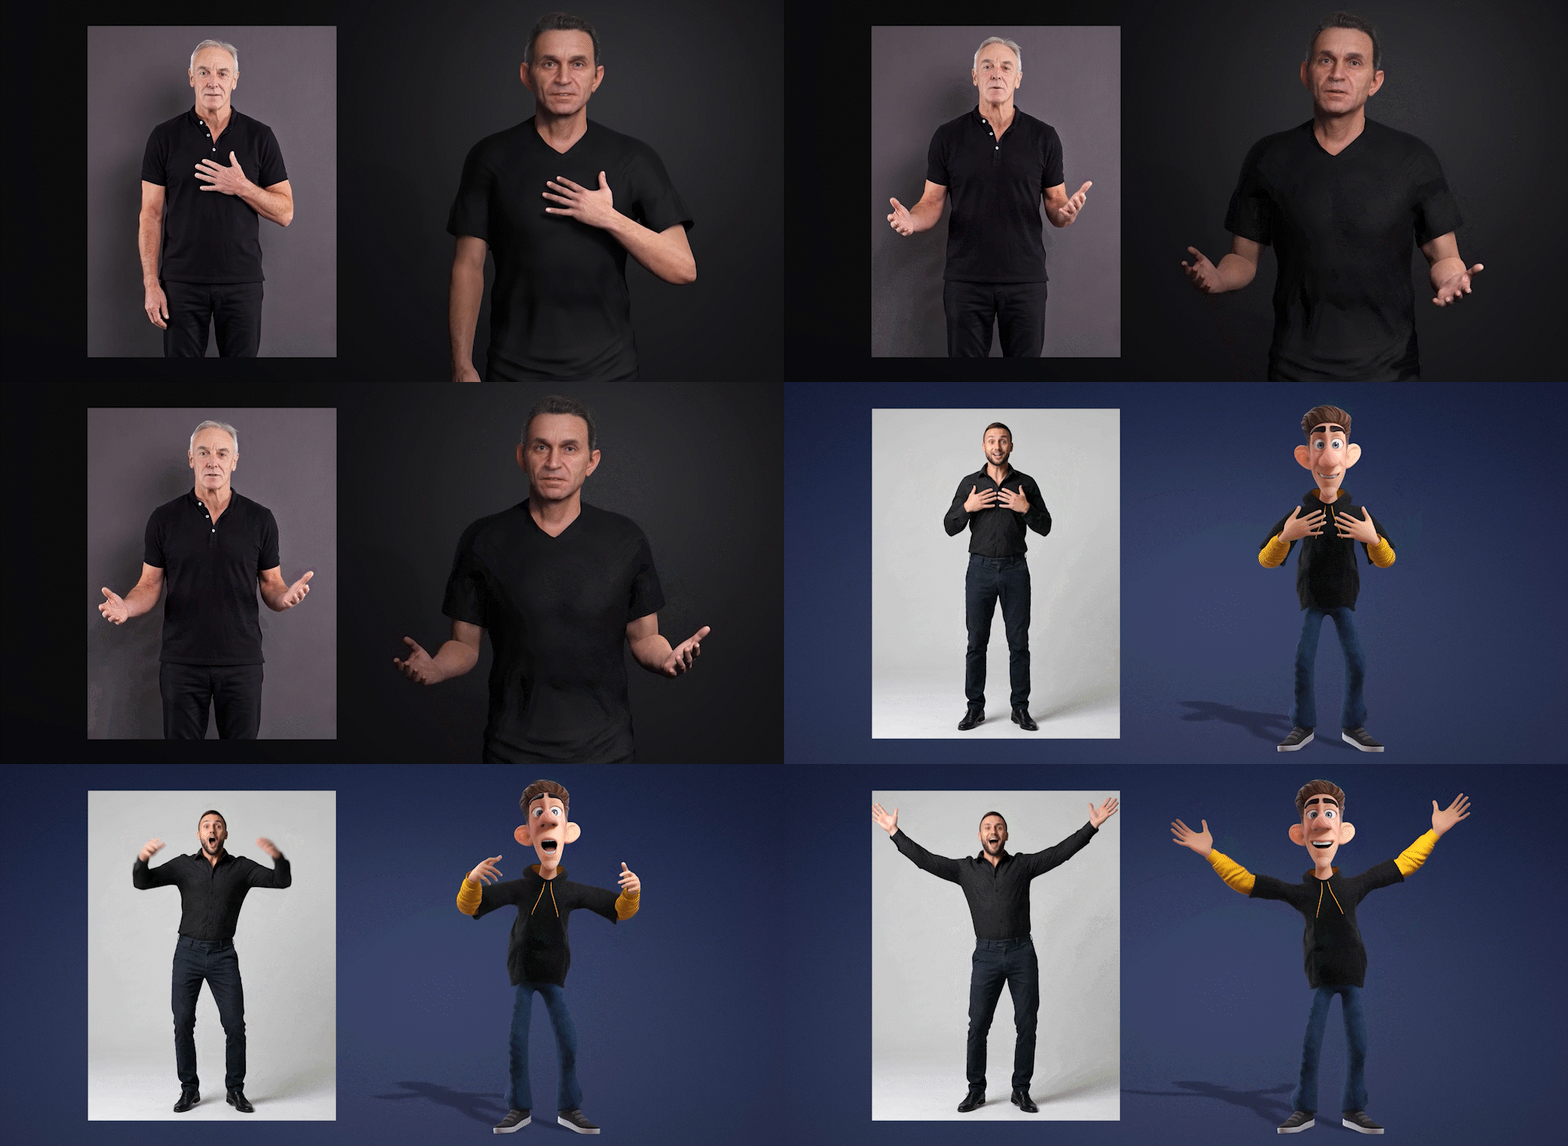
Because AccuFACE 2 is now capable of tracking smaller facial regions down to 120 × 120 pixels, you can use full-body video footage to drive both your facial and body motion capture simultaneously. By using AccuFACE 2 for the face alongside Video Mocap for the body on the exact same video file, you eliminate the need for two separate capture sessions.

From the website:

“Its advanced tracking technology is built to handle motion blur and accurately reconstruct facial performances from head regions as small as 120 × 120 pixels, delivering reliable results even in challenging recording conditions.”
Additional Controls

Strength Balance gives you control to increase or decrease the movement of specific face regions. The Smooth Filter helps smooth out performance when dealing with extreme tracking angles, excessive hair, or uneven lighting and shadowing.

Installing AccuFACE 2

Open the Reallusion Hub and download AccuFACE 2. This is a standalone program that runs in combination with iClone and Motion LIVE (located in the iClone plugin menu).

Note: While Character Creator 5 (CC5) characters are fully optimized for AccuFACE 2, Motion LIVE and AccuFACE 2 are used directly within iClone.

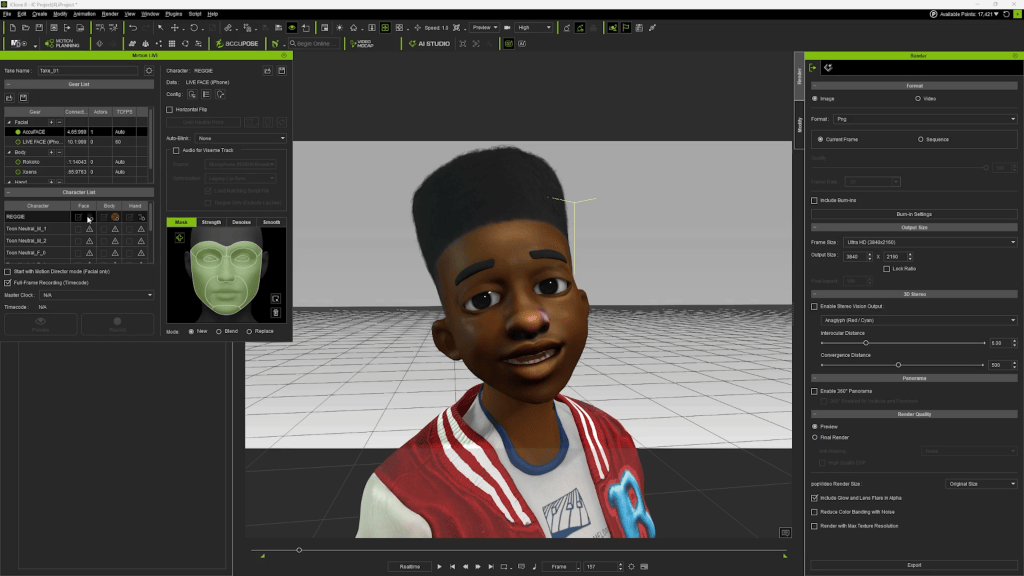
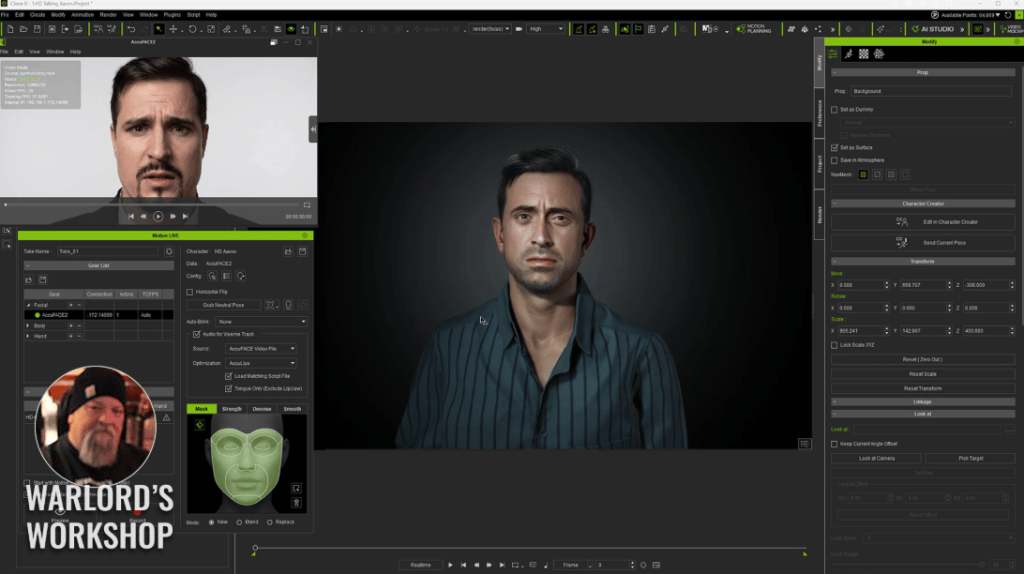
To summarize: you will start iClone, launch AccuFACE 2, and then open Motion LIVE from the iClone plugin menu. From there, select AccuFACE 2 and your character (which can be a CC5 character imported into iClone).

iClone to AccuFACE 2 via Motion LIVE

Getting AccuFACE 2 running is simple, but requires that iClone, Motion LIVE (in the Plugin Menu), and the AccuFACE 2 application be running and linked up.

  1. Launch iClone and AccuFACE 2.
  2. Open the Motion LIVE panel from the iClone Plugin menu.
  3. Click the circle/radio button next to AccuFACE 2 to enable it.
  4. Near the bottom of the Motion LIVE panel in the Character List, find the Face column under your character. Click the drop-down triangle and select AccuFACE 2.

This links AccuFACE 2 directly to your character in iClone.
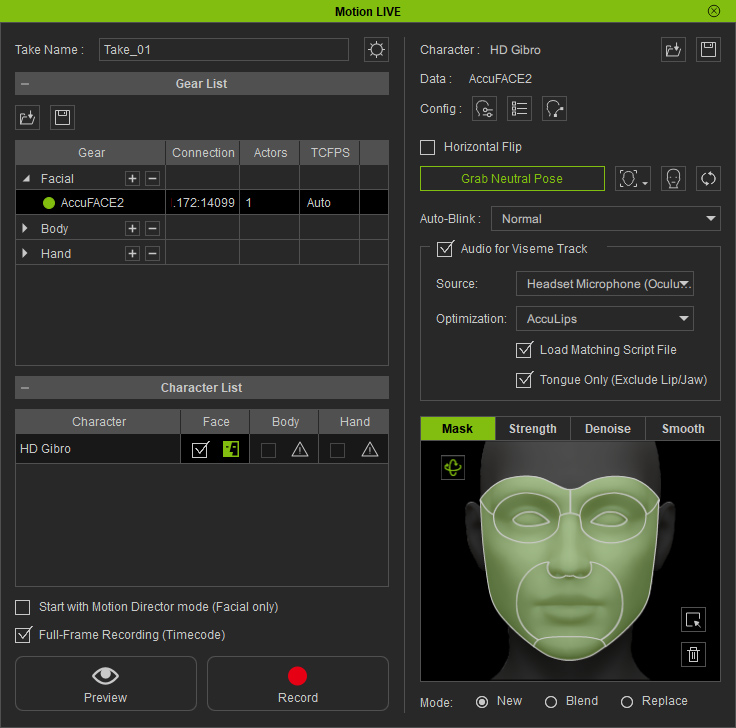
Notice the Gear List and Character selections on the left side of the window.

Older Webcams and Frame Rates

I was originally using a 2017 Logitech C922 webcam, which worked well enough for video conferencing but was showing its age. For AccuFACE 2 to work smoothly, you need a high frame rate. The C922 was only getting around 5 to 6 fps, causing AccuFACE 2 to lag terribly or freeze. I discovered the camera had an automatic low-light feature that dropped the frame rate to 15 fps in low light, leaving almost no overhead.

Setting up bright lighting helped get it to 30 fps, but required uncomfortable brightness directly in my face. Upgrading to an Elgato Facecam MK.2 bumped the frame rate to 58–60 fps, smoothing out the tracking completely.

USB 3.0 or Higher

Connecting via a USB 3.0 or higher port ensures a fast, steady stream of data. Look for blue port connectors on your desktop or laptop. Powered USB 3.0 hubs with individual power switches also work without bandwidth loss.

Live Capture – Quick Start

AccuFACE 2 simplifies capture and calibration by replacing multi-step calibration with a single Neutral Pose button. Make sure your room is brightly lit to prevent deep shadows, which are the main cause of tracking jitter.

Using Video Clips

Using video files is even easier than live capture because it requires no camera.

When you launch AccuFACE 2 with your camera unplugged or off, acknowledge the “No camera found” notice, switch to the Video tab, and load your video clip. AccuFACE 2 processes the footage quickly and allows you to test multiple clips on the same character in just a few minutes.
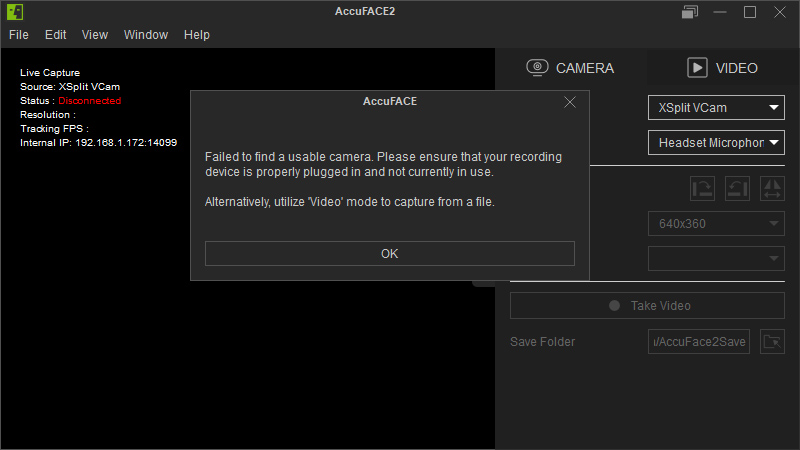
The video below will show you how I used the video feature and loaded two different videos from different characters to demonstrate its versatility. I load the initial clip, let it process, which is very quick, then test it. After this I test a second clip on the same character all done is under a couple of minutes.

The videos transfer facial and head movements but again I need to reiterate that a brightly lit room can reduce the jitters and shakes along with the provided tools like noise and movement reduction. Experimentation is highly encouraged in this area.

Below you find a quick start on using videos with accuFACE 2:

Essential Tips for Best Results

  • Lighting: Bright, indirect lighting prevents tracking noise caused by facial shadows.
  • Scene Optimization: Hide hair, secondary characters, or heavy props in iClone while capturing to reduce software load.
  • Camera Settings: Disable auto-low-light options in your webcam software so it doesn’t drop to 15 fps before sending data to AccuFACE 2.

Summary

AccuFACE 2 provides a user-friendly setup backed by powerful AI that does the heavy lifting behind the scenes. With short setup times, support for both live webcams and video files, and smooth integration with CC5 characters in iClone via Motion LIVE, it delivers professional facial motion capture for animators at any skill level.

MD McCallum - WarLord

MD McCallum – WarLord

Digital Artist MD “Mike” McCallum, aka WarLord, is a longtime iClone user. Having authored free tutorials for iClone in its early years and selected to write the iClone Beginners Guide from Packt Publishing in 2011, he was fortunate enough to meet and exchange tricks and tips with users from all over the world and loves to share this information with other users. He has authored hundreds of articles on iClone and digital art in general while reviewing some of the most popular software and hardware in the world. He has been published in many of the leading 3D online and print magazines while staying true to his biggest passion, 3D animation. For more information click here.

Related Links

Character Creator 5.2 Grand Update — From AI-Generated Meshes to Living 3D Characters

AI is transforming 3D character creation. What once took weeks of modeling and sculpting can now be generated in minutes, unlocking unprecedented speed, detail, and creative possibilities.

But a stunning 3D mesh isn’t a production-ready character.

Characters need to move, talk, express emotions, and wear interchangeable outfits. Until now, getting there meant juggling multiple tools for generation, retopology, rigging, and animation.

CC 5.2 Brings the Entire AI 3D Workflow Together

With the free Character Creator 5.2 update, Reallusion takes a major leap toward a unified AI character production pipeline. From AI model generation and character wrapping to automatic rigging, wearable outfits, and real-time animation, CC 5.2 brings the essential tools into one connected ecosystem.

Generate it. Wrap it. Dress it. Animate it. All in Character Creator.

1. AI 3D Model Generation

Turn AI Ideas into Production-Ready 3D Assets

Generate characters, clothing, hairstyles, and accessories directly within Character Creator and iClone through integrated AI services.

Powered by Tripo and Hunyuan, creators can choose Tripo P2 for clean, quad-based topology suited for animation and mesh editing, or other AI models for highly detailed geometry and texture generation. From realistic CC Characters to low-poly NPCs and crowds, the possibilities are wide open. Dedicated concept design modules further guide AI generation to produce assets optimized for character fitting and wearable outfit creation.

The AI Model Generator supports the following CC and iClone asset types:

  • Full characters and CC character bases
  • High-detail heads for Headshot workflows
  • Clothing, shoes, gloves, and wearable accessories
  • Hairstyles, hats, and attachable accessories
  • Buildings, props and scenes

2. CC Character Wrap

Turn Any Humanoid into a Fully Functional CC Character

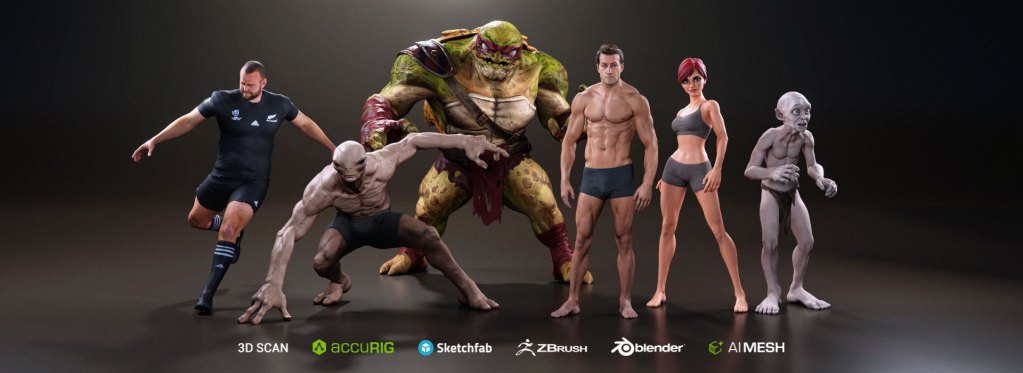
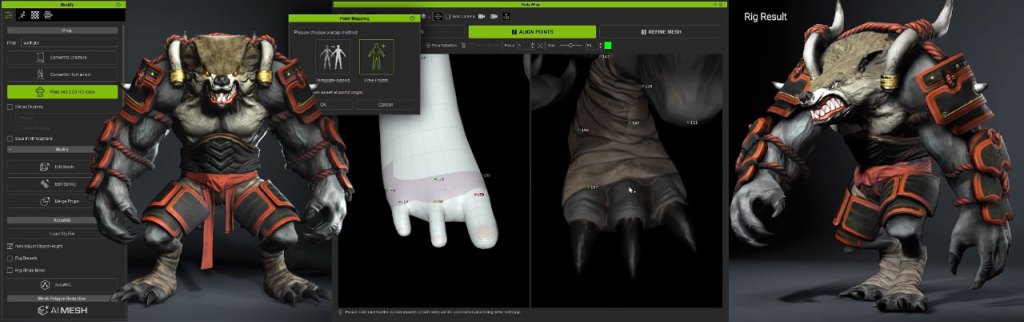
A game-changing breakthrough that converts virtually any humanoid model into native CC topology, unlocking facial and body animation, morph customization, wearable outfits, and the entire CC content ecosystem.

Two Flexible Wrapping Methods

  • Template Wrap: A guided workflow using AccuRIG joint detection and step-by-step wrap point placement. Add points anytime to preserve character likeness.
  • Free Wrap: Complete control for experienced artists. Place wrap points freely to handle unique proportions and stylized characters.

Topology Presets for Every Character Type

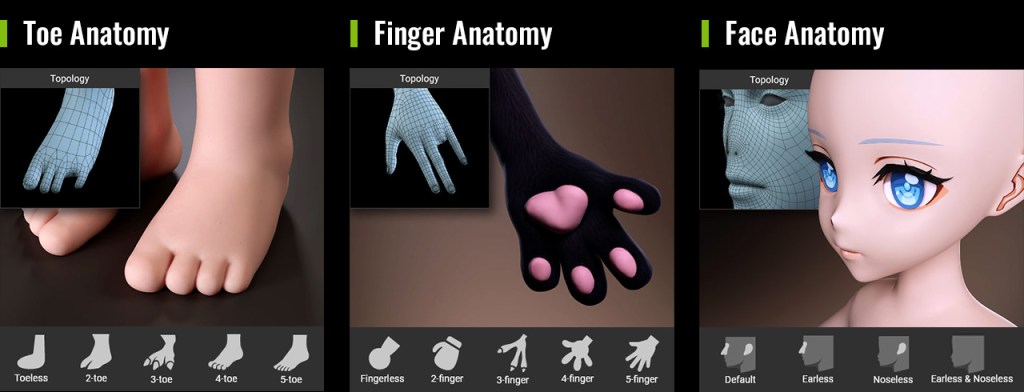
Go beyond standard humans with topology presets supporting diverse eye, nose, ear, finger, and toe designs, while maintaining mesh integrity during wrapping and editing.

Advanced Mesh Refinement

Use refinement brushes to perfect alignment around eyes, mouths, fingers, and other intricate features, or automatically project high-resolution source details onto subdivided CC topology.

3. Wearable Outfit Design System

Turn AI-Generated Assets into Animation-Ready Outfits

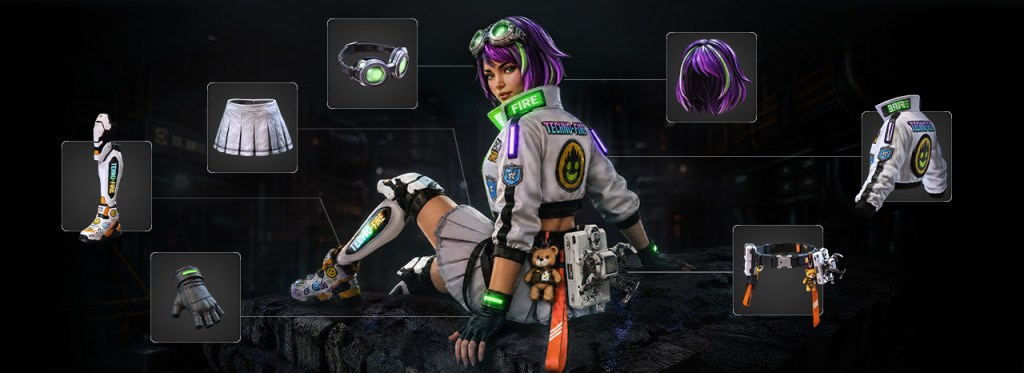
A beautiful 3D garment isn’t necessarily wearable. CC 5.2 bridges that gap with integrated tools to transform AI-generated clothing, accessories, and hairstyles into optimized, rigged, and layered character assets.

  • From Concept Design to Model Generation: Easily develop visual concepts using text prompts, reference images, or ready-made presets. For precise model generation, use AI Studio to create four-view character references, complete outfit and accessory breakdowns, and high-resolution front, left, right, and back views to ensure model consistency and accurate pose alignment.
  • Auto Skin Weight Transfer: Automatically bind outfits to character rigs with intelligent skin-weight templates.
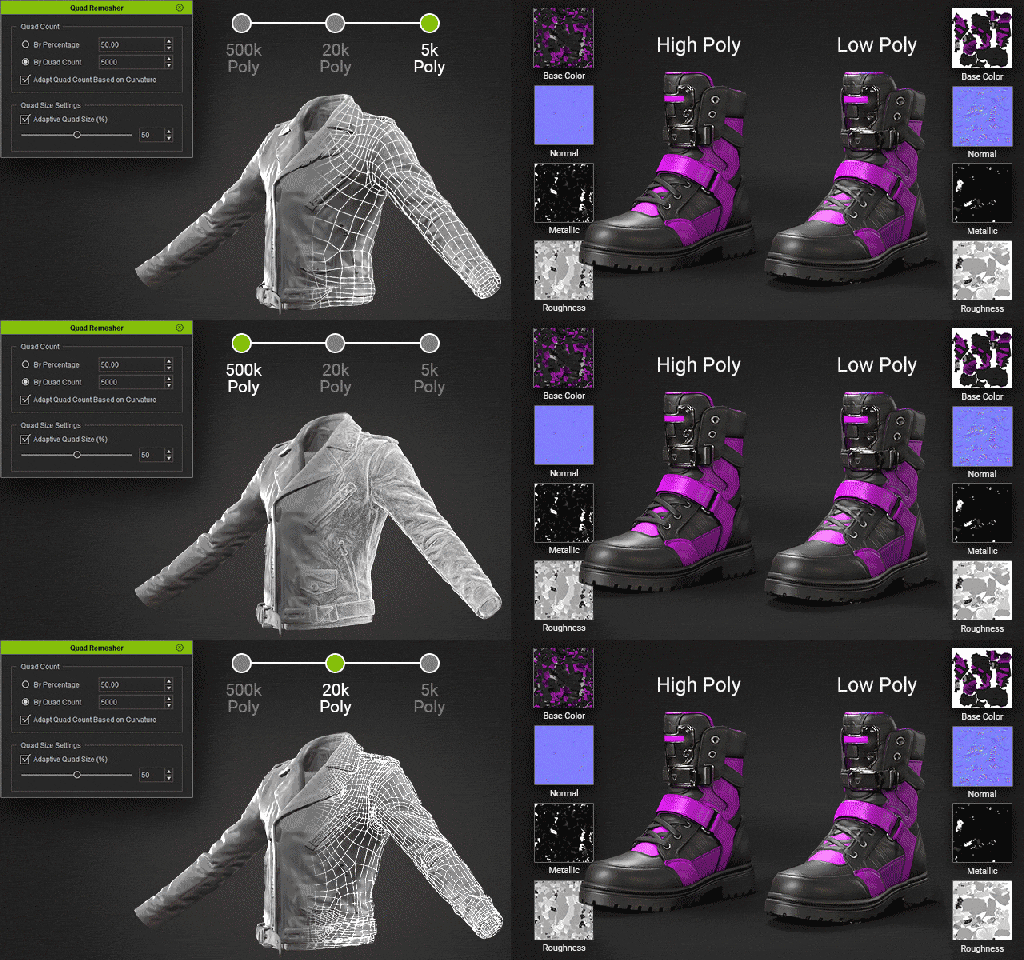
  • Quad Remesher & Texture Baking: Optimize mesh topology and polygon count, and bake high-poly details onto low-poly meshes using normal maps and PBR textures to preserve visual quality while improving performance.
  • Mesh Editing & Skin Weight Refinements:
    • Enhance mesh editing with powerful tools, including angle-based inner face removal, edge loop selection, and edge ring editing.
    • Achieve more natural clothing deformation with the Skin Weight Copy tool, enhanced edge loop and edge ring selection, and pose switching for precise skin weight adjustments.
  • Smart Outfit Layering:
    • Manage interchangeable clothing and accessories with drag-and-drop layer ordering, tuck-in options, and mesh collision detection.
    • Fine-tune shrink intensity and tuck-in blend ranges for a natural, seamless fit between garments.
    • Assign Clothing Types for easy same-type swapping

4. Other Feature Enhancements

Faster, Smarter ActorMixer

ActorMixer receives major performance and workflow improvements, making character variation and custom content creation easier than ever.

  • Improved Mixer package loading performance and automatic part assignment.
  • Convert custom body mixers into Ratio, Shape, or Full Body sliders.
  • Automatically generate thumbnails for custom Mixer assets.
  • Added support for characters with custom teeth and eyes.
  • Enabled Marketplace support for developer-created Mixer packages.

Expanded 3D Workflow for CC and iClone

  • GLB Import: Bring AI-generated 3D models and web 3D assets directly from external services to CC and iClone.
  • Mesh Consolidation & Material Unification: Improve scene performance by merging compatible meshes and unifying shared materials to save memory, reduce draw calls and optimize rendering efficiency.
  • Along with the CC 5.2 release, numerous enhancements and bug fixes have been introduced. Please refer to the Release Notes for more details.

5. One AI Credit System. Endless Creative Possibilities.

AI-to-3D and 3D-to-AI, All Under One Roof


Reallusion AI Cloud brings leading AI services together under one unified credit system, supporting everything from 3D generation and motion capture to AI image, video, and audio creation.

  • AI 3D Generation: Tripo, Hunyuan
  • AI Motion Capture: Quick Magic Video Mocap
  • AI Studio: Nano Banana, GPT Image 2, Seedance, Kling, MiniMax, and more
  • Headshot: AI-powered 4K head image generation

Related Links
Product Pages

AI Cloud Plans

Tutorials

Online Manual

Release Note

Forum

AI Studio Storytellers: R.G. Keys – Smooth Transition from Unreal Engine to a Faster 3D-to-AI Workflow

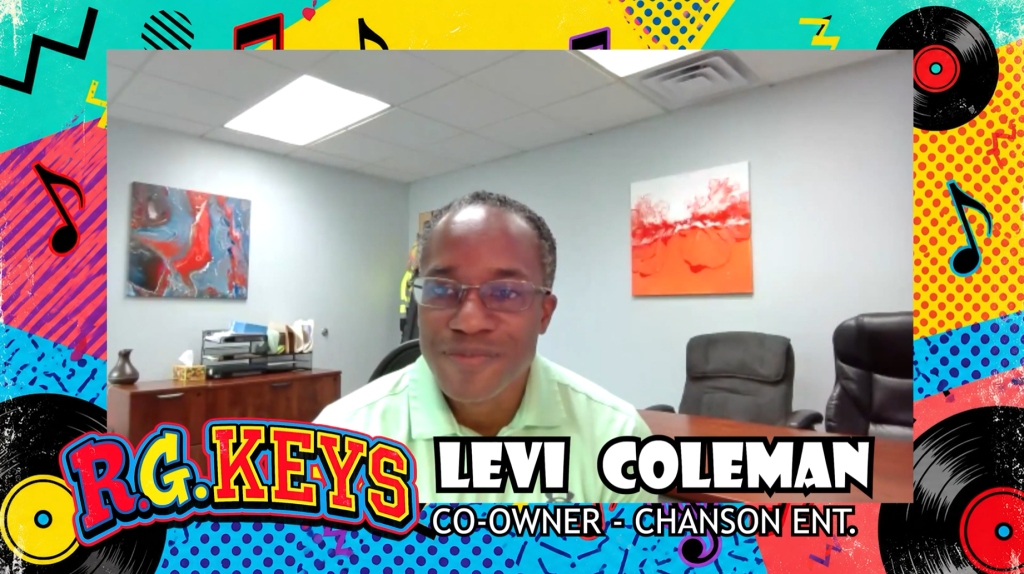
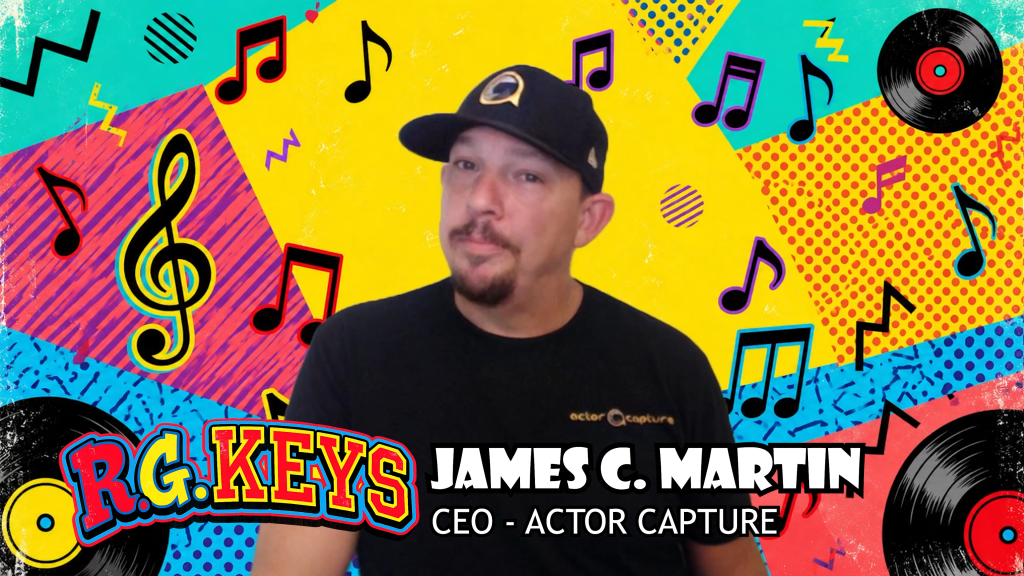
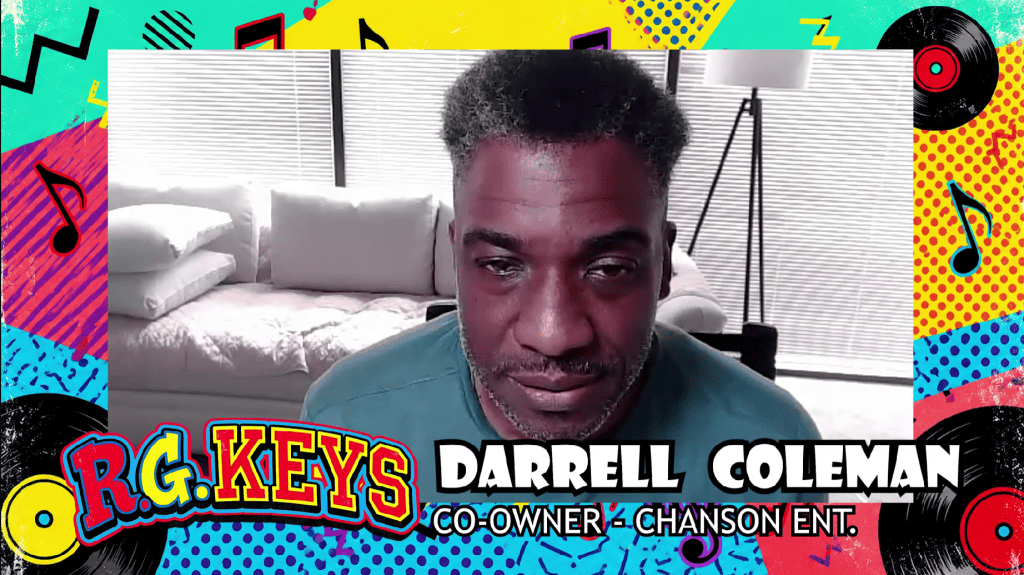
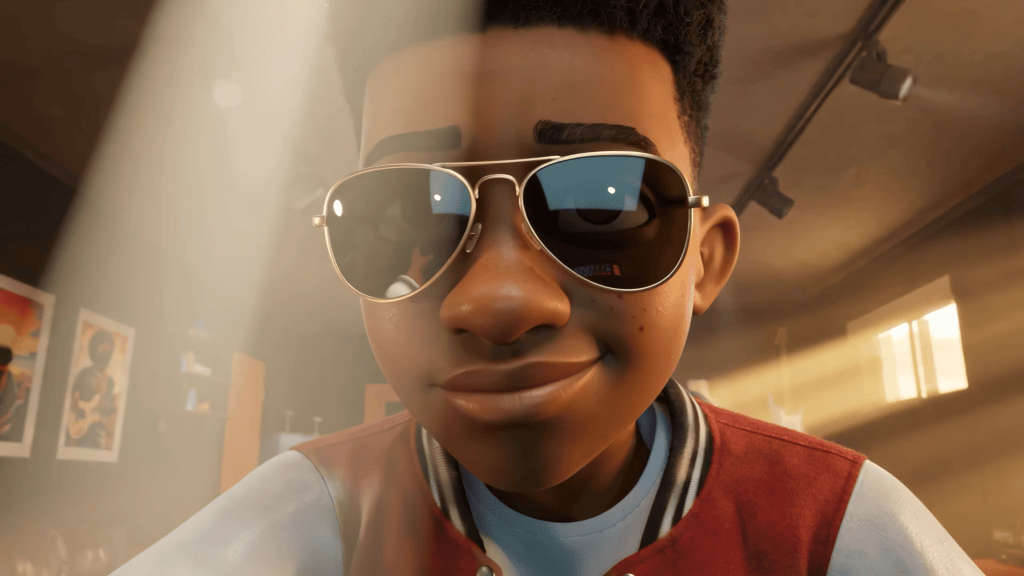
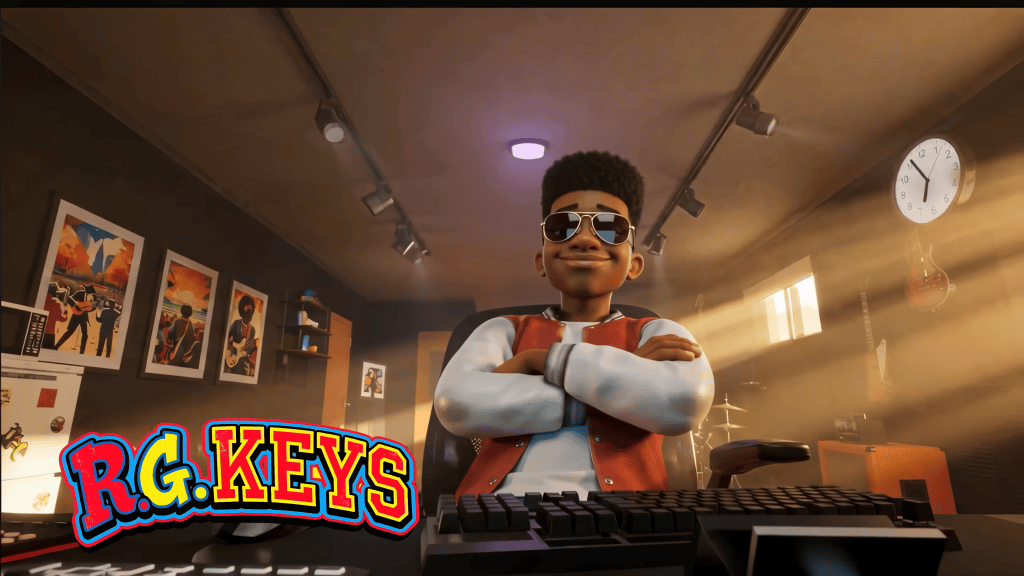
Animated storytelling is entering a new era, powered by integrated software stacks like iClone, Character Creator, and Reallusion AI Studio. By bringing together traditional 3D production, performance capture, and generative AI, these tools give creators unprecedented flexibility, visual control, and production efficiency. A compelling showcase of this hybrid pipeline is R.G. Keys, an animated series created and written by brothers Levi and Darrell Coleman of Chanson Entertainment Group. Produced in collaboration with Actor Capture, led by CEO, character designer, and animator James Martin, the project demonstrates how merging specialized software streamlines motion capture, character design, and AI-assisted animation workflows.

The story of creating R.G. Keys from Concept to Screen for Chanson Entertainment Group

Using Reallusion’s Character Creator, iClone, and AI Studio alongside motion capture technology, Unreal Engine, and generative 3D tools, Actor Capture developed a production pipeline that transforms original concepts into cinematic animated sequences. In this behind the scenes look, Martin explains how the team moved from early character sketches to fully realized digital actors, developed the environments of R.G. Keys, and introduced AI Studio to accelerate production without sacrificing creative direction.

From 2D Concepts to 3D Characters

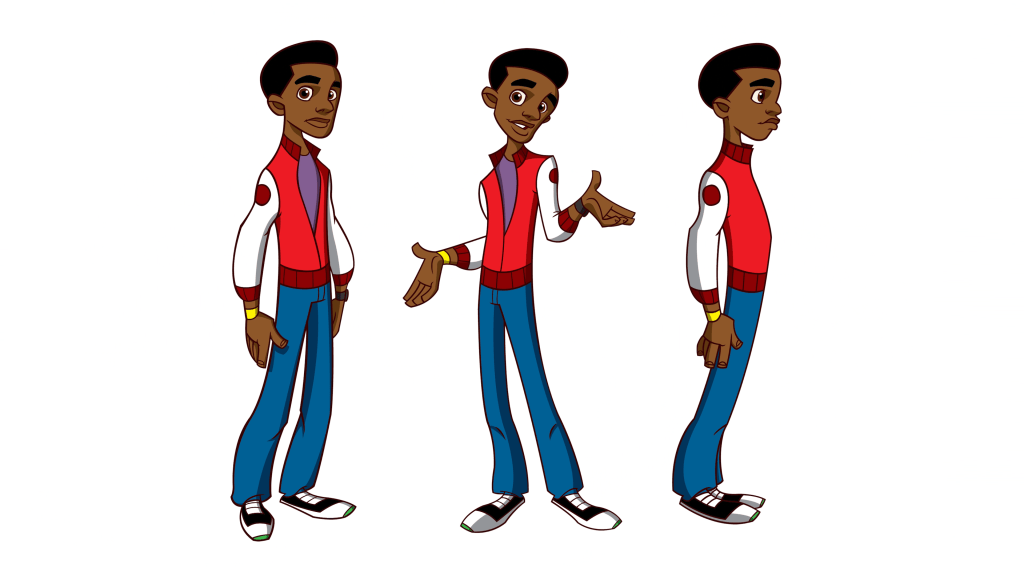
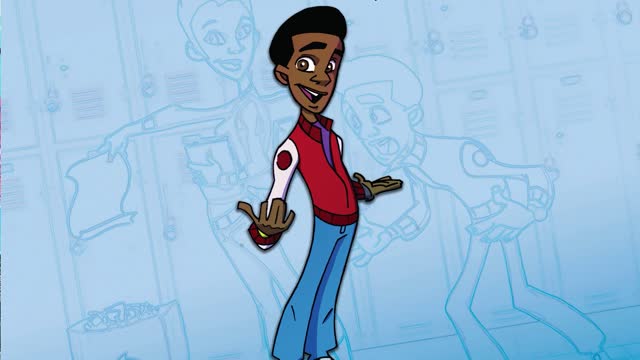
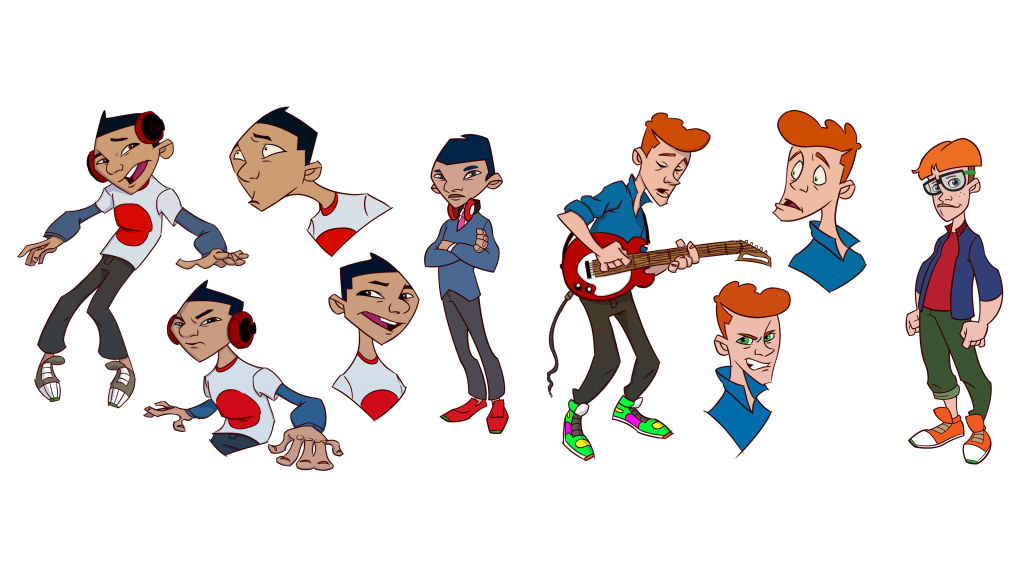
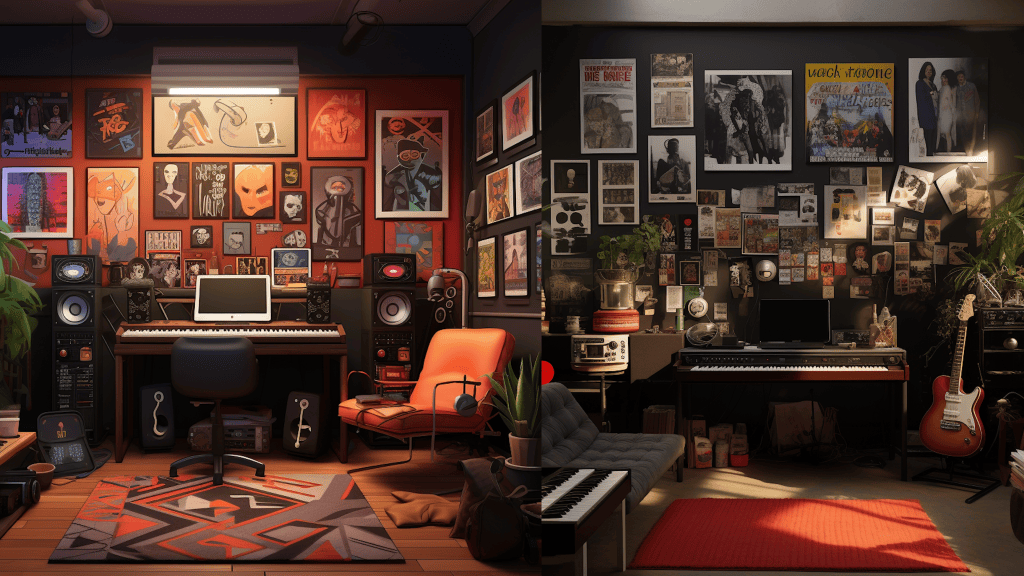
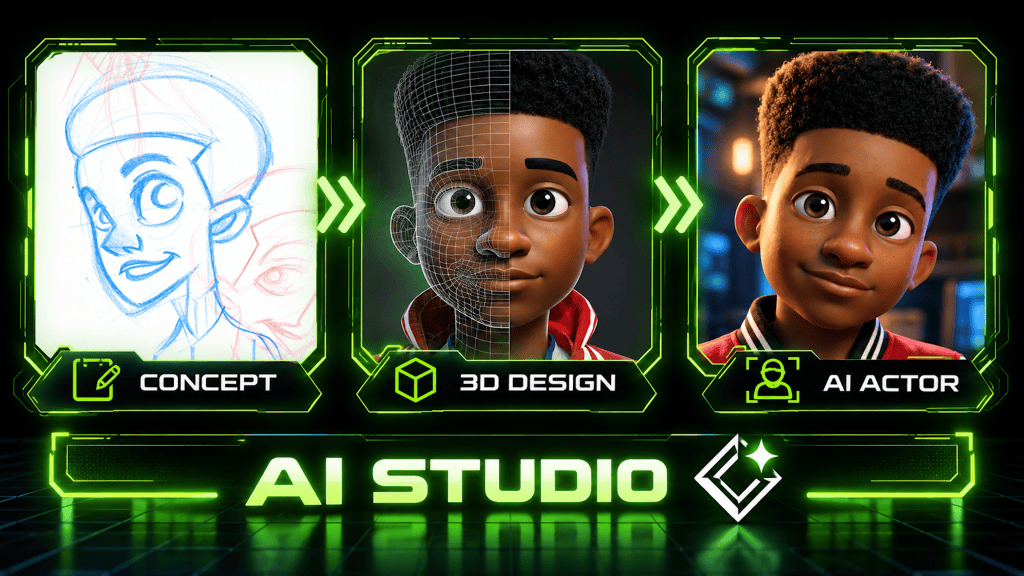
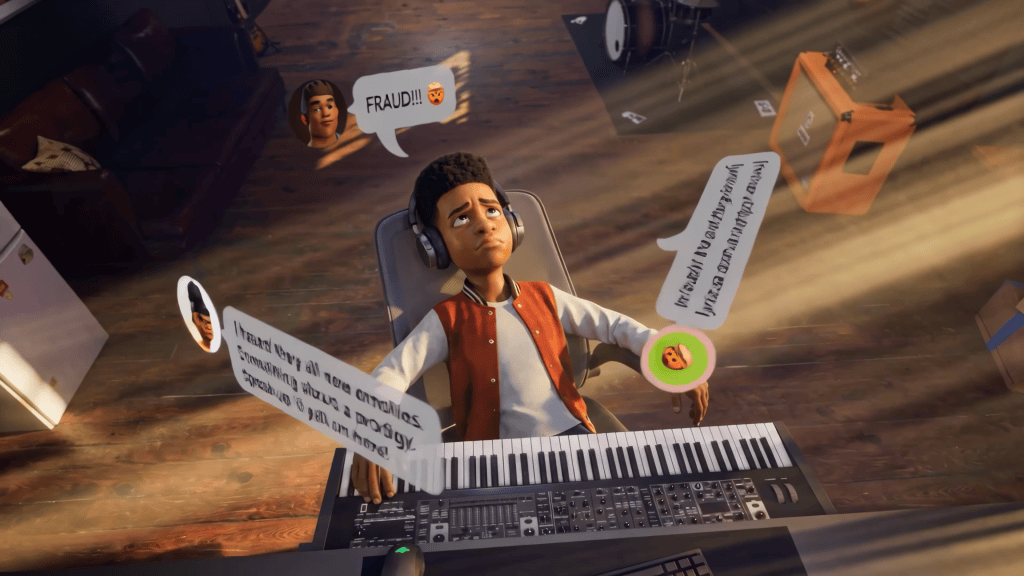
The production began with traditional pre-production materials: early 2D concept designs establishing the characters and visual world of R.G. Keys. These initial designs evolved through Midjourney generations and other visual explorations, helping the creators imagine how the main character, Reggie, might appear in the finished series.

But the transition from visual concepts to production-ready characters required a more structured approach. That’s where Reallusion Character Creator became essential.

“Character Creator was a great place for us to become creatively collaborative with the Coleman brothers early on,” explains Martin.

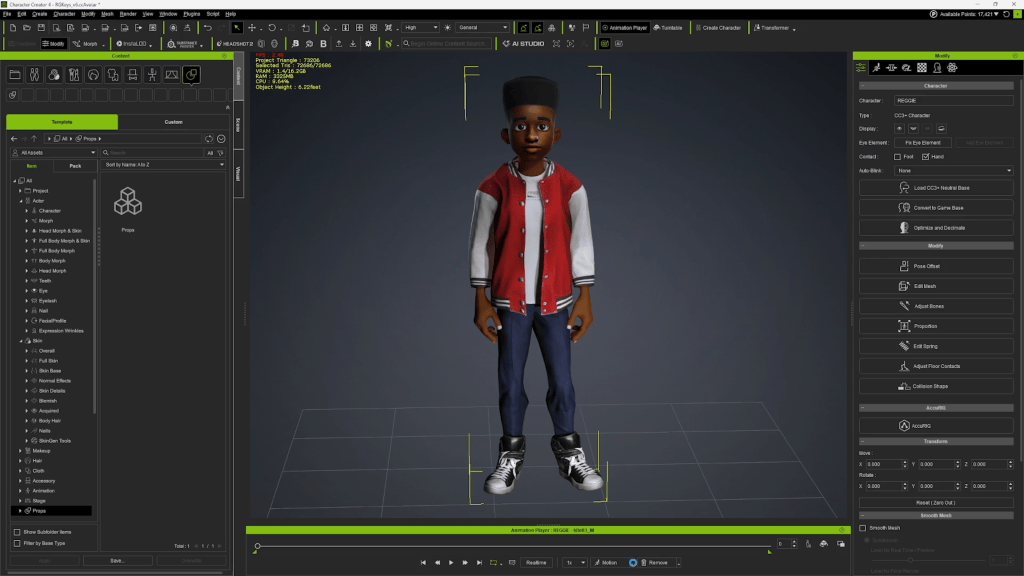
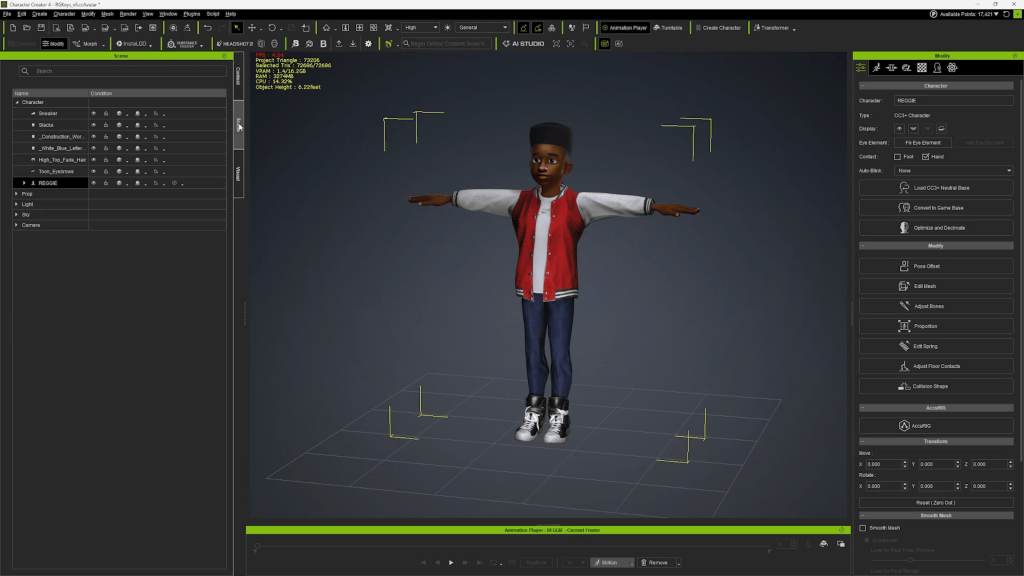
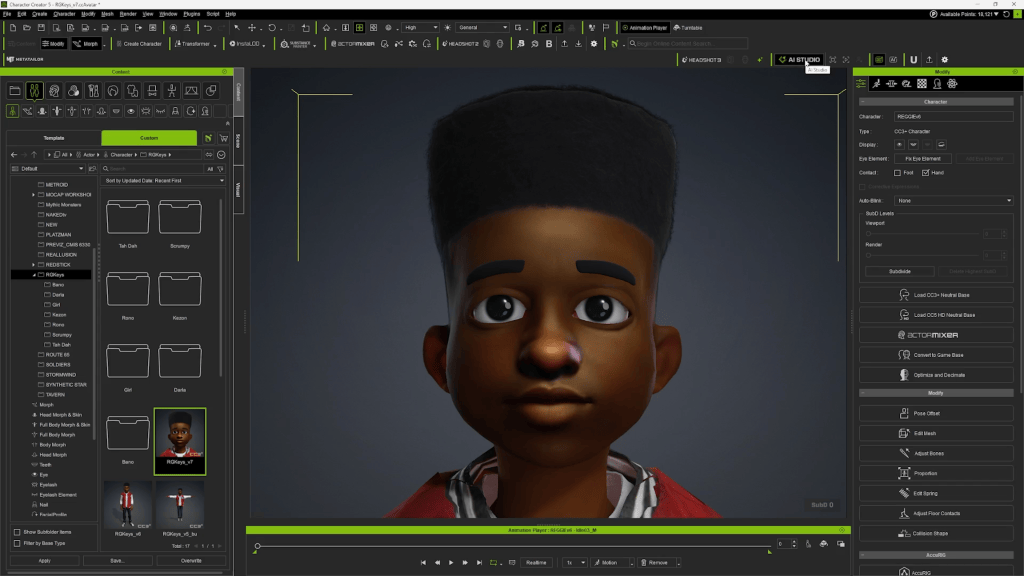
Working directly with the series creators, Actor Capture used Character Creator to refine the R.G. Keys character appearance, proportions, and overall design. The objective was not simply to create an appealing 3D model, but to develop a digital character that accurately represented the Colemans’ creative vision. As Martin explains, the team needed to ensure the finished 3D asset was a true match for how the creators imagined the character. Character Creator provided the foundation for that process, connecting the visual design to a functional 3D character rig.

Bringing Reggie to Life with Performance Capture

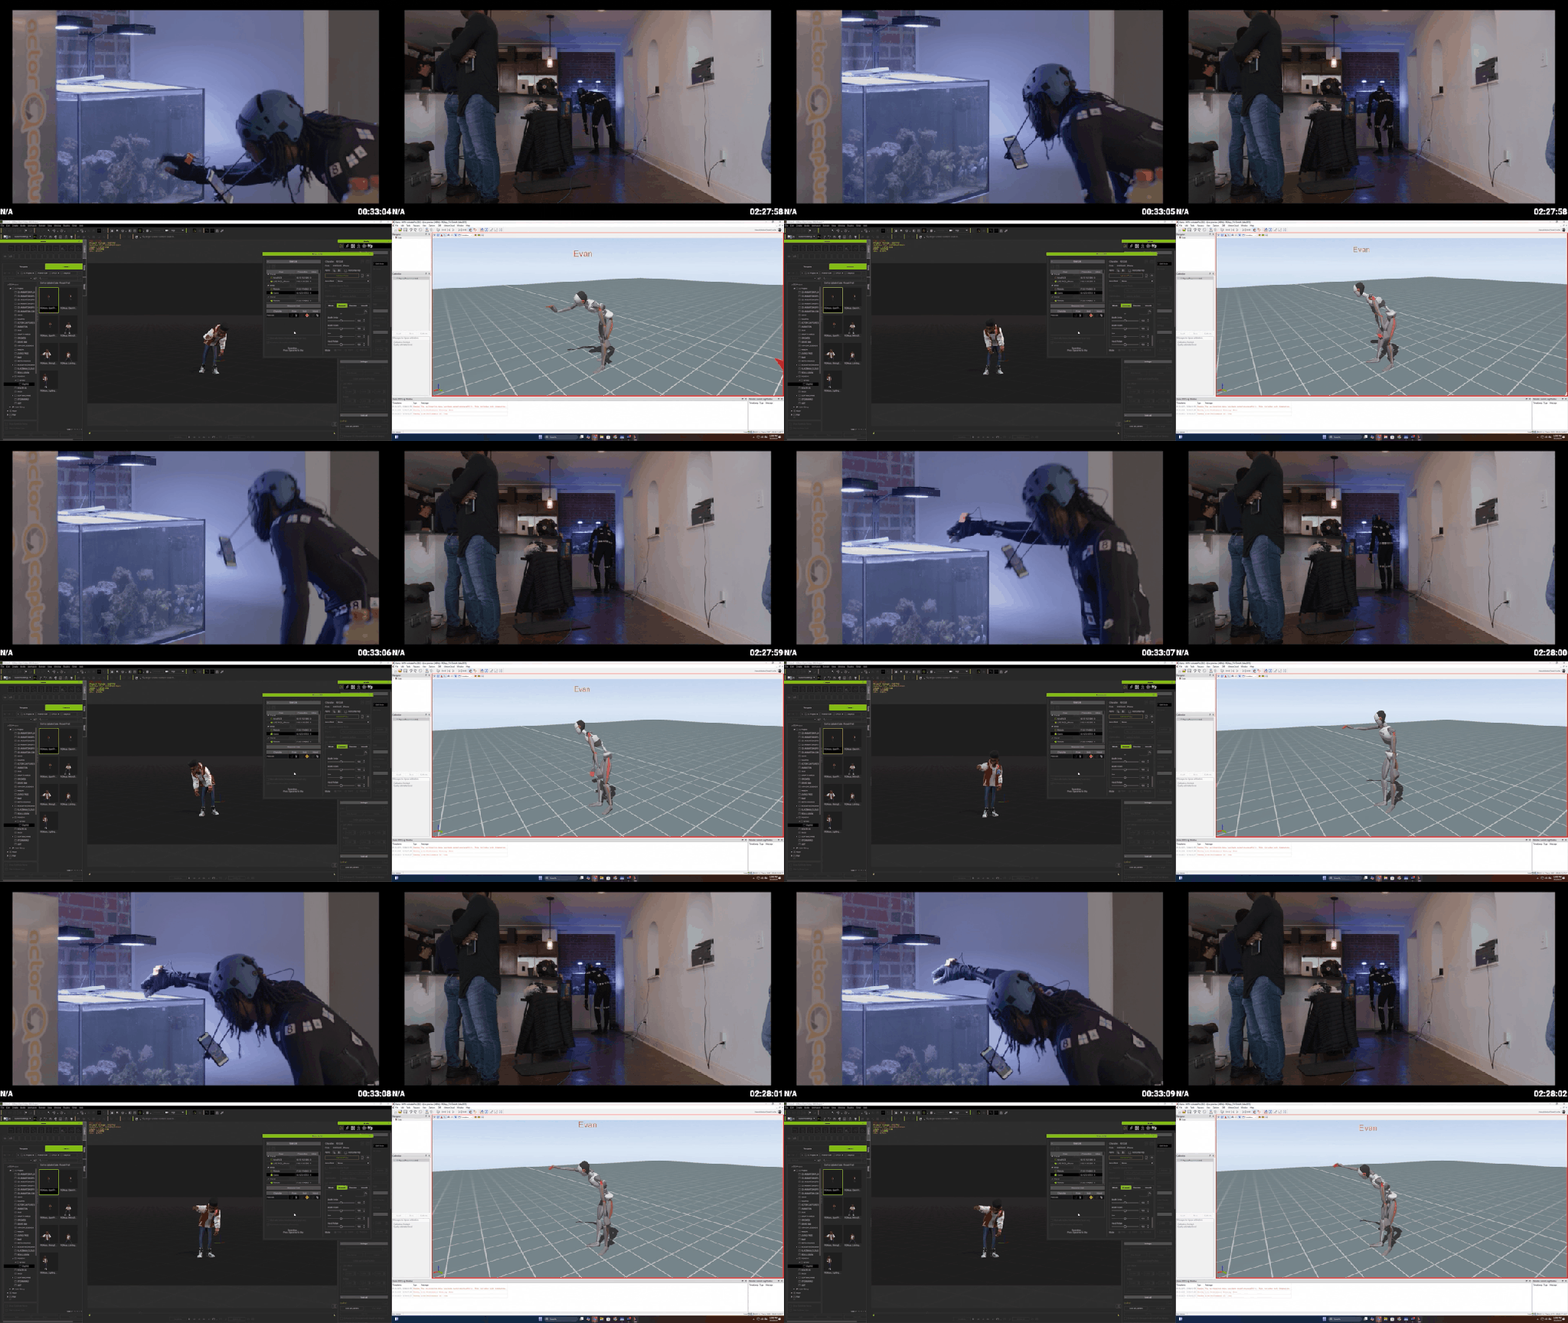
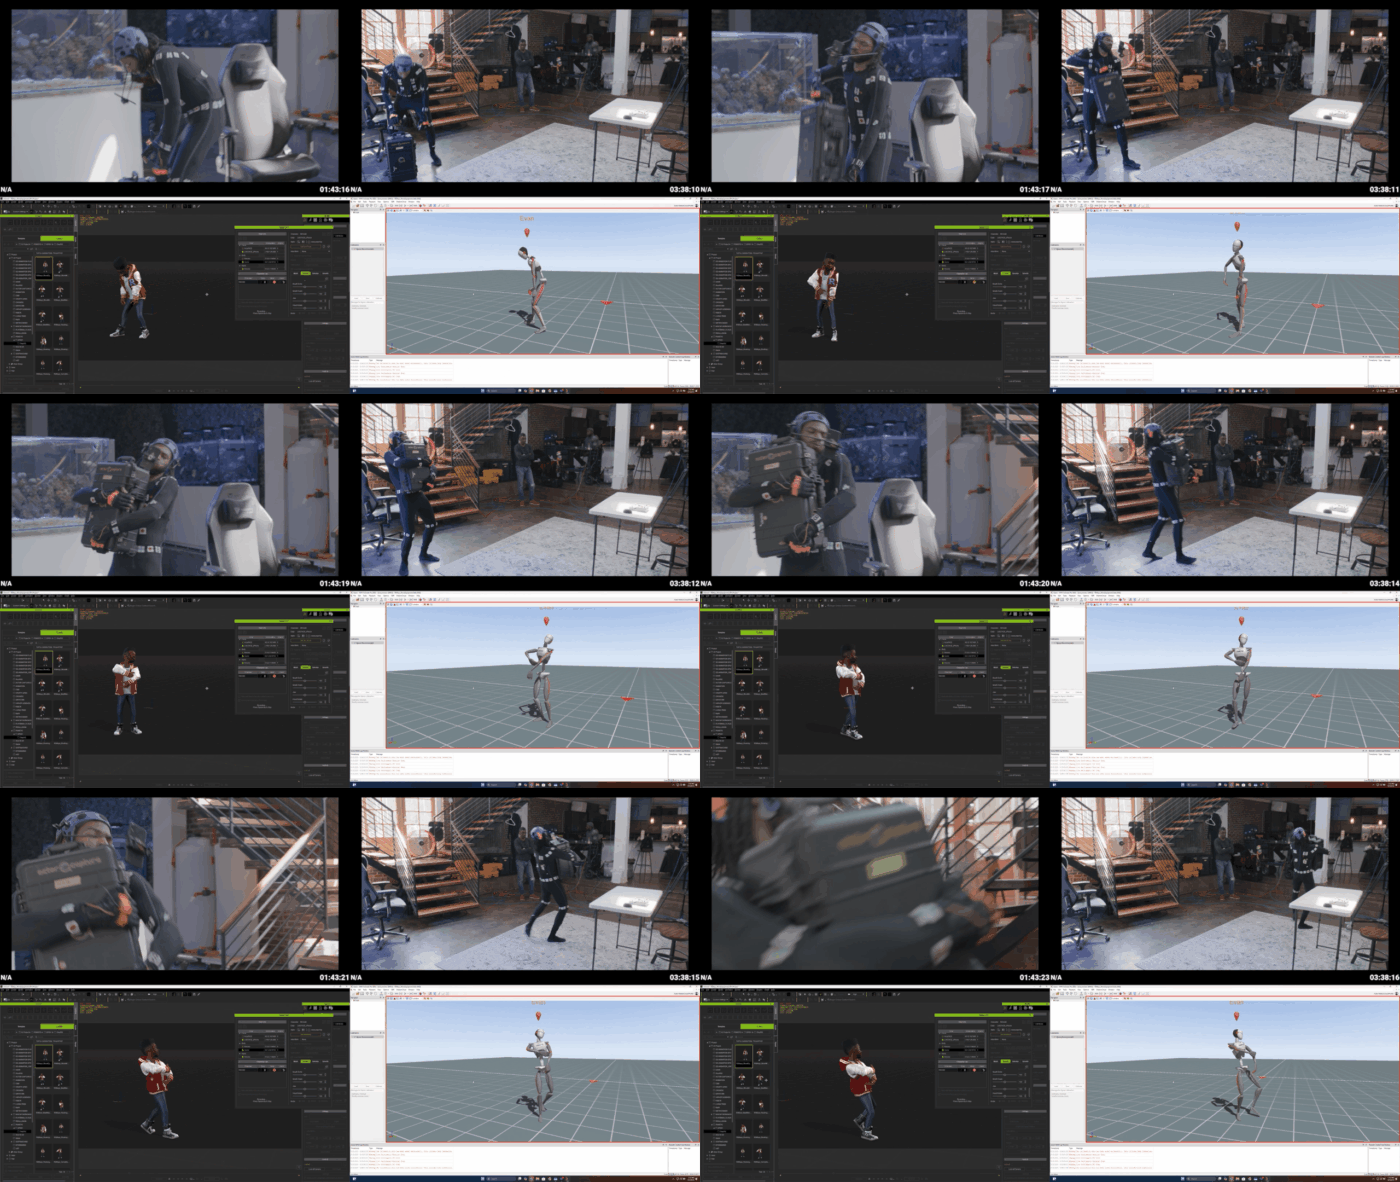
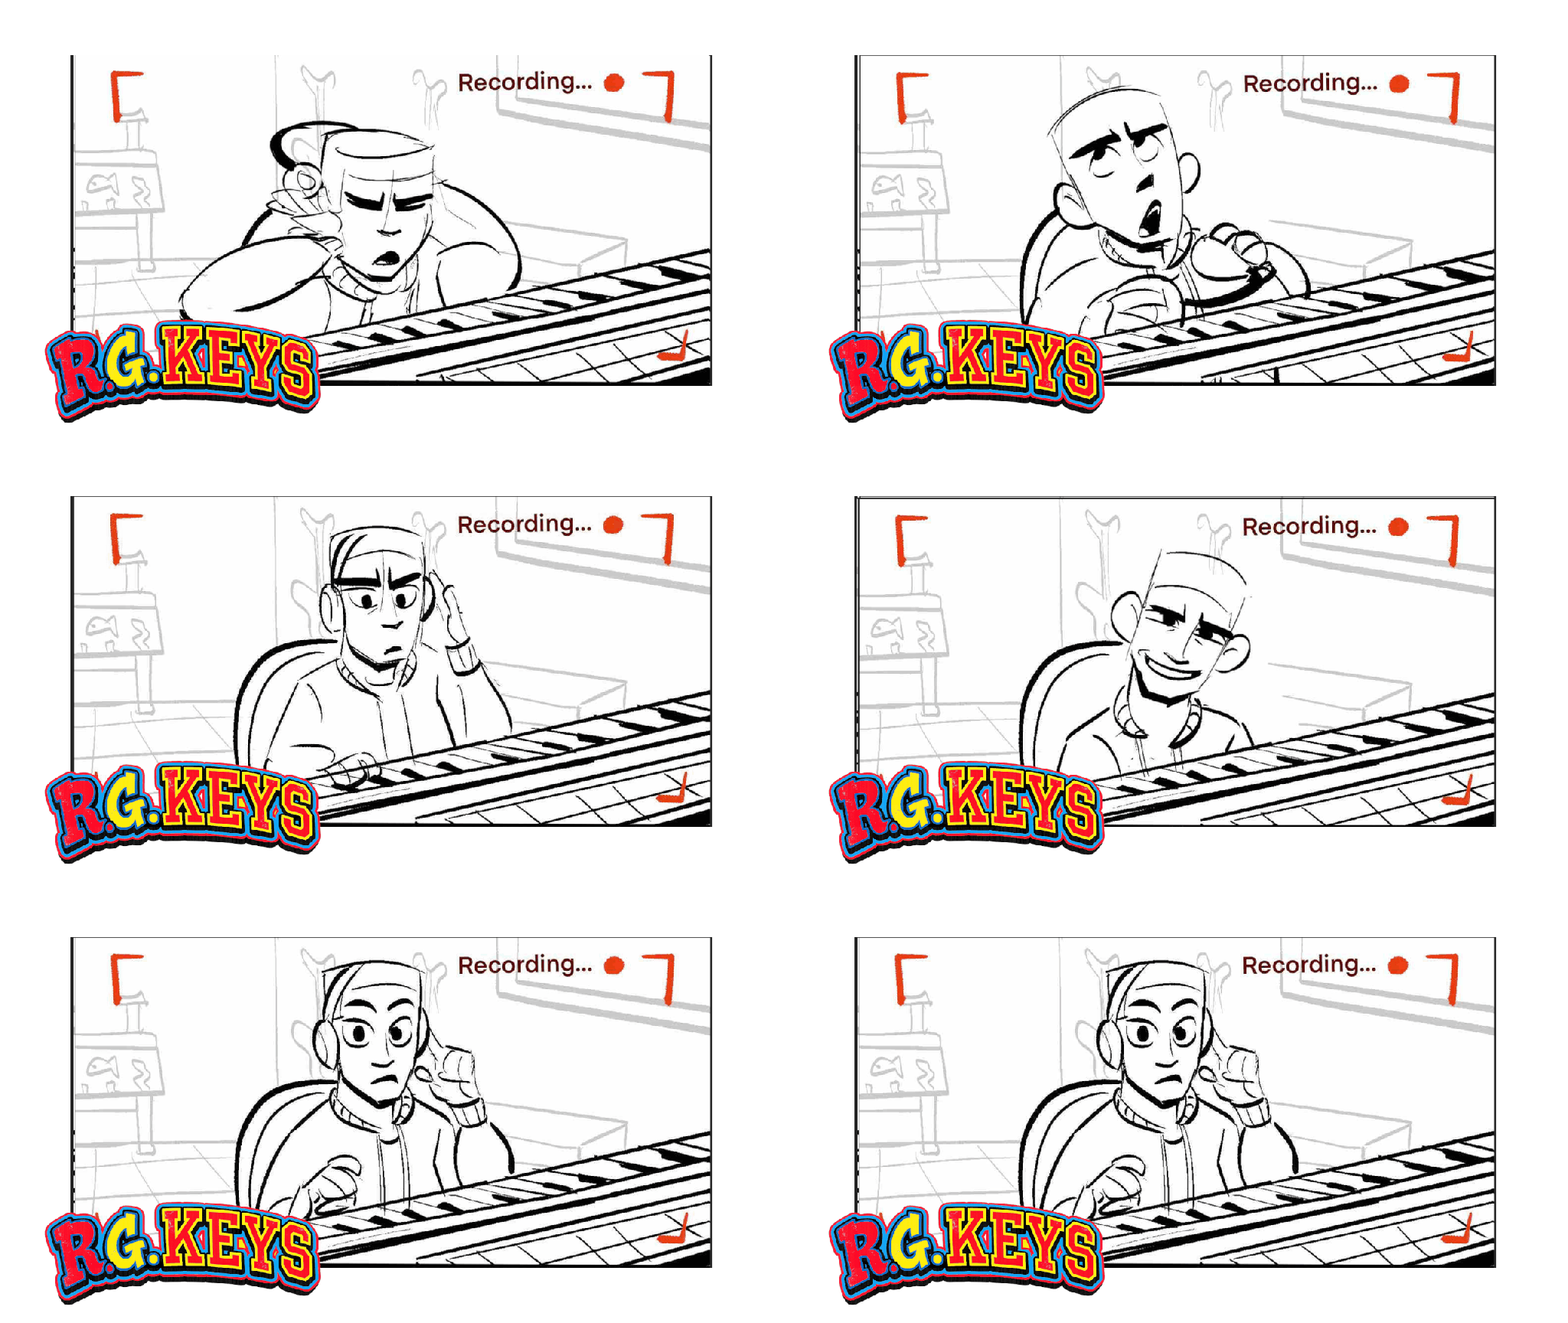
With the character established, Actor Capture introduced its performance capture workflow. The production combined Xsens motion capture suits, StretchSense gloves, and Reallusion AccuFACE to capture body movement, hand gestures, and facial performance. These systems provided complementary sources of animation data, allowing the team to translate an actor’s physical performance into Reggie’s digital character. Martin explains that starting with a Character Creator base made it possible to connect these systems through the Motion LIVE plugins inside iClone.

“This is a great way for us to data stream aggregate all of a single performer’s actions onto a character rig,” says Martin.

By combining multiple capture sources, Actor Capture could build performances that included more than basic body movement. Facial expressions, gestures, and body language could work together, helping the animated character communicate the intentions of the performer. For an animated series, this approach offers significant creative advantages.

Instead of animating every movement independently, the team can establish a performance through acting, then refine it within the digital animation environment. This preserves an important human element in the process. Technology captures the movement, but the performance begins with the actor and is shaped by the animator. For Reggie, the result was a character capable of carrying the physical expression and personality required by the series.

Creating the World of R.G. Keys: The Spacement

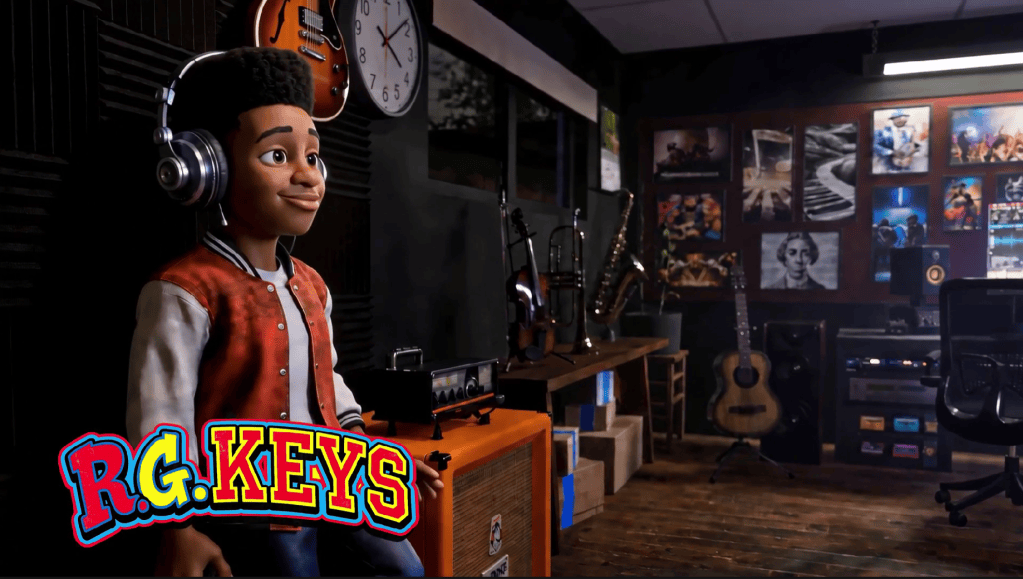
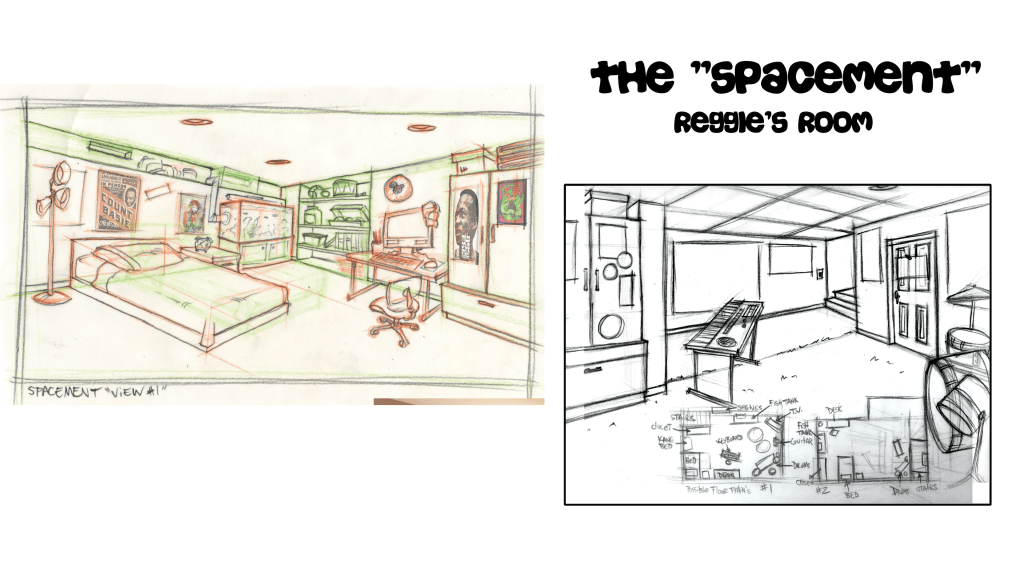
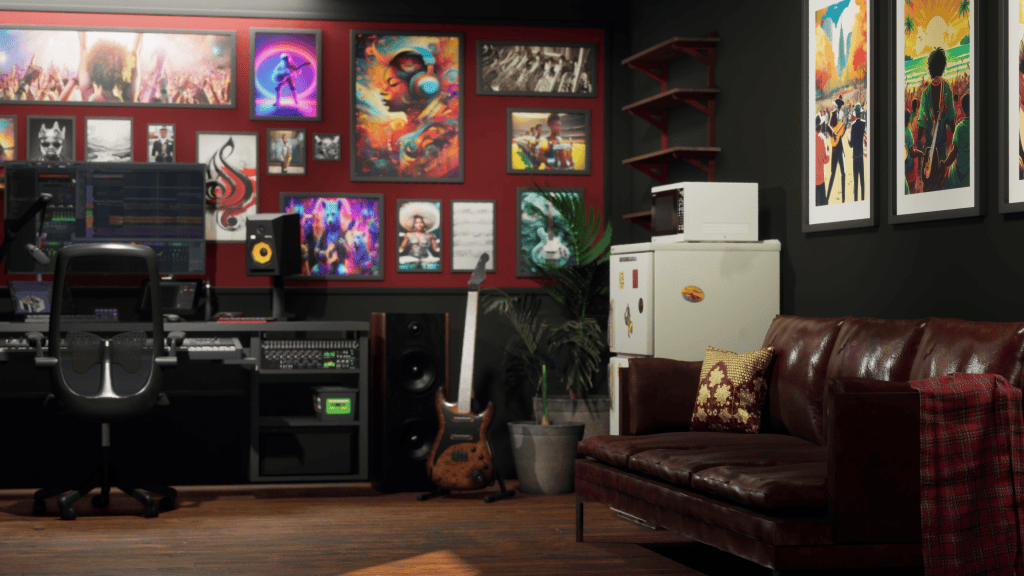
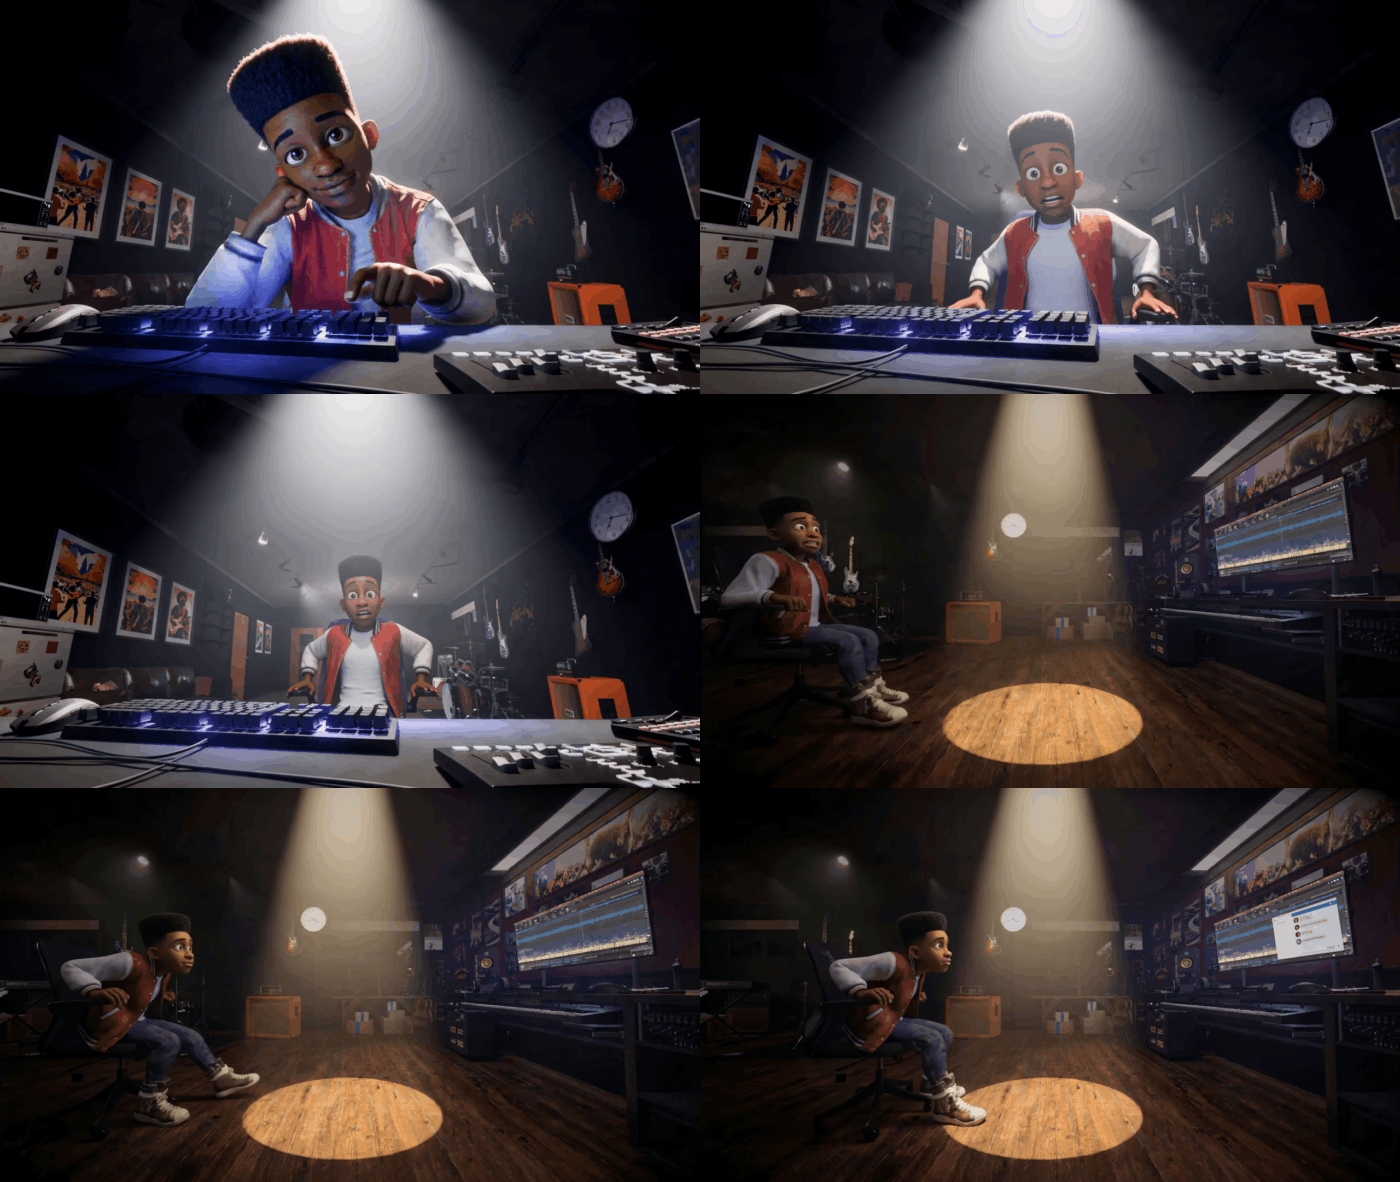
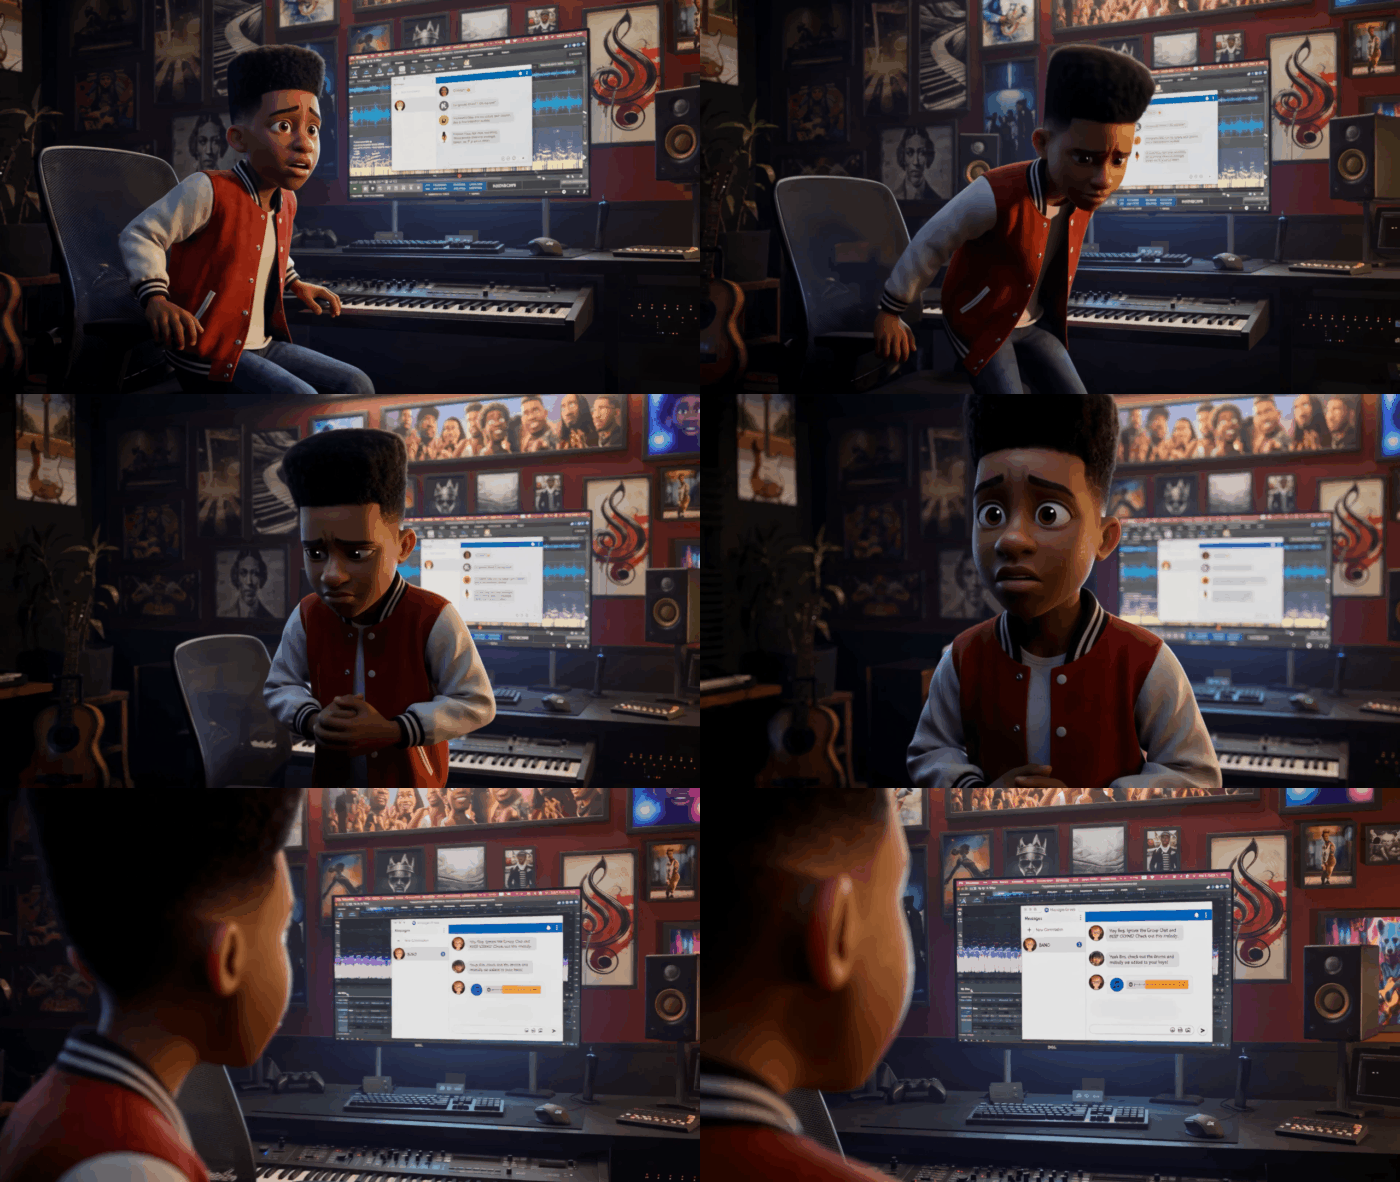
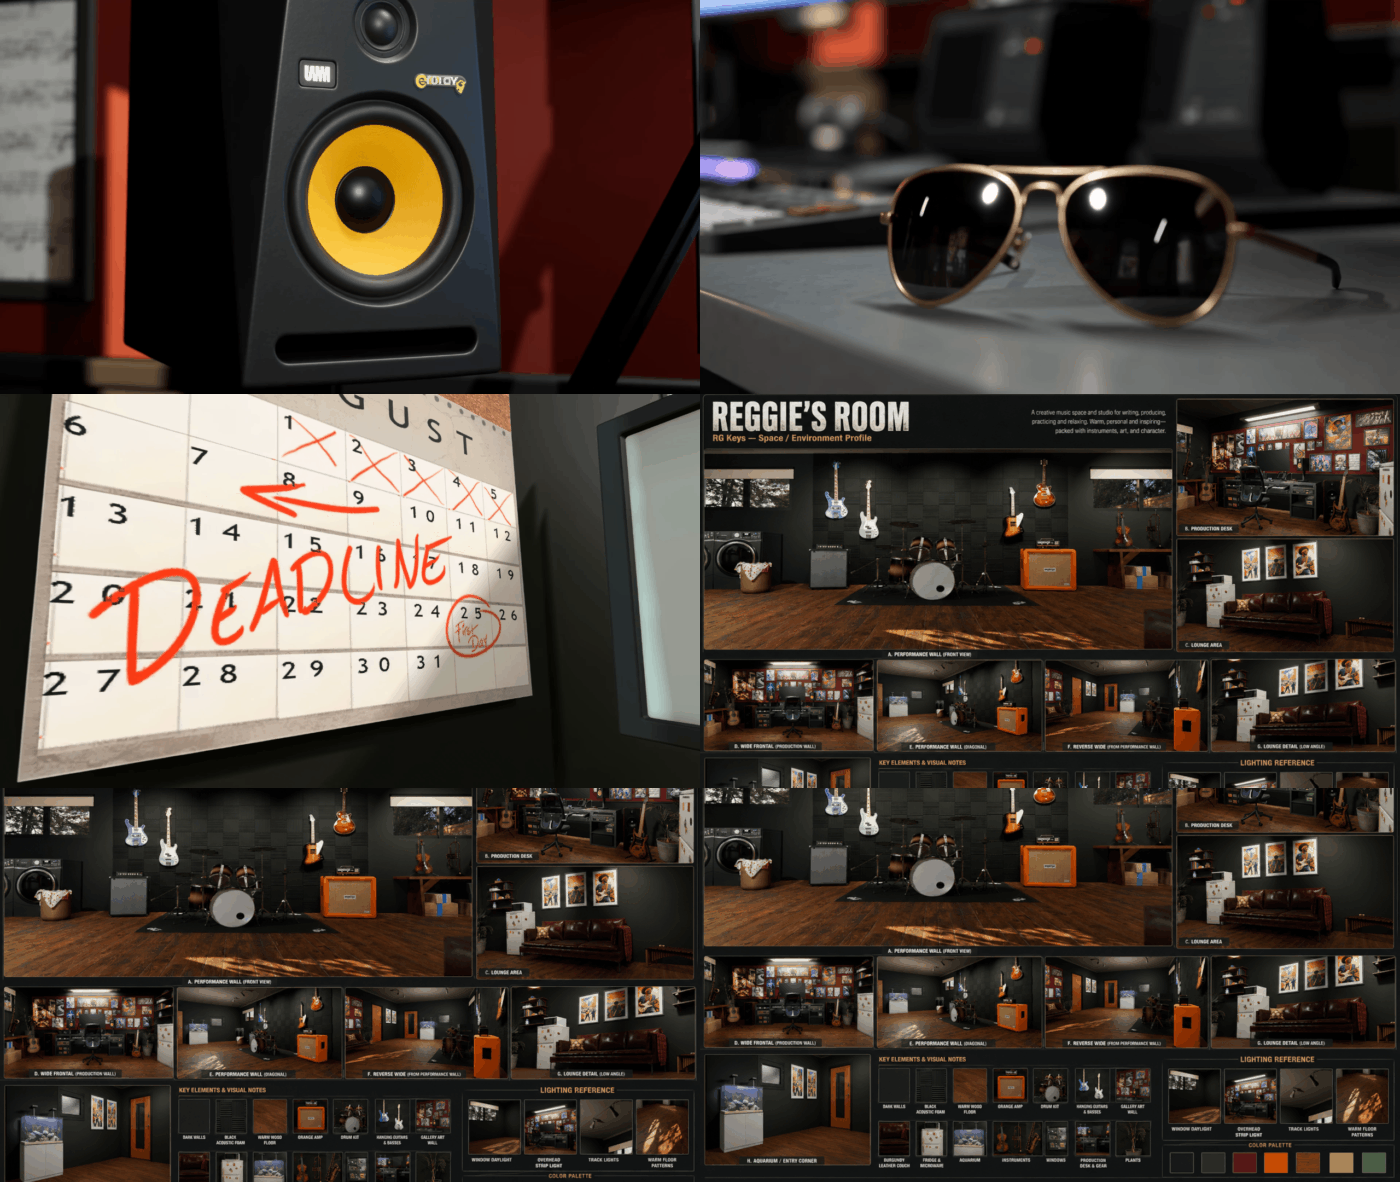
Once the character designs were finalized, Actor Capture turned its attention to environments and location development. One of the most important locations in the series is the Spacement, the basement of Reggie’s house, where he spends much of his time. The Spacement needed to function as more than a background. It required a recognizable layout, distinctive props, and enough visual detail to establish its identity within the series.

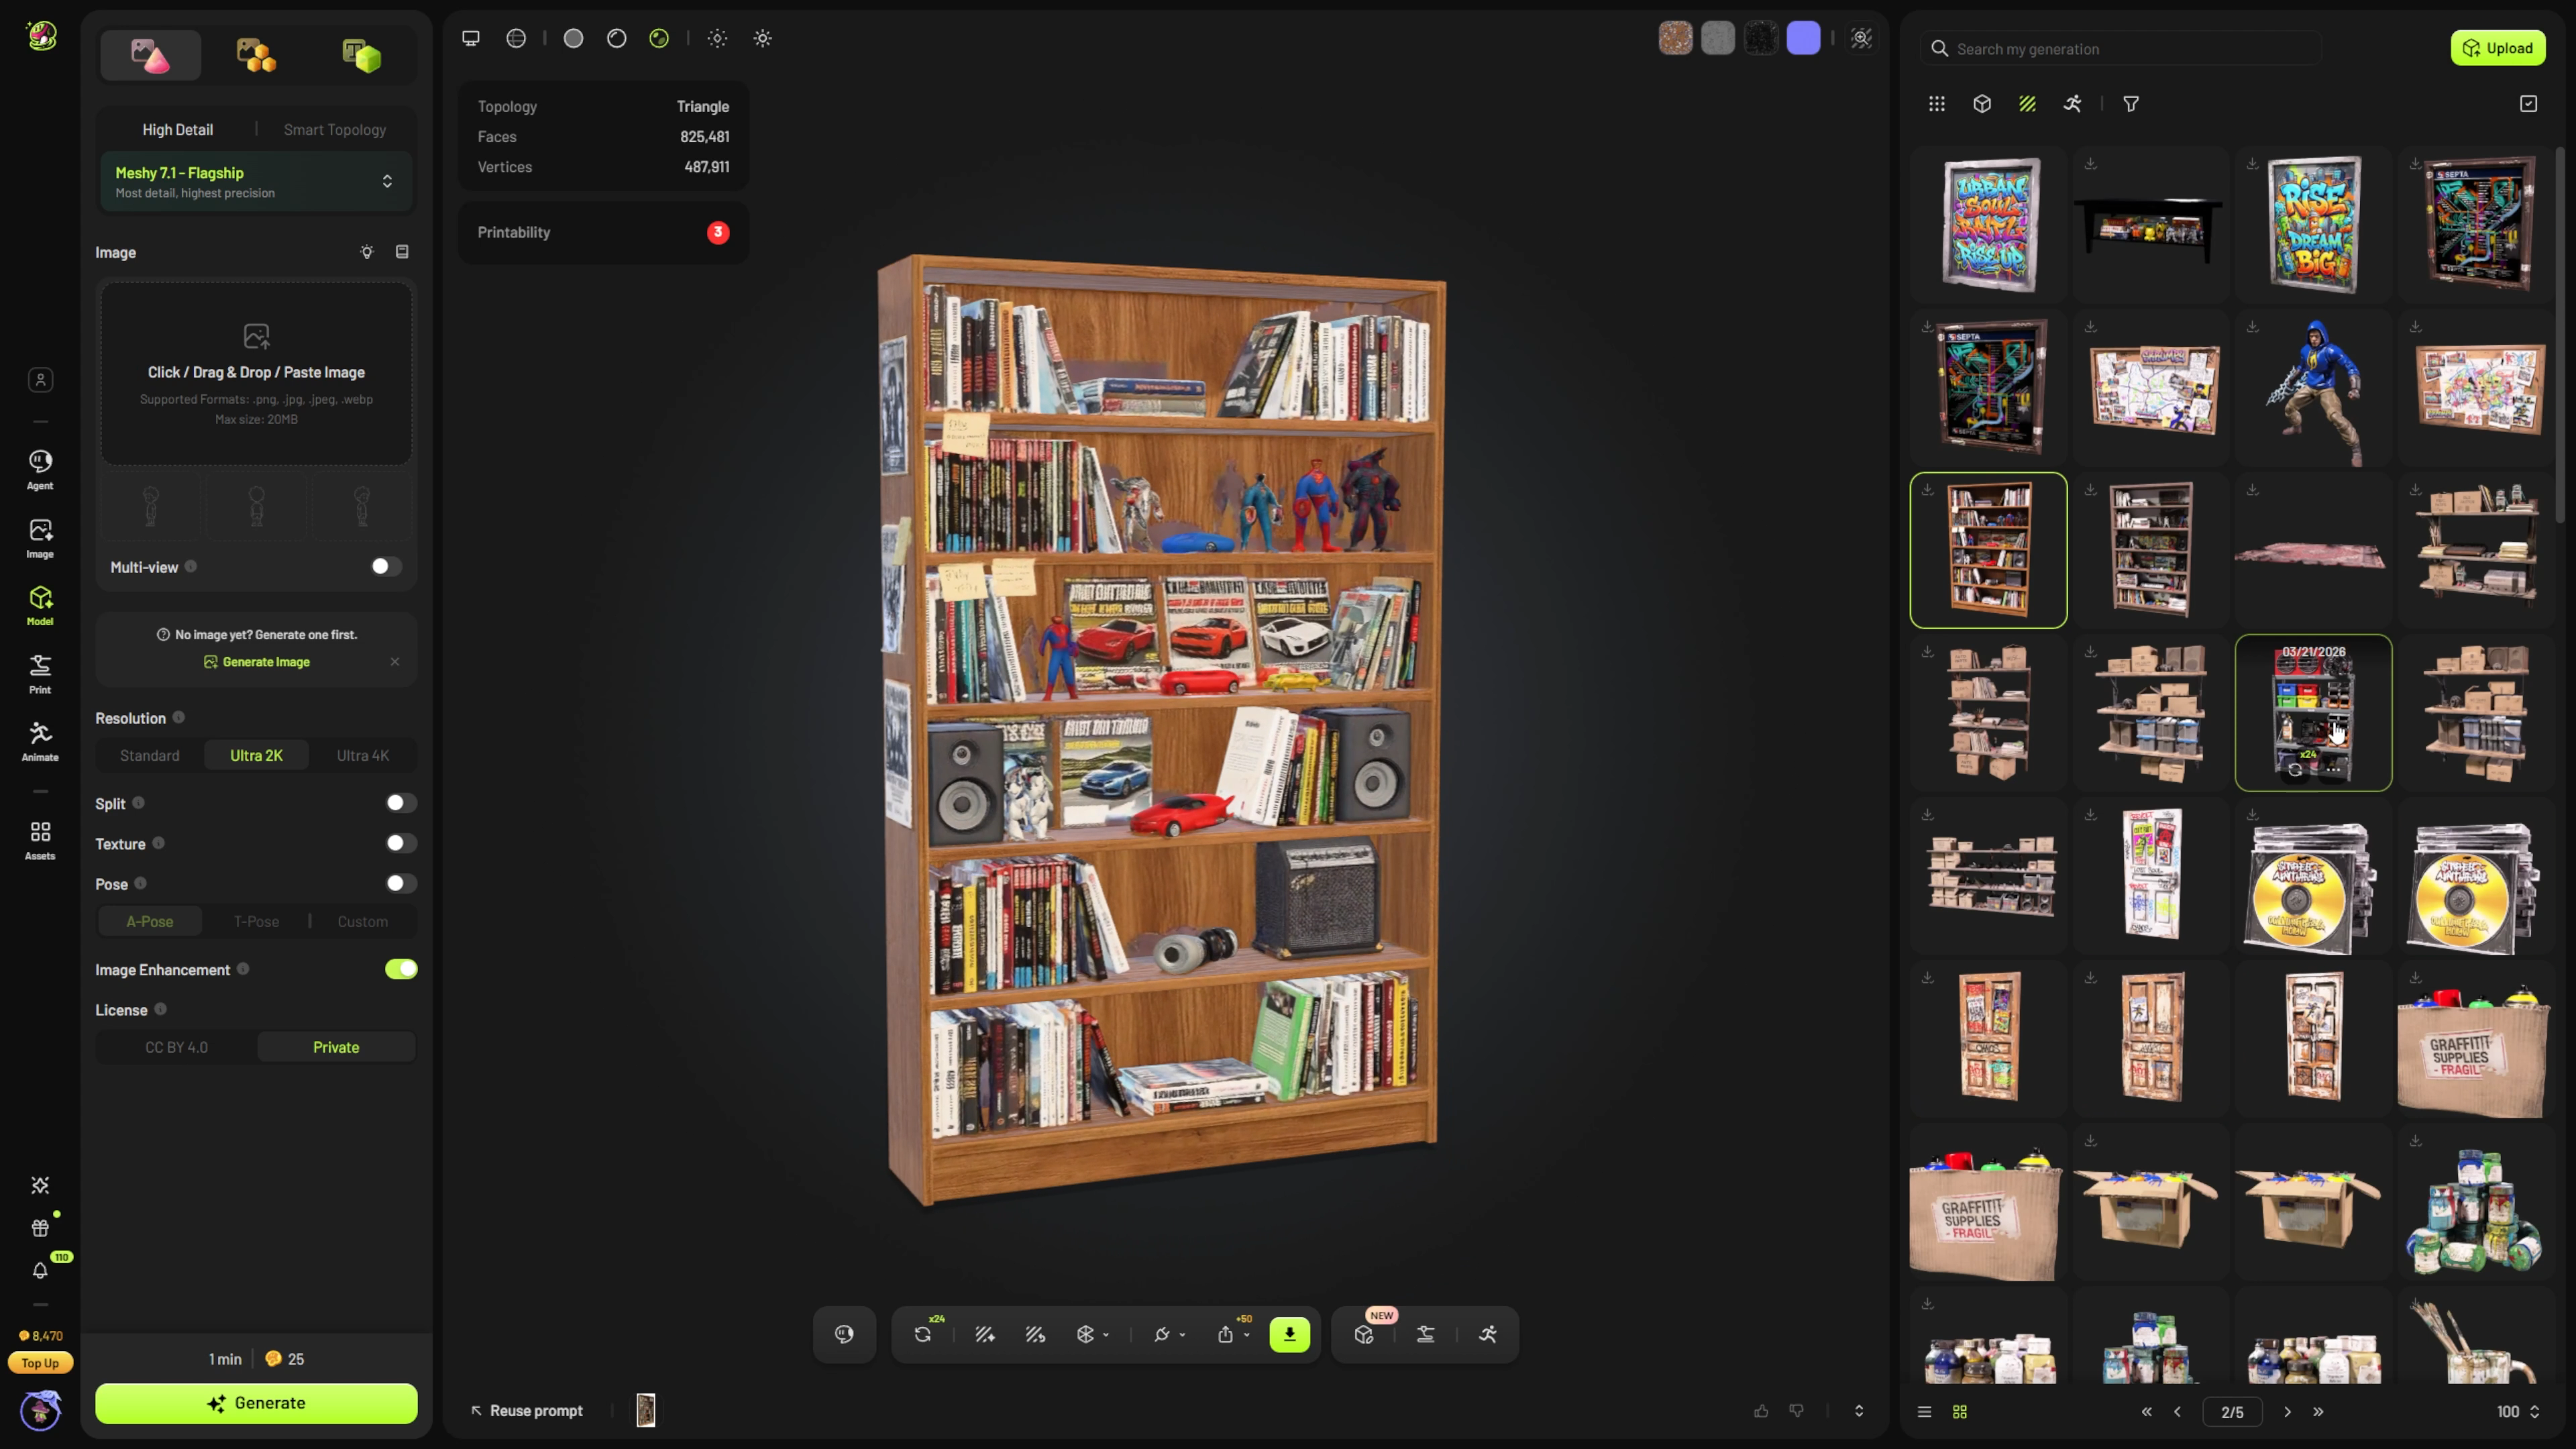
Developing that environment involved a combination of traditional 3D production and generative asset creation. Martin explains that Actor Capture turned to Meshy to help generate the many props required for the space. “This is something where we turned to Meshy for one of our generative prop workflows,” he explains. Using generative 3D tools allowed the team to explore and develop numerous objects quickly, accelerating the process of populating the environment.

Actor Capture also used iClone and Unreal Engine Live Link to explore the scene layout and visualize the environment. These early 3D visualizations became an important part of the collaboration with the Coleman brothers. Rather than waiting until the environment was finished, the production team could present spatial layouts and design ideas for review, making it easier to refine the location together. The Spacement became a key example of how the production combined creative collaboration with technical flexibility.

From Storyboards to Cinematic Shots

With characters and environments taking shape, the production moved toward shot development. The original scripts, storyboards, and early pre-production materials continued to guide the process, providing a foundation for how individual scenes should be staged and presented. But the team now had something more powerful than written descriptions and reference drawings. They had established 3D characters, virtual environments, and camera layouts that could be used to inform the next stage of production. This is where Reallusion AI Studio entered the workflow.

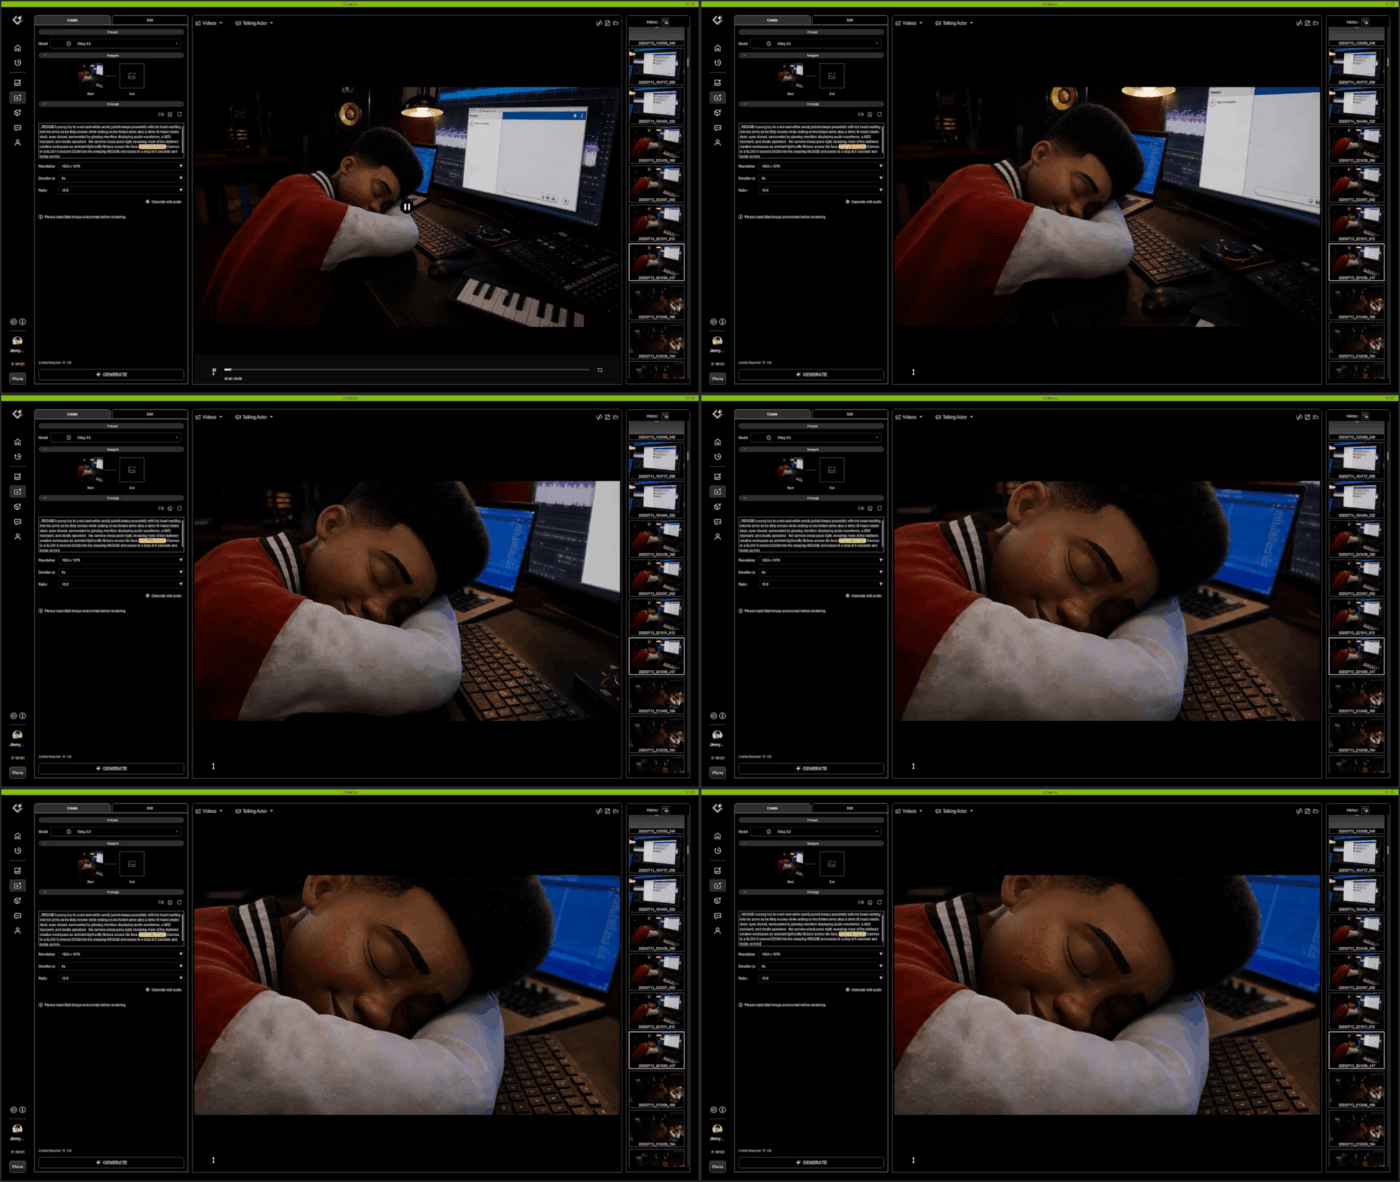
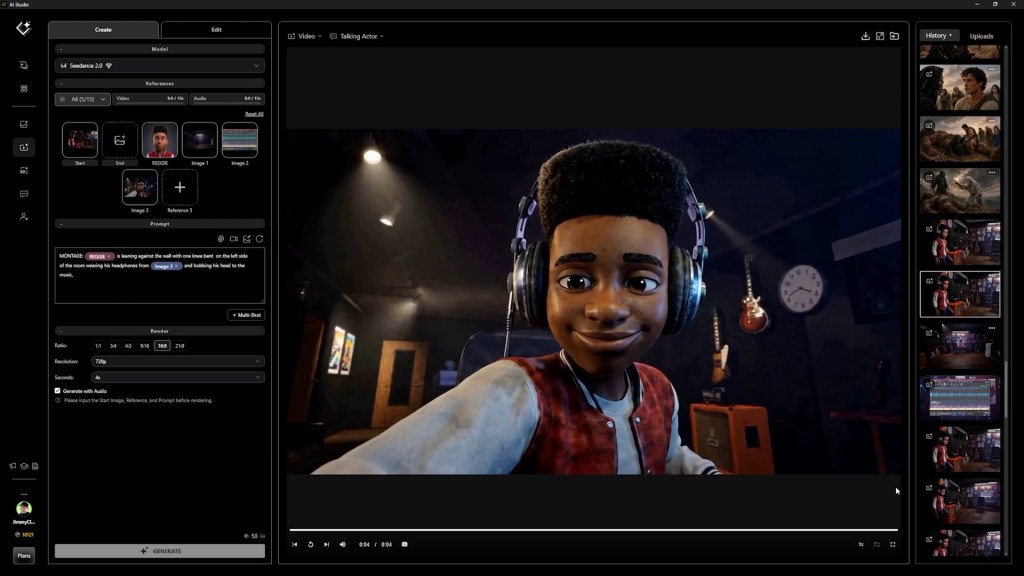
“Actor Capture utilized AI Studio early on in the production of R.G. Keys and found it to be an accelerant to the overall production process,” says Martin. He also describes AI Studio as a tool that helped raise the visual quality of the production when used with effective prompts and high-quality reference imagery. The workflow connected 3D to image to video, allowing the team to use its existing production assets as the basis for AI-assisted shot generation. Instead of relying entirely on text descriptions, Actor Capture could draw from the character designs, environments, compositions, and visual standards already established during pre-production. This made the generative process more closely connected to the original creative direction.

Transforming 3D Characters into AI Actors

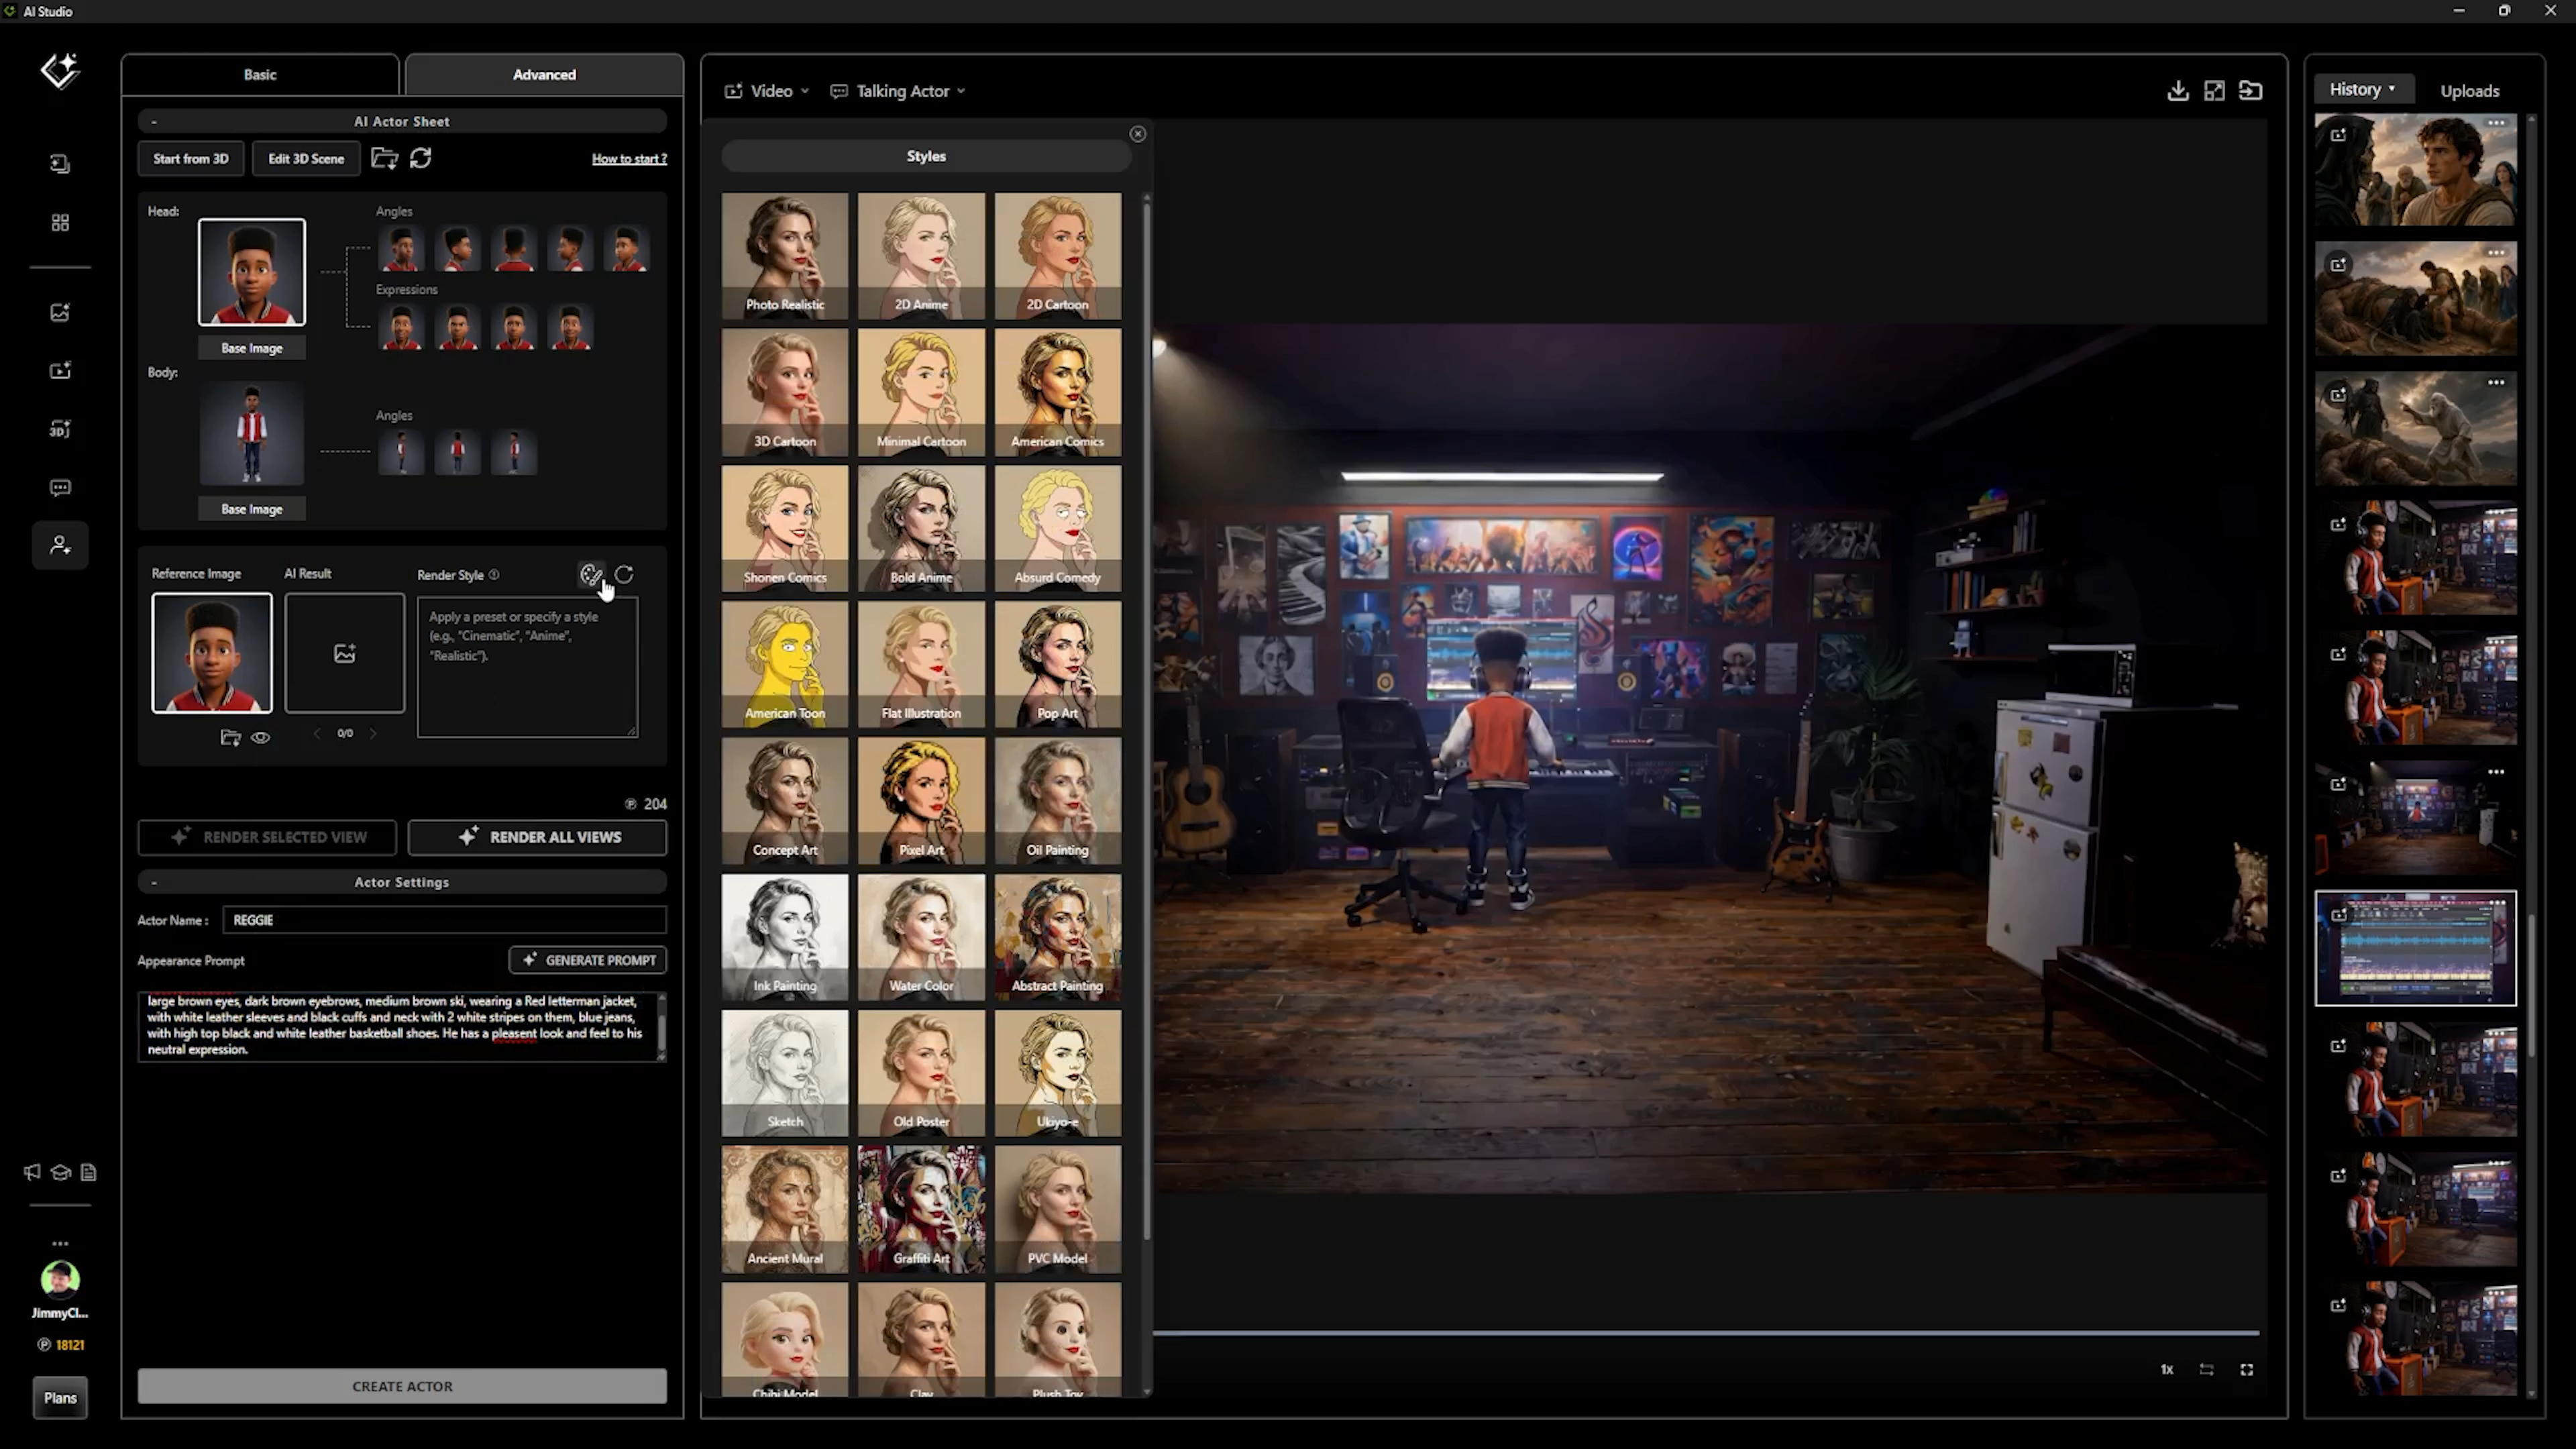
One of the most important parts of Actor Capture’s AI Studio workflow involved converting its completed 3D characters into reusable AI Actors. The team returned to its finalized Character Creator assets and used those designs to establish AI Actor identities inside AI Studio. These AI Actors could then be referenced during image generation, helping preserve a consistent appearance across different shots.

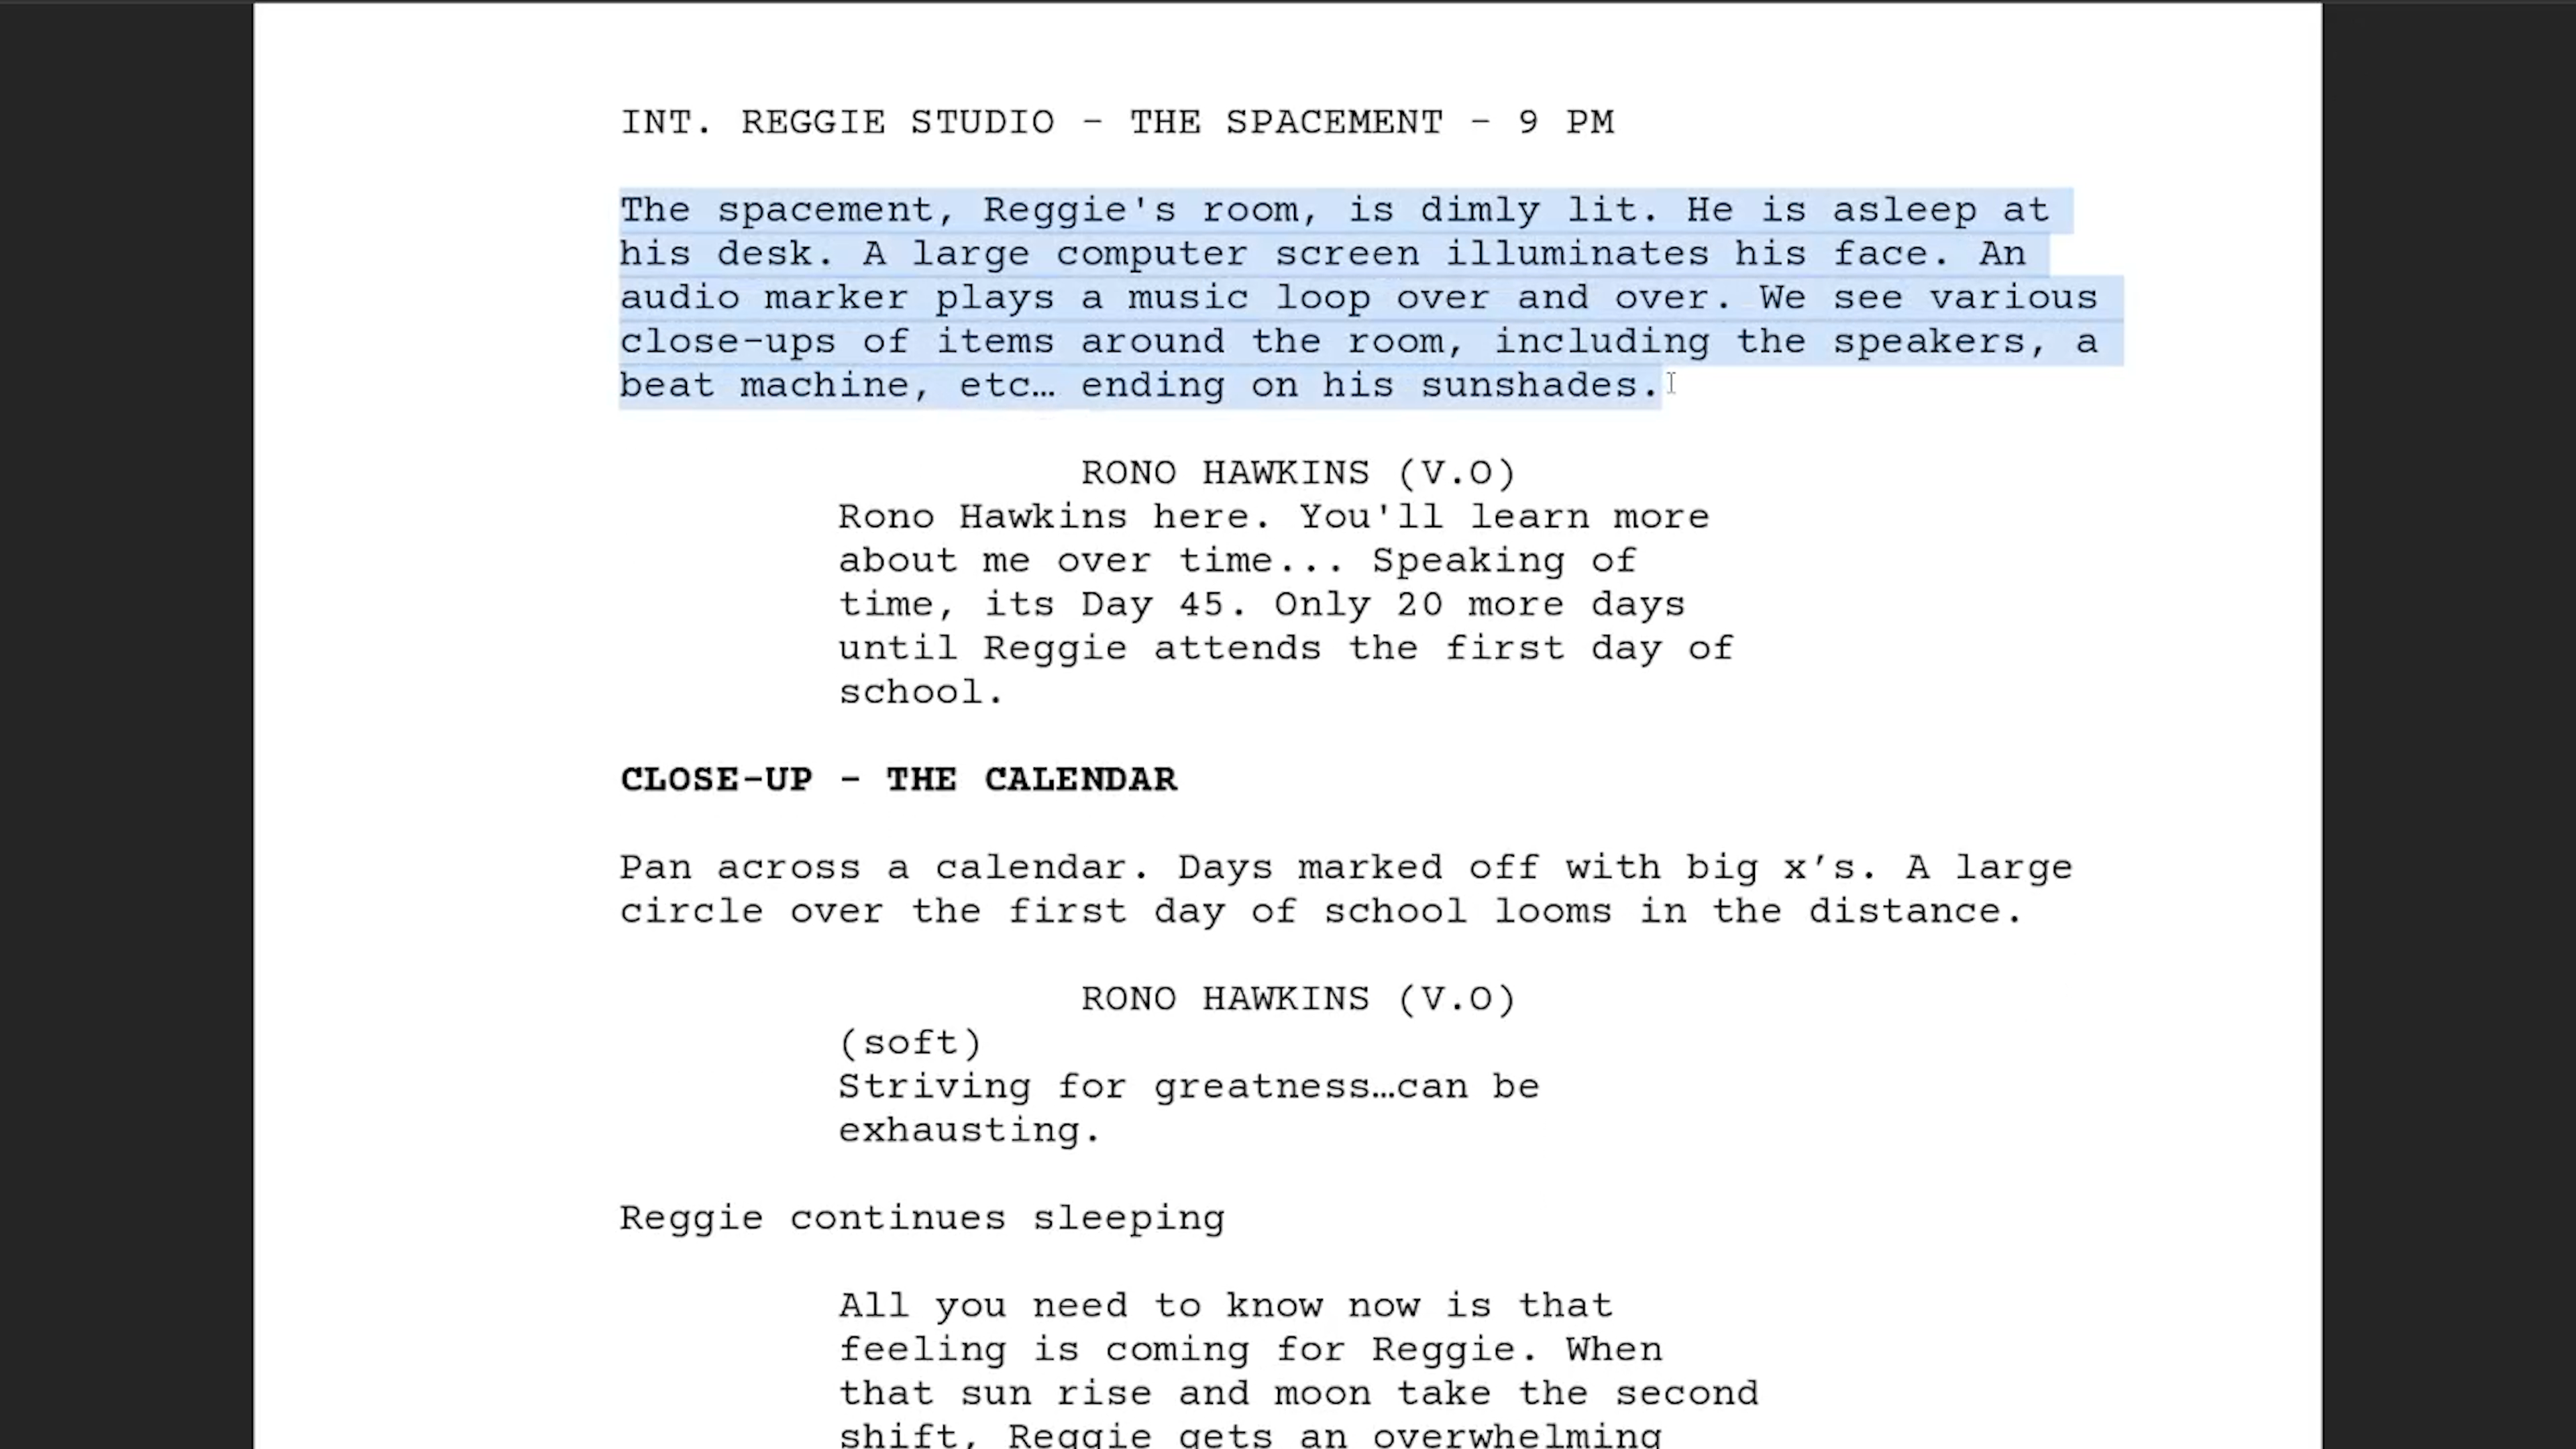
Martin explains that the scripts themselves became valuable production assets in this process. “The script itself becomes a set of prompts and certainly a set of visual standards in the written form.”This is an important distinction. The written material was not abandoned when the production introduced AI. Instead, it became another way to guide the generative process. Character descriptions, story actions, and visual references could be combined with the AI Actor profiles to inform the resulting imagery.

Each AI Actor also carried its own descriptive prompt, providing additional information about the character’s identity. Together, these elements helped Actor Capture maintain character continuity, even when camera angles and compositions changed. For an animated series, where characters must remain recognizable across numerous scenes, that consistency is essential.

Using 3D to Direct AI Generation

AI Studio also benefited from the spatial planning completed earlier in iClone and Unreal Engine. The team could return to its original 3D visualizations to inform the framing and composition of AI-generated shots. This connected the creative control of traditional 3D animation with the speed and visual possibilities of generative AI. Rather than allowing each shot to develop independently, the production could establish camera direction, character placement, scene layout, and lighting intentions before generating the final imagery.

Martin describes the process as an effective way to achieve high-quality character animation, scene design, and informed lighting. The result was a more cinematic approach to AI generation. Importantly, Martin emphasizes that the process remained under human control. The production team continued to evaluate the generated shots, make creative decisions, and select the material that best served the story and met the client’s visual standards.

AI Studio accelerated production, but it did not replace the role of the director, animator, or editor. Instead, it gave the team another set of tools for realizing the creative vision established by the Colemans.

Faster Production, Greater Creative Possibilities

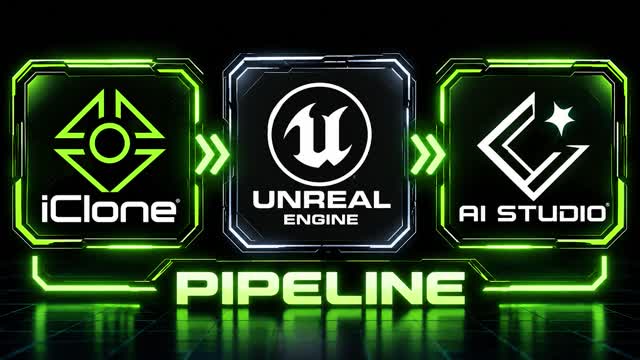
For Actor Capture, one of the most significant benefits of the combined workflow is its ability to support ambitious animated productions with greater efficiency. Character Creator provides the reusable digital actors. iClone supports animation, performance capture, and spatial planning. Unreal Engine helps visualize environments, while Meshy accelerates prop creation. AI Studio then builds on those assets, helping the team generate cinematic imagery and move more efficiently toward finished sequences.

Martin describes Actor Capture’s objective as maintaining a fast and flexible workflow while producing at a high level of visual quality. The approach also changes what may be possible for productions working with smaller budgets. Projects that once required significant resources to produce a pilot or individual episode can now explore larger ideas, more elaborate environments, and more ambitious visual storytelling.

As Martin explains, the opportunity extends beyond animation to live action, fantasy, and other genres. The same combination of pre-production planning, reusable 3D assets, performance capture, and AI-assisted generation can support many different forms of storytelling.

Human Creativity at the Center of AI Production

The making of R.G. Keys demonstrates how modern animation workflows can connect traditional production experience with emerging AI technology. For Darrell and Levi Coleman, the process provides a way to translate their original stories and characters into a fully realized animated world. For James Martin and Actor Capture, it represents an opportunity to combine character design, performance capture, 3D animation, and AI-assisted filmmaking within a connected production pipeline. The technology is important, but so is the collaboration that guides it. From the earliest character sketches to the final edit, the production remains focused on translating the creators’ vision into animated storytelling.

R.G. Keys shows how the combination of Character Creator, iClone, and AI Studio can give independent animation teams greater control, faster production, and the creative freedom to bring more ambitious stories to the screen.

As Martin’s behind the scenes presentation makes clear, the future of animation is not simply about generating images faster. It’s about giving storytellers better tools to develop characters, direct performances, and build worlds that audiences can connect with.


AI Studio Storytellers

AI Studio Storytellers highlights creators who are pushing the boundaries of modern filmmaking through Reallusion’s AI Studio workflow. Through behind-the-scenes breakdowns, production insights, and real-world projects like R.G. Keys, the series explores how filmmakers are using 3D, AI, and virtual production techniques to create the next generation of cinematic storytelling.

Professor James C. Martin is a motion capture specialist, AI Storyteller, and Technical Director at Actor Capture, as well as Professor of Practice at Georgia State University’s Creative Media Industries Institute (CMII). With over 20 years of experience, he has contributed to projects including The Suicide Squad, Lyle, Lyle, Crocodile, Creed III, and The Electric State. A Reallusion Certified Trainer, Martin specializes in motion capture, virtual production, digital humans, real-time animation, and generative AI workflows. In 2026, he was a featured presenter at the CMII AI Symposium and a panelist at the Alt Era AI Summit and Film Festival, discussing AI in education and storytelling.

About the Production

R.G. Keys
Created and written by Levi and Darrell Coleman
Chanson Entertainment Group

Animation and Production
James Martin, CEO, Actor Capture

Production Tools
Reallusion Character Creator, iClone, AI Studio, Motion LIVE, AccuFACE, Xsens, StretchSense, Unreal Engine, Meshy, and Midjourney

Learn more: ActorCapture.com

Related Posts

Reallusion AI Studio is built for 3D artists who want to streamline their workflow with authentic AI render, and for AI creators seeking stronger consistency and more precise control with less trial and error—unlocking greater productivity by blending the best of both worlds. Tutorial

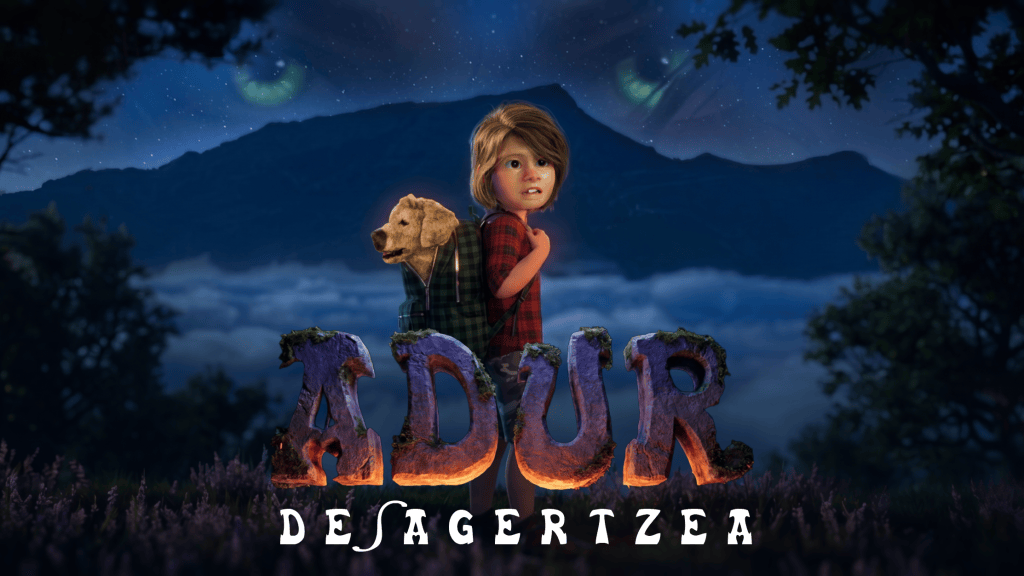
Discover how Paul Puaux and Kabengo! Games use Reallusion’s Character Creator and iClone Live Link with Unreal Engine 5 to build Adur: Desagertzea. Learn how this four-person French studio crafts a unique, stylized 2.5D cinematic platformer celebrating Basque mythology, language, and culture through real-time 3D workflows.

How Adur Game Uses Stylized 3D Character Creator for Unreal

TL;DR:

  • Kabengo! Games, a four-person studio near Bordeaux, France, is developing Adur: Desagertzea, a Basque-voiced 2.5D cinematic platformer.
  • The team chose Character Creator 5 (CC5) and ActorMixer PRO over photorealistic tools to achieve a distinct “puppet diorama” art direction with custom shaders and morphs.
  • Using iClone LIVE LINK inside Unreal Engine 5, the team tests poses and real-time animation directly in lighting environments powered by Lumen, Nanite, and RTX raytracing.
  • Learn how real-time 3D tools empower small indie teams to preserve full artistic direction while drastically cutting iteration times.

This Reallusion Pitch & Produce program showcase examines how French indie developer Kabengo! Games uses Reallusion Character Creator 5 and iClone 8 alongside Unreal Engine 5 to produce their upcoming title, Adur: Desagertzea.

By combining CC5’s morph layer system with iClone Unreal LIVE LINK, a four-person studio achieves near-final cinematic rendering and rapid animation iteration without relying on Generative AI automation.

“I turned to Character Creator as I had been using it for a couple of years, for other various projects… and knowing its powerful features for creative efficiency. Some features I was expecting to have my hands on really impressed me, particularly ActorMixer, that we used to achieve our specific body and face proportions.”

Paul Puaux – Creative / Artistic Director at Kabengo! Games

Discover how Paul Puaux and Kabengo! Games use Reallusion’s Character Creator and iClone Live Link with Unreal Engine 5 to build Adur: Desagertzea. Learn how this four-person French studio crafts a unique, stylized 2.5D cinematic platformer celebrating Basque mythology, language, and culture through real-time 3D workflows.

Featured Artist Spotlight: Kabengo! Games

For indie game developers, capturing a distinctive visual identity while maintaining production momentum is an ongoing balance. Kabengo! Games, a four-person indie studio based near Bordeaux in southwestern France, addresses this challenge directly in their debut title, Adur: Desagertzea (“Adur: The Disappearance”).

For indie game developers, capturing a distinctive visual identity while maintaining production momentum is an ongoing balance. Kabengo! Games, a four-person indie studio based near Bordeaux in southwestern France, addresses this challenge directly in their debut title, Adur: Desagertzea ("Adur: The Disappearance").
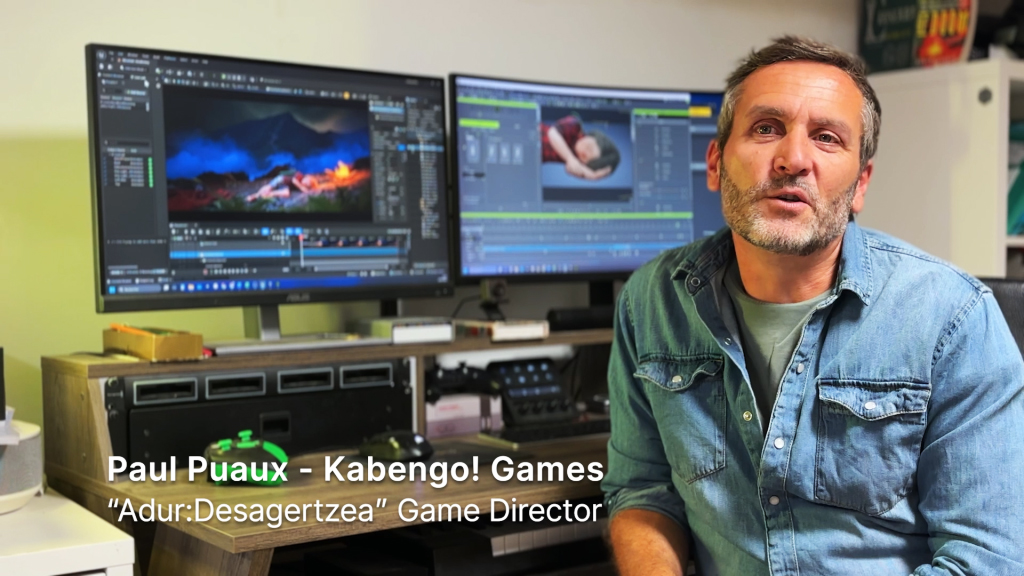
Paul Puaux - Creative / Artistic Director at Kabengo! Games
Paul Puaux – Creative / Artistic Director at Kabengo! Games

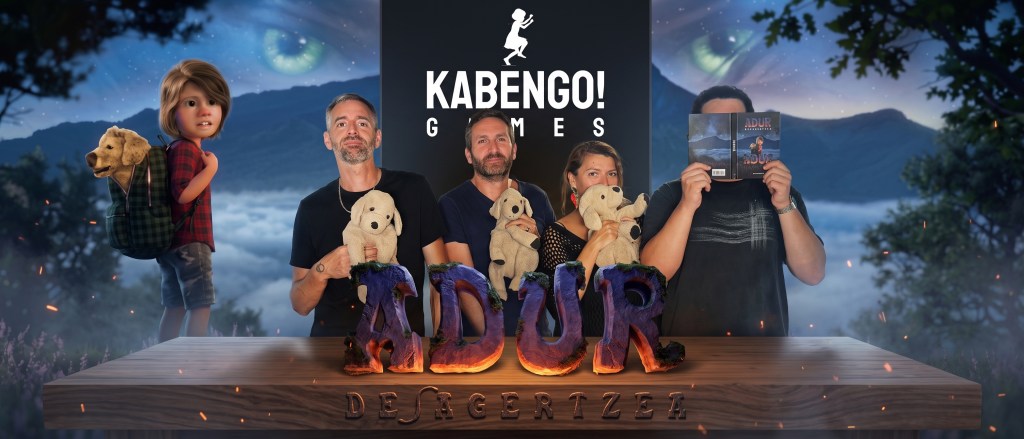
Founded by Creative and Artistic Director Paul Puaux, Narrative Lead Myriam Gallo, Composer Rémi Lonca, and a senior technical supervisor, Kabengo! Games sets out to craft atmospheric 2.5D adventure games that bridge regional heritage with modern real-time technology. Adur: Desagertzea is a cinematic platformer deeply rooted in Basque mythology, voiced in Euskera (the Basque language), and inspired by 1990s narrative classics like Another World, Flashback, and Heart of Darkness.

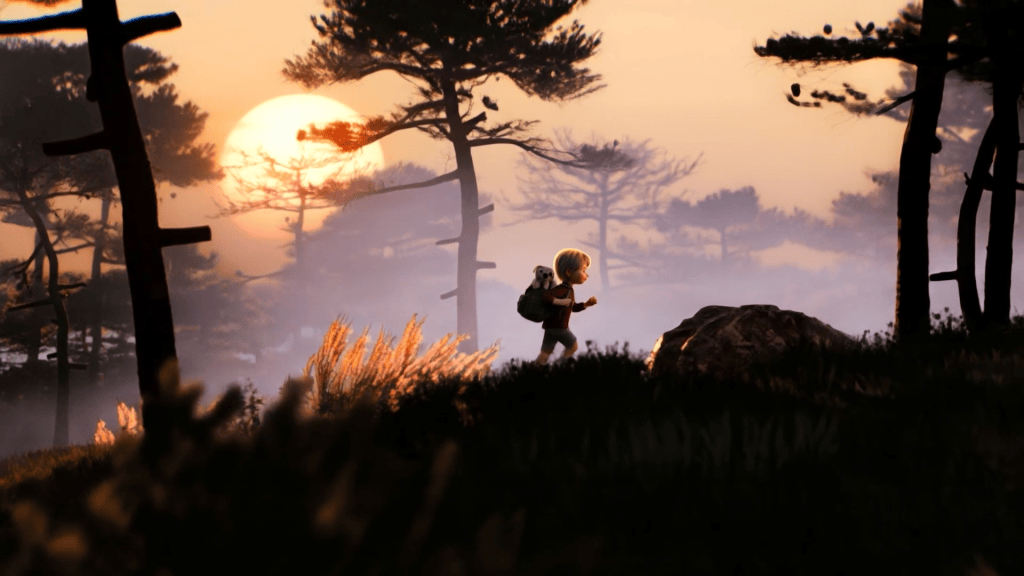
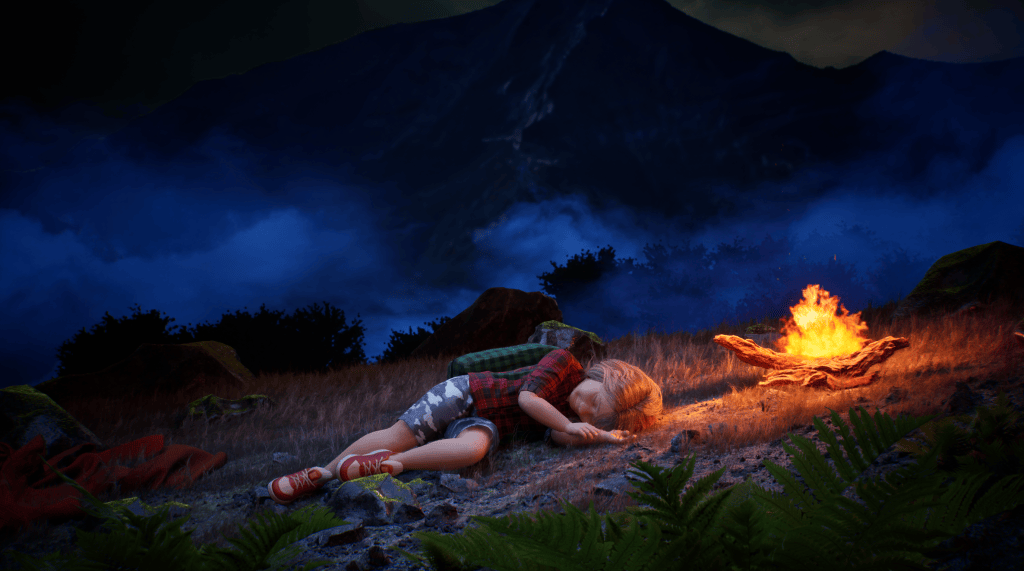
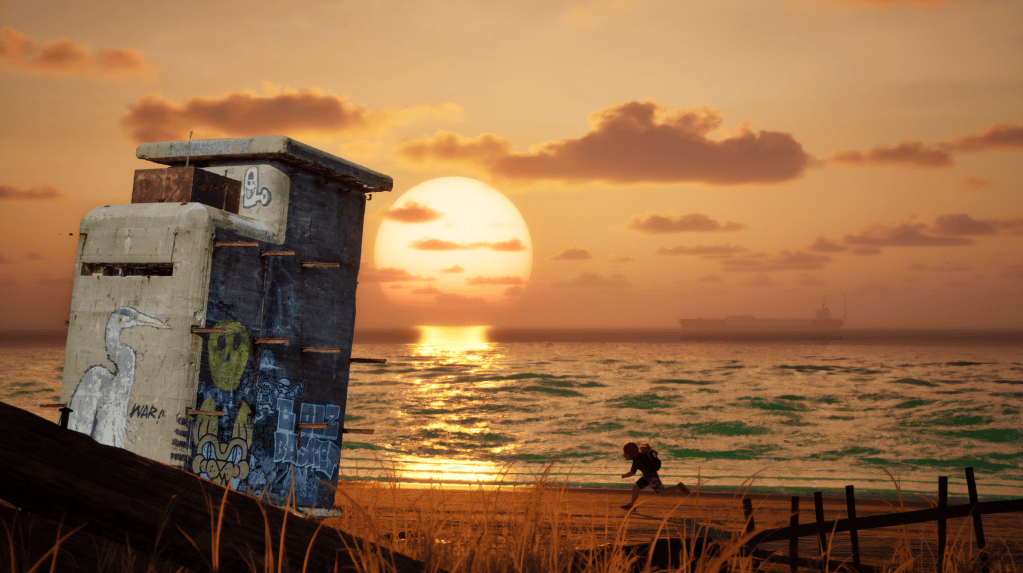
To achieve their specific visual goals—a balance halfway between realistic detail and a stylized “puppet diorama”—Paul turned to Character Creator 5 and iClone 8 connected via Unreal Auto Setup and LIVE LINK to Unreal Engine 5.

  • Studio Name: Kabengo! Games
  • Location: Southwestern France (near Bordeaux)
  • Key Team Members: Paul Puaux (Creative & Artistic Director), Myriam Gallo (Narrative Lead), Rémi Lonca (Composer), Senior Technical Supervisor.
  • Debut Project: Adur: Desagertzea (Cinematic 2.5D Platformer)
  • Digital Footprint & Official Channels:
Indie dev workflow: Character Creator 5 designing stylized 3D characters & iClone 8 animating for Unreal Engine 5 on dual monitors.

Technical Pipeline Overview

Pipeline StagePrimary Software & PluginsKey Technical Function / Benefit
Character Creation & MorphingCharacter Creator 5 (CC5), ActorMixerBlends body/facial proportions to achieve stylized “puppet diorama” silhouettes.
Shading & TexturingCC5 Shader Engine, Overdriven SSS, SkinGenCombines clay shaders, dynamic pores, wrinkles, and custom stencils in UE5.
Animation & Motion EditingiClone 8, Motion Layer Timeline, AccuFACEParametric facial expressions, procedural IK/FK switching, and motion editing.
Real-Time IntegrationiClone Live Link, Reallusion Auto Setup for UE5Streams poses and animations instantly into Unreal Engine 5 Sequencer.
World Building & RenderingUnreal Engine 5, Lumen, Nanite, RTX/DLSSReal-time global illumination, high-poly geometry rendering, and cinematic post-processing.

Pitch & Produce Interview: Paul Puaux on Adur: Desagertzea

Paul Puaux, Kabengo! Games, showing Character Creator 5 UI with stylized Adur character for Unreal Engine 5 game dev.

Q1: What inspired Adur: Desagertzea, and how does blending 2.5D exploration mechanics help you showcase Basque traditions and language?

Paul Puaux: The basic idea behind Adur: Desagertzea stems from a family anecdote in which my son nearly ran away from home one evening whilst my wife and I were gone on a night out. Gradually, the idea of turning this scenario into a game took shape.

Together with the team, we mixed and remixed the idea until it incorporated the story of our hero Adur and his grandfather Aitatxi into Basque history and mythology, set in the region where we grew up.

The team shares many common references from 1990s narrative platformers—Another World, Flashback, Heart of Darkness—and modern successors like Inside and Little Nightmares. 2D/2.5D allows us to weave narrative and gameplay together into a cinematic tapestry where the player is the hero. Basque mythology and language are cultural isolates. This oral tradition enables us to create a world blending the ancestral and the modern—from small fishing villages to ancient forges, mountains, and the ocean.

Stylized CC5 female character washing clothes in glowing cave, demonstrating "Adur's" realistic-cartoon blend.

“2D/2.5D is an incredibly creative medium because it allows us both to speak directly and explicitly to the imaginations and fears of players of all ages, and to weave narrative and gameplay together into a cinematic tapestry.”

Paul Puaux – Creative / Artistic Director at Kabengo! Games

Q2: For Adur, you needed a specific “puppet diorama” aesthetic. Why did you choose Character Creator over photorealistic options like MetaHuman Creator?

Paul Puaux: We realized early on that the storyline would be hard to build without a strong connection to our characters. The emotion they convey is essential for gameplay and cinematics. It was a no-brainer that we needed a flexible pipeline to experiment with their physical presence.

I turned to Character Creator, having used it for years across various projects. Moving to CC5 brought features like ActorMixer, which we used to achieve our specific body and face proportions. Features like overdriven Subsurface Scattering (SSS), realistic wrinkles, pores, scars, and freckles mixed with clay shaders are now regular parts of our design process.

Through the remastered Reallusion Auto Setup plugin for Unreal Engine 5, porting custom shaders turns into an exploration experience. We combine Reallusion’s built-in shading engine with Unreal’s post-processing stencils to create the stop-motion animation look of our main characters and the etched, scribbled appearance of our villains, the Beldurrak.

In that way, it shortens the path from the intention to the final render. And as time always matters in long-term projects, opting for this pipeline is a choice that’s definitely worth it.

“We combine Reallusion’s built-in shading engine with Unreal’s post-processing stencils. In that way, it shortens the path from the intention to the final render. And as time always matters in long-term projects, opting for this pipeline is a choice that’s definitely worth it”

Paul Puaux – Creative / Artistic Director at Kabengo! Games

Q3: Can you break down your animation pipeline? How does iClone LIVE LINK inside Unreal Engine 5 help a small team achieve cinematic quality so quickly?

Paul Puaux: Working in small teams on characters, world, shading, and animation is known for being a one-man band’s job. Building character reactions—whether physical or emotional—is the final gap that creates the “suspension of disbelief”.

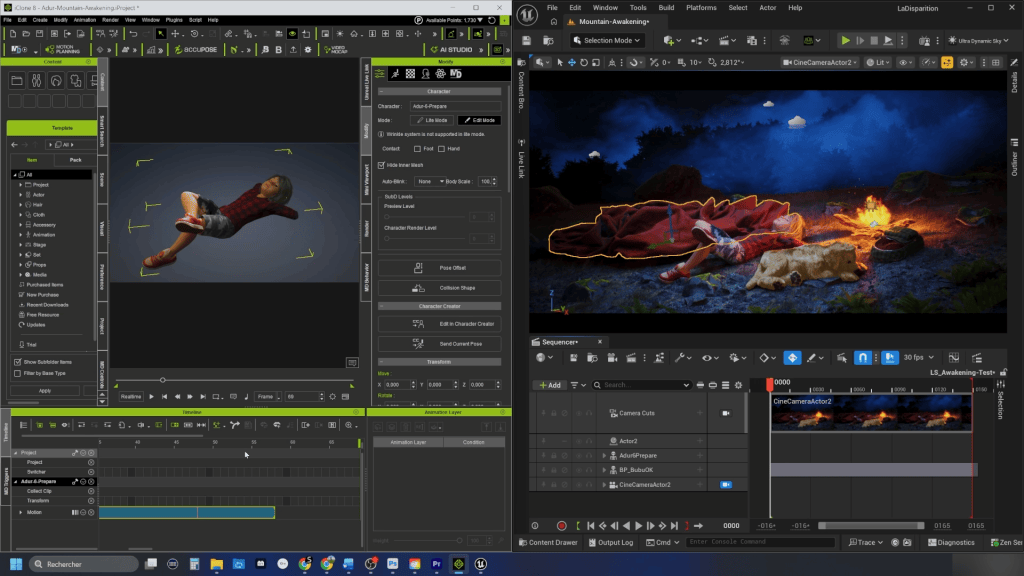
Working with a direct link between iClone and Unreal Engine makes a massive difference. In iClone, pose and motion libraries let us quickly explore parkour-inspired movement, Basque pelota games, or caricatural moves. Multiple motion layers in a dedicated timeline allow us to edit face muscles, expressions, switch IK/FK, or correct foot sliding.

Pushing everything to Unreal Engine via Live Link allows us to adjust framing inside the final lighting setup. From there, we bake animations for our Animation Blueprints (ABP) or use Take Recorder in Sequencer while leveraging Lumen, Nanite, and RTX/DLSS hardware. This “WYSIWYG” approach lets us try 10 or 20 takes fast, pulling out the absolute best from our source material.

“Working in a constant link between iClone and Unreal Engine really makes a difference when it comes to testing, staging, and direct cinematics and gameplay. In iClone, the pose and motion libraries help us quickly explore many possibilities, such as parkour-inspired motion, basque pelota games, or more cartoonish caricatural short moves.”

Paul Puaux – Creative / Artistic Director at Kabengo! Games

Q4: With your crowdfunding campaign launching soon, where can players follow your progress, and what pipeline advice do you have for other indie studios?

Paul Puaux: Our website www.kabengo.games is our central hub where the crowdfunding campaign will launch in the coming weeks. You can also follow us on YouTube, Instagram, and Facebook under Kabengo! Games, where we regularly share workflows, production logs, and behind-the-scenes updates.

Hearing Aitatxi speak Euskara to his grandson and seeing Mari appear as the mountains describe her allows players to experience this world naturally. We’re not archiving a culture; we’re handing it a controller.

My advice to solo and indie newcomers: gathering tools that fit your project is the fueling engine that keeps your world faithful to your idea. The Reallusion pipeline has been a terrific playground for building the soul of Adur, Aitatxi, and Mari. Making things memorable comes down to the moment when your characters start talking back to you in their own language.

“My advice to solo and indie newcomers: gathering tools that fit your project is the fueling engine that keeps your world faithful to your idea. The Reallusion pipeline has been a terrific playground to work on the soul of Adur, Aitatxi, Mari and all the figures you’ll meet along the way.”

Paul Puaux – Creative / Artistic Director at Kabengo! Games

Conclusion: Real-Time Precision Meets Cultural Storytelling

By pairing Character Creator 5 with iClone 8 and Unreal Engine 5, Kabengo! Games demonstrates how small independent teams can deliver cinematic 3D experiences anchored in regional heritage. Rather than relying on generic photorealism or unmanageable manual rigging workflows, Reallusion tools offer indie creators the artistic control needed to bring stylized characters to life efficiently.

To support Kabengo! Games and follow the development of Adur: Desagertzea, visit www.kabengo.games.

Frequently Asked Questions

Q: Why use Character Creator instead of MetaHuman for stylized Unreal Engine 5 games?
A: MetaHuman Creator is designed primarily for photorealism, making stylized art direction difficult. Character Creator 5 provides full morphing control through tools like ActorMixer, allowing developers to customize body silhouettes, face proportions, shaders, and clay textures to achieve unique stylized aesthetics like “puppet diorama” looks.

Q: How does iClone Live Link work with Unreal Engine 5?
A: iClone Live Link creates a real-time connection between iClone 8 and Unreal Engine 5. Animators can edit facial expressions, pose libraries, and motion layers in iClone while instantly previewing the results in UE5 under final Lumen lighting, Nanite geometry, and RTX raytracing.

Q: Can a small indie studio produce cinematic 2.5D games without traditional render farms?
A: Yes. Real-time engines like Unreal Engine 5 combined with iClone Live Link eliminate offline rendering. Animators preview near-final cinematic quality directly in-engine, enabling small teams to iterate rapidly, record sequences, and bake animations without long rendering delays.

Q: What is Adur: Desagertzea?
A: Adur: Desagertzea is an upcoming 2.5D cinematic platformer developed by French indie studio Kabengo! Games. Voiced in Euskera (Basque) and French, the game combines exploration, combat, and puzzle mechanics while showcasing authentic Basque mythology, language, and cultural traditions.

Read More:

Pitch & Produce: AccuFace as the Solution for Rapid Film Production

Creating an Action Comedy Game with AccuRIG Realtime Tools

3D Virtual Fashion with Character Creator Digital Humans

Pitch & Produce | History YouTube Channel Selects iClone and Character Creator for Speedy Production

Download a free 30 day trial of Character Creator 5

AI Studio Storytellers: RUS-T – Millions of Views, Award-Winning AI Film Workflow Unveiled

Written and produced by John C. Martin II, the AI sci-fi short RUS-T follows an abandoned Mars robot forced to choose between duty and survival. The film has become a breakout success story for Reallusion AI Studio, surpassing one million YouTube views, earning festival honors, and topping major AI film platforms. Ultimately, RUS-T proves that with the right hybrid tools, any independent creator can produce world-class, critically acclaimed cinema.

Hits 1 Million YouTube Views and Earns Global Festival Recognition

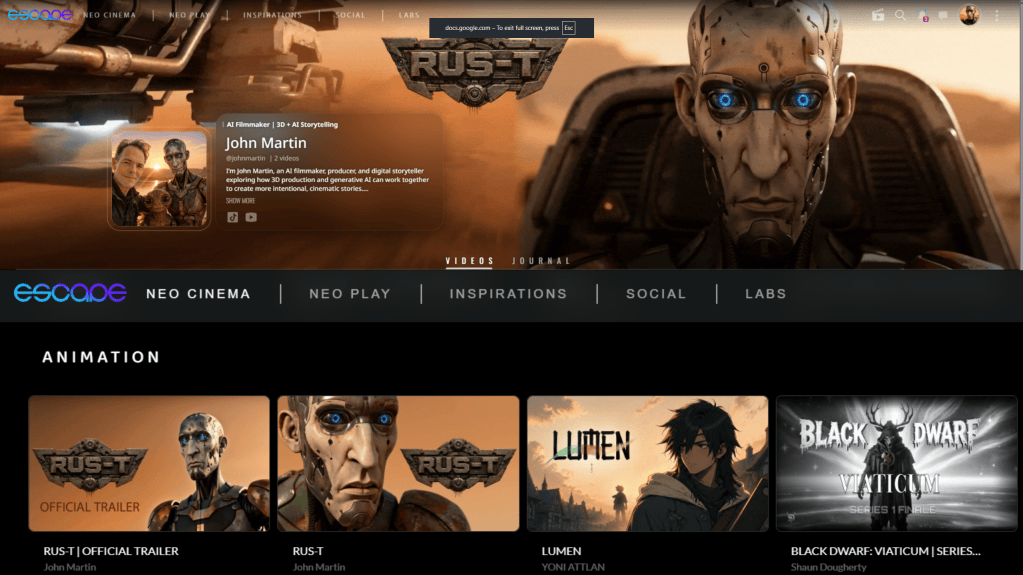
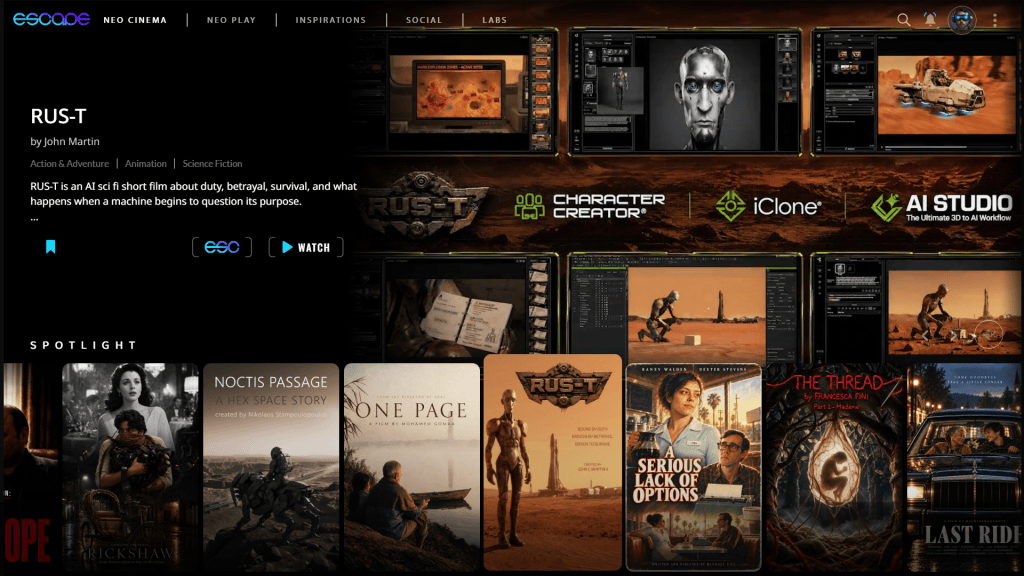
Since its release on August 31 2026, RUS-T has found a growing audience, achieving one million views on YouTube. The film has also expanded to Escape.ai, where RUS-T is featured as part of its curated collection of AI filmmaking and Martin has joined the platform as an official Escape.ai Creator

Check out John’s channel on Escape.ai: https://escape.ai/@johnmartin

RUS-T has also received festival recognition, being named a New York Short Animation Film Festival, AI Animation Finalist marking another milestone for the project as it reaches audiences beyond its original online release.

Furthermore, John Martin has been recognized at a TOP CREATOR at SHAIKE.AI, a platform for the world’s best AI filmmakers. RUS-T is featured among the industry’s elite films.

Check out John’s channel on SHAIKE: https://shaike.ai/shaiker/john-martin/ 

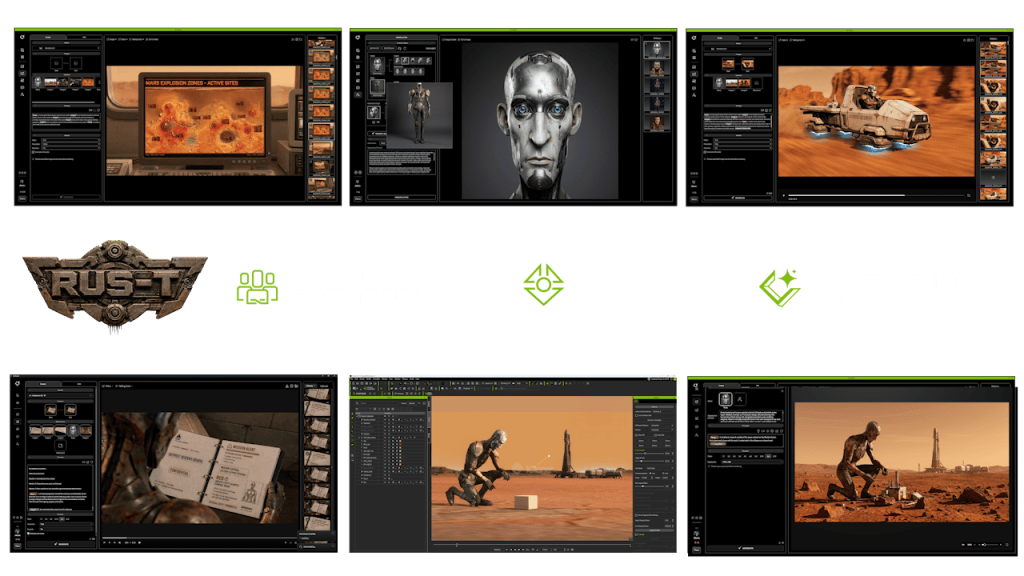
RUS-T Behind the Scenes | 3D to AI Production Workflow

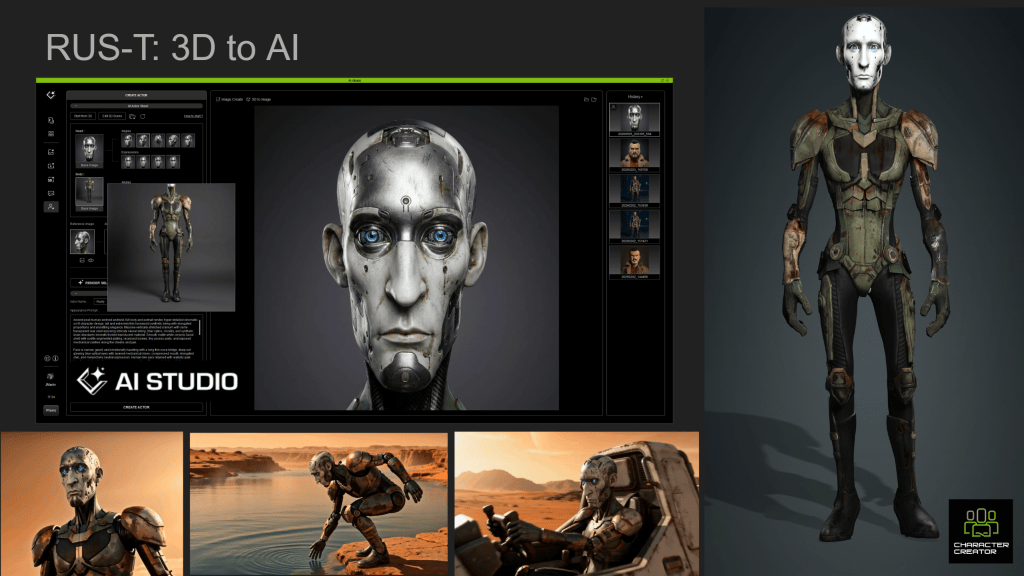
Behind that response is an equally interesting production story. RUS-T began as a 3D character and an experiment with Reallusion’s 3D-to-AI workflow, eventually growing into a complete short film.

In RUS-T: Behind the Scenes, Martin breaks down that process and shows how Character Creator, iClone and Reallusion AI Studio became the foundation for bringing RUS-T from a 3D actor into a generative AI production.

Filmmaker John C Martin II, Vice President of Marketing at Reallusion and originator of Reallusion AI Studio, wanted to explore a fundamental question facing AI filmmakers: How do you gain more control over generative AI without giving up the speed and creative possibilities that make it so exciting? His answer was to start in 3D.

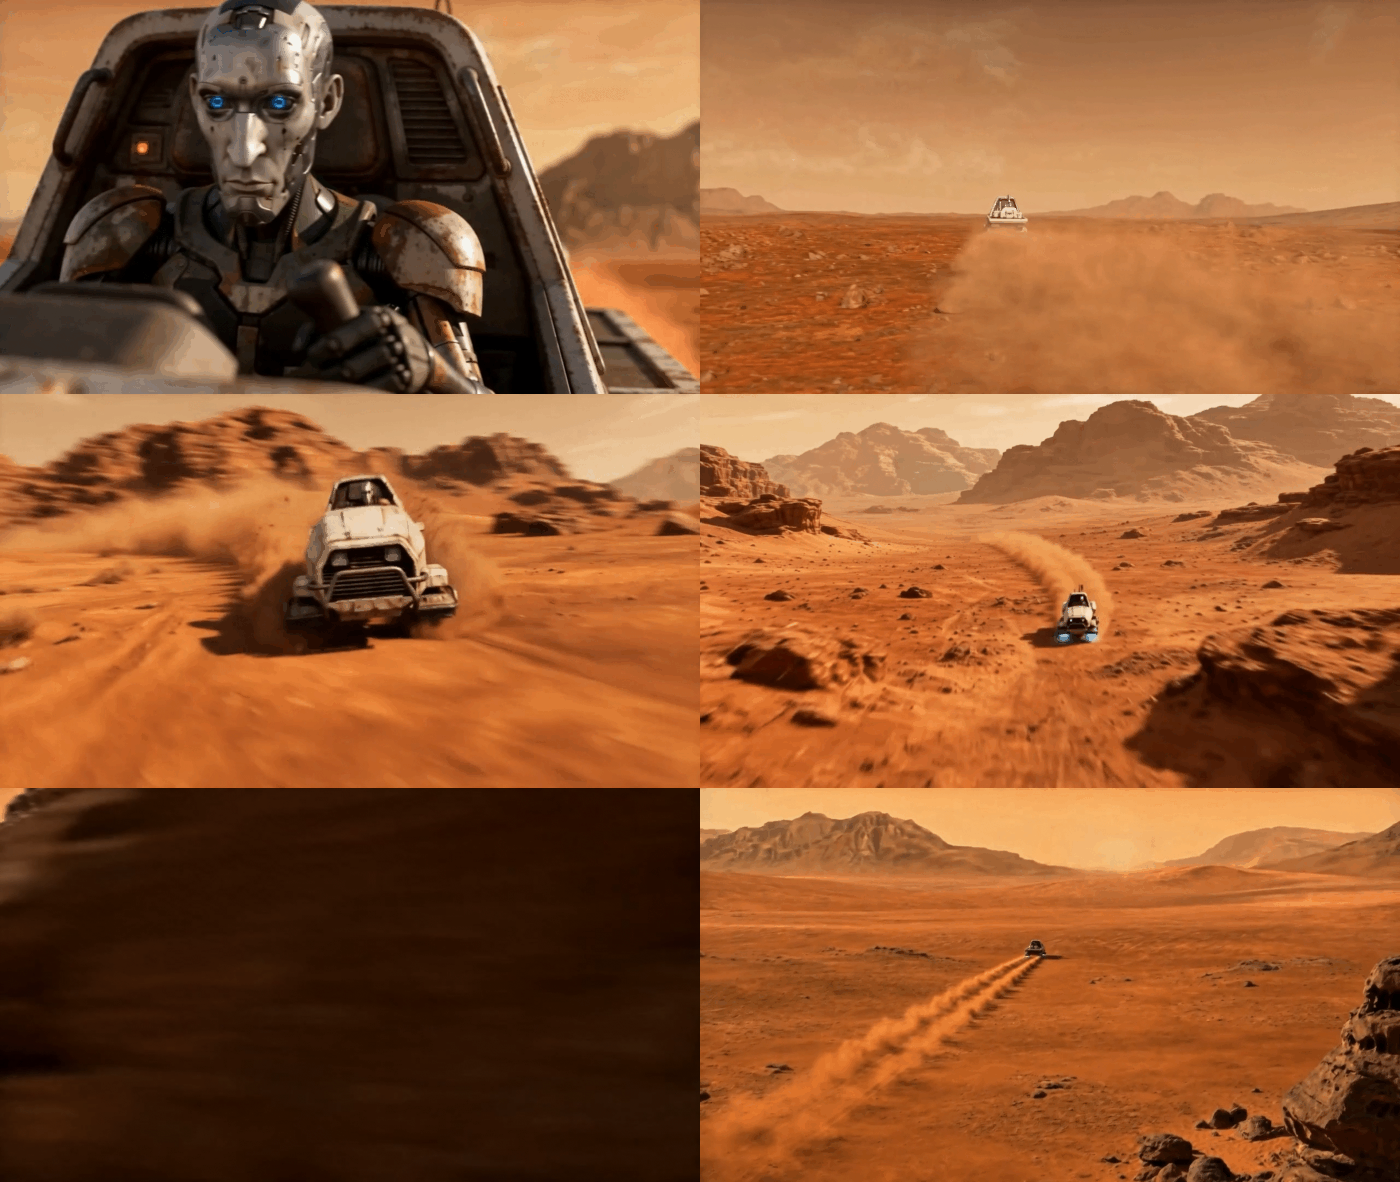
What began as a test using a Character Creator actor and an iClone scene eventually grew into RUS-T, a science-fiction short about a robot abandoned on Mars and forced to choose between the mission he was built to serve and his own survival. Behind the finished film is a production workflow that connects traditional 3D filmmaking with generative AI.

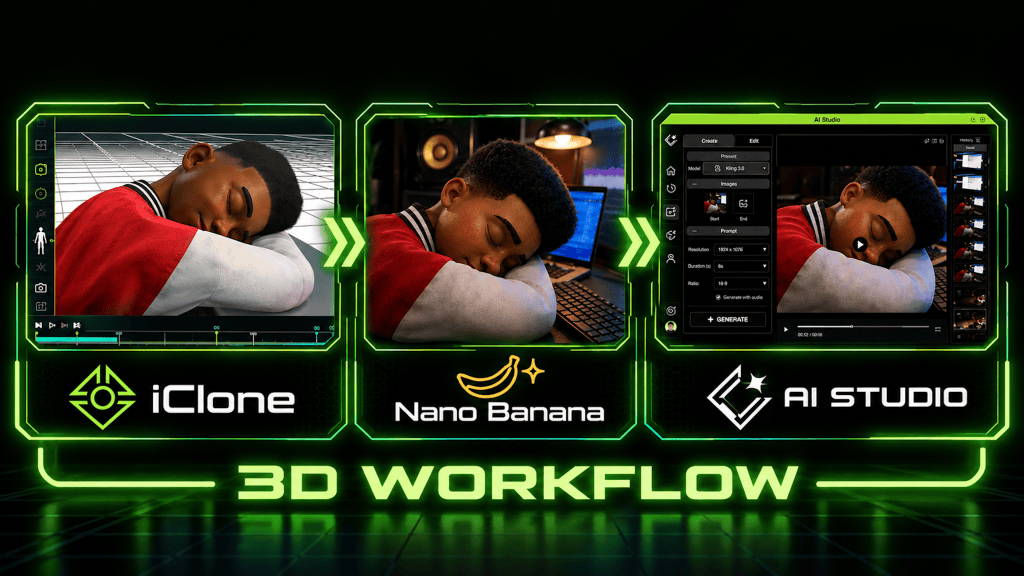
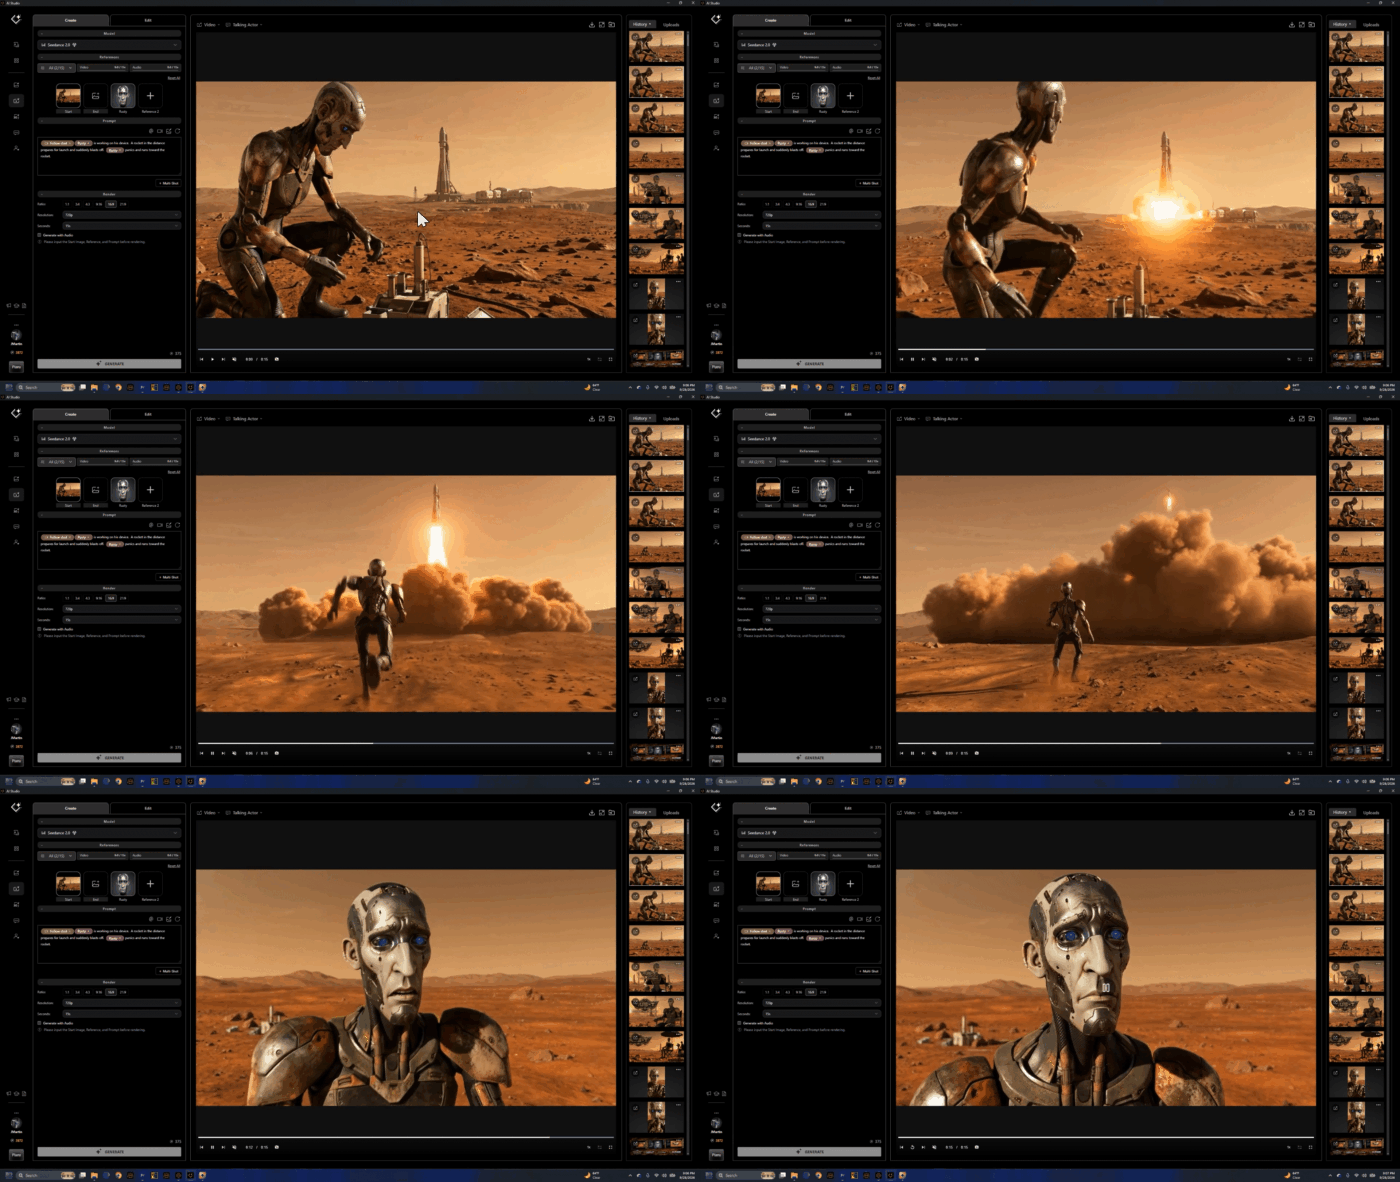
Rather than asking AI to invent every shot from scratch, Martin used Character Creator and iClone to establish the actor, performance, camera, composition and spatial relationships, then carried those decisions into Reallusion AI Studio and generative image with Nano Banana and video with Seedance 2.0.

The result is a workflow built around a simple idea: Use 3D for control. Use AI to take the shot further.

RUS-T Started as a 3D Character

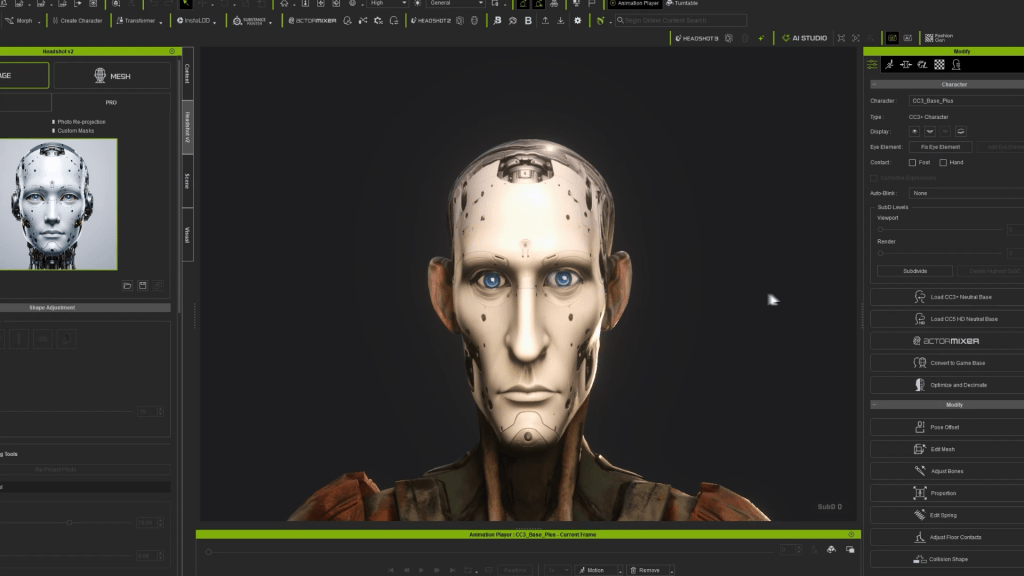
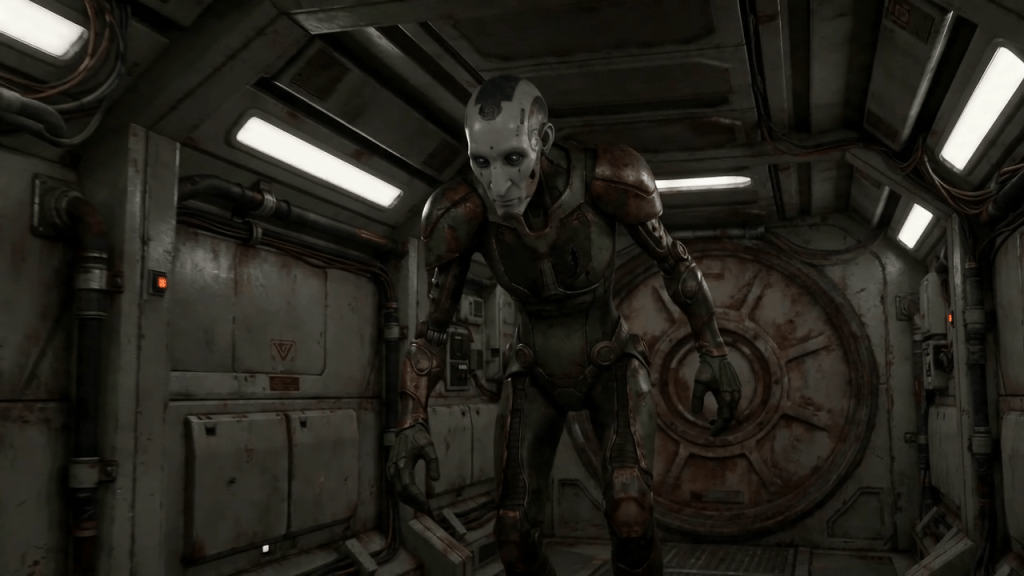
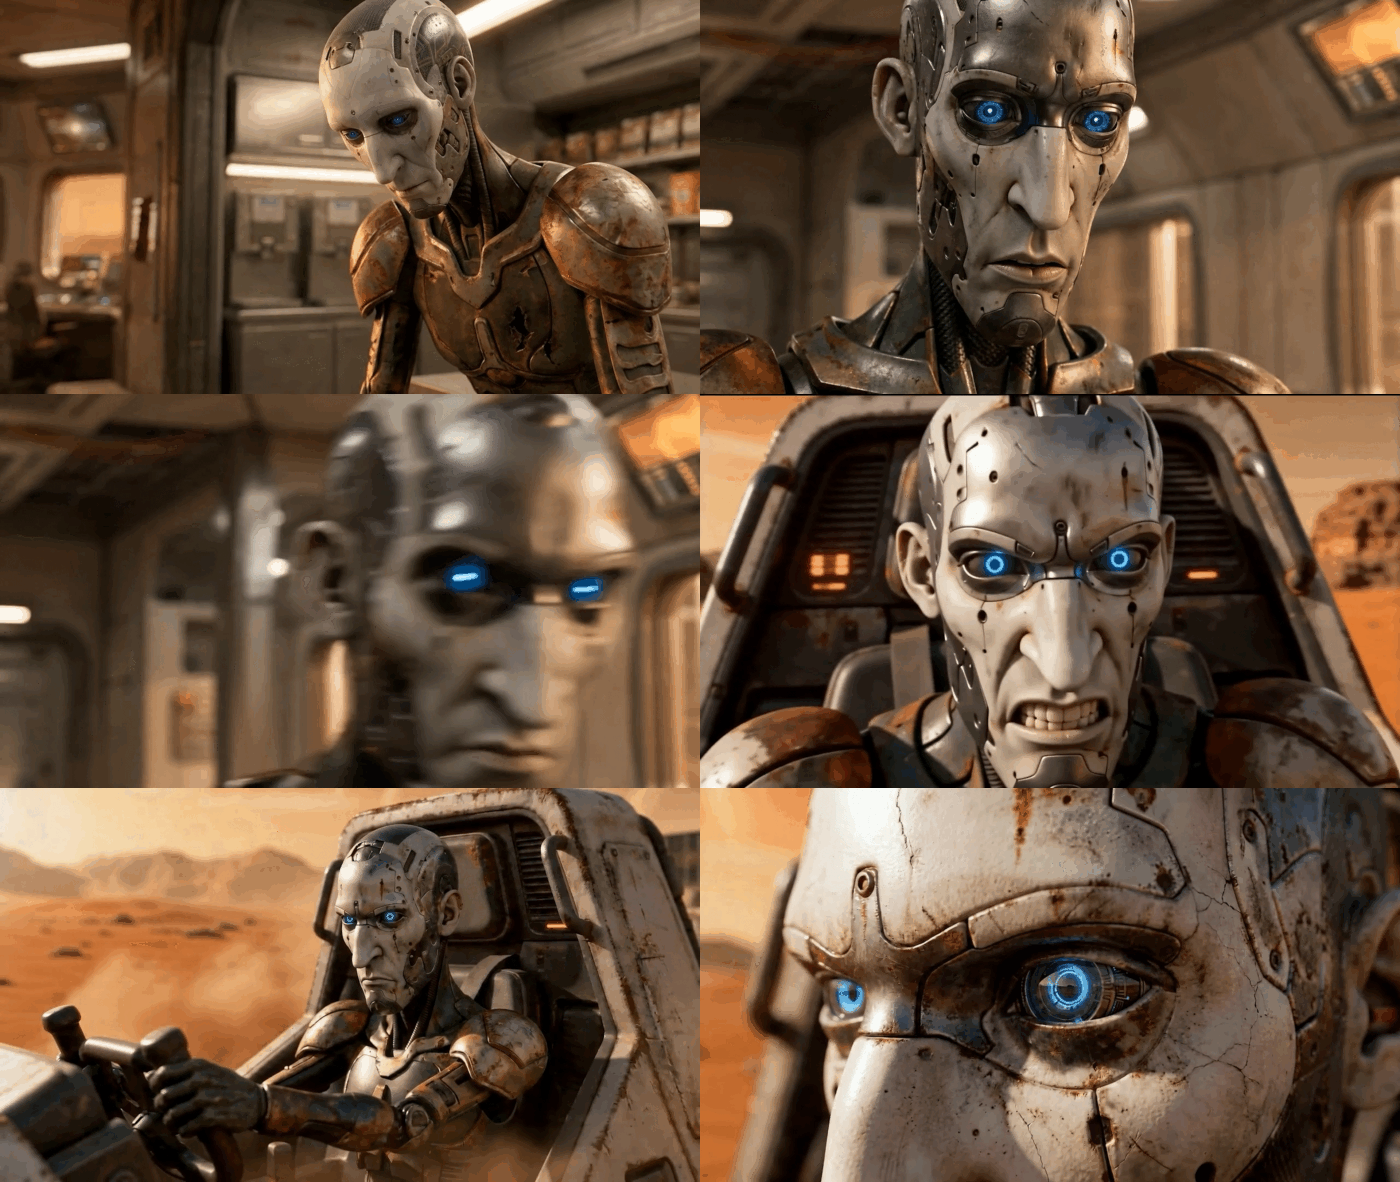
Before RUS-T was an AI Actor, he was a 3D character. The character was developed with Reallusion Character Creator, giving Martin a persistent digital character that could be posed, animated and viewed from any angle. That became increasingly important as the project evolved.

RUS-T appears throughout the film in so many different circumstances and using a 3D character, Martin had already developed, helped with ideation and planning prior to heading from 3D to AI with the project. Character Creator provided that foundation.

In the BTS film, Martin returns repeatedly to the original 3D RUS-T, demonstrating how the character can be viewed and controlled independently of any generated image. Instead of AI being responsible for discovering who RUS-T was in every shot, the production already had an actor. That actor could then be taken into AI with identity and the ability to forego the costly trial and error of generating a character.

The Image That Started the Film

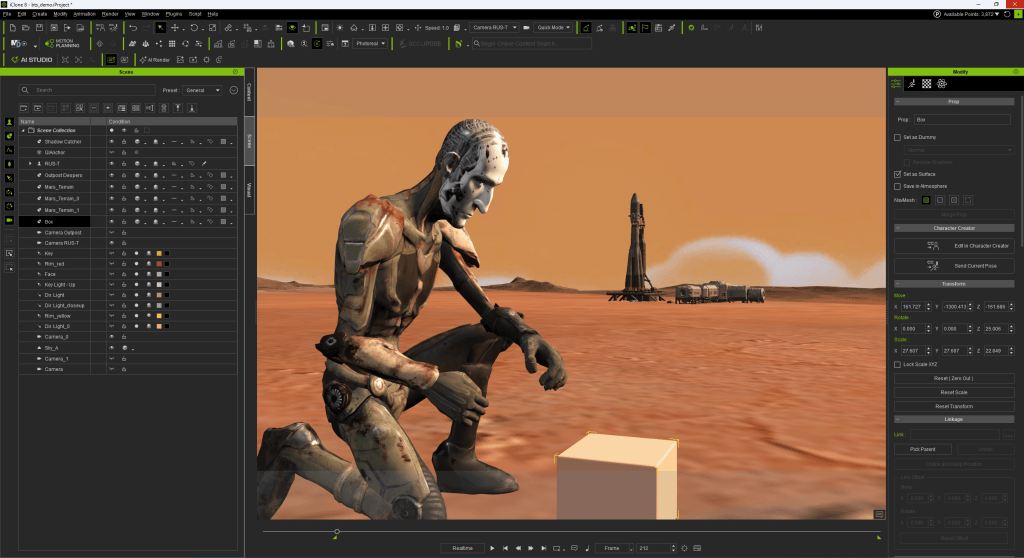
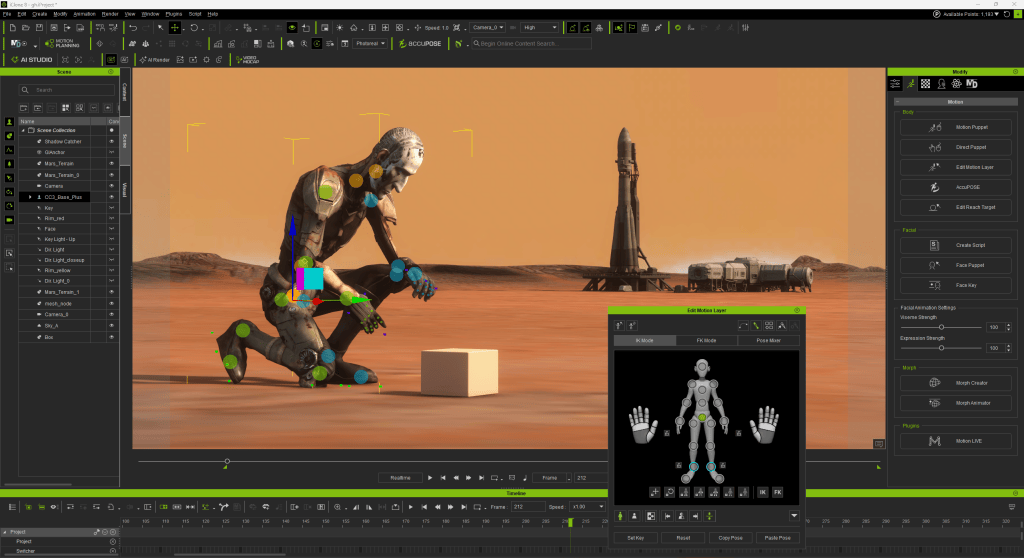
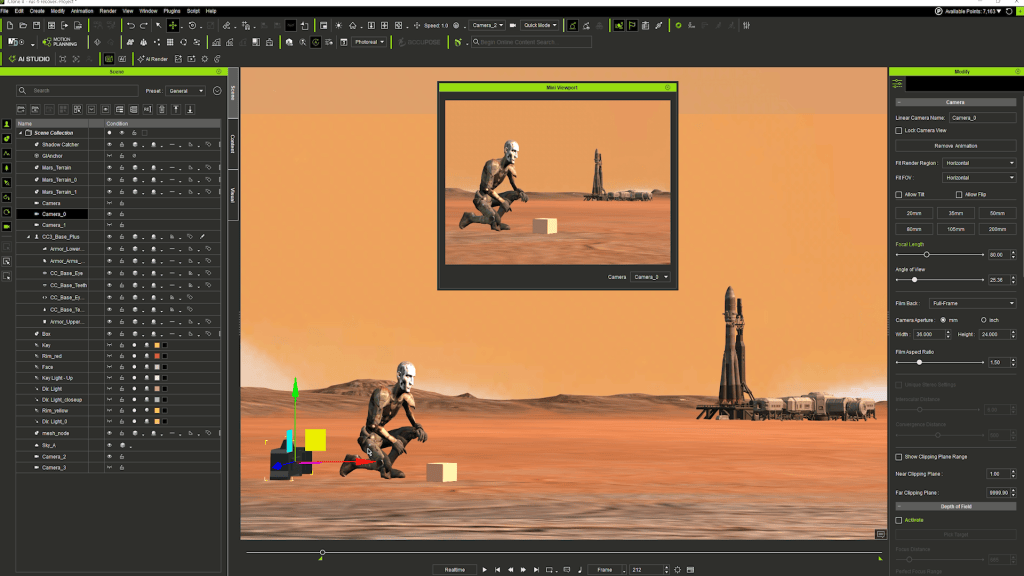
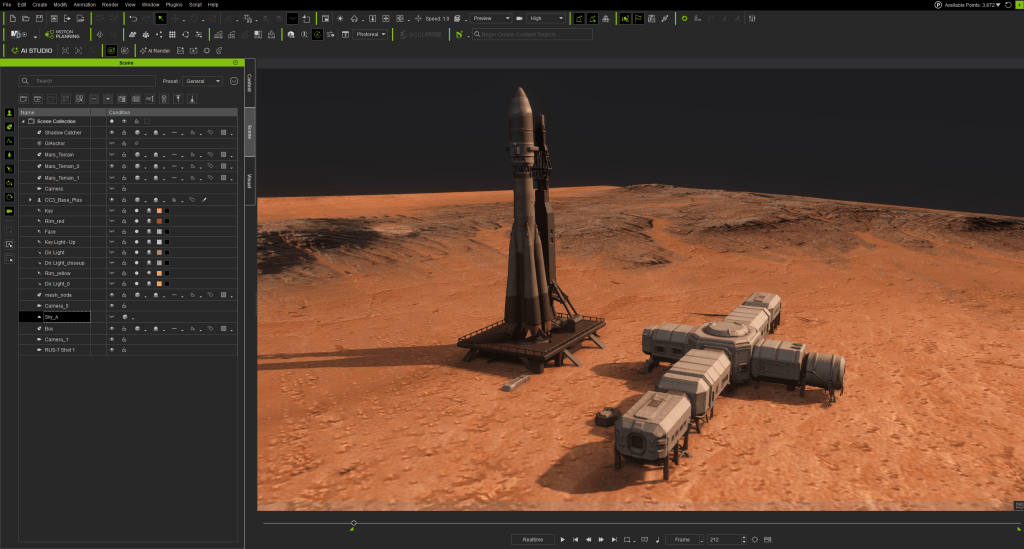
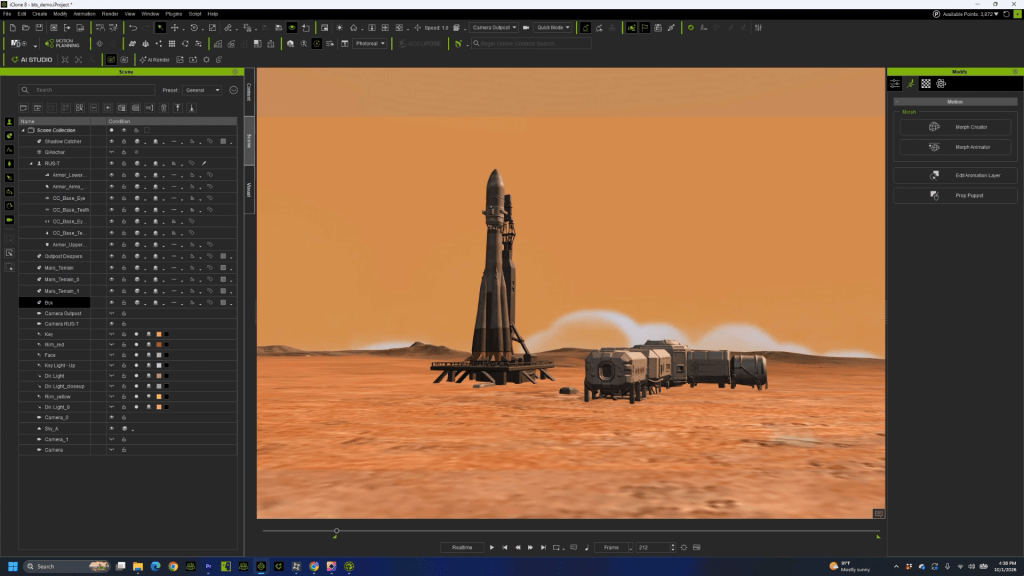
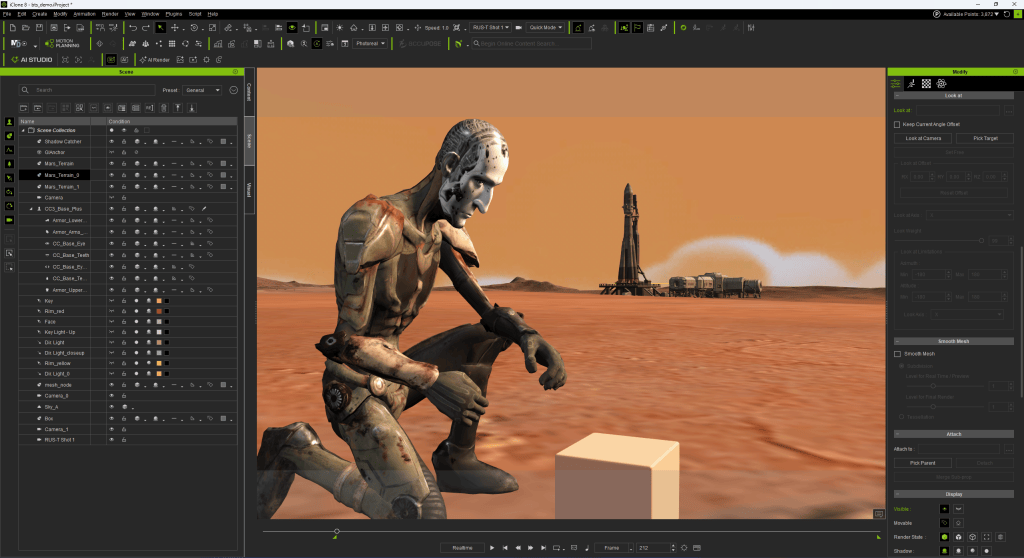
The original experiment brought RUS-T into iClone. Martin constructed a simple Martian scene containing the character, terrain and distant structures, then began exploring how an iClone composition could become the starting point for an AI-generated image. The purpose wasn’t to create a finished 3D render. It was to direct the image.

The character could be positioned precisely. A pose could be selected. The camera could be moved. The framing could be changed. Foreground and background relationships could be established before anything was generated.

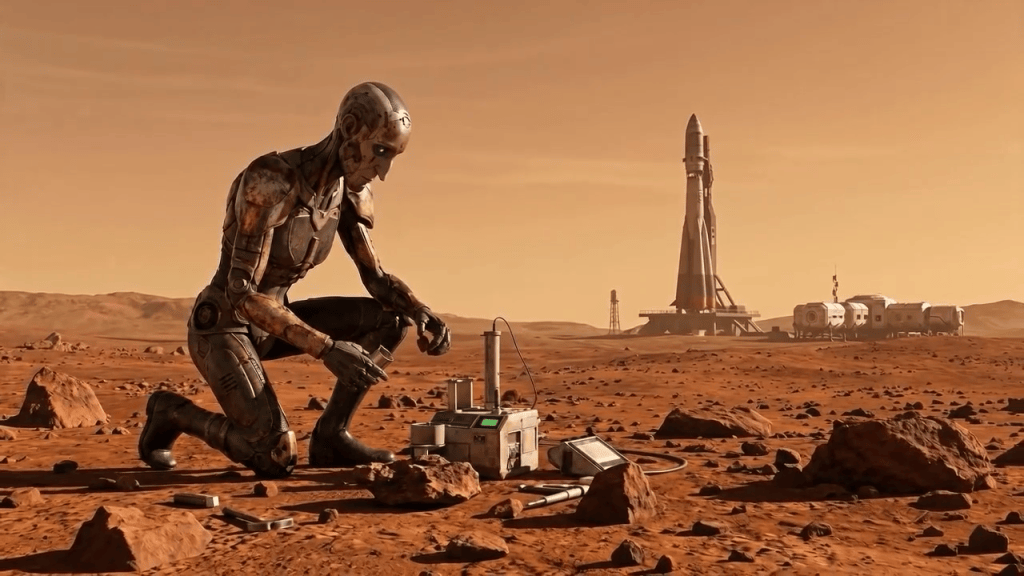
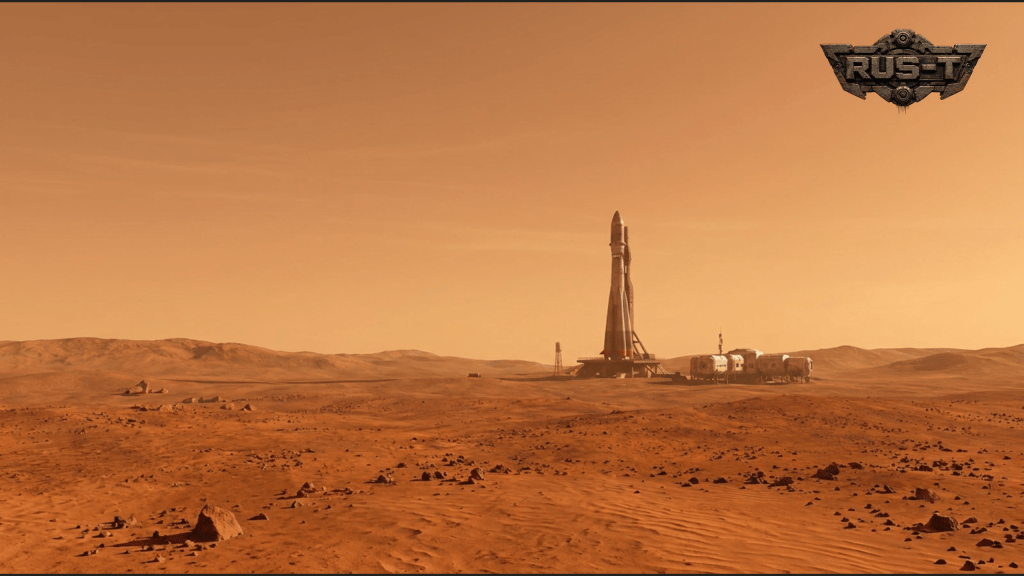
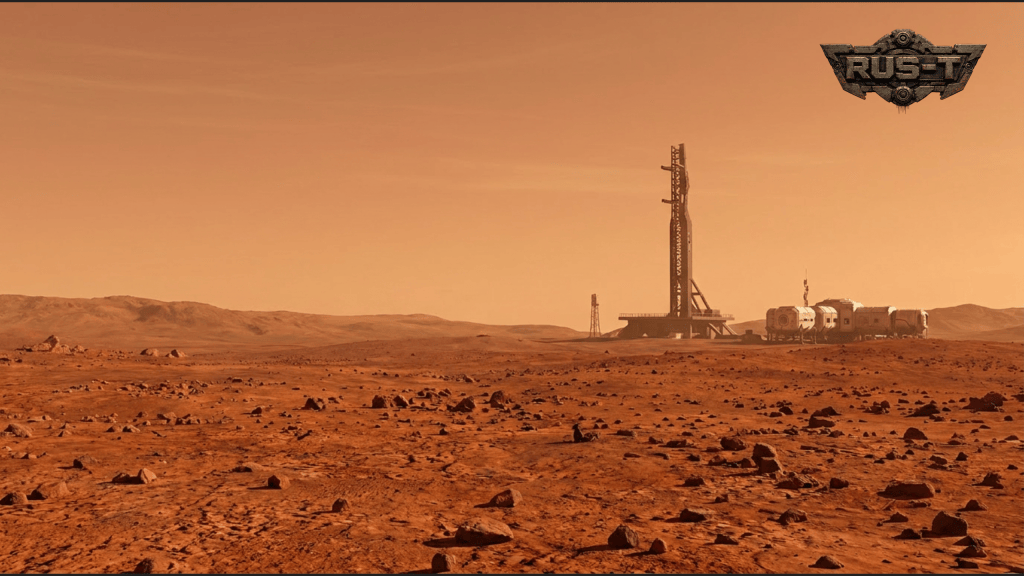
One of those early experiments showed RUS-T alone on Mars with the outpost and rocket in the distance. It was supposed to be a workflow test. Instead, it inspired a story. Who was this robot? Why was he alone? What was his purpose on Mars? Those questions became the beginning of RUS-T.

The technology wasn’t simply used to execute a pre-existing screenplay. Experimenting with the workflow helped Martin discover the film itself.

Turning a Character Creator Model into an AI Actor

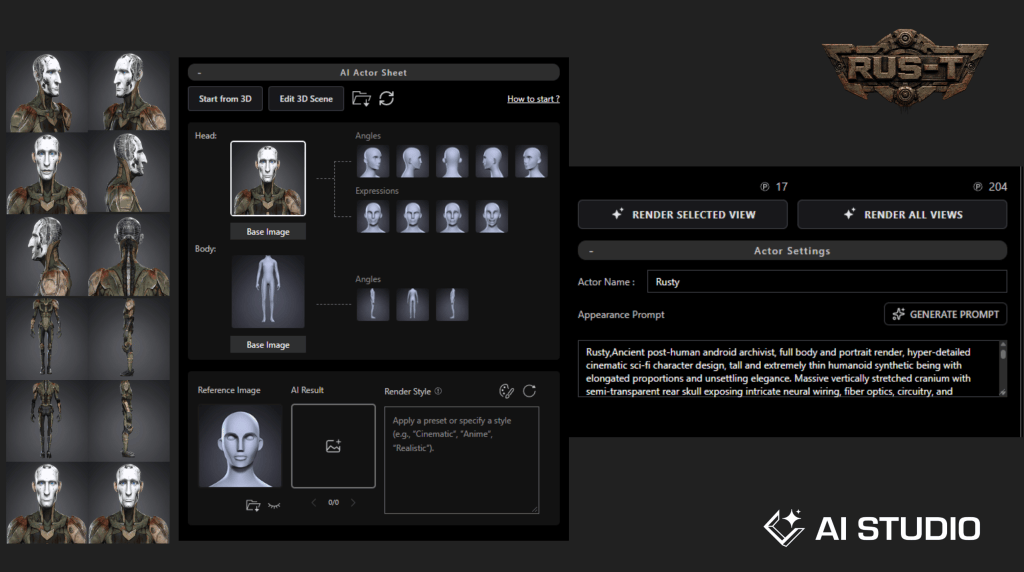
One of the most important demonstrations in the BTS is the transition from Character Creator 3D character to AI Actor in AI Studio. Martin takes the established RUS-T character and uses him to create an AI Actor. This creates a bridge between two very different production environments. On one side is a fully controllable 3D character. On the other is generative AI.

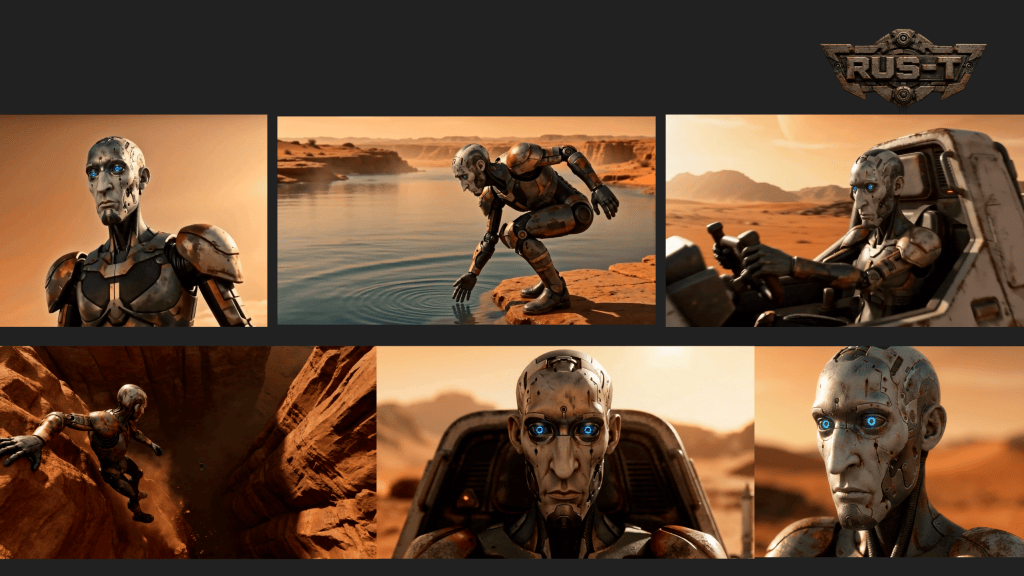
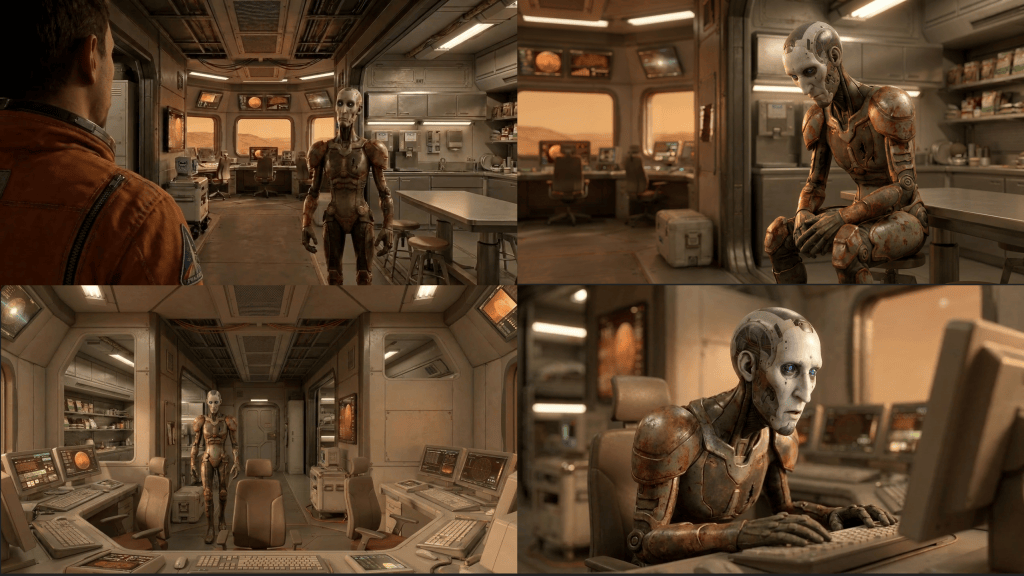
The AI Actor allows the character’s established identity to continue into that generative workflow. That was critical for RUS-T because the character appears across a wide range of situations and shot types. He kneels in the Martian soil, works with equipment, walks through Outpost Despero, reacts to the discovery that he has been abandoned, operates a hovercraft and races across Mars.

The film needed the freedom of generative AI without losing its central character along the way. Martin’s workflow starts by giving AI something concrete to work from. The character exists before the generation.

iClone Becomes a Stage for AI

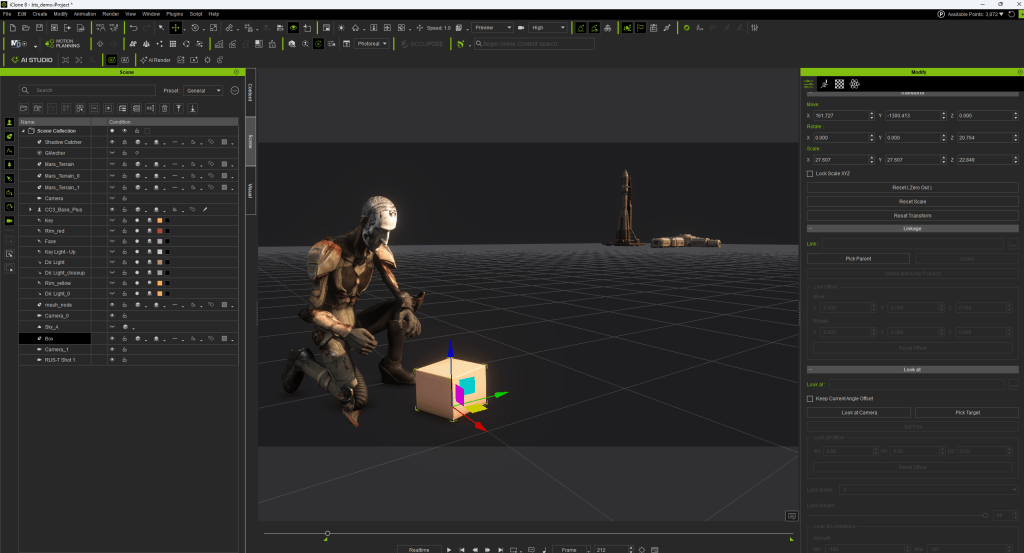
The BTS makes an important point about the role of iClone in this process. It doesn’t have to produce the final image. Instead, it can function as a virtual stage for directing AI shots.

One demonstration begins with RUS-T kneeling beside an object on the Martian surface. Inside iClone, the character’s body position, pose, camera and relationship to the object are clearly defined. The 3D scene is relatively simple like previz. But that simplicity is useful.

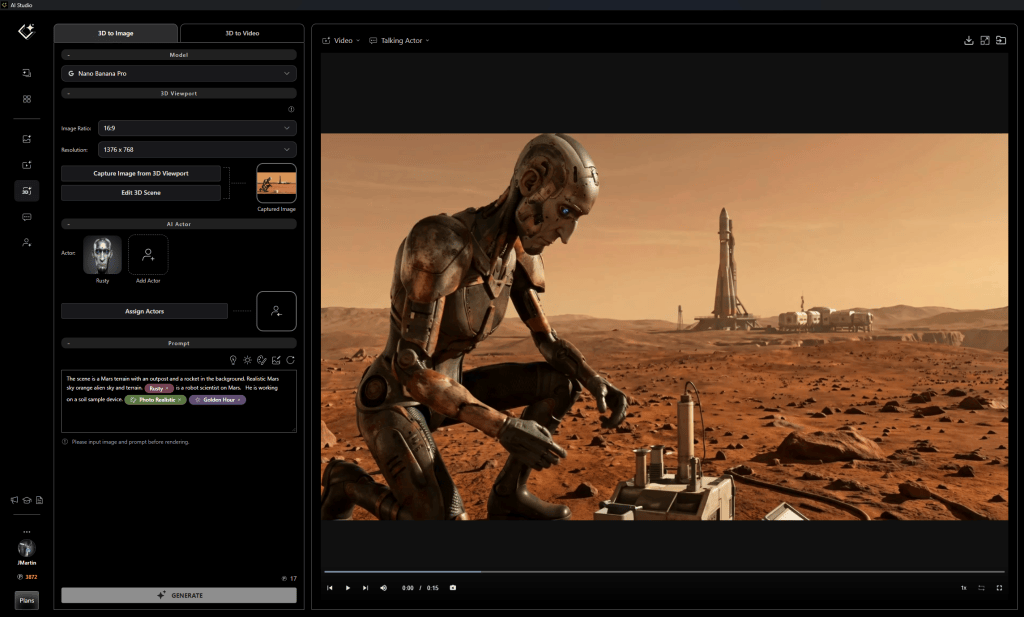
The purpose of the scene is not to solve every visual detail. It is to tell the generative model what matters about the shot. RUS-T’s location and pose. The Outpost and rocket are in the distance. The camera is positioned and the shot is framed. This is the composition. AI can then reinterpret that controlled foundation as a more fully realized cinematic image.

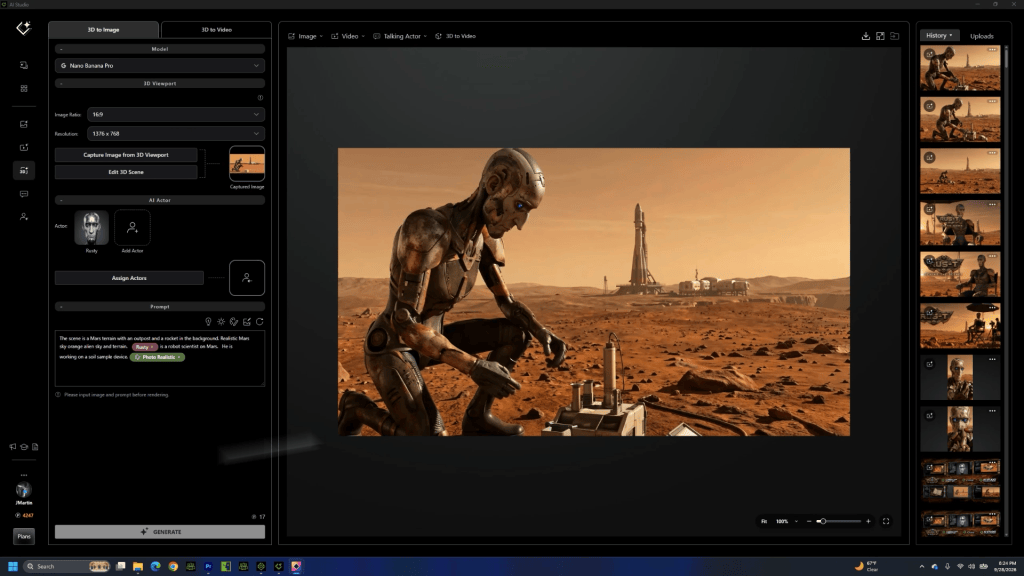
The BTS moves between these stages: the iClone setup and its AI-generated counterpart make the value of the process easy to see. The finished image can change dramatically in visual richness without losing the fundamental filmmaking decisions established and directed in 3D.

Building RUS-T’s World

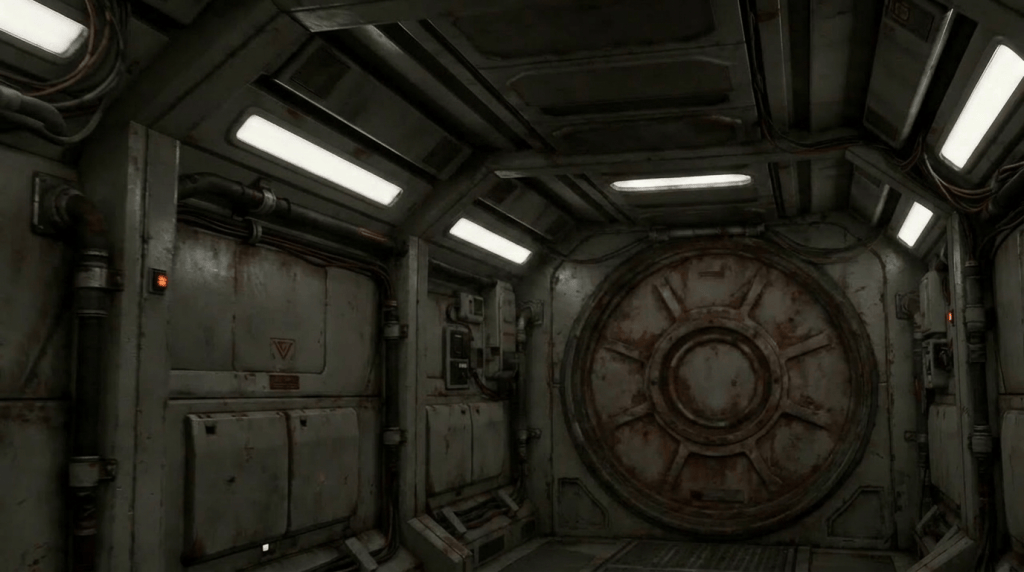
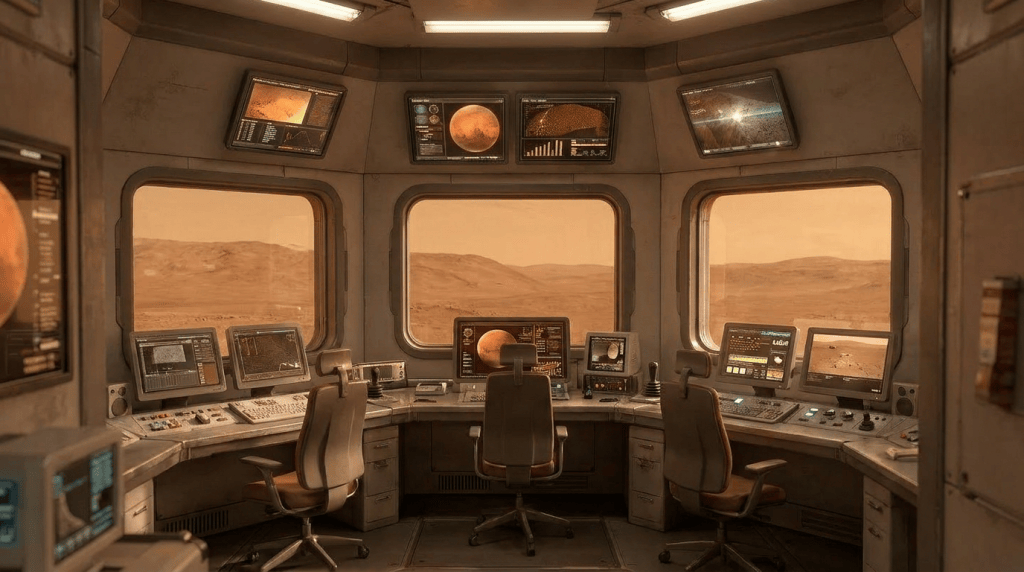
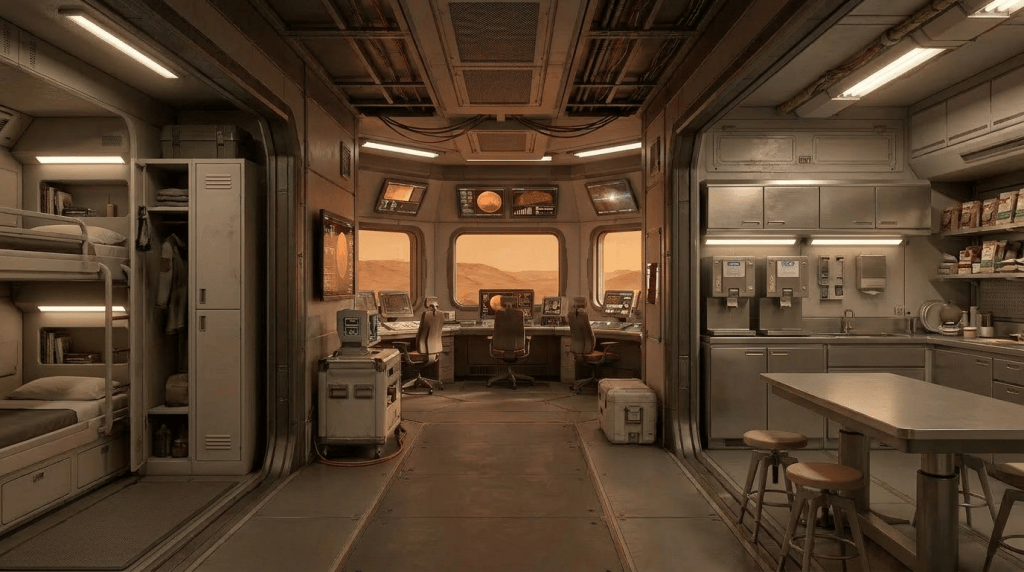
The same principle extends beyond the character. RUS-T needed a believable world around him: the Martian terrain, Outpost Despero, its interiors, the rocket, explosive devices, equipment and eventually the hovercraft that carries him across the planet.

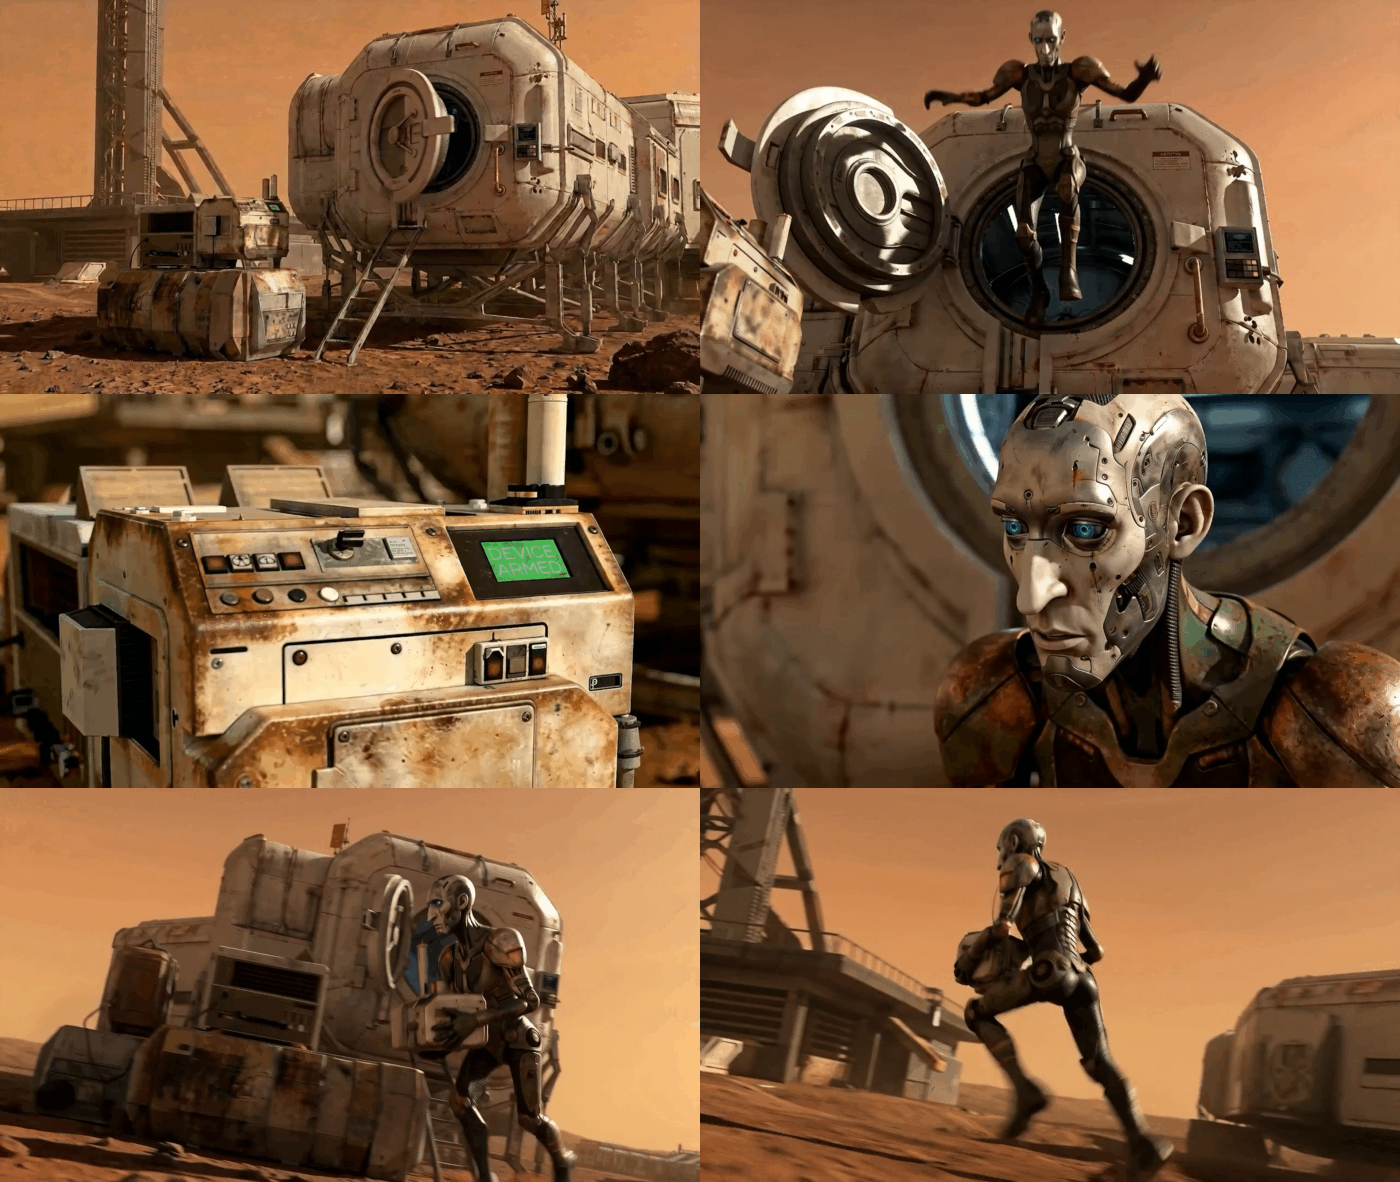
Not everything needed to be traditionally modeled and rendered. Instead, AI could expand the world from established visual references. Generated imagery could be developed into new angles and variations while preserving the elements that mattered to continuity. RUS-T walks back to Outpost Despero. Creating the shots to traverse the terrain and ultimately arrive at the Outpost was part of the coverage that was necessary to develop with AI visuals. AI Studio and Nano Banana made the shot generation possible.

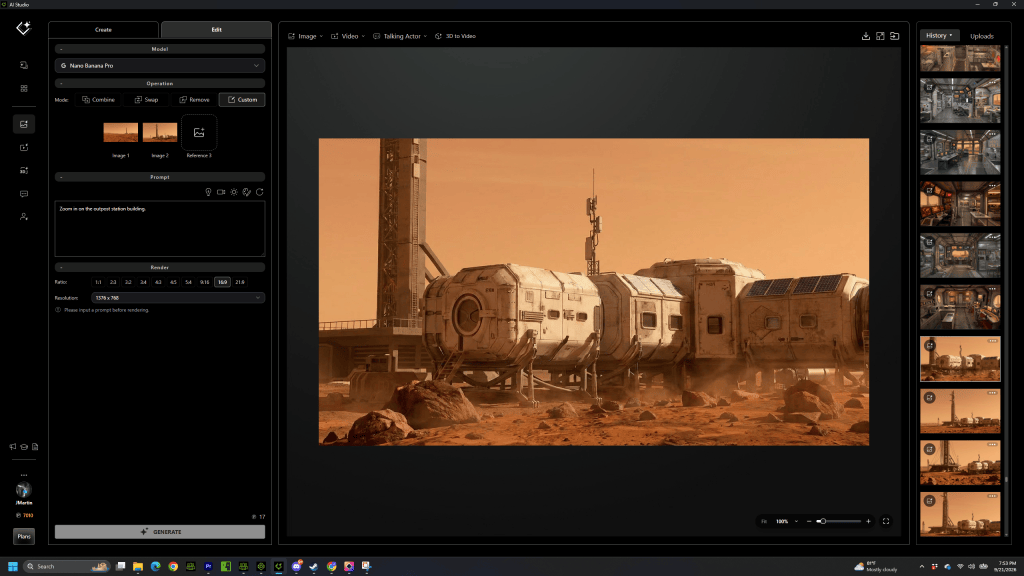
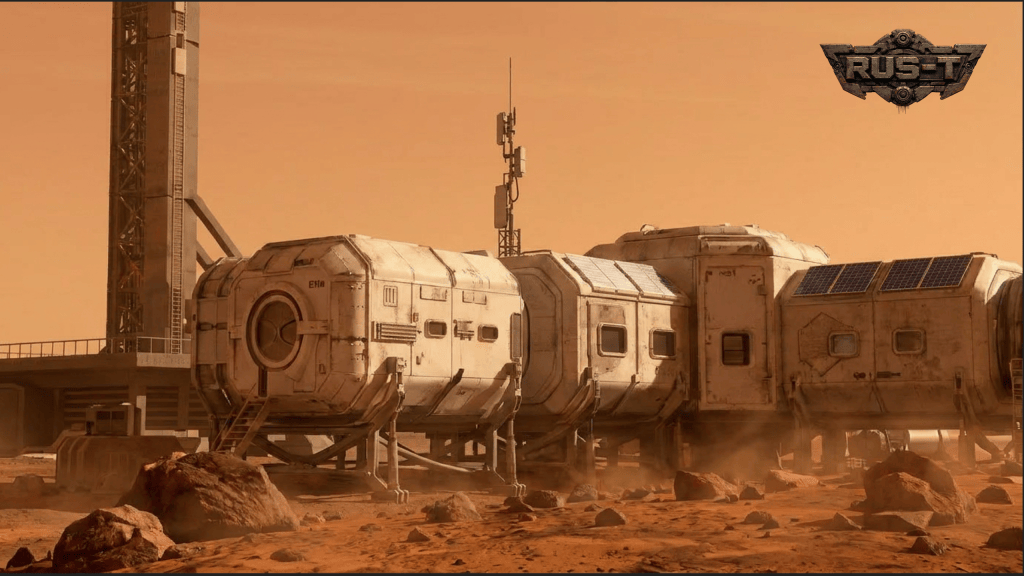
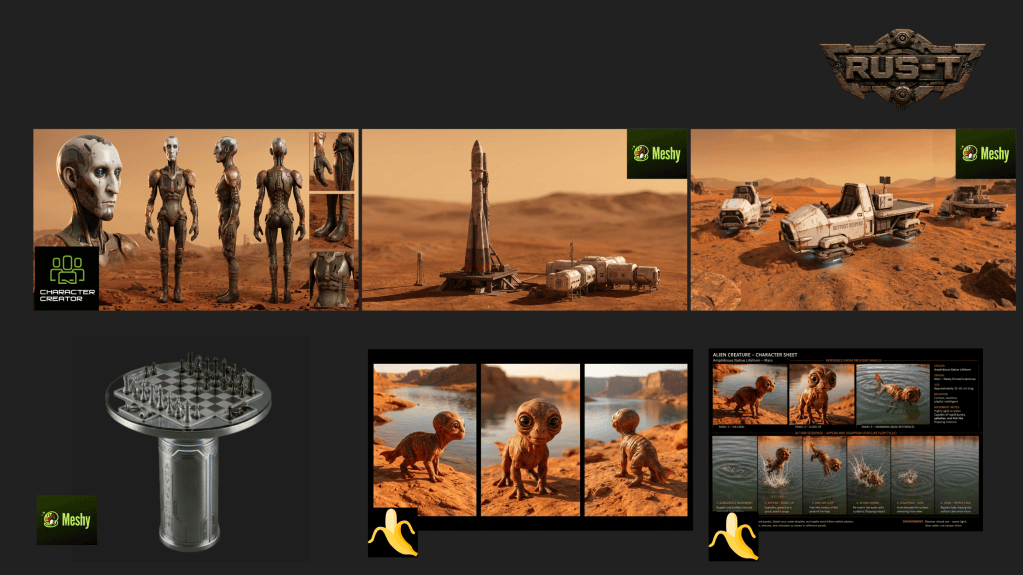
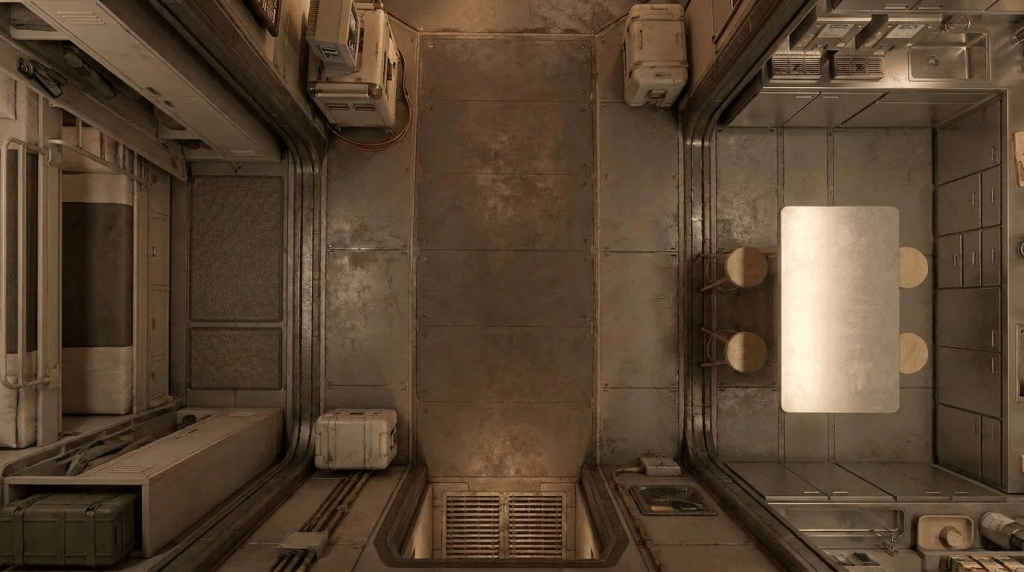
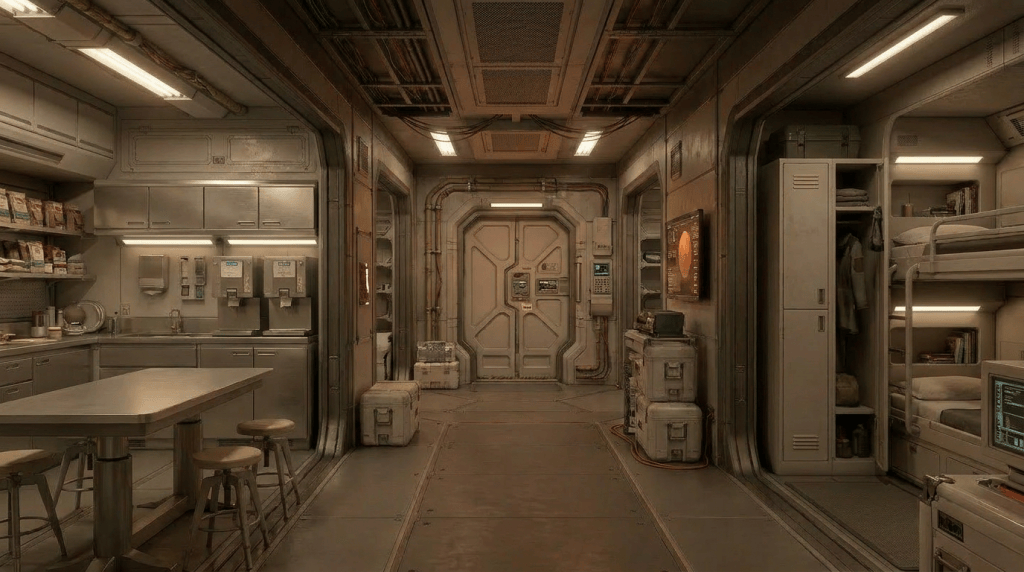
This was particularly important for Outpost Despero. The initial 3D prop was made with Meshy and imported into iClone for scene layout. The exteriors gave RUS-T his destination in the beginning of the film.

The film moves between exterior and interior locations, including areas where RUS-T discovers the truth about his mission. These environments have to feel like parts of the same outpost rather than unrelated AI images. Once a visual direction was established, it could become a reference for additional coverage. The environment itself effectively became another production asset.

Giving Props an Identity

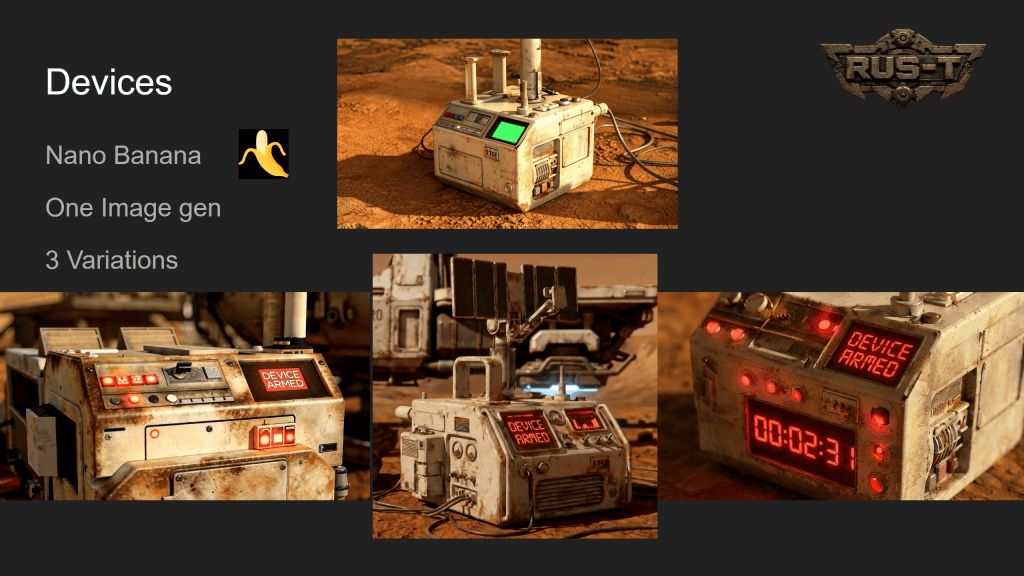
The prop identity is as crucial to the planning and production process for RUS-T as the 3D character creation. A well planned asset development cycle will save loads of time when generation begins occurring. The props are identified by reference models and images to inform the shot make deliberate video generations without overspending budget.

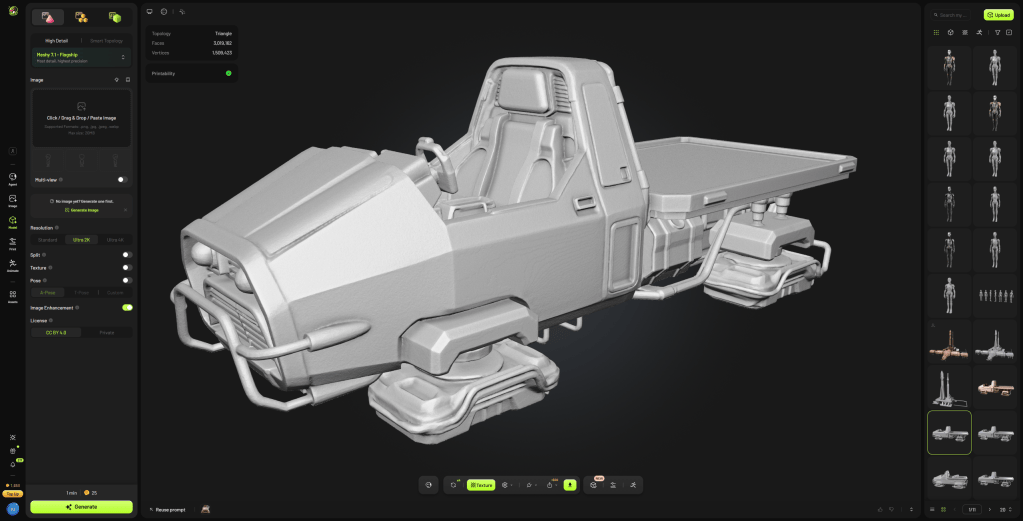
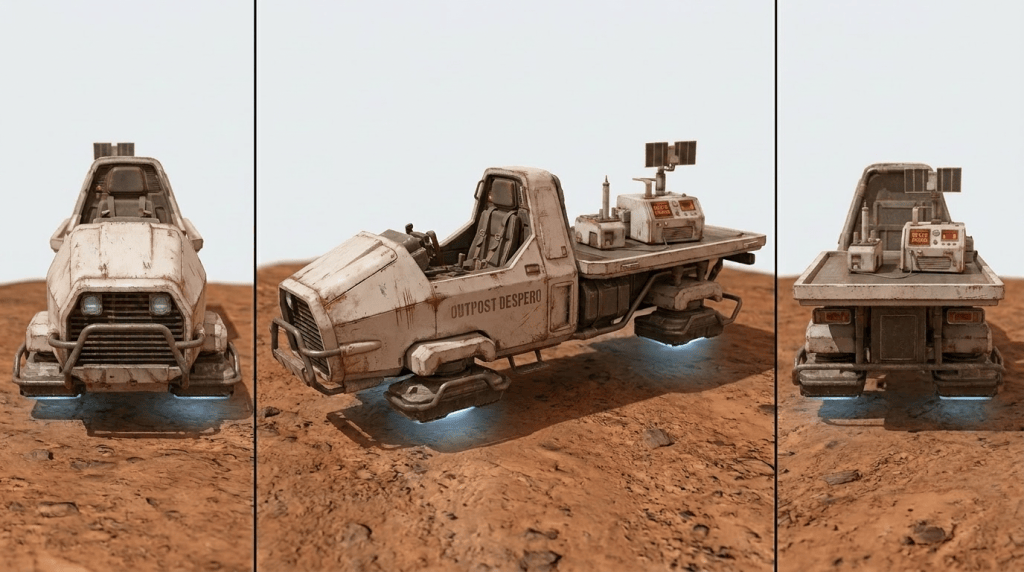
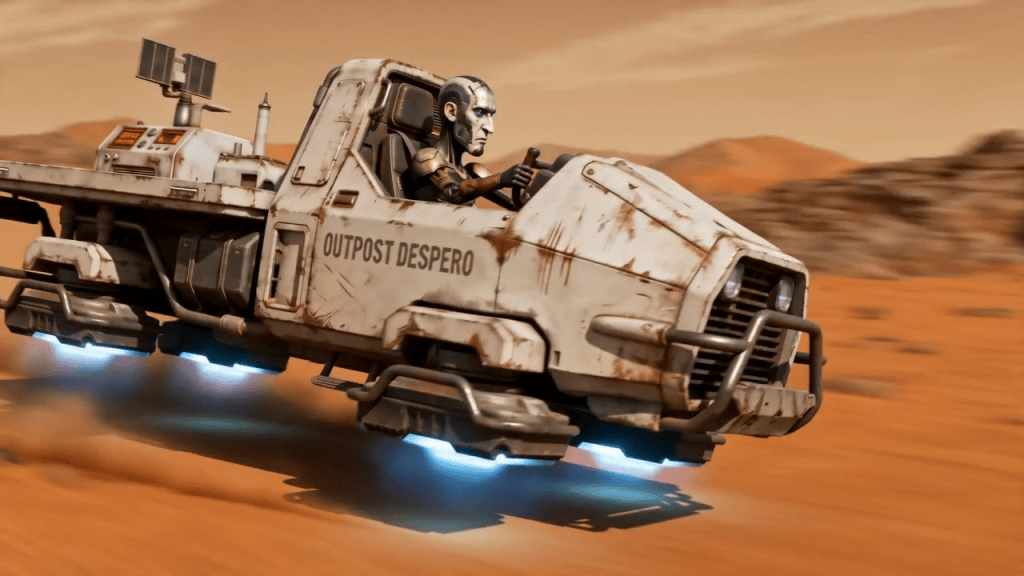
One of the clearest examples in the BTS is the hovercraft. The vehicle plays an important role in the second half of RUS-T. It isn’t background decoration. RUS-T drives it across Mars, carries the explosive devices aboard it and ultimately sends it into the canyon. That means the audience sees the vehicle repeatedly.

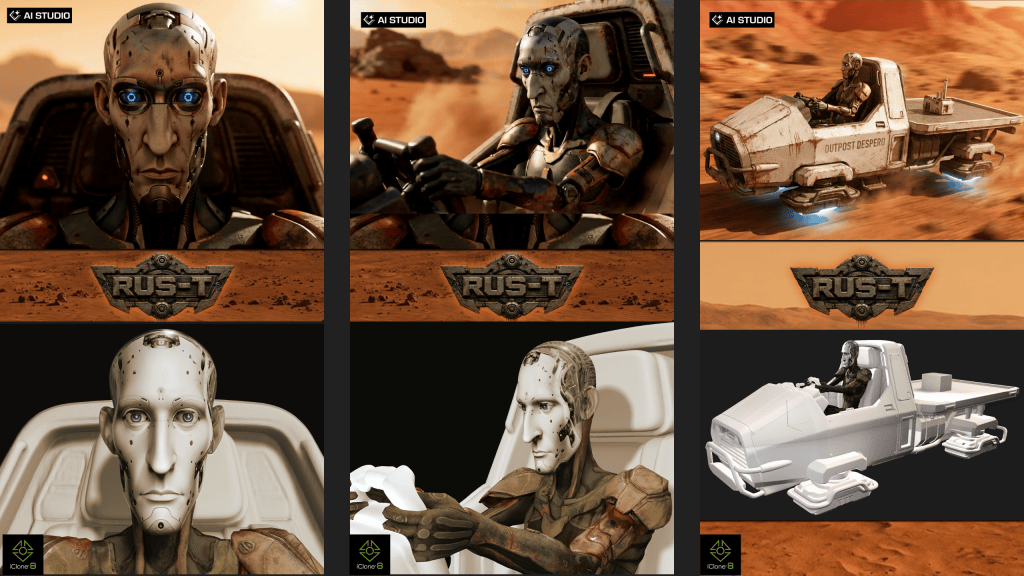
Martin used a 3D asset as the basis for creating multiple visual views of the hovercraft. Those views could then be assembled into reference imagery that communicated the vehicle’s design from more than one angle. It is essentially the same philosophy used for RUS-T himself.

The actor has an identity.

The hovercraft has an identity. The hovercraft was generated in Meshy and then sent to iClone. RUS-T was added to the hovercraft and shots were generated to created the start frames for video gen.

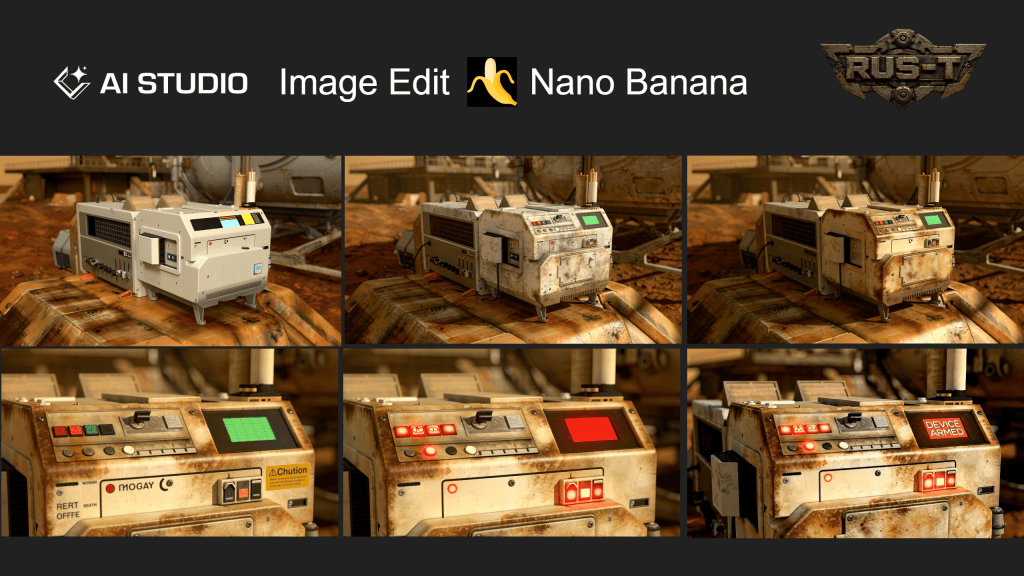
Outpost Despero has an identity. The scenes of the interior were generated using AI Studio and Nano Banana. Coverage was created using Image Edit in AI Studio to get all camera angles for the scenes.

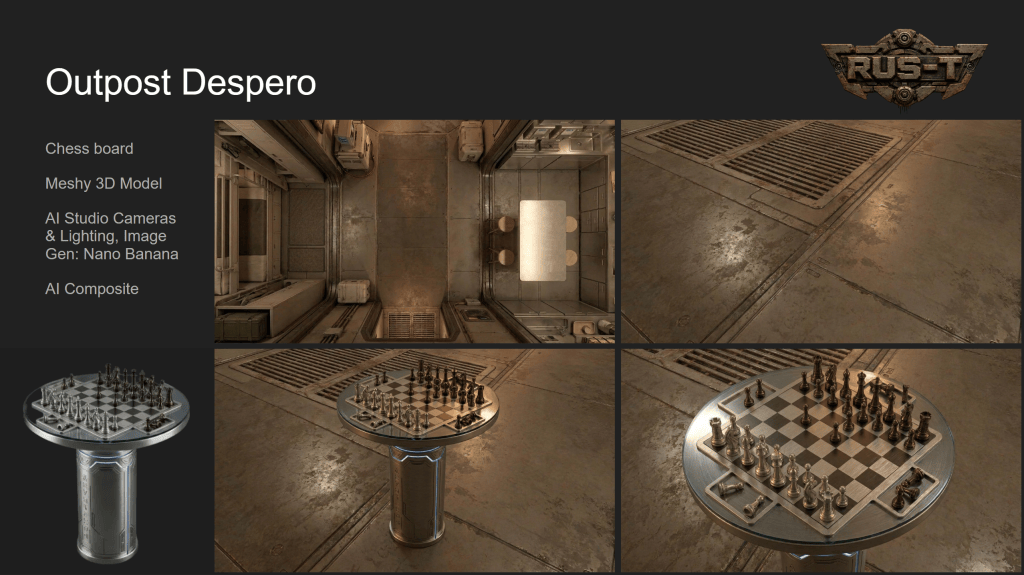
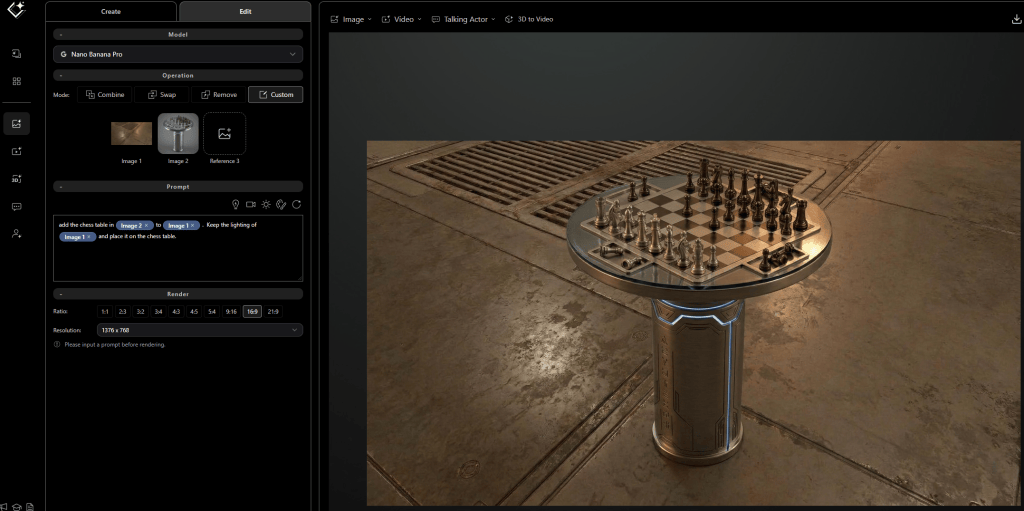
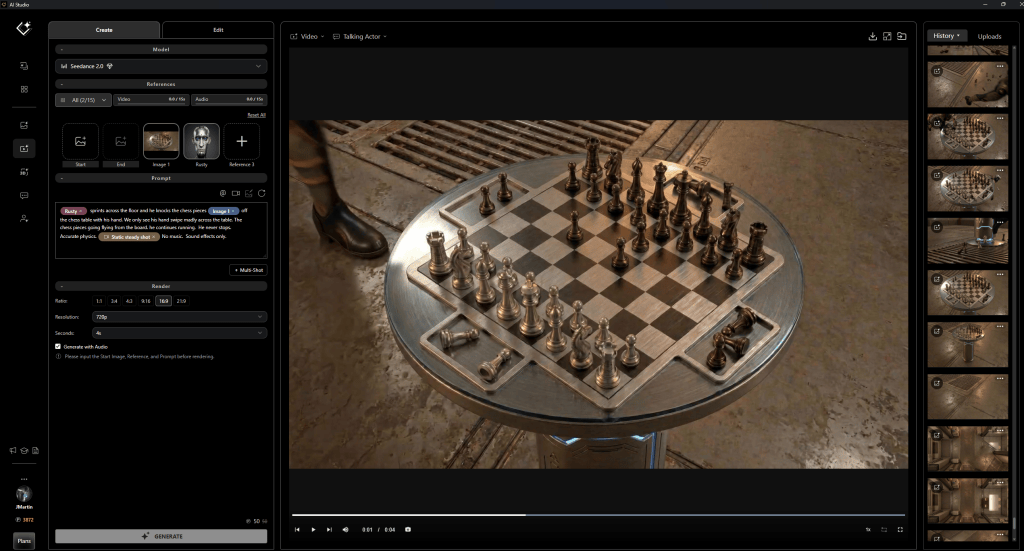
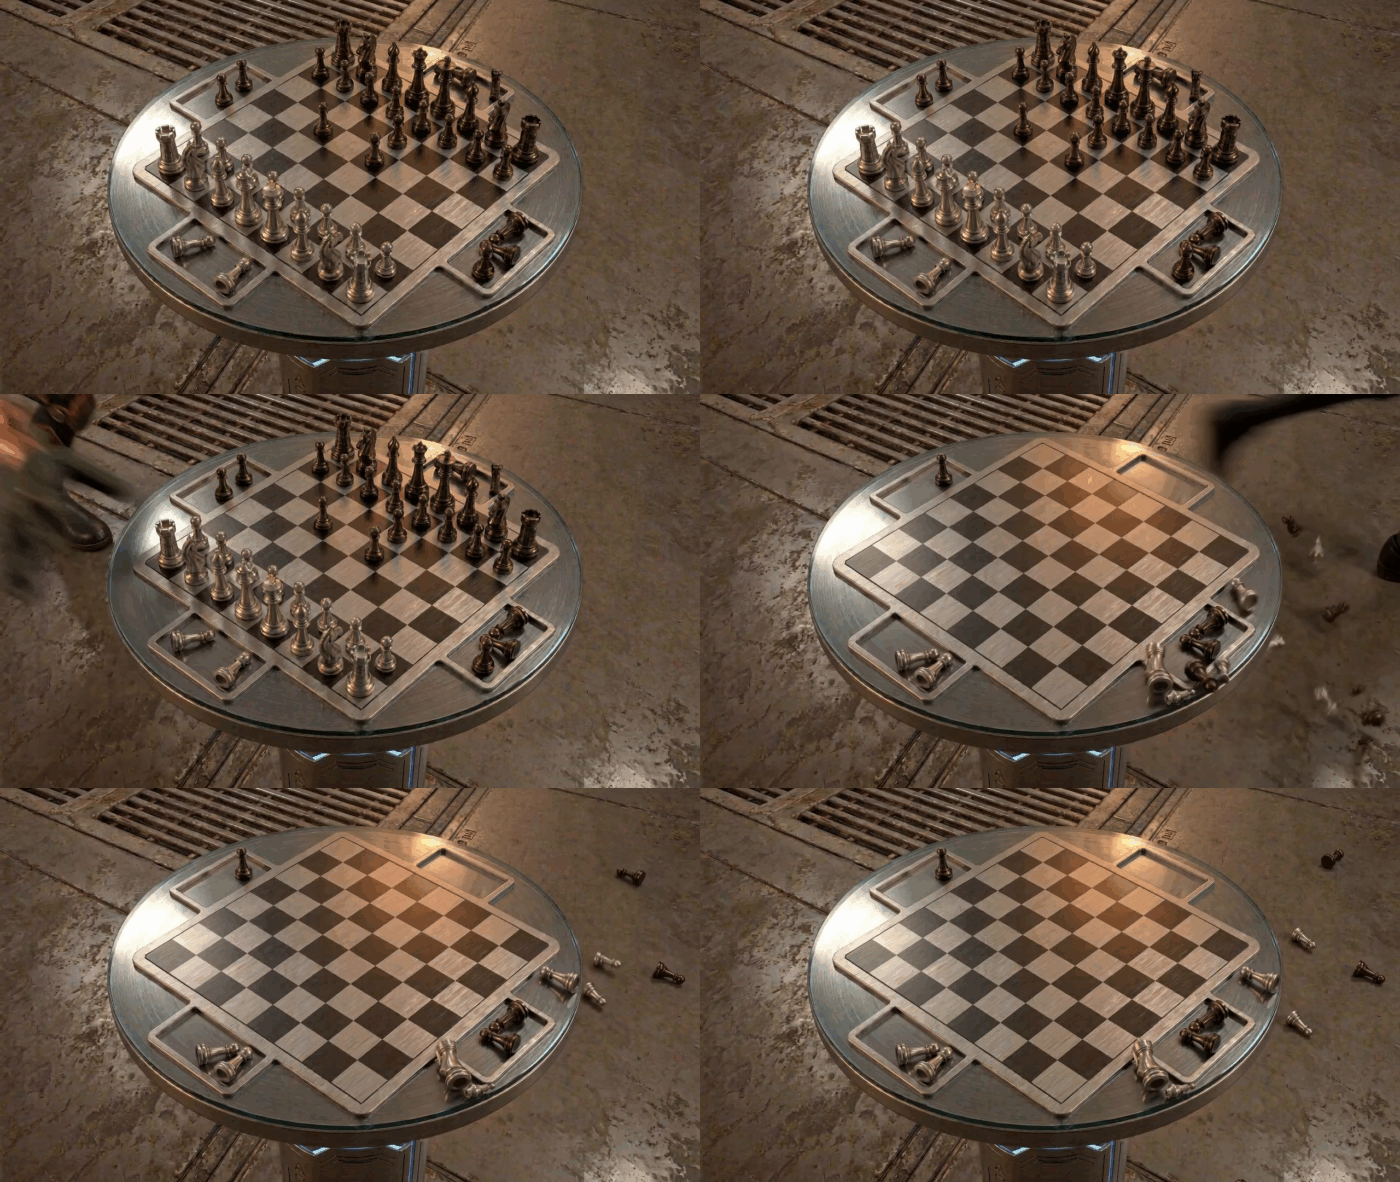
The chess board makes a brief, but poignant appearance in the film. To get the chess board and pieces, Meshy was used to generate the chess model and AI Studio Image Edit with Nano Banana was used to create a camera angle of the floor from Outpost Despero coverage references. The Image Edit Combine enabled the compositing of the chess board and the room together with lighting matched from the Outpost interior to the incorporated chess board into the scene. This workflow of Image Gen and Edit with other visual references was a common practice to get greater continuity. The final shot was generated with the image references with Seedance 2.0.

Recurring objects and environments become recognizable assets that the production can reference rather than continuously reinvent. For AI filmmaking, this is an important extension of the traditional idea of continuity.

From Controlled Frame to Cinematic Image

The RUS-T BTS repeatedly shows the progression from relatively straightforward 3D setups into much richer generated images. This is where the strengths of the hybrid workflow become visible. The iClone image does not need to contain every grain of Martian sand or every atmospheric detail that will appear in the finished frame.

Those aren’t necessarily the things Martin needs iClone to control. What matters is that the filmmaking information survives the transition. RUS-T remains the actor. His action remains readable. The composition remains intentional. The environment maintains the required relationship to the character.

The AI is then free to add the visual complexity that would otherwise require significantly more traditional production work. This is not simply using AI to make a 3D render prettier. It is dividing the shot between two technologies according to what each does best. 3D handles precision. AI handles interpretation.

From 3D to Images to Video

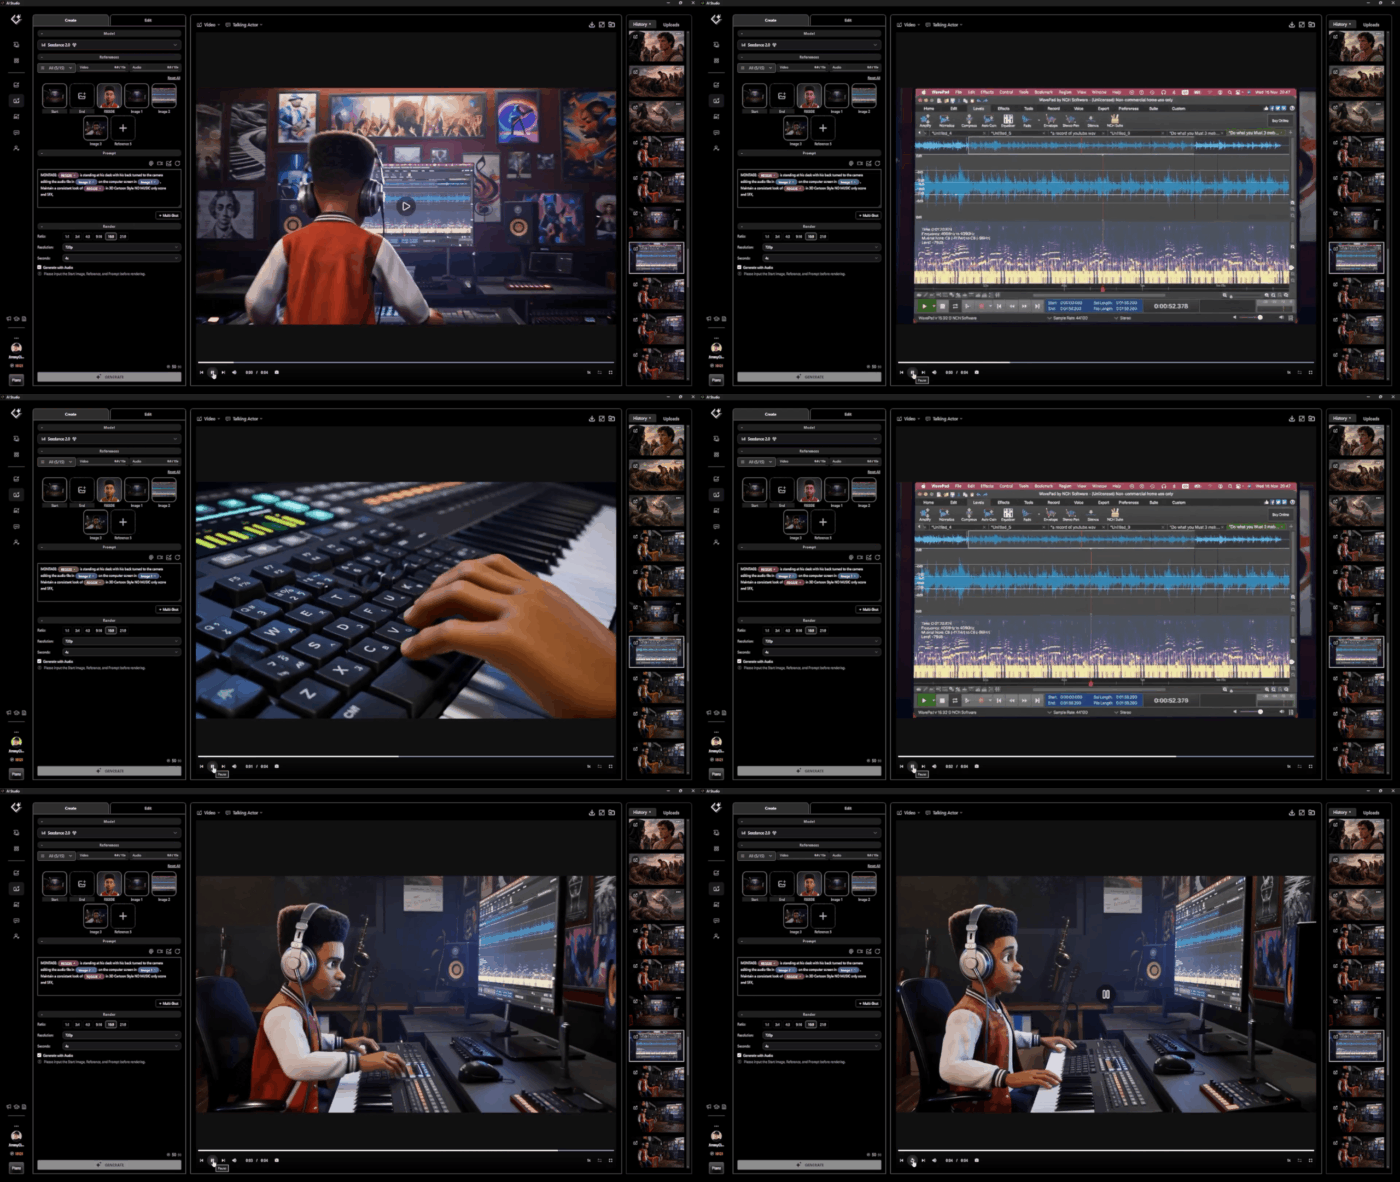
First the the visual foundation of a shot was established with the 3D to AI process. The iClone scene is sent to AI Studio using the 3D Guided Gen feature and the shot image generated with Nano Banana. Once the image of the first shot is approved the production could move seamlessly from AI image generation into AI video.

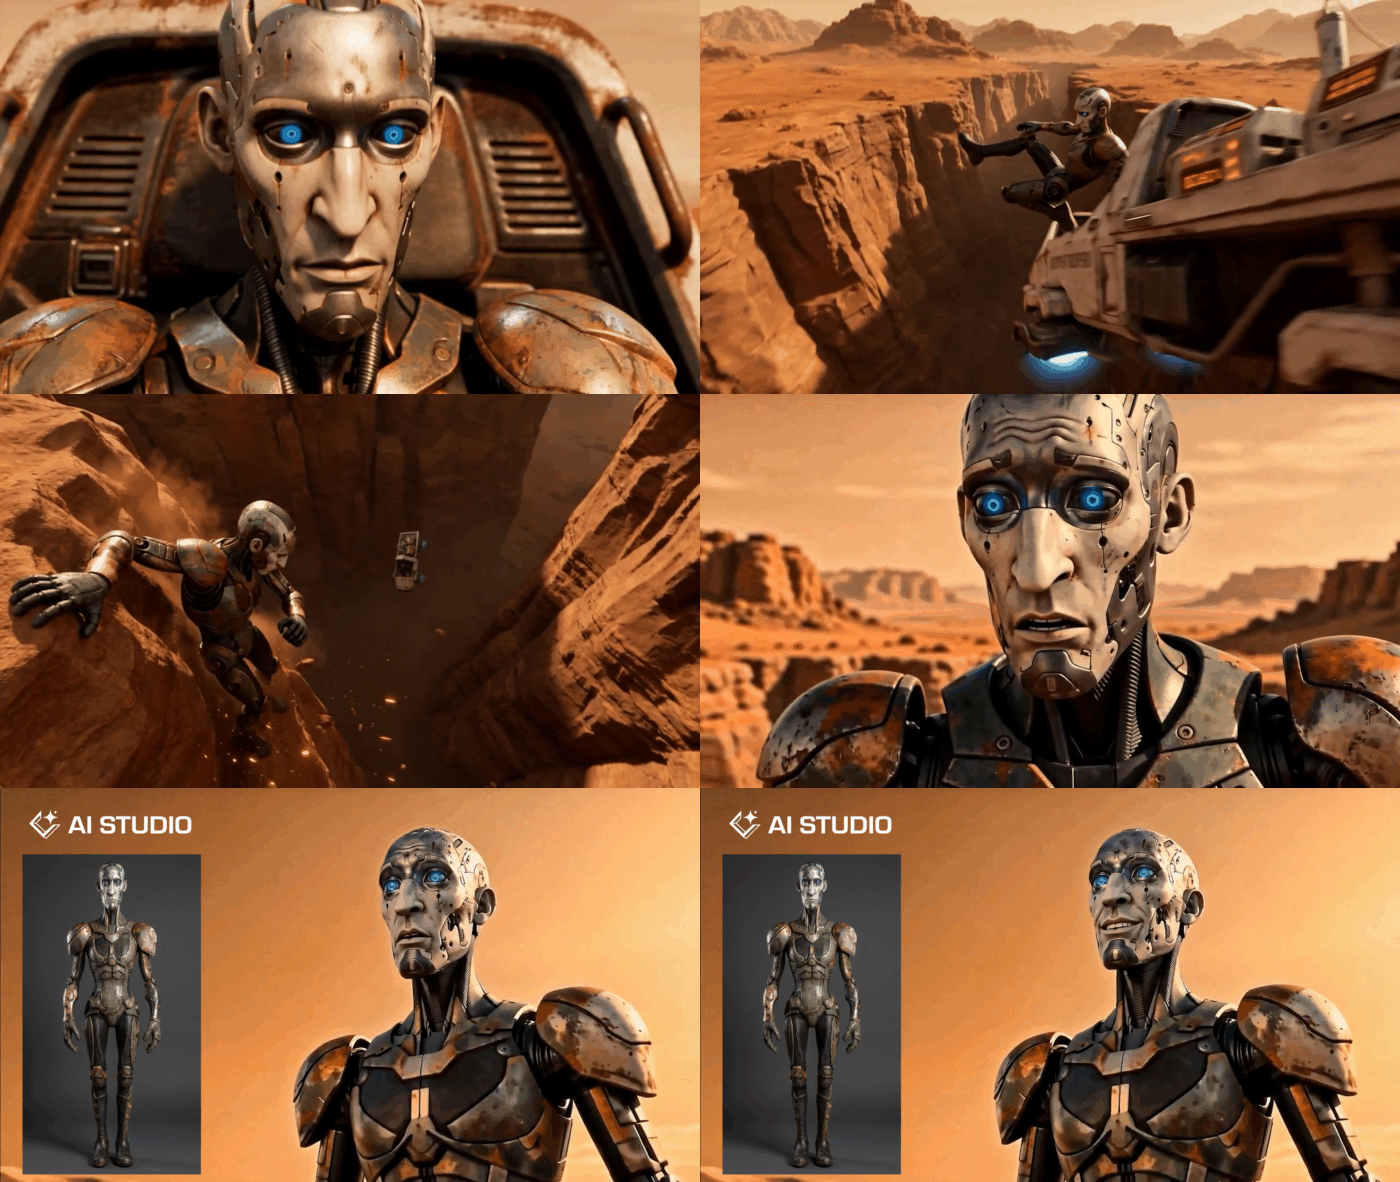
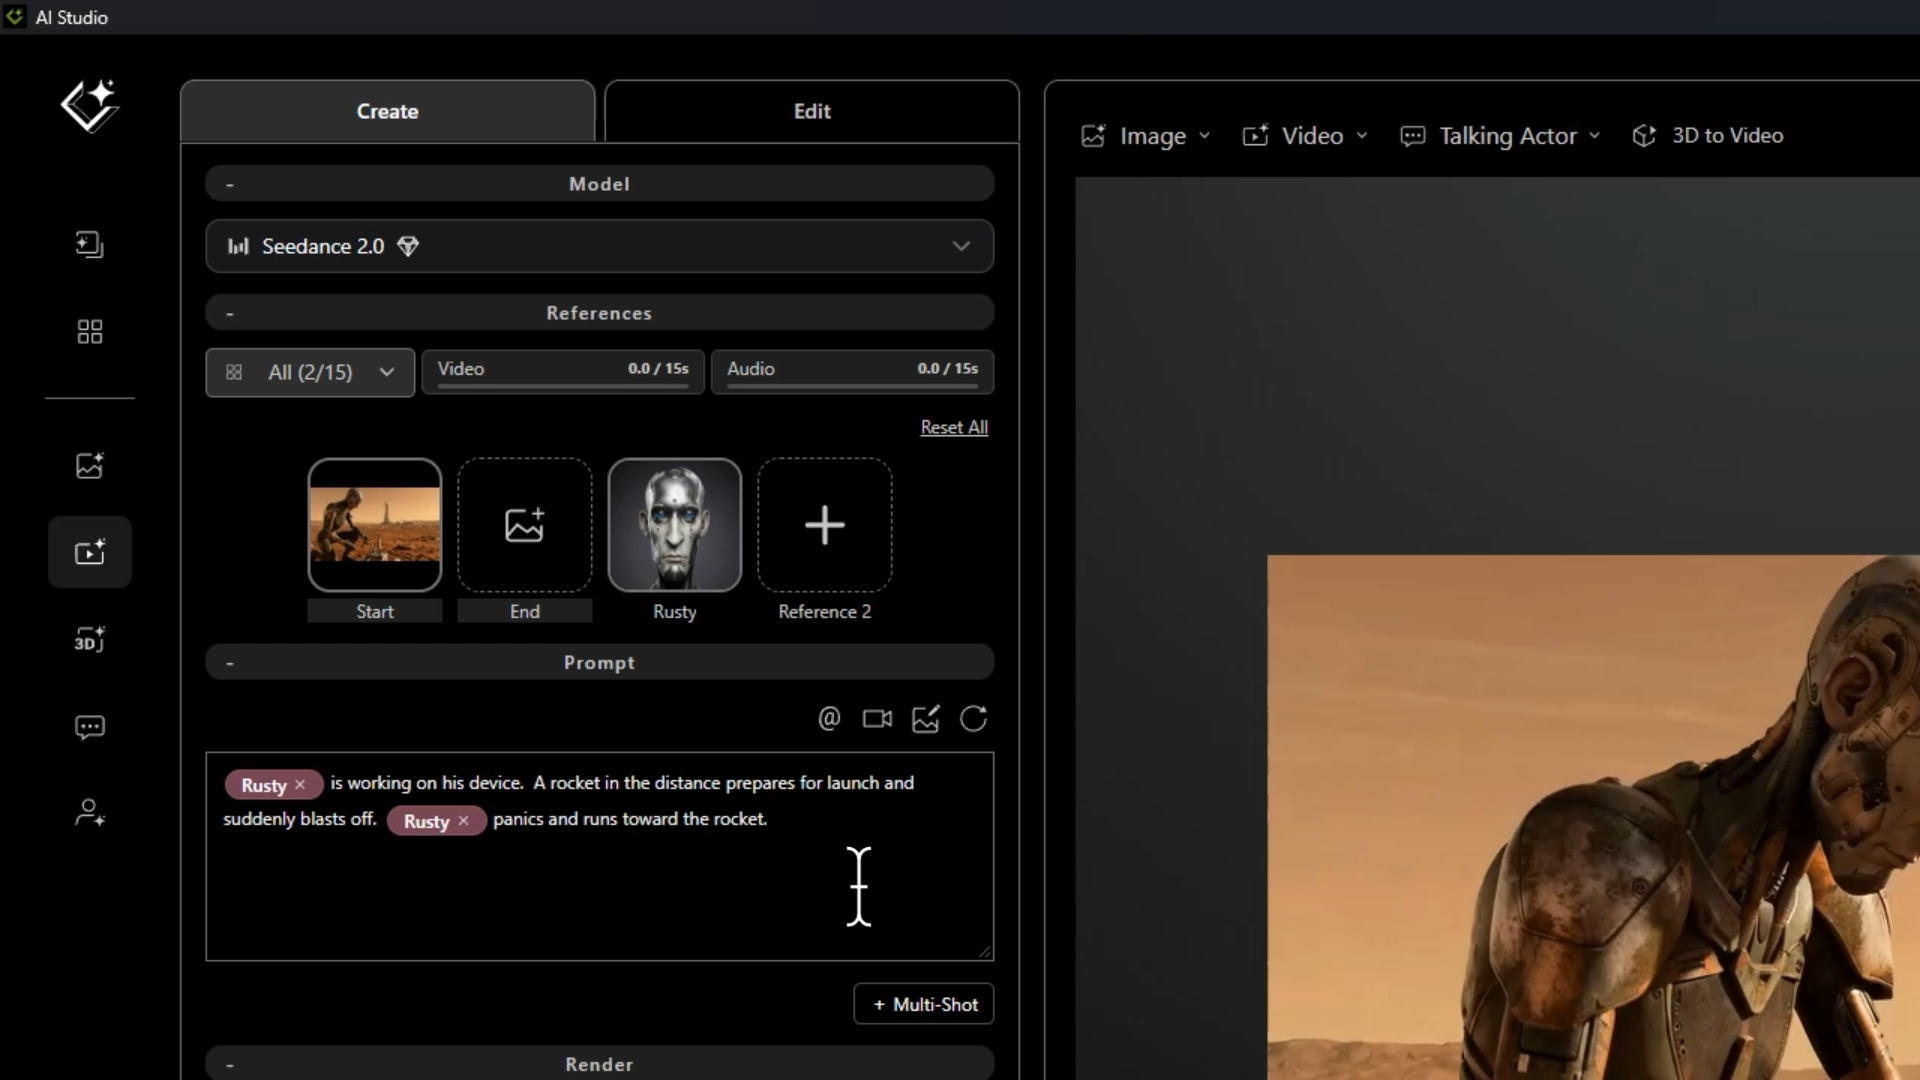
AI Studio’s Seedance 2.0 was used to turn prepared images into moving shots. By this stage, much of the visual problem had already been solved. The character was established. The shot had a composition. The environment had a look. Important objects had references. That meant video generation could begin with a much clearer visual target. This preparation was not only achieving the shot with accuracy, the 3D to AI workflow from Reallusion tools enabled cost savings on generation.

This became especially valuable as RUS-T expanded from quieter character moments into action: crossing the Martian terrain, driving the hovercraft, approaching the canyon and surviving the explosive climax of the film.

Continuity Is More Than Keeping a Character’s Face

The BTS also reveals something important about what continuity actually means for AI filmmakers. Character consistency is only the beginning. A film also needs shot continuity, environmental continuity, prop continuity and geographic continuity.

If RUS-T picks up a device, that device needs to remain recognizable.

If he leaves Outpost Despero, the audience needs to understand where he is leaving from. If he boards the hovercraft, the vehicle needs to remain the same hovercraft when the angle changes.

If the story takes him across Mars toward a canyon, those shots need to feel like a journey through one world.

These aren’t purely technical problems. They are storytelling problems. The audience needs continuity because continuity allows them to stop thinking about how an image was generated and start paying attention to what is happening to the character.

AI Studio at the Center of a Hybrid Workflow

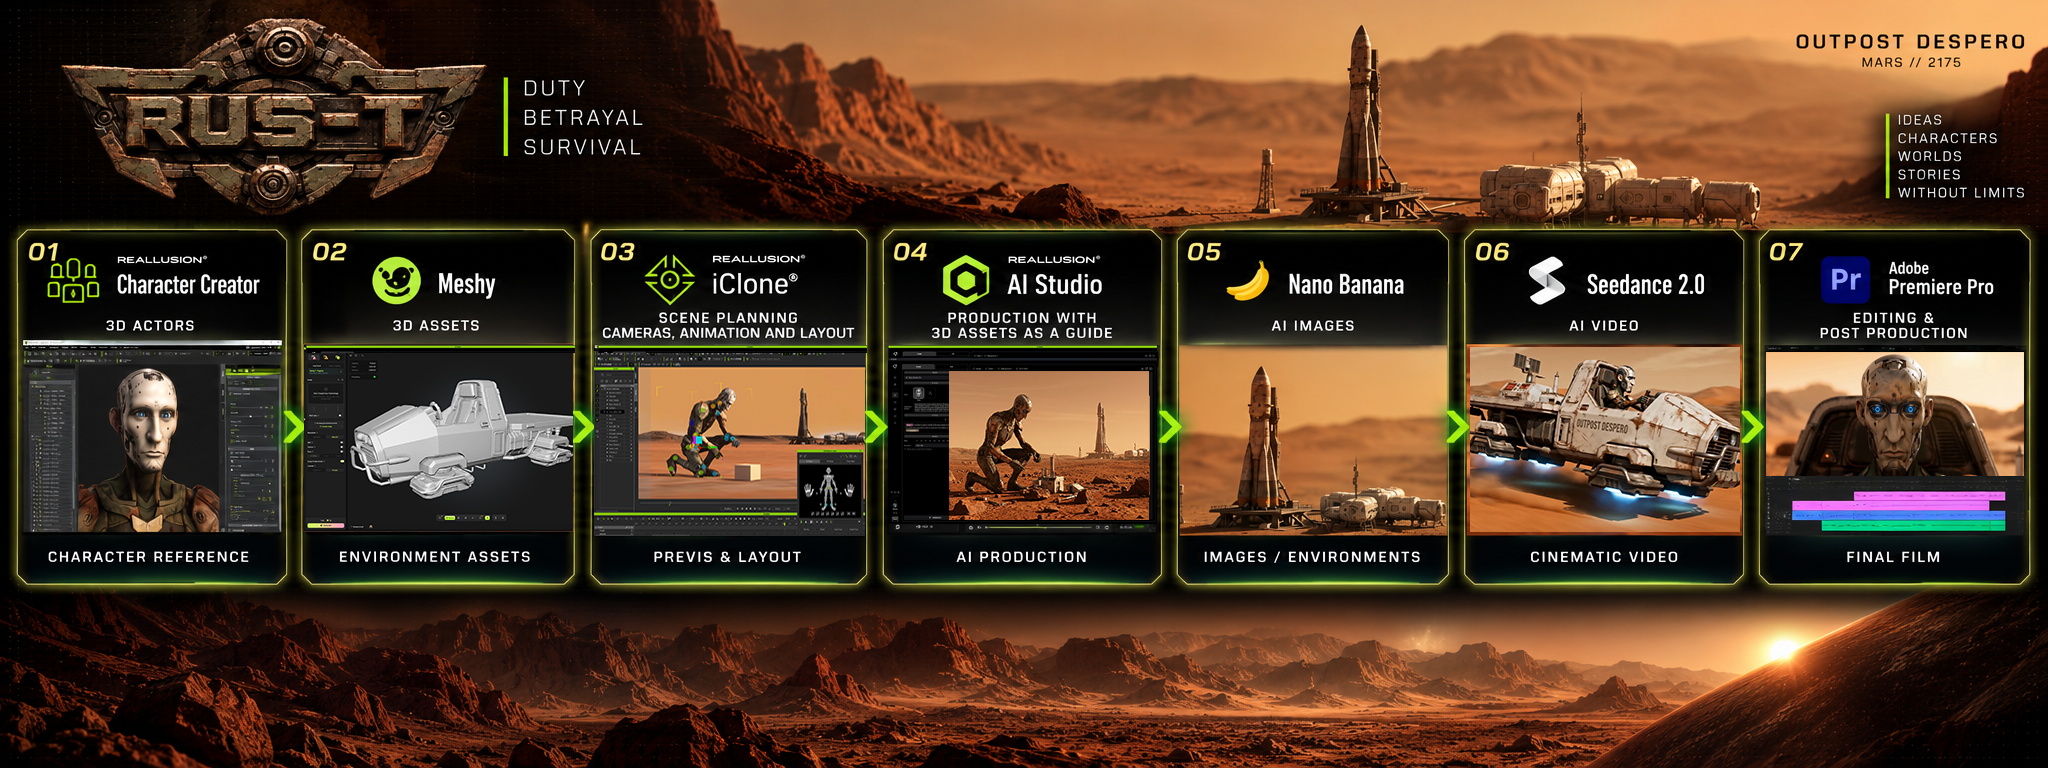
What RUS-T ultimately demonstrates is not a replacement for 3D production. It demonstrates a new use for it. Character Creator and iClone provide a controllable foundation. Reallusion AI Studio connects that foundation to generative production. Image generation expands the visual world. AI video creates motion. Adobe Premiere Pro brings those pieces together into the finished film.

But the real value is not the order of the applications. It is the way creative decisions survive between them. A character designed in 3D becomes an AI Actor. A pose created in iClone becomes a generated performance. The technologies change throughout the pipeline. The director’s intent does not.

The RUS-T workflow :

  • Character Creator
    Creation of the original RUS-T 3D actor and persistent character design.
  • iClone
    Character posing, animation, scene layout, spatial relationships, cameras and shot composition.
  • Reallusion AI Studio
    The bridge from 3D into generative production, including transforming RUS-T into a reusable AI Actor.
  • AI Image Generation
    Developing the cinematic appearance of characters, environments, props and final shot imagery, including Nano Banana in the RUS-T production.
  • Seedance 2.0
    Transforming prepared images into AI video sequences.
  • Adobe Premiere Pro
    Editing, pacing, sound and final post-production.

RUS-T Creator & AI Studio Inventor

RUS-T was written and produced by John C Martin II.

John Martin is a filmmaker, producer, and digital storyteller exploring the intersection of cinematic storytelling, 3D production, performance capture, and generative AI. With more than two decades of experience in filmmaking and digital production, he has focused on using emerging technologies to create characters, performances, and worlds that serve the story.

John is Vice President of Marketing at Reallusion, where he has spent more than two decades working with real time animation, digital humans, motion capture, and strategically developing products and go-to-market strategy for Character Creator, iClone, and AI Studio.

Collaborations include projects with ABC’s Jimmy Kimmel Live!, Disney, Warner Bros., Netflix, Industrial Light & Magic, Digital Domain, Sony Pictures, Meta, and Fremantle.

Related Posts

Reallusion AI Studio is built for 3D artists who want to streamline their workflow with authentic AI render, and for AI creators seeking stronger consistency and more precise control with less trial and error—unlocking greater productivity by blending the best of both worlds. Tutorial

Meet the 40 winners of 2026 Reallusion 3D Character Contest!

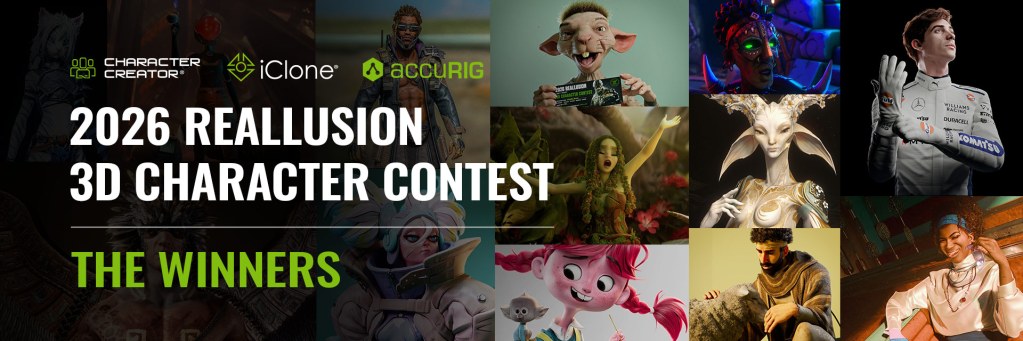
Reallusion’s 2026 3D Character Contest – Meet the Winners!

Reallusion’s 2026 3D Character Contest was held from June 1st to October 1st, 2026. Within 3 months, 200 submissions were submitted from 49 countries. The contest showcases the best 3D character design and animation created using Reallusion’s powerful character production ecosystems: Character Creator for 3D character creation, iClone for facial and body animation, and AccuRIG for rigging.

“We at Reallusion are thrilled to watch so many world-class character artists integrate Character Creator and iClone into their professional workflows. This contest clearly demonstrated that Character Creator gives artists complete creative freedom to build original 3D characters in any style or genre. Huge congratulations to every participants. We are excited to keep pushing the boundaries of 3D innovation for the community!”

– Enoc Burgos, Reallusion Director of Partnership Marketing

Prize Sponsored by Renowned Industry Leaders

The Contest was hosted by Reallusion and sponsored by industry leaders such as NVIDIA, Maxon, Epic Games, Unity, SideFX, Marvelous Designer, MSI, WD, and CenterGrid. Through this contest, Character Creator’s extensive pipeline lets artists seamlessly integrate a new workflow for rapid creativity with zero sacrifice in character quality.

Meet our winners

REALISTIC CHARACTER DESIGN

Under this category, entrants create a realistic human character in Character Creator by combining the character base with tools like ZBrush, Substance Painter, Marvelous Designer, Blender, Wrap, Texturing.xyz, and Maya.

1st Place: Jax: Soul of the Street – by Jimmy Watelle, Manager | Costa Rica

“Character Creator and the Blender Data Link helped me a lot in building the base of the Jax character, but I also faced numerous challenges related to my skill level and navigating between software, sometimes losing data or synchronization along the way. This project brought me as much enjoyment, and it helped me grow tremendously.” – Jimmy Watelle

View Jimmy’s entry and WIP

2nd Place: The Last Entry – by Leudemar “Leo” Lima, Concept Artist | Brazil

“Character Creator helped me bring my design to 3d with a lot of fidelity and realism; easy to use and intuitive, CC5 is a really powerful tool for concept artists.” – Leudemar “Leo” Lima

View Leo’s entry and WIP

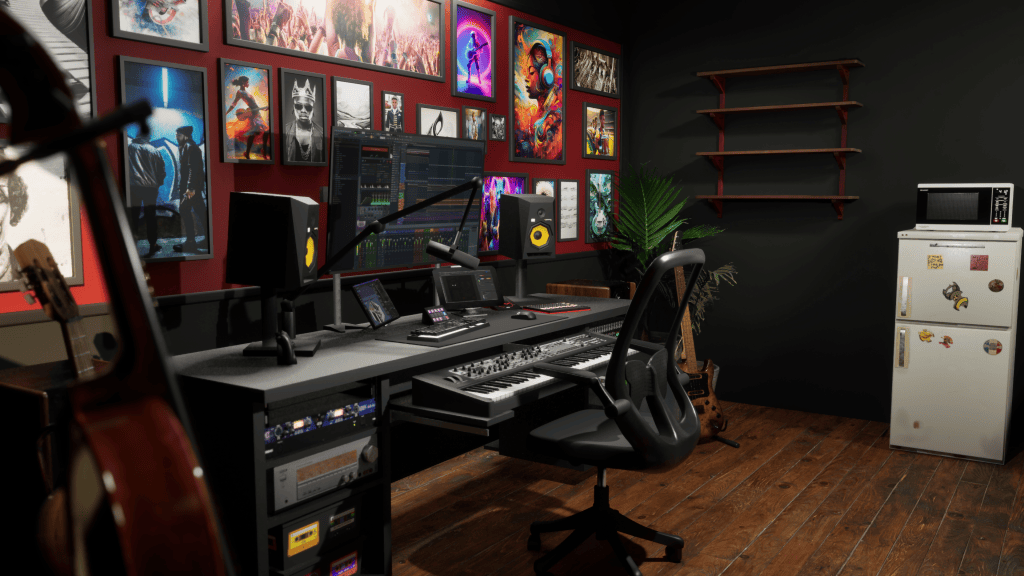
3rd Place: An Unearthly Find – by Jeet Shah, Technical Artist | India

“The speed of CC5 in making changes to primary forms for any character is impeccable and probably the best among any 3D softwares I’ve ever used. Need a skinny short girl- tweak a few sliders you get a skinny short girl. Need a fat stubby creature- tweak some more sliders and take it to ZBrush and you have a humanoid creature in under an hour all the while maintaining the subdivided geometry details in CC5 thanks to GoZ plus. And all of them with a full-body skeleton that’s ready to add some controls for posing. The new HD morphs in CC5 are certainly an upgrade to the previous version, where the lack of base mesh resolution made the morphs a bit less detailed; the new ones still come out quite detailed. One other feature I’ve heavily used is the new addition to Auto Setup for Maya. That allowed for a seamless experience in making the facial expressions on the characters directly in Maya where I rendered them.” – Jeet Shah
View Jeet’s entry and WIP

STYLIZED CHARACTER DESIGN

Under this category, entrants create a stylized character in Character Creator by combining the character base with tools like ZBrush, Substance Painter, Marvelous Designer, Blender, Wrap, Texturing.xyz, and Maya. Watch their winning entry and testimonials below.

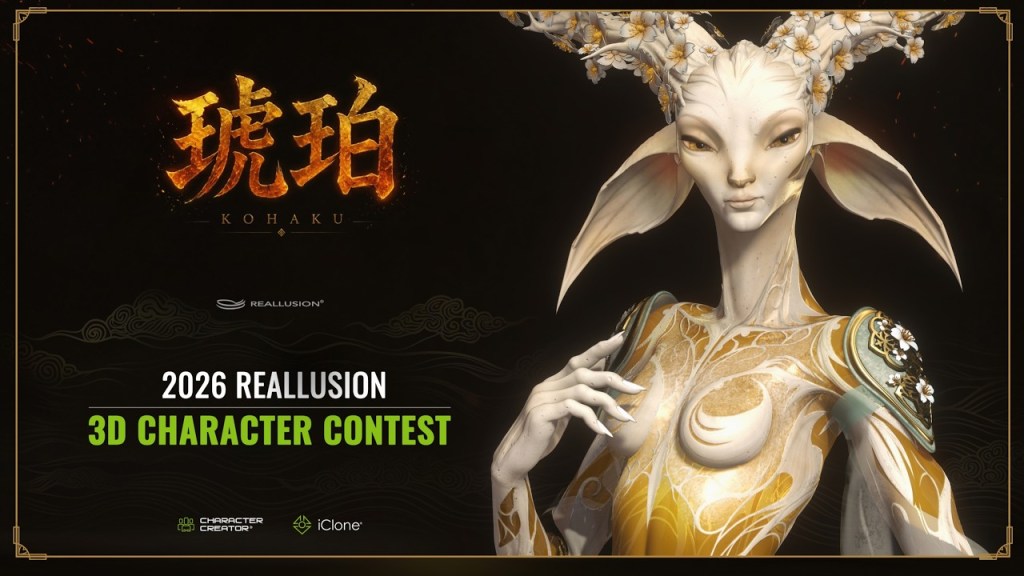
1st Place: Kohaku – Warden of Memories – by Oscar Fernandez Gonzalez, 3D Character Artist | Spain

“As a sculptor, Character Creator lets me start from a clean, optimized base mesh that I can freely customize in ZBrush. Moving back and forth between ZBrush and CC5 allows me to use each application for what it does best, making the entire workflow faster and more efficient. My favorite feature is being able to test poses on the character with incredible precision. It’s fast, intuitive, and a genuinely enjoyable part of the creative process.” – Oscar Fernandez Gonzalez

View Oscar’s entry and WIP

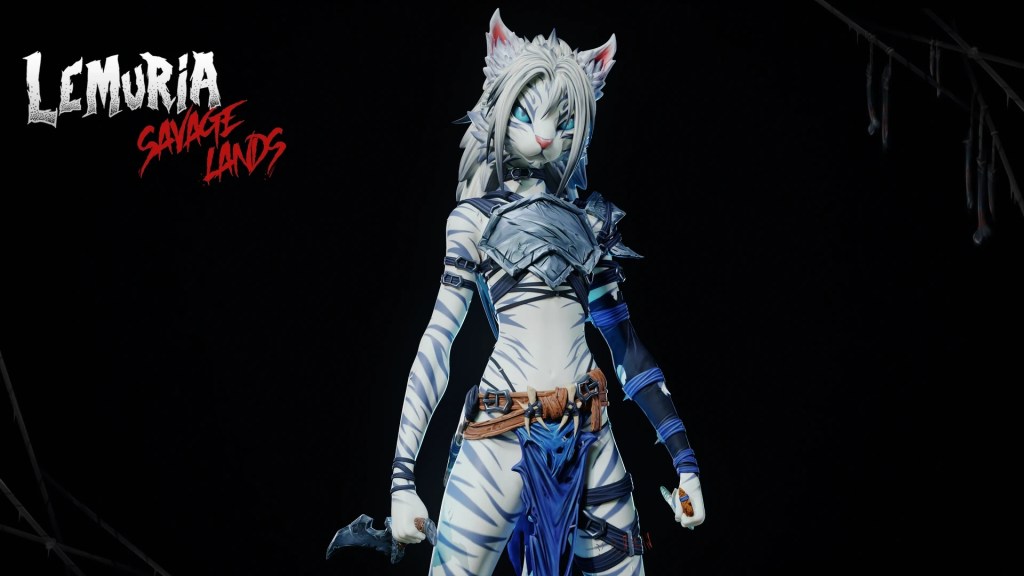
2nd Place: Erlen From Lemuria’s Savage Lands – by Felix Enrique Yaguare Lopez, Student and Freelancer | Venezuela

“Character Creator allowed me to bring my character to life effortlessly. Being able to quickly test and iterate different poses gave me the freedom to explore Erlen in multiple situations, something that would have been impossible in my timeframe, as I joined the contest a month and a half late while finishing my class projects for Libel Academy.” – Felix Enrique Yaguare Lopez

View Felix’s entry and WIP

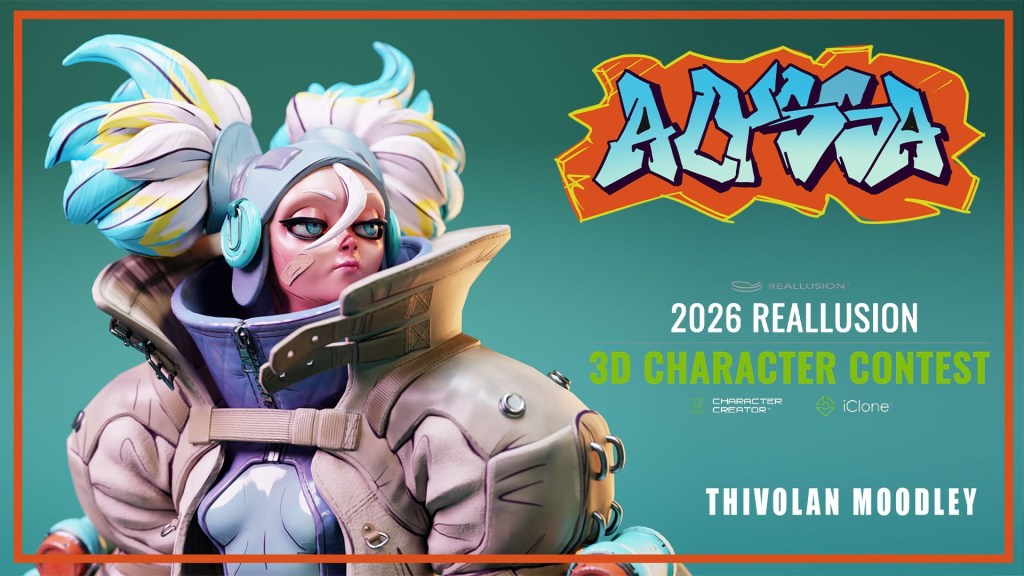
3rd Place: Alyssa – by Thivolan Moodley, 3D Sculptor & Freelancer | South Africa

“I was able to use the base mesh to really push the design from start to finish without needing to retopo or change much else! This helped me focus on the sculpting and likeness more!” – Thivolan Moodley

View Thivolan’s entry and WIP

BEST REALISTIC ANIMATION

Use iClone to create a realistic animation for a character made with the CC3+ Base. The character model can be customized with Reallusion tools and content or third-party software like ZBrush, Blender, Unreal Engine. Watch their winning entry and testimonials below.

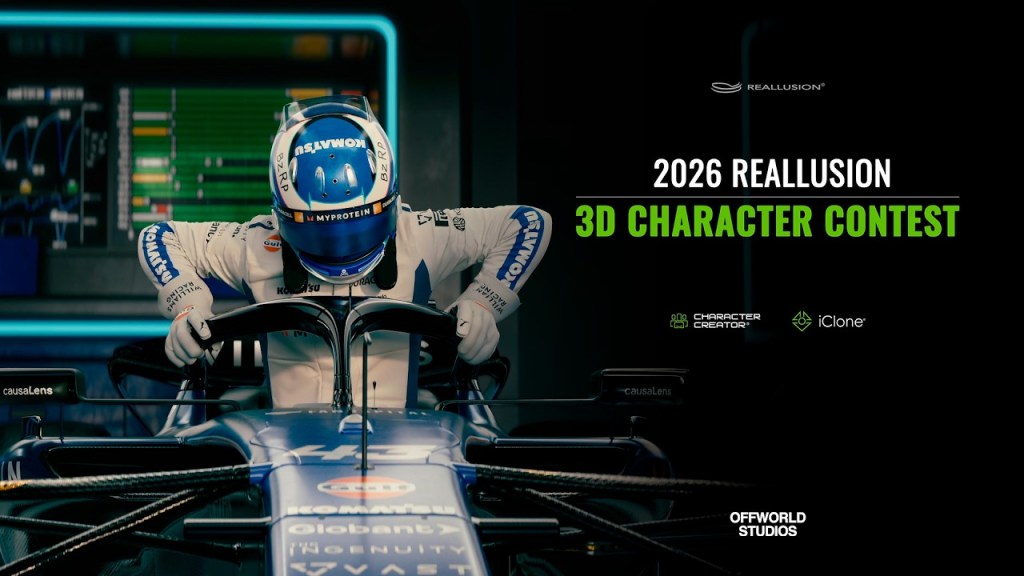
1st Place: Franco Colapino – by Off World, CGI Freelancer | Argentina

“Without Reallusion’s tools, achieving this level of quality and ease of iteration in pursuing our goal would not have been possible; the power and creative freedom it provides are immense.” – Off World

View Off World’s entry and WIP

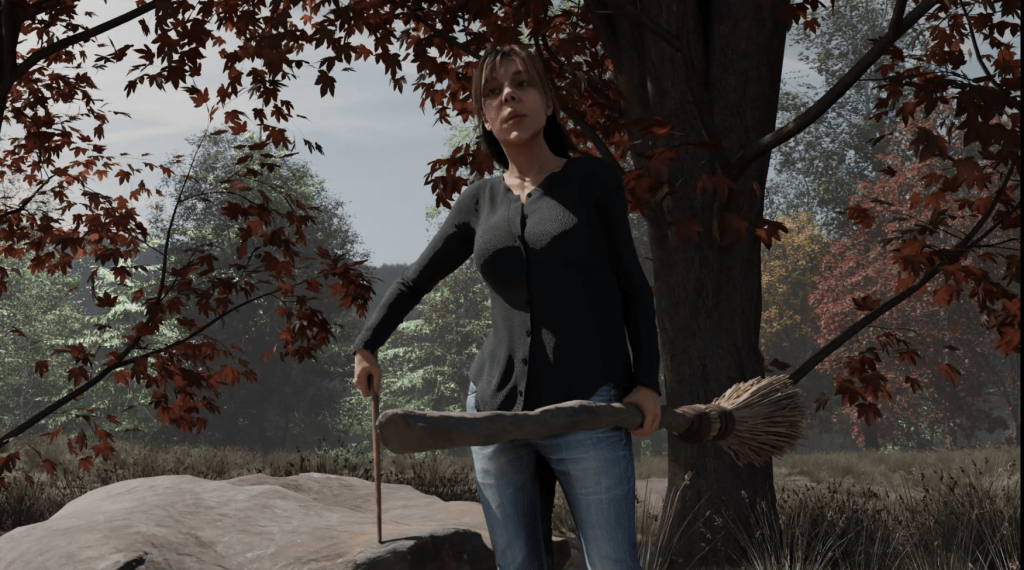
2nd Place: The Hunt – by Joseph Hoback, 3D Animator | United States

“There’s no way I could have gotten as far as I did without the use of iClone. The mocap informed not only the timing and energy but also the character as a whole.” – Joseph Hoback

View Joseph’s entry and WIP

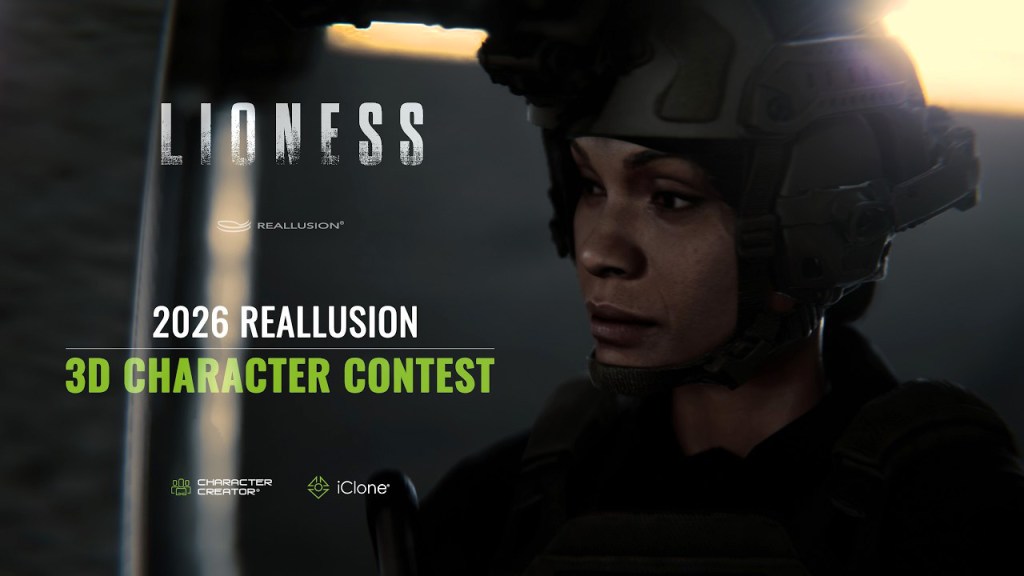
3rd Place: Special ops: Lioness – by Hector Mercado, CGI Artist & Filmmaker | Dominican Republic

“The new Headshot 3 features together with the AI assisted reference image generation and cleanup, really help in getting the character likeness when trying to create a digital double!” – Hector Mercado

View Hector’s entry and WIP

BEST STYLIZED ANIMATION

Under this category, contestants use iClone to create a stylized animation for a character made with the CC3+ Base. The character model can be customized with Reallusion tools and content or third-party software like ZBrush, Blender, Unreal Engine. Watch their winning entry and testimonials below.

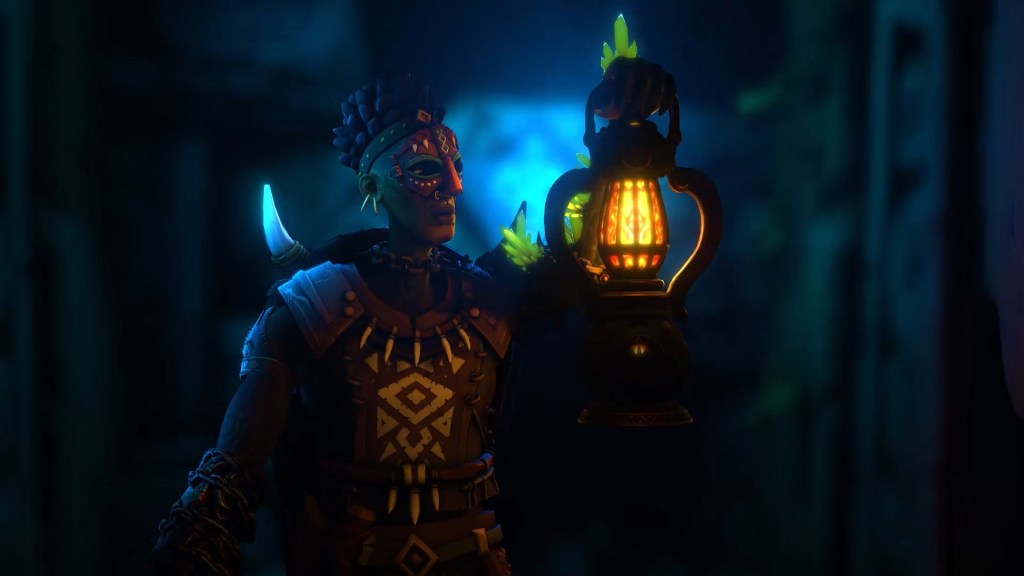
1st Place: STONE GODZ – by Dazhi Benjamin Sokomba, Animator | Nigeria

“I used iClone for final real-time render, Character Creator 5 for main character and AccuRIG for stone characters.” – Dazhi Benjamin Sokomba

View Benjamin’s entry and WIP

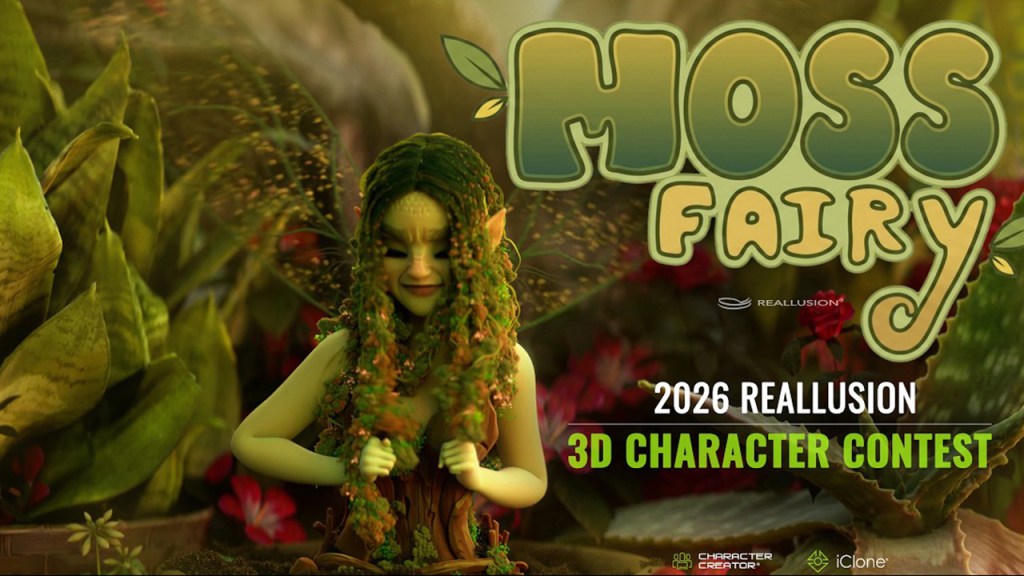
2nd Place: Moss Fairy – by Affan Shiekh, CGI artist | Pakistan

“Character Creator 5 is amazing. It gets better every year, and I would like more implementation for Blender addon!” – Affan Shiekh

View Affan’s entry and WIP

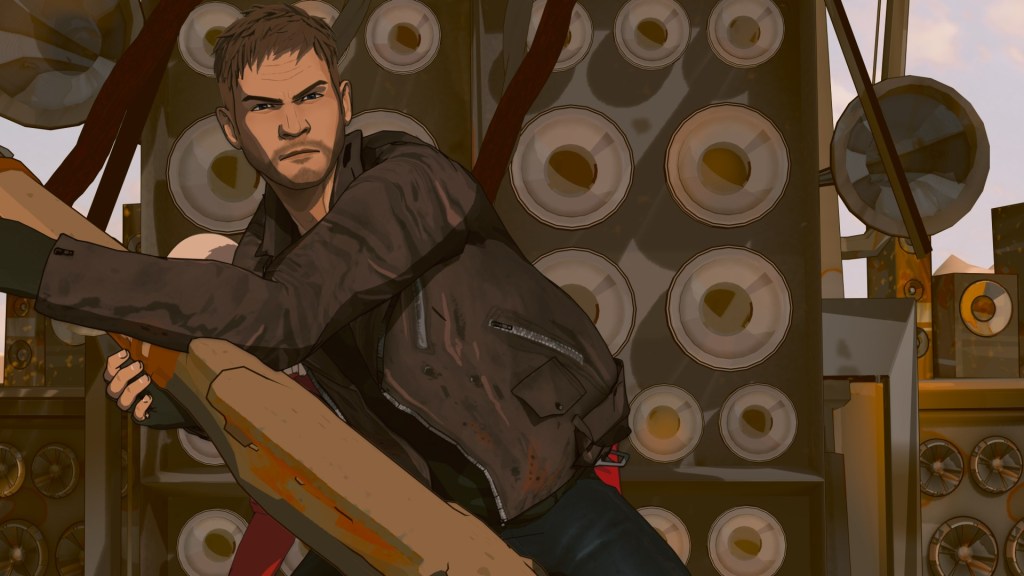
3rd Place: Hard Battle – by Soorena Sardarzadeh, 3D Character Artist | Poland

“With iClone, making animation isn’t harder than it needs to be.” – Soorena Sardarzadeh

View Soorena’s entry and WIP

BEST ACCURIG CHARACTERS

Powered by AccuRIG, artists can transform static models into fully animatable characters, regardless of topology. The winning characters showcase high sculpting details with attractive poses and professional renders. Reallusion selected four winners from this category, and here are the winners, entries, and respective WIPs.

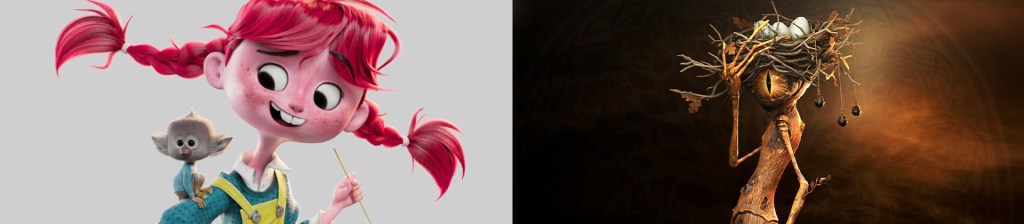
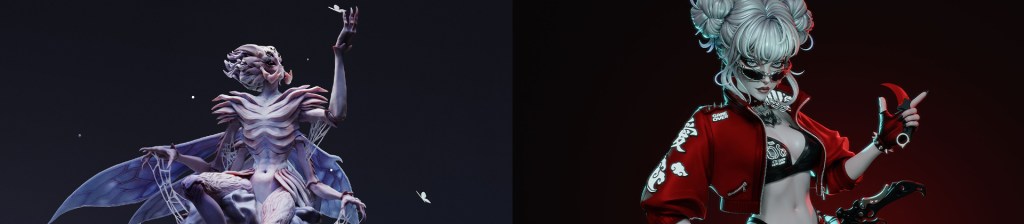
Laura Antonacci | ItalyOscar Fernandez Gonzalez | Spain

Carolyna Figueiredo | PortugalStasia Bubnova | Russian Federation

SPECIAL AWARDS

Special Awards recognize outstanding achievement across specific technical and artistic categories. Beyond their distinctive visual aesthetics, these winning entries demonstrate a deep mastery of 3D pipelines and creative problem-solving techniques. Their entries present compelling character designs, solid anatomy, and exceptional composition.

Best Render

View all winning entries and WIPs.

Vanesa Arambašić | CroatiaJacopo Filo della Torre | ItalyBahar Tavakoli | Iran

Best Pipeline Use

View all winning entries and WIPs.

David Sujono | AustraliaOlivier Beguin | SwitzerlandJorge Leonardo Ayala Arias | Colombia
Ignacio Coronel | ArgentinaJoachim Jensen | Denmark

Best Mocap Use

Sangkoo Lee | Republic of Korea

Best Digital Double

View all winning entries and WIPs.

Mobin Hivehchi | Iran Frederick Talavera Martinez | Spain

Best Student Artwork

Harlos Humberto Rivas Garcia | Venezuela

Best Costume

View all winning entries and WIPs.

Eva Sophie Cringle | BelgiumMyron Mortakis | United StatesMassimo De Antonis | Italy
Saillish | AustraliaWeedi Masindraoka | Madagascar Sadegh Khavand | Iran
Rafael S. Benedicto | PhilippinesAngel Ricalde | Peru

HONORABLE MENTIONS

Honorable Mentions celebrate standout entries that captivated the judging panel through exceptional dedication, skill, and creative vision. While not taking home a top placement, these artists delivered remarkable craft and passion throughout the competition. View all Honorable Mention entries and WIPs.

Ariya Hasani | IranMarkus Haertel | Brazil
Kurt Boutilier | CanadaOnur Erdurak | Turkey

The judging process for the “2026 Reallusion 3D Character Contest” proved to be quite difficult and took many hours of deliberation. In addition to the top 3 placements in Best Character Animation & Best Character Design, Reallusion also selected 28 winners for AccuRIG characters, Special Awards, and Honorable Mentions. See the Winner Page for winner details and showcases, and we look forward to your entry submission next year!

Read Next:

Click here to learn more about the winners’ portfolios and judge comments.

Reallusion and Escape.AI Partner to Solve AI Video Bottlenecks and Expand Distribution
Reallusion Inc. (reallusion.com), the leader in 3D character generation and real-time animation software, and Escape.AI Media Inc. (escape.ai), the premier “Neo Cinema” content platform and creator marketplace, today announced a strategic partnership. The multi-year alliance addresses critical generative AI video challenges, including visual inconsistencies, high token costs, and ambiguous IP ownership. Together, the companies establish a robust 3D-to-AI pipeline for professional AI storytellers.
Strategic alliance connects Reallusion’s 3D ecosystem with John Gaeta’s Neo Cinema platform, bringing consistent AI filmmaking to 400 million Connected TVs.

SAN JOSE, CA and LOS ANGELES, CA – October 8, 2026 — Reallusion Inc., the leader in 3D character generation and real-time animation software, and Escape.AI Media Inc., the premier “Neo Cinema” content platform and creator marketplace, today announced a strategic partnership. The multi-year alliance addresses critical generative AI video challenges, including visual inconsistencies, high token costs, and ambiguous IP ownership. Together, the companies establish a robust 3D-to-AI pipeline for professional AI storytellers.

Creators using generative AI video frequently encounter shifting character designs and high render costs, while text-generated content faces legal scrutiny regarding copyright eligibility. Reallusion and Escape.AI solve these challenges by using 3D spatial data as a precise control layer. Grounding generative models in human-authored assets ensures frame-to-frame continuity and undeniable proof of original authorship.

Reallusion’s Full-Circle 3D Ecosystem: The Structural Engine for AI

Under the agreement, Reallusion integrates its full-circle 3D software and asset infrastructure with a 3D-to-AI Video Workflow into the Escape.AI creator ecosystem:   

  • Character Creator 5 (CC5): Enables creators to design custom, fully rigged 3D characters with precise facial blendshapes and high-resolution textures. These base 3D files serve as the original IP foundation that can be trained into custom AI models with absolute visual continuity.
  • ActorCore Motion Library: Provides thousands of professionally captured, high-quality 3D motion animations, rigged characters, props, and facial expressions optimized for film, gaming, and simulation workflows.
  • iClone 8 Real-Time Animation Software: Offers real-time scene setup, motion clip editing, motion blending, camera path control, and lighting direction. This 3D environment acts as an exact physical blueprint to guide generative video models, drastically reducing AI hallucinations.
  • Reallusion AI Studio: A standalone creation app that ingests 3D scene data from iClone and CC5 as a precision control layer. By integrating leading generative AI models with highly optimized backend prompts, AI Studio ensures frame-by-frame temporal consistency while dramatically cutting cloud rendering token costs.

“Pure text-to-video generation has hit a hard ceiling when it comes to long-form narrative storytelling,” said Enoc Burgos, Director of Reallusion Inc. “Filmmakers cannot build persistent franchises when characters and animations morph from shot to shot. By pairing Reallusion’s 3D control layer with AI Studio, we give directors total camera,  spatial, lighting, and motion command over their scenes. More importantly, our alliance with Escape empowers creators by placing powerful 3D tools directly alongside a premier path to global distribution and monetization, ensuring artists retain verifiable IP ownership over their original characters and worlds.”

Reallusion Inc. (reallusion.com), the leader in 3D character generation and real-time animation software, and Escape.AI Media Inc. (escape.ai), the premier “Neo Cinema” content platform and creator marketplace, today announced a strategic partnership. The multi-year alliance addresses critical generative AI video challenges, including visual inconsistencies, high token costs, and ambiguous IP ownership. Together, the companies establish a robust 3D-to-AI pipeline for professional AI storytellers.
Watch the first AI Studio film made by https://escape.ai/@johnmartin

Escape.AI: Global CTV Distribution and Monetization 

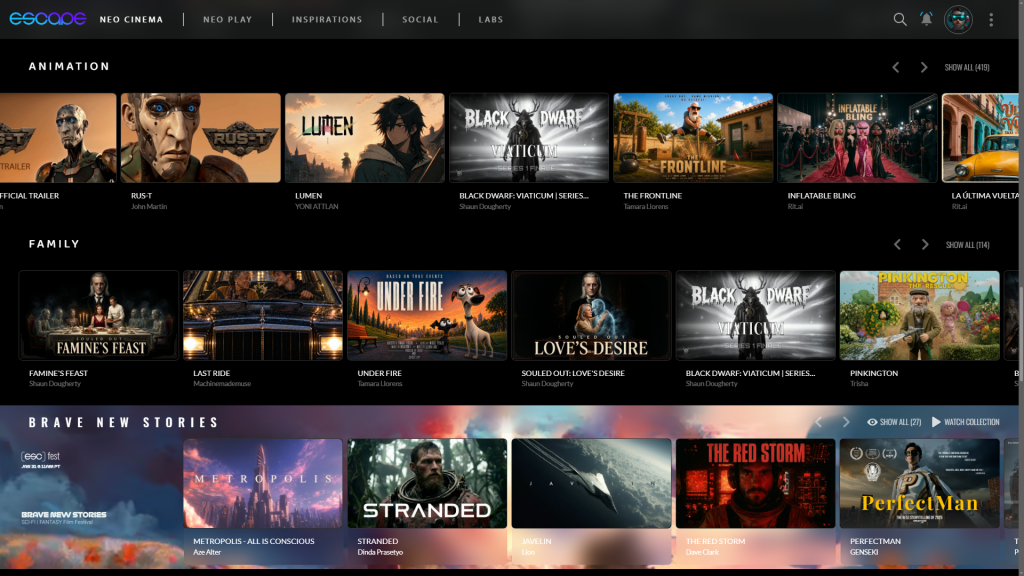
Complementing Reallusion’s creation engine, Escape.AI provides a curated, prestige distribution layer for independent AI filmmakers. Founded by Academy Award-winning visual effects pioneer John Gaeta (The Matrix), Escape.AI operates a “Neo Cinema” streaming ecosystem designed to bypass algorithm-driven social feeds in favor of gallery-quality presentation.

Key benefits of the Escape.AI platform include:

  • Global Connected TV (CTV) Footprint: Through core distribution partnerships with networks like Play.Works, Escape.AI broadcasts curated short-form films, episodic series, and visual music directly to living rooms on Roku, Amazon Fire TV, LG Smart TVs, and Samsung Smart TVs, accessing an addressable market exceeding 400 million active CTV devices.


  • Prestige Curation: Modeled after flagship visual anthologies such as Love, Death & Robots, Escape.AI elevates high-craft AI cinema across specialized genres including Sci-Fi, Fantasy, Horror, and Anime.
  • Transparent Creator Monetization: Creators distributing on Escape.AI participate in a 50% net revenue split for syndicated Connected TV content, direct audience patronage and tipping, custom channel subscriptions, and digital collectibles—all while retaining 100% ownership of their underlying intellectual property.

“Neo Cinema is about blending human imagination, game engine control, and generative AI into a unified narrative force,” said John Gaeta, Founder of Escape.AI Media Inc. “Reallusion provides the precise 3D skeleton and camera guidance that generative models desperately need to achieve cinematic discipline. By combining Reallusion’s powerful toolset with Escape’s distribution network, this partnership empowers and expands a growing community of talented filmmakers, giving them the control to craft world-class, consistent stories and the global showcase to broadcast them to hundreds of millions of screens worldwide.”

Joint Initiatives & Community Access: Escape Labs

To empower the next generation of AI filmmakers, Reallusion and Escape.AI are launching:

  1. Escape Labs Portal: Features workflow guides, asset packs, and reference blueprints showcasing CC5, iClone, and AI Studio at escape.ai/labs/tools.
  2. Community Access: Offers free access to iClone PERSONAL for the Escape.AI creator community to build 3D control layers.
  3. Masterclasses & Demos: Co-hosted workshops and a flagship joint Live Demo event on October 23, 2026, demonstrating real-time 3D-to-AI workflows.
  4. Creator Grants: Direct 3D and AI technical support, along with AI point sponsorships, for select directors participating in an elite program of creators.
To empower the next generation of AI filmmakers, Reallusion and Escape.AI are launching:

Escape Labs Portal: Features workflow guides, asset packs, and reference blueprints showcasing CC5, iClone, and AI Studio at escape.ai/labs/tools.

Community Access: Offers free access to iClone PERSONAL for the Escape.AI creator community to build 3D control layers.

Masterclasses & Demos: Co-hosted workshops and a flagship joint Live Demo event on October 16, 2026, demonstrating real-time 3D-to-AI workflows.

Creator Grants: Direct 3D and AI technical support, along with AI point sponsorships, for select directors participating in an elite program of creators.

About Reallusion Inc.

Reallusion Inc. (reallusion.com) is a leader in 3D character animation and software development that specializes in 3D character generation and real-time animation software. Its flagship tools including Character Creator, iClone, ActorCore, and AI Studio—empower filmmakers, game studios, and VFX artists worldwide to accelerate production and bridge 3D graphics with generative AI Creation workflows.

Website: https://www.reallusion.com

AI Studio: https://ai.reallusion.com/ai-studio/

About Escape.AI Media Inc.

Founded by Academy Award-winner John Gaeta (The Matrix), Escape.AI (escape.ai) is a next-generation “Neo Cinema” distribution platform and creator marketplace for AI-driven short films, experimental storytelling, and visual arts. Backed by an advisory board of veterans from Pixar, Lucasfilm, Epic Games, Disney, and Google, Escape.AI brings curated, high-craft AI cinema out of crowded social feeds and into living rooms worldwide via native Connected TV (CTV) applications reaching over 400 million active devices.

Website: https://escape.ai

Media Contacts

Reallusion Inc. PR Team

Email: marketing@reallusion.com

Press Kit: reallusion.com/press

Escape.AI Media Inc. PR Team

Email: contact@escape.ai

Press Kit: escape.ai/press

###

Frequently Asked Questions

Q: What is the partnership between Reallusion and Escape.AI?
A: Reallusion and Escape.AI have formed a strategic alliance to create a complete 3D-to-AI video pipeline. Reallusion provides the 3D software for precise scene control, while Escape.AI provides a global Connected TV (CTV) streaming platform to distribute and monetize the resulting AI films.

Q: How does Reallusion fix AI video inconsistencies?
A: Reallusion uses 3D spatial data from software like iClone and Character Creator 5 as a control layer. By giving generative AI an exact physical blueprint of the characters, lighting, and camera paths, it stops the AI from hallucinating or “morphing” from frame to frame.

Q: What is Reallusion AI Studio?
A: Reallusion AI Studio is a standalone application that ingests 3D scene data as a precision control layer. It pairs leading generative AI models with highly optimized backend prompts to ensure temporal consistency and significantly reduce cloud rendering token costs.

Q: How do creators monetize on Escape.AI?
A: Creators retain 100% ownership of their IP and receive a 50% net revenue split for syndicated CTV content. They can also earn money through direct audience tipping, custom channel subscriptions, and digital collectibles.

Read More:

AI Studio 1.1 Major Update: Standalone Application, Seedance 2.5, and Upgraded AI Actor Creator

AI Studio Storytellers: Directing AI Films with Diverse 3D Assets

AI Studio Storytellers: Building a Connected World with Consistent AI Characters

AI Studio Storytellers: Building a Brand Marketing Campaign

Reallusion AI Studio is built for 3D artists who want to streamline their workflow with authentic AI render, and for AI creators seeking stronger consistency and more precise control with less trial and error—unlocking greater productivity by blending the best of both worlds. Tutorial


Learn how to turn 2D portraits into animated 3D heads using Character Creator 5's Headshot 3 plugin, from AI generation to facial rigging and ActorMIXER styling.

Headshot 3 Plugin Guide: AI 3D Head Generation in Character Creator

TL;DR:

3D artist Jon Blalock demonstrates how to match 2D portraits to 3D meshes using Character Creator 5 with Headshot 3. The workflow, combined with built-in texture modification tools, ActorMIXER morphing, and automatic facial rigging, lets you rapidly build animation-ready realistic heads or caricatures from scratch.

Headshot 3 Plugin Overview

The Headshot 3 Plugin brings game-changing upgrades and powerful new features to Character Creator 5, building on the solid foundation of Headshot 2. Whether you are generating 3D heads from scratch or refining intricate facial details, Headshot 3 streamlines the AI-to-3D pipeline with unprecedented precision and flexibility.

Getting Started with the Headshot 3 Plugin

To kick off your character creation workflow, launch the plugin via Plugins > Headshot 3 > Headshot 3 Plugin. The intuitive interface immediately prompts you to load a front-facing image. You can craft custom source photos directly within Character Creator 5 using the integrated AI image generator. Simply enter a descriptive text prompt detailing the character face you envision (for example, a stylized medieval villager with exaggerated features).

Image generation costs vary by resolution (15 credits for 2K, 30 credits for 4K). Powered by Reallusion’s cloud servers, the generator yields flat-lit source photos. This flat lighting is essential because minimal baked-in shadows ensure dynamic in-engine lighting reacts realistically across your final 3D character mesh.

Using External Images & Image Preparation

You are not limited to generating photos within the Headshot 3 Plugin. The images created using external AI tools like Gemini Pro or ChatGPT work seamlessly as well. If an external photo contains heavy shadows, stray hair, or facial hair, you can easily clean and prepare it using Headshot 3’s built-in modify tab.

Simply drag your front-view image into the Modify panel and apply automated cleanup parameters to eliminate hair, beards, mustaches, or eyelashes. Generating a clean 4K base texture delivers a smooth surface foundation, giving you complete freedom to add modular mesh hair and 3D facial hair elements back onto your character later.

Initial Mesh Generation & Feature Matching

Once your front and profile (side) images are loaded into Headshot 3, guide the mesh generator by specifying key facial attributes.

  • Face Shape: Oval, strong jawline, defined nose line, sharp or rounded chin.
  • Facial Features: Eye bags, bulbous nose, defined front nose.
  • Body Type: Male/Female, Adult, Normal physique.

After clicking the generate button, leverage the Image Matching tools to overlay and compare the generated 3D mesh against your reference photo using the opacity slider. For characters with distinct ocular proportions, adjust the Iris UV Radius slider to perfectly match the 3D iris scale to the photo.

Refining the Front Face Mesh

Click the refine face button to enter the fine-tuning workspace. This tool provides interactive landmark guides and Bézier control points to align geometric contours precisely with facial feature boundaries:

  • Position main landmark points around the ear, jaw, skull base, nose, mouth, and eyes.
  • Adjust the Bezier curves to match the facial curvature. Unlink curve handles if you need individual tangent control.
  • Click Preview Current Parts to review the geometric overlay. Once satisfied, click Apply Current Parts.

Refining the Profile View & Best Practices

When setting up profile reference images, always use a true 100% profile image where the opposite eye is completely hidden. If your side photo shows even a hint of the far eye, re-generate a precise profile image using the AI generator rather than fitting against an angled photo.

According to Reallusion best practices and my own testing, placing landmark points at exact anatomical positions takes priority over adjusting Bézier curves. Consult the online Headshot 3 manual for precise point definitions (such as aligning the “median of the skull back” point horizontally with the eyebrows). Once completing the pointing for the eye corners, mouth corners, ear boundaries, and jawline, adjust position and scale. Then, use the preview to see the mesh, and click Apply All. This will ensure the best result for getting the head shape correct.

Stylizing Characters with ActorMIXER

To turn a realistic mesh into a stylized caricature, open the ActorMIXER plugin and load in the HD Caricature Mixer Pack. For my stylized 3D character, I found it quite helpful to use the existing content pack!

  • Blend build proportions across head, eye, nose, and jaw sections to add caricature elements without over-distorting the head.
  • Adjust body proportions to match the stylized head.
  • If mixing causes a distorted neck, select the actor morphs and adjust the Neck Length slider.

“HD Caricature Mixer is a pack that I like a lot, because it almost applies to any stylized characters. It is really flexible, and gives you the proportions of all kinds of different body build.”

Jon Blalock — Digital Artist & Educator

Adding Facial Details, Eye Corrections & Expressions

For facial hair, I use the Beard & Brows Builder pack to apply modular sideburns, mustache, and sparse beard layers.

  • Eyeball Alignment: Adjust Eyeball Depth, Eyeball Width, and Eyeball Height morph sliders so the eyes look directly forward without clipping through the eyelids.
  • Eye Blink Correction: Test eye closure using the blink tool. If the eyelids do not meet completely, go to Character > Correct Eye Blink.
  • Lighting: Apply cinematic lighting presets (Content > Item > Light > Cinematic Light) to evaluate dynamic shadows and material highlights on your finished character.

As for the facial animation & teeth depth, I tested the performance by using Motion > Facial Rig > Dramatic Male. If upper or lower teeth poke through the lips during facial expressions, adjust the Teeth Upper Depth morph to pull them back.

Conclusion

The Headshot 3 Plugin equips digital artists with an unrivaled toolkit for turning 2D portraits into fully animation-ready 3D avatars. By combining AI image generation, robust mesh-fitting controls, and seamless integration with ActorMIXER and Character Creator 5, you can dramatically accelerate your character production pipeline while maintaining full artistic control.

John Blalock

John’s background and education are in the traditional visual effects pipeline, mainly as a Compositor. Over the years, he has worked at visual effects studios such as Rhythm & Hues, and game company Sony PlayStation.

While he enjoyed those studio experiences, he found a greater love in passing along what he had learned. He has taught in the college education sector in Southern California for over 12 years, including the Academy of Art University.”

He has been entranced by their possibilities and integration with other tools, such as iClone and Character Creator, ever since. John is also co-founder of the YouTube channel AsArt and also runs a tutorial-based channel, JohnnyHowTo. He would love for you to stop by and join him on his adventures!

Frequently Asked Questions (FAQ)

Q: Can I use photos created with third-party AI generators like Midjourney, ChatGPT, or Gemini?

A: Yes! Headshot 3 accepts external images. If your source image contains baked-in shadows or unwanted hair, try to regenerate it with an AI prompt, and always mention that the character’s face should be fully lit for best results. This will give you a good start in achieving a reliable image for the later AI 3D head.

Q: Why is flat-lit lighting so important for source photos?

A: Flat lighting eliminates directional shadows on the base diffuse texture, allowing Character Creator‘s dynamic lights and shaders to render realistic highlights and shadows in real-time without visual artifacts.

Q: How do I fix teeth or eye clipping during facial animation testing?

A: You can adjust the eyeball depth, width, and height morph sliders to ensure proper eyelid contact. For teeth clipping, use the “Teeth Upper/Lower Depth morphs”, or run the correct eye blink tool under the Character menu.

Read Next:

What’s New in RTX Render Open Beta 3: Craft Film-Grade Shots & Animate Materials

Reallusion has officially launched RTX Render Open Beta 3 for iClone 8 and Character Creator 5. Building on earlier path-tracing releases, Open Beta 3 delivers key production upgrades to help creators produce film-grade visuals through advanced camera controls, expanded color management, dedicated post-processing channels, and live procedural material workflows.

  • New Users: Visit the [Reallusion Forum] for the complete Installation Guide and setup instructions.
  • Full Feature Details: Check out the Slides to view the comprehensive feature guide and visual demonstrations!

Native Volumetric Lighting

Open Beta 3 natively integrates real-time ray-traced volume scattering for physical Spot Lights and Point Lights, enabling atmospheric light shafts, sunbeams, and spotlight cones directly inside the viewport.

See more visual demos

Refined Lens Flare Controls

Lens Flare effects receive major visual enhancements in Open Beta 3. Artists can now take advantage of refined flare controls and directional settings, offering greater precision and improved optical quality when tuning lens artifacts in the scene.

See more visual demos

Industry-Standard Lens Presets & Sensor Shift

Camera mechanics receive physical-world upgrades with real-world lens profiles and shift controls. Artists can select fixed prime focal lengths (like 12mm f/2.8 or 50mm f/1.8) or standard zoom setups (like 24-70mm f/2.8) that automatically bound focal lengths and maximum apertures. A Universal Zoom mode remains available for unrestricted adjustments. Additionally, new Sensor Shift controls simulate tilt-shift lenses by shifting the internal sensor plane horizontally or vertically, keeping parallel vertical lines perfectly straight during high- or low-angle shots without moving the camera body.

See more visual demos

Physical Optics, Bokeh, and Smart Focus Tracking

Depth of field is now driven by physical F-stop values, with options to style background highlights using geometric aperture shapes, physical blade counts, or Anamorphic Squeeze Factors for realistic oval bokeh. Smart Focus Tracking keeps camera focus automatically locked onto moving actors, bone structures, or mesh vertices during dynamic motion.

See more visual demos

Multi-Scatter Bloom & Custom Glare Kernels

Highlight diffusion algorithms receive a massive upgrade with Multi-Scatter Bloom, which calculates light scattering across 6 layered passes to preserve surface details. Furthermore, artists can load custom EXR or DDS HDR images as optical kernels to render realistic glare starbursts.

See more visual demos

Decoupled World Lighting & World Background

The previous IBL framework is now split into independent World Lighting and World Background channels. Scene lighting can be driven via Ambient Light (solid color), IBL, or the new Dynamic Sky system. Ambient Light colors blend smoothly into both IBL and Dynamic Sky setups, while dedicated Horizon Height and Horizon Blur parameters enable precise blending along the ground line. 2D background imagery is also integrated directly into the World Background panel, allowing backdrop tweaks without shifting scene lighting intensity.

See more visual demos

AgX Color Management

AgX Color Management replaces standard sRGB tone mapping with the AgX View Transform and specialized Look presets (AgX-Punchy, AgX-High Contrast) to eliminate highlight clipping and smooth out HDR roll-offs.

See more visual demos

Advanced Denoising Mechanics & Diagnostics

Rendering controls now offer independent sampling profiles for viewport previewing versus final renders. Viewport denoising can be set to engage only after reaching a specified sample threshold to maintain interactivity, while final renders leverage auxiliary Albedo and Normal passes for cleaner noise reduction in dark environments.

See more visual demos

Material Render Pass Isolation

For precise compositing and surface material debugging, Open Beta 3 introduces dedicated render passes. Artists can directly isolate and inspect individual lighting components, including Transmission, Clearcoat, Sheen, Emissive, Specular, and Subsurface Scattering (SSS).

See more visual demos

Live Dynamic Substance Parameters & Timeline Keyframing

Substance materials now stay completely live within the RTX path-tracing engine without baking down into static textures. Procedural material attributes—such as pattern variations, roughness offsets, and color channels—can be tweaked in real-time. Artists can also keyframe Substance parameters directly along the Timeline to create dynamic, time-based material transformations during RTX playback.

See more visual demos

Availability

RTX Render Open Beta 3 is available now for registered users of Character Creator 5 and iClone 8. Download the update today and share your renders and feedback on the official Reallusion Forum.

Related Posts

Download iClone Personal Edition from Reallusion Hub
and experience all iClone 8 features for free