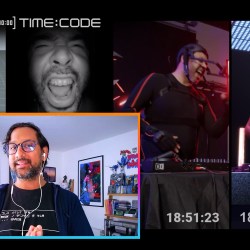
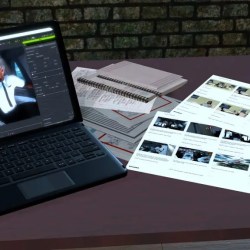
Much of filmmaking thrives on the smooth coordination of independent teams. In his latest video, Michael Tiedtke emphasizes the critical role of consistent timecode in maintaining that cohesion across disciplines. He demonstrates how the iClone Timecode plugin was used to produce a short Star Wars fan film in Unreal Engine, ensuring frame-accurate synchronization for elements like dialogue, motion capture, and visual effects. This article is a brief overview of how his timecoding approach enabled smooth integration of mixed media during production, saving both time and resources in the process.
Michael Tiedtke
Michael Tiedtke is a Pipeline Technical Director at Stiller Studios, where he develops advanced workflows and tools for real-time animated feature production. His work draws on deep expertise in character rigging, simulation, and the Unreal Engine. He is currently contributing to the film Handbok för Superhjältar – Röda Masken. Outside the studio, Michael runs a widely viewed YouTube channel with over a million views. There he shares practical, production-tested tutorials on 3D, VFX, and real-time animation for artists at all levels.
By connecting Rokoko Studio to iClone Motion LIVE, Michael was able to stream motion capture data directly for real-time preview on his 3D characters. At the same time, he set up a timecode-enabled reference camera to align the motion accurately. To ensure synchronization, he matched the frame rate and system clock across all recording devices. The motion capture was then recorded using system timecode, enabling timecoded burn-in data for each frame in iClone, direct timecode input and timeline display.
Embedded Timecodes for Effortless Alignment
iClone enabled Michael to precisely align motion capture data with reference video using their embedded timecodes. The process was both fast and precise through intuitive context menu commands and automatic alignment across all media types, including audio. The same method was applied to facial and audio capture, allowing him to synchronize both elements and fine-tune facial expressions with ease.
Post-Production Alignment in DaVinci and Unreal
For previsualization, Michael handled the initial editing in iClone and exported the previz video with a timecode burn-in. He then used DaVinci Resolve to align the timecoded video on the timeline with the audio track for perfect synchronization. In Unreal Editor, characters were placed into the scene, and Metahuman facial capture was integrated. Thanks to the consistent timecode across all assets, audio and body motion remained perfectly aligned in the Sequencer; regardless of when each element was created.
Undeniable Advantage of Timecoding
For Michael, iClone’s timecode functionality proved essential for syncing a wide range of multimedia assets. Presented through an intuitive, easily accessible interface, timecoding is just one of the many features that showcase Reallusion’s commitment to modern, efficient workflows in digital filmmaking — Another step toward democratizing the CG industry by saving time, effort, and resources.
Drag and Drop motions are a quick and easy way to animate characters for beginners and pros alike. There are many ways to break and blend existing motions, but the introduction of Animation Layers gave us a new level of control to change existing character motions limb by limb if needed.
These layers are a means to non-destructively edit a base motion by using custom layers that are “on top” overriding that part of the base motion. If you create a layer named “arms” and use that layer to animate only the arms, then it will override any arm animation contained in the base motion.
To be clear, we can animate any or all limbs with each layer as that depends on our needs and workflow. This is another example of iClone being as simple or as complicated as we need it to be. While it is just as easy to animate any combination of limbs on any given layer, I would recommend that beginners keep it simple as shown in the example tutorial below by confining each layer to a limb or two until you get some experience.
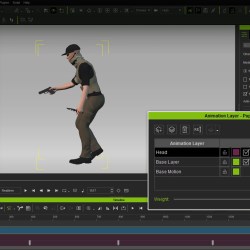
These layers are in the timeline and can be accessed by limb for fine tuning, adding preset curves or adjusting timing. The layer can also be turned on and off with a checkbox which leaves the layer intact but not in use. Since the base motion is still intact and the layers can be toggled on and off, there is no destructive editing at this point, leaving us the ability to change any aspect of our editing, regardless of timeline location or even go back to the original motion.
More Control
Animation layers give us a lot more control since we choose what to animate and when to animate it on each layer. If we choose to animate the arms and head and do so in separate layers, then we can name each layer accordingly and only animate those parts.
Keep in mind that all character limbs can be animated so be sure not to make any inadvertent changes to other limbs. Even if you make intended changes to other limbs but label the layer as arms and legs you might have trouble finding it in a complicated project so label accordingly.
Color Code
Each layer has a color code that helps you to find it on the timeline by using that color to highlight which layer you are looking at. The layer is color coded and when you select a motion on that layer, it will be highlighted with the matching color.
These unique colors give us a way to quickly and easily identify which motion belongs to which layer on the timeline.
How Animation Layers Work
Let’s jump right into an example of how simple this process is. For this example, I am using an action character carefully moving forward, crouched and at a slow to moderate pace. We’ll do this using the basic walking motion in the Motion Puppet then add animation layers to edit the characters arms and head.
The basic walking motion will be far from what we need so I will demonstrate how to adjust the motion before recording it. We will change the character’s posture and pace while locking down the hips to a more controlled and less swaying motion to match the mood of what the character is doing then we’ll start working with the layers.
I will use the layers to add a different arm motion, and I’ll also animate the head to move around and scan the area ahead and to the side. This will be manual editing but do not let that scare you as it couldn’t be easier. If all you have done is drag and drop motions at this point in using iClone then this will be a good introduction to how you can tweak those motions or customize them completely.
At the end of the tutorial, we will have a cautious walking motion with custom animation layers for the arms and head. After this you will be on your way to more customized animations.
Merge Animation layers
We can also merge animation layers into one to combine animation effects. We have a choice of Optimized which according to the manual will merge layers and their keys with a smooth optimization algorithm. The manual also warns SOME DETAIL may be lost with this method.
There is also the Per Frame method that merges the layers and their keys into continuous keyframes across the timeline.
When you merge, the layer will be renamed to MERGED [ORIGINAL Layer Name], i.e. merged right hand to easily identify merged layers.
Weight
Weight is another tool that can blend layers smoothly or transition between active layers. Below is a quick look at using the Weight slider and its effects on blending multiple layers. Weight allows us to assign weight to each motion layer to control how they interact with the other layers. It is a slider from 1 to 100 percent to control the influence of the layer within the percentage range.
Motion Versus Animation
Animation layers are for manually adjusting the limbs and not for loading motions as this has been confused in the past. If you try to load a motion into an animation layer it will overwrite the base layer and remove any animation layers you may have already added.
Motions and animations are technically different animals in the iClone world even though the terms are used interchangeably. Motions are canned animations that we drag and drop onto characters. Animation in this sense refers to manual manipulation of a character or prop by the user. These manipulations create keyframes that drive the animation. It depends on the context of the conversation or usage to distinguish between the two.
Summary
The addition of Animation Layers brings us a tool that is extremely easy to use while providing more control over our characters limbs when adding more animations to the base layer. These layers can be turned on or off so you can make several of them to test different techniques or styles and only use the ones that suit your needs. Animation Layers are another great tool for the animation toolbox and can help beginners to create custom animations on top of base layer motions for a new hybrid motion.
Digital Artist MD “Mike” McCallum, aka WarLord, is a longtime iClone user. Having authored free tutorials for iClone in its early years and selected to write the iClone Beginners Guide from Packt Publishing in 2011, he was fortunate enough to meet and exchange tricks and tips with users from all over the world and loves to share this information with other users. He has authored hundreds of articles on iClone and digital art in general while reviewing some of the most popular software and hardware in the world. He has been published in many of the leading 3D online and print magazines while staying true to his biggest passion, 3D animation. For more information click here.
Greetings, this is Peter Alexander. I’m thrilled to introduce an innovative collaboration between Reallusion’s Character Creator 4 andMetaTailor — a workflow designed to significantly enhance your 3D clothing creation process.
This integration offers a seamless, direct pipeline between two powerful tools, elevating both character design and garment fitting to an entirely new level.
Character Creator 4 is well-known for streamlining the character development process. It provides artists with a deep set of tools for rapid, high-quality avatar creation; including detailed morph sliders, facial rigging systems, and SkinGen for advanced skin texturing. It also connects directly with iClone for animation, making it a robust platform for end-to-end production.
However, one of the remaining challenges in the pipeline has been clothing; specifically, getting garments to fit, deform, and move properly across different character morphs. It’s a technically demanding process that can take hours of manual adjustments and weight painting. That’s exactly where MetaTailor comes in.
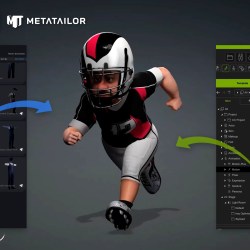
MetaTailor is purpose-built for garment rigging and fitting. It gives artists an intuitive, visual way to edit clothing meshes directly, with smart tools for vertex manipulation, automated weight transfers, and real-time collision detection. With its live deformation previews, you can immediately see how a garment will behave during character movement—drastically cutting down trial-and-error.
Let me walk you through a typical MetaTailor workflow:
Export Your Character from CC4
Start by exporting your character mesh from CC4 using the MetaTailor Bridge, which ensures your avatar is ready for fitting in the correct format.
Assign Clothing Organization by Color / Type
MetaTailor allows you to organize clothing by Type (e.g., Head, Pants, Shoes). You can group items by assigning them the same color, clicking and cycling through the color options, or assigning them an individual color to keep them separate.
Body Arrangement Points
You will next go to a screen with various points on the character’s face and body. Line them up as best as you can according to the arrangement label. You can also redo this later if you’re not sure.
Apply Automated Weight Transfers
At this point you’re able to go through the library of clothing and assign outfits and accessories with a single click. Skinning weights will be smartly applied to the clothing, and in many cases very little adjustment will be needed.
Vertex and Mesh Manipulation Tools
For more exaggerated characters, there is a variety of tools capable of pushing, pulling, smooth, and relaxing vertices. You can sculpt on the base shape or an additional sculpting layer. For even more complex characters that defy all human proportion, there is a lattice tool that allows for greater manipulation of the mesh.
Check Real-Time Deformations
Preview how the garment moves with the character using MetaTailor’s real-time deformation playback.
Export the Fitted Garment Back to CC4
Once everything looks right, simply export the updated mesh back to Character Creator 4. At which point the character’s clothing will be exported back to the existing character.
Additional Clean Up
You can use CC4’s existing tools to hide the underlying character mesh and maximize CC4’s animations without any mesh penetration.
By combining CC4’s robust character-building tools with MetaTailor’s precision garment-fitting system, artists can dramatically streamline their workflow. The result? Less time battling technical constraints, and more time focused on creativity and storytelling. This collaboration between Reallusion and MetaTailor makes high-quality, professional-level garment rigging accessible to both novice and experienced creators. Whether you’re building assets for games, film, virtual fashion, or digital humans, it’s a win in every way.
Reallusion combines Vicon technology with industry-standard timecode support in iClone
Reallusion announces its official partnership with Vicon, enabling direct motion capture support for iClone. For the first time, Vicon systems can seamlessly connect with Motion LIVE, offering full integration of real-time, high-fidelity body capture, along with facial and hand mocap, all within one unified platform. Jeff Sheetz, founder of Monkey Chow Animation Studio, shares his experience with this powerful iClone-Vicon suite, which he believes delivers studio-quality results faster than ever before.
Jeff Scheetz, Motion Capture Orlando
Since leaving his role as co-founder of The Digital Animation & Visual Effect (DAVE) School, Jeff Scheetz, alongside his wife Anne, has been running Monkey Chow Animation Studio in Orlando, Florida. In 2021, they expanded into motion capture with the launch of Motion Capture Orlando, serving the theme park industry. Their work can be seen at Universal Studios and Walt Disney World, and they’ve also produced various motion capture packs for iClone and ActorCore, such as Run for Your Life, Bank Heist, and Avenging Warriors. Jeff’s team also collaborated with Actor Capture on the Netflix movie The Electric State. Key team members include senior mocap technicians Kaszmere Messbarger and Nelson Escobar.
iClone and Vicon—The New Dynamic Duo
One of the most exciting aspects of Jeff’s relationship with Reallusion is getting to test out cutting-edge technology before it’s officially released. When he was informed that iClone would soon support Vicon integration and timecode synchronization, it was a game-changer. Motion Capture Orlando has been using Vicon’s cameras and software since they started investing in mocap gear, but they were unable to integrate Vicon data directly into Motion LIVE until now.
This breakthrough is especially significant for Jeff, as the previous workflow involved streaming Vicon data into Motion Builder for retargeting, and then moving that data into Unreal Engine. The integration of facial data, hand motion (via data gloves), and the inherent latency in this multi-step process presented challenges. Now, with iClone’s Motion LIVE, Vicon streams directly into iClone, allowing for seamless integration of face, body, and hand all within the platform. This streamlined approach reduces complexity, making it easier to execute live shows and set up production workflows.
Record, Edit, and Render Previz in iClone
When it comes to previz, speed and cost-effectiveness are essential. Traditional mocap workflows can be time-consuming due to the necessary exports and imports between different software tools. However, by recording directly into iClone, you can immediately start blocking shots, working out camera moves, and rendering previews. Jeff’s team recorded a few assassin chase scenes on their stage, using Motion LIVE to capture data, and the resulting iProject files served as the foundation for their productions.
The quality of the capture was impressive due to starting with Vicon data. This allowed them to present high-quality previz to a director quickly. The renders included vital data on the edges, such as version info, lens used, and notes for feedback, helping the team stay organized throughout the process.
From Previz to Polished Video: Cleaning and Syncing with Timecode
After capturing mocap for the previz, the team performed proper data cleaning using Shogun Post (Vicon’s mocap cleaning software), and motion edits were carried out in iClone. They identified the best takes—approximately 20% of what was shot—and cleaned only those pieces. One major challenge was syncing the cleaned data, but the introduction of timecode has made this process much easier.
Using the new Timecode Plugin, Jeff could instantly sync the cleaned motion data with the original timeline. By dropping the new motion (as an FBX) onto their character and selecting “Align Clip to Embedded Timecode”, iClone automatically aligned it with the original recording. This feature works not only for motion data but also for facial capture, hand data, audio, and video.
Seamless Mocap Sync with Live Action
This seamless integration was especially useful when creating a sitcom scene for Life with Bob! in which a live actress performed against a CGI character. Mocap actors, placed just out of frame, could improvise and interact with the CGI character.
The use of a Tentacle Sync device transmitted timecode across all systems: Vicon, the Live Face app, the video camera, and sound recording devices. This made it incredibly easy to sync everything once the master shot was completed.
Reshooting and Updating with Motion LIVE
One of Jeff’s favorite features of this new workflow is the ability to quickly make adjustments, such as reshooting facial animation without the need for a full reshoot. Using his iPhone, he could capture just the parts that needed improvement, like the lips, while leaving other aspects of the face intact. The flexibility to isolate and reshoot specific elements is a major time-saver and enhances the overall efficiency of the production process.
The New Workflow: Speed, Efficiency, and Creativity
For creators using Reallusion products, the integration of Vicon with iClone opens up new possibilities for creating high-quality animated content in a fraction of the time previously required. The new workflow allows for fast, professional results with minimal overhead. With the addition of the Timecode plugin, keeping everything aligned and organized is simple. Motion LIVE, combined with Vicon’s mocap system, empowers creators to focus on what matters most: creativity and storytelling. And after all, that’s why many of us got into animation in the first place.
Hasraf ‘HaZ’ Dulull – Filmmaker / Director / Animator
Hasraf ‘HaZ’ Dulull
HaZ Dulull began his career in video games before moving into visual effects, eventually transitioning into directing and producing. His breakout indie sci-fi feature THE BEYOND (2018) hit #2 on the iTunes Charts and became a profitable success after being licensed by Netflix. His follow-up film, 2036 Origin Unknown, starring Katee Sackhoff, received a limited theatrical release and later debuted on Netflix. HaZ went on to direct the pilot for Disney’s action-comedy series Fast Layne, also serving as Executive Producer and Creative Consultant for the full series.
As co-founder of HaZimation, HaZ has continued to push boundaries with MAX BEYOND, an indie CG animated feature created using cutting-edge real-time and virtual production tools like Character Creator, iClone, ActorCore, and Unreal Engine.
In his latest venture, HaZ launched Beyond the Pixels—a platform celebrating innovation, gaming, and technology as forces that fuel creativity. With features, interviews, and collaborations with top brands like SONY, RAZER, and WACOM, the platform offers an inspiring look at how tech empowers the creative process.
Reallusion’s TIMECODE Plugin is a Game Changer for Motion Capture
As someone who works daily in game cinematics and animation, especially with motion capture, I’ve got to say—this new plugin from Reallusion is a total game changer.
The update? It’s called Timecode. And if you’ve ever tried to keep multiple motion capture performers in sync (especially during chaotic action sequences or those intimate, dialogue-heavy moments), you already know… That struggle is real.
What Is TIME CODE?
Reallusion’s Timecode plugin brings one thing above all else: 🔁 Total synchronization across every aspect of a mocap performance.
Whether you’re capturing body motion, facial expressions via HMC, or detailed hand gestures with gloves—Timecode locks it all in, live. No more drift. No more time-consuming cleanups trying to align multiple takes in post.
We’re talking about:
🟢 Real-time alignment of video, audio, and mocap data
🟡 Cross-device and multi-performer synchronization
One of my absolute favorite features? The Quad View setup. It lets me see:
The live camera feed from the mocap stage
Mocap data visualized on skeletons or characters
A real-time preview in Unreal Engine
Prop and actor placements inside iClone
It feels like I’m directing from mission control. And it’s not just useful for me as a director—animators love it too. Why? Because everything recorded becomes a visual reference gold for the animators later to use when fixing intersections and animating on top of the mocap.
Overlay Metadata? YES, PLEASE.
You know what’s underrated but SO powerful? The burn-in data tools. You can overlay:
Timecodes
Take numbers
Versioning info
Any other production notes
It’s the kind of clarity that saves time across every department—animation, production, and mocap. It keeps the entire pipeline aligned from capture to final export.
Compatible with (Almost) Everything
Timecode isn’t a walled garden—it plays well with all the big names in mocap:
Xsens
Rokoko
Perception Neuron
OptiTrack
Vicon
And more…
Plus, integration is seamless with Unreal Engine 5, Maya, MotionBuilder, and others. Thanks to bi-directional timecode exchange, nothing gets out of sync. Ever.
A Tool Made by People Who Listen
As someone who’s used Reallusion tools for years, what impresses me most isn’t just the tech—it’s the team behind it.
You can tell this plugin was made from real conversations with real studios—indie, mid-tier, and AAA. This isn’t just another product drop. It’s a practical, smart, and scalable solution that actually meets the creative and technical needs of working professionals.
If you have used it—I want to hear from you. 💬 Drop a comment below and let me know, and—most importantly—share your work!
Seeing what other creators are building with these tools always inspires me to push harder.
Final Thoughts
The new Timecode plugin isn’t just a tool—it’s a productivity multiplier. It eliminates chaos. It empowers creativity. And it brings everyone—from mocap to animation to final render—into perfect sync.
Until next time, Stay creative, keep pushing pixels—and I’ll see you on the next one.
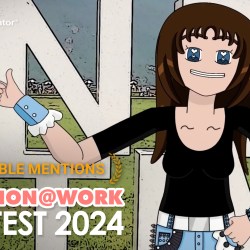
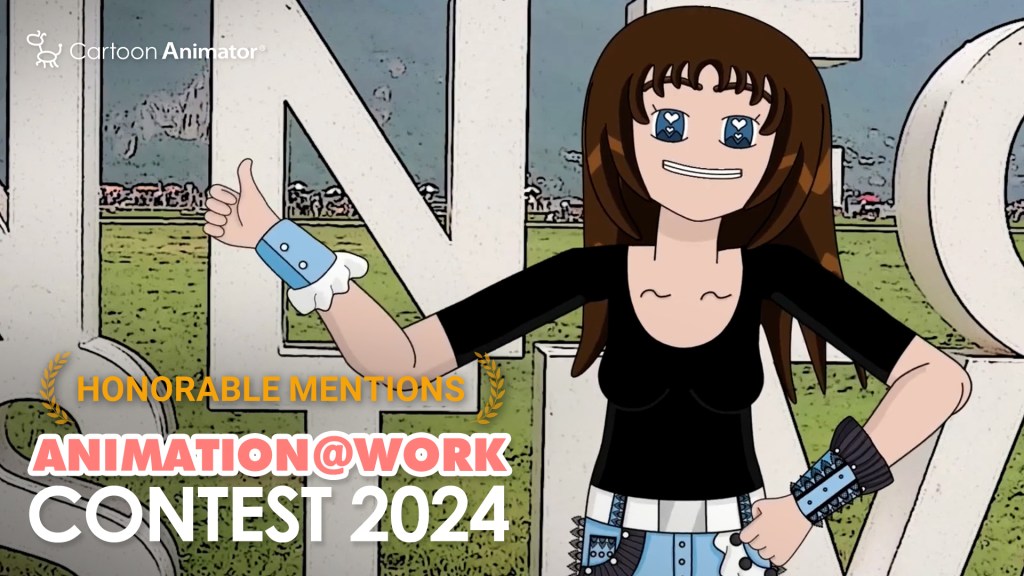
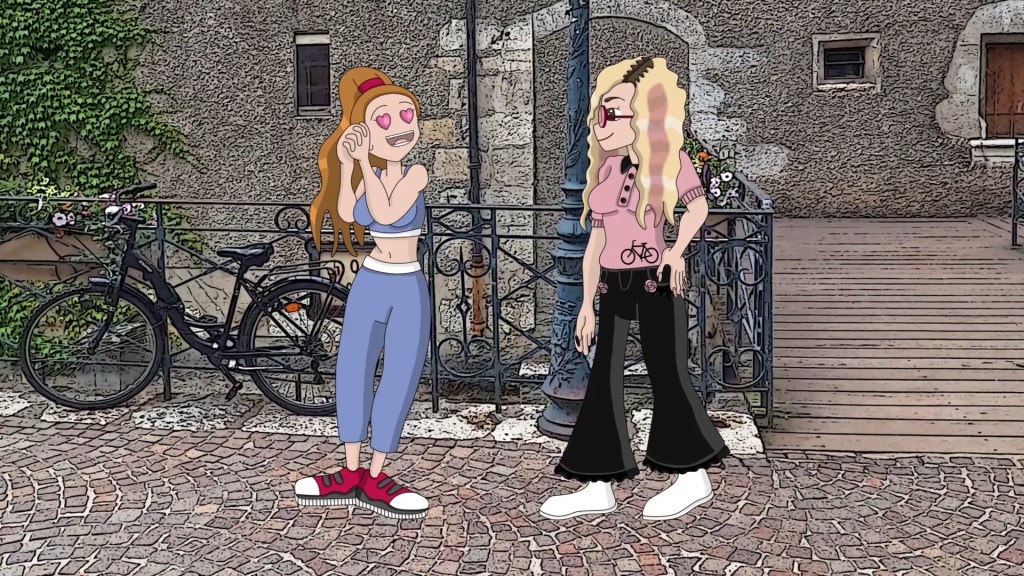
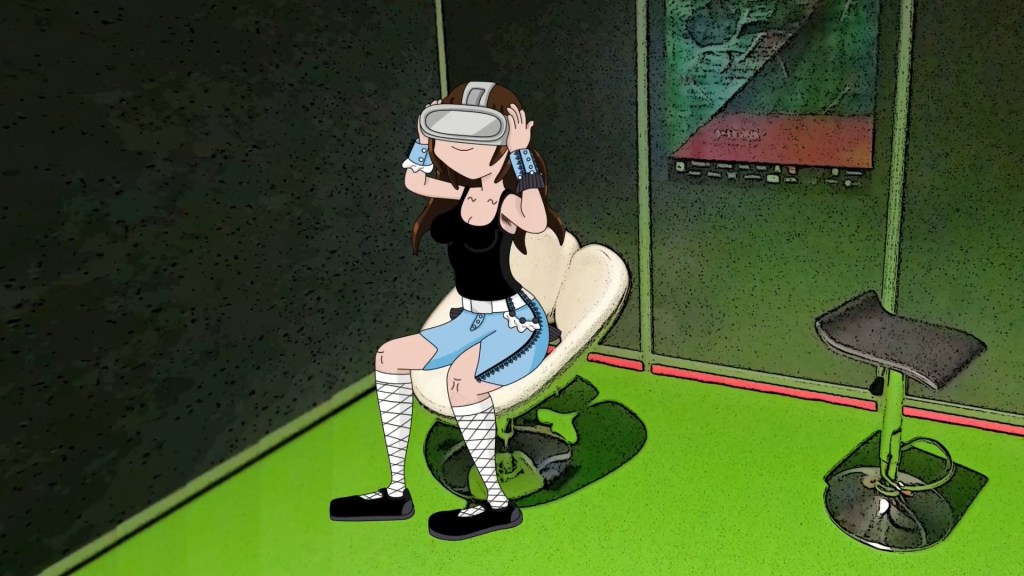
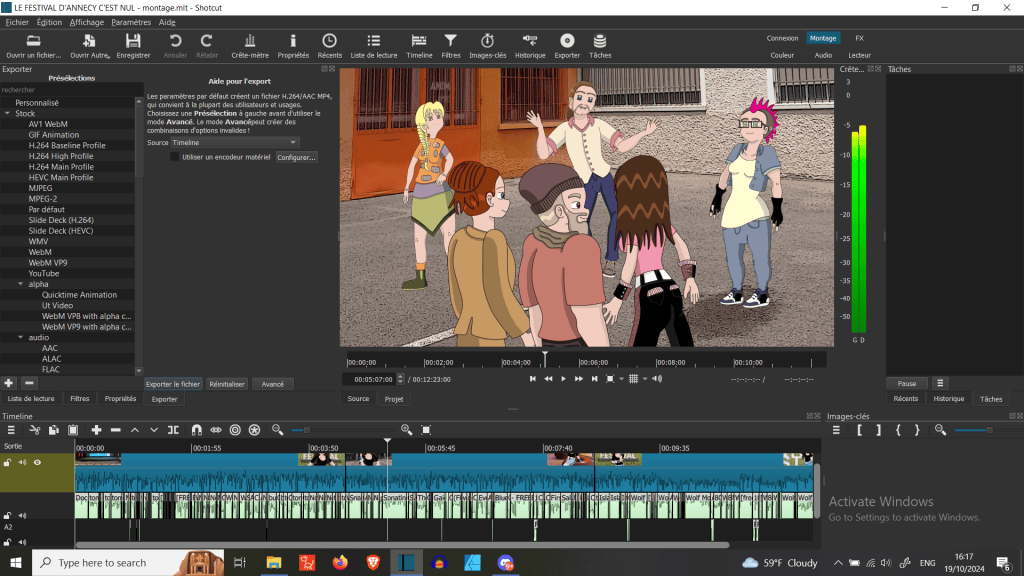
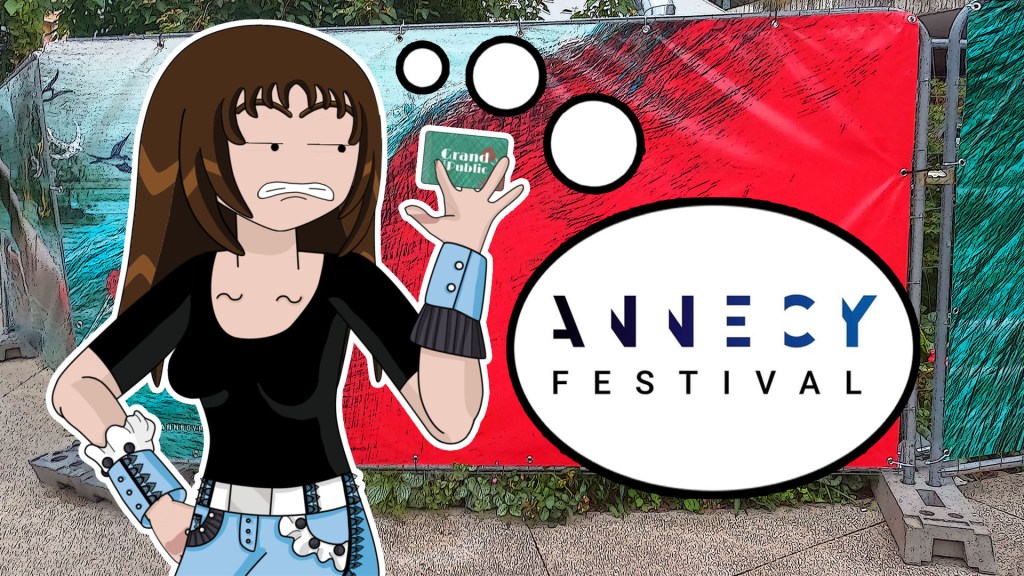
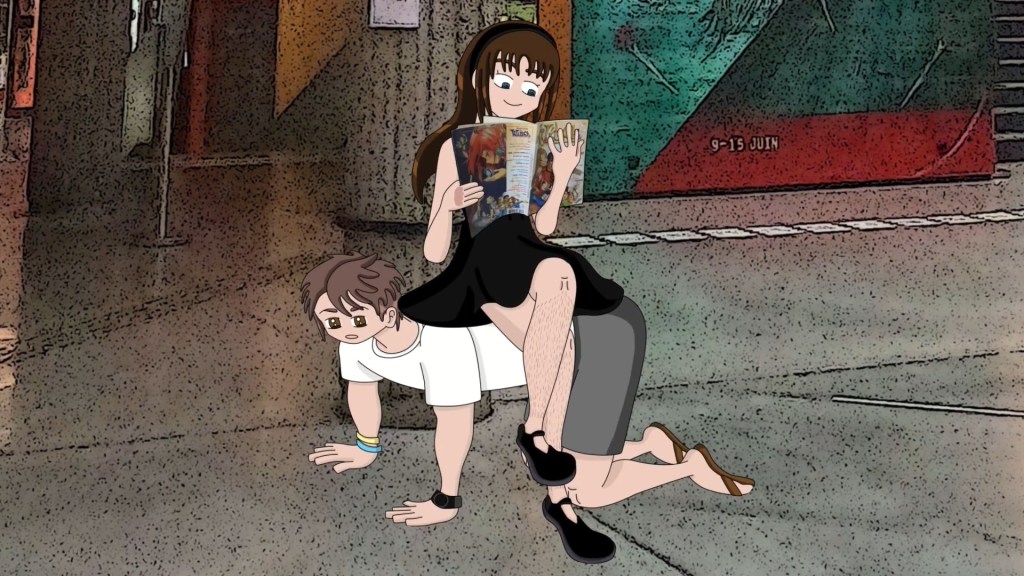
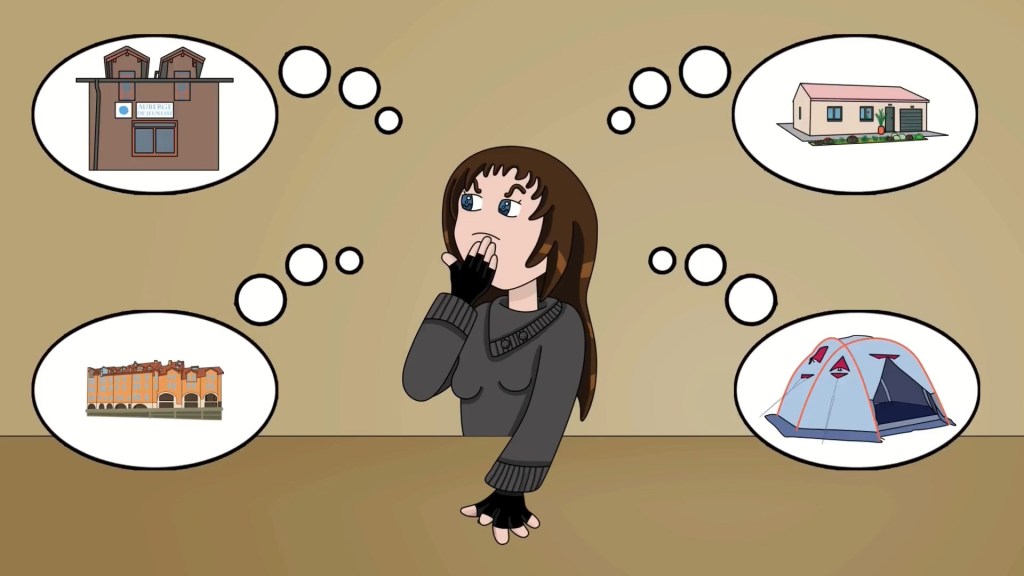
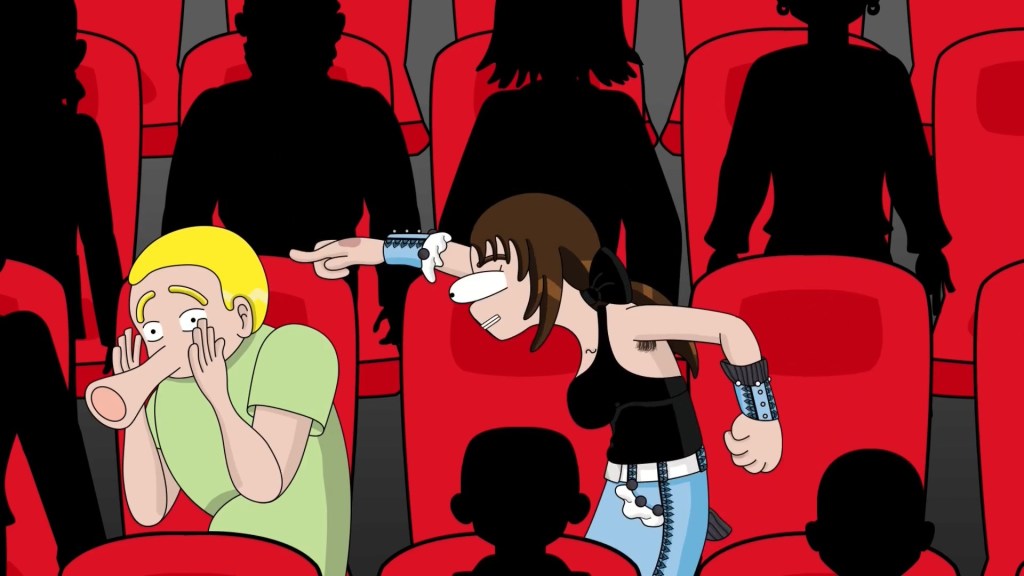
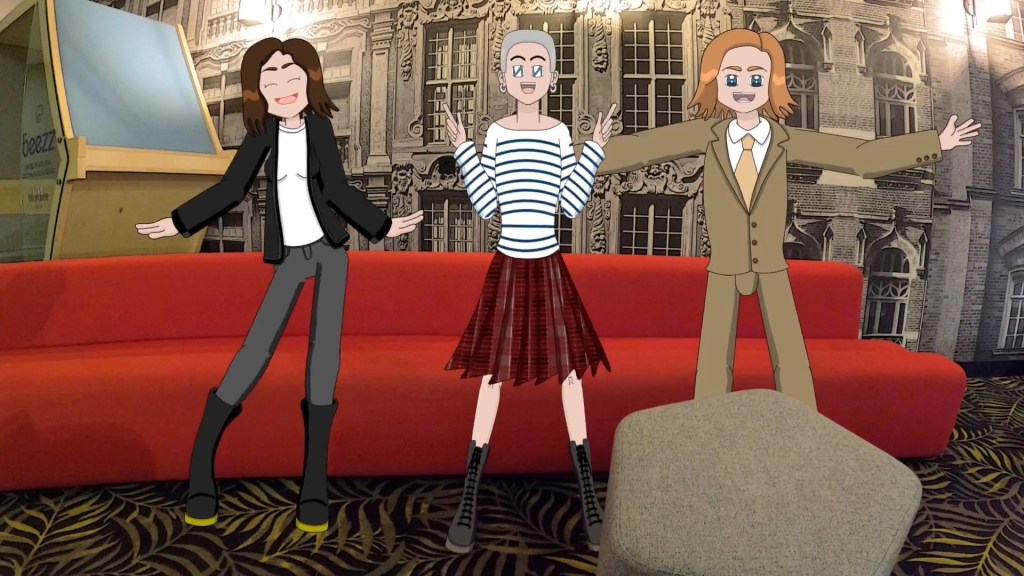
Artist RebbyCraft, received an Honorable Mention in the “Comic & Art” category of the Reallusion 2024 Animation At Work Contest. In this article, she shares the creative workflow behind her winning entry, Vlog Animé: LE FESTIVAL D’ANNECY C’EST NUL? and how she brought it to life.
RebbyCraft
Hi, I’m RebbyCraft, the creator behind the YouTube channel RebbyCraft. I’ve dreamed of becoming an animator since secondary school, with the goal of creating my own animated series. Back in the 2000s, animation resources were hard to come by, so I spent years exploring different paths—and even took a three-year gap from my studies. Maybe I was just ahead of my time.
Eventually, I enrolled in a vocational school to study graphic design. By then, I had already taught myself the basics of 2D and stop-motion animation, which made the transition to animation school feel natural. My ultimate goal is to become an independent animator—not only as a content creator, but also as a producer of my own original professional productions.
I first discovered Reallusion in 2016 through a simple Google search while looking for animation software that could help me create cartoons without requiring advanced drawing skills. At the time, my drawing abilities—especially for animation—were still developing, and I was frustrated by how that limited my ability to bring my ideas to life.
I tried Reallusion’s CrazyTalk Animator 2, the predecessor of Cartoon Animator, and immediately saw its potential. I felt a natural connection to the software, but struggled with certain aspects, especially animating characters with long hair like mine. Eventually, I set it aside to explore other options like TVPaint and OpenToonz. Everything changed when I purchased Cartoon Animator 4. I committed to learning it on my own by following Reallusion’s tutorials and gradually refining my animation skills.
In the meantime, my drawing skills improved significantly after attending animation school. I used to see myself as just a hobbyist without much talent for drawing, but with consistent practice, I gradually got better, and the creative process became much more enjoyable. Discovering and applying Cartoon Animator as my go-to tool made all the difference.
It gave me the confidence to start posting animated videos regularly on my YouTube channel and other social media platforms. I love how easily I can reuse and modify the templates I’ve created, which speeds up my workflow. I have to admit, Cartoon Animator isn’t widely used in France, and that made it feel even more special, almost like the software was tailored for me!
Why did I join using the Annecy Festival VLOG?
I chose my Animated Vlog about the Annecy Festival 2024 as my entry theme because it’s currently the most ambitious long video I’ve made, and it is the most accurate representation of the spirit of my overall channel.
Even though the Annecy Festival is as international as the Cannes Festival, I noticed that not many people, especially cartoon enthusiasts and indie animators, were aware of what goes on inside. It’s a shame because this event has so much to offer, like exposing attendees to a variety of entertainment, work opportunities, art, cultural experiences, and more. With this video, I aimed to introduce the festival as a kind of pop-culture convention and explain why it stands out from the pack.
Storytelling: preparing what to animate
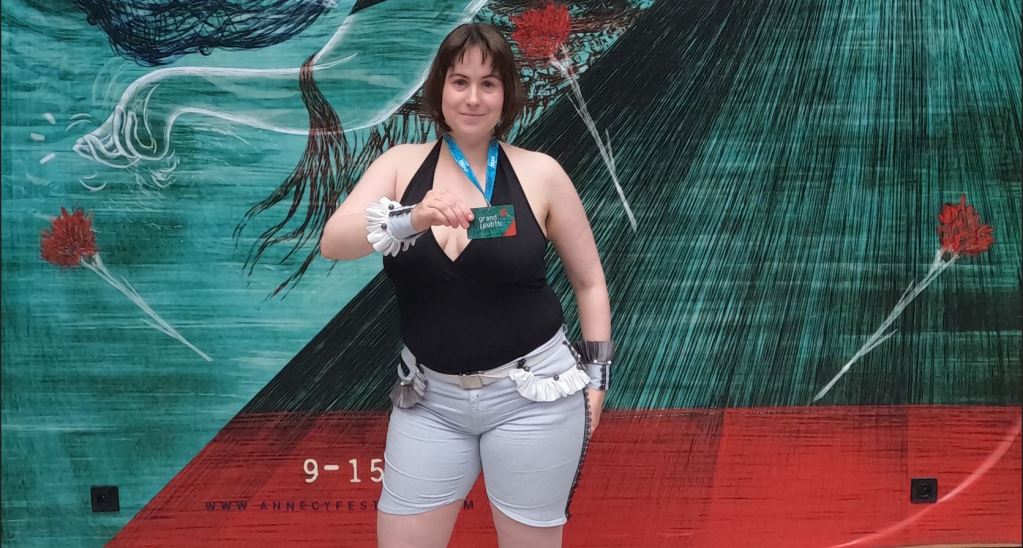
A lot can happen in one day, so I made sure to take as many pictures and videos as I could with my GoPro during the festival, capturing a wide range of scenes for my animated characters. To gather accurate background shots, I visited the event locations a day before the festival started to avoid the crowds. This allowed me to capture the full field of view of specific spots.
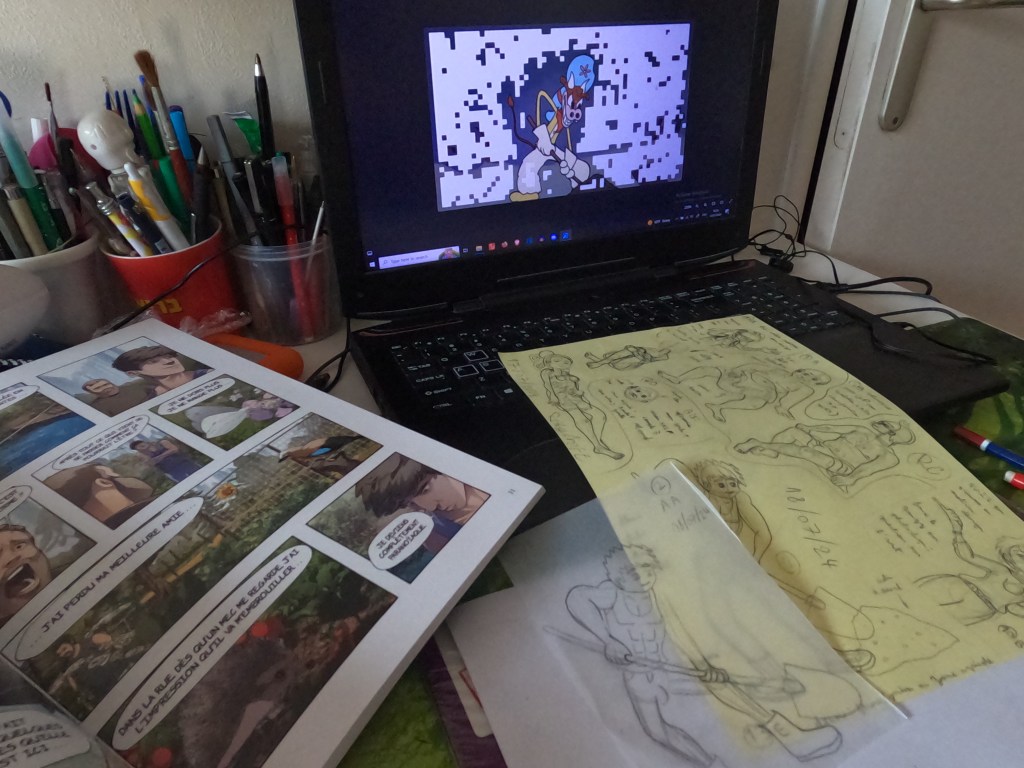
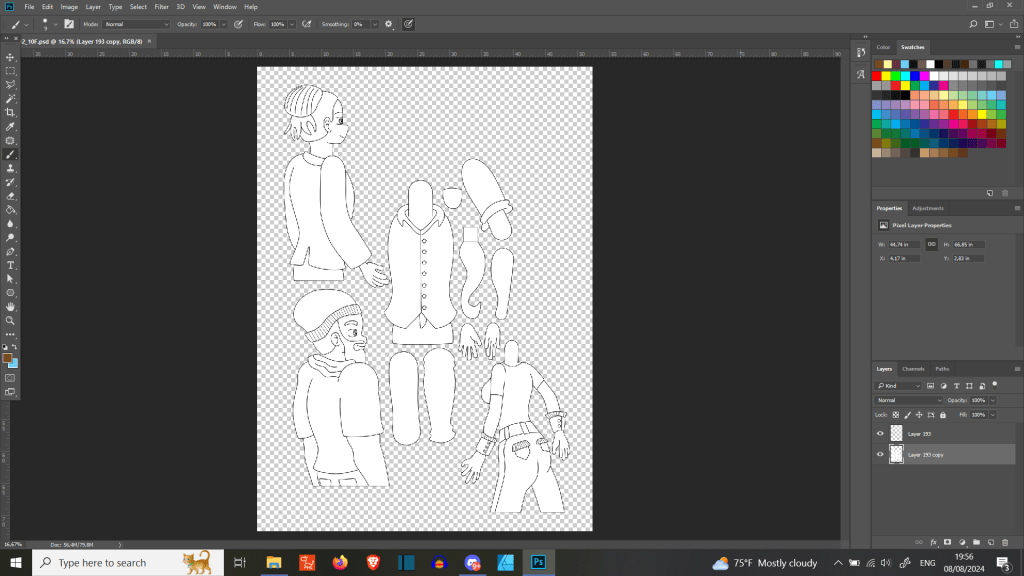
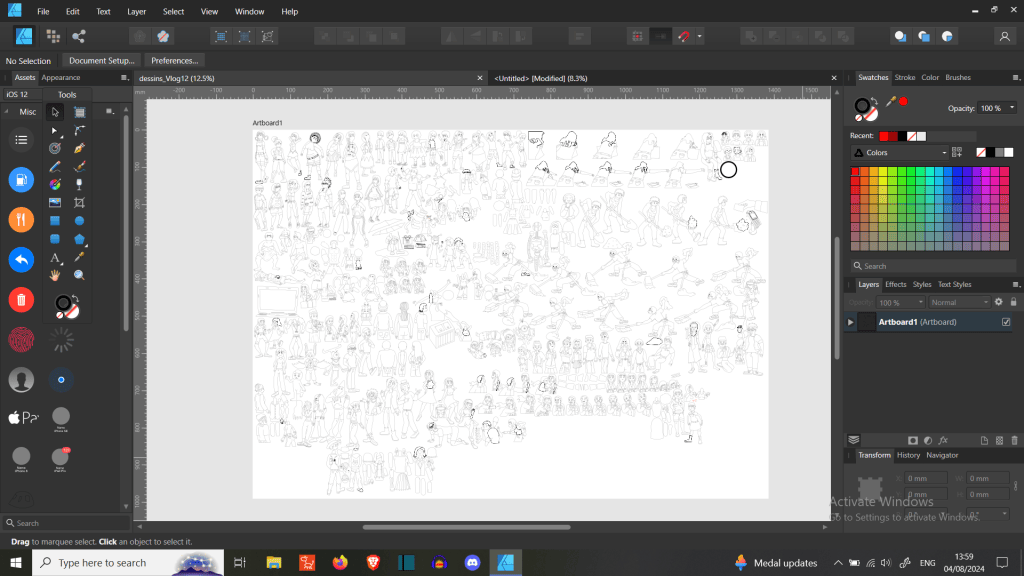
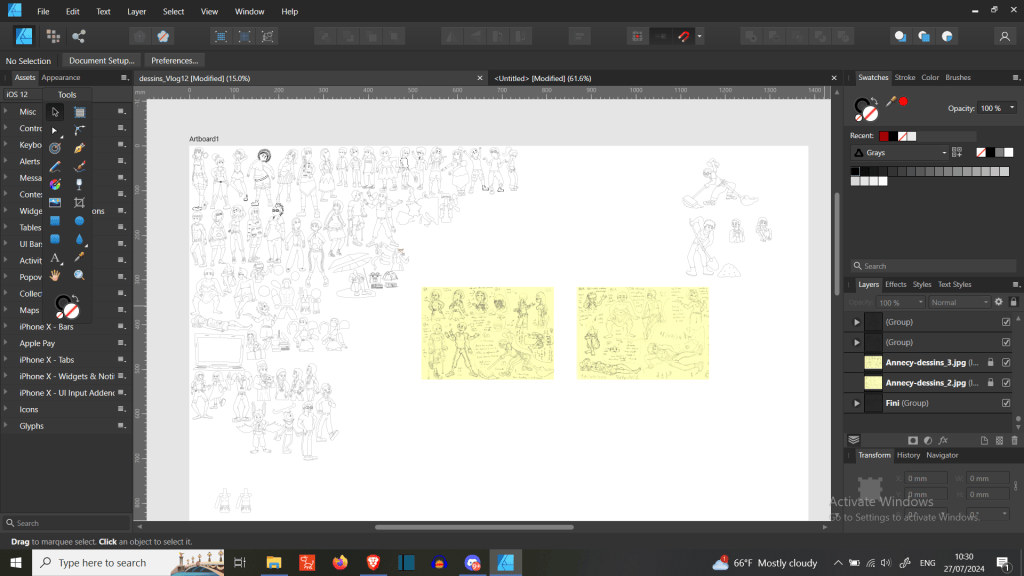
First, I finalized my script, then either sketched the scenes or created a list of what I needed to draw for the story. I scoured the internet for reference images, including poses, suits, props, and more. I also referred to materials I already had, like books, photos, and real-life objects. Finally, I drew my characters by hand on A4 sheets of paper, with the intent to fill each page to the brim before scanning them.
Leveraging Affinity Designer for drawing and character creation
After finishing my pencil drawings, I import them into Photoshop and Affinity Photo to apply subtle comic-style effects.
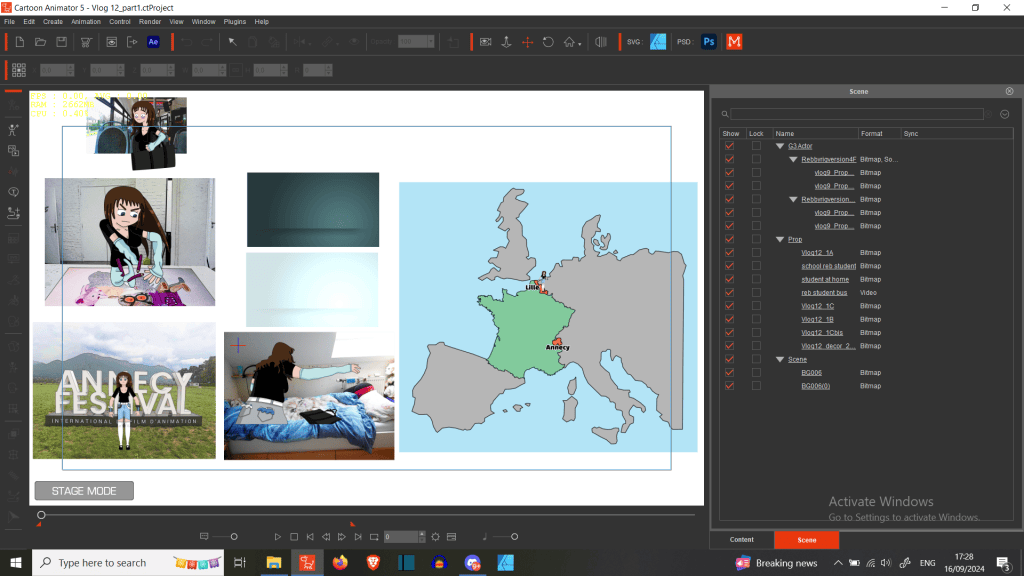
I typically handle the inking in Affinity Designer, then move back to Photoshop to finalize each element with color, shading, patterns, and additional details. This stage also includes character rigging. Once complete, I bring everything into Cartoon Animator 5 to check the rigs and add bones if necessary. Throughout the process, I deliberately skip background illustration due to the time-intensive nature of creating them.
I use a combination of manual and automated methods for animation. I typically automate the foundational movements, then manually refine specific parts—such as the body, head, or accessories—depending on what the scene requires. Making expressions in Cartoon Animator is also very intuitive and worth recommending.
Overall, it took me about four months to complete the video, largely due to numerous revisions of the script and voice recordings. Estimating the drawing time is difficult, as I often experience executive dysfunction. Some days I’m highly productive, while on others, progress is minimal. I’ve dealt with it for many years, and I’ve learned to work with it.
I can draw at least one A4-sized piece each day after spending some time gathering the best references. I prefer not to start digitally, as it lacks the tactile feel I get from traditional tools. It’s easier to infuse my drawings with my signature style, and I only use a basic graphics tablet when I need to maintain consistent size and linework for my characters.
Three things I like about Affinity
A solid Adobe alternative – It works similarly to Adobe, so switching over is easy. If you’re used to Adobe, Affinity feels familiar.
Modern and digital-friendly – Since it was made more recently, it suits today’s needs better, especially for web and screen design over print.
One-time payment – Each app costs under $60, sometimes less during sales. No subscriptions—buy once, own it forever.
About My Main Character
The main inspiration for my character design comes from 20th century cartoons like those from the golden age and the anime Magical Doremi. I love anime and cartoons, so my dream is to see a maximalist blend of both—where elastic animation and intricate details coexist. In fact, different prototypes of this mixed style have existed since 2007. This year marked the beginning of my journey on the internet to further explore and research this idea, especially by visiting MagicalDoremi.net daily to gather inspiration, all with the hope of one day creating my own animated series set in a Y2K-style internet world.
As a teenager, I used to worry that my designs weren’t original enough. But over time, I realized they actually are, mainly because I haven’t come across any copycats. I was even surprised that fans of Magical Doremi didn’t immediately recognize any resemblance between the eyes of Onpu Segawa and my character. Aside from the influences already mentioned, I also draw inspiration from real life—the people around me, specific moments, objects, and personal experiences. Other artistic influences include South Park and Caljbeut, a French animator known for his work on YouTube.
Character Creation
Rigged characters may seem easy to draw, but that’s not always the case—especially if proportions or anatomy aren’t your cup of tea. Despite the challenges, it’s essential to analyze the structure of other sprite characters to see how they’re drawn. Experiment with the templates available in Cartoon Animator, along with any additional templates you might have on hand. Imagining them with volume—like a sculptor would—can help you draw your characters from different angles. Here are some additional pointers:
Don’t hesitate to create round shapes between joints as reference points.
Keep in mind that sketched characters are rarely 100% symmetrical, but you can correct that during the inking stage.
When it comes to sprites, the more parts you add, the better the accuracy and smoothness of the final result.
Character Animation
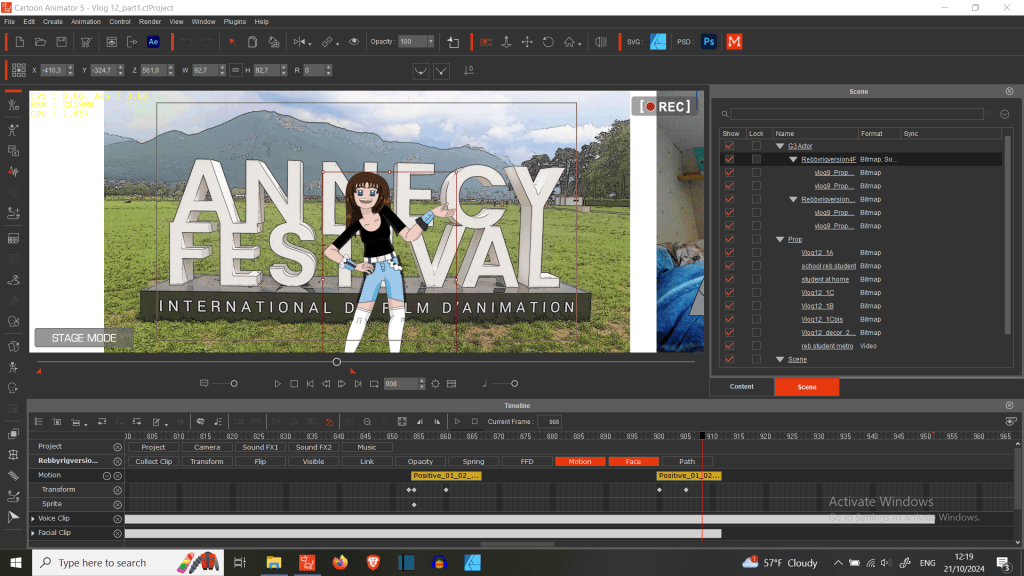
With regular animation, I typically begin by setting up a scene similar to my short content. I import new templates or reuse ones I’ve previously created in Cartoon Animator. First, I place the background, followed by the characters and props. Then I load the voice audio and animate the characters according to the overall theme and their individual emotions.
While working, I set the video format to MP4 and adjust the scene length to match the audio. For characters, I add automatic motions or keyframe body movements as needed. I also change hand, leg, and other sprites depending on the specific actions required. Accessory and prop animations are done manually for more precise motion.
I often animate the head manually but sometimes use automated motions. Usually, I start with template expressions and modify them as needed, then apply transformations. I follow a similar process for details like hair, using deformations where appropriate, and swap eye sprites to match the expression.
For traditional motions, I change out sprites and fine-tune their timing based on the desired speed. Occasionally, I use FFD (free-form deformation) for added flexibility.
Finally, I position the camera to highlight key elements, check the scene thoroughly, render the project, review for errors, and then move on to the next shot.
Staying trendy with TikTok Shorts
At first, I was skeptical of the TikTok short format—its vertical orientation felt difficult to work with, and I worried about potential copyright issues when blending various materials. But I soon realized how much easier it was to gain visibility. As a self-proclaimed nerd, I now prefer producing loads of short videos over constantly promoting my longer projects on other platforms. It frees up more time for me to create and dive into new interests.
Short video formats offer a unique advantage to animators, especially when limited to 60 seconds or less. The time cap reduces the pressure to produce lengthy content and lowers the barrier to regular posting. In France, many have begun their animation journey through this new medium. Personally, it’s opened the door for me to explore concepts like détournement animé—a style of animation that repurposes existing media (like cartoons or films) to craft new meaning, often for satire, parody, or political commentary.
For this particular animation, I didn’t record any specific audio. I simply focused on building scenes around the main theme. I reused my go-to templates and rigged characters, which were more than enough for this longer format. While working with longer durations, not much is required to capture and hold the viewer’s attention. This workflow also allows me to appear on camera like a Vtuber, join trends, or react to current topics. It’s much easier to produce partial animations on a tight schedule. The more prep work you do in advance—like building reusable assets—the faster and more automated the process becomes. And within that framework, there’s still space for custom animations that enhance engagement and stand out. It’s like raising Tamagotchi pets: the more you nurture your animated characters, the more expressive, efficient, and capable they become.
Video Editing with ShotCut
It took me some time to learn how to edit eye-catching videos. I started by following online tutorials on YouTube, especially from 60s Academy by Alex Bram and Merguez SuperStar on Loann LV’s channel. I also incorporated feedback from others to refine my approach.
The skills I developed for short-form video editing also proved useful when working on longer projects, such as my video about the Annecy Festival. Since animation is incredibly time-consuming—especially for a solo creator—I’ve streamlined my workflow for short videos. I study dynamic content and break down its structure, paying close attention to how elements like music, visuals, and scene transitions maintain a fast rhythm. Nothing should stay static for too long; every part should move in sync with the pacing.
While you can learn a lot through self-study, investing in training gives you access to more tailored advice that can really sharpen your skills. Finally, I wrap up my videos in CapCut, where I add subtitles, apply effects, and finalize the look with filters.
Closing Thoughts
I’m really happy to have taken part in the Reallusion 2024 Animation at Work Contest. Honestly, I wasn’t sure if my video met all the contest criteria, so receiving an Honorable Mention came as a complete surprise—especially since it was my first time entering any Reallusion animation competition. My advice to future contestants: be bold and take a chance. You have nothing to lose and everything to gain.
If you’re interested in my work, feel free to follow me on YouTube, Instagram, and TikTok—I’m very active on all three. You can also find me on other social media platforms!
Dom Fred – Director / Producer / Editor / 3D Animator / Martial Artist
Dom Fred
Dom Fred is no stranger to pushing creative boundaries. As a seasoned director, producer, and 3D Maya animator with over two decades of experience in television advertising and digital storytelling, Fred has crafted visually compelling commercials, music videos, and documentaries.
Operating under his banner, DOM ANIMATION STUDIO, he specializes in blending 3D characters into live environments with an unmistakable flair for martial arts and acrobatic action.
His latest experimental short film, Ninja School, offers a powerful demonstration of what real-time tools and modern mocap technology can achieve in the hands of a skilled action director.
By adapting Reallusion’s tools—ActorCore, Character Creator, and iClone—with Unreal Engine, Dom Fred brings Ninja School to life as a high-impact, real-time action short, achieving fluid, cinematic martial arts sequences without the need for costly mocap suits or labor-intensive keyframe animation.
“This NINJA SCHOOL short will accompany me during masterclasses and my 2025 Cannes Film Festival presentation. It’s a proof of concept for how indie creators and professionals alike can leverage real-time workflows to tell powerful stories with cinematic precision.”
Dom Fred – Director / Producer / Editor / 3D Animator / Martial Artist
Behind Ninja School
Ninja School is more than just an animated film—it’s a technical showcase and creative exploration designed to highlight Fred’s real-time production workflow. The short film introduces viewers to Master Yen Chu and a group of ninja students in a training academy, where traditional martial arts and modern animation collide in cinematic fashion.
“This project was about exploring the creative and technical potential of real-time tools, and demonstrating how far we’ve come in animating complex action scenes quickly and efficiently,” said Dom Fred.
The characters, such as Master Yen Chu and his students, were brought to life using meticulous design and outfitted with costumes crafted by Libertas Armory—available on the Reallusion Content Store—adding authenticity and style to the film’s visual identity.
Fred’s Ninja School was made possible through a sophisticated pipeline built around Reallusion’s powerful suite of tools. From initial character design to post-production, the workflow was both efficient and cinematic.
Character Creator 4 (CC4) was used to model and customize all characters, giving them lifelike expressions, stylized proportions, and wardrobe flexibility.
iClone 8 served as the animation hub, used for animatics, pre-visualization, and scene layout.
ActorCore provided the motion capture data, specifically from packs such as SWAT Stunts, Wall Crawler, and Hand-to-Hand Combat.
The final renders were completed in Unreal Engine, with post-production edits in Adobe Premiere Pro 2025.
A Workflow Centered on Efficiency and Action
Pre-production began in iClone, where Fred and his team crafted animatics and technical shot breakdowns. This allowed them to plan camera angles, timing, and choreography without wasting time or resources.
“iClone is constantly evolving. Its flexibility lets us save precious time in pre-production while keeping the action sharp and cinematic.”
Dom Fred – Director / Producer / Editor / 3D Animator / Martial Artist
Once the shots were locked, ActorCore’s motion capture packs were brought in to bring high-octane martial arts to life. With direct integration into iClone, these pre-made motion clips allowed for fast iteration and powerful results.
Thanks to iClone’s LIVE LINK feature, all scenes were seamlessly transferred to Unreal Engine 5, enabling real-time lighting, high-fidelity rendering, and smooth animation playback. This seamless transfer allowed Fred to focus on cinematic quality while maintaining speed.
The Power of ActorCore Motion Packs
Fred relied on three specific motion packs from ActorCore, which delivered stunning realism and flexibility:
These ActorCore packs allowed the team to visualize and finalize movements rapidly, preserving energy for fine-tuning lighting and compositing in Unreal Engine and Premiere.
This pack provided tactical movements, perfect for choreographing intense sequences where ninja students execute coordinated takedowns and disarm techniques. “The SWAT Stunts pack gave us grounded, powerful action movements that brought authenticity to our fight scenes,” said Fred.
Used to highlight acrobatic skills and vertical movement, this pack allowed characters to leap and scale walls, giving the short a dynamic verticality. “Wall Crawler animations helped us simulate gravity-defying ninja agility, all without needing mocap gear or manual keyframing,” Fred explained.
This pack delivered fluid, realistic martial arts choreography that made every scene feel like a blockbuster. “The hand-to-hand combat motions felt real and cinematic right out of the box. It saved us so much time,” – Dom Fred.
Real-Time Production for the Future
Ninja School isn’t just an internal experiment—it’s also a key piece for Dom Fred’s upcoming masterclasses and his technical showcase at the 2025 Cannes Film Festival. The short film exemplifies how real-time tools like Character Creator, iClone, and Unreal Engine, when combined with quality motion capture, can dramatically streamline animation pipelines.
A Collaborative Effort
Fred also extended thanks to Reallusion and the broader content creation community:
“We sincerely thank our partner Reallusion and the content creators who make it possible for us to efficiently complete our 3D animation and VFX projects.”
Dom Fred – Director / Producer / Editor / 3D Animator / Martial Artist
Ninja School stands as a tribute to what’s possible when innovation, technology, and storytelling come together—backed by the right tools and creative vision.
Storyboarding was one of the reasons I discovered iClone about twenty years ago as I was looking for an easier way to get the job done. Storyboarding, for those beginners not familiar with the concept, is a simple way to pre-visualize a script with static images for each scene that represent the flow of the story and give the director and principal photographer a chance to hash over their shot list and other items.
It is much easier and cost effective to storyboard a scene for animation or live action than to just start shooting it on location or start animating without a roadmap. When shooting a live scene there can be tremendous costs to redoing a shot because of a bad camera angle. Storyboarding allows the directors to visualize these shots before a crew is put on the clock.
More importantly, a storyboard adds structure and helps to maintain continuity between shots, and it works equally well in animation by providing a glimpse at what we are trying to animate or get on film versus what we “envision” in our minds. There are no downsides to using a storyboard and iClone is here to help.
Do not confuse a storyboard with an animated movie. Storyboards are usually concise and do not have to contain works of art. Some are nothing more than stick figures drawn on paper while others are almost complete productions of the movie in book form. While these do not have to be high quality, they do need to convey the direction the production takes and explain or show the aesthetics of certain scenes.
A crude storyboard can at the very least help to get a coherent video that an audience can follow. It can also show problems before the production work beings. As mentioned earlier, this produces a cohesive video and can prevent straying from the main storyline. Even the smallest, seemingly unimportant video can benefit from storyboarding.
Posing Versus Animating
One of the best features of storyboarding is you do not have to be an animator to create storyboards. This only involves posing, not animating and iClone is packed with poses. And motions that can become poses. The new AccuPOSE makes iClone an even more formidable storyboarding app by providing a library of AI-assisted posing that can grow each month with the optional Infinity subscription that adds new pose libraries regularly
I mentioned motions because they are nothing more than a collection of poses and you can load a motion, scrub down the timeline until you find a pose you like then right click, select REMOVE ANIMATION and what is left is a pose.
iClone Workspace Setup for Cockpit Storyboard Below.
Static Storyboards
Think of a static storyboard as a simple comic book. It needs to convey the emotion, looks and feel of a comic book panel. It must tell viewers at a glance what the director or cinematographer wants the audience to see and feel. It’s not always possible to convey enough emotion in a static image especially when you are new to all this. Sometimes it’s not necessary depending on the direction and instructions you are following. In any case just give it your best shot and you’ll see your storyboards and videos improve.
I’ve yet to work on a storyboard that didn’t discover problems and require some adjustment no matter how ironclad we may think we have fleshed out our original story.
Animated Storyboards
Animated storyboards are fantastic but require a lot more time and resources. Even just 10 to 30 seconds of animation can take several hours at a previz level and that I something you need to keep in mind.
By previz level I mean flat or very rudimentary lighting, low poly props to keep things moving along while using simple characters and props.
The animated panels need to convey the proper message but not recreate the entire. Do not reinvent the wheel, just get the ideas across. A hybrid storyboard combing elements of static and animated panels may be a better fit for some projects.
Simplified Storyboard Setup Using Scaled Variations of the Free Box Primitive, Wall and Trees that comes with iClone.
Practice with your Favorite Movie or Show
Thats right! Storyboard a scene from one of your favorite movies or television shows that conveys the story and style of the scene as you see it. Then step back and storyboard it from another viewpoint or a re-imagining of the storyline to practice your creative thinking and getting what you see in your head down on the screen.
It’s that last part that trips up a lot of creatives. It can be the most difficult part of the pre-viz process. The powers-that-be tell you what they want to see and then you have to get on the same page and storyboard their vision for everyone else to work with.
Storyboard 1 – Airliner Cockpit
Panel 1: Cockpit Interior | Tight Shot | Full Flight Crew Routine flight with the crew concentrating on tasks during a routine and uneventful flight.
Panel 2: Cockpit Interior | Closeup of Cockpit Door Shot slightly Rotated for dramatic Effect. No characters in view. A sudden pounding on the cockpit door rips through the cockpit with a warning.
Panel 3: Cockpit Interior | Crew Closeup. The startled pilots look at each other while the Engineer looks through the peep hole. only to find it blocked.
Panel 4: Cockpit Interior | Door Closeup. The Engineer turns to get the Crash Axe while the pounding intensifies on the door. There is no answer to the captain’s demand to identify themselves.
Panel 5: Cockpit Interior | Wide side shot of Engineer holding Crash Axe in front of cabin door. Flight Engineer stands in front of cabin door with the Crash Axe in hand ready to defend the cockpit. The 1st Officer continues the Mayday call while squawking the 7500-hijack code. The captain is still demanding Identification.
Panel 6: Cockpit Interior | Closeup of Copilot 1st Officer presses the transponder button for the 7500-hijack code.
Panel 7: Panoramic Shot | Jet Only Side shot of Airbus jet over land.
Panel 8: Exterior Shot | Fighter Jets Two F-16s take off from nearby airbase to intercept the airliner.
Storyboard 2: Simplified with Dummy Assets
We can create a storyboard with 3D primitives that come with iClone such as blocks, walls and floors to make the props in the in the scene. This works well in the early stages of a project when the exact location settings or interior types might not be set.
Like the first storyboard above it can also be used to create or adapt a shot list for the entire project. You can visualize camera angles at amazing speed and make adjustments before putting any crew on the clock.
Cafe Interaction – Taking an Order
Panel 1: Interior Wide shot | Café Establishing shot to start the interaction between wait staff and customers
Panel2: Interior Wide Left to Right Angle with All Three Subjects Waitress looks to customer 1 and waits for order.
Panel3: Interior | Right to Left Wide Angle Customer 1 looks at waitress and gives order.
Panel4: Interior | Left to Right Wide Angle Waitress switches to customer 2 and waits for order.
Panel 5: Interior | Left to Right Wide Angle with Customer 2 Customer 2 looks at and gives order to waitress.
Panel 6: Interior | Wide Left to Right Angle | All Three Subjects. Waitress thanks the customers for their order and finishes up.
The above storyboard shows how even simple, everyday interactions like taking and giving an order in a café can not only be visualized but improved. It would be very easy for a director of photography to make changes to their shot list based on work from the storyboard phase and will usually have a large amount of input in the creation of the storyboard and its evolution.
Smart Search PlugIn
The AI-Assisted Smart Search plug-in utilizes AI-enhanced search techniques to quickly and easily locate assets for storyboards and other projects. Smart Search offers two methods of searching for and locating assets.
Keyword Search lets us locate assets by Name, Tag or Author similar to conventional search.
Deep Search is the real powerhouse with its AI-assisted algorithms to quickly locate what you need and not lose that creative spark while searching. It includes Natural Language Support where even brief descriptions will give accurate, immediate results in over 100 languages!
To top that off, Deep Search also provides Drag and Drop or Copy and Paste Image based searching for those just right assets you have in mind but can’t put a name to for conventional or keyword search.
We can even select a prop out of our scene, right click and use Deep Search Similar to find assets closely resembling the selected prop, usually in a matter of seconds. We can also filter by category and exclude unwanted results, cutting back on clutter than be so easily distracting and time consuming.
Remember what I said earlier about motions being a group of poses? With the newly released Motion Deep Search we can now find motions much faster, and each motion can carry thousands of poses to use in the storyboard by scrubbing down the time to a desired pose, right click and Remove Animation to keep the pose as mentioned earlier.
I could go on and on about Motion Deep Search, but you get the picture. When you combine existing motions with what is available in the Content Store and Marketplace you have the potential of thousands of poses extracted from those motions including free motions that come with iClone.
This is a powerful usage case of Reallusion tools, planning and storyboarding to previsualize (Previs/Previz) a war feature motion picture on Amazon Prime India, The Forgotten Army. It’s also a classic case of using Reallusion tools to save on time and resources while moving the project forward possibly avoiding costly delays.
This case features Carletto, a puppet developed and animated in 1996 by Jim Henson Studios. Italian production house UBIK recreated the character for a series of commercials using Reallusion tools.
This case highlights Geoff Hecht, VFX supervisor on the Near Future: Manana Cabana project using Reallusion tools and storyboards to speed up production while not sacrificing quality.
Cartoon Animator
We can storyboard with Cartoon Animator too. It shares a lot with iClone and can accomplish many of the same tasks. The latest update has improved it even more and it can be a more economical way to create storyboards. I’m not experienced with Cartoon Animator like I am with iClone, but I would be surprised it you ran into any problems using it for the same purpose.
Summary
In closing I would like to stress the importance of continuity when laying out a story and a simple storyboard will go a long way to making your story ironclad with no surprises during production and no plot holes or left turns to confuse the audience.
Even if you just sketch out an outline on napkins with stick figures it will often be superior to not having any storyboarding at all. In this business, continuity is extremely important.
Yes, it’s an extra step in the creative process but it’s those extra steps that make work stand out and be recognized.
Digital Artist MD “Mike” McCallum, aka WarLord, is a longtime iClone user. Having authored free tutorials for iClone in its early years and selected to write the iClone Beginners Guide from Packt Publishing in 2011, he was fortunate enough to meet and exchange tricks and tips with users from all over the world and loves to share this information with other users. He has authored hundreds of articles on iClone and digital art in general while reviewing some of the most popular software and hardware in the world. He has been published in many of the leading 3D online and print magazines while staying true to his biggest passion, 3D animation. For more information click here.
Luis Cerezo, a seasoned creator with extensive experience in advertising, television, music videos, documentaries, and independent films, has embarked on a captivating journey to bring history to life through the lens of digital storytelling.
At the age of 15, Luis began an early career as a jazz drummer. As a filmmaker, he founded Cinelibre, an alternative production platform inspired by guerrilla filmmaking. His works have been premiered in Madrid, Montreal, Bogota, Warsaw and Shanghai. In 2015, his first novel “Eo” was published by Suma Letras. (www.luiscerezo.net)
His latest project recreates the awe-inspiring atmosphere of Mérida, known in antiquity as Emerita Augusta—a city that flourished nearly 2,000 years ago as a major capital of the Roman Empire. This ambitious endeavor not only revives the architectural grandeur of the era but also highlights the poignant story of Eulalia, a 13-year-old girl whose bravery and defiance made her a timeless symbol of freedom and faith.
To authentically represent Eulalia’s character and her world, Cerezo collaborated with a global team of artists, historians, and archaeologists. Beginning with traditional sketches and children’s historical recreations of the saint, the team utilized Character Creator to design detailed 3D models of characters, while costumes were crafted with input from experts in ancient Roman fashion. The city itself was meticulously reconstructed using topographic studies and archaeological data, blending realism with artistic interpretation.
Animations were developed using iClone, with its native files seamlessly integrated into Unreal Engine for rendering. This workflow allowed the team to create dynamic and emotionally resonant scenes efficiently. Cerezo credits Reallusion’s software suite for transforming complex production into an enjoyable and time-effective process, pushing the boundaries of digital artistry while honoring an enduring cultural legacy.
How Luis Cerezo Revived Ancient Mérida and the Story of Eulalia with iClone, Character Creator, and Unreal Engine
Q: Hello Luis. Welcome to our Feature Stories. Kindly share with us what inspired you to focus on Eulalia’s story and the recreation of ancient Mérida for this project?
From the moment a friend shared Eulalia’s story with me, a seed was planted that grew little by little. Initially, I never thought I could write it due to its magnitude, but it emerged spontaneously as part of a novel draft. Another factor was walking through the ruins of the present-day city, imagining it as it once was, and asking myself, “Why not see it as it used to be?”
But the most important aspect is the underlying theme of the struggle of that young girl.
Eulalia is about free will and standing firm in one’s convictions—a concept that made her a spiritual cornerstone of the Hispanic world and the West, as free will is what defines us as human beings.
Q: How did you collaborate with historians and archaeologists to ensure historical accuracy in the character designs and environments?
I’ve noticed that major productions, such as The Fall of the Roman Empire (Anthony Mann, 1964) or Shōgun (Hulu & Disney+, 2024), often lack historical rigor.
While taking natural narrative liberties, I felt it was essential to depict things as they truly were. From Late Empire clothing, to streets and textures, everything has been cross-referenced with excellent researchers actively working on excavations.
Under the guidance of Miguel Alba, who accompanied me step by step through the reconstructed areas, every detail was verified alongside various specialists. The Consorcio Mérida Ciudad Monumental was pivotal to this process. It’s composed of enthusiastic archaeologists and historians with a strong reputation for their restoration work.
A great advantage is that Mérida has remarkably well-preserved sites—from the theater to the stunning Temple of Diana and the ancient circus. Much of their structure remains intact, serving as a basis for reconstructing what time has erased.
Q: Could you explain how you used Character Creator to design the characters, from sketches to final models?
First, I sought visual references for each character, much like I do for my novels: creating a conceptual foundation. For a character venerated by millions, this required special care and reflection. Early sketches using AI didn’t convince me, so I turned to Yan Rodríguez, an artist and excellent anatomist, who crafted traditional sketches on paper.
People often underestimate the importance of anatomy, but those who study it deeply understand how facial muscles and bones shape a character’s essence.
The challenge was to stylize the characters enough to avoid the “uncanny valley” effect but not excessively so. This process took considerable time.
Fortunately, once a strong initial concept was established, Character Creator provided all the necessary and highly flexible tools.
“Once a strong initial concept was established, Character Creator provided all the necessary and highly flexible tools. The workflow was smooth, as the software allows for intuitive manipulation of ideas—a quality I find fascinating.”
Luis Cerezo – Writer / Filmmaker / Director
I even think I could use Character Creator to design faces for my novels, visualizing characters as I write.
Q: How did you integrate iClone animations into Unreal Engine, and what benefits did this workflow provide for rendering the final scenes?
The story of Eulalia spans a dramatic moment with significant social weight. Therefore, the approach couldn’t be excessively realistic, in contrast with the scenery.
iCloneis an incredibly intuitive system for animation, reminiscent of music composition in software like Logic or Cubase—you can layer, speed up, and amplify tracks. Being a first step, I conducted numerous tests and discovered that iClone allows blending MOCAP, manual animations, and library assets. The possibilities within iClone’s ecosystem are vast, and this experience has left me eager to explore further.
As for integration with Unreal Engine, iClone LIVE LINK worked seamlessly, enabling the use of Unreal’s lighting, scenery, and rendering capabilities, which dramatically enhanced the scenes.
“Reallusion has gained a devoted fan in me since day one, and I’ll rely on their tools for my next project, which takes place between interstellar space and a neighborhood market.”