首頁 » Page 26
3D character artist Jorge Ayala shares his tips and tricks of making the winning entry - Alchemist Astin from the 2024 Reallusion 3D Character Contest.

Winner Select: How a Character Artist Claimed First Place in Stylized Design

Jorge Leonardo Ayala Arias

My name is Jorge Ayala. I started my career in graphic design, but I started taking some basic 3D courses in 2017. I found it fascinating what could be done, although at that time I didn’t have the vision of being in the role of a 3D Character Artist. During the pandemic, I delved deeper into this world and started creating pieces focused on characters.

The most important point came in 2021 when everything made more sense. I realized that I enjoyed and had fun working in 3D. At that time, I was working as a freelancer, and one afternoon, while I was telling a friend about the projects I had developed for competitions and the classes I had taken, she sent me a job offer she saw on Facebook. I thought, “I have nothing to lose by trying”. Two days later, I received a response saying they liked my portfolio and wanted to do an interview. I ended up getting the offer and began my journey in the 3D industry.

Jorge’s ArtStation

3D Character Concept – Alchemist Astin

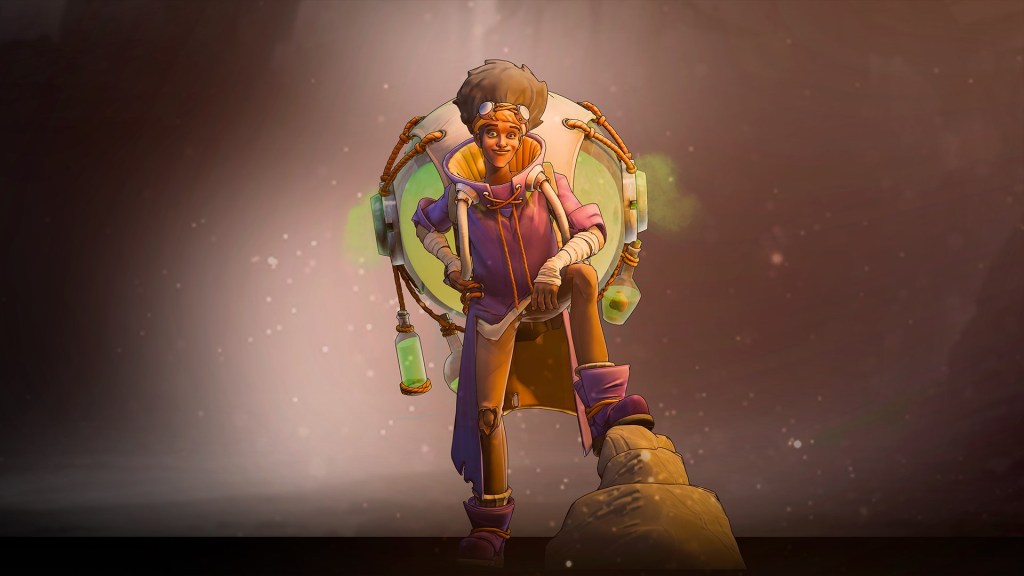
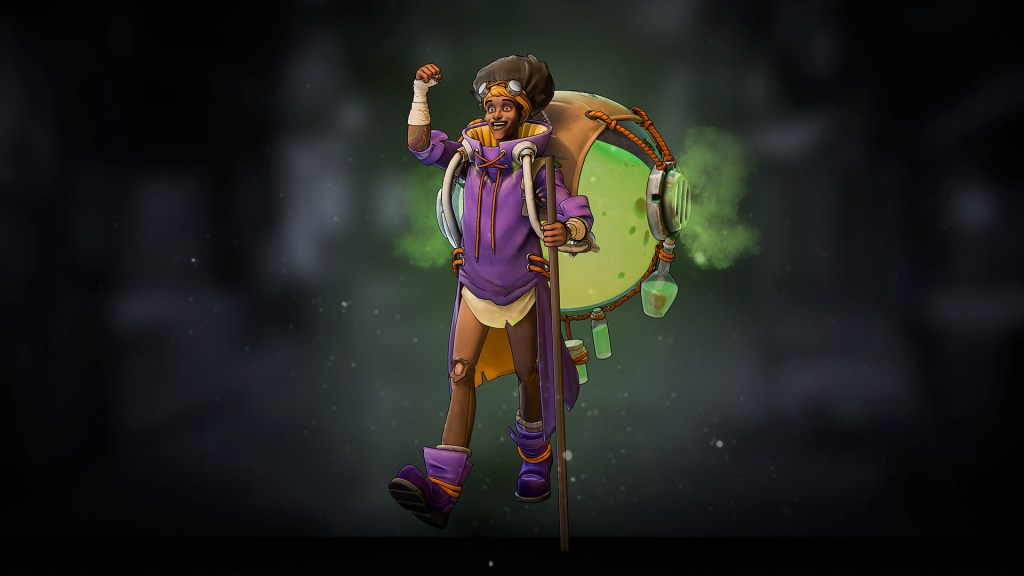
This concept is by concept artist Hans Chen, and it caught my attention immediately when I saw it. The vibrant colors and tones captivated me, but it was his dazzling accessories that truly sparked my interest. I immediately began to analyze what I could do with this character. It would be fascinating to bring each element of the character to life!

I imagined the bottles on his back bouncing as he ventured, his shirt moving with each step, and the shoelaces swaying back and forth. Even the detail of his hair couldn’t go unnoticed; I felt that adding movement to this seemingly static aspect would give it greater relevance, adding an interesting realism to his entire design.

The setting led me to envision a futuristic steampunk world, somewhat similar to the aesthetic of the movie Mortal Engines. In terms of style, I drew inspiration from a combination of references such as Spiderverse, Arcane, and the recent animated film Teenage Mutant Ninja Turtles: Mutant Mayhem.

When developing the character’s personality, I envisioned him as someone with multiple facets—a scientist who experiments not only with his creations but also with his own body. This character carries strange creatures with him, like plants with eyes and organs preserved in jars, along with his experimental liquid. To reach that point, I imagined that his mind must be somewhat unbalanced, which is reflected in the renders and appearance of the character, showcasing different facets or personalities.

Starting with Character Creator (CC)

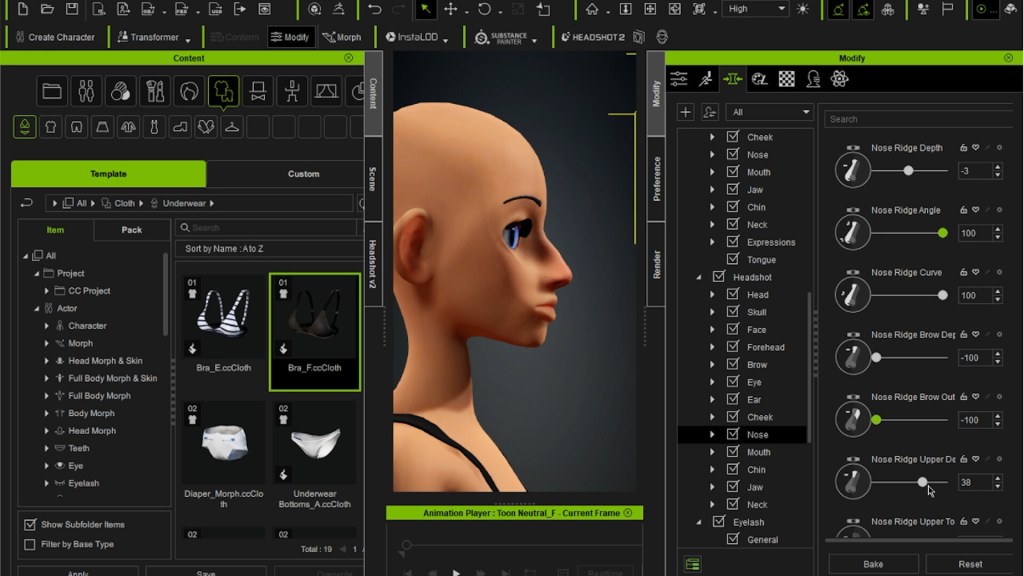
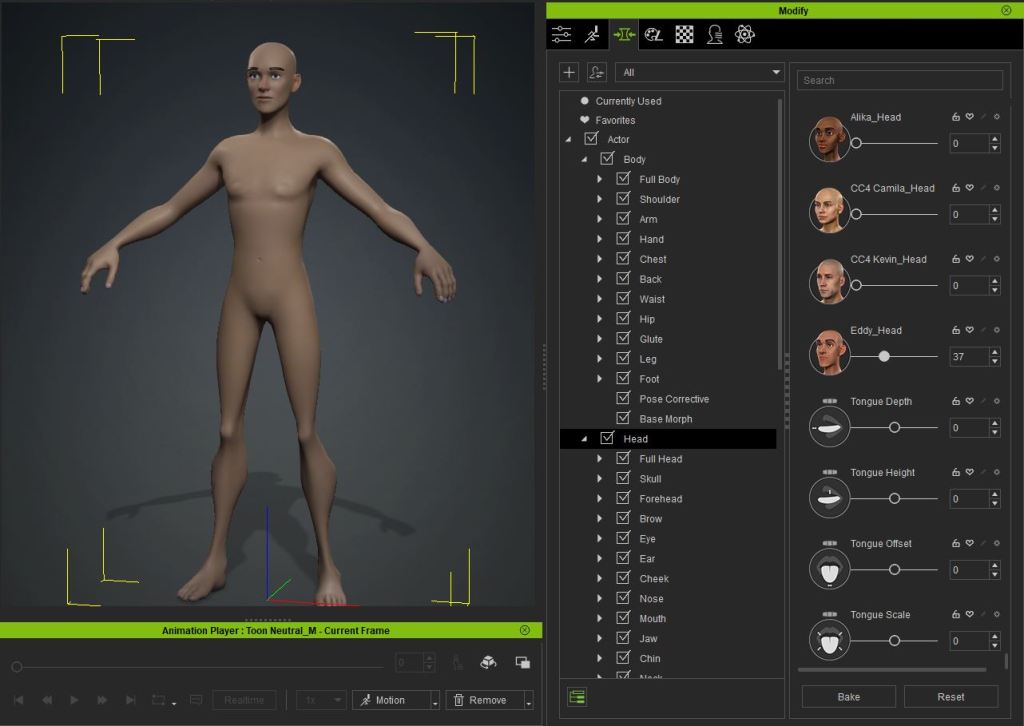
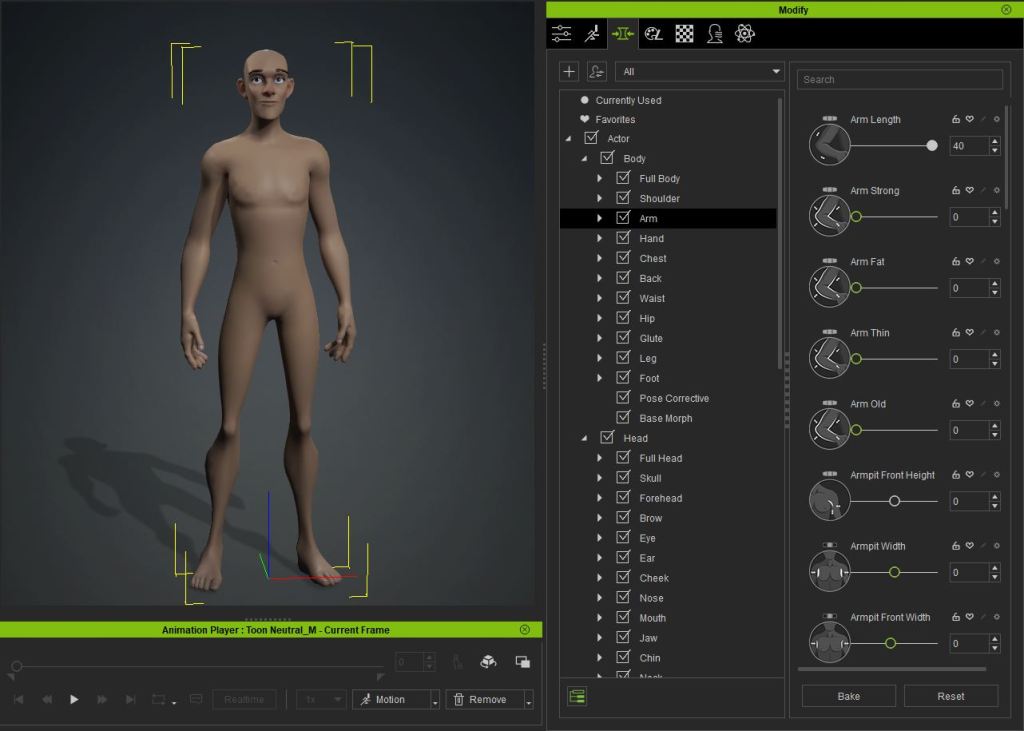
This was the first time I used the CC Toon Base, as I had previously worked mainly with realistic meshes. Upon using it, I discovered that it offered a significant advantage: the stylized features were more defined, which provided a great starting point for further defining the details and adjusting them to the needs of my project, becoming a valuable resource for character development.

I spent two or three days getting used to using these Expression Morph Sliders in Character Creator. Experimenting and pushing everything to the limit, trying different configurations to see which ones were useful and which ones were not.
GoZ and SubTools

Using GoZ has been an important tool for me, as it allows me to export and re-import the model in record time, making my workflow much more efficient. By maintaining the subdivision levels in ZBrush and preserving the rigging in Character Creator, I can work seamlessly between both platforms.
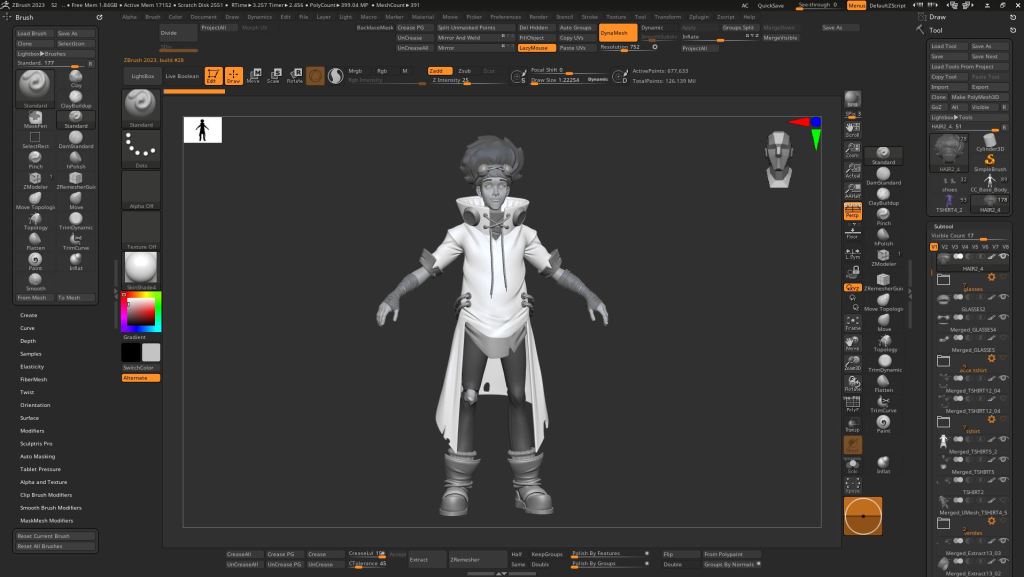
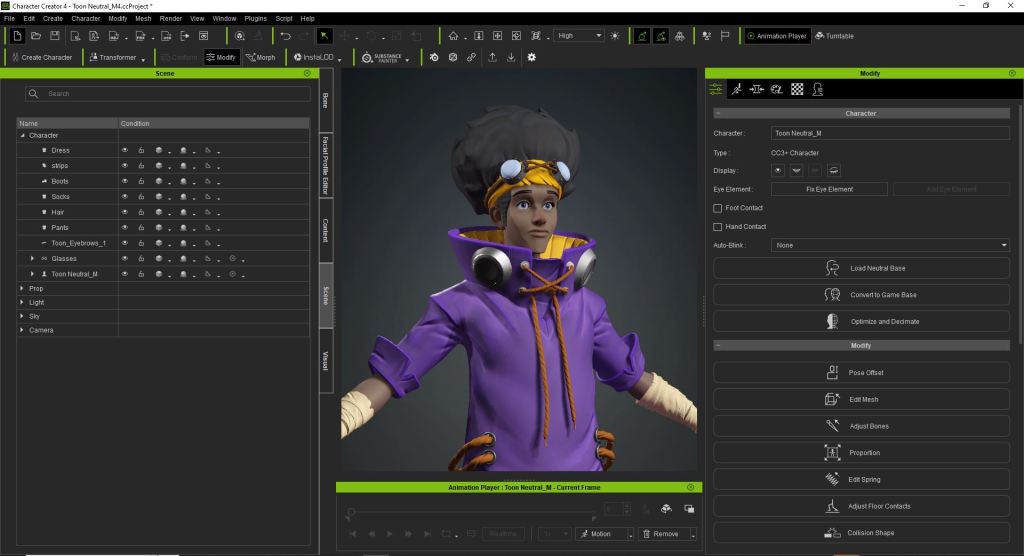
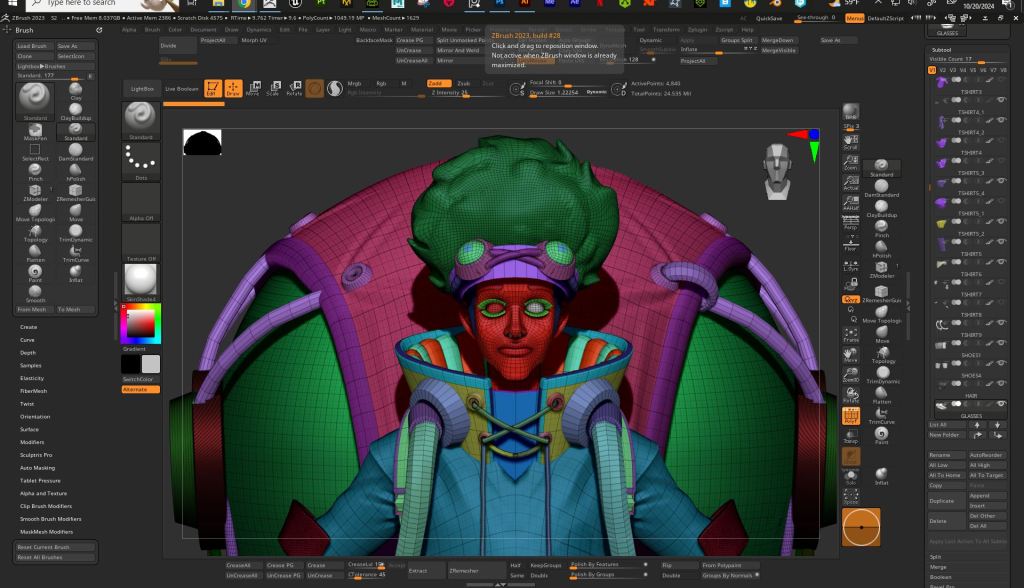
The process involves selecting the base mesh in CC4 and exporting it to ZBrush via GoZ. In ZBrush, I start detailing, adjusting, and moving the mesh to refine it. Then, I send it back to CC4 to check that everything is in order and that the visualization is correct. If necessary, I can re-send it to ZBrush to continue updating the model and adding accessories, clothing, weapons, or any other details the character requires.
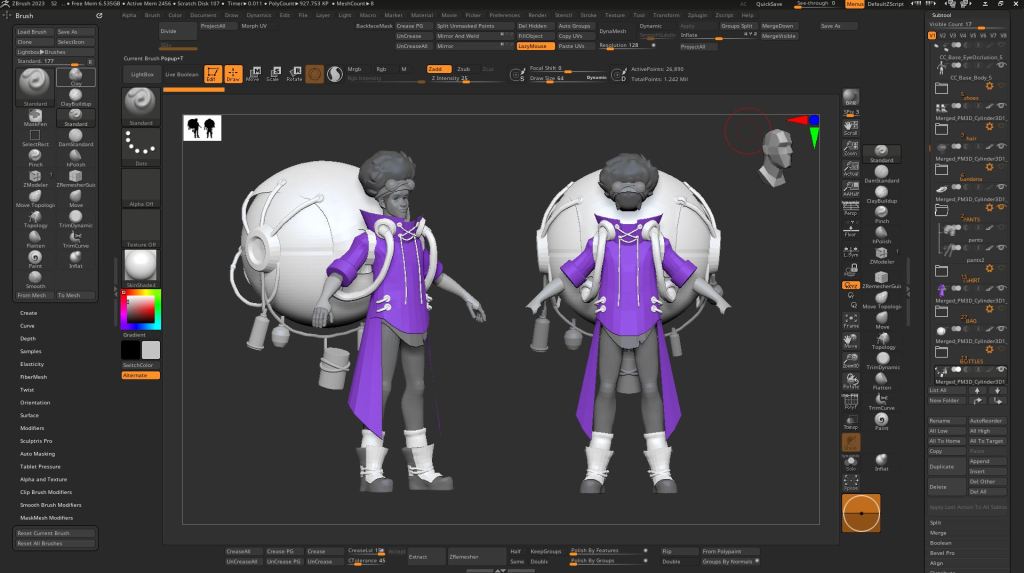
The best part is that when I return to CC4 using GoZ, the accessories are already anchored to the character, allowing me to adjust the weights for each one and ensure they work correctly during movement tests.

Cloth Making

I use ZBrush for cloth making, although Blender is also a good option; it all depends on the artist and which tool they feel most comfortable with. I prefer ZBrush because it provides me with versatility throughout the process. From the initial sculpting to polishing objects, creating shapes with ZRemesher, extrusion, subdivision, and adding finer details. Additionally, the variety of brushes in ZBrush allows me to add details like wrinkles and other textures, making it my preferred choice for this program
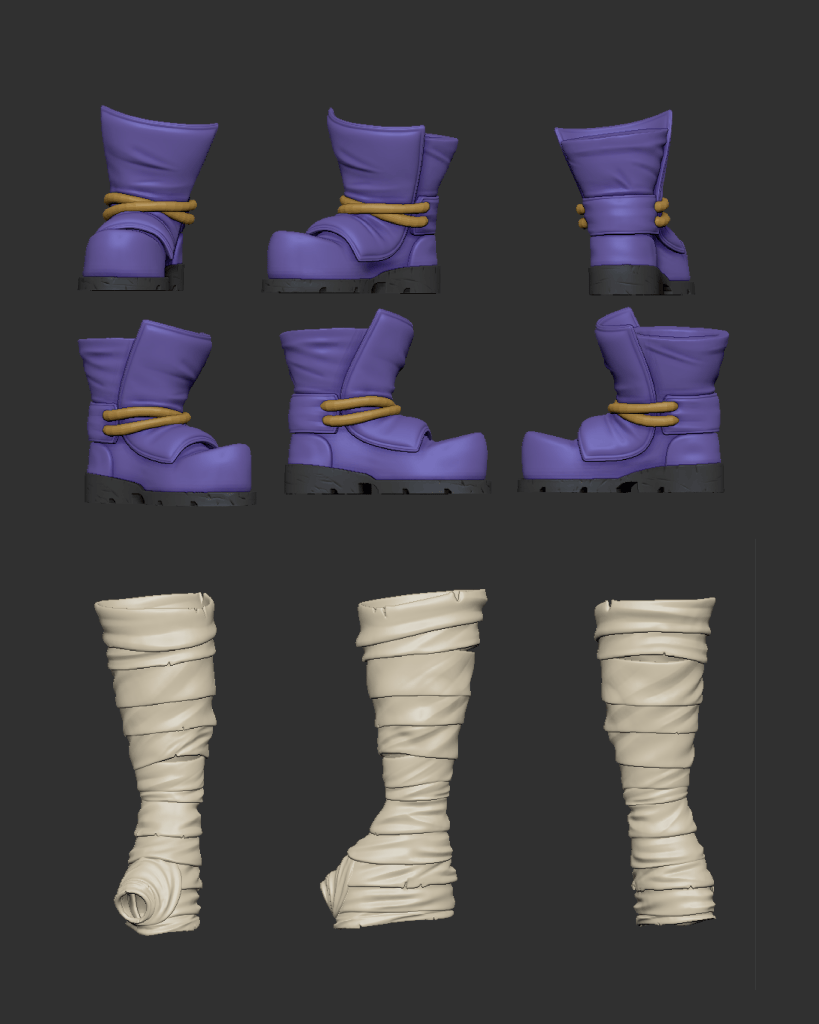
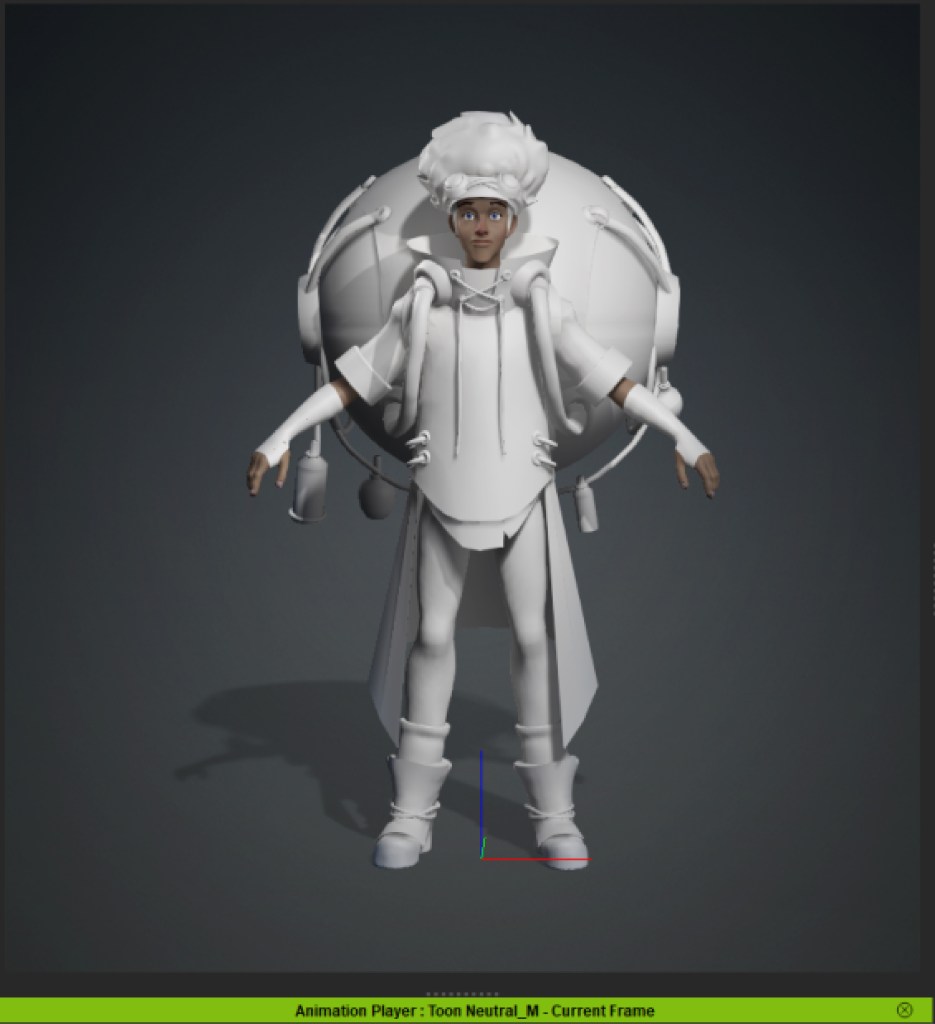
Here are some tips to make your character’s personality stand out. I have a procedure when making the cloth. First, I mask the part I need to develop from the base model, for example, the shirt. By extracting it, I obtain a general shape that helps me refine and save time on its base. I can rely on basic geometric shapes, like cylinders or squares, to start modeling the structure. Then, I simply extrude and control the edges and holes.
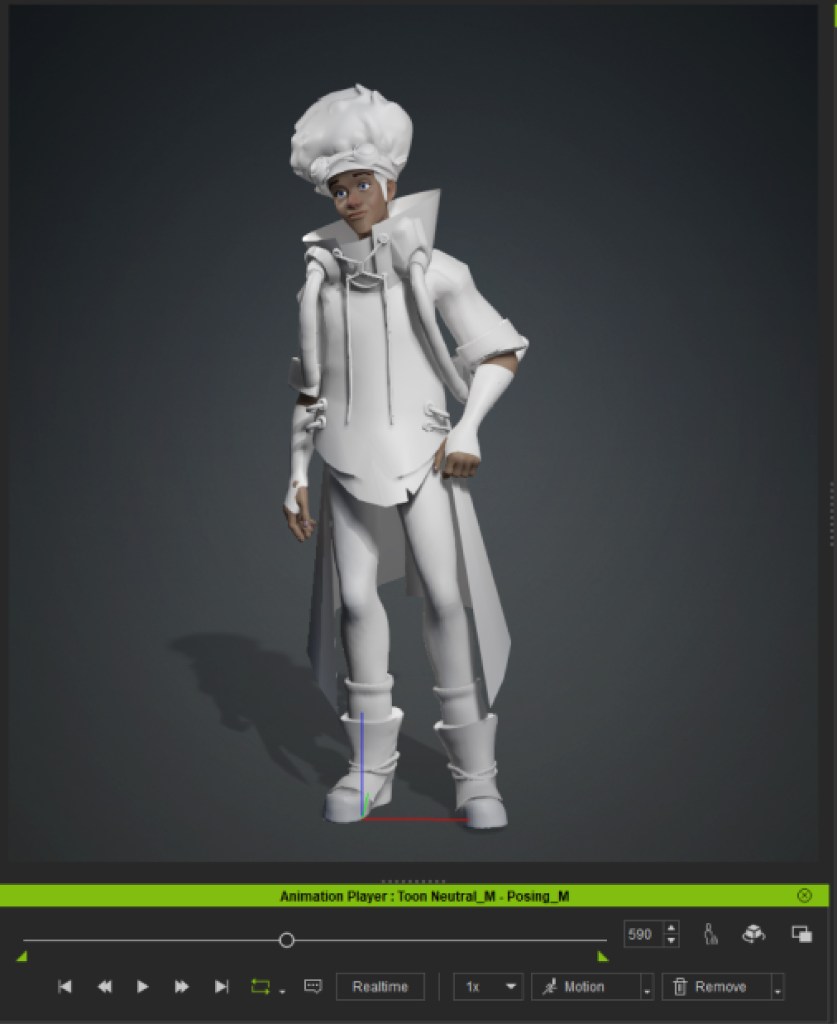
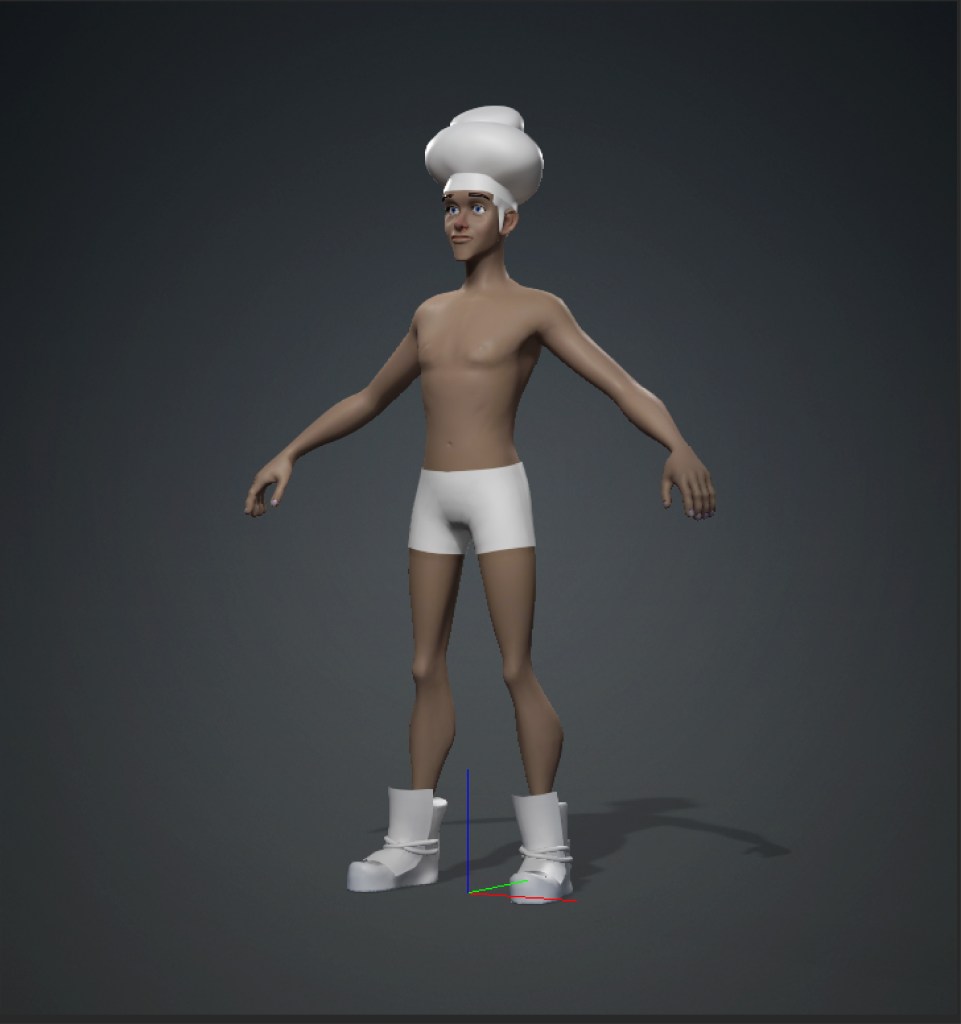
Additionally, I use the Dynamic option when I have these shapes made with low geometry and have control over the edges. This allows me to visualize my polished model without the need for millions of polygons. Once I feel the shape is appropriate, I apply DynaMesh, giving me subdivisions to start detailing. This way, I can achieve very polished shapes, and it can also be used for hard surface modeling.

Accessories

I like to develop the accessories completely unless the project has specific time constraints or other requirements. I always prefer to create them from scratch because it allows me to continuously improve my skills through practice and development. I started by developing a general blocking of this accessory:
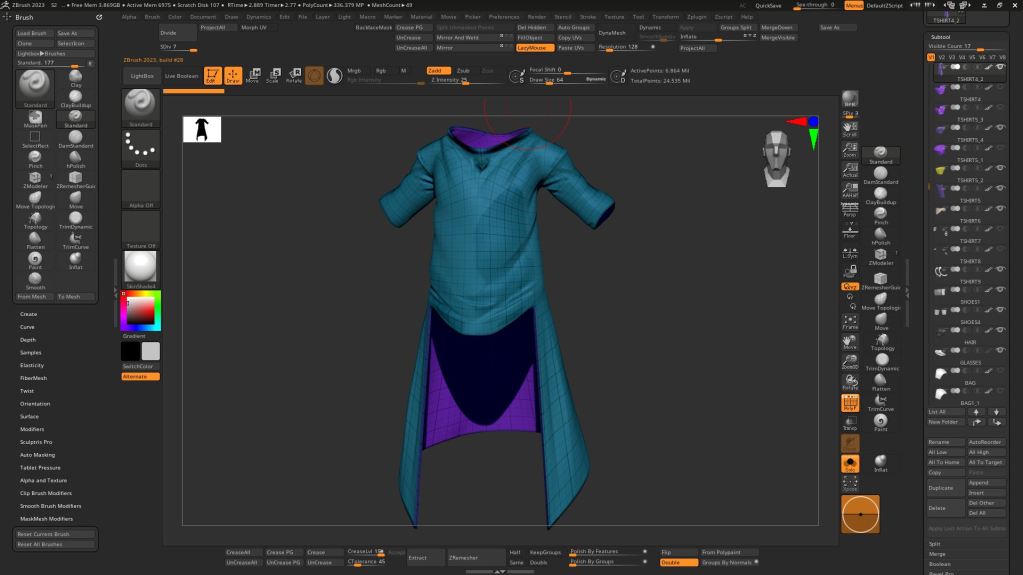
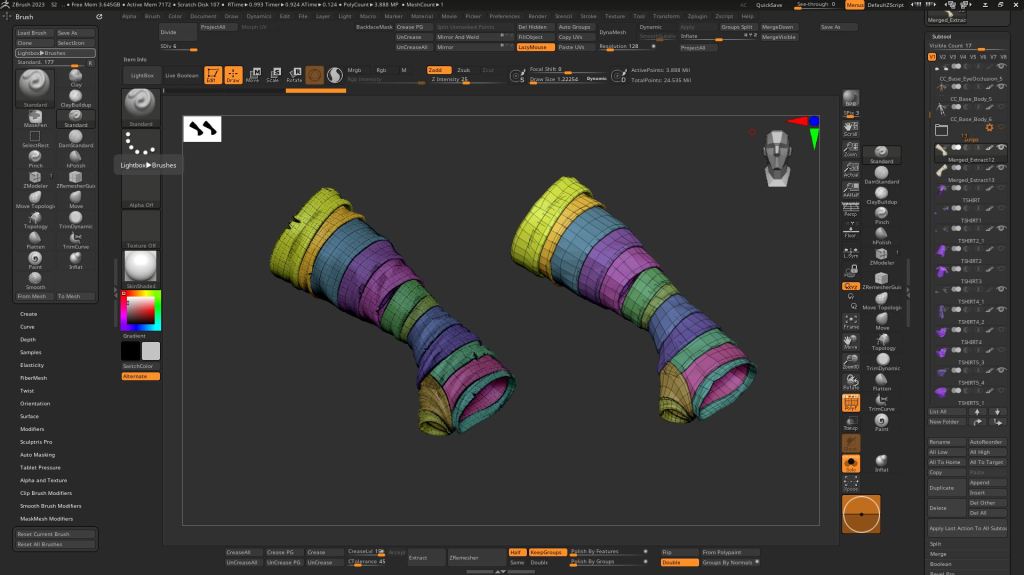
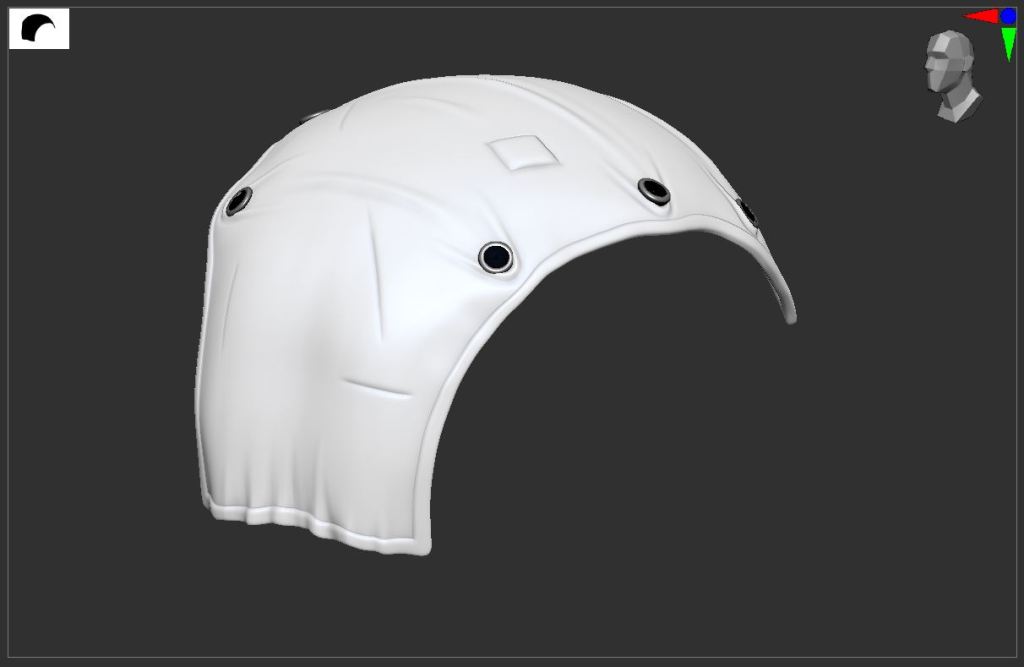
  • Blanket: For the top part, I took a plane and adjusted it vertically, using the Dynamic option (run the simulation) so that it would collide with the sphere. From there, I began to extrude and add details.
  • Side Grids: I used symmetry to ensure that both sections were identical. I relied on Boolean operations to create the perfect holes. I developed each layer with a cylinder, scaling some faces to achieve a conical shape, and then arranged it according to the blocking.
  • Bottles: I started with basic shapes like cylinders and spheres, using a low subdivision. After that, I merged the shapes and polished the details.
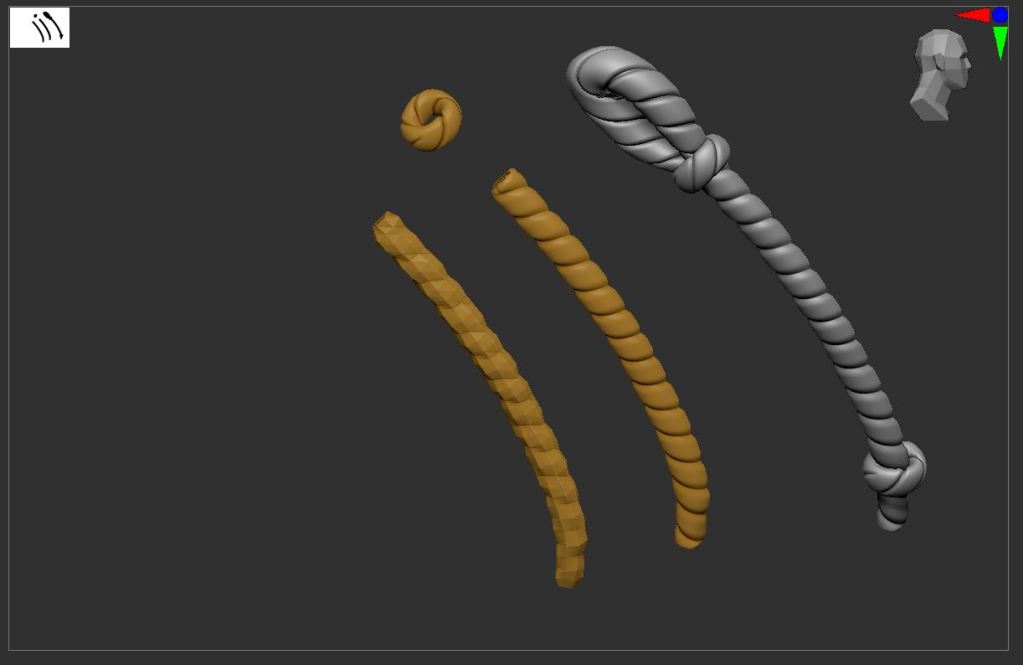
  • Ropes: I developed them using cylinders and the ZModeler for the coiled shapes. I generated the UVs and created the pattern using Noise Surface.
  • Sphere and Liquid: I used two spheres, one on top of the other, with different scales to simulate the liquid.
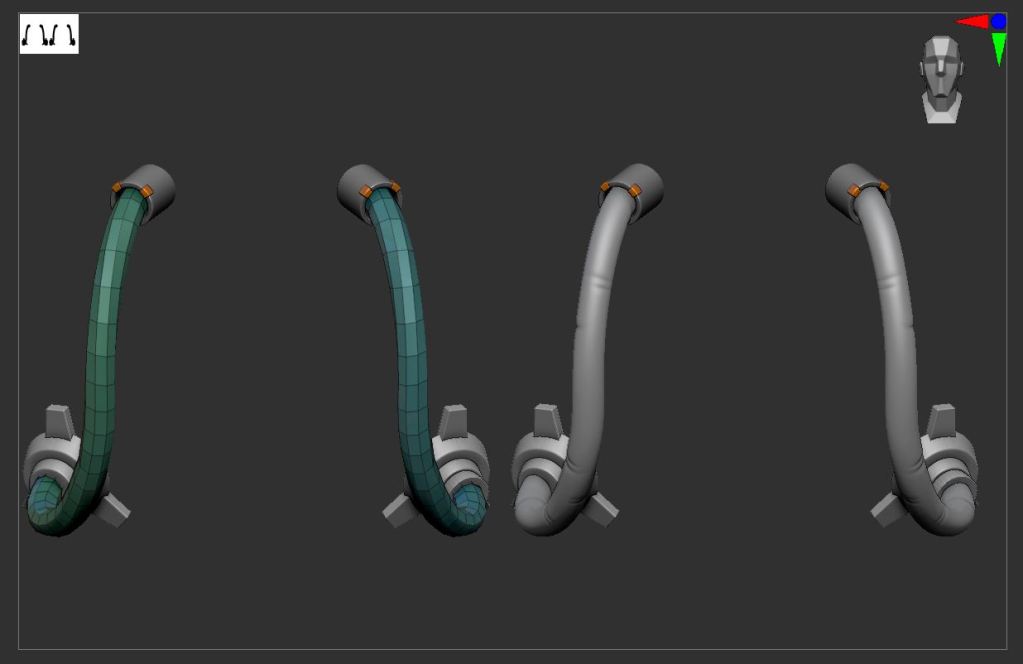
  • Pipes: I used the Curve Tube brush, adjusting the width and radius of the brush. I began to define the path and then made adjustments to ensure it looked as I wanted, moving it as necessary.
Animation Preparation in Blender

Once I had the entire model, I used the Blender Addon in CC4 to export it in Pose T.
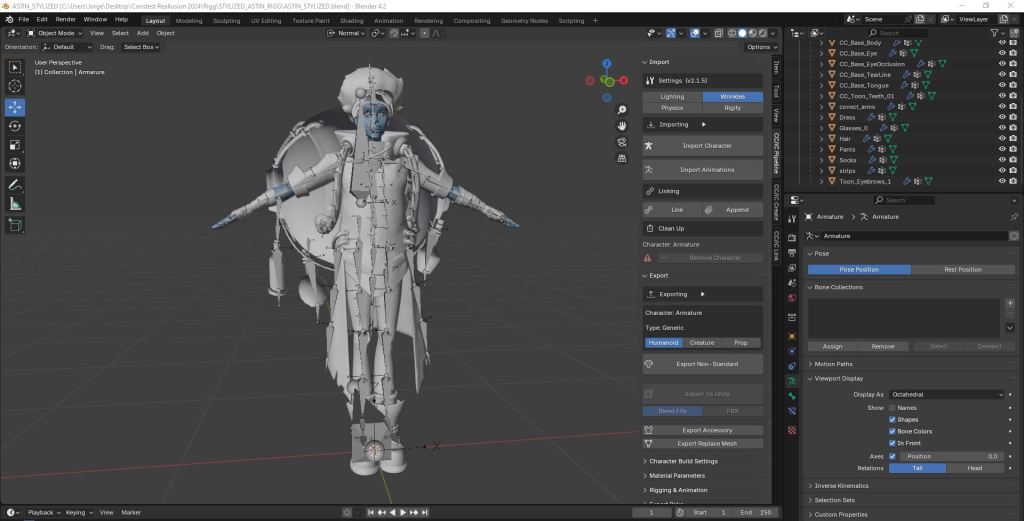
Then in Blender, I applied the CC Pipeline to import the model. At this point, I have the complete model and the main bones. I place the skeleton in edit mode, and with the accessories correctly positioned, I start adding the necessary bones for each action, logically considering which parts require movement. I assign bones to the bottles, hair, ropes, and the long part of the shirt. Afterward, I export the model again as FBX using the CC Pipeline.

Next, I return to a new project in CC4 and import the model using the Blender Pipeline in Pose T. With the Characterization option, I pair the bones so that CC4 recognizes the skeleton and the new bones. Then, I begin to determine if they will be Spring Bones, assign weights, and ensure they are visible. (Tip: To reintegrate the character into CC4 and ensure the skeleton works correctly, it is essential to always keep it in Pose T.) Otherwise, when importing it in Pose A, the Characterization part will not be recognized.

Tip: Always in Pose T!
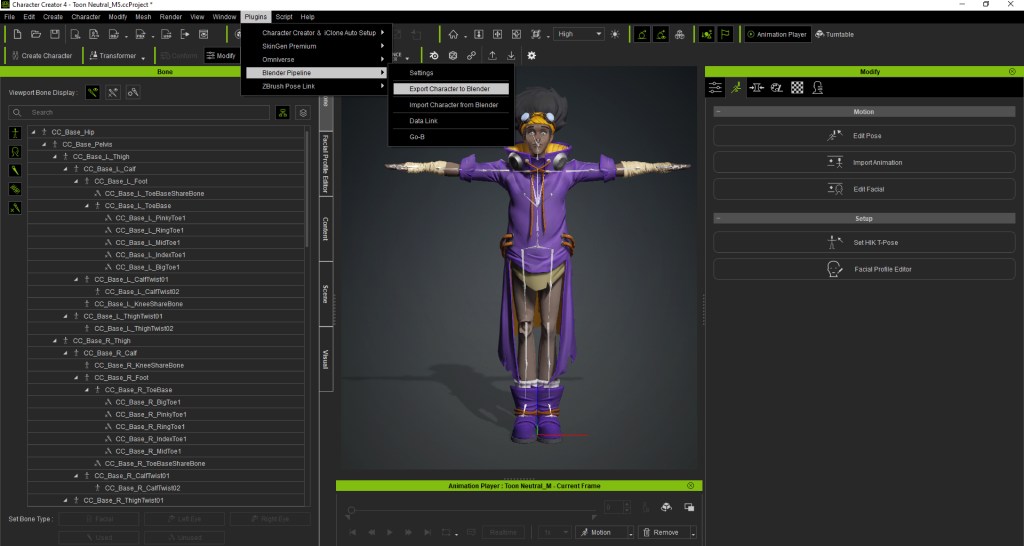
In Blender, I only installed the CC Pipeline plugin, which helps me maintain the same format that CC4 can read correctly. This avoids potential errors during the export and import process. Once set up, I start adding the necessary bones for the model. It is very easy to exchange the model between these two programs, as the plugins maintain the rigging properties. This allows us to add or remove accessories as needed without altering the functionality of the model.

Character Animation in iClone

To make a believable character animation, a few techniques were deployed in iClone. I already had some supporting animations in CC4, where I had to adjust certain positions due to the overlapping of some parts of the model. When I sent it to iClone, I was able to blend the different animations to create fluid movements and smooth transitions, allowing me to create a more believable and high-quality presentation.
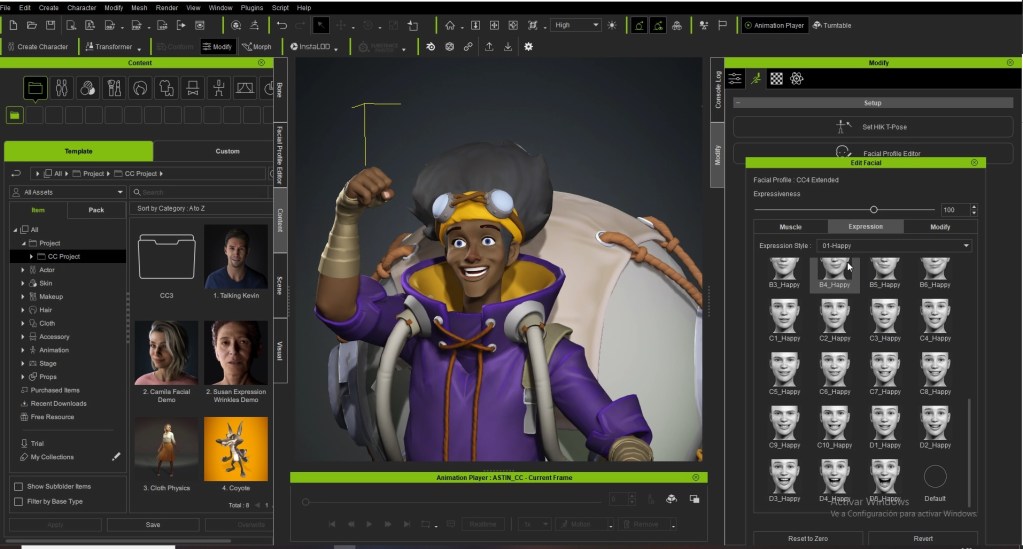
In this project, iClone made it easy for me to mix animations in record time, which I highly recommend. Another interesting feature is the MD (Motion Director) or to me as Manual Device Control, which allows you to guide the direction of movement using the mouse or a game controller, making it easier to move the character and achieve the desired path. I find this to be an important aspect of the software.

Blender Pipeline: Final Composition and Eevee Render

It is essential to have everything well-named and organized. This applies to all aspects of the work, as failing to do so will result in having many items in the scene, making it a nightmare to figure out which is which.

I created a folder for each pose, in which I included all the personalized material specifically for that pose: cameras, angles, and lighting. This way, I maintained order and made it easier to exchange and adjust according to the new ideas that came to mind, all in the same file with different poses.

I used Grease Pencil to generate outlines and toon-style details, as my textures were geared towards a hand-painted style. This resulted in a good combination that enhanced the model.
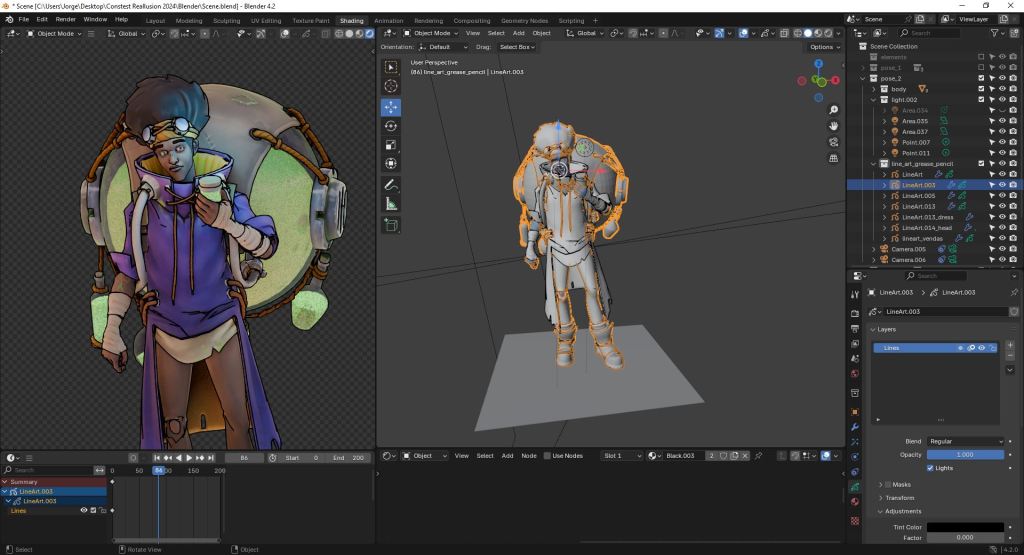
  • Lighting: I started with some basic lights to achieve a well-lit and presentable appearance for the character. From there, I experimented and modified the lights according to the tone I wanted to give. I used reference photos to replicate the lighting and make adjustments. I primarily worked with Area Lights and HDRI.
  • Final Edit: I exported my renders as PNGs and performed the final composition by adding backgrounds and textures in Photoshop and applying effects that enhance the pose image. I adjusted the contrast and brightness to add more richness to the render.

My Experience with Blender AutoSetup

The experience of using Blender AutoSetup was satisfactory, as it is very easy and intuitive to use. Additionally, it considerably reduces the processes since it keeps the rigging of my character enabled when returning it to CC4. It helped me a lot that I already had Ambient Occlusion (AO) and other features activated, which I had to enable manually in previous versions. Additionally, ray tracing in Eevee helped enhance the images.

Closing Thoughts
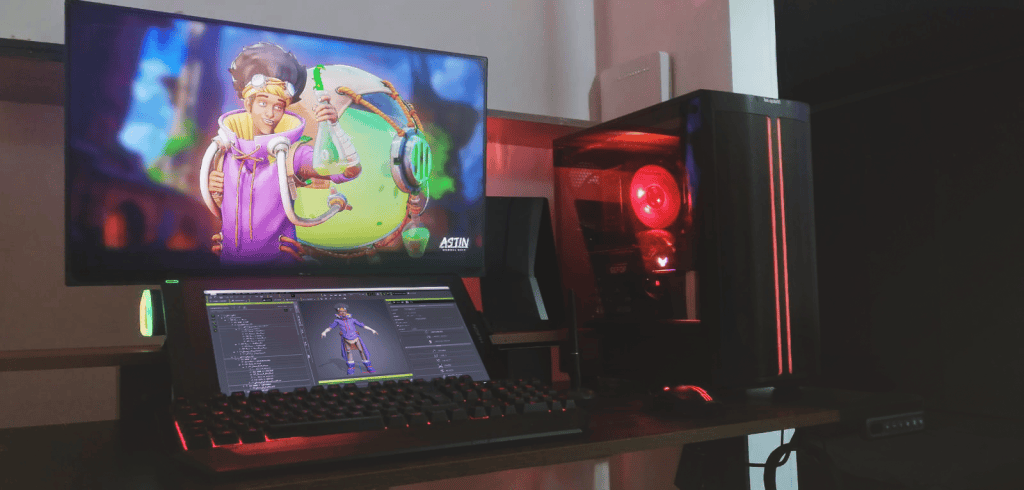
It was the beginning of everything because once I adjusted the first mesh, I had a clear path toward where I wanted to take my model. In a way, I already had a visual style very close to the final one, with many stylized features that allowed me to guide the other pieces toward that style. Regarding material management, I could decide whether I wanted a stylized PBR style that CC4 showed me and compare it in Blender with my hand-painted textures.

When selecting your character, it’s important to analyze which additional elements, such as accessories, can enhance its functionality, making it stand out even more.
Time is a fundamental factor. We must not take for granted that we have a long deadline, as difficulties may arise along the way. As the deadline approaches, we may find ourselves under pressure because we weren’t prudent with our time, and we may not be able to apply the desired quality or even finish the project. Therefore, time management is very important.

It is a great help to advance faster in your projects in every way. Moreover, it adds value since we often leave the model static. With all the tools CC4 offers, we can enhance our art in record time without sacrificing quality. This allows us to bring movement to the model and easily export it to different platforms.

Related Posts

Click through to learn more about the winners’ portfolios and judge comments

iClone 8.52: A Major Leap for Professional Animation Editing

iClone 8.52 delivers a highly anticipated update for professional animation editing, packed with groundbreaking features driven by user feedback. Despite its numerical step from 8.51, this release introduces transformative tools to elevate animation workflows.

Key New Features:

We extend our heartfelt thanks to Martin Mejzlik and Milan Dolezal, acclaimed contributors to the Mafia game series, who advocated for enhancements like non-destructive editing, improved curve performance, and motion trails. Their insights, rooted in extensive industry experience, have been pivotal in shaping this release.

Additionally, renowned 3D expert and YouTuber askNK emphasized the importance of integrating advanced curve filters, inspired by MotionBuilder, to facilitate high-quality motion capture (mocap) data cleanup. iClone 8.52 now empowers animators with these professional-grade tools.

Overview of iClone 8.52 new features

AccuPOSE: Revolutionizing Natural 3D Posing

AccuPOSE, an AI-powered innovation utilizing deep learning models trained on ActorCore’s extensive motion database. AccuPOSE understands human movement across countless scenarios, enabling users to create highly natural poses with minimal effort. Beyond hand-key animation, this technology plays a vital role in connecting motion clips, refining motion layers, and dramatically simplifying mocap data cleanup.

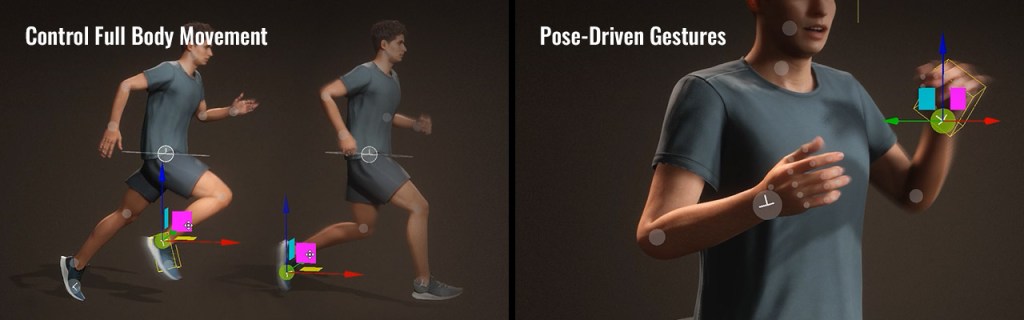
  • Control Full Body Movement: Achieve full-body transformations merely from minimal inputs. AccuPOSE’s real-time body pose estimation guarantees natural postures during editing. 
  • Pose-Driven Gestures: Arm adjustments naturally drive wrist movements and hand gestures, generating authentic human behaviors with minimal effort.

Check out demo on product page

Fully Controllable AI Guidance

To work in harmony with AI technology, controllability is a huge factor. The real brilliance of AccuPose lies in its unmatched flexibility and precision. You have the power to decide which parts of the body the AI adjusts and which parts remain untouched. This allows you to fine-tune every movement to your exact needs.

  • Precision & Freedom: By applying Transformation and Rotation constraints to selected joints, designers can control AI pose suggestions with precision and flexibility.
  • Constraints & Lock: Utilize T/R Constraints to maintain manual control flexibility. Use the Lock feature to securely fix the end effectors in place.
  • AI Suggestion: You can specify which part of the body the AI should provide suggestions for, while preserving the desired sections by using locks and move/rotate constraints.
  • Mirror: The Mirror feature ensures that AI-generated poses for hands or legs maintain symmetry with mirrored postures during any adjustments.

Check out demo on product page

Seamless Integration with Existing Works

Getting started with AccuPose is straightforward. Simply open the tool, select an AI behavior model, and transform any pose effortlessly with the guidance of natural posing techniques.

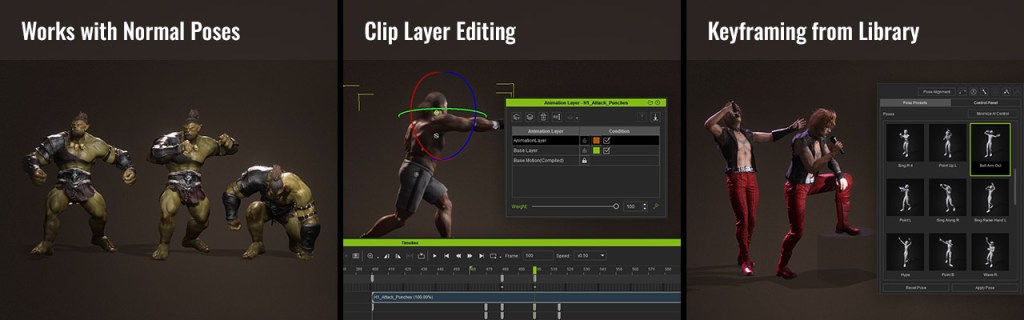
  • Works with Normal Poses: Transform existing poses into AccuPoses with selected behaviors, and experience the precision of natural posing with customizable IK constraints.
  • Clip Layer Editing: By incorporating AI-assisted layer keys, users can effectively enhance motion velocity in selected motion clips.
  • Keyframing from Library: Easily add dynamic poses from the AccuPOSE to arrange keyframes on the timeline, optionally filling in custom in-betweens and curves for smooth transitions. 

Check out demo on product page

Accelerate All Key Animation Workflow

Curious about how AI-assisted posing can enhance your workflow? It’s incredibly adaptable and can be applied wherever setting keyframes is needed, making it a valuable tool across various creative tasks.

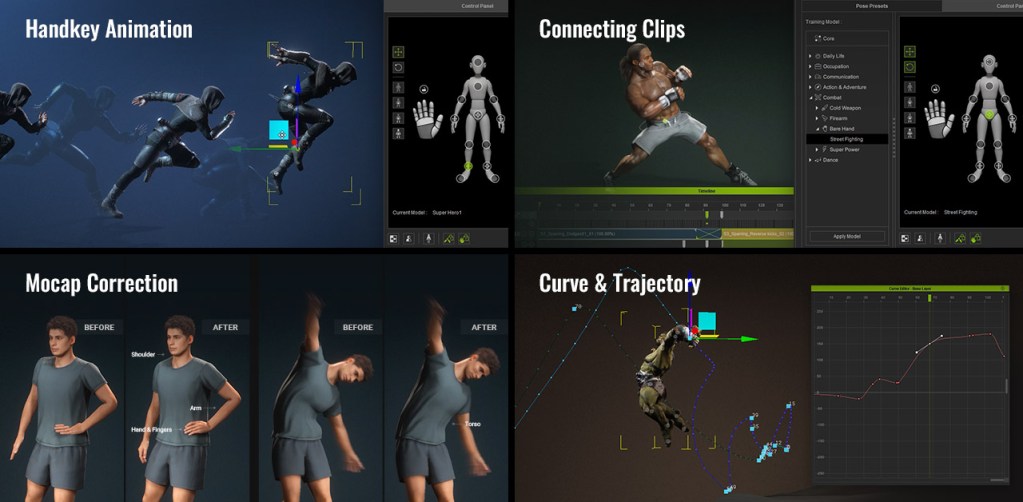
  • Handkey Animation: Driven by deep-learned human motions, the posing suggestion enhances the efficiency of quality keyframe posing and supports the creation of compelling animation styles.
  • Connecting Clips: The intelligent posing feature simplifies the process of filling in missing poses between motion clips, creating more natural transitions.
  • Mocap Correction: The natural AI posing capability can effectively solve the mocap challenges such as shoulder stiffness, motion distortion, and even enhances animations with realistic hand gestures.
  • Curve & Trajectory: iClone’s motion curve and motion trail functions empower animators to refine keyframe timing and spatial trajectories, ensuring high-quality animation outcomes.

Check out demo on product page

Download AccuPOSE CORE Free and Subscribe INFINITY for All 

3D Posing with the assistance of AI might sound exciting itself, but AccuPOSE is way more than that. It comes with a big library of AI-training models that answer your diverse scenario demands. 

The same control applied to a selected joint can yield entirely different results depending on the chosen AccuPOSE model, giving users absolute control over the character’s AI reactions.

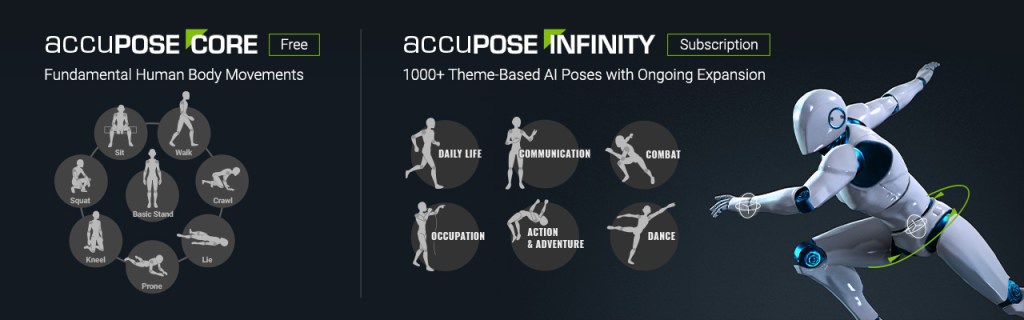
AccuPOSE is a free plugin for iClone 8.52, all users will have access to the CORE Library, it supports fundamental human body movements like stand, sit, walk, kneel, lie, prone, etc. 

For those seeking advanced features, the INFINITY expansion offers an extensive library of over 1,000 AI-trained poses across 41 genres, along with continuous updates. 

Important Update:

Effective January 6, AccuPOSE INFINITY moves to a one-time purchase ($149 USD). All previous subscribers can switch to the perpetual license at no cost.

Learn more

Elevates Motion Editing to Pro Level

The iClone 8.52 release brings four highly acclaimed professional animation features, voted by animators as essential to their workflows. These tools are meticulously crafted to serve as the foundation of daily productivity.

  • Motion Trail

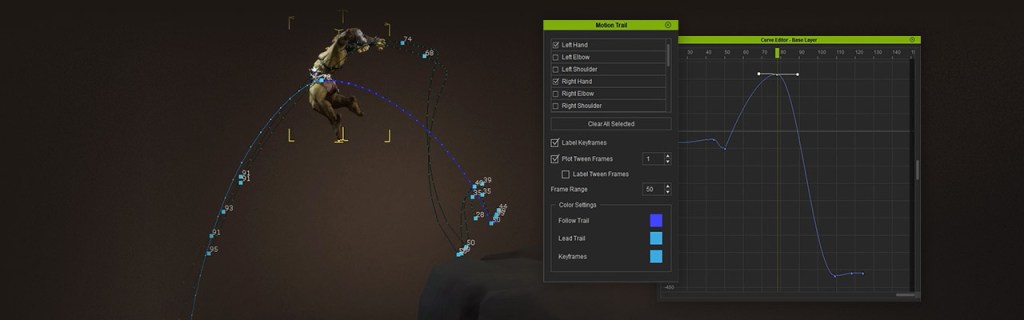
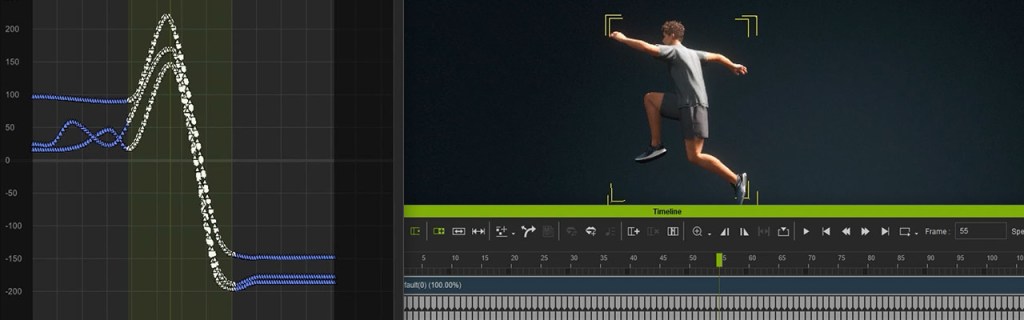
The motion trail feature enables professional animators to visualize trajectories for selected joints. It supports real-time editing of keyframes directly on the trail or within the curve editor, providing an efficient approach to managing motion paths and animation timing. Additionally, users can adjust the path range and customize the trail’s color to improve control and visualization.

Check out demo on product page

  • Non-Destructive Editing

Users can now break motion clips without worrying about losing data, as cut-out portions remain recoverable. Additionally, for clips edited with motion layer keys, our non-destructive approach retains all layer data for further editing. 

Check out demo on product page

  • Curve Filters 

Several new filter options are added. These include tools that remove jitters while preserving motion details, fix peak noise, reduce keys for bezier spline editing, and smooth selected tracks seamlessly. In addition, we have introduced a preview mode to enable users to observe filtered results in real time while adjusting parameters for greater precision.

Check out demo on product page

  • Curve Performance Enhancement

Motion Curve performance has been significantly enhanced for intensive editing across multiple tracks. Users can now enjoy near-instant responsiveness when selecting, moving, copying, pasting, or deleting keys in extended curve sequences.

Check out demo on product page

Related Sources:

AccuPOSE Tutorials

Check out iClone 8.52 new features

iClone 8.52 release note

Learn more about iClone 8

Online manual

FAQ

How a ZBrush Artist Speeds Up Rigging and Posing with Character Creator AccuRIG

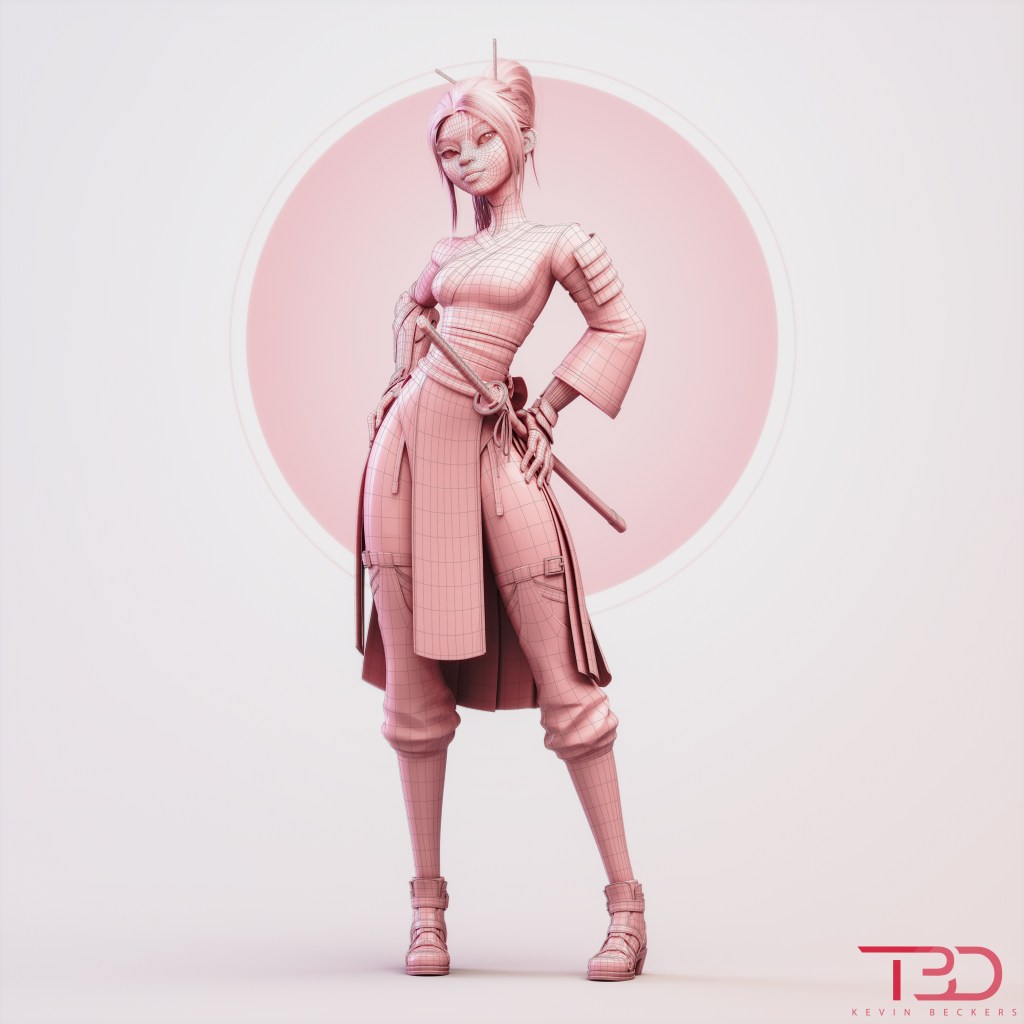
Kevin Beckers

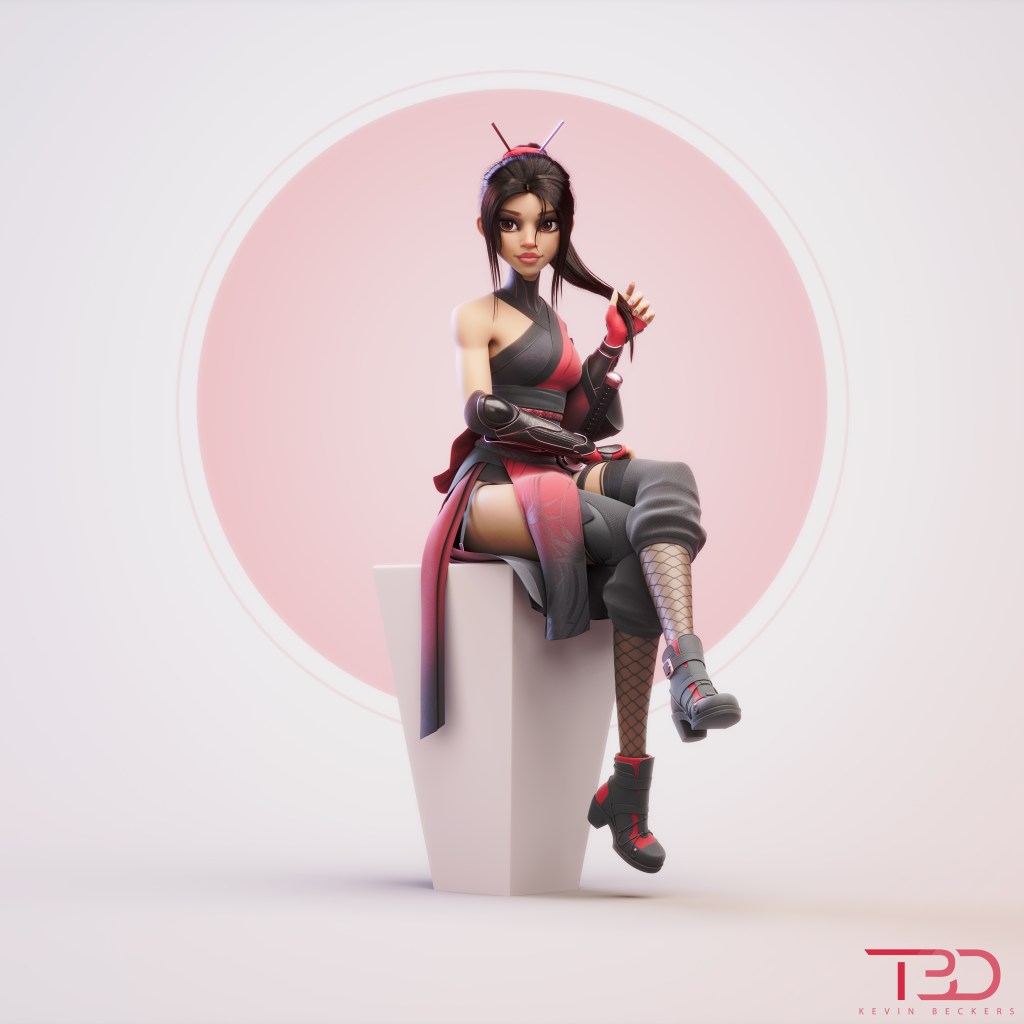
Hi, I’m Kevin Beckers, also known as Tycane3D. I’ve been working in 3D for many years, starting my professional career in 2007 with a company in Amsterdam. There, I focused on product visualization for clients like Miele and Philips, interior archviz, and even some exciting projects for the Dutch Air Force.

During this time, I developed my character creation skills, and in 2018, I transitioned to a full-time freelance character artist role. Since then, I’ve collaborated with many companies, including Wooga, Colorbleed, and Axis. Working with Axis, I had the pleasure of bringing Randy Bishop’s characters to life in 3D for their “A Christmas Carol” movie. It’s a shame that they are no longer around.
Kevin’s ArtStation

Posing a character is never easy

For me, character creation is the most enjoyable part of working in 3D. I’ve done professional work in product visualization and interior archviz, but nothing compares to creating unique or quirky characters.

One challenging aspect of character creation is the posing stage. While there’s nothing inherently wrong with posing, the methods can be frustrating. If you’ve modeled your character in an A or T pose, your options are limited: you can either invest significant time in rigging or use more direct tools like ZBrush’s transpose features. For me, using the transpose tools feels tedious and slow, making it harder to experiment with different poses since each adjustment takes considerable effort.

Rigging & posing with Character Creator

For simpler characters, posing isn’t too difficult. But when dealing with multiple layers, it can become a real challenge. Fortunately, Character Creator 4 (CC4) simplifies the process considerably. CC4 allows you to build entire characters and includes a powerful autorigger that handles details like fingers, along with a GoZ bridge for seamless integration. Within minutes, your character can be fully rigged, enabling forward and inverse kinematics for intuitive posing. This setup makes posing not only faster but also encourages creativity and experimentation.

To use CC4 with ZBrush, start by installing CC4 and enabling the GoZ option. Before diving in, I recommend downloading Reallusion’s free plugin, ZBrush Pose Tools, which is handy even if you’re not using CC4. Available on their website, this plugin offers a few helpful features, like rescaling your model to accurate humanoid proportions. Simply choose a preset length or input a custom value, and it will adjust your model’s scale in ZBrush. This ensures that when you import it into other 3D software, the model will have consistent sizing.

ZBrush Pose Tools

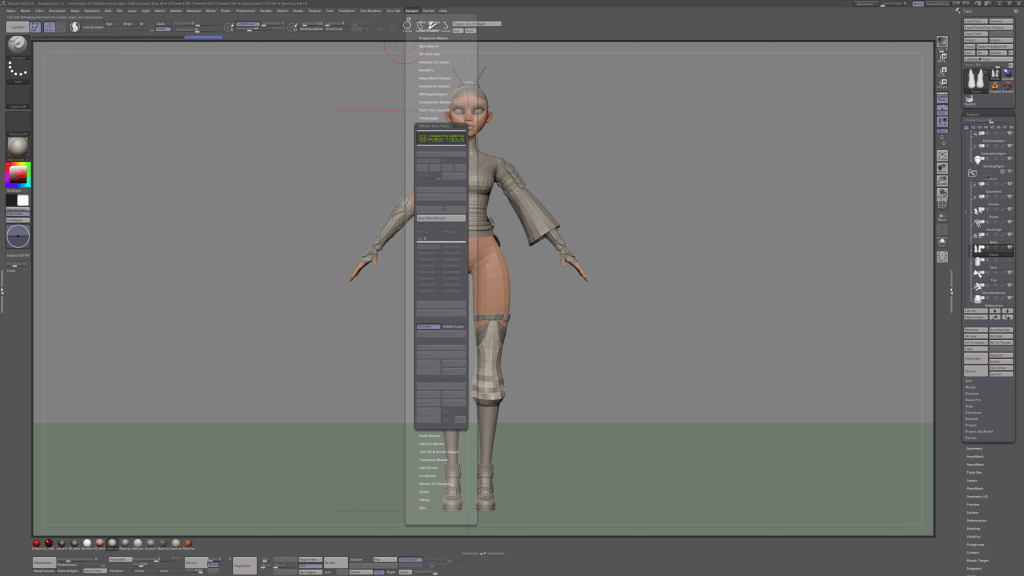
The plugin also allows you to easily store multiple poses within a single ZBrush file. Simply click “record new pose,” give it a name, and it will create a layer on each of your subtools labeled with that name. Afterward, you can select “edit current pose,” set those layers to “record,” and any adjustments you make to your model will be saved to that layer. Once you’re satisfied with the pose, hit “save,” and it will stop recording on all layers. This makes it simple to create new poses, with each one stored in its own layer for easy access.

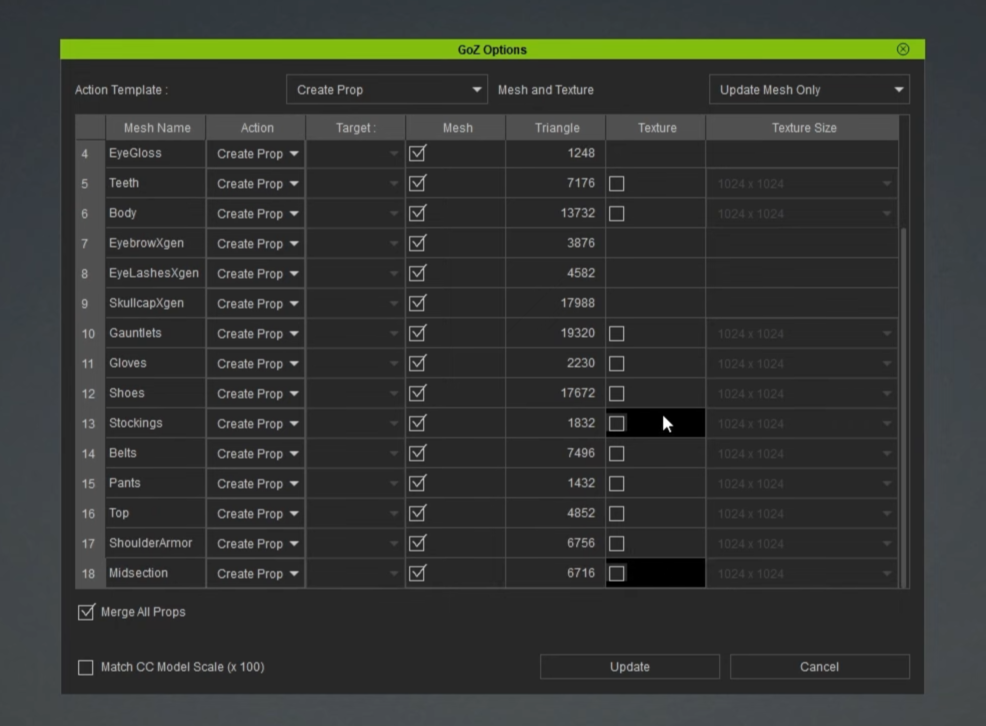
Once the pose layer is set to recording mode, I hide any parts of the character I don’t want rigged. For this particular character, I avoid rigging flowy cloth parts, as I plan to pose them manually or use Maya’s nCloth for simulation. After that, I hit GoZ, which opens CC4. I leave the settings as they are in the pop-up panel, and just like that, your model is transferred into CC4, ready for further adjustments.

GoZ pop up pannel

Auto rig your character in minutes with AccuRIG

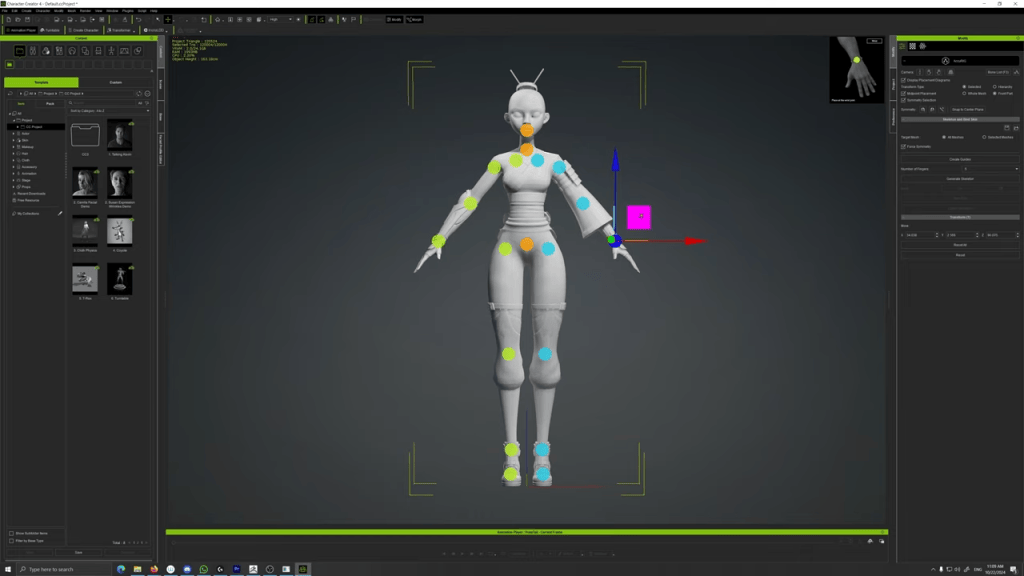
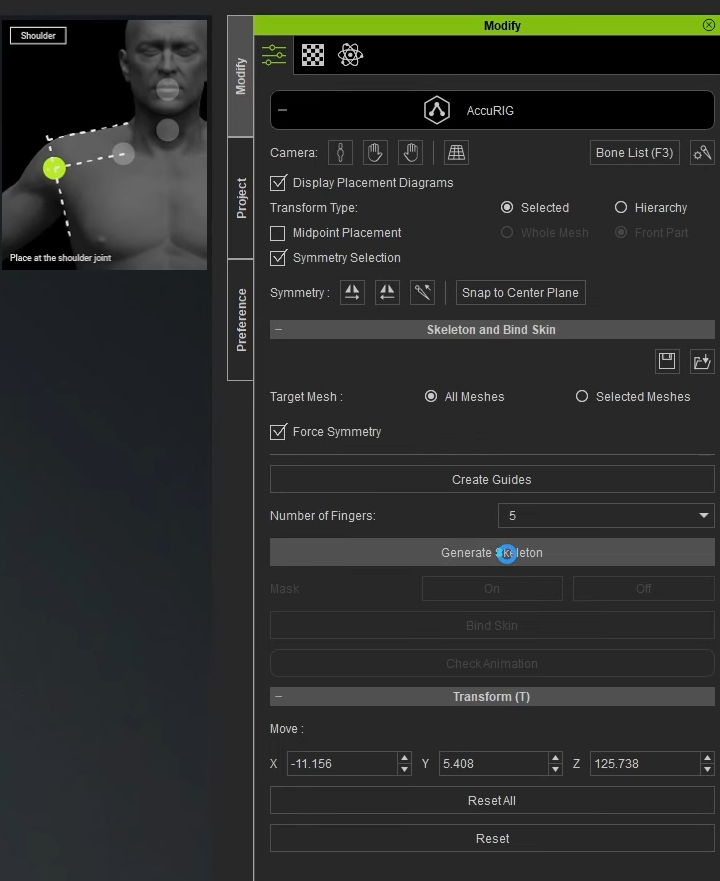
To rig your model, find “Accurig” in the sidebar on the right, which opens the Accurig panel. Simply hit “Create guides“, and after a few seconds, it will generate guides based on your model. Sometimes, they need a bit of adjustment, so make sure the guides are in the right spots.

You’ll see a helpful thumbnail at the top right showing the ideal positions, so try to match those. Once you’re satisfied with the guide placement, hit “build skeleton“, and it will build the actual rig, including finger bones. You can adjust these if they’re slightly off, and when you’re happy with them, click on “bind skin”. That’s it—your model is now rigged.

Your model is now rigged!

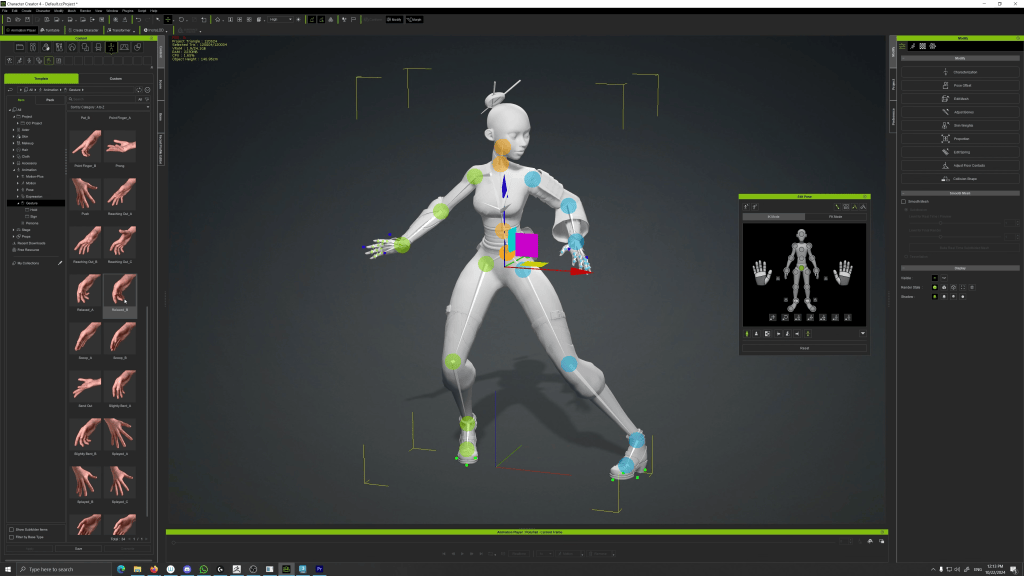
From here, you can use Character Creator’s extensive motion library to add animation or select a pose. There’s even a collection of “gestures” for the hands, so you don’t have to manually adjust each finger. Alternatively, you can press “N” on your keyboard to enter posing mode, where you have full control over the rig and can manually pose your model using FK or IK.

left: collection of “gestures” for the hand; right: press “N” on your keyboard to enter posing mode

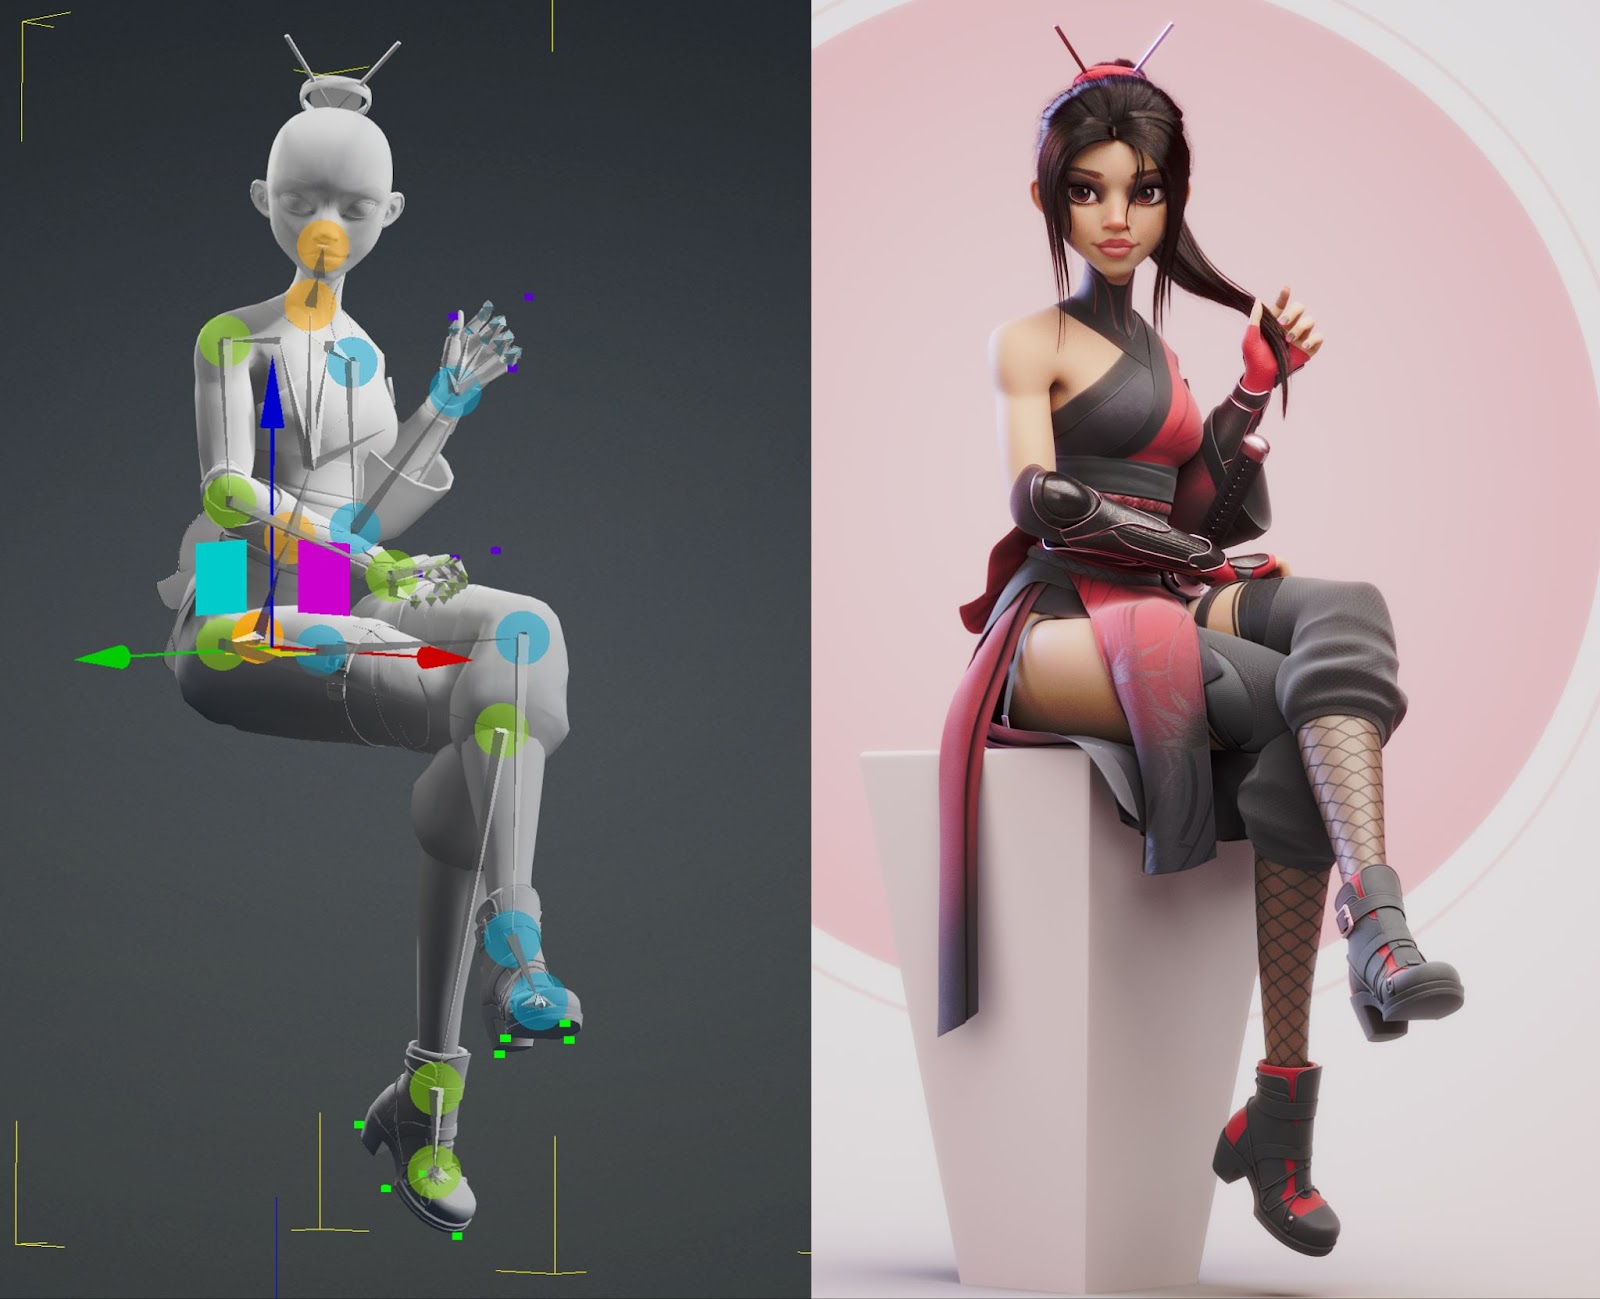
Once you’re happy with the pose, simply hit the GoZ button, make sure “relink” is set on all objects, select “send current pose”, and send it all back to ZBrush. It should update your model there, and with PoseTools still in recording mode, everything will be neatly placed into the pose layer. You can also export the model as an OBJ instead of using GoZ (which can be useful, as GoZ can be quirky at times) and manually load the models if needed. With my pose in ZBrush, I can further tweak and refine the model using the regular ZBrush tools. And that’s how I use Accurig for posing with Character Creator 4.

Conclusion

The speed at which you can get your character rigged and start posing using a proper rig in Accurig has been incredibly helpful. It not only makes the process easier, but also allows me to feel more creative, experiment freely, and have more fun. The added bonus of PoseTools, which lets me easily store multiple poses and rescale my characters, has made the character creation process that much easier.

Related Posts

Winner Select: Mastering Visual Storytelling: 3D Artist Journey with Character Creator

About Tomas Babka

Tomas Bebka, a versatile 3D artist from the Czech Republic, carved a unique path in the digital art world. Initially working in hospitality, Tomas eventually followed his passion for animation and 3D design, earning a bachelor’s degree in stop-motion animation. He then honed his 3D skills with Blender and online tutorials. Over the past five years, he made the leap to freelance work, creating everything from 3D printing models to animations for commercials. While character design started as more of a hobby, it quickly became a central focus, inspiring him to explore new tools and techniques.

Tomas’s Artstation

Origin Story

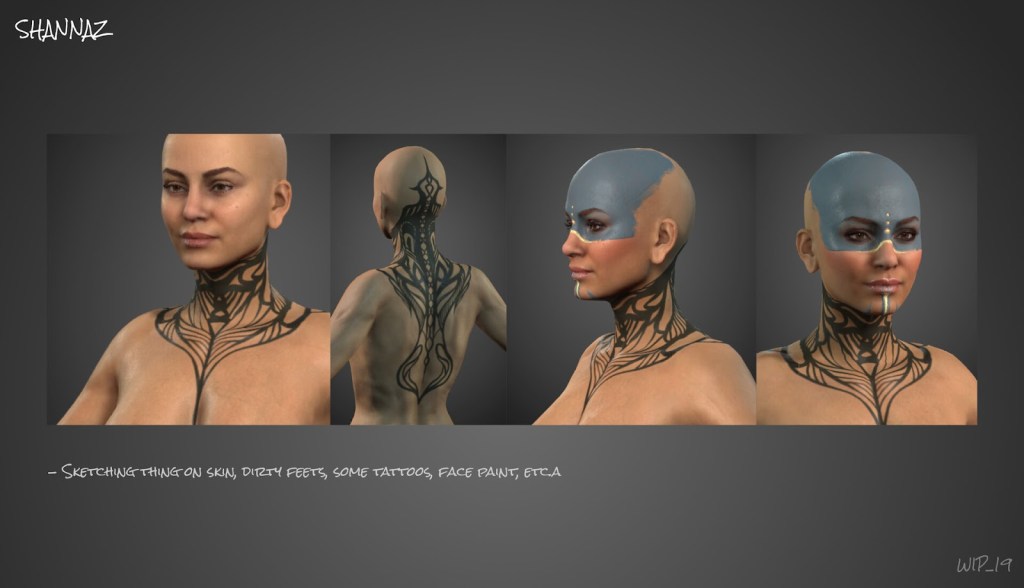
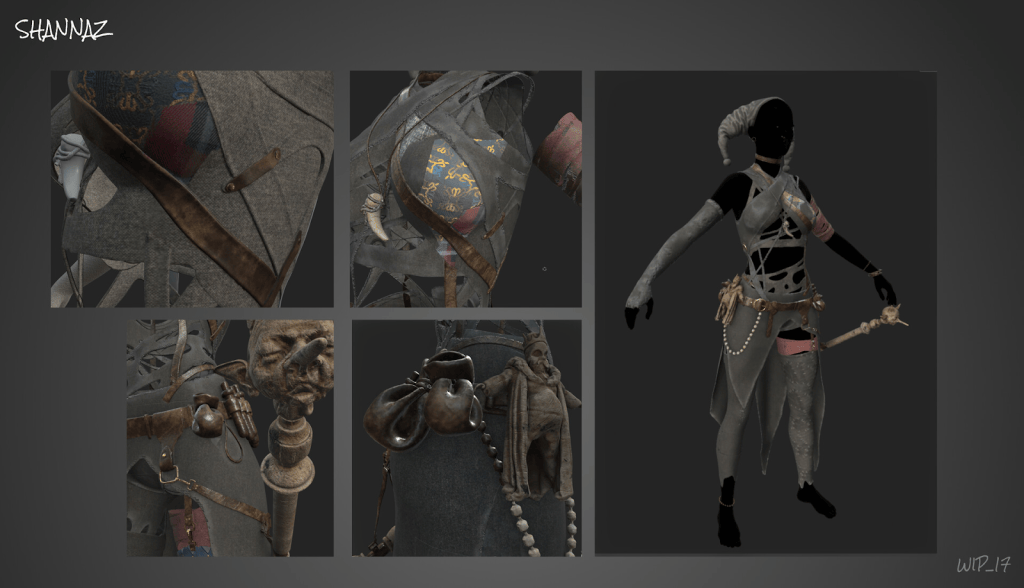
For the 2024 Reallusion 3D Character Contest, Tomas introduced us to “Shanas”, a character brimming with symbolism and depth. Inspired by the fantasy works of authors like Terry Pratchett, she embodies the resilience and cunning of a true survivor. In Tomas’s story, Shanas comes from a tribe that is attacked and enslaved by a cruel king who destroys her village. Forced into the role of a jester, she uses her wit, beauty, and mystical powers to secretly manipulate and control the tyrant. Her distinctive patchwork costume, crafted from scraps, symbolizes her ability to survive and adapt against all odds.

A red string binds a small king puppet to her hand, representing her control over the ruler. Her face paint, inspired by Braveheart, draws from tribal influences, and a flute, used in her rituals, gives her the power to bind spirits to masks. Tomas’s story-driven approach makes his work truly stand out, with each piece of Shanas’s design telling a part of her tale.

How Character Creator Benefits His Workflow

Morphs and Expressions

Character Creator’s morph and pose capabilities were pivotal in bringing Shanas to life. Tomas focused on shaping Shanas’s silhouette to reflect her story and personality, something he could quickly achieve using Character Creator’s morph targets. “Morphs are very important for me because the character’s silhouette and shapes tell their story”, he explains. By utilizing these morphs, he was able to create a variety of character shapes quickly, from initial concept through to final detailing.

Expressions and poses also played a crucial role. Tomas particularly enjoyed posing Shanas with her flute, which symbolizes her control over the spirits bound to her mask. He could easily save and reuse poses, an efficient feature for someone who relies heavily on body language and facial expressions to convey emotion in his characters.

Accessories and Texturing

Accessories were equally essential for Tomas’s work. He conceptualized Shanas’s attire as a self-made patchwork of fabric scraps, reflecting her resourcefulness. Tomas relied heavily on textures, using Substance Painter to add realistic details to her costume without complex geometry. He also incorporated Character Creator’s makeup editor, drawing inspiration from tribal face paintings seen in films like Braveheart, which enhanced Shanas’s tribal origins and mystical aura.

Blender Auto Setup

Blender Auto Setup was a significant timesaver, streamlining the process of setting up shaders in Blender. “If you’re experienced with Blender, you could connect nodes manually, but it takes time”, he says. Auto Setup allowed him to bypass the repetitive task of connecting nodes for nails, eyes, and other complex materials, letting him focus on enhancing his renders rather than on technical setup. Tomas appreciated how Auto Setup helped translate Character Creator’s high-quality textures and UDIMs efficiently into Blender, allowing him to recreate Shanas’s themes of wilderness and resilience.

Final Thoughts

Reflecting on his experience, Tomas sees character design as a deeply creative process that requires a fine balance of technical skill and storytelling. “Everything is about the story for me”, he reveals. With Character Creator, Tomas was able to bring his unique vision for Shanas to life in a seamless and time-efficient manner.

Tomas plans to dive deeper into animation in future projects, integrating his Character Creator and Blender skills with Unreal Engine for cinematic animations. His journey exemplifies how 3D artists can use storytelling to elevate character design, using tools like Character Creator and Blender to create art that is as visually compelling as it is narratively rich.

Learn more

Character Creator – Enjoy a 30-day Free Trial

Tomas’s full WIP

Related Posts

Click through to learn more about the winners’ portfolios and judge comments

Amazing Plugin for Practical 3D Building & Construction Design – Neriverso

Welcome to Neriverso, where the captivating world of video games meets the expertise of Neri Neto, a seasoned technology journalist and skilled game programmer. Through Neriverso, Neri shares his profound insights and boundless passion for everything he adores, including video game development!

As a dedicated game programmer, Neri has lent his talents to numerous indie projects, crafting engaging mechanics and contributing to the development of captivating titles. Embrace the Neriverse and embark on a journey fueled by Neri Neto’s unwavering enthusiasm and commitment to his craft and community.

Streamline 3D Architecture with iClone’s BuildingGen Plugin

In this video, 3D artist Neri Neto demonstrates the powerful features of iClone’s BuildingGen plugin, showcasing how it revolutionizes the creation of detailed and customizable 3D environments effortlessly.

What is the BuildingGen Plugin?

iClone BuildingGen solution for customizable 3D buildings

The BuildingGen plugin in iClone allows users to generate impressive architectural structures using a simple and intuitive interface. It offers a wide range of design options, enabling artists to create everything from modern skyscrapers to quaint villages in mere minutes.

BuildingGen is the ultimate solution for creating customizable 3D buildings easily. Unlike traditional modular building generators that require extensive node-graph editing, BuildingGen enables instant generation of 3D buildings using customizable Blueprints. Easily organize your 3D modules into versatile packages, define construction styles with interchangeable components and materials, and enjoy unparalleled flexibility in architectural design.

Neri Neto’s Workflow

Neri Neto outlines his creative process while using BuildingGen, emphasizing its speed and flexibility. He combines the plugin with other iClone tools to bring his visions to life without the need for extensive manual modeling.

“BuildingGen has transformed the way I create environments. It allows me to focus more on the storytelling aspects of my work, rather than getting bogged down by tedious building design.”

Neri Neto – Journalist | Game Programmer | Content Creator

Step-by-Step Demonstration

Throughout the video, Neri provides a step-by-step demonstration that encapsulates his workflow:

  1. Initial Setup: Starting with basic terrain and layout design.
  2. Building Creation: Utilizing BuildingGen to quickly generate multiple building types and styles.
  3. Customization: Showing how to fine-tune buildings to better fit the scene’s narrative.
  4. Final Touches: Adding lighting, textures, and surrounding details to enhance realism.

Conclusion

Neri Neto’s use of iClone’s BuildingGen plugin exemplifies how modern tools can streamline the creative process for 3D artists. By simplifying building design, artists can focus on creating immersive and compelling narratives within their 3D environments.

Follow Neriverso

Instagram:
https://www.instagram.com/neriverso/

TikTok:
https://www.tiktok.com/@neriverso

Related Posts

Smart Search – Your Guide to Thousands of Assets

Since iClone, Character Creator and Cartoon Animator were released over the years there has been a determined effort by Reallusion to provide quality 3D assets for their animators. These applications have always downloaded with a lot of usable assets but just ask any animator and they’ll tell you there are never enough assets. It doesn’t matter how big your assets library becomes; you will always want or need more.

To meet this need, Reallusion introduced its Marketplace for users and asset creators to share and sell more 3D props, characters and accessories which has exploded into a market of thousands of assets from extremely talented developers.

This doesn’t include Reallusion’s own Content Store of professionally created 3D assets and animations that cover a wide range of needs. In fact, all of this available content has created a new problem for users.

And, of course, we don’t want to leave out ActorCore, the one-stop shop for professionally crafted characters from main actors to extras in crowds. ActorCore search results are included in AI-powered results unless filtered out.

A Vast Amount of Content

The problem, a good problem admittedly, of so much content, is how to find what we need in all of those 2D/3D assets in the combined stores without spending a lot of time or growing frustrated.

When one is searching for assets, particularly if you are the animator instead of a producer, you must stop what you love to do and find a needed asset. For some of us this is a fun diversion but for others it is a terrible distraction that can completely kill the creative buzz. Especially when the search goes on and on.

So, we jump online and start searching. The Content Store, ActorCore and the Marketplace have great filters to find content, but filters are just that and don’t compare to AI based search for speed and efficiency. Even if you love searching for content, this AI-enhanced search plugin will enhance the experience and lower the frustration level by drastically decreasing the amount of time it takes to narrow down and find relevant content.

Smart Search

Reallusion’s new AI-powered Smart Search comes to the rescue with its long reach and almost instant replies. The AI-powered technology is a big leap in asset searching for combing through the thousands of assets available across all the content stores. This smart plugin is so fast you don’t even have time to take a sip of your favorite beverage before you have the results.

Below you will find some quick, no-frills demos using Smart Search in all three applications.

Character Creator

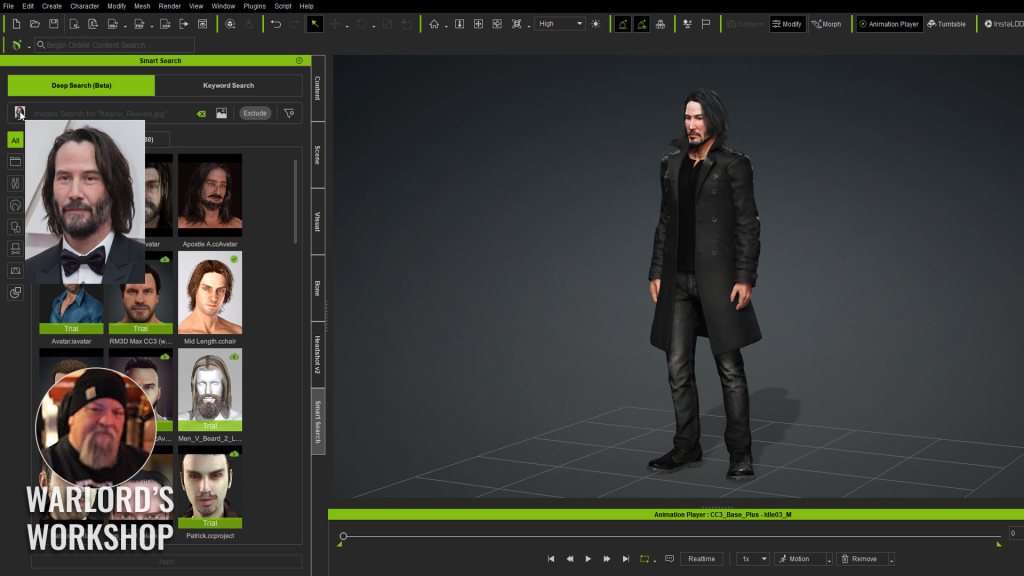
This project is a very simple use of the Smart Search image feature to quickly find a hairstyle that would match our character. I had already used Headshot 2 to recreate the actor’s head on a Character Creator body. I also already had the clothing in place as I knew what assets I had on hand and wanted to use.

The problem was the hair. I could not recall having a hair style even similar to the character, so I found a headshot image (photo not the plugin) to drag and drop into Smart Search. It quickly pointed out a hairstyle that I already had in inventory and stored locally on the system. The results were almost instantaneous as you can see in the capture below.

iClone

iClone has so many good assets that Smart Search was becoming a necessity for new assets and items already purchased. In this case I wanted to load up a battle scene with a mech and a character (avatar) for a driver.

I knew I had the mech and the driver in my purchased inventory, but I couldn’t recall a battle scene and this is where Smart Search quickly pointed me to a ton of options including an older Desert Storm battlefield that I had all but forgotten about. See the video below for a quick demo.

Cartoon Animator

Like iClone, the Cartoon Animator community has created a lot of quality 2D content from top developers and users. As a newbie to Cartoon Animator I can attest to how Smart Search simplifies the task of finding relevant assets for any given project in a lot of different genres. The Smart Search plugin can be docked in the user interface like other tools for quick, convenient use.

Smart Searches Available

Deep Search (Beta)

Deep Search is crafted for ease of use, offering intuitive search functions with category-based filtering. Drag in images, describe what you’re seeking in natural language, or retrieve similar items — all powered by an AI model trained to catalog countless digital assets in the Reallusion ecosystem to deliver highly relevant, visually matching results.

  • Text Search – Even brief descriptions will give accurate, immediate results. Input your native language. Multilingual Deep Search has you covered!
  • Image Search – Streamlined search by dragging in image references from your files or web pages. Easily copy images or specific sections from any visual source for immediate use in your projects.
  • Find Similar – Use “Find Similar” to refine your search with closely related assets. Find content similar to items in your project and swap them out with better options. Find alternatives to embedded and purchased assets to add variety to your projects. Find similar content from Search Results and the Content Manager too.

Keyword Search

  • Text Search – Query content using matching titles, descriptions, and tags thoughtfully applied by content authors.
  • By Author – Search for items created by specific artists, including top-rated and favorite content developers.
  • Search Motions – Find the perfect motion with keywords, tags, and the upcoming Deep Search support.

My Quick No-Frills Review

I really didn’t think I would need an AI assisted search feature. It was not high on my list of priorities. I just didn’t realize it needed to be. Lighting fast searches allow me to look for more props and other assets in much less time. And I mean look for more props than I normally would have too… since the frustration level is nil. I can also see this being a boost to content creators to hopefully funnel more sales to them as it can help identify their items via AI instead of just naming and tags.

Like most Reallusion products and tools this AI plugin requires little to no time in terms of learning to use and will be returning queries with more assets than you will probably want to look at… and faster than you can lean back in your chair to wait for the results.

Summary

As shown in the first Character Creator 4 demo you can see for yourself how just dragging an image of an actor can immediately locate relevant content. This eliminates a lot of searching, filtering, rephrasing search words and so forth that eat up a lot of time. You can go right back to work without skipping a beat or losing creative focus.

As AI Smart Search matures there are even better improvements on the way with Deep Search extending to our custom assets as Reallusion continues to add features. There is also an online survey for users to help them make the Smart Search even better.

To use the new AI driven Smart Search plugin, all you have to do is open your Reallusion Hub and update the applications. Then you can you type, drag and drop and refine AI-driven searches that will put content at your fingertips in less time that it takes me to type this sentence.

Smart Search Online Manual

Kai’s tutorial on how to use Smart Search

MD McCallum - WarLord

MD McCallum – WarLord

Digital Artist MD “Mike” McCallum, aka WarLord, is a longtime iClone user. Having authored free tutorials for iClone in its early years and selected to write the iClone Beginners Guide from Packt Publishing in 2011, he was fortunate enough to meet and exchange tricks and tips with users from all over the world and loves to share this information with other users. He has authored hundreds of articles on iClone and digital art in general while reviewing some of the most popular software and hardware in the world. He has been published in many of the leading 3D online and print magazines while staying true to his biggest passion, 3D animation. For more information click here.

Winner Select: Leveraging Rokoko Mocap & iClone for Delicate Character Animation

Melis Caner

Hi, I’m Melis Caner, a 3D Generalist and filmmaker with a Film degree from Dokuz Eylul University. After graduating with a focus on cinematography, editing, and sound design, I discovered 3D animation during the pandemic that followed. Amazed by its limitless creative possibilities, what began as a hobby quickly became my career and a new form of self-expression. My lifelong love for drawing, dancing, and acting now comes together in 3D animation, blending all my passions into one art form.

Melis Caner’s ArtStation

Concept

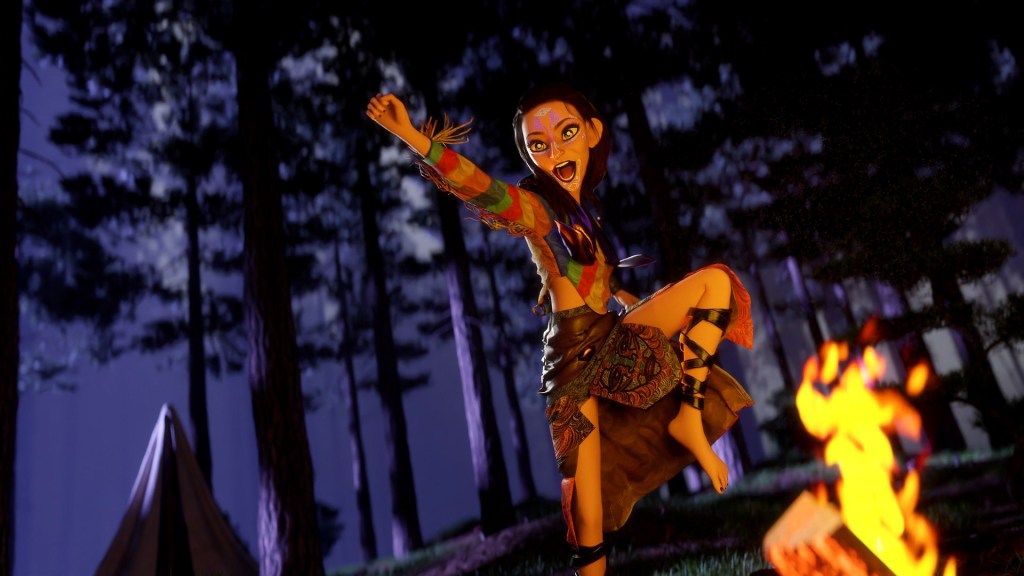
Before I started to think about the story I decided to focus on my character. I knew that I wanted to create an ethnic-looking stylistic character, and I wanted to combine her with sharp ritualistic movements. That’s how my Shaman character idea was born. I researched traditional shaman rituals, their attire, sounds, and their connection with nature. Initially, I thought of a ritual to change the color of the firepit, but the purpose wasn’t clear. Onur Erdurak (@blendreams) helped me develop a deeper story about reviving a dead bird, adding meaning to the Shaman’s bond with nature.

Once I had the concept, I jumped into Character Creator and experimented with the CC Toon base. It was a trial-and-error process where I explored different looks until the character felt right.

Using Character Creator

This animation was my third time using the CC Toon base. It’s incredibly convenient for creating stylized characters, with a variety of morph sliders that allow for easy customization to match your vision. It’s always fun to play around with the morph sliders to create my character. It doesn’t take a long time to master it, it’s simple, fast, and easy. I suggest adding some of the most used sliders to your favorites, so next time you’d save a lot of time and get even faster.

I designed and simulated the dress using Marvelous Designer. For accessories, I used the arm and leg bands from JoeLoXYungChuang’s Martial Art – Costume B 5 Set, which I found on the Reallusion Marketplace.

Using Marvelous Designer

I’ve been using Marvelous Designer for nearly three years. In my entry video, I tried many ways to reflect the Shaman’s persona. Besides her expression and body movement, I also figured out that the flowy garment would also add depth to the story. So I began to pay attention to the details of the garment, making sure that the cutting, textures, and colors were perfect for the character.

I wanted the costume to look kind of traditional and fitting to the character’s personality. It had to be colorful, flowy and unbalanced. I used my own textures and digital painting to create a unique design. I created my custom brush in ProCreate and used custom digital paintings as textures.

Rokoko Mocap

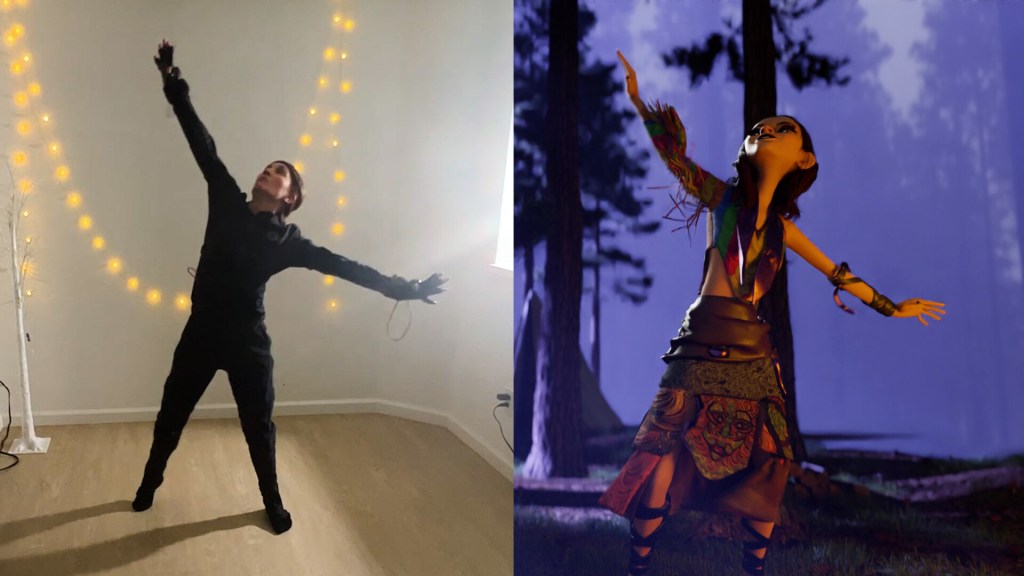
In this entry, I was using the Mocap equipment from Rokoko. I have to say “I love using the Rokoko Smart Suit”! It speeds up the animation process and adds so much freedom. I enjoy dancing and capturing my own movements with a motion capture suit. Using the movements I made adds a little piece of me to the character as well, and I think that makes the animation even more personal.

Here are some workflow and tips from my experience. For this animation, I came up with a choreography that she would dance around the fire. I recorded myself without the suit and memorized the choreography. When I felt ready I put on the suit and recorded a few takes and chose my favorite.

I exported my character from CC to iClone and just dragged and dropped the exported file from Rokoko’s software. It was almost perfect. I just had to adjust the circling around the pit fire. To ensure my character moved correctly around the firepit and reached the bird, I used reference objects in Blender, exported them to iClone, and adjusted the movement.

For me, the connection between story and visuals is everything. A single look can tell a story, and the story can shape how a character looks. Character Creator has been an incredible tool in bringing that balance to life. It gives me the flexibility to experiment and adapt as I go, making the process feel natural and enjoyable — like each design choice is part of the story unfolding.

iClone Animation

I used Marvelous Designer to design and simulate the cloth simulation. Initially, I designed another dress for her but it crashed and then I just got carried away with the final design. I used my own textures and combined them with a fabric normal map. I think that makes it look more realistic.

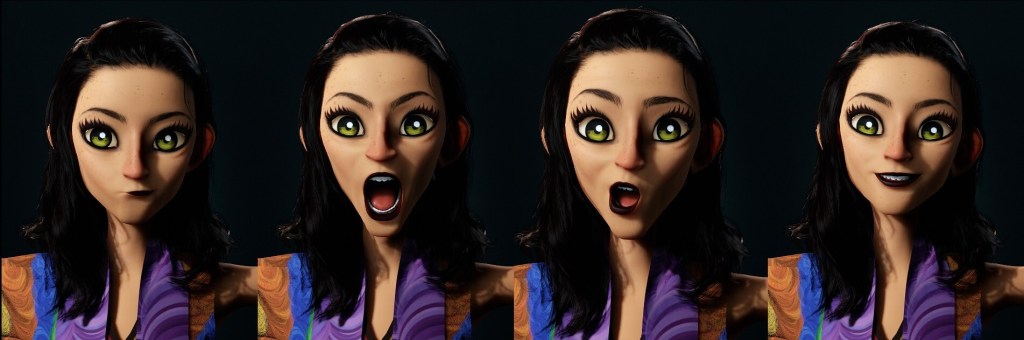
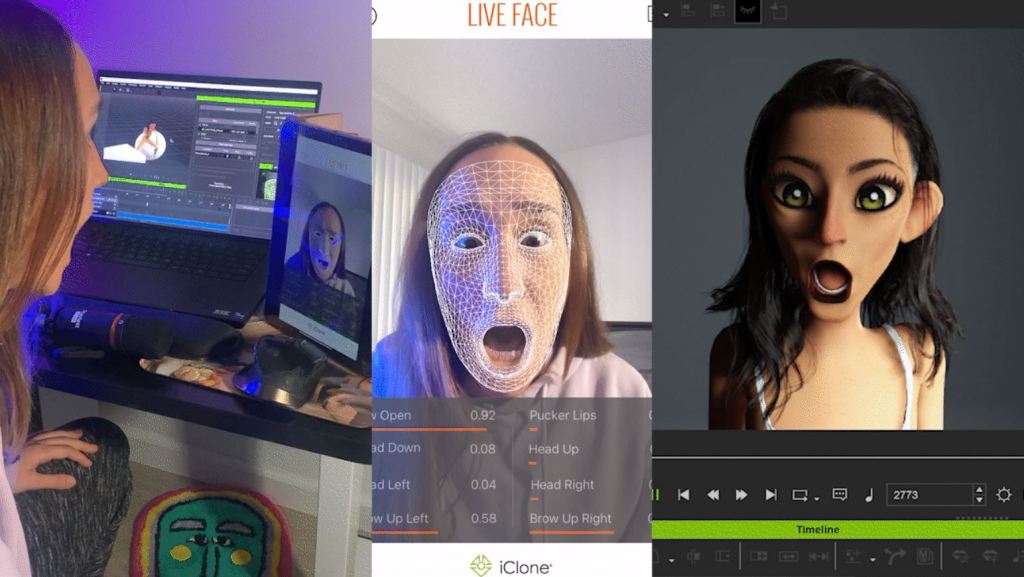
Here are some awesome iClone that I’d recommend: The foot lock feature is a game-changer—one click and the feet stay perfectly grounded! I usually get my character’s shoulders very high with the raw motion capture data. It’s also great for adjusting shoulder positions when cleaning mocap data. I love using iClone Live Face to capture my facial movements and being able to play with expressiveness is a great feature. I can adjust the face however I want, easily.

In my entry, I also took time to arrange the camera. I think that’s where my film studies came in handy. Although I find the close-up a bit extreme in this animation, I found it necessary to reflect the energy of my character. I think even a little movement of the camera adds a lot to the flow of the story.

Composition in Blender

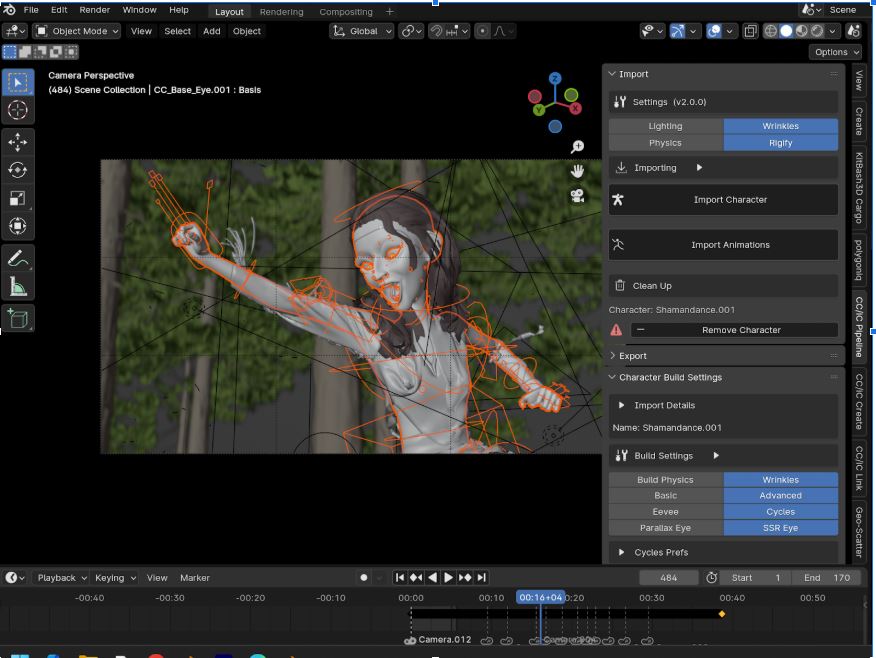
To begin with, the Blender AutoSetup plugin makes the whole process easier and very fast. I use it almost for all of my CC characters. CC Pipeline add-on in Blender makes the setup much easier. It allows you to import the character the right way. I usually only drop the Specular a bit. I like the matte look on the character. I change the eye materials to basic and bump up the coat and specular.

Also, I like to play around with the material settings. Usually, I decrease the Specular to make the skin look more matte and play around with eye materials to make them look more realistic. However, in this entry, I didn’t have the chance to use the latest Data Link feature in the contest. But I look forward to exploring data-link in future projects!

Closing Thoughts

Creating “Shaman” was a rewarding journey that blended my love for storytelling with the flexibility of powerful tools like Character Creator, Marvelous Designer, Rokoko Mocap, and iClone. The ability to experiment, adapt, and bring my vision to life was key to achieving a character that felt truly personal.

While I’m not a character artist or sculptor, creating a rigged character with CC4 proved far more efficient than starting from scratch with sculpting software. The combination of motion capture and thoughtful design choices allowed me to convey emotion and depth authentically. This project reinforced the importance of the connection between story and visuals, and I’m excited to continue exploring these tools in future projects.

Related Posts

Click through to learn more about the winners’ portfolios and judge comments

Top Stylized Horror Film Honors Mexican Sacrifice

Discover How Alfonso Hinojosa Created a Top-Notch 3D Animated Film with iClone, Character Creator & Unreal

Alfonso Hinojosa – 3D Generalist / Filmmaker

Alfonso Hinojosa

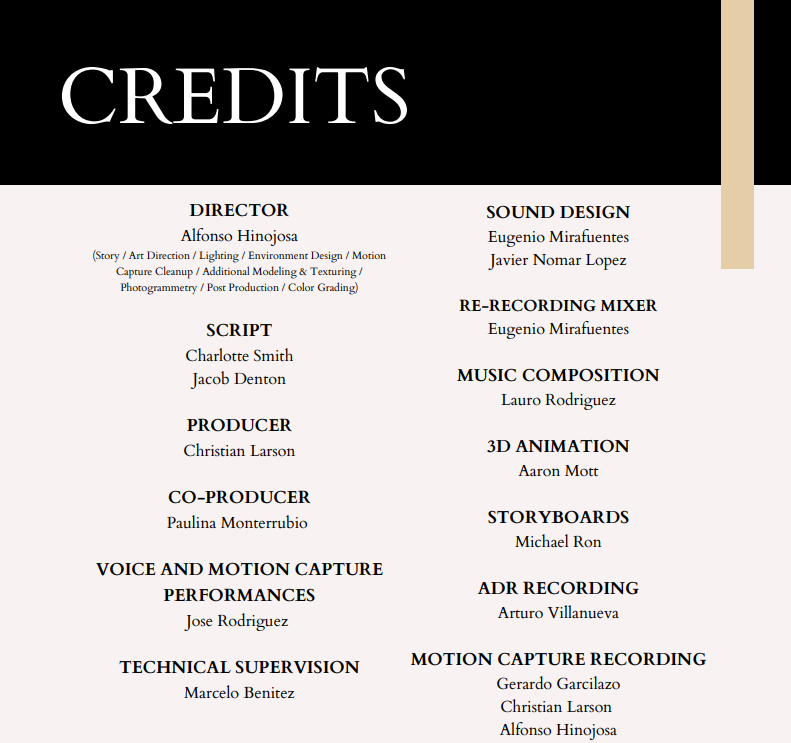
Alfonso Hinojosa is a 3D Generalist and Filmmaker hailing from Monterrey, Mexico. A recent graduate from the Savannah College of Art and Design (SCAD) with a BFA in Film and Television, he has specialized in Virtual Production. Despite being largely self-taught as a 3D artist, Alfonso has successfully applied his artistic and technical skills to contribute to various content creation projects, including animations, XR, AR, and MR productions.

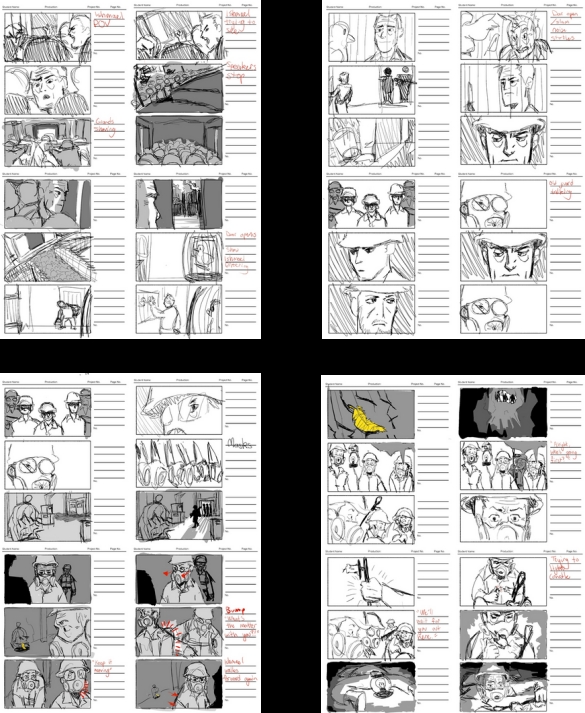
As Alfonso approached the end of his studies, he had the opportunity to direct a short film for his senior thesis. Driven by a desire to tell a story that resonated with his roots and shone a spotlight on the culture that shaped his identity as an artist, he embarked on creating Songbirds.

During the planning stages, Alfonso quickly realized that traditional tools would not suffice to fully bring his vision to life within the limited timeframe. This realization led him to explore Character Creator 4 (CC4) and iClone 8, tools that not only expedited the production process but also significantly expanded the creative possibilities of the project.

With Character Creator 4 (CC4), Alfonso transformed photogrammetry scans into a fully developed cast of characters. The tools provided by Character Creator allowed him to seamlessly swap textures within Unreal Engine, enhancing the narrative through visual storytelling by adapting character textures to match their scenes. Additionally, using iClone 8, Alfonso cleaned up Wonder Dynamic animations and applied them effortlessly to their respective skeletons.

Reallusion tools such as Character Creator and iClone have not only empowered Alfonso as an artist but have also broadened the scope of storytelling possibilities, enabling him to fully realize his vision for Songbirds.

“One of the best features for me was Character Creator’s Headshot 2.0 plugin because it allowed me to create fully rigged characters from any mesh or image and I was then able to fine tune details to get the stylized realism look I was looking for. Being able to drag and drop any asset from Reallusion’s texture library was extremely valuable.”

Alfonso Hinojosa – 3D Generalist / Filmmaker
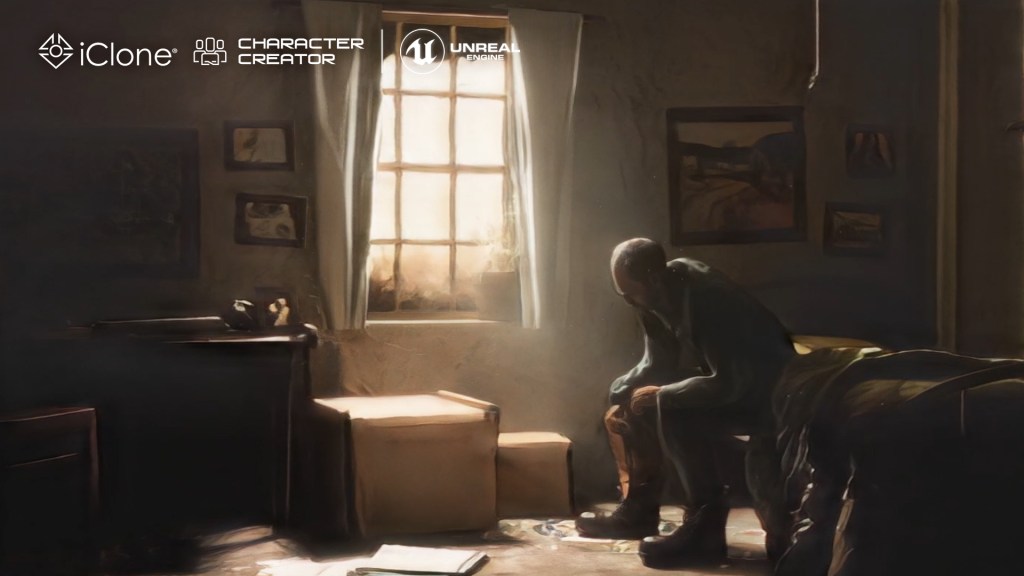
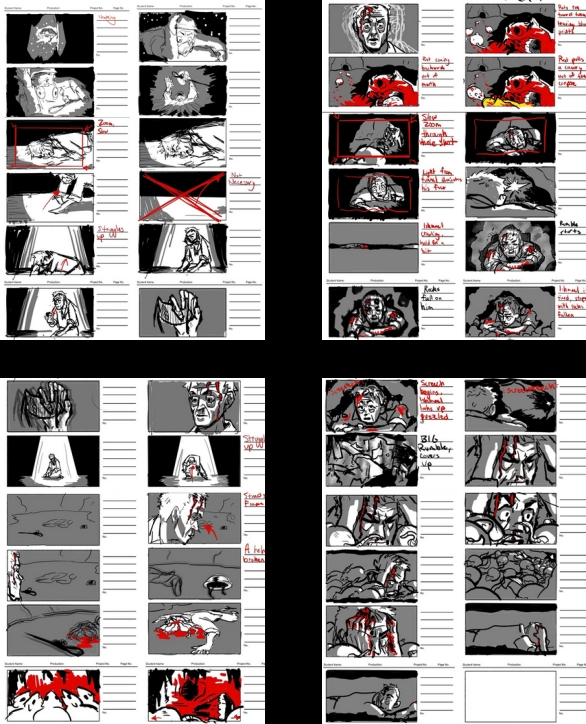
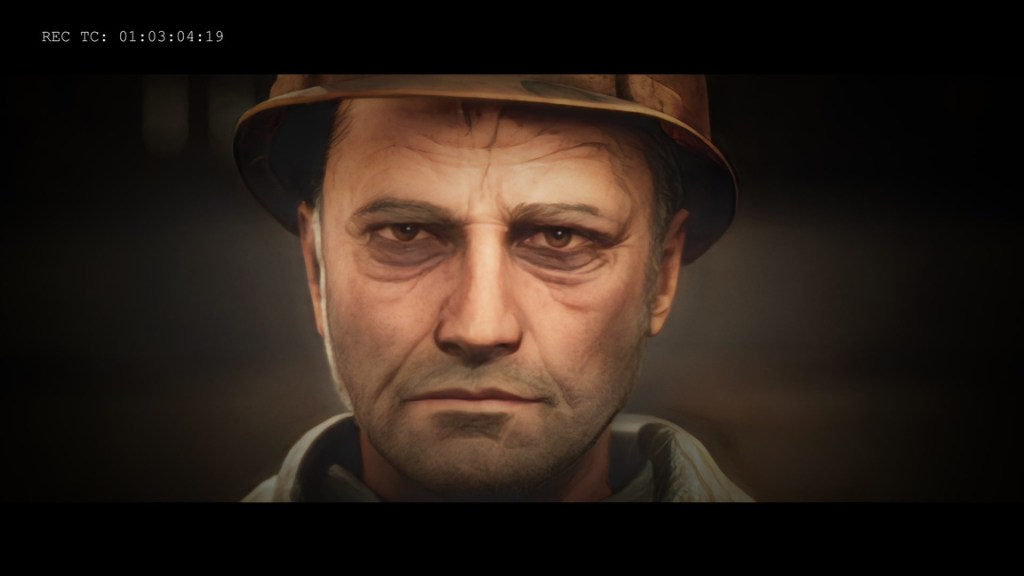
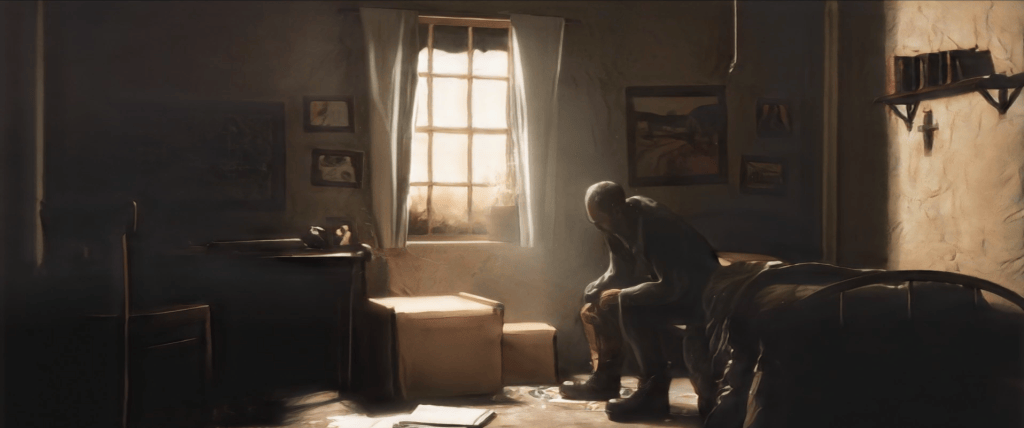
Created as part of a senior year thesis project, this 10-minute animation is set in 1970s Coahuila during the period known as The Tragic Dozen. Reflecting a poignant chapter of Mexican history, the story follows an elderly miner who must descend into a perilous passage after an accident the previous night. As he ventures deeper into the mine, he encounters an unnatural threat lurking in the darkness.

Songbirds – The Inspired History Behind It

Hello! My name is Alfonso Hinojosa, and I am a filmmaker and 3D generalist from Monterrey, Mexico. When I first began making movies in high school, I never imagined I would pursue this career path. My journey into visual effects felt almost subconscious; it came from my curiosity to experiment with new tools and ideas in my projects. This exploration continued throughout high school, and when I enrolled in my film degree program, I began to learn about different resources outside the film department that were also available to me as a part of SCAD, and I felt like there was no excuse to not make the most out of them while I could so I made it a point to incorporate these resources into the projects I created for my film classes whenever I could.

Eventually, I was invited to participate in the newly established Virtual Production classes within the film and animation department at SCAD and as I approached my senior year of college, I wanted my thesis film, Songbirds, to serve as a culmination of everything I had learned since becoming a filmmaker. I also originally came up with the idea for Songbirds because I wanted to honor my grandfather by telling a story set in the time and place he lived through and showing how these themes still resonate in Mexican culture today.

SCAD professors doubted 10 min film for graduation project

For me, it really came down to demonstrating that it was possible and communicating my process as clearly as possible. One thing that really helped was creating a breakdown alongside the project. This allowed me to show how my work fit into the overall workflow and aligned with the project’s timeline. After finishing the characters for Songbirds using Character Creator, the first thing I did was complete a single scene to prove that the timeline was achievable.

Following the full workflow I had in mind from start to finish before committing to it, not only reassured my professors that I could finish my thesis on time, even if it meant wrapping up in the final week, but it also gave me the confidence to keep moving forward with the project. With this scene as a proof of concept, I also brought together an amazing team to help me bring the vision to life.

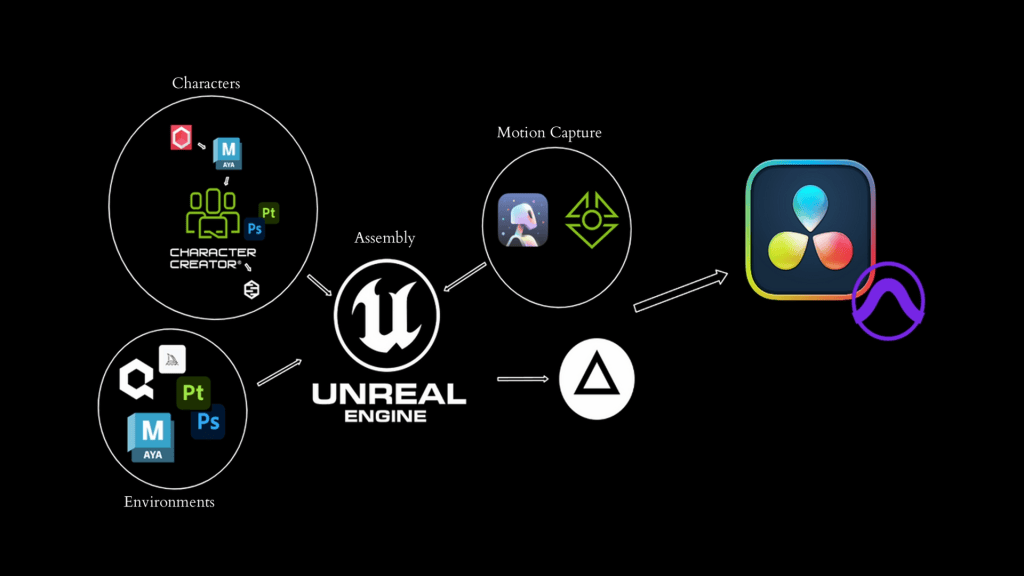
Breakdown from Concept to Creation of Songbirds

iClone & Character Creator: A Pivotal Moment in Production

After watching the Character Creator‘s animated character system video which showcases different tools, I started to read more on those which I thought would be useful for Songbirds. The more I learned, the more I knew that not using Character Creator for the project would be a huge missed opportunity. However, it was the moment I found out about the plugin that allows you to apply all the work from Character Creator to a Metahuman avatar that I committed to using Reallusion tools because of how much it would speed up production without sacrificing the quality of the outcome I wanted to achieve.

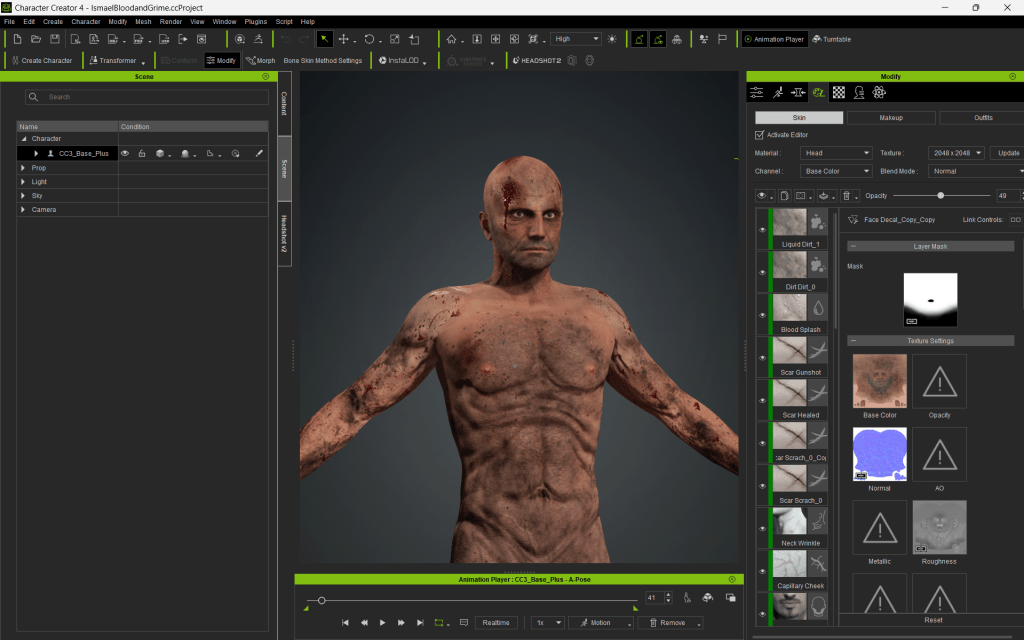
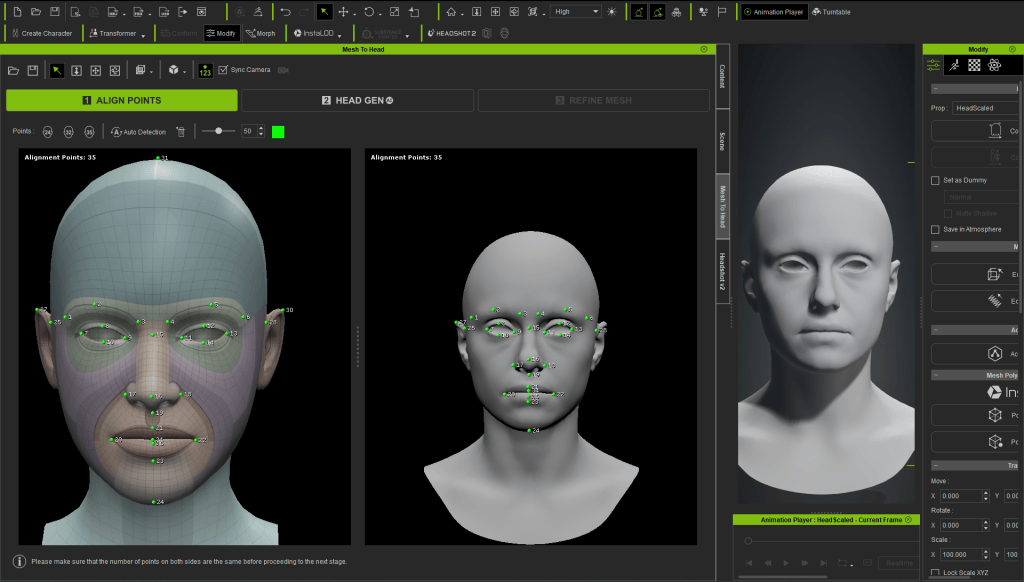
Once I started working on the main cast for Songbirds, one of the best features for me was Character Creator’s Headshot 2.0 plugin because it allowed me to create fully rigged characters from any mesh or image and I was then able to fine tune details to get the stylized realism look I was looking for. Additionally, being able to drag and drop any asset from Reallusion’s texture library was extremely valuable since I could create different sets of textures to correspond to different scenes.
Wonder Dynamics AI Mocap Combined with iClone for Motion Editing

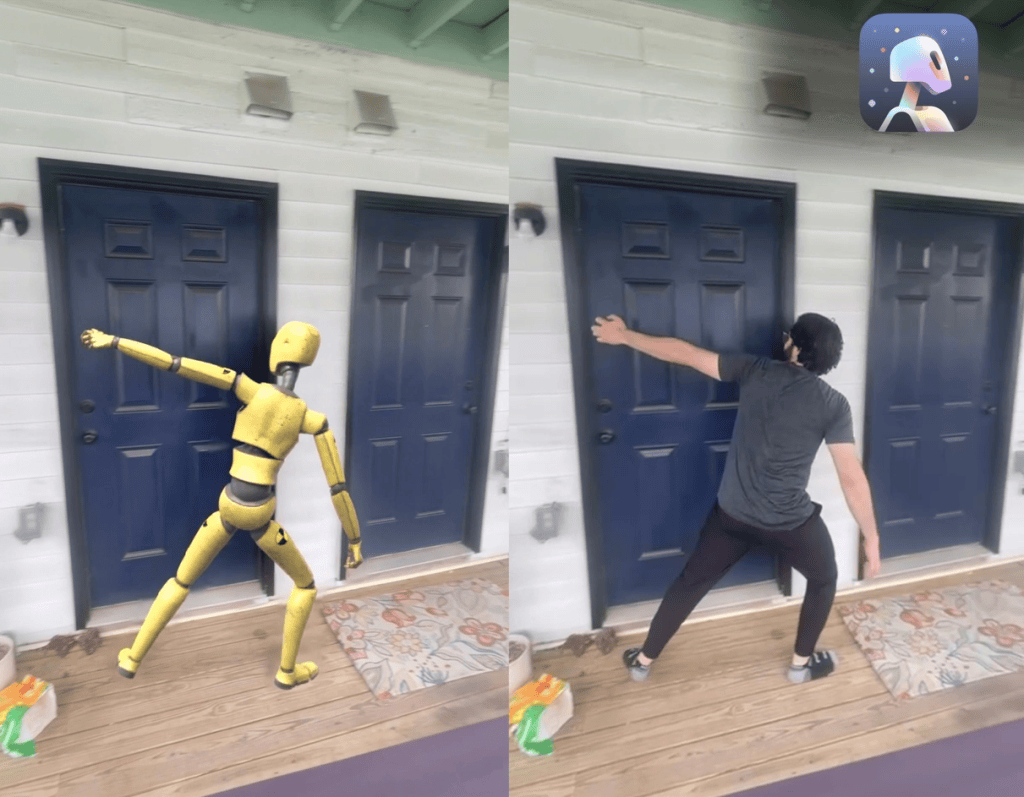
Prior to this, I had absolutely zero experience cleaning up motion capture, so everything from concepts to practice was new to me. While overwhelming at first, iClone‘s user-friendly interface definitely made the process less intimidating. After reading about the general process for bringing data from Wonder Dynamics into iClone, I just had to figure out how to apply that data to my characters so that I could begin the cleanup. With the scenes fully recorded in Wonder Dynamics, I processed and downloaded all FBX files containing the recorded data and imported them into Character Creator.
All the animation data was then removed to get a clean T-Posed skeleton to generate a HIK profile containing all parameters for the skeletal structure.

Next, I opened the corresponding Metahuman character, again in Character Creator, and applied the Wonder Dynamics animation with the HIK set as the motion profile. Looking back, this felt like the only rigorous part of the process because of the trial-and-error nature of it. However, once I had everything working as intended, it was only a matter of dragging and dropping my files before proceeding to the cleanup, which was my favorite part of the whole process. By the end, since I had everything set up and organized, I would go through an entire scene’s set of animations in only a matter of hours because of how easy it felt to clean up the data inside of iClone.

“I had absolutely zero experience cleaning up motion capture, so everything from concepts to practice was new to me. iClone‘s user-friendly interface definitely made the process less intimidating. I would go through an entire scene’s set of animations in only a matter of hours because of how easy it felt to clean up the data inside of iClone.”

Alfonso Hinojosa – 3D Generalist / Filmmaker

Body Performance Cleanup 

  1. The generated FBX file containing the data is then imported into Character Creator where all the animation data is removed leaving us with a T Posed skeleton. 
  2. Inside Character Creator, the next step is to create an HIK profile out of the Skeleton. This typically includes a collection of parameters, settings, and constraints tailored for a specific character’s skeletal structure. 
  3. Next, opening a new Character Creator file, import the corresponding Metahuman dummy character and apply the Wonder Dynamics animation with the HIK set as the motion profile. 
  4. To begin cleaning up the mocap, the Character Creator project is then sent to iClone where the animation will be modified using the Motion Editor before exporting out to Unreal Engine. 
  5. After the animation has been cleaned up, the final step is to smoothen out the jitter left from the MOCAP recording through the curve editor.  

Facial Performance Recording 

  1. Using the iClone LIVEFACE facial mocap app on an iPhone and record video while performing. 
  2. Export data out and import into Unreal Engine 
  3. Bake Animation into Avatar’s face.

Songbirds – a very distinct visual identity

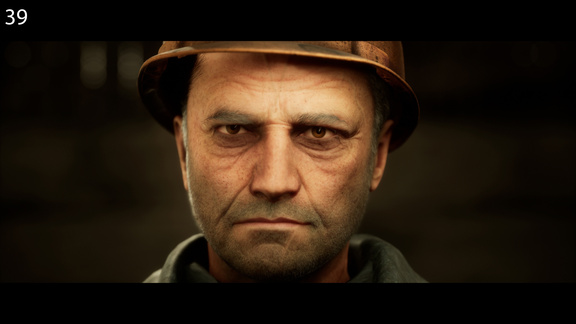
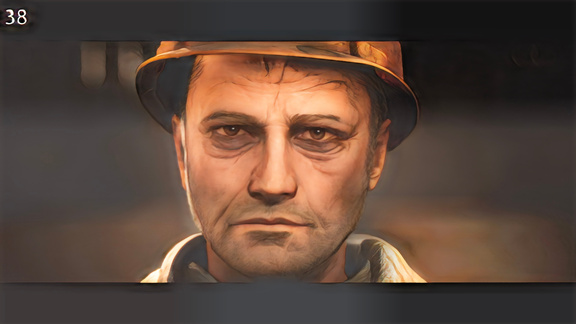
One of my personal goals with Songbirds was to make it look completely different from the traditional Unreal Engine aesthetic. Something that really inspires me from current animation trends is the blend between 2D and 3D, as this always catches my attention. With this project, I wanted to crank up that aesthetic and have everything look as if it were a 3D painting. This ended up being one of the most challenging parts of the project as everything had to be created and organized with this final look in mind. Since all frames would have to be processed one by one to achieve the blend between 2D and 3D I was looking for.

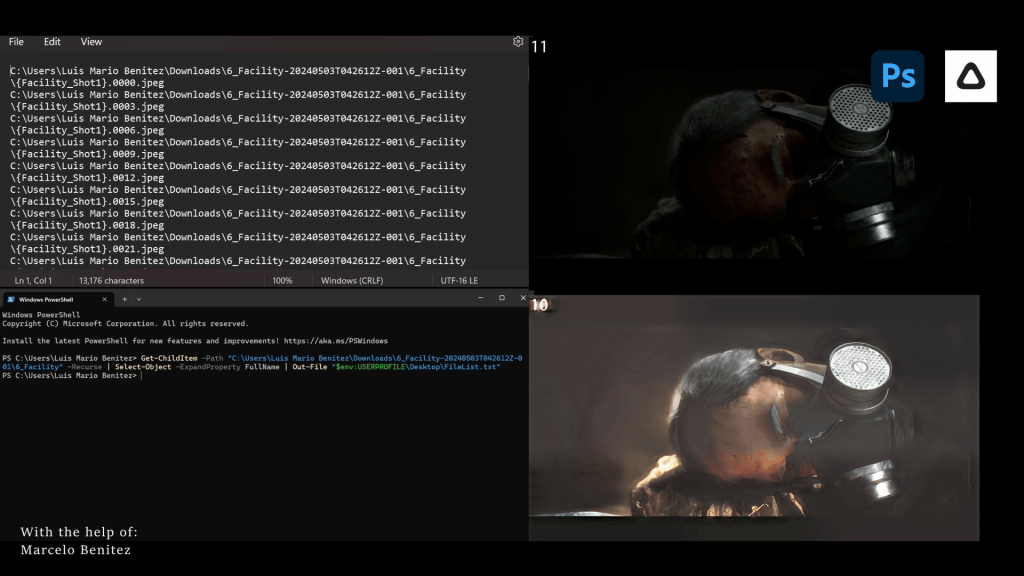
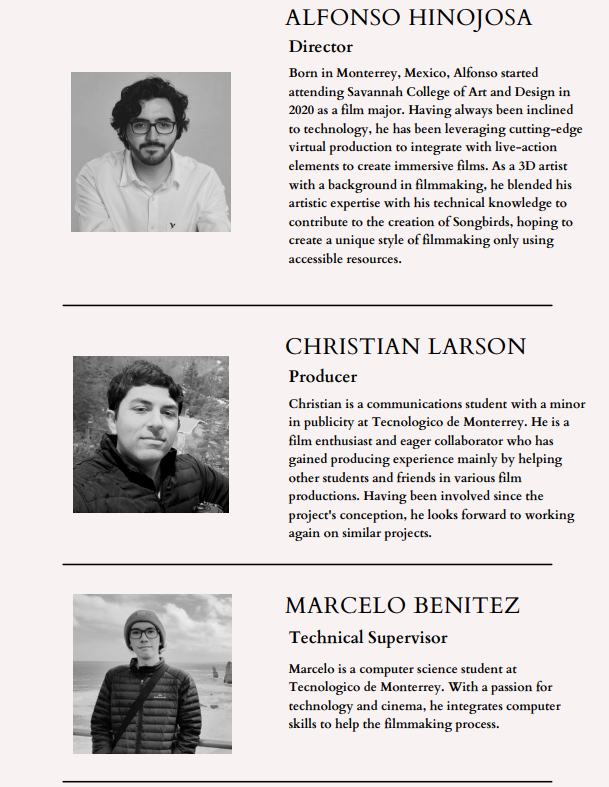
Prior to beginning the stylization my friends and the project’s Technical Supervisor, Marcelo Benitez, also had to develop custom software to automatically sort and organize our frames before bringing them to the final timeline in Davinci Resolve. Because of how rigorous the production for Songbirds was, we only ended up having about a week left to stylize the full timeline of Songbirds.

Between myself, Marcelo, and producer Christian Larson, we sat down for almost every hour of every day for a full week stylizing frames individually, feeling like we were losing our minds, but with only 3 hours to go, the movie was finally done and was delivered in time

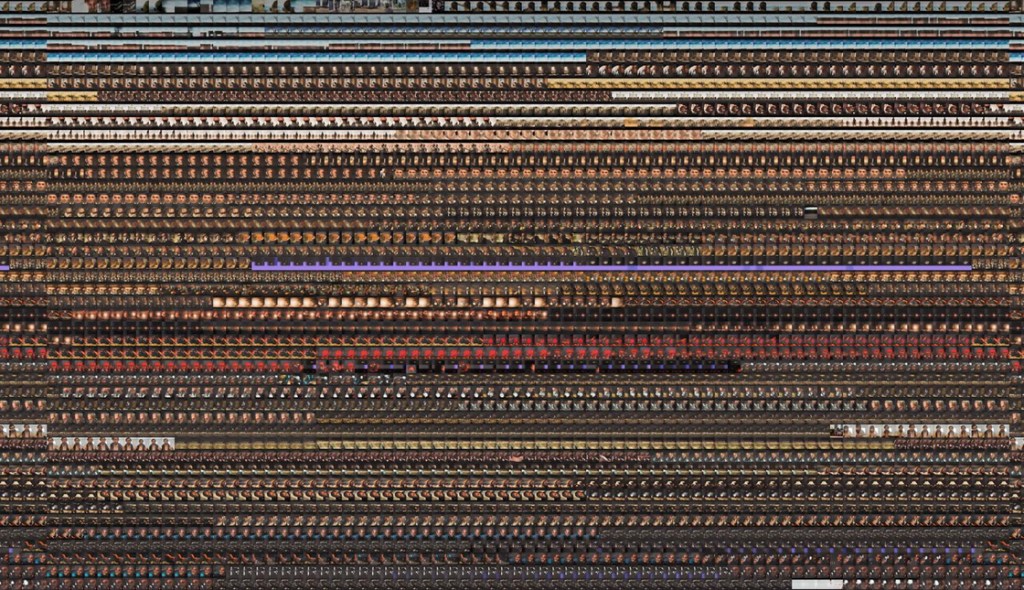
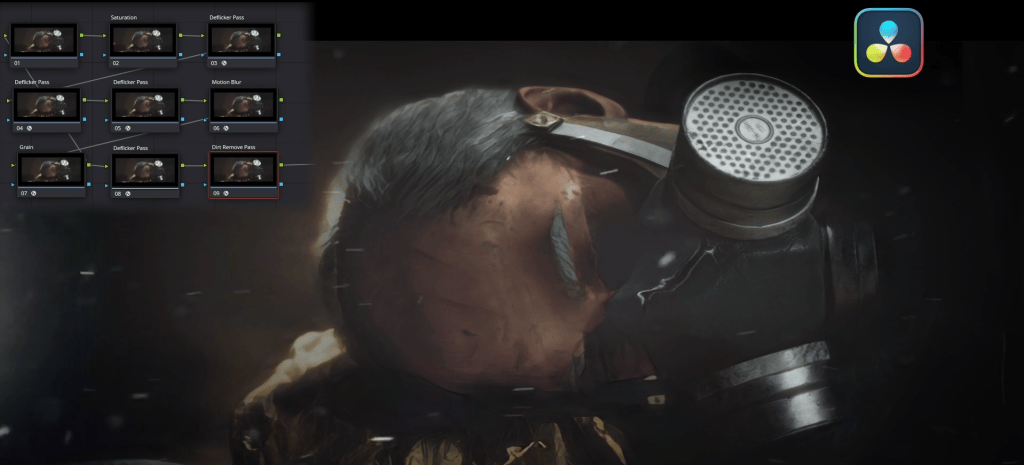
Finally, every one of the 4,455 final frames was uploaded and manually processed through Prismas Filters. After all shots had been stylized, the original renders were combined with the stylized version to create a blend between 2D & 3D.

Once all the frames had been placed in their according spot on the timeline, a deflicker pass alongside a dirt remove pass was added to get rid of any unwanted jitter caused by the stylization.

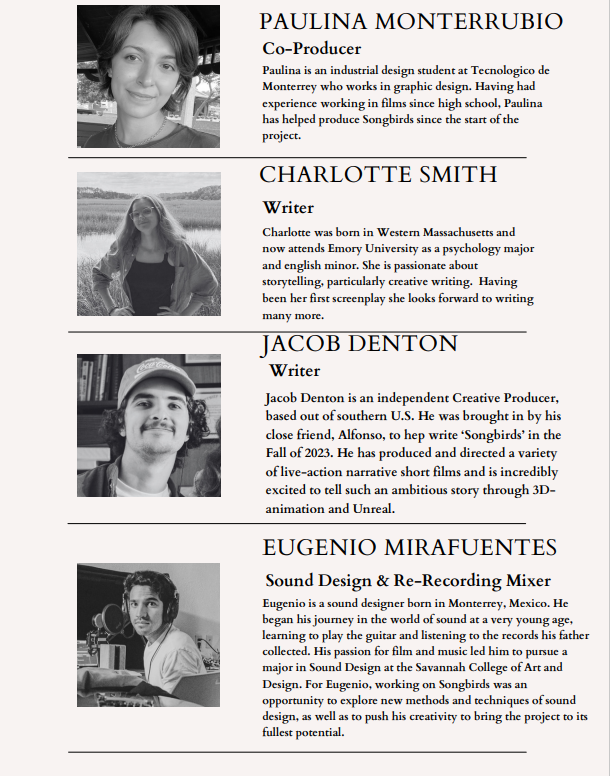
The Team

Related Posts

Easily Turn Yourself into an Animated Livestream Host

Imagine animating as fast as playing a video game, with character control at your fingertips. For example, you’re tapping hotkeys, gliding your mouse, and your character moves seamlessly, almost as if by magic. Add facial motion capture, and now your own expressions bring your animated character to life. It sounds unreal, right? Well, with the new Cartoon Animator 5.3 update, that’s exactly what I’m about to do with this cartoon version of myself. And I’ll guide you through every step, so you can create your own animated livestream.

Quick Character Creation

For a super-fast setup, I grab a pre-made character from Social Buddies.

Now, Social Buddies is a paid product, but no worries — you can follow along using any of the free characters that come with a fresh installation of Cartoon Animator. For my character, though, I’ll be using Social Buddies and choosing “Harry” as the starting point.
I then switch to Composer mode and launch the character in Photoshop.

Once in Photoshop, I quickly create the eyeglasses in fast-forward. Then, I select one eye, locate it in the Layers panel, and position the eyeglasses layer above the eye.

I repeat the same process with the other lens.

To ensure Cartoon Animator recognizes the eyeglasses, I place them in a folder named after the layer.

Next, I remove the hair and draw the beard.

I prefer to separate the beard into three layers: center, side, and the other side. This makes it easier when preparing the 360 head. Next, I recolor the clothes, isolating each body part to ensure it is done correctly.

Then, I do the legs and arms.

I changed my mind and decided on a darker color for the coat. Next, I colored the shoes, and we’re all done!

Quick Adjustments to the 360 Head

Back in Cartoon Animator, I head into composer mode to set up the 360 head.

First, I adjust the eyeglasses for each angle, ensuring they move seamlessly with the eyes. I carefully go through all 8 points, angle by angle, view by view.

After a quick preview, you can see that the eyeglasses now follow the head movements smoothly. Next, I’ll do the same for the beard, using the “Deform” tool to adjust it for each angle. I’ll fast-forward through this part.

Finally, I run a test by clicking “Preview”, then pressing the spacebar and moving the mouse. With everything looking great, the character is officially ready!

Setting up the Scene

Back in Stage mode, I set up the scene by clicking and dragging props from the Content Panel. I navigate to “Item”, then “Props”, and finally “Stage”. From there, I add a background, a podium (sized to 131), and to finish … some curtains.

Just like that, the scene is ready to go!

Setting up Facial Motion Capture

For those of you who want to animate quickly with motion capture, you can use Motion Live2D.

I’m using Live Face on my phone, and to make sure it connects properly to Cartoon Animator, I just need to input the correct IP address.

Setting up Lip Sync

To enhance character performances, I like using automatic lip-sync with voice input. It adds emotion and works smoothly with expression triggers.

Simply enter that number into Motion Live, and as long as both your phone and computer are on the same Wi-Fi network, it’ll connect seamlessly.

Setting up Puppet Stage with Customized Clips

To set up the Puppet Stage, all I do is click on the Puppet Stage icon, then drag motion clips from the Content Panel.

You’ll notice there are keyboard shortcuts assigned. When I press Preview and hit the spacebar, I can use those keys to control the character just like playing a game.

By activating the “Loop” function, I can make the character repeat the motion endlessly until I hit another button.

Next, I’ll activate Motion Pilot by checking it on. Then, I adjust a setting by going to Motion, then Face, to prevent the character from flipping when moving the mouse side to side. Now, I click “Preview”, press the spacebar so I can press the shortcut keys and move the mouse to make my character dance around.

Since I want the head animation to be controlled by motion capture, I need to take an extra step. I’ll adjust the motion clips so they don’t animate the head.

Customizing Motion Clips

This part is simple but requires a bit of work. I start by adding a motion clip. In this case, I’m combining two from the Content Panel: Item, 2D Motion, G3 Human, Elastic Folks, and then Idle & Talk. From there, I double-click on “Stand 01” and then “Stand 03”.

Next, I bring up the timeline, make sure the object-related track is activated, and click on “FFD” and “Motion”. For my animation style, I remove the FFD clips by selecting them and pressing the delete key.

To remove the head animation so I can control it with motion capture, I simply right-click on the clip, select “Remove Motion”, and choose “Neck”, “Head”, and “Head_Nub”, then click “Remove”.

Now, when the clip plays, I’ll be able to control the head using motion capture. To save it, I go to the last frame of the motion clip and click “Set End Frame”, ensuring that the custom clip includes all the animation up to this point.

Then, I open the Content Panel, click “Custom”, select “Animation”, and hit “Save”. If I already have a version created, I’ll simply choose “Overwrite” to update it.

There you go! Now we have a clip that I can activate and control the head with motion capture at the same time. I repeat this process for a couple more motion clips to finish.

Recording Animation in Realtime

Now, it’s time for the fun part—recording the animation! All I have to do is click “Record”, and everything I do from here is captured in real-time..

Here’s how it works:

  • I move my face to control the character’s facial expressions.
  • I use my mouse to move the character across the screen.
  • I hit keyboard shortcuts to make the character perform different actions, like jumping, dancing, and more.

Every movement is recorded live, and in no time, the animation is complete. No delays, no post-editing — everything happens as I’m doing it!

Conclusion

With Cartoon Animator 5, creating animations feels as seamless as playing a game. It’s fast, fun, and best of all, it’s live. If you haven’t tried it yet, download the Cartoon Animator 5 free trial and start bringing your characters to life!
About Cartoon Animator

Official product page

FREE download for 30 days & get 1,700+ ready-made assets
Related Posts