Starting January 6, 2026, Reallusion will introduce new subscription-based licensing options, giving you greater flexibility to choose the plan that best fits your needs. Alongside the existing perpetual licenses, these subscription plans significantly expand creative possibilities across Reallusion ecosystems for Character Creator, iClone, and Cartoon Animator. All subscription plans provide the same rights and privileges as perpetual licenses under the Reallusion Software EULA, ensuring a fair and consistent experience for all customers.
Subscription Model Benefits
Available with monthly or annual renewal options, subscription licensing offers a flexible and budget-friendly solution for short-term projects and creators new to the Reallusion family of products.
Same EULA Rights Enjoy the same commercial-use rights and features as perpetual license holders, fully covered under the Reallusion EULA.
Stay on the Cutting Edge Always access the latest software versions—including major upgrades (e.g., iClone 8 to iClone 9)—at no additional cost during your active subscription.
Full Ecosystem Access Get unrestricted access to plugins and content purchases that integrate seamlessly with your existing pipelines and third-party tools, including Blender, Unreal Engine, Unity, Maya, ZBrush, and more.
Upgrade Perks Receive an exclusive member discount when upgrading your subscription or switching to a perpetual license. Transitions are seamless, with no service interruption, and discounts are automatically applied at checkout.
Reallusion offers seven subscription plans, available with both monthly and annual billing options. Get started with Character Creator for as little as $8.30 per month, or iClone for just $16.90 per month. For detailed plan information and comparisons, please visit our official website.
Perpetual Model Benefits
Reallusion continues to support perpetual licensing for creators and studios that value the reliability and long-term stability of permanent software ownership.
Pay Once, Own Forever Make a one-time purchase with no recurring fees to secure a lasting production tool for your pipeline.
Stable Production Environment Ideal for long-term projects that benefit from consistent version control and a predictable, uninterrupted production environment.
Collaborative Synergies Perpetual licenses remain essential for teams requiring advanced software management and allocation, including floating license control, shared content and project purchases, and seamless collaboration with external clients and partners.
License Recommendation
Perpetual Licenses are ideal for users who prefer permanent ownership, and for companies, studios, or educational institutions that need multi-seat licenses, team-based content sharing, floating license, and seamless external collaboration via Workgroups. We recommend purchasing our two most popular bundles to get started and save over 35%, or you may visit our Software Store to mix and match your own custom bundle.
Subscription Licenses are best for personal use, short-term projects, or budget-conscious creators. The Reallusion 3D Suite 365 plan is the premier option for a complete CC & IC toolkit. Choosing the Annual Plan provides the most cost-effective value to get started.
License Types
Perpetual License
Subscription License (365)
Best For
1. Permanent use 2. Content sharing, team collaboration 3. Studios and businesses
1. Personal use 2. Short-term projects 3. Budget-conscious creators
User Rights
1. Commercial use rights (EULA) 2. Access to full content and add-on platforms 3. Pipeline support for 3rd-party integrations
Unique Benefit
1. No recurring fees 2. Multi-seat licensing and workgroup management
1. Access to most up-to-date versions 2. Flexible upgrade options
Payment
One-time Purchase (No recurring fees)
Recurring Payment (Billed monthly or annually)
Refund Policy
14-day money-back guarantee
No refund, Cancel anytime (next billing)
Limitation
Personal license only (Not suitable for workgroups or educational licensing)
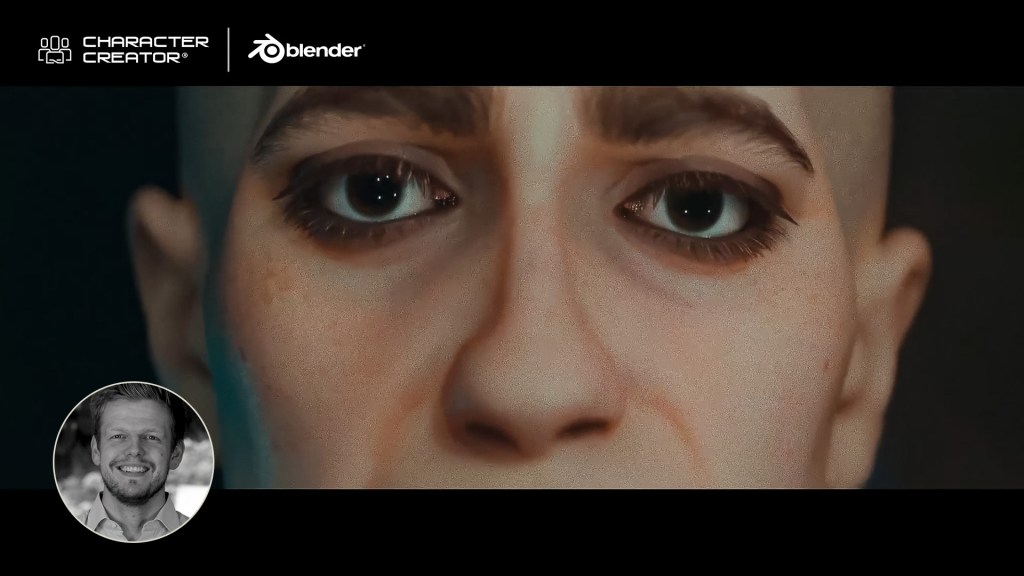
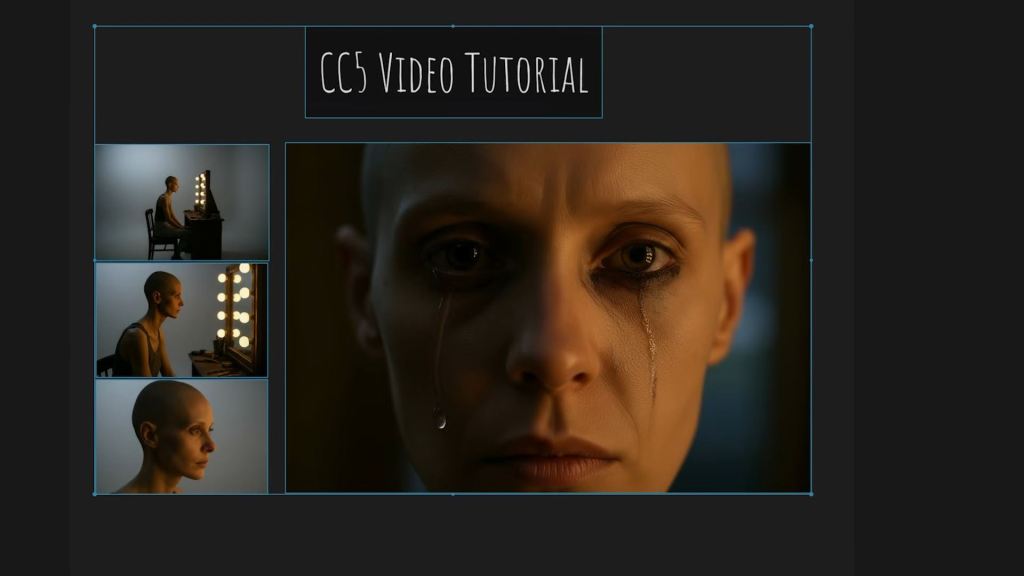
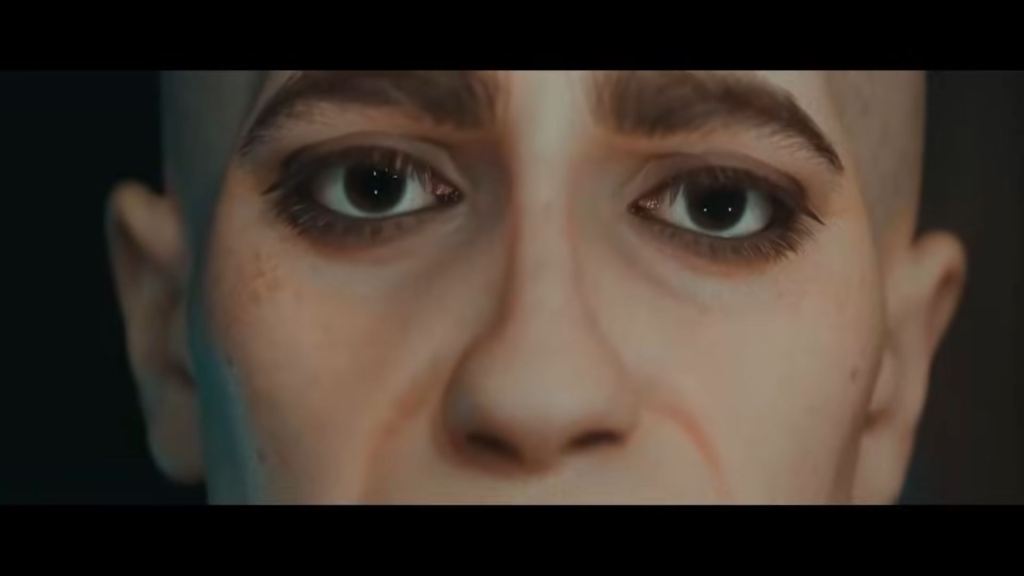
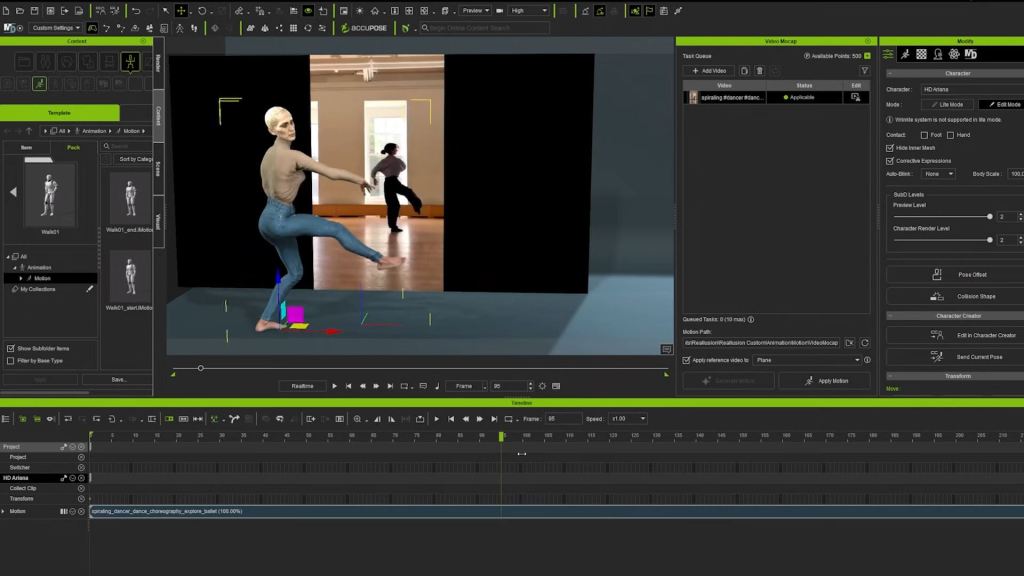
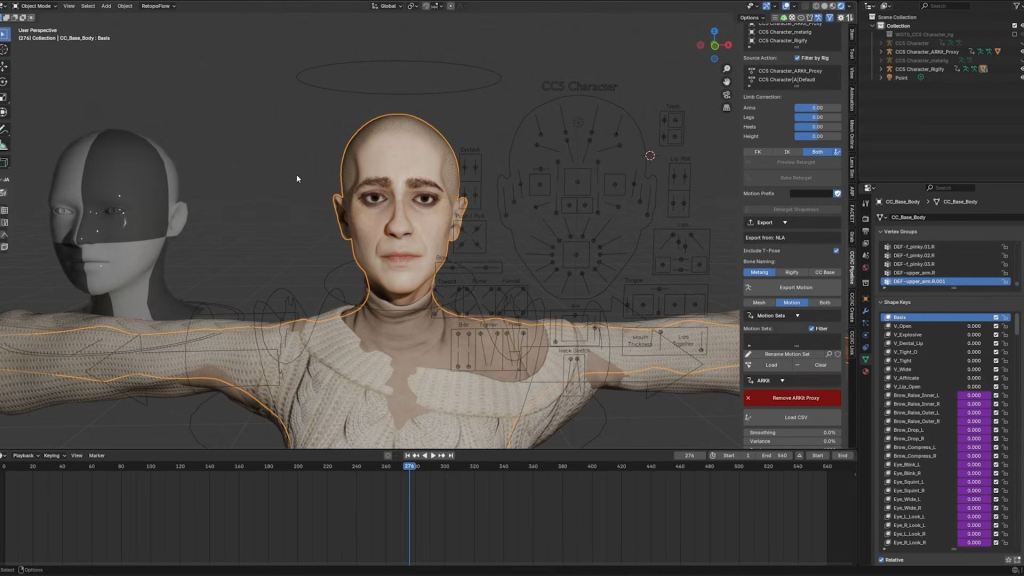
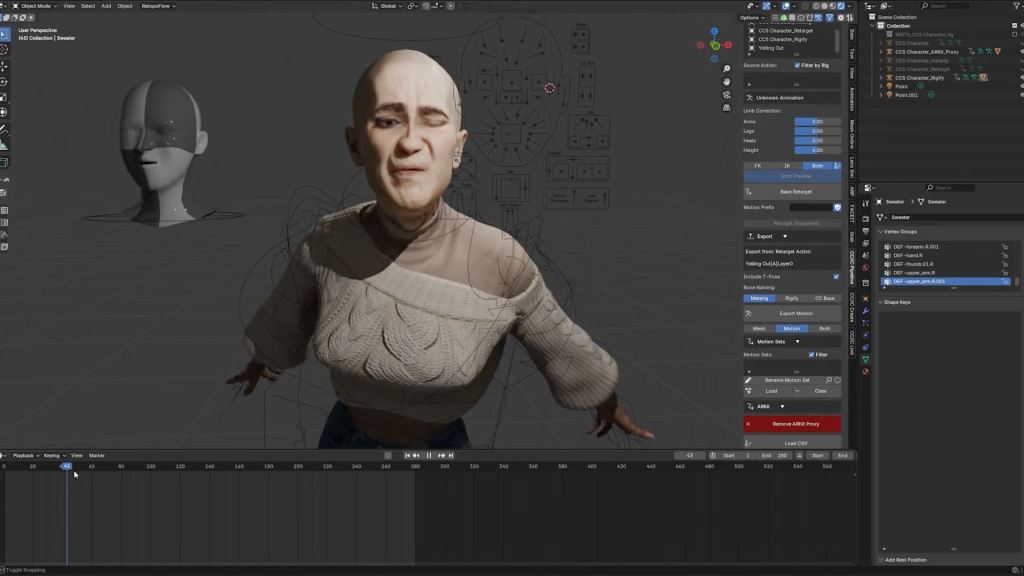
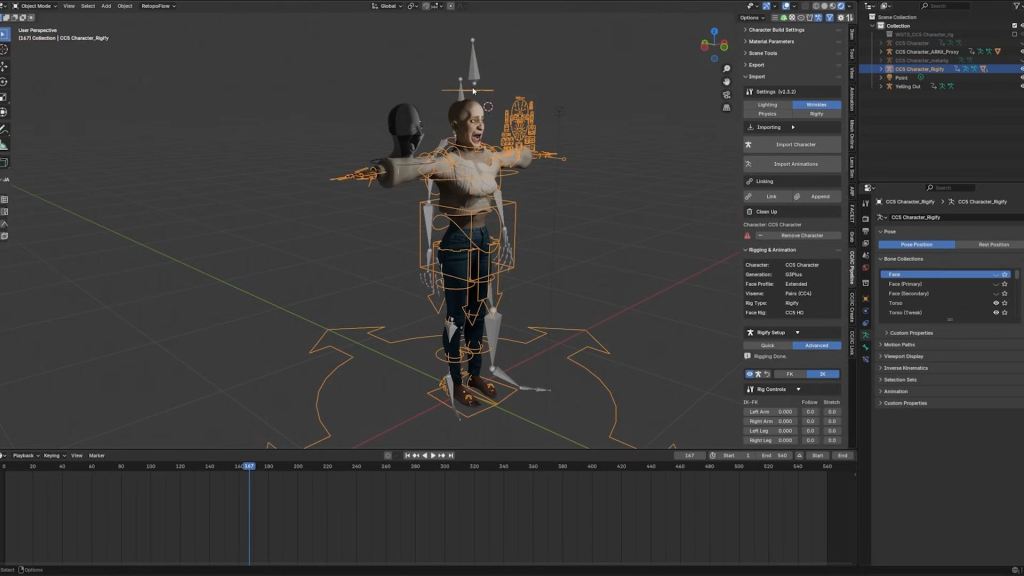
Researcher Thies shares complete character workflow and honest review with CC5, iClone and Blender. He uses the latest Video Mocap Plugin and get the animation to Blender for final rendering.
Thies Grünewald
Hi, my name is Thies Grünewald, I am 37 years old, and have been working in film and video production for over 15 years. I have continuously expanded my expertise in the areas of camera, lighting, and audio, and have constantly sought to improve my skills through numerous image films, interviews, explanatory films, music videos, and above all, my own short film projects. In post-production, in addition to editing and color grading, I now focus heavily on 2D- and 3D-animation. Over the years I have added workflows between the programs Blender, Zbrush, and Substance Painter, as well as Marvelous Designer and Character Creator for character design/animation. In compositing, I have been working with Adobe After Effects and other plugins such as Red Giant, Element 3D and Mocha AE since the beginning of my professional career.
Thanks to my job at the university, I have the opportunity to impart knowledge and, at the same time, constantly broaden my own horizons through exchanges with young students and keep pace with the rapid technological developments in the field of AI.
I have been a loyal Character Creator 4 user for a couple of years. Anyone who has ever designed a CGI character from start to finish knows what it means: sculpting, retopology, texturing, shading, rigging, weight painting. With Character Creator, I can focus on my actual strengths: every character I create with Character Creator, whether it’s realistic or stylized, is production-ready and fits seamlessly into my existing workflow.
So sharing my opinion for CC5 becomes a no-brainer for me. Character Creator 5 has become an important part of my work. This allows me to invest more time in my creative processes.
”As a one-man band, it is essential for me to work with tools that allow me to implement my creative projects faster and more efficiently in a professional manner without compromising on quality. For me, CC5 has become indispensable.“
Thies Grünewald, Researcher at University of Applied Sciences South Westphalia
Exploring the Next-Gen Features of Character Creator 5
Let’s quickly talk about the new CC5 features, as I have integrated all of them into this character. First, we have a new subdivision level that allows for incredible detail. We also have a realistic skin system to dial in micro-details, alongside an upgraded facial performance system.
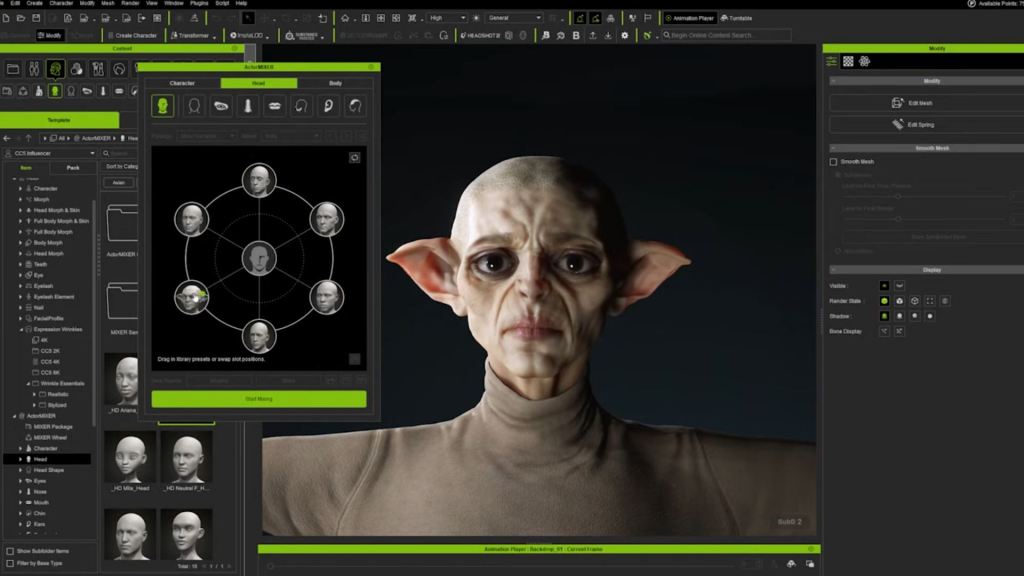
Of course, we have the ActorMIXER. Within seconds, you can play around with models to create unique characters. My goal was to create a specific concept, and I ended up with this female character using the mixer’s various morphs. Whether you are looking for a standard change or a fantasy-style character, you can achieve it with the click of a button — or in this case, by dragging the mouse. For those of us who aren’t primarily character artists, this is a game-changer.
Blender Pipeline and Performance Optimization
Let’s discuss production-ready workflows, specifically integrating this into Blender. If you are working on a slower PC and can’t handle Subdivision Level 2 characters, no problem. You can use the “Create” section to bake your normal maps down to Level 0 or 1. This ensures your characters work fluently even without high-end hardware.
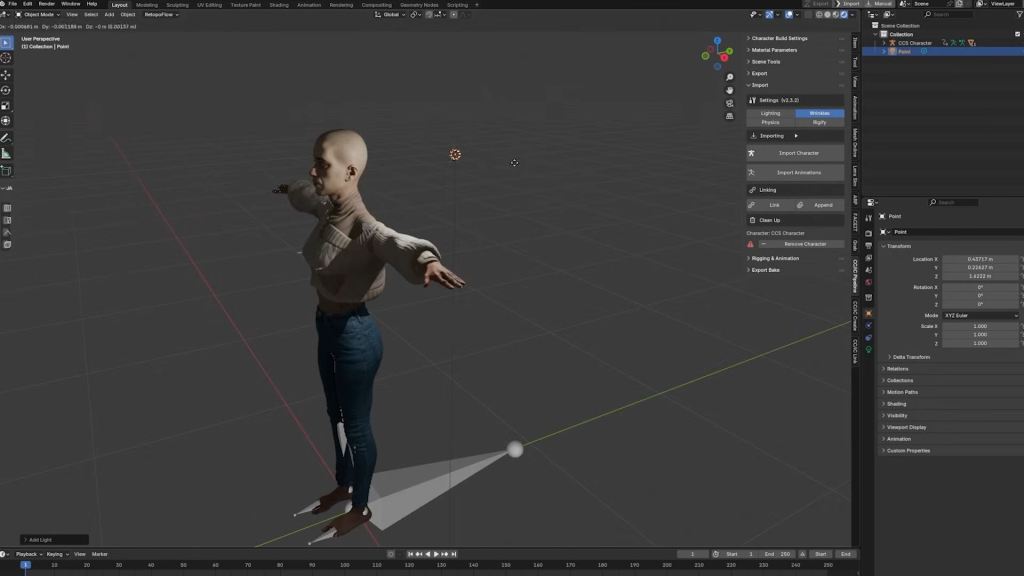
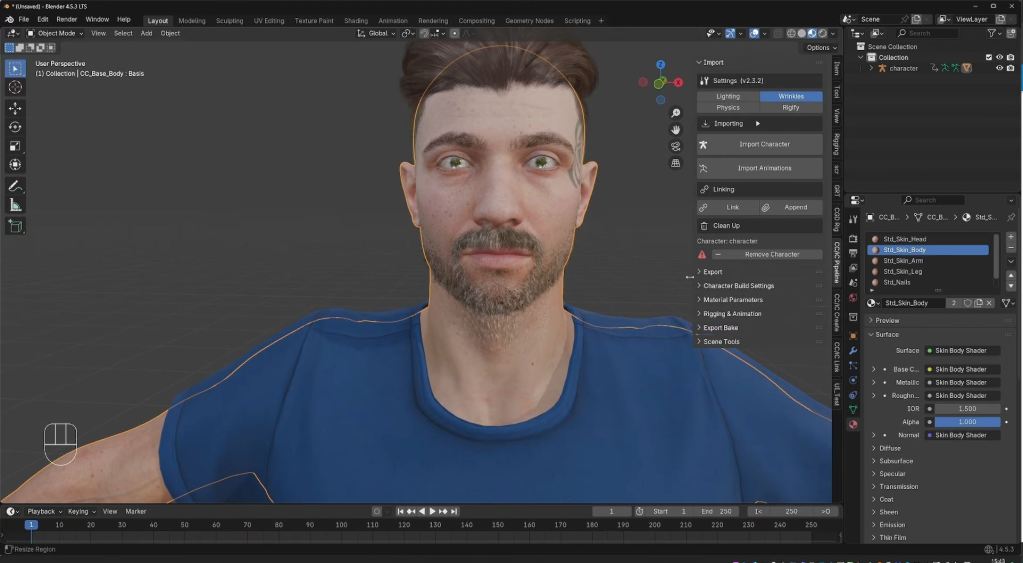
To export to Blender, navigate toPlugins > Blender Pipeline > Export Character. A menu will appear, allowing you to choose your subdivision level; I recommend Level 1 for better playback feedback. Once exported, you can use the free Reallusion add-on for Blender. This tool handles texturing and rigging automatically, removing the technical hassle usually associated with character creation
Rigging and Facial Animation
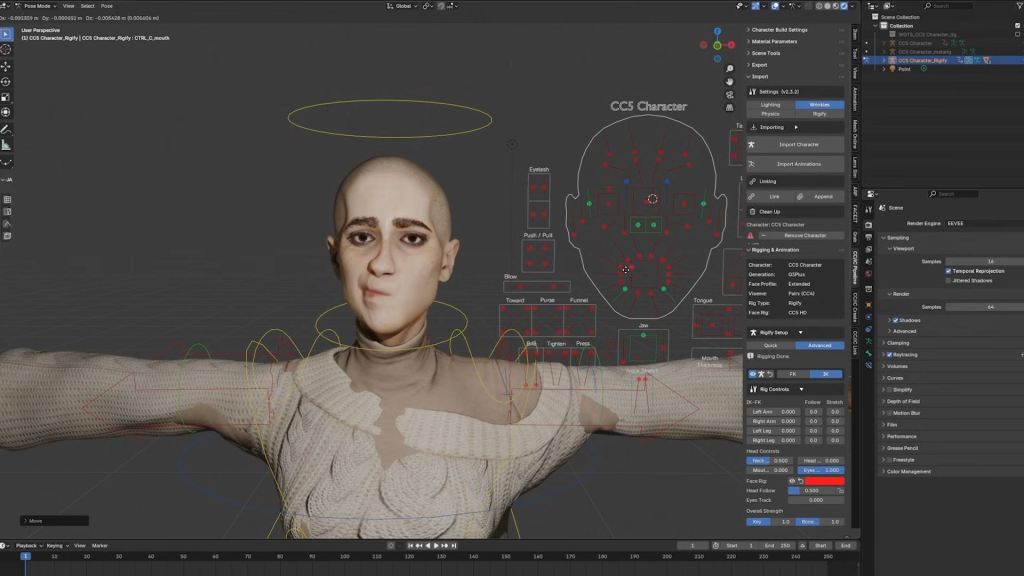
Once imported, ensure you enable ray tracing in Eevee to make the eyes look their best. The character comes with a high-quality rig and perfect weights from Character Creator. You can also use the Rigify setup in the advanced options to generate a control rig for your animations.
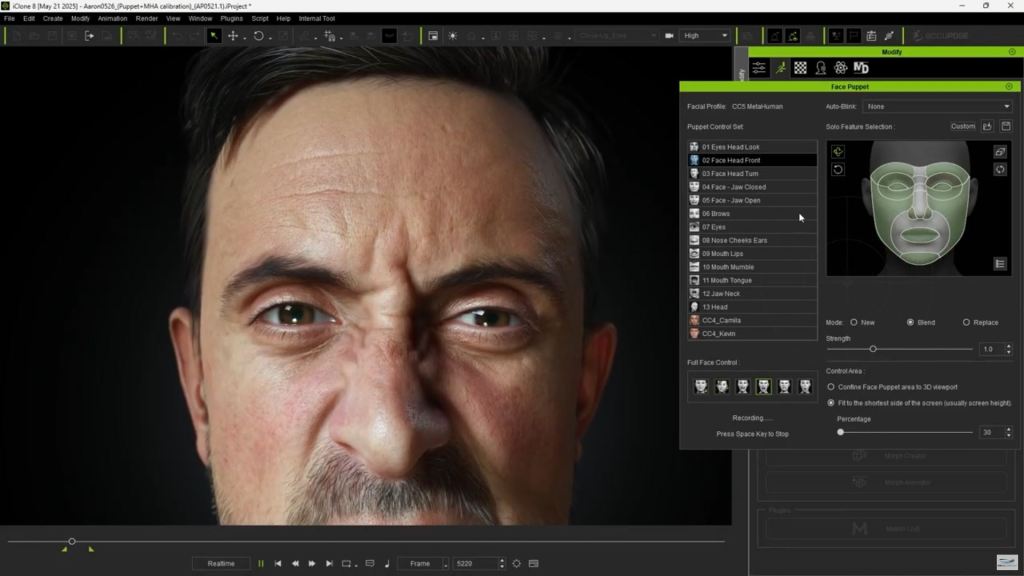
The face rig is particularly impressive. If you’re familiar with Unreal Engine, it will look familiar as it’s based on the MetaHuman system. We even have wrinkle maps for realistic micro-details.
Motion Capture and AI Technology
For animation, you can import mocap data or use the new video mocap feature – Video Mocap Plugin. Reallusion has partnered with QuickMagic AI for “motion-suit-less” animation. You simply upload a video — QuickMagic recommends a static camera, but it works with slight movement — and the AI identifies the silhouette for full-body and finger tracking.
While each generation costs about 250 Reallusion points (roughly $2.50 USD), it provides a handy way to get nice animations without an expensive mocap suit. Each generation takes approximately ten minutes, and the software retargets the motion to your character automatically.
Face Mocap and Retargeting
If you prefer different options, the Blender add-on supports face mocap using ARKit. You can use the free Live Link Face app (exclusively for iPhone) to record a CSV file. Uploading that file onto the “proxy face” in Blender applies the mocap data directly to your character’s shape keys.
Additionally, you can import animations from sources like Mixamo. Simply download the Mixamo rig, select your character as the source armature, and preview the retargeted animation. If the rotation is off, just apply a 90-degree X-axis rotation to the character and everything should work fine.
Conclusion
We’ve created a complete, lifelike animation using a character designed in Character Creator 5 (with all its new features), combined with a free face mocap app, and free Mixamo animations. All of this was implemented into an existing 3D scene in Blender, easily and without the need for deep technical knowledge of the complex character animation process.
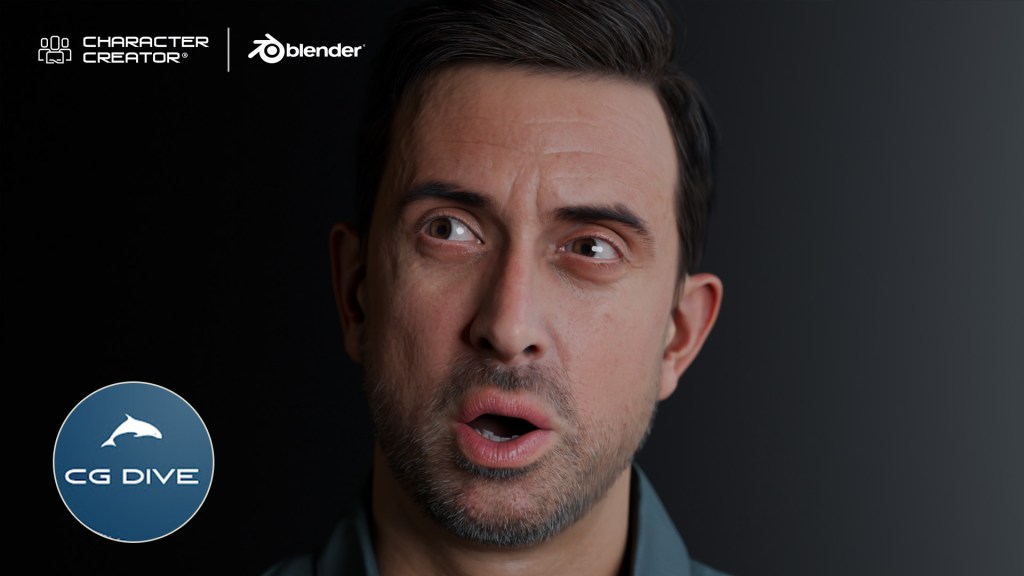
In-depth Blender lecturer CG Dive offers a comprehensive review of Character Creator 5.
Todor / CGDive (Blender Rigging Tips)
Hi, I’m Todor of CGDive. CGDive is a Blender-focused YouTube channel dedicated to making complex 3D concepts clear and approachable. The channel is known for deep-dive explorations, structured workflows, and tutorials that go beyond button-pressing. CGDive aims to teach the why and how behind the tools. We break down technical topics such as rigging, add-ons, or new Blender features into actionable steps that artists can immediately apply to their own projects. Our goal is simple: help beginner to intermediate Blender users master technical 3D skills without the overwhelm and move towards the advanced level.
I’ve heard a lot about Character Creator from some of the most productive CG artists I know, who absolutely swear by it. So, I dived in and explored the new Character Creator 5. As a longtime Blender user, I was surprised by how much time it can save me. Blender gives us incredible freedom, but when you have to create multiple human characters, especially as a solo creator or a small team, all the modeling, texturing, and rigging quickly turns into a mountain of work.
CC5: The Dedicated Digital Human Solution
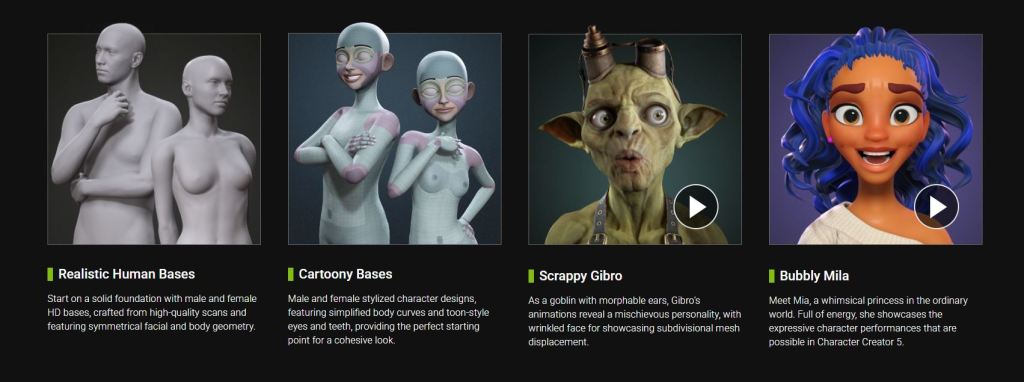
Character Creator addresses exactly these pain points by giving you a full production-ready human base that you can customize as much as you want. You can achieve any style from realistic to cartoony and even bespoke characters sculpted by hand. So, what is Character Creator 5? It is the latest version of a standalone application from Reallusion that specializes in one thing: high-quality humanoid characters. It gives you a fully customizable human mesh and textures, clothes that adapt to the custom character’s shape, an automatic body and face rig, and easy export pipelines not just to Blender, but to almost any popular 3D software like Unreal, Unity, ZBrush, and many others.
Diving into Character Creator 5
You have a couple of approaches for generating characters in CC5. If you just need a great-looking character quickly, you can drag and drop a preconfigured character and use it as-is or continue customizing. Alternatively, start from a neutral base (male/female, realistic/cartoony). Enable morphs and start clicking on parts of the character to tweak them. The morph sliders offer an enormous amount of customization — you can even tweak the shape of each individual tooth. This deep customization is simplified because every character uses the same core system (topology, rig, materials, and facial animation). The choice is simply where you begin.
The ActorMIXER Workflow
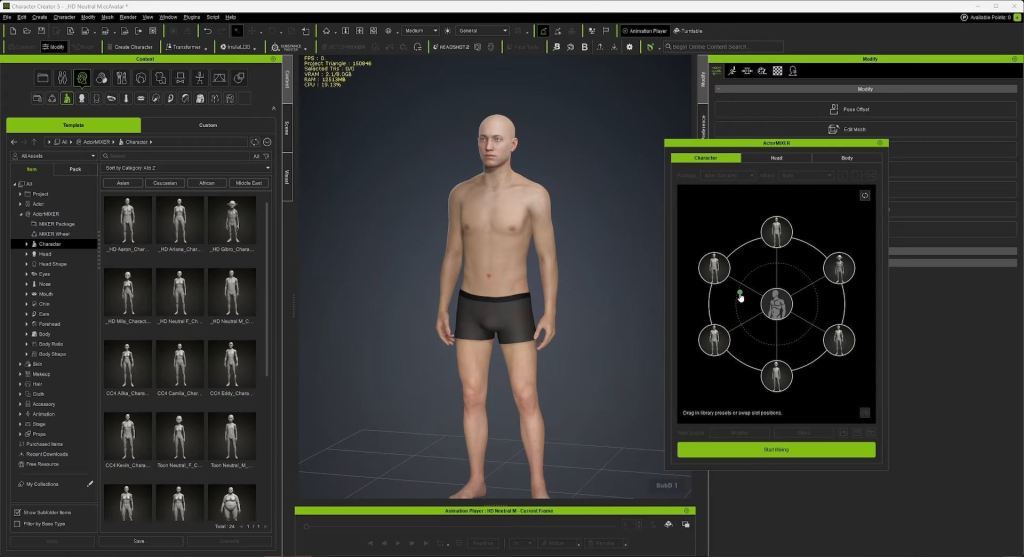
My favorite workflow is the ActorMIXER. It consistently helps create appealing characters. Start with a new base male (or female). Click “Start Mixing” and drag a dot towards other preset characters to blend shapes. You can mix between three characters at once: the base and the two in the dot’s current section. Play around to find the shape you like. If needed, stop mixing, replace the blend characters, and mix again. You can then focus on the head, tweaking its overall shape and then individual parts like the eyes, nose, mouth, and ears.
Texturing and Detailing
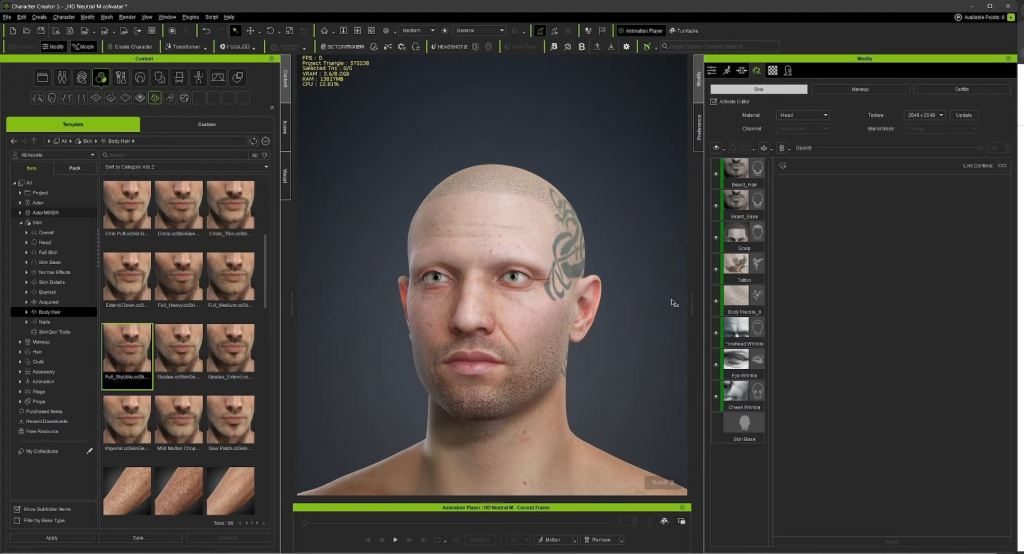
Once satisfied with the shape, focus on textures. After selecting a base skin, use the texture layering utility to add effects like dynamic wrinkles, imperfections, tattoos, scars, and facial hair. You can detail both the head and the body this way. If your texture looks good but needs a slight color tweak, go to the texture tab and adjust the color. You also have the option to apply makeup. Hair is crucial, and you can layer different hair parts for unique looks.
Clothing and Final Touches
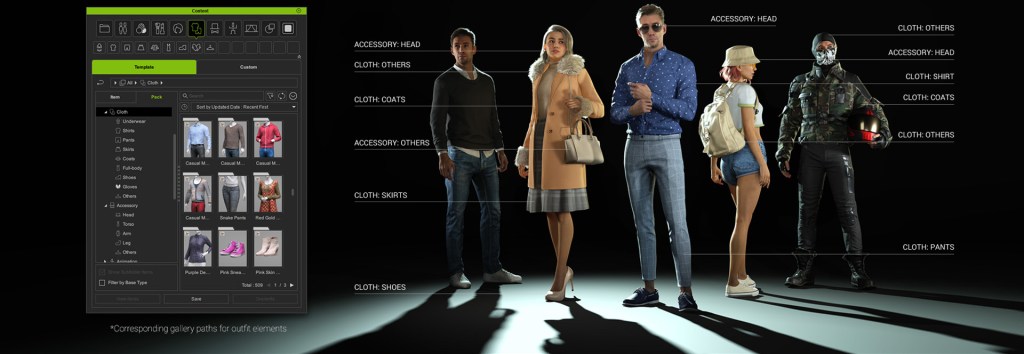
Finally, add clothing using the usual drag-and-drop functionality. Shoes change the character’s height; for example, high heels will adjust the height accordingly. What’s cool is that you can keep tweaking the character’s shape even after the clothing outfit system is applied, and the garments will react to the changes.
HD Morphs
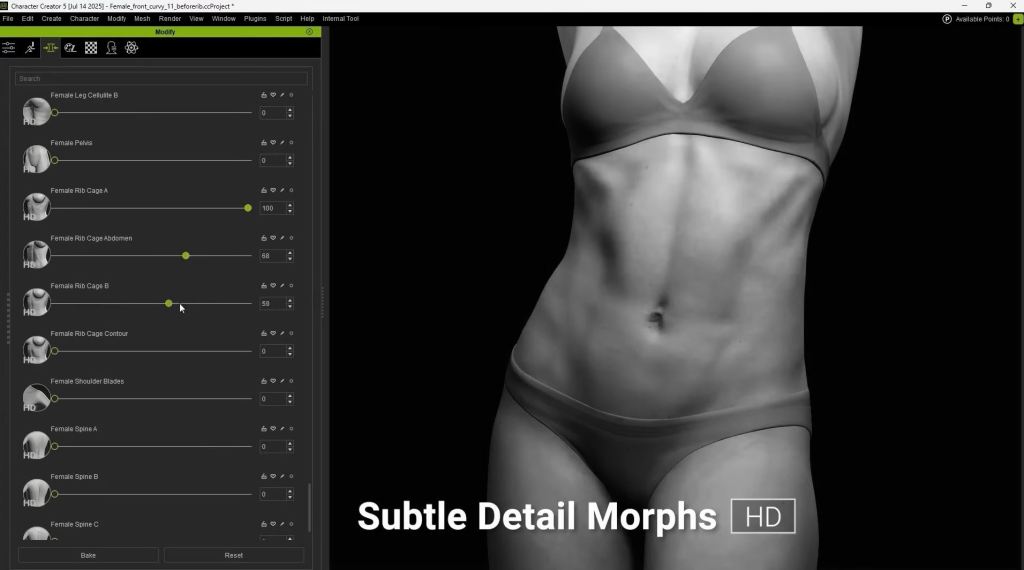
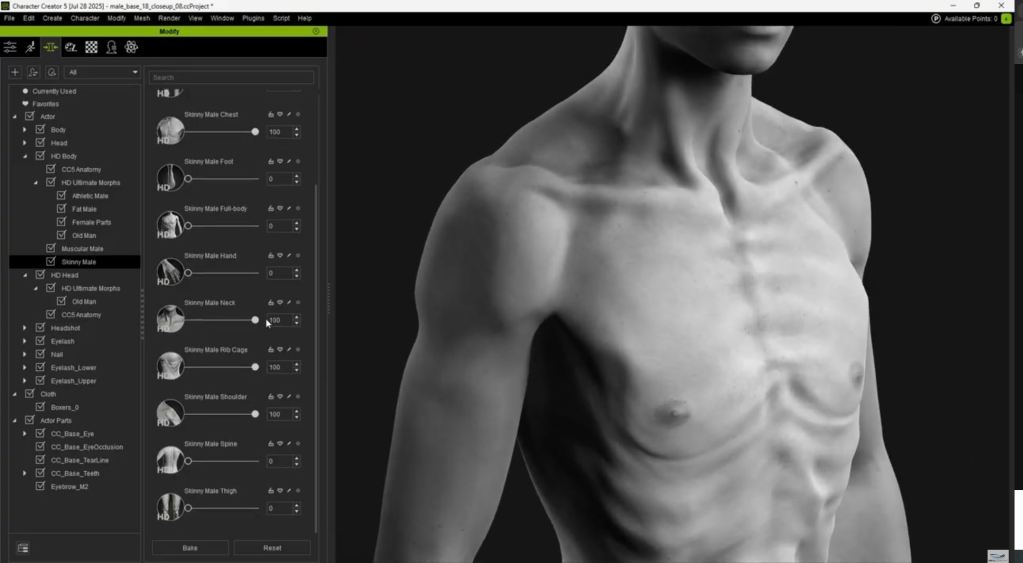
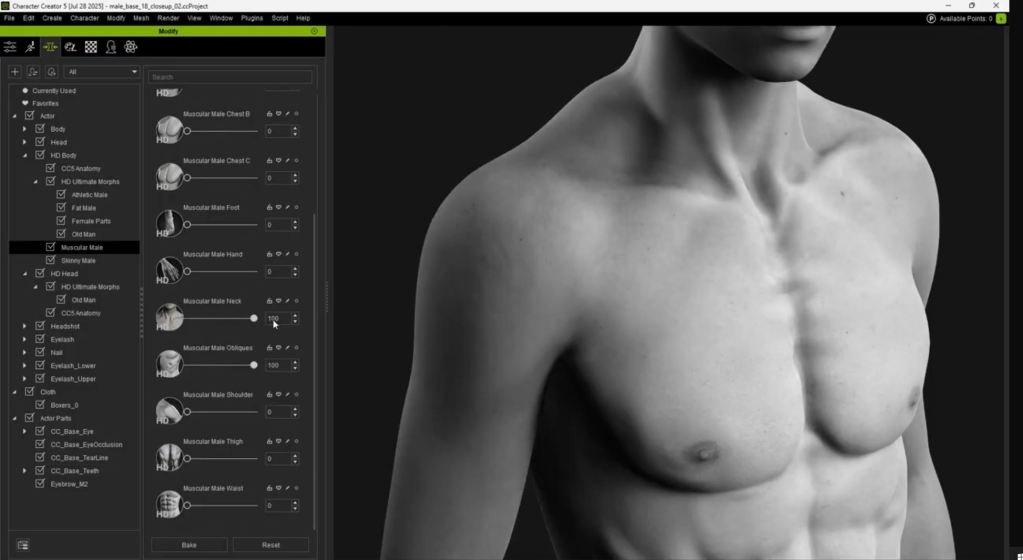
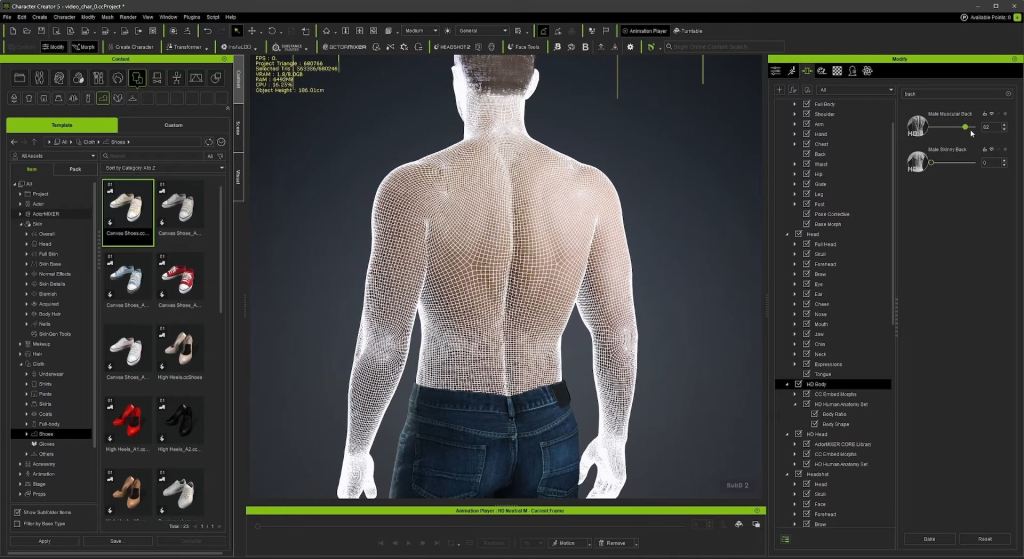
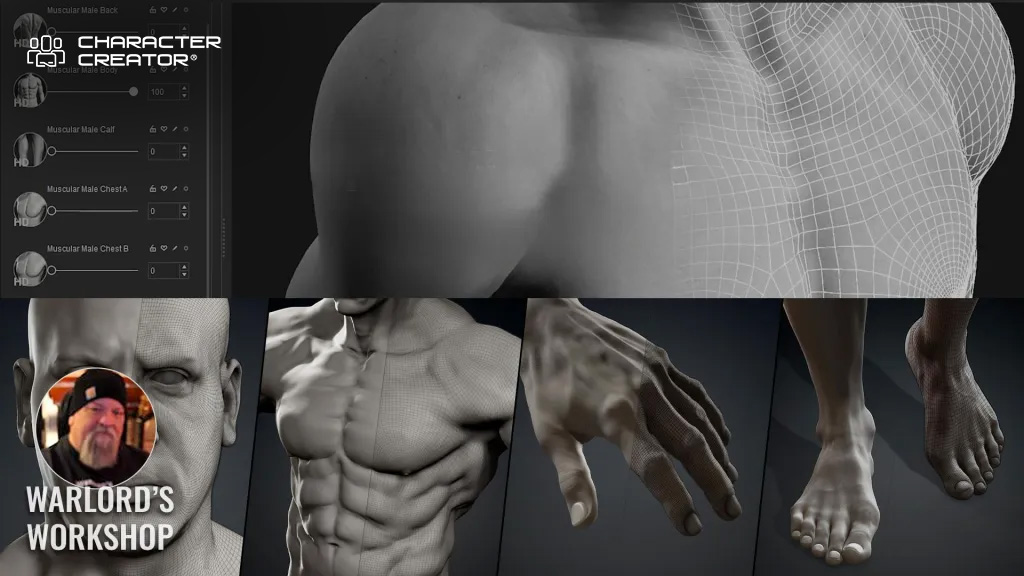
If you temporarily delete the shirt, you can see the HD Morphs. CC5 characters can be subdivided. Using the highest subdivision of two, you can find the morphs labeled HD. These are fine details that displace the geometry and change the silhouette, making your character look professionally sculpted. They are great for adding muscle details, and unlike normal maps, they are true geometry displacement. They can also be used to simulate aging.
Blender Pipeline
Now, let’s get into exporting this character into Blender. That used to be possible and fairly easy, even in older versions of Character Creator, but now, under plugins, we have a Blender Pipeline plug-in. You simply click “Export Character to Blender” to export and start Blender. In Blender, you need to install the official and free Character Creator pipeline add-on. In the pipeline tab, you can go to “Import Character” and import the FBX. You will get the character exactly as you designed it. This add-on has a ton of features, including the ability to tweak the parameters of your materials, such as adding an overlay color over the skin or changing the roughness.
Automatic Rigging
For animation, you can generate a Rigify rig with just one click. This will take a while, but when it is done, you will be happy with the results. The advanced face rig is particularly impressive. This is the most complex face rig I’ve ever seen inside Blender. If this reminds you of the MetaHuman Meta rig, that is because the CC characters are compatible with MetaHumans, which is a whole other topic often covered by channels focused on Unreal. Reallusion has a dedicated tutorial for this, and I will share it below.
Final Thoughts
These are some of the core workflows with CC5, and I wanted to talk about the limitations. Character Creator focuses on humanoids. So, it might be challenging to create your full production inside CC5, but that is what we have Blender and Unreal Engine for. As long as your character has two arms and two legs, you can easily customize it to your liking, but non-standard and non-humanoid characters are outside the scope of the program.
For many Blender hobbyists, there are modules within, and the final fee might add up. So this may turn off some hobbyists. On the other hand, busy professionals may instantly see the value of the software in the time it will save them. My advice is to only buy it if you can clearly see the value. Yet, Character Creator 5 isn’t here to replace Blender. It is an extension to help you speed up your character workflow and let you focus on the storytelling and the bigger picture of your production.
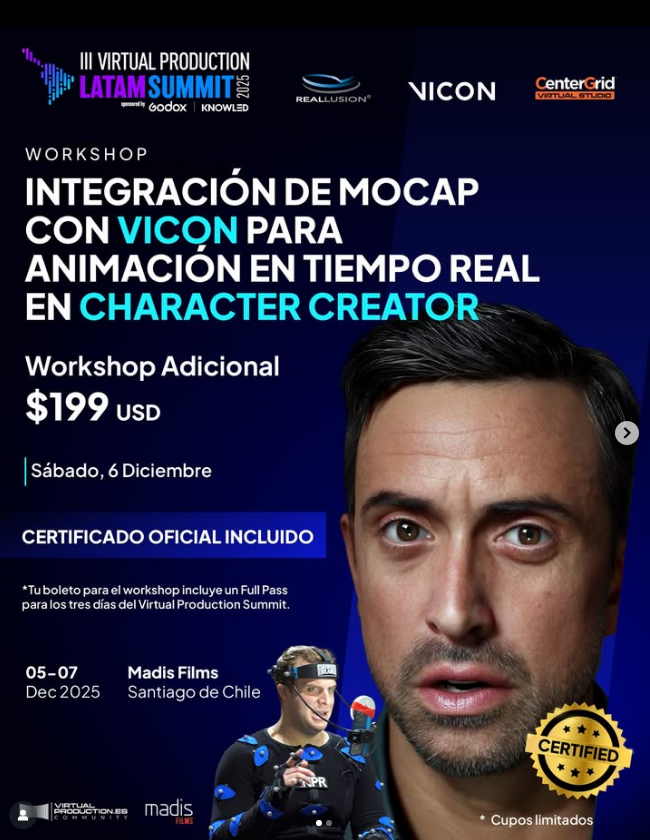
Reallusion & Vicon Lead Real-Time Mocap Innovation at the 2025 Virtual Production Summit in Chile
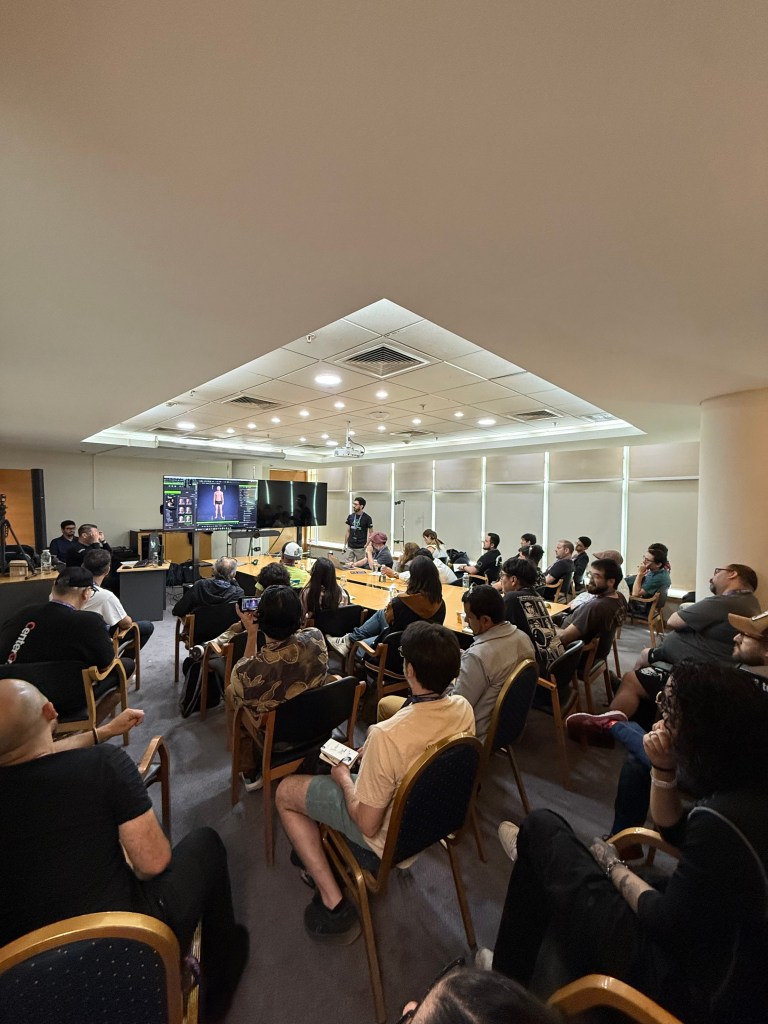
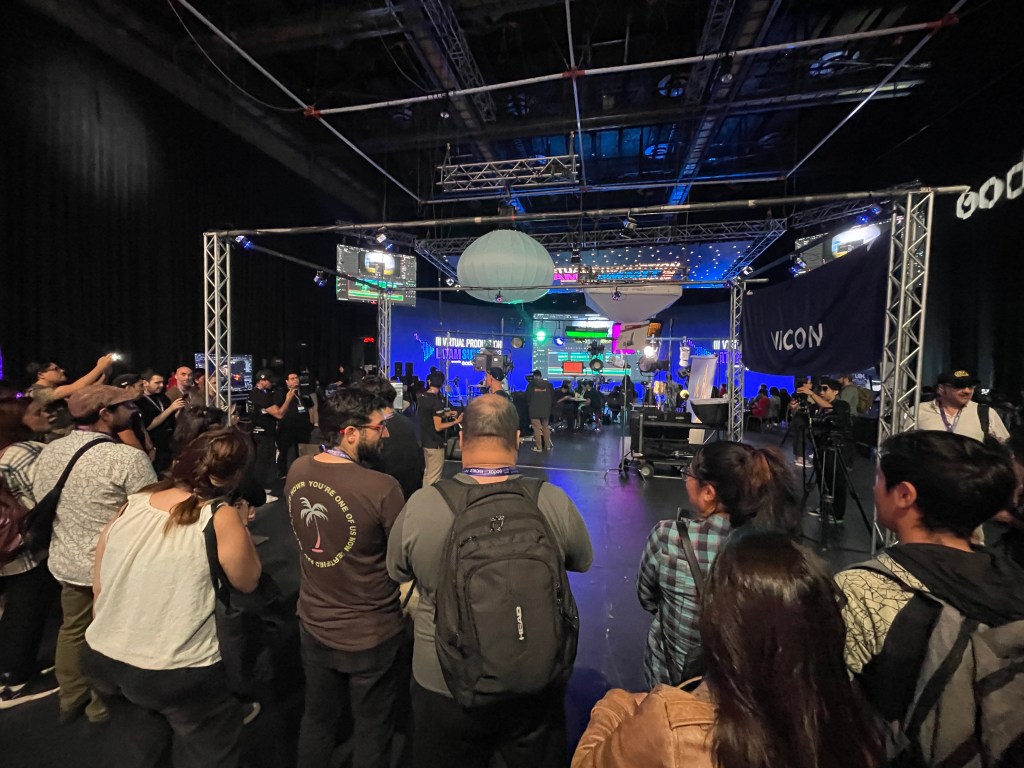
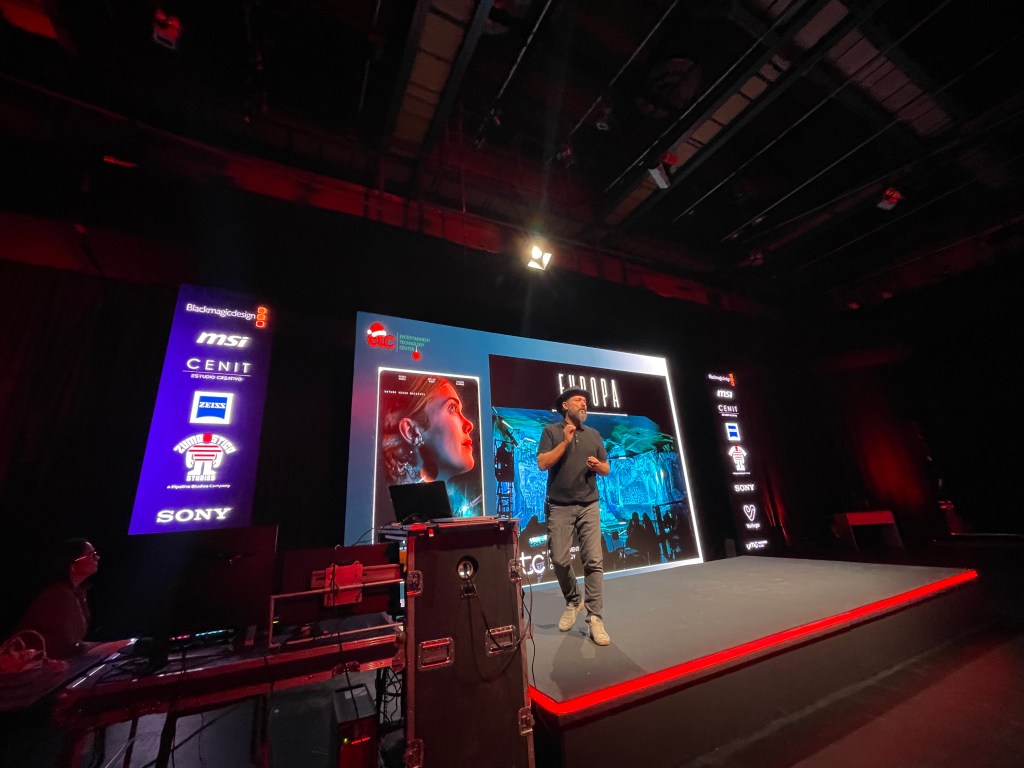
The 3rd Virtual Production Summit in Santiago, Chile, held from December 5–7, 2025, brought together global creators, technologists, and industry leaders to explore the cutting edge of virtual production — a blend of real-time rendering, motion capture, LED volumes, and immersive workflows reshaping film, TV, and interactive media. Hosted by Madis Films, a pioneer in real-time and ICVFX production technologies, this year’s summit marked a significant milestone for Latin America’s vibrant virtual production community.
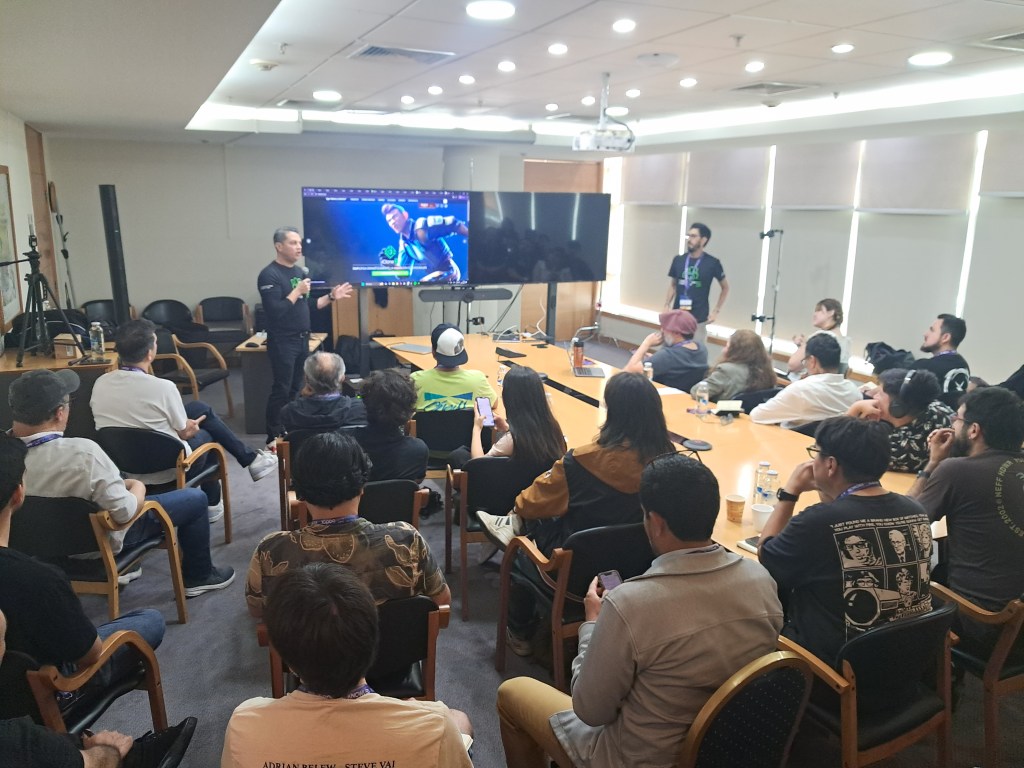
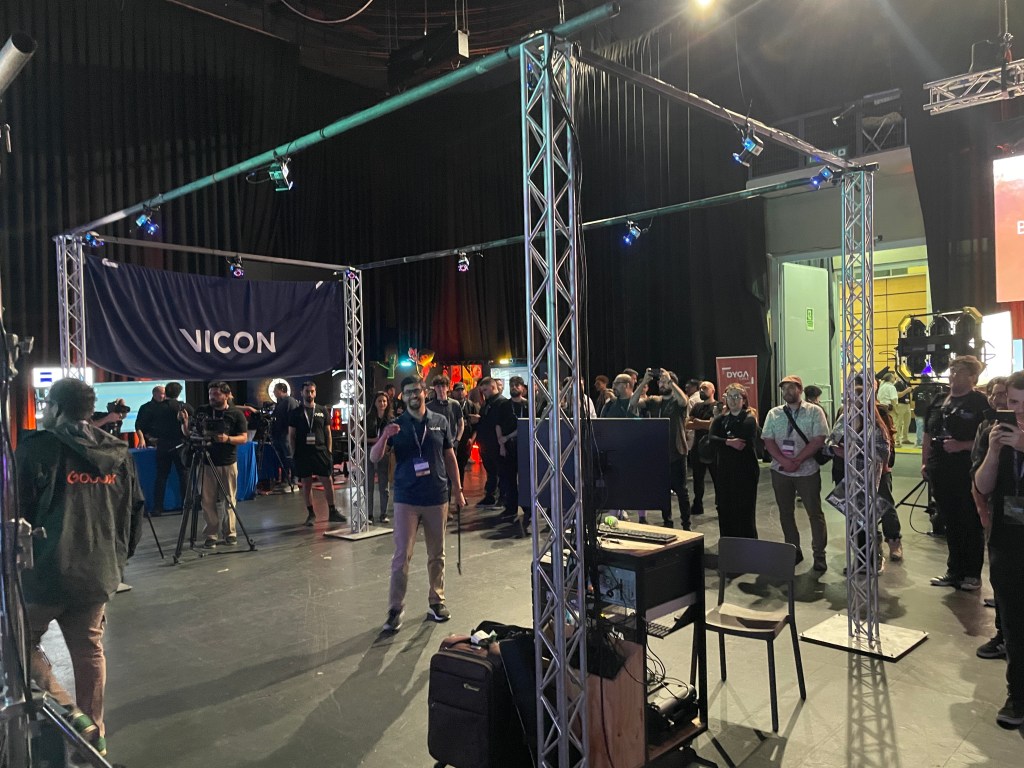
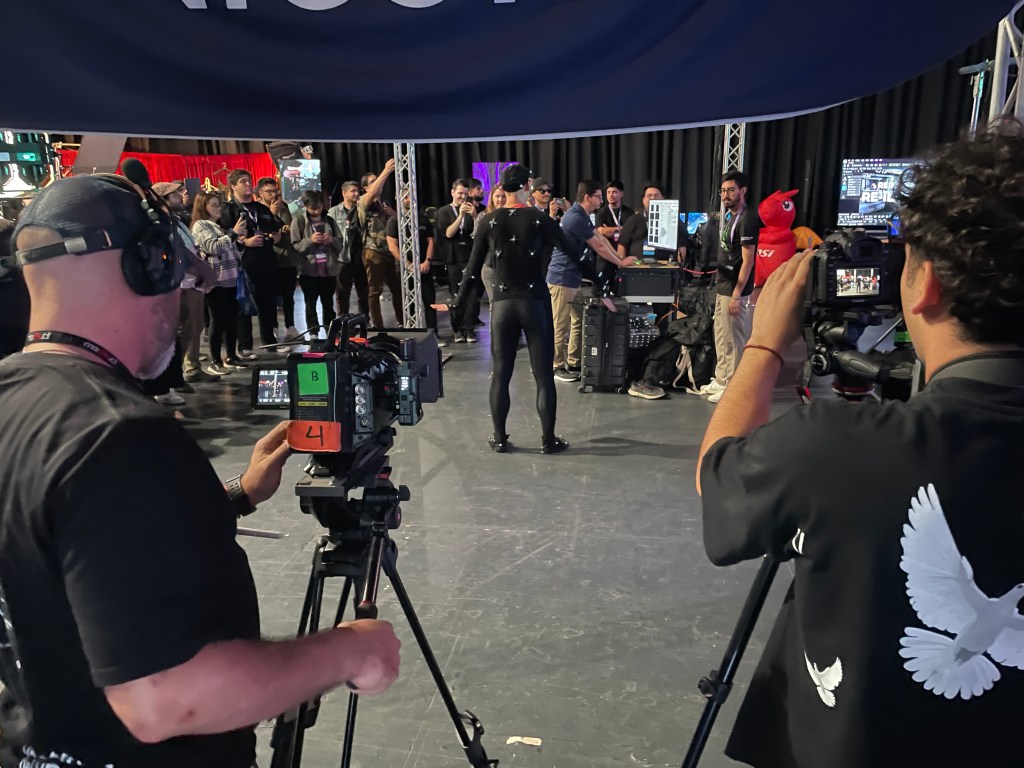
Reallusion was invited by HCG Technologiesand Madis Films to be a Silver Sponsor in collaboration with Vicon’s optical motion capture systems, and CenterGrid’s Virtual Studio service, co-presenting a landmark joint workshop titled “Vicon MoCap Integration for Real-Time Animation in Character Creator.” This flagship session showcased how creators can combine Character Creator 5, iClone 8, and Vicon mocap workflows to produce real-time character animation for film, previs, and digital production.
A Hub for Virtual Production Innovation in Latin America
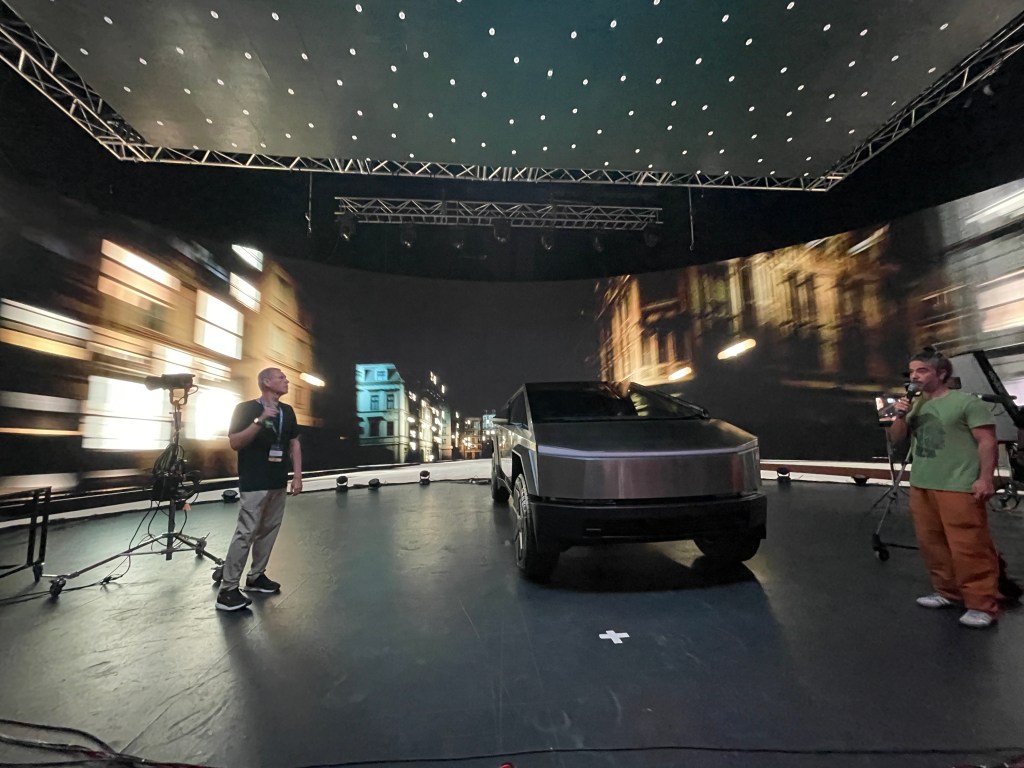
The Virtual Production Summit has rapidly become the most important event of its kind in Latin America, originally born in Mexico and now taking place in Santiago de Chile. Hosted at the state-of-the-art facilities of Madis Films, known for operating Chile’s largest permanent ICVFX LED volumes and cutting-edge production resources, the summit served as a crossroads for filmmakers, animators, virtual production technologists, and educators across the region and beyond.
This three-day summit featured an extensive program of talks, panels, demos, and workshops designed to demystify real-time pipelines and accelerate adoption of next-gen production tools across creative industries. Attendees ranged from student creators and educators to studio professionals seeking to push the boundaries of digital content creation.
Empowering Creators: The Reallusion × Vicon Workshop
Build and customize a AAA digital human character using Character Creator 5
Configure real-time control setups for face and body animation
Integrate Vicon Shogun body-capture data with iClone 8
Capture synchronized full-body and facial mocap in real time
Troubleshoot latency and synchronization issues in a full realtime pipeline
This structured learning path allowed technical professionals — from previs artists to virtual production supervisors — to experience a complete mocap-to-animation workflow in a single immersive session.
The workshop was led by industry experts, including:
Enoc Burgos, Director of Partnership Marketing at Reallusion (guiding CC5 demo and pipeline strategies)
Rodrigo Muñoz, Sales Account Manager at Vicon, bringing deep expertise in motion capture systems
Nelson Quimbay, Motion Capture Stage Manager at HCG Technologies, a visual artist with extensive experience in mocap and virtual production
Together, this team demonstrated practical workflows that marry realtime character animation with professional mocap systems, empowering creators to take full advantage of modern digital pipelines, while giving them full IP ownership over their creations for further transmedia asset revenue stream generation.
Connecting with the Latin American Creative Community
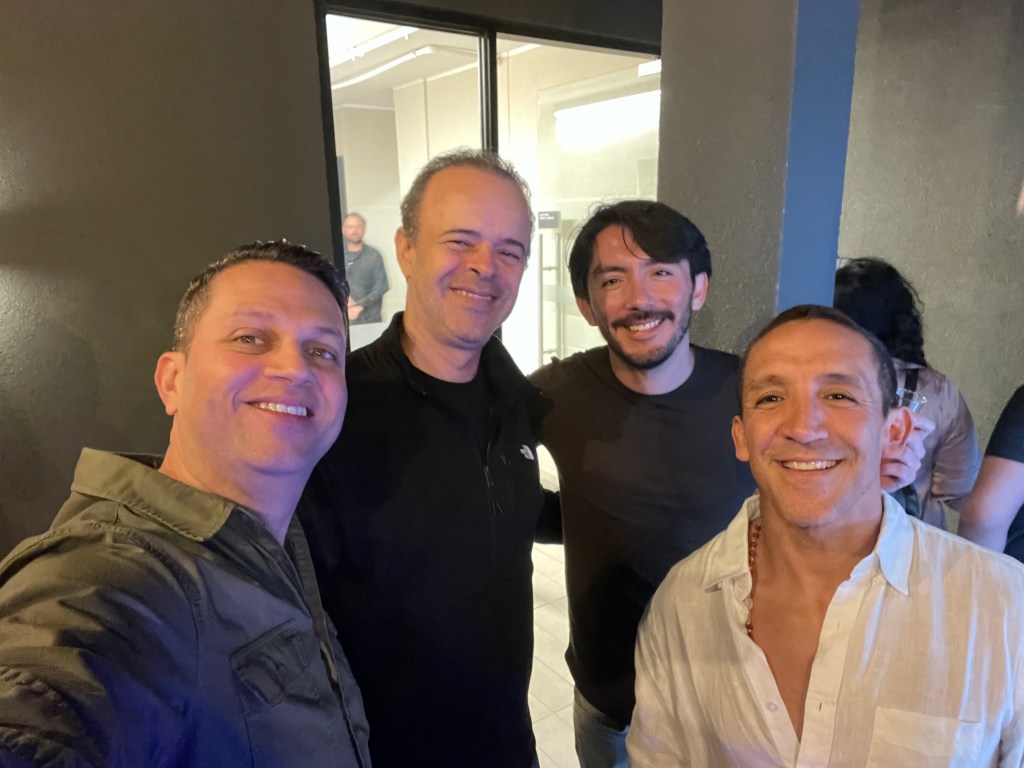
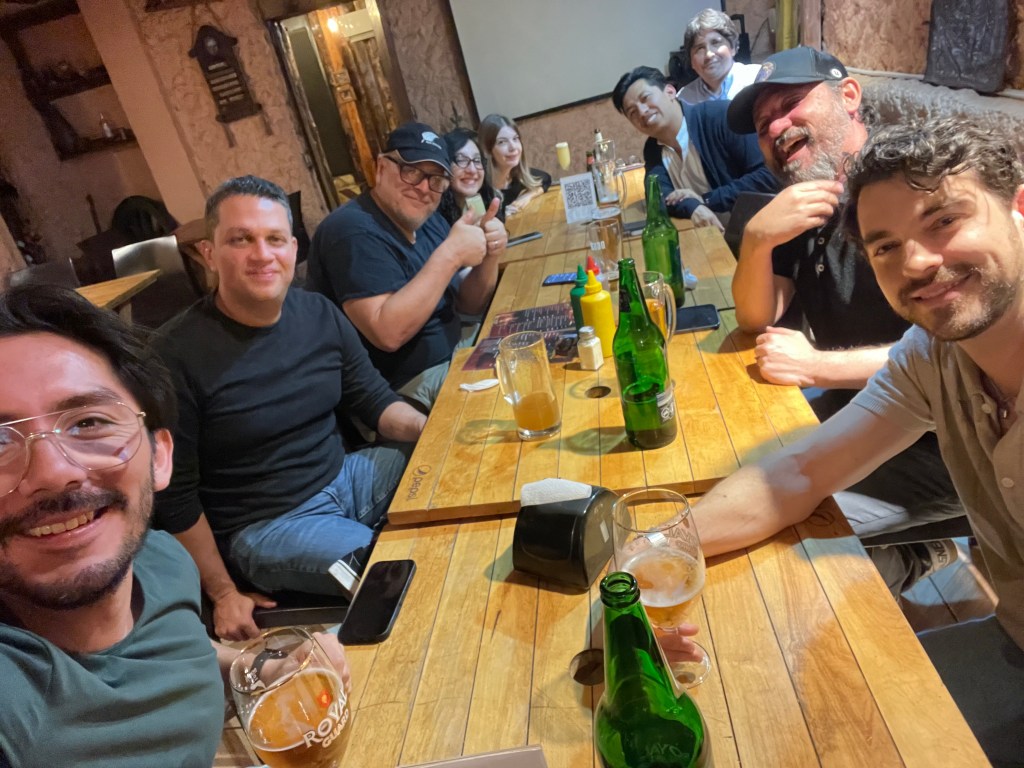
During the summit, Reallusion’s Director of Marketing, Enoc Burgos, seized the opportunity to connect with Latin American creators, partners, and longtime fans — sharing the latest advances in Reallusion’s ecosystem and gathering valuable feedback from real-world practitioners.
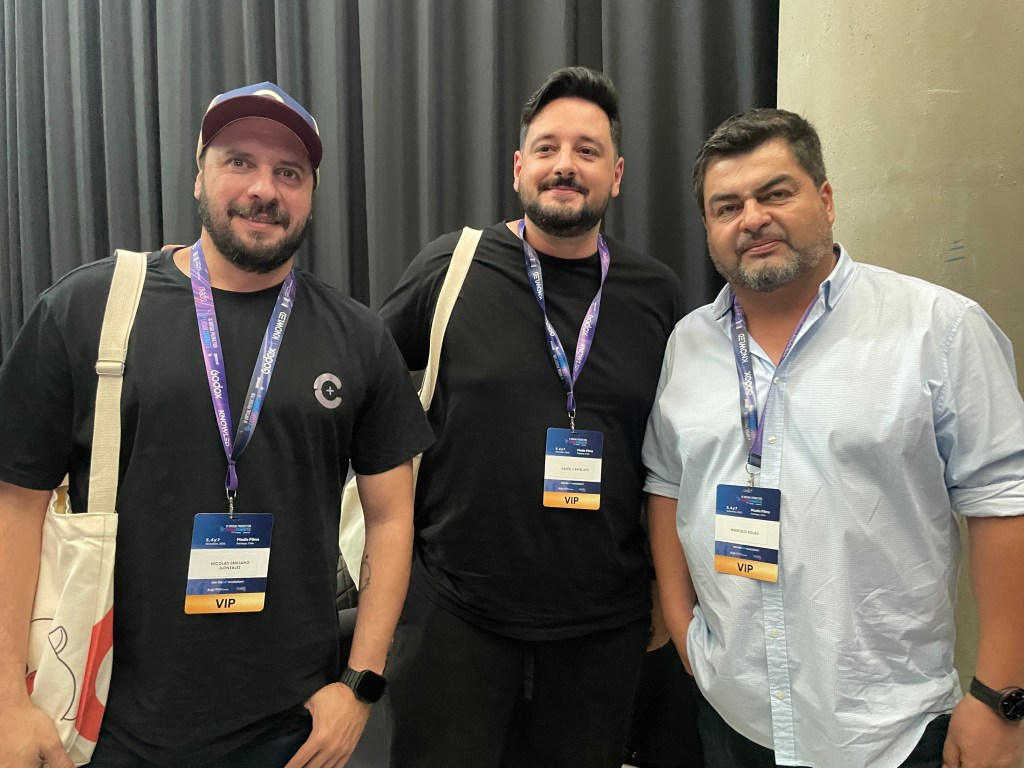
Reallusion also engaged with many distinguished professionals who contributed to panels and networking events throughout the summit, enriching discussions and fostering collaboration across disciplines:
Erik Weaver — Head of Virtual & Adaptive Production, known for AI-driven workflows and cloud-integrated pipelines.
Fabian Albarracin — Real-Time Graphics Director at NBC Universal / Telemundo.
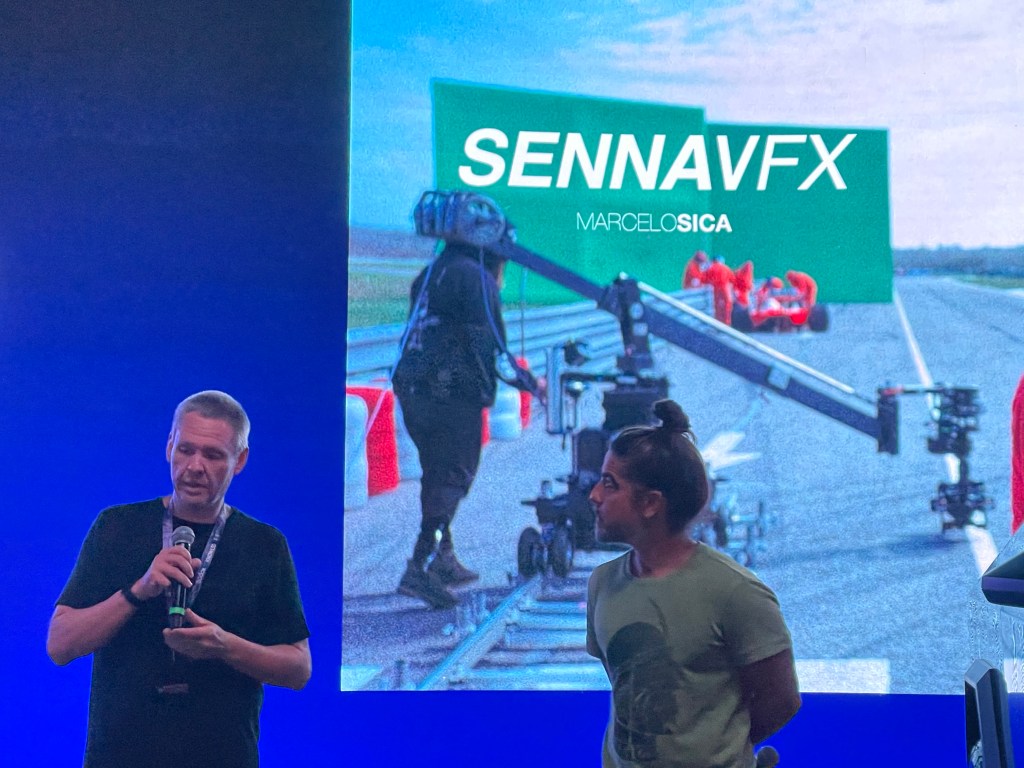
Marcelo Siqueira — Visual Effects Producer & Supervisor at SENNAVFX.
Pablo Accame, Daniel Cappelletti, Nicolas Gonzalez, Ignacio Pol (Control Studios Team) — Creators behind Netflix’s “The Eternaut,” blending virtual production and cinematic content.
Sandro Di Segni — VFX Executive for Amazon Prime Video.
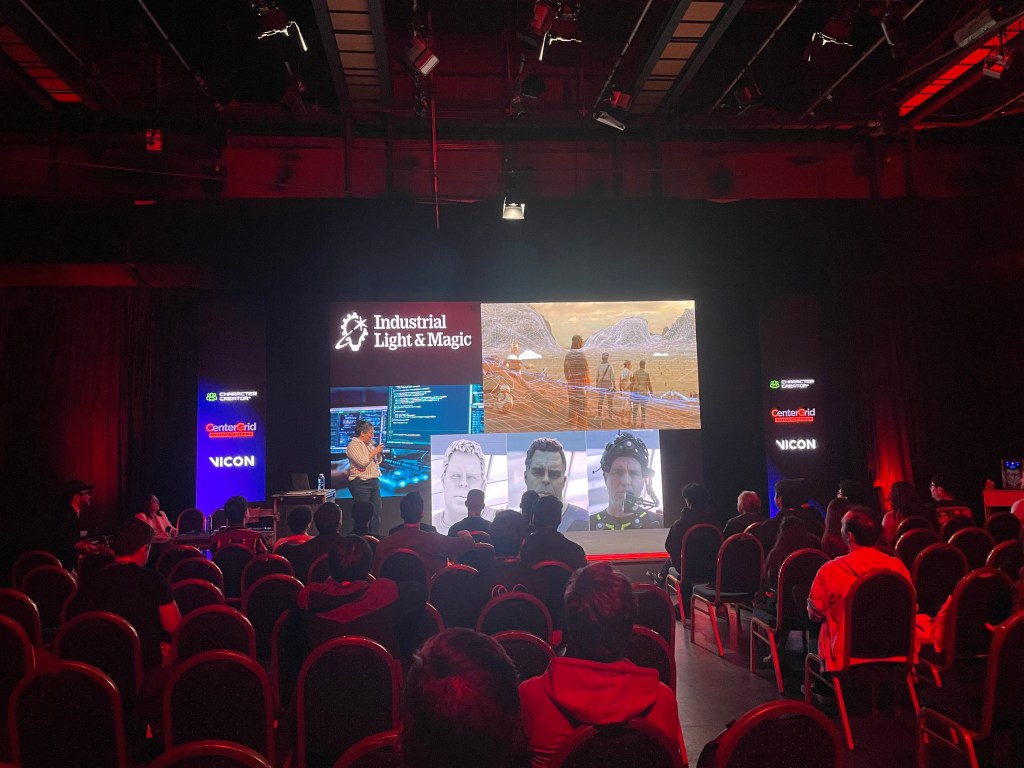
Sonia Contreras — Virtual Production Supervisor at Industrial Light & Magic.
Fernando Rivas-Manzaneque — CEO & Co-founder of Volinga.
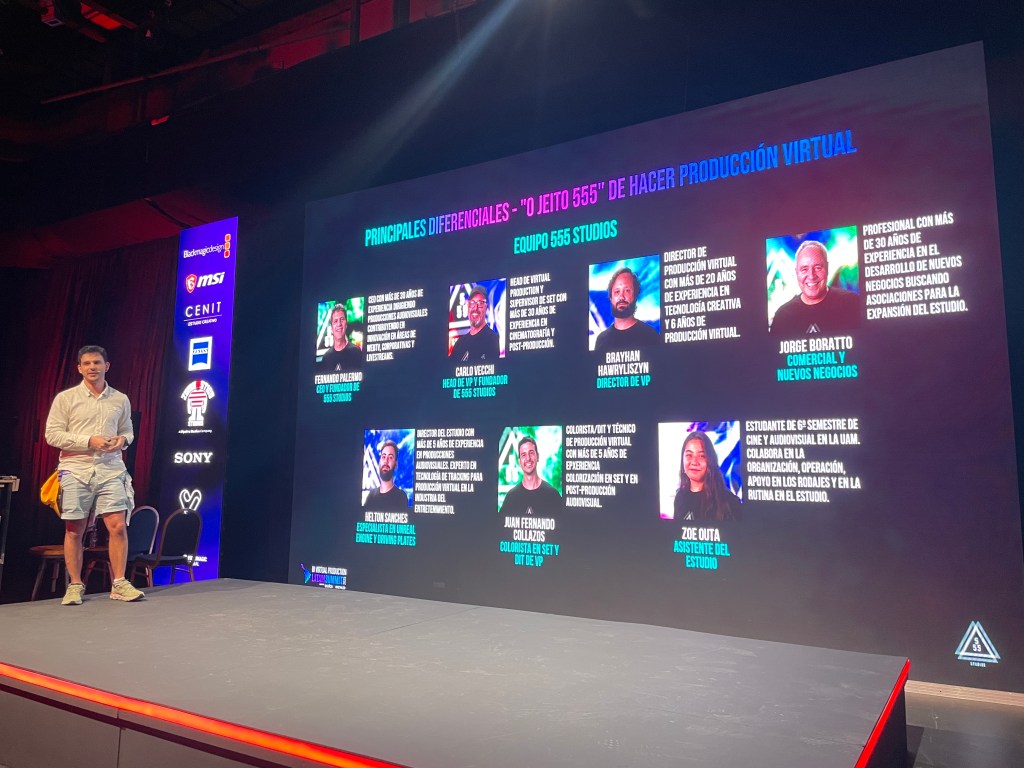
Fernando Palermo — CEO and Founder of 555 Studios with team Carlos Vecchi, Head of VP, and Juan Fernando Collazos Colorist and presenter
Eric Pinkel — Cloud Virtual Production Specialist at CenterGrid.
These interactions weren’t limited to scheduled sessions — informal mixers and networking receptions gave attendees the chance to exchange ideas, build relationships, and explore creative collaborations that extend beyond the summit itself.
Advancing Real-Time Pipelines with Reallusion Tools
The summit spotlighted the increasing relevance of tools like Character Creator 5 and iClone 8 in collaborative production environments. When paired with professional mocap like Vicon’s Shōgun software and real-time engines, these tools empower creators to iterate faster, visualize ideas live, and streamline complex animation pipelines.
Recent updates to iClone 8, such as advanced timecode synchronization and deep integration with mocap hardware like Vicon, further enhance the platform’s viability for professional workflows in film, TV, and interactive media. These capabilities allow synchronized capture across multiple devices and media sources, boosting real-time performance and reducing post-production friction — a perfect match for virtual production environments.
A Summit to Remember — and What’s Next
Reallusion was delighted to not only participate in the Summit’s official programming but also engage deeply with the audience and partners throughout the event. The collaborative spirit, shared insights, and excitement around emerging real-time workflows made the 2025 Virtual Production Summit a standout moment for the community.
From hands-on workshops and expert panels to relaxed evening mixers, this gathering strengthened global creative bonds and showcased how real-time animation and motion capture technologies are transforming storytelling.
It was a fantastic event, and Reallusion extends heartfelt thanks to all partners, speakers, and fans who visited the booth or joined sessions. The company looks forward to reconnecting at next year’s summit, sharing new innovations, and continuing to support creators worldwide on the frontier of virtual production.
FAQ
How does Vicon motion capture integrate with Character Creator and iClone?
Vicon motion capture integrates with Reallusion’s Character Creator and iClone through real-time data streaming, allowing body motion captured in Vicon Shogun to drive fully rigged digital characters instantly. This setup enables live preview, rapid iteration, and synchronized animation workflows ideal for virtual production and previs.
What are the benefits of using Character Creator 5 and iClone 8 for virtual production?
Character Creator 5 and iClone 8 provide a streamlined digital character pipeline, offering rapid character generation, facial and body animation, real-time motion capture integration, and engine-ready export. These tools reduce production time, lower technical barriers, and enable creators to work interactively in real-time environments.
Who is the Vicon MoCap Integration workshop designed for?
The workshop is designed for 3D animators, virtual production supervisors, previs artists, filmmakers, educators, and studios interested in real-time animation workflows. It is suitable for both beginners entering motion capture and experienced professionals seeking to optimize real-time character animation pipelines.
Can Reallusion tools be used in professional film and streaming productions?
Yes. Reallusion tools are widely used in professional environments for previs, animation, virtual production, and real-time storytelling. When combined with industry-standard motion capture systems like Vicon and real-time engines, they support scalable pipelines used in film, television, streaming, and interactive media productions.
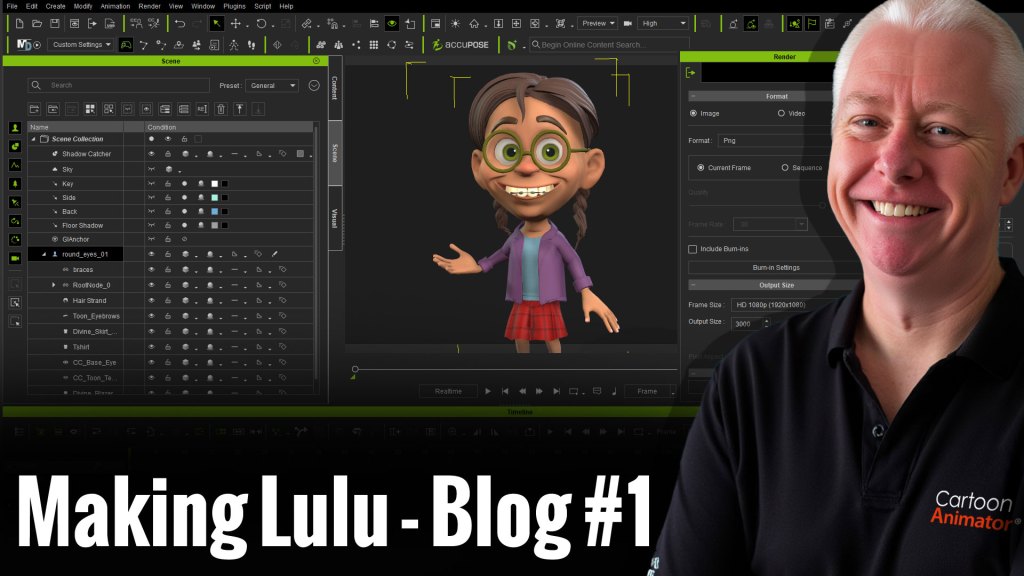
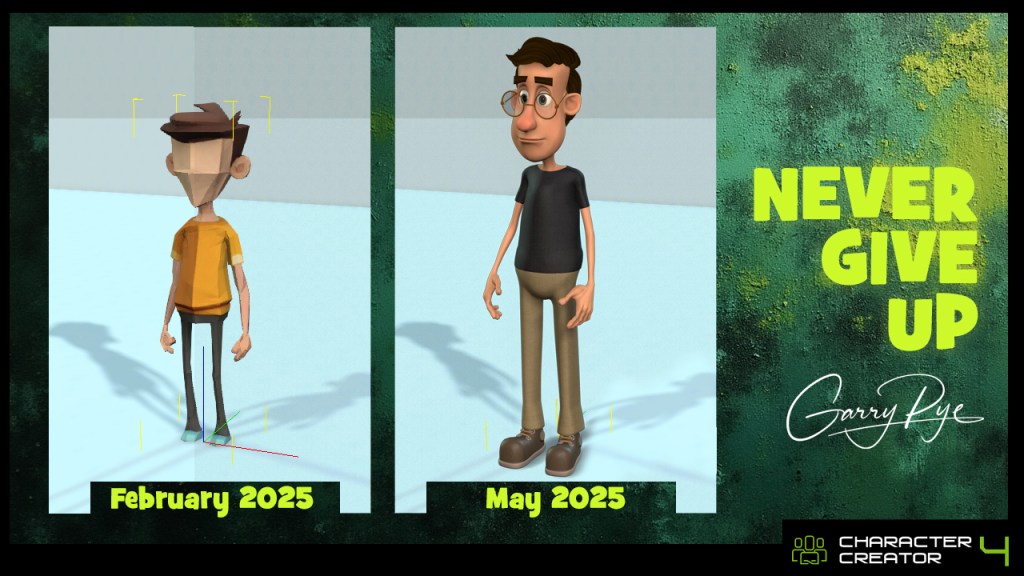
After four months of trial, error, and hard-won breakthroughs, Garry Pye’s first 3D character, Carl, marked the end of one chapter—and the beginning of another. The From 2D to 3D journey proved that learning 3D character creation from scratch is possible with persistence and curiosity. Now, armed with those lessons, Garry starts fresh with a new challenge: Lulu. This new series isn’t about starting over—it’s about building smarter, pushing further, and applying everything learned along the way, one character at a time.
Having finally completed my very first 3D character for iClone using Character Creator, I’m about to dive straight into my second. And I couldn’t be more excited. This time around, I feel like I might actually know what I’m doing, or at least enough to make fewer mistakes.
My first 3D character, Carl, took me just under four months from start to finish. That might sound like a long time, but considering I started with absolutely zero knowledge of Character Creator, iClone or Blender, it still amazes me that I ended up with a fully rigged, lip synched actor who could blink, smile, and move like a real person. It proved something important to me, that you don’t need to be a genius to make a 3D character, you just need curiosity, persistence, and a healthy sense of humour when things go wrong.
Now it’s Lulu’s turn.
This time, my goal is to create a character who’s a little more complex, something that pushes me past my comfort zone. I want to see if I can bring one of my own 2D character designs to life in 3D form, with all the quirks and personality that make my 2D work obviously mine. I also want to try new things I avoided the first time because they looked too scary, like sculpting more complicated hair and modelling clothing from scratch. And I want to understand more of why things work instead of just blindly following tutorials. Most of all, I’d like to work a bit faster and spend less time staring blankly at the screen wondering what I broke this time.
I decided to document every step of the process. It’s partly for anyone else out there who’s brand new to 3D and feels like it’s all too overwhelming, but mostly it’s for me. Because in a few weeks, I’ll have forgotten how I did half of it and it will be a nice guide for my own work moving forward.
If creating my first 3D character Carl was like learning to walk in 3D, then making Lulu is my attempt to jog, probably awkwardly, most likely in the wrong direction, but with enthusiasm. I want to build her faster, smarter, and with more intention than before. I want to see if the lessons from my first build actually stuck.
So here we go again. I’m ready for the wins, the frustrations, the late-night “aha” moments, and the occasional “why is her face melting?” crisis. But that’s all part of the adventure.
Garry Pye is an Australian illustrator, animator, and Cartoon Animator instructor with over a decade of experience in the animation industry. Known for his unique blend of creativity and humor, Garry’s work spans from teaching animation techniques to creating innovative content that helps both novice and experienced animators improve their skills.
Garry’s enthusiasm for storytelling and animation shines through in all his projects, whether it’s creating animated shorts, preparing educational tutorials, or sharing his expertise by teaching. With a passion for making animation accessible and fun, Garry has built a community of learners who not only appreciate his knowledge but also his infectious sense of humor and dedication to his craft.
Animation Journey: From Drawing Cartoons to 3D Worlds
This article is the fifth installment of my Garry’s ongoing journal series, From 2D to 3D. If you haven’t read previous posts, then we recommend starting there:
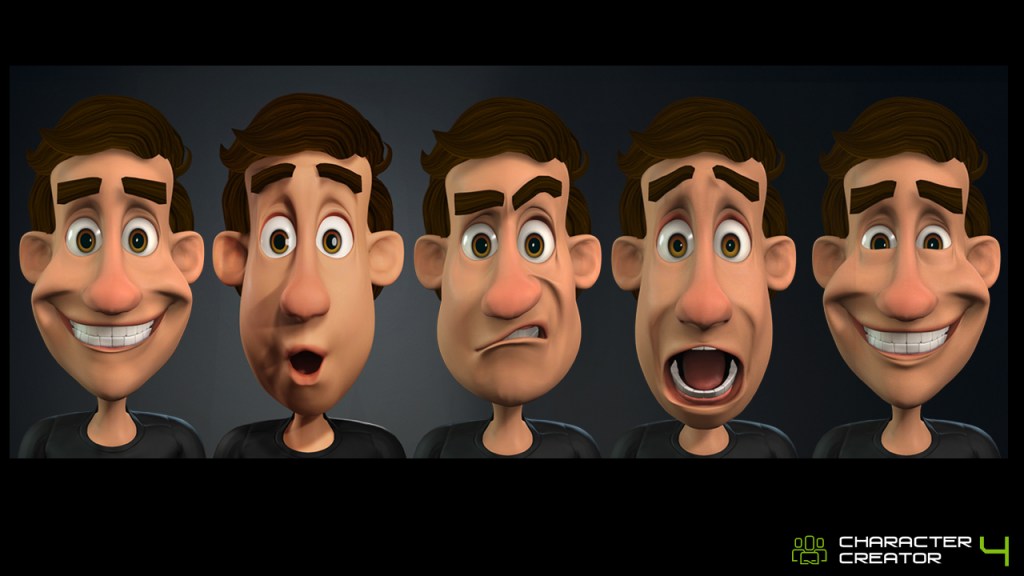
With my first 3D character Carl almost complete, the only thing left to do was some small tweaking to put my own fingerprints on his personality. Character Creator gave me the power to customise my characters facial expressions, for his speech visemes and emotions and I was even able to build in my own custom expressions which were more exaggerated and cartoony than the standard human settings.
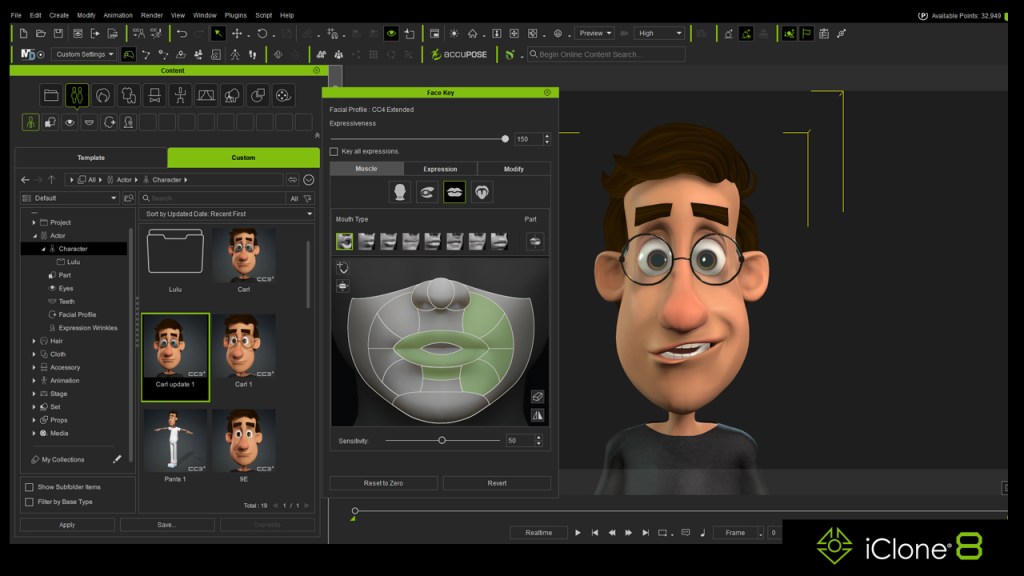
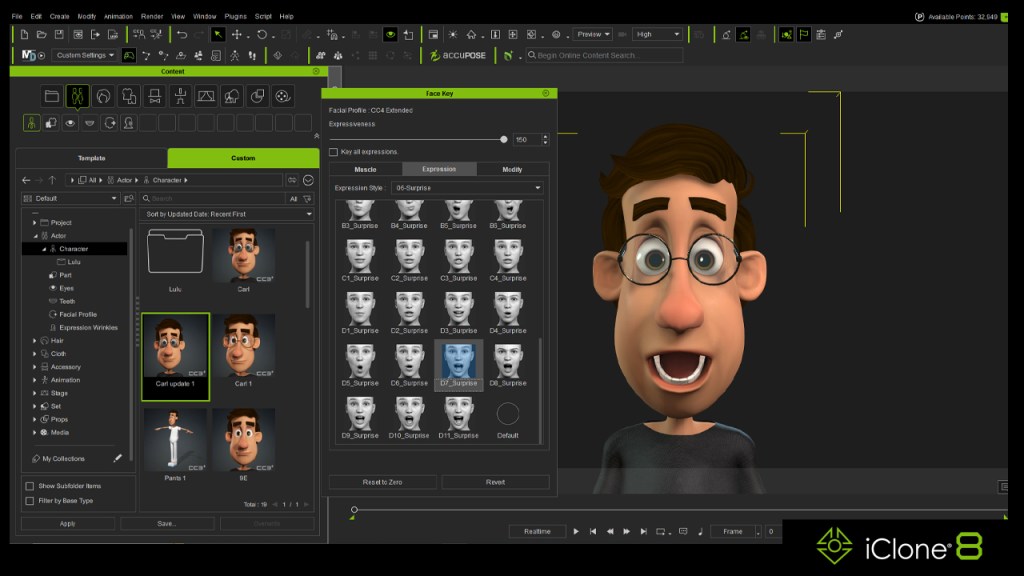
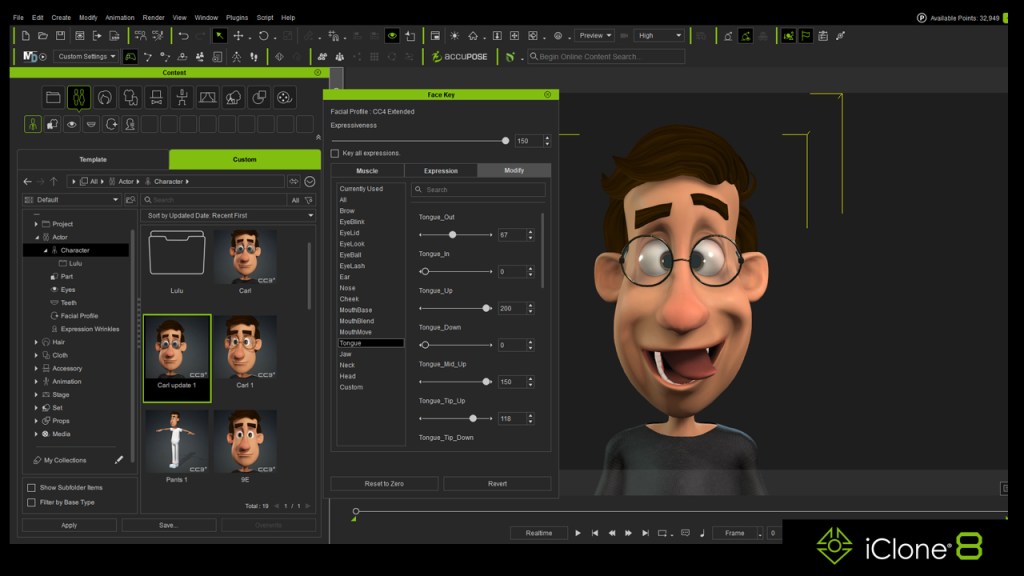
Coming from a background in 2D animation with Cartoon Animator, one thing I am really impressed with in the 3D world is the incredible detail in the face muscles that allow for the most precise keyframing of facial expressions. From subtle, slight motion to extreme, wild expressions, every movement is captured perfectly. And thanks to the Edit Facial menu in Character Creator and iClone, I have precise control over Carls facial movements in three unique ways.
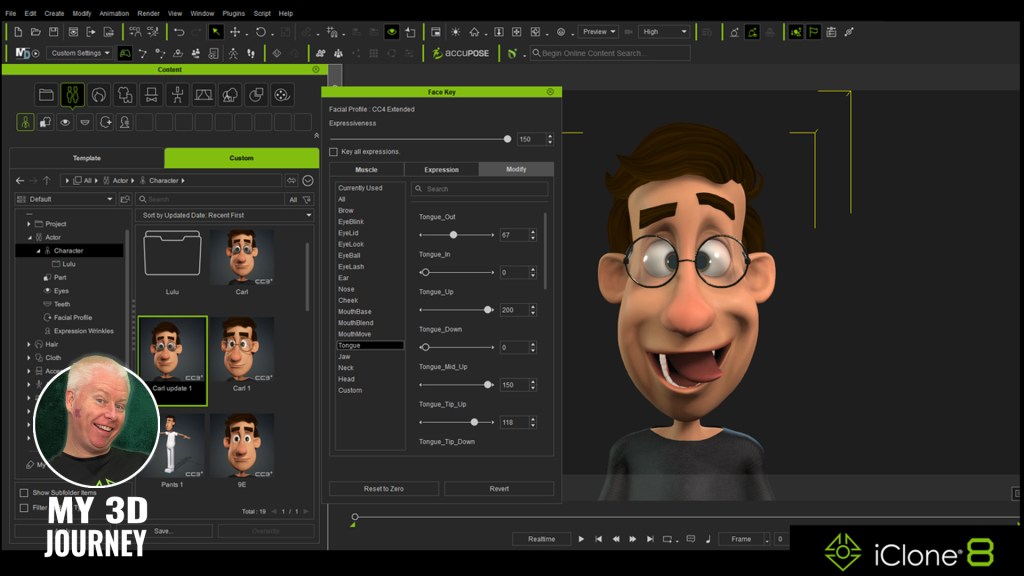
The Muscle option allows me to manipulate specific areas of Carls face, from his cheeks to his tongue, pushing and pulling the muscles around in real time on the model for instant results that can be keyframes. This means you have a visual guide right there on screen alongside your character, and any changes you make to the head model in the menu, affect your characters face in the same place at the same time.
The Expressions list gives me dozens of premade expressions for all different emotions and is the perfect one-click solution (and one that I found myself leaning towards more and more). Every emotion imaginable is available within the list of presets this way and it takes only seconds to breathe life into your character.
And the third option available for manipulating your characters face is the Modify tab. Here you are presented with a long list of sliders which you can tweak for precise control over every aspect of your characters face. Here I was also able to control the custom facial expressions built into Carl and the coolest thing about the Modify sliders is that you can manually over ride their maximum range far beyond their limit of 100% to give some truly comical and outrageous results.
It has been 4 months now since I started my journey trying to learn 3D animation with iClone and Character Creator. And today for the first time I have fully working custom character built from scratch by me. And I couldn’t be more proud of this achievement. I do need to point out that I did not do this all on my own. I had incredible guidance from Rampa Tinling and Peter Alexander and amazing support from the entire 3D community.
But he’s mine. I made him.
My first ever Cartoon Animator 5 character took me 3 months to build. My first 3D character took 4 months. And I was only able to spend up to 3 hours a day working on him because of my other work commitments. So I feel that’s even more impressive.
But when I say it’s impressive, I don’t mean me. I mean the software is impressive. Full credit goes to the ease of the character creation process that is offered by Character Creator, and the amazing tools of iClone that can bring them to life. When it comes to learning new stuff, I am not the sharpest tool in the shed, but I am proof that this can be done by anyone and that’s great news.
Is it easy? Not for me. Is it possible? Yes, even for me.
Garry Pye is an Australian illustrator, animator, and Cartoon Animator instructor with over a decade of experience in the animation industry. Known for his unique blend of creativity and humor, Garry’s work spans from teaching animation techniques to creating innovative content that helps both novice and experienced animators improve their skills.
Garry’s enthusiasm for storytelling and animation shines through in all his projects, whether it’s creating animated shorts, preparing educational tutorials, or sharing his expertise by teaching. With a passion for making animation accessible and fun, Garry has built a community of learners who not only appreciate his knowledge but also his infectious sense of humor and dedication to his craft.
3D animator Cliff (Round Table Animation) shares his honest review of Charcter Creator 5, demonstrating tips on how to custiomize charcater. and bring it to Blender for fight animation.
Cliff Paul/ Round Table Animation
Hey, I’m Cliff, the creator behind Round Table Animation, a YouTube channel dedicated to helping aspiring 3D animators master fight choreography and cinematic storytelling. I’ve worked with indie studios and creative teams to bring action sequences to life using tools like Blender, Unreal Engine, and Reallusion’s Character Creator 5.
My goal is to make animation less intimidating by breaking down complex workflows into clear, creative steps. Whether it’s crafting stylized fight scenes or building custom characters, I love showing how anyone can bring AAA-quality animation to their projects.
Tired of using other characters for animation? Imagine animating your next fight, but instead of using Goku or Spider-Man, it’s your own character. The way they move, the way they fight, their story is built by you. I’m going to walk you through exactly how I created my own original fighter, bring them into Blender, and animate them to life through combat.
This time, I wanted to try something easier than Blender’s character creation tools, especially since I’m not a modeler. That’s when I decided to check out Character Creator 5.
CC5 Interface and Customization
At first glance, the CC5 layout looks super clean, though the many icons can be intimidating. However, once you start playing, it’s really straightforward. I thought of it like an RPG character creator taken to the max.
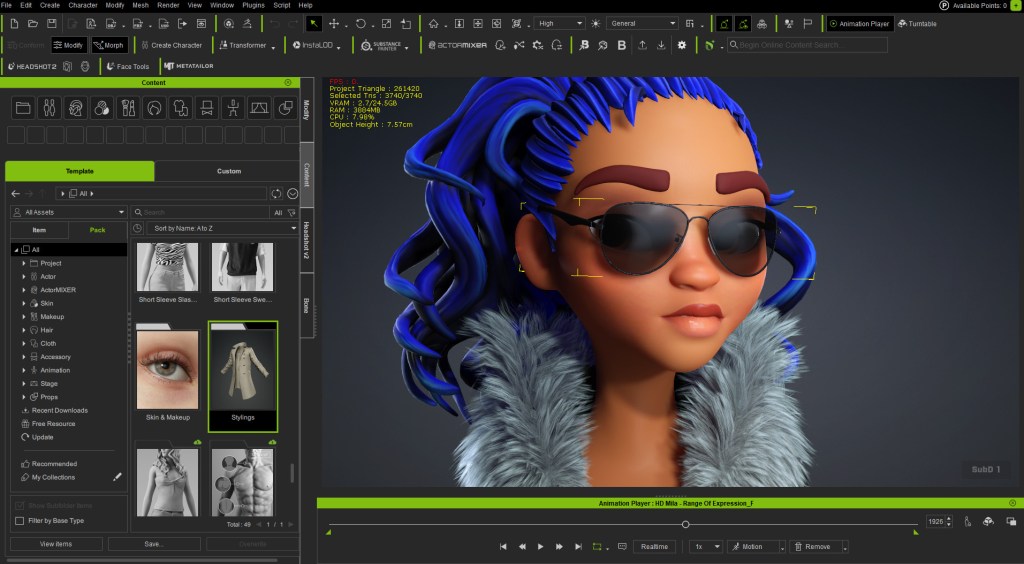
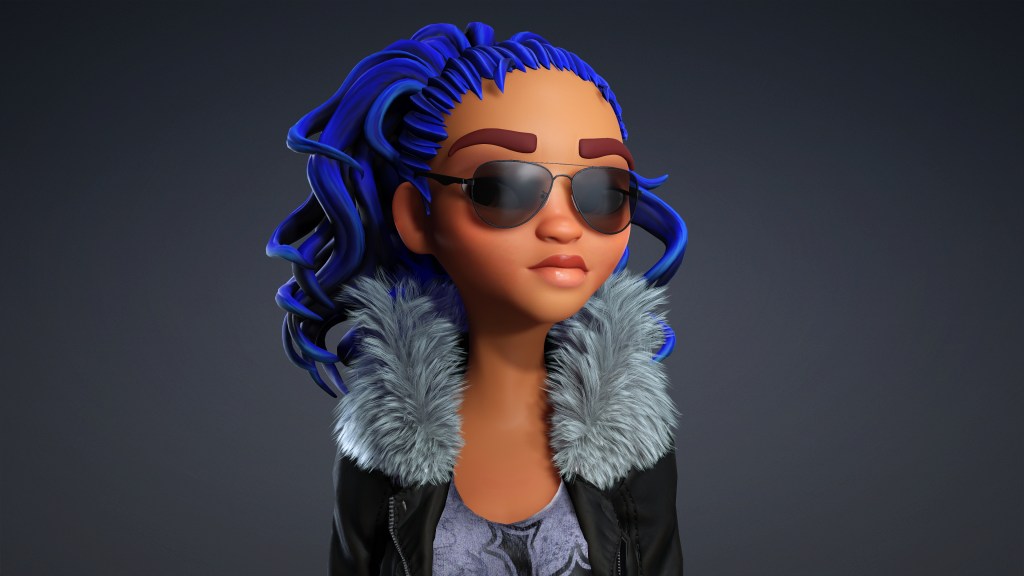
CC5 comes with new high-quality base characters. Instead of digging through endless sliders, you can simply click and drag on the model to stretch the neck, broaden the shoulders, or sculpt the jawline, all in real time. I wanted something more stylized, so I chose the CC5 character, Mila, to customize.
Assembling the Fighter’s Outfit
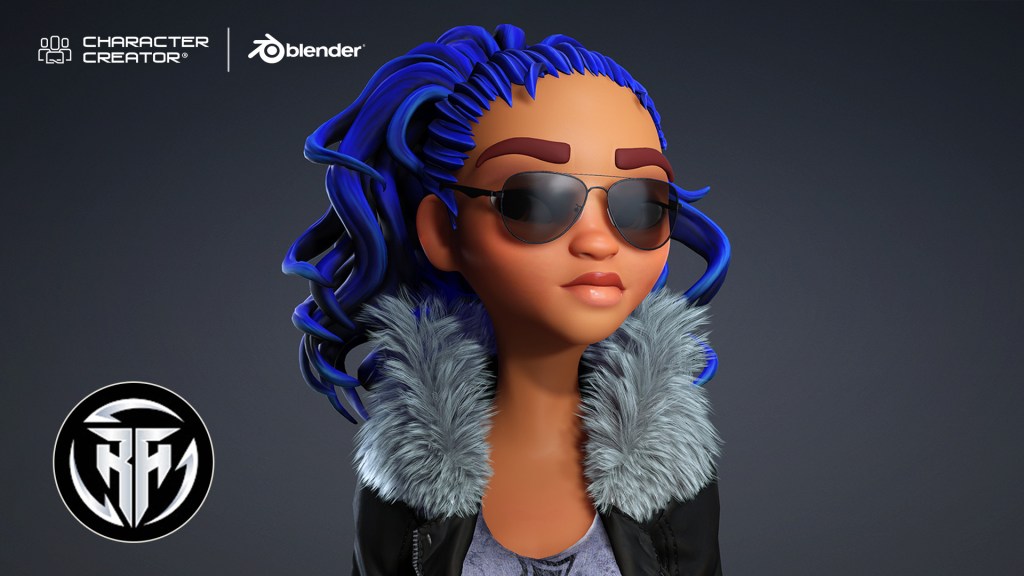
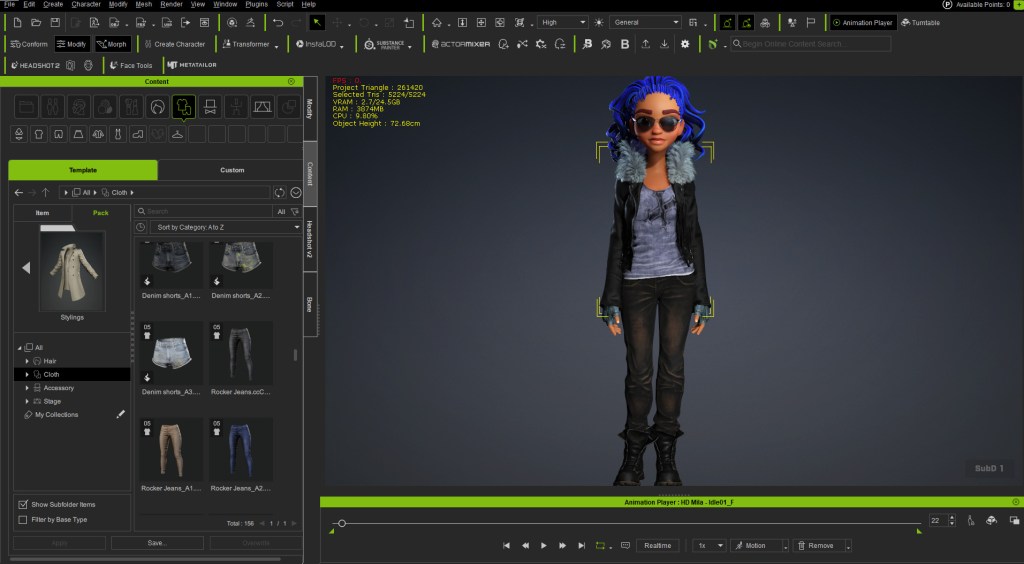
Mila looks great as a base mesh, but I wanted her to look like a fighter. I was going for a cyberpunk, futuristic type of style. You can change and click, and drag any available outfit onto the character, and it automatically adjusts.
I mixed and matched several CC5 assets: a badass shirt, jeans, a nice leather jacket, boots, a cloud wrap, and gloves. The clothes look great and fit because they’re automatically tailored to her.
If there is any clipping (e.g., the jacket touching the body or clipping on the pants), you can go into the mesh edit tools and use the calculating collisions feature to automatically adjust the mesh and fix the part.
Final Checks and Export
I adjusted the sunglasses to fit her face better. From here, we have our custom fighter ready to transfer to Blender. You can check if the clothing works by using the in-program motion check feature, like playing a walk cycle. This also lets you check the facial rig and range of expression. Crucially, all these facial features will transfer as shape keys over to Blender.
To export, I went to File > Export as an FBX, choosing the clothed character and selecting Blender in the tool set. I chose to export just the mesh, not the temporary animation I used for the check.
Rigging and Animating in Blender
In Blender, I used File > Import as an FBX. The character loads in immediately with the textures automatically applied. For rigging, I prefer to use the Auto Rig Pro plugin because it’s easy to put controls on a mesh that already has a base rig. However, you can use Rigify if you are more familiar with it. Once rigged, we have our character ready to go.
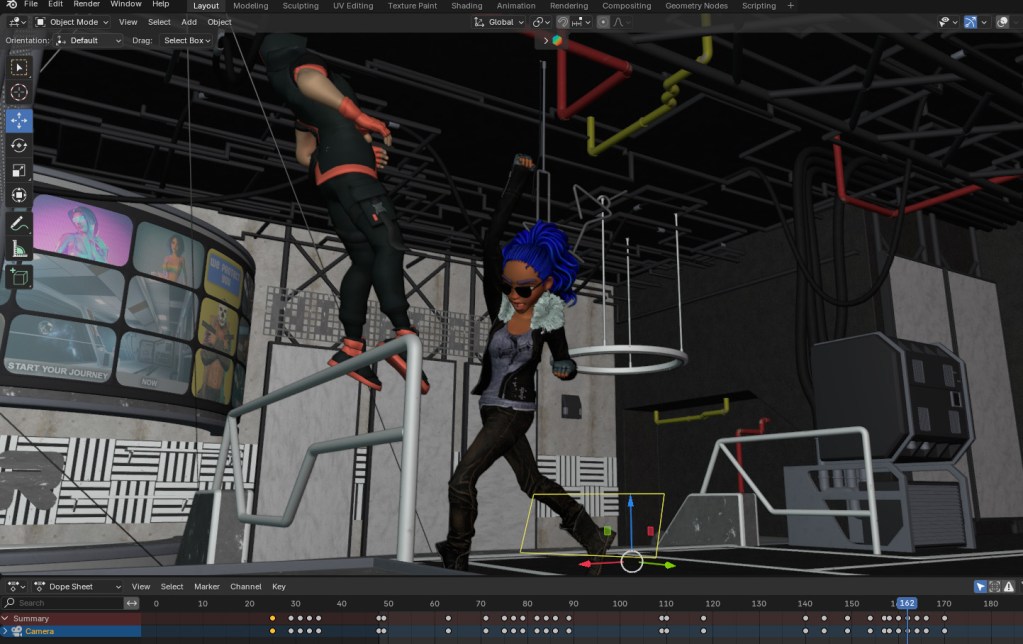
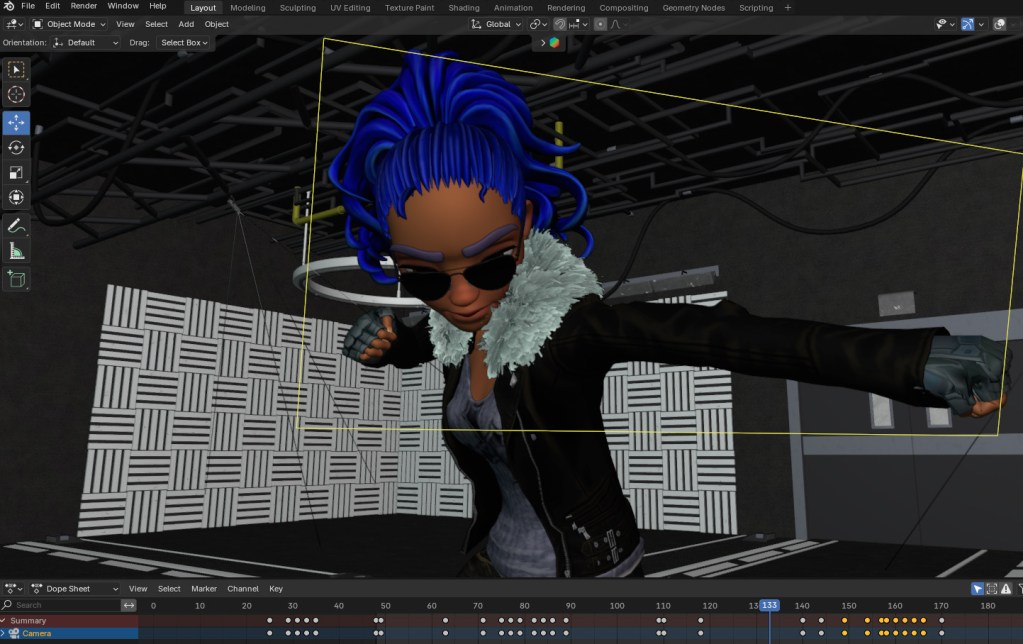
I placed her in a cyberpunk nightclub setting to fight a character. The smooth transition from CC5 to Blender makes the creative process work well. Seeing your own customized character perform a short punch combo is a nice feeling compared to using stock characters.
Fight Animation: Taking my bad-ass CC5 character to Blender.
Final Thoughts
I think CC5 is definitely the tool to make more extravagant, out-of-the-box characters like this, though it takes practice. The following images are the final looks for the character. In the next tutorial, I’ll cover the character animation of impact, so you can ensure that your hits are landing accurately.
There is a lot for beginners to grasp when jumping off into 3D. In the rush to get beginners going, experienced users sometimes forget what it was like to not have a basis to understand a lot of the 3D jargon. This is true for even the fundamentals when we first start. The introduction of High Definition (HD) character mesh in Character Creator 5 has put the spotlight on mesh. While mesh is the basis of any 3D modeling it is not talked about very often.
Character Creator 5 takes care of all the technical work behind the scenes and users are no longer required to have a deep understanding of fundamentals to create a character like early digital artists had to possess. In fact, Character Creator 5 has simplified so much of the character creation process that almost anyone with basic computer skills can make a custom character mesh with it, but not all beginners grasp why mesh attributes matter.
Let’s take a deeper dive into mesh to gain a better understanding of how HD Character mesh works.
What is 3D Mesh?
At its core, a 3D mesh is an organized assembly of geometric elements: vertices, edges, and faces. These basic building blocks interact to create the surface and shape of a digital object. Let’s break down each component:
Vertices: These are individual points in 3D space, defined by their x, y, and z coordinates. Vertices act as anchor points for the structure of the mesh.
Edges: Edges are straight lines that connect pairs of vertices, outlining the skeleton of the model.
Faces: Faces are flat surfaces formed by connecting three or more edges. The most common types are triangles (three edges) and quads (four edges).
When combined, these components form a continuous network, a “mesh”, that envelops the shape of the object. The mesh essentially provides a scaffolding upon which textures, colors, and other features are layered. Meshes are crucial not only in entertainment but also in fields like architecture, engineering, medicine, and virtual reality, where accurate digital representations are necessary.
With Character Creator 5 you don’t have to master any of this but understanding it will enhance your use of CC5.
What is Mesh Density?
Mesh density refers to the number of geometric elements—primarily polygons—that make up the mesh. Polygons are the flat shapes that make up the mesh’s surface. The density is determined by how many of these polygons are present and how closely they are packed together.
A mesh with low density has relatively few polygons, resulting in a surface that may appear angular or faceted, especially when viewed up close. On the other hand, a high-density mesh contains a vast number of polygons, which allows for smoother surfaces, more complex shapes and detail.
Why Mesh Density Matters
Mesh density is a critical factor in the visual quality and realism of a digital model. The more polygons present, the finer the detail. For example, a simple cube might require only eight vertices and twelve triangles, but a highly detailed human face might need tens of thousands—or even millions—of polygons to accurately depict the nuances of skin, muscle, and expression.
However, increasing mesh density comes with trade-offs. More polygons mean greater computational demand. Rendering, animating, and manipulating a high-density mesh can require powerful hardware (think gaming specs as a simple minimum rule of thumb), more memory, and efficient software algorithms. This is why mesh density must be carefully balanced against performance needs, especially in real-time applications like video games or interactive virtual environments.
Mesh Density and Level of Detail (LOD)
One way artists and engineers manage mesh density is through Level of Detail (LOD) techniques. LOD systems use multiple versions of a mesh with varying densities. As an object moves farther from the camera, a lower-density mesh is used, reducing computational load without sacrificing visual quality where detail is not needed. When the object is close to the viewer, a high-density mesh ensures realism and precision. This approach is especially important in large-scale environments where thousands of objects may be visible at once.
Subdivision in Character Creator 5
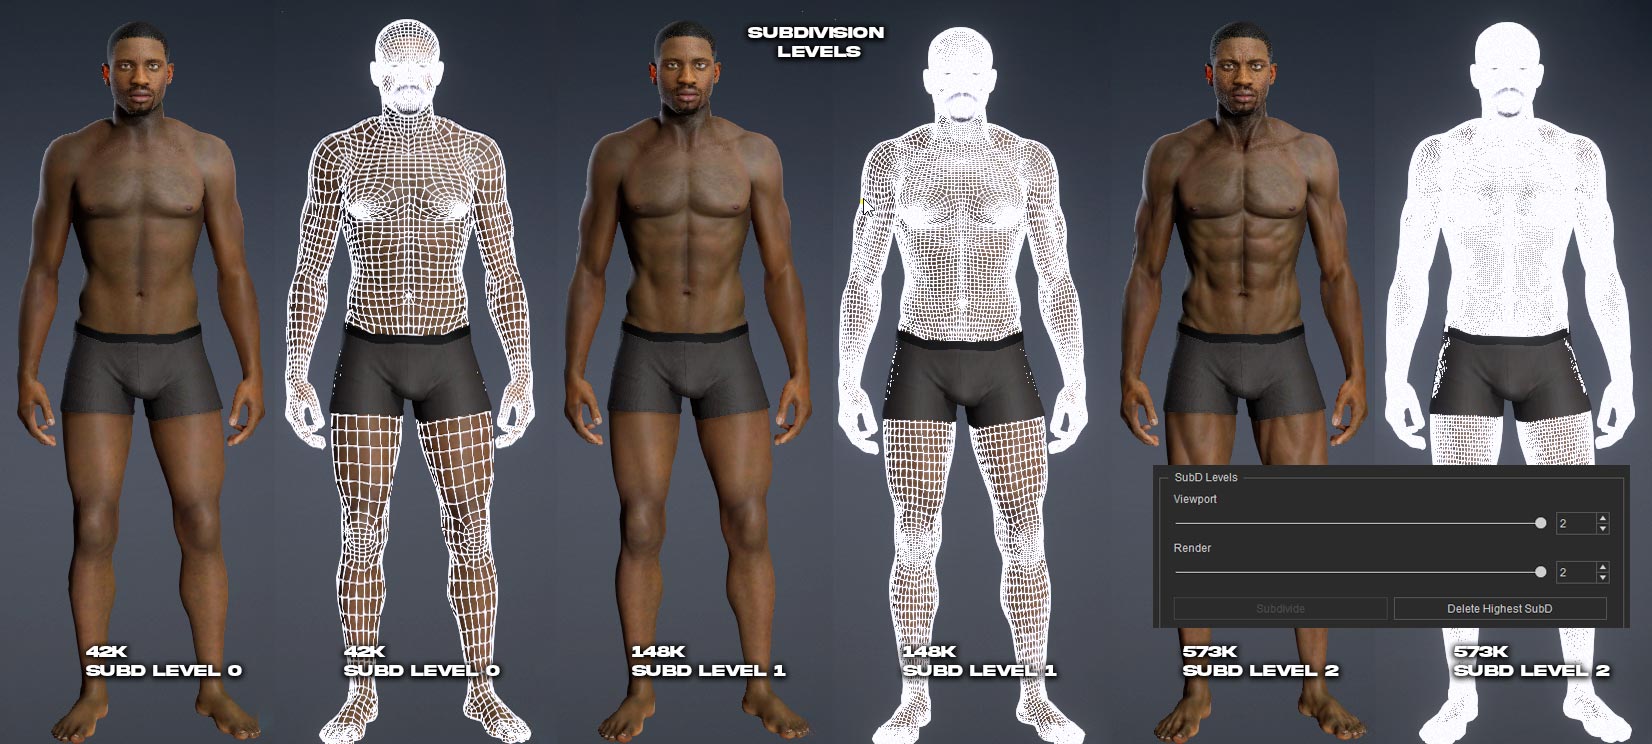
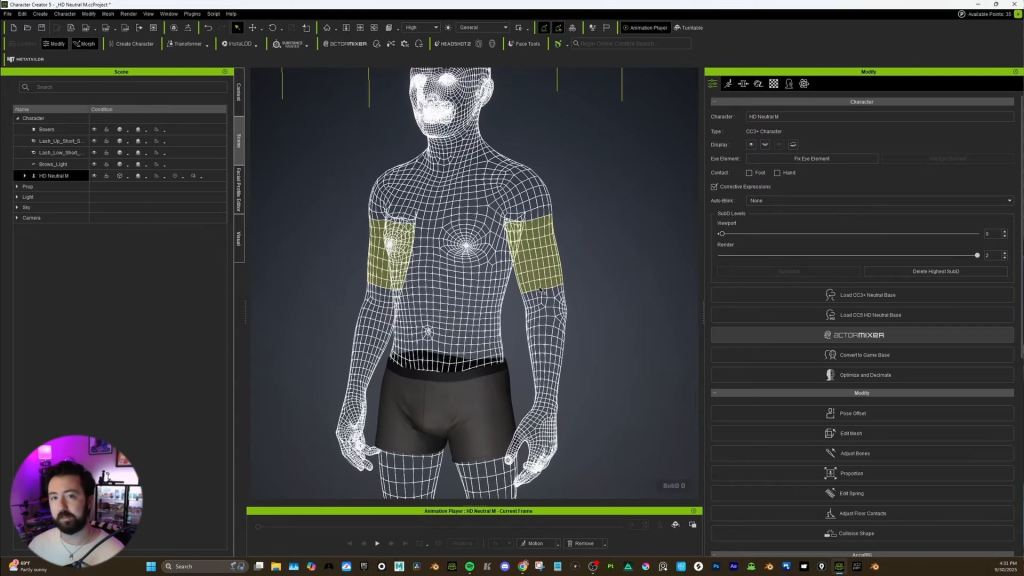
Subdivision in Character Creator 5 is the same as in other 3D applications in that it subdivides the mesh into more faces or polys. By using the subdivision feature in CC5 we can now create three levels of character meshes from simple to highly detailed.
For reference below, the white lines mark the quad boundaries with the widest boundaries being the lowest mesh and the smallest boundaries being closer together and therefore the densest mesh.
High Definition Meshes: The Gateway to Realism
High definition (HD) meshes are those constructed with exceptionally high mesh density. HD meshes are indispensable in scenarios where realism is paramount. This can include character modeling for films, detailed anatomical scans for medical applications, or close-up renders of products for marketing and design.
Achieving Photorealism: Wrinkles, Skin, and Micro-Details
The true power of HD meshes lies in their ability to capture micro-details, the tiny features that give objects and characters their lifelike appearance. For instance, modeling a human face is a formidable challenge. The surface is not simply smooth; it is covered in pores, fine lines, wrinkles, folds, scars, freckles, and subtle textures. With a low-density mesh, these features cannot be accurately represented. The surface appears flat or plastic-like, and the illusion of reality is lost.
High definition meshes, on the other hand, allow artists to sculpt or morph every wrinkle, crease, and pore. Each vertex can be manipulated to create the undulating landscape of human skin. The result is a model that not only looks realistic but also behaves realistically when animated or lit. Shadows fall naturally into wrinkles, highlights shimmer on oily skin, and expressions move convincingly. For animated characters, these details are essential for conveying emotion and personality.
HD Mesh Enhances Muscle & Body Definition
High definition meshes play a crucial role in accurately representing muscles and anatomical features in 3D models. With increased mesh density, artists can sculpt subtle curves, bulges, and indentations that mimic the natural flow of muscle fibers and skin. This allows for the precise depiction of muscle groups, tendons, and bone structure, making the model appear more lifelike.
For example, HD meshes enable the creation of detailed muscle striations, veins, and skin folds that are essential for realistic human anatomy. When animated, these details respond naturally to movement, showing how muscles flex and stretch. This level of detail is especially important for close-up renders, medical visualization, and character animation, where anatomical accuracy enhances realism and believability.
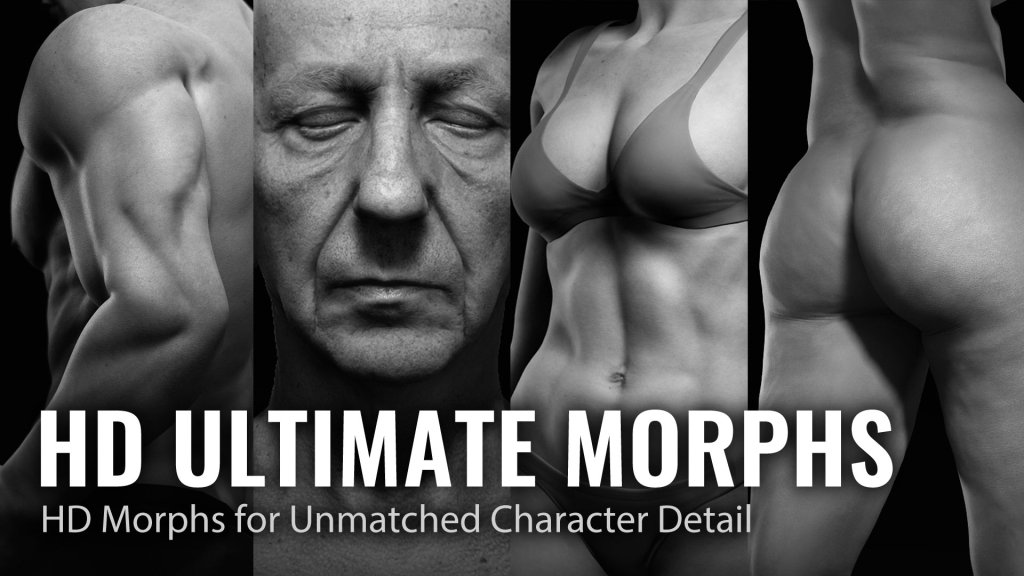
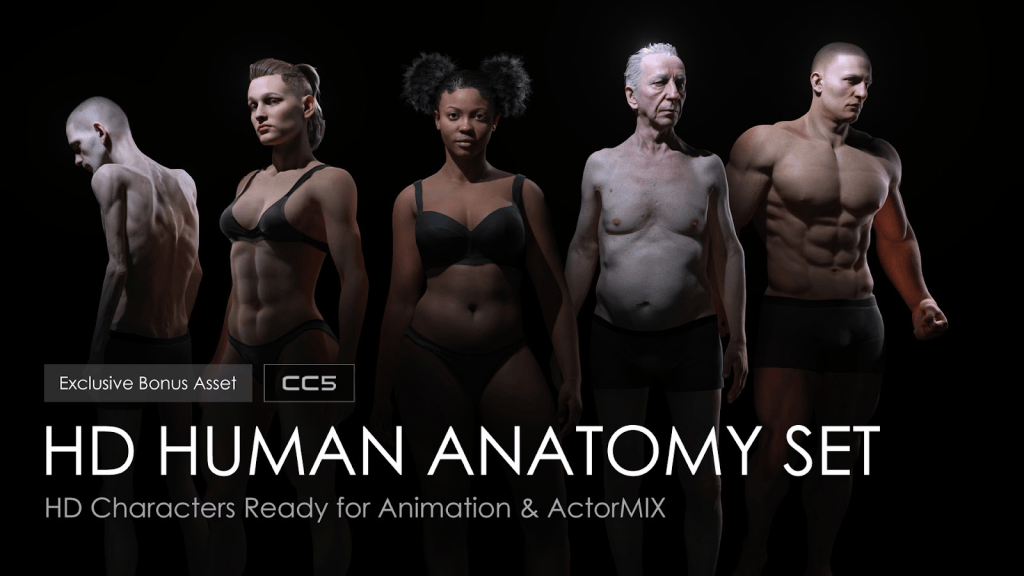
To achieve this level of detail, explore the HD Ultimate Morphs and HD Human Anatomy Set in Reallusion’s Content Store. These packs provide extensive morphing options and detailed anatomical structures to help you create professional-grade realistic characters.
TIP: Seamless CC-to-ZBrush workflow lets you freely sculpt intricate character details and transfer them back to CC as baked texture maps for each subdivision. – Reallusion CC5 Website
Projection – Texture Baking
Texture baking is the process of creating a high-density model for sculpting and one or two lower density models to transfer or “Bake” the high-density mesh contours into maps that produce the same results with much less computational overhead. The high poly model has heavy mesh density for a lot of detail in the muscle, body and skin exterior. The mesh sculpting done on the high density mesh is then transferred to the lower poly meshes via mapping channels like normals or micro normals.
Techniques for Creating High Definition Meshes
Artists and modelers use a variety of techniques to achieve high mesh density and detail:
Subdivision: Starting with a low-density base mesh, the model is subdivided, split into more polygons, to increase resolution. Popular tools like ZBrush and Blender offer powerful subdivision tools.
Sculpting: Digital sculpting lets artists push, pull, and manipulate the mesh as if it were clay, adding and refining details at the vertex level.
Displacement Maps: Displacement maps use grayscale images to deform the mesh at render time, adding complexity without increasing the base polygon count.
The great news for beginners is Character Creator 5 takes care of all this with it’s new subdivision levels. Instead of having a single density mesh you can use subdivision to create two more levels for three in total (Sublevels 0,1,2). This provides much more control over what can sculpted into the high level mesh and then projected onto the lower level mesh. This uses mapping instead of mesh density which saves computational overhead.
A Quick Look at SubD Levels 0, 1, 2 – Subdividing a standard CC3+ Character for More Detail
Rendering and Animation with HD Meshes
Once a high definition mesh is created, it can be textured, shaded, and animated. Textures add color and surface variation, while shaders control how light interacts with the mesh. Advanced rendering engines can simulate subsurface scattering, making skin glow with soft, lifelike radiance, or calculate realistic reflections on shiny surfaces and CC5 takes care of all this for us.
Animation with HD meshes is particularly rewarding in character work. When a character smiles, the mesh moves to create authentic creases around the mouth and eyes. As the skin stretches and compresses, micro-details add depth and believability. Motion capture and facial rigging are often used to drive these intricate mesh deformations.
Challenges and Considerations
Despite their advantages, HD meshes pose challenges. Large file sizes can slow down workflows and overwhelm hardware. Collaboration across teams may require simplifying or “decimating” the mesh to lower densities for certain tasks. Real-time applications, such as video games, must use clever optimization strategies, including normal maps, bump maps, and LOD systems, to simulate detail without the computational cost of millions of polygons.
Summary
As digital art and technology continue to advance, the demand for greater realism grows. Understanding 3D mesh principles lets artists, engineers, and scientists choose the right structure for their purpose, whether it’s a streamlined low-poly asset for a fast-paced game, or a breathtakingly detailed model for a cinematic close-up. The interplay between mesh density and realism defines the cutting edge of visual storytelling, placing the power of hyper-realistic digital creation squarely in our hands.
Digital Artist MD “Mike” McCallum, aka WarLord, is a longtime iClone user. Having authored free tutorials for iClone in its early years and selected to write the iClone Beginners Guide from Packt Publishing in 2011, he was fortunate enough to meet and exchange tricks and tips with users from all over the world and loves to share this information with other users. He has authored hundreds of articles on iClone and digital art in general while reviewing some of the most popular software and hardware in the world. He has been published in many of the leading 3D online and print magazines while staying true to his biggest passion, 3D animation. For more information click here.
Michael Deliso from Deli Productions shows his creation path with the latest Character Creator 5. His honest review helps the Unreal 3d community to dive in to the easy character tools.
Michael Deliso / Deli Productions
I’m Michael Deliso, a Previs Supervisor and the creator of the YouTube channel Deli Productions. For the past eight and a half years, I’ve worked in the film and television industry, helping directors, cinematographers, and VFX supervisors bring their ideas to life through previs. I’ve had the privilege of contributing to projects such as Star Wars: The Mandalorian, Star Wars: Ahsoka, Predator: Killer of Killers, and many more.
I started Deli Productions to demystify the world of animation and cinematography, creating easy-to-follow tutorials that break down the same workflows and creative philosophies I use in professional productions. I also love exploring new software and tools—like from Reallusion—that empower animators to build custom assets faster and focus on what matters most: TELLING GREAT STORIES!
Character Creator 5 is a software that allows you to create custom characters using things like morphs, and allows you to drag and drop outfits. Their entire ecosystem is pretty cool, and the release of CC5 has addressed my main gripes with Character Creator 4 seems to have been addressed. When I first launched CC5, it looked almost exactly the same as Character Creator 4, which is a good thing.
The ActorMIXER: MetaHuman-Style Customization
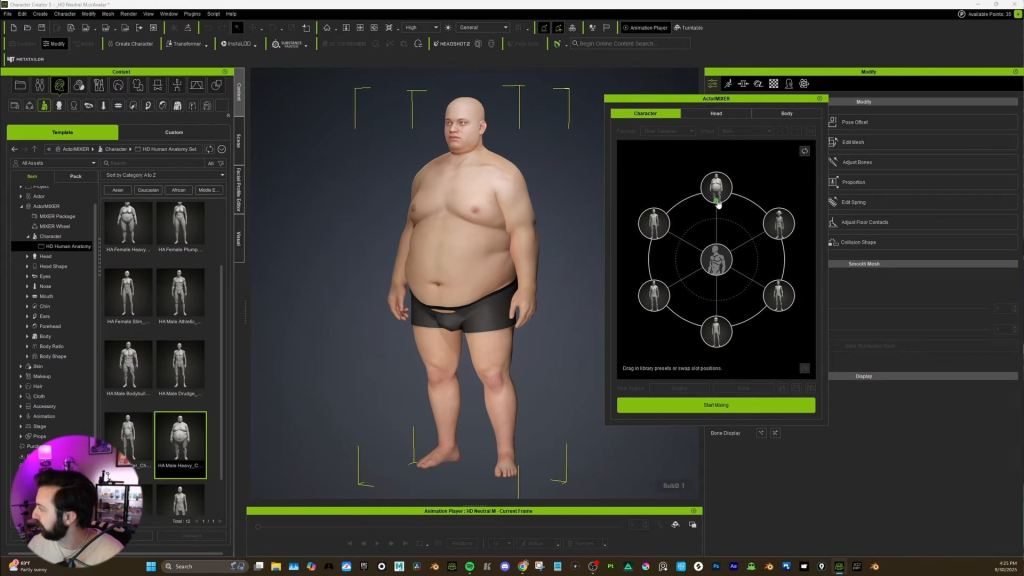
One of the things that they added is something called the ActorMIXERPlugin. It’s very similar to the MetaHuman feature, where you can choose a couple of different people or presets and then slide in between.
In the ActorMIXER plugin, we have character, head, and body options. You can target specific head features—like eyes, nose, mouth, chin, ears, and forehead—for fine detail adjustments. For the body, you can separate the body ratio and the body shape itself.
You can drag and drop new features from the HD anatomy set—like a goblin or a heavier-set person—into the mixer. Hitting Start Mixing gives you a dot to move around, combining traits to favor, say, a little bit of goblin and a little bit of heavy set. You can refine the body by separating the body ratio from the muscles to keep the muscle definition intact while changing the overall proportions.
Sculpting with Morphs and Subdivisions
The morph button up top lets you use morph targets (basically blendshapes) to click and drag directly on the character, adjusting arms, neck width, or nose size.
One of the big new things that addresses my main gripe is subdivisions. In CC4, the wireframe was light but lacked detail, which meant fine details from my custom sculpts wouldn’t transfer over. Now, under the modify tab, you can go up to Subdivision 2, which becomes really dense and is great for capturing fine sculpting detail. These subdivisions allow us to use something called HD morphs. Under “HD body”, I can scroll down and give the character finely detailed abs, especially visible if we go up to Subdivision 2.
Optimizing Detail with Baked Normals
Using a higher subdivision makes the rig heavier. The best animation workflow might be to animate on the lighter Subdivision 0 and swap to the detailed Subdivision 2 when rendering.
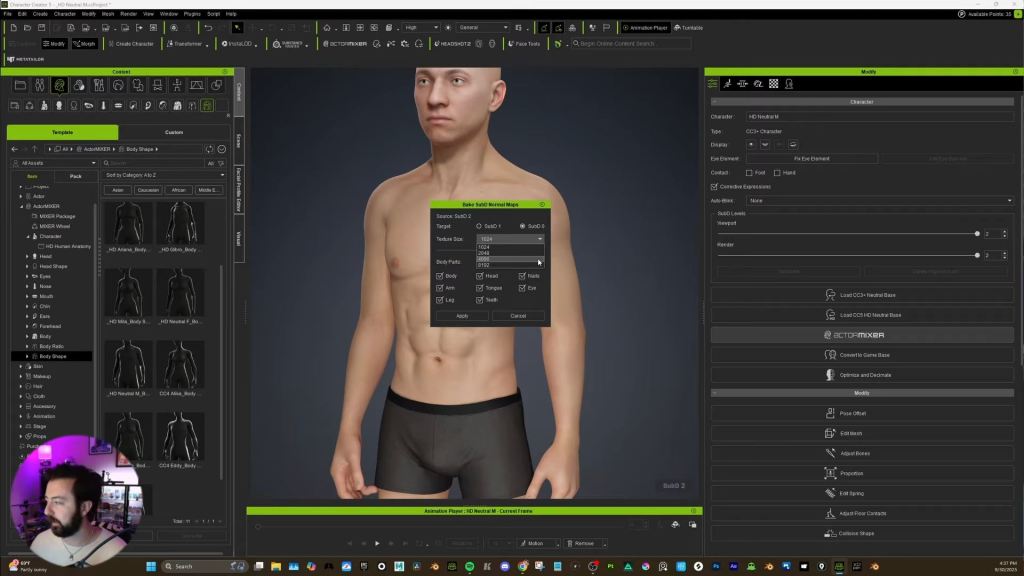
However, CC5 added a way to keep the detail on the lower subdivision by baking your subdivisions into a normal map. The normal map is an image that allows light to interact with the model in finer detail, making it look much better than a heavy character, especially if you have many characters in a scene.
To do this, go to create and select bake subD normal maps. You can choose to bake from the SubD source to SubD0 or SubD1. I recommend a minimum of 4K texture size for a main character, or 8K if your computer can handle it. After applying, the SubD0 character looks pretty damn good with all the normals baked in.
Extended Plus Facial Profile and Unreal Integration
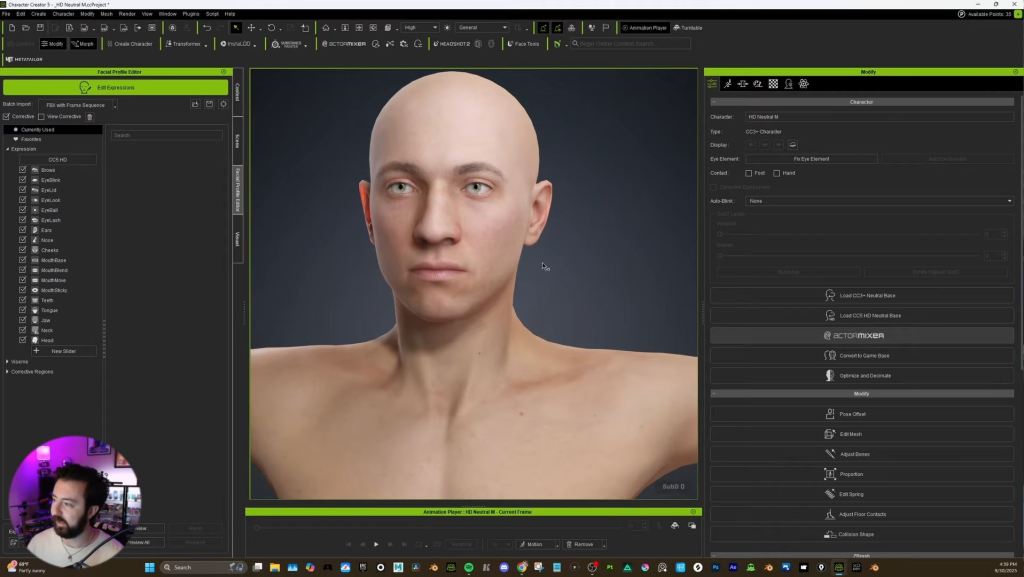
They also added the Extended Plus Facial Profile. This adds corrective morphs that limit how much the mouth moves during animation, preventing it from looking unrealistic and dialing it back into more realism. Crucially, I got confirmation from Reallusion that this Extended Plus Facial Profile does transfer over to Unreal.
I mainly use Character Creator with Maya. I reached out to Advanced Skeleton (which I use for my rigs), and they’ve recently updated—so it should hopefully work with CC5 now. Bringing this into Unreal feels great. I’ve also made a dedicated tutorial video on how to use it.
Unreal Workflow
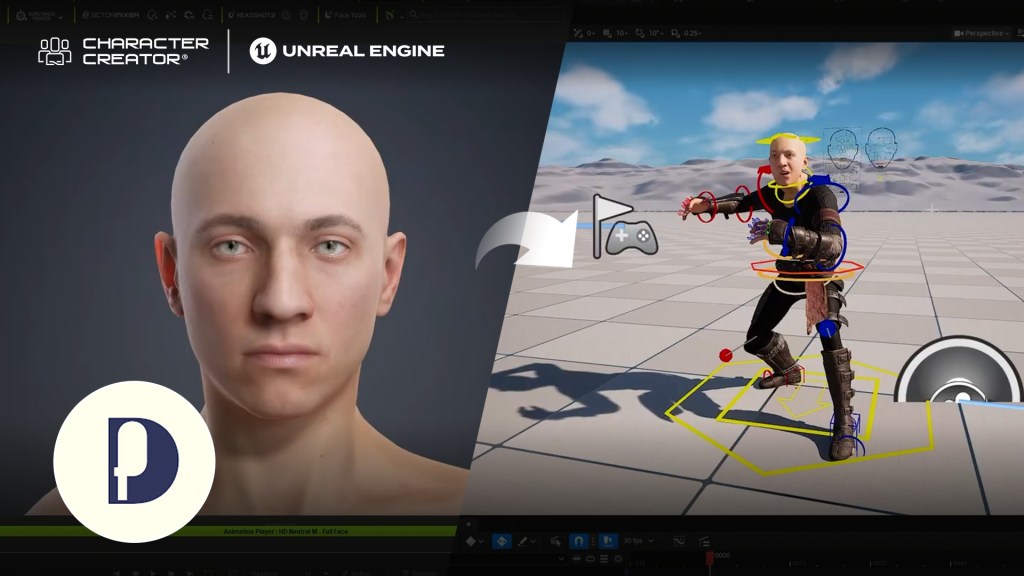
In CC5, Export the FBX clothed character using the Unreal UE5 skeleton preset. You can select your desired subdivision level here.
Install the Reallusion auto setup tool and the Character Creator control rig plugin from Fab (Unreal’s marketplace).
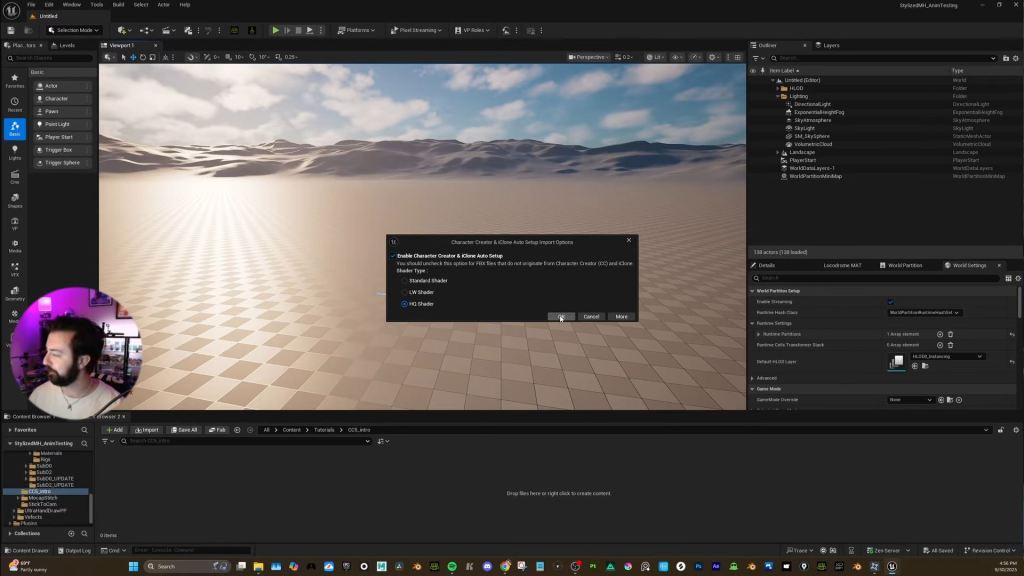
In Unreal, drag the FBX in. In the import window, select the HQ shader and ensure Import Morph Targets is checked, or your facial rig won’t work.
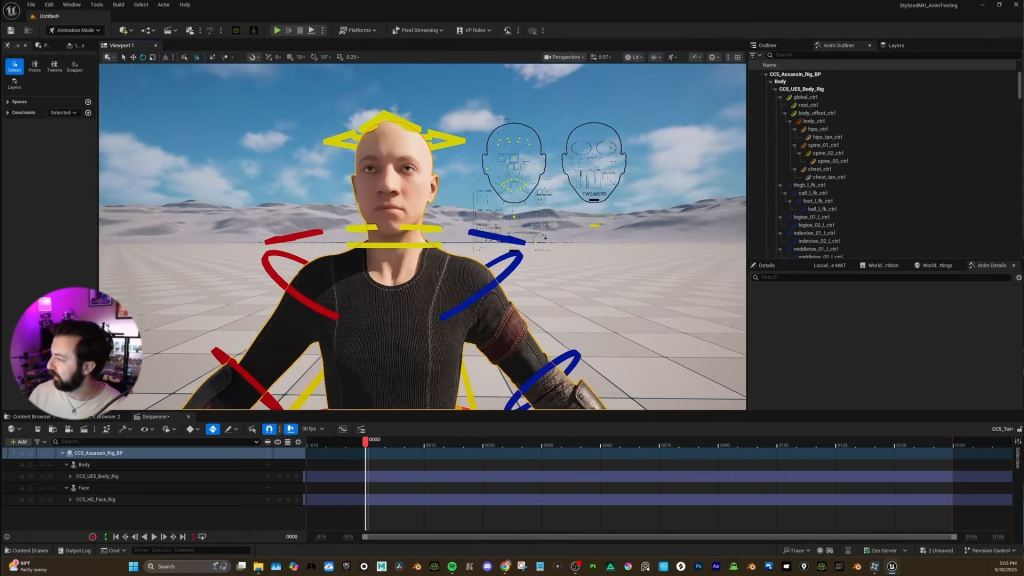
Once imported, right-click the skeletal mesh and select Create CC Control Rig. This separates the body and head into a blueprint like a MetaHuman.
Drag the new rig BP into a Level Sequence, and your character is ready to animate. One thing to note is that you can check the Delete Hidden Faces option during export in CC5 to prevent skin from popping through the clothes
One thing to note is that you can check the Delete Hidden Faces option during export in CC5 to prevent skin from popping through the clothes
Final Thoughts and Next Steps
This was a brief overview of Character Creator 5. I’ll definitely be doing more tutorials for:
Pitting a CC5 character versus a MetaHuman.
An updated process for setting up your character rig in Maya.
Experimenting on getting the character into Blender.
So I am definitely recommending this software to users who are looking for a time-saving character workflow. Stay tuned for more of my channel and videos, and let’s create something cool and fun together in 3D!