首頁 » 2024 » Page 3

Smart Search – Your Guide to Thousands of Assets

Since iClone, Character Creator and Cartoon Animator were released over the years there has been a determined effort by Reallusion to provide quality 3D assets for their animators. These applications have always downloaded with a lot of usable assets but just ask any animator and they’ll tell you there are never enough assets. It doesn’t matter how big your assets library becomes; you will always want or need more.

To meet this need, Reallusion introduced its Marketplace for users and asset creators to share and sell more 3D props, characters and accessories which has exploded into a market of thousands of assets from extremely talented developers.

This doesn’t include Reallusion’s own Content Store of professionally created 3D assets and animations that cover a wide range of needs. In fact, all of this available content has created a new problem for users.

And, of course, we don’t want to leave out ActorCore, the one-stop shop for professionally crafted characters from main actors to extras in crowds. ActorCore search results are included in AI-powered results unless filtered out.

A Vast Amount of Content

The problem, a good problem admittedly, of so much content, is how to find what we need in all of those 2D/3D assets in the combined stores without spending a lot of time or growing frustrated.

When one is searching for assets, particularly if you are the animator instead of a producer, you must stop what you love to do and find a needed asset. For some of us this is a fun diversion but for others it is a terrible distraction that can completely kill the creative buzz. Especially when the search goes on and on.

So, we jump online and start searching. The Content Store, ActorCore and the Marketplace have great filters to find content, but filters are just that and don’t compare to AI based search for speed and efficiency. Even if you love searching for content, this AI-enhanced search plugin will enhance the experience and lower the frustration level by drastically decreasing the amount of time it takes to narrow down and find relevant content.

Smart Search

Reallusion’s new AI-powered Smart Search comes to the rescue with its long reach and almost instant replies. The AI-powered technology is a big leap in asset searching for combing through the thousands of assets available across all the content stores. This smart plugin is so fast you don’t even have time to take a sip of your favorite beverage before you have the results.

Below you will find some quick, no-frills demos using Smart Search in all three applications.

Character Creator

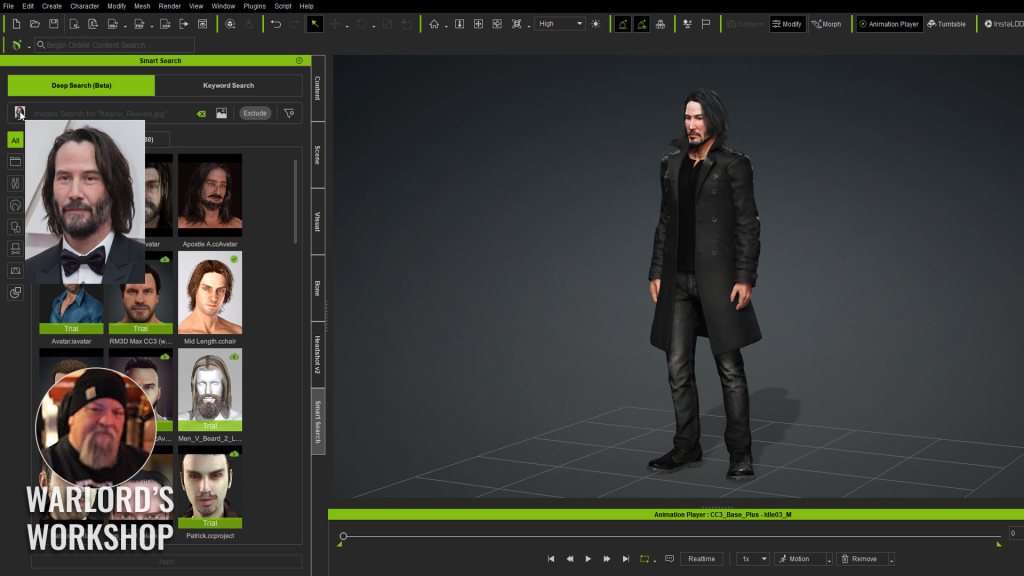
This project is a very simple use of the Smart Search image feature to quickly find a hairstyle that would match our character. I had already used Headshot 2 to recreate the actor’s head on a Character Creator body. I also already had the clothing in place as I knew what assets I had on hand and wanted to use.

The problem was the hair. I could not recall having a hair style even similar to the character, so I found a headshot image (photo not the plugin) to drag and drop into Smart Search. It quickly pointed out a hairstyle that I already had in inventory and stored locally on the system. The results were almost instantaneous as you can see in the capture below.

iClone

iClone has so many good assets that Smart Search was becoming a necessity for new assets and items already purchased. In this case I wanted to load up a battle scene with a mech and a character (avatar) for a driver.

I knew I had the mech and the driver in my purchased inventory, but I couldn’t recall a battle scene and this is where Smart Search quickly pointed me to a ton of options including an older Desert Storm battlefield that I had all but forgotten about. See the video below for a quick demo.

Cartoon Animator

Like iClone, the Cartoon Animator community has created a lot of quality 2D content from top developers and users. As a newbie to Cartoon Animator I can attest to how Smart Search simplifies the task of finding relevant assets for any given project in a lot of different genres. The Smart Search plugin can be docked in the user interface like other tools for quick, convenient use.

Smart Searches Available

Deep Search (Beta)

Deep Search is crafted for ease of use, offering intuitive search functions with category-based filtering. Drag in images, describe what you’re seeking in natural language, or retrieve similar items — all powered by an AI model trained to catalog countless digital assets in the Reallusion ecosystem to deliver highly relevant, visually matching results.

  • Text Search – Even brief descriptions will give accurate, immediate results. Input your native language. Multilingual Deep Search has you covered!
  • Image Search – Streamlined search by dragging in image references from your files or web pages. Easily copy images or specific sections from any visual source for immediate use in your projects.
  • Find Similar – Use “Find Similar” to refine your search with closely related assets. Find content similar to items in your project and swap them out with better options. Find alternatives to embedded and purchased assets to add variety to your projects. Find similar content from Search Results and the Content Manager too.

Keyword Search

  • Text Search – Query content using matching titles, descriptions, and tags thoughtfully applied by content authors.
  • By Author – Search for items created by specific artists, including top-rated and favorite content developers.
  • Search Motions – Find the perfect motion with keywords, tags, and the upcoming Deep Search support.

My Quick No-Frills Review

I really didn’t think I would need an AI assisted search feature. It was not high on my list of priorities. I just didn’t realize it needed to be. Lighting fast searches allow me to look for more props and other assets in much less time. And I mean look for more props than I normally would have too… since the frustration level is nil. I can also see this being a boost to content creators to hopefully funnel more sales to them as it can help identify their items via AI instead of just naming and tags.

Like most Reallusion products and tools this AI plugin requires little to no time in terms of learning to use and will be returning queries with more assets than you will probably want to look at… and faster than you can lean back in your chair to wait for the results.

Summary

As shown in the first Character Creator 4 demo you can see for yourself how just dragging an image of an actor can immediately locate relevant content. This eliminates a lot of searching, filtering, rephrasing search words and so forth that eat up a lot of time. You can go right back to work without skipping a beat or losing creative focus.

As AI Smart Search matures there are even better improvements on the way with Deep Search extending to our custom assets as Reallusion continues to add features. There is also an online survey for users to help them make the Smart Search even better.

To use the new AI driven Smart Search plugin, all you have to do is open your Reallusion Hub and update the applications. Then you can you type, drag and drop and refine AI-driven searches that will put content at your fingertips in less time that it takes me to type this sentence.

Smart Search Online Manual

Kai’s tutorial on how to use Smart Search

MD McCallum - WarLord

MD McCallum – WarLord

Digital Artist MD “Mike” McCallum, aka WarLord, is a longtime iClone user. Having authored free tutorials for iClone in its early years and selected to write the iClone Beginners Guide from Packt Publishing in 2011, he was fortunate enough to meet and exchange tricks and tips with users from all over the world and loves to share this information with other users. He has authored hundreds of articles on iClone and digital art in general while reviewing some of the most popular software and hardware in the world. He has been published in many of the leading 3D online and print magazines while staying true to his biggest passion, 3D animation. For more information click here.

Winner Select: Leveraging Rokoko Mocap & iClone for Delicate Character Animation

Melis Caner

Hi, I’m Melis Caner, a 3D Generalist and filmmaker with a Film degree from Dokuz Eylul University. After graduating with a focus on cinematography, editing, and sound design, I discovered 3D animation during the pandemic that followed. Amazed by its limitless creative possibilities, what began as a hobby quickly became my career and a new form of self-expression. My lifelong love for drawing, dancing, and acting now comes together in 3D animation, blending all my passions into one art form.

Melis Caner’s ArtStation

Concept

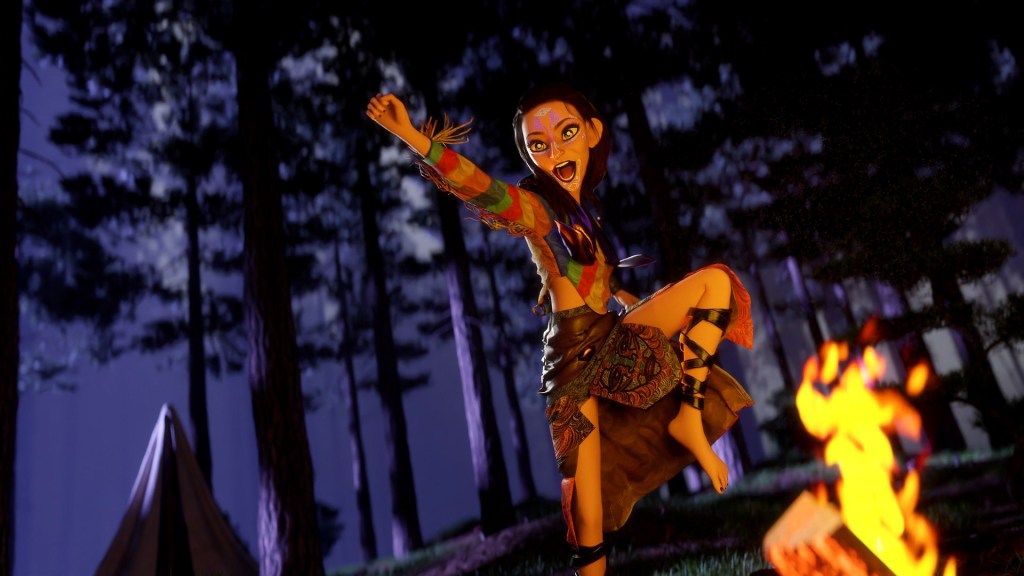
Before I started to think about the story I decided to focus on my character. I knew that I wanted to create an ethnic-looking stylistic character, and I wanted to combine her with sharp ritualistic movements. That’s how my Shaman character idea was born. I researched traditional shaman rituals, their attire, sounds, and their connection with nature. Initially, I thought of a ritual to change the color of the firepit, but the purpose wasn’t clear. Onur Erdurak (@blendreams) helped me develop a deeper story about reviving a dead bird, adding meaning to the Shaman’s bond with nature.
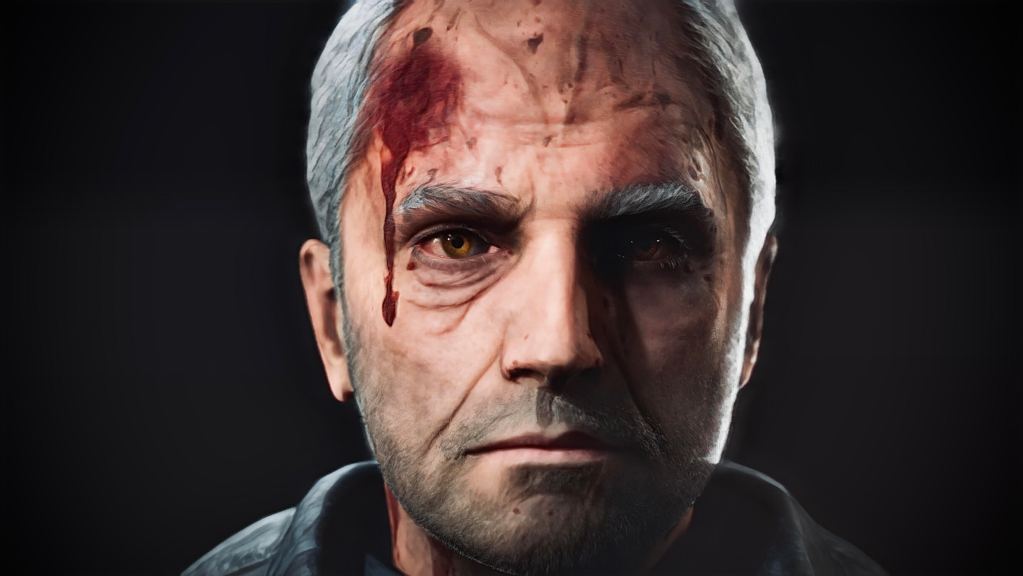
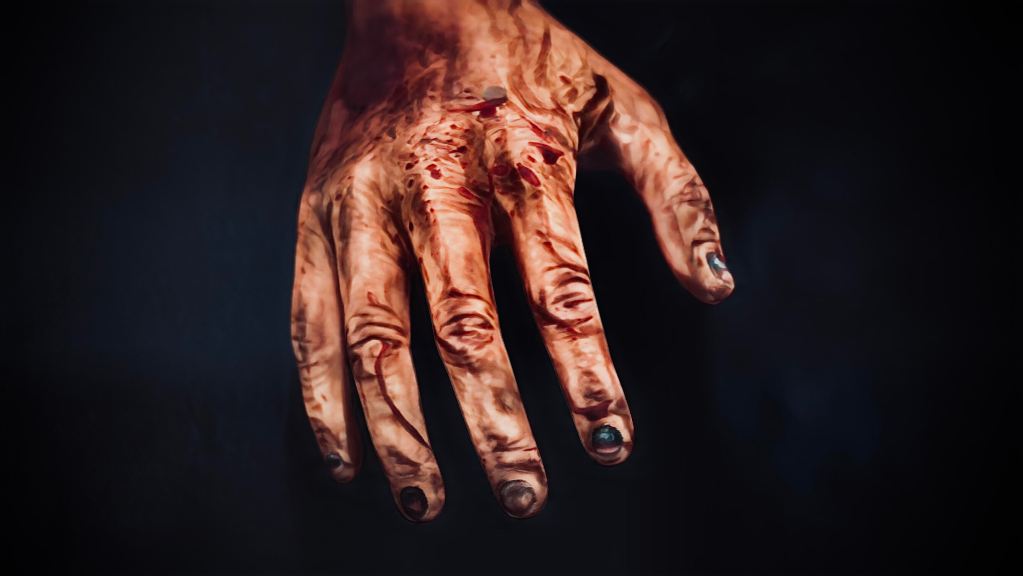
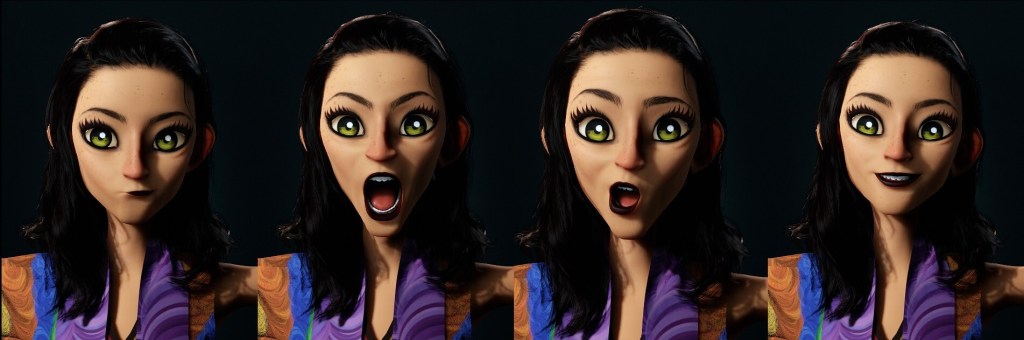
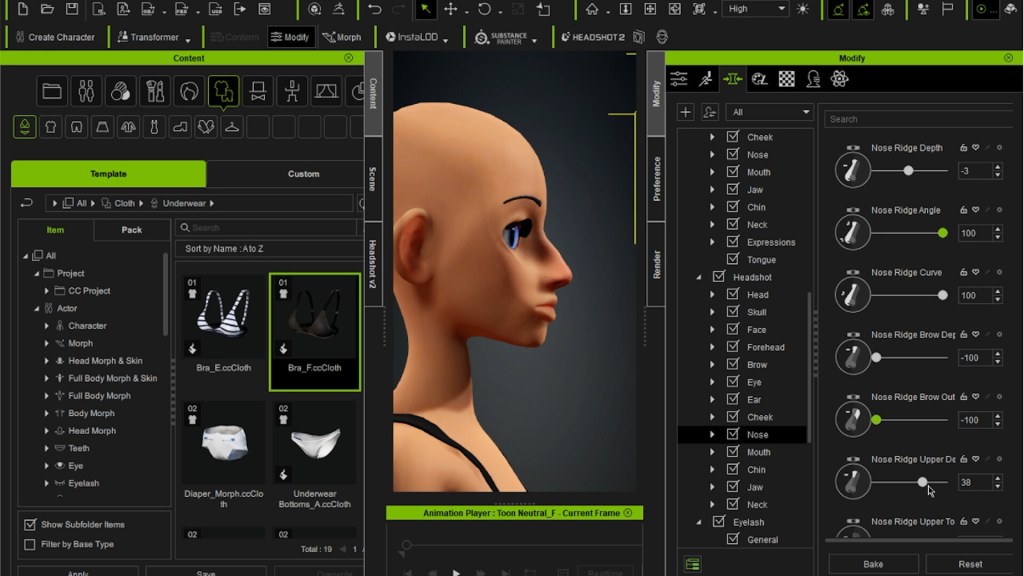
Once I had the concept, I jumped into Character Creator and experimented with the CC Toon base. It was a trial-and-error process where I explored different looks until the character felt right.

Using Character Creator

This animation was my third time using the CC Toon base. It’s incredibly convenient for creating stylized characters, with a variety of morph sliders that allow for easy customization to match your vision. It’s always fun to play around with the morph sliders to create my character. It doesn’t take a long time to master it, it’s simple, fast, and easy. I suggest adding some of the most used sliders to your favorites, so next time you’d save a lot of time and get even faster.

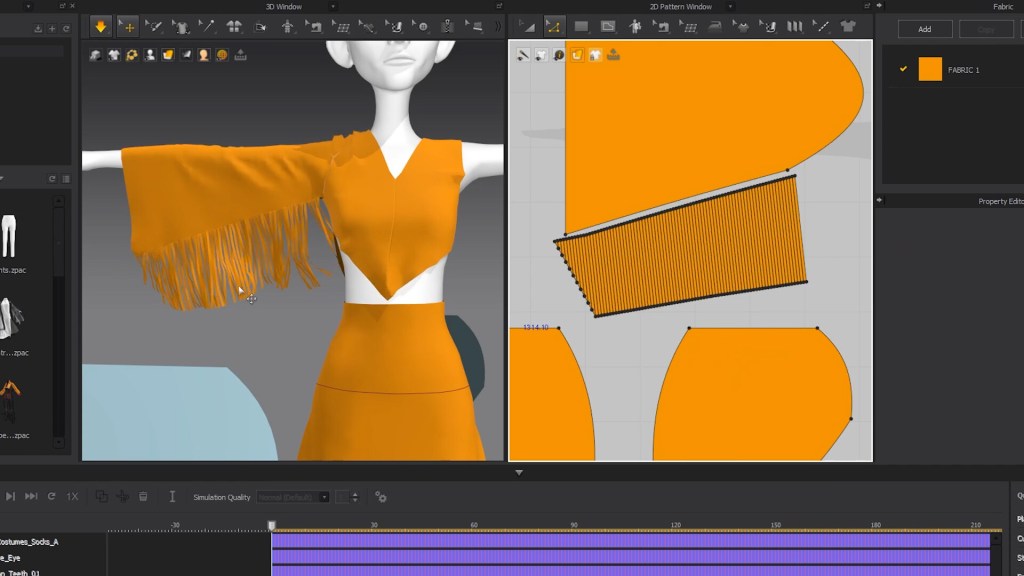
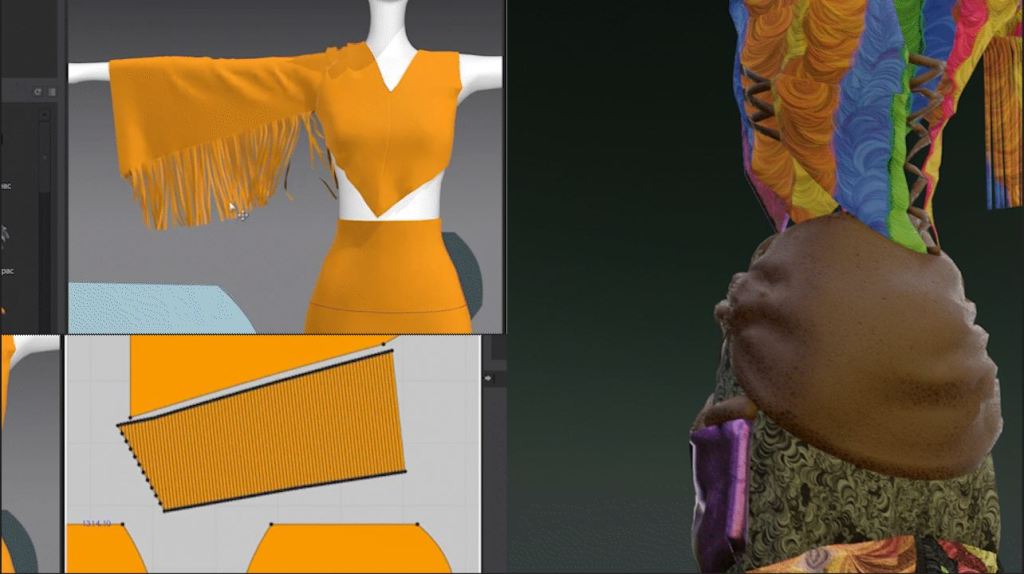
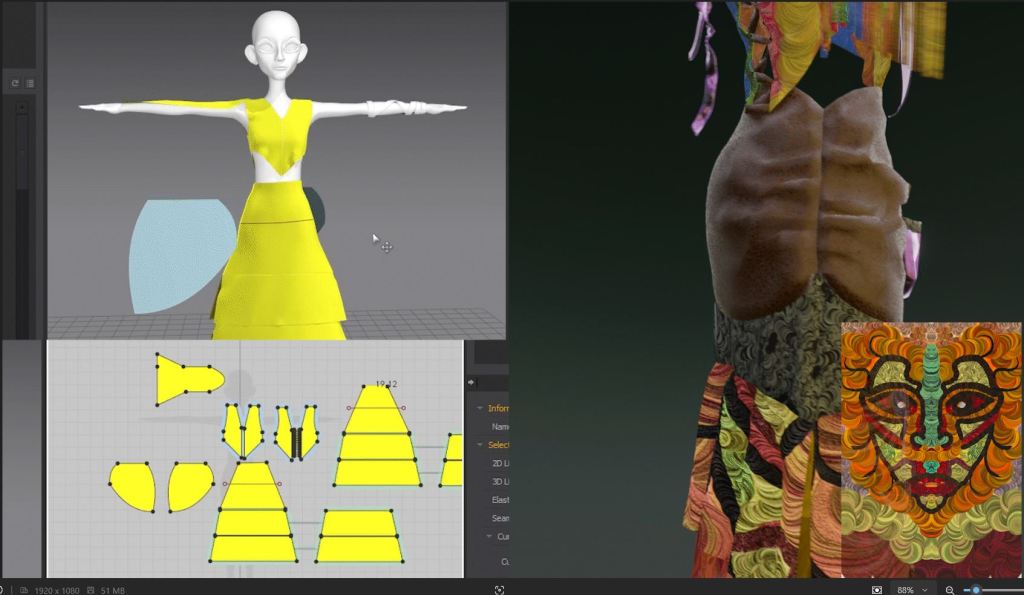
I designed and simulated the dress using Marvelous Designer. For accessories, I used the arm and leg bands from JoeLoXYungChuang’s Martial Art – Costume B 5 Set, which I found on the Reallusion Marketplace.

Using Marvelous Designer

I’ve been using Marvelous Designer for nearly three years. In my entry video, I tried many ways to reflect the Shaman’s persona. Besides her expression and body movement, I also figured out that the flowy garment would also add depth to the story. So I began to pay attention to the details of the garment, making sure that the cutting, textures, and colors were perfect for the character.

I wanted the costume to look kind of traditional and fitting to the character’s personality. It had to be colorful, flowy and unbalanced. I used my own textures and digital painting to create a unique design. I created my custom brush in ProCreate and used custom digital paintings as textures.

Rokoko Mocap

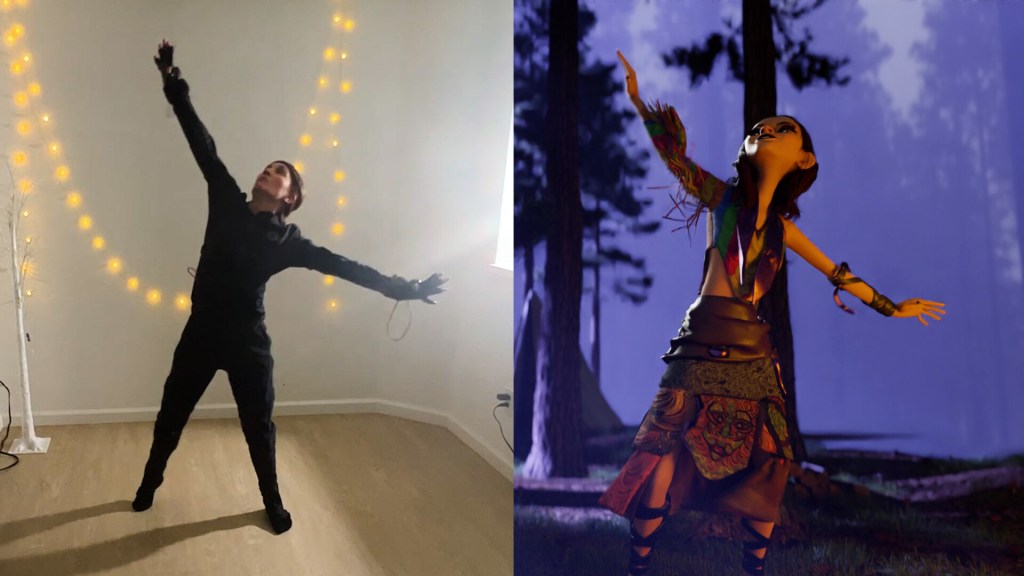
In this entry, I was using the Mocap equipment from Rokoko. I have to say “I love using the Rokoko Smart Suit”! It speeds up the animation process and adds so much freedom. I enjoy dancing and capturing my own movements with a motion capture suit. Using the movements I made adds a little piece of me to the character as well, and I think that makes the animation even more personal.

Here are some workflow and tips from my experience. For this animation, I came up with a choreography that she would dance around the fire. I recorded myself without the suit and memorized the choreography. When I felt ready I put on the suit and recorded a few takes and chose my favorite.
I exported my character from CC to iClone and just dragged and dropped the exported file from Rokoko’s software. It was almost perfect. I just had to adjust the circling around the pit fire. To ensure my character moved correctly around the firepit and reached the bird, I used reference objects in Blender, exported them to iClone, and adjusted the movement.

For me, the connection between story and visuals is everything. A single look can tell a story, and the story can shape how a character looks. Character Creator has been an incredible tool in bringing that balance to life. It gives me the flexibility to experiment and adapt as I go, making the process feel natural and enjoyable — like each design choice is part of the story unfolding.

iClone Animation

I used Marvelous Designer to design and simulate the cloth simulation. Initially, I designed another dress for her but it crashed and then I just got carried away with the final design. I used my own textures and combined them with a fabric normal map. I think that makes it look more realistic.

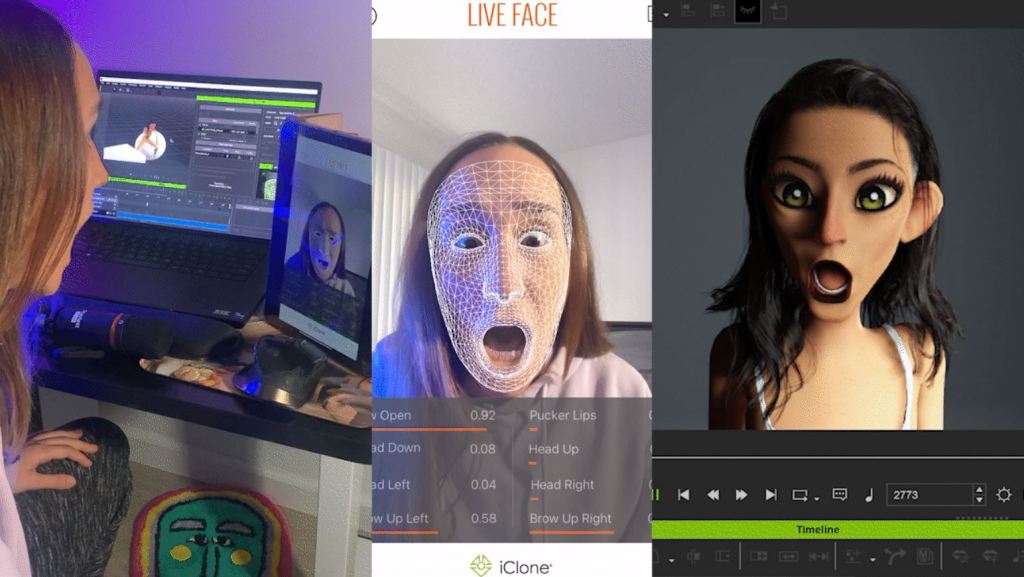
Here are some awesome iClone that I’d recommend: The foot lock feature is a game-changer—one click and the feet stay perfectly grounded! I usually get my character’s shoulders very high with the raw motion capture data. It’s also great for adjusting shoulder positions when cleaning mocap data. I love using iClone Live Face to capture my facial movements and being able to play with expressiveness is a great feature. I can adjust the face however I want, easily.

In my entry, I also took time to arrange the camera. I think that’s where my film studies came in handy. Although I find the close-up a bit extreme in this animation, I found it necessary to reflect the energy of my character. I think even a little movement of the camera adds a lot to the flow of the story.

Composition in Blender

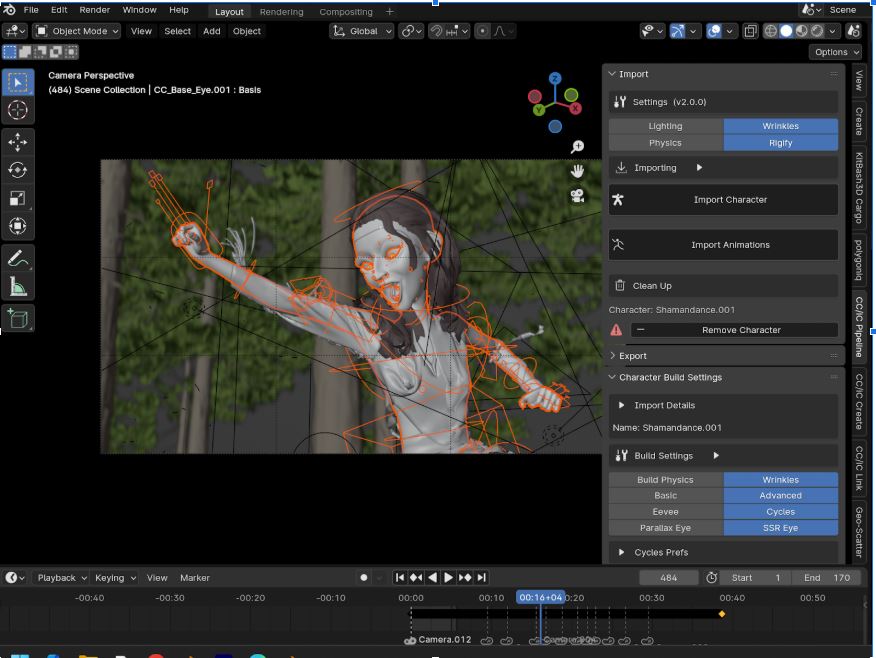
To begin with, the Blender AutoSetup plugin makes the whole process easier and very fast. I use it almost for all of my CC characters. CC Pipeline add-on in Blender makes the setup much easier. It allows you to import the character the right way. I usually only drop the Specular a bit. I like the matte look on the character. I change the eye materials to basic and bump up the coat and specular.

Also, I like to play around with the material settings. Usually, I decrease the Specular to make the skin look more matte and play around with eye materials to make them look more realistic. However, in this entry, I didn’t have the chance to use the latest Data Link feature in the contest. But I look forward to exploring data-link in future projects!

Closing Thoughts

Creating “Shaman” was a rewarding journey that blended my love for storytelling with the flexibility of powerful tools like Character Creator, Marvelous Designer, Rokoko Mocap, and iClone. The ability to experiment, adapt, and bring my vision to life was key to achieving a character that felt truly personal.

While I’m not a character artist or sculptor, creating a rigged character with CC4 proved far more efficient than starting from scratch with sculpting software. The combination of motion capture and thoughtful design choices allowed me to convey emotion and depth authentically. This project reinforced the importance of the connection between story and visuals, and I’m excited to continue exploring these tools in future projects.

Related Posts

Click through to learn more about the winners’ portfolios and judge comments

Top Stylized Horror Film Honors Mexican Sacrifice

Discover How Alfonso Hinojosa Created a Top-Notch 3D Animated Film with iClone, Character Creator & Unreal

Alfonso Hinojosa – 3D Generalist / Filmmaker

Alfonso Hinojosa

Alfonso Hinojosa is a 3D Generalist and Filmmaker hailing from Monterrey, Mexico. A recent graduate from the Savannah College of Art and Design (SCAD) with a BFA in Film and Television, he has specialized in Virtual Production. Despite being largely self-taught as a 3D artist, Alfonso has successfully applied his artistic and technical skills to contribute to various content creation projects, including animations, XR, AR, and MR productions.

As Alfonso approached the end of his studies, he had the opportunity to direct a short film for his senior thesis. Driven by a desire to tell a story that resonated with his roots and shone a spotlight on the culture that shaped his identity as an artist, he embarked on creating Songbirds.

During the planning stages, Alfonso quickly realized that traditional tools would not suffice to fully bring his vision to life within the limited timeframe. This realization led him to explore Character Creator 4 (CC4) and iClone 8, tools that not only expedited the production process but also significantly expanded the creative possibilities of the project.

With Character Creator 4 (CC4), Alfonso transformed photogrammetry scans into a fully developed cast of characters. The tools provided by Character Creator allowed him to seamlessly swap textures within Unreal Engine, enhancing the narrative through visual storytelling by adapting character textures to match their scenes. Additionally, using iClone 8, Alfonso cleaned up Wonder Dynamic animations and applied them effortlessly to their respective skeletons.

Reallusion tools such as Character Creator and iClone have not only empowered Alfonso as an artist but have also broadened the scope of storytelling possibilities, enabling him to fully realize his vision for Songbirds.

“One of the best features for me was Character Creator’s Headshot 2.0 plugin because it allowed me to create fully rigged characters from any mesh or image and I was then able to fine tune details to get the stylized realism look I was looking for. Being able to drag and drop any asset from Reallusion’s texture library was extremely valuable.”

Alfonso Hinojosa – 3D Generalist / Filmmaker
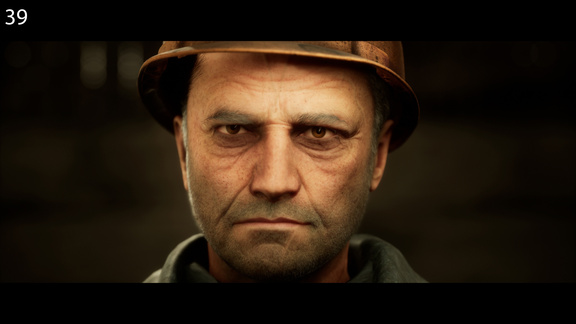
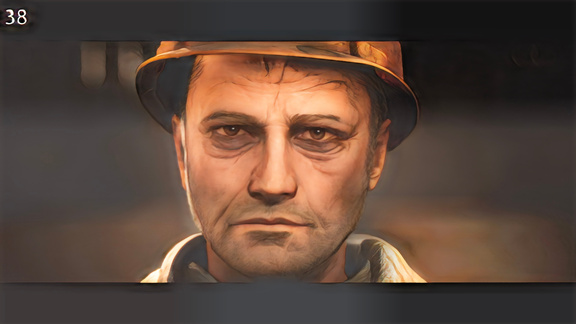
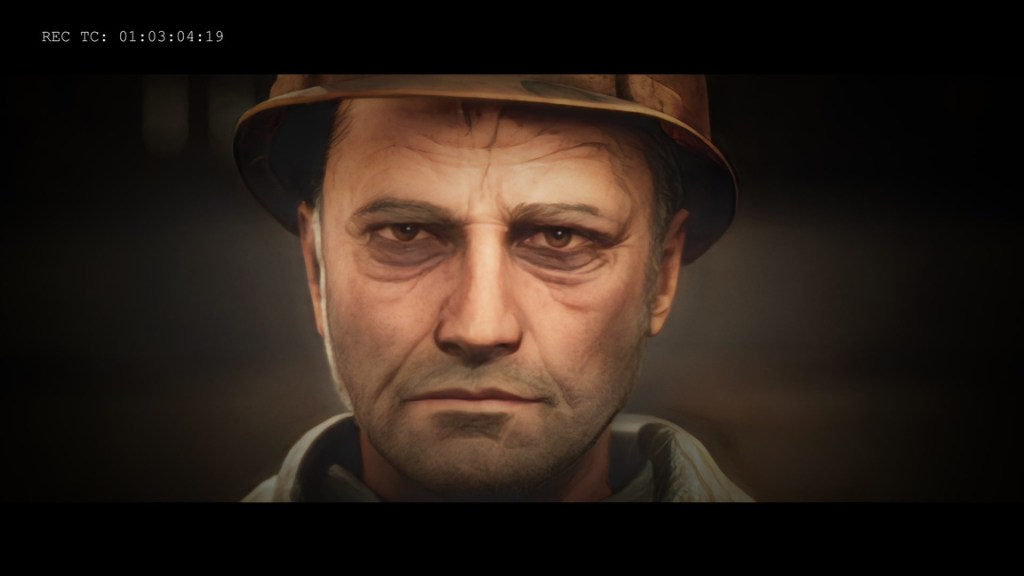
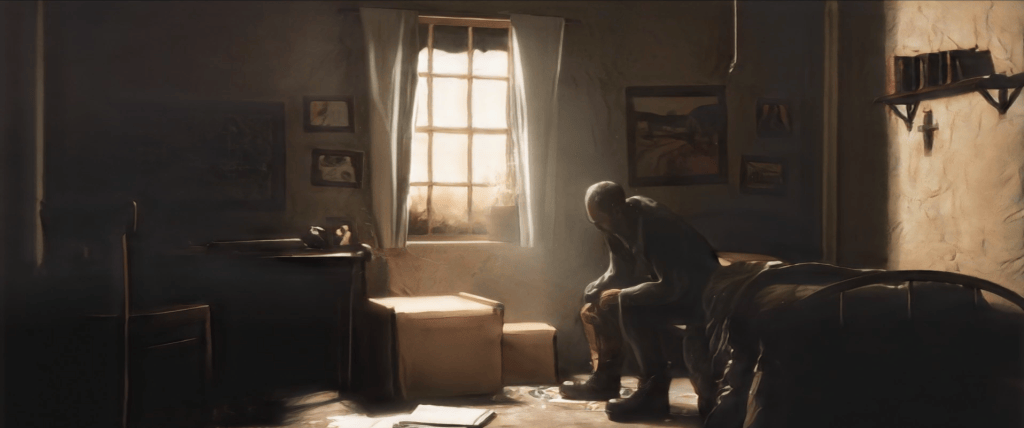
Created as part of a senior year thesis project, this 10-minute animation is set in 1970s Coahuila during the period known as The Tragic Dozen. Reflecting a poignant chapter of Mexican history, the story follows an elderly miner who must descend into a perilous passage after an accident the previous night. As he ventures deeper into the mine, he encounters an unnatural threat lurking in the darkness.

Songbirds – The Inspired History Behind It

Hello! My name is Alfonso Hinojosa, and I am a filmmaker and 3D generalist from Monterrey, Mexico. When I first began making movies in high school, I never imagined I would pursue this career path. My journey into visual effects felt almost subconscious; it came from my curiosity to experiment with new tools and ideas in my projects. This exploration continued throughout high school, and when I enrolled in my film degree program, I began to learn about different resources outside the film department that were also available to me as a part of SCAD, and I felt like there was no excuse to not make the most out of them while I could so I made it a point to incorporate these resources into the projects I created for my film classes whenever I could.

Eventually, I was invited to participate in the newly established Virtual Production classes within the film and animation department at SCAD and as I approached my senior year of college, I wanted my thesis film, Songbirds, to serve as a culmination of everything I had learned since becoming a filmmaker. I also originally came up with the idea for Songbirds because I wanted to honor my grandfather by telling a story set in the time and place he lived through and showing how these themes still resonate in Mexican culture today.

SCAD professors doubted 10 min film for graduation project

For me, it really came down to demonstrating that it was possible and communicating my process as clearly as possible. One thing that really helped was creating a breakdown alongside the project. This allowed me to show how my work fit into the overall workflow and aligned with the project’s timeline. After finishing the characters for Songbirds using Character Creator, the first thing I did was complete a single scene to prove that the timeline was achievable.

Following the full workflow I had in mind from start to finish before committing to it, not only reassured my professors that I could finish my thesis on time, even if it meant wrapping up in the final week, but it also gave me the confidence to keep moving forward with the project. With this scene as a proof of concept, I also brought together an amazing team to help me bring the vision to life.

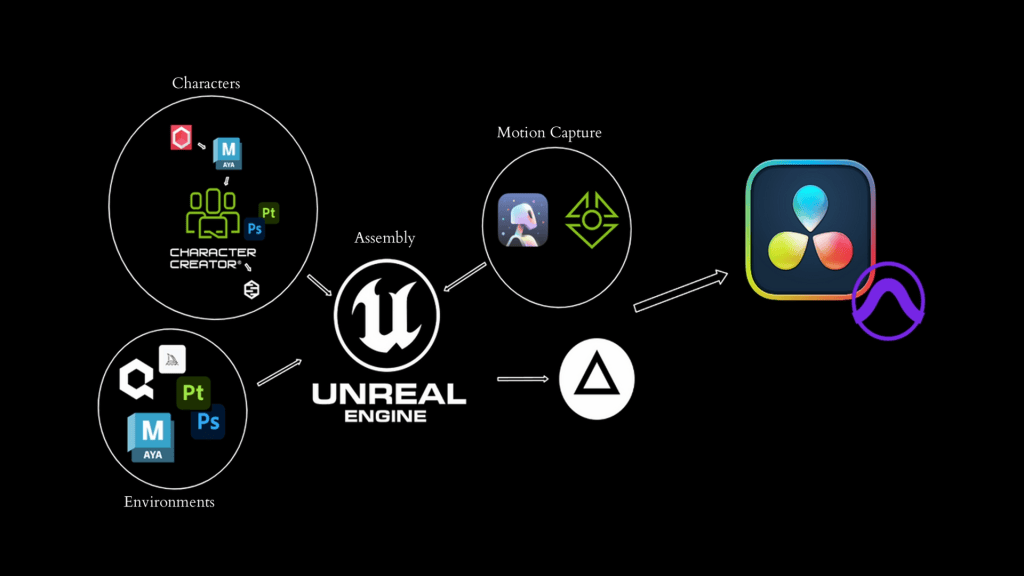
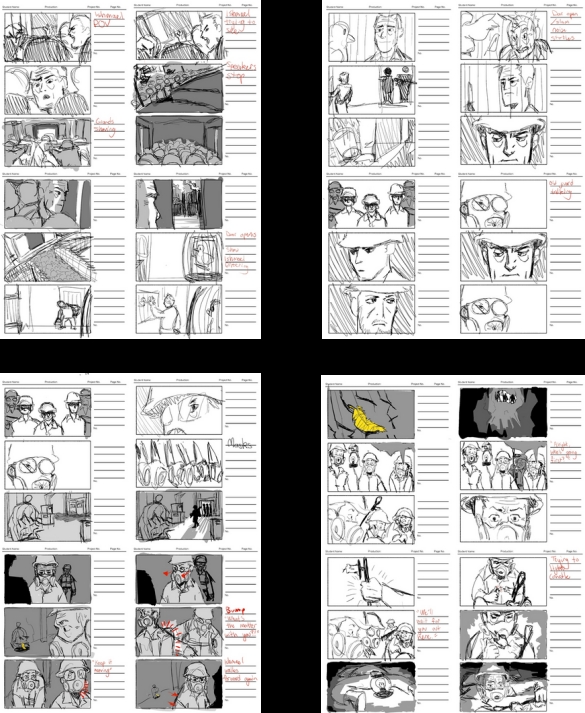
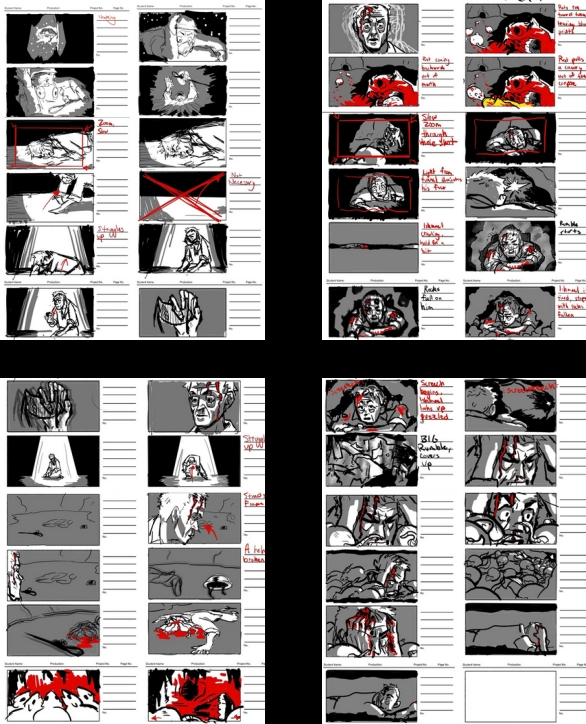
Breakdown from Concept to Creation of Songbirds

iClone & Character Creator: A Pivotal Moment in Production

After watching the Character Creator‘s animated character system video which showcases different tools, I started to read more on those which I thought would be useful for Songbirds. The more I learned, the more I knew that not using Character Creator for the project would be a huge missed opportunity. However, it was the moment I found out about the plugin that allows you to apply all the work from Character Creator to a Metahuman avatar that I committed to using Reallusion tools because of how much it would speed up production without sacrificing the quality of the outcome I wanted to achieve.

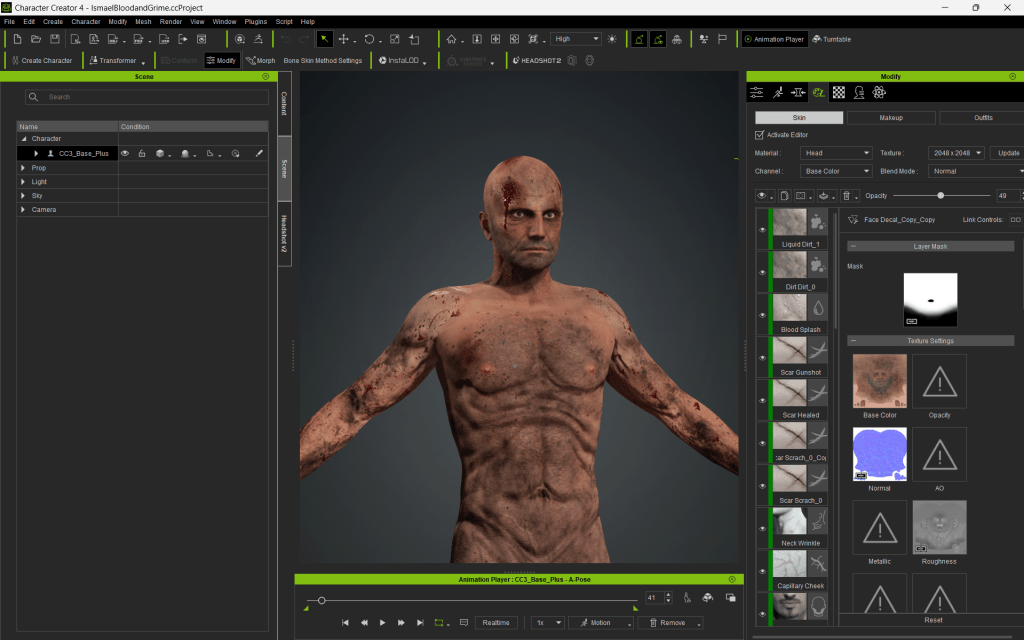
Once I started working on the main cast for Songbirds, one of the best features for me was Character Creator’s Headshot 2.0 plugin because it allowed me to create fully rigged characters from any mesh or image and I was then able to fine tune details to get the stylized realism look I was looking for. Additionally, being able to drag and drop any asset from Reallusion’s texture library was extremely valuable since I could create different sets of textures to correspond to different scenes.

Wonder Dynamics AI Mocap Combined with iClone for Motion Editing

Prior to this, I had absolutely zero experience cleaning up motion capture, so everything from concepts to practice was new to me. While overwhelming at first, iClone‘s user-friendly interface definitely made the process less intimidating. After reading about the general process for bringing data from Wonder Dynamics into iClone, I just had to figure out how to apply that data to my characters so that I could begin the cleanup. With the scenes fully recorded in Wonder Dynamics, I processed and downloaded all FBX files containing the recorded data and imported them into Character Creator.

All the animation data was then removed to get a clean T-Posed skeleton to generate a HIK profile containing all parameters for the skeletal structure.

Next, I opened the corresponding Metahuman character, again in Character Creator, and applied the Wonder Dynamics animation with the HIK set as the motion profile. Looking back, this felt like the only rigorous part of the process because of the trial-and-error nature of it. However, once I had everything working as intended, it was only a matter of dragging and dropping my files before proceeding to the cleanup, which was my favorite part of the whole process. By the end, since I had everything set up and organized, I would go through an entire scene’s set of animations in only a matter of hours because of how easy it felt to clean up the data inside of iClone.

“I had absolutely zero experience cleaning up motion capture, so everything from concepts to practice was new to me. iClone‘s user-friendly interface definitely made the process less intimidating. I would go through an entire scene’s set of animations in only a matter of hours because of how easy it felt to clean up the data inside of iClone.”

Alfonso Hinojosa – 3D Generalist / Filmmaker

Body Performance Cleanup 

  1. The generated FBX file containing the data is then imported into Character Creator where all the animation data is removed leaving us with a T Posed skeleton. 
  2. Inside Character Creator, the next step is to create an HIK profile out of the Skeleton. This typically includes a collection of parameters, settings, and constraints tailored for a specific character’s skeletal structure. 
  3. Next, opening a new Character Creator file, import the corresponding Metahuman dummy character and apply the Wonder Dynamics animation with the HIK set as the motion profile. 
  4. To begin cleaning up the mocap, the Character Creator project is then sent to iClone where the animation will be modified using the Motion Editor before exporting out to Unreal Engine. 
  5. After the animation has been cleaned up, the final step is to smoothen out the jitter left from the MOCAP recording through the curve editor.  

Facial Performance Recording 

  1. Using the iClone LIVEFACE facial mocap app on an iPhone and record video while performing. 
  2. Export data out and import into Unreal Engine 
  3. Bake Animation into Avatar’s face.

Songbirds – a very distinct visual identity

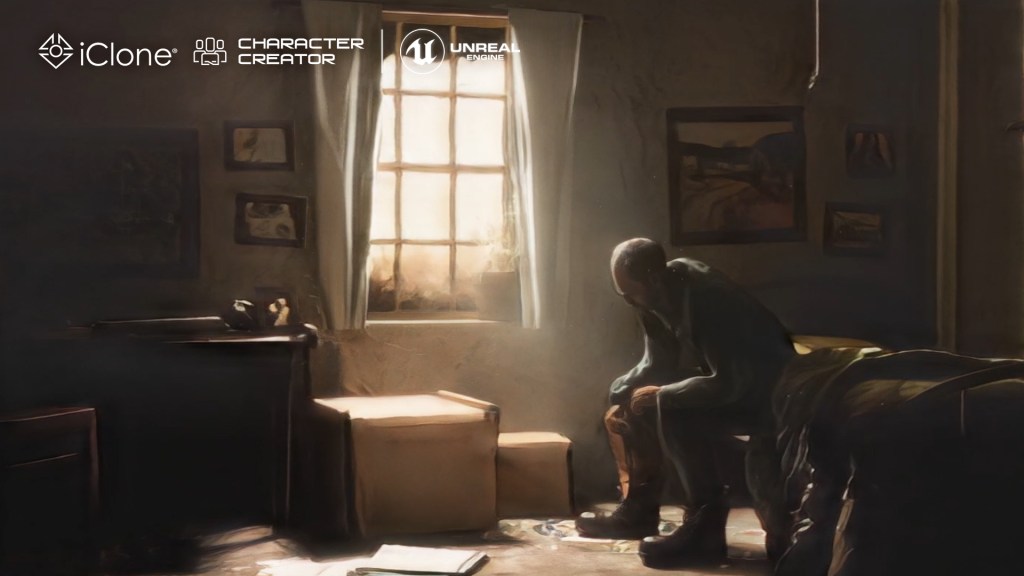
One of my personal goals with Songbirds was to make it look completely different from the traditional Unreal Engine aesthetic. Something that really inspires me from current animation trends is the blend between 2D and 3D, as this always catches my attention. With this project, I wanted to crank up that aesthetic and have everything look as if it were a 3D painting. This ended up being one of the most challenging parts of the project as everything had to be created and organized with this final look in mind. Since all frames would have to be processed one by one to achieve the blend between 2D and 3D I was looking for.

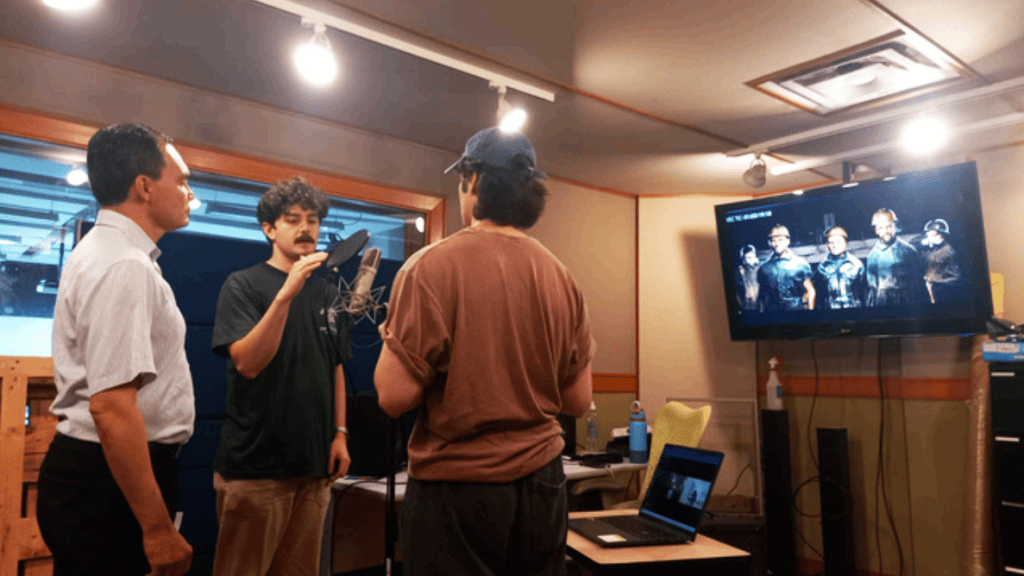
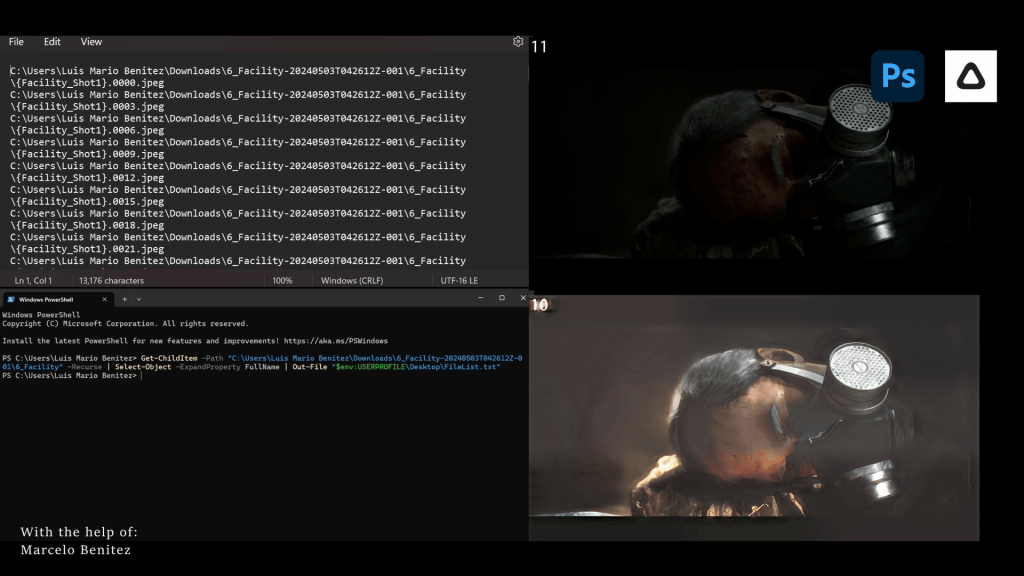
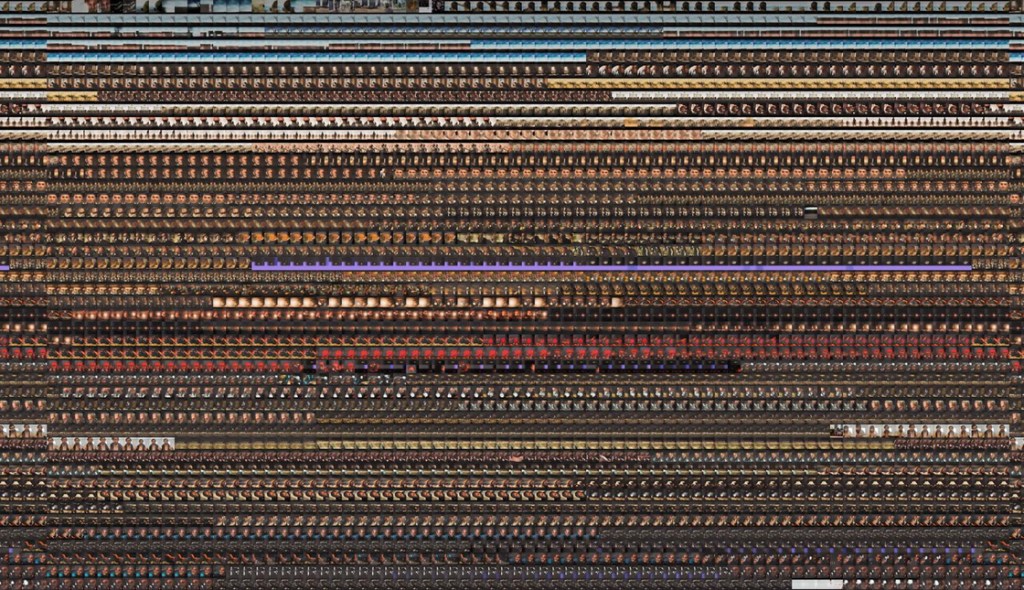
Prior to beginning the stylization my friends and the project’s Technical Supervisor, Marcelo Benitez, also had to develop custom software to automatically sort and organize our frames before bringing them to the final timeline in Davinci Resolve. Because of how rigorous the production for Songbirds was, we only ended up having about a week left to stylize the full timeline of Songbirds.

Between myself, Marcelo, and producer Christian Larson, we sat down for almost every hour of every day for a full week stylizing frames individually, feeling like we were losing our minds, but with only 3 hours to go, the movie was finally done and was delivered in time

Finally, every one of the 4,455 final frames was uploaded and manually processed through Prismas Filters. After all shots had been stylized, the original renders were combined with the stylized version to create a blend between 2D & 3D.

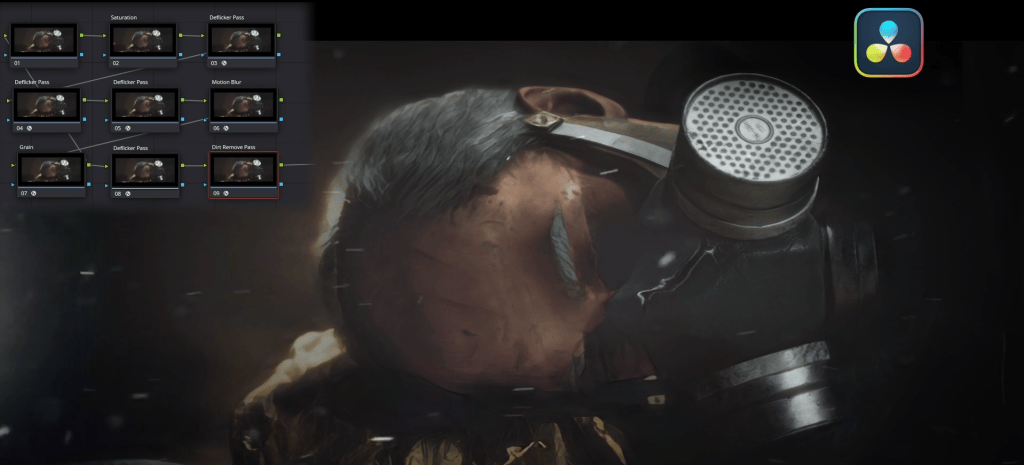
Once all the frames had been placed in their according spot on the timeline, a deflicker pass alongside a dirt remove pass was added to get rid of any unwanted jitter caused by the stylization.

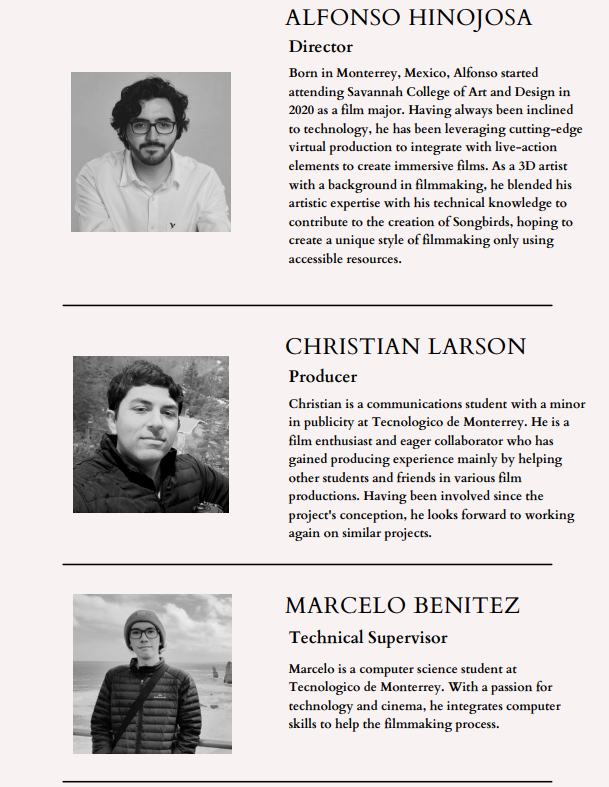
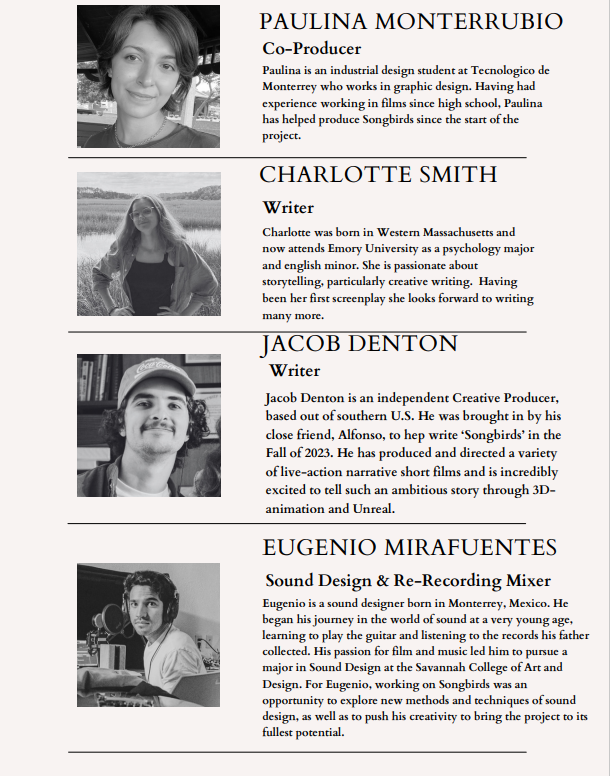
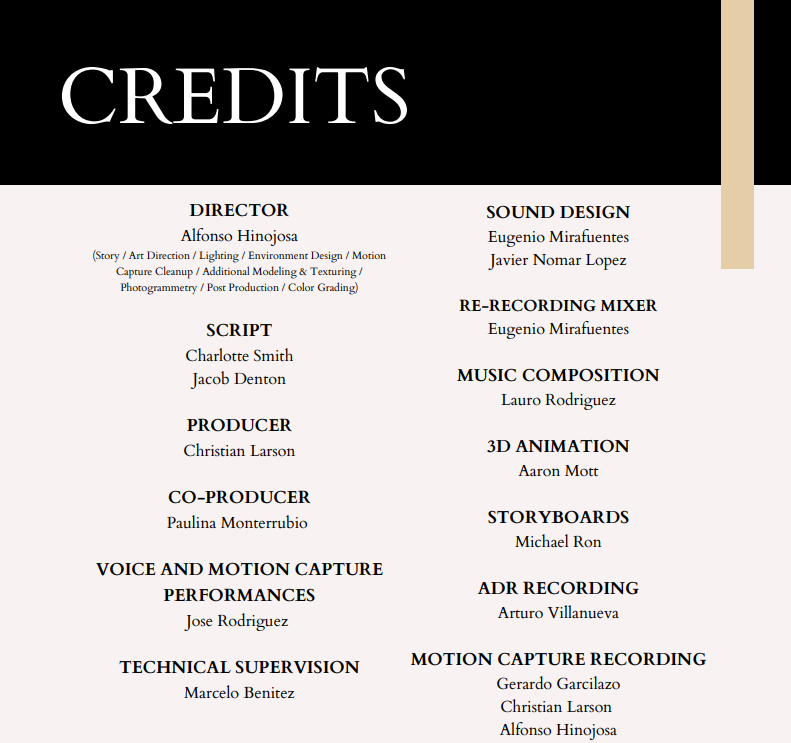
The Team

Related Posts

Easily Turn Yourself into an Animated Livestream Host

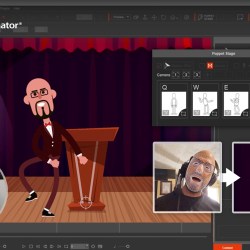
Imagine animating as fast as playing a video game, with character control at your fingertips. For example, you’re tapping hotkeys, gliding your mouse, and your character moves seamlessly, almost as if by magic. Add facial motion capture, and now your own expressions bring your animated character to life. It sounds unreal, right? Well, with the new Cartoon Animator 5.3 update, that’s exactly what I’m about to do with this cartoon version of myself. And I’ll guide you through every step, so you can create your own animated livestream.

Quick Character Creation

For a super-fast setup, I grab a pre-made character from Social Buddies.

Now, Social Buddies is a paid product, but no worries — you can follow along using any of the free characters that come with a fresh installation of Cartoon Animator. For my character, though, I’ll be using Social Buddies and choosing “Harry” as the starting point.

I then switch to Composer mode and launch the character in Photoshop.

Once in Photoshop, I quickly create the eyeglasses in fast-forward. Then, I select one eye, locate it in the Layers panel, and position the eyeglasses layer above the eye.

I repeat the same process with the other lens.

To ensure Cartoon Animator recognizes the eyeglasses, I place them in a folder named after the layer.

Next, I remove the hair and draw the beard.

I prefer to separate the beard into three layers: center, side, and the other side. This makes it easier when preparing the 360 head. Next, I recolor the clothes, isolating each body part to ensure it is done correctly.

Then, I do the legs and arms.

I changed my mind and decided on a darker color for the coat. Next, I colored the shoes, and we’re all done!

Quick Adjustments to the 360 Head

Back in Cartoon Animator, I head into composer mode to set up the 360 head.

First, I adjust the eyeglasses for each angle, ensuring they move seamlessly with the eyes. I carefully go through all 8 points, angle by angle, view by view.

After a quick preview, you can see that the eyeglasses now follow the head movements smoothly. Next, I’ll do the same for the beard, using the “Deform” tool to adjust it for each angle. I’ll fast-forward through this part.

Finally, I run a test by clicking “Preview”, then pressing the spacebar and moving the mouse. With everything looking great, the character is officially ready!

Setting up the Scene

Back in Stage mode, I set up the scene by clicking and dragging props from the Content Panel. I navigate to “Item”, then “Props”, and finally “Stage”. From there, I add a background, a podium (sized to 131), and to finish … some curtains.

Just like that, the scene is ready to go!

Setting up Facial Motion Capture

For those of you who want to animate quickly with motion capture, you can use Motion Live2D.

I’m using Live Face on my phone, and to make sure it connects properly to Cartoon Animator, I just need to input the correct IP address.

Setting up Lip Sync

To enhance character performances, I like using automatic lip-sync with voice input. It adds emotion and works smoothly with expression triggers.

Simply enter that number into Motion Live, and as long as both your phone and computer are on the same Wi-Fi network, it’ll connect seamlessly.

Setting up Puppet Stage with Customized Clips

To set up the Puppet Stage, all I do is click on the Puppet Stage icon, then drag motion clips from the Content Panel.

You’ll notice there are keyboard shortcuts assigned. When I press Preview and hit the spacebar, I can use those keys to control the character just like playing a game.

By activating the “Loop” function, I can make the character repeat the motion endlessly until I hit another button.

Next, I’ll activate Motion Pilot by checking it on. Then, I adjust a setting by going to Motion, then Face, to prevent the character from flipping when moving the mouse side to side. Now, I click “Preview”, press the spacebar so I can press the shortcut keys and move the mouse to make my character dance around.

Since I want the head animation to be controlled by motion capture, I need to take an extra step. I’ll adjust the motion clips so they don’t animate the head.

Customizing Motion Clips

This part is simple but requires a bit of work. I start by adding a motion clip. In this case, I’m combining two from the Content Panel: Item, 2D Motion, G3 Human, Elastic Folks, and then Idle & Talk. From there, I double-click on “Stand 01” and then “Stand 03”.

Next, I bring up the timeline, make sure the object-related track is activated, and click on “FFD” and “Motion”. For my animation style, I remove the FFD clips by selecting them and pressing the delete key.

To remove the head animation so I can control it with motion capture, I simply right-click on the clip, select “Remove Motion”, and choose “Neck”, “Head”, and “Head_Nub”, then click “Remove”.

Now, when the clip plays, I’ll be able to control the head using motion capture. To save it, I go to the last frame of the motion clip and click “Set End Frame”, ensuring that the custom clip includes all the animation up to this point.

Then, I open the Content Panel, click “Custom”, select “Animation”, and hit “Save”. If I already have a version created, I’ll simply choose “Overwrite” to update it.

There you go! Now we have a clip that I can activate and control the head with motion capture at the same time. I repeat this process for a couple more motion clips to finish.

Recording Animation in Realtime

Now, it’s time for the fun part—recording the animation! All I have to do is click “Record”, and everything I do from here is captured in real-time..

Here’s how it works:

  • I move my face to control the character’s facial expressions.
  • I use my mouse to move the character across the screen.
  • I hit keyboard shortcuts to make the character perform different actions, like jumping, dancing, and more.

Every movement is recorded live, and in no time, the animation is complete. No delays, no post-editing — everything happens as I’m doing it!

Conclusion

With Cartoon Animator 5, creating animations feels as seamless as playing a game. It’s fast, fun, and best of all, it’s live. If you haven’t tried it yet, download the Cartoon Animator 5 free trial and start bringing your characters to life!

About Cartoon Animator

Official product page

FREE download for 30 days & get 1,700+ ready-made assets

Related Posts

Turning Podcasts into Animations with Cartoon Animator

Lucky Planet

Lucky Planet is a crowdfunded popular science project dedicated to producing engaging and educational animated films. Founded by LuckyOne, the project aims to make scientific concepts accessible to a general audience, fostering a culture of scientific thinking and contributing to informed public discourse.

At the heart of Lucky Planet’s mission is the belief that rationality, curiosity, open-mindedness, and a passion for learning are essential tools for navigating the complexities of today’s world. These core values shape the content and approach of every project.

Lucky Planet’s content is meticulously researched and held to high standards of accuracy and quality, inspired by educational pioneers like Bill Nye the Science Guy and the Kurzgesagt YouTube channel. Through these animated films, Lucky Planet strives to become a trusted source of reliable information and to inspire audiences to embrace science and critical thinking.

“ With my previous 3D software, I’d spend about 80% of my time on technical stuff and only 20% on creative work. With Cartoon Animator, it’s the complete opposite!”

LuckyOne – Lucky Planet 2D Animation

Cartoon Animator for Education

If you’re fascinated by the wild facts of modern science, join Lucky Planet on their journey of transforming podcasts into animated shorts that are both educational and entertaining. In this interview, we delve behind the scenes with Lucky Planet to learn more about their creative process and how they craft animations that attract over a million views. With the help of Cartoon Animator and 2D animation, they’ve created a whole new approach to producing animated series.

In this journey through animation, Lucky Planet showcases how Cartoon Animator has revolutionized the way they create, allowing them to focus on storytelling and creativity while producing captivating content. With engaging visuals and powerful messages, they continue to inspire audiences worldwide.

Q: Hi Lucky Planet. Can you begin by telling us about a bit more about yourself and your work?

I’m Lucky Planet, an animator from Thailand with over 10 years of experience in 2D/3D animation. As well as my role as an animation director I am also a producer. I was fortunate enough to be a winner at SIGGRAPH USA and was nominated at the Annecy Animation Festival.

Q: How did you first discover Cartoon Animator and how did it become your 2D animation choice to create your content?

My journey to Cartoon Animator was unexpected. I was a 3D animator working with MAYA for many years, but then I had an accident that required me to have eye surgery. After recovering from the surgery, I found that the interface of 3D software became really challenging for my eyes to navigate. 

But my passion for animation hadn’t dimmed, so I started searching YouTube for software that could solve my problem – something with a clean, large user interface that focused on animating and could be learned in a few weeks. That’s how I discovered Cartoon Animator. I challenged myself to start a project animating a science podcast I love, aiming to produce an animation while learning the software. This challenge turned into a project I’ve happily worked on for three years now.

Q: Can you tell us more about the great work you are doing with Cartoon Animator?

I’m a big fan of the science podcast called Witcast, one of Thailand’s first podcasts since 2012. While listening, I often imagine fun science facts as wacky animations, like the life cycle of fig wasps, sun sneeze reflex, or the physics of Kaiju. I pitched my idea of visualising these stories to the podcasters. They loved the concept of taking their 3-hour podcast episodes and distilling them down to a vibrant 3-minute animation which presents the key message. Since my first time working with Witcast, we’ve been best friends and collaborators ever since.

Q: Do you find the process of creating characters and content for Cartoon Animator easy and enjoyable?

It’s incredibly fun. I can forget about all the complex tasks like graphs and attribute numbers from high-end 3D software yet still produce high-quality animation. It’s like stripping away all the unnecessary arsenal and keeping just one rocket – it’s all I need to launch into the sky.

“Cartoon Animator is incredibly fun. I can forget about all the complex tasks like graphs and attribute numbers from high-end 3D software yet still produce high-quality animation. It’s like stripping away all the unnecessary arsenal and keeping just one rocket – it’s all I need to launch into the sky.”

LuckyOne – Lucky Planet 2D Animation

Q: Do you have your favourite Cartoon Animator tools or features that you enjoy working with most?

The automatic lip-sync, animation clips, and spring bones features are my absolute favorites. They’re not only easy to use but also save me tons of time in my workflow. As a solo creator, this allows me to focus more on the creative aspects. With my previous 3D software, I’d spend about 80% of my time on technical stuff and only 20% on creative work. With Cartoon Animator, it’s the complete opposite!

“In Cartoon Animator, the automatic lip-sync, animation clips, and spring bones features are my absolute favorites. They’re not only easy to use but also save me tons of time in my workflow. As a solo creator, this allows me to focus more on the creative aspects.”

LuckyOne – Lucky Planet 2D Animation

And although I haven’t sold any content in the 2D Marketplace yet, I am eager to learn more about it and plan to join soon.

Q: Can you give us some insight in to the projects you are currently working on using Cartoon Animator? 

I’ve completed 25 episodes of my science animation series, which you can watch here:

https://linktr.ee/LuckyplanetS1

Currently, these episodes are in Thai, but I’m working on adapting them into English to reach a global audience, as some of these episodes have already reached over a million views!

Q: Do you have any advice for inspiring animators who are dreaming of creating animations that attract as many views as Lucky Planet?

I focus on science content, which isn’t huge, but I think finding your niche is key. Its important to make stuff that clicks with people. Don’t stress about pleasing everyone, that’s practically impossible. Getting attention isn’t always great. I still get negative comments, but if you’re passionate about your ideas, seek out those who share your vision. I’m a believer in “If you build it, they will come.”

Follow Lucky Planet

Email:
wonderlugia@gmail.com

YouTube:
https://www.youtube.com/luckyplanet

Twitter X:
https://x.com/LuckyPlanet_One

YouTube (Thai)
https://www.youtube.com/playlist?list=PLnngDzPu334B_eheKSeGv0L9NzhkhSLlf

Discord:
http://discord.gg/U8beU5UTmV

Related Posts

In this article, artist Francis Bon Vun Hong shows us how to create a winning Blender Character for the 2024 Reallusion 3D Character Contest using AccuRIG.

Winner Select: Animating Blender Character with AccuRIG

In the Reallusion 2024 3D Character Contest, artist Francis Bon Vun Hong was among the winners in the “Best AccuRIG Character” category. In this article, he takes us through the workflow that brought his winning entry, “Azura (Combat Bunny)”, to life.

FRANCIS BONG VUN HONG

Hello, I’m Francis, a recent graduate with a Bachelor of Arts with Honors in Creative Digital Media, completed over three and a half years. My journey into the 3D industry began during my studies, where I discovered a passion for animation, character design, and digital storytelling.

In September 2023, I joined Betapuru Digital Studio as an intern, immersing myself in a professional environment to hone my skills and gain hands-on experience. Now, I am continuing to build my career in 3D and animation, aiming to create visually captivating content.

Francis’ YouTube Channel

Blender Character Design

I designed “Azura” with a cyberpunk, bunny-inspired style, aiming for the intricate detail of an in-game character. I used Blender, Marvelous Designer, and Substance Painter to bring her to life, and AccuRig ActorCore helped streamline the rigging process, making her movements fluid and lifelike.

Inspiration

My character design was inspired by stylized games like Valorant, Deadlock, Apex Legends, and Overwatch, which combine striking visuals with rich backstories. I admire how games like Overwatch and League of Legends use cinematic storytelling to develop characters, and this blend of design and narrative drives me to create visually engaging characters with strong connections to their worlds.

Design Process

I’ve been using Blender for about 3–4 years, starting back in my studies. I find human anatomy particularly challenging when it comes to sculpting. Estimating proportions accurately is tough, so I rely on various online references to help me adjust body proportions while working on my characters.

Blender Character Sculpting

I start my sculpting process with a basic cube, then apply a multiresolution modifier. This lets me subdivide the mesh like the subdivision surface modifier, but with the added benefit of editing each subdivision level directly in sculpt mode.

Body Sculpt

The Multires modifier allows me to subdivide my mesh to add more detail during sculpting without altering the base mesh, similar to subsurf. Unlike Dyntopo, which generates extra geometry and can result in messy topology, Multires helps me maintain a clean model by preserving a lower-resolution base while I add high-resolution detail. I can also bake this detail into normal or bump maps, allowing me to keep my viewport low-poly while still achieving high-quality renders.

Hair Modeling

For hairs, I used curves in Blender, which I found to be the most effective method for creating stylized hair. With plenty of tutorials available, it wasn’t difficult to master.

For accessories like clothing, I turned to Marvelous Designer. It’s a highly efficient tool that simulates clothing in real time, offering a more streamlined process compared to baking garments in Blender, which can be time-consuming.

Cloth Modeling and Simulation

I only get to explore Marvelous Designer when I come across this competition. So I would say this competition has also urged me to learn new software which would greatly increase the efficiency of workflow.

For accessories like clothing, I turned to Marvelous Designer. It’s a highly efficient tool that simulates clothing in real time, offering a more streamlined process compared to baking garments in Blender, which can be time-consuming.

The Inspiration

The image above features characters from the anime “Cyberpunk Edgerunners”. Their clothing is designed in a typical cyberpunk style, reflecting the genre’s aesthetic. The design is futuristic and edgy, with high-tech elements such as illuminated or glowing patterns, panels, and logos, emphasizing the cyberpunk theme. Additional details like zippers, buckles, and integrated gadgets or armor further enhance the tech-inspired look.

Texturing

As for texturing, instead of using textures, I mostly hand painted the character, including her outfits and accessories in substance painter so it would look more stylized. Therefore, colors come into play and I have to make use of fancy bright and neon colors that would enhance the cyberpunk-inspired look of the character.

Rigging, Posing, and Animation

When I joined this competition, I had just started using AccuRIG and ActorCore. I first became familiar with Reallusion during my internships at Betapuru, where I attended Mr. Aydeen’s Reallusion workshop in Sri Aman. After a deeper understanding of the tools, I discovered that you can actually achieve more with the AccuRIG from Character Creator. These are truly great software tools.

Besides Actorcore, there are also Reallusion’s content store and marketplace which allows you to find similar characters that you could take references from or purchases for use.

AccuRIG does provide an automated rigging process, which is super nice and I also find various poses online. I took down the walking poses while most of the free poses may not fit my character well so I have to pose them myself in Blender. However, all these animations and poses are really time-saving if it becomes a fit with your character.

Recommended Blender Addons

1) Wiggle Bones

The Wiggle Bones add-on is a simple yet powerful tool that allows you to easily add physics-based motion to bones in your rig. With this add-on, you can assign specific bones a dynamic, jiggly-wiggly effect, bringing more life and realism to your animations with minimal effort.

2) QuadRemesher

The QuadRemesh command quickly creates clean quad-based meshes from surfaces, existing meshes, or SubDs. It uses a smart algorithm to make the mesh easier to work with, which is great for things like rendering, animation, simulations, and reverse engineering. This makes it simple to get high-quality results for various projects.

3) CC/IC Pipeline

This plugin is mainly used to retarget the downloaded animation from the ActorCore website to my character.

On Improving Skills

I wouldn’t call myself a professional 3D artist just yet — there’s still so much to learn in the 3D field, and many software tools I’ve yet to explore. In my opinion, the more software you master, the better your work can be. It’s not just about saving time — different programs excel at different tasks. For example, Marvelous Designer is great for creating realistic clothing, Houdini is ideal for VFX, and AccuRig makes rigging and posing easier. By streamlining your workflow with the right tools, you can focus less on repetitive tasks and spend more time enhancing your character in other creative ways.

Final Thoughts

Streamlining Your Character Creation

Character Creator excels at quickly generating high-quality, customizable characters. It’s perfect for speeding up the character creation process while still allowing for detailed control, saving you a lot of time compared to starting from scratch.

Seamless Integration

Character Creator works well with other 3D software, like Blender, Maya, or Unreal Engine. Take advantage of this compatibility to integrate characters smoothly into your larger pipeline.

Being Great for Beginners and Pros

Whether you’re a beginner looking for an easy way to create characters, or a more experienced artist looking to streamline your workflow, Character Creator offers tools that can help you focus more on creative choices and less on technical hurdles.

Related Posts

Click through to learn more about the winners’ portfolios and judge comments

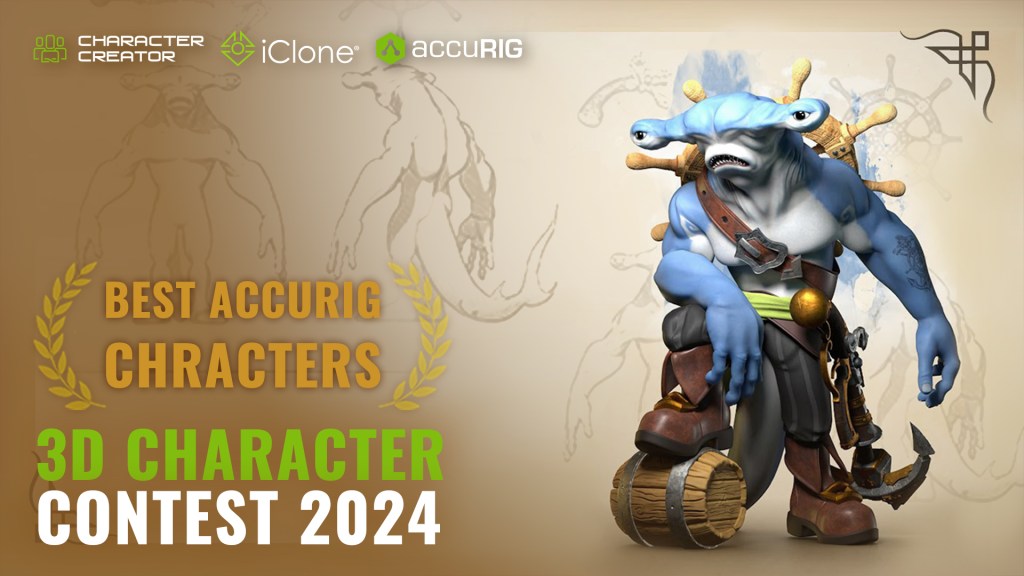
Winner Select – Secrets revealed for Hammer Jack ZBrush AccuRIG workflow

DIGITAL 3D SCULPTOR ÓSCAR FERNÁNDEZ

Hi artists! My name is Óscar Fernández, and I am a digital sculptor. My work typically centers on figures for 3D printing and collectibles. It’s an honor to be selected as a winner in the 2024 Reallusion 3D Character Contest, and I’d like to demonstrate my workflow for my winning entry – *The Hammer Jack*. Creating something unique for the contest was a joy, and I’m excited to share that experience with Reallusion readers.

In the 2024 Reallusion 3D Character Contest, I eagerly submitted several entries. Participants had access to free CC3 base characters, fully rigged and ready for animation, letting us focus on crafting unique characters, which was ideal for ZBrush enthusiasts. On the other hand, the arrival of AccuRIG has been a game-changer, allowing me to rig a character created from scratch in ZBrush in just 10 minutes. This category was where I felt the most excitement. I didn’t even sketch out the character beforehand; I simply started with an idea in mind: a pirate hammerhead shark. Let’s see how it turned out!

Oscar Fernandez’s ArtStation

Block Out Phase

I intended to create a stylized character, so I started with a typical modular blockout to define the character’s proportions and overall look. Using basic shapes with a low polygon count, I defined the character’s volumes. This system allowed me to easily adjust the proportions without getting caught up in the details and losing focus.

Using Dynamesh ZRemesher

During the blockout, I performed a dynamesh to merge all the meshes, begin defining the anatomy, and establish the primary shapes. Once I defined the main shapes, I applied a ZRemesher and added subdivision levels. This system allowed me to switch between lower subdivision levels, which still supported substantial changes to the basic shape, and higher levels that enabled the addition of finer details. After finalizing the character’s shape, I subdivided it once more and continued increasing the level of detail with folds and secondary forms.

ZBrush Polypaint Process

Using the skin shade material, I began manually adding color with Polypaint. I didn’t want the separation between the white and blue parts to be just a gradient, so I blended the transition with an alpha. After applying the base color, I used a system similar to painting the real figures. I simulated zenithal lighting by brightening areas that would be more exposed to light from above and darkening areas more hidden from that light direction. To refine this, I used ambient occlusion or cavity masks to adjust the darkness or brightness of specific areas. For the eyes, I employed radial symmetry and an alpha to achieve a look similar to the real eyes of a hammerhead shark. When the character had eyes, it seemed to start coming to life.

Making Teeth

For the teeth, I simply sculpted a basic shape, turned it into an insert mesh piece, and applied it directly to the surface of the mouth. To check if everything worked well, I proceeded with my first rigging test. Before bringing the character into CC4, I opened Character Creator and exported a base mesh as an OBJ, which I then imported into ZBrush to adjust its size. (Although this can be done using Character Creator Pose Tools, I opted for this method.)

After unwrapping the UVs for each Subtool, I brought the character into CC4 using the new GoZ plugin, which automatically generated the Normal and Diffuse maps, as long as the UVs were set up beforehand. With a simple click, the character was sent to CC4. I imported everything as a prop, and that was it. Then, I performed a quick AccuRIG check with the walking animation, which revealed that the tail was not attached to the body. I defined it as an accessory and attached it to the hips so it moved with them.

Making Hard Surface Accessories

To begin adding storytelling elements to the character, I attached a rudder that the shark always carries on its back. I used ZModeler to define the basic shape, applying ZRemesher as needed, with polygroups to help guide the program in creating a suitable topology. Once the basic shape was complete, I unwrapped the UVs to allow for subdivision and sufficient resolution to apply a wood grain texture.

Since the alpha for the wood grain was horizontally oriented, I aligned the UV islands accordingly to ensure the grain followed the correct direction. After finalizing the sculpt, I moved on to polypaint, following the same process as for the body. I applied base colors, highlights, and shadows, and used cavity and ambient occlusion masks to enhance depth and detail.

Making Clothing

The next step was dressing the character with boots. I chose a simple design to maintain a stylized look, opting for a low polygon count. To keep the mesh structure straightforward, I defined the boots in three parts: the sole, the main boot, and a separate mesh for the folded-over section. For the metal detail, I returned to ZModeler and created a basic shape to use as an insert mesh brush. This approach allowed me to adjust the projection strength so the metal detail aligned seamlessly with the boot’s shape.

After duplicating the mesh for the body, I used “Slice Curve” to make a couple of cuts defining the pants. I smoothed the edges, reduced the polygon count, and completed the basic shape. To create a more natural drape for the garment, I applied physics to let the program handle some of the adjustments automatically. I masked the waist edge and the area around the knees, then fine-tuned the settings and used cloth brushes to add some extra wrinkles for realism.

Making Accessories

For the remaining accessories, such as the waistcloth, belts holding the anchor, and the pistol, I extracted them from the original body mesh, adjusted them, and ran them through ZRemesher. The hard surface elements were created simply with ZModeler. By separating the faces into different polygroups, I quickly achieved the desired shapes, combining ZRemesher and “Polish by Groups” to maintain volume and ensure smooth, clean shapes.

I wanted the accessories accompanying the character to help tell their story, so I decided to design a gun that shoots anchors, with the anchors dragging enemies to the depths. The design of the gun was developed on the fly, drawing inspiration from various sources and refining it repeatedly until I arrived at a shape I was satisfied with.

I wasn’t much of a fan of the Knife Curve tool, as it usually caused the program to crash. However, I started experimenting with it for the metal parts protruding from the weapon’s body, and I really enjoyed the creative freedom that the knife curve tool set offered.

Exploring CC AccuRIG

Next up was the rigging process. When I created a character in an A Pose, I tended to give it a more natural pose. I noticed that AccuRIG worked much better when the arms were fully extended, more or less in the same plane as the back. The hands also performed better when they were in a more rigid position, with a flat palm and fully stretched fingers. So, I modified the character using “Transpose Master to find that more rigid position that AccuRIG seemed more comfortable with.

Once I had all the accessories with the Polypaint done and the UVs extracted, I sent everything directly to CC4. The plug-in extracts both the normal maps and the color information, allowing everything to be displayed in high quality in CC4. By sending all the parts that would move with the character, such as pieces of clothing, I avoided any issues with their behavior, as they adjusted to the rigging of the body. For the rigging, I selected the character and started placing the joint points in the right spots. Thanks to the help of diagrams, it was super easy, even for someone who had never done it before.

Then, I sent the accessories even though there were several Subtools for each one. It wasn’t necessary to merge them, as all those parts could be grouped into a single element. I adjusted the position of the accessories and linked them to the corresponding body parts, like the spine for the helm.

Since the anatomy of this character was a bit unusual, I could define variations in the base posture, such as the separation of the arms and legs or whether the character was more or less hunched over, to improve the behavior of the animations and poses. To add the gun, I followed the same process I used for the helm.

Posing with AccuRIG

Next was the most fun part of the whole process. Anyone who has posed in ZBrush knows it can be a real ordeal. It’s a slow process, and you have to think carefully before moving your character. What I loved about this workflow was that we could do a lot of tests in just minutes. By taking a pose from the Pose Library or selecting a specific frame from a particular animation, we achieved dynamic poses quickly and in a fun way. It wasn’t the real sacrifice that posing in ZBrush can be.

The hand position is another gem within this workflow. The Character Creator Library likely has almost any pose we need. By taking a pose from the library, we can still manually adjust it to make it unique or achieve a better result. This applies to both hand positions and body poses. Next, I grabbed my little figure and started playing around.

The new feature in GoZ Plus allows us to combine it with Character Creator Pose Tools. When we bring our characters back to ZBrush, we activate the “relink mesh changes” in a new layer box, as well as the “current pose” box. The process then executes automatically. In ZBrush, everything stays as it was—Subdivision Levels, Polypaint, etc.—and we also get a new layer with the information of our pose.

With Character Creator Pose Tools, we can store all the positions in the rack simply by pressing the “Convert Layers to Pose” button. This way, we can have all the poses of our character in a single project and access them with the press of a button. Since each pose is just a layer, we only need to activate the “Edit Current Pose” button, which puts the layers of all the Subtools corresponding to that pose into recording mode. From there, we can continue manually adjusting the anatomy or adding wrinkles to the clothing that would only appear in that pose, without affecting the others.

If we wanted to add fabrics to our character that move independently with the character’s movement, we would simply send it to CC4 as a flat plane. They shouldn’t have thickness, and once the weights are defined using a mask, we’re done. However, in this case, I created the fabrics as I normally would—with their thickness, folds, etc.—then added a layer, naming it according to the specific pose, and adjusted it manually.

Final Render in Marmoset Toolbag

On this occasion, I rendered in Marmoset Toolbag 4 and took my laziness to the absolute extreme. I exported the high poly mesh of each pose directly as an FBX file. With the Subtools organized by materials, so I could modify them directly in Marmoset. I created a new material for each group of materials and took advantage of the Polypaint we had already done in ZBrush. 

By selecting vertex color in the albedo map, I was able to get all the color information. Then, I adjusted other parameters like roughness, metalness, SSS, etc., for each material manually, or modified some of the existing materials from the library. After setting up the lights and adjusting both the position and the settings of each one, we were ready to render. And here’s our final look!

Related Posts

Click through to learn more about the winners’ portfolios and judge comments

VFX Studio Transforms Virtual Production with iClone & Unreal

Filmworks/FX, founded in 2001, specializes in virtual production, significantly speeding up the filmmaking process. Utilizing tools like iClone and Unreal Engine, the company can produce high-quality content rapidly, exemplified by a commercial featuring William Shatner, completed in just two hours. This technology revolutionizes filmmaking, making it more accessible and cost-effective for indie creators.

Revolutionizing Filmmaking: How Virtual Production with iClone and Unreal Engine Transforms Visual Effects Companies

Ken Locsmandi – Director, Producer, Visual Effects Supervisor, Writer

Ken Locsmandi – Owner/Founder of Filmworks/FX, Inc.

Founded in 2001 by Ken Locsmandi, Filmworks/FX, Inc. is a boutique visual effects company with a strong DIY ethos and a determined, underdog spirit. Their team of artists is known for a world-class work ethic, expertly handling diverse tasks while maintaining high standards for quality visual content.

Locsmandi’s career includes work on iconic films like The Matrix, Fight Club, and The Cell. Since its establishment, Filmworks/FX has delivered visual effects for major studios. They contributed to projects such as Geostorm, Gone Girl, Blue Bloods, and House of Cards. Originally, the company combined digital and analog workflows, including a Kodak-certified color film lab. With the rise of digital technology, they transitioned fully to digital VFX in 2007.

As Filmworks/FX evolved, it forged new partnerships and expanded into television production with a facility in New York. There, the team completed nearly 3,000 visual effects shots for major series like Blue Bloods and Hap and Leonard. The company has embraced virtual production to offer greater flexibility and efficiency, adapting to industry trends and client needs.

At the core of Filmworks/FX’s virtual production pipeline are Character Creator and iClone, which integrate seamlessly with Unreal Engine. These tools enable the team to produce high-quality, real-time animations and digital characters with remarkable speed and cost-effectiveness. Character Creator and iClone streamline production. They also elevate creative possibilities. This positions Filmworks/FX at the forefront of innovation in the visual effects industry.

“With Character Creator, iClone, and Unreal Engine, we create stunning visuals. These visuals would have taken us months. We are now doing them in hours sometimes. What would have cost $100,000 is now costing $10,000 or less. You actually get to be more creative. This is because you’re not spending all your time on laborious technical tasks.”

Ken Locsmandi – Director, Producer, Visual Effects Supervisor, Writer
https://www.filmworksfx.com/ourwork.html

Filmworks/FX, Inc., a boutique visual effects company

I started doing computer graphics in the late 1980s. I used software applications like 3D Studio (DOS), which became Max. I also used Wavefront, the precursor to Maya. At the same time, I concurrently did traditional darkroom film processing. In 1991, I completed my first CG animated commercial. From there I was hooked on the technology.

By 1995 I helped produce a full-length feature shot on 8 mm film. We employed the use of model miniatures and all the effects were achieved in-camera. The use of computers and computer graphics was still costly and cumbersome. However, I knew they would ultimately be the means to create the stories I wanted to tell.

In the late 1990s, the computer VFX industry began to take off. At that time, I ran a small company out of my apartment with home-built PCs. Massive, well-funded VFX companies dominated the industry using expensive SGI computers. Nevertheless, business growth provided opportunities. We were able to do visual effects on films such as The Matrix, Fight Club, and The Cell. Doing films of this caliber out of an apartment on PCs was unheard of at the time.

Leaving what was considered the “garage VFX shop” scenario, I formed Filmworks/FX, inc. in 2001. The name stemmed from Filmworks Laboratory, a cinema processing facility, from which we were renting space. A few years later Filmworks/FX, Inc. purchased Filmworks Laboratory. This was a unique scenario. It was one of the few places in the world. It handled photochemical processing, digital VFX, telecine, film scanning, and digital intermediate (color grading).

Filmworks/FX, Inc. eventually became producing partners on several feature films. They continued to generate VFX work on projects like Apocalypto, Terminal, Knight and Day, Star Trek: Picard, and Blue Bloods. They also contributed to hundreds of additional television episodes and films.

Recently the company has moved into virtual production workflows. We developed a virtual production system that is portable and versatile. We can move the system to any stage and are able to use it outdoors. We employed the system on the film, Flight Risk, directed by Mel Gibson.

Virtual production tools to redefine traditional filmmaking

Characters play an essential role in our work. This includes our in-house projects and service-based client work. iClone, Character Creator, and Unreal have become the core of our virtual production pipeline. The term virtual production will fade away soon, and will just be synonymous with production.

With these tools, Character Creator, iClone, and Unreal Engine, we create stunning visuals. These visuals would have taken us months. We are now able to create them in hours sometimes. What once cost one hundred thousand dollars is now ten thousand or less. You also get to be more creative because you’re not spending all your time on laborious technical tasks.

The Shatner Collection using Character Creator and iClone

The Egard Watch Company asked me to write, produce, and direct a commercial with William Shatner. The commercial featured a watch co-designed by Mr. Shatner.

The commercial would have cost over $120,000 dollars if done traditionally. It would have involved a 10 to 12-hour shooting day. Additionally, a month of post-production and 2 weeks of preparation would be needed. In this case, we did 3 days of “prep”. We shot a two-and-a-half minute interview and the thirty-second spot in 2 hours. Before wrapping, we had a rough edit of the commercial to view. This was remarkable.

“If done traditionally, the commercial would have cost over $120,000 dollars. It would require a 10 to 12-hour shooting day, a month of post, and 2 weeks of preparation. In this case, we did 3 days of “prep”. We shot a two-and-a-half minute interview and the thirty-second spot in 2 hours. Gus, the grey alien, was constructed in about 15 minutes using Character Creator in conjunction with ZBrush. “

Ken Locsmandi – Director, Producer, Visual Effects Supervisor, Writer

The spot involved a full CG warehouse with Shatner’s fictitious space collection. This included such items as The Space Shuttle, lunar rover, satellites, astronaut suits, and of course Gus, the grey alien.

Most VFX artists know how time-consuming it is to build, rig, texture, and animate a character. Gus, the grey alien, was constructed in about 15 minutes using Character Creator in conjunction with ZBrush.

Using a base human model in Character Creator. I simply used the procedural sliders to get Gus’s overall shape. Some minor adjustments couldn’t be done easily in Character Creator. Tasks such as completely smoothing the ears to the skull were done in ZBrush. The GoZ bridge function inside Character Creator enables quick modifications. You can modify the ears in ZBrush and send them back to Character Creator. This process completes in about a minute. The Base model in Character Creator is already rigged. You can modify the model in ZBrush without needing manual re-rigging or binding. The software just does it all behind the scenes. It is phenomenal!

To make Gus’s human skin tone grey, the hue saturation sliders inside Character Creator were used. The other amazing thing about the Character Creator model is that all the facial targets are already made. You can immediately bind mocap or use the iClone AccuLIPS text-to-speech function to the character.

We didn’t have the exact animation placement or dialogue for Gus while shooting. Once we had the final dialogue and staging it took about an hour to adjust it using iClone.

Bronson Beak – reducing costs with the right tools

Bronson Beak is a film project that I wrote many years ago. The project was optioned by three of the major studios in Hollywood. For those who don’t know, an option lets the studio hold onto your project for a minimal fee. They do this until they figure out if and how they want to make it.

This process can take years to iron itself out. In the case of Bronson Beak, it took years for the options to expire till the project rights reverted back to me. The film is an action-adventure comedy. Initially, the plan was to photograph real animals. Then, VFX would place them into the environment and make them speak. We did several tests this way, fairly successfully.

Doing the film this way though would cost about 60 million dollars. My desire was to do the film independently, at a 60 million dollar budget was gonna be a tall order. Any independent filmmaker will contest how hard it is to raise funds.

“Here comes the magic of Reallusion and Unreal. We did tests and it blew my mind. We were able to take CG animals and bound them through ActorCore AccuRIG. Then, we immediately applied motion capture to their bodies and face. Again, my head just exploded when I watched these tests.”

Ken Locsmandi – Director, Producer, Visual Effects Supervisor, Writer

Real-time body and facial capture was being applied to the characters with near real-time rendering. Using our virtual production system I could operate a camera just like filming in the physical world. This allowed us to have instant editorial versions. We just produced a month of work in 45 minutes to an hour. KAPOW! Did I happen to mention my head exploded?

“Because of the Reallusion tool sets and Unreal, we decided to go into production on the project. The company will self-fund initially and then bring on partners. This 60 million dollar film could now be done for less than 1/10th of that original budget, because of these tools. VFX studios not employing these tool sets will not be able to compete in the future. In the right circumstances, iClone and Character Creator will increase your productivity by ten to twenty fold. Time always boils down to dollars.”

Ken Locsmandi – Director, Producer, Visual Effects Supervisor, Writer

To all those filmmakers like me, with no connections or money to make a project, these tools may be just the thing to allow your vision to become a reality. Are there technical skills needed to work these applications? Yes, but they are exponentially easier to use than the industry standard software applications.

My career in filmmaking and VFX has been long. There were eras that were not enjoyable. It became a “grind” to make good stuff. Innovative applications like iClone and Unreal have made this now, the most exciting and fun time.

Follow Filmworks/FX, Inc.

Website:
https://www.filmworksfx.com/

LinkedIn:
https://www.linkedin.com/company/filmworks-fx-inc./

Vimeo:
https://vimeo.com/user6398229

Instagram:
https://www.instagram.com/filmworksfx

Related Posts

Empower Blender Character Creation with Enhanced Auto Setup

Reallusion, a leader in 3D animation and character creation software, announces a powerful upgrade to its free Blender Auto Setup (BAS), now optimized for Blender 4.2. This update allows seamless integration between Character Creator (CC), iClone, and Blender, moving beyond the constraints of FBX file transfers. The new “Data Link” feature ensures reliable bidirectional data synchronization. The free Auto Setup also includes automatic assignment of CC digital human shaders, advanced character editing tools, scene tools, compatibility with Rigify control rigs, and support for both Eevee and Cycles render engines.

Data Link – Character & Prop Live Synching with Blender

The new Data Link feature streamlines the process of synchronizing characters, poses, morphs, motions, and live sequences between CC, iClone, and Blender with a single click. This eliminates the need for exporting and importing FBX files, making the workflow more efficient. It also allows lighting and camera setups to sync from CC and IClone to Blender, ensuring visual consistency across platforms.

For complex scenes like crowd simulations, the “Send All” option simplifies the process by transferring the entire scene—including props, characters, lighting, and cameras—to Blender with a single click. Mocap and motion director recordings from iClone can also be seamlessly synchronized into Blender.

Enhanced Character Editing Experience for Blender

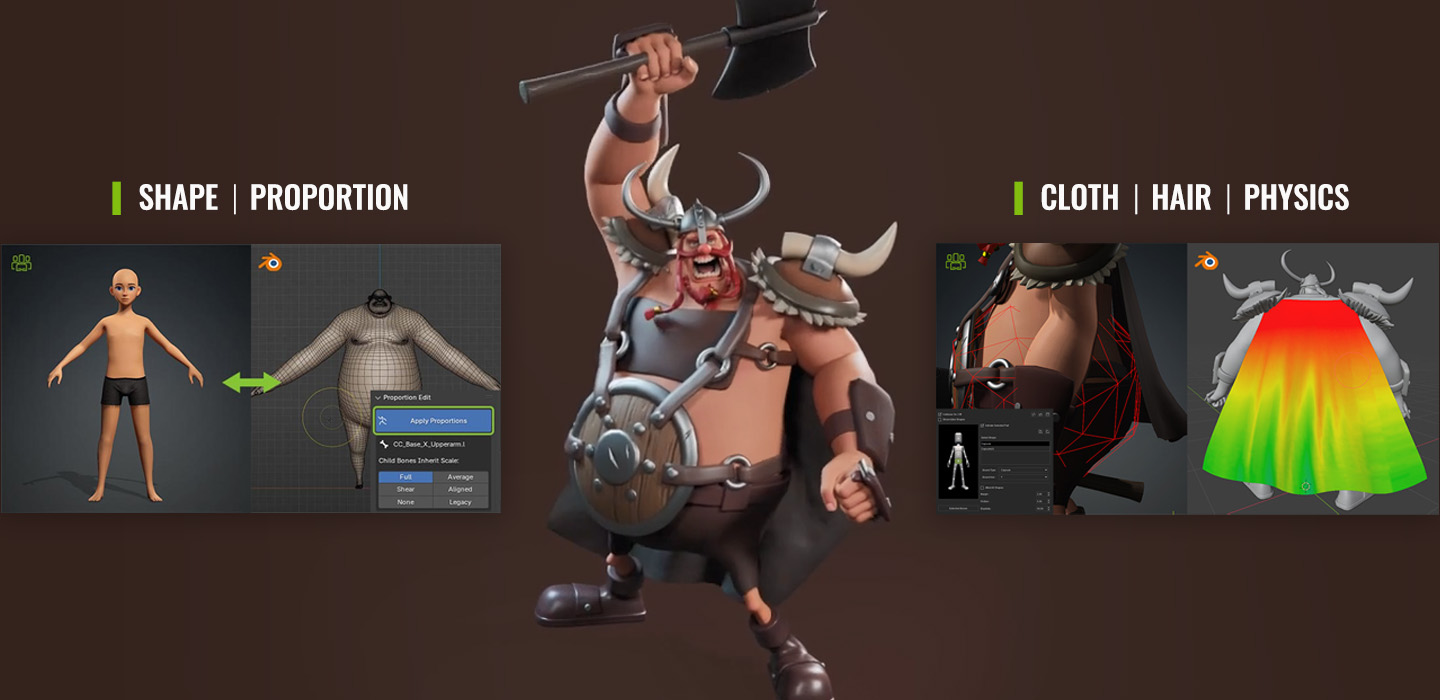
Blender Auto Setup auto-configures sculpt mode and the multiresolution modifier, making character sculpting effortless. Once sculpting is done, the one-click “Bake & Apply” function finalizes the base shape and sends it back to Character Creator. The proportion editing feature allows direct adjustment of the character’s bone scale, offering precise customization options.

BAS integrates hair spring rigs and cloth physics, enabling adjustments to cloth collision, weight maps, and simulation baking. For hair, it supports bone spring rigs, allowing tweaks to bone parameters and hair binding for more dynamic, realistic movement.

Ultra-Realistic Digital Human Shader

The Blender Auto Setup takes full advantage of Character Creator‘s (CC) Digital Human Shader, automatically generating optimized Blender material graphs for photorealistic rendering. These shaders bring characters to life with ultra-realistic details, supporting customizable parameters for various features, such as skin tone, wrinkles, hair, eyes, and teeth.

Scene Tools and Support for Blender EEVEE and Cycles Rendering

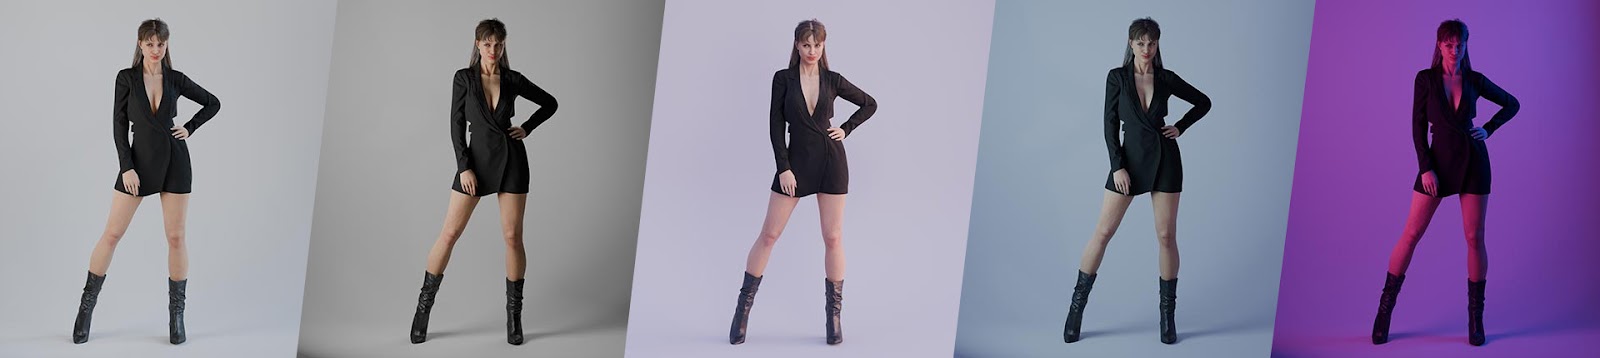
To streamline the lighting and rendering process, Auto Setup includes 12 built-in scene light presets, enabling quick changes to different lighting environments. Additionally, with a one-click transition to Cycles render, users can optimize their workflow for both real-time previews in EEVEE and final high-quality renders in Cycles, boosting efficiency while maintaining visual fidelity.

Advanced Animation and Rigify Control Rig Integration

BAS ensures precise animation transfer from CC and iClone to Blender and generates a Rigify control rig. This feature allows fine-tuning of character movements with Inverse Kinematics (IK) and Forward Kinematics (FK), and automatically retargets motions. It enhances flexibility and control over animations in Blender and allows the rig to be sent back to CC or iClone for further editing.

This revolutionary tool is available for free and can be downloaded by registering as a member on the Reallusion website. This release reaffirms Reallusion’s commitment to enhancing the creative workflow for Blender users, making it easier than ever to bring characters and animations to life.

Related resources

Blender Auto Setup – Download for free

Character Creator – Enjoy a 30-day free trial

iClone – Enjoy a 30-day free trial