Animation Journey: From Drawing Cartoons to 3D Worlds
Entry 1 – Why I Left The Comfort Of 2D
With a lifetime of passion for drawing cartoons, after stumbling onto Cartoon Animator, I felt I finally found my place in the world. My name is Garry Pye and for more than the last 10 years I have been a 2D animator and content developer using Cartoon Animator.
What started out as me creating my own silly cartoons to entertain my friends, eventually grew into a full time business as a content developer and role as Community Manager for our animation community.
Now I feel it is time for me explore new territories, so I am opening the doors to the world of 3D animation, and this is my journey.
Let’s be clear.
I didn’t leave 2D animation because I stopped loving it. In fact, I’m not leaving 2D animation at all. I still adore it. It’s where I started, where I built a career creating quirky, oddball cartoon characters, and where I found a voice. Cartoon Animator is a powerful tool for 2D animation, and it’s amazing what you can do with a couple of silly shapes and an original idea.
But after over ten years of 2D animation, I became curious. What if I could view my characters from all angles? What if I could light them like in a movie, rotate them like action figures, or create environments that didn’t have to be completely redrawn every time I moved the camera?
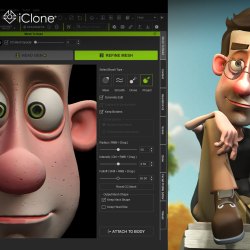
That curiosity made me dip my toe into the third dimension. I spent all my free time watching YouTube videos and reading endless social media threads. Then I took the leap of faith and got myself iClone, Character Creator (CC), the CC Headshot plugin, and Blender. I was all in.
And let me tell you, nothing makes you miss 2D faster than trying to navigate your first Blender viewport with the camera upside down and your character’s leg stuck inside their head.
What gave me the confidence to keep going was how surprisingly familiar some things were.
Many of the tools and processes between Cartoon Animator and iClone overlapped. Keyframes, camera controls, body movements. These were all familiar territory. Even though there was a mountain to climb, I realised that coming from Cartoon Animator meant I had already laid a lot of the groundwork.
So I was hooked. Even though I had absolutely no idea what I was doing and I was intimidated by the scope of it all.
I found myself stepping into a space where I was suddenly a beginner again after years of perfecting my 2D skills.
But I could feel the possibilities expanding. Suddenly, I wasn’t just drawing scenes. I was building worlds.
Shifting into 3D has changed how I work day-to-day.
More late nights. More screen time. Juggling all this with existing projects takes commitment.
So I decided to write some articles about my journey from 2D to 3D to help and inspire others like me. Total newbies who see all the amazing things 3D animation can do and want in on the fun.
I don’t expect this journey to be smooth sailing. I’m realistic. There’s a lot to learn, and what I need to know is complicated.
In future articles, I’ll share what goes wrong and what (finally) works. I’m determined to give this everything I’ve got and see if I can make it to the finish line.
I’d love you to come along for the ride.
2D is still in my blood. It’s where I learned to move an audience, one frame at a time.
But 3D? That’s where I’m learning to breathe life into them.
Garry Pye is an Australian illustrator, animator, and Cartoon Animator instructor with over a decade of experience in the animation industry. Known for his unique blend of creativity and humor, Garry’s work spans from teaching animation techniques to creating innovative content that helps both novice and experienced animators improve their skills.
Garry’s enthusiasm for storytelling and animation shines through in all his projects, whether it’s creating animated shorts, preparing educational tutorials, or sharing his expertise by teaching. With a passion for making animation accessible and fun, Garry has built a community of learners who not only appreciate his knowledge but also his infectious sense of humor and dedication to his craft.
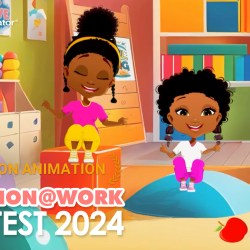
Kael Camaris combined Cartoon Animator, Affinity Designer, and various AI tools for his animated children’s songs. The vibrant characters and setting made him the winner of the contest.
In this Winner Spotlight interview, we speak with Kael Kamaris, first-place winner of the 2024 Animation at Work contestunder the “Education Animation” category. Kael’s winning entry, called “Tiana & Teo – Teaser Trailer – Faith Base Nursery Rhymes,” is made possible with the powerful fusion of Cartoon Animator (CTA), AI tools like ChatGPT, and creative software such as Affinity Designer and Blender. Kael shares insights into his production workflow, character design process, and how AI has become a vital part of his animation toolkit.
Kael Camaris
Hi, my name is Kael Camaris. I am a 2D animator based in the United Kingdom. Coming from illustration books and 2d character background, I know best in turning the 2d concepts into colorful commercial productions and merchandise. With the vibrant color tone setting, I always find it interesting when diving into children’s book production.
Currently, I also teach private lessons to aspiring animators and illustrators. My goal is to let my courses help students to be completely independent and creative!
ChatGPT has become an invaluable part of my workflow, especially when I’m looking for creative script ideas, brainstorming content, or even when I’m struggling with writer’s block. It helps me generate concepts, dialogues, and even song lyrics for my animated videos. Having a reliable AI assistant like ChatGPT ensures I can stay productive without getting stuck during the creative process.
The key to writing good prompts is being specific with the details you want. For example, if I’m working on a script, I might prompt ChatGPT with something like: “Generate a 1-minute script for a children’s animation about the letter ‘B,’ incorporating themes of kindness and teamwork.” The more targeted your request, the more tailored the response will be. It helps save time by narrowing down the creative options and getting a starting point quickly.
Leveraging AI Tools: Voice, Songs, and Audio
I chose these tools because they offer a great balance of affordability and functionality. For voices, I use RVC Voice Converter, which is free, and it allows me to create cartoonish voices that match the energy of the 2D animations.
For music, I subscribe to Suno Chirp on a yearly basis, which provides me with a vast library of tracks that I can customize for my animations. Suno Chirp costs around £50 a year, which is a great deal for royalty-free music with high production value. As for sound editing, I use Ardour, which is an open-source tool, so there’s no cost, and it’s perfect for editing voiceovers and adding sound effects to my animations.
On Character Design with Affinity Designer
My characters are designed using Affinity Designer, where I create vector-based illustrations. I usually start by sketching the character’s outline and key features, then break them into separate components, like the body, head, and limbs, for easier rigging. One tip I often use in Affinity Designer is to keep my lines as clean and simple as possible, as it makes the rigging process much smoother. I also make use of the ‘Pen Tool’ to create precise curves and shapes for body parts, ensuring that everything is proportionate and easily adjustable.
My background in 2D illustration is essential for creating well-balanced, aesthetically pleasing characters. I can focus on the design’s artistry and functionality, ensuring characters not only look good but can also be easily animated. The understanding of proportions, anatomy, and perspective that I developed in my 2D illustration work really helps when it comes to designing characters that are both visually appealing and suitable for animation.
When designing characters for animation, it’s crucial to keep movement in mind. I always ensure the design is simplified with separate parts (like limbs, facial expressions, etc.) to make the rigging process easier. For rigging, my tip is to break down the character into as many pieces as possible to allow for smooth and flexible movement, especially for the face. I also recommend keeping the anchor points centered for each limb and part, as this makes it easier to animate fluid motions.
On Character Animation
I use iClone 8 to add 3D motions to my 2D character animation workflow with the plugin that integrates with Cartoon Animator. My process starts by importing character animations from iClone, converting them into 2D motion files, and then refining them in Cartoon Animator. The dos are: always make sure the motion is fluid and matches the character’s design, and test different angles to ensure the 3D-to-2D conversion looks natural. The don’ts: don’t overcomplicate the motions – keep them simple and aligned with your character’s style.
For facial animation, my key tip is to use separate layers for different facial components (eyes, mouth, eyebrows). This gives me flexibility to animate expressions more naturally. Additionally, I like to use subtle movements—small shifts in the eye position, slight eyebrow raises, or mouth corners—because they help create more emotive and relatable characters.
When it comes to body animation, keeping the character’s weight and posture consistent is crucial. I focus on the character’s center of gravity and make sure that the movements are balanced. One of my favorite tips is to exaggerate the movement slightly to give it more life, especially when the character is in motion. This makes the animation feel more dynamic and fluid.
Lip sync animation can be tricky, but it’s all about timing. I always break down the dialogue into individual phonemes and match them to the character’s mouth shapes. My tip is to start with the key poses for the mouth (open, closed, etc.) and then fill in the in-betweens. Also, don’t forget to add subtle head movements to complement the lip sync – it gives the character more personality.
On Compositing
In Blender, I use the nodes editor extensively for compositing and to create more dynamic camera movements. Nodes allow me to control and adjust lighting, color grading, and effects with precision. I also rely on Blender’s camera rigging and animation tools to create more engaging shots, ensuring that the camera smoothly transitions through scenes without abrupt jumps. For optimization, I always use the layers and scene management tools to keep everything organized, which makes it much easier to handle more complex projects.
Closing Thoughts
This competition has been an incredible experience, and I’m really proud of the work I’ve submitted. My advice to future contestants is to focus on your unique style and don’t be afraid to experiment with different tools and techniques. Animation is all about creativity and storytelling, so embrace your personal touch. You can follow my work on another alias Facebook for collaboration inquiries. I’m always excited to connect with fellow animators and creatives!
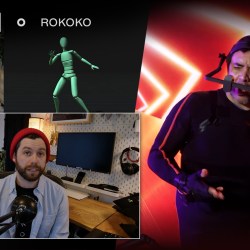
Real-time 3D animation just got a major upgrade with the latest iClone 8.52 update. In this feature review video, Sam Lazarus from Rokoko breaks down how the newest tools in iClone 8.52 streamline and enhance animation workflows. From preciseRokoko body motion capture and AccuFace facial tracking to AI-powered lip sync and the brand-new Timecode plugin, Sam explores how these powerful features come together for seamless, efficient production.
Whether you’re an indie animator or part of a larger studio, this in-depth review shows how iClone 8.52 unlocks new levels of control and speed in real-time 3D animation.
Why iClone and Rokoko are Must-Have for Character Designers and Human Creators
User-friendly workflow: Import or live stream motion capture from Rokoko Studio directly into iClone or Character Creator.
Robust mocap editing: Adjust shoulders, hands, and more with a powerful IK editing system.
Non-destructive editing: Maintain original motion capture data while applying edits to ensure flexibility.
Sam Lazarus Highlights iClone 2025 Features
Sam Lazarus, Creative Director at Rokoko, recently released a comprehensive review of iClone 8’s 2025 updates — and we’re breaking down everything you need to know to elevate your 3D character animation projects.
1. Timecode Syncing
Automatically sync Rokoko mocap with other mocap systems or audio using timecode.
Ideal for combining Rokoko SmartGloves, with Xsens suits, and more natively within iClone.
2. Motion Trail Editor
Visualize and edit the entire character’s translation in real time.
Makes complex mocap edits easier and more intuitive.
3. New Filters for Smoother Animation
Peak removal to clean up erratic keyframe spikes.
Butterworth smoothing for polished, AAA-quality motion.
4. Improved Non-Destructive Timeline Editing
Edit mocap without permanently altering keyframes.
Essential for iterating on animations without losing original data.
How These Updates Improve Your 3D Animation Workflow
Faster turnaround on creating believable, expressive characters.
Simplified syncing of multi-source mocap data means fewer headaches in post-production.
Higher quality mocap results without expensive hardware investments.
Enhanced lip sync animation capabilities via iClone AccuFace, perfect for dialogue-heavy scenes.
Practical Tips to Get Started
Use Rokoko Studio to record your motion capture or live stream directly into iClone.
Export mocap data and drag it onto your character base in iClone or Character Creator.
Experiment with the new motion trail editor to refine large movements.
Apply butterworth smoothing filters to clean up jittery animations.
Use timecode syncing when combining different mocap devices or syncing with audio.
Why This Matters to You as a Character Designer or Human Creator
The combination of iClone 8 and Rokoko Studio offers a comprehensive toolkit to bring your digital human creations to life. Whether you’re a solo indie animator or part of a studio, these updates reduce technical barriers and let you focus on creativity. The ease of importing motion capture and refining it inside a single software ecosystem is invaluable for:
3D animation software enthusiasts
Character designers aiming for lifelike movement
Human creators wanting fast, high-quality rigs
Animators focusing on lip sync animation with natural expressions
FAQ
Can I use Rokoko motion capture with any character base in iClone? Yes, Rokoko mocap data can be applied to any compatible character base imported or created in iClone and Character Creator.
How does AccuFace improve lip sync animation? AcuFace uses a single camera input to capture detailed facial expressions, enabling realistic lip sync and emotion transfer in real time.
What is Butterworth smoothing? It’s a filtering technique that smooths out jagged mocap keyframes for cleaner, more professional animations.
Is non-destructive editing difficult to learn? No, iClone 8’s timeline editor makes non-destructive editing straightforward, letting you keep original data intact while experimenting.
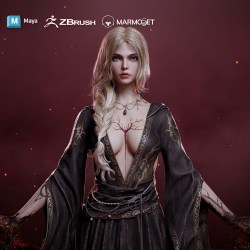
My name is Linhai Xu, a 3D character artist specializing in game character modeling. I have worked on notable projects such as Call of Duty: Black Ops Cold War, NieR: Automata – The End of YoRHa Edition, and Ashfall. In this showcase, I will walk you through the complete workflow of my latest 3D character project, Burn the Darkness, from initial concept in Character Creator 4 (CC4) to final rendering, and share insights that may inspire fellow artists.
For this project, I wanted to portray a sorceress struggling against the impending darkness consuming her. She casts magic to resist the overwhelming force, captured in a dramatic pose and lighting setup within Toolbag 5. The entire process took approximately two and a half months.
A strong foundation in character design begins with well-defined concepts and references. I spent considerable time gathering images from platforms like ArtStation and Pinterest, ensuring a broad spectrum of inspiration covering character silhouettes, costumes, material details, and environmental mood.
Additionally, I frequently browse online shopping platforms to find real-world accessories and outfits similar to my envisioned character. Since product images are often clear and well-lit, they serve as excellent visual references, aiding in accurate modeling.
3D Modeling Workflow
Modeling is the most time-intensive phase of character creation. My process began with a base model in Character Creator 4 (CC4), where I adjusted the character’s proportions to match the concept. CC4’s intuitive tools allowed me to fine-tune the body shape before moving into ZBrush for detailed sculpting.
Using CC4’s motion features, I was able to preview animations directly on the character and refine its movements. This helped in determining the natural flow of fabric and accessories, ensuring they interacted correctly with the body.
High-poly details were sculpted in ZBrush, refining anatomy, clothing, and intricate accessories. For elements like armor and props, I used a combination of Blender and ZBrush to maximize flexibility in my workflow.
Once the high-poly modeling was complete, I optimized the mesh and created low-poly versions in Maya, where I also handled UV unwrapping, leveraging Toolbag 5 UDIM support for complex layouts.
Blender played a crucial role in creating the character’s hair. I utilized curve-bound planes for better control and flexibility, ensuring the hairstyle maintained a natural flow.
For the hand magma effect, I employed Blender’s FluidLab plugin, which allowed for realistic fluid simulations. The results were later enhanced in Toolbag by adding displacement maps to refine surface details.
Texturing and Material Details
Surface detailing is essential for bringing a character to life. Substance Painter was my primary tool for texturing skin details and fabric patterns, as well as generating metallic and leather materials.
I meticulously layered skin textures, using height and normal maps to enhance depth and realism. Clothing textures were developed using a mix of procedural maps and hand-painted details, ensuring a handcrafted look that matched the concept’s dark fantasy aesthetic. To bring out the character’s realism, I focused on intricate metal and leather materials, applying custom shaders and edge wear effects to simulate natural aging.
Since Toolbag 5 was used for final rendering, I continuously exported textures from Substance Painter to assess and refine their appearance. The pen tool in Substance Painter 9.0 proved invaluable for adding stitching and continuous pattern details, achieving a high level of polish.
Lighting and Rendering
I utilized Toolbag 5 to set up the final scene, focusing on dynamic lighting to enhance the character’s presence. The scene’s volcanic landscape was built using Bridge’s rock assets, which added depth and realism to the environment.
Lighting was key in emphasizing the character’s silhouette and emotional tension. The main light source was positioned at an overhead angle to create dramatic contrast, while a subtle rim light was used to define the edges and separate the character from the background.
One challenge I faced was achieving volumetric depth in the environment. Since Toolbag’s fog system lacked detailed controls, I simulated atmospheric fog using multiple layered mesh planes to replicate a smoky, immersive atmosphere.
Additionally, I integrated ambient particles, such as fire embers and dark burning fragments, to add realism and enhance the sense of movement in the scene.
For color grading, I switched from Linear mode to Hejl tone mapping, which provided better vibrancy and contrast to achieve a strong cinematic impact.
Reflections and Lessons Learned
Having used CC4 for three years, I have witnessed its remarkable growth, and it has become an invaluable tool in my workflow. It significantly optimizes character creation, making the process more efficient and enjoyable.
This project provided valuable insights into balancing technical execution with artistic storytelling. One of the most important lessons I learned was the value of concept clarity. Having a well-defined idea from the start streamlined the entire workflow and ensured all elements aligned cohesively.
Additionally, time management proved crucial; structuring each phase efficiently allowed me to maintain steady progress without unnecessary delays. Lastly, I gained a deeper appreciation for storytelling through character design, realizing that beyond visual aesthetics, the emotional and environmental context significantly enhances immersion.
This project pushed my skills further, especially in balancing character design with environmental storytelling. Moving forward, I aim to invest more time in refining concept phases and maintaining a strong narrative foundation in my works.
For more details, you can view my project on ArtStation and GGAC:
Real-Time Motion Capture Powered by iClone Timecode Sync in Studio 101
The Actor Capture team leads two advanced motion capture shoots in Studio 101 at the Creative Media Industries Institute (CMII) at Georgia State University. Reallusion iClone Timecode plugin played a pivotal role in synchronizing the motion capture sequences, highlighting its importance in real-time virtual production.
Based in Atlanta, Georgia, Actor Capture is a motion capture and VFX powerhouse known for its work on blockbuster productions like The Electric State (Netflix), Lyle Lyle Crocodile (Sony Pictures), The Suicide Squad (Warner Bros.), and Replicas (Entertainment Pictures). The company also caters to the music and episodic world, with notable appearances such as Cardi B and Offset’s feature in “Cardi Tries..,” garnering over 6.8 million views.
Whether capturing high-impact stunts or intimate performances, Actor Capture’s team often juggles multiple motion capture technologies by combining optical, inertial, facial, and hand tracking depending on the shoot’s requirements.
Motion capture pipelines are complex, especially when syncing data from various sources like OptiTrack, Xsens, Rokoko, and FACEGOOD. The introduction of Reallusion’s Timecode plugin within iClone’s Motion LIVE ecosystem solves one of the industry’s longstanding pain points: data synchronization.
Enabling timecode metadata into multiple datastreams (even without native LTC – linear timecode – support) ensures the alignment of all captured motion, video reference footages, and animation outputs throughout production and post-production.
The Quad System and Synchronized Visualization
Actor Capture’s unique setup includes a Quad video village display with four critical views:
Two RED cameras for video reference.
The mocap software interface (OptiTrack, Vicon Shogun, or Xsens MVN Animate).
A real-time visualization engine (iClone or Unreal Engine) rendering the retargeted character animation.
This layout offers all stakeholders, including directors, editor, and VFX supervisors an overview of the aligned performances, data, and visualizations. The glue that kept this all together was timecode synchronization.
Timecode-enabled capture ensures “circle takes” and other critical moments are clearly documented and easily retrievable during editorial and VFX processes. With a synced shotlist and detailed notes, each take remains linked to its corresponding data—all essential for large-scale, high-stakes productions.
For the first session, four stunt performers comprising two males and two females, were recorded using a 40-camera OptiTrack system with Motive suites. An equal number of avatars were assigned to the actors and streamed live into iClone through Motion LIVE.
Thanks to iClone Timecode and Tentacle Sync devices, even complex scenes with multiple actors and overlapping performances were kept in sync; allowing the editorial and post teams to easily identify, evaluate, and extract the best takes for final production.
Session 2: Multi-Device Capture with Xsens and FACEGOOD Face Mocap
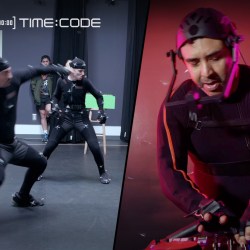
The second session featured a high-energy DJ performance by Ruban “Swift” Vidal. To capture his full-body performance, the Actor Capture team integrated:
Xsens Link Suit with MVN Animate for body tracking.
Rokoko Smart Gloves for finger capture.
FACEGOOD HMC with Avatary for facial capture via dual IR camera feed.
All data streams were unified through iClone Motion LIVE, synced with Tentacle Sync Timecode devices. While tools like MVN and FACEGOOD supported direct timecode jamming, Rokoko did not; making the iClone Timecode plugin’s ability to assign timecode retroactively a critical component in maintaining a unified timeline.
Real-Time and Post-Production Benefits
Recordings can undergo HD Processing post-shoot to refine body motion. Once enhanced, this data can be reimported into iClone, where iClone Timecode ensures face and finger captures align perfectly with the refined body motion.
Facial data captured with FACEGOOD can be solved in Avatary Studio, where the landmark tracker enables high-precision face tracking. With iClone integration, key poses are instantly visible on characters in real time, allowing precise retargeting for high-fidelity facial expressions.
By embedding and burning timecode across all data streams, Actor Capture ensures a high level of accuracy when delivering takes to animators, VFX vendors, or editors; At the same time, avoiding mismatches and saving hours in post.
Conclusion: A Game-Changer for Real-Time Studios
Reallusion’s iClone Timecode plugin brings professional-grade precision to real-time animation; And the Actor Capture team was able to embrace this technology to unlock the full power of synchronized workflows—even when juggling complex, multi-source mocap data.
In productions packed with long scripts, dense shotlists, or multiple performers, the iClone Timecode keeps everything tight and on track. Circle Takes are called in perfect sync and delivered without a hitch. With it, directors, producers, and animators have the control they need to drive performance-focused storytelling forward.
How to Animate a Fast MetaHuman Fight Scene with Reallusion 3D Motion Packs
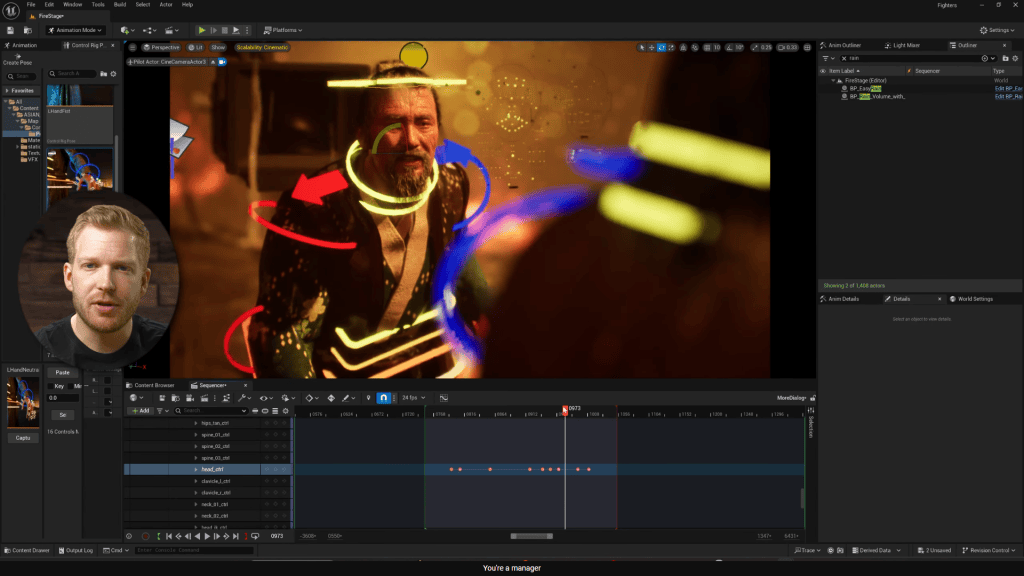
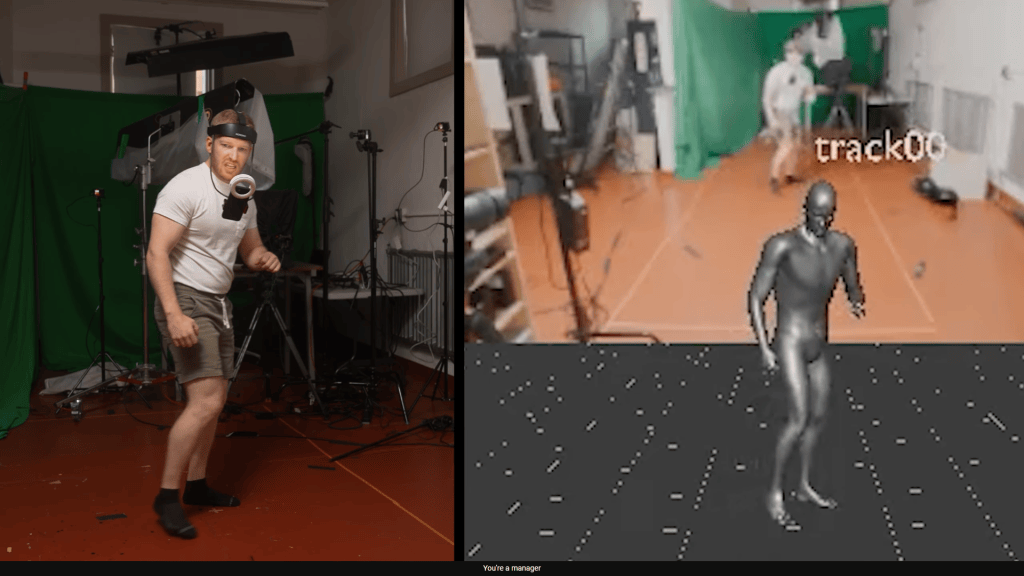
If you’re a 3D animator or filmmaker looking to create fast, fluid fight scenes, this real-world breakdown from Charlie Driscoll will show you how. Using Reallusion’s ActorCore hand-to-hand combat pack, paired with Unreal Engine 5, MetaHuman Animator, and Move.ai, he demonstrates how to blend pre-built assets and performance capture into cinematic action sequences — all without needing a massive team.
“I was just like I have to make something with this pack of amazing hand-to-hand combat animations. I just remember thinking they were so cool, and all I would have to do is come up with a story to tie these fight scene animations together.”
Charlie Driscoll – Director, Cinematographer, Producer
Charlie Driscoll is a Director, Cinematographer, and Producer at Northwoods Revolution and the creator of the YouTube channel The Darkest Age – Unreal Engine Filmmaking. On his channel, he explores real-time animation techniques and pushes the boundaries of short film production using Unreal Engine 5, MetaHuman, and AI-powered tools.
In his recent behind-the-scenes breakdown, Charlie shares how he choreographed and animated a kung fu-style action short, integrating Reallusion’s ActorCore 3D motion content, AI dubbing, VFX assets, and his own motion capture performance.
The Creative Spark: ActorCore’s Combat Animation Pack
The project began when Charlie discovered Reallusion’s Hand-to-Hand Combat Motion Pack. With over 60 polished, professionally choreographed fight animations — punches, kicks, blocks, knockdowns — this pack served as the foundation of his scene.
“You just drop them (ActorCore 3D animations) into Unreal Engine and you have the basis of a fight scene.”
Charlie Driscoll – Director, Cinematographer, Producer
Building the Scene in Unreal Engine 5
Charlie selected a burning tree temple from FAB (formerly Quixel) and added dramatic lighting, rain, smoke, and fire FX. He then:
Retargeted the Reallusion animations to MetaHumans
Layered in custom mocap using Move.ai
Used dynamic camera movement to blend mocap and pre-built animations
Motion Capture with Move.ai + Reallusion
Charlie used Move.ai’s markerless mocap with multiple iPhones to capture his own body movement. He then blended it with Reallusion’s combat animations — giving the scene both cinematic action and personal expression.
This hybrid workflow allowed:
Speed from premade animations
Emotional nuance from custom mocap
Flexibility to iterate quickly
AI Lip Sync with ElevenLabs + MetaHuman Animator
To add realistic lip sync:
Charlie recorded lines in English
Translated and cloned the voice in Mandarin using ElevenLabs
Captured facial mocap using MetaHuman Animator
Synced the new Mandarin voice with accurate Chinese lip movement
Tools Used in the Workflow
Tool
Role
ActorCore
Hand-to-hand combat animation pack
Unreal Engine 5
Real-time rendering and scene setup
MetaHuman Animator
Facial mocap and lip sync
Move.ai
Suitless motion capture
ElevenLabs
AI dubbing and voice cloning
FAB
Environment assets
Artlist
Music and SFX
Why Reallusion is a Game Changer
Reallusion’s ActorCore motion packs allow 3D creators to:
Animate instantly with high-quality human motion
Avoid tedious keyframing or custom mocap setups
Focus on storytelling and visual polish
For indie creators, it’s a powerful way to animate action scenes quickly without sacrificing quality.
Final Thoughts
Charlie Driscoll’s workflow proves that real-time cinematic animation is now more accessible than ever. With tools like Reallusion, Move.ai, and MetaHuman Animator, animators can create polished fight scenes faster — and with fewer technical hurdles.
FAQ
What is ActorCore?
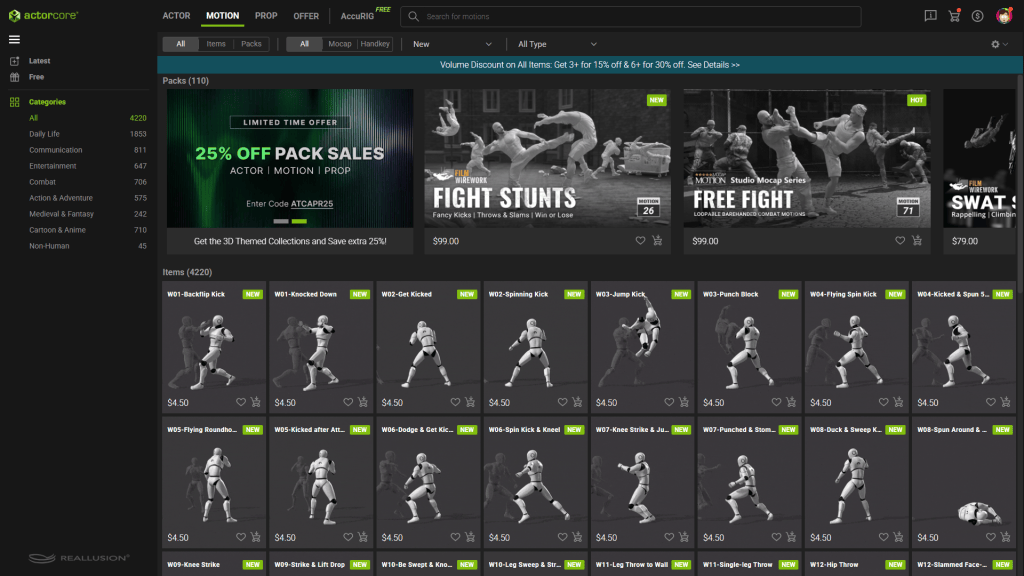
ActorCore is Reallusion’s marketplace for professional motion-capture animations ready for Unreal, Unity, and other 3D platforms.
Can I use ActorCore animations on MetaHumans?
Yes — they can be retargeted in Unreal using standard workflows.
Do I need motion capture gear?
No — Reallusion animations are pre-made. You only need mocap gear if you want to add custom performances.
Reallusion joins forces with elite stunt pros to unleash cutting-edge motion capture animations for next-gen digital production.This high-impact collaboration taps into the explosive talent of veteran kung fu artists, celebrated for their precision in wire-aerial combat and harness choreography.
By fusing top-tier stuntcraft with state-of-the-art mocap, Reallusion delivers a game-changing pipeline for blockbuster-quality action with the same level of planning and execution as big-budget productions. The result is a dynamic library of cinematic stunt animations that are refined, action-ready, and available now on ActorCore as plug-and-play assets for instant integration.
What’s more, you can witness the action unfold:
How Wire Stunts Electrify Mocap Animation
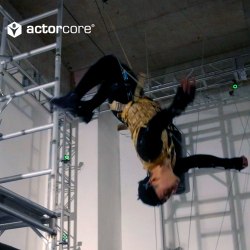
Wire stunt performers offer significant advantages for motion capture, especially in action-heavy or physically demanding scenes. This technique is increasingly in demand in the film industry, particularly within superhero, sci-fi, and fantasy genres.
Authentic Daredevil Action
When paired with skill and precise body control, wire stunts can execute complex aerial maneuvers, flips, and quick reflexive actions (think explosions) — all feats that are challenging to achieve with hand-key animation. With the right equipment, technique, and technology, wire stunts can deliver natural, believable, and physics-driven action.
“Motion capture relies on the body’s lines to reconstruct the shape and movement of a person, so the resulting curves can often look a bit different. However, when viewed with the naked eye, the motion usually appears acceptable.
That’s why, during many of our motion playback sessions, we need to review the captured animation to examine the body’s curves and verify whether the performed actions meet our requirements.“
Jun-xi Wu, Stunt Choreographer, the Hung Ga Ban Team*
Precise Capture of Gravity-Defying Stunts
Wire harnesses let stunt actors defy gravity to soar, leap, float, and spin right into the heart of explosive action scenes. With the same level of precision and planning as major blockbuster productions, these high-flying performances bring an extra spark to 3D animation and visual effects, turning motion capture into something truly spectacular.
“You might have seen some motion capture setups where they tie a sling around the actor’s body, and when they pull it, the actor starts spinning around. Actually, when doing that move, it’s really hard for the person being pulled to get a feel for it. You have to completely trust the wire team, otherwise, if you’re not careful, it’s really easy to get hurt.”
Yu-Kai Lin, Stunt Performer
Stunning 3D Stunts are Now Available
Reallusion’s collaboration with wire stunt performers has led to the creation of three high-impact motion capture animation packs, each filled with impressive action.
Explosion Stunts Pack
Bring the heat to your scenes with the Explosion Stunts pack—tailor-made for modern warfare and high-stakes rescue missions. Packed with powerful reactions to bomb blasts and energy weapon impacts, these animations inject explosive realism and heart-pounding intensity.
SWAT Stunts Pack
Unleash gravity-defying action with the SWAT Stunts pack—crafted for elite operatives and thrill-seekers alike. From rappelling down walls and smashing through windows to scaling skyscrapers and soaring in wingsuits, these heart-stopping stunts channel the intensity of blockbuster hits like Mission: Impossible. Perfect for SWAT units, special forces, secret agents, or extreme sports stories that demand grounded heroes and high-octane realism.
Fight Stunts Pack
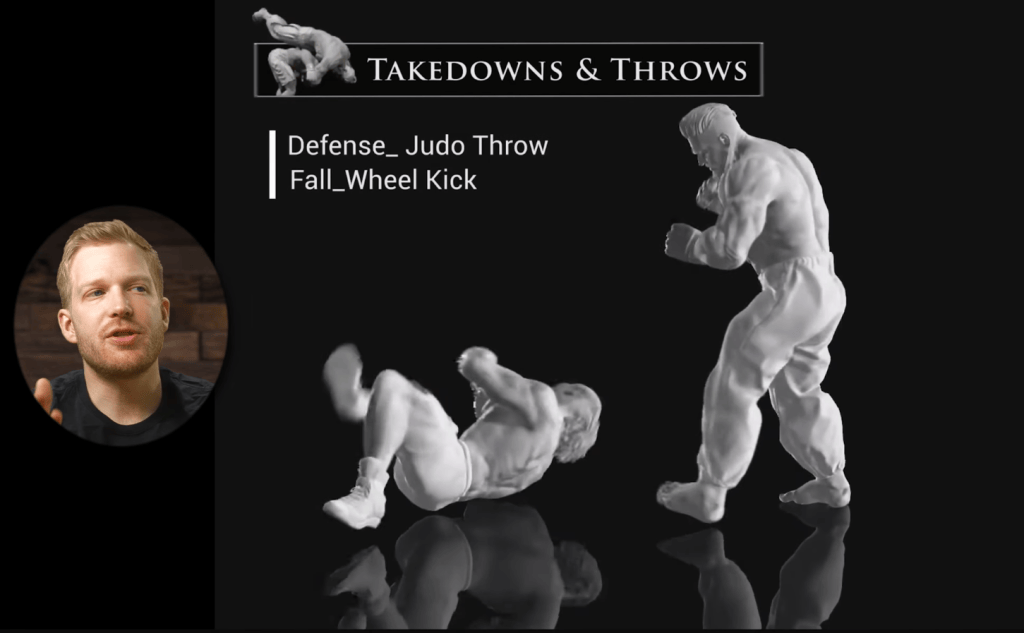
Step into the arena with the Fight Stunts pack—an adrenaline-charged collection of martial arts choreography built for cinematic impact. Featuring high-flying kicks, crushing blows, body throws, and bone-crunching takedowns, these moves channel the explosive energy of Street Fighter, The Matrix, and John Wick. Whether you’re crafting a gritty brawl or a slick showdown, this pack delivers the raw power and precision your fight scenes demand.
Reallusion continues to revolutionize animation, offering users unparalleled tools and content for high dynamic, cinematic productions. With numerous exciting content releases on the horizon, now is the ideal time to explore the limitless possibilities on the ActorCore 3D Motion store. These motions will soon be incorporated into iClone AccuPOSE for AI motion editing. Stay tuned for more!
*The Hung Ga Ban Team (洪家班) was founded by action superstar Samuel “Sammo” Hung Kam-bo (洪金寶) in the 1970s as a martial arts action film troupe. With his exceptional physical skills and quick thinking, Sammo Hung not only became a successful action star but also rose to fame as a renowned martial arts choreographer. Sammo places great importance on teamwork—he built Hung Ga Ban like a big family, where anyone with talent and ability would receive his unconditional help and support. Today, this team is one of the most successful and professional martial arts and stunt choreography groups in the film and entertainment industry.
FCN Producciones Transforms Biblical Storytelling Through Advanced Character Designer Tools and 3D Animation Software
FCN Producciones
Based in Heredia, Costa Rica, FCN Producciones represents the production arm of Fore Christ, INC., a non-profit organization headquartered in the United States. This foundation is dedicated to creating value-based media content and implementing community impact programs that resonate across cultural boundaries. What began as a modest operation has evolved into a technically sophisticated studio capable of developing virtual productions for international television networks and digital platforms.
The studio specializes in creating immersive visual storytelling that brings biblical narratives to modern audiences through advanced 3D character animation and virtual production techniques. Their flagship series, “Walking by the Word,” exemplifies their creative vision by seamlessly blending biblical storytelling with contemporary virtual environments.
Through innovative use of technology, FCN Producciones has pioneered a real-time production workflow that combines tools like Unreal Engine, Aximmetry, and Reallusion’s Character Creator and iClone, its AI-enhanced AccuPOSE tools, and the iClone Unreal LIVE LINK plugin. This workflow allows them to create, animate, and integrate 3D characters and scenes with a level of efficiency and detail that matches the visual demands of today’s media landscape.
Meet the Team
Jonathan Williamson – President of Fore Christ, INC. / Chief Operations Officer at DeCarol Williamson Enterprises / Walking by the Word / Time to Talk
Jonathan Williamson – President and Creative Visionary
As President of Fore Christ, INC., Jonathan Williamson leads with a clear mission: creating and promoting values-based content that resonates across cultures. He serves as both host and creator of “Walking by the Word,” FCN’s flagship series that shares biblical teachings through visually engaging, accessible, and culturally relevant formats.
Jonathan’s vision extends beyond pure entertainment. He also hosts the complementary program “Time to Talk,” where he interviews diverse voices to explore conversations around faith, values, and positive impact in everyday life. Both formats reflect the foundation’s commitment to meaningful storytelling.
With an eye toward international outreach, Jonathan expertly combines spiritual messages with cutting-edge technology, connecting with audiences of various ages and backgrounds. His leadership also extends to the FCN Samaritan Initiative in Africa, which provides discipleship, social support, and community development programs to vulnerable communities.
Beyond his work with FCN, Jonathan serves as Chief Operations Officer at DeCarol Williamson Enterprises, a North Carolina-based company developing various business initiatives, where he oversees strategic operations and contributes to growth project execution.
Giovanni Rojas Alfaro – 3D Generalist for Virtual Production
With over 17 years of experience in graphic design, advertising, illustration, and 3D visualization, Giovanni Rojas brings exceptional technical and creative skills to FCN Producciones. Throughout his impressive career, he has collaborated with international brands and projects across multiple industries, delivering sophisticated visual solutions for both digital media and corporate environments.
Giovanni Rojas Alfaro – 3D Generalist for Virtual Production
Since joining FCN in 2017, Giovanni has focused on character design, scene development, and asset creation for virtual environments. His expertise spans multiple tools, including Cinema 4D, ZBrush, Unreal Engine, and the Adobe Substance 3D suite. Recently, he has incorporated Reallusion’s powerful toolset—namely, iClone and Character Creator—into his workflow, significantly expanding his capabilities in real-time production and personalized character design.
Giovanni’s work stands out for its meticulous attention to detail and solid foundation in visual design principles, which he now applies to optimized workflows in virtual production settings, achieving impressive results with limited resources.
Minor Cortés Chinchilla – Virtual Production Technical Director
Minor Cortés Chinchilla – Virtual Production Technical Director
As a veteran team member with over two decades at FCN Producciones, Minor Cortés has been instrumental in the studio’s technical and operational development. In his current role as Virtual Production Technical Director, he coordinates the integration of real-time production technologies, expertly adapting tools such as Unreal Engine, Aximmetry, iClone, and Character Creator to meet the demands of a fast-paced, multidisciplinary work environment.
Minor’s approach combines hands-on technical expertise with structured workflow management, allowing the team to handle complex projects efficiently despite their relatively small size. Through his technical leadership, FCN maintains high production standards in audiovisual content for both digital and broadcast media platforms.
The Creative Process: Bringing Biblical Stories to Life
FCN Producciones recently had the opportunity to bring their content to an international network broadcasting via satellite throughout the United States and Latin America. This new partnership required them to adapt to precise formatting and duration requirements, prompting the team to re-record three pivotal episodes: “Bethlehem,” “The Ministry of Jesus,” and “The Crucifixion.”
FCN animates the Ministry of Jesus with Reallusion tools
Character Creation Revolution with Reallusion Tools
When FCN first began producing “Walking by the Word,” one of their greatest challenges involved animated character quality. As Jonathan Williamson explains, “If you look at some of our earlier episodes, you’ll notice that the quality was honestly a little bit low. The animations were very blocky, very jumpy, and we didn’t have any way of actually customizing the clothing they were wearing.”
FCN uses Character Creator to create biblically accurate figures.
Everything changed when they discovered Reallusion’s software suite. “Once we began working with Reallusion, it gave us a new ability to make more real characters,” Williamson notes.
“We were able to start creating and customizing clothes, customizing the animations where it made it seem as if they were interacting. It made them seem more real and that lent to a much greater quality in production for all of our episodes and programs.”
Jonathan Williamson – Host and President of Fore Christ, INC
For these updated episodes, FCN leveraged the full power of Reallusion’s character design tools:
Character Creator became their primary platform for generating biblical characters from scratch. The team designed everything from body types and skin tones to period-appropriate clothing and accessories. For the “Bethlehem” episode, they created detailed characters, including baby Jesus, while “The Ministry of Jesus” and “The Crucifixion” required diverse figures with historically accurate attire and props such as vessels and Roman weaponry.
For the “Bethlehem” episode, FCN used Character Creator for baby Jesus
Each character was meticulously crafted using Character Creator‘s sophisticated toolkit, including Transfer Skin, Wave, Comfort Adjust, and Edit Mesh functions to achieve realistic and contextually appropriate appearances.
The character base technology within Character Creator proved invaluable for ensuring historical accuracy while maintaining visual coherence across different scenes and episodes.
Animation Workflow and Integration
Once characters were designed, FCN utilized Reallusion’s animation tools to bring them to life:
iCloneserved as their primary animation platform, allowing them to apply base animations from extensive motion libraries while making precise adjustments for each scene.
FCN used iClone as primary character animation platform
iClone AccuPOSE became an essential tool for refining character movements and expressions. Giovanni explains, “For scenes that required more complex movements or specific postures, we turned to iClone AccuPOSE, which allowed us to intuitively manipulate the character’s entire body. We could move one part of the body and see how others adjust automatically in a natural way.”
For crowd scenes, the team usediClone Crowd Simulation to create believable background activity and navigation paths that enhanced the environmental storytelling without overwhelming their system resources.
The iClone Unreal LIVE LINK feature proved particularly valuable, enabling seamless transfer of characters and animations directly into Unreal Engine scenes, maintaining visual fidelity and animation quality throughout the pipeline.
Technical Integration: The Aximmetry Challenge
One key technical challenge FCN faced was their use of Aximmetry as their final production engine. Unlike standard setups, Aximmetry operates on a modified version of Unreal Engine, which often creates compatibility issues with third-party plugins.
“One of the key points of our workflow is that we use Aximmetry as the final production engine. Unlike other systems, Aximmetry operates on a modified version of Unreal Engine, which often causes incompatibilities with many plugins. However, Reallusion tools like iClone and LIVE LINK are fully compatible with this customized version of Unreal.”
Minor Cortés Chinchilla – Virtual Production Technical Director
This compatibility proved decisive in their tool selection process, as it allowed for a seamless workflow from character creation through final production. Minor’s team developed a systematic approach:
They accurately replicated terrain and environmental elements within iClone to test animations
Using iClone’s Unreal LIVE LINK plugin, they selected meshes or element sets from Unreal Engine and transferred them directly to iClone as reference meshes
These reference meshes allowed for precise character positioning and interactions, such as natural walking on terrain or proper alignment with environmental obstacles
iClone Unreal LIVE LINK plugin to directly transfer animations and meshes with Unreal Engine
Problem-Solving with Reallusion Tools
The FCN team encountered and solved numerous technical challenges using Reallusion’s toolset:
Costume Physics and Collision Management: “On several occasions, it was necessary to adjust the costumes to prevent garments from passing through the character’s body during movements like walking, bending, or interacting with objects,” Giovanni notes. The team used collision management tools and applied physics simulations for natural cloth movement without compromising performance.
Complex Animation Requirements: For specialized scenes, like a Roman character mounted on horseback, the team combined multiple approaches. They first exported the character to iClone, utilized preset animations like horseback riding from the software’s gallery, then customized these animations to fit their specific scene requirements. AccuPOSE helped perfect the rider’s posture for natural arm, torso, and head movements.
Resource Management: To enhance scene richness without overwhelming their limited resources, FCN leveraged Reallusion’s Content Store, Marketplace, and ActorCore. These resources provided access to period-appropriate accessories, costumes, hairstyles, and other elements without requiring costly custom modeling.
Blueprint Control in Production: From iClone, the team exported fully animated characters and organized them in Unreal within independent sequences managed through a master sequencer. “Each group—Romans, merchants, animals—has its own sequence,” explains Minor. “These sequences generated from iClone can be integrated within a blueprint in Unreal, and once the project is exported to Aximmetry, it’s possible to control it using triggers during live production.”
The Reallusion Advantage: Why These Tools Matter
For a small studio like FCN Producciones, Reallusion’s character designer and animation tools have been transformative. Giovanni Rojas summarizes it well: “The flexibility of Reallusion’s tools gave us creative control that wouldn’t be possible with a small team otherwise.”
Key advantages of the Reallusion ecosystem include:
1. Accessibility and Efficiency
Reallusion’s tools democratize high-quality character creation and animation, making professional-grade results achievable even for smaller studios. The intuitive interfaces and comprehensive libraries allowed FCN to focus on storytelling rather than technical hurdles.
2. Seamless Integration
The compatibility between Reallusion products and FCN’s existing technology stack (particularly the modified Unreal Engine used by Aximmetry) eliminated workflow bottlenecks. As Minor Cortés emphasizes, “Reallusion’s compatibility with the version of Unreal used by Aximmetry was key. Everything worked without technical barriers.”
3. Complete Character Control
From initial design through animation and integration into final scenes, Reallusion provided FCN with unprecedented control over their characters’ appearance, movement, and expressiveness. This level of control significantly elevated the visual quality of their productions.
4. Resource Optimization
For a small team with limited resources, Reallusion’s extensive content libraries and efficient workflows allowed FCN to achieve results that would otherwise require much larger teams and budgets. The ability to customize existing assets rather than creating everything from scratch proved invaluable.
Character Creator content libraries make all motions, clothing, hairs and props, interchangeable
Conclusion: The Future of Biblical Storytelling Through 3D Animation
FCN Producciones demonstrates how even modest-sized teams can achieve impressive results in virtual production by selecting the right tools and establishing efficient workflows. Their success with Reallusion’s character creation and animation software illustrates how modern technology can revitalize traditional storytelling.
“What matters to us is telling meaningful stories. These tools helped us do it with clarity and quality,” says Jonathan Williamson, highlighting the ultimate purpose behind their technical achievements.
For other 3D animators, content creators, and production houses seeking to enhance their character creation capabilities, FCN’s experience offers valuable insights. The combination of Character Creator‘s detailed human creator tools, iClone‘s animation capabilities, and AccuPOSE‘s refinement functions provides a comprehensive solution for character-driven storytelling across various genres and formats.
By embracing these powerful 3D character animation and lip sync animation tools, FCN has not only improved their technical capabilities but also enhanced their ability to fulfill their core mission: telling meaningful stories with technical precision and creative vision.
Artist Pascal Teunissen earns third place in the “Business & Commercial” category of the Reallusion 2024 Animation at Work contest. In this article, he walks us through the complete workflow behind his winning entry, “Fictive Commercial: Pilgrim Travel Mug”.
Pascal Teunissen
Hello, I’m Pascal Teunissen. My professional background is quite diverse. I began my career as an architectural drafter in infrastructure, focusing on electricity and water pipelines. Currently, I work as a civil servant at Rijkswaterstaat, where I’m responsible for data delivery and processing to support the planning of major maintenance on provincial roads in the Netherlands.
Alongside my professional work, I’ve always had a passion for creativity. I started by developing simple games in Unity, but I soon felt the urge to do more, including creating my own characters and worlds. My first attempt was with OpenToonz, but I quickly ran into its limitations and technical issues. While working with Unity, I discovered Character Creator, which seemed like the perfect tool for building 3D characters.
At one point, I explored cryptocurrency trading, but eventually chose to invest in something far more fulfilling: my creative hobby. That decision was perfectly timed with a bundle offer for iClone, Character Creator, and Cartoon Animator, which was an opportunity I couldn’t pass up.
Cartoon Animator turned out to be the tool I had been looking for. Especially after mastering Affinity Designer, I was able to design and animate my own characters. I invested in all the Reallusion add-ons and taught myself the software through practice and experimentation. Cartoon Animator has become my favorite animation program, enabling me to work faster and more efficiently, even with my busy family life.
Among my favorite new features in Cartoon Animator are the spring bones function and the image/sprite sequence options. These tools allow me to animate props quickly and add frame-by-frame action to my scenes. When I need to create animations rapidly, these features significantly enhance my workflow, helping me achieve a more professional animation style.
Background Story & Concept
The idea for the portable cup commercial came from a personal moment. I had just started my new job at Rijkswaterstaat, and on my first day, I received a travel mug. I liked it so much that I thought “it would make a great idea for an animation”. I’ve created several commercial-style animations Supsman.
Preparing this particular entry took me about two to three weeks. The first week is usually spent on design and storyboarding. Weeks two and three are focused on animating, reviewing, and refining any errors. Storyboarding is a major part of my process. I invest a good amount of time into it, as it helps shape the flow and visual structure early on.
Tip to fellow artists: keep things simple but clear. A strong storyboard doesn’t have to be perfect—it just needs to communicate your ideas effectively.
Character Design with Affinity Designer
My creative process often begins with inspiration from Pinterest or AI-generated characters. I then design my own versions in Affinity Designer, working directly in a vector style. I’ve also gained experience in rigging, partly through feedback received while selling my creations on the Reallusion Marketplace. In addition, I share free content on the marketplace as a way to give back to the community.
I’ve experimented with rigging in Moho and After Effects, but Cartoon Animator remains my preferred tool due to its intuitive workflow. I discontinued my previous YouTube channel due to copyright issues and a lack of focus, but I’ve since launched a new one called Kleine.wijsneuzen.kanaal, focusing on educational content for children.
Building the Animated Scene
One of the most challenging scenes to create was one where the color palette didn’t align with the rest of the film. Balancing the look and feel to match the overall tone proved to be especially tricky.
When it comes to crafting strong backgrounds, I rely on a wide range of references. These include photos I’ve taken of buildings while on vacation, images from Pinterest, and even AI-generated concepts. I often use AI to create cartoon-style visuals from specific camera angles. By blending these various sources of inspiration, I’m able to distill the strongest elements and shape them into a style that reflects my own vision.
I used a lot of 2D and 3D motions from the Reallusion Marketplace as starting points and adjusted them to fit my needs for the animated scene.
I kept my VFX as subtle adjustments, such as lighting adjustments, adding shadows, and occasionally a slight wiggle in the lines, which can be seen in my kitchen scene.
Advice to Future Contestants
For future contestants, I would say: don’t be afraid to experiment or make mistakes. The learning journey is just as valuable as the final result. Take time to understand the judging criteria and focus on the elements that carry the most weight. Have a clear plan before you begin, but stay flexible and adjust your approach when needed. Seek feedback from others and use it to strengthen your work.
Use references and lots of them. Study professional animations and let yourself be inspired by other artists, but always bring your own unique style and vision to the project. Most importantly, be honest and authentic in your work. Stay positive, even if you don’t win. Be grateful for the experience, and see it as a step forward in your creative growth. I won the Honorable Mention from last year’s contest, but as I practiced more with the techniques, the better I eventually improved.
Closing Thoughts
My final thoughts on this competition are overwhelmingly positive. It was an intense, yet highly educational experience. I learned a great deal, especially in the areas of storytelling and storyboarding, which I now realize are skills I want to continue improving. I’m proud of what I’ve achieved through this process.
To future contestants, my advice is simple: enjoy the journey. Don’t put too much pressure on yourself. Be open to experimenting, embrace mistakes as part of the process, and learn from every step along the way. Most of all, stay true to your creative vision.
If you’d like to connect, feel free to send me a message through one of my items on the Reallusion Marketplace – Joekie. You can also reach out to me through my other YouTube channels for Kids: kleine.wijsneuzen.kanaal. Thank you for having me in this contest!