Large-Scale Combat Scene, Achieved in Days, Not Months
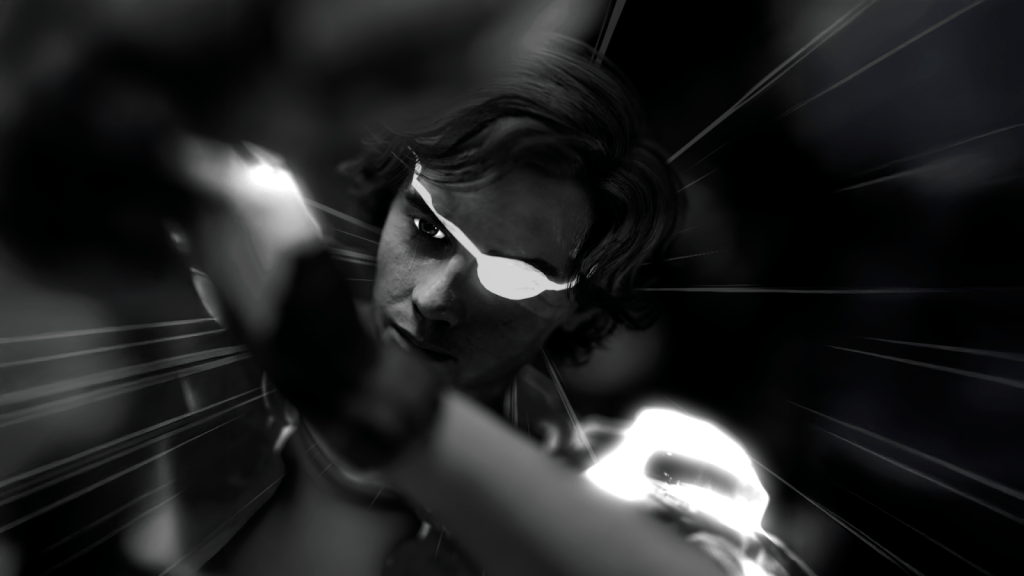
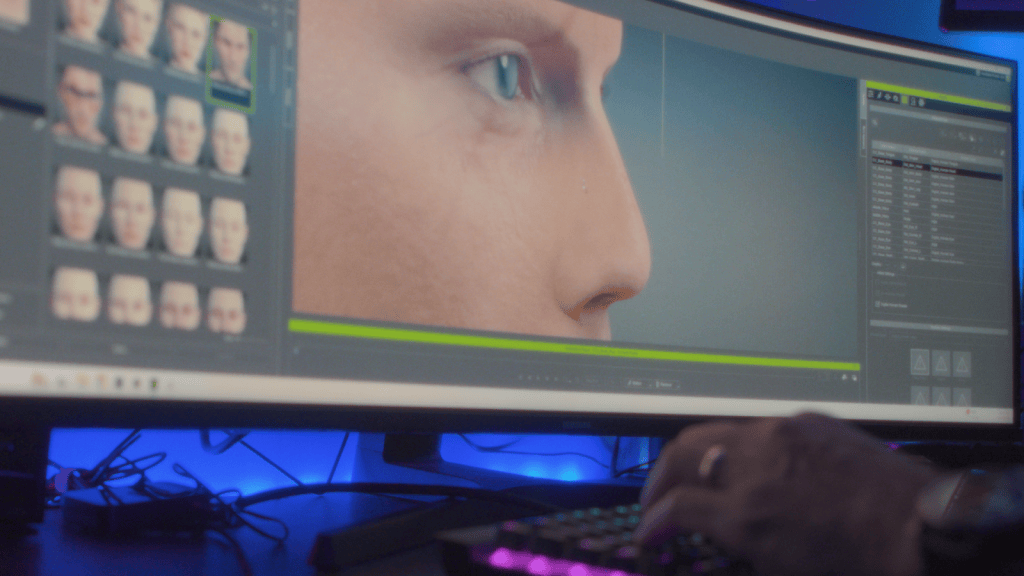
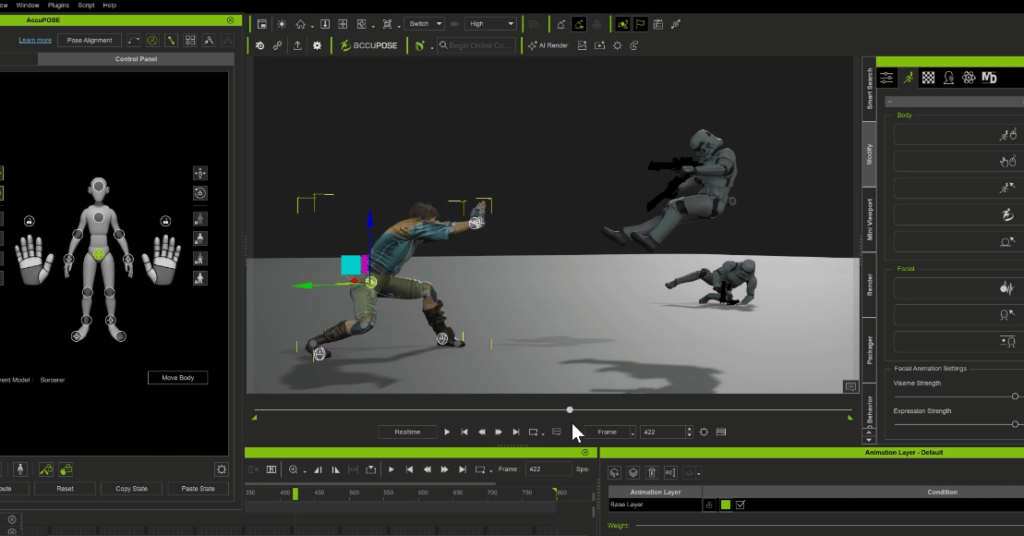
Solo artist Nick Shaheen set out to turn his childhood flipbook lightsaber duels into a full Star Wars-inspired previs in just one week. UsingCharacter Creator, iClone, and AccuPOSE, he transforms rough sketches into a stylized cinematic sequence, showing how AccuPOSE makes large-scale action possible without motion capture or painstaking months of hand-keying.
Nick Shaheen
I’m Nick Shaheen, a radiologist by profession and a CG artist by passion. My journey into animation started in an unexpected place: in medical illustration. Early in my career, I spent a fair bit of time creating motion graphics and anatomical visuals to help explain complex medical concepts. That experience taught me the power of visual storytelling and deepened my appreciation for animation as a way to communicate ideas dynamically.
One Person, One Week: From Notebook Previs to Final Render
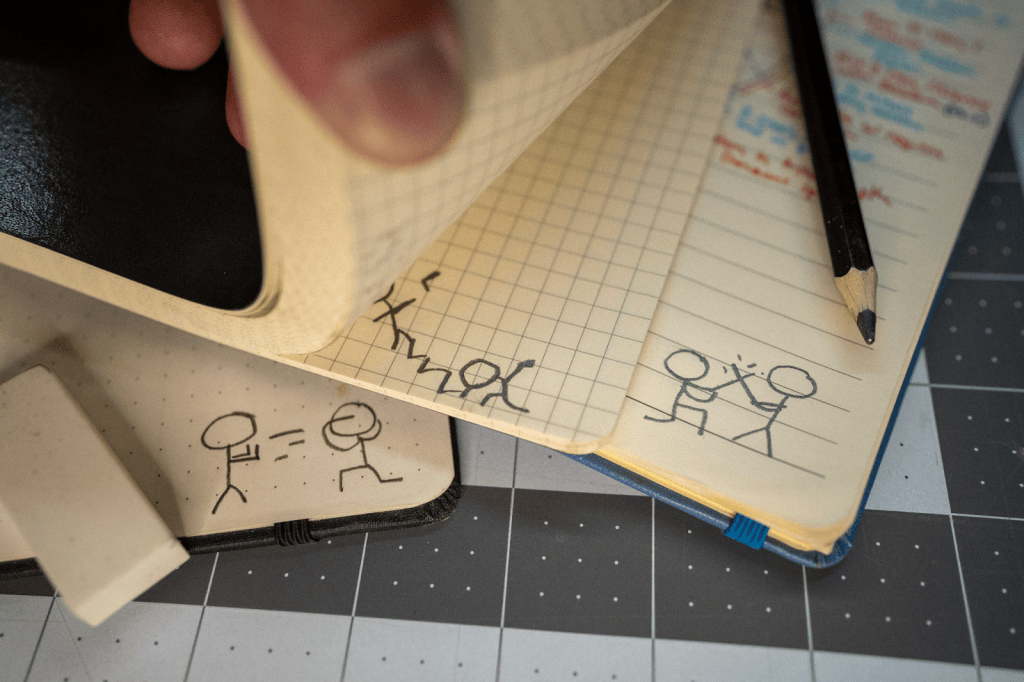
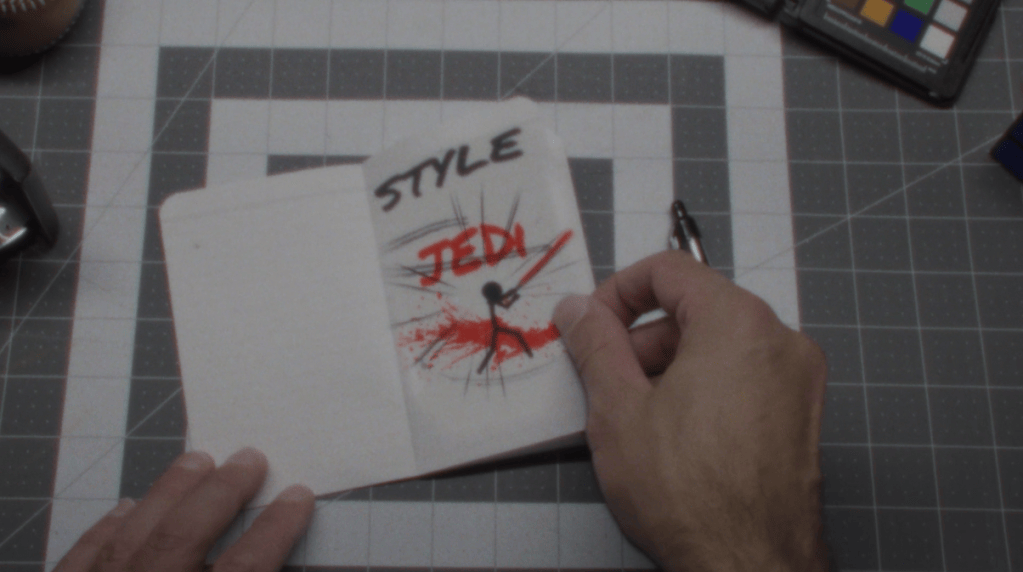
As a kid, I used to animate stick-figure lightsaber battles in the margins of my notebooks. Looking back, those sketches were basically previsualizations before computers were around — rough ideas of motion that hinted at something bigger. Recently, I dug out some of those old flipbook animations and thought: Can I bring these sketches to life using the tools I already have?
The Creative Challenge: Stylized, Fast, and Mocap-Free
I gave myself three rules for this project:
Stylized, not generic. I didn’t want “just another Star Wars animation”. My inspirations were Guy Ritchie, 300, and Sin City — meaning sweeping camera moves, dramatic lighting, and bold color palettes driving the action.
One-week deadline. From modeling to render. Sometimes a time restriction is the best creative push — forcing you to commit to ideas and move the project forward.
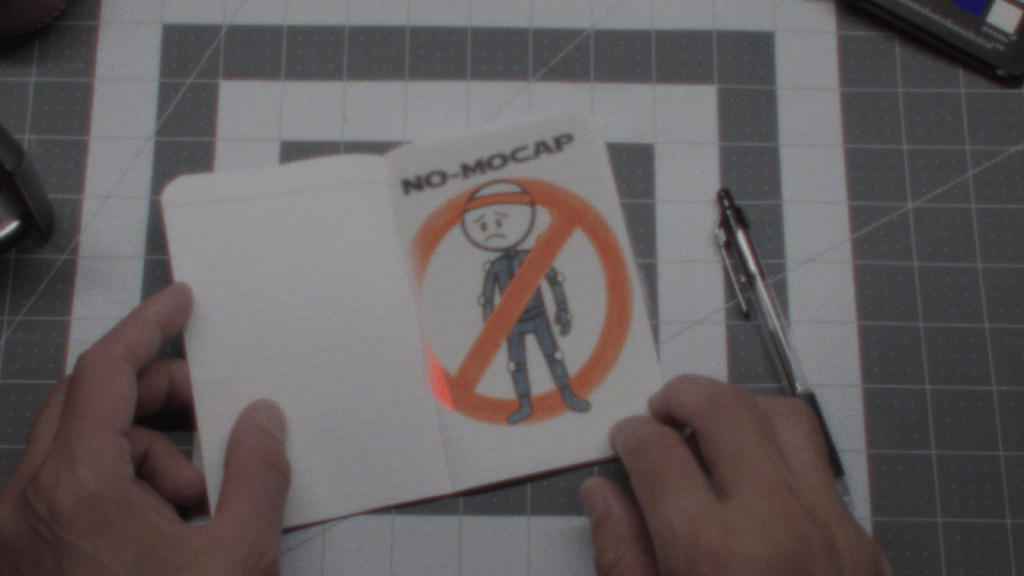
No motion capture. The fight needed to feel larger-than-life and supernatural, something I couldn’t easily achieve without wirework and a stunt double.
Rapid Character Creation with Character Creator and AccuRIG
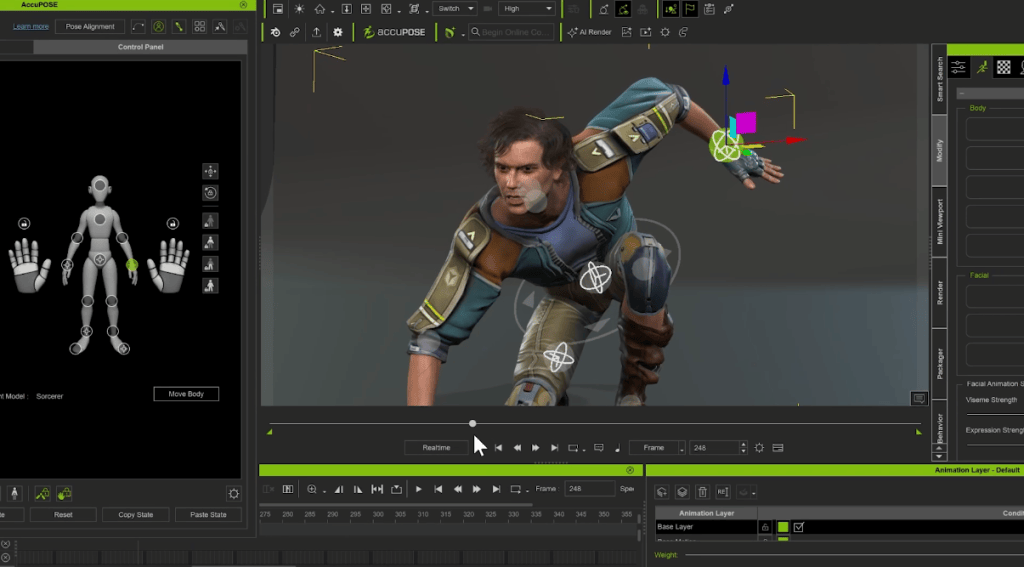
I built my Jedi Knight in Character Creator 4, using Headshot 2, Face Tools, and ZBrush for refinement. For the enemy, I brought in a Stormtrooper model and quickly rigged it with AccuRIG. I textured both characters in Substance Painter. Admittedly, many of the finer details got obscured by the action — but sometimes that’s the trade-off when the energy of the scene takes center stage. With characters ready, it was time to play in the sandbox that is iClone 8.
From Poses to Epic Battle in a Day with AccuPOSE
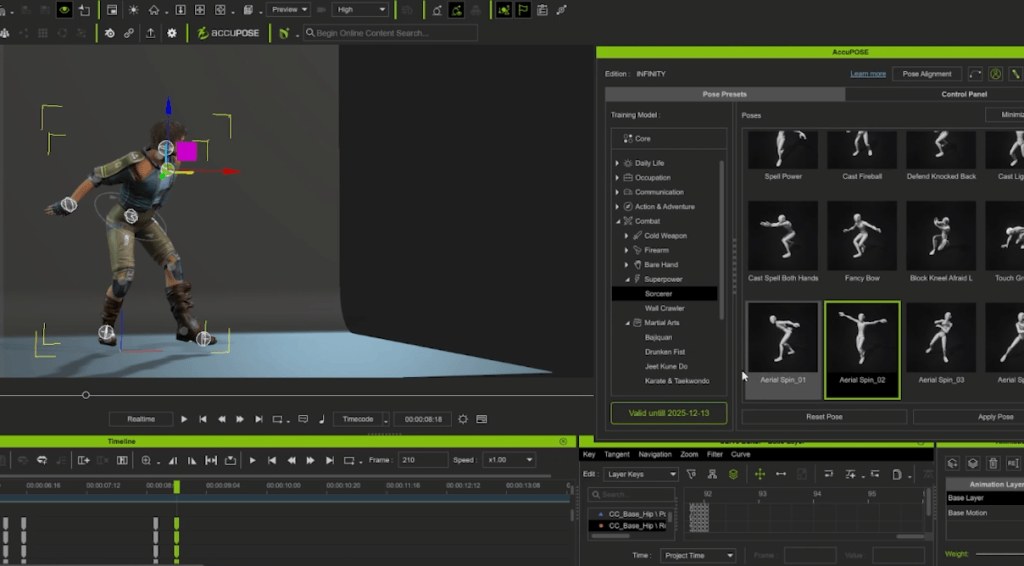
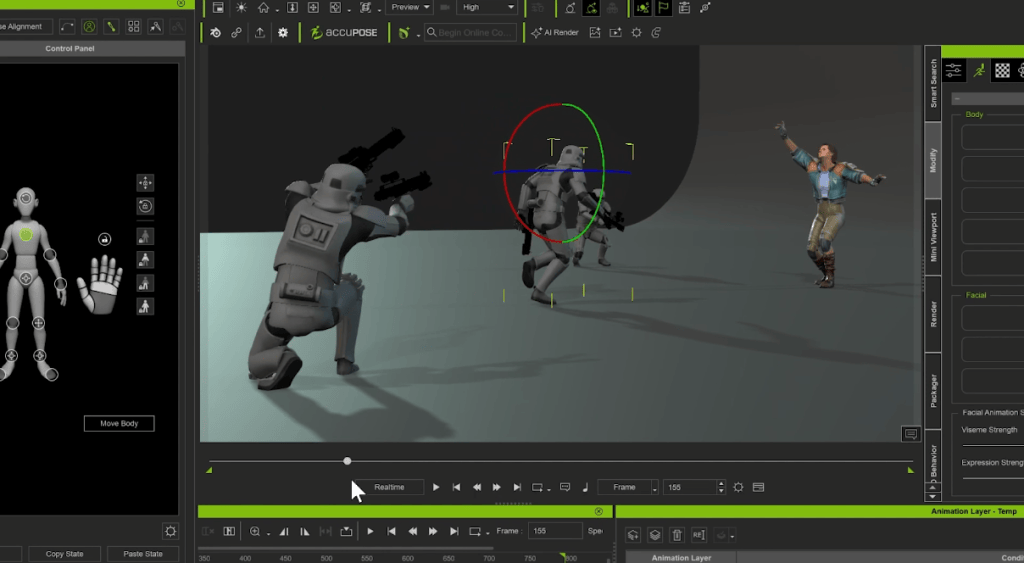
I wanted a large battle with lots of characters. The problem? I’m not exactly a Jedi fight choreographer. That’s where AccuPOSE came in. I set a starting pose and an ending pose and AccuPOSE helped me fill in the space with smooth in-betweens while preserving the structure of each character. In one day, I animated my hero and more than 15 Stormtroopers (most hidden in the background, but still adding scale and chaos). That efficiency gave me more time to focus on lighting, texturing, VFX, and compositing in Cinema 4D and After Effects.
Beyond Static Poses: Natural Motion Made Simple
In my tutorial video, I also showcased how versatile AccuPOSE can be. With AccuPOSE INFINITY, you get a library of themed poses tailored for different scenarios, giving you a head start whether you’re animating combat, daily actions, or cinematic moments. Best of all, it doesn’t just drop a character into position; it guides the transition between poses, keeping movements natural and preventing structural breakdowns. That ability to blend poses seamlessly was the only reason I could pull off a project of this scale in a single week.
From Notebook Previs to Stylized Fantasy
From notebook sketches to a stylized Star Wars-inspired one-shot, all in just one week — that’s the magic of the Reallusion suite and AccuPOSE. I didn’t need a mocap studio, a stunt double, or months of hand-keying. Just a flipbook, some software, and a lot of caffeine. Got a stick-figure duel of your own? Try it in AccuPOSE — you won’t be disappointed.
Animation Journey: From Drawing Cartoons to 3D Worlds
This article is the forth installment of my Garry’s ongoing journal series, From 2D to 3D. If you haven’t read previous posts, then we recommend starting there:
In the first post, I shared the pivotal moment that led me to transition from a decade of 2D work into the world of 3D animation. In the second, I explored the tools, challenges, and creative breakthroughs that shaped my early steps.
In my third entry, I took on the test of building my first fully custom 3D character from scratch. And in this forth article, I share with you how I overcame eye-blinking issues in Character Creator!
Entry 4 – Overcoming Obstacles
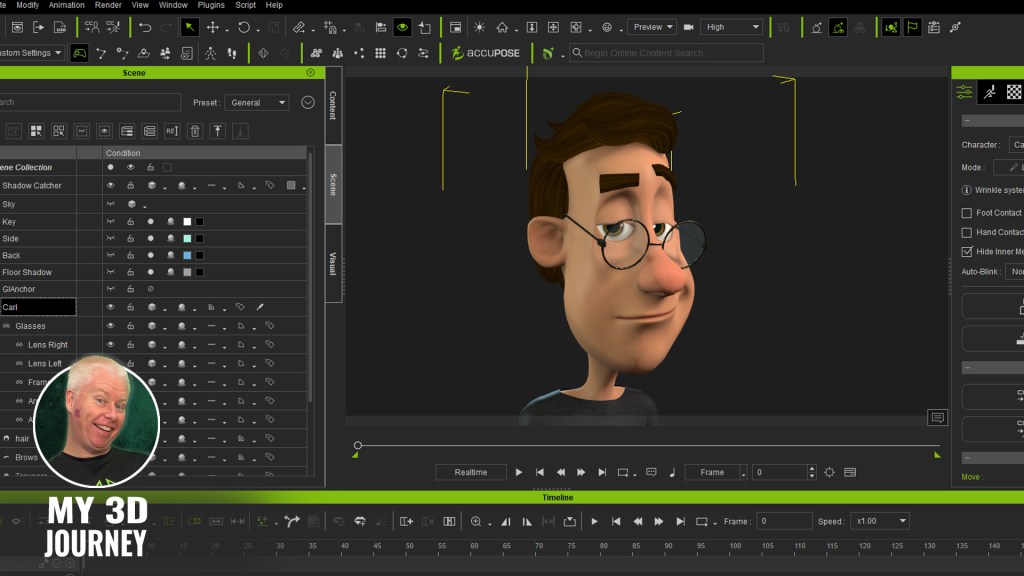
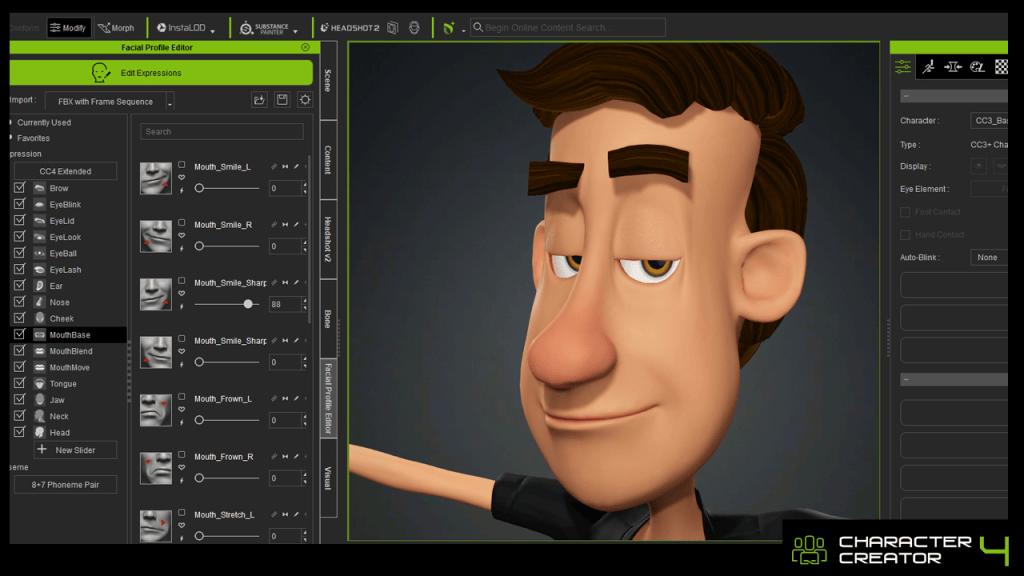
By this point, I have affectionately named my first 3D actor, Carl, and I was feeling like a creative genius. I’d customised his proportions, sculpted him into an original-looking cartoon character, and was finally starting to feel like I had a handle on this whole 3D thing.
And then he blinked…
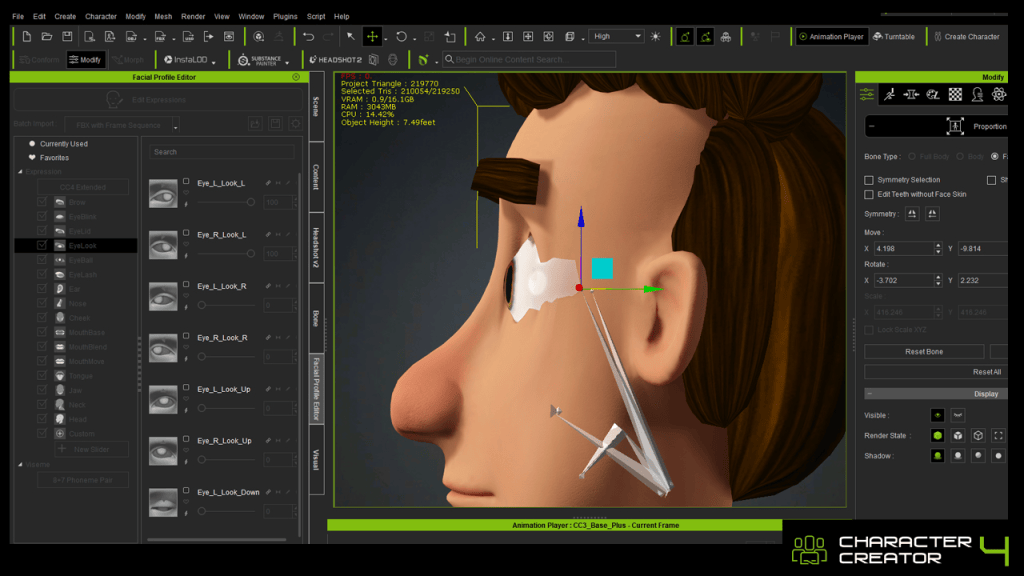
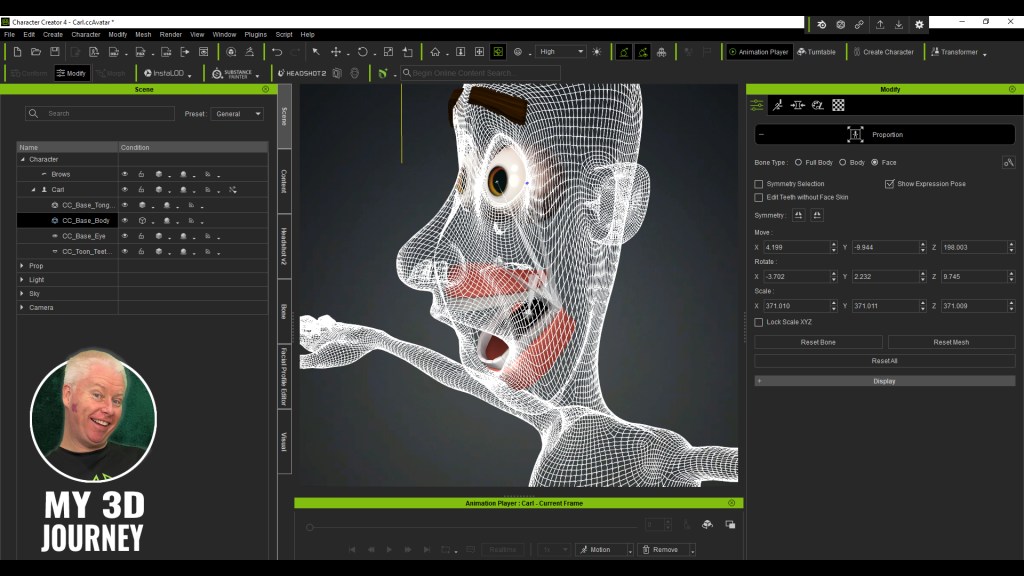
Except he didn’t really blink. His upper eyelids came down, sure, but instead of closing over the eyes like a normal human, they pushed right through them. And I don’t mean subtly. Carl’s big, expressive cartoon eyeballs shot halfway out of his skull like he’d just seen a ghost.
It was my first proper speed bump. The moment where I thought, well that’s horrifying. Guess I broke it.But Carl wasn’t broken. It was me. Of course it was me.
In my pursuit of stylisation, I had given Carl huge, bulging eyes, so very different from the more realistic human eyes of the original base model. I’m not interested in realism. I wanted a cartoon appeal. And cartoon eyeballs come with consequences.
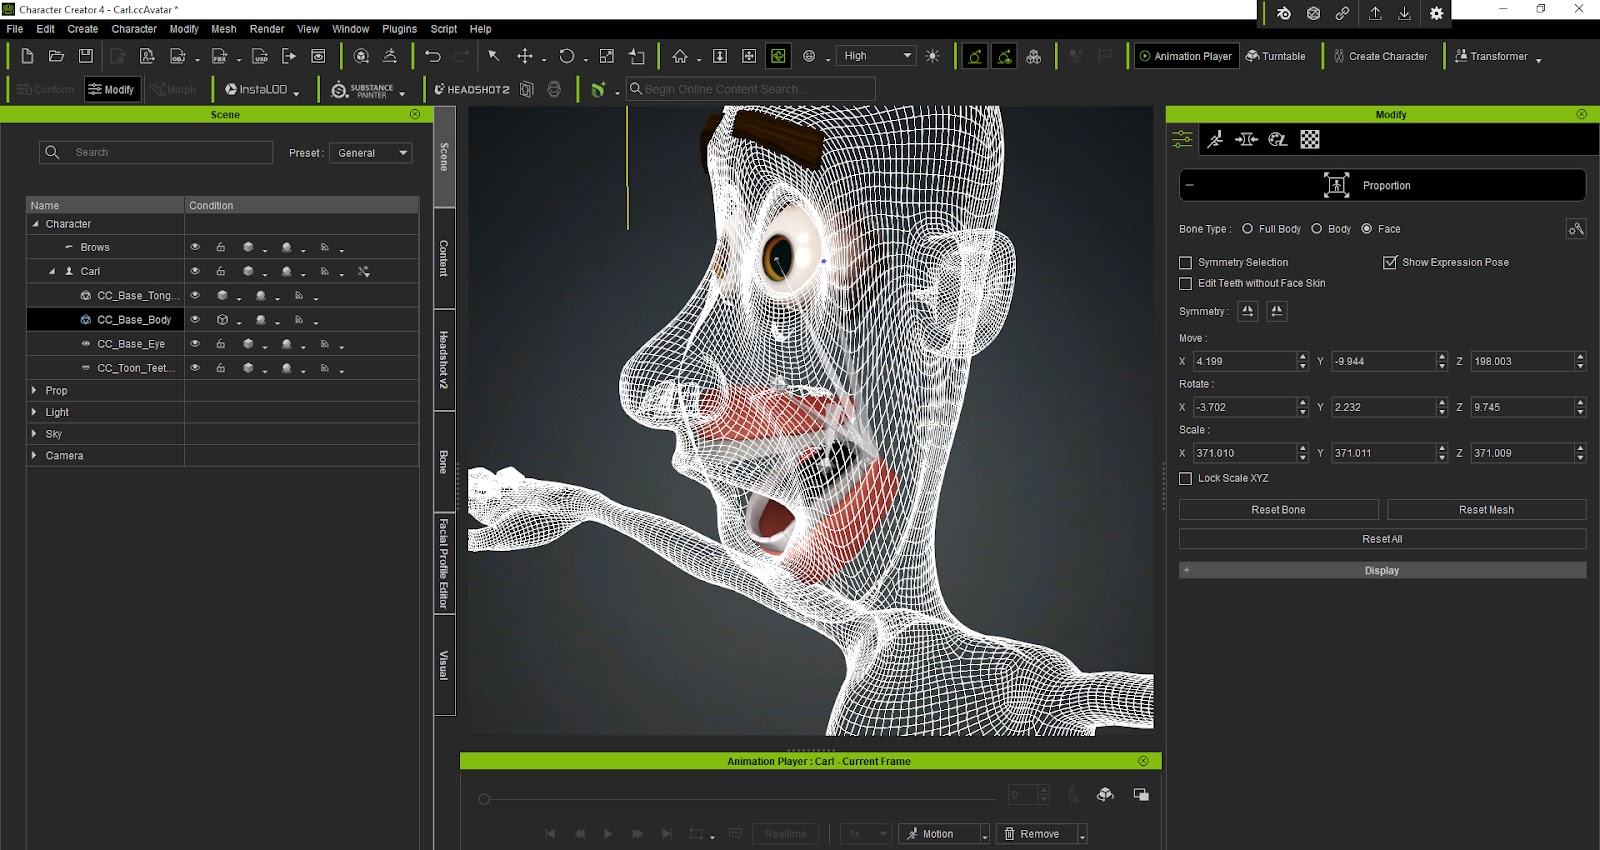
With Edit Mesh, I was able to grab Carl’s upper eyelid geometry and carefully pull it outward, one vertex at a time, to better wrap around his large spherical eyes. It was a matter of tweaking, then testing. Over and over again.
But it worked. Sort of.
The eyelid now cleared the eyeball, but it still didn’t perform quite right. When Carl looked left or right, his eyeballs once again pushed forward, right through the skin of his eyelids. That’s when I returned to the Proportion Tool and repositioned Carl’s eyeballs slightly deeper into his head, away from the eyelids. Just a few subtle nudges backward. And somehow, that was the magic combo.
The eyelid cleared. The blink looked clean. And Carl no longer looked like he was trying to eject his own eyeballs every time he closed them.
It was my first proper frustration, and also my first real victory. Because I hadn’t given up. I hadn’t deleted the project in rage. I’d fixed it. Sure, it was one blink. But for me? That blink was a breakthrough.
And that’s the lesson I wasn’t to impart to other newbies myself in this entry of my journey. The importance of not throwing in the towel. If I had walked away at that point, and trust me, there were times where it was close, I would have missed the moment where things finally clicked. It’s so easy to assume the software is at fault, or that we’re just “not cut out” for 3D animation and rigging. But sometimes, it’s just one or two missing pieces. A tool you haven’t used yet. A solution you haven’t thought of.
There are so many resources out there that can help. The Reallusion YouTube Channel is a goldmine not just for tutorials, but for showing what’s actually possible. The community forums and user groups are full of people who’ve already faced (and solved) the weird problem you’re currently swearing at. And the support I have received on my journey so far has been overwhelmingly positive.
Even ChatGPT has been incredibly helpful when I hit a wall and just need a clear explanation or a gentle “here’s what you’re probably doing wrong.”
And more than anything, just turning up matters. Sitting down, opening the file, poking around.
You don’t have to know the answer, you just have to stay curious long enough to find it.
Garry Pye is an Australian illustrator, animator, and Cartoon Animator instructor with over a decade of experience in the animation industry. Known for his unique blend of creativity and humor, Garry’s work spans from teaching animation techniques to creating innovative content that helps both novice and experienced animators improve their skills.
Garry’s enthusiasm for storytelling and animation shines through in all his projects, whether it’s creating animated shorts, preparing educational tutorials, or sharing his expertise by teaching. With a passion for making animation accessible and fun, Garry has built a community of learners who not only appreciate his knowledge but also his infectious sense of humor and dedication to his craft.
With the release of AccuRIG 2, now available free for download at the ActorCore online store, we can enjoy the improvements of the next generation of easy 3D character rigging and motion. As mentioned in Reallusion release information, AccuRIG has become a worldwide leader in rigging 3D characters for the gaming and entertainment industries with over 200,000 users worldwide.
Designed for creators across gaming, film, and simulation, the new version introduces AI-powered motion search, multilingual support, and an integrated workflow that eliminates the need for external browsing or manual retargeting. With enhanced preview capabilities and broad platform compatibility, AccuRIG 2 positions itself as a fast, accessible solution for high-quality character animation.
What is ActorCore
Before we get started let’s take a brief look at ActorCore for those not familiar with it. ActorCore is Reallusion’s cloud-based platform for 3D character animation, offering a massive library of motion assets and fully rigged characters optimized for real-time production.
It provides creators with thousands of professionally crafted animations, ranging from everyday actions to cinematic sequences, designed for compatibility with major 3D tools like Unreal Engine, Unity, Blender, and Maya. ActorCore also includes lightweight, animation-ready characters built for crowd simulation, business visualization, and digital twin applications.
With support for facial expressions, lip-sync, and precise body articulation, the platform enables high-quality results across gaming, film, and simulation workflows.
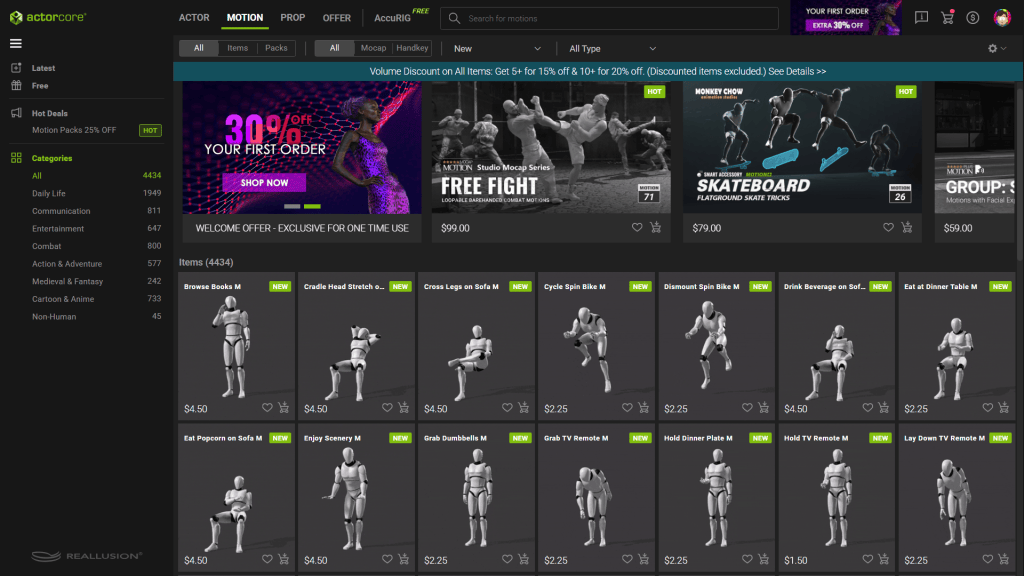
Over 4,500 Premium Motions
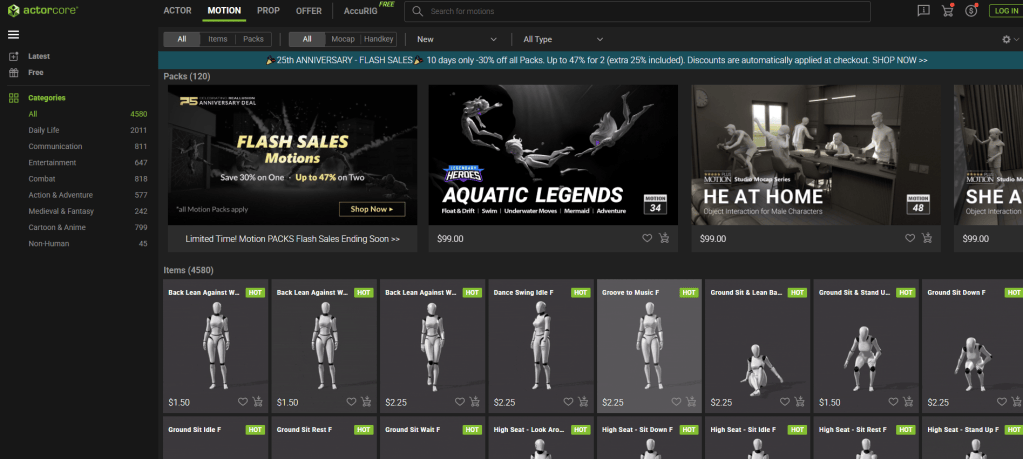
A notable enhancement is the direct in-app integration of over 4,500 ActorCore motions, allowing users to rig, animate, preview, and export characters without leaving the platform. This streamlines the entire workflow, making it faster and more efficient for both studios and individual creators.
AI Smart Search
The AI Smart Search feature in AccuRIG 2 is designed to simplify and accelerate the process of finding suitable animations for 3D characters. Instead of manually browsing through external libraries or switching between applications, users can now search for motions directly within the AccuRIG interface.
The system supports multiple search methods, including category-based filtering and natural language input, which allows users to describe the type of motion they need in everyday terms. This functionality is multilingual, supporting over 100 languages, making it accessible to a global user base.
The search engine is built to interpret descriptive queries and match them with relevant animations from the ActorCore library, which containing the aforementioned 4,500 plus motion assets can be a real time saver and limit frustration. This integration not only saves time but also enhances selections of animations that fit specific project needs.
This feature is particularly useful for creators working across diverse industries such as gaming, film, and simulation who require quick access to high-quality, retargetable motions without interrupting their workflow.
Group Interaction Motion Search
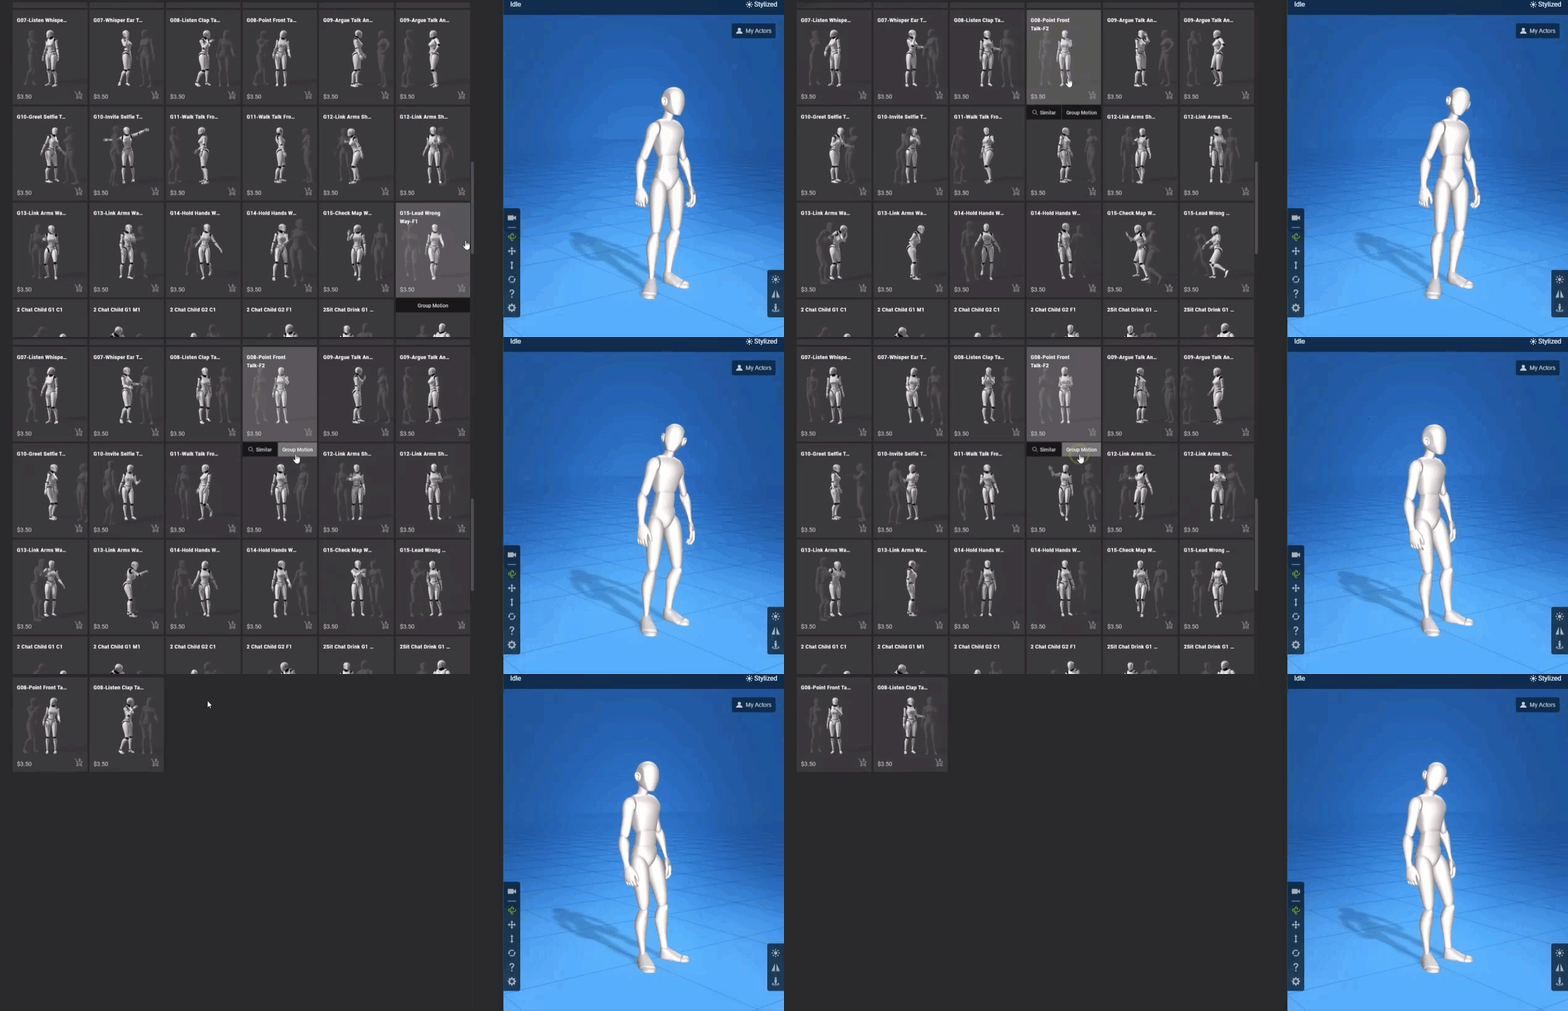
We can also search similar interactive motions as shown in the video above. These can be used to enrich conversations, highlight how characters relate to each other, and add depth to acting performances. The goal is to find gestures and motions that make interactions feel more natural and expressive. We can hover over a motion thumbnail to bring up the Group Motion tab. This will identify any related group motions for that particular type of interaction.
With Group Interaction Motion Search we can very quickly and efficiently locate related motions that will enhance the visual performance of our characters. Another tool to save time and cut down if not eliminate frustration in the search for the proper motions. Less time on such aspects of a project as these can translate into more creative time to build audience rapport.
Finding Similar Motions
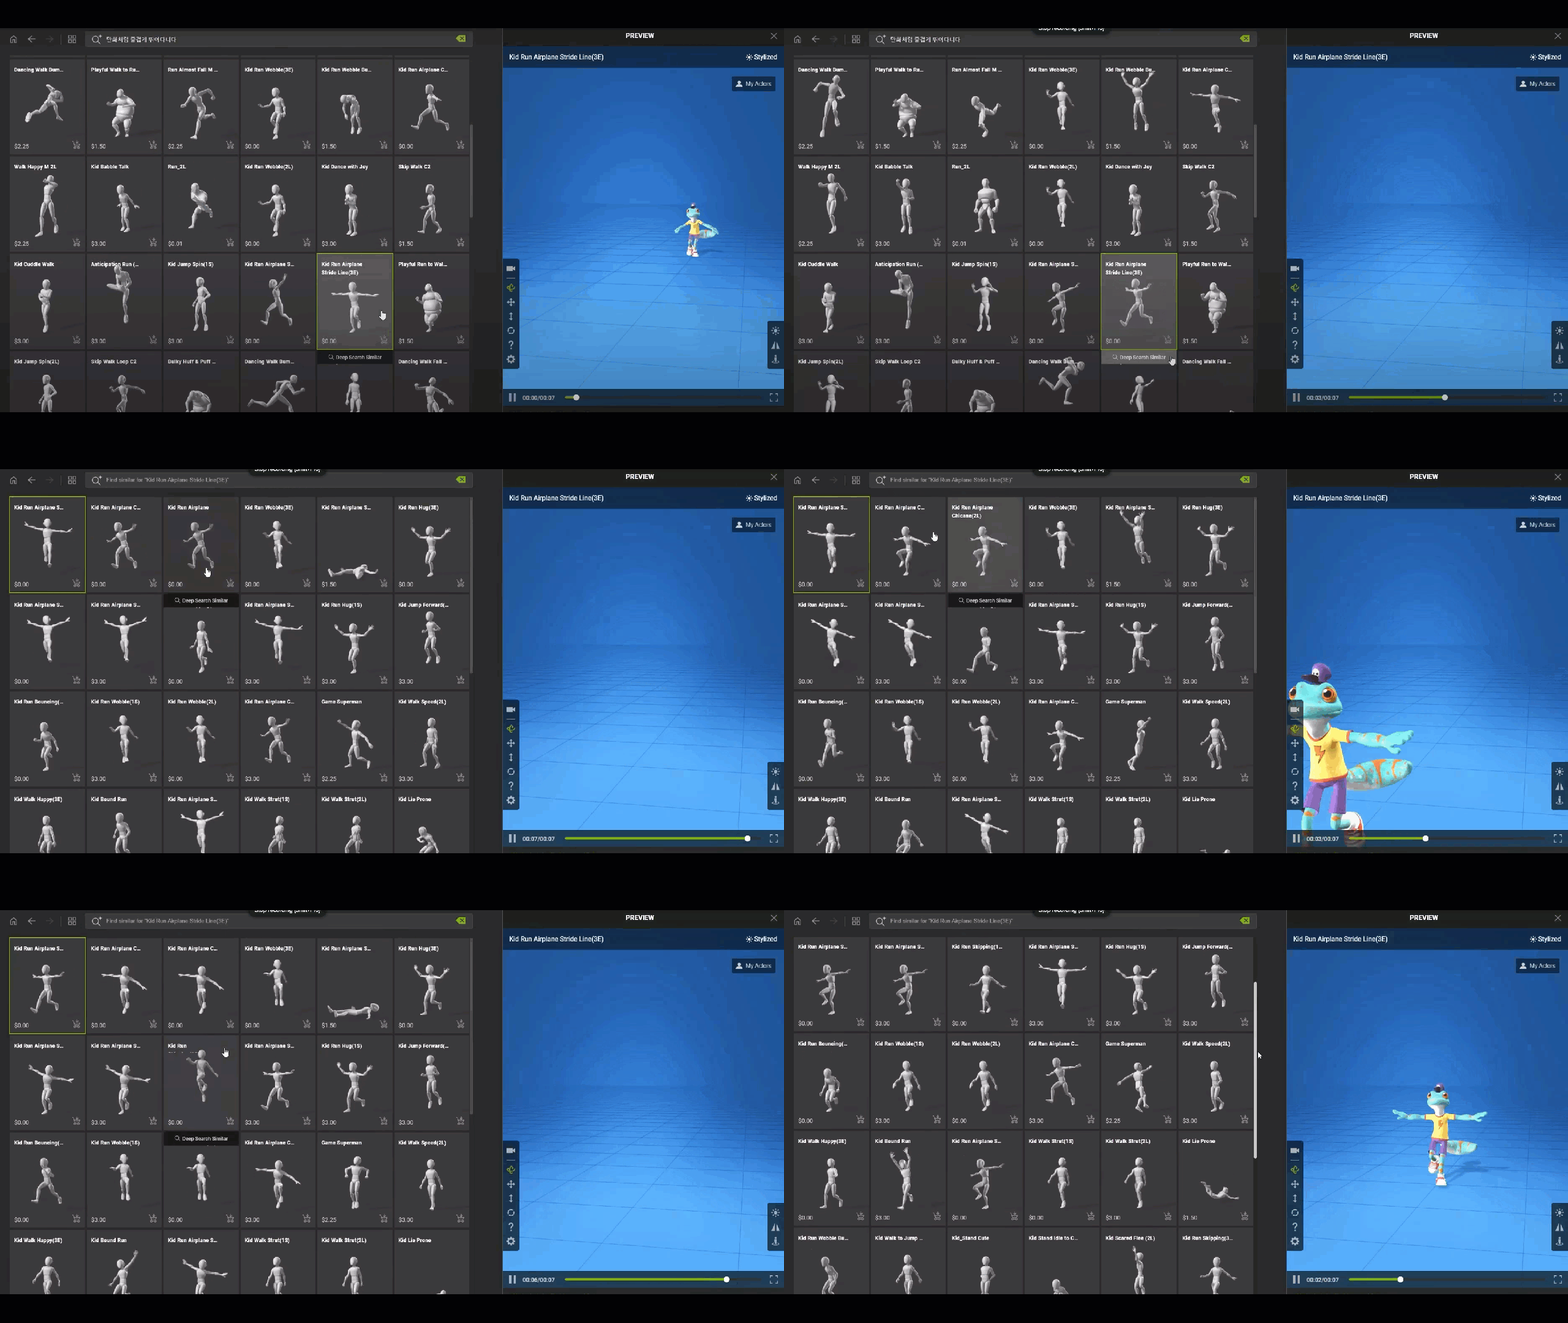
Just like searching for Group Interaction Motions we can also search for Similar Motions. As explained in the video above this is useful for locating similar motions so you can explore more possibilities based on the original motion you are working with. This can also serve as a placeholder motion during the initial layout which can be replaced using this advanced search feature when actual final production work begins.
Natural Language Search with Multi-Lingual Support
We can use simple one word searches such as “jump” or we can further refine the search with something like “backflip jump”. The best feature with the Natural Language support now baked into the AI Search is the ability to use a natural language prompt as shown in the tutorial. The tutorial uses an example of “crouch walk while peeking around” which can return results showing similar motions where the character looks around the environment as they move.
The video further goes on to show how we can add “in a cartoon style” to the prompt to return relevant results showing cartooning motions. An even more telling demonstration of the AI Search Nature Language support shows how adding “cat woman” to describe a cat like female fighter to find motions that best match those characteristics. Summarize the scenario, style, or character traits in clear, simple terms to quickly identify appropriate motions.
Multi-lingual support allows us the possibility of searching in our native language and we are encouraged to experiment with creative prompts to find what we need.
Motion Retargeting
Retargeting motions used to be a major part of 3D animation. There were tools and applications focused on retargeting to ensure everything matched up to enable the character to move like it was supposed to move. Retargeting could be time-consuming and always had to be taken into account in terms of time allocation.
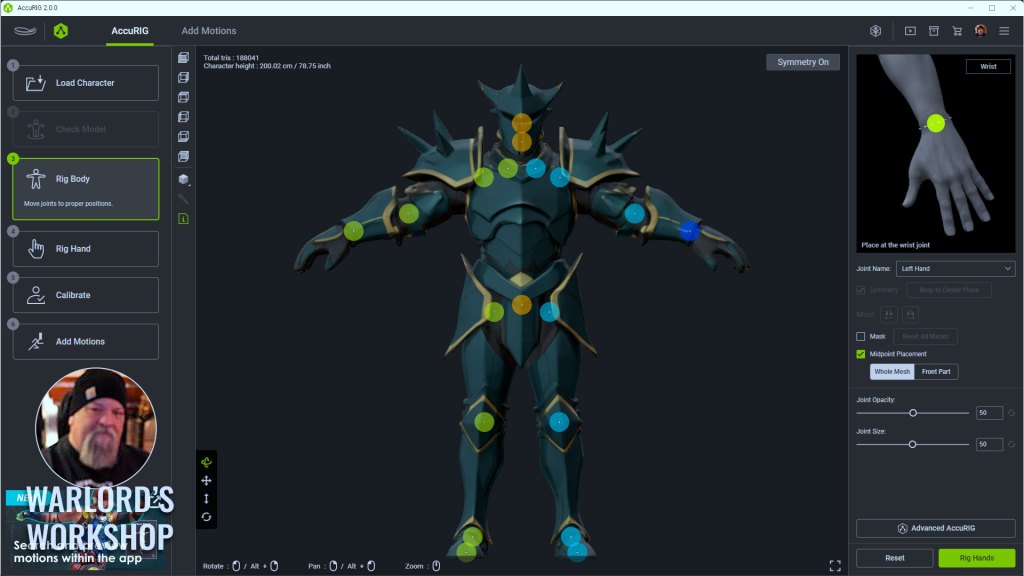
Now, with AccuRIG, we don’t even think about retargeting in the same way anymore. In fact, we don’t think about retargeting or deal with it at all except for the initial marker placements on the limbs. It’s all done behind the scenes, under the hood, while we sit back waiting for the rigging to complete.
Set the markers, refine and adjust, then skin the character (one-click skinning) after telling it how many fingers from zero to five. That is all there is to it. AccuRIG takes care of the rest.
Go to the ActorCore website to download the free AccuRIG 2 application and see for yourself. There rare plenty of motions to test your automated rigs once they are ready.
Rig Once for Multiple Applications
Another great feature of AccuRIG is the “rig once and use” feature. This allows the skinned 3D Character to work with many different applications thereby eliminating the unnecessary complexity of working with a large group of applications in the same project. The universal FBX or USD export is recognized by most leading 3D applications today.
– Blender, – Cinema 4D – NVIDIA – Omniverse – Character Creator and iClone
This includes any software that can import FBX or USD 3D file formats. That covers a lot of applications and makes distribution of assets much easier in a multi-tool pipeline. As long as any pipeline utilizes those formats it will remain open to any characters created by AccuRIG 2 and other Reallusion products.
More Time Creating, Less Time Rigging
As mentioned earlier, the speed of AccuRIG can reduce the frustration of rigging characters for many differ 3D applications. This means you get to spend more time on the fun stuff, being creative, instead of wading hip deep into a technical morass of how to do something. Frustration can definitely slow down the creative process so anytime we can avoid that frustration means more creative time.
And there is never enough creative time.
Advanced AccuRIG
Advanced AccuRIG is available only in Character Creator and it greatly enhances the tools and features of AccuRIG.
At its core, Advanced AccuRIG retains the intuitive five-step rigging process that made the original tool accessible to a broad user base. However, it introduces a suite of manual refinement tools that allow users to precisely adjust joint positions, correct poses, and fine-tune skin weights. This added control is especially valuable when working with complex character meshes or non-standard proportions.
One of the key differences is multi-mesh support, enabling users to rig characters composed of separate geometry groups without merging them. This preserves the integrity of original assets and simplifies editing. Additionally, Advanced AccuRIG offers enhanced skin weight painting, allowing for smoother deformations and more natural motion transitions.
While the free version is well-suited for rapid rigging and general-purpose use, Advanced AccuRIG is designed for creators who require precision, flexibility, and compatibility with high-end production environments.
Summary
AccuRIG has always been one of the simplest and most reliable auto-rigging tools on the market today. Its main selling point lies with its ease of use and rigging speed. The only things that my trip up the rigging are non-standard proportions and characters. Even then those are usually extreme characters to start with.
With it being a free download there is no reason to not at least give it a try. It could certainly be worth a few minutes to see if AccuRIG can work magic on your characters too. When you also consider you can evaluate the rigging using thousands of motions, preview, and select suitable motions for 3d models all within the app how can you afford to NOT to give it a go?
Join over 200,000 users that rely on AccuRIG for 3D character rigging at no upfront cost, extremely small learning curve and universal FBX or USD export to 3D applications used by studios, small teams and indies.
Digital Artist MD “Mike” McCallum, aka WarLord, is a longtime iClone user. Having authored free tutorials for iClone in its early years and selected to write the iClone Beginners Guide from Packt Publishing in 2011, he was fortunate enough to meet and exchange tricks and tips with users from all over the world and loves to share this information with other users. He has authored hundreds of articles on iClone and digital art in general while reviewing some of the most popular software and hardware in the world. He has been published in many of the leading 3D online and print magazines while staying true to his biggest passion, 3D animation. For more information click here.
With over 25 years of experience in filmmaking, animation, VFX, and software design, Aharon Rabinowitz is a respected name in the creative industry.
Through his work he has helped brands bring stories to life using cutting-edge tools. Formerly part of the leadership team at Red Giant/Maxon, Aharon is now the VP of Marketing at School of Motion.
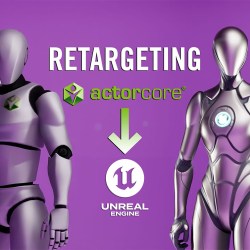
His educational content has empowered thousands of artists worldwide, and in this detailed tutorial, he takes on a common challenge faced by animators and Unreal Engine users: retargeting ActorCore animations to the UE5 mannequin.
Why Use ActorCore for Animation?
ActorCore by Reallusion is known for its high-quality motion capture (mocap) animations, covering a wide range of realistic movements—from idle stances and walks to complex combat and interaction sequences.
These animations are:
Professionally captured and cleaned
Featuring a broad range of motions
Cost-effective and accessible
Offering ready-to-use FBX formats
Compatible with real-time engines like Unreal Engine 5
Despite their quality, retargeting ActorCore motions directly onto UE5’s skeletons can create issues when using the auto-retargeting system in Unreal.
The Challenge: Auto Retargeting Doesn’t Work Perfectly
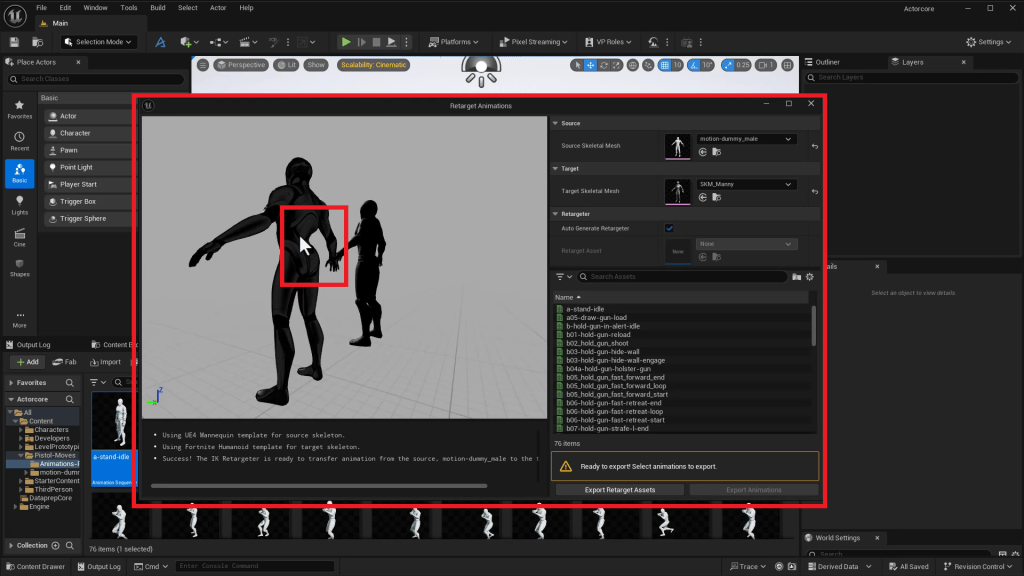
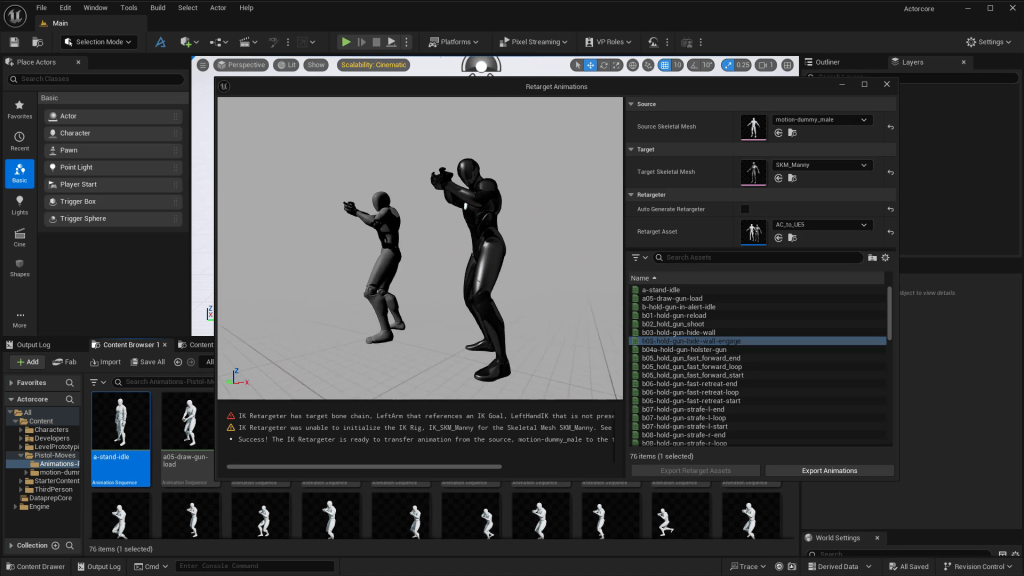
While Unreal Engine 5 features a robust auto-retargeting system, there are incompatibilities between the ActorCore skeleton and UE5’s SK_Manny mannequin. Aharon demonstrates that a simple retarget results in unnatural poses, with issues like:
Bent spines
Incorrect foot placement
Misaligned arms and shoulders
These issues stem from differences in bone hierarchy, particularly in the spine and limbs. So, how do you fix it?
Step-by-Step: Retarget ActorCore Motions to UE5 Mannequin
1. Set Up ActorCore and UE5 Skeletons in Unreal Engine
Import your ActorCore animation library into Unreal Engine 5. Locate your ActorCore skeleton (e.g., MotionDummy_Male) and the UE5 mannequin (SKM_Manny).
2. Create IK Rigs for Both Skeletons
IK (Inverse Kinematics) rigs allow Unreal to interpret skeleton movement more accurately. Here’s how:
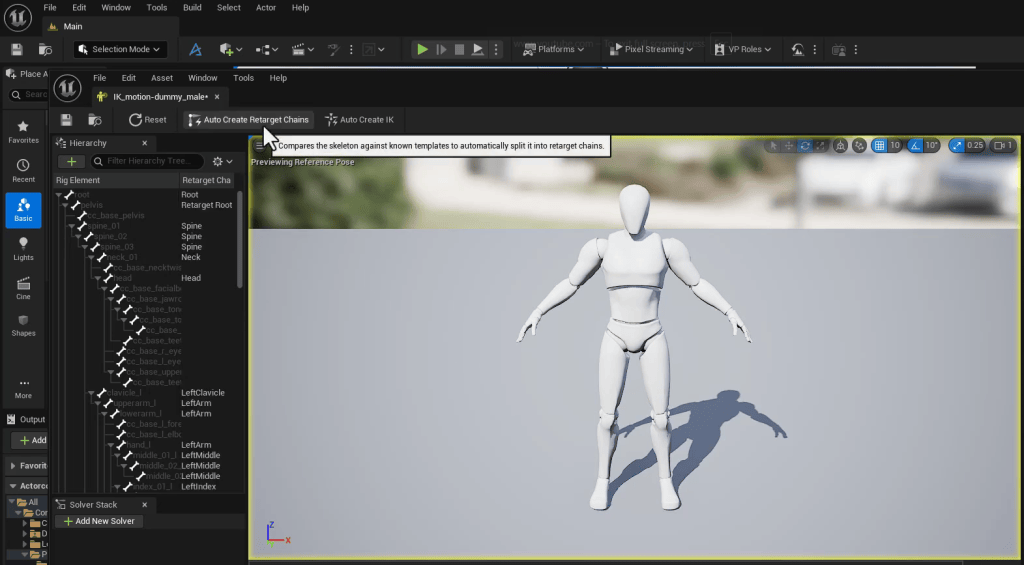
Right-click on the ActorCore skeleton and select Create > IK Rig
Inside the rig, use Auto-Create Retarget Chains
Click Save and exit
Repeat the above steps for the SKM_Manny skeleton.
3. Build a Custom Retargeter
Now that both skeletons have IK rigs:
Right-click on your animation folder
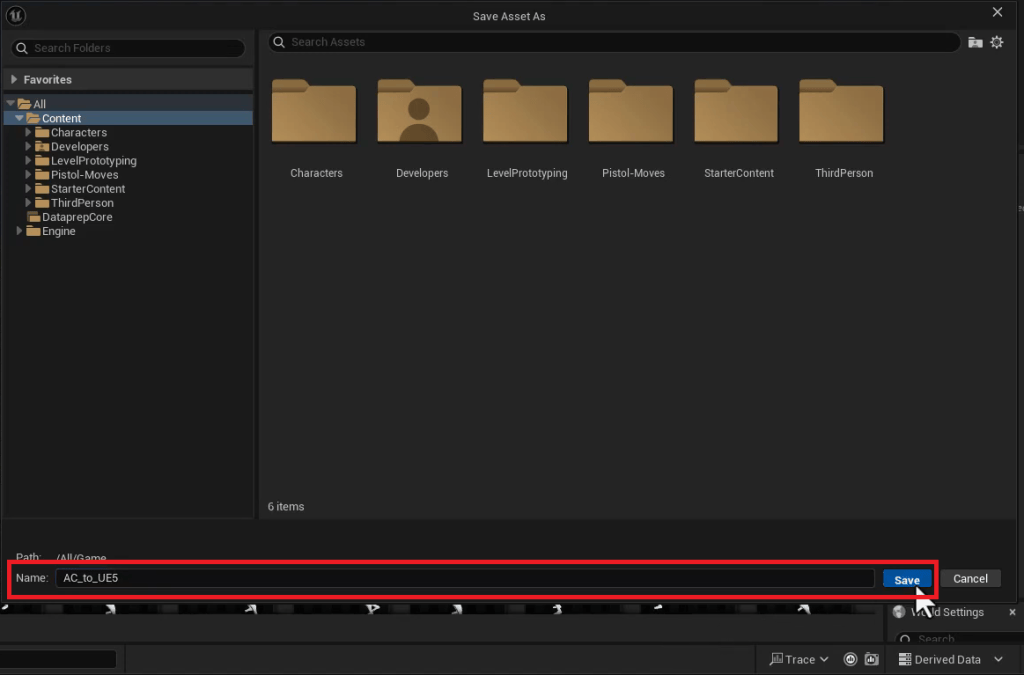
Choose Retarget Animations > IK Retargeter
Save the retargeter at the root level and name it something like AC_to_UE5
4. Assign Source and Target IK Rigs
Open the new retargeter file and set:
Source IK Rig to MotionDummy_Male
Target IK Rig to SKM_Manny
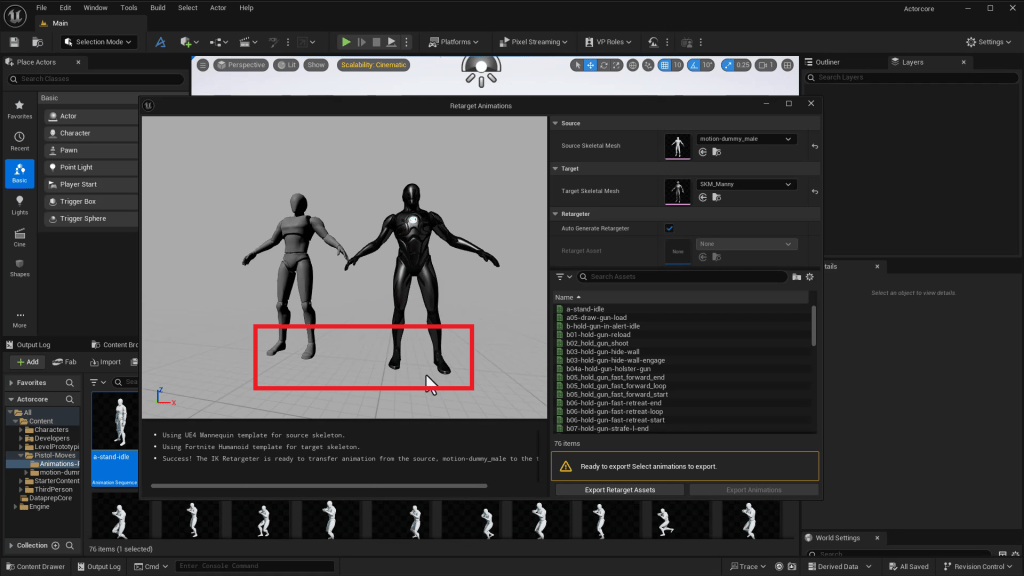
In the Preview Settings, adjust the Target Mesh Scale (e.g., 1.05) to align the character heights visually.
Manual Corrections to Fix Retargeting Errors
Even with IK retargeting, some bone misalignments can persist. Here’s how Aharon adjusts them:
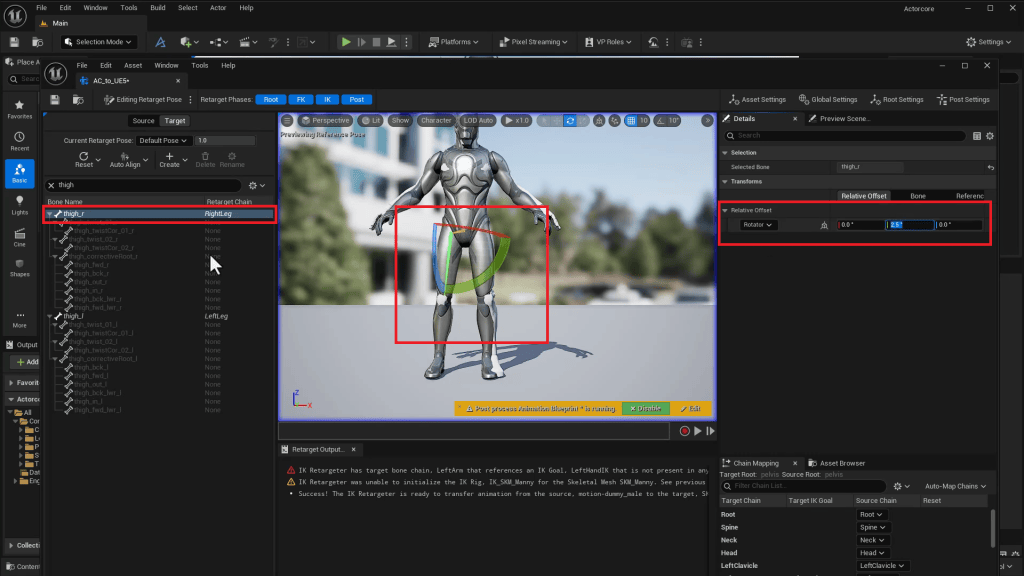
Adjusting the Legs and Feet
Select Right Thigh and set rotation offset (e.g., 2.5°)
Repeat for Left Thigh
For feet, rotate to a natural standing position (e.g., -5° on both)
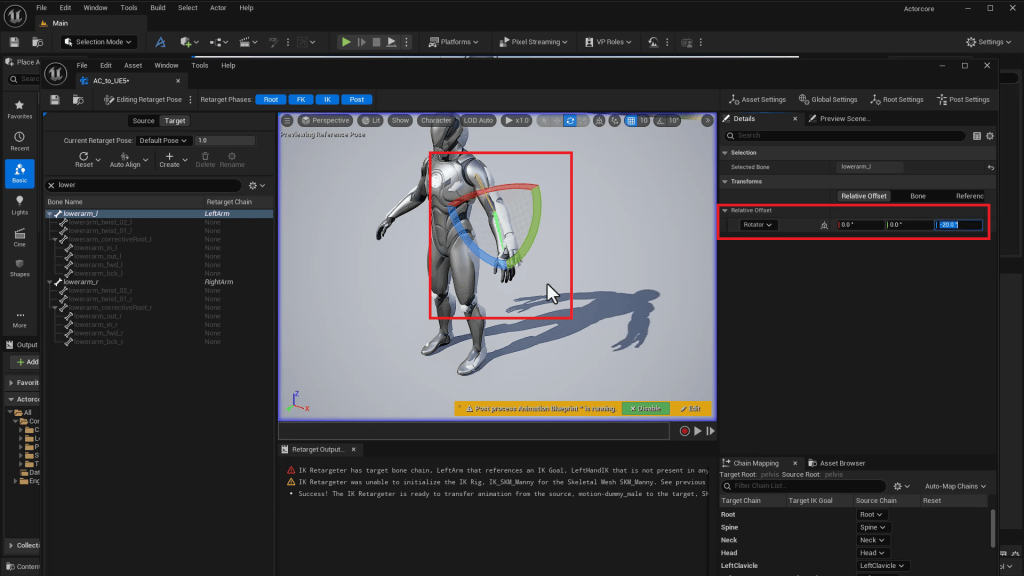
Adjusting the Arms
Lower Arms may require a -20° rotation to straighten
Upper Arms can be lifted slightly (e.g., 5° rotation)
These edits are not perfect but produce significantly improved results.
Finalizing and Testing Retargeted Animations
Once your manual tweaks are in place:
Save your IK retargeter
Go back to the animation folder
Right-click > Retarget Animations
Select SKM_Manny as the target and choose AC_to_UE5 as the retargeter
You’ll see the animation now preserves the original motion with improved posture and realism.
Tips for Finessing Animation Retargets
Aharon recommends the following:
Compare the Retarget Animation window side by side with the IK Retargeter
Use mirror rotation settings for symmetrical limbs
Use small adjustments (e.g., -10°, +8°) to fix interpenetration issues (like hand crossover)
Always save your work at each stage
While you won’t get a perfect match every time, you’ll achieve production-ready quality without complex scripting or re-rigging.
Advantages of This Workflow
✅ Professional Mocap Library: ActorCore offers affordable, industry-grade mocap.
✅ Customization Control: Manual retargeting allows for precision edits.
✅ Real-Time Ready: Seamlessly integrates with Unreal Engine 5 for interactive media, games, and virtual production.
✅ Reusable Assets: Create a reusable retargeter for future projects using the same skeletons.
✅ Time Efficiency: IK Rig + Manual Tweaks > Rigging from Scratch
Other Software Mentioned
While the focus is on Reallusion ActorCore and Unreal Engine 5, this pipeline can also integrate with:
Character Creator to generate characters with precise bone structures
Blender or Maya for additional mesh cleanup
Conclusion
If you’re a 3D animator, game developer, or content creator using Unreal Engine 5, Reallusion’s ActorCore animations are a powerful, professional resource. With Aharon Rabinowitz’s step-by-step process, you can overcome retargeting challenges and bring high-quality motion data into your UE5 projects with ease.
Start building your retargeter today—unlocking more control, better realism, and faster workflows for your animations.
Reallusion officially releases Character Creator 5 (CC5), a major upgrade that brings the character creation ecosystem into the HD era. Its powerful subdivision workflow bridges game-ready 3D characters with film-quality rendering. This release includes all-new HD Morphs, anatomically accurate human bases, the next-gen ActorMIXER PRO plugin, and an advanced HD facial animation system. Step into the future of expressive, lifelike, production-ready digital humans.
With CC5, existing users can upgrade their legacy characters to HD quality, unlock Extended+ or HD facial profiles, and immediately benefit from enhanced facial animation capabilities. All previously purchased CC plugins and iClone software will also receive free upgrades to ensure full compatibility with CC5.
Raising the Bar for Real-Time HD Character Creation
Since its 2015 debut, Character Creator has become a leading solution for professional 3D character development. With the release of the next-generation CC5, Reallusion raises the bar once again by introducing a powerful new HD character base that supports up to 16 times more mesh detail with one-click subdivisioning.
Paired with enhanced shaders, high-resolution eyes, whole new eyelash system, and full displacement map support, CC5 delivers cinema-quality visuals with real geometric depth (even for real-time editing). Whether for film-quality close-ups or performance-optimized game development, CC5 offers the fidelity and flexibility needed to meet the demands of any creative pipeline.
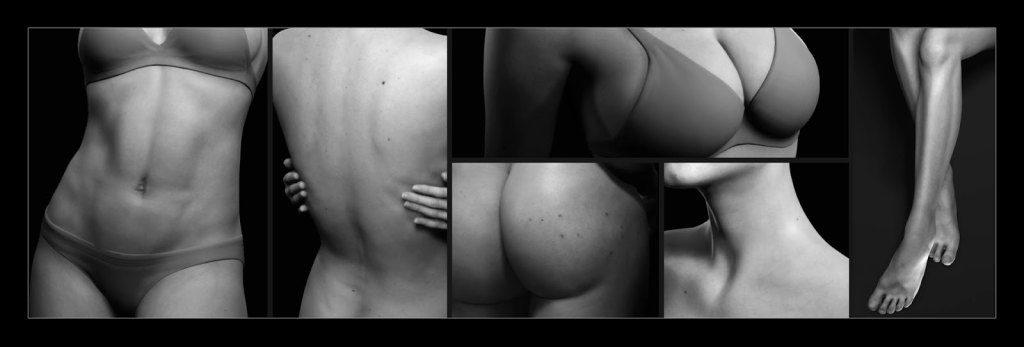
The system also includes HD morphs that add layers of anatomical detail without altering the character’s bone structure or main proportions. It’s a revamp that allows the same base mesh to become slimmer or fuller, define feminine curves or muscular forms, or even portray graceful aging.
With these advancements, CC5 redefines what’s possible for instantaneous character design, making it the ideal creative hub for Blender, Maya, and other major solutions.
Next-Gen Facial Animation for True-to-Life Expressions
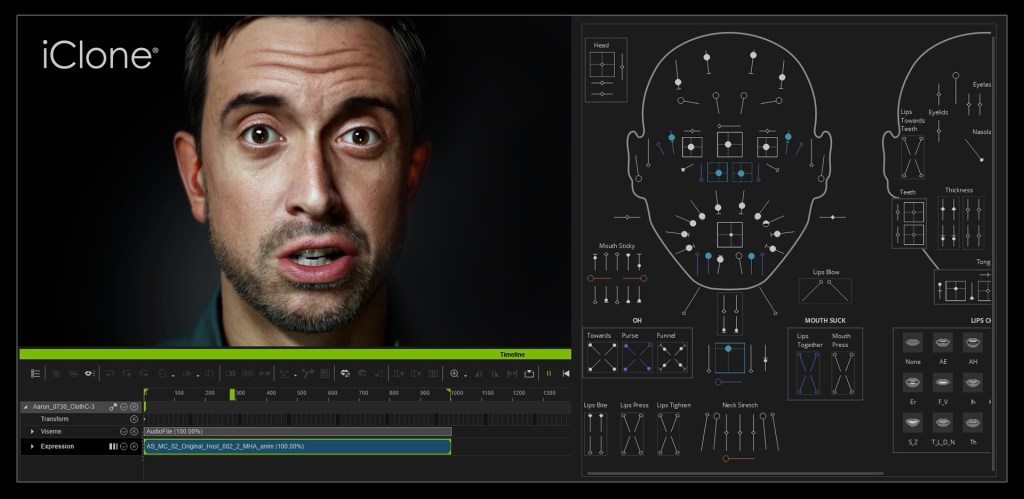
Facial expressions are key to believable character performance, and CC5 takes them further with a completely overhauled HD Expression Profile. Each expression now drives an expanded set of blendshapes, enabling precise micro-expressions that capture subtle emotional shifts. From a smirk to a furrowed brow or the twitch of an eyelid, every nuance can be rendered for greater impact. In total, artists gain finer control over emotional detail, helping to enhance storytelling across games, film, and other forms of media.
A newly introduced Corrective Expression System ensures that all blended expressions remain within anatomically accurate ranges, preventing visual distortion while maintaining facial structure. While non-linear animation curves and mesh elasticity empower realistic motion details such as sticky lips, squints, and tension in the brows. The entire system will be fully supported in iClone, with updates to facial mocap tools for iPhone, AccuFACE.
ActorMIXER, the Smarter Character Generator
Introduced with Character Creator 5,ActorMIXERis a revolutionary character blender that enables non-destructive mixing and matching of entire characters, facial features, and head shapes to create unique appearances. Whether combining stylized elements with realistic traits or recombining parts from different characters, it preserves full rigging and animation compatibility. ActorMIXER empowers rapid prototyping and creative exploration without compromising control or quality.
For professional artists, the ActorMIXER PRO plugin unlocks advanced features and the fullActorMIXER CORE Library, providing deeper customization and expanded asset access. Any character can be made “mixable” by converting it into Mixer sliders and skins. With one-click randomization, diverse characters can be generated; or use the ActorMIXER Packager to create and share custom Mixer assets that are built for collaboration and commercialization.
Seamless Integration with Major Industry Pipelines
Maya & Marmoset Toolbag
CC5 expands its Auto Setup ecosystem to include MayaArnoldand Marmoset Toolbag, offering automatic shader assignments and facial rig compatibility for streamlined character transfer, animation editing, and final rendering.
Professionals can now combine cinematic-level character creation in CC5, intuitive face and body animation editing in iClone 8, and ready-to-use motions and assets from Reallusion to accelerate animation and lookdev productions.
ZBrush Subdivision Workflow
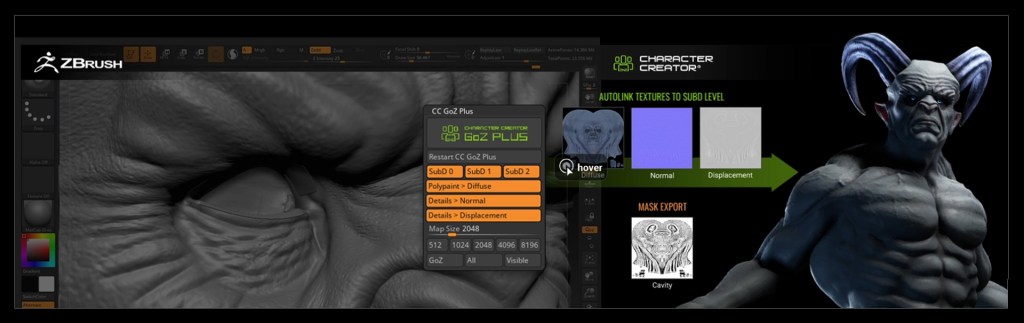
CC5 integrates seamlessly with ZBrush via GoZ, enabling high-resolution sculpt data to be baked directly onto subdivided characters. Artists can convert sculpted detail into normal and displacement maps, maintaining fidelity throughout the sculpt-to-animation process.
The upgraded Face Tools now support wrinkle-to-displacement baking and 8K textures, giving ZBrush users powerful tools to enhance expression realism and fine-tune facial surface detail with precision.
Blender Support
The latest upgrade toBlender Auto Setupadds support for both Eevee and Cycles render engines, along with adjustable material-based displacement maps, allowing you to fine-tune displacement strength directly in Blender.
CC5 characters can be exported with HD facial animations and wrinkle displacements, including controls for wrinkle intensity and playback speed. HD iClone animations can also be imported into Blender, fully compatible with the HD Face Board that utilizes MetaHuman-style facial controls. These features work seamlessly with both standard and extended facial profiles.
Unreal Engine and MetaHuman Interoperability
For Unreal developers, CC5 introduces a suite of enhancements to streamline animation and character deployment. CC characters can now be exported with skeletons optimized for Unreal Engine 4 and 5, including bind poses tailored for MetaHuman and UEFN formats, ensuring precise motion retargeting and real-time gameplay control.
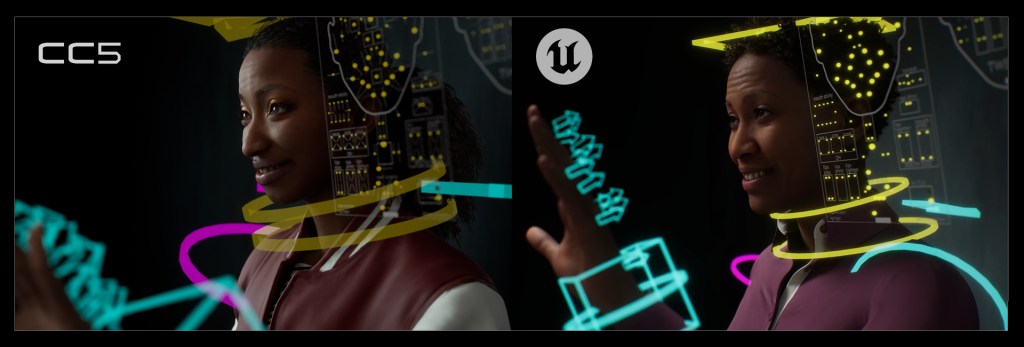
CC5 HD characters and MetaHumans now share the same skeleton structures and facial control standards compatible with the Auto Setup plugin. Characters can swap directly with MetaHuman counterparts in Unreal Sequencer, allowing the direct application of MetaHuman animations without tedious motion retargeting. This update makes CC characters fully compatible with Unreal’s MHA facial capture, body mocap, and audio-to-face syncing, delivering a unified animation workflow inside Unreal Engine.
For iClone developers, the new Unreal Live Link update adds UE5 skeleton, enabling one-click character and motion transfer to UE5.5/UE5.6. MetaHuman facial animations can also be imported for realistic talking performances, with matching HD Face controls available as a free download for high-definition facial refinement and seamless MetaHuman data compatibility.
CC5 Deluxe – UNLEASH THE FULL POTENTIAL OF Character Creator 5
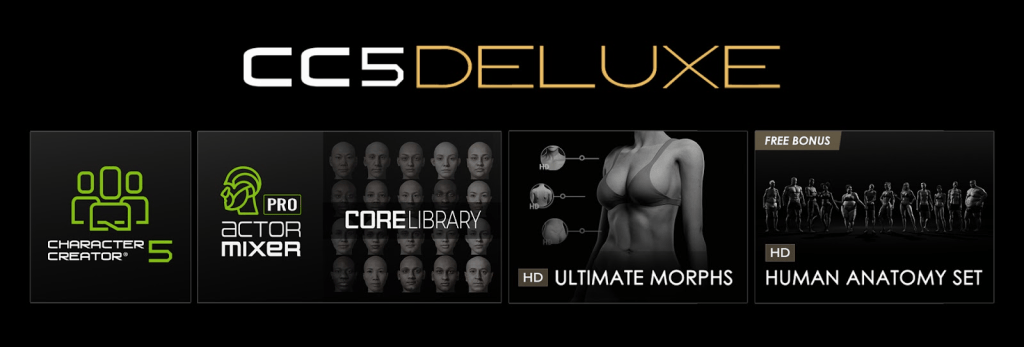
Harness the full power of Character Creator 5, the centerpiece of next-level character creation. CC5 Deluxe enhances your workflow with ActorMIXER PRO, the full ActorMIXER Core Library, and a collection of HD skins. Refine every detail with the HD Ultimate Morphs Pack, and receive the HD Human Anatomy Set (valued at $990) as an exclusive bonus. Whether you’re a seasoned artist or just getting started, CC5 Deluxe is the best starter kit to instantly elevate your creativity to a pro level.
HD Ultimate Morphs Pack
Step into a new era of realism with the HD Ultimate Morphs Pack. Featuring 152 meticulously organized body morphs and 20 head types across 12 core body styles, each slider allows for precise refinement—from facial micro-details to full-body adjustments—all without altering base proportions. Powered by the Subdivision workflow, this system offers sculpting freedom like never before. For optimized performance, HD morphs can also be baked into normal maps at lower subdivision levels without compromising visual quality.
HD Human Anatomy Set
The HD Human Anatomy Set includes 12 fully rigged, animation-ready characters built from high-resolution 3D scan data, with both 2K and 4K texture options for real-time and cinematic use. Every character is ActorMIXER-ready and fully modular—allowing users to mix and match faces and bodies by simply dragging elements into the Mixer Wheel and previewing results instantly. This set maximizes the power of ActorMIXER and is exclusive to CC5 Deluxe buyers.
Join the “#MyFirstCC5” Event for Prizes
To celebrate the launch of Character Creator 5, Reallusion invites creators worldwide to join the My CC5 Foray event. This month-long celebration lets creators share their first CC5 character on the Reallusion Forums and Instagram using the hashtag #MyFirstCC5. From September 1 to 27, 2025, weekly winners will be selected on both platforms to receive exclusive HD Ultimate Morphs content, and forum participants will also earn a limited-edition badge.
Ready to showcase your first CC5 creations and win prizes? Join the discussionon the Reallusion Forum, start your 30-day free trial of Character Creator 5 and ActorMIXER PRO today and experience the full creative power of real-time HD character design.
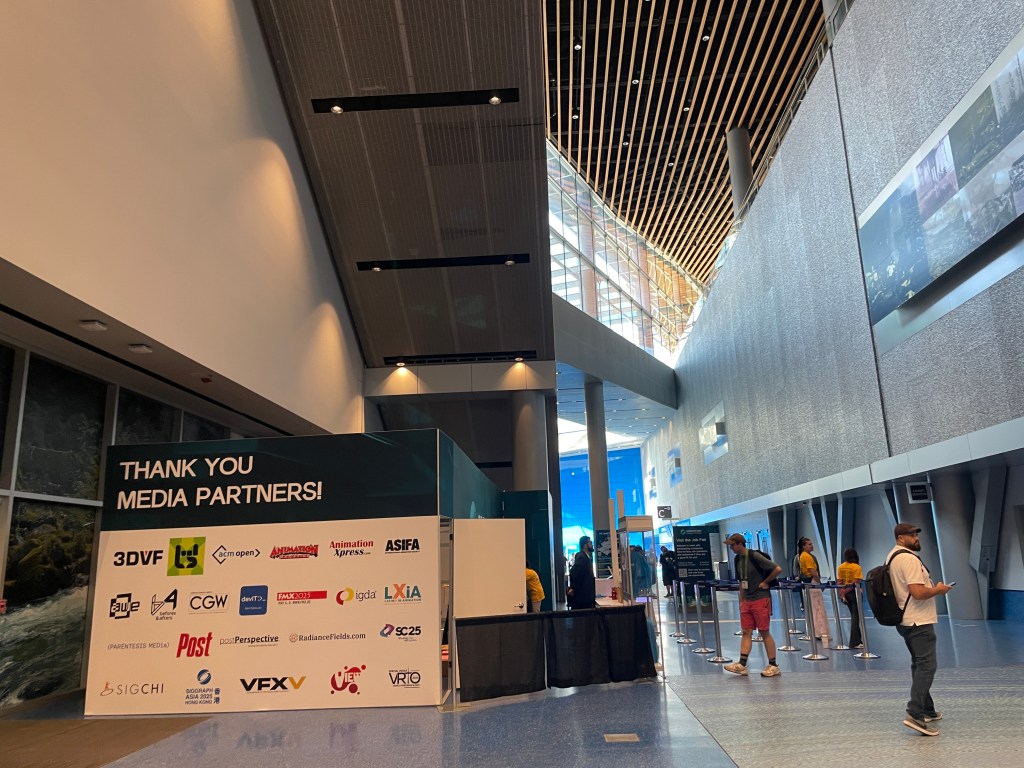
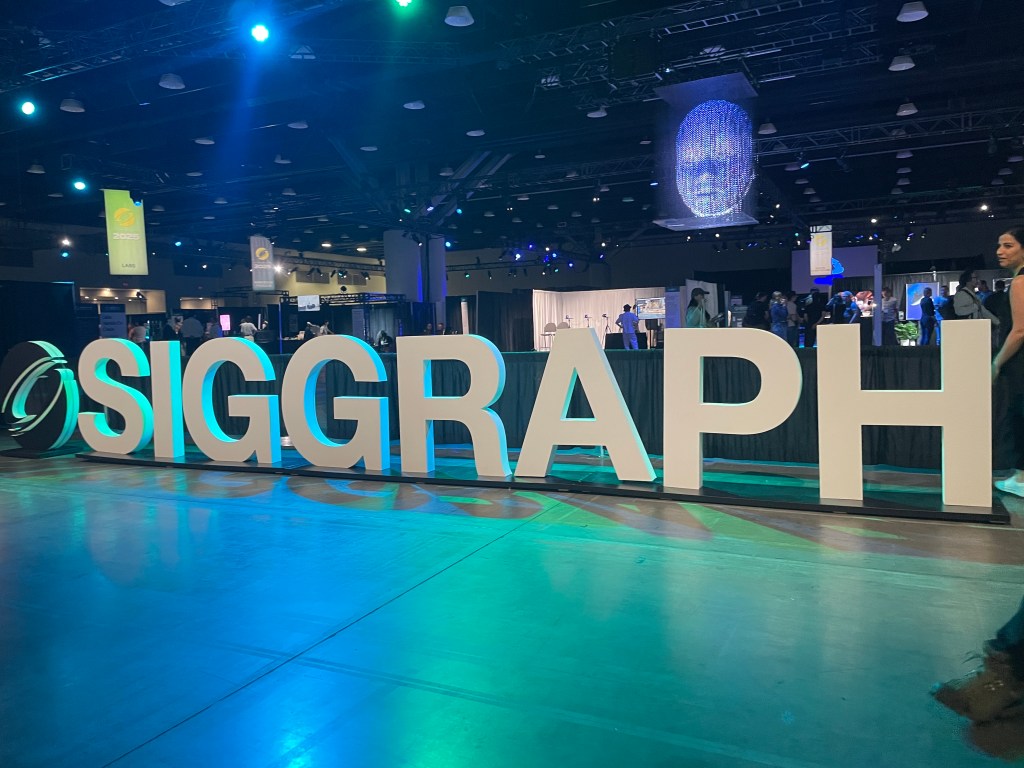
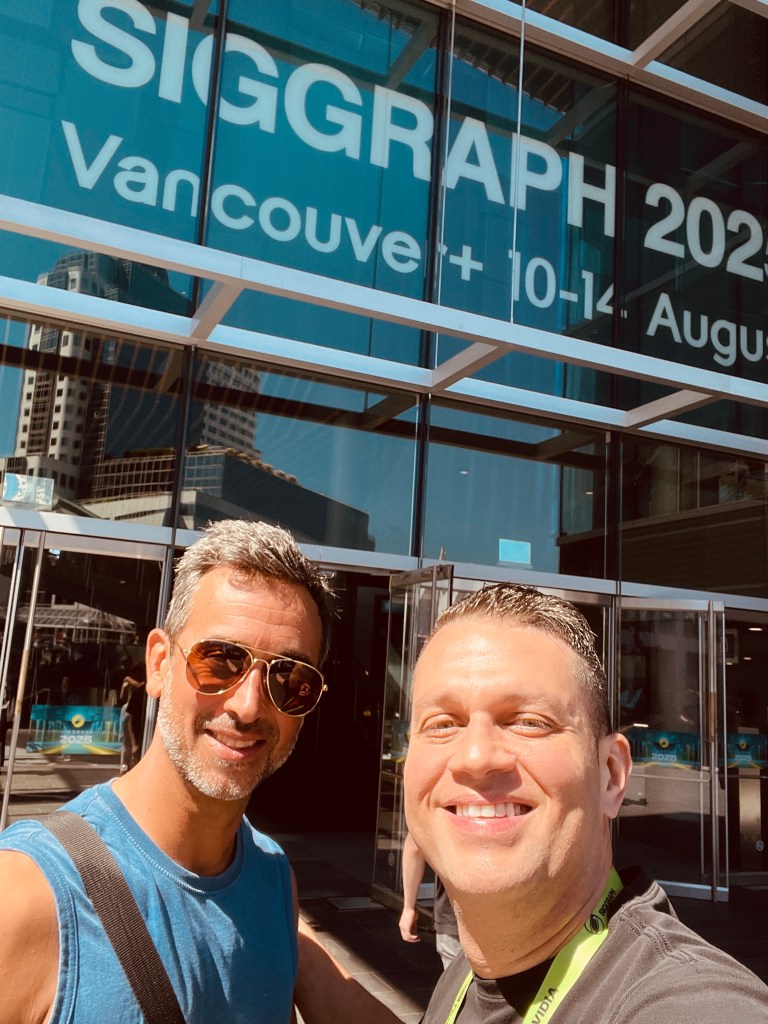
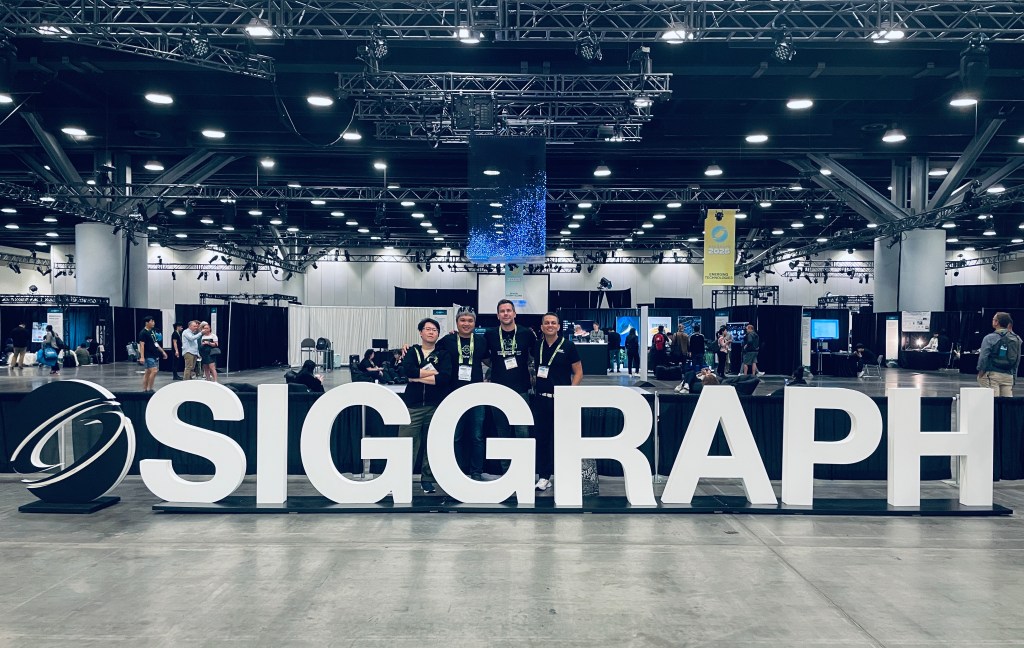
SIGGRAPH 2025 returned to Vancouver with a spectacular showcase of cutting-edge technology for computer graphics, interactive techniques, and 3D innovation. Known as the world’s premier conference for visual computing professionals, SIGGRAPH brought together artists, developers, and technology leaders to explore the future of creativity.
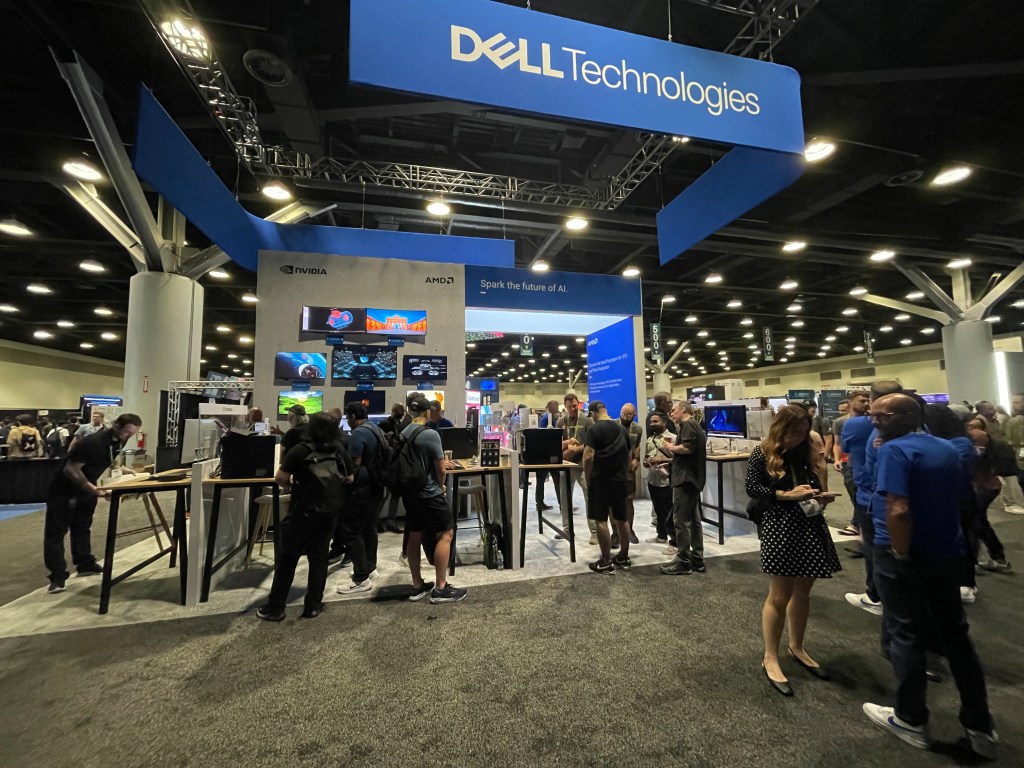
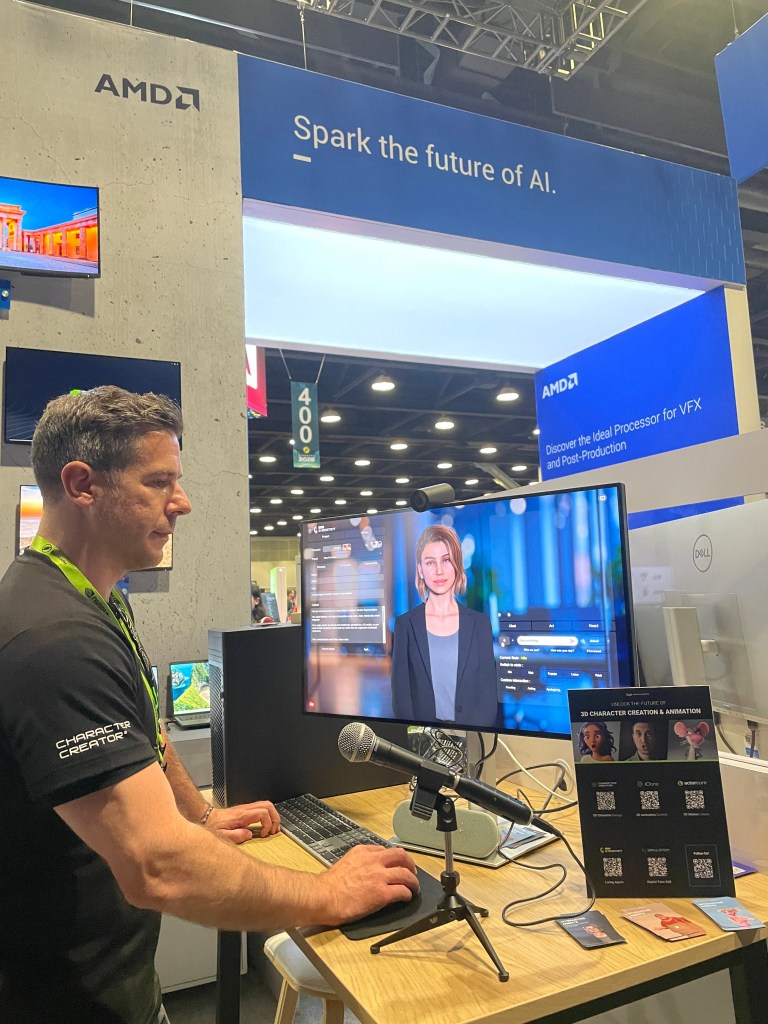
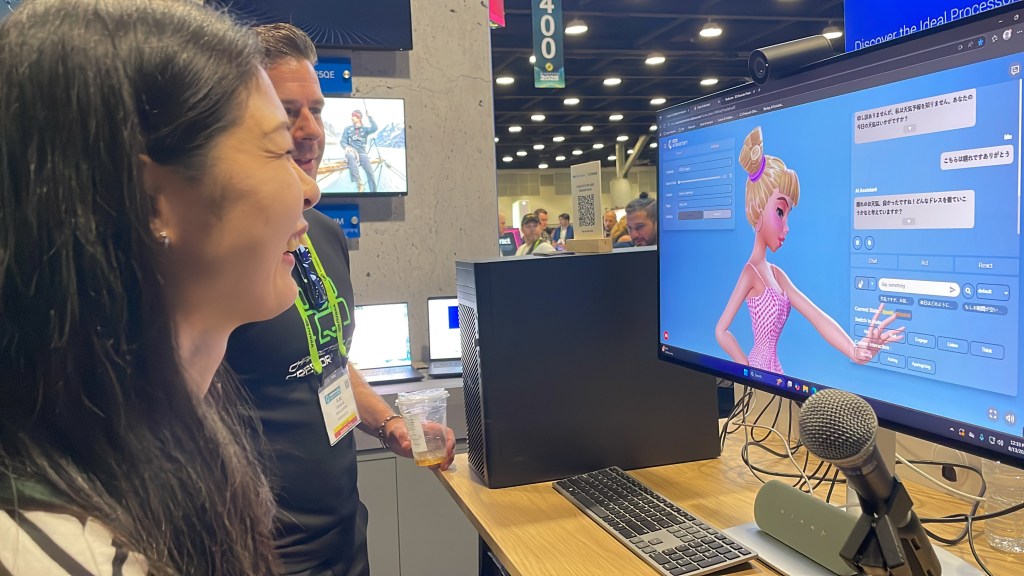
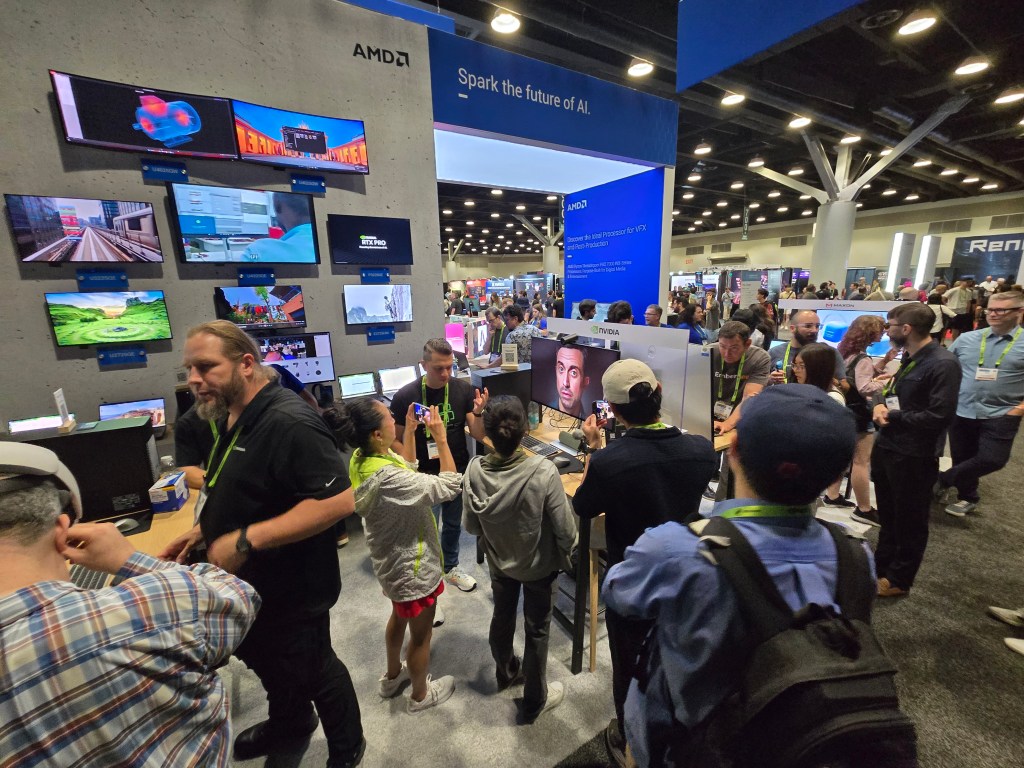
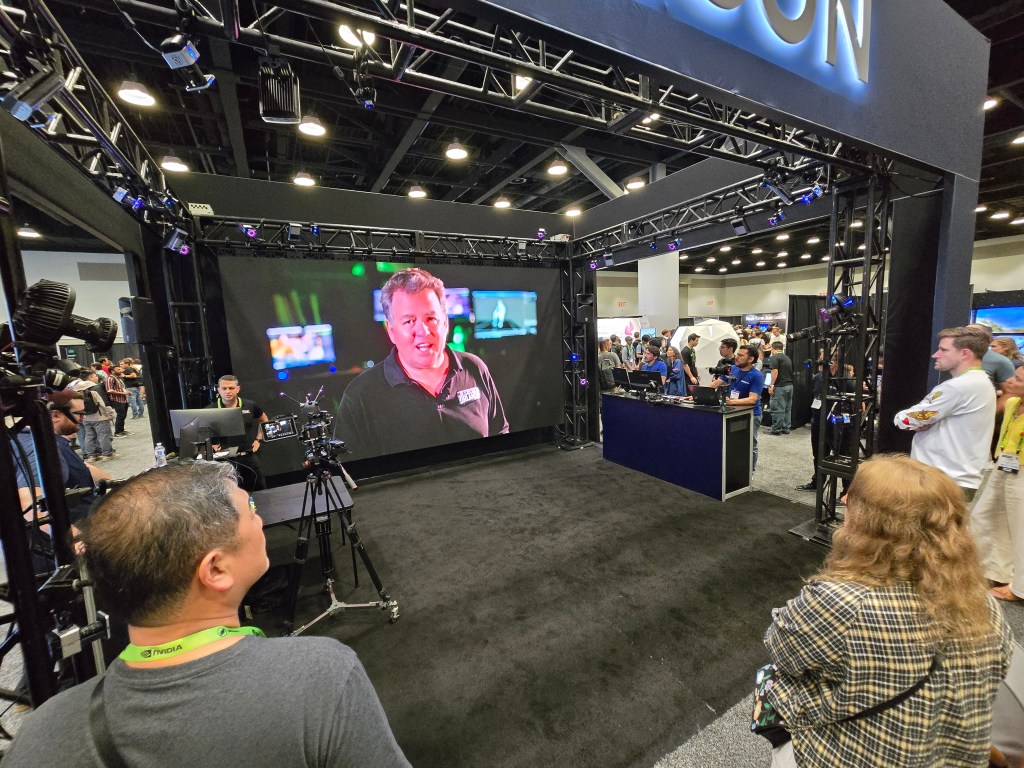
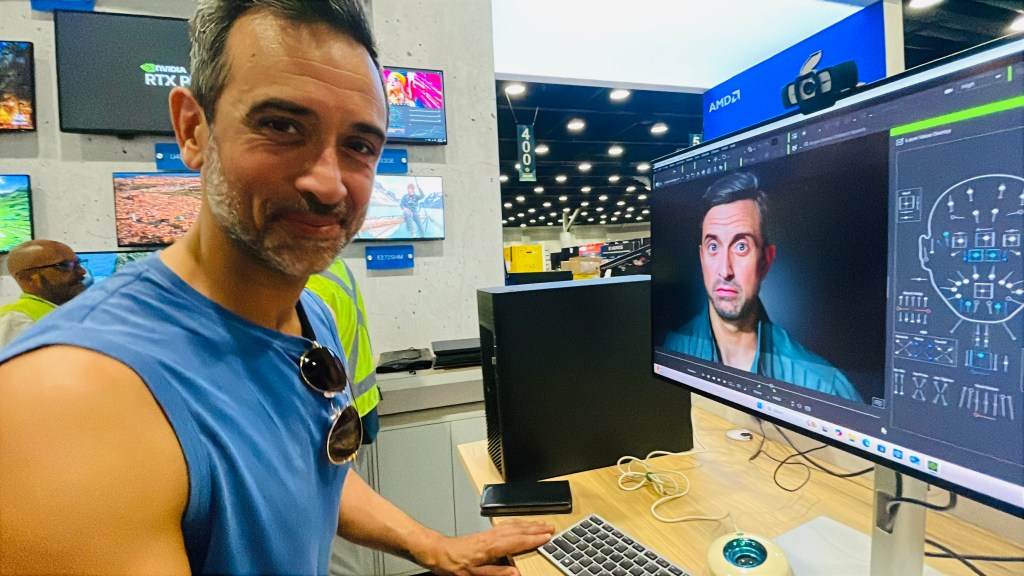
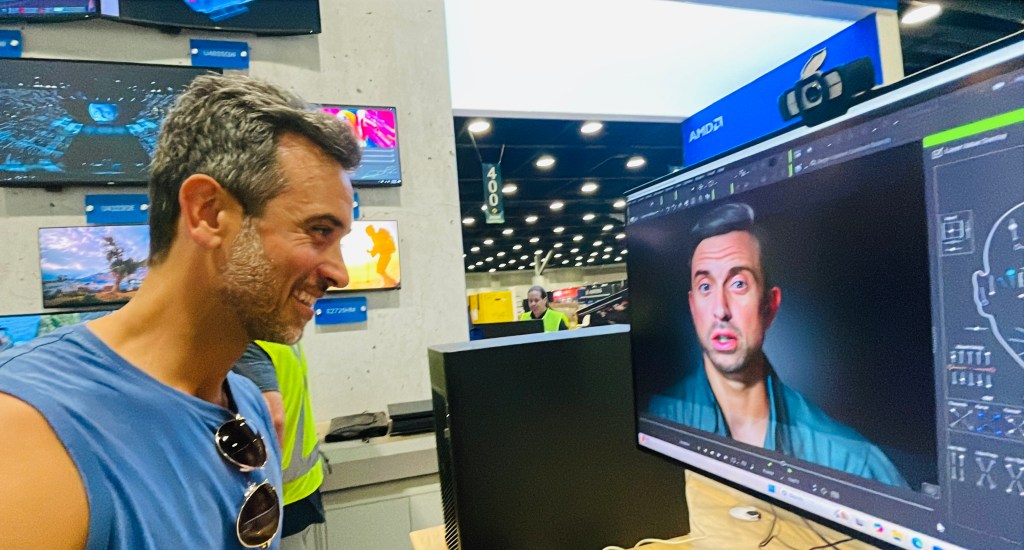
Among the highlights this year was Reallusion, who partnered with Dell Technologies and NVIDIA to debut its latest Interactive Agents and Character Creator 5.
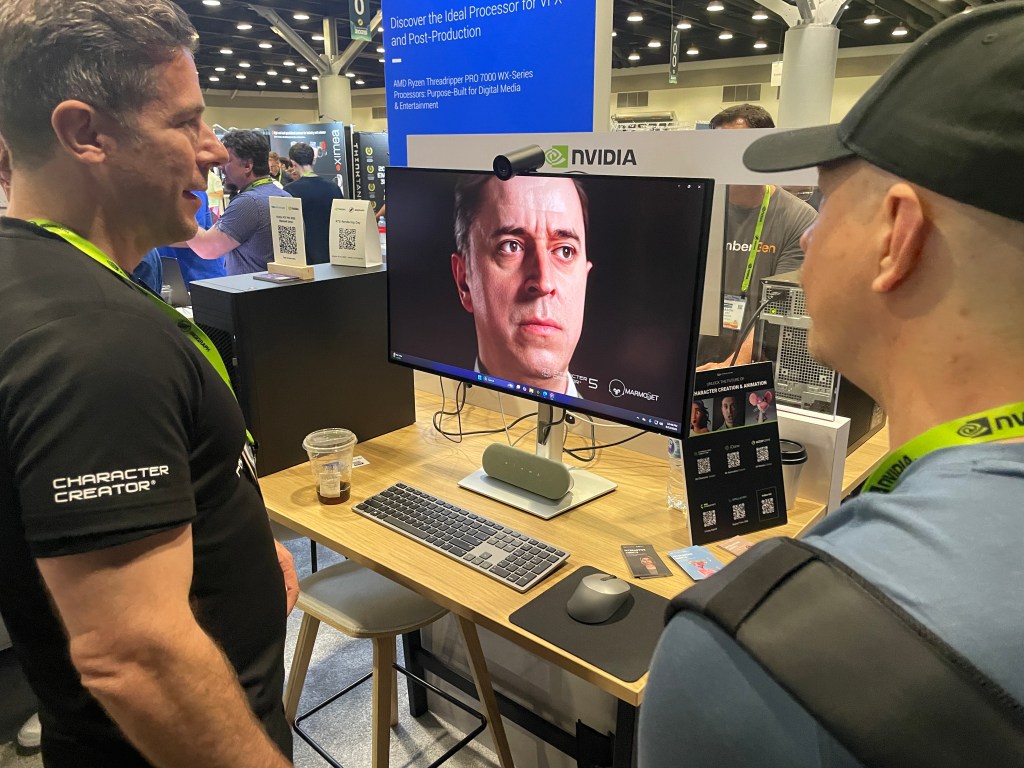
These technologies ran seamlessly on Dell’s Pro Max Tower T2, powered by the groundbreaking NVIDIA RTX PRO 6000 Blackwell Series GPUs, delivering unmatched real-time animation performance.
Reallusion’s Presence at SIGGRAPH 2025
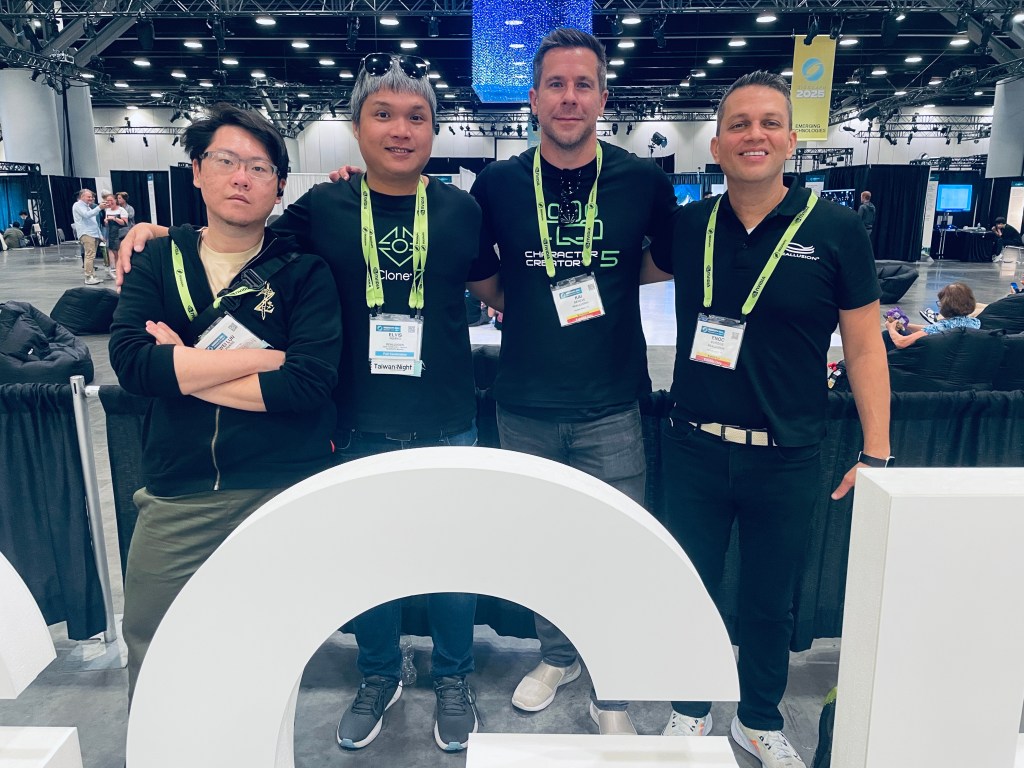
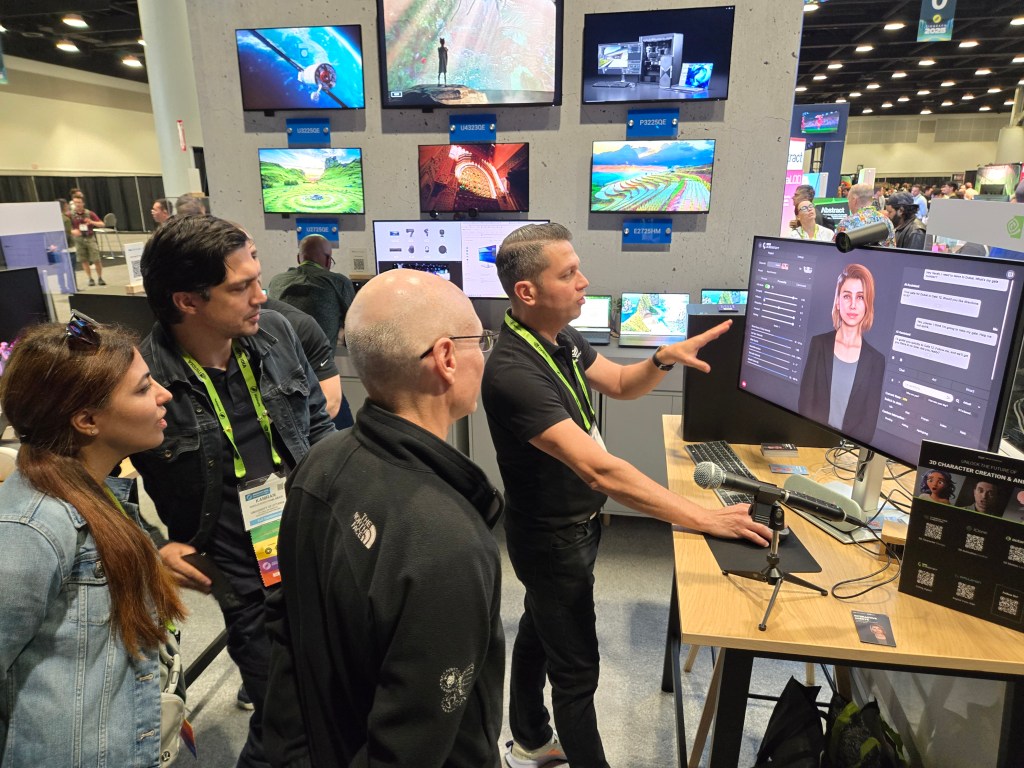
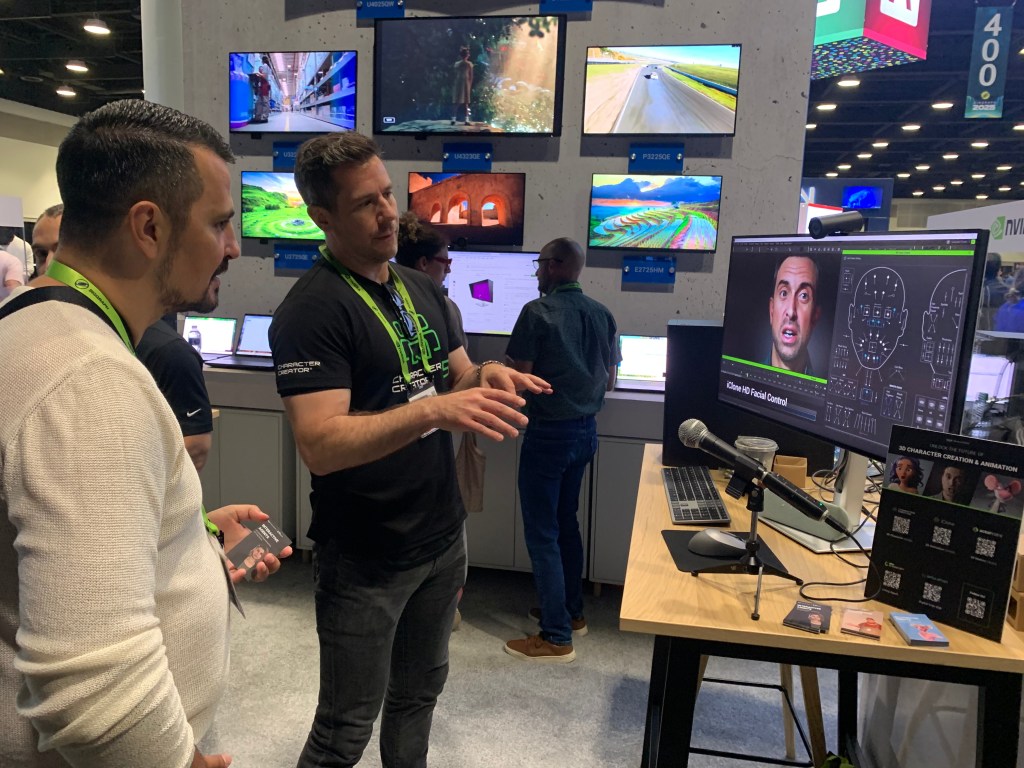
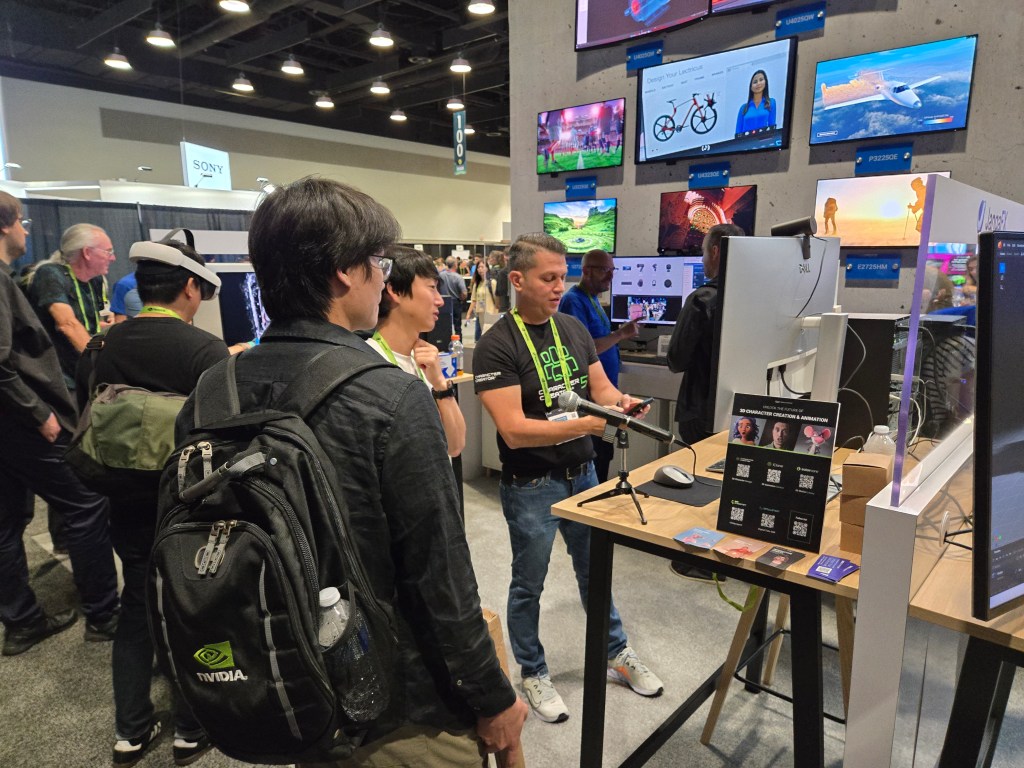
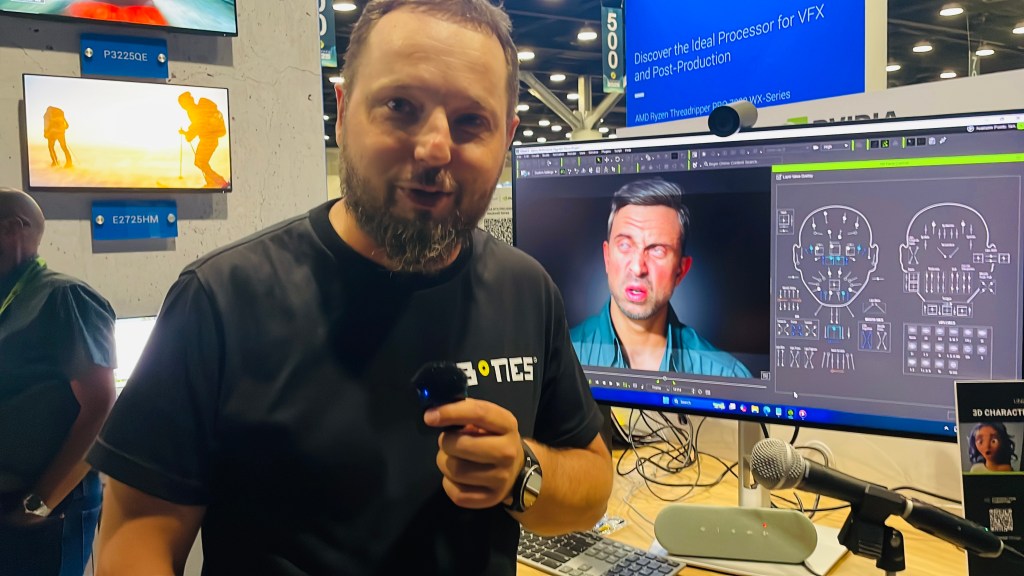
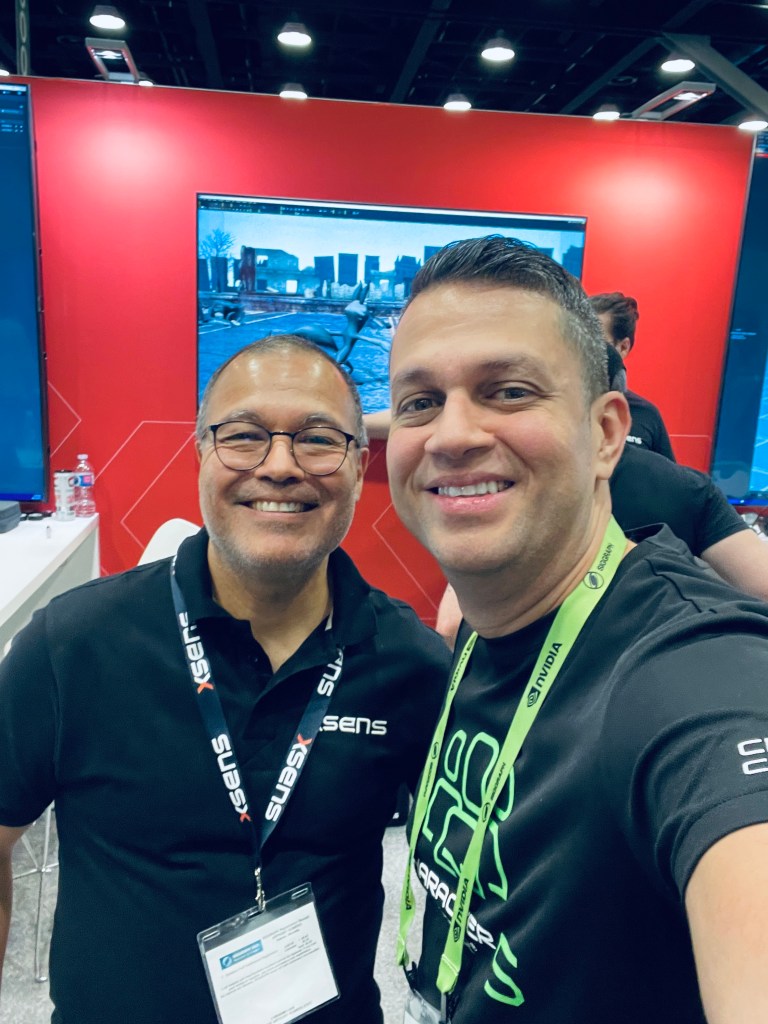
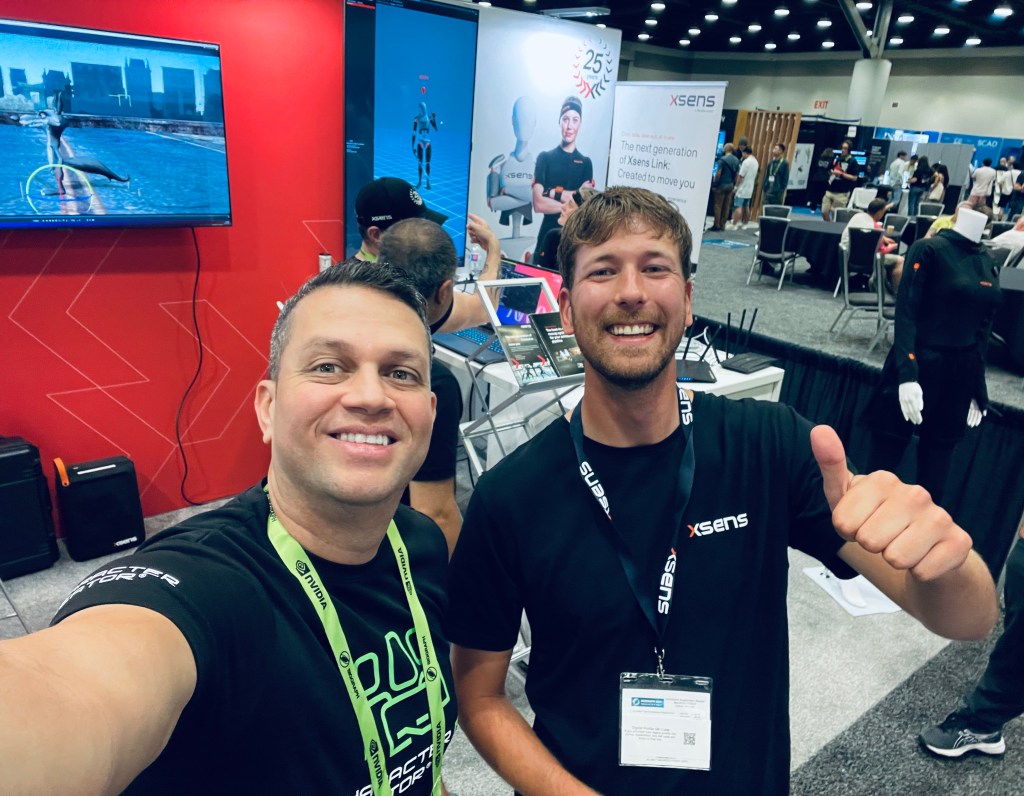
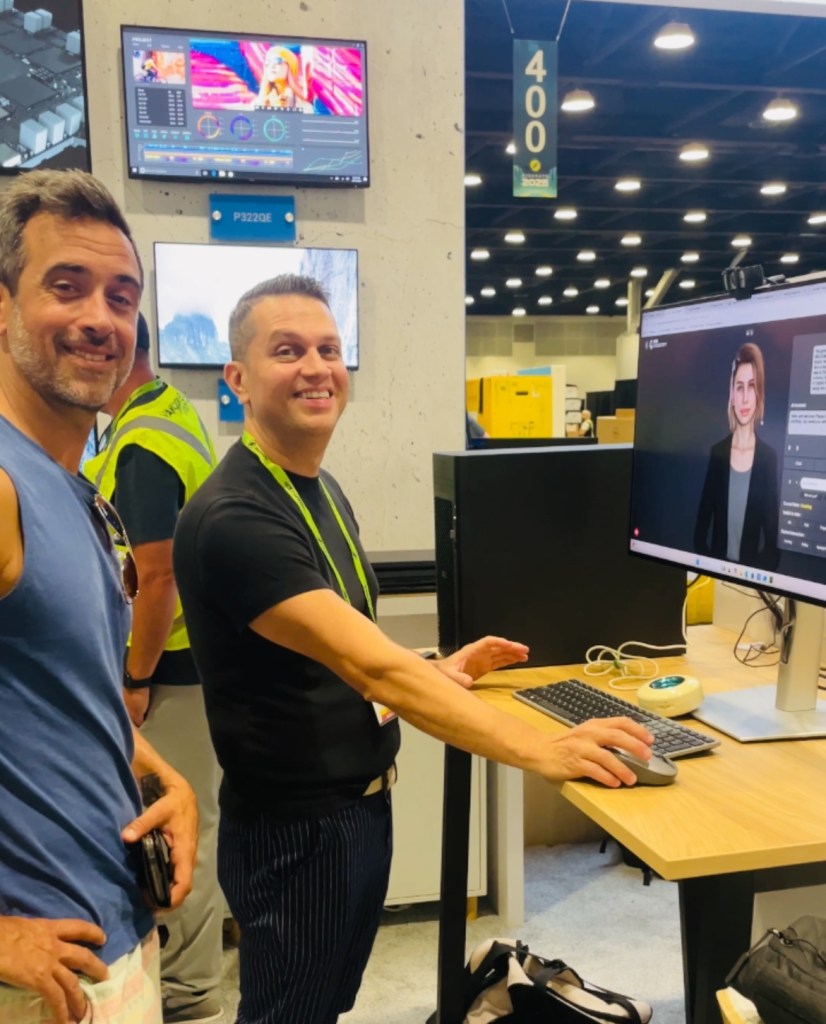
Over the course of the three-day event, Reallusion’s team, with Director of Marketing, Enoc Burgos, and Academic Sales Director, Kai Deneve, welcomed hundreds of attendees to experience firsthand the company’s latest innovations.
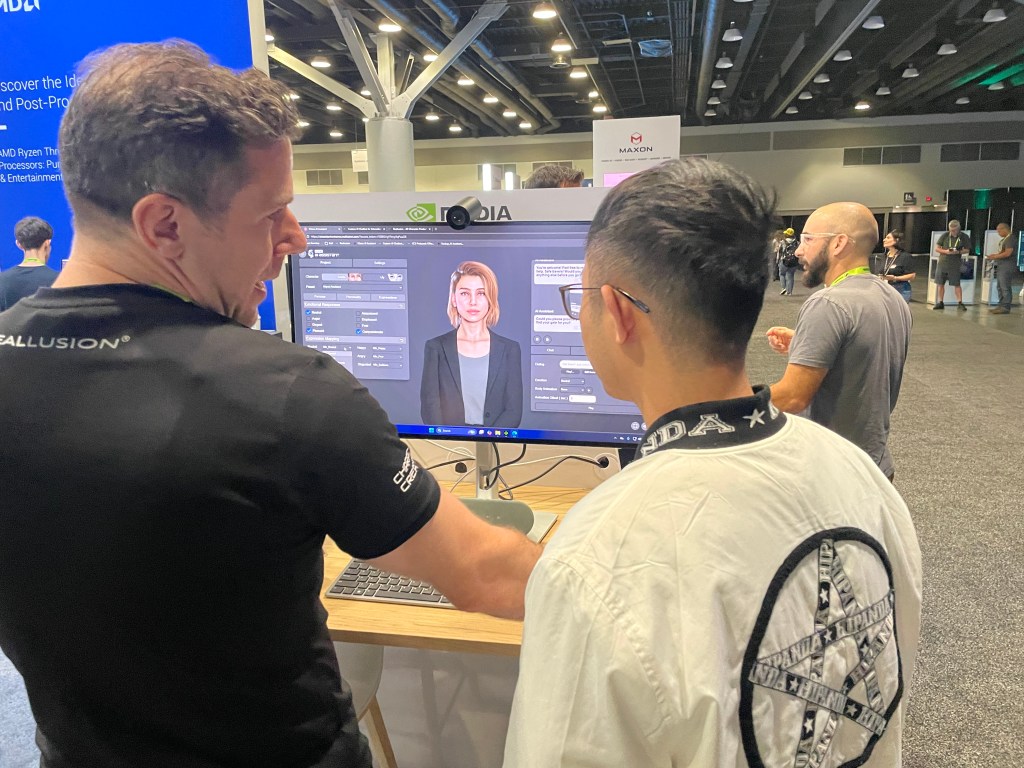
Visitors to the Dell booth were excited to demo Interactive Agents, Reallusion’s customizable AI-driven characters designed for businesses, creators, and developers. These agents are not rented or generic… they’re fully owned and tailored by their creators, making them ideal for a wide range of industries including education, entertainment, and enterprise.
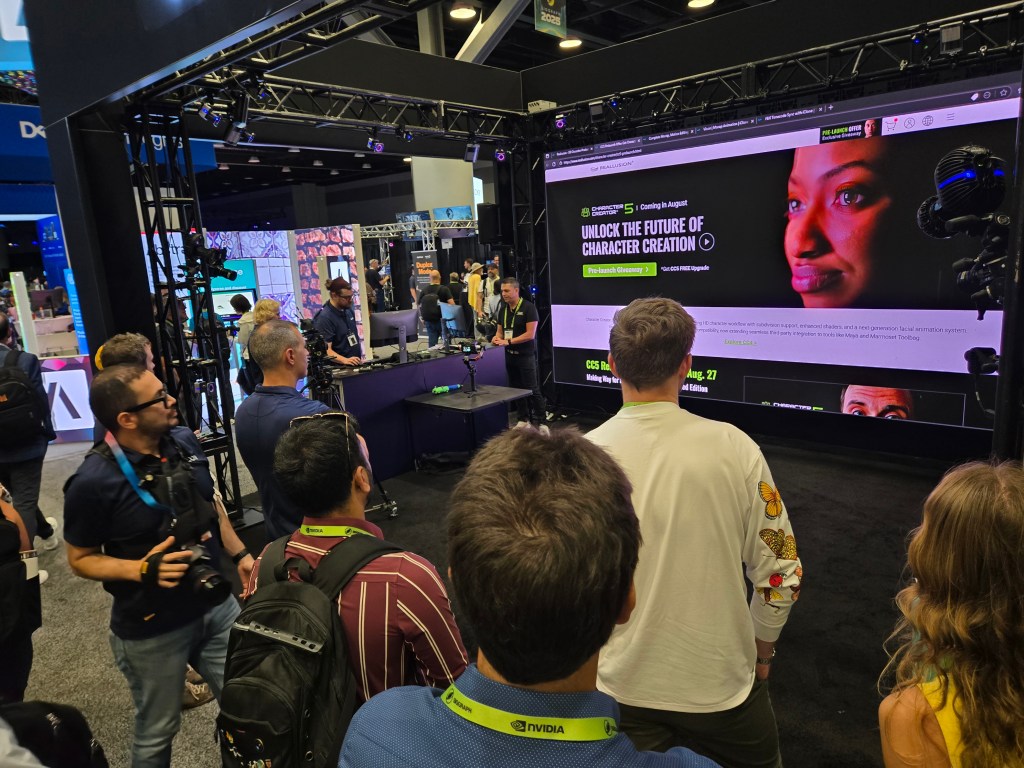
Reallusion also unveiled its highly anticipated Character Creator 5 (CC5), the next evolution of its acclaimed character design platform. CC5 introduces hyper-realistic digital humans, enhanced animation-ready meshes, advanced facial rigging, and tools for stylized or realistic character workflows. Together with the NVIDIA-powered Dell workstations, CC5 delivered blazing-fast rendering and real-time animation performance, leaving visitors in awe of the possibilities.
Showcasing the Latest Interactive Agents
Reallusion’sInteractive Agents stole the spotlight at SIGGRAPH 2025. Unlike many AI avatar solutions that lock users into subscription models, Reallusion empowers creators to fully customize, own, and deploy their agents. These virtual personalities can:
Answer questions in real time.
Act as interactive brand representatives.
Function as virtual assistants for websites, apps, or immersive experiences.
Engage audiences across multiple platforms without third-party restrictions.
This approach resonated with the SIGGRAPH audience of animators, production studios, and developers looking for flexible, scalable AI tools.
Character Creator 5: Redefining Digital Humans
Character Creator 5 pushed the boundaries of digital human creation. New features include:
HD Character Technology: Advanced skin shaders and dynamic detail bring lifelike realism.
Optimized Game Export: Streamlined workflows for Unreal Engine, Unity, and other platforms.
Facial and Body Rigging Enhancements: Expanded compatibility with mocap and animation tools.
Stylization Tools: Support for both photoreal and stylized avatars.
The live demos highlighted how CC5 seamlessly integrates with pipelines for film, games, and virtual production. Attendees were especially impressed by how CC5 characters could be animated instantly using motion capture and real-time rendering powered by NVIDIA RTX GPUs.
Connecting with Partners and Friends
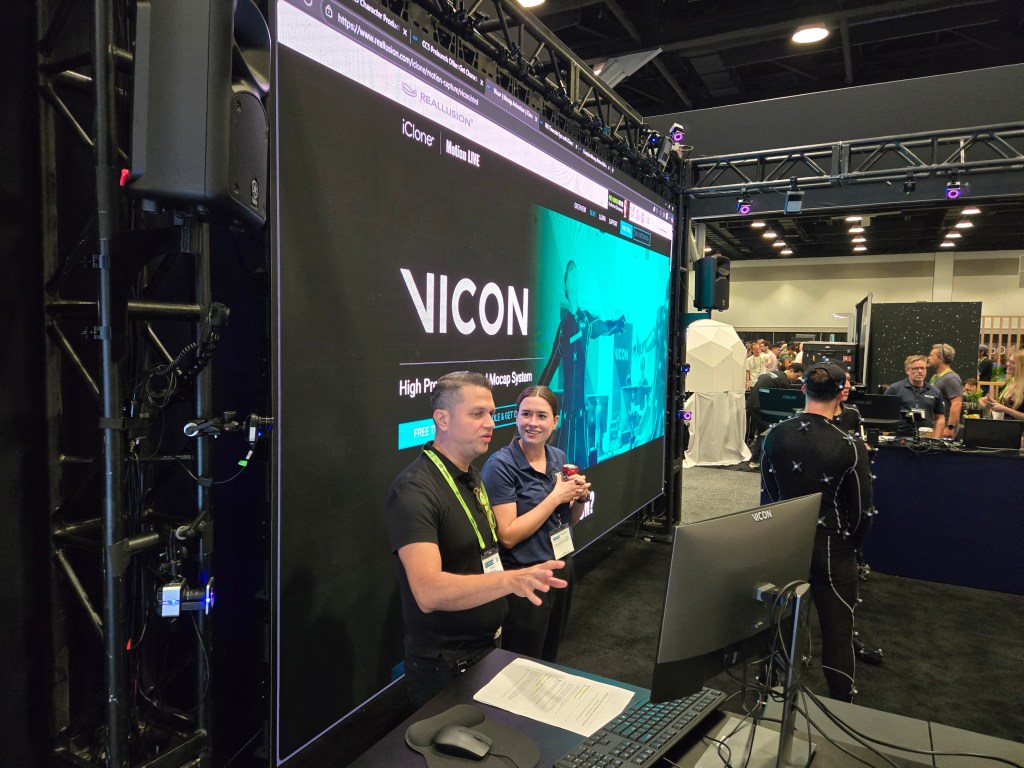
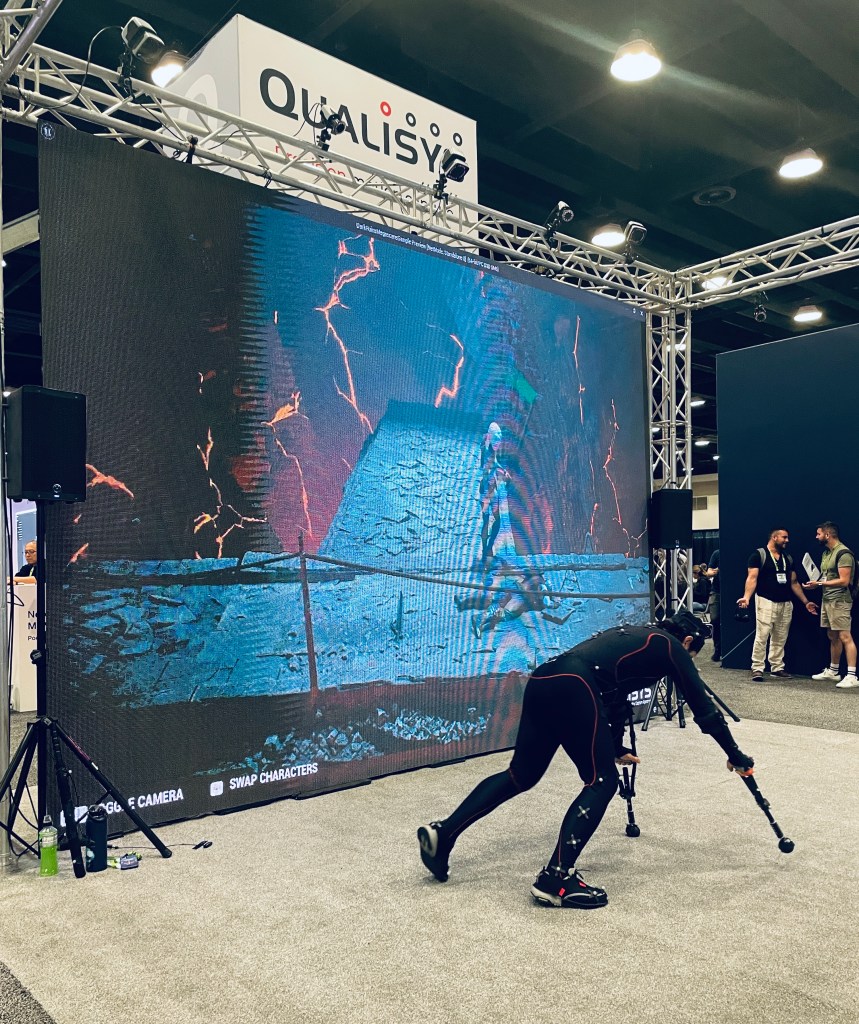
SIGGRAPH was also a valuable networking hub. Reallusion reconnected with longtime partners including NVIDIA, Dell, VICON, XSENS, Qualisys, Bones Studios, Meshcapade, and The Sawmill Studios. Each partnership highlighted the growing ecosystem of tools that integrate with Reallusion software for motion capture, animation, and AI-driven workflows.
Special Presentation at VICON Booth
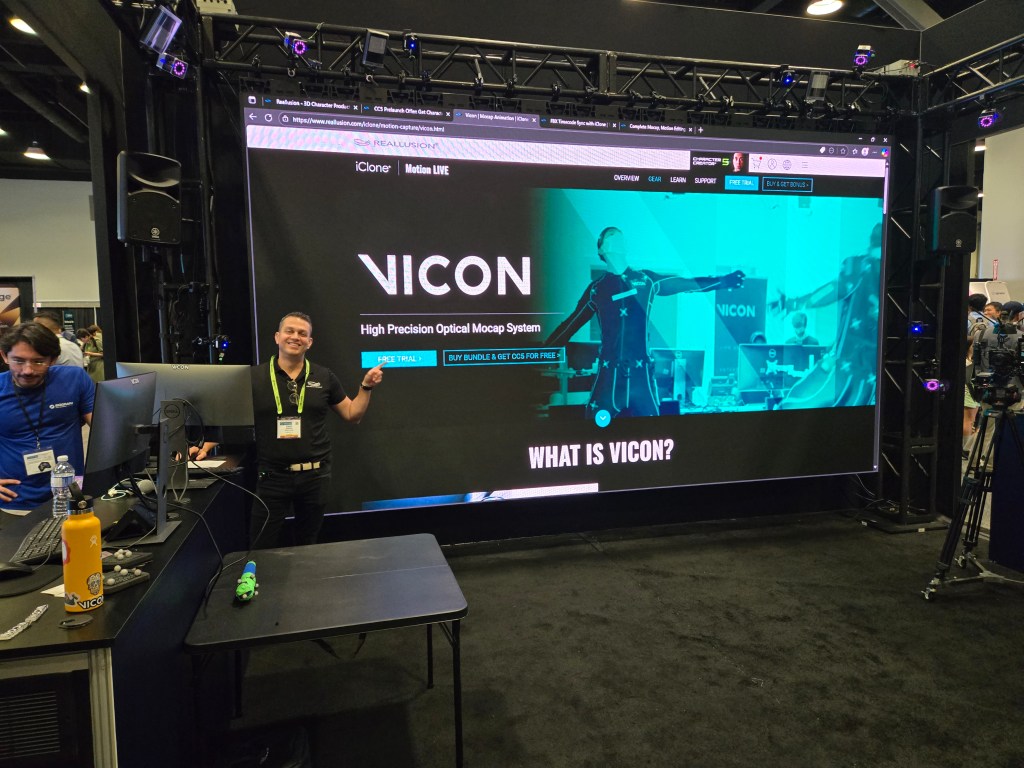
One of the highlights of the event was Enoc Burgos’ guest presentation at the VICON booth. At the talk, he introduced the latest VICON profile plugin for iClone’s Motion LIVE platform, alongside the new iClone Timecode plugin for synchronizing multiple real-time capture sources. This breakthrough allows animators to capture, align, and animate data from different mocap devices in perfect sync, unlocking powerful possibilities for studios working with complex pipelines.
Reallusion’s Digital Aaron at SIGGRAPH
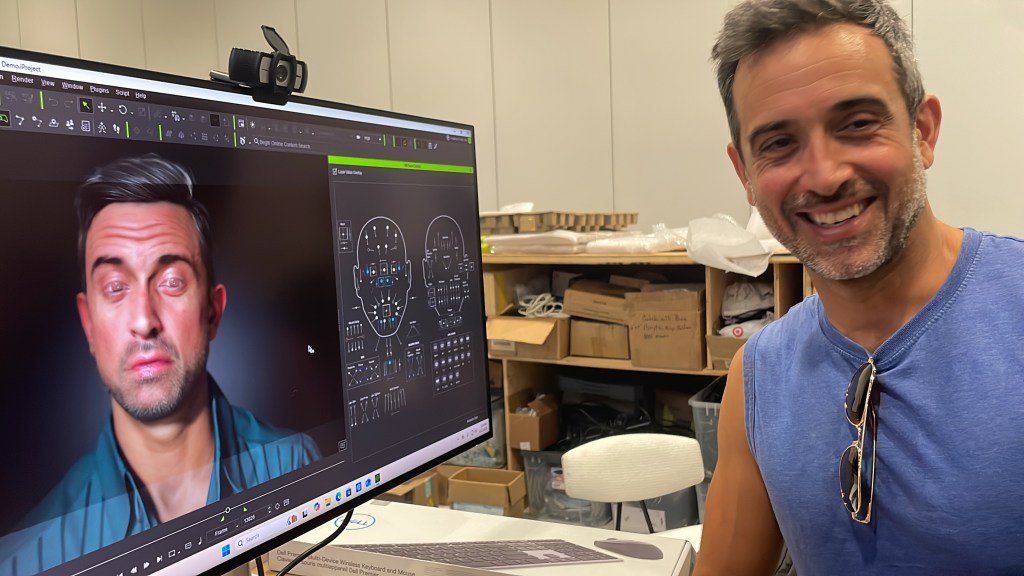
Another exciting moment came when Canadian actor Aaron Gagnon, who was previously scanned as a Character Creator 5 avatar, visited the convention center. Attendees watched as his digital twin was animated live on stage with CC5 HD Character technology. Seeing a performer witness their own hyper-realistic avatar in action was a powerful demonstration of the future of digital identity in animation and storytelling.
After-Hours Mixers and Industry Connections
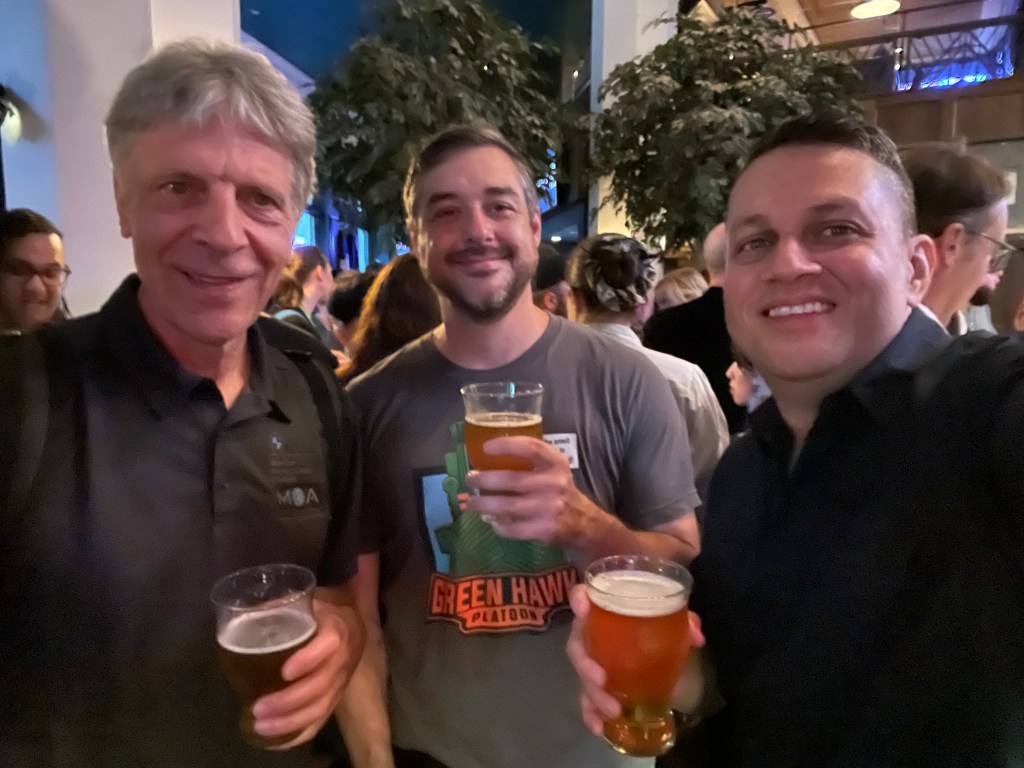
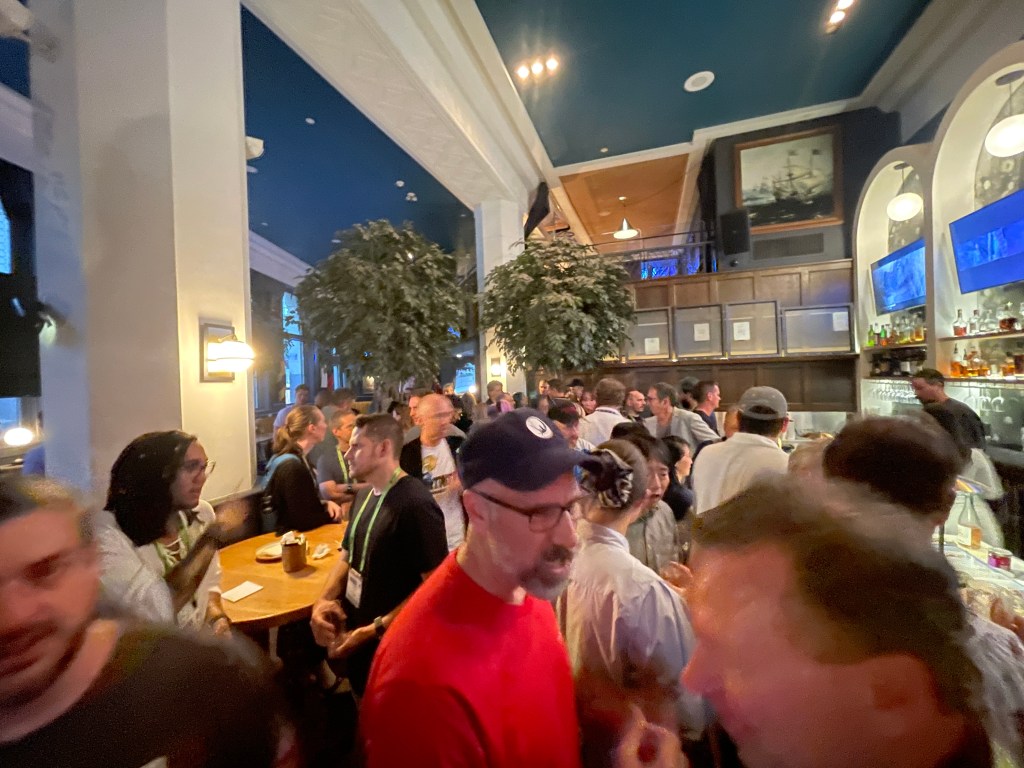
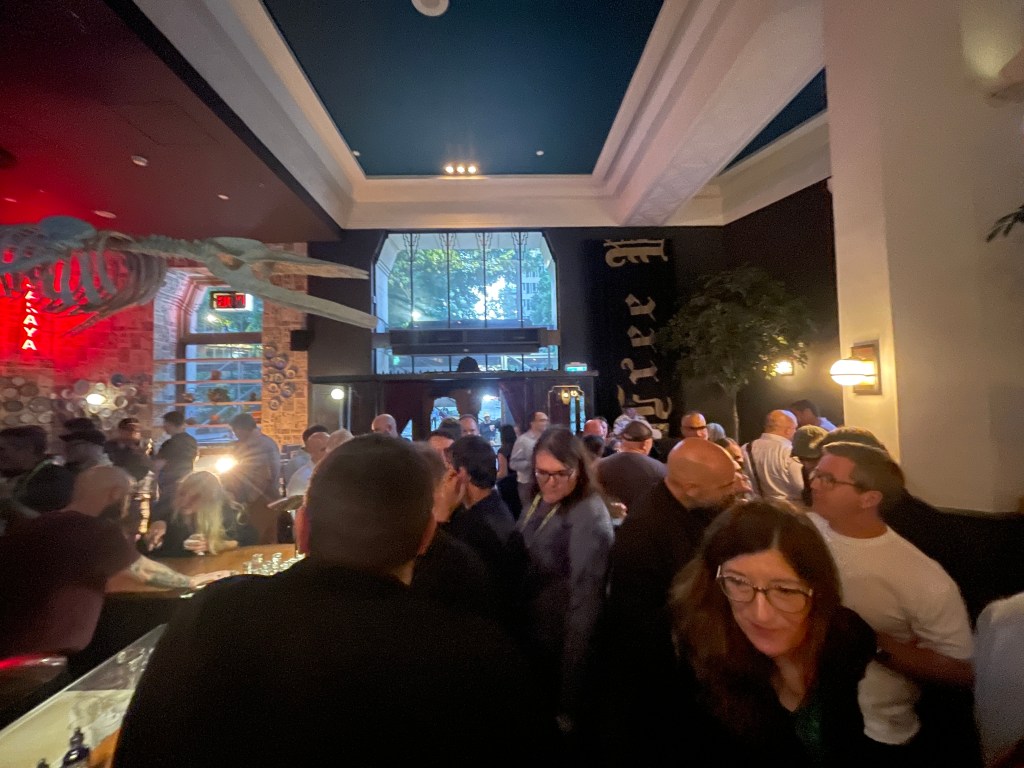
Beyond the exhibition floor, the Reallusion team joined several after-hours mixers hosted by Epic Games, NVIDIA, the Society for Game Cinematics, and others. These informal events provided opportunities to reconnect with game developers like Nick Romick, as well as meet new collaborators and exchange ideas with industry leaders. These networking sessions reinforced Reallusion’s place at the heart of the animation and interactive media community.
Looking Ahead: Reallusion Thanks Its Community
SIGGRAPH 2025 was a resounding success for Reallusion. From unveiling Interactive Agents and Character Creator 5, to collaborating with partners like Dell and NVIDIA, the event underscored the company’s mission to empower creators with innovative, real-time animation tools. Reallusion extends a heartfelt thank you to its partners, collaborators, and fans who visited the Dell Technologies booth and participated in live demos. The team looks forward to sharing even more groundbreaking technology in the near future.
FAQ
What are Reallusion Interactive Agents?
Reallusion’s Interactive Agents are fully customizable AI-driven virtual characters that businesses and creators can own and deploy across multiple platforms.
What’s new in Character Creator 5?
CC5 introduces hyper-realistic HD characters, improved facial rigging, optimized export pipelines, and support for both stylized and realistic designs.
How does Reallusion work with NVIDIA and Dell?
At SIGGRAPH 2025, Reallusion partnered with Dell’s Pro Max Tower T2, powered by NVIDIA RTX PRO 6000 GPUs, to deliver ultra-fast, real-time performance.
Can Reallusion tools integrate with motion capture systems?
Yes, iClone’s Motion LIVE platform integrates with VICON, XSENS, and Qualisys, and now features a new Timecode plugin for multi-device sync.
Who is Aaron Gagnon in relation to Reallusion?
Aaron Gagnon is a Canadian actor scanned into Character Creator 5 as a digital avatar, showcased live at SIGGRAPH 2025.
Layering different shots and media have been around for a long time. Many beginners don’t realize the extent to which some productions rely on compositing and not filming the entire scene as it happens. After Effects is a compositing program that elevated this type of production by making it available to the masses. There is a reason Adobe identified After Effects as an effective software solution way back in 1994 when it purchased the company, CoSA – Company of Science and Art, to make it part of Adobe.
According to Wikipedia:
Compositing is the process or technique of combining visual elements from separate sources into single images, often to create the illusion that all those elements are parts of the same scene.
To be clear, iClone is NOT compositing software. However, it can be used as such when you consider we have the workspace background, image planes, image billboards and image layers to take the place of actual layers like we have in After Effects, Photoshop and similar applications. In fact, I use the workspace background and image planes more than anything and it can add a dramatic and cinematic touch to a simple scene.
The Workspace Background
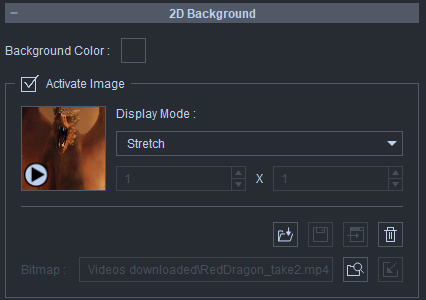
We can access the workspace background by going into the Project tab and looking for background which can be a solid color, image or video. All you have to do is drag and drop the AI generated video onto the project background area in the Project tab or even faster just drag and drop it visually to workspace background. It should map the background space and play with the regular playback controls.
It is recommended you line up the 3D workspace with the background where the grid matches the ground plane of the video. This starts the process for a smooth working experience. This doesn’t mean you need to angle the grid to match a road, which you can do, but it’s more important to line up the grid to the viewport at background horizon level.
Dragon Slayer Breakdown
Let’s take this simple dragon slayer example and break it down. It only has one character (the Knight), five particle effects, both legacy and PopcornFX, along with an AI-generated background. This background is from the new video generation service from Midjourney based on an image of a Dragon challenging what is in front of it.
To be clear, the background was first generated as an image with Midjourney then animated by pressing a button. You can have Midjourney choose what to animate in the image and how it will animate which isn’t always right the first time. There are ways to control this with manual prompting versus the automatic animate feature. We can also set the beginning and ending frame to the same image in Midjourney to stop most camera movement.
This type of scene can draw a viewer deeper into the story with the visuals even when it only lasts a few seconds. It can immediately set the tone for whatever follows, and it is beginners level work in this example. While there is a lot of movement in the scene it boils down to those canned motions dragged and dropped onto the Knight character while the animated background does the rest.
The particle FX are optional but are easy to use and add more flair to the scene. In a manner of minutes, you can put together a scene like this. It will most likely take more time in Midjourney or the AI video generator of your choice than you will spend in iClone.
Dust Off
This example like the Dragon slayer above is a simple scene that only involves a few more characters (all duplicated from the original character) with different poses. The two standing characters watch the aircraft lift off and depart by looking at it and following an invisible box dummy that moves with the aircraft to mimic that character following the aircraft lift off with their heads.
Don’t overcomplicate things.
As beginners we already have a lot to keep up with when we work with the feet or lower legs of the characters in full view. This can turn into a chase-our-tails task where we fight one little problem only to create another trying to meld the 2D video background to the 3D assets. Keep the ground plane contact with character’s feet OFF SCREEN. Place the feet or props in positions that don’t show the full contact point of 2D and 3D assets. Problem solved and no chasing our tail.
The goal is to have the viewer not even realize you have used a video or where that video may start compared to the 3D work in the scene. The tutorial also shows how to hide parts of the background footage with props to cover up any strange AI-related happenings like a person walking in the background with their head backwards. Hiding and eventually masking these anomalies will become a common tool or skill if it doesn’t improve.
Both the demo and tutorial videos have one thing in common. Without the animated background they are not usable. They are not even a scene.
Quick and Dirty Color Grading (Color Matching)
A big problem with using different media in iClone is the sharp contrast in the color pallets of the media. We aren’t always able to use or find assets in the same color pallet, so we use Color Grading which on the pro level is a skill in itself. We don’t need pro level color grading so much as we need blending of colors along with color overlays like image layers that match the main color of the scene.
This is an old-school work-around that has been around since digital art existed and can come close to color grading which didn’t exist back then. It’s a simple concept to tie disparate media together for continuity. I’ve written about this method before in various contexts over other articles.
For example, we take a stock piece of footage for the animated background, and it has an orange tint to it. Then we add iClone characters that may have a brown tint to them. Adding props makes this even more complicated as each prop could have a different colored “look”. A purplish piece of furniture along with green tinted lamps or floors.
I don’t mean the lamps or floors are green. I mean they have normal colors but have a slightly green tint or palette compared to assets that are around them. These assets all need to have the same overall tint to them so we can use overlays as a quick and dirty method of achieving this effect.
LUTs are another important piece to the puzzle as they keep the image layer color from bleaching or washing out the image. These are effects that use images to project a color or combination of colors. While a color based image layer can work in most cases, lighter colors can washout the scene if dialed up too much.
In the color grading example below, I show you what it looks like in native iClone lighting, what it looks like with just an image overlay and the final look with is a combination of three LUTs and the image overlay to achieve the dusty look I wanted. The demo also shows some variations between the LUT layers as they are turned on.
While true color grading is an advanced skill, we can use this much simpler method to get more continuity of color. Color grading can be a hard a concept to explain as all props and characters have their own colors so the short tutorial below should help to visualize this.
The tutorial covers this quick and dirty color grading/matching process using the same scene as in the above tutorial.
New AI Render Beta Plugin Now Available
Not only can we use AI-Generated and animated backgrounds we can also try out the new AI Render plugin now in open beta. I will cover this exciting new plugin in a future article but for now the future looks very bright for iClone rendering with the power of AI. Like other iClone features this plugin can be as simple as just using it right out the box following directions or you can jump off into the deep end of data and customize your own look.
This is an integration of ComfyUI for the ability to use almost any model with the AI Render. The potential is huge. If you have no idea what I’m going on about… don’t worry. There will be tutorials and discussions to get all of us up to speed on AI rendering.
AI models included with the plugin are:
Photorealism Image
Cinema Image
Films Image
2D Manga Image
2D Anime Image
2D Brushwork Image
2D Game Visual Image
3D Anime Image
3D Cartoon Image
3D Concept Art Image
2D Clean Line Image
Photorealism Video
Cinema Video
Films Video
2D Manga Video
2D Anime Video
2D Brushwork Video
2D Game Visual Video
3D Anime Video
3D Cartoon Video
3D Concept Art Video
2D Clean Line Video
Images from the new iClone AI Render Plugin
Reallusion has automated the ComfyUI install to the point where almost anyone can do it without AI experience. Its all packaged up in a nice little installer that takes care of all the tech nerd stuff that makes the magic inside our little boxes. While that is a bit flowery it is the truth as Reallusion has made the plugin ridiculously easy to install. You’ll need about 80 Gigs of space if you download all the models provided.
Summary
One thing I’ve covered many times is the little bits of easy-to-produce eye candy like these AI-animated background scenes that can make a lot of difference in getting and keeping the attention of viewers. Whether we are just starting out as animators or are seasoned pros… A few easy seconds of eye candy can go a long way to filling in gaps while maintaining the focus of the viewer.
It doesn’t have to be Midjourney as they are new to video generation for consumers as of this writing. Any AI video generator will work if they have compatible resolutions or close enough to look smooth.
Compositing is still the lifeblood of moviemaking. Nothing may be what it seems after it comes out of the hands of a good compositor. Might as well start picking up on this technique now so you will be prepared for it in the future as your animation skills grow.
MD McCallum – WarLord
Digital Artist MD “Mike” McCallum, aka WarLord, is a longtime iClone user. Having authored free tutorials for iClone in its early years and selected to write the iClone Beginners Guide from Packt Publishing in 2011, he was fortunate enough to meet and exchange tricks and tips with users from all over the world and loves to share this information with other users. He has authored hundreds of articles on iClone and digital art in general while reviewing some of the most popular software and hardware in the world. He has been published in many of the leading 3D online and print magazines while staying true to his biggest passion, 3D animation. For more information click here.
Animation Journey: From Drawing Cartoons to 3D Worlds
This article is the third installment of my Garry’s ongoing journal series, From 2D to 3D. If you haven’t read previous posts, then we recommend starting there:
In the first post, I shared the pivotal moment that led me to transition from a decade of 2D work into the world of 3D animation. In the second, I explored the tools, challenges, and creative breakthroughs that shaped my early steps. Now, in this third entry, I take on my biggest test yet—building my first fully custom 3D character from scratch.
Entry 3 – Make or break
By now, I’d played with my new toys, iClone and Character Creator (CC4). I’d clicked all the buttons just to see what they do. I’d binge watched every Youtube tutorial Reallusion had ever posted, and I’d even reached out to some of the pros for advice.But the honeymoon phase was over. It was time to knuckle down and see if I could actually make something. A full 3D actor. From scratch. By myself.
I opened up Character Creator 4 and took a deep breath. I knew I wanted to create a stylised character that kept the look and personality of the 2D actors I have made. A cartoon character with exaggerated features, custom proportions, and a head that looked like it belonged in a Pixar short.
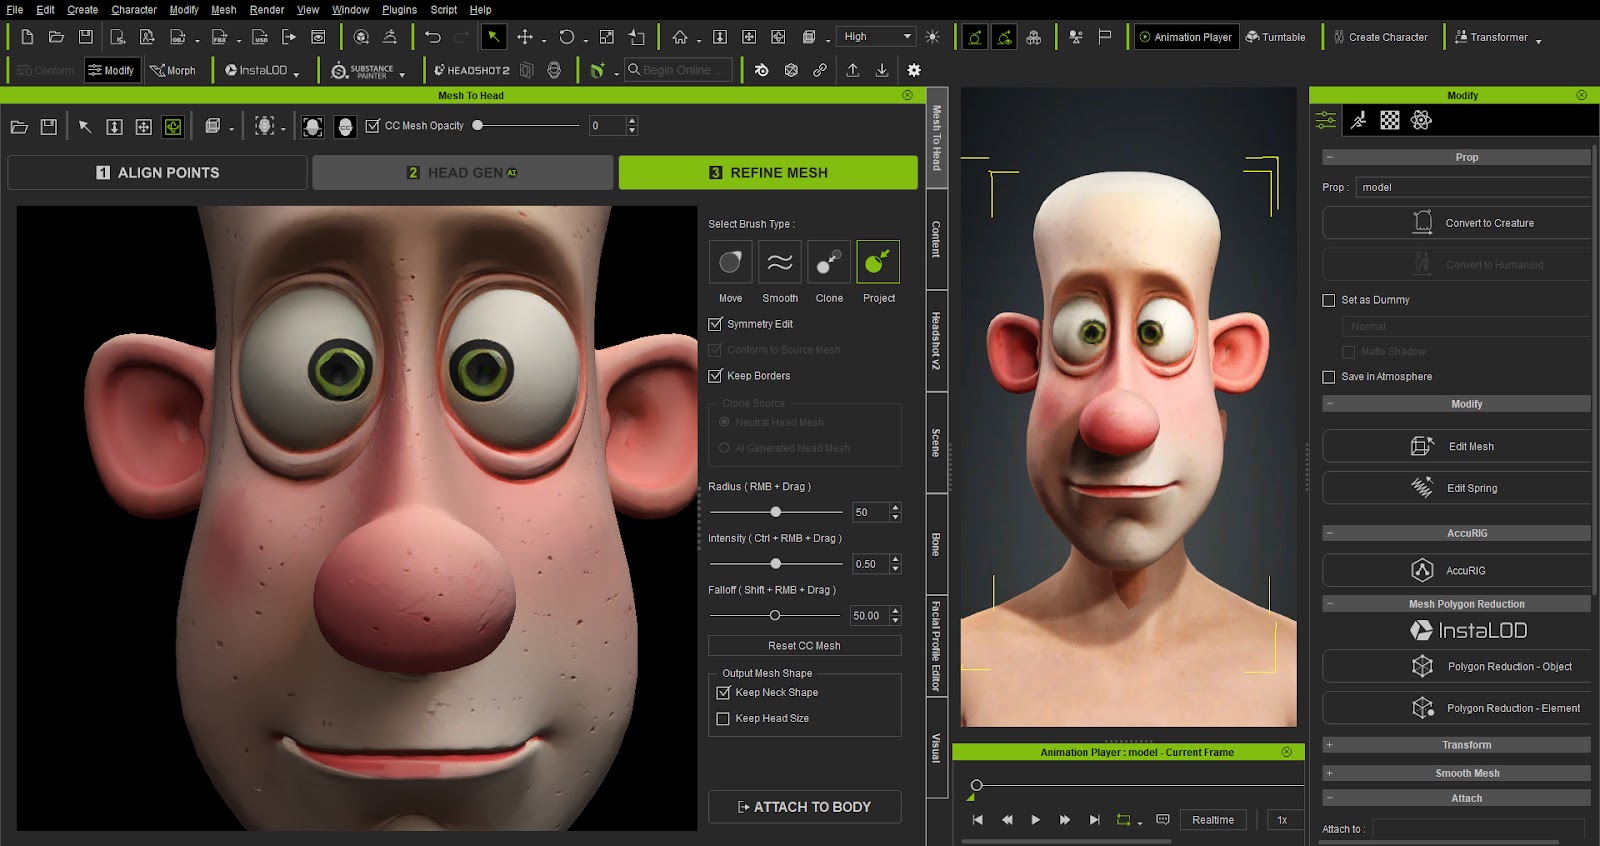
I generated a 3D head model in the AI software Meshy, saved it as an FBX file and applied that skin mask to the HeadShot 2.0 base model. And even hearing myself say that sentence out loud puts a smile on my face and demonstrates just how far I have come in such a short space of time, because a couple of months ago, none of that would’ve made the slightest bit of sense to me.
The decision to do as much of the heavy lifting as possible directly inside Character Creator was the right decision for me, because the more I used CC4 the more comfortable I was using it. Processes became more instinctive, although there were still plenty of times I needed to refer back to the tutorials and I now use ChatGPT so much that we are best friends.
With the help of CC4s morph sliders I was able to make instant changes to my characters look, both for his face and body. And when I had maxed out the sliders and needed to push the extremes, I had tools on hand like the Proportion tool and Edit Mesh which allowed for precise control of even the smallest details.
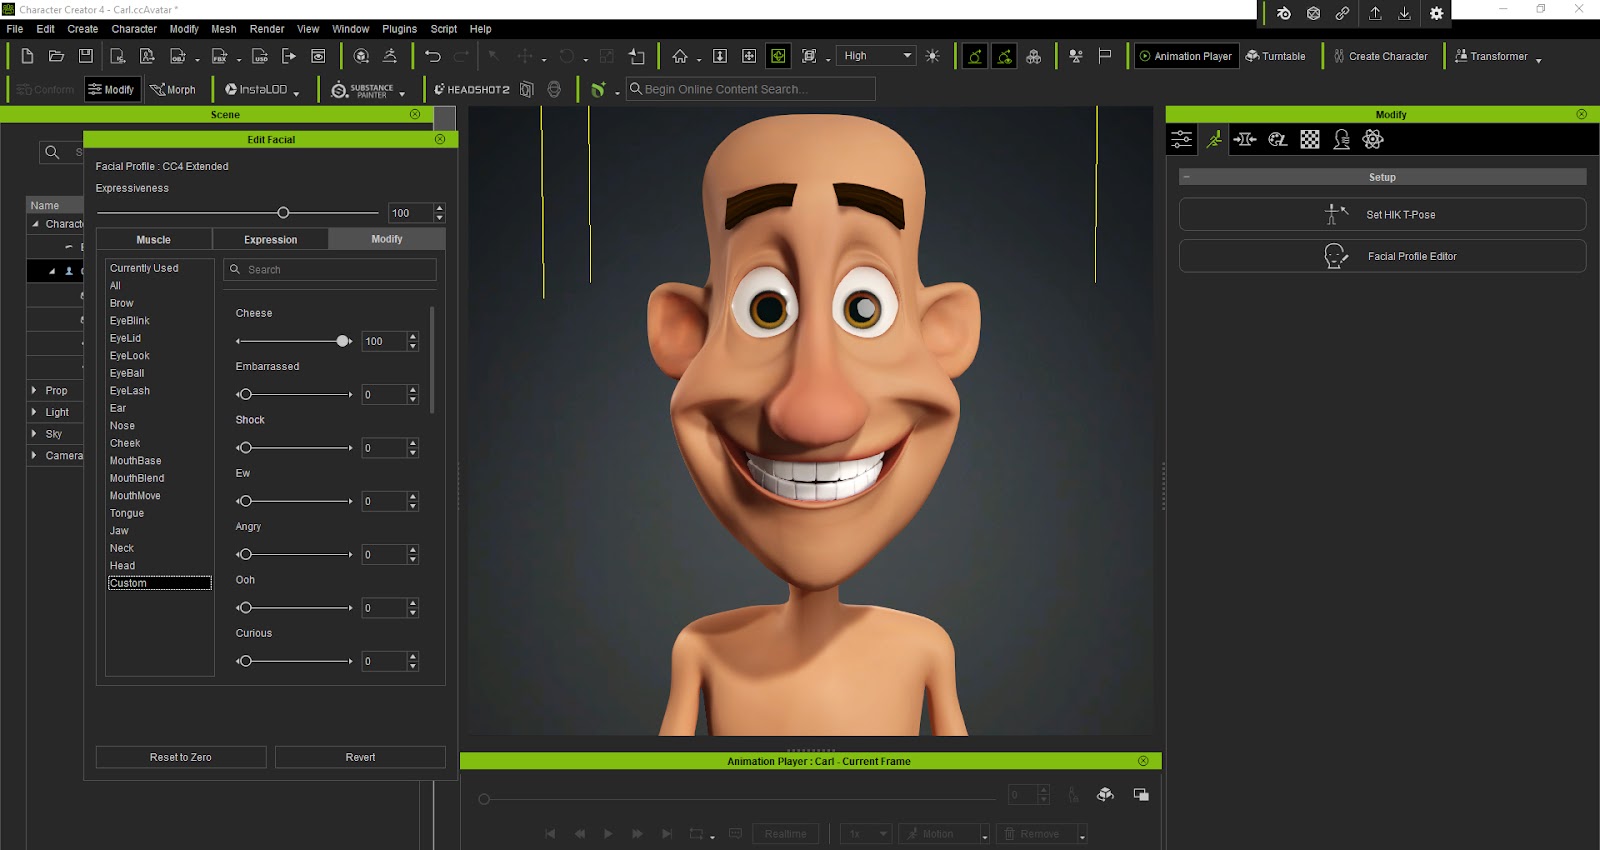
Working in 2D character design requires hours of drawing and redrawing mouth shapes and eye sprites. Now I found myself modelling my actors face to accommodate these shapes, making sure that his teeth were in the correct position when he smiled and that his eyes stayed in his sockets when they rotate. The biggest advantage of working in 3D was the opportunity for more subtle face movement as well as the most extreme. I already had the feeling that if I could see this character through to the end that he was going to be more expressive and have more personality than almost any character I have been able to make in 2D.
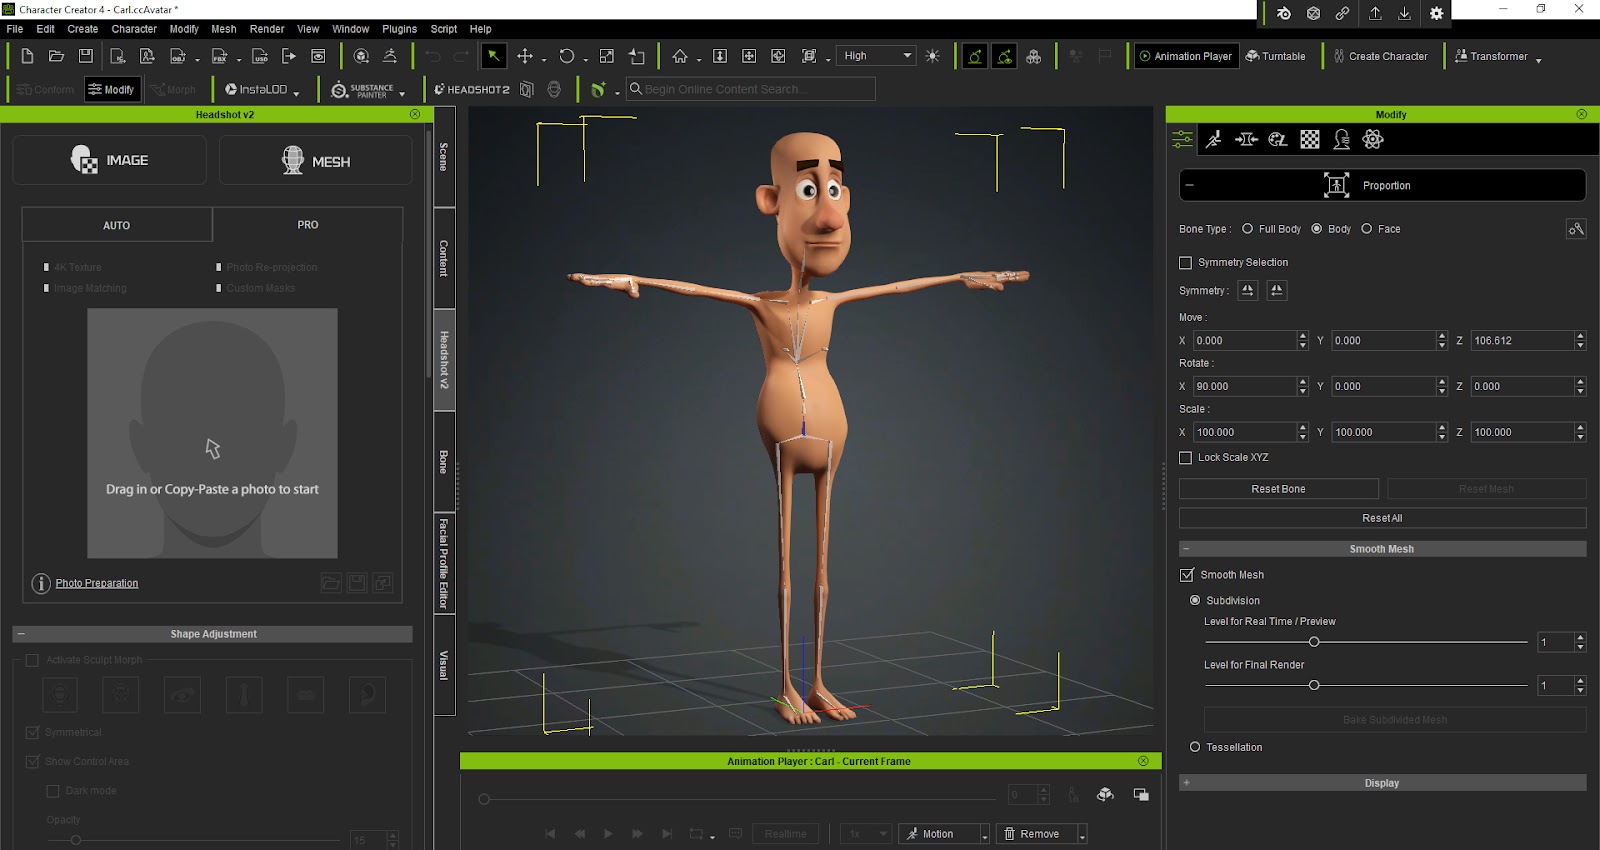
I had named my first 3D actor Carl. Carl now had a face, but he was going to need a body. Naturally, I started with the default male base in Character Creator. He was tall, chiseled, and clearly went to the gym more than I ever have. But this wasn’t going to be that kind of character. I wanted to create something stylised. So instead of chasing perfect anatomy, I decided to do something much more cartoony and goofy.
This is where the morph sliders and the Proportion tool in CC4 came into play, both of which are incredibly powerful. You start with a few innocent tweaks, like bringing the waist in or rounding out the shoulders. But then you start exceeding the parameters of the sliders like a mad scientist just to see what your character would look like with a giraffes neck or six foot long legs. Whatever you do, there is nothing more fun than seeing your changes happen in real time.
I wanted a 3D cartoon style version of my own 2D characters. Something that could live in the same exaggerated world as my 2D characters but still feel grounded in reality.
The morph sliders let me dial in specific details like a softer jawline, broader nose, flatter chest, slightly hunched shoulders. The Proportion tool helped me fine tune the overall body shape including a shorter torso, longer arms, slightly bowed posture.
I was building a custom character in 3D that felt like mine. Not just in style, but in shape. He wasn’t a template anymore. He was starting to feel like a cartoon reflection of my style. I wasn’t just learning the tools, I was connecting to them.
What followed was hours of experimentation, frustration, small wins, and spectacular failures. Sliders were pushed. Meshes were mangled. Eyeballs were accidentally deleted. But slowly, something began to take shape. I wasn’t just clicking anymore, I was making choices. The chin needed to be wider? I could do that. The ears a little lower? Too easy. Make the eyes match my style and vision, not just a generic preset? Done. Suddenly, I was no longer following the tutorial, I was breaking away from it.
I decided to export my actor into Blender to start tweaking the mesh. Ten minutes later, I was questioning every life choice I had ever made and quickly went back to CC4. Blender was going to have to happen, but not today.
The lesson I learnt at this point in my journey is that it’s not about perfection, it’s about commitment. I told myself “You’re going to finish this actor, no matter what. No backing out. No abandoning the file in a WIP folder that you never open again.”
I have a long way to go. And so does Carl. But he was starting to take shape and my first steps into the 3D world were more than exciting enough to make me keep going.
Garry Pye is an Australian illustrator, animator, and Cartoon Animator instructor with over a decade of experience in the animation industry. Known for his unique blend of creativity and humor, Garry’s work spans from teaching animation techniques to creating innovative content that helps both novice and experienced animators improve their skills.
Garry’s enthusiasm for storytelling and animation shines through in all his projects, whether it’s creating animated shorts, preparing educational tutorials, or sharing his expertise by teaching. With a passion for making animation accessible and fun, Garry has built a community of learners who not only appreciate his knowledge but also his infectious sense of humor and dedication to his craft.
José Tijerín, a digital illustrator and 3D sculptor, is the creator of the video game “Dear Althea” on Steam and the content pack “We’re Besties” available in the Reallusion Content Store.
The world of digital sculpting is in a constant state of flux, and artificial intelligence is no longer a futuristic promise, but a revolutionary tool that is redefining the foundations of 3D creation. Far from replacing human creativity, generative AI accelerates workflows, allowing us to reach levels of complexity that previously required an exorbitant investment of time and resources. The real power lies not in a single tool, but in the synergy of a production pipeline that merges the speed of AI with the precision of professional tools.
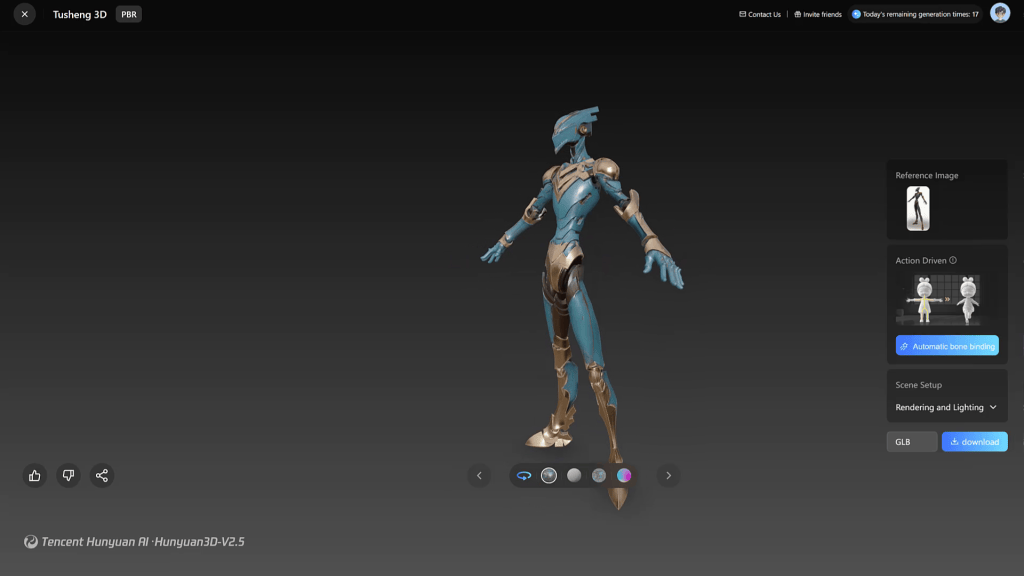
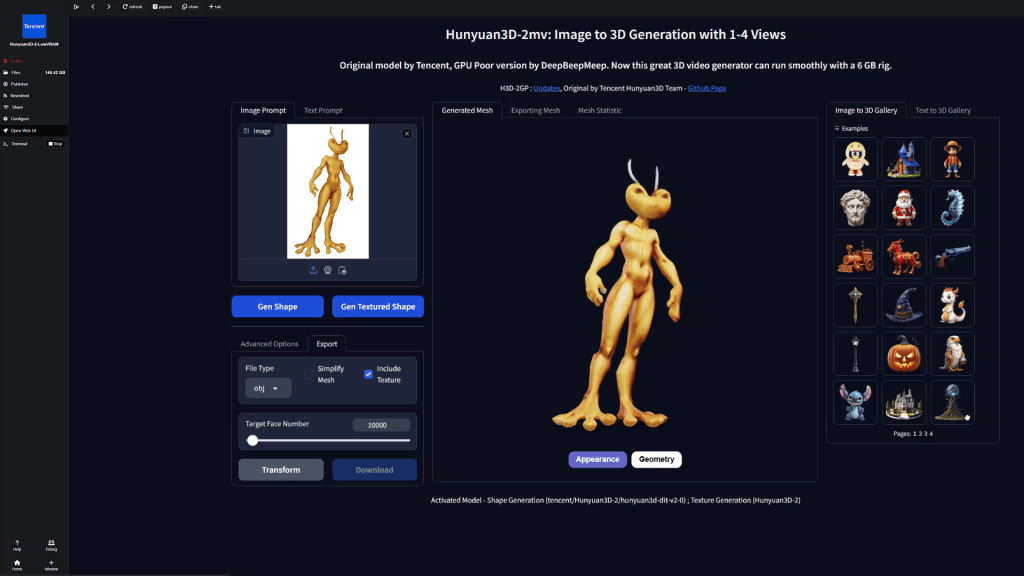
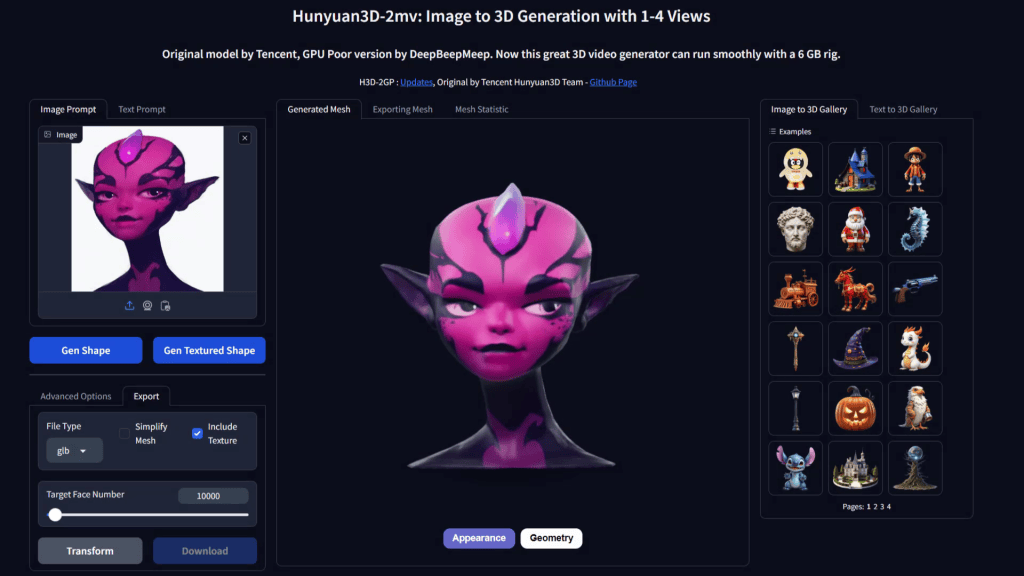
At the epicenter of this new wave is Hunyuan3D, the 3D generation AI developed by Tencent. Its v2.5 version stands out for offering one of the highest geometric resolutions and texture qualities on the market, even generating Roughness and Metallic maps, essential for standard rendering. However, the AI-generated model is not the end of the road, but a formidable starting point.
In this article, we will explore three professional workflows that demonstrate how to transform an AI-generated 3D model into a fully functional, animation-ready character, using the Character Creator 4 ecosystem as a backbone.
The Starting Point: Hunyuan3D
Before diving into the workflows, it is crucial to understand the strategic distinction between the web version of Hunyuan3D v2.5 and its local installable counterpart. This is not a simple choice between quality and speed, but two complementary tools.
The v2.5 online version is the precision tool. Its ability to generate high-density meshes and PBR textures makes it the ideal choice for creating a model of maximum fidelity. On the other hand, the local version, especially its “Mini” model that requires only 3 GB of VRAM, is the engine of agility and creative exploration. Running it in seconds on our own PC, without relying on credits or internet connection, transforms it into a rapid prototyping machine, ideal for iterating accessory designs or frictionless armor components.
A crafty artist will use v2.5 to establish the main vision of their character at the highest quality, and will turn to the local version to populate that design with details, props and variations.
Workflow 1: Auto-rig AI-generated model with Advanced AccuRIG in Character Creator
This is the most direct and efficient method to bring to life an AI-generated model that already has a good humanoid form. It is ideal for when time is short and the goal is to have a character animated in minutes.
Step-by-Step Guide
Generation and Export: Create your character design in Hunyuan3D v2.5 with enough detail and volume to capture your intended concept. Once generation is completed, export the model as OBJ or FBX.
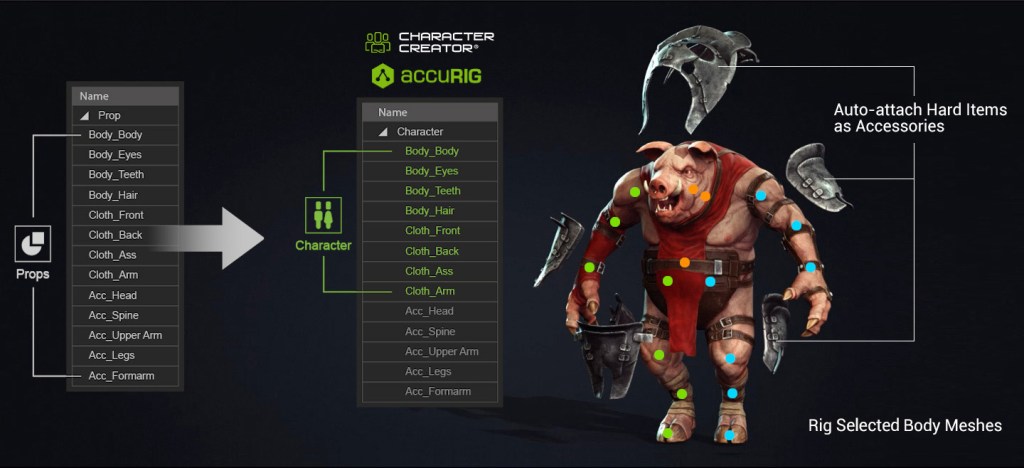
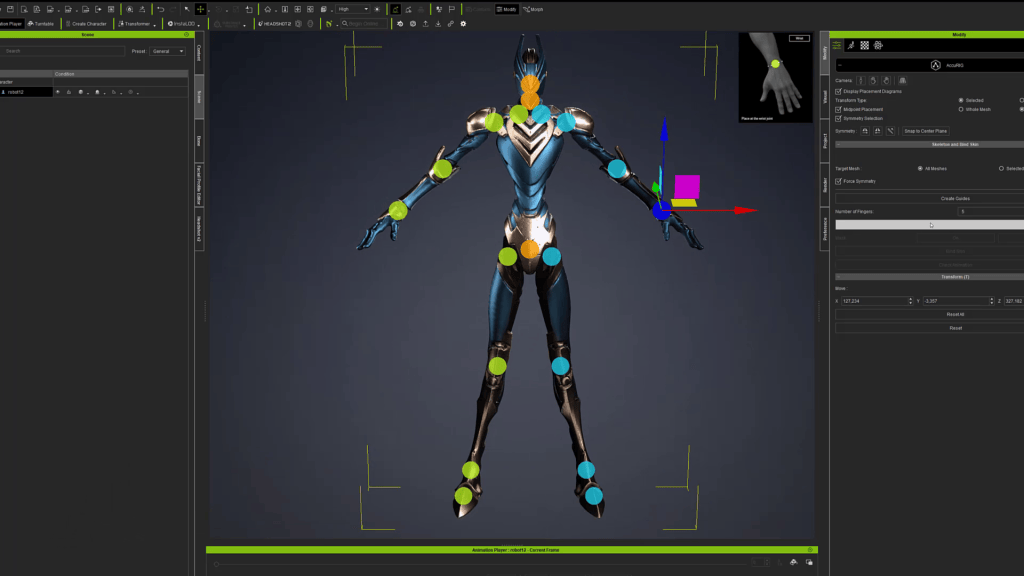
Import into Character Creator 4: Bring the exported model into CC4 and Advanced AccuRIG will analyze the mesh and automatically identifies the key anatomical points. In seconds, it generates a functional skeleton. The tool allows you to manually adjust bones, customize the structure for non-human proportions, and define finger articulation precisely.
Animate: After rigging with AccuRIG, you can easily animate your AI model with the motion in CC4.
Workflow 2: Sculpt CC Base from AI Reference Using GoZ and ZBrush
This workflow represents the industry standard and is designed to overcome the main limitation of AI models: their topology. AI-generated mesh is often dense, irregular, and not animation-friendly. Instead of directly animating it, we treat the AI model as a high-quality design reference.
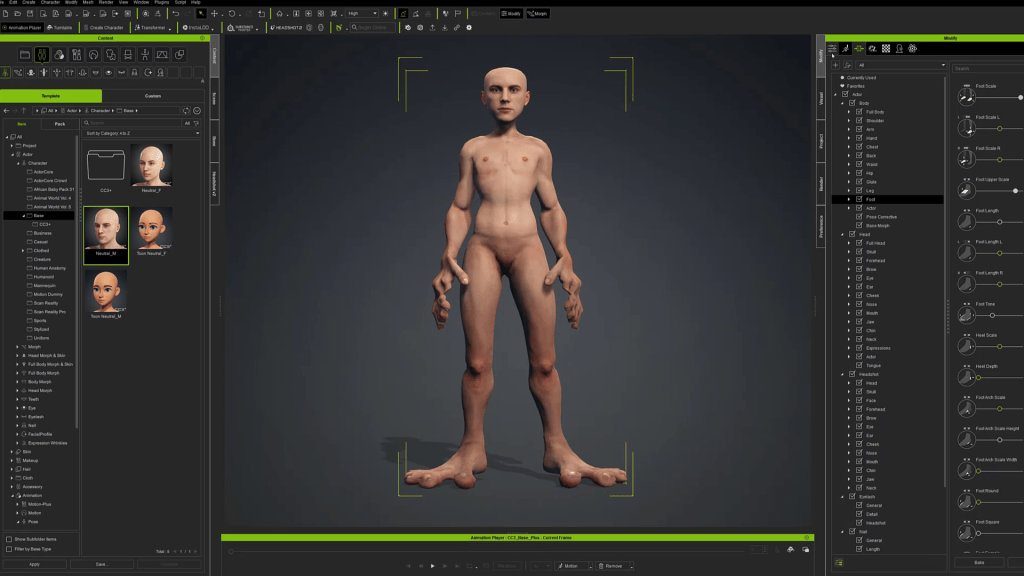
By leveraging Character Creator’s well-balanced topology, we can reshape the base mesh in ZBrush and conveniently send it back via GoZ plus.
Key Steps
Sketch-to-3D Generation: Begin with a 2D sketch or concept art, and use Hunyuan3D to convert it into a high-detail 3D mesh. This allows for creative exploration while retaining the original silhouette and proportions.
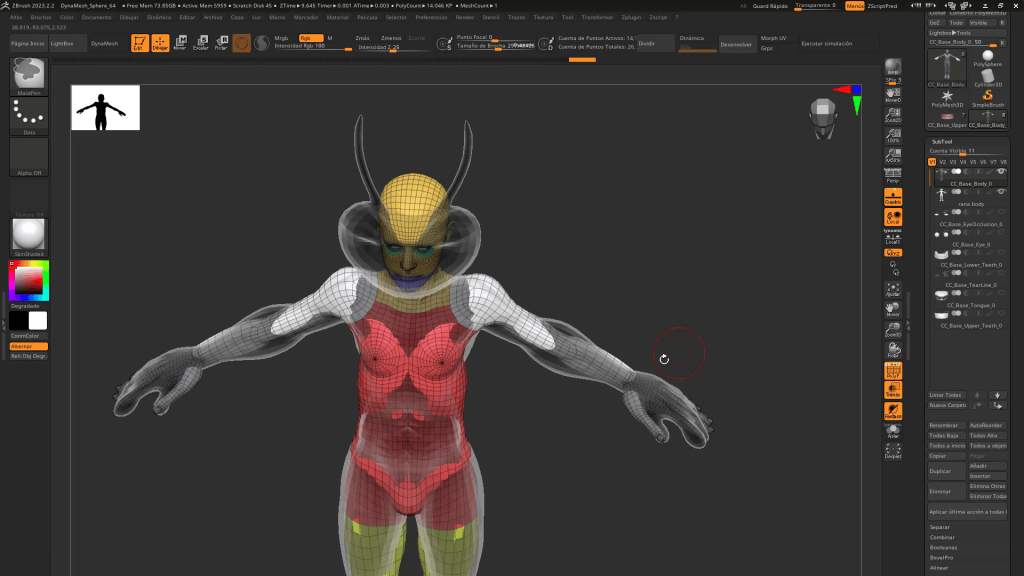
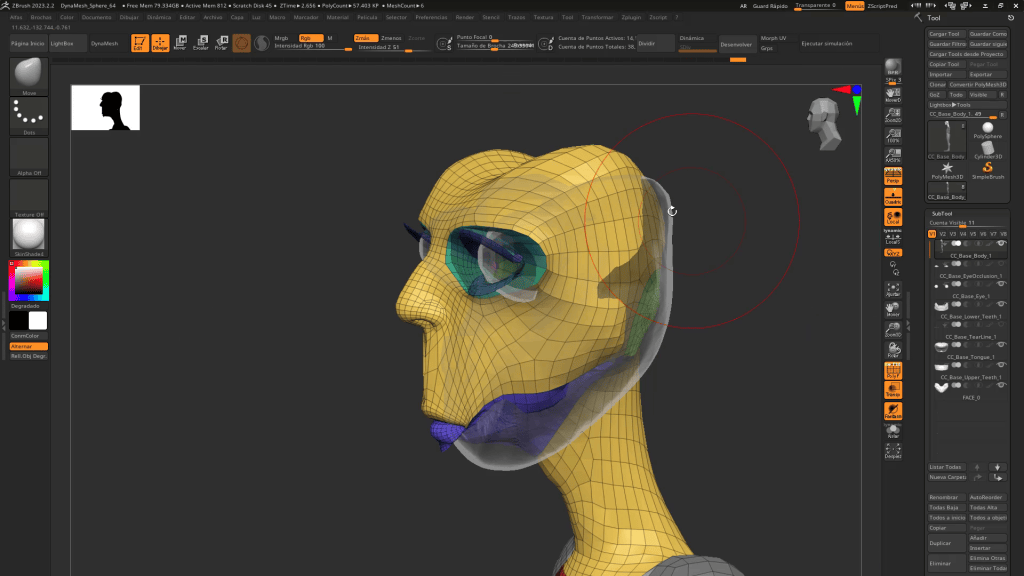
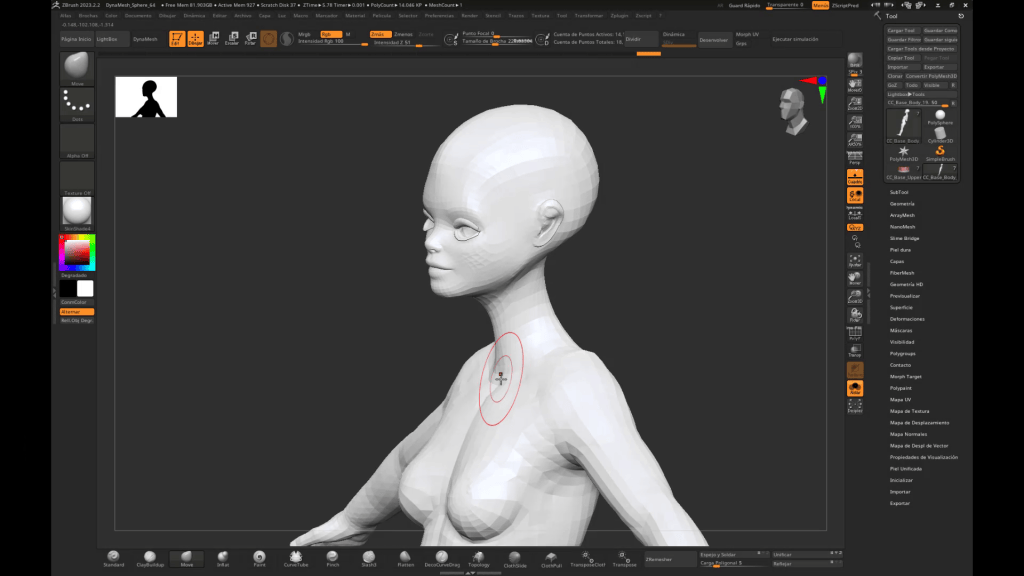
Project AI Details: Import the Hunyuan3D model into ZBrush and use it as a reference. Using ZBrush’s projection tools, transfer proportions and sculptural details onto the CC4 mesh. The organization in polygroups of CC4 models is crucial here, allowing us to isolate and work with precision in areas such as the face or hands.
Send it back to CC4 with GoZ: Once the sculpting on the CC base is complete, send the character back to CC using GoZ. In CC, use the Adjust Bone Auto Position feature to realign the skeleton.
Head Morph and Final Sculpt: To handle the head shape, first deform the CC base head to roughly match the AI-generated head. Use CC’s Morph tools to further refine the head shape. Once the shape is close, send the character back to ZBrush using GoZ and finalize the head sculpt.
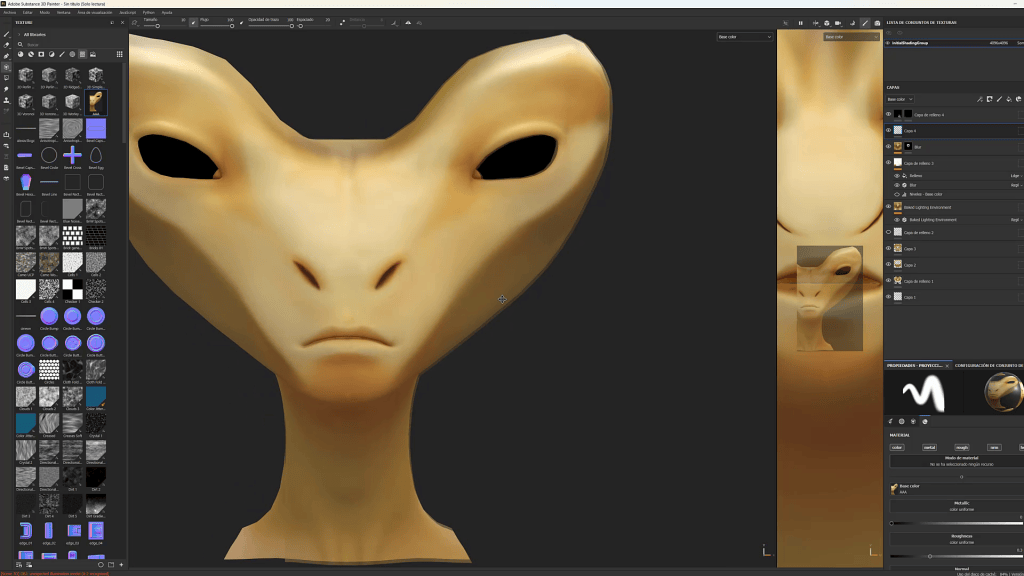
Enhance AI Textures: Hunyuan3D’s textures are a solid starting point but often lack resolution. To enhance them, capture orthographic views in Substance Painter and import them into a generative AI editor like Krita AI Diffusion or Photoshop.
By painting over the captures and applying low creativity strength (40–55%), you can add realistic detail while retaining control. The enhanced images are then projected back onto the model in Substance Painter to produce high-quality final textures.
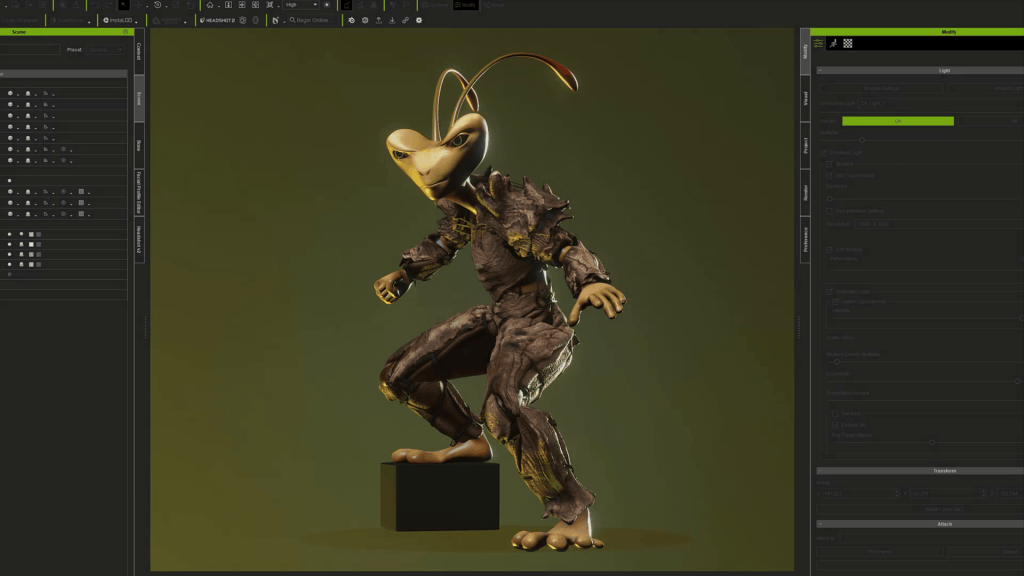
Add Armor: Use the same technique—piece by piece—to generate armor components in Hunyuan3D. Import and fit each piece onto the character in ZBrush or CC4. This modular approach allows you to build a complete, poseable character fully equipped for animation.
The result is a clean, animation-ready mesh with the design fidelity of your AI concept.
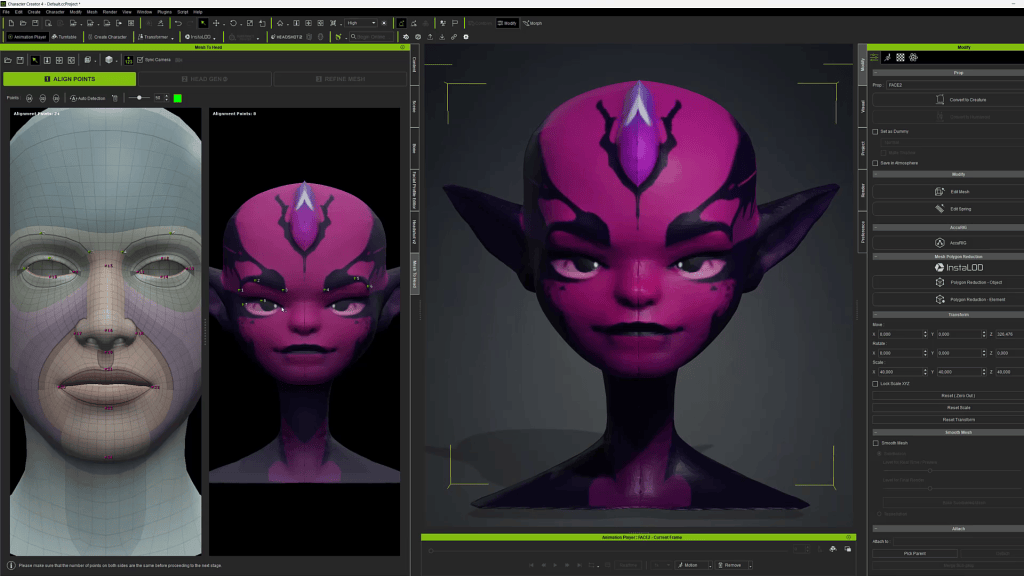
Workflow 3: Convert AI-Generated Head to CC Character Using Headshot 2
When focusing on facial fidelity and expression, Headshot 2 is the ultimate shortcut. This AI-powered plugin of Character Creator allows you to generate realistic, animation-ready heads from a photo or 3D reference model.
Step-by-Step Guide
Generate 3D Reference Head: Use Hunyuan3D or other tools to produce a clean frontal view of the head.
Import to Headshot 2 in CC4: Load the model in Headshot 2 Pro. Align key points (eyes, nose, mouth, chin) during the guided setup.
Generate Head Mesh: Headshot 2 creates a clean, rigged head with functional blendshapes. Minor refinements can be made in ZBrush via GoZ.
You’ll end up with a head that has perfect topology, base textures, and full support for facial animation—without modeling or retopology.
A New Paradigm
The intelligent integration of AI into our production pipelines does not turn us into mere machine operators; it frees us to focus on what really matters: art, design, and storytelling. These three workflows demonstrate that AI and professional tools do not compete, but enhance each other. The barrier to entry into the 3D world has been drastically lowered, and for established artists, the creative possibilities have expanded to infinity. The revolution is here, and now is the time to master it.
FAQ
Can I animate a Hunyuan 3D model directly?
There are three professional workflows covered in this article:
Headshot 2: To convert an AI-generated 3D head into a CC-compatible head with full facial rig and generate a full body.
AccuRIG: For quick auto-rigging of humanoid meshes directly in Character Creator.
GoZ & ZBrush: To use AI models as reference and sculpt over clean CC topology for full control and deformation.
How to rig an AI-generated model?
You can use the built-in rigging functions from tools like Hunyuan3D or Meshy, but we recommend using AccuRIG in Character Creator for more accurate, customizable, and animation-friendly results
Does Headshot 2 work with stylized faces?
Yes, Reallusion Headshot 2 supports both realistic and stylized characters through its adjustable Pro Mode.
What if my AI model is not human-shaped?
AccuRIG allows manual adjustment for non-humanoid skeletons, giving flexibility for stylized or creature designs.