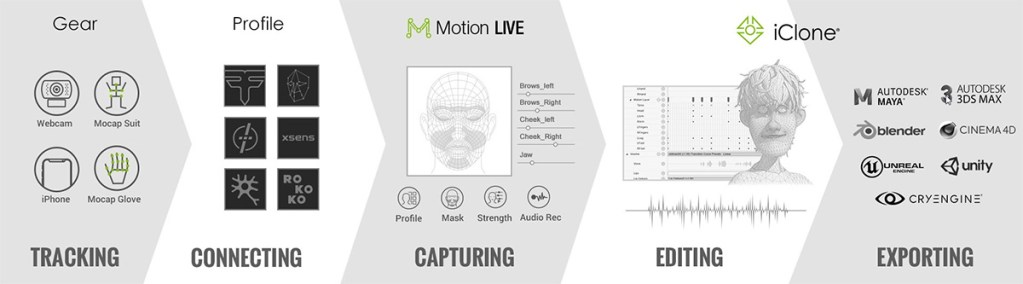
Intro- The Power of ZBrush Face Tools
The face is the first thing your audience looks at when watching or interacting with your character, so it is of the utmost importance that you make that experience a memorable one! And not just how your character looks standing there expressionless — your character’s face will move while it tells its story, and if all it can pull from is mediocre, default shapes, its performance will fall flat, and its story won’t be very interesting to your viewers. YOUR face and its movements are unique and interesting, so why wouldn’t your character’s face be as well. Beyond how your character’s face moves, there’s also supporting details that interact with facial movements that lend nuance and uniqueness to your character as well, adding a richness and believability that will make your characters stand out among a sea of boring characters, as well as being more effective telling their visual story. That’s why we are going to explore the powerful plugin – ZBrush Face Tools.
In this article we’re going to learn how Face Tools allow to you create all of these rich, unique shapes, wrinkles, and supporting detail, all while keeping the process fun. Creating expressive characters historically was a tedious and time consuming process, where you spent most of your time managing files and tweaking verts. With the Face Tools plugin, you’ll spend your time sculpting, painting, and exploring what makes your character unique, and letting Character Creator do the heavy lifting on the technical implementation!
- Part 1. Face Tools Installation and The Concept of Expression Wrinkles in Character Creator (CC)
- Part 2. Fast Prototyping Head & Body for ZBrush Sculpting
- Part 3. Sculpting High-res Base Head with ZBrush Face Tools
- Part 4. Create Unique Expressions & Wrinkles with ZBrush Face Tools
- Part 5. Transfer Character’s Head and Complete the body in ZBrush
Part 1. Face Tools Installation and The Concept of Expression Wrinkles in Character Creator (CC)
Installation
Before we get too far, we need to discuss what expression wrinkles are, and how they’re used and implemented in Character Creator. We’ll also go ahead and get Face Tools installed, so it’s ready to go when we need it. Installation is easy: go to the Reallusion Hub, click on Character Creator, and press the Install button for ZBrush Face Tools.

Character Base Head
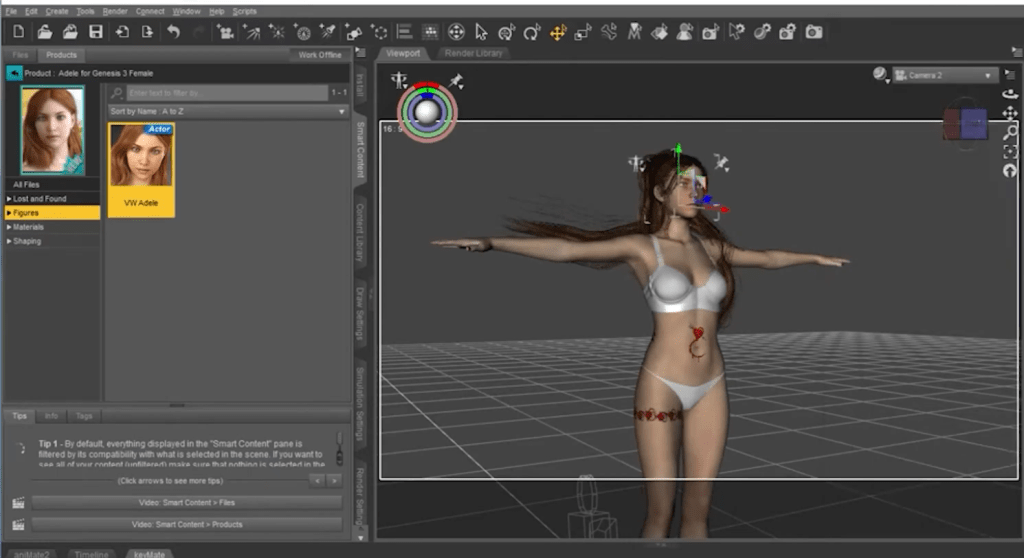
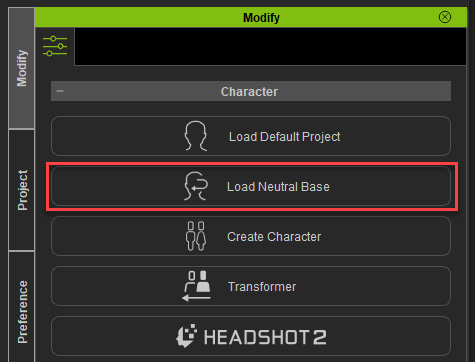
To illustrate some concepts, go to the Modify panel in Character Creator and press the Load Neutral Base button. Hit J on your keyboard to zoom in on the head, then go to the Morph tab > Head section to change the look of your character using the various sliders

Base Head & Face Shapes
Your base geometry is the low-res topology of your neutral face and body. You can go into the Scene tab and change the shading mode to wireframe to see your low-res geometry.

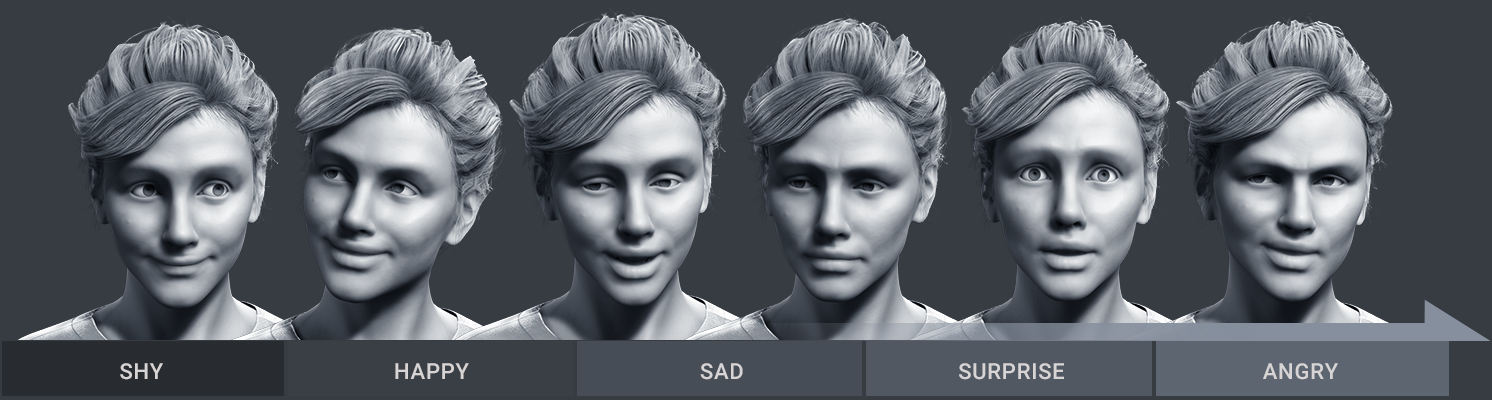
As you’re using morph sliders, this low-res geometry is moving, updating the look of your character. Next, go to the Motion tab and click the Edit Facial button; this will load up a dummy head where you can click and drag on the various muscles of your character to generate expressions.


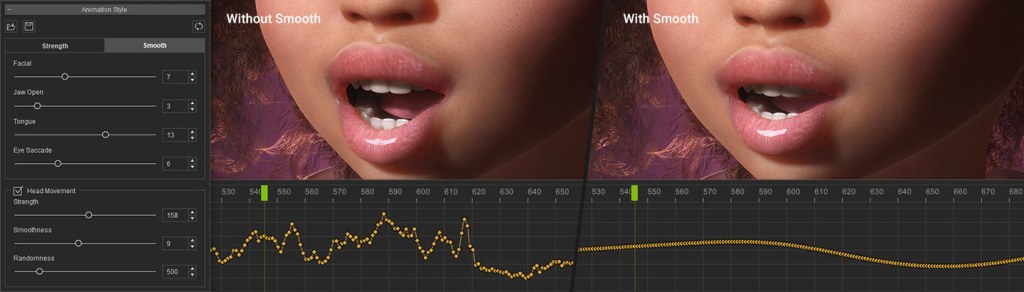
Expression Wrinkles
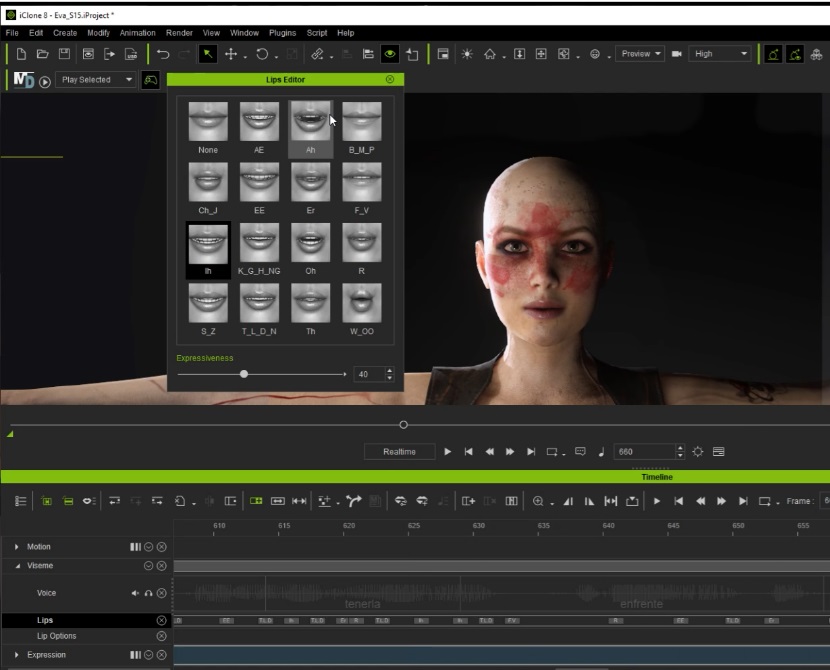
So we know our character’s face can emote with shapes, but you’ll notice when the face moves, it’s a little underwhelming. Look in a mirror and raise your brows; notice how your forehead wrinkles as your eyebrows go up, and in fact get deeper and more pronounced the higher your eyebrows go. Expression Wrinkles are driven by the facial shapes that help enhance the realism of our expressions, by behaving exactly how your face does in real life. When your character’s eyebrows go up, wrinkles will start to appear on the forehead.

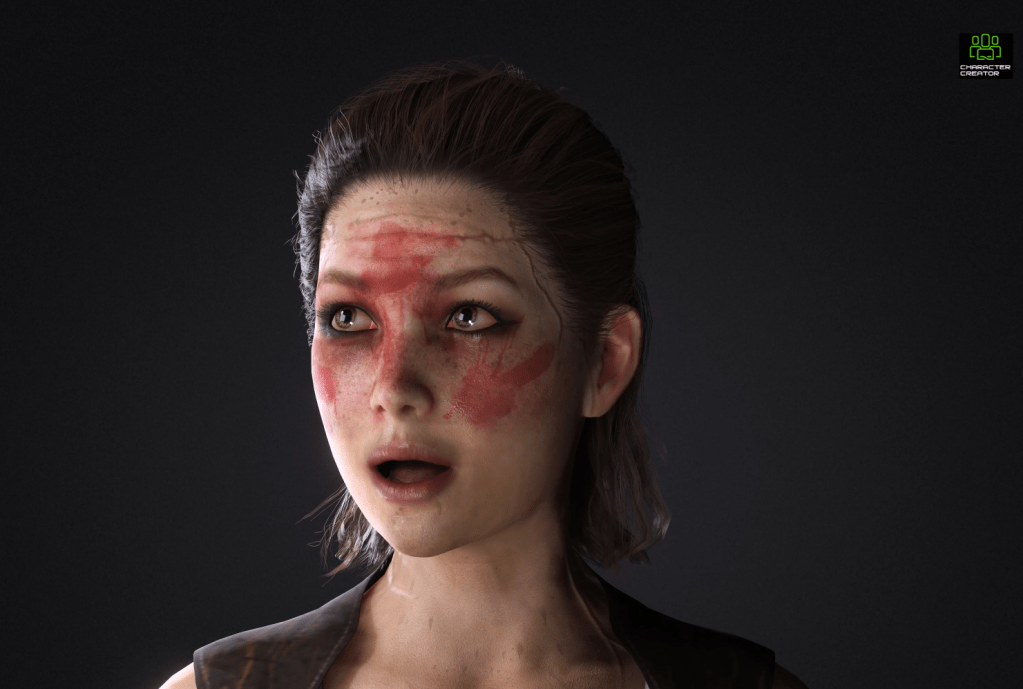
expressions being supported by expression wrinkle textures to add
realism!
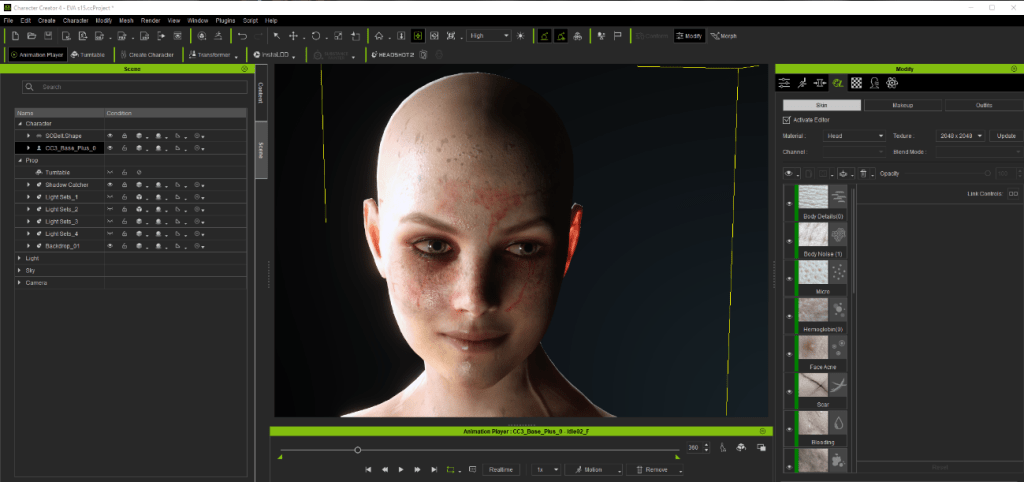
Adding Neutral Expression Wrinkles
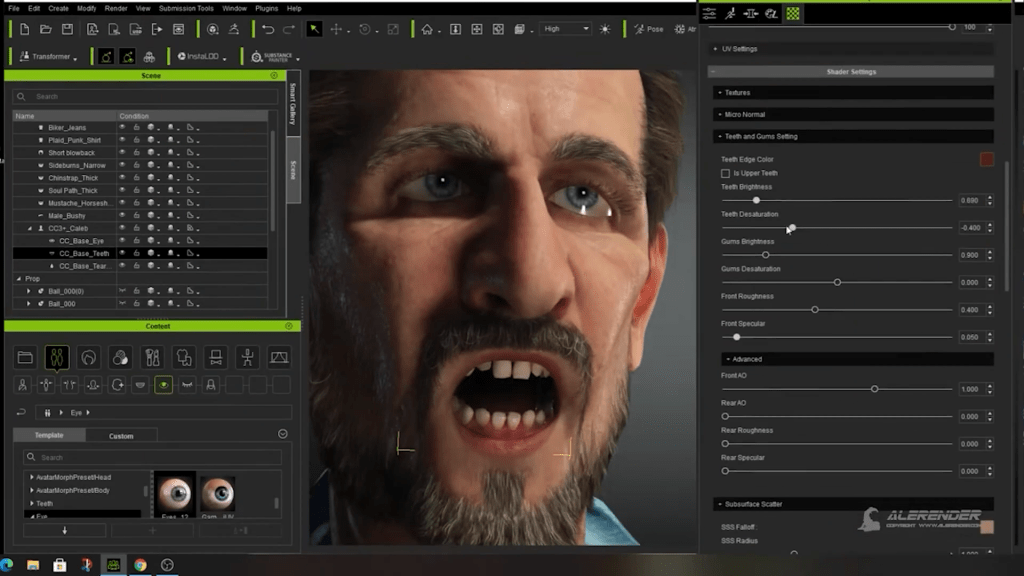
Let’s add some quick expression wrinkles to our morphed, neutral test character. Select the top group of your “CC3_Base_Plus” neutral character in the Scene tab, and you’ll see an Expression Wrinkles tab is available in the Modify panel — click on this tab. If you check on Activate Expression Wrinkles, Character Creator will apply default expression wrinkles to our character (these can actually be found in Actor > Expression Wrinkles > Neutral in the Content tab). Turn on Check with Expressions as well, and as you click on the different areas of the face in the dummy panel, the expression wrinkle system will activate a face shape, and blend in the appropriate wrinkles on your character where those shapes require it.
You can change the Strength, AO, Redness, and Rate of Appearance in the sliders below the dummy window. As your characters face animates, slight movements will cause less intense wrinkles to show up, but extreme or exaggerated facial expressions will bring in a texture map that will add wrinkle bumps (normal strength), shadows for those wrinkles (AO), and blood pooling between the wrinkles (Redness). All of these together create a much more nuanced, believable result as your character’s face moves.

Expression Wrinkles for Stylized Characters
These default wrinkles are fairly realistic — but, what if you had a stylized character, with chiseled, cartoony shapes? Realistic wrinkles would look out of place on these types of characters — but, don’t worry, with Face Tools we’ll be able to make custom shapes and expression wrinkles for both realistic characters as well as cartoony stylized ones! In fact, if you have the “Wrinkle Essentials” pack from the Reallusion Marketplace, you can apply different types of preset stylized wrinkles to your stylized characters.


Part 2. Fast Prototyping Head & Body for ZBrush Sculpting
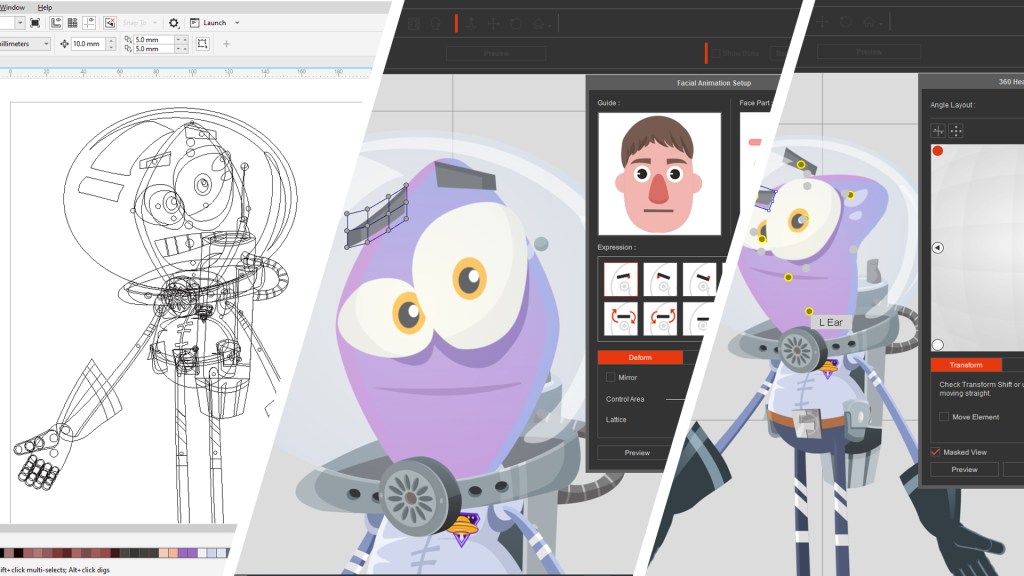
Kevin Base Head Setup
Let’s start a new character that we can take into ZBrush and make our own. To provide us with a good starting point, let’s load up the “CC4 Kevin” character from the Actor > Character folder.

Right now, Kevin isn’t symmetrical, and that’s ok — you don’t really want a perfectly symmetrical character. However, just starting out my new character, I want a symmetrical mesh to sculpt on in ZBrush to make things go a little faster, and later right before we call it done, we can dial in asymmetry using morphs. To fix this, select the “Kevin” group in the scene tab, and in the attributes tab, choose Edit Mesh, then choose a Mirror Copy option (left to right or right to left).


Using Morphs in CC
Now that your eyelids are symmetrical, your eyeball placement is probably off a little. Luckily, all you have to do is go to the Morph tab and use the Morphs > Head > Eye > Eyeball > Eyeball Height sliders to fix eyeball placement in our newly symmetrical mesh. Also, while we’re in the morphs tab, go ahead and make overall adjustments to your character’s physique/head to get closer to the character you want to make (in our case, a gaunt, vampiric creature).

Remember you can use the Morph button in your toolbar to quickly and easily grab sections of your character’s face to move them around, and you can get more morph slider options by using the “Ultimate Morphs” pack from the Reallusion Marketplace.

Face Tools Locations in Character Creator
With a character loaded in Character Creator, you’ll find the button to send your character to ZBrush using Face Tools in these locations:
- Plugins > Face Tools
- Top menu bar
- Modify tab > Face Tools (with a character selected)
Installing the Face Tools Plugin for ZBrush
Use any of the above methods to send your character to ZBrush. If you haven’t installed the plugin to ZBrush, it will prompt you to install. Select the version of ZBrush you want to install it for, and click OK.

Face Tools Output Settings
Before Character Creator sends over your character, it’s going to need a little more information about what we want to send over. In the ZBrush Face Tools dialog box, choose Create New for Action, since we’re not relinking an existing project. For Subdivision, we’ll do Level 6 – 2k Texture Resolution. This means when it sends our current head over to ZBrush, it will be subdivided up to level 6 (SDiv 6), and if we transfer the base color texture currently applied to our Character Creator head to our ZBrush polypaint, the millions of polygons that make up our SDiv 6 head will be enough to support a 2048 (2k) texture resolution on the transfer. Which is exactly what we’re going to do later.
Go ahead and check on Normal Details; this will put the skin pores and fine wrinkle detail currently applied to our character into an adjustable, sculptable layer in ZBrush. Then click All to turn on all the normals for every expression. All of our expressions in ZBrush will have Kevin’s own expression wrinkle detail baked into a sculptable layer for that expression.


Before we click GoZ, we’re going to uncheck Include normals in polypaint; This can be useful in some situations, but because we’ll be changing our base head polypaint, it’s not something we’ll need to do with our workflow. Finally, click the GoZ button to send all this over to ZBrush.
Part 3. Sculpting High-res Base Head with ZBrush Face Tools
ZBrush Sculpting
Now that we’re in ZBrush, open the Face Tools plugin by going to the ZPlugin menu, and clicking on the Face Tools submenu. While in ZBrush, we can modify the characters base Head, Eyes, Teeth, and Tongue geometry and polypaint, and any changes we make will be baked and sent back to CC.
Detail Layer, Diffuse, and Range
The Detail Layer button in the Face Tools plugin turns the “CC_DetailLayer” in your Layer pallet on and off. The Detail Layer contains pore detail and basic face detail wrinkles. We’ll toggle this off while sculpting our base. We want to ensure our base sculpting is done on the base model, NOT on a layer. However, if you want to add more pore or wrinkle detail to this layer, toggle it on, and press the record button on the layer. The Diffuse button loads up the head texture from CC, which we can transfer to polypaint later on. The Range button (with no expressions selected) will apply the Face Topology and UV Guide to your head.

Head Base Sculpt
Let’s start finetuning our character. Again, turn off your Detail Layer so we’re only sculpting on the base geometry that gets propagated to all of our other shapes. Drop down to subdivision level 1 under Tool > Geometry, and use your favorite ZBrush brushes to change your major volumes, increasing subdivisions as needed to dial in your custom primary and secondary forms.


Turn on your Range map so you get a better idea of what edgeloop the systems will be looking for when deforming into shapes later. When creating primary forms, make sure you move the geometry appropriately to keep the face guidelines where they need to be, instead of just sculpting through them.
You can also Ctrl+Shift click areas of your face to get easy visibility access while sculpting (press Shift+F on your keyboard to toggle polyframe mode on and off in ZBrush).

Detail Sculpting
Once you get your primary and secondary forms done for your custom ZBrush character, you can turn on the Detail Layer in the Face Tools plugin to continue sculpting high frequency pore and fine wrinkle detail.

Polypaint
Stop recording on your detail layer if you are. Go ahead and turn the detail layer off completely in the Face Tools plugin menu. Turn on Diffuse in the Face Tools plugin menu to load Kevin’s base color into our subtools texture, go to highest subdivision on your mesh, and in the Tool > Polypaint menu, click Polypaint from Texture to transfer Kevin’s diffuse texture to your head subtools polypaint. Once you’ve done that, go ahead and turn Diffuse OFF in FaceTools; that’ll turn the texture off, but your head should still be colored by the transferred polypaint. At this point, make any changes that you want in ZBrush to both the base head sculpt and its corresponding polypaint. Remember you can use the Polypaint > Adjust Colors menu, and utilize any ZBrush brush with RGB turned on in the toolbar to paint on your model, as well as sculpt.

polypaint
Eyes, Teeth & Tongue
Select a teeth or tongue subtool, subdivide the model up, and just like the head, turn the Diffuse texture on using the Face Tools plugin. Press Polypaint from Texture to transfer Kevin’s base color texture to your polypaint, unless you want to paint this subtool from scratch, which is fine too. Change the model and polypaint as you see fit for your character, it’ll all get sent back over to CC in the next step.

Sending Base Head Changes Back to CC
Turn on your detail layer to make sure it’s still working well with your changes up to this point, and modify as needed. In the ZBrush Face Tools plugin menu, press the Update to Character Creator button. On the left side of the resulting dialog box, check on the Base Mesh, Polypaint > Diffuse, Details > Normal, and Cavity > Blend options, so all of our detailed sculpt and polypaint changes are baked back to the CC character. Keep the Texture Size at 2048, and under Facial Parts, check on anything that you updated in ZBrush – Head, Eyes, Tongue, and Teeth can all be updated. The options on the right side of this dialog box can be unchecked for now. Press the Update to Character Creator button.


The ZBrush data is sent over to CC, so tab over to Character Creator, and in the resulting dialog box, keep the defaults checked, along with Apply Head Color to Body, so Character Creator will automatically adjust the body tone to match the head. We’ve successfully transferred the base details and polypaint from ZBrush back to Character Creator.

back into Character Creator using Face Tools
Part 4. Create Unique Expressions & Wrinkles with ZBrush Face Tools
Sculpting Expressions in ZBrush Using Face Tools
So we’ve got our base head, eyes, tongue, and teeth changes in ZBrush and in Character Creator, so now let’s work on those custom expressions. Tab back over to ZBrush and click on an expression in Face Tools to begin tweaking the wrinkles for that expression. Remember, the face tools button is turning on the corresponding expression layer in your layer pallet, and pressing the REC button so you can sculpt and polypaint on that expression. Any changes you make to your geometry or polypaint while the expression is in REC mode will eventually be sent back to Character Creator.


Before you sculpt on an expression, you can press the Apply Mask button in the Face Tools plugin menu; this will show the area that will bake out sculpted detail and polypaint information back to CC for the selected expression (in this example, “Brows Drop”). Go through each expression and sculpt/polypaint to create the perfect shapes and details for every expression for your unique character.

Sending Expression Updates from ZBrush back to Character Creator
After you’ve fine-tuned your expressions in ZBrush, press the Update to Character Creator button in the Face Tools plugin menu again. This time we’ll use the right side menu.
- If you updated shapes of the face (SDiv 1), check on Expression Morphs.
- If you updated expression wrinkles (SDiv 2-6), check on Wrinkle > Normal to bake those details back to CC.
- If you updated your polypaint for the expressions (redness, etc…) check on Wrinkle > Diffuse to ensure those changes get baked back to CC.
Back in CC, keep the defaults checked in the GoZ menu, then go to the animation player and choose Motion > Wrinkle Check for “Dramatic_Male”. As your face animates, your custom expression wrinkle changes will show up on the character.


Part 5. Transfer Character’s Head and Complete the body in ZBrush
Full Body Head Data Transfer
Our head still looks a bit out of place on our CC body; let’s sculpt a custom body to match our head. First, select your character assets in CC, then hit the GoZ button in the toolbar, to send our body over to ZBrush this time. Keep all the defaults in the resulting dialog box, and make sure you have a-pose selected in the Pose section. Back in ZBrush, switch from the body tool we just sent over back to Face Tools that we were sculpting expressions on. Select the “CC_Base_SkinHead” subtool, then Ctrl+LMB the latest point in the history slider to store those vertex positions and colors into history.


Next, switch back to the body tool, select the “CC_Base_Body” subtool, and press the Tool > Geometry > Divide button until it reaches SDiv 6 to match the head resolution from the other Face Tools subtool.
Turn on Polyframe visibility with Shift+F, then Ctrl+Shift click the “red” polygroups on the body subtool to isolate their visibility (body and eyelash geometry). Then Ctrl+Shift+Drag in your document to invert visibility, so only the head geometry is showing (minus the body and eyelashes).


Now that the vertex order matches between the Face Tools head geometry stored in history and the body geometry, select the Morph brush (you can hit the B, M, then G keys on your keyboard to select it), and “brush in” the details stored in history onto your body geometry! This will get our sculpted detail onto our “body” head, but not the polypaint. For that, go to the Tool > Subtool > Project menu, turn off “Geometry” so just Color is selected, and press the “Project History” button to transfer the color data from your Face Tools head to your body tool head!
Link and Sculpt
Ctrl+Shift click in your document to make all the geometry visible for your body subtool, then press the GoZ All button in the ZBrush Tool menu to send your updated body back to CC.
While you’re in CC, switch the pose from the standard a-pose to the relaxed a-pose using the Motion menu in the Animation Player, press the GoZ button in the Character Creator menu bar to send our relaxed a-pose to ZBrush.
Make sure you choose Current Pose in the dialog box.

Body Sculpt
Sculpt and polypaint the rest of the body, and follow the body Substance Painter workflow from the previous “Goblin” series to bake mesh maps and populate CC with your character textures.

subtools, the Face Tools tool will
have 9 subtools

Conclusion
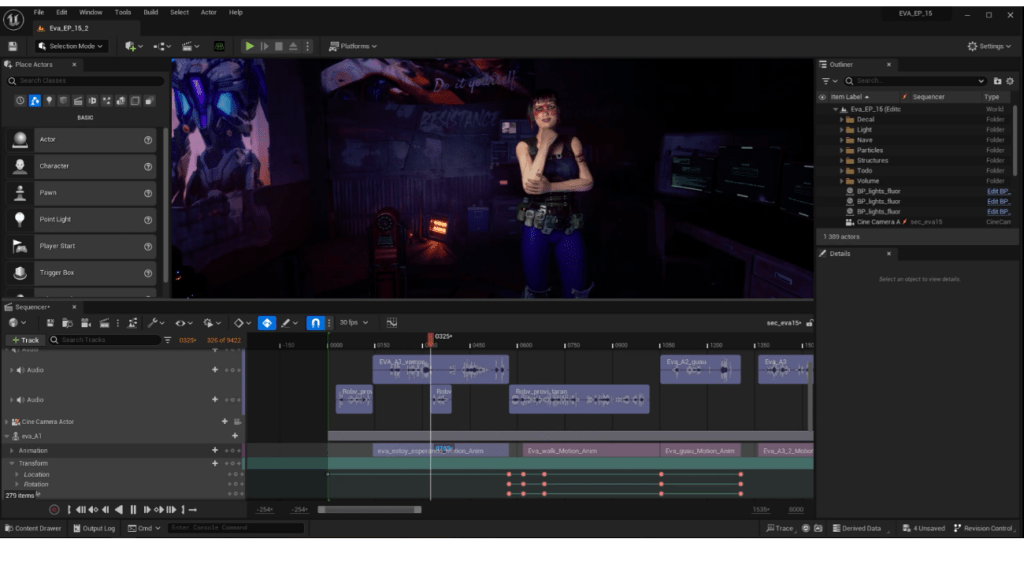
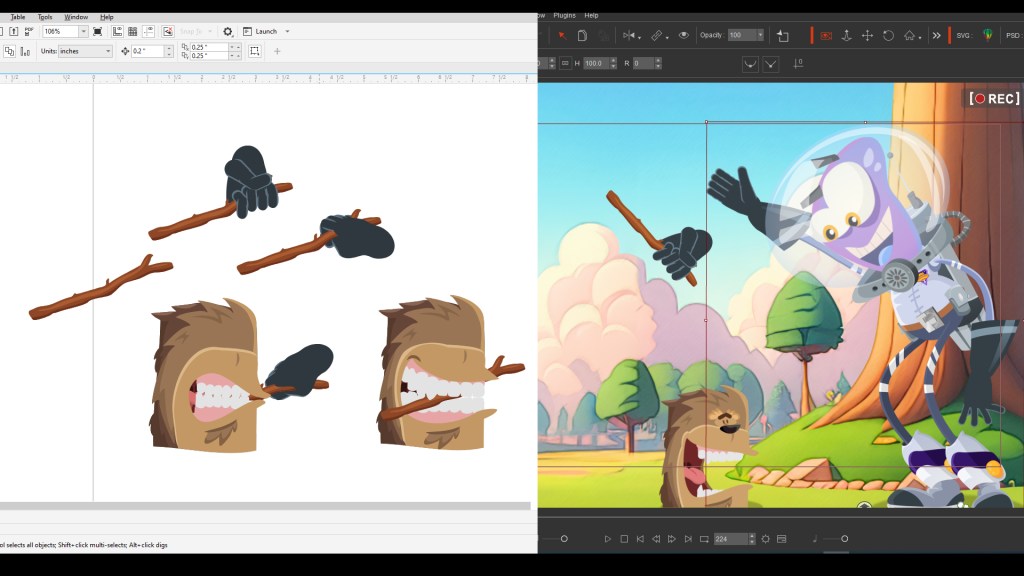
You now have a unique character with a custom body, custom facial expressions, and custom expression wrinkles, all tuned exactly how you want for your particular character. Feel free to apply accessories, clothing, animations, and poses to this character like we did in our previous “Goblin” article.

About The Author

Michael Pavlovich earned a Bachelor’s degree in Computer Animation from RSAD in 2005. Initially, he contributed to the development of environment and character art for popular video games such as Madden and NCAA Football. Later, he relocated to Austin to join Daybreak Games, where he worked on the creation of art assets for DC Universe Online.
Presently, Michael holds the position of Director of Character, Weapon, and Vehicle Art at Certain Affinity. His expertise lies in implementing iterative pipelines for Certain Affinity artists helping develop renowned video game franchises, including Halo, Call of Duty, and DOOM. To stay updated on his latest tutorial projects, you can visit Michael’s YouTube or ArtStation page.
Read More
PavMike CC to ZBrush Workflow Tutorial (1/3): Base to Texturing
PavMike CC to ZBrush Workflow Tutorial (2/3): Cloth & Accessory
PavMike CC to ZBrush Workflow Tutorial (3/3): Posing & Animation