ÓSCAR FERNÁNDEZ / DIGITAL SCULPTOR
Óscar Fernández is a freelance digital sculptor from Spain, specializing in creating figures for 3D printing. With deep expertise in ZBrush, he is known for crafting highly expressive characters that capture both personality and motion. His work stands out through the meticulous attention to facial expression, muscle definition, and dynamic posing, giving each sculpt a strong sense of tension and storytelling power.

Overview
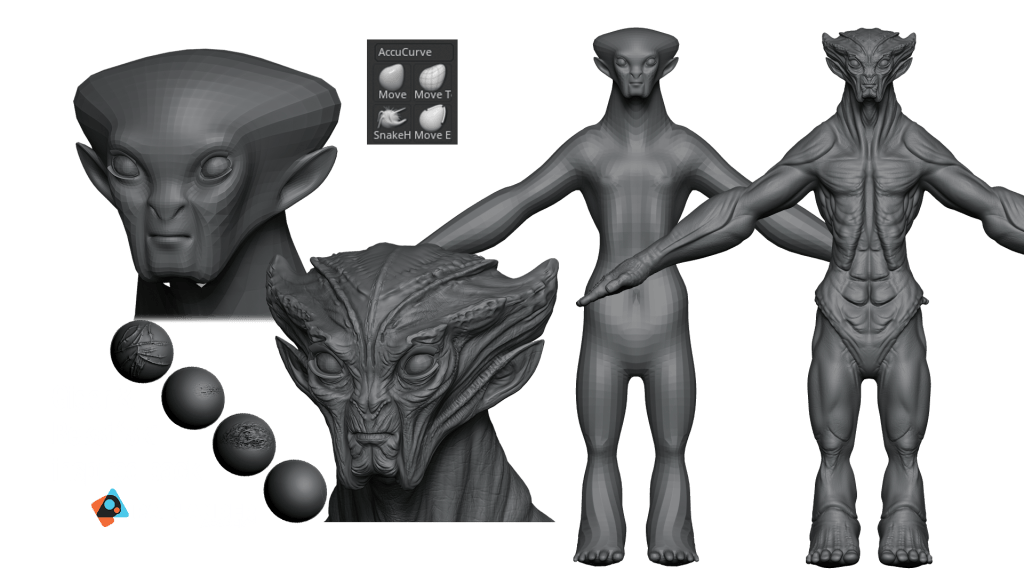
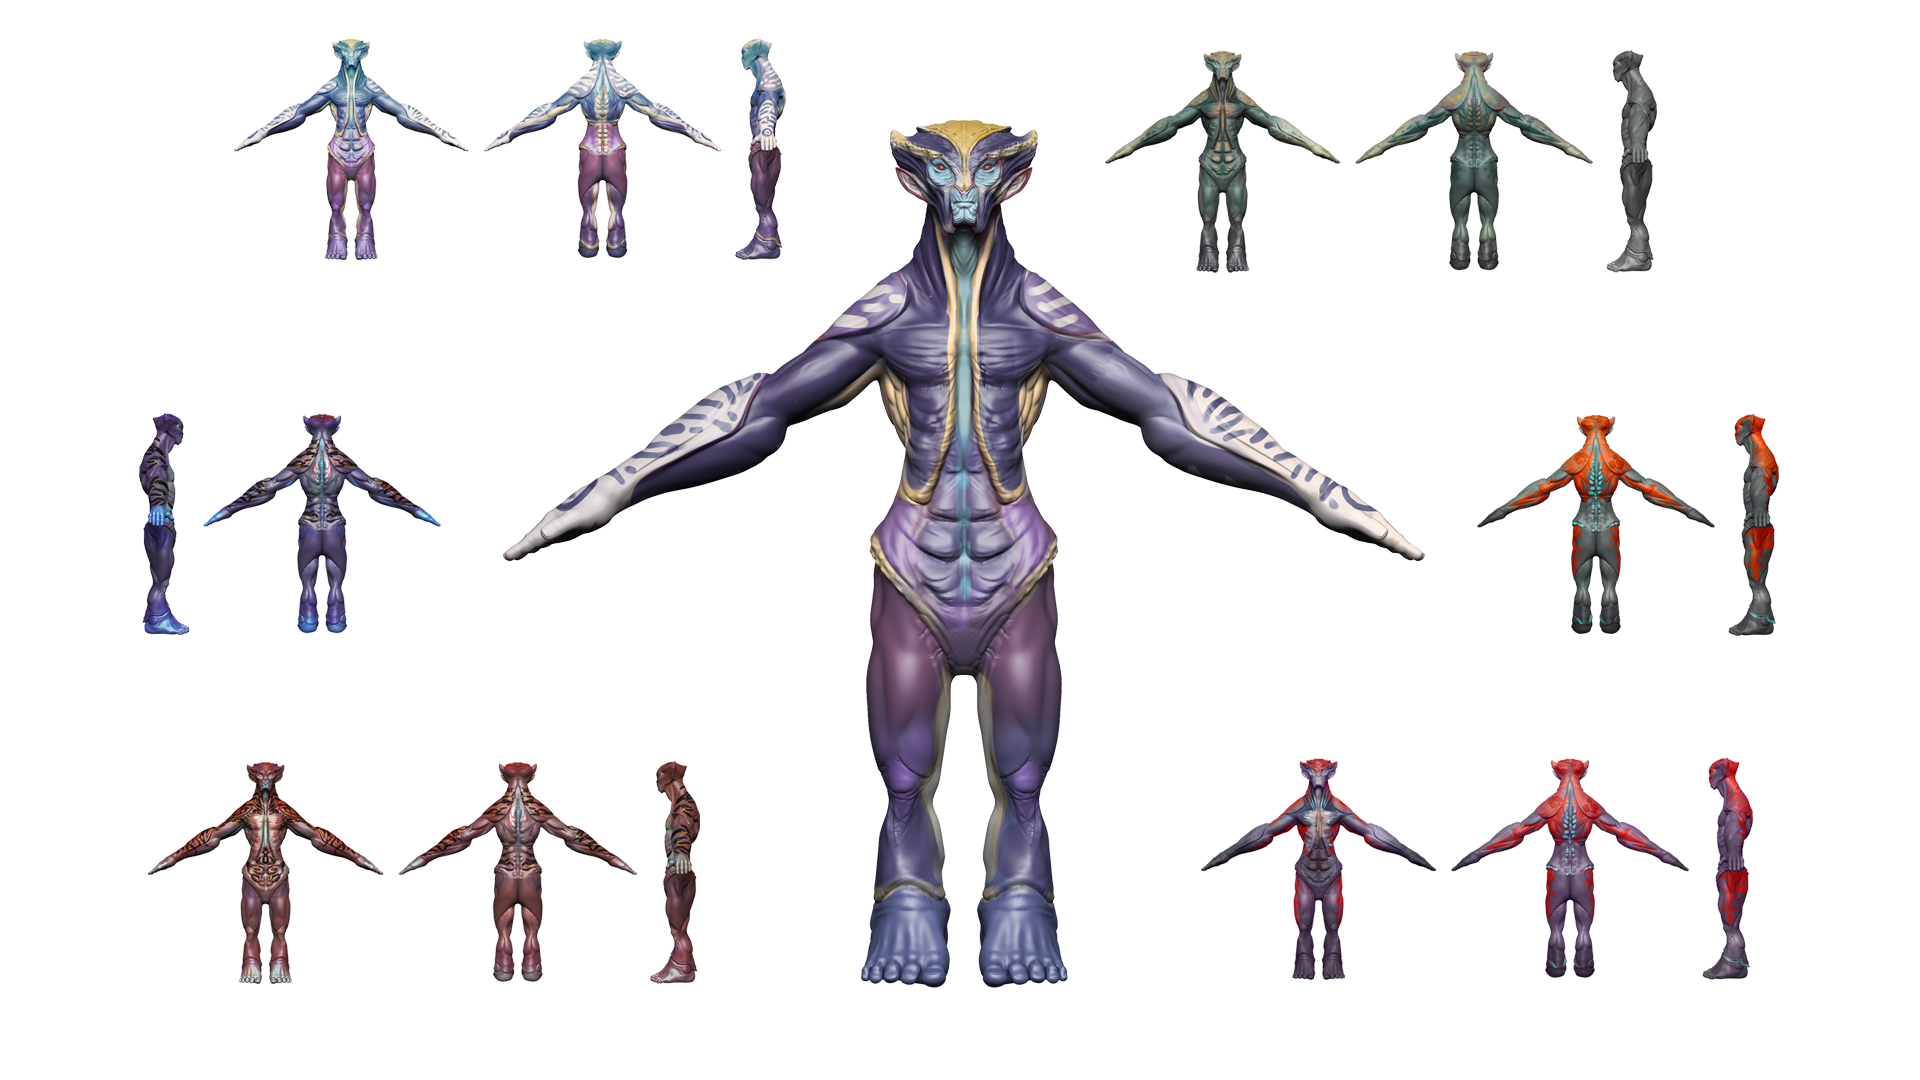
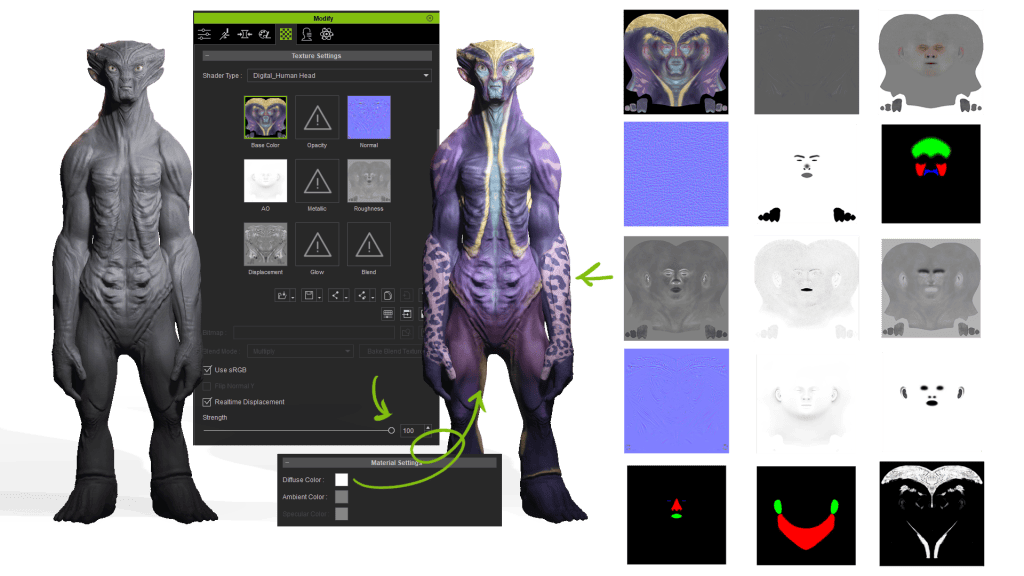
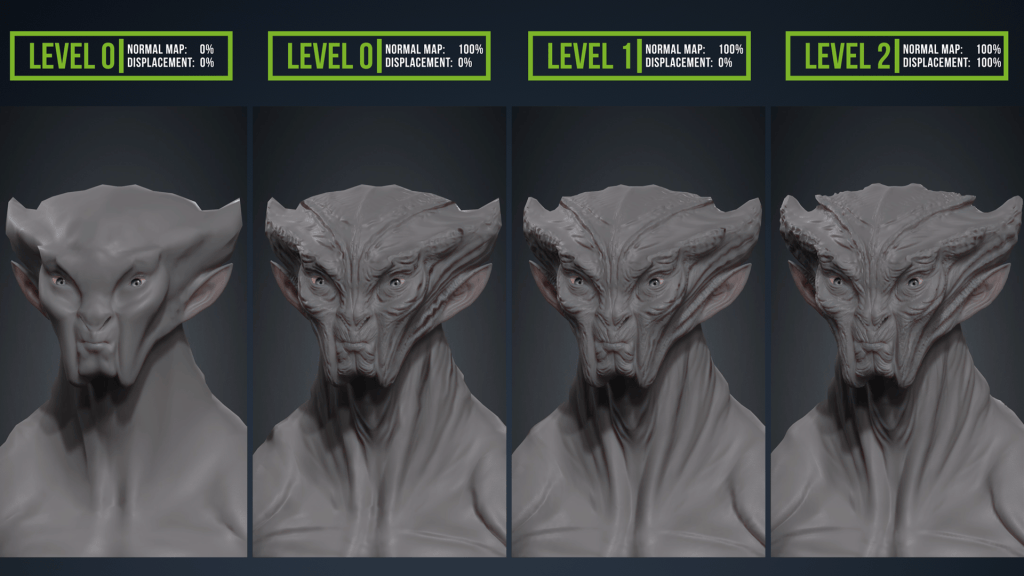
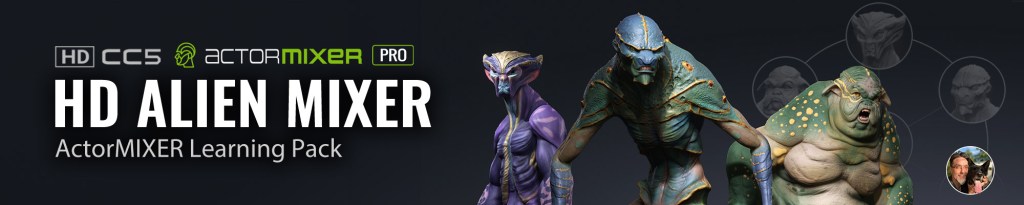
Hello everyone, this time we’re going to continue with another of the most important improvements in Character Creator 5 (CC5), focused on character creation. In the previous article, we saw how to create this humanoid alien using CC’s new HD base mesh, subdividing it up to level 7 in ZBrush, generating color, normal, and displacement maps automatically, and adjusting the intensity of those maps independently for each subdivision level in CC5.
In this tutorial, we’ll show how to turn custom characters into ActorMIXER sliders and blend them with other characters to create infinite variations. Starting with three unique alien designs, you’ll see how ActorMIXER Pro transforms them into reusable Mixer Assets, ready to combine with CC5’s powerful libraries for generating an endless cast of characters.
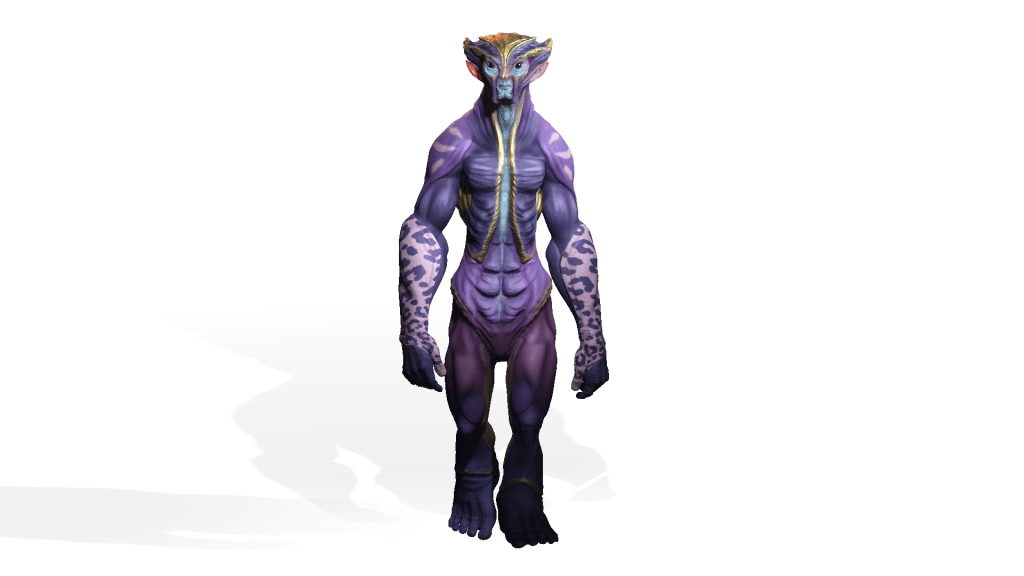
Character concept art
My name is Oscar Fernández, and before diving into the next new feature, let’s create two more characters using the same workflow as in the previous article. First, we’ll start with the concept art for two new team members. Together with Kithart, we looked for two designs that were completely opposite to each other and very different from the first model, which could be considered a bit more neutral.
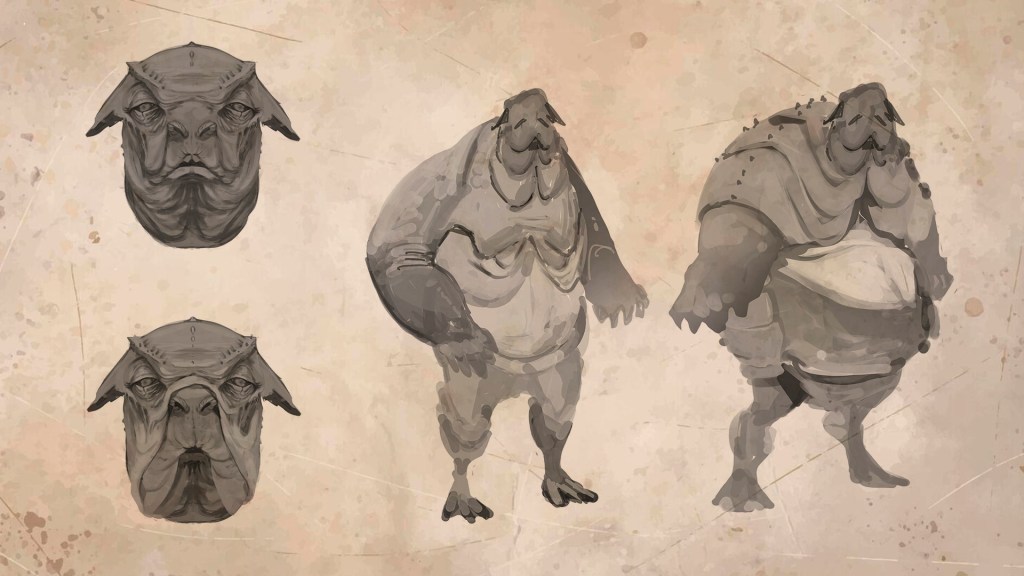
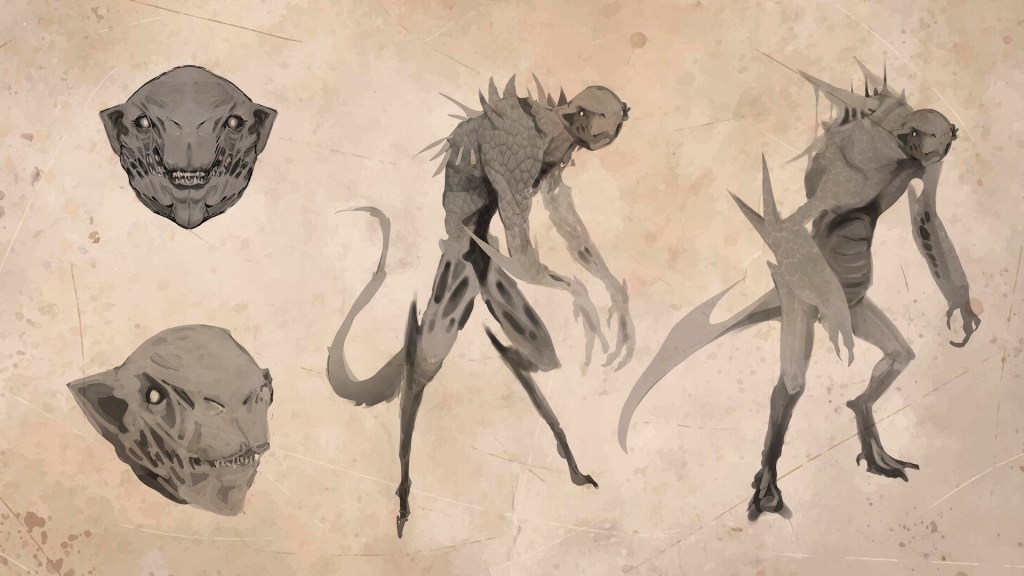
In the sketches Kithart sent me, we can see that one of them will be extremely fat, slow-moving, and with a calmer look, while the other had to be a relentless predator, fast, agile, and with an evil edge.
The new characters
We’ll quickly walk through the construction of both characters in parallel. We start with CC’s new base mesh and use the program’s native sliders to “feel out” the main proportions, which lets us quickly and intuitively capture the essence of the character.
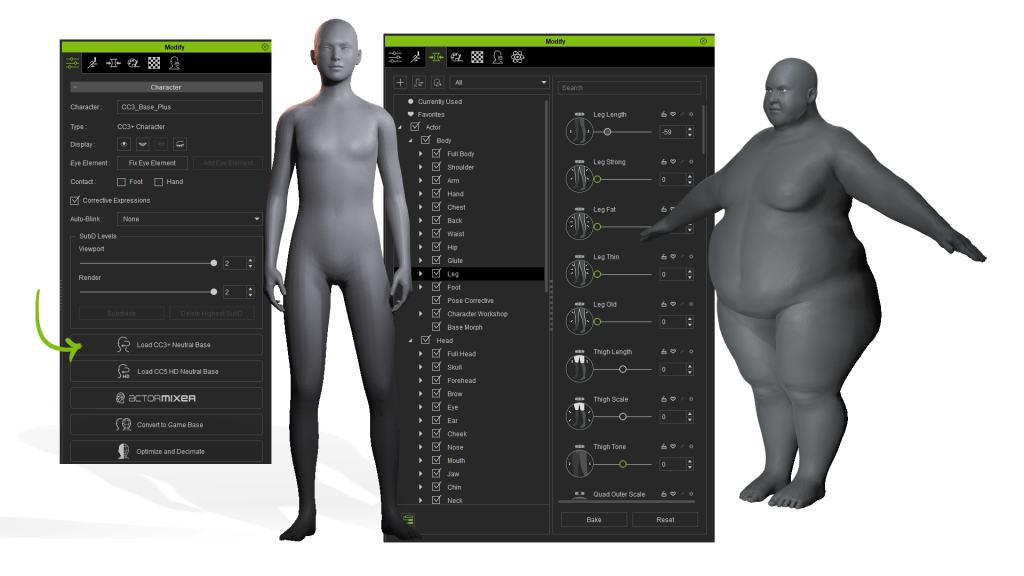
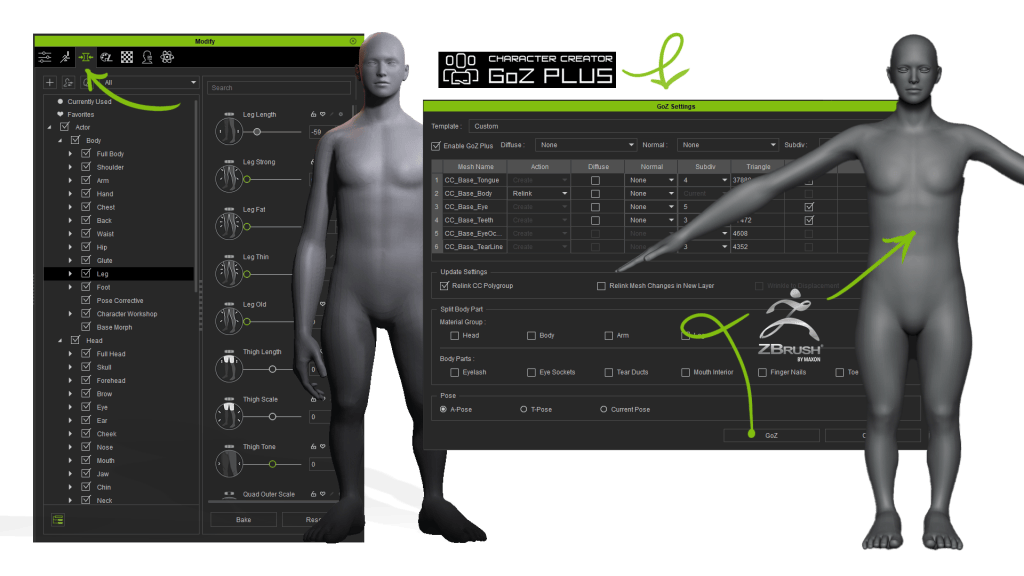
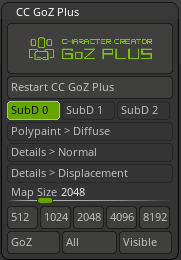
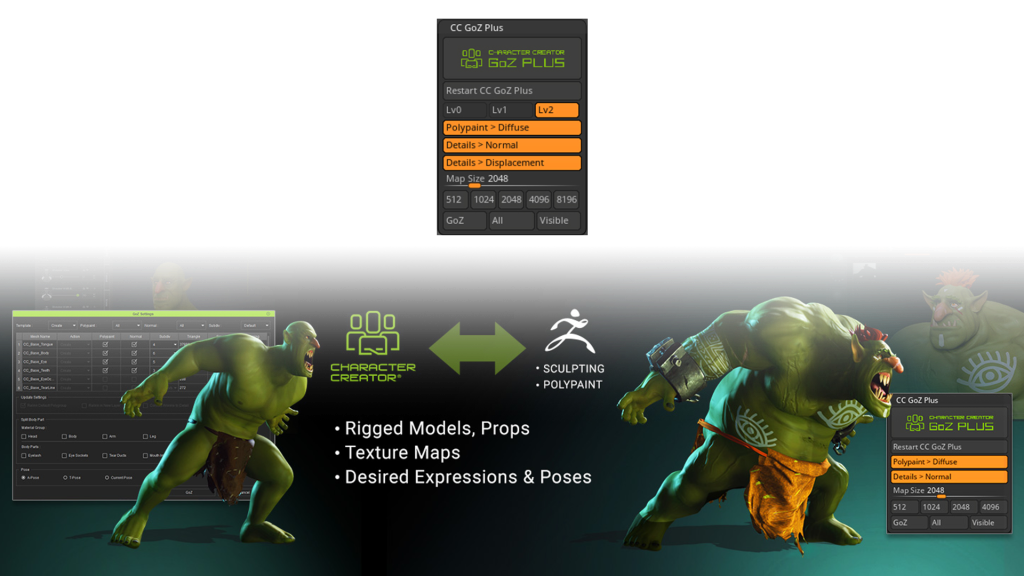
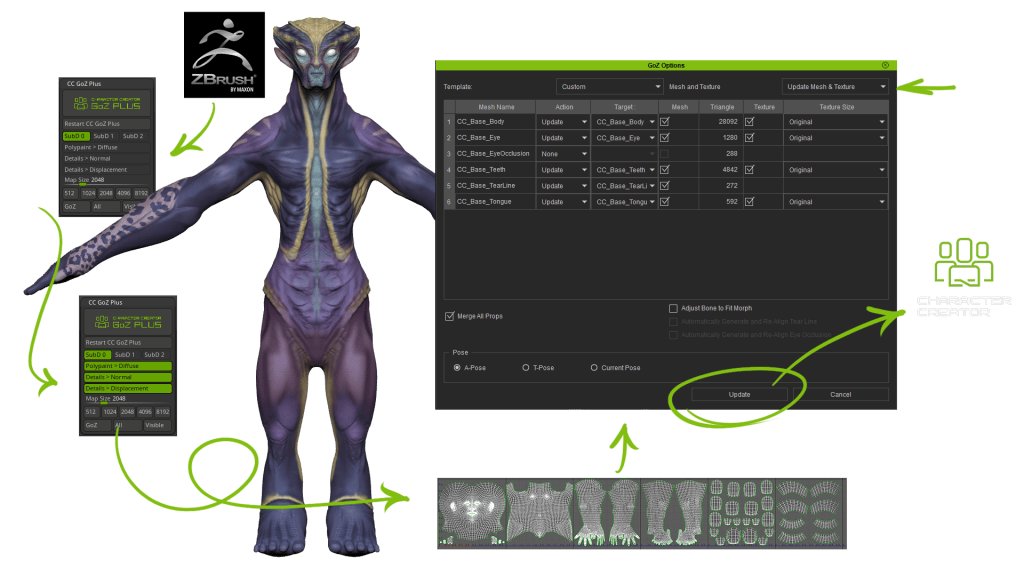
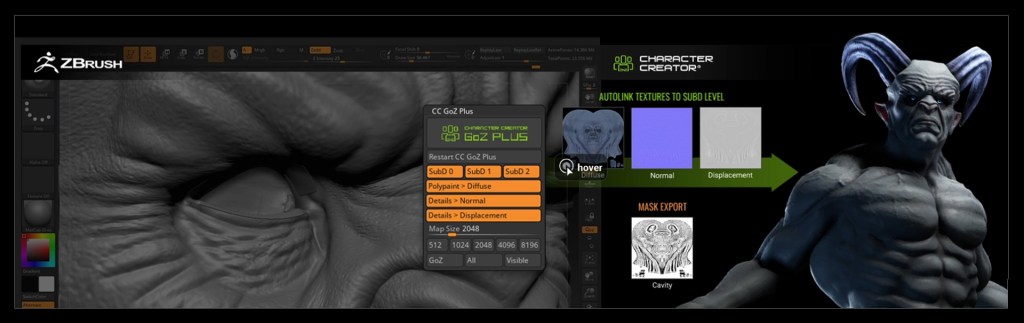
Once the first adjustments are made, we send the character over to ZBrush. We press the GoZ Plus button and, for now, in the settings we’ll tell it not to send any map—so we uncheck color and normal maps and leave subdivisions at default. With everything else as is, we press GoZ and our character loads automatically in ZBrush.

Now we can start sculpting. My recommendation for these early stages, when we’re searching for the character’s primary shape, is to use brushes that deform the mesh (like Move or even DamStandard), but avoid those that add or remove material (such as any Clay variants). This way, we stay faithful to the initial topology, ensuring the best results later for expressions and Face Blending.
This is a good time to recall our four sacred don’ts:
- Don’t modify the model’s topology
- Don’t delete subdivision levels
- Don’t change the default pose
- Don’t rename Subtools
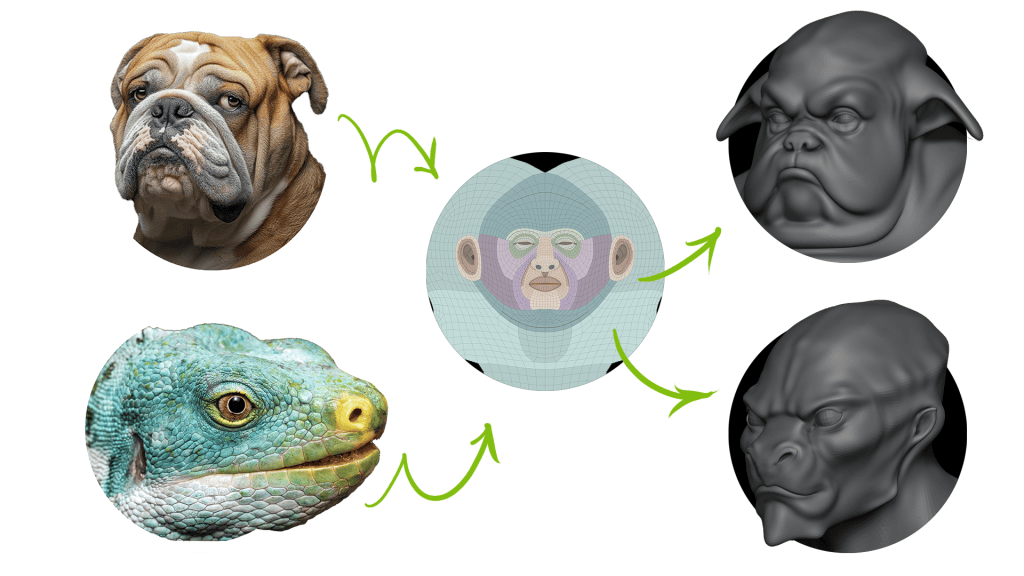
For the first model, that stubborn personality with slightly clumsy movements reminded us of a bulldog, so we leaned into that look for the face. You can see how the base mesh, even starting from a human face, gives us amazing versatility to play with features like the nose or lips. For the second model, we wanted something much more aggressive and emotionless, so we went for a reptilian face, something lizard-like. All while preserving topology integrity, especially in the primary regions.
With the faces done, we move on to the bodies, where each one takes a completely different direction:
- The bulldog’s body challenge is creating solid secondary and tertiary forms to properly express body fat volumes.
- For the reptile, one of its defining features is digitigrade legs. To make sure animations behave correctly, we’ll move the ankles to the start of the toes. Again, this shows how versatile the base mesh is, even for such extreme changes.
- As for the hands, we go from the bulldog’s chubby paw to the reptile’s lean, clawed hand.
Finally, we add fine details like skin texture, scales, spines, etc.—sculpting shapes, using alphas for textures, or Chisel-type brushes for more intricate forms. Once again, I relied on Kithkart for the color phase, for which he sent me the following proposals. We needed all the characters to belong to the same world, but with completely different color palettes, while keeping some golden/metallic areas as a unifying element, like a shared trait of their planet.
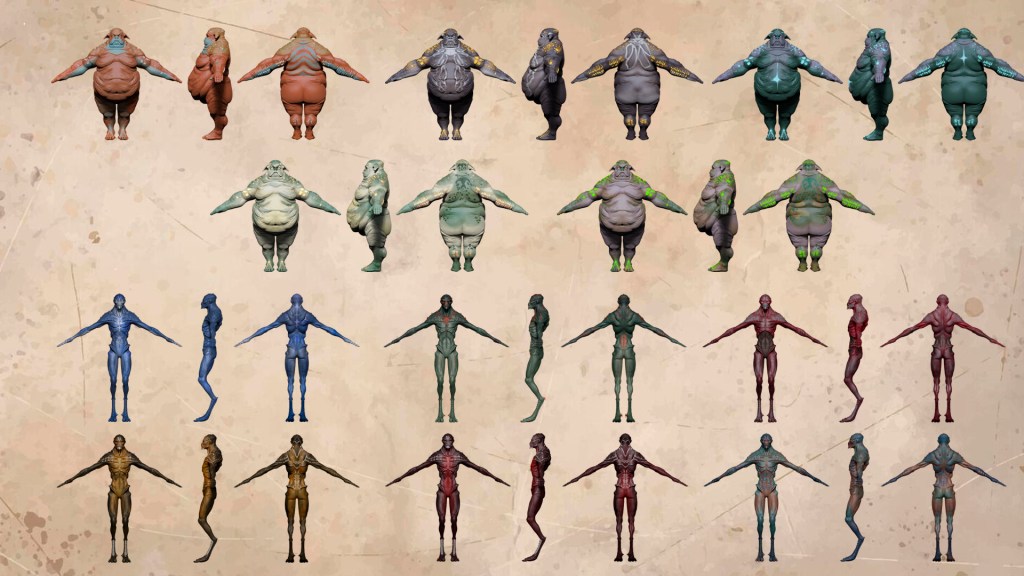
As before, texturing is done entirely in ZBrush with Polypaint, applying gradients for base color, masks, alphas, and hand painting for finer details.
Sending back to CC5
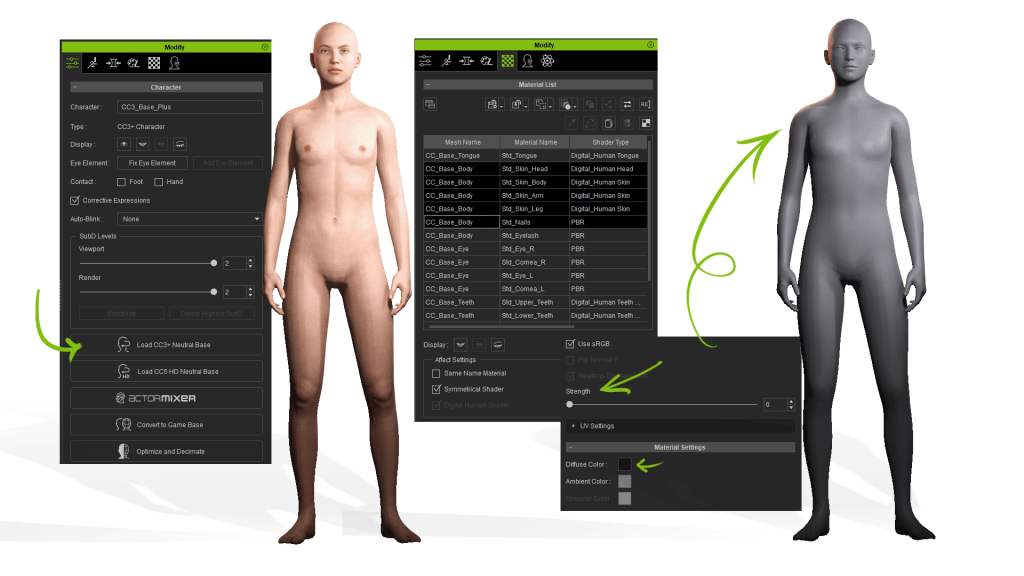
Once our models are finished sculpt-wise, we can bring them back into CC. One thing to note: we don’t even need to keep the original file where we made the first edits. Just load the neutral base mesh, and you can connect your character to it.
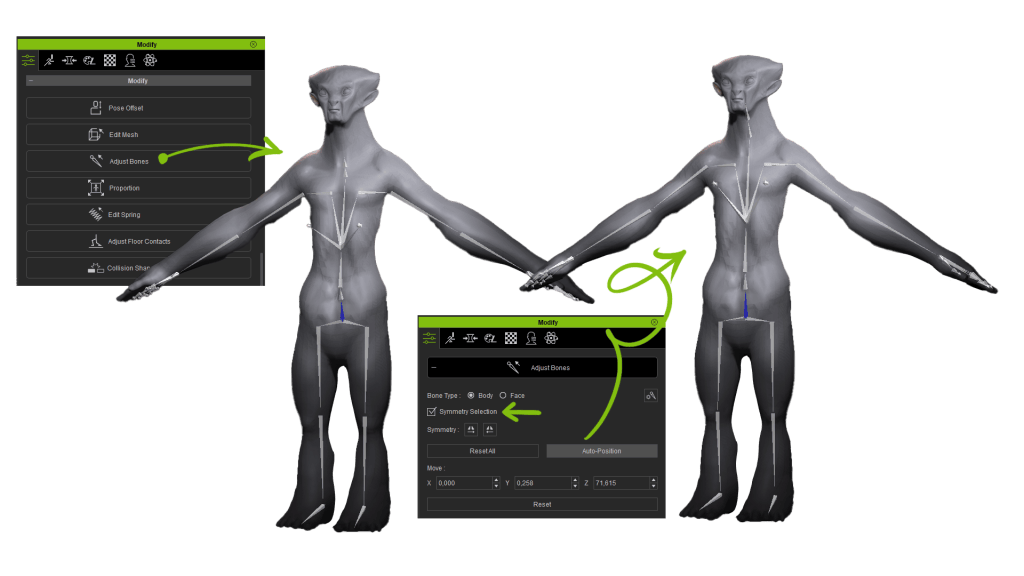
We’ll start at level 0, this time checking all the maps so GoZ Plus generates them automatically. When updating in CC, we tick “Adjust Bone to Fit Morph” so the bones automatically adapt to the new proportions. In the lizard’s case, you’ll see the ankle joint goes exactly where we want it, since CC automatically matches polygons to joints.
After verifying everything works with some body and facial animations, we subdivide once in CC5 and return to ZBrush to export the maps and mesh for level 1.
Repeat for level 2, and our characters are complete.

Here’s a quick extra trick: creating a mask for golden metallic areas.
Export the diffuse maps for each body part and open them in Photoshop. Create a new layer, fill it with black.
Use color range selection on the golden areas and fill them with white on the black layer.
Save the map and drag it into the “metallic” slot in CC5, tweak settings, and done. This simple method lets you add metallic zones and other effects directly in CC5.
Adaptive animation in iClone
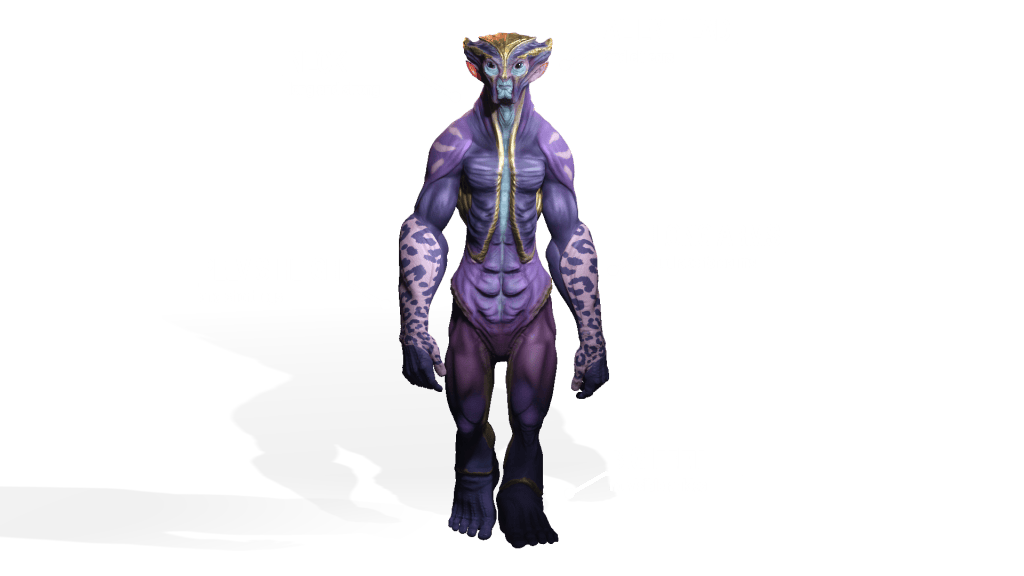
I’m not much of an animator… Well, let’s be honest, I don’t know how to animate at all. But thanks to CC’s motion libraries and some tweaks in iClone, I created a custom walk cycle for each character. In iClone, I loaded an animation that fit each one and slightly adjusted body parts using “Edit Motion Layer”. Since we do this on the first frame, the modification carries through the whole animation. Select start and end frames, save, and apply it in CC5.
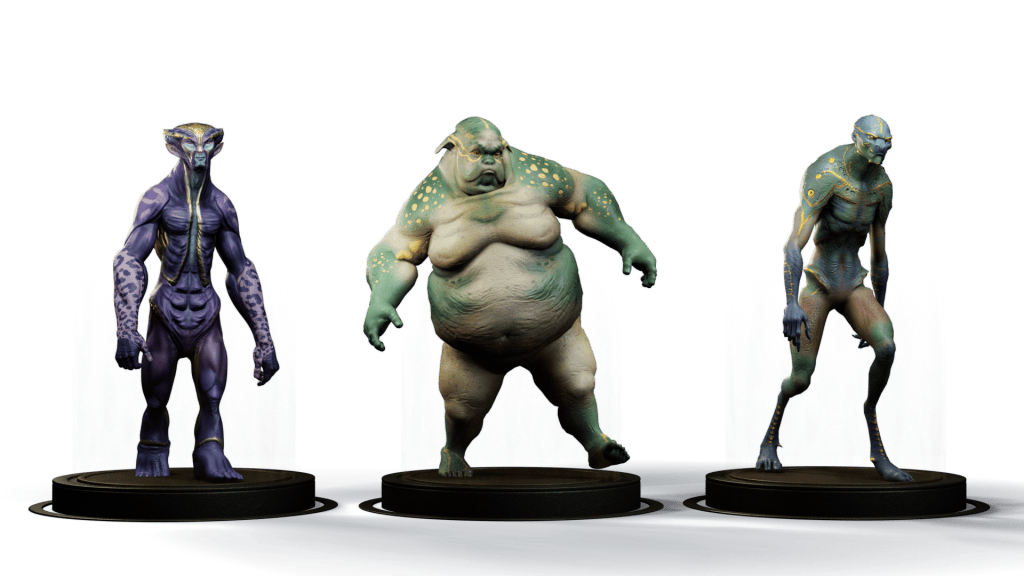
For finishing touches, I’ll load eye and teeth textures from CC’s library, keeping the mesh as is but applying the materials.
3D print-ready workflow
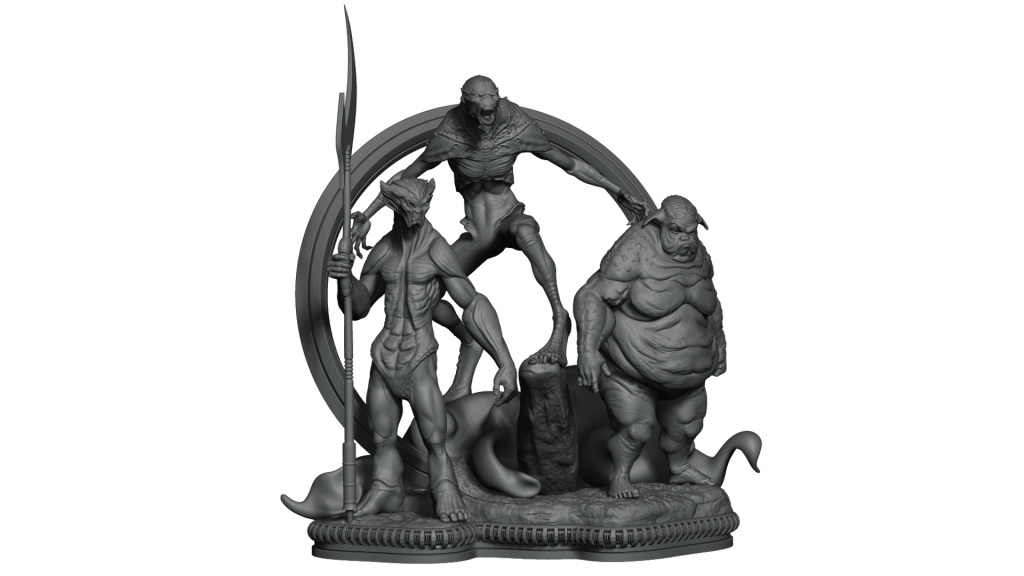
I couldn’t resist bringing this workflow into my own field—figure creation for 3D printing. I posed each character in CC5 and saved a separate file for each. Using SubTool Master, I loaded them all into the same project, arranged them, built a simple base with some extras, and it’s done!
For a true final piece, much more work would be needed, but what you see on screen took me under an hour—including posing all three characters and building the base. Imagine what we could achieve with a good idea and dedicated time and care.
ActorMIXER Pro
Now we move on to the main topic of this article: ActorMIXER, the new plugin for Character Creator 5. It provides an intuitive and fast system for creating and customizing characters. It allows non-destructive deformation of the head, full body, or individual facial features simply by dragging the mouse.
The best way to understand it is by continuing with our project. With CC5 installed, the simplest way is to open Reallusion Hub and install the plugin there, although you can also download it directly from Reallusion’s website.
How to create MIXER assets
The first step is to create “Mixer Presets” so ActorMIXER can use them as targets in the mixing wheels.
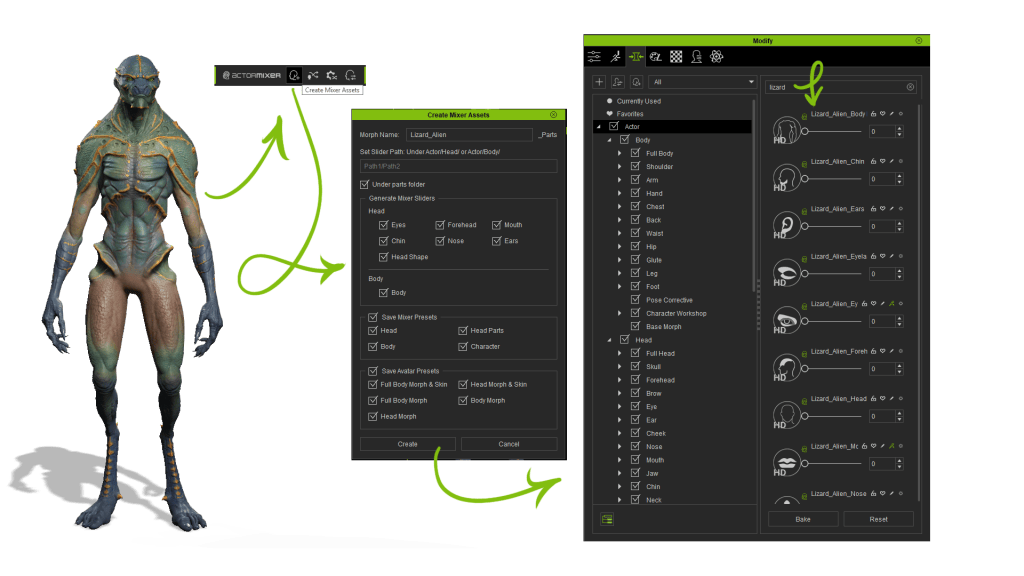
1. Load a character and open the “Create Mixer Assets” panel (from the ActorMIXER toolbar icon or Plugins > ActorMIXER > Create Mixer Assets).
2. Configure the Mixer Assets:
Enter a name and path for the custom slider. Tick “Under parts folder” so the generated slider is placed correctly. In our case, we’ll enable all checkboxes for a full slider set and also mark “Save Avatar Presets” so the sliders appear in the Morphs panel.
3. Click “Create.” The system splits the character into different parts controlled by the generated Mixer Sliders. This produces gallery items, facial and body sliders, and skin materials for texture swapping.
4. Repeat for the other characters. Note: the subdivision level you select determines the type of Mixer Sliders created—“Mixer Sliders” for SubD 0, and “HD Mixer Sliders” for SubD 1 or 2.
The “Mixer Sliders” are the ones affected by ActorMIXER’s blending operations. We’ll take a closer look at this later.
Individualization
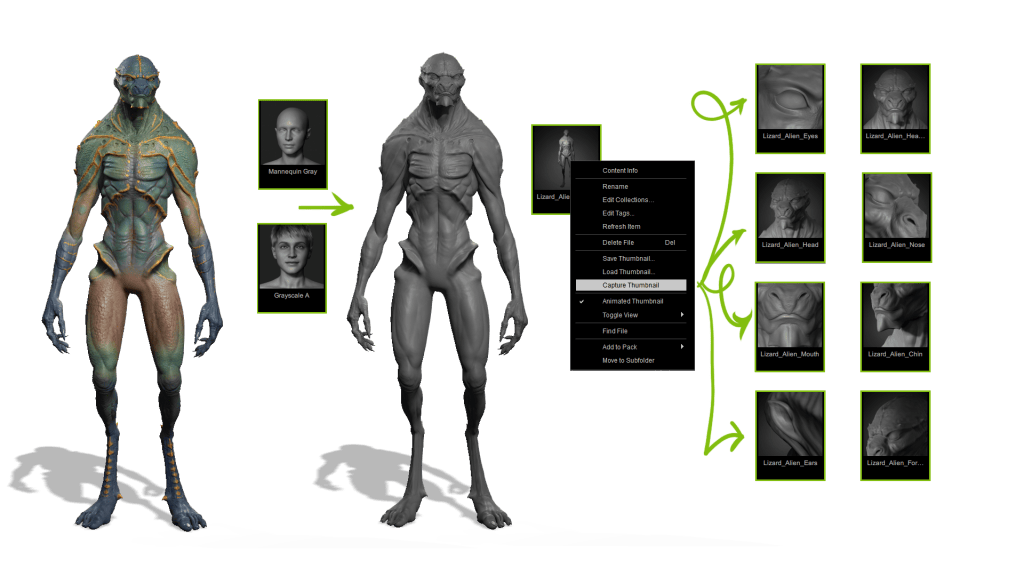
We’re ready to start mixing, but first, let’s make custom thumbnails for each character with the same style as the default ActorMIXER ones. This step is optional, but if we’re doing it, let’s do it right!
Load a character and pose it similarly to the default thumbnails. Since we need to focus on volumes when building characters, apply the grayscale atmosphere and “Mannequin Gray” material so textures don’t distract us. I also tweak the ambient light for softer shadows and boost intensity to brighten the character.
The goal is to align the camera angle with the ActorMIXER thumbnails. Then go to the relevant section and click “Capture Thumbnail” to update. Repeat across sections, using the originals as reference. Do this for all three characters and everything looks super professional.
ActorMIXER (Editing mode)
For better performance, set character subdivision to 0 or 1 (depending on your system) and use 2K skin textures for preview. With everything ready, we finally launch ActorMIXER: open it from the Modify menu, the toolbar, or Plugins > ActorMIXER.
Once open, choose the base character mesh. In our case, we’ll pick Base Male as a starting point, since the characters I plan to make should look more human than the creatures we built earlier. ActorMIXER opens in Editing Mode, where we can create our own mixing wheels with the presets we generated.
Select each category and drag-drop the presets. Categories auto-sync with the Content Manager gallery for efficient selection. Right-click a target to replace, reset, or delete it. Drag and drop to reorder or swap targets. It’s important that each wheel has at least three targets.
If we want to reuse the wheels we’ve created, we can save them as a Mixer Layout file (*.ccMixerLayout). Just click the ‘Save Wheel Set’ button and choose either ‘Save Active Wheel Set’ (to save only the current wheel) or ‘Save All Listed Wheel Set’ (to save every wheel across all categories).
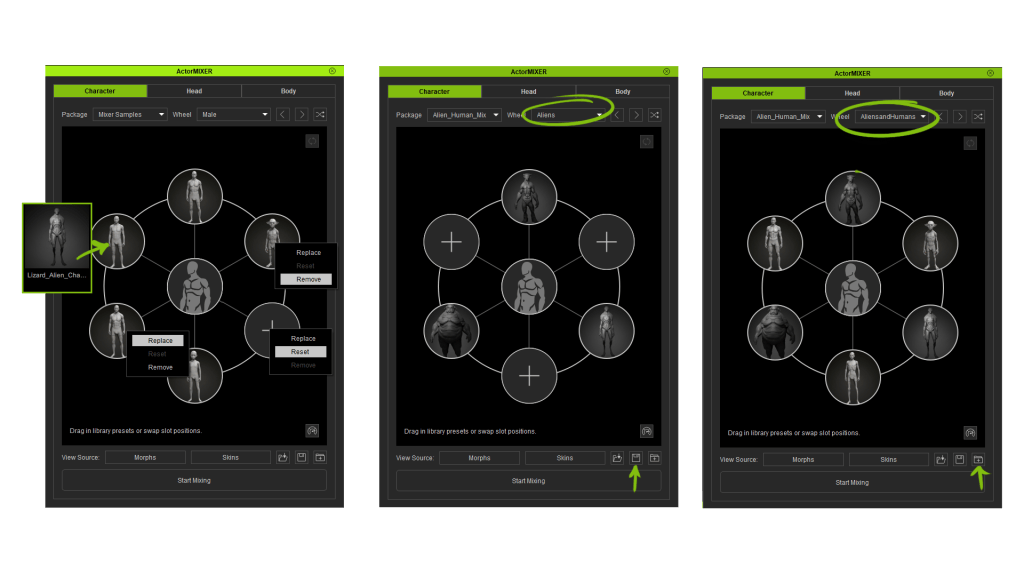
I’m going to create another wheel where I’ll include our characters along with some others from the gallery to enrich the results even more. ActorMIXER Pro comes with the ActorMIXER PRO CORE Library and the HD Human Anatomy Set as a free bonus, so I’ll also add a few elements from those libraries, as well as from the base library.
The last thing we need to know about Editing Mode is that we can also group multiple mixing wheels into a Mixer Package. This allows us to easily reuse our setups, share them with other users, or transfer them to another computer without rebuilding the wheels from scratch. Just press “Save Package”, select the folder where you’ve saved your wheels, give the package a name, and you’ll be ready to quickly load your custom wheels anytime.
ActorMIXER (mixing mode)
Once the wheels are configured, we can start blending the shapes. To access Mixing Mode, click the “Start Mixing” button at the bottom of the panel, then simply drag the green dot in any direction within the wheel. As you move it, the character in the scene transforms, blending the features of the “Mixer Presets” we set as targets.
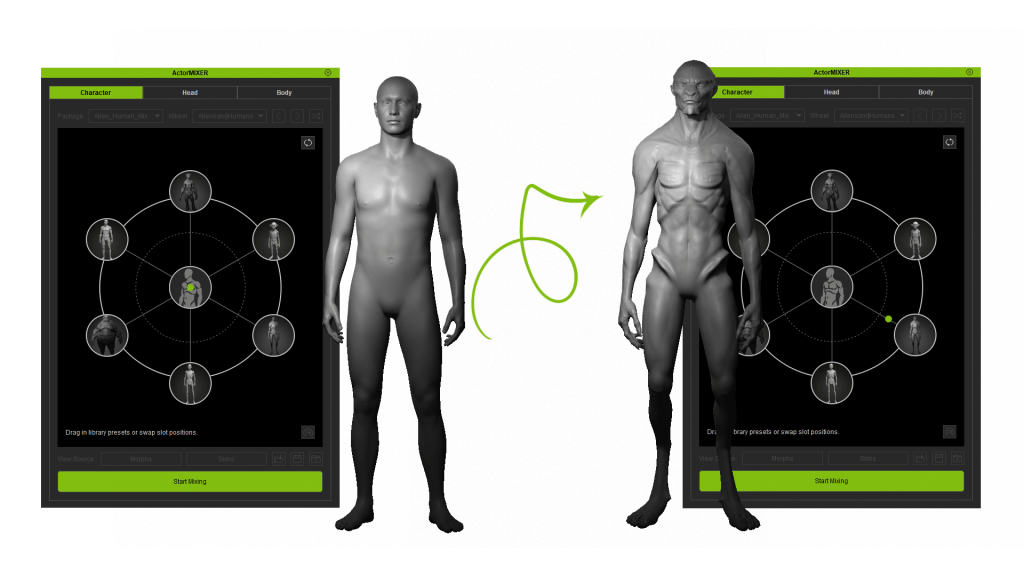
You’ll notice two concentric circles in the display. If we place the green dot inside the inner circle, the shapes blend with our presets but with a stronger influence from the base character. If we move it to the outer circle, the presets carry more weight in the mix. Keeping this in mind, we can go through each category, refining the forms until the character is finished.

Once we’re done, we stop mixing by pressing the active “Start Mixing” button again. From here, the only step left is to apply the skin by dragging it directly from the Content Manager. When we’re satisfied with the result, we close ActorMIXER. But that’s not the end—we can continue fine-tuning with sliders until we achieve the desired outcome.
Since we’re talking about sliders, let’s cover a few considerations that can help in character creation. Sliders with the green ActorMIXER icon are affected by the mix, while those without the icon remain unchanged. This is very useful when we want to keep certain features intact.
For example, let’s create a second character where we modify arm and leg length, along with some other elements, using the general Mixer Sliders. When we begin mixing, these traits remain unchanged—super useful for designing members of the same family who retain common traits.
We can also apply a pose or facial expression and perform the entire mixing process with the character already posed. This gives us a more dynamic, detailed view of how the blends affect appearance and body language, allowing for even more precise and consistent design.
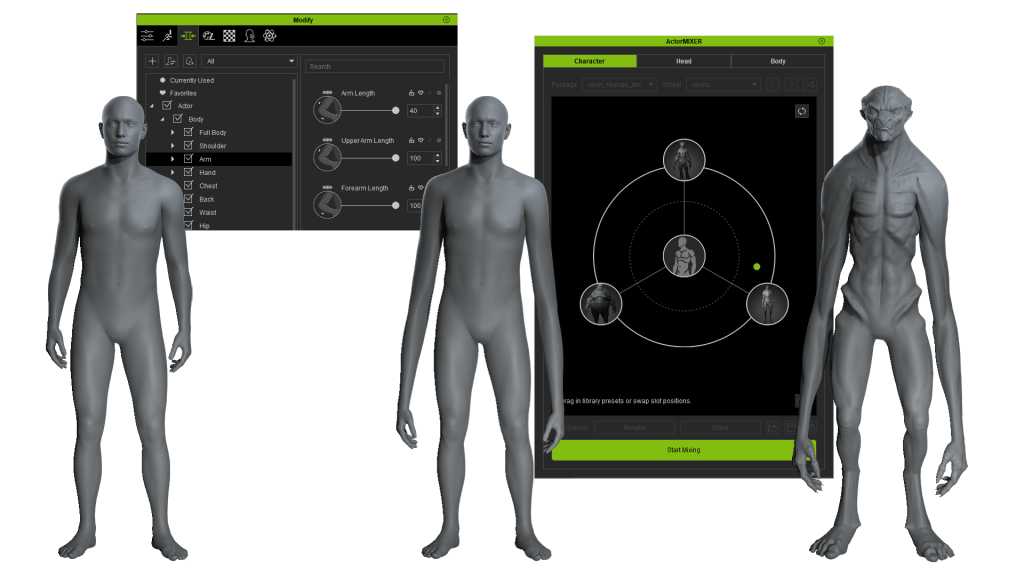
Now for the finishing touches: CC5 has improved eyes with greater HD detail, direct iris control (adjusting both size and color), eyelid shading, realistic tear line/occlusion effects, and enhanced eyelashes. We also have new controls for teeth, which we can use to polish our character further.
With our character complete, the last step is to ensure everything works properly. To do this, we can add a facial animation to see how it behaves, along with a body animation to confirm everything moves as expected. The results are fantastic, so now we just need to save our new creation. Open the Content Manager, go to the Custom > Character tab, and click Add.
As we’ve seen, ActorMIXER provides an incredibly intuitive way to create an infinite variety of characters in such a simple manner that it becomes almost addictive. But these aren’t the only new features—so stay tuned for more from Character Creator 5!
FAQ
Can I mix with my own character in ActorMIXER?
Yes, but you’ll need ActorMIXER Pro. The Pro version allows you to convert your own custom characters into Mixer Assets and blend them with other characters for unlimited variations.
How to enrich the content of ActorMIXER?
Purchasing ActorMIXER Pro includes the ActorMIXER Core Library, which contains over 40 scan-level HD heads covering a wide range of ethnicities, genders, and ages. Additionally, if you own CC5 Deluxe, you’ll receive the HD Human Anatomy Set with 12 fully rigged characters (6 male, 6 female) that can be directly mixed for full-body variations.
If I want to create my own ActorMIXER Assets, what should I pay attention to?
Follow the golden rules: don’t modify topology, don’t delete subdivision levels, don’t change the default pose, and don’t rename subtools. When creating Mixer Assets in CC5, choose the right subdivision level (SubD 0 for Mixer Sliders, SubD 1–2 for HD Mixer Sliders) to ensure compatibility and smooth blending.
Can I design and mix while the character is posed and expressing emotion?
Yes. ActorMIXER Pro supports mixing with poses and facial expressions applied, giving you a more dynamic view of how blends affect both appearance and body language. This makes it easier to design consistent, production-ready characters.
Does ActorMIXER Pro support stylized and realistic designs?
Absolutely. It works with both styles, letting you mix your own creations with the PRO CORE Library and HD Human Anatomy assets.
Relate Posts
- From Concept to Motion-Ready Alien Character: ZBrush and CC5 HD Step-by-step Workflow
- The Expert Guide to Stylized ZBrush Expressions for Salvador Dali
- 3D Printing and Character Posing with ZBrush & Character Creator